buildnething
-
Posts
106 -
Joined
-
Last visited
Content Type
Profiles
Forums
Events
Gallery
Everything posted by buildnething
-
Where's the rest of the decals?
-
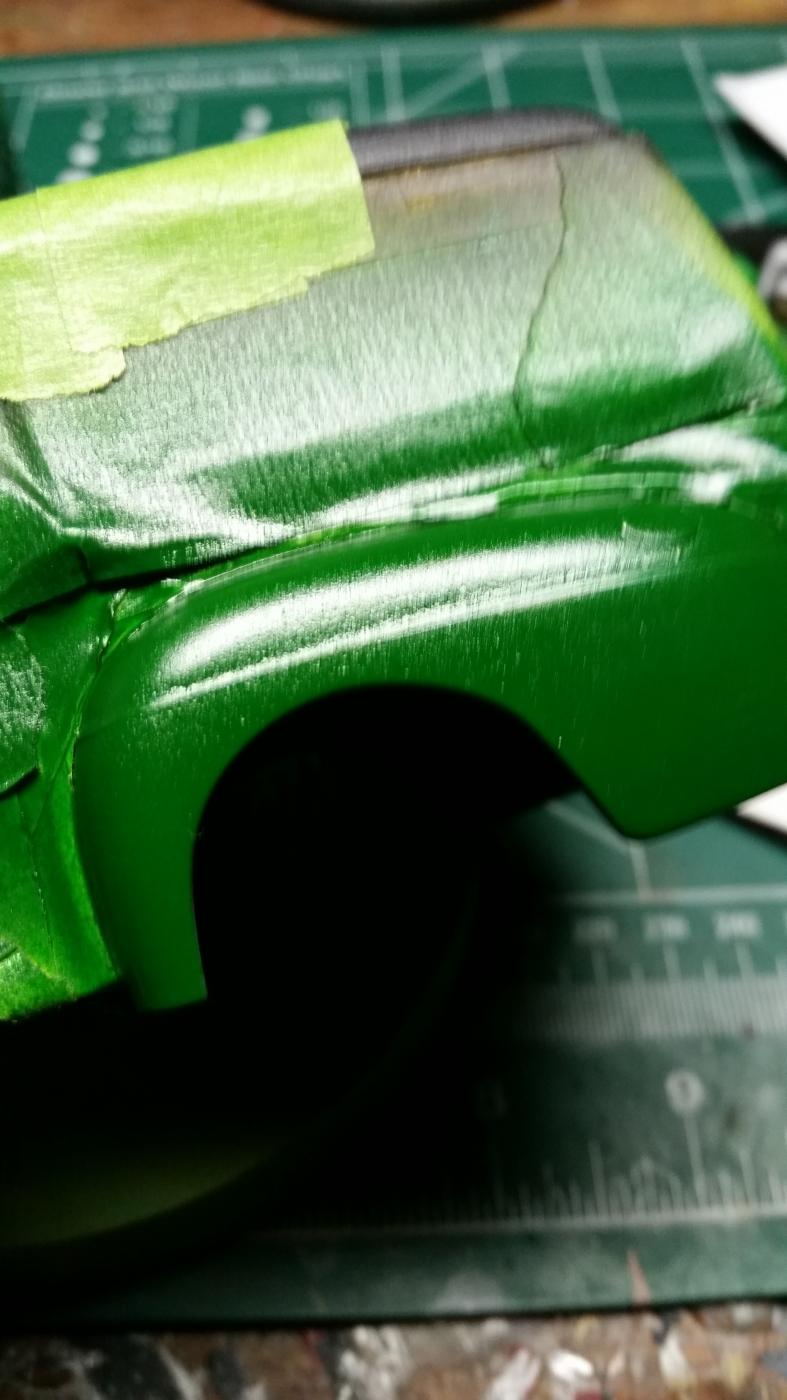
I am not really considering re-spraying the entire fenders and hood. I mean it wouldnt take long, but Its relatively smooth as is and I think a good color sanding to the highest grit I have will suffice honestly. Then depending on how that turns out I will either apply a clear and polish that out and call it a day, or I will apply another color coat smooth that out, and apply clear. Just depends. I honestly think this stems from the over spray when I was doing the wood part of the vehicle. The primer was smooth to begin with, but I didnt mask that area when I airbrushed and weathered the wood grain area, and I also sprayed clear over that to protect, which got onto the primer as well. At least thats what I am thinking has caused the color to not be smooth in those areas.
-
Thank you for clarifying that. I see how that can be frustrating. Dealing with willful ignorance can be difficult for anyone. I am of the tech age. I was born at a time where the tides were turning. Early 80s. Im apart of a group of people who experienced life before the internet, and through its development into what it is today. I personally feel people my age (currently 32) are a generational gap in terms of tech. Some of the "older" folk are simply not interested in the computer and the internet and its wealth of knowledge. For some odd reason. But I can understand why that may be the case for them. They are set in their ways. So yes its 2016 and yes we all should do our best to make informed decisions. There really is no reason not to. Ignorance is not bliss as they say.
-
I was just sensing a lack of understanding, but yes I see what you are saying and agree. I think people tend to get frustrated and automatically take it personally and say things like that. I usually just ignore personal assumptions like that!
-
By "you" are you referring to me? I deserve what? I know how to read perfectly well, and so well in fact I sense a tone of frustration in your post. Whats wrong? I simply was saying that not everyone knows these kits like the backs of their hands, like many older/more experienced model builders do. This is why Forums exist in the first place. A place to share information. Also, as you obviously know, not all kits have parts layouts printed on the box. So how would an inexperienced and unaware modeler know? Besides doing research before hand? What if they bought it online, where there was no image of the back of the box? Also doing a google search on this is limited in itself. I spend hours researching and looking at model related websites, and sometimes reviews are few and far between.
-
You know some of us weren't even around yet, when these were made, so..how would know whats in the box? LOL JS I was born in 1983. But yes some simple googling and researching will help.
-
Yea I have heard this before, I just tend to rush through the prep. UH OH! Its all about habit, I need to form these types of habits. I paint indoors though, so temperature shouldnt be an issue, I would think. Plus its a brand new can, I wouldnt think the nozzle would be clogged that quickly, but I will clean it for sure. So once, i color sand it smooth, should I add another coat of color? Or go straight to clear coat?
-
Thanks! I hope so too!
-
Thanks. I will be purchasing that micro mesh kit soon.
-
Thanks MrBuick. Great tips and I will apply them. I think I will like the micro mesh better. The sponges are great for big long panels, but a cloth will help with this build better. Have a link for them? I have seen that video before. I watch a lot of model related content on youtube. Its really where I have learned all I know. I am self taught for the most part.
-
Thanks. I agree that the paint isnt terrible, and that its an easy fix, but color sanding scares me. I have never really learned the proper technique. I have attempted to do it with marginal results. I use the square sanding sponges that are up to 12000 grit, but I still saw scratches in the past. What do you use? And how do I do it. Because I dont think my sanding and polishing technique is quite right.
-
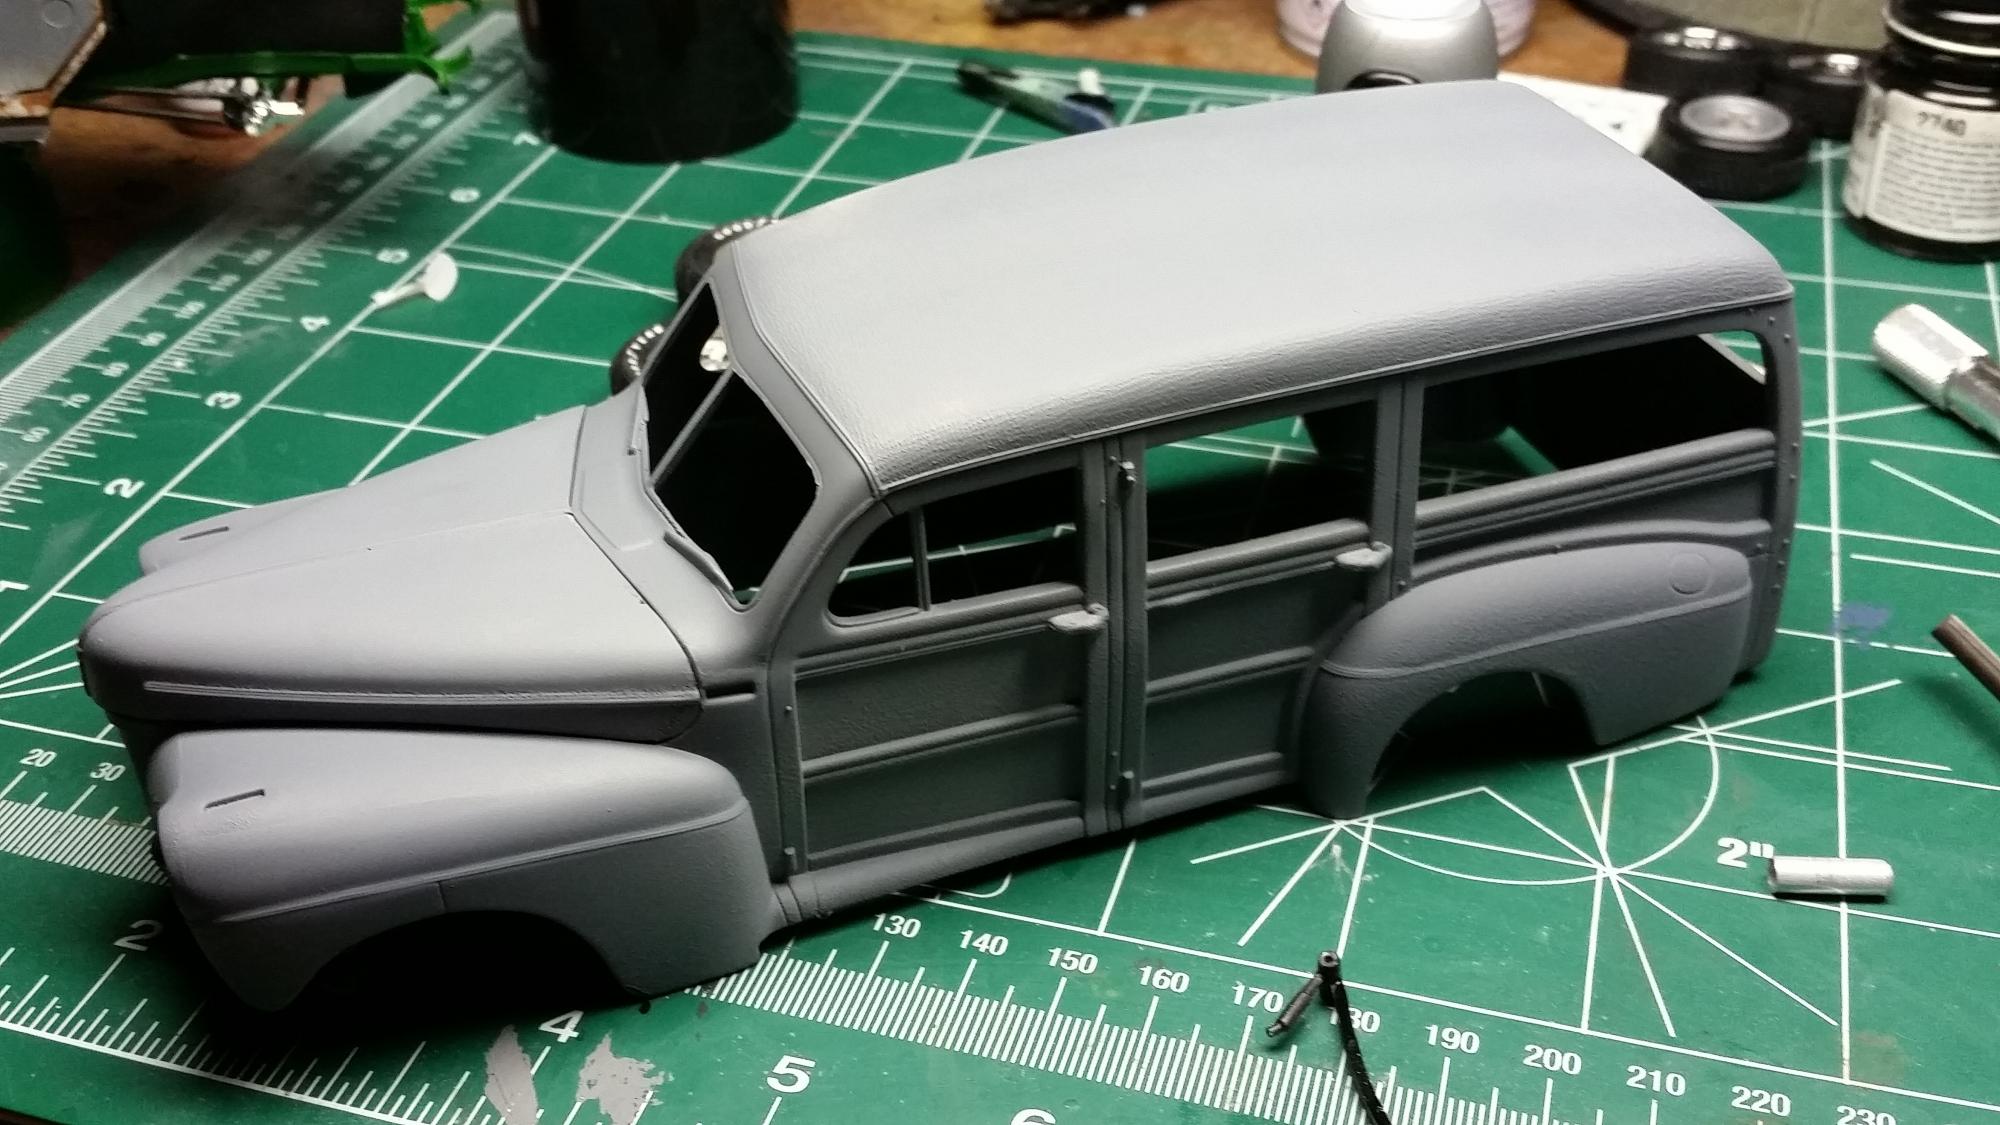
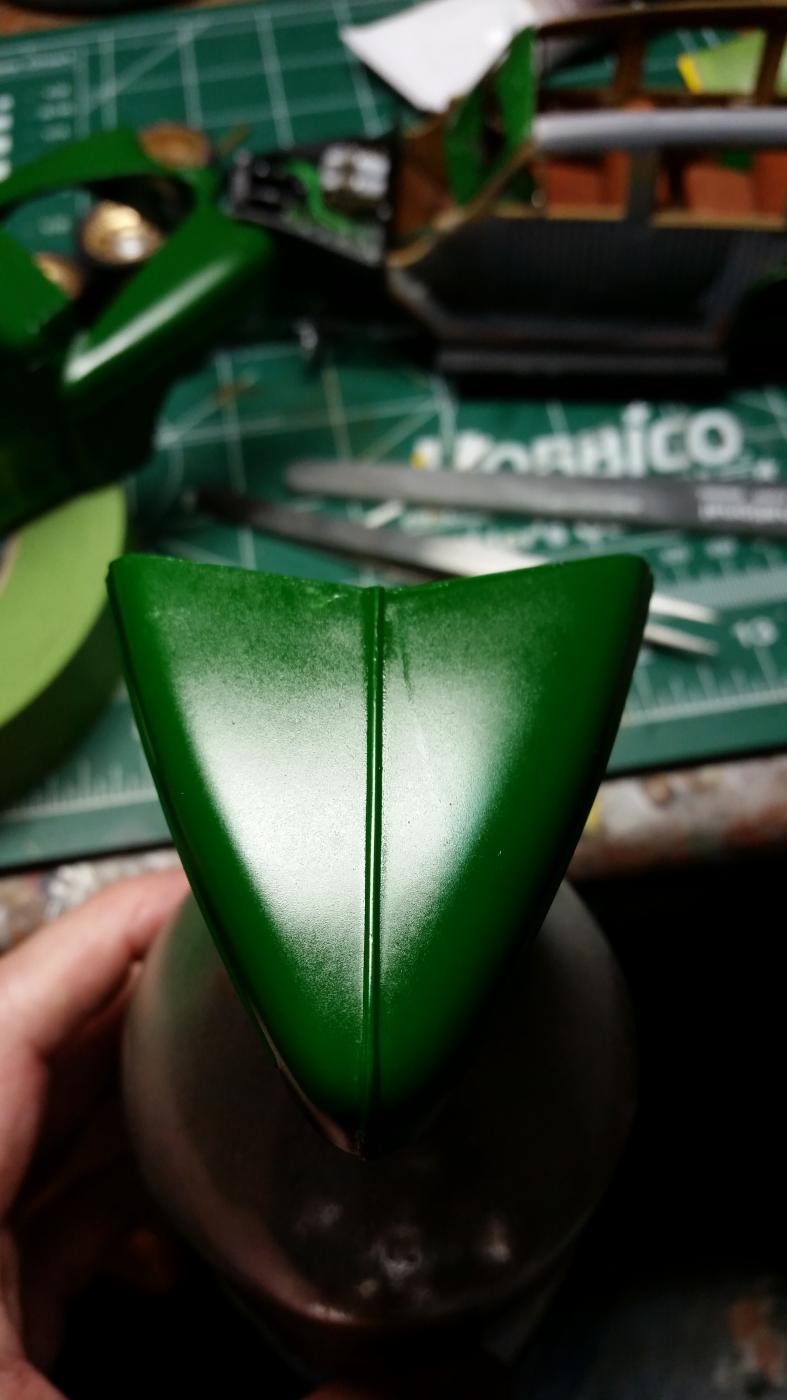
So I ran into a minor hiccup where I always do. The painting of the body. Man this masking has been a PITA! But it will be worth it. But, I can never get the color paint to lay down smooth and imperfection free, especially from rattle cans. Which is all I have and use. Except for some minor airbrushing I am learning now. But I have some pictures of the issues and would like some explanation as to why it is happening, and how I could possibly fix it. Thanks. The help is much appreciated. I love building model cars the most but I just still cannot achieve that perfect paint job, which is crucial to automotive subjects. I build other genres as well, with much better success. But I am a gearhead at heart. I dabble in Sci-Fi (Star Wars mainly) and jets and modern armor, and they have came out great! Just want the same to occur with my main subject of autos. Here are the issues: Is this orange peel? Whats happening here? Why is it rough in spots? This is surprising from Tamiya paint. Some of it very nice and smooth. The ts-6 Tamiya matte black came out smooth on the roof at least. You can still see the molded in texture, which is nice. LOL

-
Does anyone know if they make the 340 stripes in decals?
-
Yea at first I did, But unfortunately this is what I had to do. If I had some extra parts like that, I definitely would have switched them out. But honestly I think it fits the theme. This is going to be custom but a weathered custom. Like a fuax finish that is kinda popular right now. I have some surprises in order!
-
No I do like modern parts, I wish there were more of them. But for this build I wish the kit supplied a stock set up as well. I dont have a big parts bin yet so its difficult for me to find spare parts to use. But yes google is invaluable for reference photos and information, I agree.
-
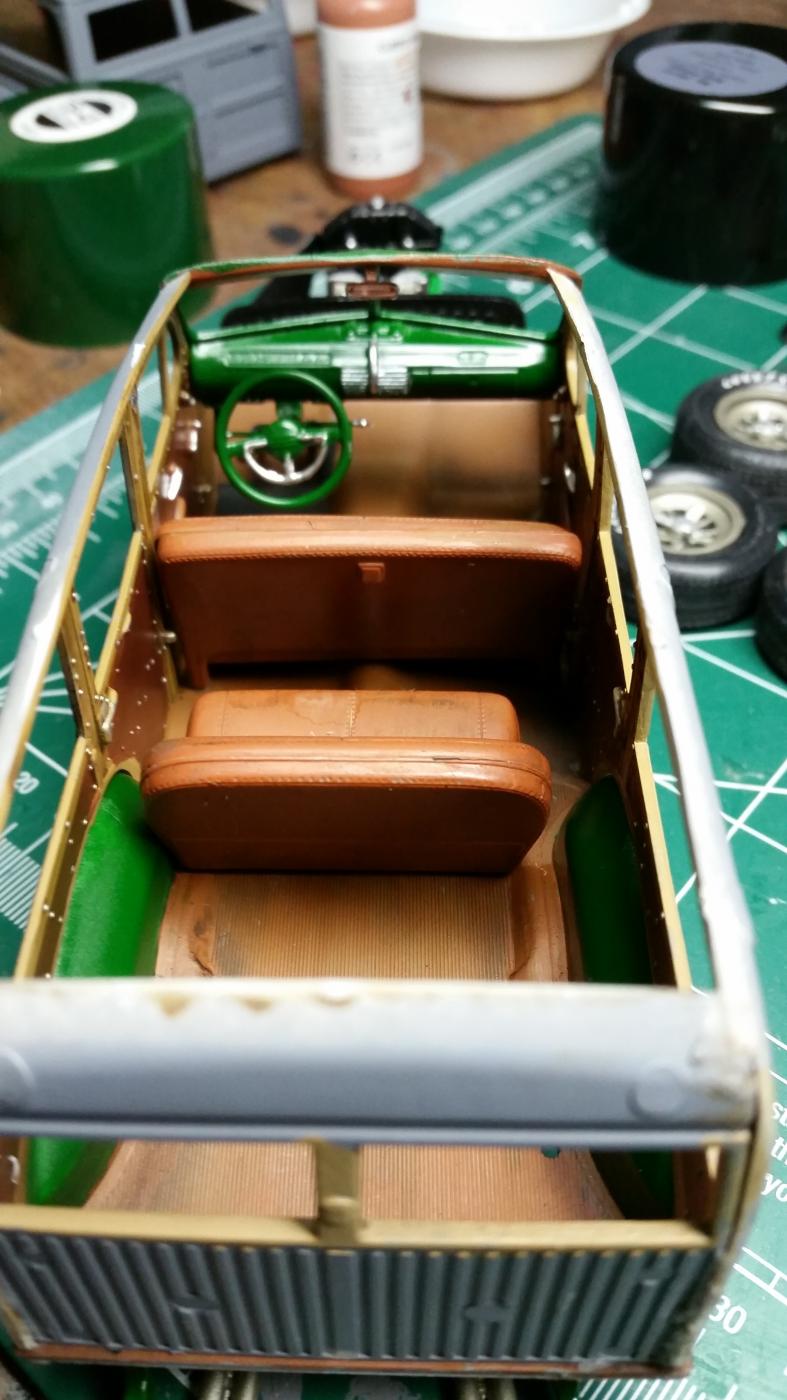
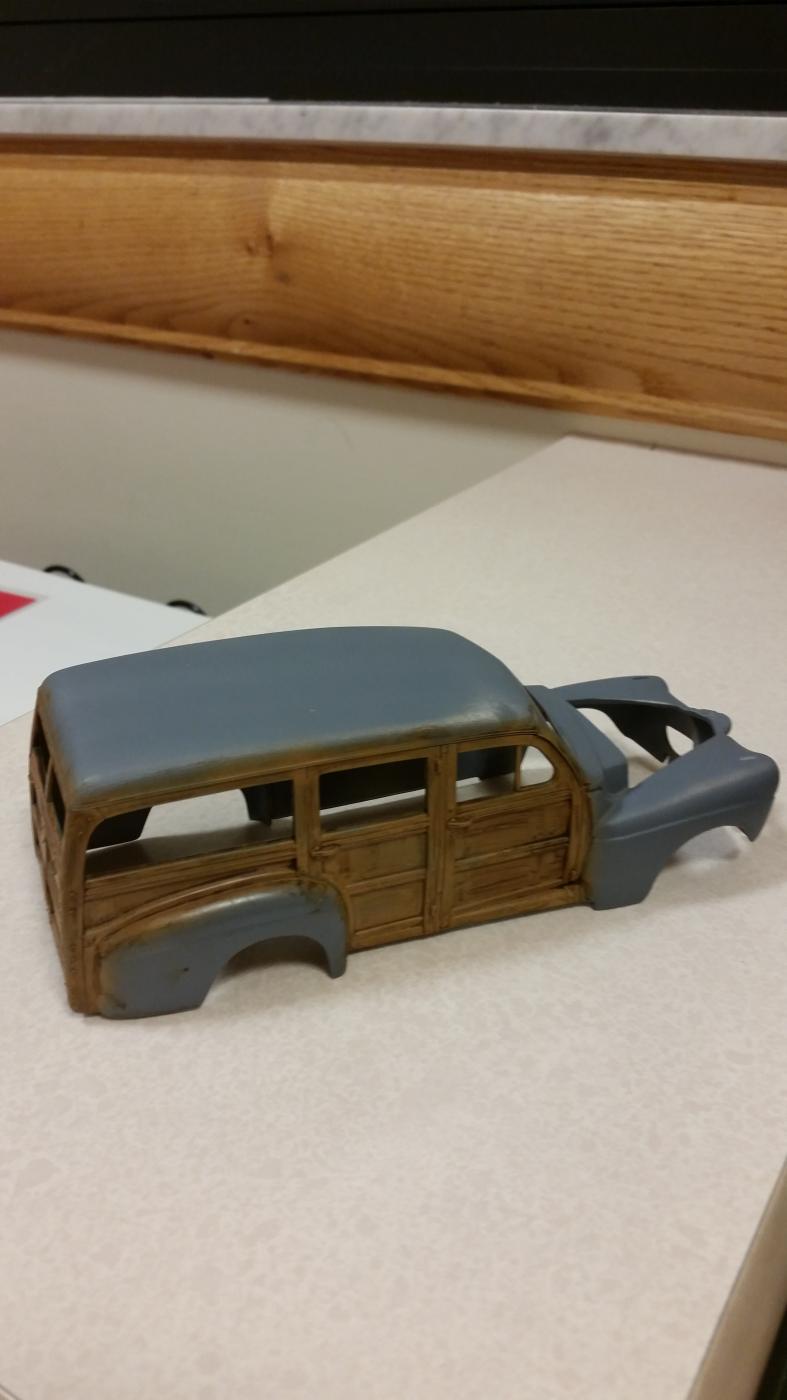
Here's the pics! I could not get them to upload for some reason earlier. Now I am home and submitting from my PC. Keep in mind I will still be using the kit wood grain decals for the inner panels..So it will look a little cleaner when done.
-
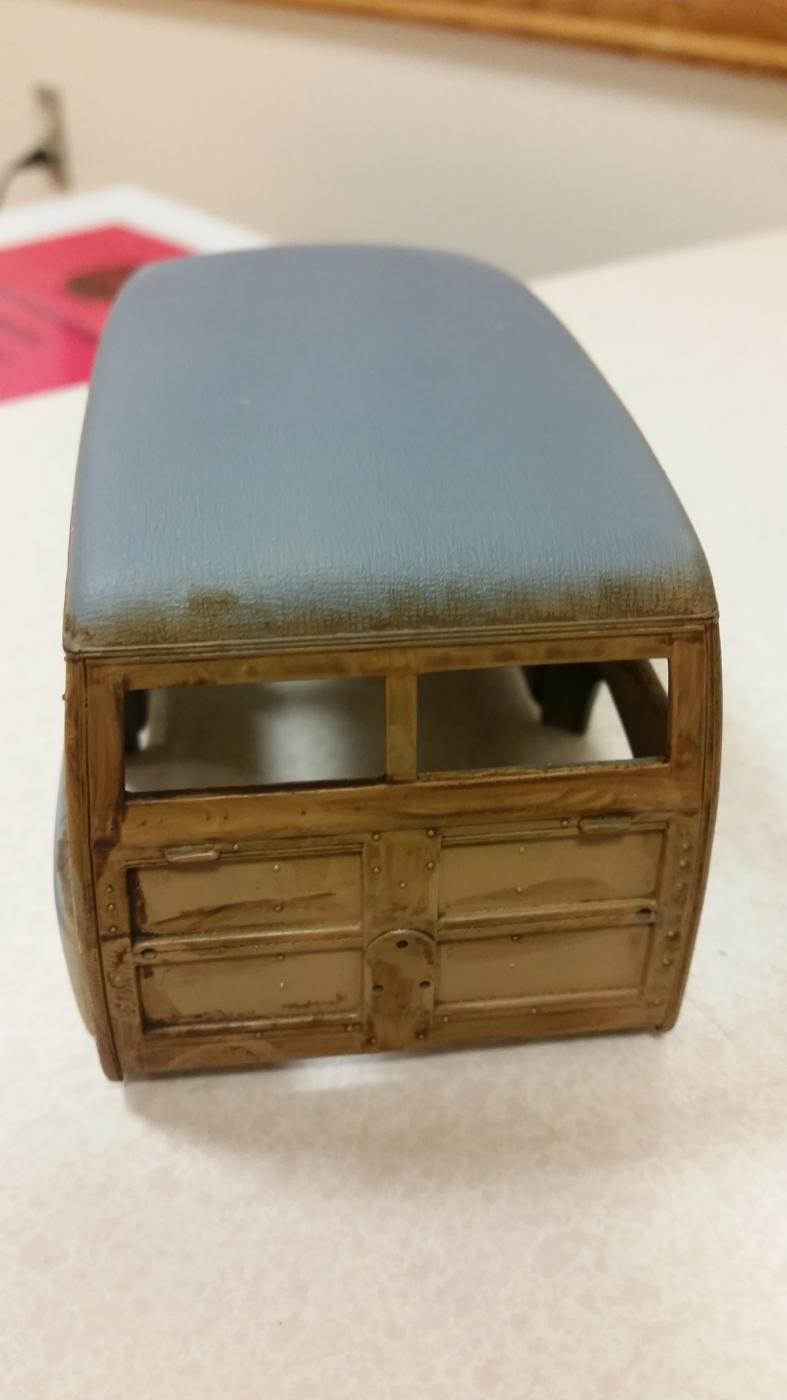
Sprayed tamiya clear over the wood sections and proceeded to use an Ochre wash to simulate the darker wood grain. Basically I used a square bristle brush and allow the material to work for me. The key is not to be uniform, wood grain is not perfect in its formation, its sporadic, so your strokes has to be the same way. When making your wash, I make sure to leave chunks of oil colors in the wash, this is how you can get various effects and shades of darkness in the wash.
-
 This is intense! I like the concept, and I am partial to steam punk design. I feel a doc cranky vibe going on here. Got any watch parts? I see so much to learn here. I will be watching this one carefully, to learn more scratch building techniques! Thanks for sharing your progress.
 -
Exterior/Interior Wood Grain process in pictures. The first color of the wood grain, the lighter color is sprayed on the exterior of the vehicle and on the molded-in boards on the roof of the vehicle. The paint used is Tamiya XF-59 Dessert Yellow shot through an airbrush.
-
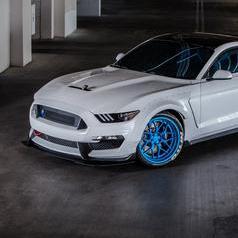
My dream car! Would love to own a 2013 Boss, but I would have to have it in gottahavit green! LOL. I have this same kit and plan on doing mine in scalefinishes green! Awesome Work!
-
1964 Ford Taunus 17M P3. Air Trax/Tamiya/scratch.
buildnething replied to Mr.Zombie's topic in Model Cars
Amazing stuff! That is the level of weathering I aspire to! Thanks for sharing! -
Went ahead and decided to modify the exhaust to a more modern, and cleaner look. I have only attempted this a few times. They are a little off in length but I think it looks much better than what was provided in the box, Plus they wont interfere with the bumper install like the box stock ones appeared to. .
-
-
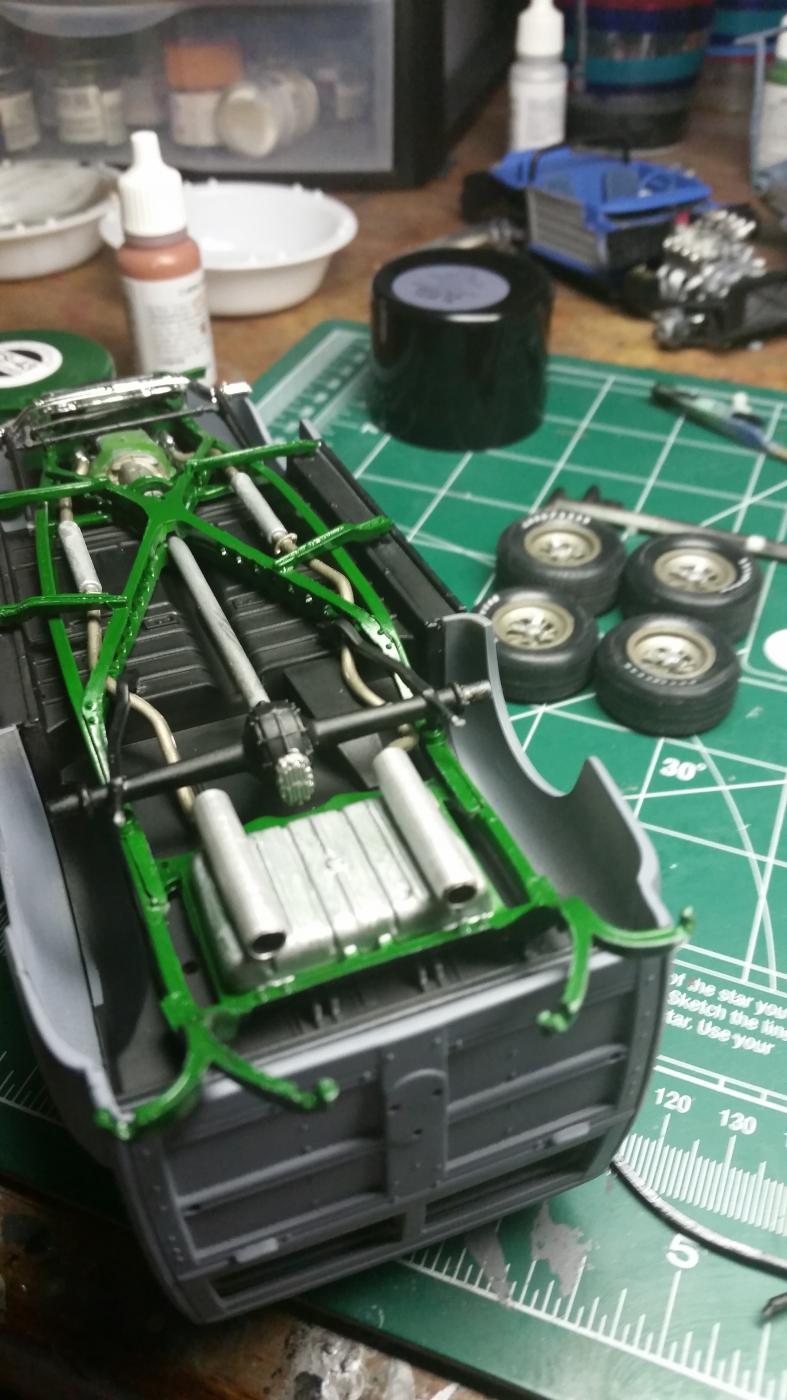
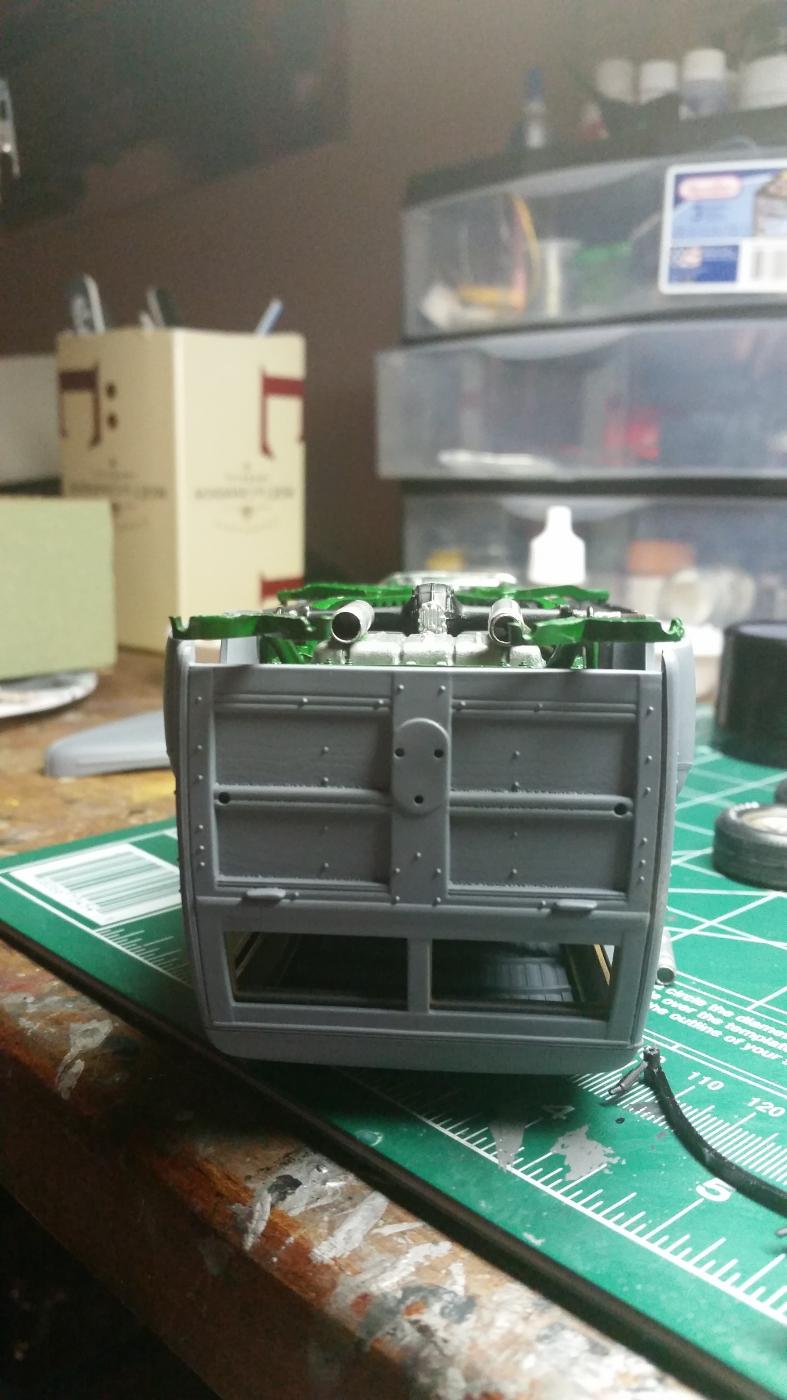
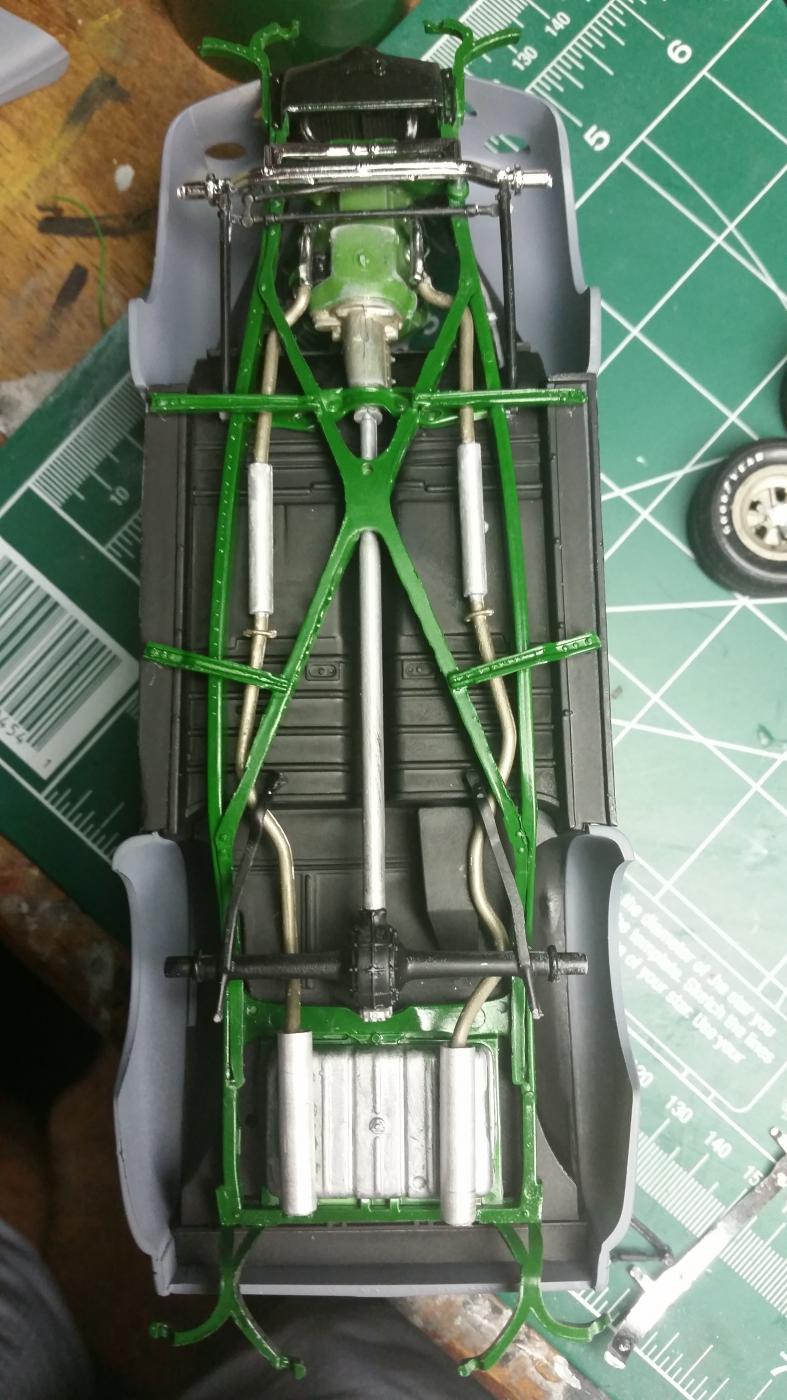
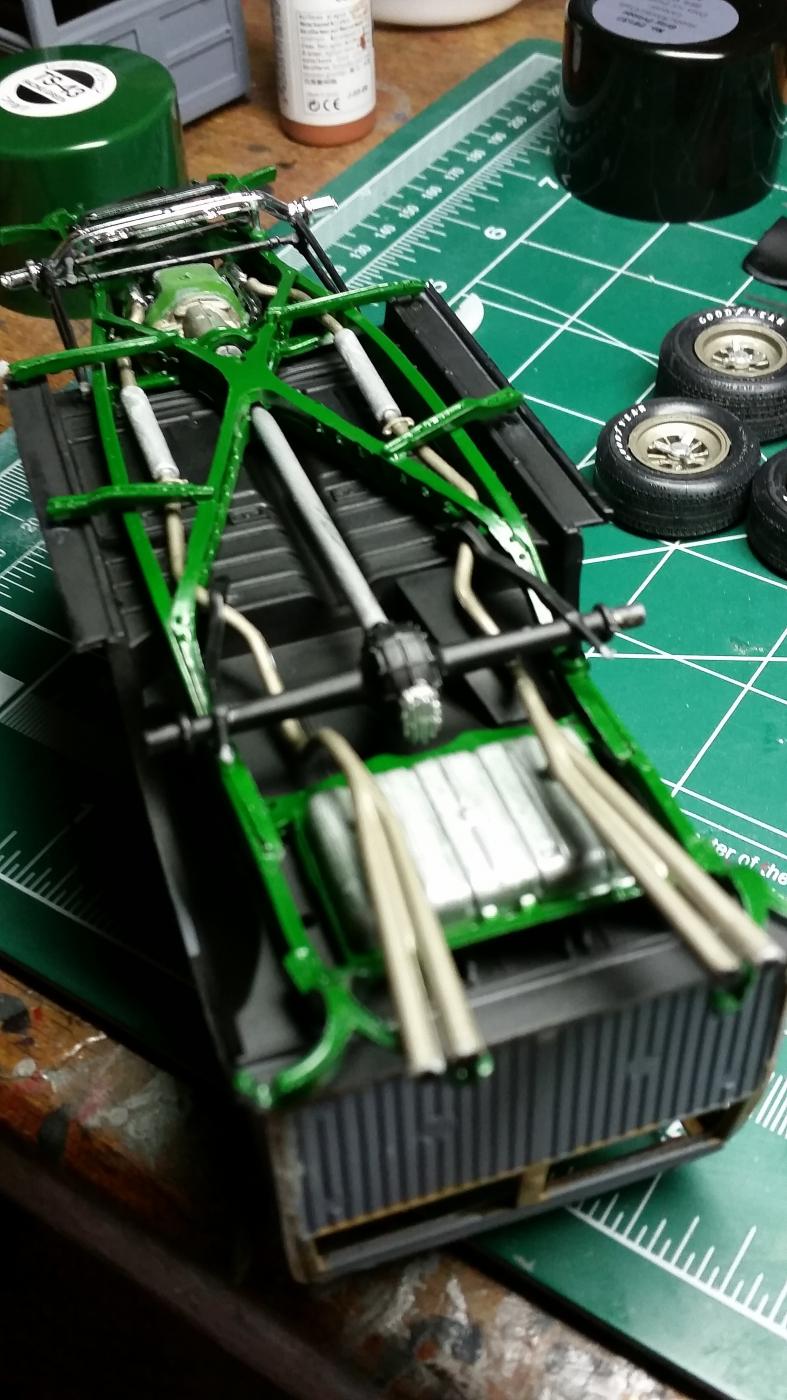
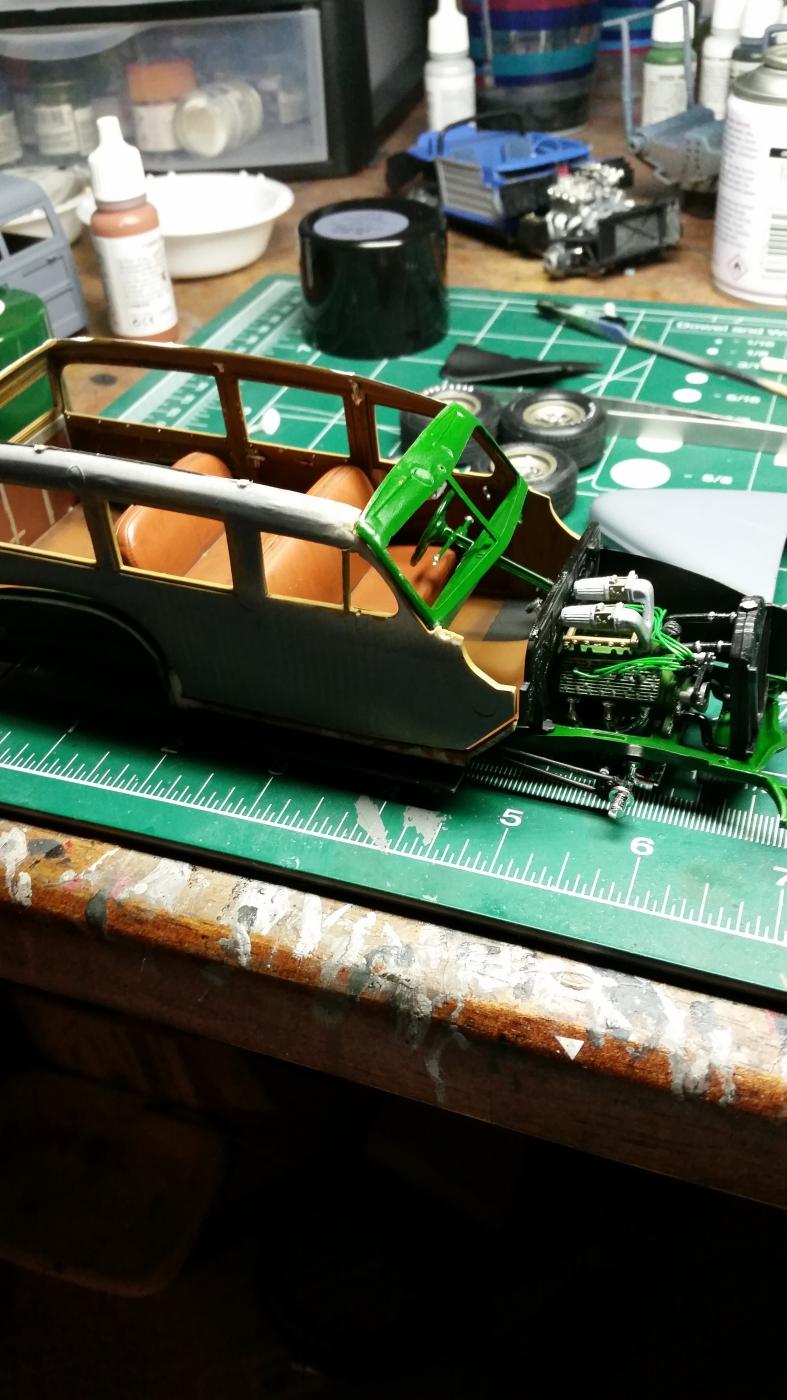
Another Update: Continued work on the interior tub and chassis. Got the drive train installed, firewall, and inner fender wells installed as well. Body primed and ready!
-
Yea that is the plan. Plan to just Cut some straight aluminum tubing and add it to the ends of the exhaust so it looks hallow.


.jpg.b2ab2c8385cea01bbfabcd317f242338.jpg)