GTJUNIOR Posted March 31, 2016 Posted March 31, 2016 Good luck with the repainting of your Torino. I trust that all will go well. Looking good so far.
Samiches Posted March 31, 2016 Author Posted March 31, 2016 Thanks American185, Dogfish, and GTJunior, your comments are appreciated. American, I have been lucky to have both my previous black paint jobs come out very well. The problem was most likely the clear coat application. I probably put it on too late or too early.
Samiches Posted April 1, 2016 Author Posted April 1, 2016 Well, I created an online straw poll to help me choose what color to paint the Torino. The color choices are black, red, and yellow. The yellow is very close to the factory yellow of the 1970 Torino incase you are wondering, the red paint is also very close, but maybe a shade darker, but hard to tell for me.The poll closes at 10pm tomorrow (Apr 1st) which is appox. 29 hrs from now. This will give me time to get everything ready to paint this Saturday which looks like it should be about perfect for painting.Thanks for the comments and taking time to vote!Here is the link to the straw poll:http://strawpoll.me/7242067
Samiches Posted April 2, 2016 Author Posted April 2, 2016 Thank you to all who voted. I should have this painted tmrw with the winning color barring any setbacks.
Dirkpitt289 Posted April 2, 2016 Posted April 2, 2016 What was Bill's (Spencer1984) tip for the plug wires?
Samiches Posted April 2, 2016 Author Posted April 2, 2016 What was Bill's (Spencer1984) tip for the plug wires?Your question was asked and answered on page one. I think there is a link to spencer's video.
Samiches Posted April 2, 2016 Author Posted April 2, 2016 Here is the winning color with 50% of the votes. It should look good with that black interior. Same color scheme as my 1968 GTO it turns out. FYI red and black tied for 2nd place.
Samiches Posted April 4, 2016 Author Posted April 4, 2016 I almost missed that fact that I would have to redo the factory overspray on the chassis. Got it painted before the cold front rolled in.
Samiches Posted April 11, 2016 Author Posted April 11, 2016 I got the paint all polished and have started foiling. It is too bad that they did not include the small vent looking pieces at the rear of the Torino in the photo etched parts. They are are pain to do.
StevenGuthmiller Posted April 12, 2016 Posted April 12, 2016 Red & Black...... Pffffft! You chose the right color! Steve
Samiches Posted April 21, 2016 Author Posted April 21, 2016 Well Steven, actually the people chose the color. It does look good though. I got all of the foiling and body detailing done. I just have to install windows, side markers, and some decals. That is about it. Oh, and some engine bay stuff lastly, I think.
Samiches Posted April 22, 2016 Author Posted April 22, 2016 I got a bit more progress done today. I still have to go back in and clean up the wheels a little bit from the black paint.
Samiches Posted April 28, 2016 Author Posted April 28, 2016 I only have a few more details to add to the engine bay, then it will be on to adding the bumpers and the last of the decals. I'm not sure if I want to add the stripes or not.
bismarck Posted April 28, 2016 Posted April 28, 2016 Good looking Torino!! The color looks spot on, and could pass for a factory option color. Great work so far.
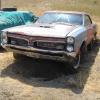
Samiches Posted April 29, 2016 Author Posted April 29, 2016 Bismark, I was after this look with the yellow.
Sledsel Posted April 29, 2016 Posted April 29, 2016 Very nice, LOVE the color scheme. Going with the stripes? Wish I has seen the build earlier.... Not a knock, but you made a boo boo..... if you do another, this is the correct distributor location, in the block next to the water neck (although, it looks okay all built) Kinda cool I found a 1:1 the the same color
Samiches Posted April 29, 2016 Author Posted April 29, 2016 Thanks Sledsel for the comment. I discovered the boo boo yesterday when trying to install the upper radiator hose. The instructions show to install the distributor in the hole on the left, so I did out of inexperience with the kit. There are a few other misprints like that. I found that the drawing of the rear leaf springs is off too. They are drawn backwards. I think the drawing of the radiator assembly also has the radiator upside down. At least I caught those!
Sledsel Posted April 29, 2016 Posted April 29, 2016 Thanks Sledsel for the comment. I discovered the boo boo yesterday when trying to install the upper radiator hose. The instructions show to install the distributor in the hole on the left, so I did out of inexperience with the kit. There are a few other misprints like that. I found that the drawing of the rear leaf springs is off too. They are drawn backwards. I think the drawing of the radiator assembly also has the radiator upside down. At least I caught those!Yea, they like to mess with us. I know when I am unsure, I look up reference photos and trial fit..... A LOT!
Samiches Posted May 4, 2016 Author Posted May 4, 2016 I have a question about the "laser" stripes for the knowledgeable Ford fans out there. How rare of an option are the stripes? I am kind of impartial to them and I'm not sure if I want to use them, especially since I already clear coated. I'm kind of wondering if people look for Torino's that came with factory stripes more than without. I don't think they are a performance indicator, like the Judge stripes on GTOs. Comments are appreciated. I am almost thinking about doing another online strawpoll for this. Polls are kind of fun with the exception of Politics.
Samiches Posted May 4, 2016 Author Posted May 4, 2016 (edited) Here are some pictures of the instructions, so you can see where I went wrong. Sorry for the blurriness of the last instruction picture. Also, I am almost done with everything but the final decals! The first picture shows the distributer clearly going into the hole on the left instead of between them like it should. The middle picture shows everything in place. The third picture shows it in the middle all of the sudden and now the upper radiator hose going into the hole on the left much later in the instructions... boo. Oh well, I can live with it. Edited May 4, 2016 by Samiches
cook_dw Posted May 4, 2016 Posted May 4, 2016 I wouldn't have noticed the mishap on the distributor but Im not a Ford guy.. I know I see stuff on other models (especially Camaros; since that is my passion on the full scale) that look out of place but they are waaaaaay better builders than I so who am I to judge. Regardless that is what this forum is for right..??.. Sharing and learning. I know I am learning a ton. Great job on the build, it looks amazing.
Rider Posted May 4, 2016 Posted May 4, 2016 Regardless, this is a great bit of work and attention to detail. I herd engine was a one off concept Ford was working on. ;-)
Samiches Posted May 9, 2016 Author Posted May 9, 2016 I have everything added except for the final decals at this point. I noticed that the exhaust tips didn't look right, so I drilled them out. The only thing holding me back from completing this is my indecisiveness on the "laser" stripes.
Recommended Posts
Create an account or sign in to comment
You need to be a member in order to leave a comment
Create an account
Sign up for a new account in our community. It's easy!
Register a new accountSign in
Already have an account? Sign in here.
Sign In Now