Samiches
-
Posts
77 -
Joined
-
Last visited
Content Type
Profiles
Forums
Events
Gallery
Everything posted by Samiches
-
I used Krylon Max gloss white with Krylon Fusion Clear. I think the Fusion is now named Max, but not 100% sure. Also, thanks for all the praise, this model gave me a bit of a fight at the end when the body didn't want to connect with the chassis very well. I guess that is what clamps are for.
-
-
All finished and posted in the under glass section if anyone is interested.
-
Dodge5522, I used embossing powder to simulate the carpeting. Also, pretty good choices for a first car! Thanks Charlie!
-
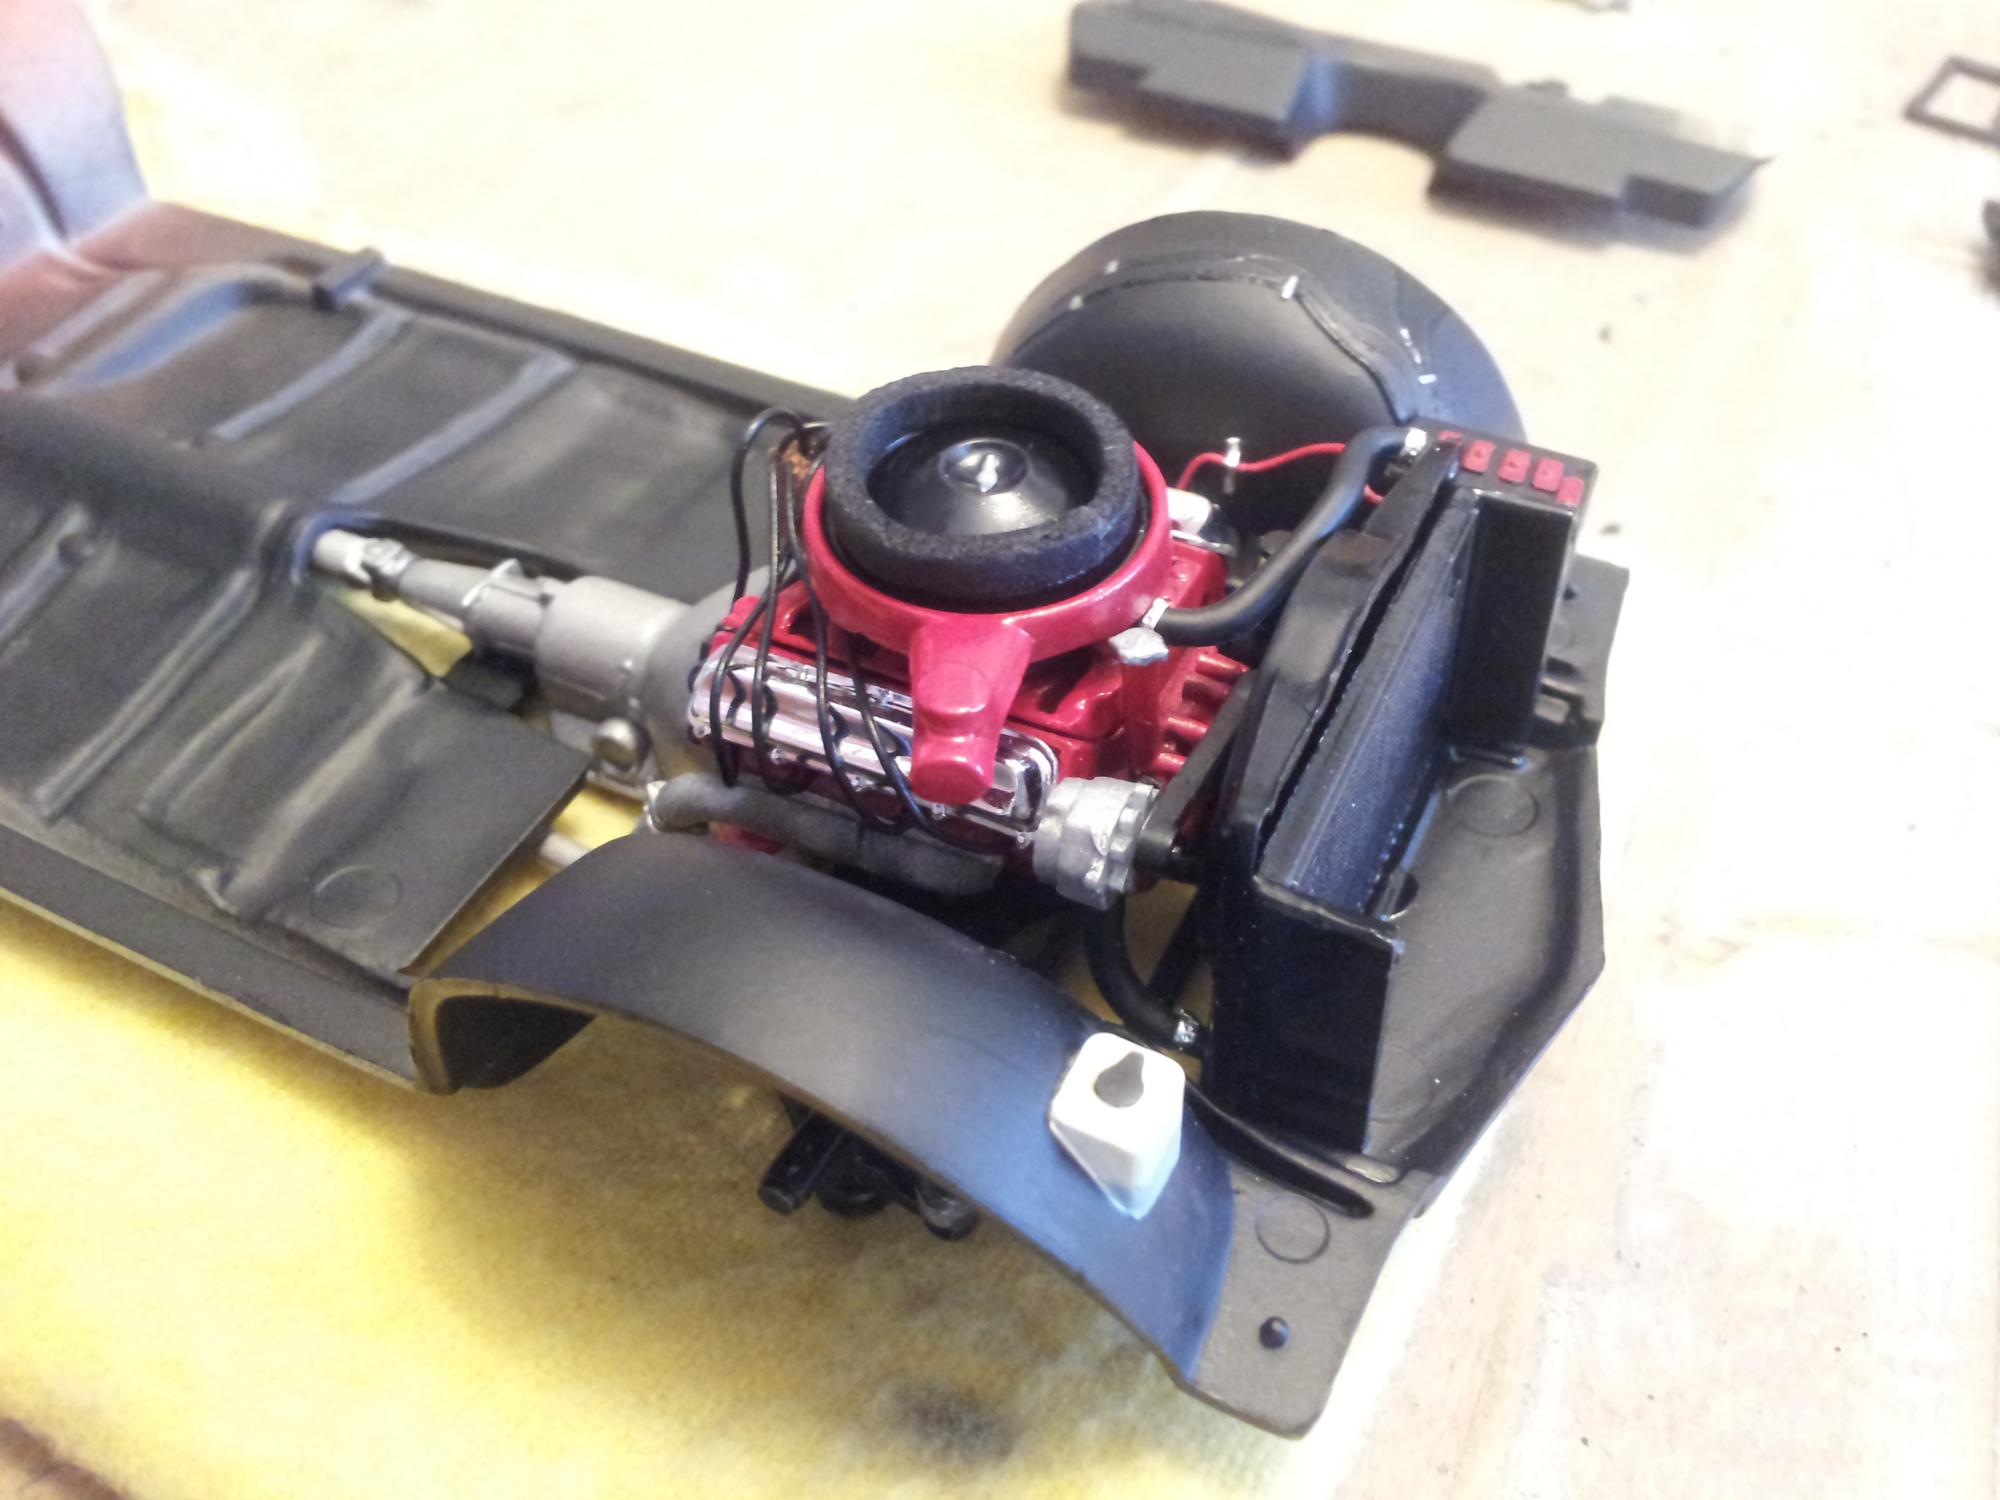
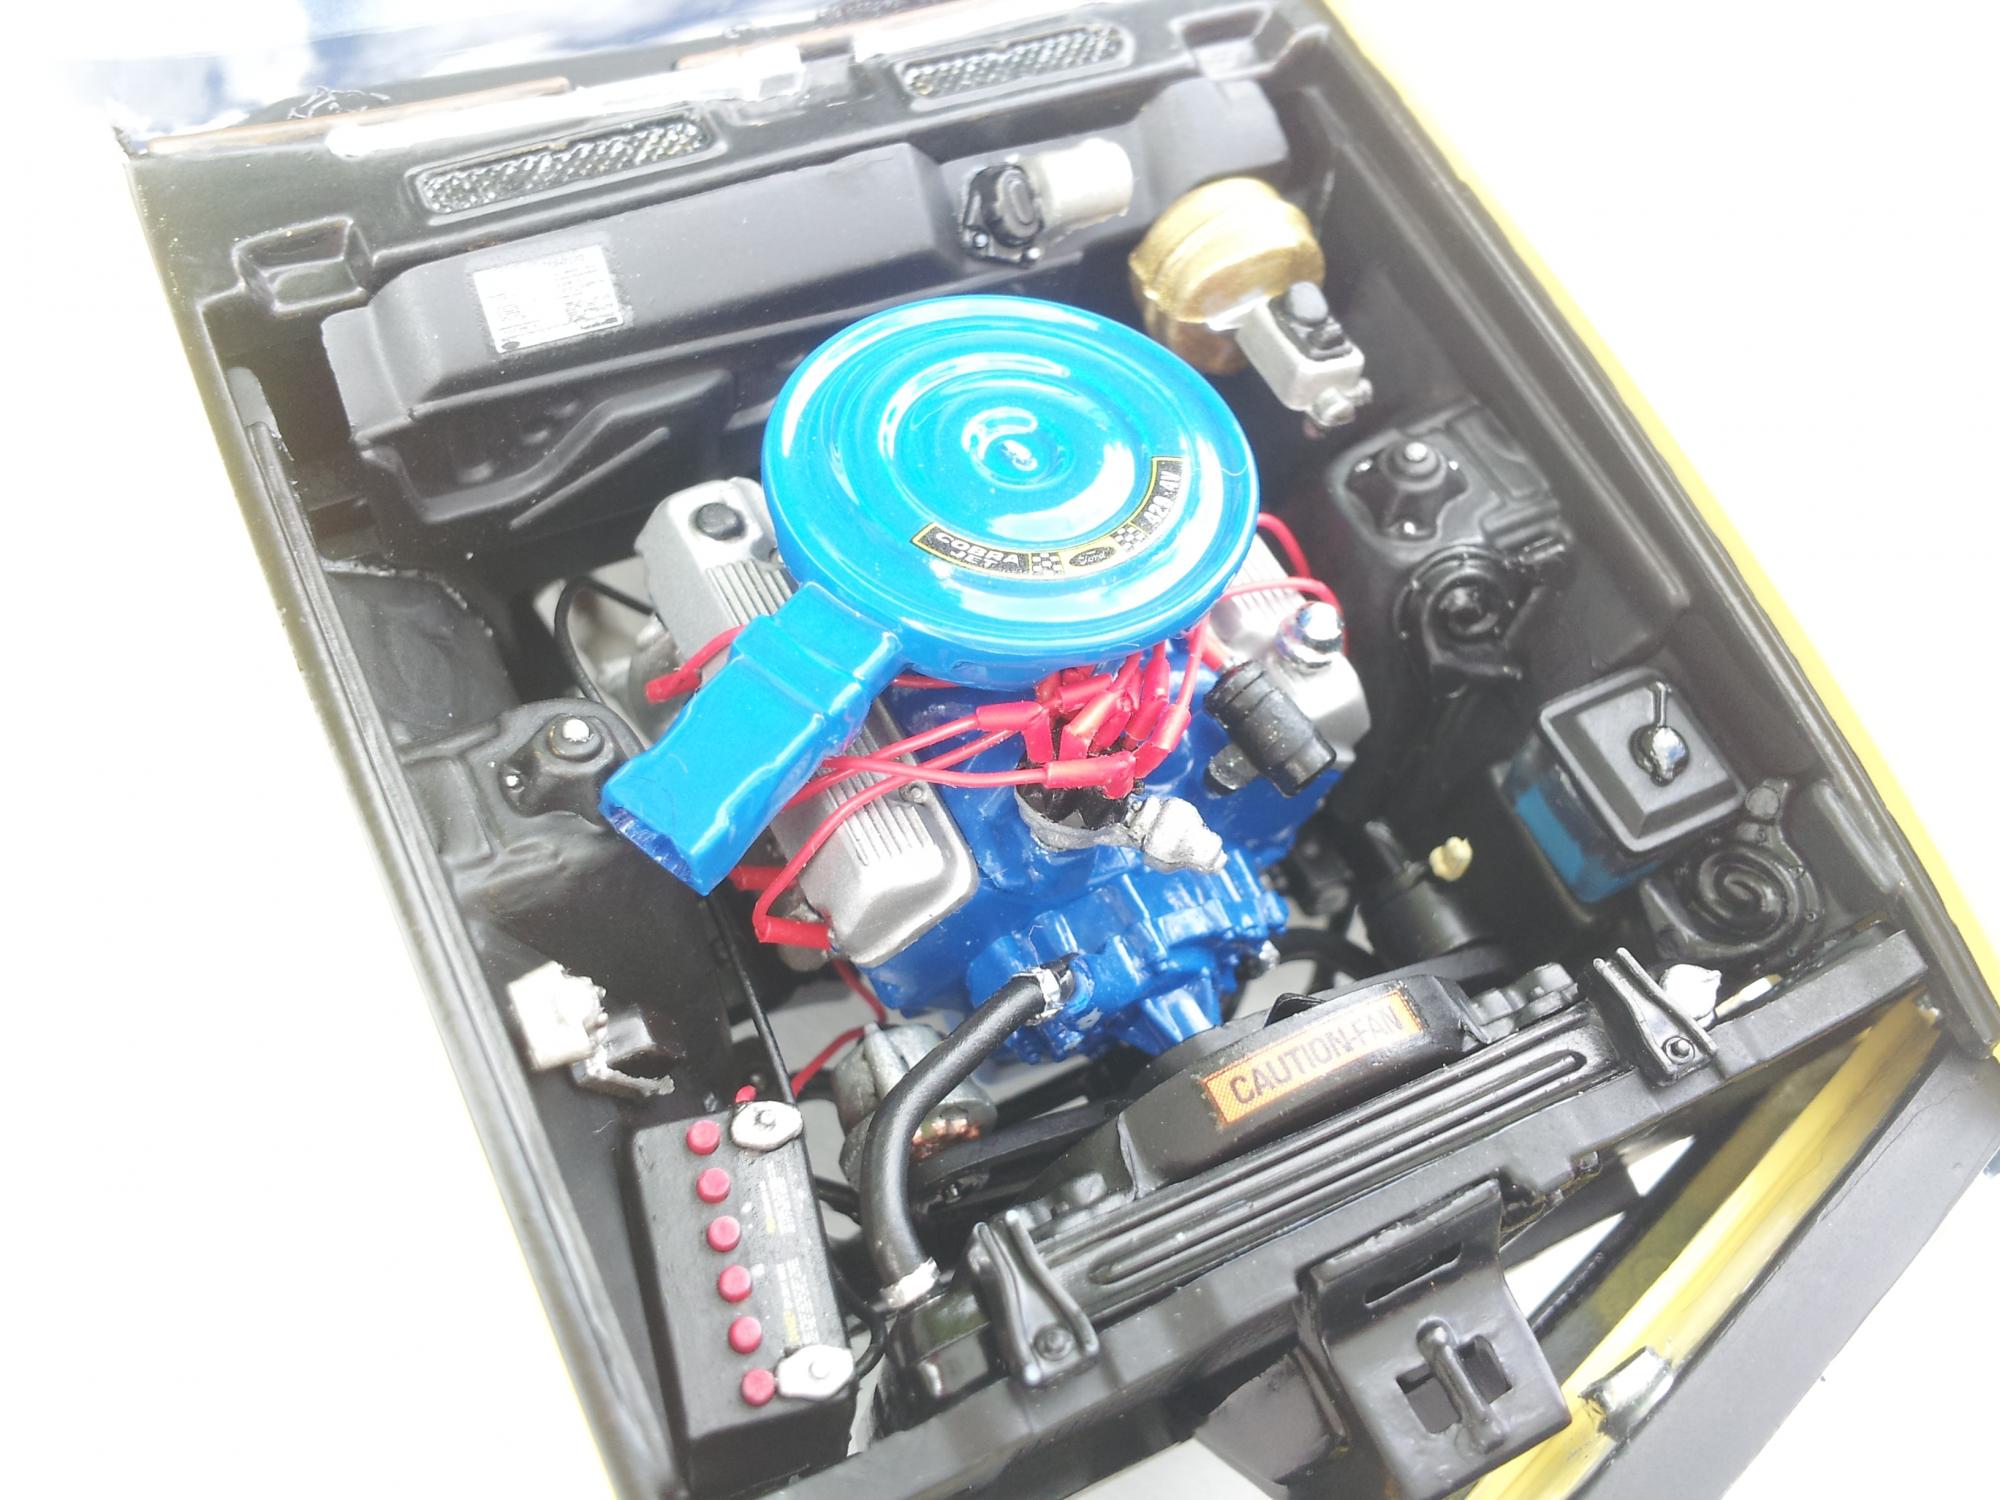
I finished up installing the suspension and other parts that go onto the chassis. I added some springs to the rear suspension, battery cable, and air cleaner foam seal. I wish there was the air inlet part that goes on top of the cleaner for the ram air style.

-
I got the chassis all finished painted. I will probably get the steering and suspension along with the rear components done this week too. Here is the chassis in succession:
-
...looking good...
-
This tribute is coming along quite nicely.
-
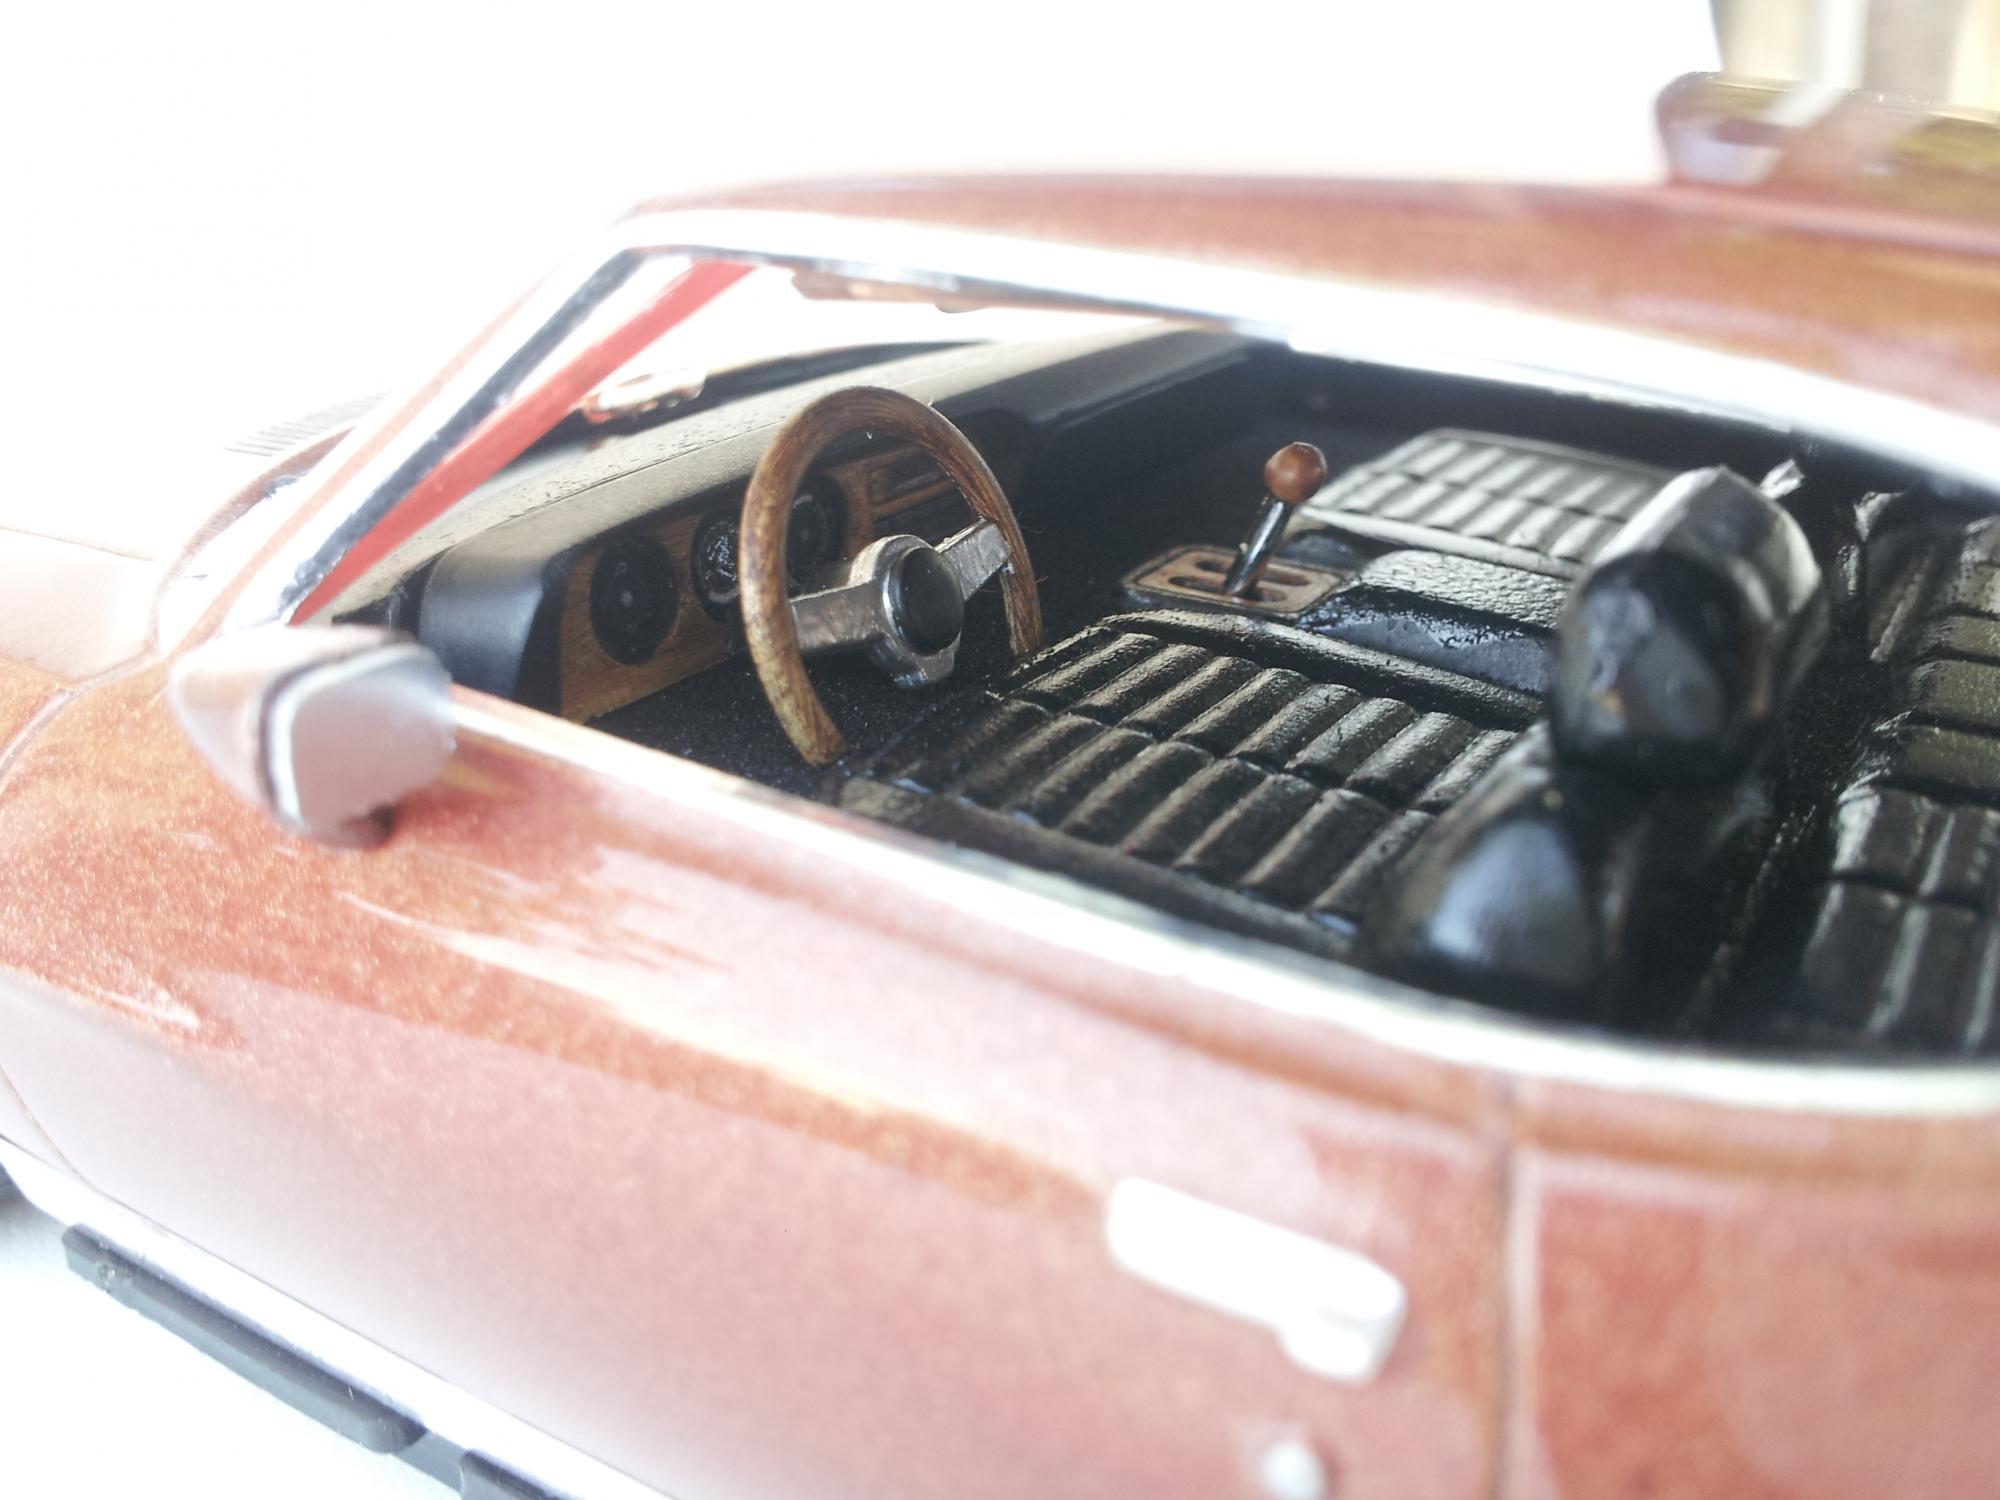
The interior is finished and I am pretty happy with it. I don't think the steering wheel is correct, so I tried to at least make it look like it could belong on a '69 hurst olds. Thanks for the comments and checking out this post.
-
I think the shocks that you made for the rear hatch look a lot better than the huge hinges you had originally. Well done replicating your 1:1!
-
Thanks, it came out better than expected.
-
Here is the work that I've got done on the interior so far: Thanks for looking!
-
I bought this kit to bash for an upcoming 1970 Pontiac GTO build, but couldn't bring myself to do it. The car and kit just look like too much fun. I added an ignition coil from my parts box. I also made the foam piece that goes on top of the air cleaner, but need to make sure I didn't make it too tall before installing it permanently.
-
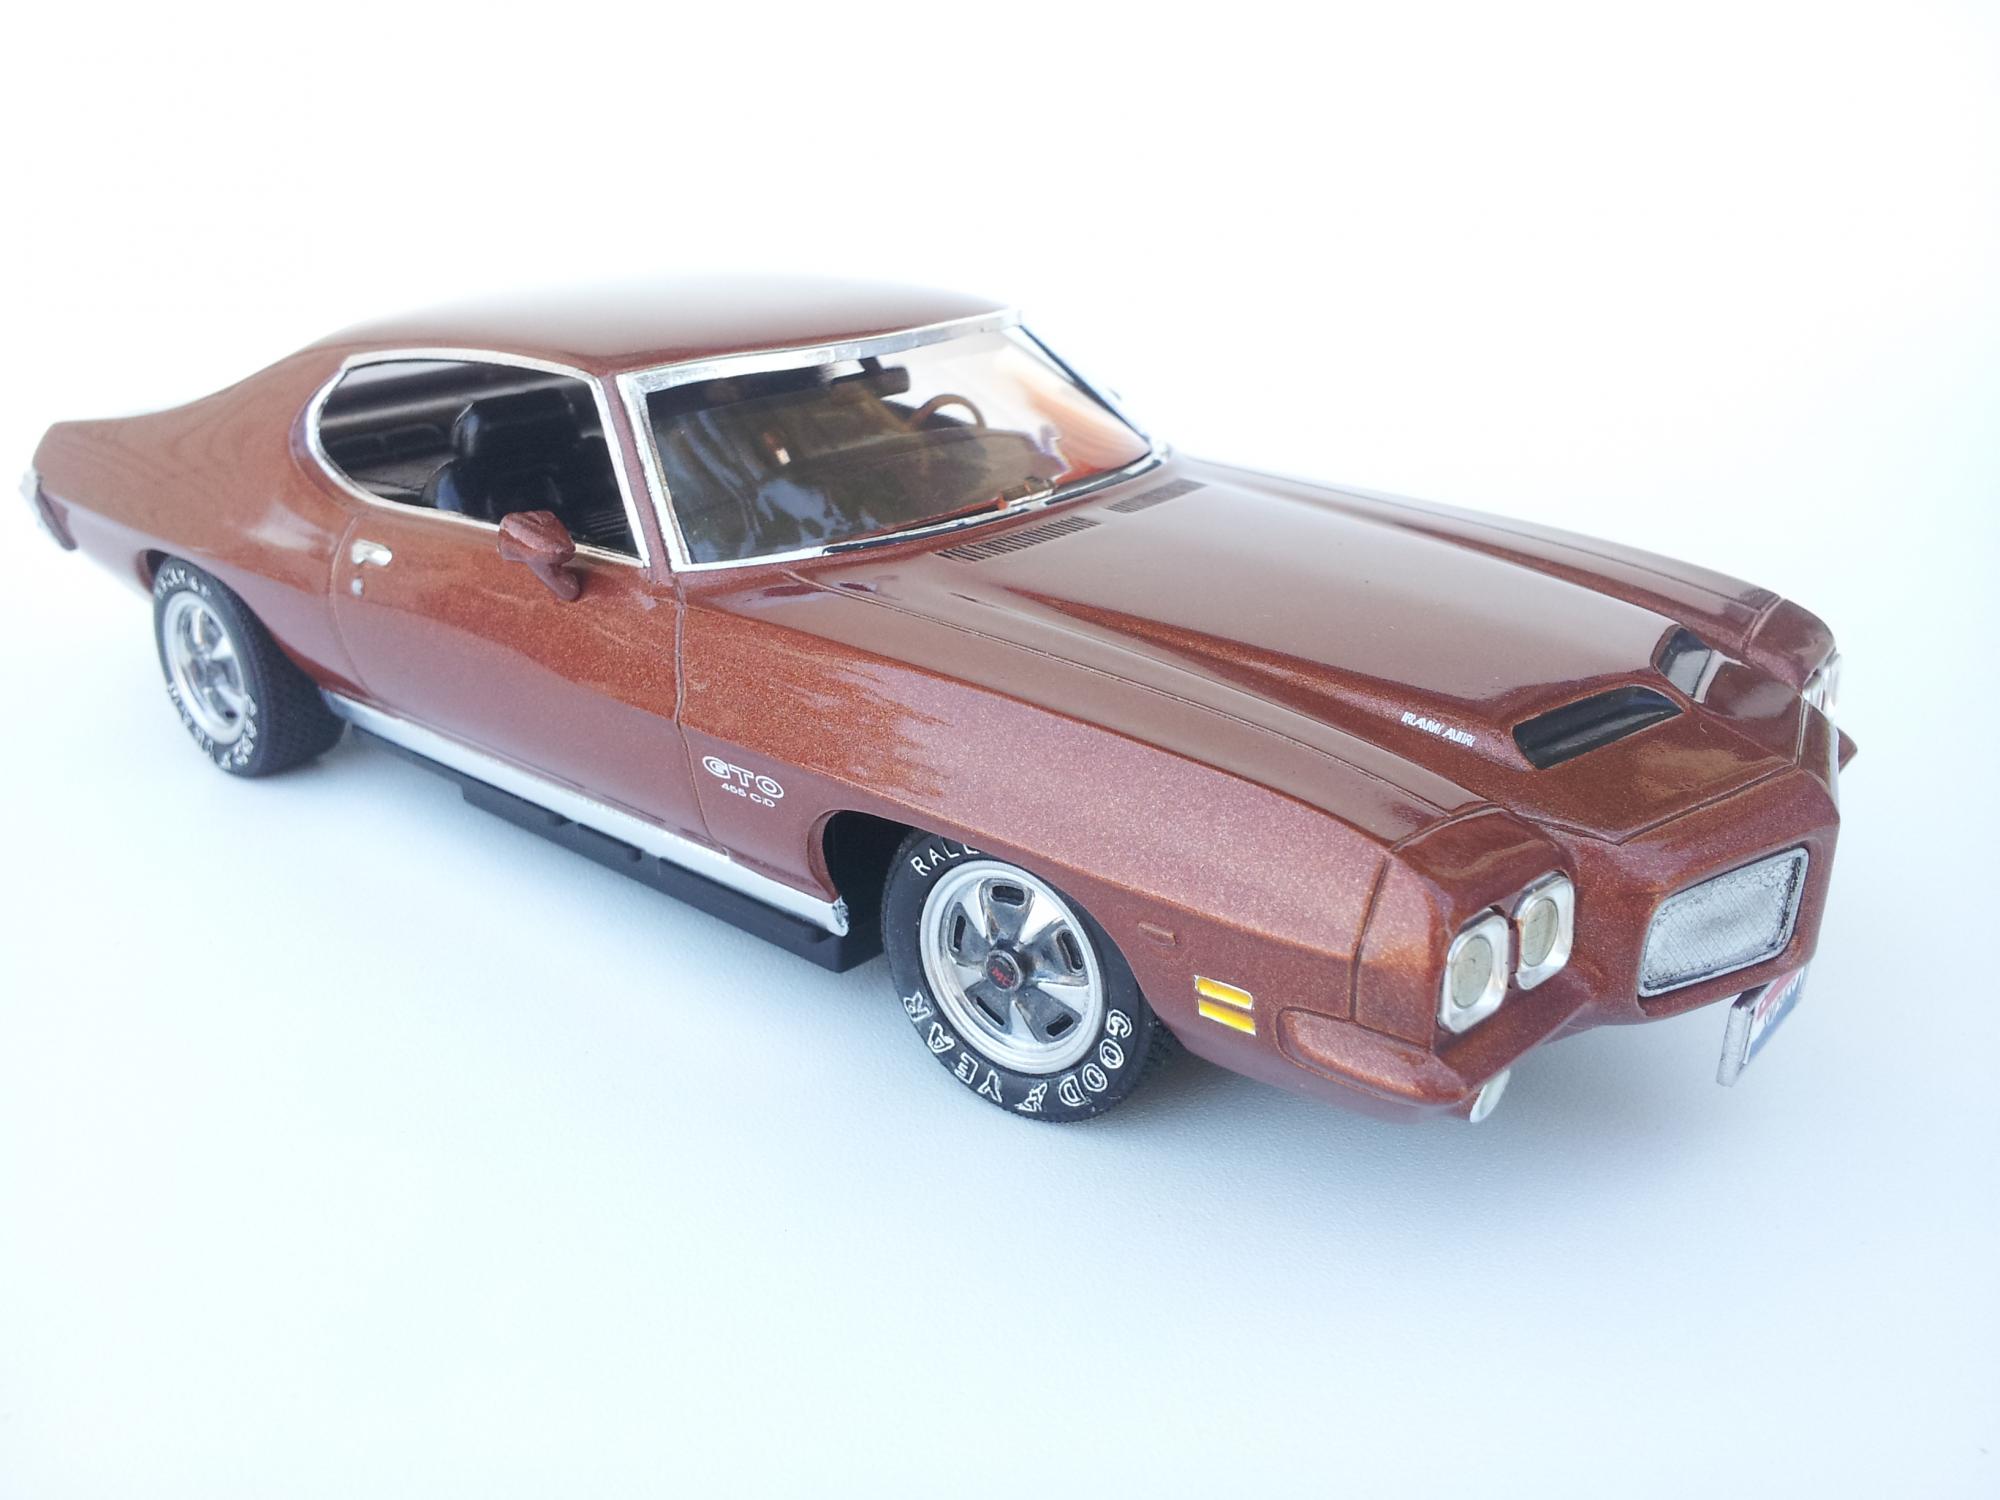
Thanks XJ6 and Snake. The color is Castillian Bronze and I got it from Scale finishes. I used one of those cheap Preval sprayers, which worked out better than anticipated.
-
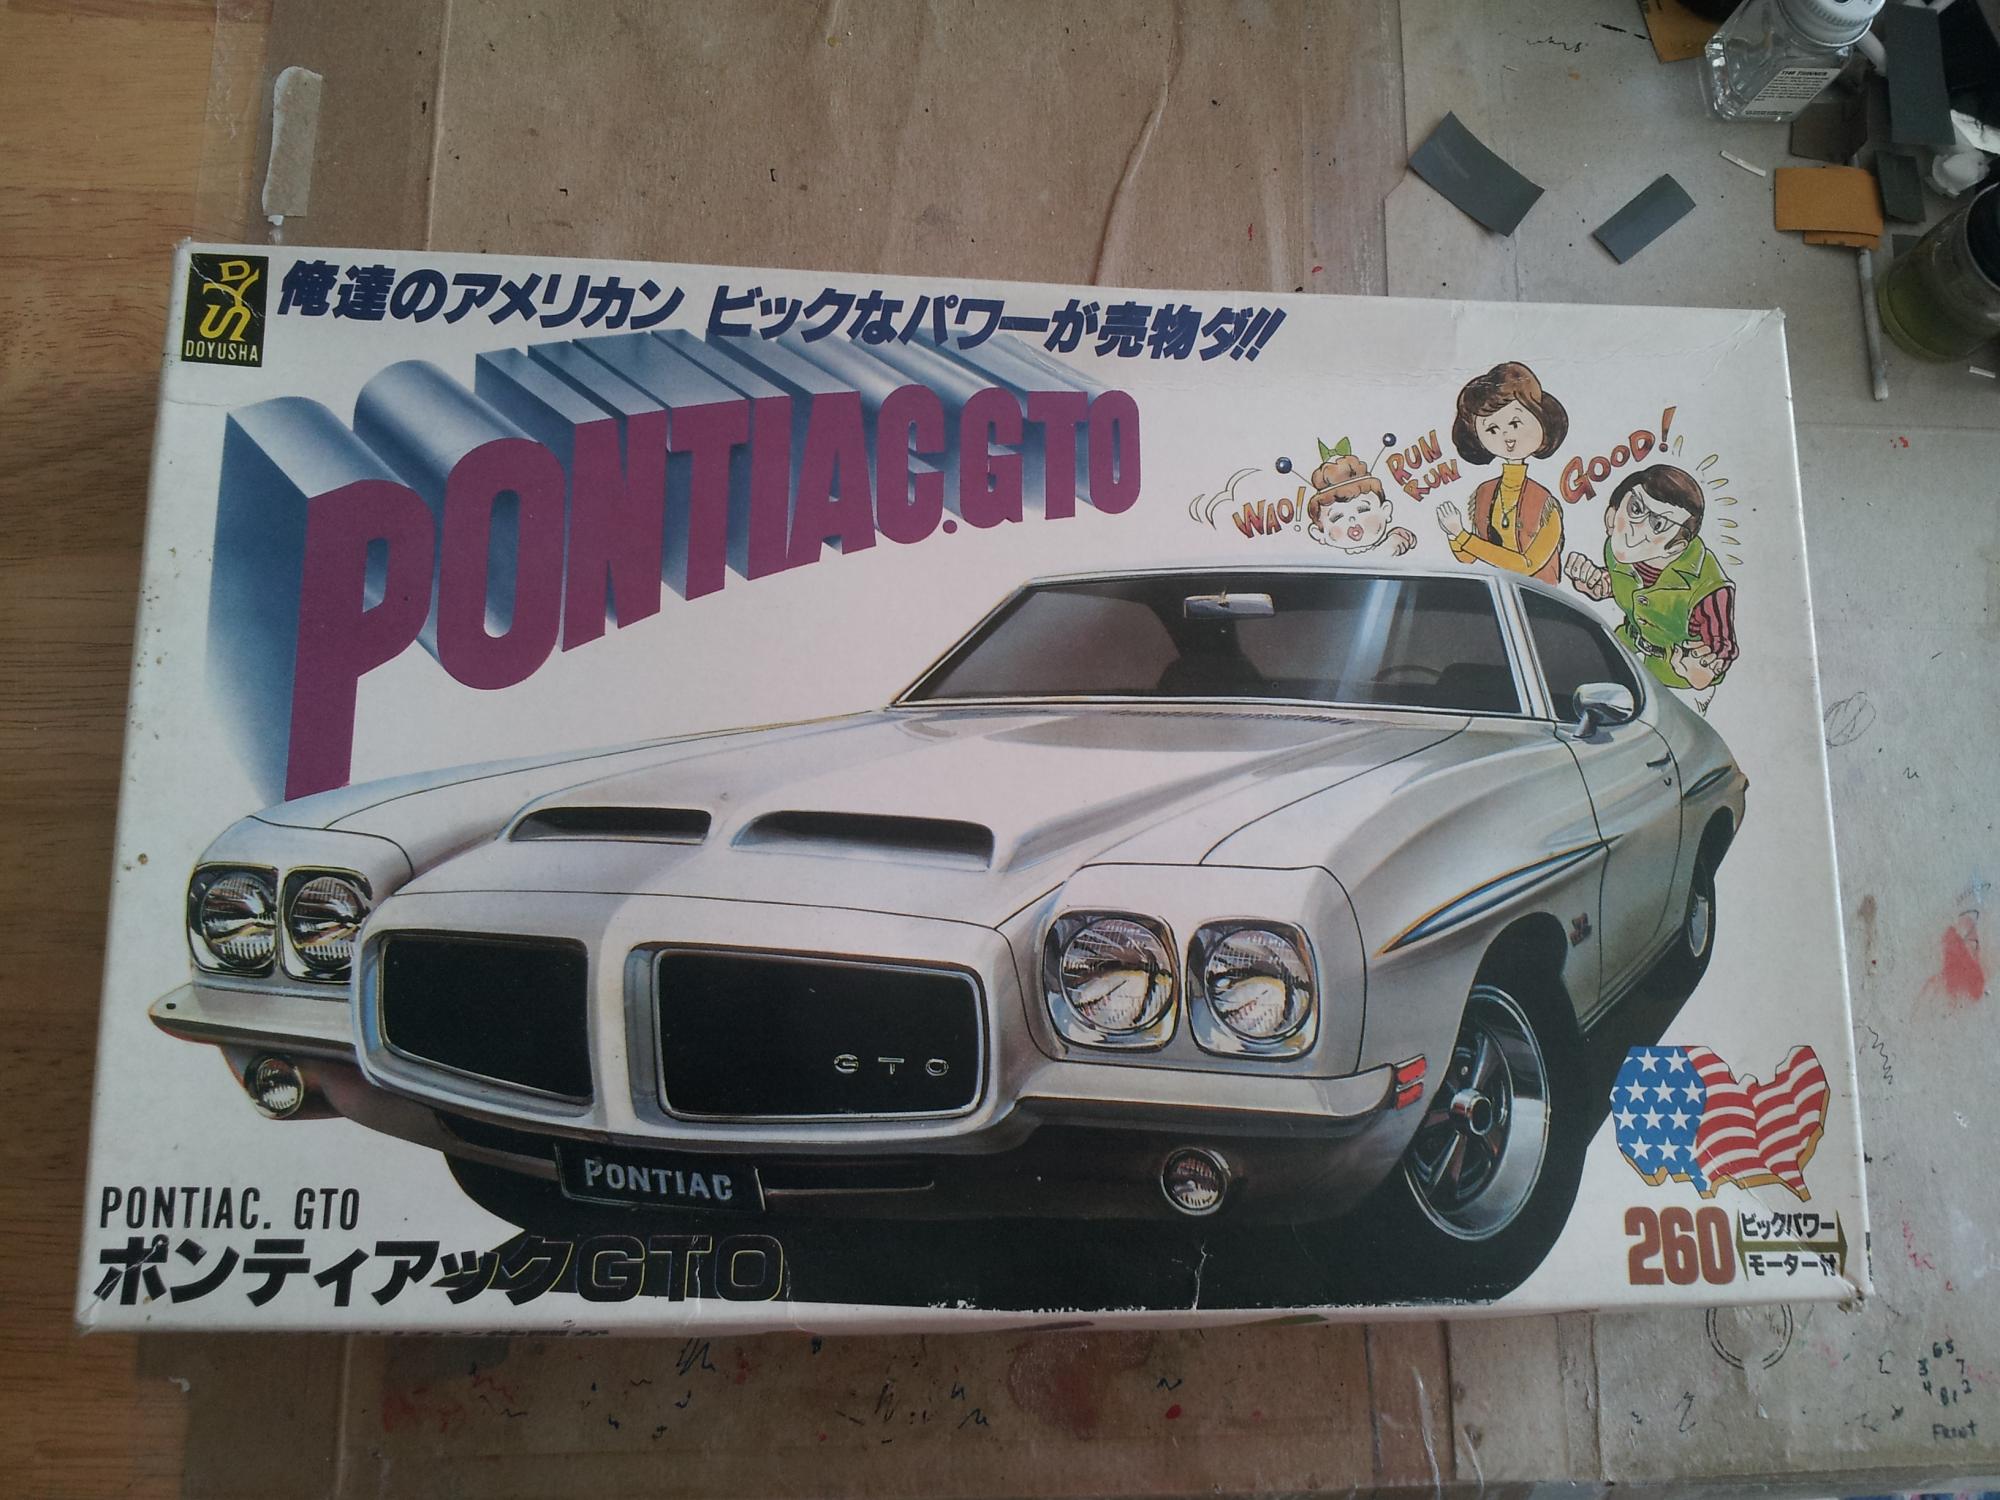
Yes, apparently they thought this was a 1964 GTO. Not very close at all. The lack of interior detail is because the space between the bottom of the car and the interior is where 4 AA batteries are suppose to reside along with the motor.
-
Great job with the conversion, you can't tell where you cut and modified the body. Again, well done!
-
A quick build of a battery operated plastic model kit.
-
Torino - Updated RestoMod Starsky Hutch new ride
Samiches replied to RestoModGuy's topic in Model Cars
Very aggressive looking Torino you got there! -
I still have a lot to learn, so thanks for the comment. You win some, you lose some.
-
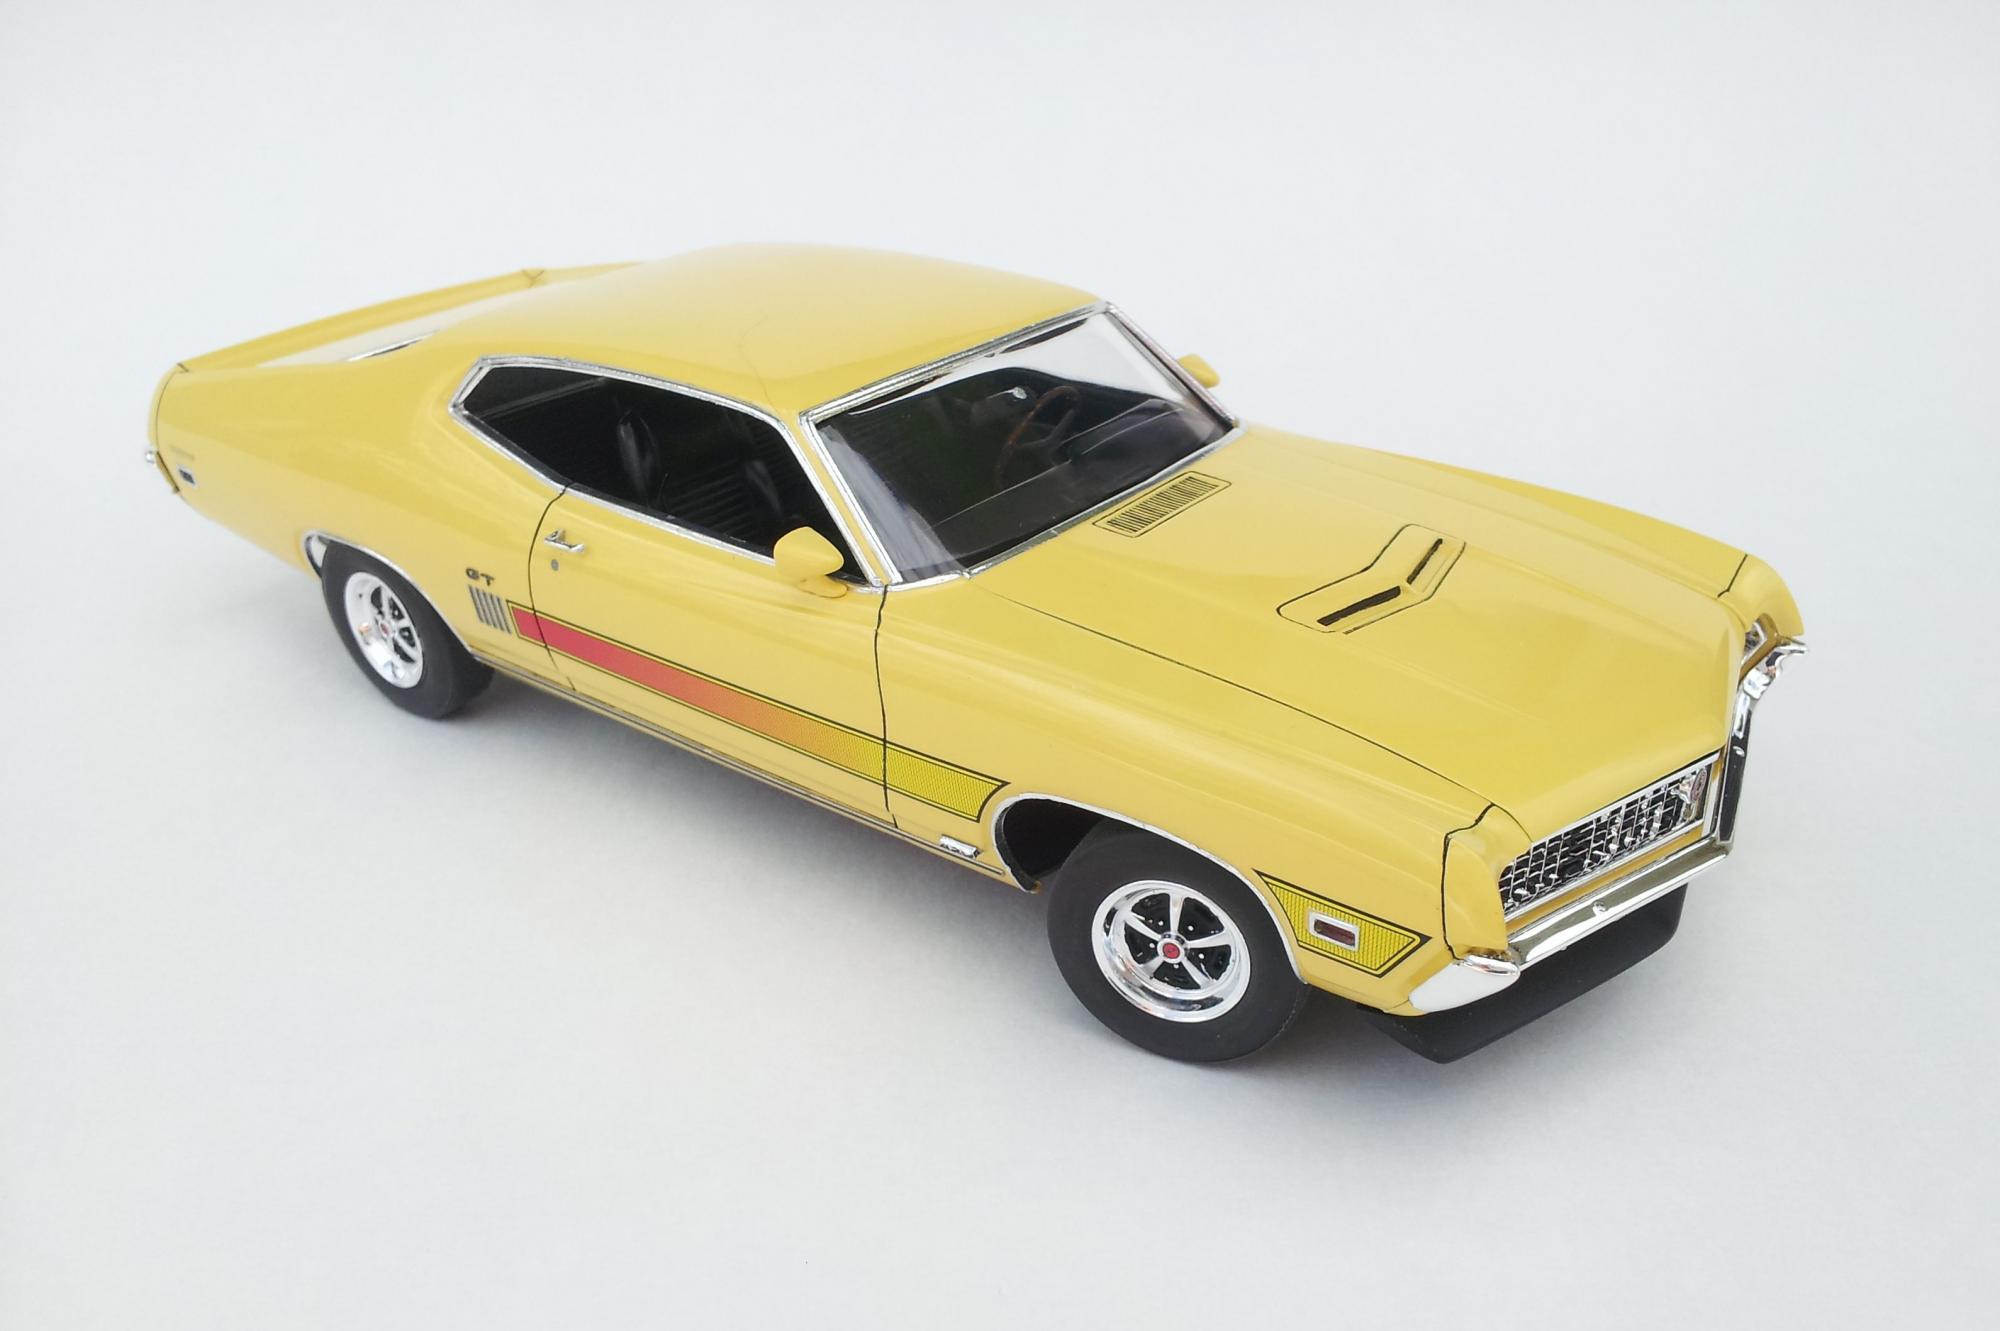
Thanks Bill, Shoop, and Steven! The yellow was a wild card and came out looking great.
-
I used acrylic paint in the wheels which is easy to clean up with a toothpick. To answer you second question, the poseable steering is part of the kit engineering. Thanks for the nice comments, it came out very well. I've only been doing models as an adult for the last couple of years, and the tips and tricks that people share on these model forums are super helpful and the reason my models aren't glue bombs any more. Another tip that I learned is to know when to walk away from my model and let stuff dry, or just get a different perspective. Sometimes you have to completely strip the paint on your model and start over. You get out what you put in.
-
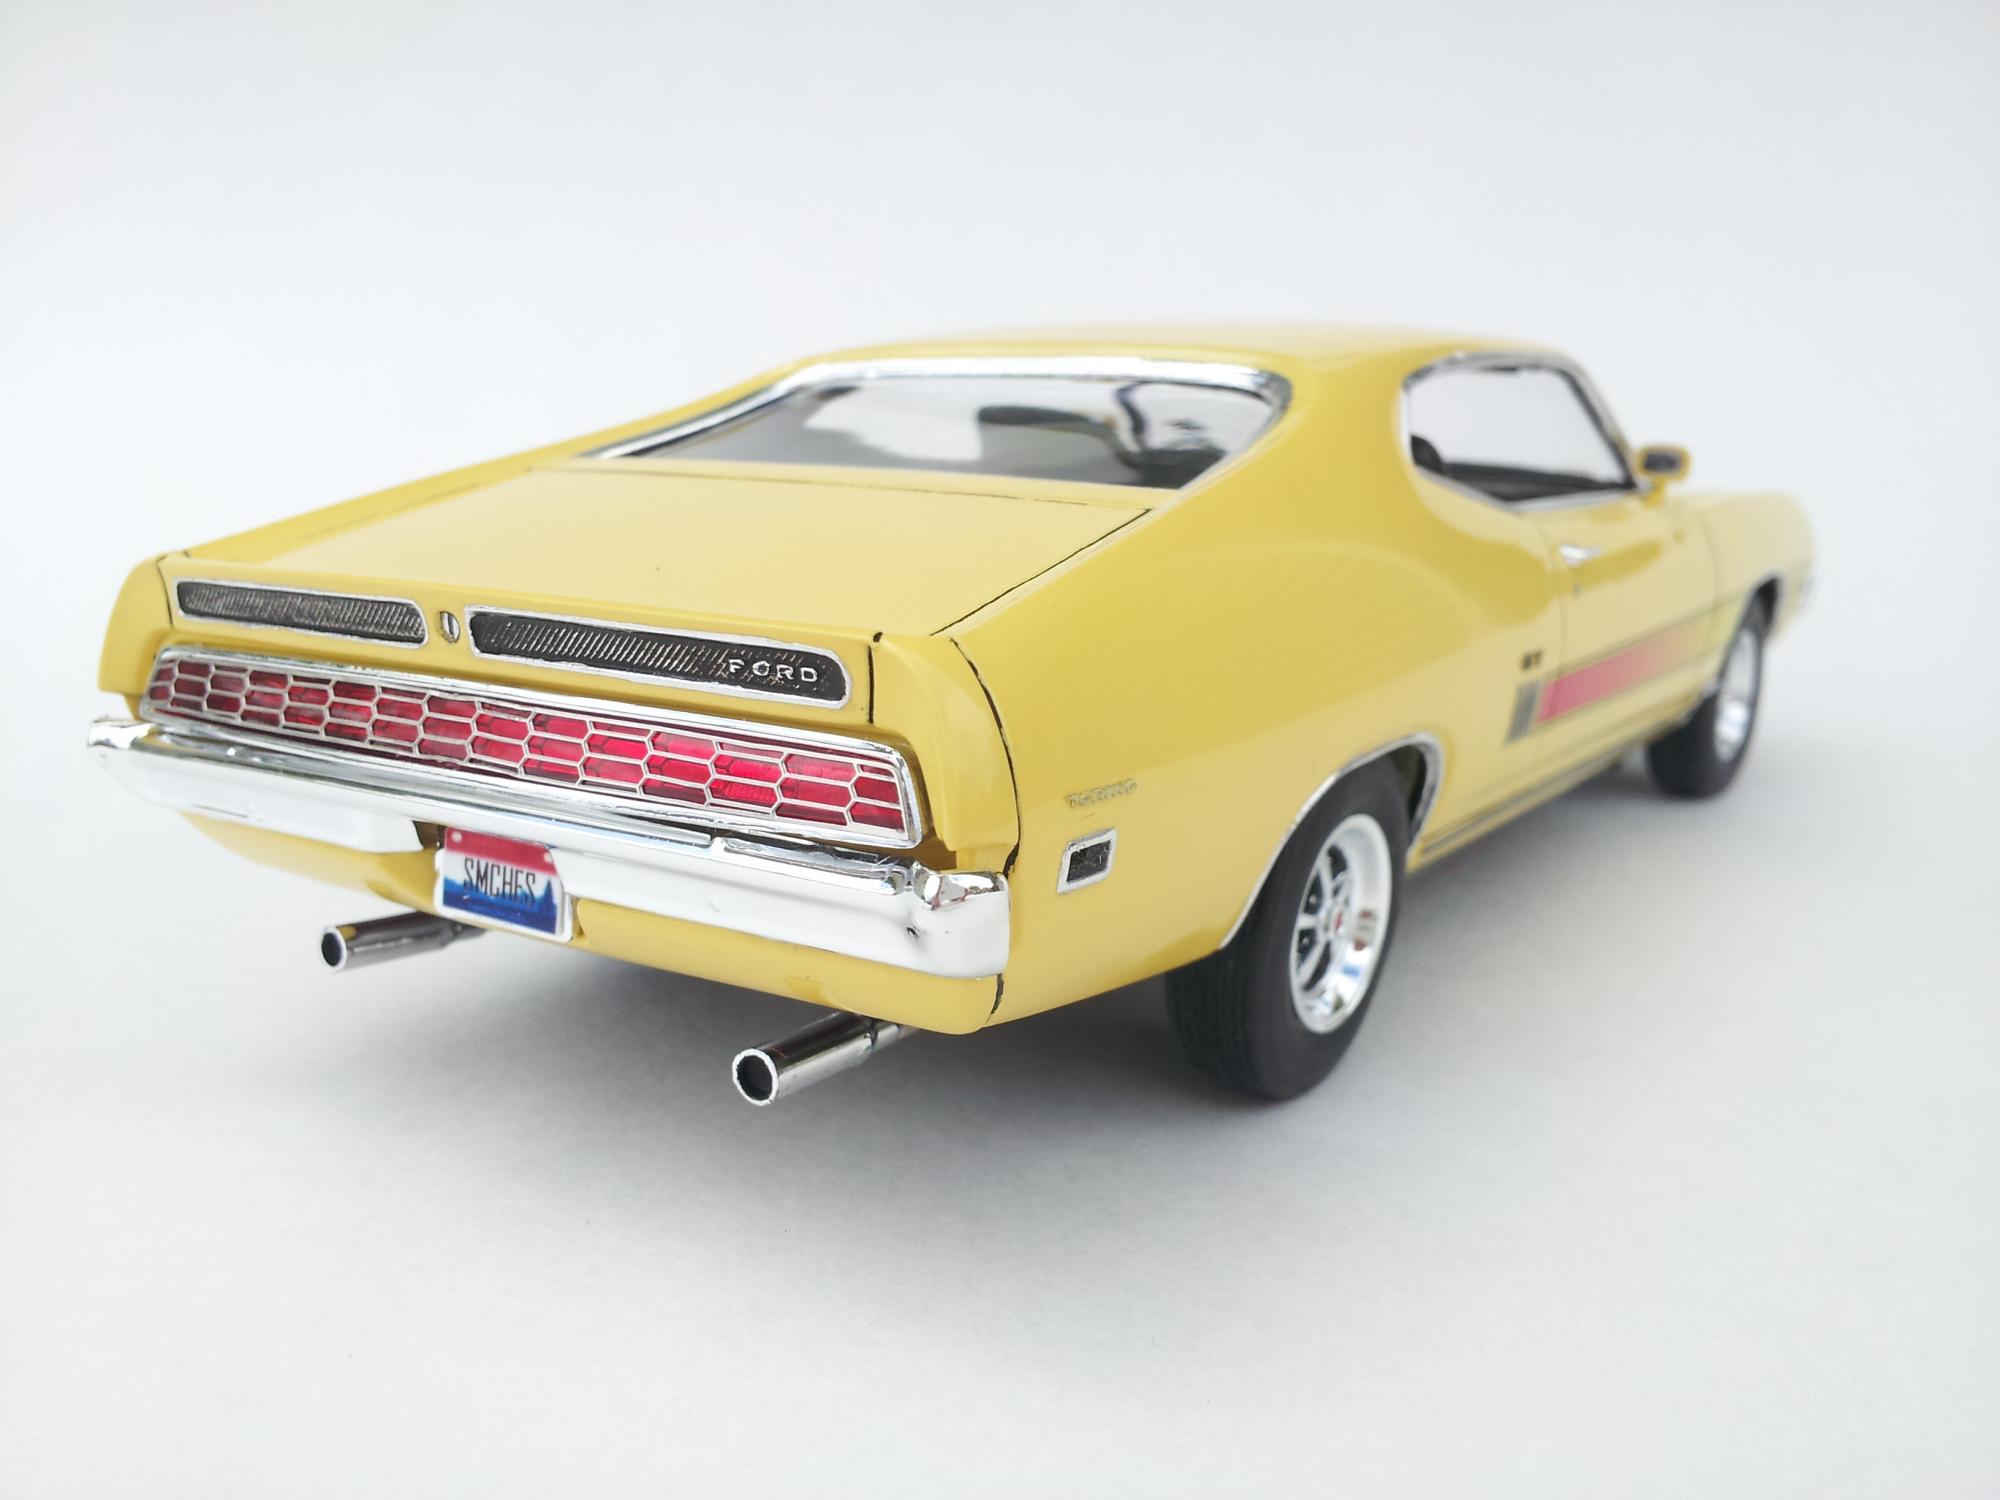
Here is my finished WIP in all its glory. Thanks for all of the comments while during my WIP! WIP: http://www.modelcarsmag.com/forums/topic/111860-1970-torino-gt-wip/
-
Very clean build. Outstanding GTO!
-
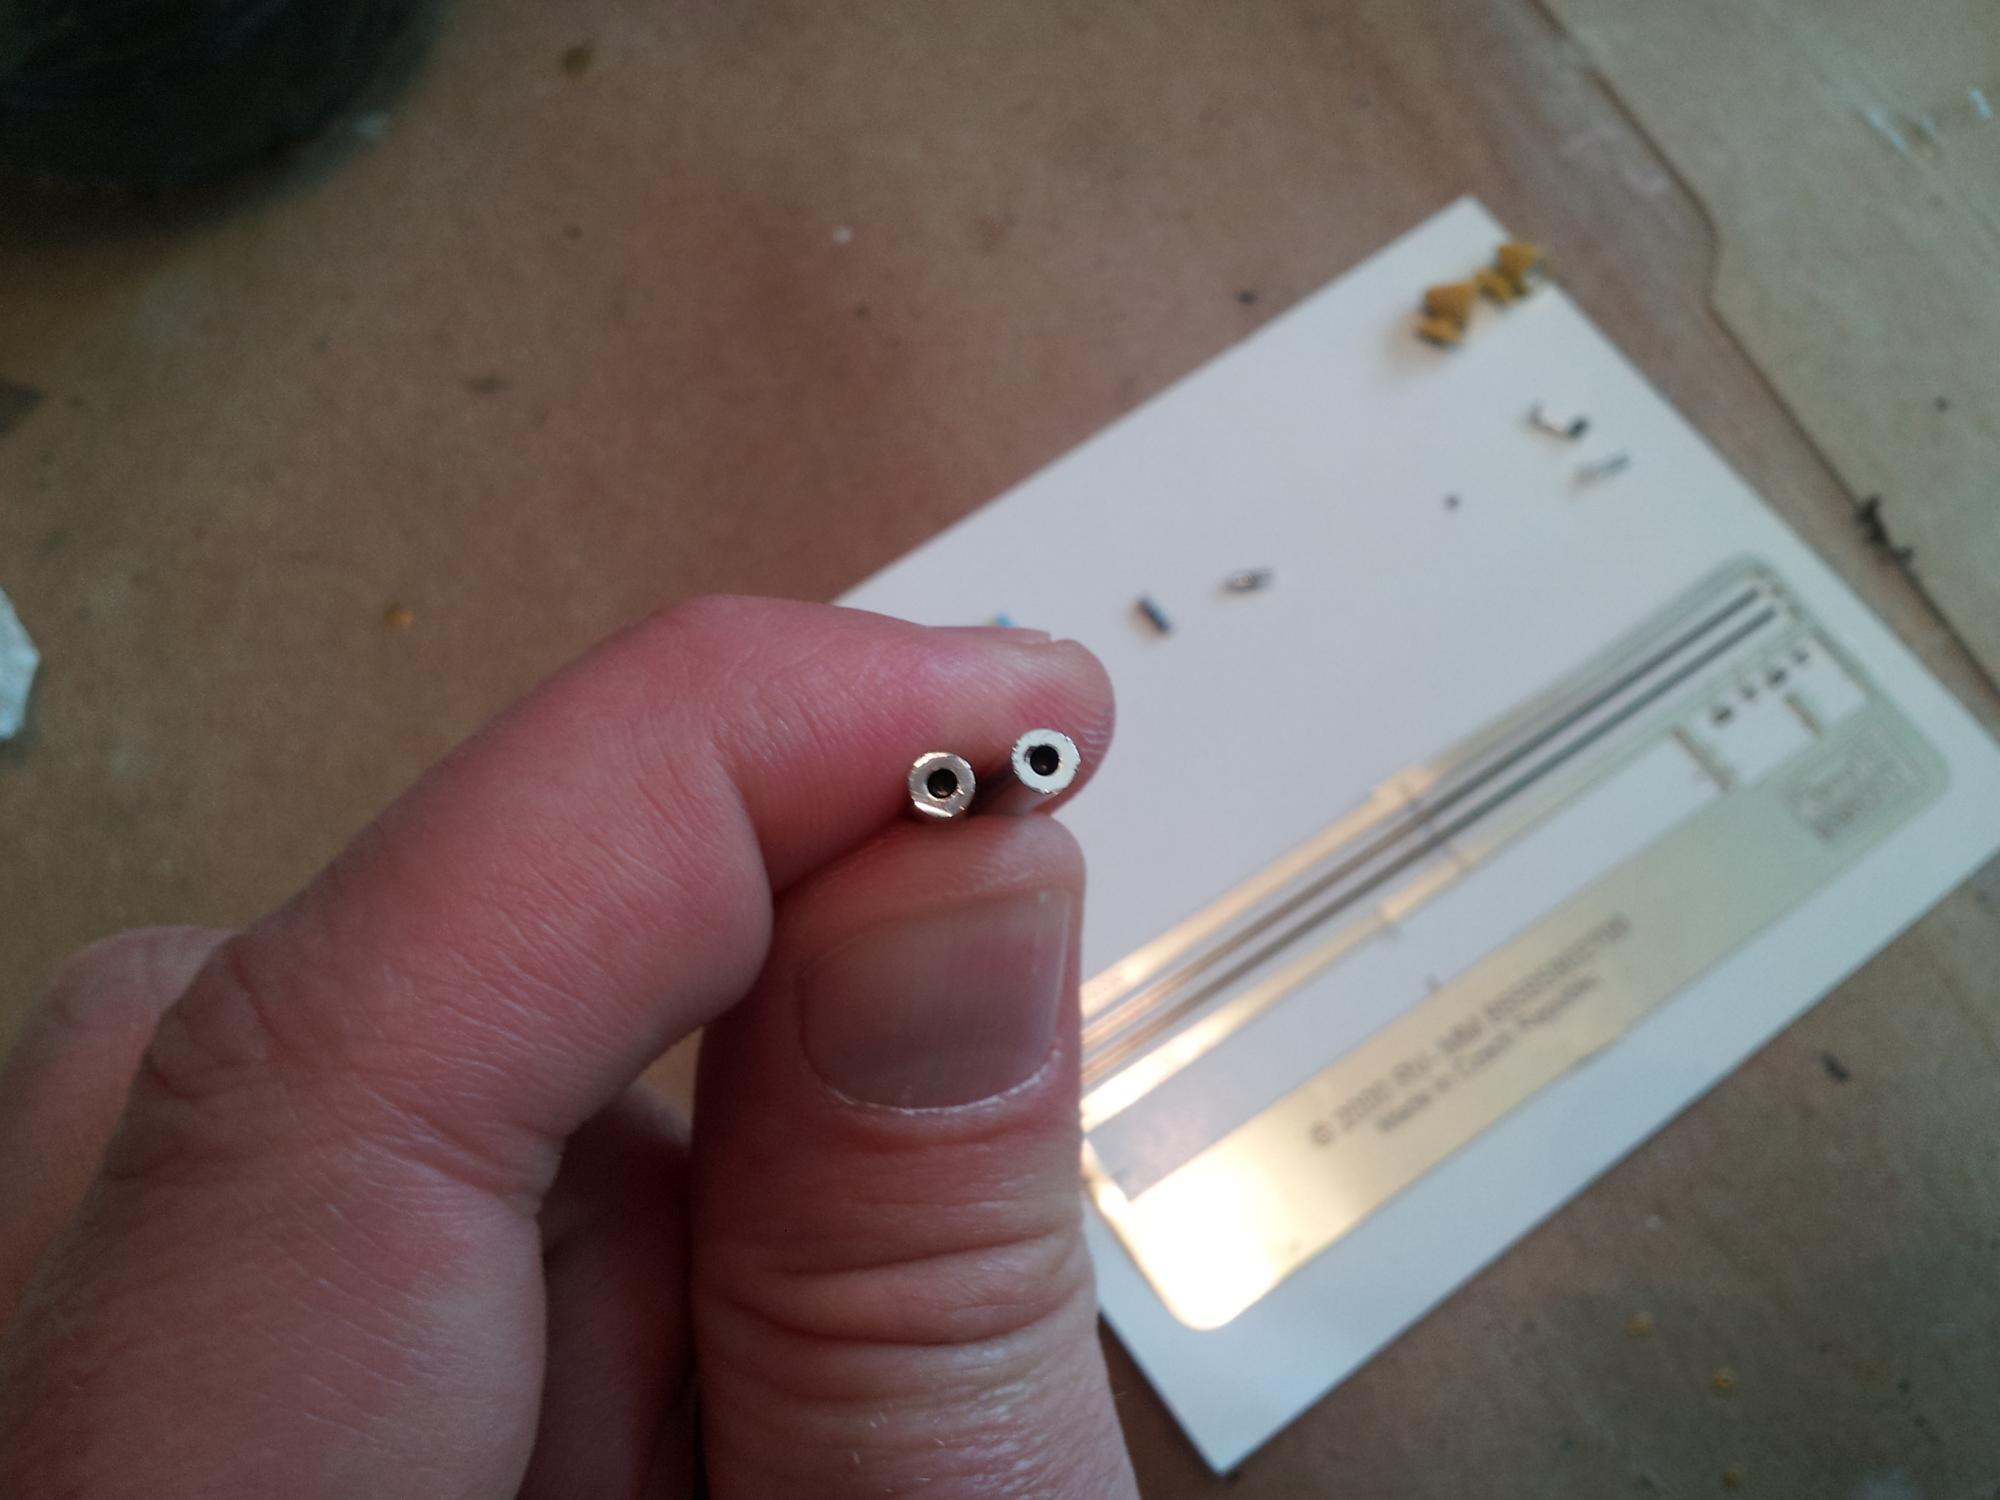
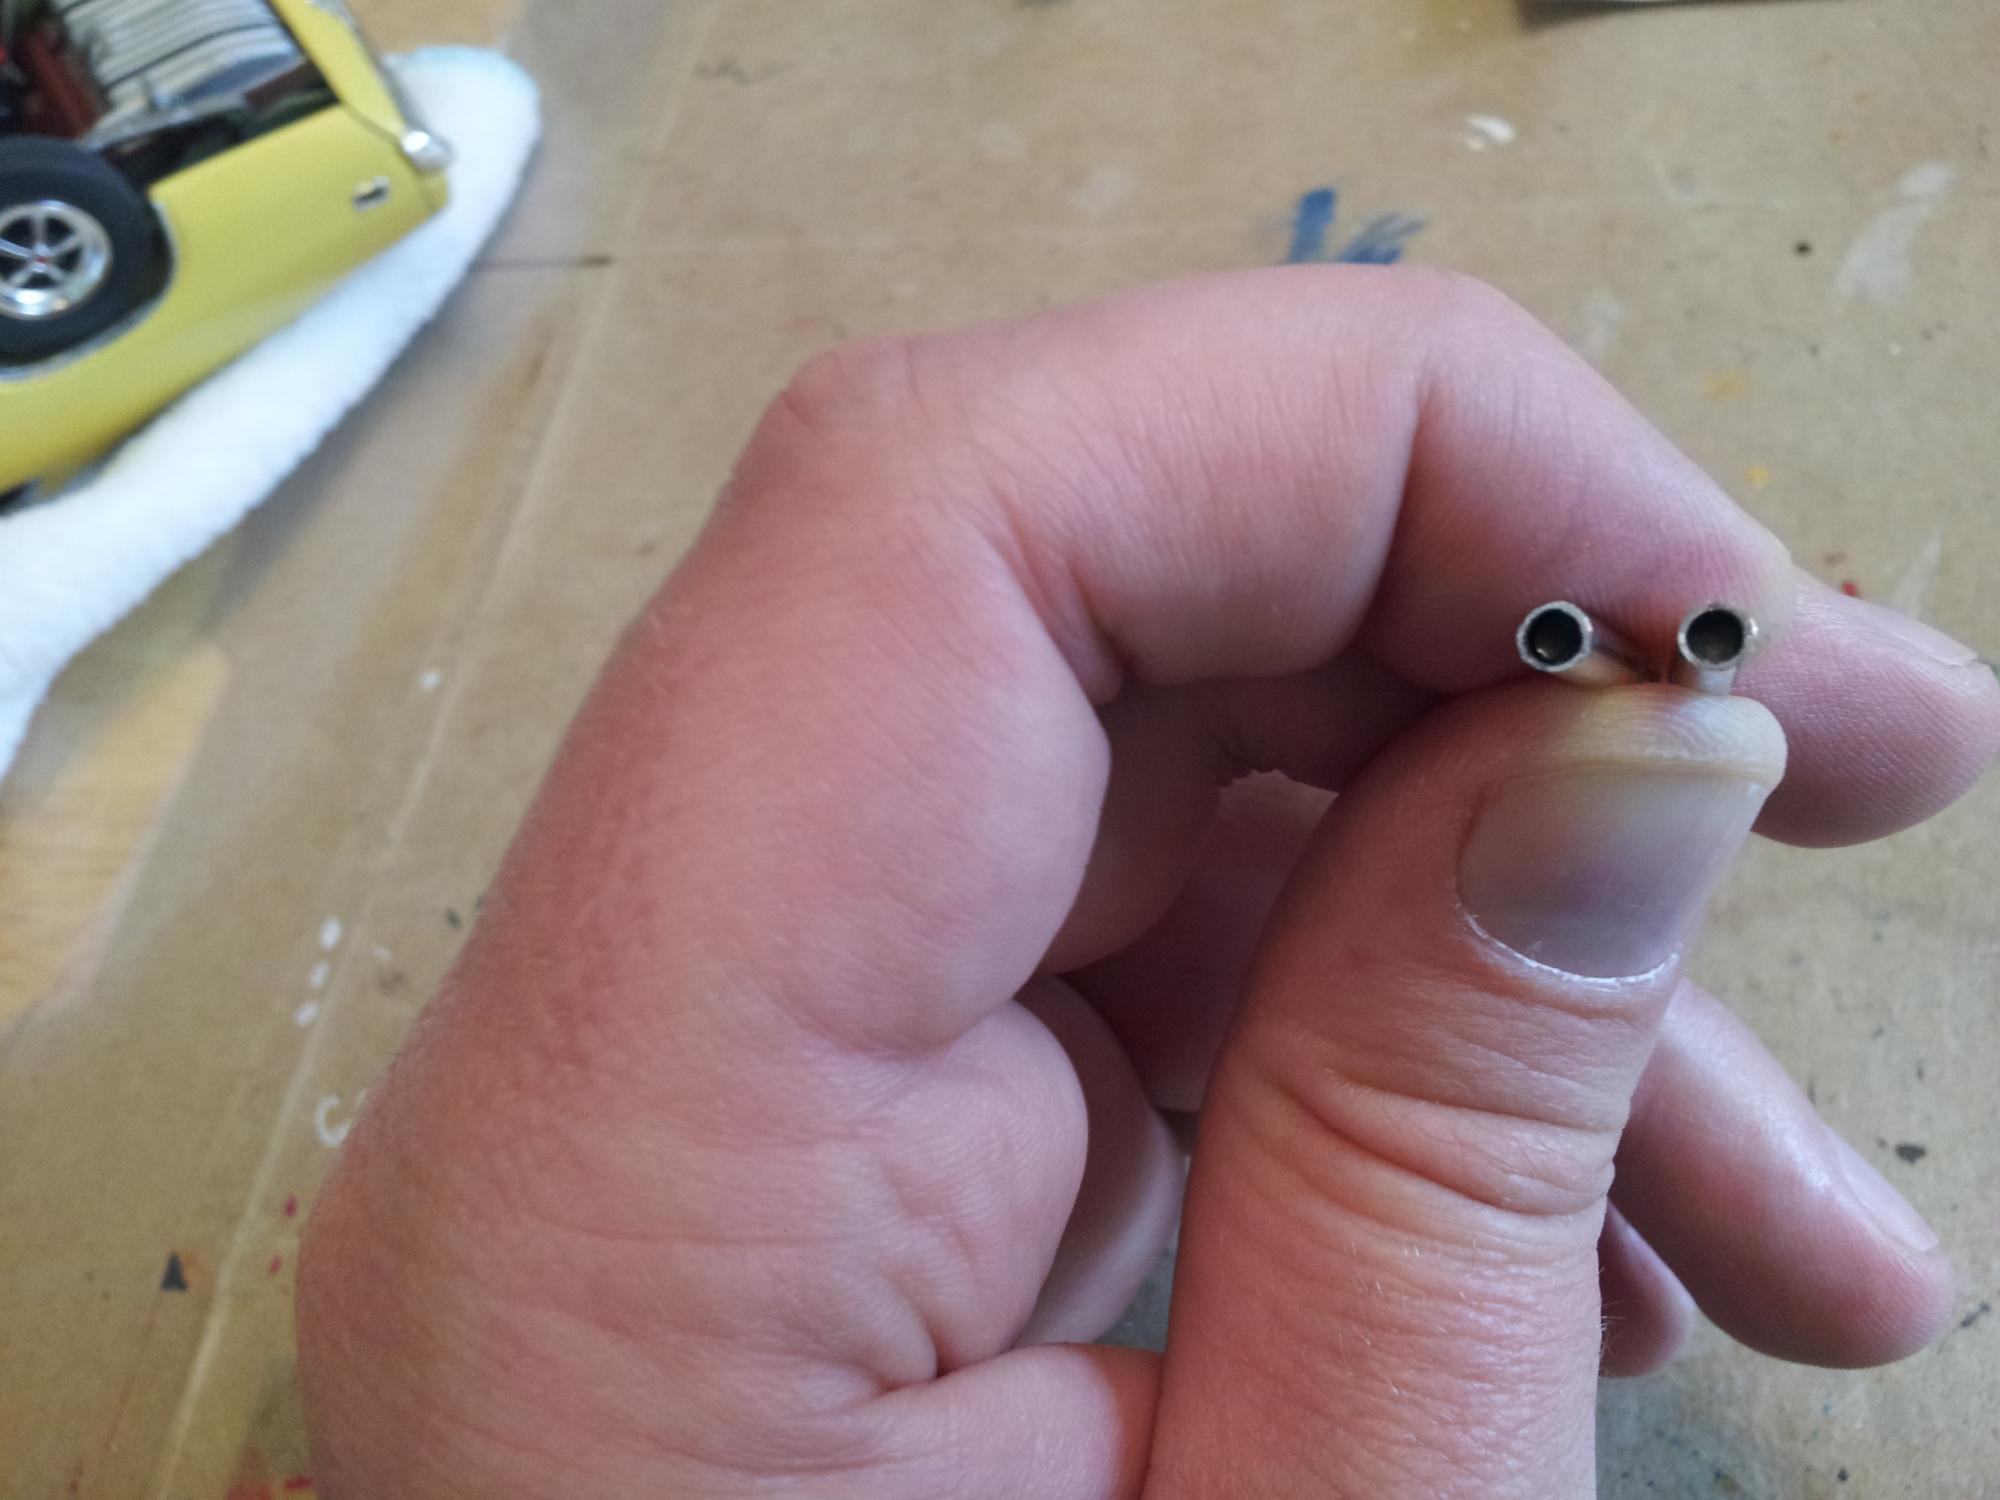
I have everything added except for the final decals at this point. I noticed that the exhaust tips didn't look right, so I drilled them out. The only thing holding me back from completing this is my indecisiveness on the "laser" stripes.
-
Amazing work here!