JollySipper Posted March 1, 2023 Author Share Posted March 1, 2023 Body got painted today.......... There's a small dust bit on the hood area that will get sanded tomorrow so I can put one more coat of clear on. 2 Quote Link to comment Share on other sites More sharing options...
PowerPlant Posted March 1, 2023 Share Posted March 1, 2023 Looks great in silver 😎 1 Quote Link to comment Share on other sites More sharing options...
JollySipper Posted March 1, 2023 Author Share Posted March 1, 2023 Rear suspension is together...... The tow hook and exhaust tip will be very last. Quote Link to comment Share on other sites More sharing options...
JollySipper Posted March 13, 2023 Author Share Posted March 13, 2023 Aaaaaaand the front suspension. 1 Quote Link to comment Share on other sites More sharing options...
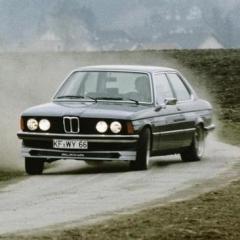
JollySipper Posted March 18, 2023 Author Share Posted March 18, 2023 Today is 3/18, guys! (That's a model of BMW.................) 1 Quote Link to comment Share on other sites More sharing options...
JollySipper Posted March 24, 2023 Author Share Posted March 24, 2023 Yea, I'm a riot........... I think I've figured out how to halfway represent the window moulding. I just painted the trim black, then I went around the inside edge with a silver paint pen. Whatcha thunk? 2 Quote Link to comment Share on other sites More sharing options...
PowerPlant Posted March 29, 2023 Share Posted March 29, 2023 This is probably the part I am least looking forward to on my kit, but yours looks great! Quote Link to comment Share on other sites More sharing options...
JollySipper Posted March 29, 2023 Author Share Posted March 29, 2023 Thanks, Matija! There's decals in the kit that are supposed to represent the window trim.... Maybe you can work with those a bit better than I could....... Quote Link to comment Share on other sites More sharing options...
slownlow Posted April 2, 2023 Share Posted April 2, 2023 Thanks for the heads up about this thread TJ. A friend gave me 2 ESCI models of the iconic WWll BMW R75. One was started but had a few bits missing. So rather than do a military build I went more in the bobber direction. The kits are 1/9th scale so there is lots of opportunity for detail. To disassemble the started kit I used the wet then freeze technique with modest success. Thinking this might be the case I predrilled most of the contact points to receive a pin on assembly. Major body work was done to the front of the car and moderate changes on the bike. Now I’ve started the military version and this is the progress so far. Because of the size of the kit there are a few fun factors incorporated. The forks compress, the seats are sprung and of course the wheels go round and round. Anyway that’s the progress so far. 1 Quote Link to comment Share on other sites More sharing options...
slownlow Posted April 16, 2023 Share Posted April 16, 2023 We’ll the bike is done, now onto the car. Along the way I found a way to hold it while adding fidley bits. The square peg at the rear wheel it to power the sidecar. They sure asked a lot of the 750cc engine. Quote Link to comment Share on other sites More sharing options...
JollySipper Posted April 17, 2023 Author Share Posted April 17, 2023 That's really a cool build, so far! I really like the bobber, too......... The levers mounted to the tank, gear levers? Quote Link to comment Share on other sites More sharing options...
JollySipper Posted April 17, 2023 Author Share Posted April 17, 2023 I started this Fujimi 6 series some time back...... I had put carpet in the floors because the stampings are visible. Somehow it caused some interference when it was time to join the finished chassis to the body. I let it sit in it's box for a while, and just the other day drug it back to the bench. I'll show the engine bay and chassis that are complete. I've disassembled the interior to sort it out, and hopefully be able to fit this bad boy together! Here's the link to the original WIP thread......... Quote Link to comment Share on other sites More sharing options...
slownlow Posted April 17, 2023 Share Posted April 17, 2023 TJ, in reply to your question about the levers on the side of the tank. One is to move from high to low range, like a split axel in a truck. The other is to change regular gears. This also had a reverse. There is a foot shifter like bikes have now on the left side. BMW kept both hand and foot options until the mid 50s. Not sure why. There is also a lever just below the seat and I believe that is to engage or disengage the car wheel. I wish I knew how to keep replies aligned with their original topic. Quote Link to comment Share on other sites More sharing options...
JollySipper Posted April 18, 2023 Author Share Posted April 18, 2023 On 4/17/2023 at 10:32 AM, slownlow said: I wish I knew how to keep replies aligned with their original topic. Hey, Bob.... Do you know how to use the quote function? Not trying too be a smartalec, but it's the only way to directly reply to a post...... I'm really liking your build....... Quote Link to comment Share on other sites More sharing options...
JollySipper Posted April 18, 2023 Author Share Posted April 18, 2023 I've reassembled the interior.... Tomorrow I'll try final fitment again. I was thinking that I had wasted a lot of work on this one for it to just sit in it's box, unfinished. Looks like a fresh perspective is all I needed to get motivated again.......... Quote Link to comment Share on other sites More sharing options...
slownlow Posted April 19, 2023 Share Posted April 19, 2023 3 hours ago, JollySipper said: Hey, Bob.... Do you know how to use the quote function? Not trying too be a smartalec, but it's the only way to directly reply to a post...... I'm really liking your build....... I’m trying the quote thing out. The trick will be remembering it. I can tell you about stuff I did in 1957 but not what I had for lunch yesterday. Quote Link to comment Share on other sites More sharing options...
slownlow Posted April 24, 2023 Share Posted April 24, 2023 Posted April 16 On 4/16/2023 at 4:19 PM, slownlow said: We’ll the bike is done, now onto the car. She’s done. I added some personal gear and various chalks to give it a used look. The decals were definitely showing their age but micro set and micro sol settled them down. 2 Quote Link to comment Share on other sites More sharing options...
redscampi Posted April 24, 2023 Share Posted April 24, 2023 That is some impressive modeling! You can almost feel the dirt on that bike. Quote Link to comment Share on other sites More sharing options...
slownlow Posted April 24, 2023 Share Posted April 24, 2023 55 minutes ago, redscampi said: You can almost feel the dirt on that bike. Thanks Gary. This is what I used. Kind of pricy for what it is. Tamiya offers a variety of weathering chalks but you could probably get artists chalk with more color choices for a better bargain. Quote Link to comment Share on other sites More sharing options...
redscampi Posted April 24, 2023 Share Posted April 24, 2023 2 hours ago, slownlow said: Thanks Gary. This is what I used. Kind of pricy for what it is. Tamiya offers a variety of weathering chalks but you could probably get artists chalk with more color choices for a better bargain. Hey Bob, I have some ancient artists pastels that seem to work pretty well. I've actually resorted to using real dirt or dust and that works fine too as long as you make sure to keep it in scale. Quote Link to comment Share on other sites More sharing options...
redscampi Posted April 24, 2023 Share Posted April 24, 2023 On 3/24/2023 at 2:01 PM, JollySipper said: Yea, I'm a riot........... I think I've figured out how to halfway represent the window moulding. I just painted the trim black, then I went around the inside edge with a silver paint pen. Whatcha thunk? looks pretty good actually. 1 Quote Link to comment Share on other sites More sharing options...
JollySipper Posted September 28, 2023 Author Share Posted September 28, 2023 Guys, I had put this away for a while..... I've decided to bring it back out and finish it up! I put some decals on it in an attempt to add visual interest. Really all I have left to do is install the taillights (again), put the body and chassis together, then finish up the trim pieces...... Quote Link to comment Share on other sites More sharing options...
Ace-Garageguy Posted September 28, 2023 Share Posted September 28, 2023 Missed this thread earlier, really like the little 2002 and it's six-cylinder siblings. Never owned a Beemew other than an Isetta that got away, but worked on and drove a boatload. Great cars...at least the earlier, simpler ones. Your model's looking really fine. 1 Quote Link to comment Share on other sites More sharing options...
JollySipper Posted September 28, 2023 Author Share Posted September 28, 2023 Thanks a bunch, Bill! I've made more progress........... I guess this is together for the final time. Quote Link to comment Share on other sites More sharing options...
JollySipper Posted September 28, 2023 Author Share Posted September 28, 2023 So, working on applying the trim! The rocker strip and rub strip........ Note to self, next time place all the exterior trim before paint, then foil and paint as needed. The rub strip is three pieces, one for each panel it's on...... It's gonna be tough to do this cleanly! 1 Quote Link to comment Share on other sites More sharing options...
Recommended Posts
Join the conversation
You can post now and register later. If you have an account, sign in now to post with your account.
Note: Your post will require moderator approval before it will be visible.