Jürgen M. Posted December 21, 2023 Share Posted December 21, 2023 (edited) Hey guys, I couldn't wait. I began to do some rework on my R.D. Mack. Like I said I wanted to exchange the sleeper cab and the wheels in order to make it look more authentic. The chassis is in scale 1/24. It's from a Ford 9000 LTL from Italeri! That way it looked to big for the 1/25 scaled trailer. I'll have to put in a new front axle, of course with steering! I already printed the front rims and the sleeper is primered. A challenge will be the tilting of the hood and bullbar which didn't work before but I'll think of something. Here you can see the sleeper just put on loosely and not yet painted with base coat. These are the front rims. The tires are from Revell! This is how it looked before! Edited December 21, 2023 by Jürgen M. 1 Quote Link to comment Share on other sites More sharing options...
cifenet Posted December 21, 2023 Share Posted December 21, 2023 Nice job on this, the trucks look tough! I can see a lot of work has went in this. I like the multiple license plates displayed in the front as well. Quote Link to comment Share on other sites More sharing options...
Rockford Posted December 21, 2023 Share Posted December 21, 2023 So R.D. means Rubber Duck! Now I get it. Wheels look great, keep up the good work. Can you print a Kris Kristofferson? Quote Link to comment Share on other sites More sharing options...
Jürgen M. Posted December 22, 2023 Author Share Posted December 22, 2023 😂 I can try! But Ali MacGraw would bei nice too! The plates are the authentic plates of R.D. in Convoy! I know that not everything is Like the original but it's getting close! All parts are printed meanwhile! Tomorrow they get their paint job. Then the (re-) assembly begins! Pictures will follow! 2 Quote Link to comment Share on other sites More sharing options...
Jürgen M. Posted December 25, 2023 Author Share Posted December 25, 2023 Hi everyone, there's still quite something to do in this truck. here you can see the rims, the fifth wheel and the steering front axle. I put in steel pins because the printed one's always broke off. These are the connectors between bullbar and hood. I saw those on a scene in the movie. In the below picture you can see those just above the plates. Hope I can fit those in to make it look good. The back side of the bullbar doesn't look really good, but it's hardly visible later. Just wanted to show you how I want to make the tilting mechanism. Actually I'm going to combine hood and bullbar to tilt in one piece. There'll be more after the holidays! Quote Link to comment Share on other sites More sharing options...
Rockford Posted December 25, 2023 Share Posted December 25, 2023 Very clever mate. It's going to be great when it is finished. Your surface finish looks better too! You're getting more and more professional with each job. Quote Link to comment Share on other sites More sharing options...
Jürgen M. Posted December 26, 2023 Author Share Posted December 26, 2023 (edited) 21 hours ago, Rockford said: Very clever mate. It's going to be great when it is finished. Your surface finish looks better too! You're getting more and more professional with each job. Thanks Rockford! The better surface finish ist due to the new printer and new printing parameters. I'm happy about that too. I try to improve my work and the details each time and during a project. I'm glad it shows! 😊 Edited December 26, 2023 by Jürgen M. Quote Link to comment Share on other sites More sharing options...
Jürgen M. Posted December 26, 2023 Author Share Posted December 26, 2023 Here's some more progress! Sleeper completed and the bullbar hinged up. Wheels completed too! 1 Quote Link to comment Share on other sites More sharing options...
Jürgen M. Posted December 26, 2023 Author Share Posted December 26, 2023 The hood is now integrated and taped. Hope it comes out satisfactory! 1 Quote Link to comment Share on other sites More sharing options...
Jürgen M. Posted December 26, 2023 Author Share Posted December 26, 2023 (edited) Unfortunately the hood of the Mack model kit is not the same as the R.D. hood, which is a bit higher above the fenders. I've been honestly thinking about printing one that's more similar to the original but that's gonna take quite some time. The designing will be a real challenge. For the time though, this one will have to do it. Edited December 26, 2023 by Jürgen M. Quote Link to comment Share on other sites More sharing options...
Jürgen M. Posted December 26, 2023 Author Share Posted December 26, 2023 It works!!!!! Now follows the obligatory fine tuning! 🥳 1 Quote Link to comment Share on other sites More sharing options...
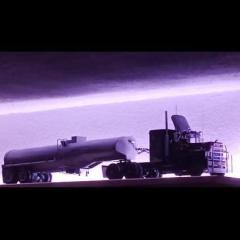
Jürgen M. Posted December 26, 2023 Author Share Posted December 26, 2023 (edited) Looks good to me! Put some "dust" on it! Edited December 26, 2023 by Jürgen M. 3 Quote Link to comment Share on other sites More sharing options...
Jürgen M. Posted December 29, 2023 Author Share Posted December 29, 2023 Here's a comparison before / after: 1 Quote Link to comment Share on other sites More sharing options...
DRIPTROIT 71 Posted December 30, 2023 Share Posted December 30, 2023 Looks great! Quote Link to comment Share on other sites More sharing options...
Jürgen M. Posted February 13 Author Share Posted February 13 Hey everyone, I´m back and I just wasn´t satified with the result of my R.D. workover. Anyway I designed and printed a new hood since the AMT one isn´t quite similar to the original RS700L one which is higher an the fenders are lower and closer to the wheels. This is the result of the 3D design. The print out: And a new bullbar: Hope it turns out better this time. I know, this over-over work might be picky but I just couldn´t resist. Oh yes, since I now have a hood of an R600 left I might as well do something with it. But that´ll be another post! Quote Link to comment Share on other sites More sharing options...
Jürgen M. Posted February 18 Author Share Posted February 18 OK, it's done! I completed the hood, overdid the bullbar once more and finished the paintjob. Still doesn't look exactly like in the movie but much closer! The designing of the hood was a real toughy! Still I think it Looks pretty good but you decide! 😊 Only the dust ist still missing but that'll be the easy part! Quote Link to comment Share on other sites More sharing options...
Rockford Posted February 18 Share Posted February 18 Well done! I can imagine the hood would be awkward because there's so many different planes you've got to accommodate. I know what it's like from trying to form a sunvisor on anything but a 352 Pete because it's just a straight box cab shape. You cracked it though! Quote Link to comment Share on other sites More sharing options...
Jürgen M. Posted February 18 Author Share Posted February 18 Thanks Rockford, wasn't easy though. It took me almost three months of effoert to get the hood designed. It's still not perfect but it looks more authentic than the R600 hood. The cab of the R600 for the "Big Nasty" project was comparably easy but took me about 6 weeks. I've learned a lot in 3D designing in the last 9 months and I'm sure there's many more tricks to discover. Quote Link to comment Share on other sites More sharing options...
Recommended Posts
Join the conversation
You can post now and register later. If you have an account, sign in now to post with your account.
Note: Your post will require moderator approval before it will be visible.