Jürgen M. Posted February 18 Share Posted February 18 (edited) Hi, I'm back with a new projekt. As the title of this build says, it's going to be the Mack R600 called "Big Nasty" from the movie Convoy! It will also be the last "Convoy" truck I'll be doing. This time it won't be completely from scratch since I've got lots of parts in my box that I want to use. Of course the hood will be the old R.D. hood, the engine is from an old amt Peterbilt359 kit which fell totally apart during moving. Anyway, I'm looking forward to it. Especially the two trailers will be a challenge. The cabin ist already printed, so are the wheels and some chassis parts. I'll be back with more details shortly! Edited February 18 by Jürgen M. 5 Quote Link to comment Share on other sites More sharing options...
Rockford Posted February 18 Share Posted February 18 I don't remember this truck but I think I've only seen Convoy once or twice, and it was a long time ago too. It'll be interesting to watch this. Quote Link to comment Share on other sites More sharing options...
Jürgen M. Posted February 18 Author Share Posted February 18 Hey Rockford, I'm sure it's not easy to memorize all of the trucks in the movie, especially when you've only seen it once or twice. I'm a Convoy Freak though and I'm not sure how often I've seen it but it must have been at least twenty or twenty five times. Maybe more. Still I'm going to quit building one after the other! With this one I'll have five of them. That's enough, even for a freak like me! 😊 I'll show them all when this one's finished. I'm gonna have to Take a Look at some scenes again though because I have to find Out what it says one the doors in order to make the decals! Here's some more printed parts. Quote Link to comment Share on other sites More sharing options...
Jürgen M. Posted February 19 Author Share Posted February 19 Hi, I've got a bit of progress to report. The chassis is growing. Fuel tanks and axles have found their destination! Shocks are printed... Fuel tanks prepared for mounting, .. The assembly of the chassis is headed for completion! A few more steps until the painting begins! 2 Quote Link to comment Share on other sites More sharing options...
Jürgen M. Posted February 21 Author Share Posted February 21 OK, some changes had to be made. I discarded the fuel tank holders. Didn't like them. Works for round ones but not for these. Made new ones and had to change the tanks as well. Left: old, right: new Also lengthened the chassis about 2cms. Seemed a bit too short after I had positioned the cabin and the hood. Still some work to do in that. Also put on the sliding plate for the fifth wheel. Like I mentioned I want to use up some old parts. The engine is growing too. Decided not to use the old one after all. I discovered that it was damaged. 2 Quote Link to comment Share on other sites More sharing options...
The Brush Posted February 21 Share Posted February 21 Great work on this one, Those printers are very handy, Quote Link to comment Share on other sites More sharing options...
Jürgen M. Posted February 21 Author Share Posted February 21 Thanks! 👍 Yes they are! Especially when it comes to tricky solutions you can customize as you wish! Quote Link to comment Share on other sites More sharing options...
Jürgen M. Posted February 22 Author Share Posted February 22 Here's more progress: The air filter is printed and mounted. The engine is almost finished, shaft is printed, the new tanks are in place, such as the battery boxes and the firewall is finished and placed in its position but not glued yet. A few more parts to print, some finishing to do in the lengthened frame and then the painting can begin! 2 Quote Link to comment Share on other sites More sharing options...
Jürgen M. Posted February 27 Author Share Posted February 27 (edited) Good morning, I wanted to share the progress of my build. Actually I almost stopped building because you guys are used to much more precision in building, details, painting. I've looked at some of the builds in the forum and I must admit I'm far away from what you guys do. I'm really impressed! Honestly! But I'm not going to stop the build. I put in a lot of effort designing parts and trying to make them look as good as possible! Why quit? No, this is not fishing for compliments. I know where I'm standing but I'm still happy that some of you appreciate what I do, knowing I could do better. OK, lets cut the BLAH_BLAH_BLAH_BLAH, here's more progress: The red looks brighter in the picture than it actually is! The interior: The cockpit goes into the cabin, then they're combined! Painted chassis. The hood is just taped to see the fit! Here you can see the cab with the fit in cockpit! Double air intake from the filter: One leads to the cabin and (later) also one to the turbo charger! Edited February 27 by Jürgen M. 4 Quote Link to comment Share on other sites More sharing options...
Rockford Posted February 27 Share Posted February 27 (edited) You're not fishing for complements but you're going to get some from me. I think the stuff you're doing is amazing and I dearly wish I could do the same. Your so resourceful and not scared dive in and try stuff. I spend three weeks handcrafting a Cummins which was great, but I'd need another three weeks to make another one. Once you've modelled something you can press a few buttons and do another one while you have your breakfast! Vast improvement. Your R series is looking great, especially when you consider what a complex shape Mack cabs and hoods are. Keep up the good work, you're an inspiration mate. Edited February 27 by Rockford Further waffle added Quote Link to comment Share on other sites More sharing options...
Jürgen M. Posted February 27 Author Share Posted February 27 3 hours ago, Rockford said: You're not fishing for complements but you're going to get some from me. I think the stuff you're doing is amazing and I dearly wish I could do the same. Your so resourceful and not scared dive in and try stuff. I spend three weeks handcrafting a Cummins which was great, but I'd need another three weeks to make another one. Once you've modelled something you can press a few buttons and do another one while you have your breakfast! Vast improvement. Your R series is looking great, especially when you consider what a complex shape Mack cabs and hoods are. Keep up the good work, you're an inspiration mate. Wow, thanks Rockford! I'm flattered and Happy to hear that my work ist actually that good. I was just comparing the precision of the stuff you guys make. Engines with authentic tubing and wiring, perfectly worked frames and suspensions, ..! I really appreciate yor feed Back and I'll keep trying to improve my quality! 👍 Quote Link to comment Share on other sites More sharing options...
Jürgen M. Posted February 27 Author Share Posted February 27 (edited) Oh yes, by the way, the hood of the Big Nasty truck is from the Mack R685ST kit (old R.D. hood), only the cabin is printed. But I did print a new hood for the RS700L (Rubber Duck). Edited February 27 by Jürgen M. Quote Link to comment Share on other sites More sharing options...
Jürgen M. Posted February 27 Author Share Posted February 27 (edited) Had some trouble with the painting of the hood. It sort of peeled off. Don't know why but I suspect it's the mix of colors. I had the same problem when I built "Pig Pen" (Convoy). The aubergine tone was mixed out of 5 different colors and after having applied it, the paint began to wrinkle. Had to sand it off and repaint. What helped was putting a different primer underneath. I had used flat black. Just like this time! Using flat grey seems to work better. Hope it does this time too. Unfortunate that I didn't remember before painting! Looks good now. Primer didn't wrinkle! Hope the rest works as well! Edited February 27 by Jürgen M. Quote Link to comment Share on other sites More sharing options...
Jürgen M. Posted February 28 Author Share Posted February 28 OK, I actually missed taking more pictures of the build progress. Here's what I've got to show: I'd say not so bad! Wheels are "aged" with graphite Powder, normally used for lubricating locks and hinges. Still a lot to do but I'm satisfied up to now! Quote Link to comment Share on other sites More sharing options...
Jürgen M. Posted February 29 Author Share Posted February 29 I discovered that the front axle is a bit too wide. The R685st is about 5mm smaller in width than other 1/25 kits which means the front wheels would be too far outside of the fenders. I actually decided to redo the complete front axle incl. steering. The 3D drawing of the axles is already shortened by 5mm and printed. Now I have to reprint the other parts but first I have to reduce the holes a bit to create a better fit. The wheels tend to tip a little to the inside which makes the whole thing look like a VW Beetle of the 70s. Quote Link to comment Share on other sites More sharing options...
Jürgen M. Posted February 29 Author Share Posted February 29 (edited) Here's a view from the other end: The mud flaps are printed also with loops to put through the metal rod. Still have to be aged more! The movie truck hast a long spring on the back side of the cab to hold the air lines. I'll do that when the first trailer ist done. Also there are brackets one the side of the frame, I believe they're the holders for quarter fenders. I'll have to see If I can get a good view of them in a movie scene. Edited February 29 by Jürgen M. Quote Link to comment Share on other sites More sharing options...
cifenet Posted February 29 Share Posted February 29 Looking pretty good so far, the 3D printed parts look like they came from model manufacturing companies. Nice job on the green stripes too, they came out quite clean. Nice job! Quote Link to comment Share on other sites More sharing options...
Jürgen M. Posted February 29 Author Share Posted February 29 (edited) Thanks! 😊 Glad you like it! I must admit I am quite proud of it myself too. But there's still a lot to do. The shortened front axle is finished and hast to be painted and mounted (The white one is the new one, obviously) , the air hose from the filter to the turbo charger still has to be designed and the mirrors are still missing. But I'm not in a hurry. Edited February 29 by Jürgen M. 1 Quote Link to comment Share on other sites More sharing options...
Jürgen M. Posted March 1 Author Share Posted March 1 (edited) Good morning, I got a little more done: Got the too wide axle off without breaking anything. Also the breakdrums were detachable without damage. Got the mirrors in and the hood hinged. Now the fine tuning begins! Rear turning signals, tail lights, Bulldog on the hood, aging, more dust in the mud flaps, ... Then the tricky part begins: Designing and applying the decals! Edited March 1 by Jürgen M. 1 Quote Link to comment Share on other sites More sharing options...
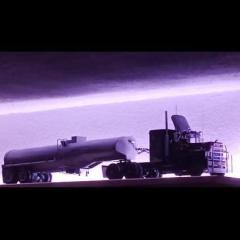
Jürgen M. Posted March 1 Author Share Posted March 1 OK, guess I thought of everything. Turning signals, antennas, the number 2 in the sides, the screen on the grille, ....! Oops. Just saw that the right rear outside tire isn't sitting strait. Be fixed in a sec. Gonna Put some dust on it too. But I have to wait till the decals are on. Otherwise they won't stick! Now the decals have to be designed. Gonna be a toughy! I'm not sure how I'll design them, I mean with which design software. The standard stuff won't do the job I guess. I'm not talking about the writing on the doors, I mean the red pinstripes on the green. My hands aren't calm enough to do it with paint. Maybe If I practice a bit on some others parts. I'll think of something! By the way, this is the only shot I've got showing the doors. Anyone know exactly what it says? The white letters and numbers are very blurry! Quote Link to comment Share on other sites More sharing options...
Jürgen M. Posted March 1 Author Share Posted March 1 The tire is straight again! 👍 Now I'll look for a design software to create the decals! Quote Link to comment Share on other sites More sharing options...
Force Posted March 1 Share Posted March 1 12 hours ago, Jürgen M. said: Now the decals have to be designed. Gonna be a toughy! I'm not sure how I'll design them, I mean with which design software. The standard stuff won't do the job I guess. I'm not talking about the writing on the doors, I mean the red pinstripes on the green. My hands aren't calm enough to do it with paint. Maybe If I practice a bit on some others parts. I'll think of something! By the way, this is the only shot I've got showing the doors. Anyone know exactly what it says? The white letters and numbers are very blurry! Ehh...green??? It looks to be gold or light brown to me...definately not green. Quote Link to comment Share on other sites More sharing options...
Jürgen M. Posted March 1 Author Share Posted March 1 Sorry, but I've got a red-green problem. A friend of mine said it's green with a touch of gold in it. But thanks for the input. Quote Link to comment Share on other sites More sharing options...
Jürgen M. Posted March 2 Author Share Posted March 2 I'll design the decals more gold colored which will cover the green. But the green does come out very bright on the pictures. In real it's not quite so. I do understand your point of view though. It still looks too green. I'm always thankful for input like that. Helps me think over one thing or another! Quote Link to comment Share on other sites More sharing options...
Jürgen M. Posted March 2 Author Share Posted March 2 (edited) Till I've got the decals finished I'm going to begin the first Trailer. I have a question about the two trailers. Does anyone have a picture of the rear of the first trailer where you can see the hitch? I'm not sure if the american ones look like the European ones. I've got pictures of the draw bar as it's shown on the box of the amt double header that I found in the internet so I'll make it like that but I'm not sure about the hitch itself. I know I could make it easier by buying the kit but they don't look like the ones in the movie! I'd be greatful for some hints in this one! 😊 Oh, one more thing: are they generally 27ft. long or are there ones that are only 20ft. long like the short overseas containers? Edited March 2 by Jürgen M. Quote Link to comment Share on other sites More sharing options...
Recommended Posts
Join the conversation
You can post now and register later. If you have an account, sign in now to post with your account.
Note: Your post will require moderator approval before it will be visible.