sak Posted September 1, 2010 Author Share Posted September 1, 2010 Ok this is waaay too complicated. And I have looked into it and it seems quite expensive as well. So is basecoat a form of urethane or something different? Quote Link to comment Share on other sites More sharing options...
Steve Keck Posted September 1, 2010 Share Posted September 1, 2010 The terms base coat/clear coat come from the automotive world as do the urethanes. The base coat is the color coat after primer. In the base coat/clear coat world the color coats generally do not have a gloss finish - the gloss coat is provided by the urethane. Quote Link to comment Share on other sites More sharing options...
slapshot Posted September 4, 2010 Share Posted September 4, 2010 (edited) Hey David thought you might like to see the end results of my first urethane clear paint job polished with a little wax to booth.The base coat is Ice Blue pearl by Boyd.Under lamp light it appears almost silver.The coat looks deep & 1:1 like first hand. The polishing really brings out the depth of the finish.Once again thanks for your help.Boy thats one more step in the building process. I understand now how one can take three to six months & more to complete one model.Oh by the way the trash got polished out. Edited September 4, 2010 by slapshot Quote Link to comment Share on other sites More sharing options...
Karmodeler2 Posted September 4, 2010 Share Posted September 4, 2010 Hey David thought you might like to see the end results of my first urethane clear paint job polished with a little wax to booth.The base coat is Ice Blue pearl by Boyd.Under lamp light it appears almost silver.The coat looks deep & 1:1 like first hand. The polishing really brings out the depth of the finish.Once again thanks for your help.Boy thats one more step in the building process. I understand now how one can take three to six months & more to complete one model.Oh by the way the trash got polished out. It looks really nice. It definitely is one more (tedious) step in the building process, and one that probably takes more time that the rest of the build. But the end results are worth it. Another tip for you is when you are cutting and buffing (mainly buffing), put a lamp across the room to check how your reflection is. This will give you more depth (really, it will give you more work to do, but in the end it's worth it) and seldom are model contest held at venues where the light sources in the room are directly on top of the model. Move your light source away to get a better reflection of how you are doing with the cut and buff stage (pun intended). Still use the one at your desk, but as a reference, use one further away.. Nice job and I'm glad the blemish sanded out. I figured it would since it has for me several times in the past. David Quote Link to comment Share on other sites More sharing options...
Ddms Posted September 4, 2010 Share Posted September 4, 2010 I'm way late getting into this topic, but I'd like to add my 2 cents worth anyway. I use 1K urethane for base (color) coat. It's available in 2 oz. bottles from my local Finish Masters store, and the cost is about $14. The store provides chip books, and will mix any color I want. The paint needs to be thinned at least 2-1 with medium temp reducer, also available from FM. So it's fairly economical. For primer, I use Tamiya Surface Primer. For clearcoat, I use U-POL Power Shot spray cans, available from Ditchek & Sons. It's not as flashy brilliant as 2K urethane, but I it takes a beautiful polish. For depth, I will put it up against anything. When I spray the urethane, I use a professional painter's respirator. I'm very, very pleased with the results I get from this combination. Quote Link to comment Share on other sites More sharing options...
slapshot Posted September 4, 2010 Share Posted September 4, 2010 (edited) The term cut & buffing means to polish with the sand paper(cut) & to (buff) wax the surface after the final cutting in Right? For the first buffing I used Novus #1 & for the cutting in I started with 3200 up to 1200 with soap and water. Should or could I switch to a auto wax like Meguiar"s Tech wax 2.0 or should I continue on with the buffing with the Novus #1. Thanks Gary Edited September 4, 2010 by slapshot Quote Link to comment Share on other sites More sharing options...
Steve Keck Posted September 4, 2010 Share Posted September 4, 2010 Gary, To me cutting=sanding flat. It is the unusual clear coat that lays down perfectly flat(read NO orange peel, NO trash, and NO build up along seam lines.) I start with the least aggressive grit I can get away with, usually 4000, so you are on the right track with the 3200. Yes to the dish washing soap and water to keep the cloths free of paint. Once the surface is flat the cutting stops and the buffing begins. Buffing occurs as the scratches become finer and finer as you progress through the grits up to 12,000. The scratches only get smaller because the paint above them is eroded away by the buffing action. Once the scratch is there the only way to make it disappear is to polish off the surrounding paint. Try turning the model 90 degrees each time you change to a finer grit. Stop with that grit when the old scratches disappear. Some of us skip alternate grits. If the old scratches are not disappearing, then drop back a grit. For me, somewhere around the 8,000 grit the "buffing" changes to "polishing" as the scratches are no longer visible to these old eyes and the dull appearance starts changing to a bright mirror-like finish. Polishing compounds come in progressive grits as do the polishing clothes. To a large extent, the clothes and the compounds are redundant. They are both designed to make the scratches finer and finer. Each has it’s place where it out performs the other. There are both chemical and mechanical polishing compounds available from 3M, Mothers, Meguiars, etc. Be very careful with the chemical ones as they can be very surprising with how fast and aggressive they can perform. Ask a knowledgeable clerk you trust about their compatibility with your products. I had a urethane clear coat that just would not polish out to my satisfaction. In desperation I used Meguiars #2 and it turned from a shelf model to a contest winner. Years before I used that same #2 on a clear styrene piece from Tamiya and the piece crazed instantly making it useless. Tamiya makes three successive grit polishes plus a final wax. I use the middle (blue cap) extensively. Sometimes Novus #2 works when the Tamiya doesn’t. I can't speak to the Meguiars Tech wax 2.0 but I believe it to be a maintenance type wax as is the Novus #1. The Novus #1 is a wipe-on-buff-off product. It only enhances the appearance by filling in the smallest scratches. It does not remove any paint that would result in a smoother surface. There are three products I know of that work well for me: “the treatment†model wax, aka, The Final Detail; 3M’s Imperial Hand Glaze; and, Mother’s Showtime. Mark Jones put me onto the Hand Glaze and he suggested mixing it with The Final Detail. I use this concoction to get that wet-look shine. I use the Showtime to maintain the shine. Steve Quote Link to comment Share on other sites More sharing options...
Karmodeler2 Posted September 4, 2010 Share Posted September 4, 2010 Gary, I want to DITTO what Steve said above. Great info and a wealth of experience we all could benefit from. I always use Dawn, and you can use whatever you have, added to my water where I soak my paper for at least an hour before using. I even add Dawn directly to the model sometimes, when I get up to the 8000 range. When done, I rinse the papers thoroughly and put on a towel to dry before putting them back in the bags. This will prevent mold and mildew on your paper. It depends on the product I am using as to how far I got with the paper. I recently found that by starting with 3000 grit paper ( a Meguiars product) I was able to sand (cut) every thing down to a flat, almost semi gloss or matte finish. I know at this point I have a level playing field so to speak, because I have no low or high spots on the finish. If you can see small shiny areas surrounded by a flat finish, then you are not where you need to be with a "level" playing field. Once I was there, I used the Tamiya blue cap polish (called "fine") and then the white cap (called "Finish") and then their green liquid wax. I did not have to do anything past 3000 grit and the finish was awesome. This was Tamiya base, Tamiya clear. Here are the shots of it. I know it may not appear to be smooth, but Steve will attest to the depth of shine since he has seen it in person and says the pics don't do it justice. (Thanks Steve). That is the camera lens in the second photo, below the truck line, and the sun being reflected with the trees further up on the trunk. Now these two were shot with a PPG clear, and I had to go all the way up to 12,000 then the 3 Tamiya products listed above. I find the urethanes to be a little softer in polishing and are easier to scratch where the Tamiya paints (the modified lacquers) are much harder and don't require the full cut and buff that the PPG and others seem to require. As far as switching waxes, I would say stick with what works best for you, which means trial and error. This hobby has a lot of paths to get to the same destination. Experiment with some and see what works best and leaves the best finish for you. Also, us another light source, from somewhere across the room, so you can periodically check the shine. This will show you the "depth" and whether you have removed all the scratches. This is how your model will be at the shows (if you compete) because the lights are rarely directly on top of your model. They are usually in the ceiling of the room, which in some cases, like ATL, are in a gym, far away. If you paint looks good directly under a light, chances are it's not good when the light source is 30 feet a way. And some people are shocked when they put their models down and it does not look as good there as it did at home. That is why it's good to have another light source. Hope this helps, David Quote Link to comment Share on other sites More sharing options...
slapshot Posted September 4, 2010 Share Posted September 4, 2010 Those models are a fine example of what it takes be competitive on the tables & win. There's more to a show stopper model than meets the eye & I for for one appreciate the time & knowledge that you & Steve have shared with all of us who are following this sub forum.I do look forward to competing in the near future. It seems that every time that I think I'm close another step pops up. What ever it takes I will get there & this forum & the ones like it sure make that path allot easier to follow. One thought comes to mine about Urethane clears, can it be removed if one sands through the clear & paint while polishing the model. Like a brake fluid bath etc.etc.? Thanks Gary Quote Link to comment Share on other sites More sharing options...
Len Woodruff Posted September 5, 2010 Share Posted September 5, 2010 I have successfully removed Urethane paints w/ 91% alcohol. Quote Link to comment Share on other sites More sharing options...
Steve Keck Posted September 5, 2010 Share Posted September 5, 2010 I have done the dreaded "polish through the clear and color coats" deed. Instead of starting over I've patched the color and reshot the clear. To do this successfully you must be aware of how the color coat affects the urethane. While urethane can be applied over most paints the reverse is not true. Test and then test again. Plastic spoons are the best test bed. Don't even think of trying this with anything other than an airbrush. I prcatically dusted Tamiya over urethane knowing a wet coat could lead to disaster. And, it's best to do a whole panel instead of just the bad spot. Quote Link to comment Share on other sites More sharing options...
Steve Keck Posted September 5, 2010 Share Posted September 5, 2010 Gary, Here are the shots of it. I know it may not appear to be smooth, but Steve will attest to the depth of shine since he has seen it in person and says the pics don't do it justice. That is the camera lens in the second photo, below the truck line, and the sun being reflected with the trees further up on the trunk. David, OK, it was a weak moment when I said that. It must have been the heat here in the valleyLOL! OK, seriously the paint is much better viewed in person. However, to be perfectly honest, I didn't see any camera lens or tree reflections. They must have been Photoshopped in. Quote Link to comment Share on other sites More sharing options...
Len Woodruff Posted September 5, 2010 Share Posted September 5, 2010 (edited) I have done the dreaded "polish through the clear and color coats" deed. Instead of starting over I've patched the color and reshot the clear. To do this successfully you must be aware of how the color coat affects the urethane. While urethane can be applied over most paints the reverse is not true. Test and then test again. Plastic spoons are the best test bed. Don't even think of trying this with anything other than an airbrush. I prcatically dusted Tamiya over urethane knowing a wet coat could lead to disaster. And, it's best to do a whole panel instead of just the bad spot. I haven't polished through like you but I have shot automotive hot lacquer onto urethane clear with no problems. The engine compartment was shot with Eastwood's under the hood black. Edited September 5, 2010 by Len Woodruff Quote Link to comment Share on other sites More sharing options...
Karmodeler2 Posted September 5, 2010 Share Posted September 5, 2010 Hey Gary, I agree with Steve that you should test it, and spoons have been the best for me too. Steve turned me on to that idea. I have had Tamiya clear just DESTROY the PPG clear and ate it like it was eating a meal. It even did it again (yes, I'm stupid) when I sanded out the cracks, misted it on, and two days later, cracked again. I use either Scalecote paint remover (for trains....it is great and is water soluble and re-useable, or I use Chameleon paint remover. It has the same properties) and it takes all paints off that I have used and does not harm the plastic. If you do a panel repair, do it like the real world and tape the panel off and do it by itself. If it's a pearl or a metallic, then you might have to go from the crown of the fender or belt line, from front to back on the entire side of the model, to hide the way the metallics and pearls lay down. Most the time on the complicated mixes (pearls and/or Metallics) it's best to do a strip and start over. I know it takes longer, but the end result is better. David Here is the car I am talking about. It is Alclad copper, with a super fine copper pearl in the clear coat (which was the PPG first) and then the Tamiya clear (BIG mistake). I know the car is called "Bad Snake" and it fits the theme, but it was not something I was trying to do. If you look at this pic, to the right of the fuel cap and to the left of the lights (the lights on the right side), you can see the crinkling that was caused by the two coats not getting along with each other. There is a big crack just below the bumper on the right (almost directly below the back up light, but the area below the bumper) that is really bad, but the bumper covered most of it. In this pic, if you look over the exhaust pipe, and just before the fender starts to rise, you can see the cracks in the paint. I was trying to photo this car so they did not show, so sorry for the explanation but I have to draw your eyes to it, or you may not see it. I was trying to cover it with PPG as I knew the PPG would not harm the temporary body tattoo on the side (the snake skin) or the cobra that I had ghosted onto the trunk. Then I wanted the Tamiya cause it lays down so thin and buffs really nice. If I had tried it on the spoons first, I think I would have saved a lot of trouble and headache on my part. I am "oaky" with the finished product, but I am not happy with it. I would have liked the finish to be wrinkle free, although people have said it goes will with the theme. It's just something I can't claim as a design because it did not start out that way. Hope this helps. David Quote Link to comment Share on other sites More sharing options...
Ddms Posted September 5, 2010 Share Posted September 5, 2010 (edited) I have done the dreaded "polish through the clear and color coats" deed. Instead of starting over I've patched the color and reshot the clear. Me too, and it's worked out great. I mask the surrounding area with what I call a "blending mask." It's made of tape with the inner edge folded over, so it doesn't stick to the surface and stays a little above it. I've actually had no problem spraying 1K urethane over my favorite clearcoat, U-POL Power Can Clear. But I have no idea whether that would work with 2K. Usually the tape doesn't sit as high above the surface as in this photo, but you get the idea. Edited September 5, 2010 by Ddms Quote Link to comment Share on other sites More sharing options...
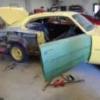
slapshot Posted September 5, 2010 Share Posted September 5, 2010 (edited) David, The paint scheme looks fantastic & the subject is unique to say the least. Those who thought that the unfortunate paint issue was actually part of the paint scheme was spot on. Here is a couple pics of my completed Nova, except for the hood. This probably was not the best choice for a first time try at polishing a paint job but it was handy. Darn car has more square edges than a block of wood. But as corny as it sounds it was a lesson learned in how to apply urethane clear & polish a paint job correctly,next time. I found out that Urethane clears are not so scary done the right way & polishing the paint is yet another step in the process of show quality finishes needed to compete at the tables. Once again thanks to all for the helpful info. Gary Edited September 8, 2010 by slapshot Quote Link to comment Share on other sites More sharing options...
Karmodeler2 Posted September 6, 2010 Share Posted September 6, 2010 Nice job, Gary. And you have another tool in your bag for your next build. Now you know why some of the more round, art-deco style builds have such nice paint jobs. There are no corners to cut and buff!! and be glad it was not black. I think the color and model were a great choice and a good starting point to hone you skills at polishing. Look forward to seeing the next one! David Quote Link to comment Share on other sites More sharing options...
Steve Keck Posted September 6, 2010 Share Posted September 6, 2010 Gary. You have a steep learning curve (undoubtedly through Professor Morton’s able assistance). You’ve got the theory and the application down. Great job! Quote Link to comment Share on other sites More sharing options...
Recommended Posts
Join the conversation
You can post now and register later. If you have an account, sign in now to post with your account.
Note: Your post will require moderator approval before it will be visible.