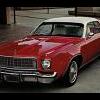
Railfreak78 Posted November 28, 2010 Posted November 28, 2010 Hey gang. This question could be answered by everyone but, I mainly use spray paint due to not having an air brush. We all get orange peel from time to time but how do you get rid of it? I have heard of polishing it out but I'd like to see products. Most of the time I can hand polish out a car with rubbing compound and then wax. This car featured looks great in the sun but the shadows prove it is very orange peeled and I can't hit it again thicker like I am used to or it will flood really bad. I would like to hear peoples ways of over coming this problem. My roomate has issues to a lot and Future still shows the texture. I do normally "flood" paint but In this case it will not work. Thanks everyone for looking and any advice. I look up to all of you. Pics of products would be great. Thanks.....
Nick Winter Posted November 28, 2010 Posted November 28, 2010 Here's a tutorial from another site. Never tried it but might haelp you Brian. Orange Peel Tutorial Nick
Terry Sumner Posted November 28, 2010 Posted November 28, 2010 The only way to get a glossy surface is to have that surface perfectly flat. Paint that is full of orange peel is nothing but hills and valleys on the surface. You can polish those hills and valleys and make them shiny, but the hills and valleys are still there...just now they are shiny hills and valleys. To get that glass smooth gloss you must level out those hills and valleys by sanding them flat. And it's best to use some kind of flat sanding block to do so as simply sanding with your fingers will not work as well. Your fingers are soft and they will follow the hills and valleys to a degree. Sand the paint with some fine grit sandpaper wrapped around your block. It's best to do this under running water to wash away the sludge and broken off tiny pieces of grit from the sandpaper. Once you have the surface nice and flat, then you can go ahead with polishing the paint to a nice gloss. I like to use one of the polishing kits available that come with the block, cloth sanding "papers" in grits 3200 through 12,000, and the polishing compunds. Micromark has them as well as other suppliers. Here's a photo of a Willys that has been painted but not sanded and polished yet. You can see the reflection of the light fixture on the roof of the model and you can see all the squiggly lines in the reflection that indicate the hills and valleys. Hosted on Fotki Here are 2 photos of the same Willys after I sanded and then polished it. The surface is so smooth you can read the writing on the inside of the reflector of the light fixture in the reflection. Hosted on Fotki Hosted on Fotki Hope this helps!
Guest Sickfish Posted November 28, 2010 Posted November 28, 2010 Yes I agree with Terry 100%! There's no point continually layering coat after coat of paint, particularily from a spray can, because all you're doing is making the "hills & valleys" bigger... It's very hard to control the amount of paint/pressure coming out of a spray can, for obvious reasons. Along with what Terry has already said, for sanding/polishing & waxing, after you're happy with the colour coats, the best way to nullify the amount of orange peel you wind up with, is to start with the best possible body/parts. No kit is perfect, ever. Every kit I have ever built has hi/low spots, seam lines, mold lines, sink holes etc. So fill in the sink holes, sand away all the seam, mold, high/low spots & prime it all. I always prime because priming will always show any flaws that you may of missed & are able to fix, before colour coats . Priming also helps the colour coats dry quicker & stick better . So start with the best possible body/parts & you will acheive better paint jobs here's a couple of pics of my current build, a ferrari california, before clear coats & after, fully wet sanded, polished & waxed... Sanded, polished & waxed... Cheers Cliffo
Railfreak78 Posted November 28, 2010 Author Posted November 28, 2010 Thanks for the feedback guys. I know all about the body work and primer and such. I really didn't know of grits that fine to use to polish them. Looks like MicroMark will be where I look. Normally my way of flood painting forces it to level out but this stuff here is Testors metallic and it runs so easy Thanks again guys.
Tim H Posted November 29, 2010 Posted November 29, 2010 While all of us have had orange peal. I have found that you need to put the paint on heavy enough that it flattens out but light enough that is doesn't run. It is a fine line I learned. it took me a while to learn it. I was always going to light. I usually warm my cans up under hot tap water. I will run the can then shake it, repeating till the can remains warm when shaken. it ups the pressure and causes the paint to flow better. Tim
Danno Posted November 29, 2010 Posted November 29, 2010 Brian, Just don't sand the metallic ... it will ruin the metallic effect. Put three or four coats of clear over your metallic and then sand the clear ... be careful to not burn through the clear into the metallic or all the way through the color coat on peaks or edges. It's tricky the first couple of times, but you'll pick it up with practice. You'll find that 3200 or 3600 grit (polishing kit) will knock down the big "hills" and then progress through 4000, 6000, 8000 and finish up with 12000. Then polish it out with a fine polish and swirl remover and you'll be amazed when you wax it! It's best to use non-silicon products so you can paint over it if you have to touch up any burn-throughs. I prefer Maguires, but there are other good products and its seems to be a matter of personal choice. Good luck!
EH225M Posted November 29, 2010 Posted November 29, 2010 Brian, What everyone else has suggested will work. What no one has suggested though is to speak to a spray painter in PHX!. If a profesional spray painter worth his salt cant tell you how to get rid of orange peel, then he / she / or it shouldn't be working! I dont use polishing kits either, if I get orange peel from a rattle can then let it dry out. Use wet/dry paper with plenty of water and gently block sand with 1000 grit all over the body, then rinse clean.For a block, I use a cut down pencil eraser. Once dry, shoot again - lightly. keep doing this untill your satisfied that the surface has enough coverage and is flat . Then you can polish and wax. Dont sand the last wet coat, that's the glory coat where the metallic will shine and everyone will drop their jaws on the keyboard when they see the results of your fine work! Dont use silicone polishes untill you're sure there's no more painting required. Dont even open a silicone polish product in the same room as your model is in while there's painting going on. DONT!! Practice, practice, practice. James.
Mark Brown Posted November 29, 2010 Posted November 29, 2010 but this stuff here is Testors metallic and it runs so easy Just my opinion, but you identified your problem right there. I never could get a good paint job with Testors and I tried for years. There seemed to be two choices - orange peel or running. Once I started using Tamiya and auto paints like Duplicolor, I never saw orange peel again. I only use Testors for small parts, and rarely even for that.
Danno Posted November 29, 2010 Posted November 29, 2010 Just my opinion, but you identified your problem right there. I never could get a good paint job with Testors and I tried for years. There seemed to be two choices - orange peel or running. Once I started using Tamiya and auto paints like Duplicolor, I never saw orange peel again. I only use Testors for small parts, and rarely even for that. Oh, that's a good point. It's dang difficult to get a decent finish with the old Testors enamel stuff. What I have left, I also use only for painting small parts where a smooth finish is not necessary. The new Testors lacquers are excellent but the enamels are problematic. Just another 2-cents worth.
Dave Ambrose Posted November 29, 2010 Posted November 29, 2010 (edited) For what it's worth, I've gotten nice results with Testors spray cans; especially the "One Coat Lacquers." Are you putting on a "mist coat" as your first color coat? This is a very light coat of paint. It looks terrible and makes you feel like you've ruined the whole thing, but it forms the transition from the primer to color coats. After that coat dries, you can start laying down color coats. Here's the paint sequence that works best for me when I'm painting with enamel. I'm using an airbrush, but you should be able to do something similar with spray cans. Prime with model master primer. Last coat is sanded out with 800 grit.Mist coat of color. Let dry well.Color coat. Still light, but heavier than the mist coat. The paint should look wet and smooth as it goes on.Wait 20 minutes or so. Paint should be skinned over (surface dry)Repeat color coat / dry cycle until you get the color you want. It usually takes me three coats to get the color coverage I need. I get aa almost mirror smooth surface, but that will be hard to do with the cans. The distance between the can and the subject, and the speed you move the spray interact. Orange peel happens when the paint drys too much before it hits the surface, so you need to move a little bit closer, and move the spray faster. This is all much easier with an airbrush, but, you should be able to do well with a spray can if you're careful. Edited November 29, 2010 by Dave Ambrose
Recommended Posts
Create an account or sign in to comment
You need to be a member in order to leave a comment
Create an account
Sign up for a new account in our community. It's easy!
Register a new accountSign in
Already have an account? Sign in here.
Sign In Now