Sam Cates Posted April 19, 2011 Share Posted April 19, 2011 (edited) I got this built kit pretty cheap. Total glue bomb and it had been badly broken, I think there are more pieces now than were originally in the kit. Here is what I started with, I have made a little progress with the chassis and will post more photos tomorrow once it is dry. I am waiting for new wheels and possibly new rear tires. Edited April 19, 2011 by metalmulisha20@live.com Quote Link to comment Share on other sites More sharing options...
gasser59 Posted April 19, 2011 Share Posted April 19, 2011 Looks like there's plenty there to work with. What are your plans for this build? Quote Link to comment Share on other sites More sharing options...
Sam Cates Posted April 19, 2011 Author Share Posted April 19, 2011 Looks like there's plenty there to work with. What are your plans for this build? I think I am just going to rebuild it as it was, have a new set of Revelleader decals, probably going to build it box stock with the details the kit came with. Just to get used to building the bigger stuff. Quote Link to comment Share on other sites More sharing options...
Sam Cates Posted April 20, 2011 Author Share Posted April 20, 2011 (edited) Got the body stripped, primed and painted. I think the color is a bit bright, I am not sure though because the photo makes it look pink...(bad lighting in my work room). Straightened the chassis out and re-assembled the front and rear axles. Used the old wheels and tires for mock up to make sure the chassis sits level. I will be ordering the correct front wheels from Casey and I am not sure who to get rear tires from, I heard Flashpoint or Comp Resins have good ones. Edited April 20, 2011 by metalmulisha20@live.com Quote Link to comment Share on other sites More sharing options...
ratnasty Posted April 20, 2011 Share Posted April 20, 2011 Looking good Metal keep going and posting pics Chuck Quote Link to comment Share on other sites More sharing options...
Mr.1/16th Posted April 22, 2011 Share Posted April 22, 2011 GREAT START MY FRIEND!! Quote Link to comment Share on other sites More sharing options...
stump Posted April 23, 2011 Share Posted April 23, 2011 Looking reaaal good Sam. Makes me wish mine had survived my early years..... Mate, give Terry a go @ Flashpoint. I've just got some of his ProMod slicks and they are sweet as....I think the T/F F/C slicks are slightly taller and wider than "stock" Revell items. But probably a whole lot more accurate too, which is a good thing. Keep up the great work mate, and I LOVE the body colour too. Quote Link to comment Share on other sites More sharing options...
Sam Cates Posted April 24, 2011 Author Share Posted April 24, 2011 Okay, I got the decals applied, not too happy with them (Being so old, the quality has suffered). I cleared the body and will add finish detail to it as soon as the clear dries (window trim, bumpers etc). Hope it looks as good to you guys as it does to me! Here are some before and after photos... Quote Link to comment Share on other sites More sharing options...
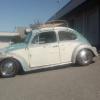
Casey Posted April 26, 2011 Share Posted April 26, 2011 I always had good luck painting the bumpers on this kit, but your pic reminds me the rear bumper is huge. Take your time painting it as it's very visible on the finished model. Looking good so far, Sam. Quote Link to comment Share on other sites More sharing options...
Recommended Posts
Join the conversation
You can post now and register later. If you have an account, sign in now to post with your account.
Note: Your post will require moderator approval before it will be visible.