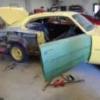
Custom Mike Posted July 15, 2011 Posted July 15, 2011 Jeff, here's a pic of what Dave's talking about, there's also a red reflector on the armrest. I did a ton of researching this car when I built mine, if you need any pics, let me know!
fairlaneranch Posted July 15, 2011 Posted July 15, 2011 The armrest bases are chrome too! Front and rear. Also,the windshield pillars are all chrome (the A posts) I see a lot of guys mess up on these but 66-71s are like this(see the pic of my old Ranchero)
sak Posted July 23, 2011 Author Posted July 23, 2011 (edited) The armrest bases are chrome too! Front and rear. Also,the windshield pillars are all chrome (the A posts) I see a lot of guys mess up on these but 66-71s are like this(see the pic of my old Ranchero) I intend to mess up the chrome on the pillars. Even though I know that they were there, I like the look without. Same with those courtesy lights on the doors. I clearcoated the hood with that dupont stuff and it seems real high quality. I will now have to invest in some of that super high grit sandpaper. Don't want to mess this up. But its the first time doing black so I expect to not be perfect. Edited July 23, 2011 by sak
RodneyBad Posted July 23, 2011 Posted July 23, 2011 WOW! I thought half of the hood was chromed. Interior is looking Super... This is one of my Top 5 favorite cars..
Monty Posted July 23, 2011 Posted July 23, 2011 i just built a drag version of this kit and it was fun. i really like the extra details you are adding in and the paint detailing. what do you have in mind for the upper shock mounts on the shock/spring towers? AMT kind of left that detail out James T is building this same car and apparently made or found some mounts: I just left the question for him in his thread 'cuz I'd like to know too.
sak Posted July 23, 2011 Author Posted July 23, 2011 I would like to know as well, and also if that hood will close after adding them. I took some pics of the wheels I chose, the wheels will be painted black in the end.
JTRACING Posted July 24, 2011 Posted July 24, 2011 nice wheels! and the hood closes fine after adding those shock mounts.
John Teresi Posted July 24, 2011 Posted July 24, 2011 (edited) Jeff.......alot of nice detail going on...... Edited July 24, 2011 by John Teresi
Reeves Racing Posted July 24, 2011 Posted July 24, 2011 Very nice work. You are going to need a tinee tiny valve stem tool to pull that mini valve stem through that wheel
sak Posted August 19, 2011 Author Posted August 19, 2011 Almost finished the wheels. Put some dullcote on them to make them seem a little more real.
Dr. Cranky Posted August 19, 2011 Posted August 19, 2011 Excellent. Liking the details. Keep it going, please.
Tom Setzer Posted August 19, 2011 Posted August 19, 2011 I like the detailing you are doing on this build, very realistic in appearance. You are going to have a very nice car when finish! CHEERS! Tom
sak Posted August 30, 2011 Author Posted August 30, 2011 Small update I wetsanded the hood and polished it with scratchx, Still see small scratches in the finish. I always only used 2000 grit, then polish and have always been satisfied but these scratches really easy to see with black paint. 2000 is the finest thing I have so think I should get one of those kits with the real fine paper. But I am thinking of first applying another coat of this dupont clearcoat, but this time thru my airbrush. Anybody know anything about these acrylic paints? The can only says to wait 10-15 minutes between coats. Its been about a week since I aplied the second coats of paint and not sure if it is safe to add more clearcoat. This paint seems to be kinda almost foamy and this last time, little bubbles stuck to the surface and dried into little pits in the paint. Had a hard time getting it smooth. I have heard of some paints needing a month to cure if you wait more than the 10-15 minutes.
Dr. Cranky Posted August 30, 2011 Posted August 30, 2011 The gloss is coming through nicely. This one is just around the corner from getting done. Keep up the great eye candy, please.
sak Posted August 30, 2011 Author Posted August 30, 2011 Thank you. The scratches still bother me though. An autobody shop recommended going over with meguirs fine cut cleaner , then swirl remover. So I might try that on the hood and see what happens.
nybuilder Posted September 10, 2011 Posted September 10, 2011 Nicely done on the rear emblem. Great looking build.!
Custom Mike Posted September 11, 2011 Posted September 11, 2011 Jeff, that Fairlane script looks great, I'll try that on my next one of these! Much cheaper than a Keith Marks decal set to be sure!
Alyn Posted September 11, 2011 Posted September 11, 2011 great detail work on the powerplant. Nicely done all around for that matter.
walt francis Posted September 12, 2011 Posted September 12, 2011 I am loving the detail you are putting into the 66 and really hoping to see more.
sak Posted September 22, 2011 Author Posted September 22, 2011 Just need to polish down the body and start to assemble it. Put four coats of clearcoat so hopefully I won't burn thru it.
Custom Mike Posted September 23, 2011 Posted September 23, 2011 Jeff, what color/brand of Red is that on the washer bottle? This is looking really good now!
Jeff Johnston Posted September 23, 2011 Posted September 23, 2011 this just proves that its the little details that make the big difference. Very nice work and I love the extra detail.
Recommended Posts
Create an account or sign in to comment
You need to be a member in order to leave a comment
Create an account
Sign up for a new account in our community. It's easy!
Register a new accountSign in
Already have an account? Sign in here.
Sign In Now