stump Posted November 26, 2011 Posted November 26, 2011 Joe, thats looking AWESOME mate. I have time tough enough doing 1/12 scale, still to try my 1/16 builds. Not sure I'm looking forward to it now. Keep up the great work bud.
Prostreet Posted November 26, 2011 Author Posted November 26, 2011 Joe, thats looking AWESOME mate. I have time tough enough doing 1/12 scale, still to try my 1/16 builds. Not sure I'm looking forward to it now. Keep up the great work bud. Thx. Greg, Redid my reverse lever to move it, and finished up the center of my chassis and seat mounts. Spent most of my day rearranging my hobby room and putting in a new desk. Will post some pictures tommarrow night of my progress.
Prostreet Posted November 30, 2011 Author Posted November 30, 2011 (edited) Finally had some more time to work on the chassis, I have most of the center of the chassis complete and the funny car part of the cage started and my seat mount pretty much complete. After work tommarrow i will get the driveshaft tunnel done then start on the upper part of the cage. really hard to get those little tubes right where you want them, I'm learning alot and so far i'm happy with the way it is turning out. definitely some things i will change on the next one i build, Also received my new turbos from TRD and there going to work good. I will get some pictures up of the turbos tommarrow night. sorry for the big pictures, i tried resizing in photobucket and doesn't seem to be working. I just started using photobucket. Edited November 30, 2011 by Prostreet
eviltwincustoms Posted November 30, 2011 Posted November 30, 2011 Hey Joe, that work looks mighty darn good to me for being your first! If I didn't know any better, it looks like this wasn't your first attempt. See... I knew you could do it, now you are no longer a virgin to custom chassis work! Actually your pictures are the right size, I dont have to squint to see anything and dont have to click on a darn thumbnail to see the picture. lol However I would like to take a peak at your Funny Car cage and seat mounts a little better!
Prostreet Posted November 30, 2011 Author Posted November 30, 2011 Thx. Bart, The top half of the cage should be fun lol. I will try to get some better pictures of the seat mounts and cage tonight.
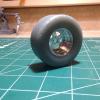
Prostreet Posted November 30, 2011 Author Posted November 30, 2011 (edited) Mike, here's a picture of the turbo next to the flashpoint BAE hemi. They are the 2-1/2" turbos, bummer is the detail isn't as good as it was on the larger ones but they are still nice, hard to get good pictures of it with my Iphone, I really need to invest in a good camera. Bart, Here are some more pictures of the cage and the seat mount setup. Kinda hard to see in these pictures. Edited December 4, 2011 by Prostreet
Mooneyzs Posted December 1, 2011 Posted December 1, 2011 Joe... that chassis work is looking great man. It is sure coming along. Keep up the great work on this.
tyrone Posted December 1, 2011 Posted December 1, 2011 Looking really good the firewall and the cage are looking good, cant wait to see it all come together w/the turbos...
eviltwincustoms Posted December 1, 2011 Posted December 1, 2011 I am with everyone else... I think Joe has done an outstanding job for his first full blown chassis job!.... Even I am learning as he shows his work. I saw the Video Tim (TDR) put up on Youtube on how to clean and prime the parts. He was using the 4.5" Turbo and they looked like they had A LOT of Detail! That is a shame it doesn't scale down to keep that. Can't wait to get the Keith Black Hemi block and Heads from TDR. My plan is to use it as a model for my own Brad Anderson aluminum block... we will see how it goes. If I don't like it, at least I can resort to using the block with some modifications after speaking with Dave to make it look like a BAE.
Prostreet Posted December 1, 2011 Author Posted December 1, 2011 Thx. for all the compliments guys, It makes the build that much better to me. I'm trying to find some pictures of the Brake master cylinder setup for the brakes along with the hand brake setup, Not really finding anything. If anybody has any pictures of that and could share that would be great. I will have another update tonight since i played hookie from work today lol.
outlaw105 Posted December 1, 2011 Posted December 1, 2011 looks good! Haven't seen a turbo build in a while... Are you gonna mount the turbos behind the front wheels or out front?
Magic Photos Posted December 1, 2011 Posted December 1, 2011 I like this build very work, will be watching very close for my later build. Mike
Prostreet Posted December 2, 2011 Author Posted December 2, 2011 looks good! Haven't seen a turbo build in a while... Are you gonna mount the turbos behind the front wheels or out front? looks good! Haven't seen a turbo build in a while... Are you gonna mount the turbos behind the front wheels or out front? Thx. guys, I'm gonna mount them behind the front wheels. more updates tommarrow night.
Prostreet Posted December 4, 2011 Author Posted December 4, 2011 Only got a little work done, Made the Drive shaft tunnel. Used some K&S sheet and Plastruct .060" rod, I drilled some holes in the chassis and glued the hoops in and the tunnel itself is removable. Hope to have some more updates later tonight. it's been slow going but i'm making some progress lol.
comp1839 Posted December 4, 2011 Posted December 4, 2011 joe, you wanted master cyl. mounting shots? where did you want the master cyl. to mount? in front of the firewall. high or low? behind the fire wall under the drivers feet? bart, just so you know. TDR doesn't sell a keith black block. they sell a std hemi block. if i get time and tim wants to model a keith black block. it is on my list of "wants" but, as of now you'll be modifying a std. hemi block to look like a BAE.
Prostreet Posted December 4, 2011 Author Posted December 4, 2011 Dave: Either under the drivers feet or behind the firewall, Also do they use the same master cylinder for the handbrake and do all promods run a handbrake? I'm more into the outlaw cars my promod knowledge isn't so great.
comp1839 Posted December 4, 2011 Posted December 4, 2011 yes, typically it is the same master cyl.. no, not all pro mod cars run hand brakes. a lot of guys find staging a clutch car easier with a hand brake. it all depends on your driving style. i sent y6ou a p.m..
eviltwincustoms Posted December 5, 2011 Posted December 5, 2011 joe, you wanted master cyl. mounting shots? where did you want the master cyl. to mount? in front of the firewall. high or low? behind the fire wall under the drivers feet? bart, just so you know. TDR doesn't sell a keith black block. they sell a std hemi block. if i get time and tim wants to model a keith black block. it is on my list of "wants" but, as of now you'll be modifying a std. hemi block to look like a BAE. Thanks for clarifying that for me, once I get back Mid week my plans are to begin working on my own mock up until the block arrives. Joe very nice job on bending that Tunnel yourself. What did you use to get the curve and how did you finally get it to stay together without struggling with it popping apart? LOL
outlaw105 Posted December 5, 2011 Posted December 5, 2011 The tunnel looks great... I also want to know how you bent it, I might try it on my build.
Prostreet Posted December 5, 2011 Author Posted December 5, 2011 (edited) Thx. Guys, Can't tell you all my secrets. J/K lol, I used the end of a X-acto knife and bent it around it by hand. i did the top first to get a nice bend, Then i did the bottom and bent on half then the other. The bottom over laps a 32nd", the tin holds it's shape nice so it doesn't pop apart. I got my brake and clutch pedal mount and pedals done. this tiny stuff is very tedious and time consuming. gonna do the hand brake tommarrow. Edited December 5, 2011 by Prostreet
tyrone Posted December 5, 2011 Posted December 5, 2011 Great looking stuff you got going on here Joe...
Prostreet Posted December 5, 2011 Author Posted December 5, 2011 Thx. Tyrone, I learn alot from you guys on this forum.
eviltwincustoms Posted December 5, 2011 Posted December 5, 2011 Man Joe!!!! I am so impressed with your work!!! So just to clear up my confusion.. the seam on the tunnel is then on the bottom or the passengers side? And will you be putting the wrapped tubing on the bottom of the tunnel as well?
Recommended Posts
Create an account or sign in to comment
You need to be a member in order to leave a comment
Create an account
Sign up for a new account in our community. It's easy!
Register a new accountSign in
Already have an account? Sign in here.
Sign In Now