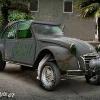
stulee11 Posted December 24, 2011 Posted December 24, 2011 hi all being as my "69 nova" is coming to a end i thought i would kit this one to satisfy my craving over this feastive time. hope you all will watch and advise me on anything i am doing wrong . and if anyone has done this kit before please dont hold back post yous pics and any help to go with them. well anyway here she is the only slight down side i have found upon opening it is its all molded in blue and the detail doesnt look as good as some of my other kits but hey ho lol.
stulee11 Posted December 24, 2011 Author Posted December 24, 2011 last one hope to see plenty of followers and helpers lol. as always any comments welcome good or bad. thanks stu
moparmagiclives Posted December 24, 2011 Posted December 24, 2011 I picked this up a wile back, havent started it yet as I'm not sure where to go with it. Cant wait to see yours take off..
stulee11 Posted December 24, 2011 Author Posted December 24, 2011 its going to be mainly box stock but i am toying with the idea of putting in rear disk brakes
W-409 Posted December 24, 2011 Posted December 24, 2011 I have older release from this kit, but this is quite close. Be careful with the placement of those front wheels, on this re-release they are easily too back. Great and interesting project, can't wait to see. It's great kit, and with your skills, it's going to look great.
Evil Appetite Posted December 25, 2011 Posted December 25, 2011 I'll be watching this one as well. Bought 5 when it was first released. haven't built any yet, this might get me going though
envious8420 Posted December 25, 2011 Posted December 25, 2011 The whole front suspension is quite fiddly on this on, wonderful kit though. Ive built many over the years.
stulee11 Posted December 25, 2011 Author Posted December 25, 2011 The whole front suspension is quite fiddly on this on, wonderful kit though. Ive built many over the years. there are some sweet rides there. did you drop the front end if so how did you do it ??
stulee11 Posted December 25, 2011 Author Posted December 25, 2011 not much has gone on with her as yet i really aint been in the mood today been feeling a little down. But i did moch up the rear disk to the rear end oh and the body is in guide coat primer hope you all had a wicked day thanks for looking in stu
stulee11 Posted December 25, 2011 Author Posted December 25, 2011 I am working on the same kit right now. The body fell of the table and broke the front window brace on the drivers side.Now i dont know how to fix it. So be careful the plastic is kinda thin there. thanks for that advice mate it did feel a bit flimsey wen i opened it up. can't wait to see where you go with yours. good luck with it
stulee11 Posted December 25, 2011 Author Posted December 25, 2011 I can tell you that mine wont be to good. I was going to watch your thread and see how yours went. I still need to find away to fix the brace. mines going to be mainly box stock just with the wiring done and hopefuly the rear disk's on it i am just in the final stages of my other nova if you wanna look at that one for idea's
Wheels Posted December 26, 2011 Posted December 26, 2011 Nice start! I have one sitting near my workbench but I have a couple models to finish first!
Guest Posted December 26, 2011 Posted December 26, 2011 Only suggestion I have with this kit is please lengthen the rear fenderwell openings to match the size of the tires. So many people build this kit without doing that and it just kills the look of them. Nothing looks worse than a set of big tires behind small wheel openings.
stulee11 Posted December 26, 2011 Author Posted December 26, 2011 Only suggestion I have with this kit is please lengthen the rear fenderwell openings to match the size of the tires. So many people build this kit without doing that and it just kills the look of them. Nothing looks worse than a set of big tires behind small wheel openings. how do i do it ? I aint ever done it before.
Guest Posted December 26, 2011 Posted December 26, 2011 how do i do it ? I aint ever done it before. Measure your tubs on your chassis at the bottom. Measure your wheel openings at the bottom. Take the difference,subtract 2mm and divide by two. That will give you how much the fenderwell needs to be lengthened at the front and rear. Tape over your wheel openings on the body and trace around the lips of them. That gives you the shape you need to have. Cut the tape into two pieces and place them on the body using the measurements you have and mark the body with a permanent marker. Remove the excess. You'll have to redo the recess at the front and rear to make it match the rest of the opening. You'll also have to trim the chrome strips at the bottom off if you use them. It's very easy to do and well worth the effort.
stulee11 Posted December 26, 2011 Author Posted December 26, 2011 Measure your tubs on your chassis at the bottom. Measure your wheel openings at the bottom. Take the difference,subtract 2mm and divide by two. That will give you how much the fenderwell needs to be lengthened at the front and rear. Tape over your wheel openings on the body and trace around the lips of them. That gives you the shape you need to have. Cut the tape into two pieces and place them on the body using the measurements you have and mark the body with a permanent marker. Remove the excess. You'll have to redo the recess at the front and rear to make it match the rest of the opening. You'll also have to trim the chrome strips at the bottom off if you use them. It's very easy to do and well worth the effort. Oh for me it sounds hard as this is only about my 8th model kit lol. If you have any pics that would sort of help lol
Guest Posted December 26, 2011 Posted December 26, 2011 Sorry,no photos of the process. I rarely, if ever, take progress photos. I have an old build that I could take a photo of if that would help.
stulee11 Posted December 26, 2011 Author Posted December 26, 2011 Sorry,no photos of the process. I rarely, if ever, take progress photos. I have an old build that I could take a photo of if that would help. yeah they might help mate.
stulee11 Posted December 29, 2011 Author Posted December 29, 2011 (edited) hi all small update really but i am in 2 minds weather to open the trunk or not ... i have been trying to make the fuel cell but not to sure it's looking right . see i know how to open the trunk up but i aint to sure if it will look ok without the doors being opened. as i dont know how to do the door pannels... so thats why i am in 2 minds lol thanks for looking in stu Edited December 29, 2011 by stulee11
stulee11 Posted January 4, 2012 Author Posted January 4, 2012 hi all not much of and update... but i got the colour on and got her clear coated hope you all like you can't really see the colour "pop" in this one this is the hood done you can see the colour a litte better in this one hope you all like and please any comments welcome good or bad thanks for looking in stu
crazyjim Posted January 4, 2012 Posted January 4, 2012 Another SHINY :) one, Stu? I love it. I built that kit just about out of the box and entered in the Street Machine class in a show. Because it had slicks on it, the judges forced it into a racing class. I have another in my inventory and it will get Ma's Resin M/T Sportsman tires in the rear with VCG Resin Weld 5 star wheels.
Dirkpitt289 Posted January 4, 2012 Posted January 4, 2012 This is coming along nicely. I like the color
Dr. Cranky Posted January 4, 2012 Posted January 4, 2012 Looking good in that color. I've always liked this kit, but I've only built a couple in all of this time. Keep it going.
stulee11 Posted January 6, 2012 Author Posted January 6, 2012 hey everyone got quite alot done on this over the last few days ... engine is all done ... chassis is all done ... interior is all done although its not the best quality ...body is all cleared,BMFed and glass is in ... let me know what ya all think engine test fit in the chassis... i had to cut the engine mouting brackets down to fit better .
Recommended Posts
Create an account or sign in to comment
You need to be a member in order to leave a comment
Create an account
Sign up for a new account in our community. It's easy!
Register a new accountSign in
Already have an account? Sign in here.
Sign In Now