BigBad Posted December 28, 2011 Posted December 28, 2011 (edited) Here is a project Edited April 26, 2012 by BigBad
Prostreet Posted December 28, 2011 Posted December 28, 2011 Great looking truck, any info on the trailer and truck?
BigBad Posted December 28, 2011 Author Posted December 28, 2011 Great looking truck, any info on the trailer and truck? What info do you need Joe?
Prostreet Posted December 28, 2011 Posted December 28, 2011 What info do you need Joe? Never mind, For some reason just the pictures showed when i first checked out the thread.
scale trucker Posted December 29, 2011 Posted December 29, 2011 very nice .can;t wait to see finished.
ntc8733 Posted December 29, 2011 Posted December 29, 2011 Awesome work! Always great to see a nice looking trailer with a great rig.
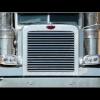
Semi Trailer Mechanic Posted December 29, 2011 Posted December 29, 2011 Here is a project I have be working at for a while: It's an Italeri American Van modified to better suit it's 1:24 scale. The original kit box van mesures 6 inch short off the scale 13 foot 6 inches height it's suppose to measure. I had to take another van kit to use the extra material for the front, the sides and the rear of the van. Of course, I had to make a mistake in my measurments, so I added a styrene strip you can see near the top of the sides. Doesn't matter too much as there will be an "aluminum" stffener strip going down the sides near the top and the bottom of the sides. I painted it the same color as the tractor as ther trailers usually match at Robert transport. Since I was using two kits to build this one, I also used one of the axles off the second kit to obtain the tri-axle setup. From the back you can see that I'm not quite finished with the door and marker light details. By the way, I masked all the edges with tamiya masking tape... This stuff does a GREAT job! No seeping AT ALL! You can also see the styrene strip I used to shim the side. In this picture I'm showing the wheels painted with Alclad chrome paint. I will paint them with another coat as the paint here is too dark, another coat should lighten it a bit. Also a coat of clear paint will be needed as the paint sticks to fingers... In this picture you can see the trailer matches the truck's sleeper a lot better than the original configuration. Also, the black stripe on the truck's sde will continue down the side of the trailer at the same height until it reaches the company logo further towards the rear. I have split the suspension of the original kit in half to get a scale 6 foot spacing between the axles. I think the body sits little to high fro my taste though, i might modify it. Next to do are air brake hoses, the aero skirts at the bottom sides, aluminum stiffener body strips, clearance light details, mud flaps and custom decals to match the tractor. Thanks for looking! I like what you've done so far!!! What are you refering to as "aluminum body stiffeners" ? Are you talking about those full length bumpers you see mounted mostly at the top and the bottom? If so those are to protect the trailer from collisions. Such as another trailer being backed in a hole next to it. If the driver hits it it'll just scrape those bumpers opposed to potentially damaging the panels,posts and upper or lower rails. Van trailers are designed to maintain structure integrity as a whole box and they are supposed to flex. The sides,roof,and floor all work as one and allow the box to flex and to carry the weight of the load. That's why you don't see piers under them like flatbeds!
BigBad Posted December 29, 2011 Author Posted December 29, 2011 I like what you've done so far!!! What are you refering to as "aluminum body stiffeners" ? Are you talking about those full length bumpers you see mounted mostly at the top and the bottom? If so those are to protect the trailer from collisions. Such as another trailer being backed in a hole next to it. If the driver hits it it'll just scrape those bumpers opposed to potentially damaging the panels,posts and upper or lower rails. Van trailers are designed to maintain structure integrity as a whole box and they are supposed to flex. The sides,roof,and floor all work as one and allow the box to flex and to carry the weight of the load. That's why you don't see piers under them like flatbeds! Ok then, now I know they're like "bodyside mouldings" we used to have on cars to prevent damage! Thanks for the enlightenment Scott. I also noticed that there weren't any huge backbone frame elements as on flatbeds. Sort of a unit-body. Thanks Scott!
Jim B Posted December 29, 2011 Posted December 29, 2011 Looks really nice. I'm hoping that Moebius adds the RigSkirts to their Great Dane van.
Tony Bryan Posted December 30, 2011 Posted December 30, 2011 Top job Bob, truck and trailer look great
truckabilly Posted December 30, 2011 Posted December 30, 2011 A very nice truck & trailer. Nice job on the van. Some different hubs would make it look even better.
jekylljr Posted December 30, 2011 Posted December 30, 2011 bob: a very nice job!! i like it,would look cool if it had red rims,..otherwise bang on! likin the side skirts havent seen that done on a trailer model yet, i see robert on the 401 corridor all the time huge fleet, where did u get those custom decals?ive been lookin for a way to make some i heard about makin them on a computer and using decal paper when u print but wasnt sure of the program keep up the super work bob i enjoy all ur builds! farway model truck fleet
BigBad Posted December 30, 2011 Author Posted December 30, 2011 (edited) bob: a very nice job!! i like it,would look cool if it had red rims,..otherwise bang on! likin the side skirts havent seen that done on a trailer model yet, i see robert on the 401 corridor all the time huge fleet, where did u get those custom decals?ive been lookin for a way to make some i heard about makin them on a computer and using decal paper when u print but wasnt sure of the program keep up the super work bob i enjoy all ur builds! farway model truck fleet Hi Steve, thanks for the compliments! Still thinking about those wheels. There are no special programs for decals really. I take pictures of what I want from trucks then download the pictures on the computer. I use the "Paint" program to correct colors, missing lines, correct contours and correct general stuff. Then I save it. Then, I open a document with Microsoft "Word" and insert the image in that document to scale the decals and make the design fit on 1/2 a 8.5X11 sheet (decal stock size). Then I test the design for size and color on a regular sheet, see if it fits properly and then cut the designs to see if they are the right size or scale. When everything's good, print a decal sheet. Remember for pale or white you need a white background. If you print dark colors and need to have body color, print you design on clear stock. Once printed on decal stock, you HAVE to shoot clearcoat (like Testors decal clearcoat)over the design so the ink doesn't come off the decal sheet when put in water. Don't cut too close to the design so the water doesn't seep to the colors. then put them on the model. Does a great job and it's pretty easy. All you need to do is some planning. Have fun! Edited December 30, 2011 by Z06Bob
jekylljr Posted December 30, 2011 Posted December 30, 2011 thanks bob appreciate the advice i will try it sometime soon,... thanks again ---farway model truck fleet
Recommended Posts
Create an account or sign in to comment
You need to be a member in order to leave a comment
Create an account
Sign up for a new account in our community. It's easy!
Register a new accountSign in
Already have an account? Sign in here.
Sign In Now