randx0 Posted April 10, 2015 Posted April 10, 2015 This is turning out great . I like the "sprue glue" but I find it can sometimes melt and warp, while not as easy to sand but very very strong acrylic nail filler (nail polish section )works well especially when added strength is needed. Just a suggestion in case you need it or anyone else inspired by this kind of build.
Roadrunner Posted April 10, 2015 Posted April 10, 2015 I'm not sure I've got the courage to chop up a model like that. My hat's off to you.
Rotorbolt73 Posted April 10, 2015 Author Posted April 10, 2015 (edited) Thanks guys. The sprue glue method I used seems to be working great for me. I guess it depends on how you mix it. My mixture has a lot of plastic in it. I mainly use it to fill gaps when I blend in pieces like I did here. Sands pretty easy but in my case I have a lot of areas to work. The only part of the body that looks like it will require some actual filler is the quarter panels. The curve of the 82 and 84 side sections do differ. I won't use sprue glue to do that blend as too much would be required and I might have the issues like you mentioned. I just got a small pint can of bondo at the local auto parts store to use. So I'm just waiting to be in the right frame of mind to do that step..but the build is progressing. slowly but getting close. As far as all the cutting, chopping and splicing i'm doing..Sometimes you just gotta' jump in and do it. Especially if no one makes what you're wanting to build. Do it enough and then it becomes easier and not as intimidating. Edited April 10, 2015 by Rotorbolt73
DumpyDan Posted April 11, 2015 Posted April 11, 2015 Great you blended the two kits together like they were meant to be together. Awesome job keep them pic`s coming
Kennyboy Posted April 11, 2015 Posted April 11, 2015 (edited) I really love what you are doing here Matt! A suggestion for the rear quarters would be to try out Apoxie Sculpt by Aves. I use it for all my cut and splice projects.......Bondo has the tendency to shrink and crack on plastic. Apoxie Sculpt doesn't shrink and does not leave separation lines and you can shape it like clay with water. Hardens solid after 24 hours. You can find it on Ebay or Amazon to name a few. Also, if you want to strengthen the insides of the rear quarters try using some toilet paper cut to size and soak it with CA glue......this creates an almost fiberglassed joint on the inside and makes the panel VERY ridgid! Edited April 11, 2015 by Kennyboy
66belair Posted April 11, 2015 Posted April 11, 2015 Looking good Matt. If you are coming to the meeting tonight bring it with you. Would like to see that body in person.
Rotorbolt73 Posted April 11, 2015 Author Posted April 11, 2015 Thank you for the comments and suggestions guys. Never heard of Apoxie Sulpt Ken..I'll check into it. Maybe its not too expensive or I might can find it at my LHS or hobby lobby. But chances are i'll be using the bondo filler I got. i don't know... I only need a thin swipe on both upper quarters. never had problems out of it before..Now the red bondo brand glaze filler will shrink and crack like you mention. I don't use that stuff anymore. I do like the CA glue and tissuie paper idea. But I have already put a bead of my sprue glue on the back side of the joints and it seems to be holding up. Good to see you here Mike. Sure I'll bring it to the meeting.
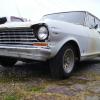
stickyfingers Posted April 12, 2015 Posted April 12, 2015 (edited) Cool project, here's some pics that you might find useful. It's a Vette that has the same bodywork as the Wraith Vette. The bottom pic is pretty large with good detail of the hood and front end. Edited April 12, 2015 by stickyfingers
Mister Twister Posted April 12, 2015 Posted April 12, 2015 Excellent work you're doing on this build....I'm anxious to see more.
mod3l Lover Posted April 16, 2015 Posted April 16, 2015 Matt, Looking great as I expected! Those pictures make me think that the Vette they used in the movie was from that after-market company. All that sanding would likely make my hands curl up in painful limp lumps! Keep up the great work, I'm just loving it. David S.
Rotorbolt73 Posted April 16, 2015 Author Posted April 16, 2015 Thanks guys. Those "motion vette" pics were some I referred to when I was making the hood. Yeah you're not kidding David about the hands. Mine can get pretty bad if I do to much with em. In fact, work on this build was held up because of that reason. Hands hurt too bad from projects at work and yard work around the house. But I did manage to get the quarter blend work done. Also I'm moving on to the engine. The 82 kit comes with a somewhat basic engine but has a manual shift transmission. The movie car had an automatic. So I decided to use the incomplete engine block with auto trans from the 84 parts vette. Not sure of what induction setup to use since the movie never actually showed an engine shot from this car. Guess I'll just use whatever setup I want.
Tony-442 Posted April 17, 2015 Posted April 17, 2015 Wow, this is really awesome! Great job! I too, suffer from hand cramps or maybe it's arthritis, I'm not sure, but they cramp up and are pretty soar. All part of getting old I guess. I take tylenol, which does help me. Can wait for the updates. Keep'em comin'.
Whelen36 Posted April 19, 2015 Posted April 19, 2015 Why don't you just go with the engine with the turbo pipe that rug head had built for it ( the one the wraith character shot apart )? It was supposedly to go in the vette
Rotorbolt73 Posted April 19, 2015 Author Posted April 19, 2015 "Turbo pipe"?? Umm... That was a supercharger setup on that engine. Judging by the valve covers on it, It looked to be a Chrysler Hemi too. I actually considered doing that at one point.....But then it wouldn't be the car from the movie but rather a "what if" car....As in: what if the wraith didn't shoot up that engine and Packard managed to get rug head to "fit it in the vette"..Before the final race scene...Would have been cool if that happened though.. But I'm not going that route..Maybe I might build another later and do that mod..or someone else can..I'm going to stick with the obvious Chevy engine that was probably in it. Besides, I really don't want to cut a hole in that daytona hood I just made.. Just something I could never understand in that movie ...is how a shotgun could blow apart a fully assembled blown Hemi engine like that..It fell apart like it wasn't even bolted together..
Rotorbolt73 Posted April 19, 2015 Author Posted April 19, 2015 I did manage to get the body in primer today...Finally! Now to let this coat dry so I can wet sand it for a 2nd coat to get the body surface smoother.
slusher Posted April 19, 2015 Posted April 19, 2015 Great looking body Matt, real impressive body work...
Whelen36 Posted April 20, 2015 Posted April 20, 2015 I know it was a super charger set up but in the movie I remember Packard asking if the turbo pipe was ready to be put in the car, right before the wraith showed up and blew it apart. I only called it a turbo pipe because that's what I heard in the movie and wanted to make a reference point to the engine in question in the movie. Most likely just a movie mistake just like when the vette shot through the tomb stones in the graveyard with no body damage , and them passing the same ( Volvo ?? ) car in the race scenes over and over again. I'm really looking forward to seeing this completed, I think it'll look awesome
Rotorbolt73 Posted April 20, 2015 Author Posted April 20, 2015 Ohh... I always thought he was saying "hows the injection line coming?" every time he inquired about it. Well, the vette was in fact damaged when the wraith's car hit him in the rear pushing him into the graveyard..That repaired tail damage can be seen in the final race at the end. Why the front was never busted up from going through all those headstones, not to mention the windshield, is something I've always questioned too.. Messed around with the interior. Decided to use the eckler seats as they were the most correct appearing. I glued a section of evergreen tube to the bottoms that allows them to be positioned so they don't look like they are sitting so low in the interior bucket. I also cut out the rear e brake section of the eckler console and transfered it to the 82 interior. Here is a mock up of the interior. I also used the automatic shifter from the 84 parts vette. I can now start the priming and painting process for it..
Whelen36 Posted April 21, 2015 Posted April 21, 2015 Your right guy, when you said about the injection line. My mistake, that is what he said, been a while since I saw the movie, the memory isn't what it used to be LOL. Are you going to high detail the kit?? Like gauges, seatbelts, wiring???
Rotorbolt73 Posted April 22, 2015 Author Posted April 22, 2015 (edited) Not sure yet if I'll go that far with detailing. I usually will wire up the engines in my builds. Not going to worry much over things like seatbelts. I still have a lot more to do with this thing.. Ok, One area I have not yet done is the suspension systems. I typically build these up so I can do a mock up of the assembled chassis to check the wheelbase and stance before I paint anything.. Since my 84 parts vette rear chassis clip was missing the rear suspension/ axel, I took the one from the eckler kit to use. The track width is pretty much the same. Heres the pieces laid out. for some reason the eckler kit didn't have the rear differential cover or mount bar. Fortunately I had a partial rear suspension from the AMT 34 Ford street rod kit that I was able to get that piece from. The 84 rear clip section had a lot of open areas and such, so I filled in those with some evergreen sheet. After a little trimming and some fit work, I got the rear suspension glued together and mocked up. Note the slot I had to cut in between the cross member and fuel tank to clear the rear swaybar. I'm using the 82 vette kits basic front suspension as is. However, it does not have any front coil springs or upper A Arms. I dug through my parts box and found what I need that will work. I do not know what kit these pieces are from. I decided not to use the eckler front pieces because I wanted to keep that assembly whole in case I need to use it in another build one day. I trimmed down the coil springs some and drilled a hole through the center of them so that they will slip over the mounting post molded into the 82 front suspension piece. The upper A arms were then trimmed to fit and everything was glued into place. Edited April 22, 2015 by Rotorbolt73
Recommended Posts
Create an account or sign in to comment
You need to be a member in order to leave a comment
Create an account
Sign up for a new account in our community. It's easy!
Register a new accountSign in
Already have an account? Sign in here.
Sign In Now