PierreR89
-
Posts
532 -
Joined
-
Last visited
Content Type
Profiles
Forums
Events
Gallery
Everything posted by PierreR89
-
Kenworth K100 twinsteer triaxle
PierreR89 replied to PierreR89's topic in WIP: Model Trucks: Big Rigs and Heavy Equipment
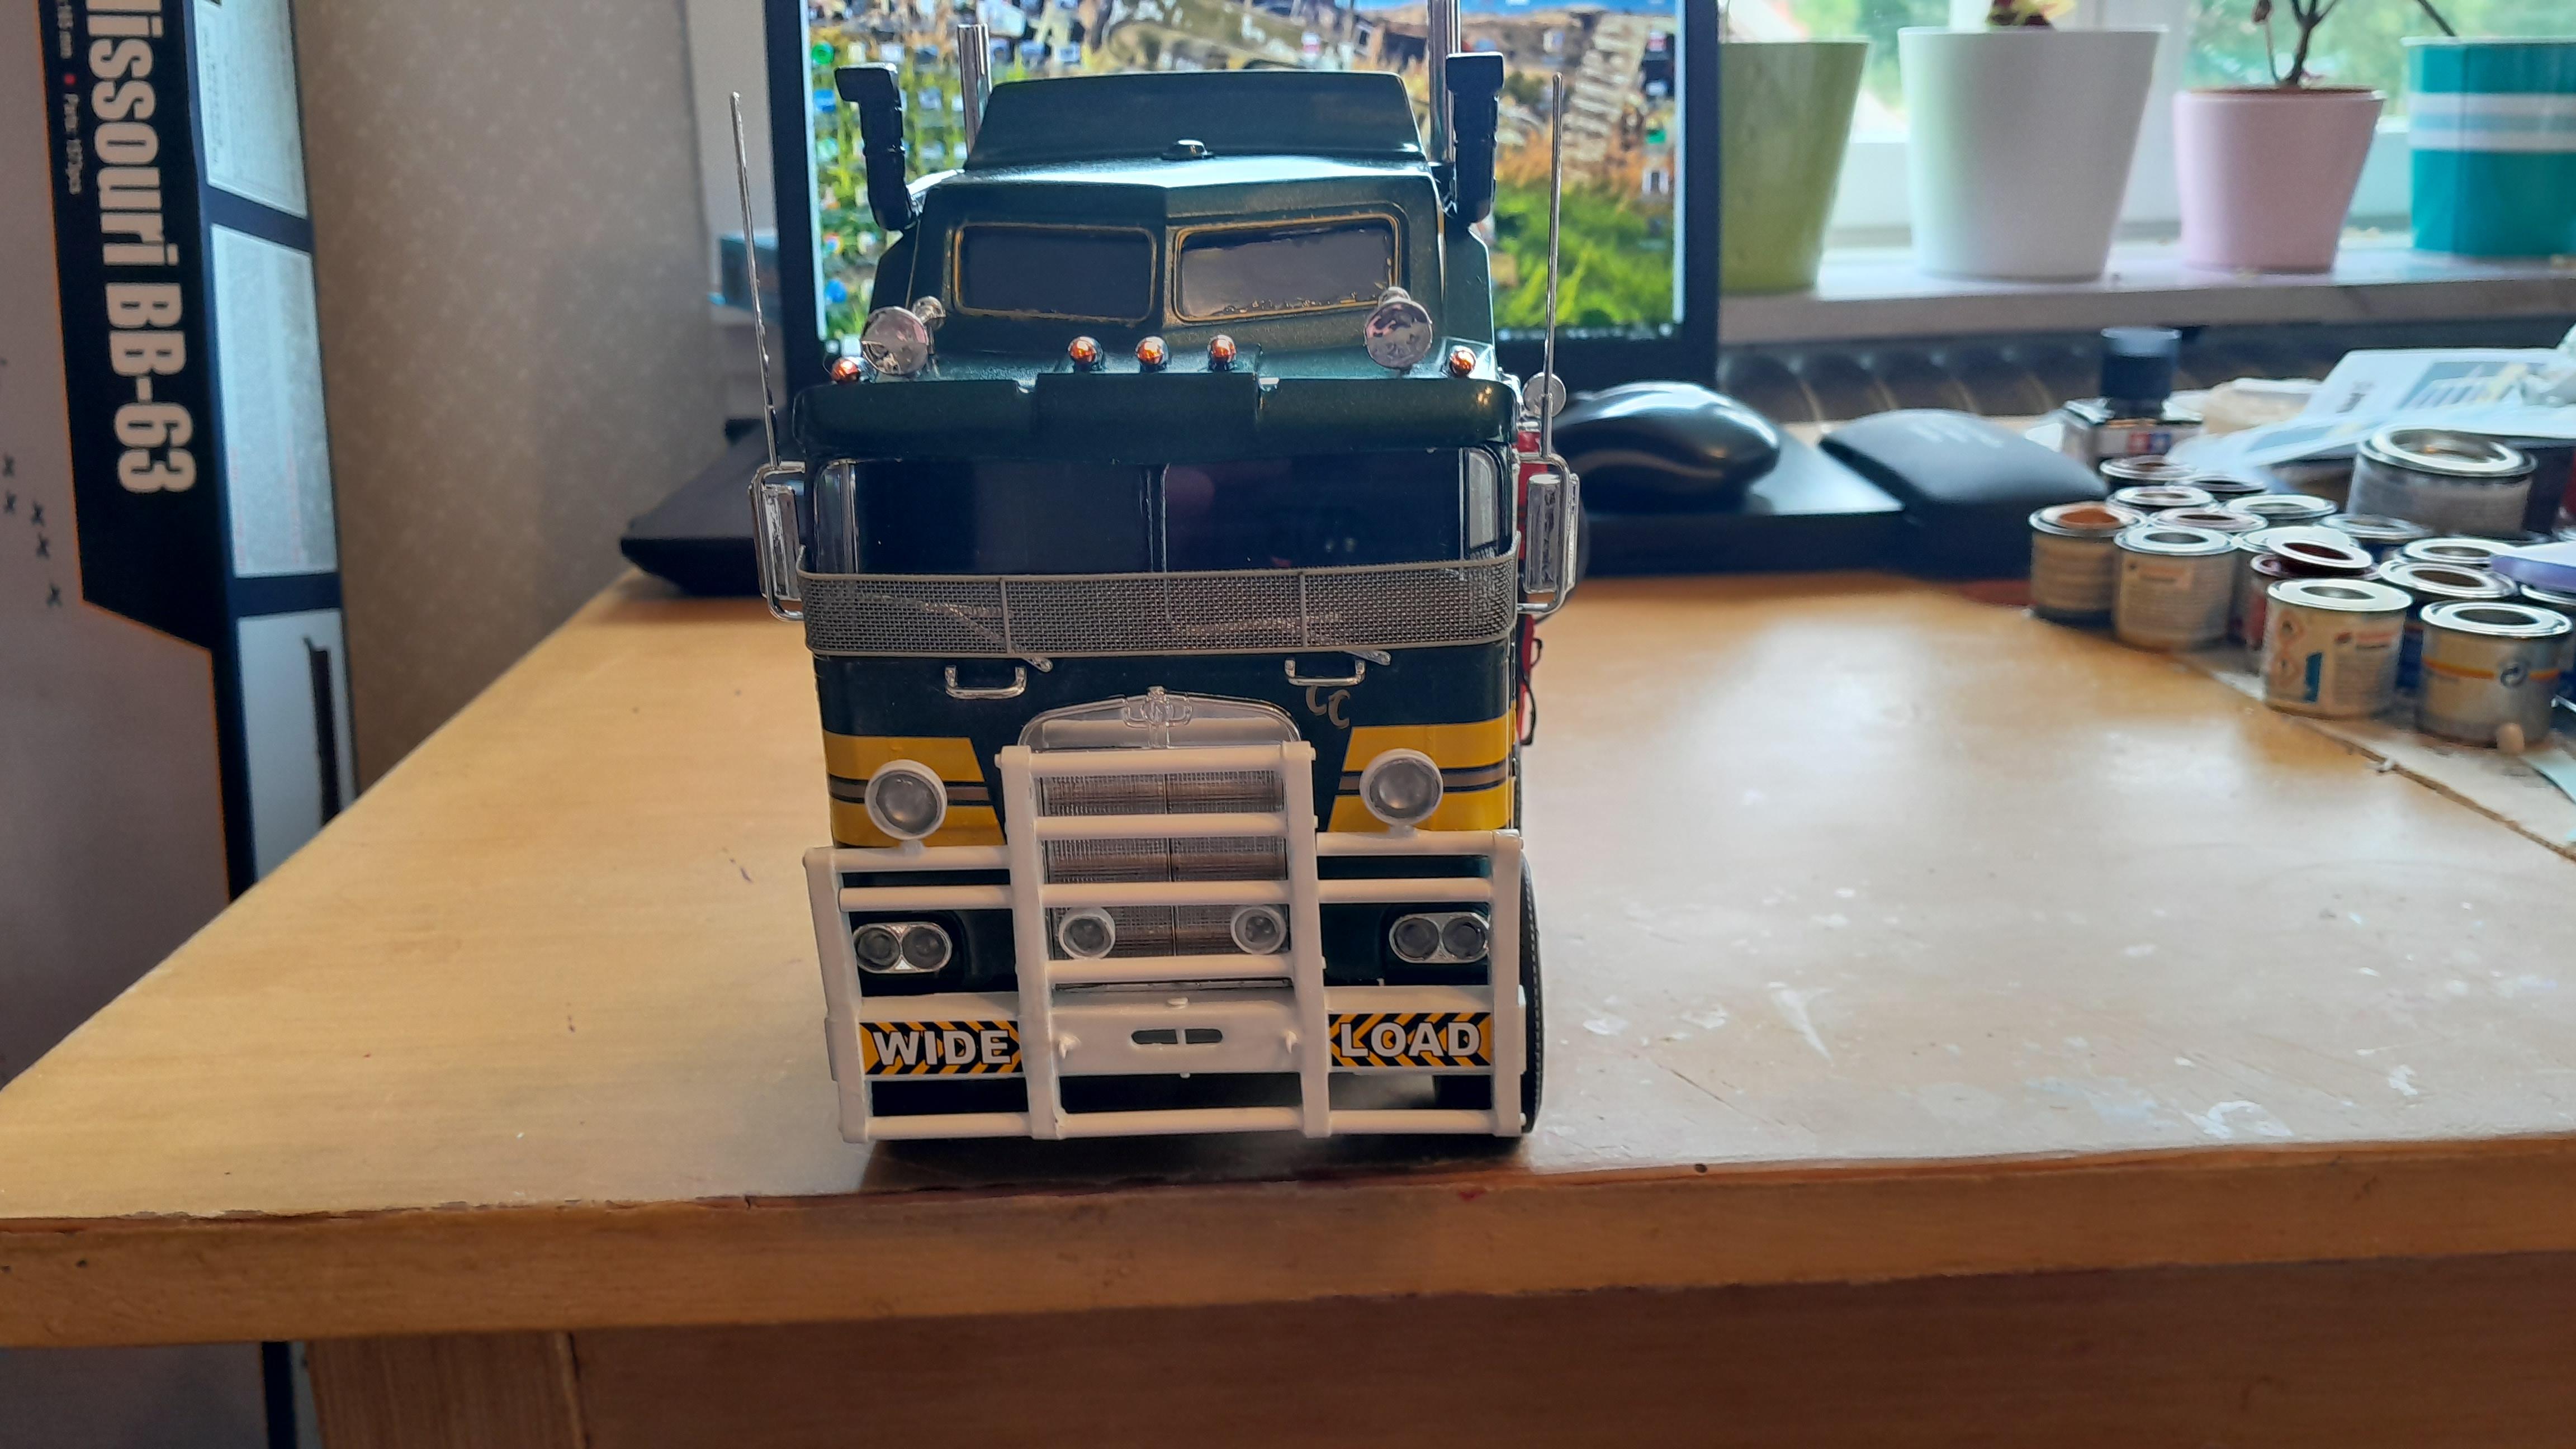
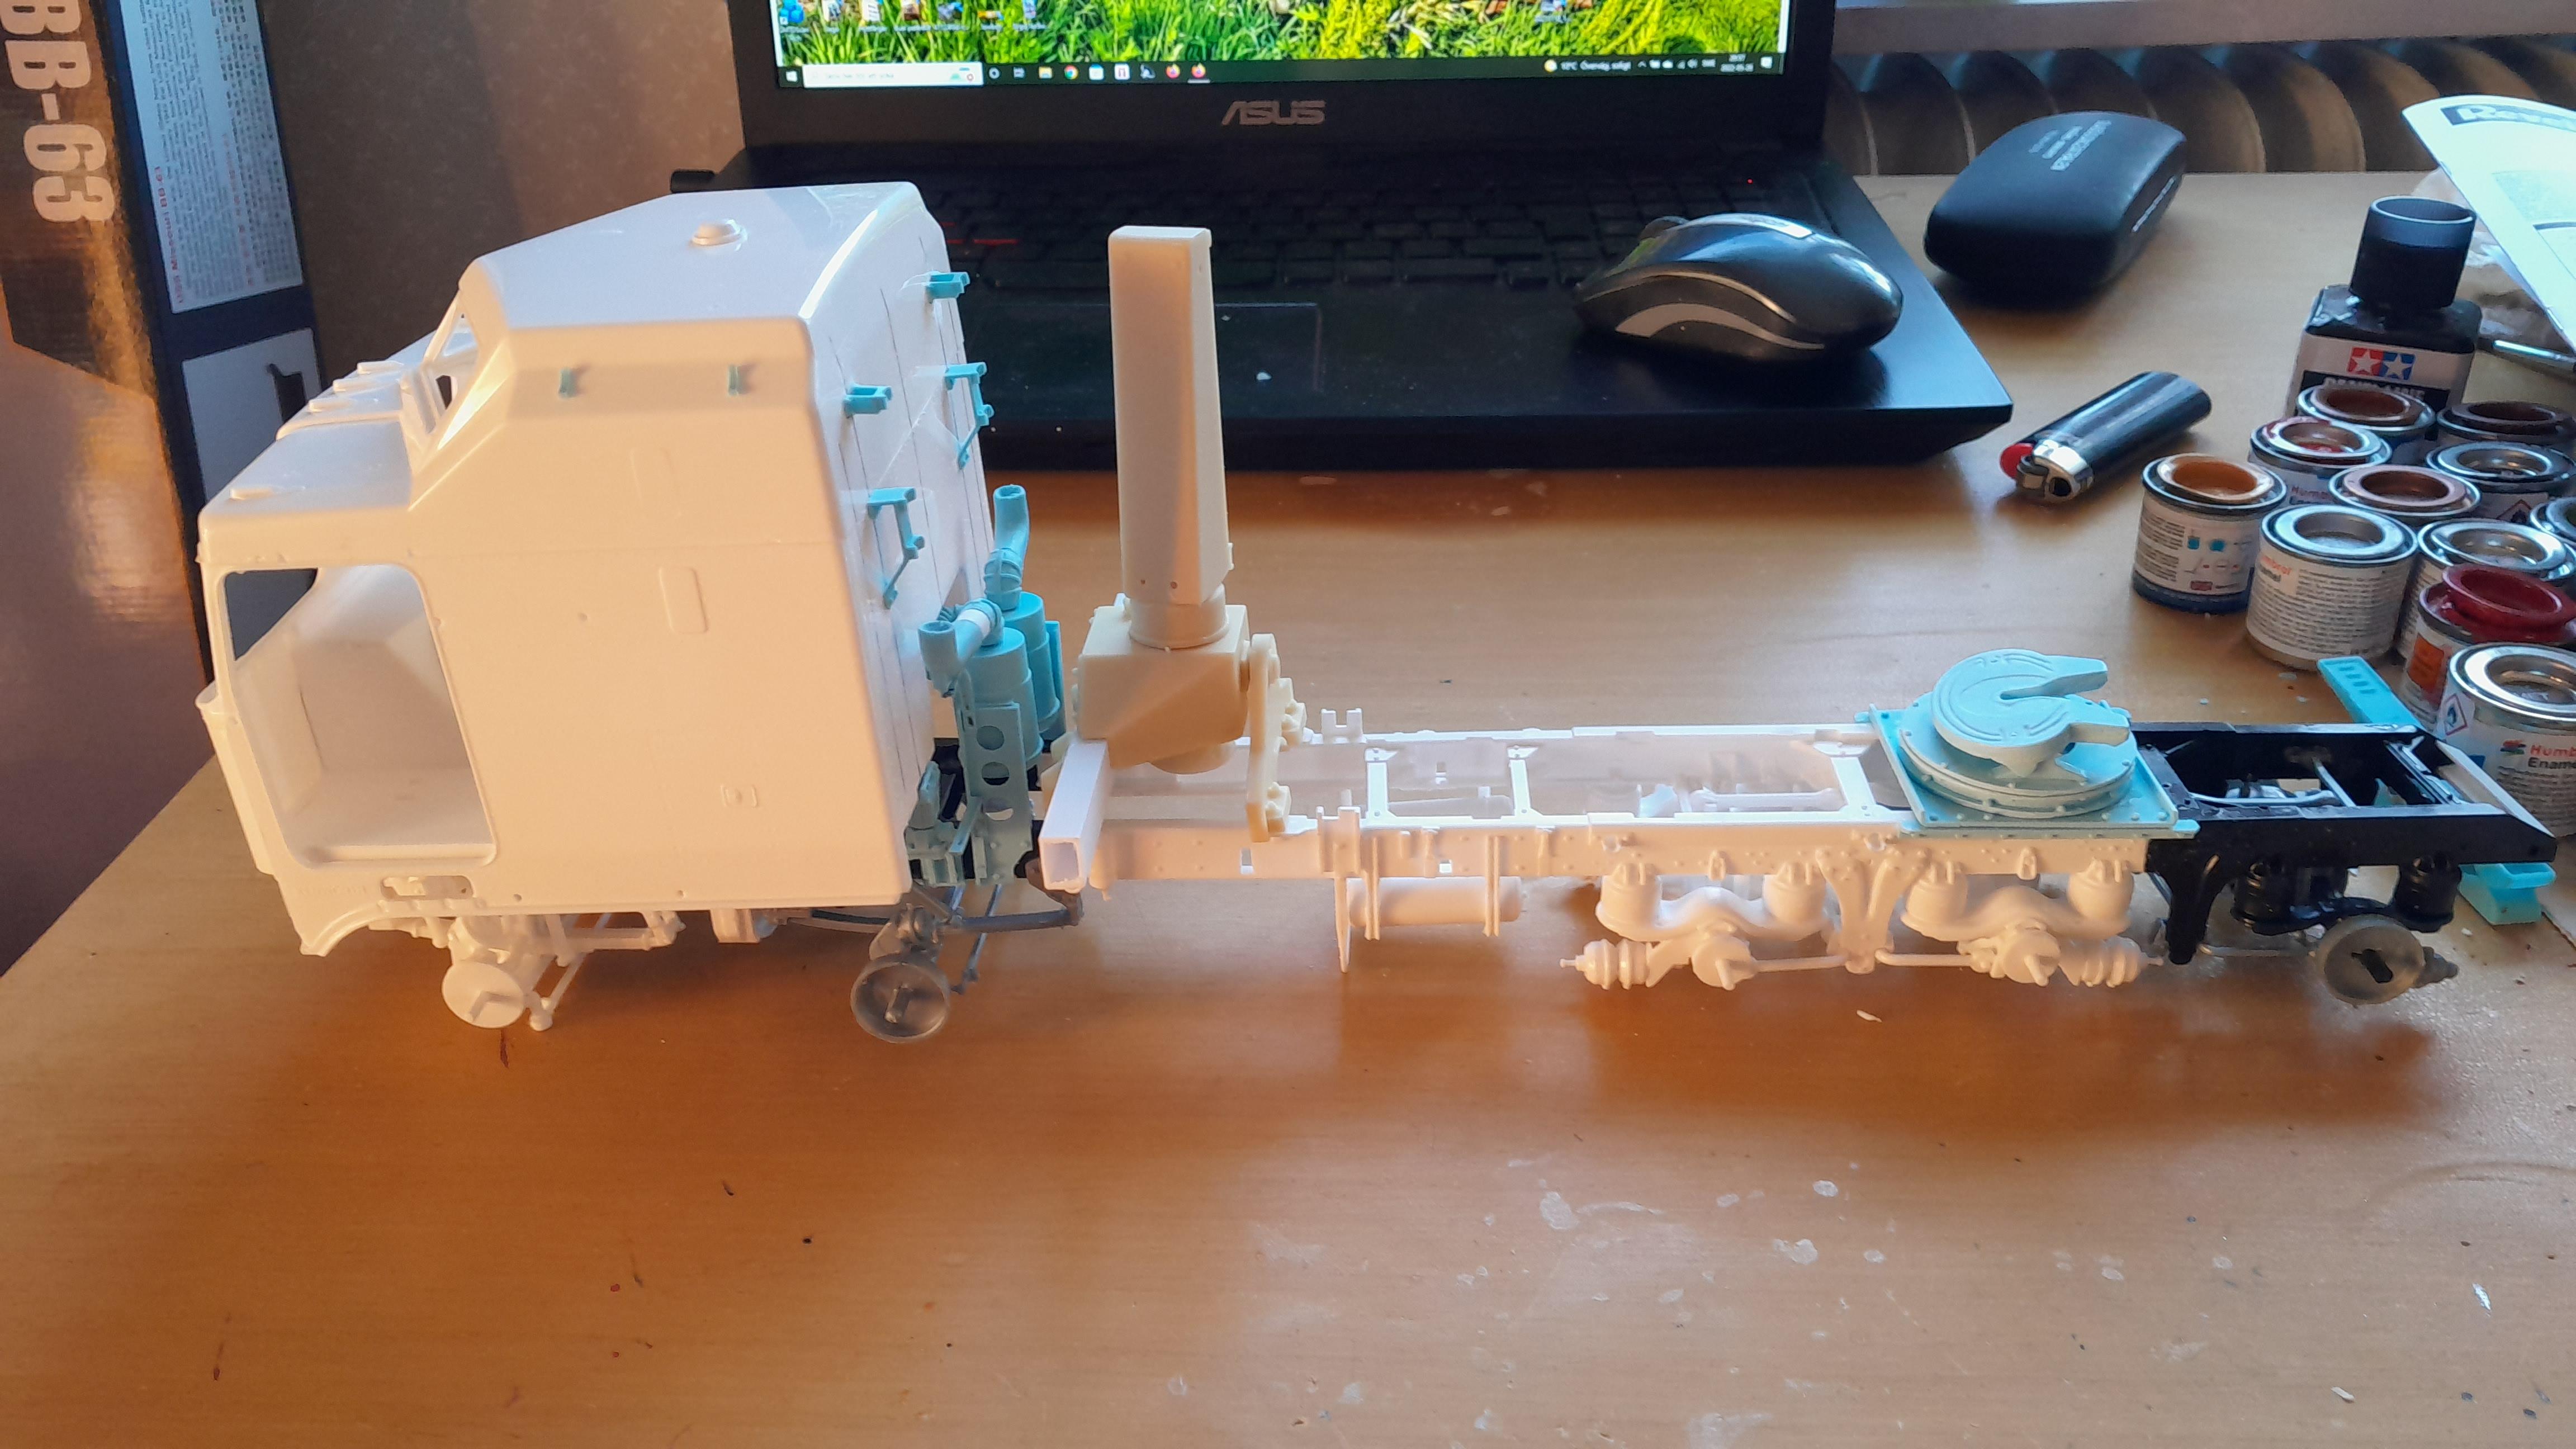
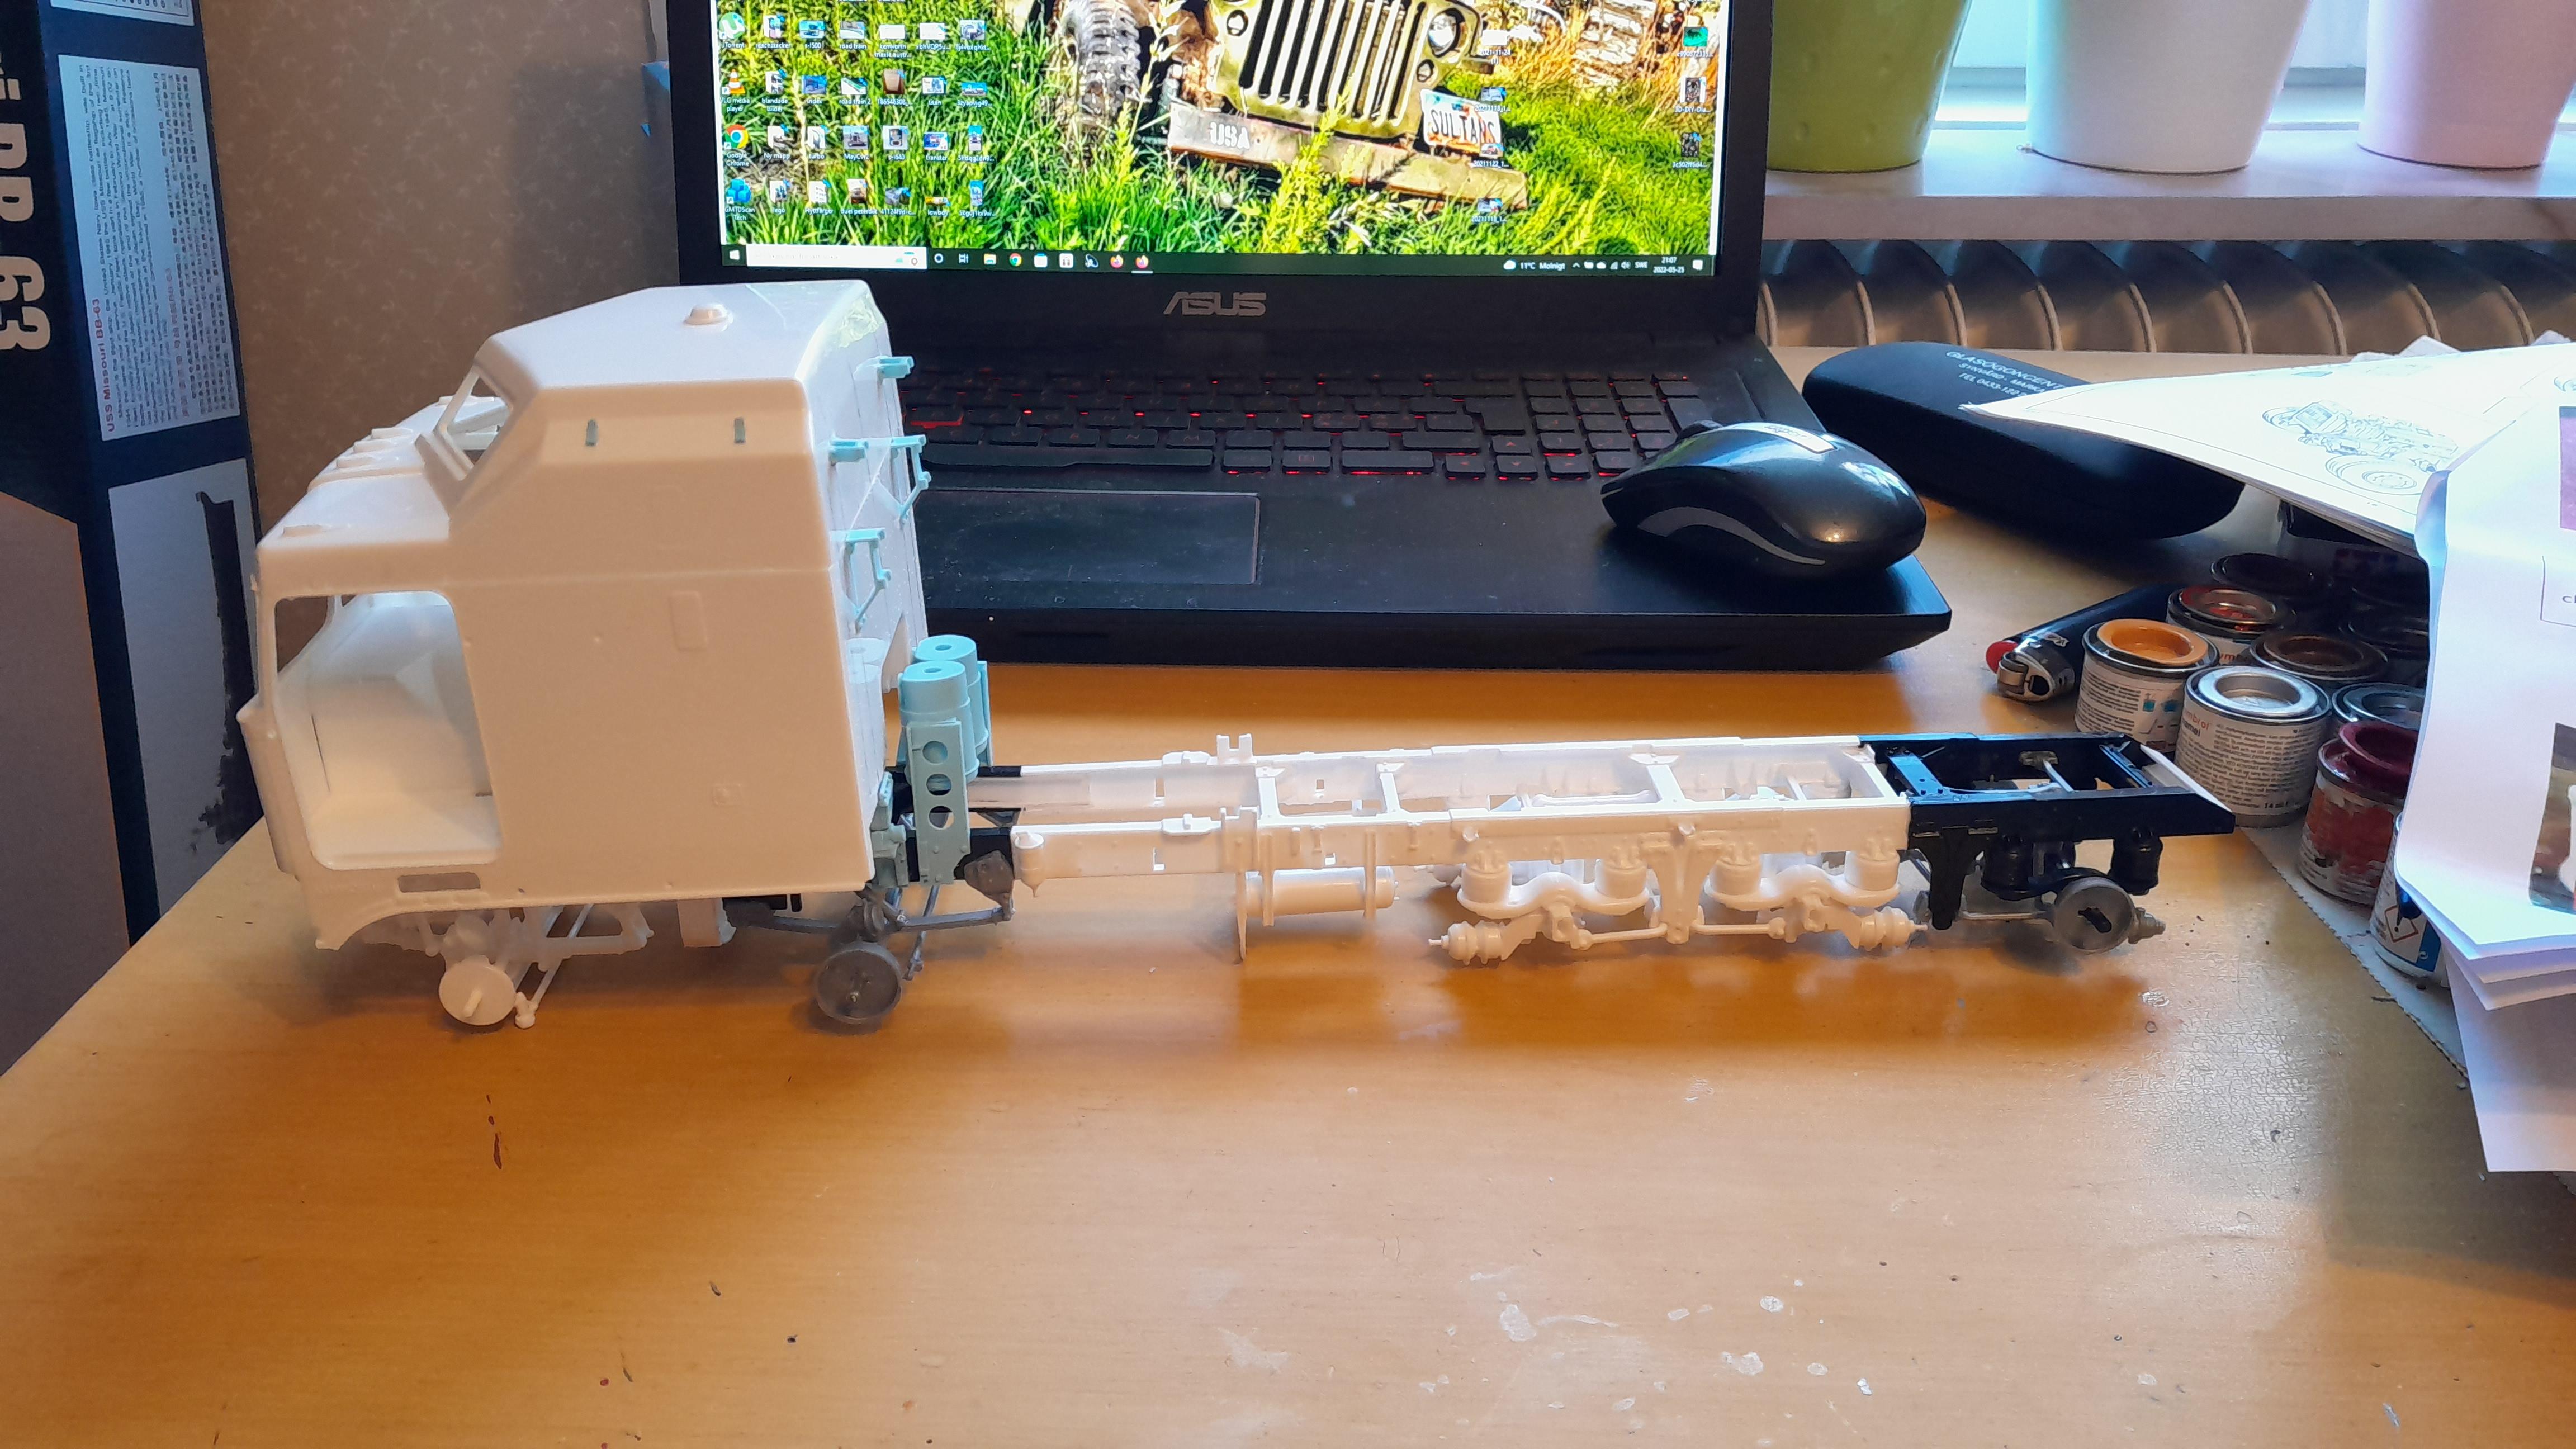
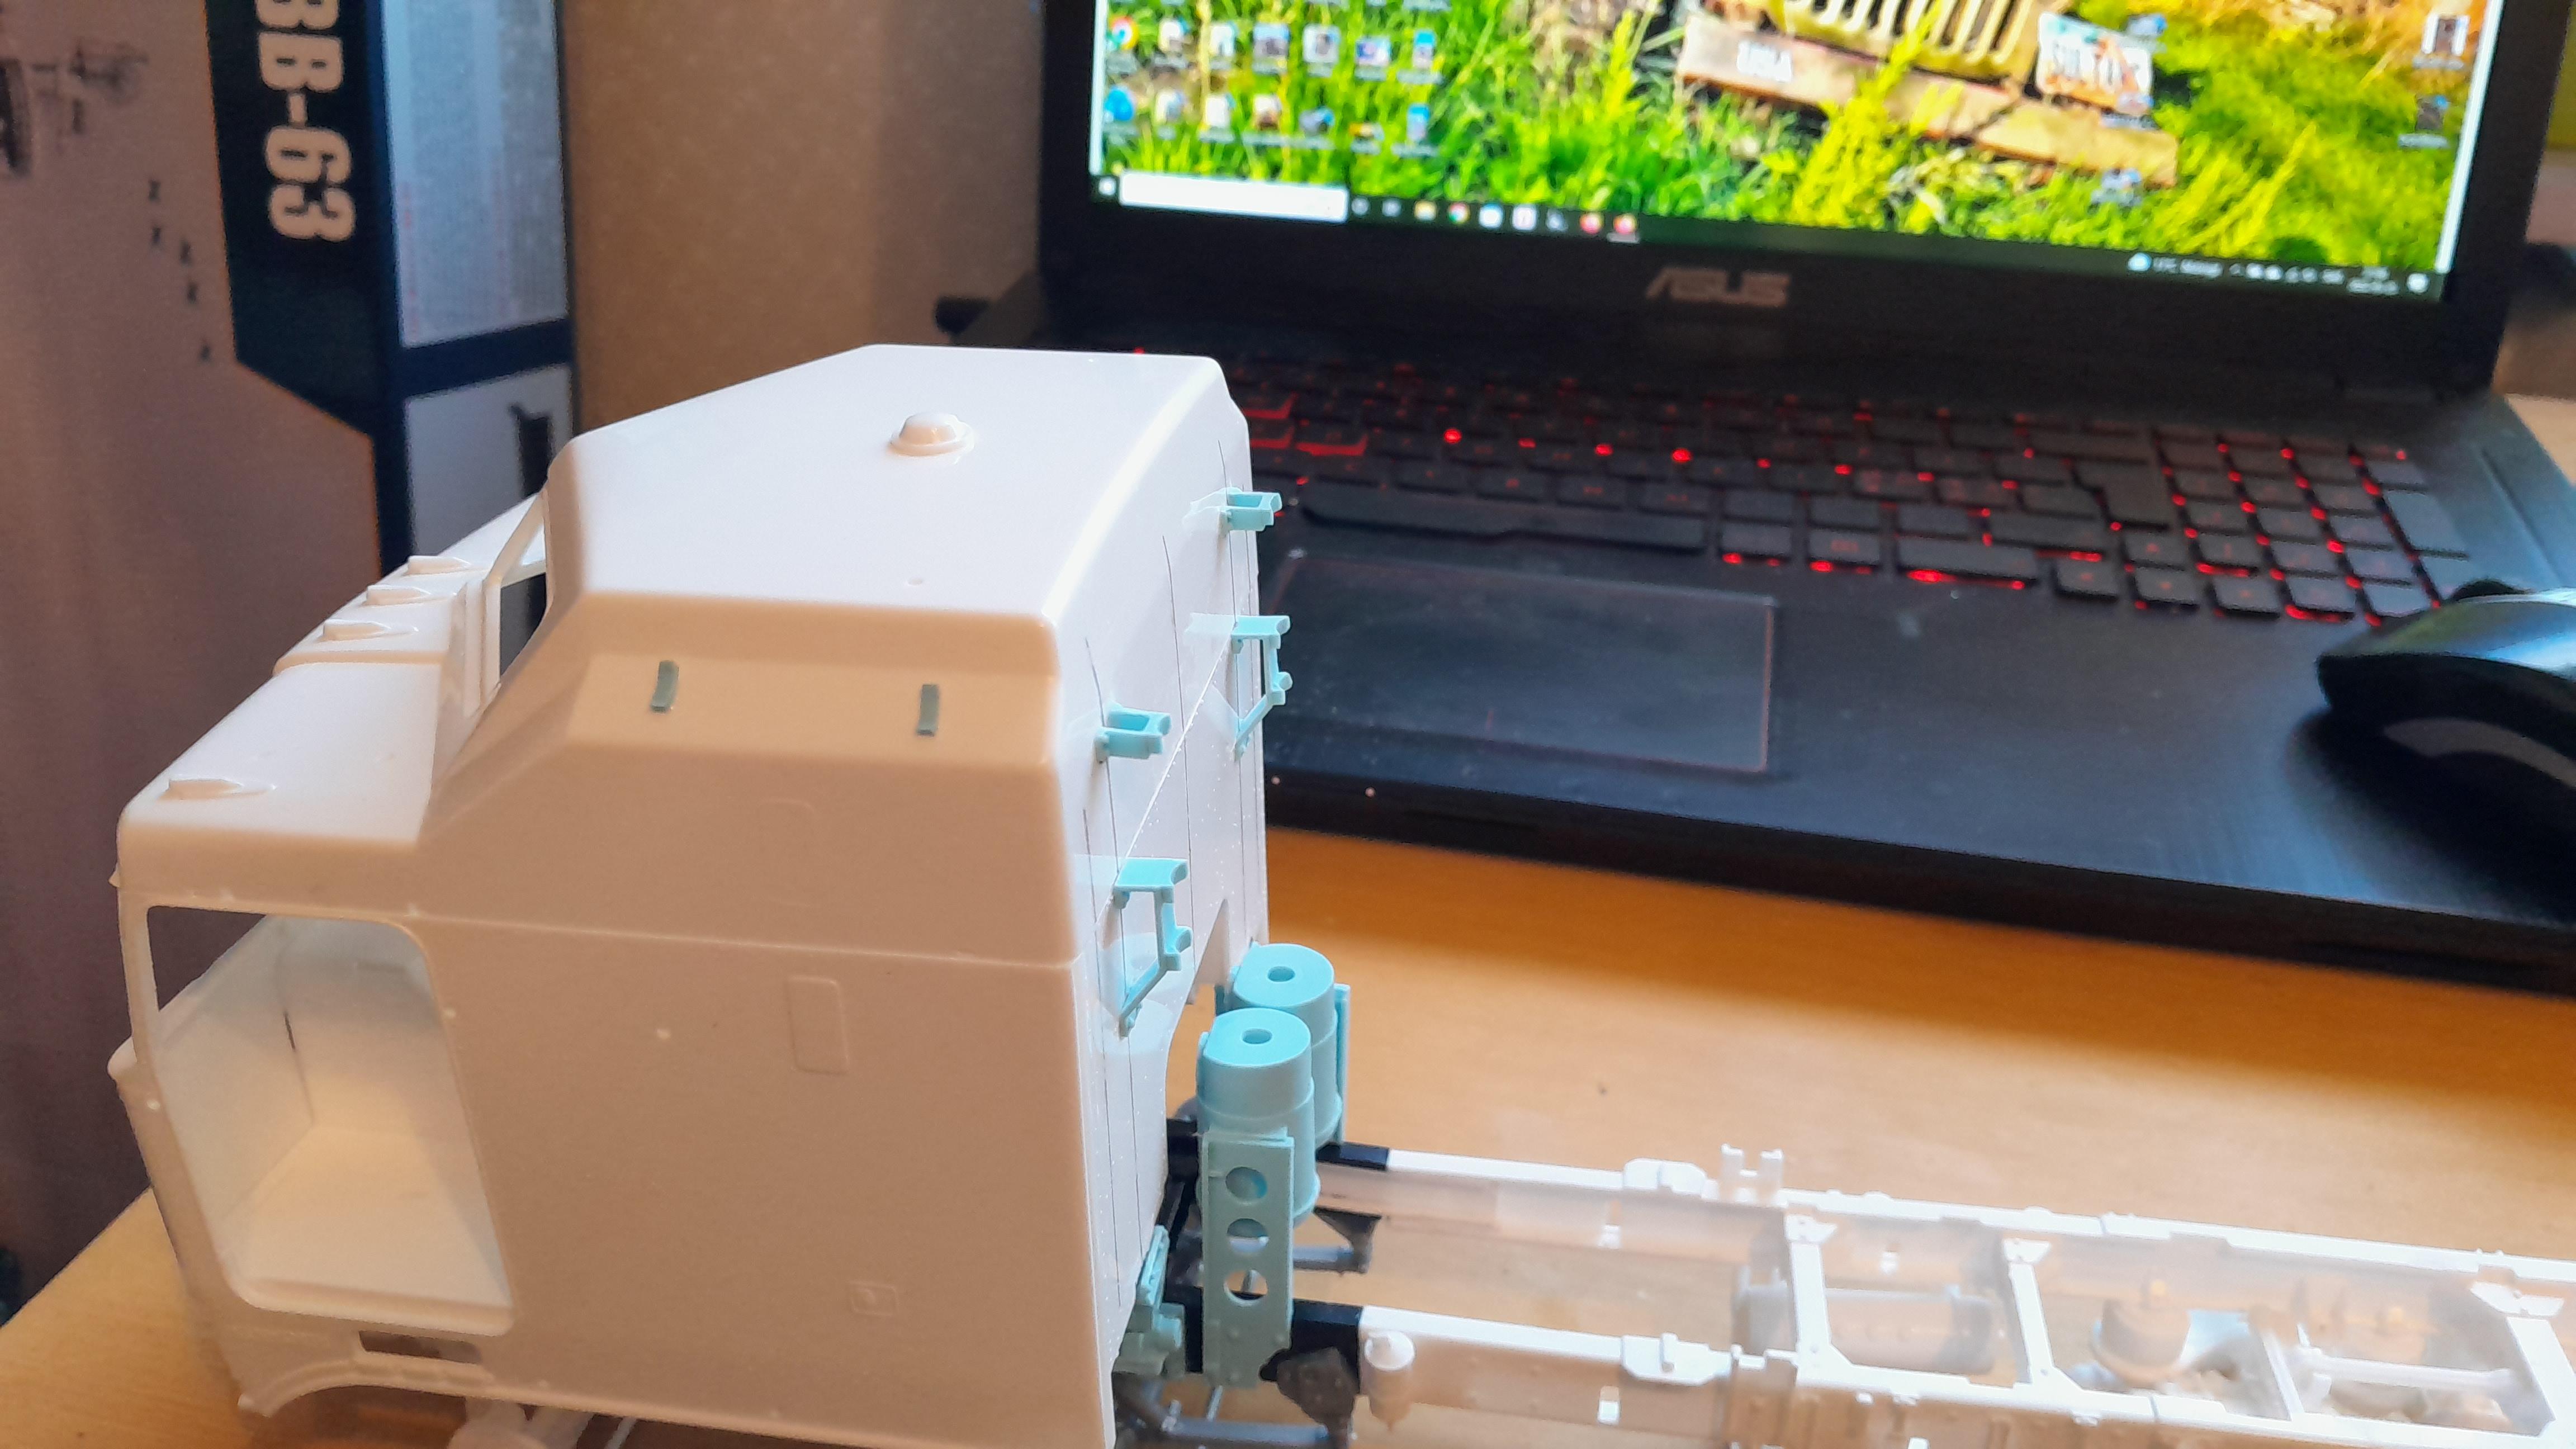
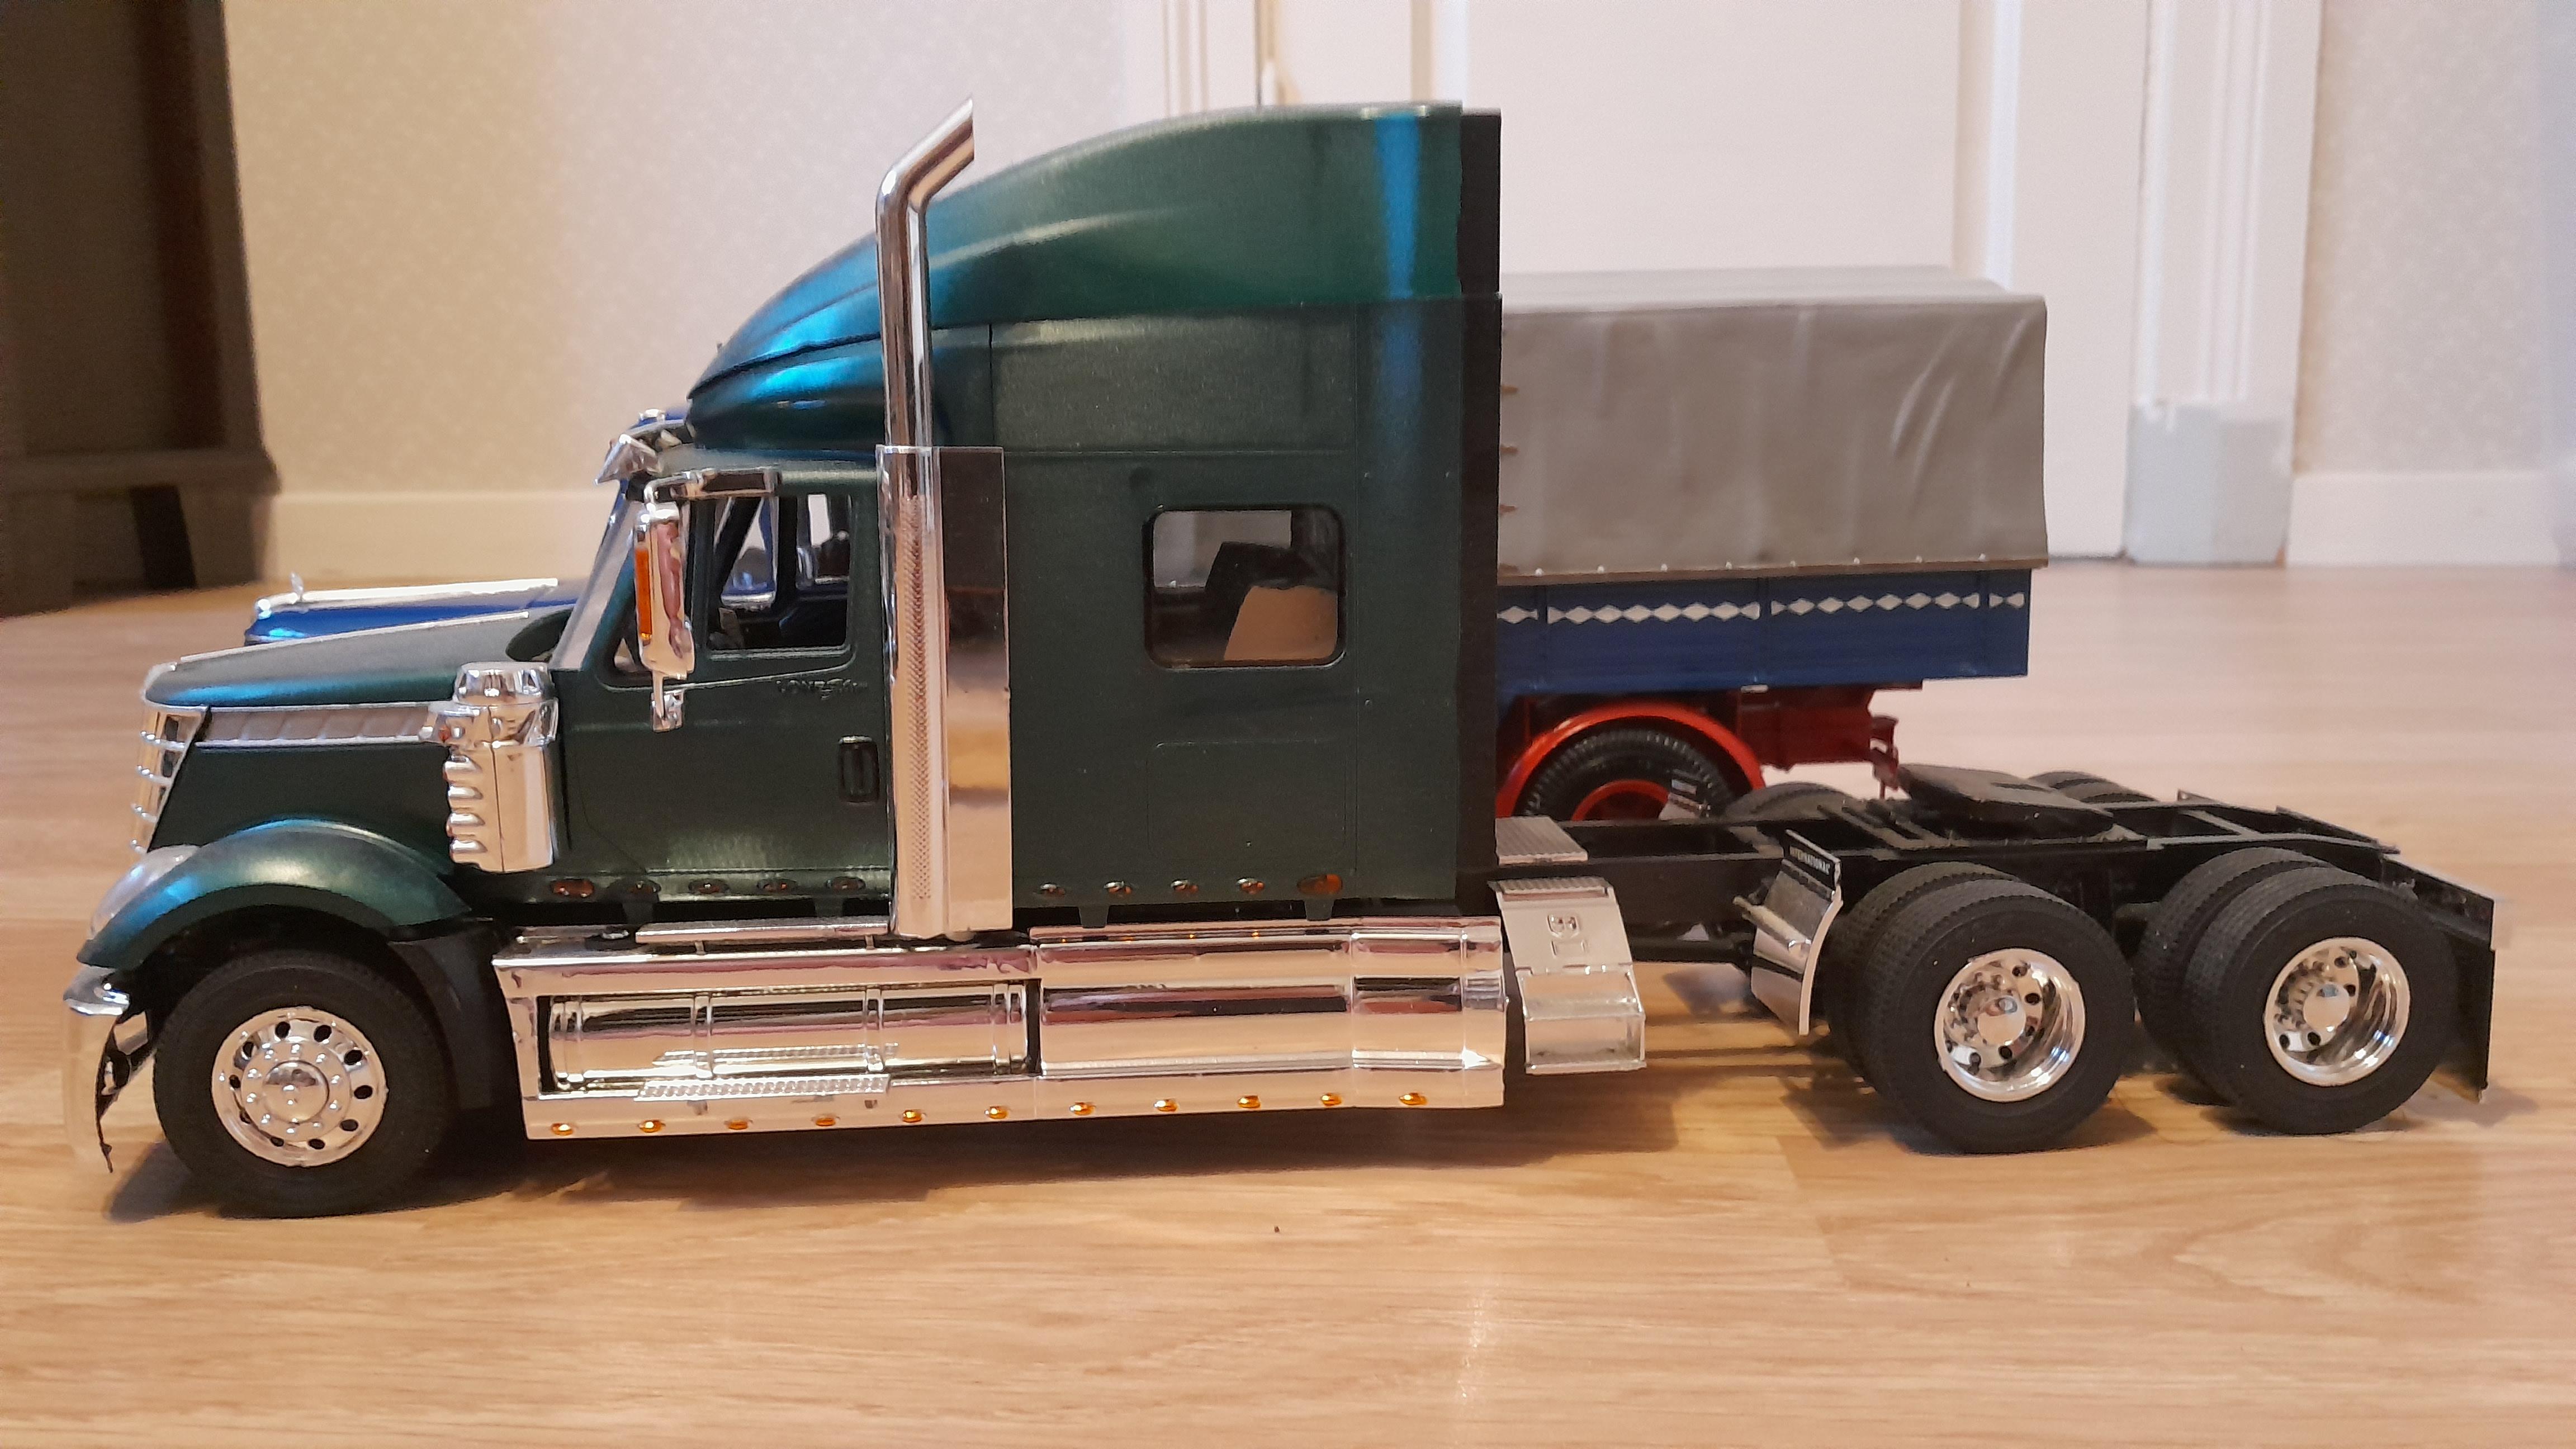
Thank you. Did as much as i can do to it now untill i get the parts i need from Auslowe so from here on the build will be at a stand still. Only parts i still need to use from the kit is the indicators on each side of the cab. They should have been put on a earlier but i noticed that i had forgotten to paint them. The wheels are not glued on to the axles yet because i am going to use other tires and need to have the wheels of the truck when i fix that. I have been thinking of adding a trailer to it but i cant decide between a lowboy or a flatbed. If i go with the lowboy i have both Revell's and AMT's lowboy kits, if i go with flatbed i have to make something myself that looks like Revell's 6axle trailers they had a long time ago. Here is what the truck looks like now.
-
Kenworth K100 twinsteer triaxle
PierreR89 replied to PierreR89's topic in WIP: Model Trucks: Big Rigs and Heavy Equipment
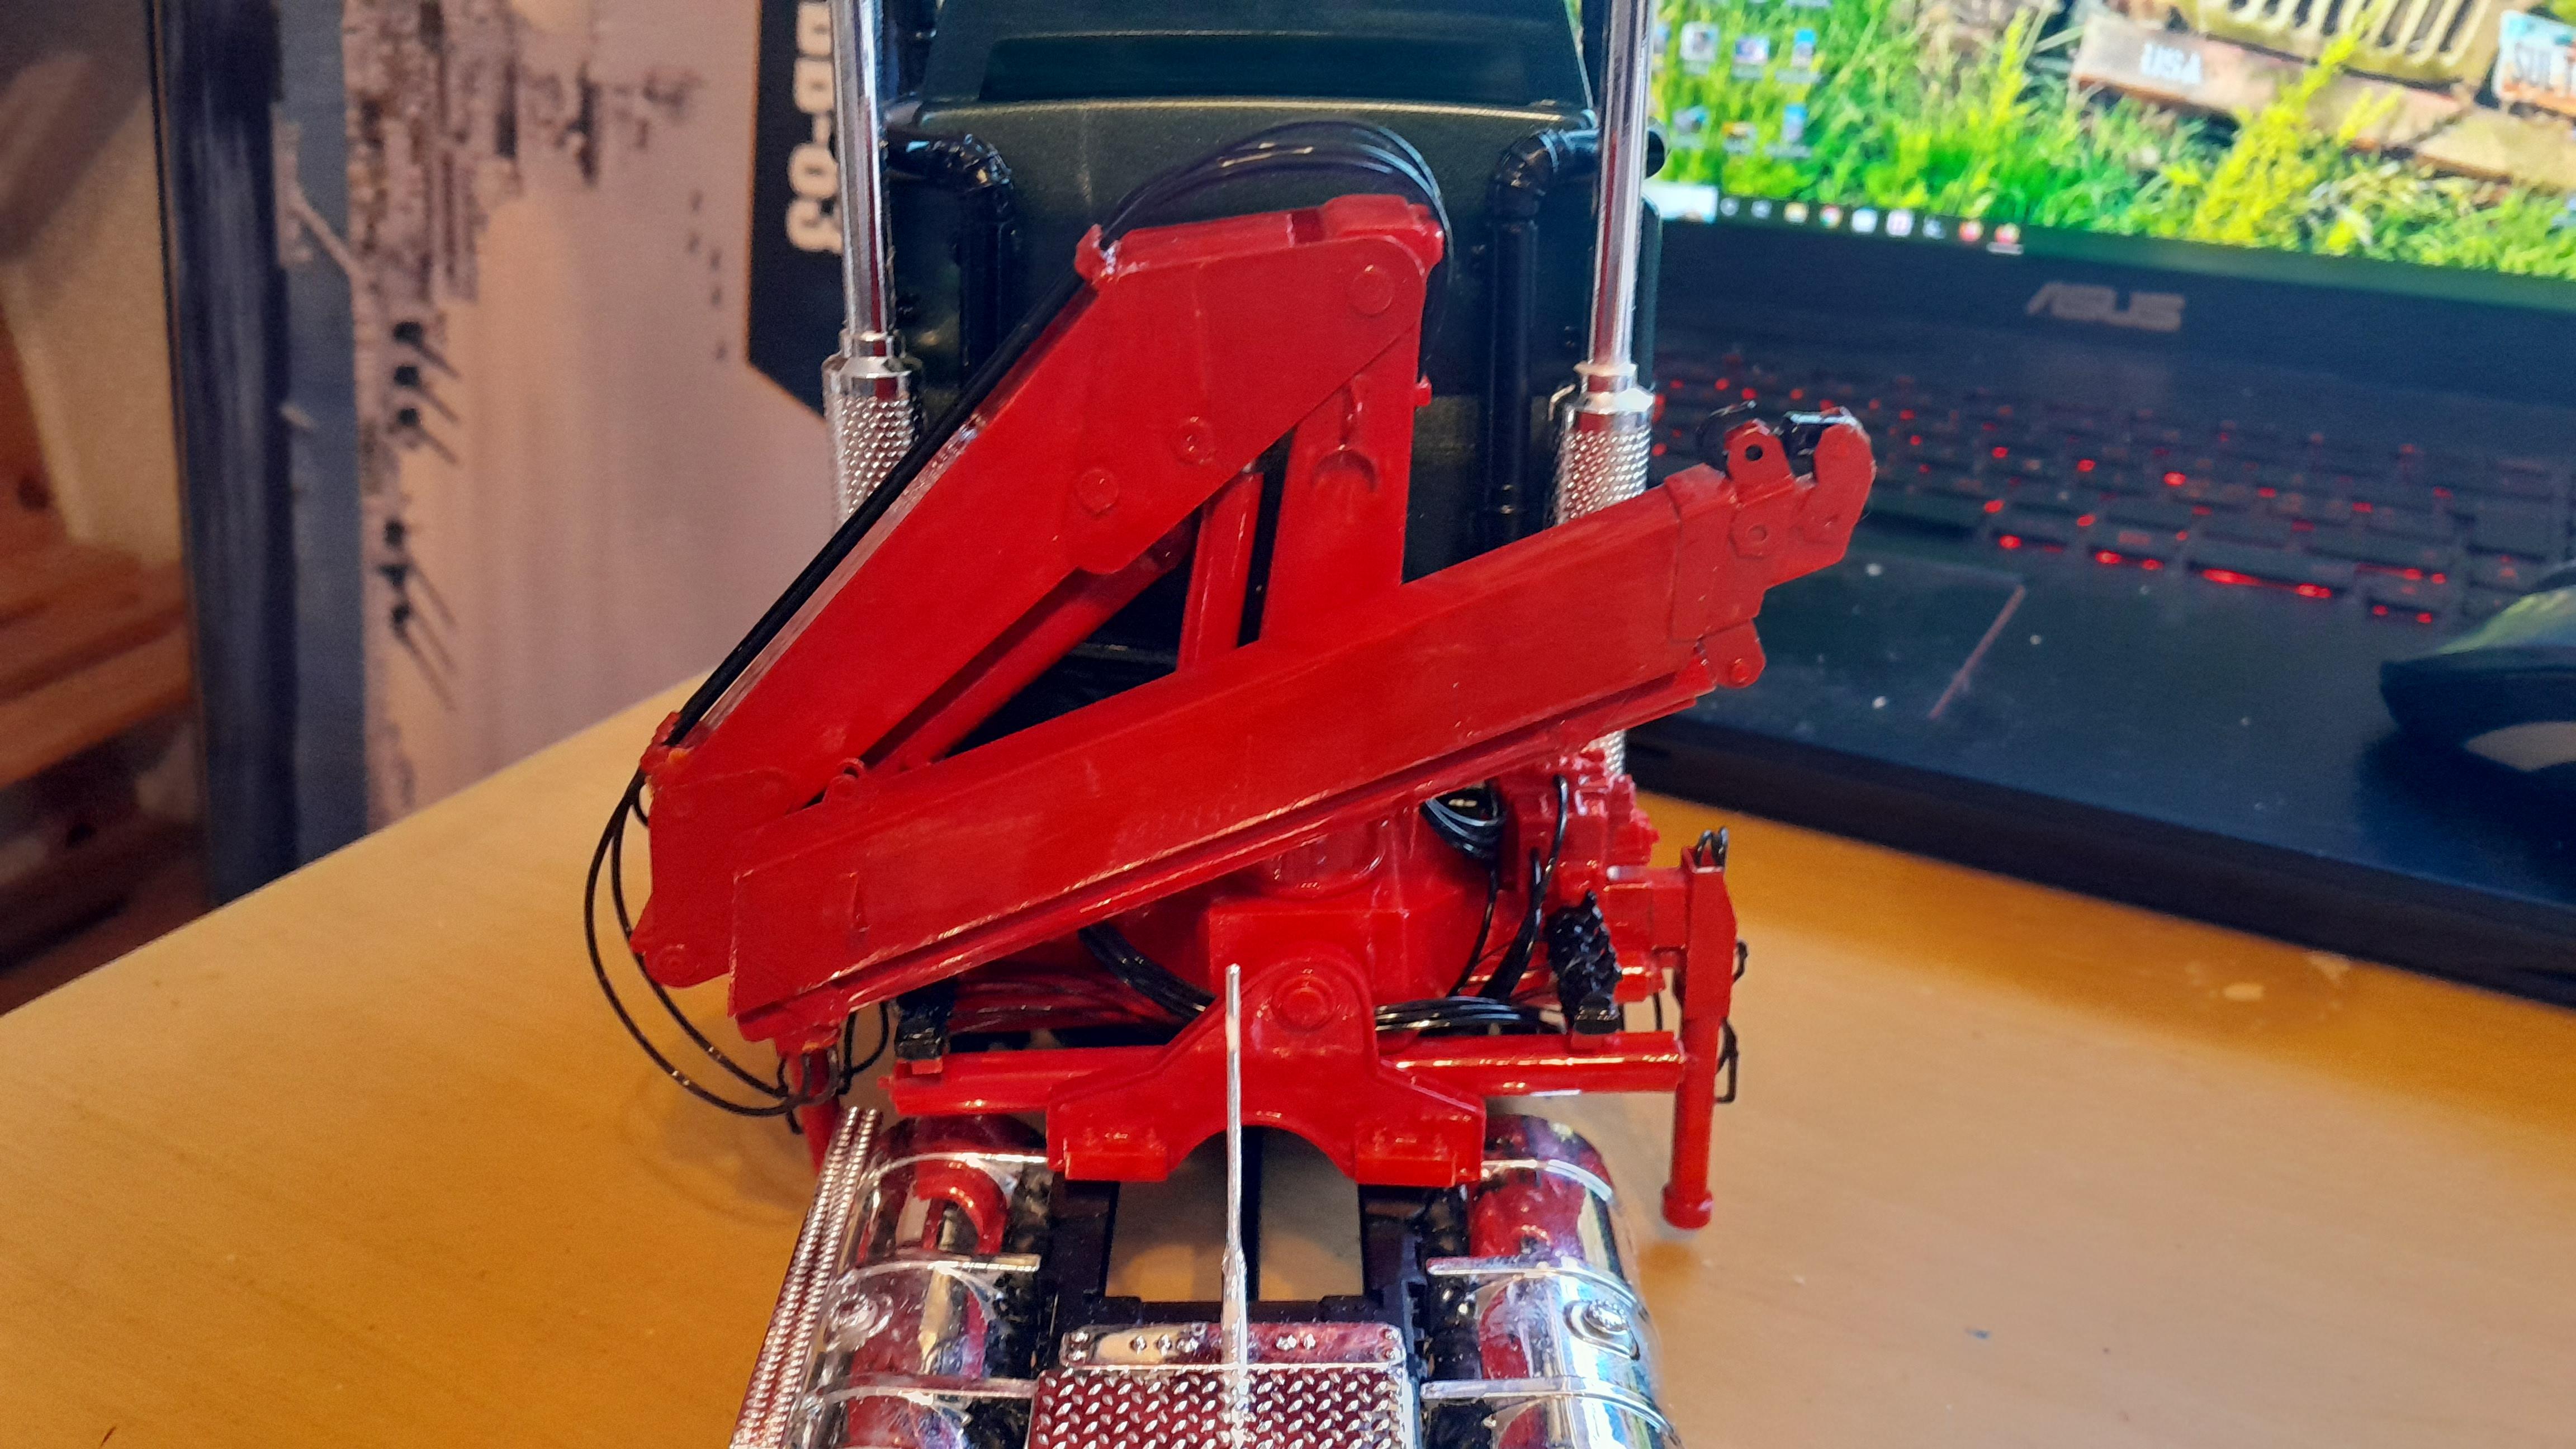
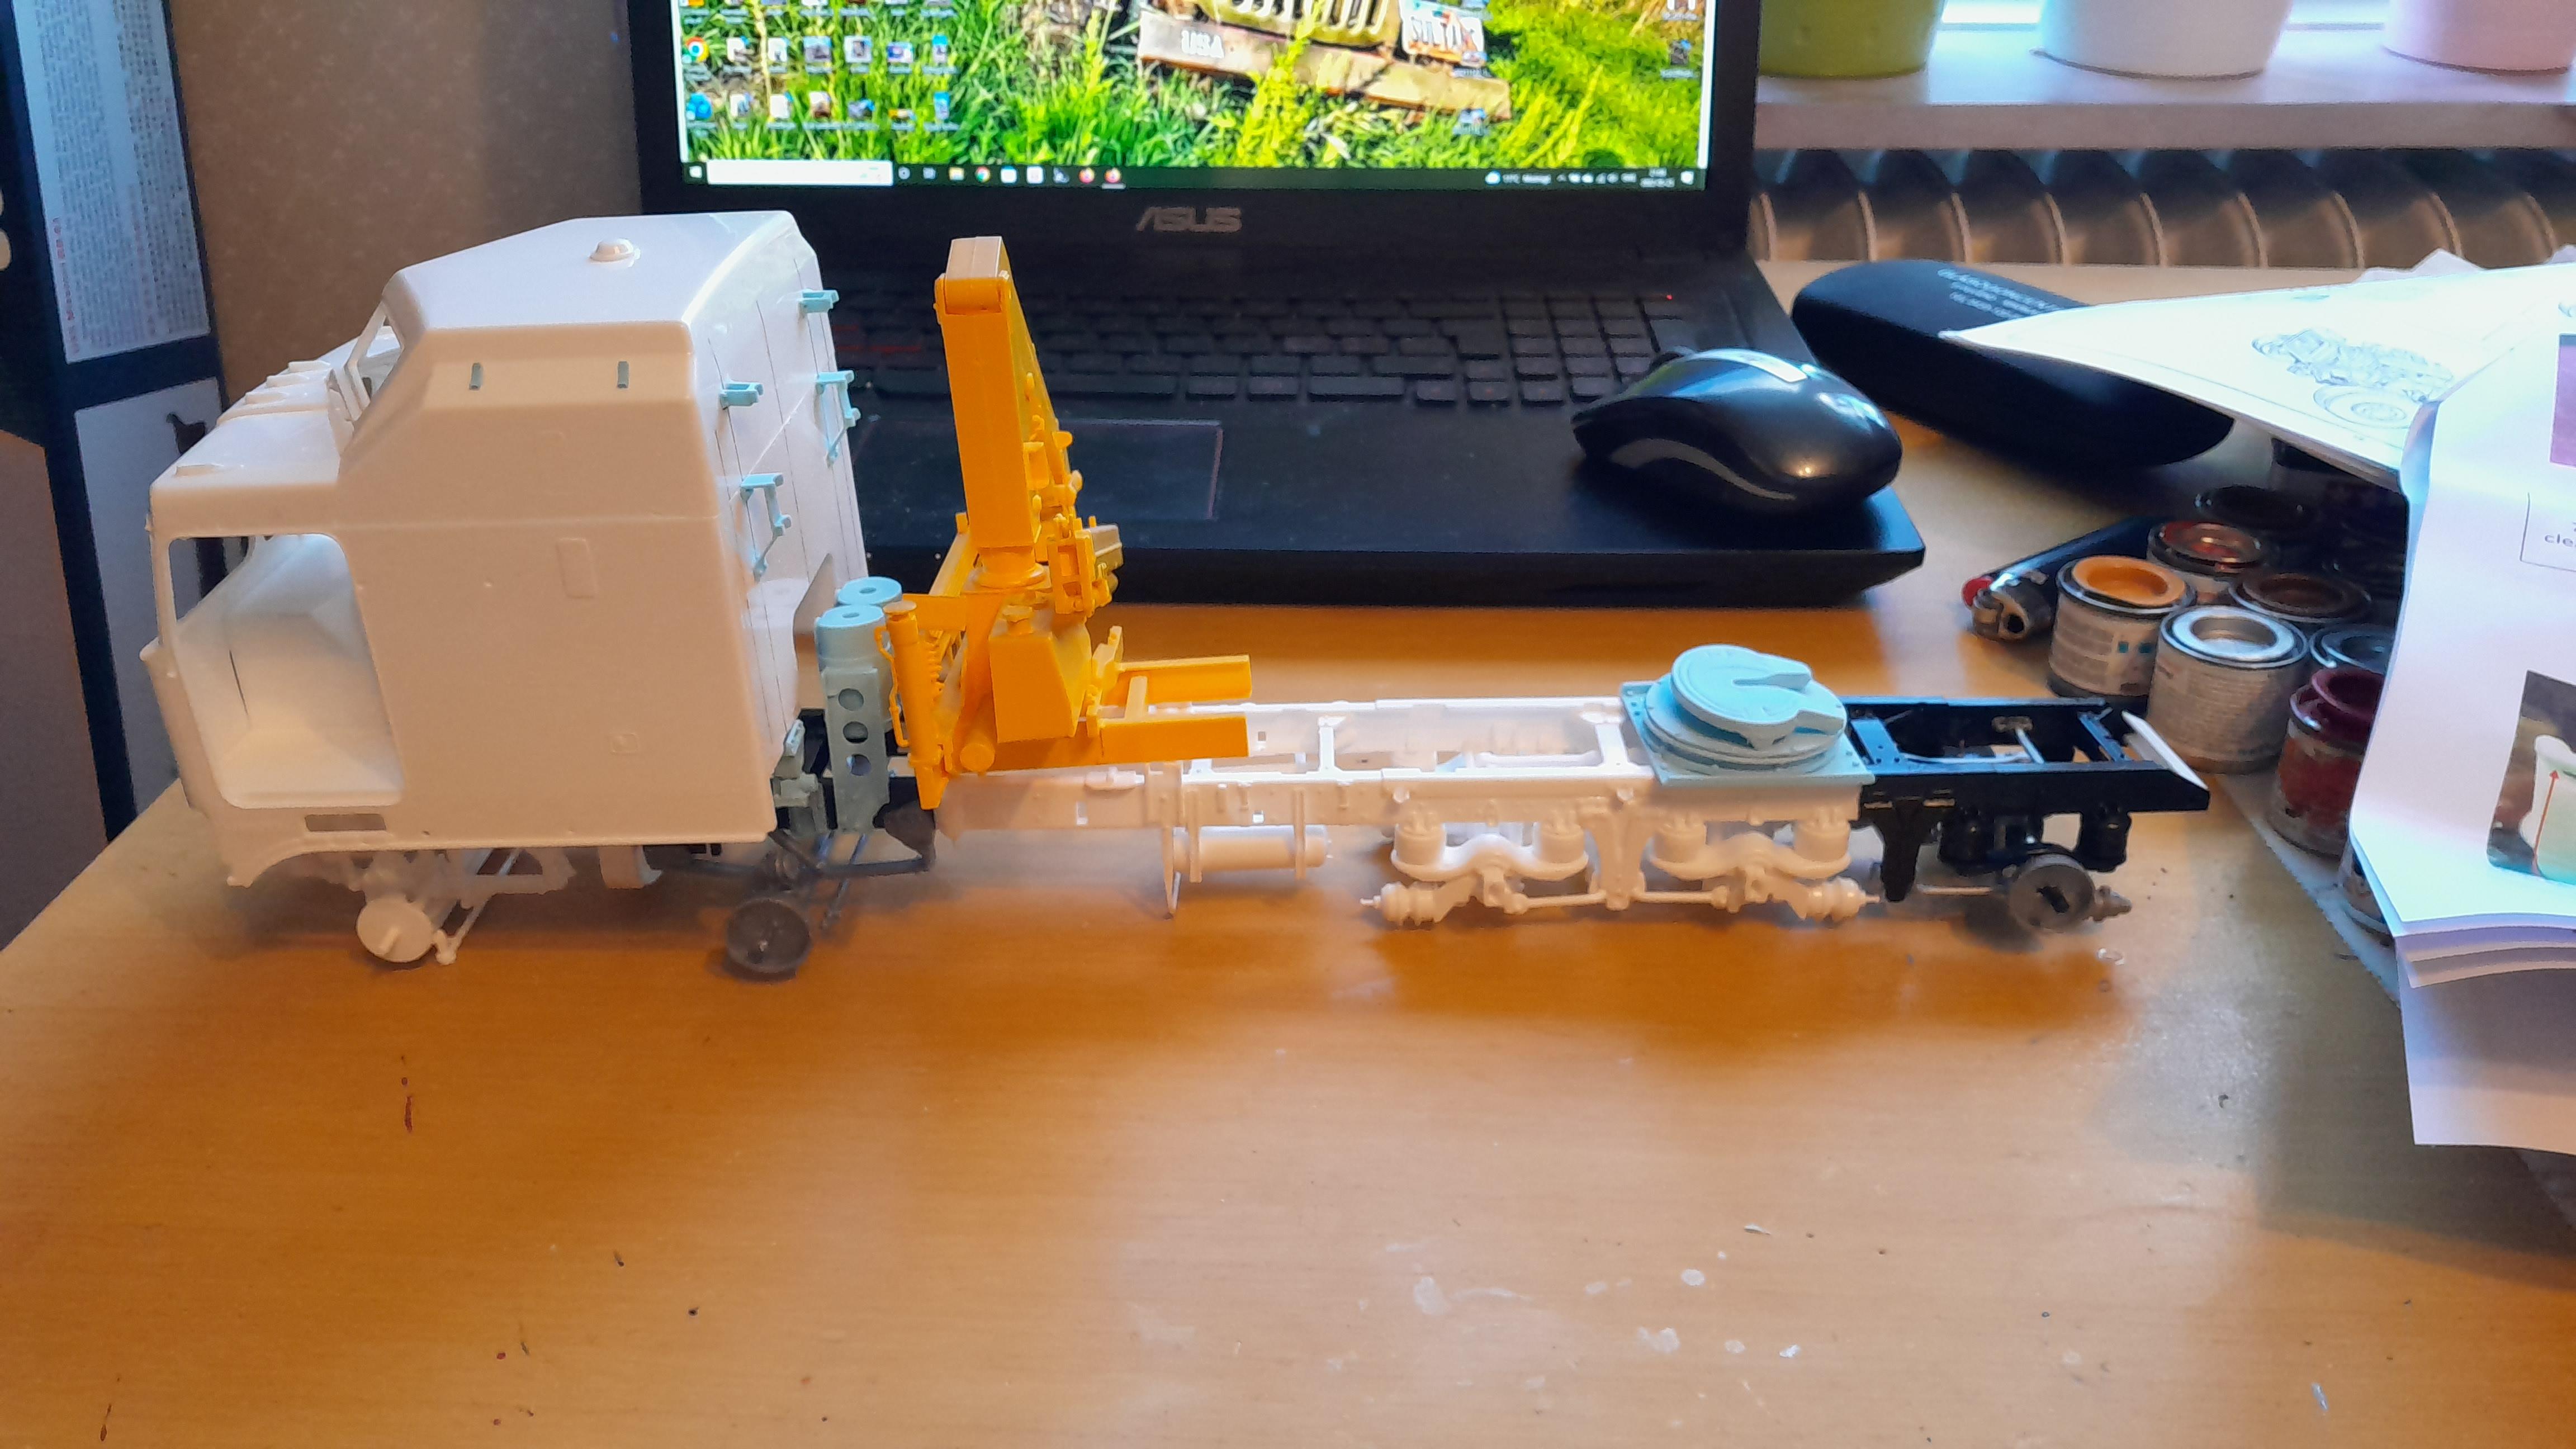
Thanks. Did some work on the crane tonight and think i can call it done. Painted a few spots i missed and added all of the hydrualic lines to it.
-
Kenworth K100 twinsteer triaxle
PierreR89 replied to PierreR89's topic in WIP: Model Trucks: Big Rigs and Heavy Equipment
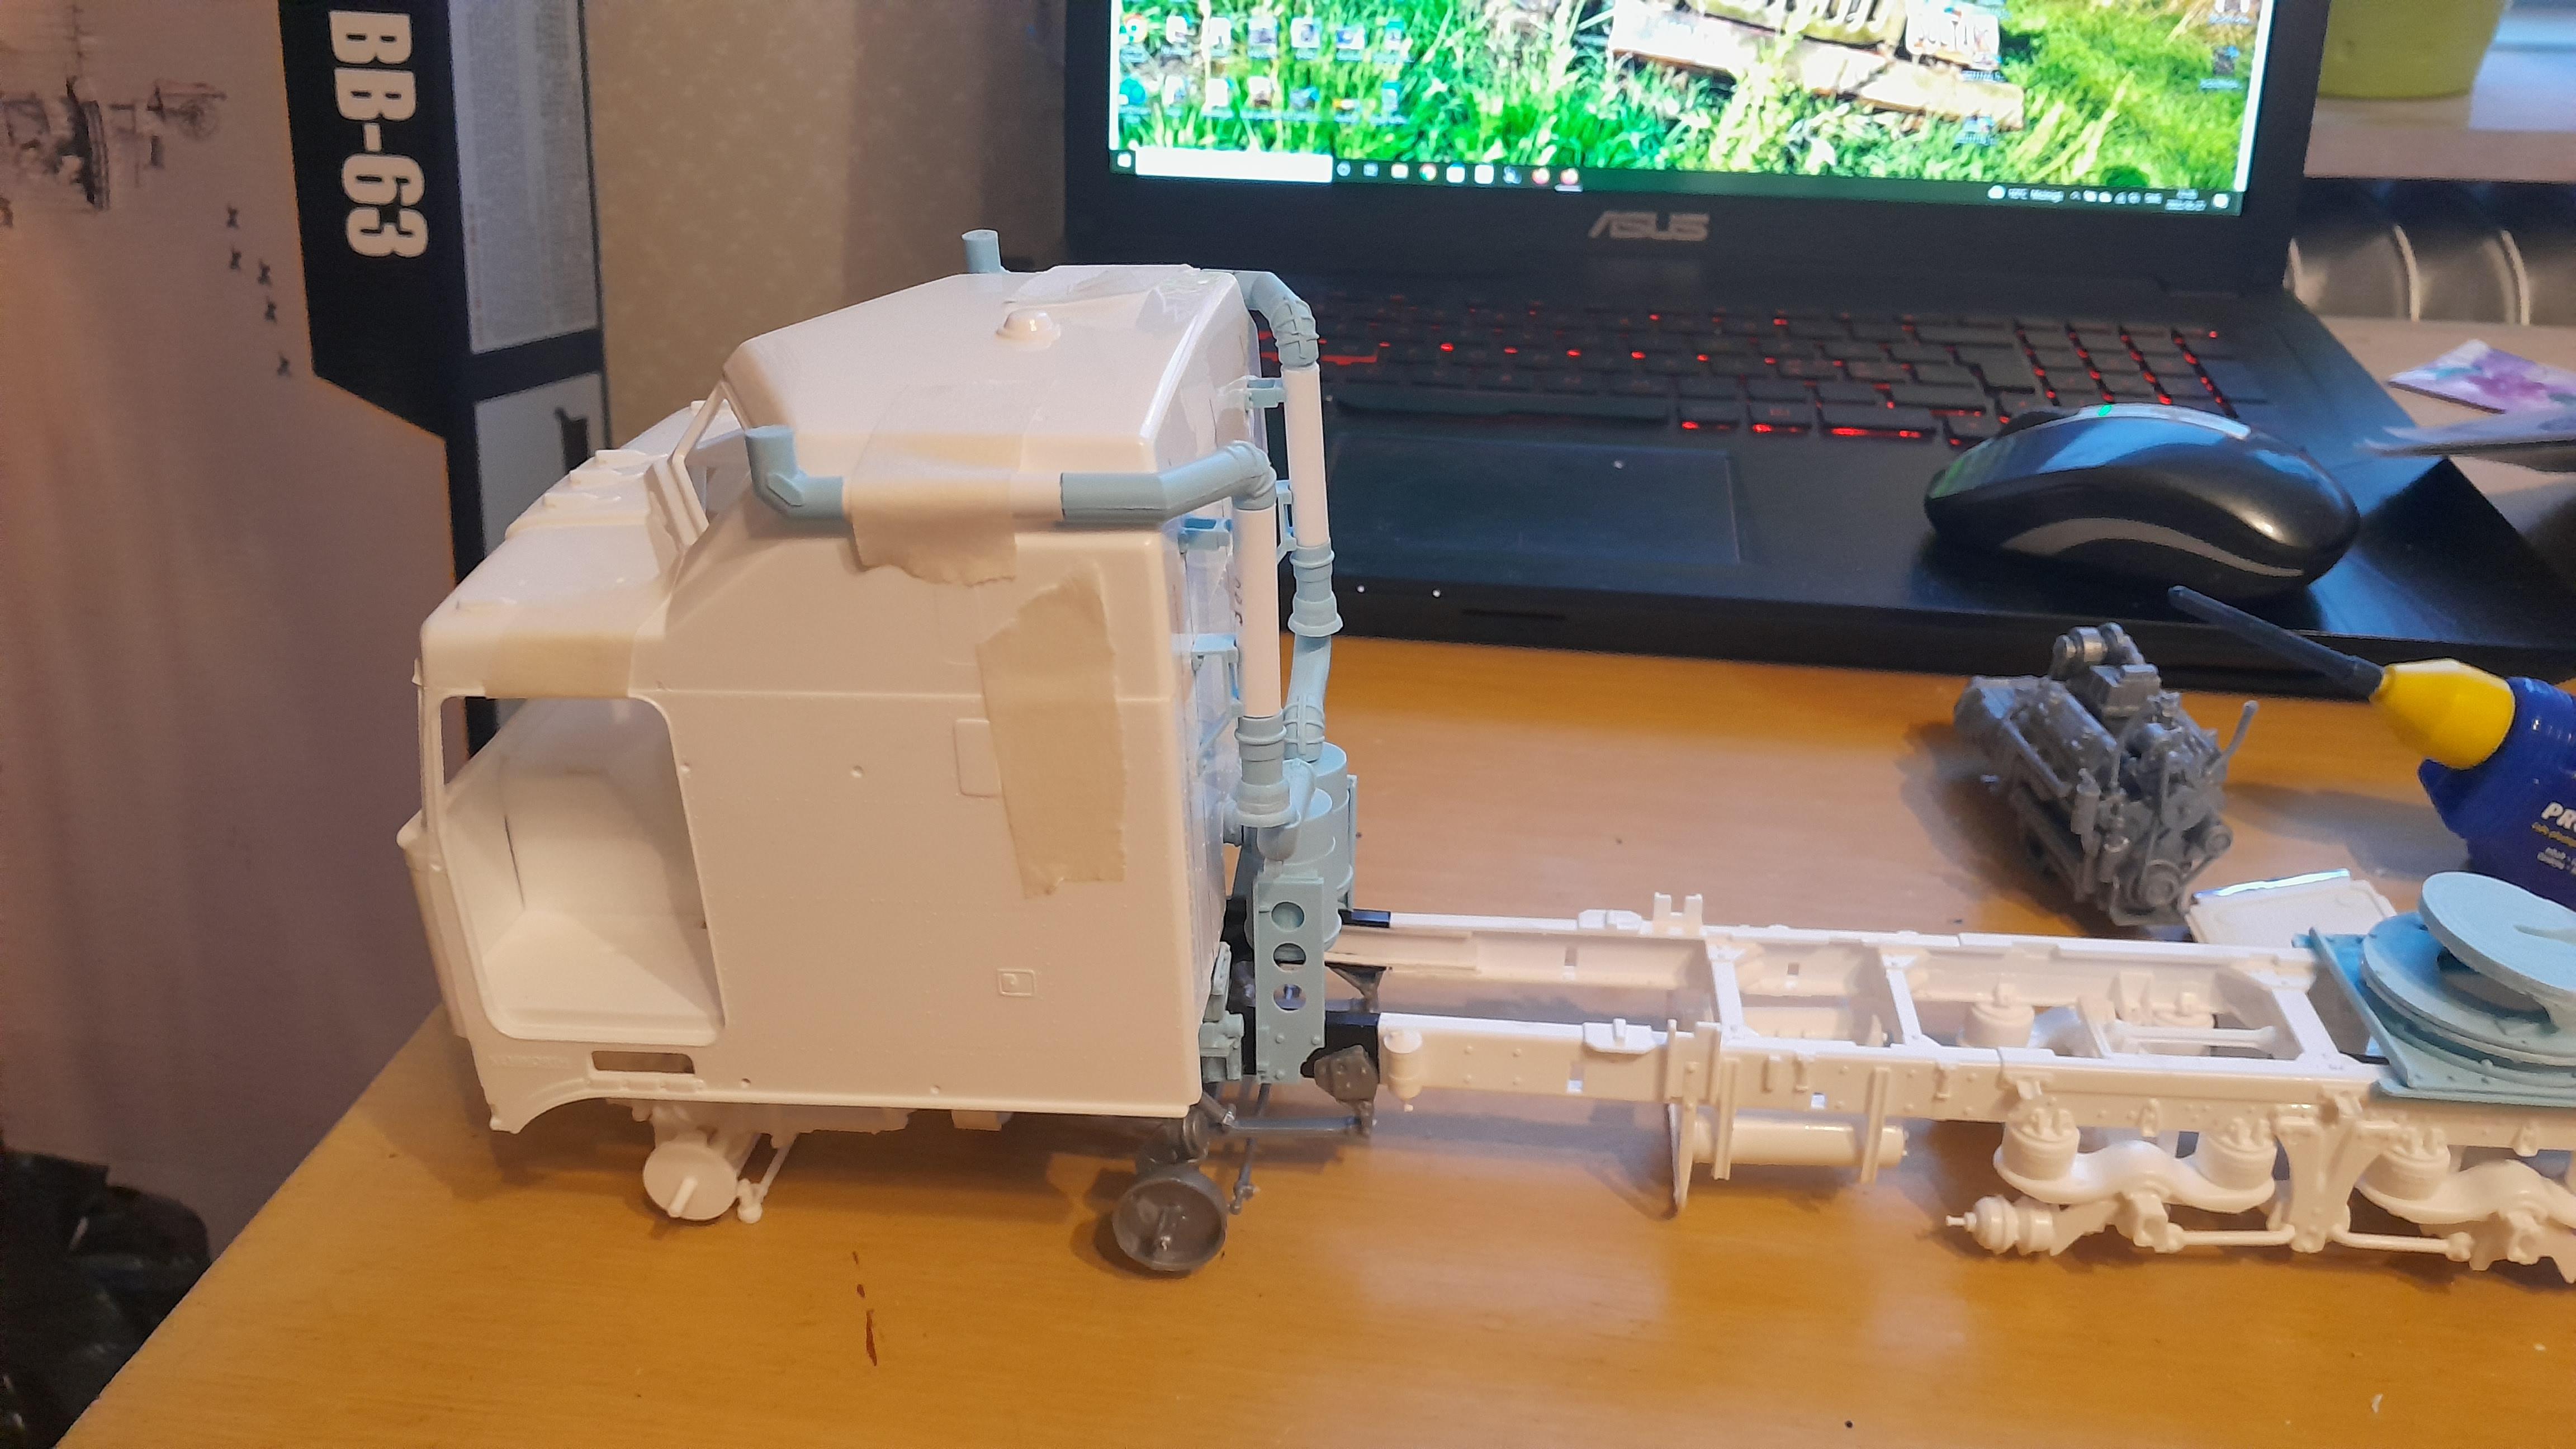
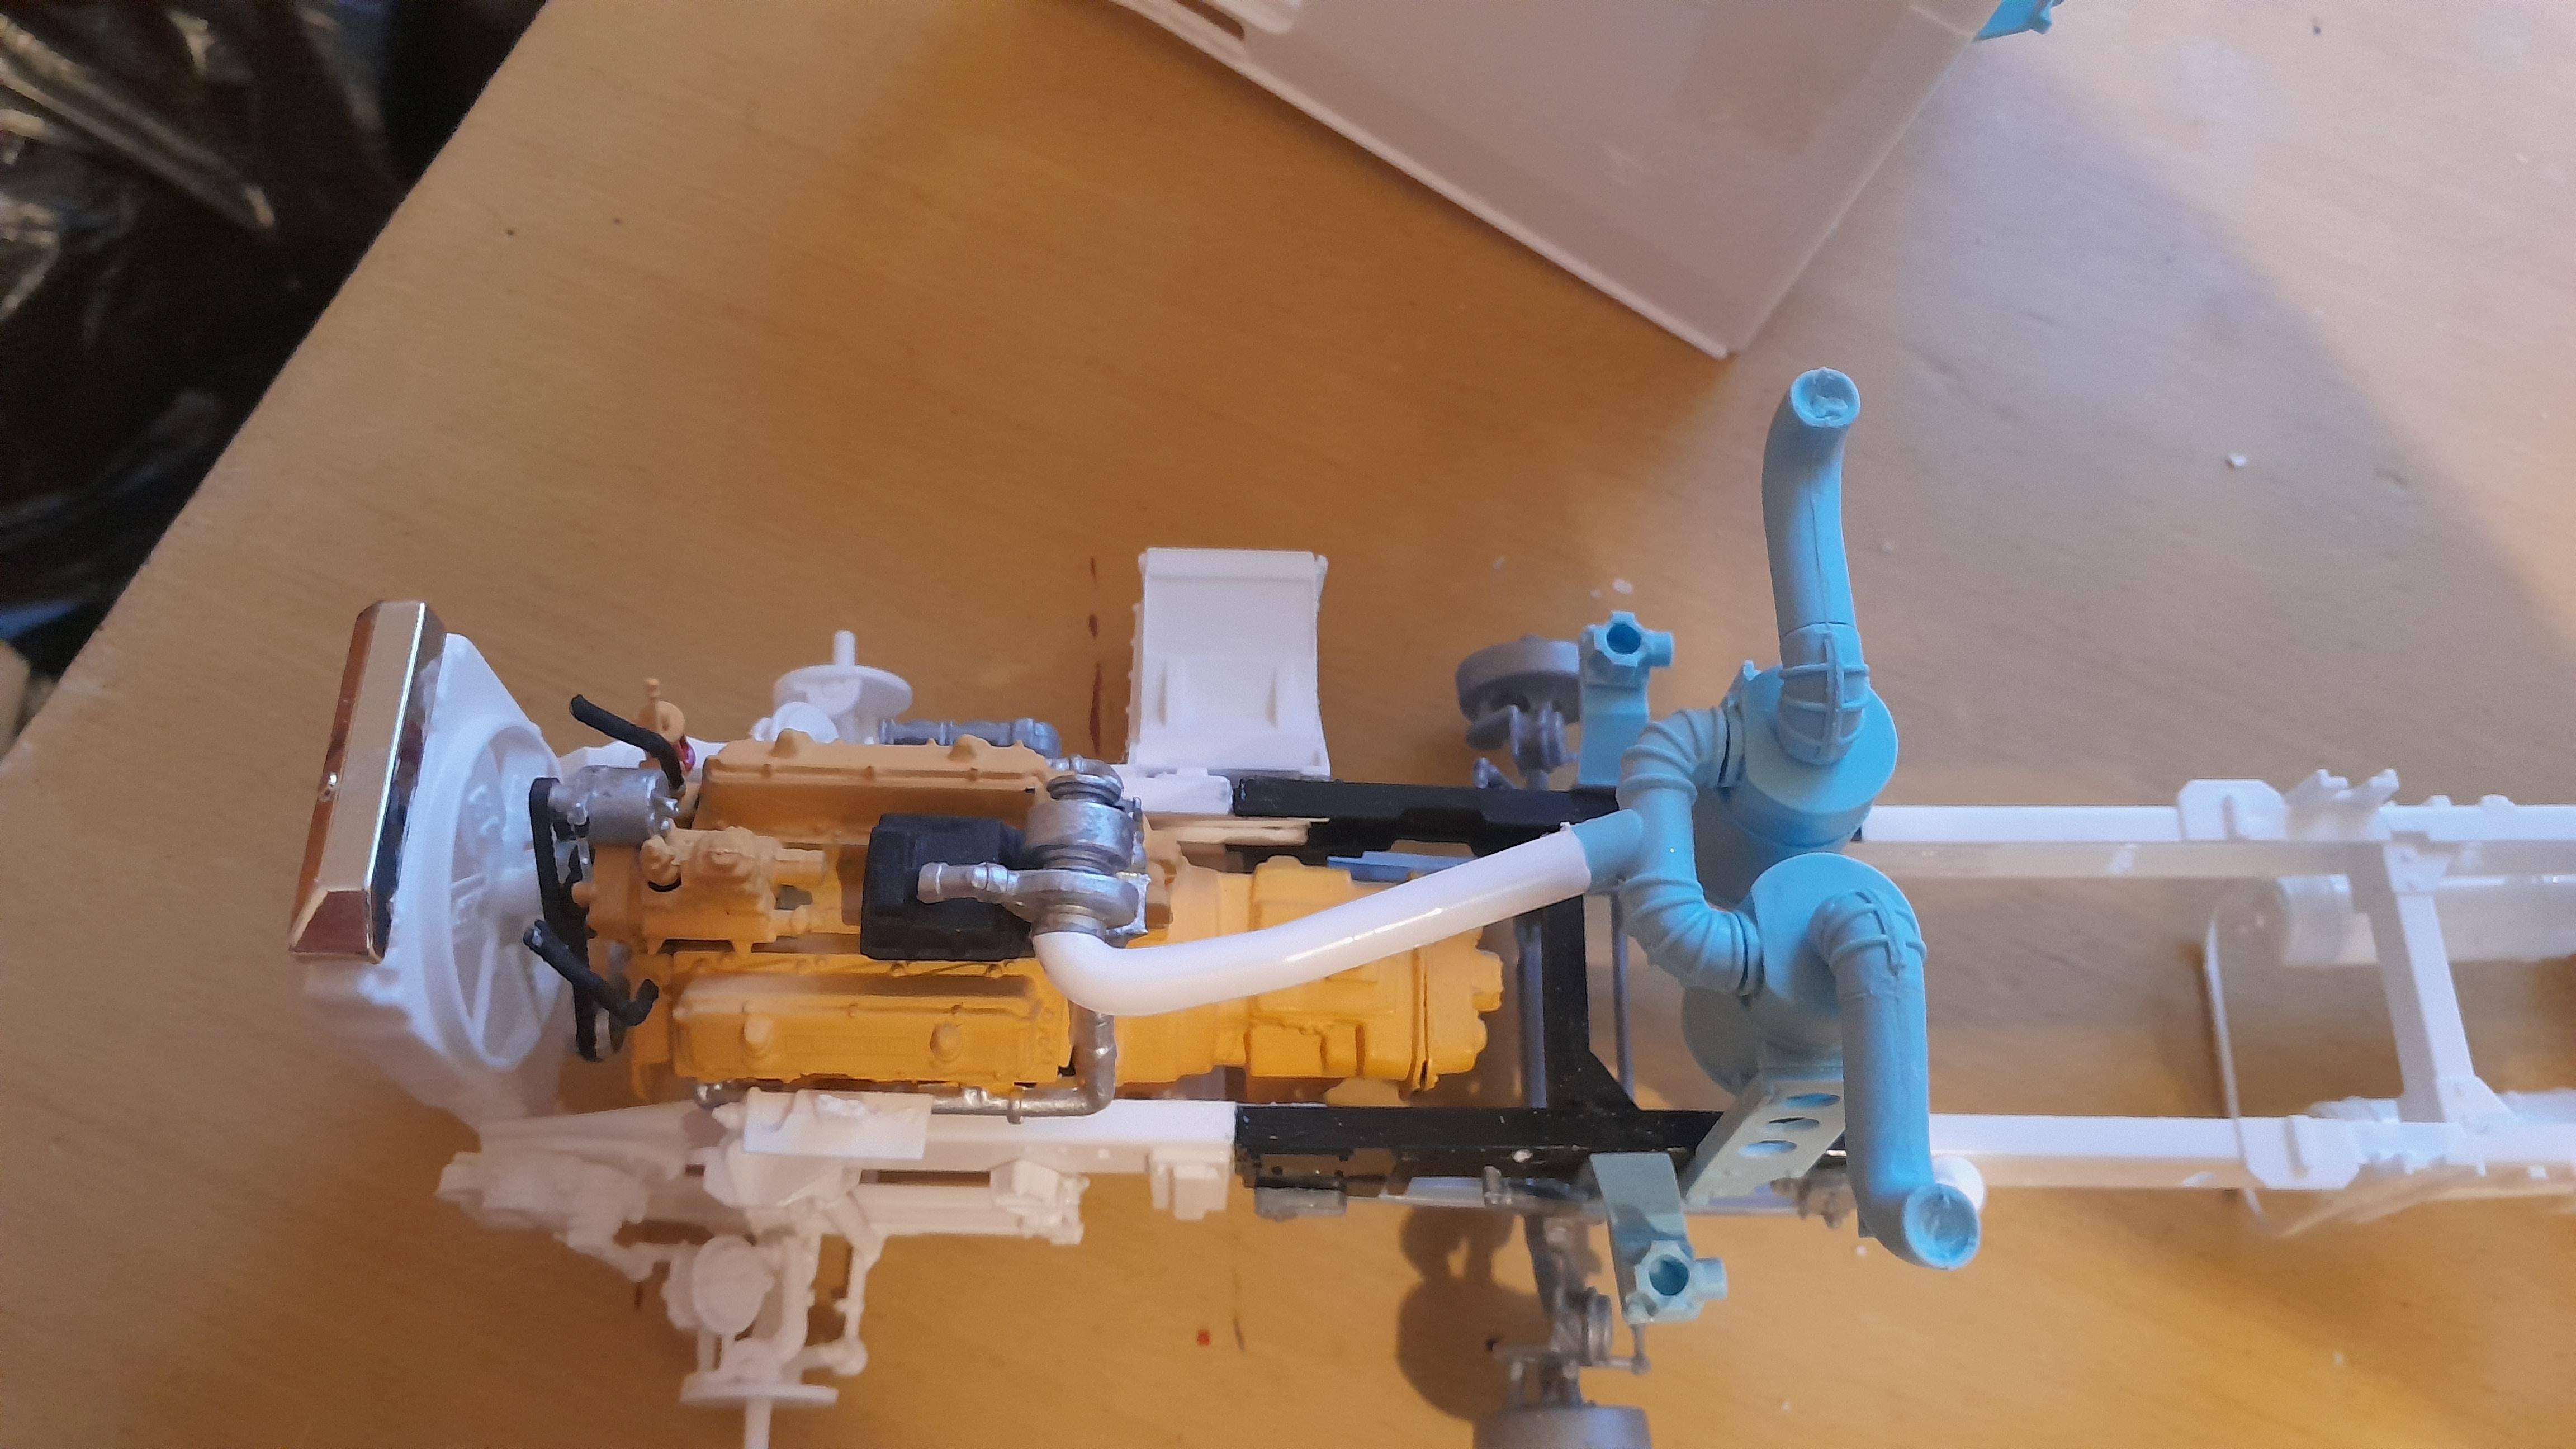
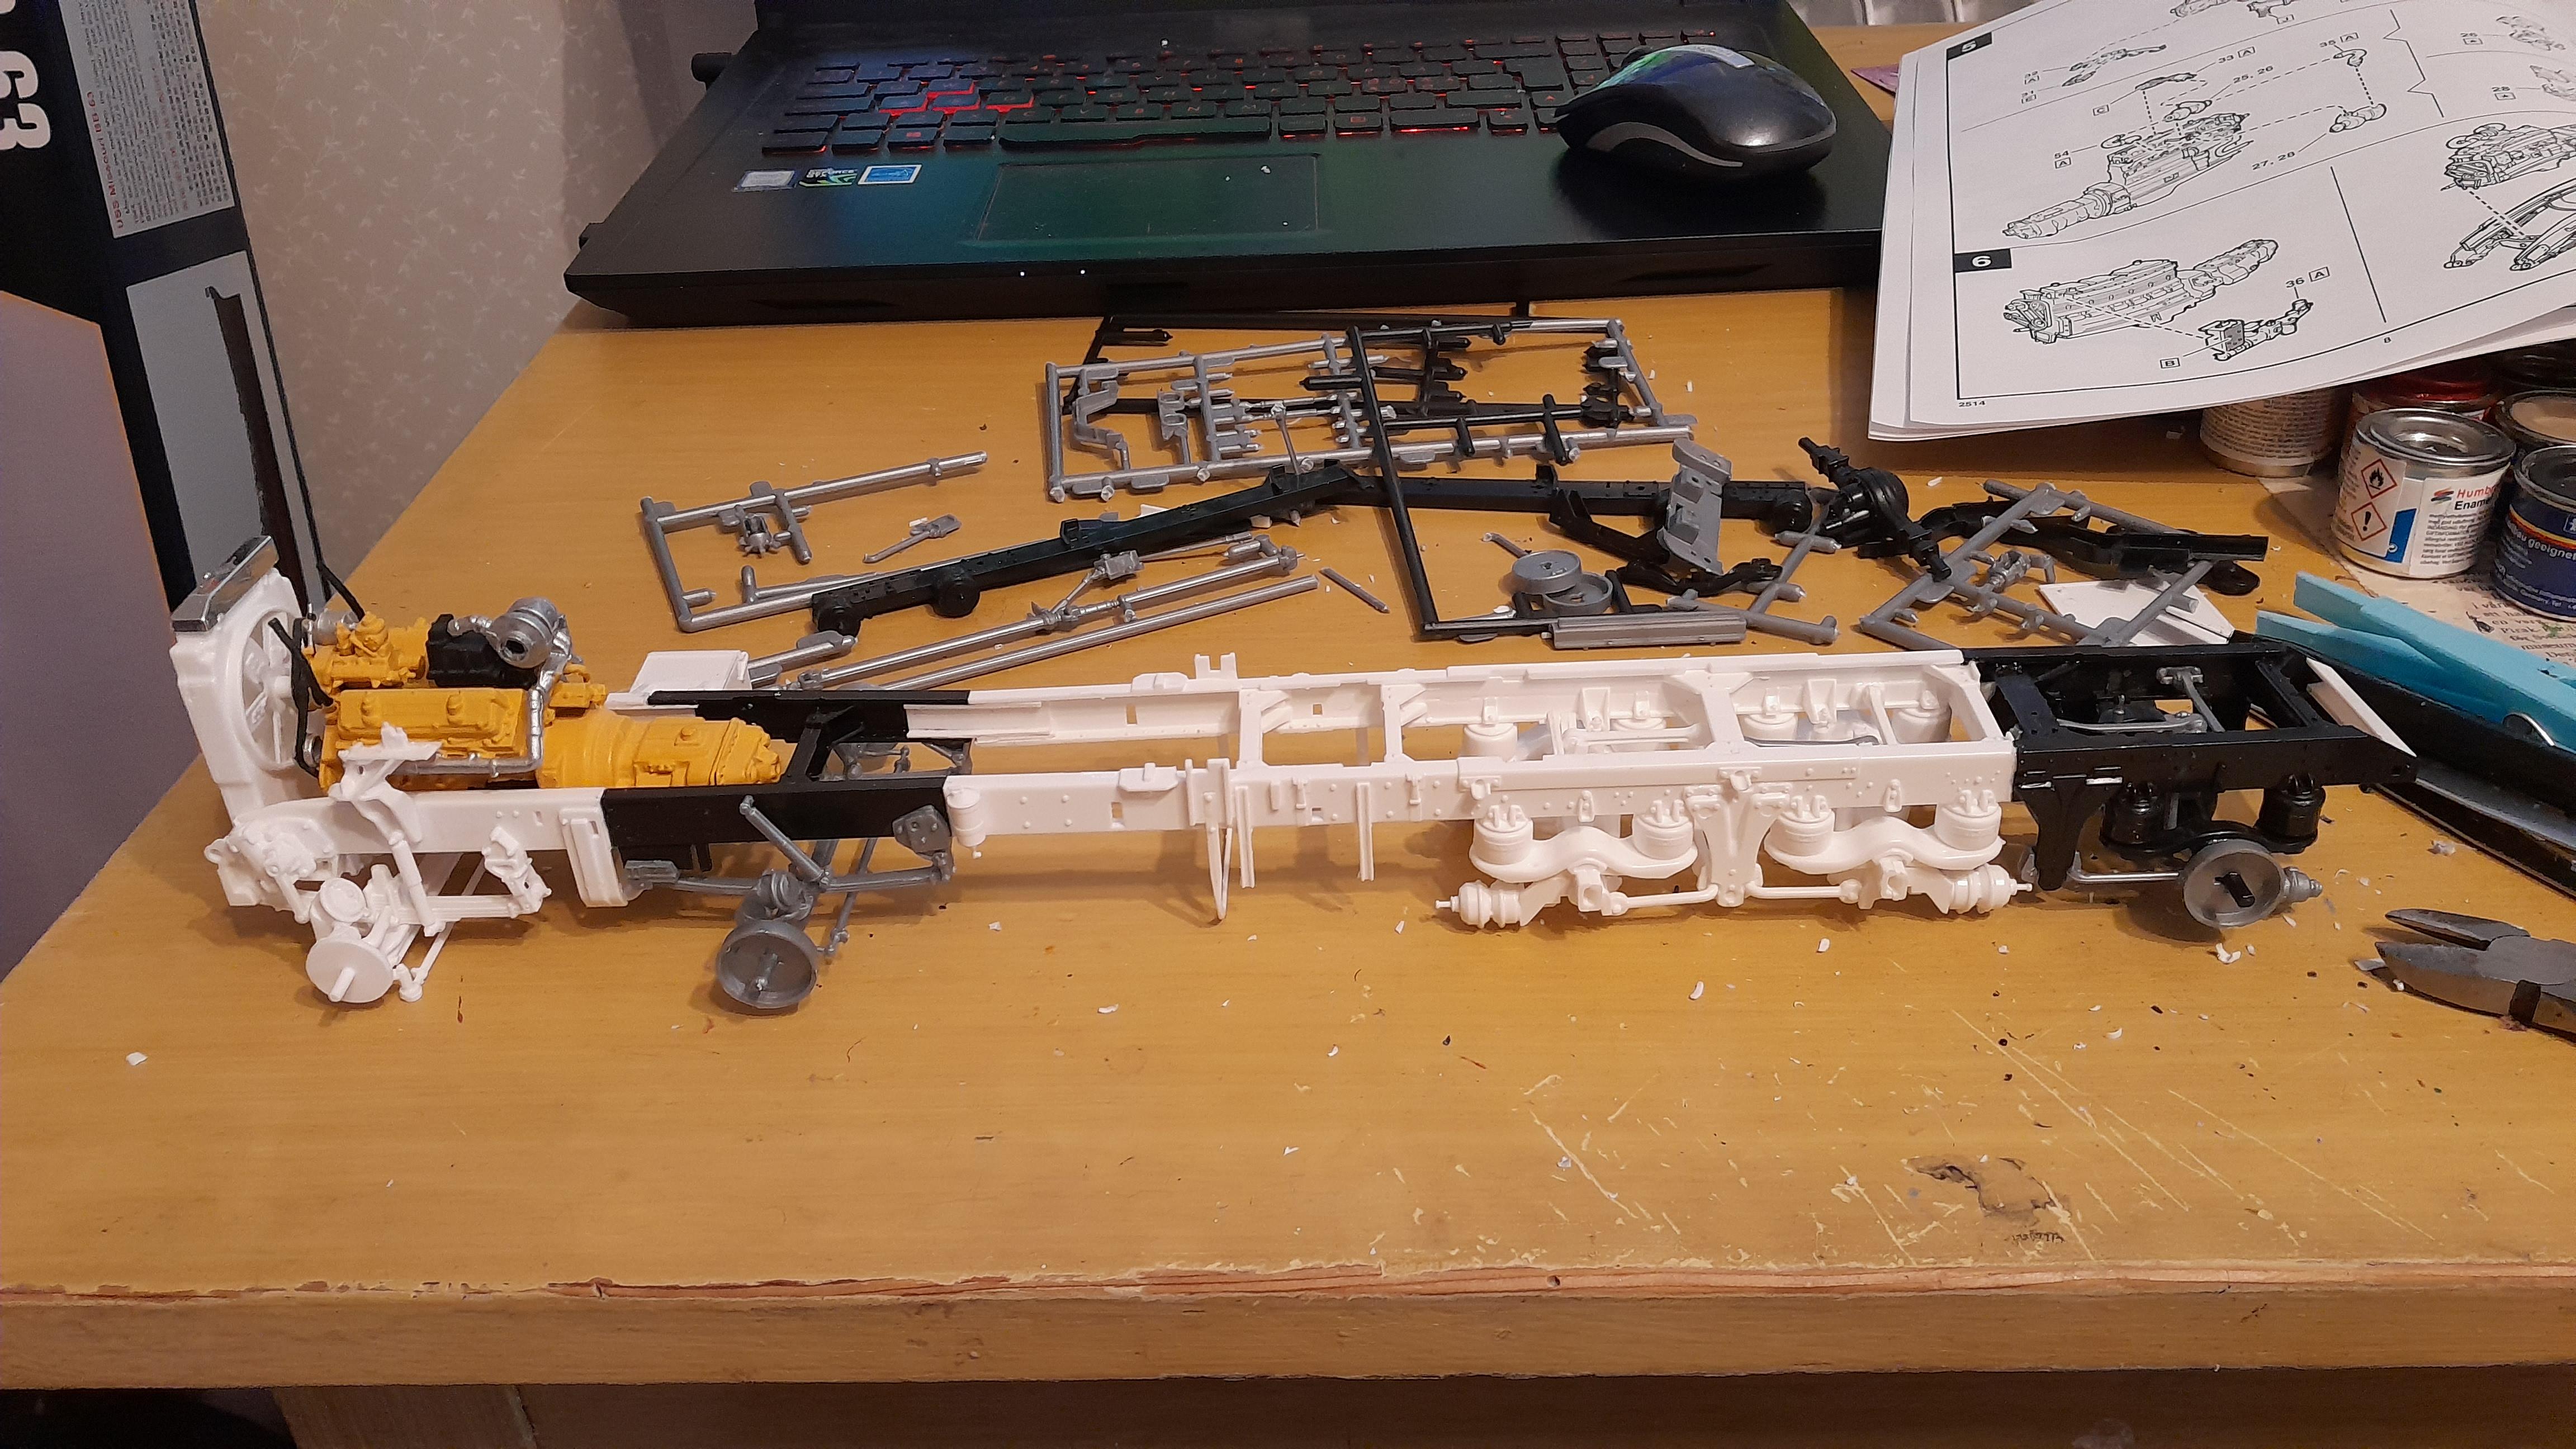
Small things done today. Put in the engine in the frame and added the stacks to the cab. Made a exhaustpipe from the turbo down to the rest of the exhaust system, just need to paint it. Also chromed the lights on the bullbar and added 2 decals to it. What do everyone here use to glue vinyl/rubber lines to resin and diecast parts? Superglue dont seem to work for me on the crane...
-
Kenworth K100 twinsteer triaxle
PierreR89 replied to PierreR89's topic in WIP: Model Trucks: Big Rigs and Heavy Equipment
Finally back at this again. Got it painted and put on the decals its just missing the exhaust stacks, after they are put on the cab will be done. The engine is being painted to so that will also soon be mounted and then the driveline will be complete. Found some spare catwalks (not sure about what they are called) in my parts box that i added to the frame. The crane needs some more painting and then adding the hydrualic lines after that the crane will be done and mounted to the truck. I decided that i wanted the wheels red and black. The bullbar is drying from painting right now and that will be white. Its not long now untill it is completed but due to work,vacation and other stuff the next 4 weeks i dont think i will have any time to build for a while.
-
Kenworth K100 twinsteer triaxle
PierreR89 replied to PierreR89's topic in WIP: Model Trucks: Big Rigs and Heavy Equipment
Thanks. Thanks. Thanks. I think i am going to go with a black frame, red crane and might do the cab green as the boxart is. I decided to add a coupler for normal trailers to the truck for when one of them needs moving and most heavy haulers have them anyways. This one i think is a Swedish VBG model that i got from the Volvo f12 low roof kit and not a Rockinger. The crossmember i mounted it on is a unused crossmember from the AMT ford snowplow kit. Also did the bullbar for the front and decided the location for the fueltanks so they dont interfere with the outriggers on the crane. The crane is going to be mounted on the chassie this way or else the outriggers will not be able to be retracted because they will hit the fueltanks. I have ordered the tires and a few other things i need for it from auslowe today, even without them the build can go forward and i just need to use the tires from the kit and the extra ones i have bought for it untill they are here.
-
Kenworth K100 twinsteer triaxle
PierreR89 replied to PierreR89's topic in WIP: Model Trucks: Big Rigs and Heavy Equipment
Got the rear fenders mounted and got the wheels on it just to test everything out. The tires are italeris trailer tires that i used to get the height of the fenders right and the tires will be replaced later with better ones. It is going to look something like this when it is done, only things missing on the exterior is the bullbar, fueltanks,rear lights and stoneguard for the windshield. Just have to decide what colors the frame, crane and cab will have.
-
Kenworth K100 twinsteer triaxle
PierreR89 replied to PierreR89's topic in WIP: Model Trucks: Big Rigs and Heavy Equipment
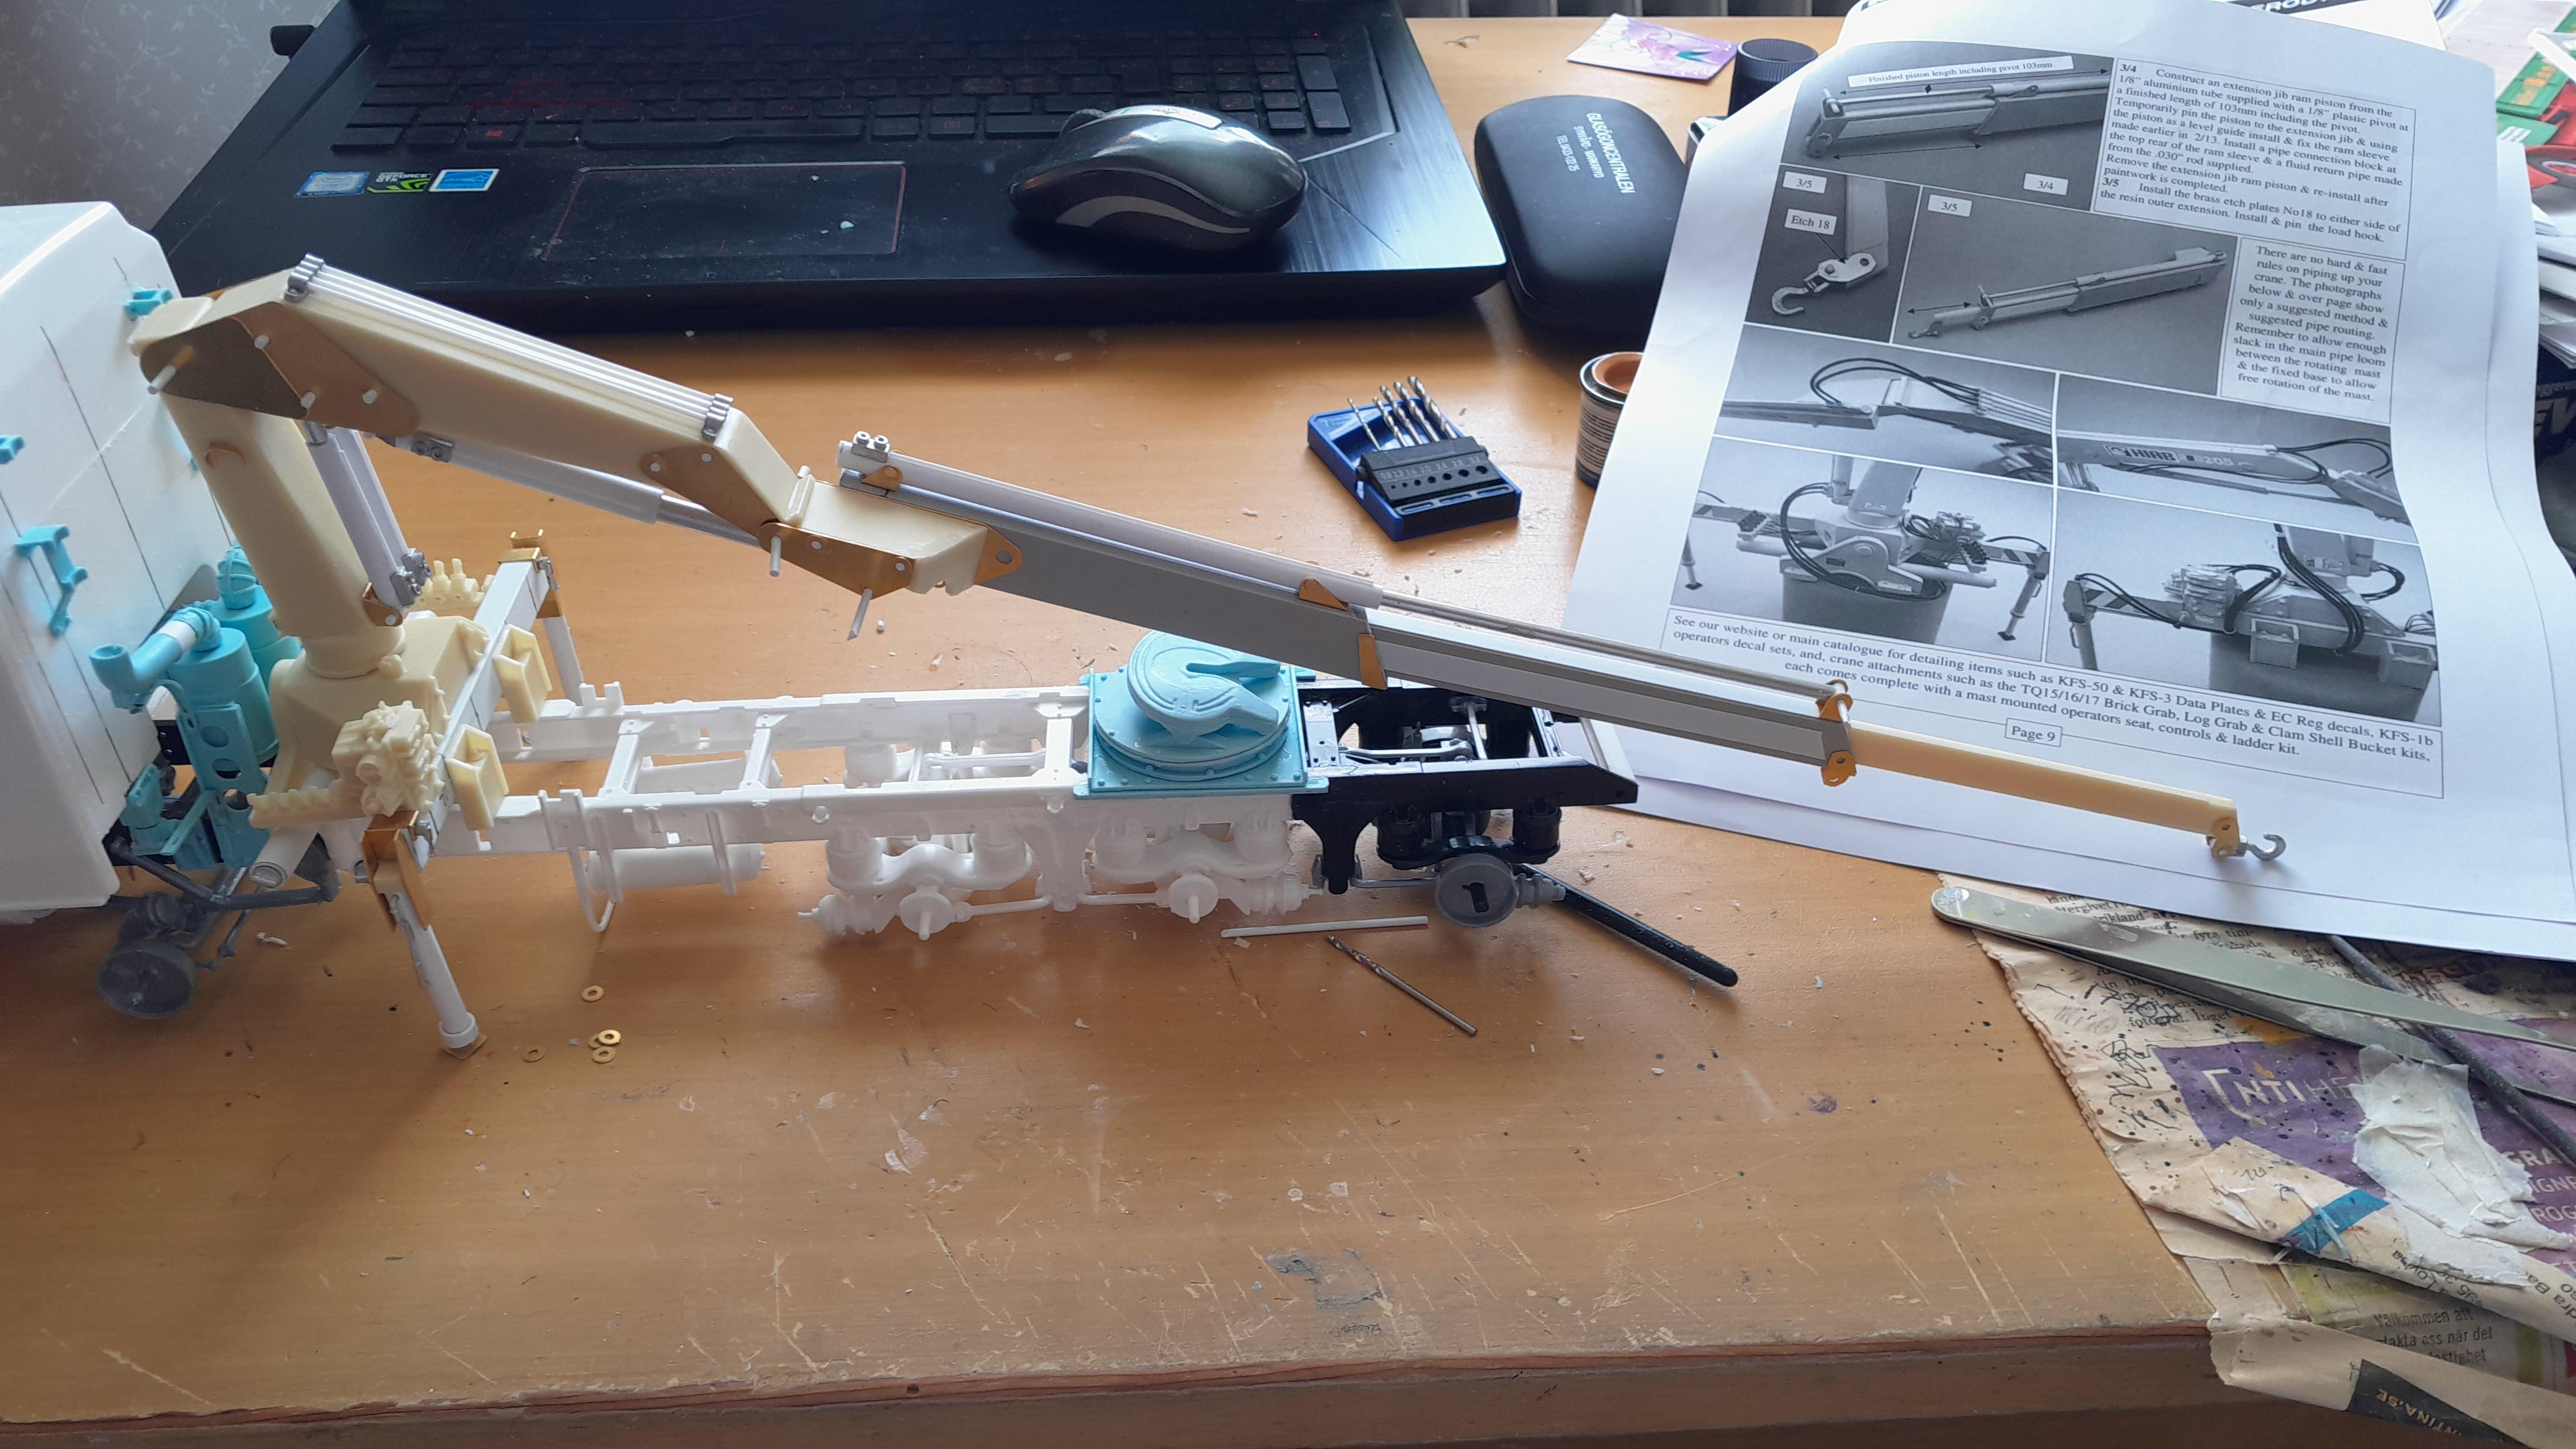
Got the crane assembled and testfitted to the truck, its big.. maybe to big for this one? Still need to paint and run the hydraulic lines for it.
-
Kenworth K100 twinsteer triaxle
PierreR89 replied to PierreR89's topic in WIP: Model Trucks: Big Rigs and Heavy Equipment
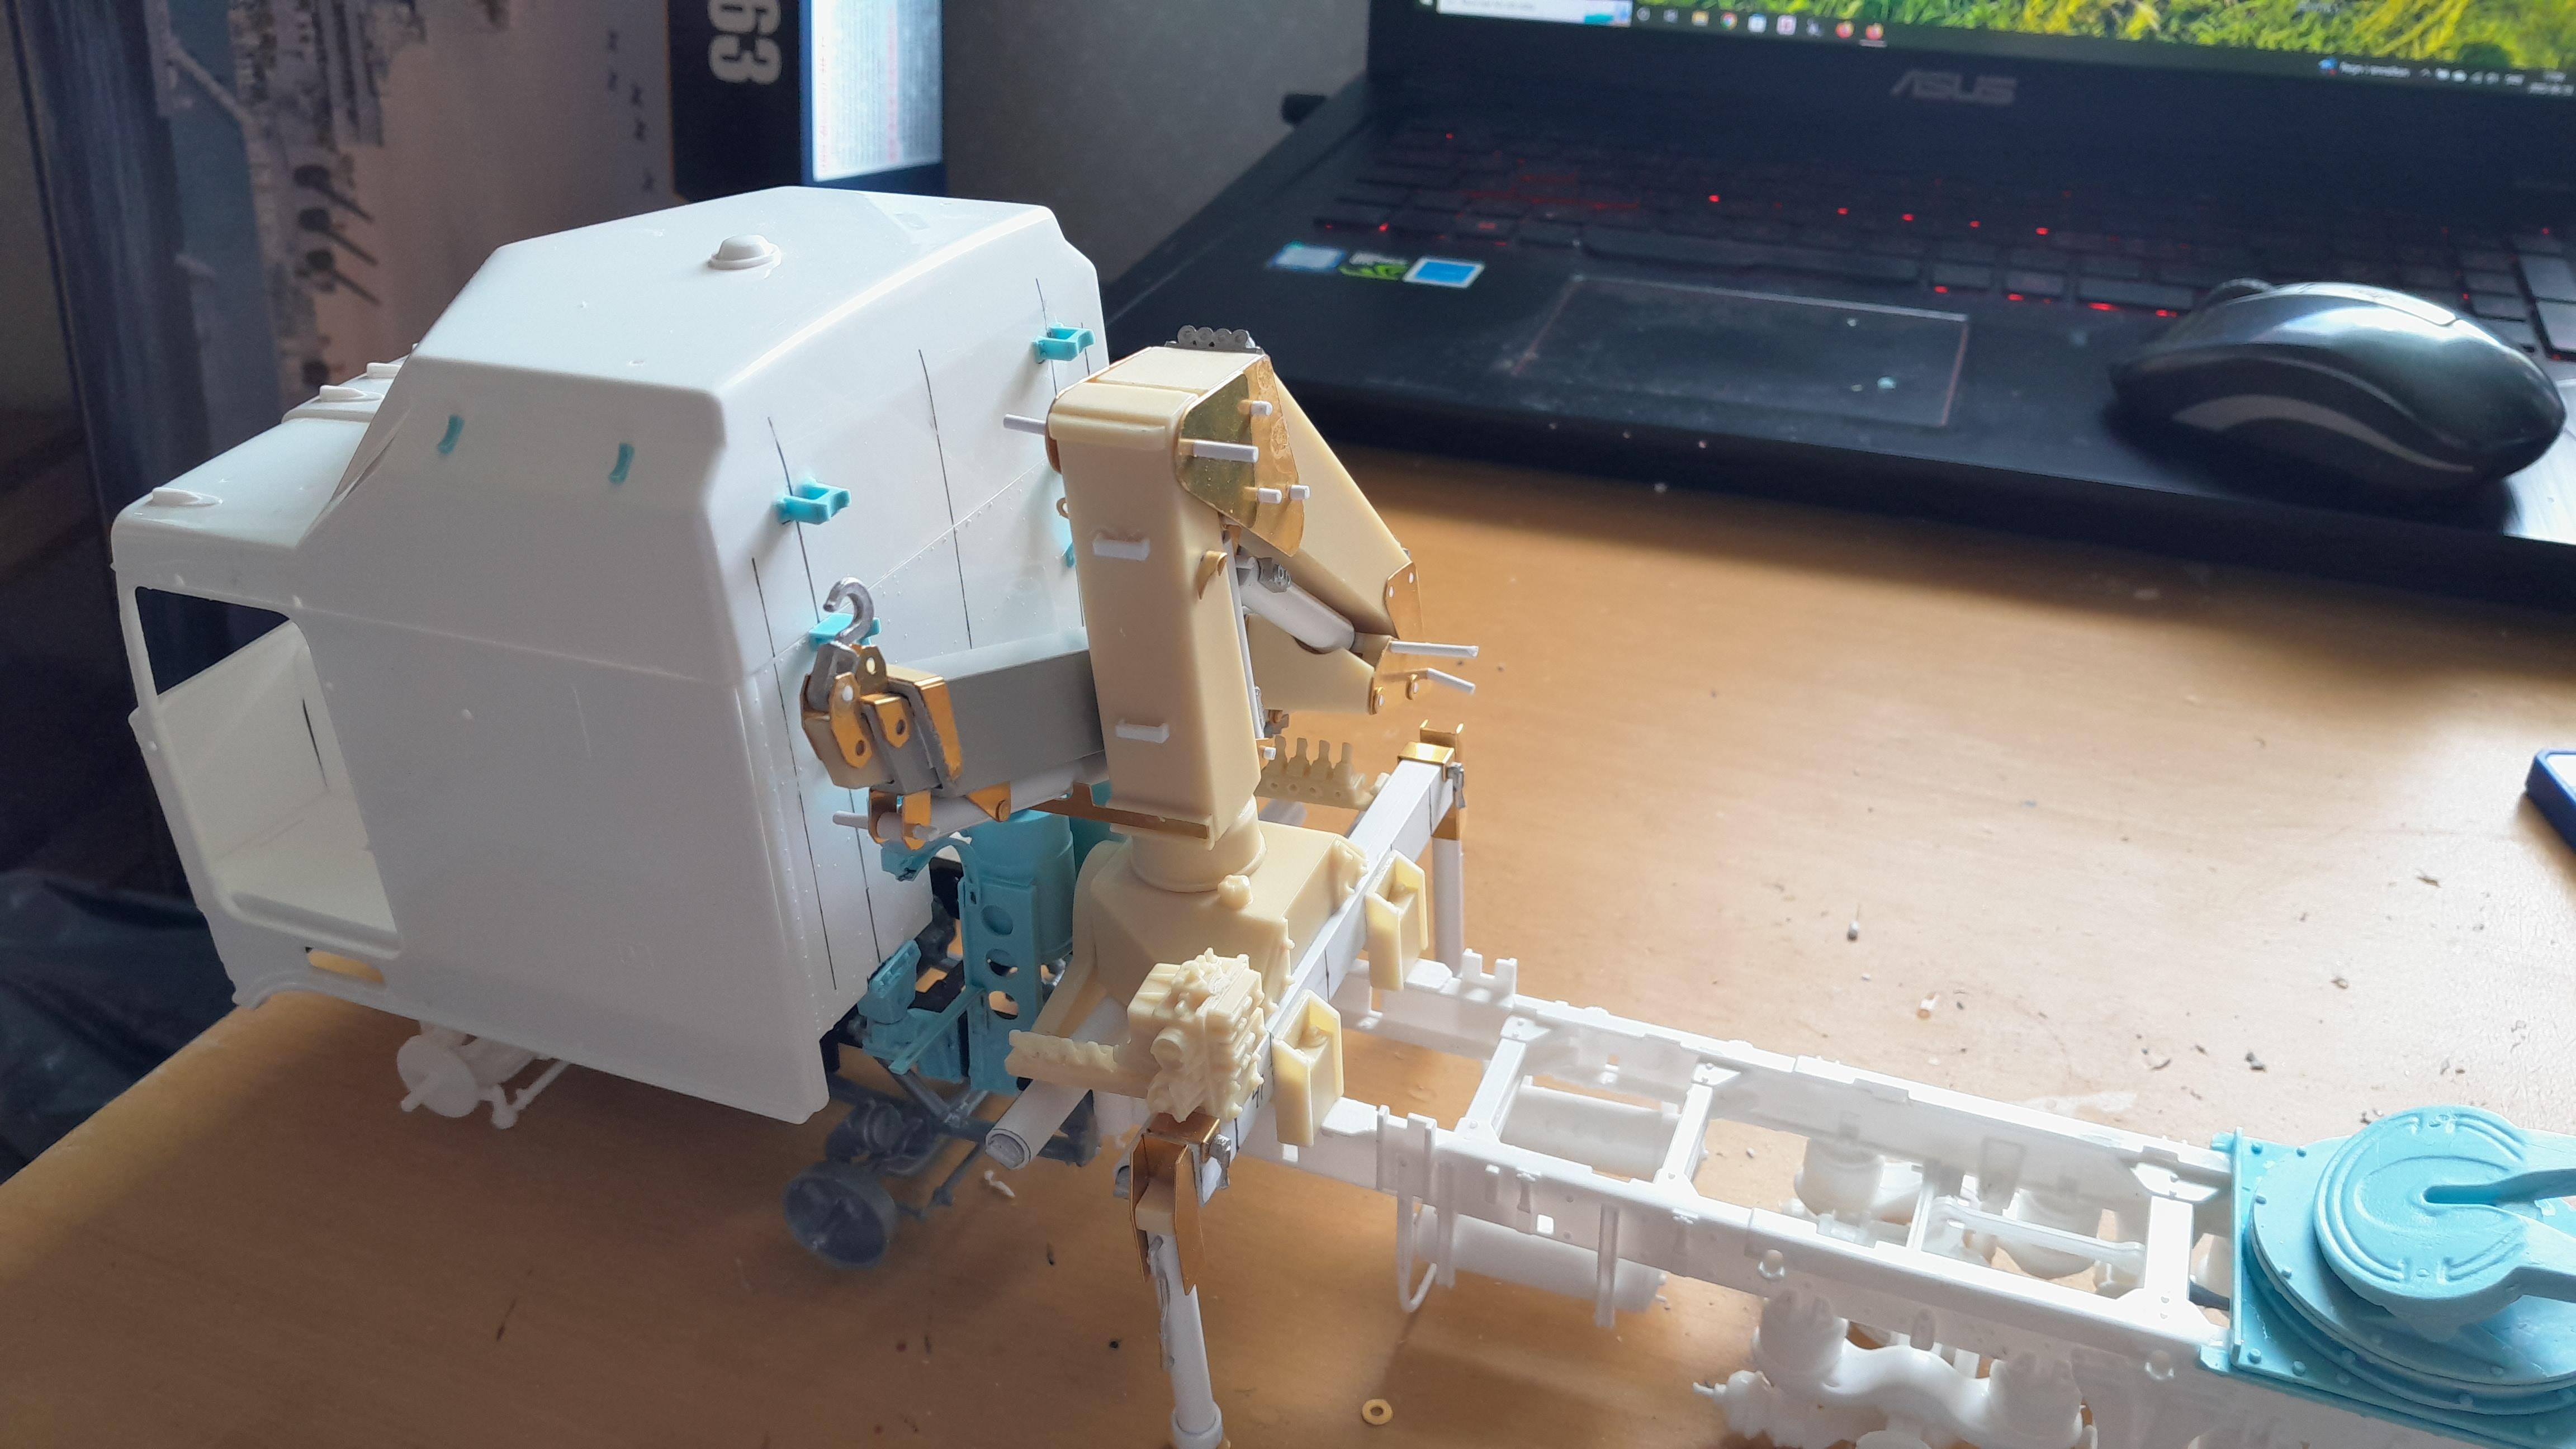
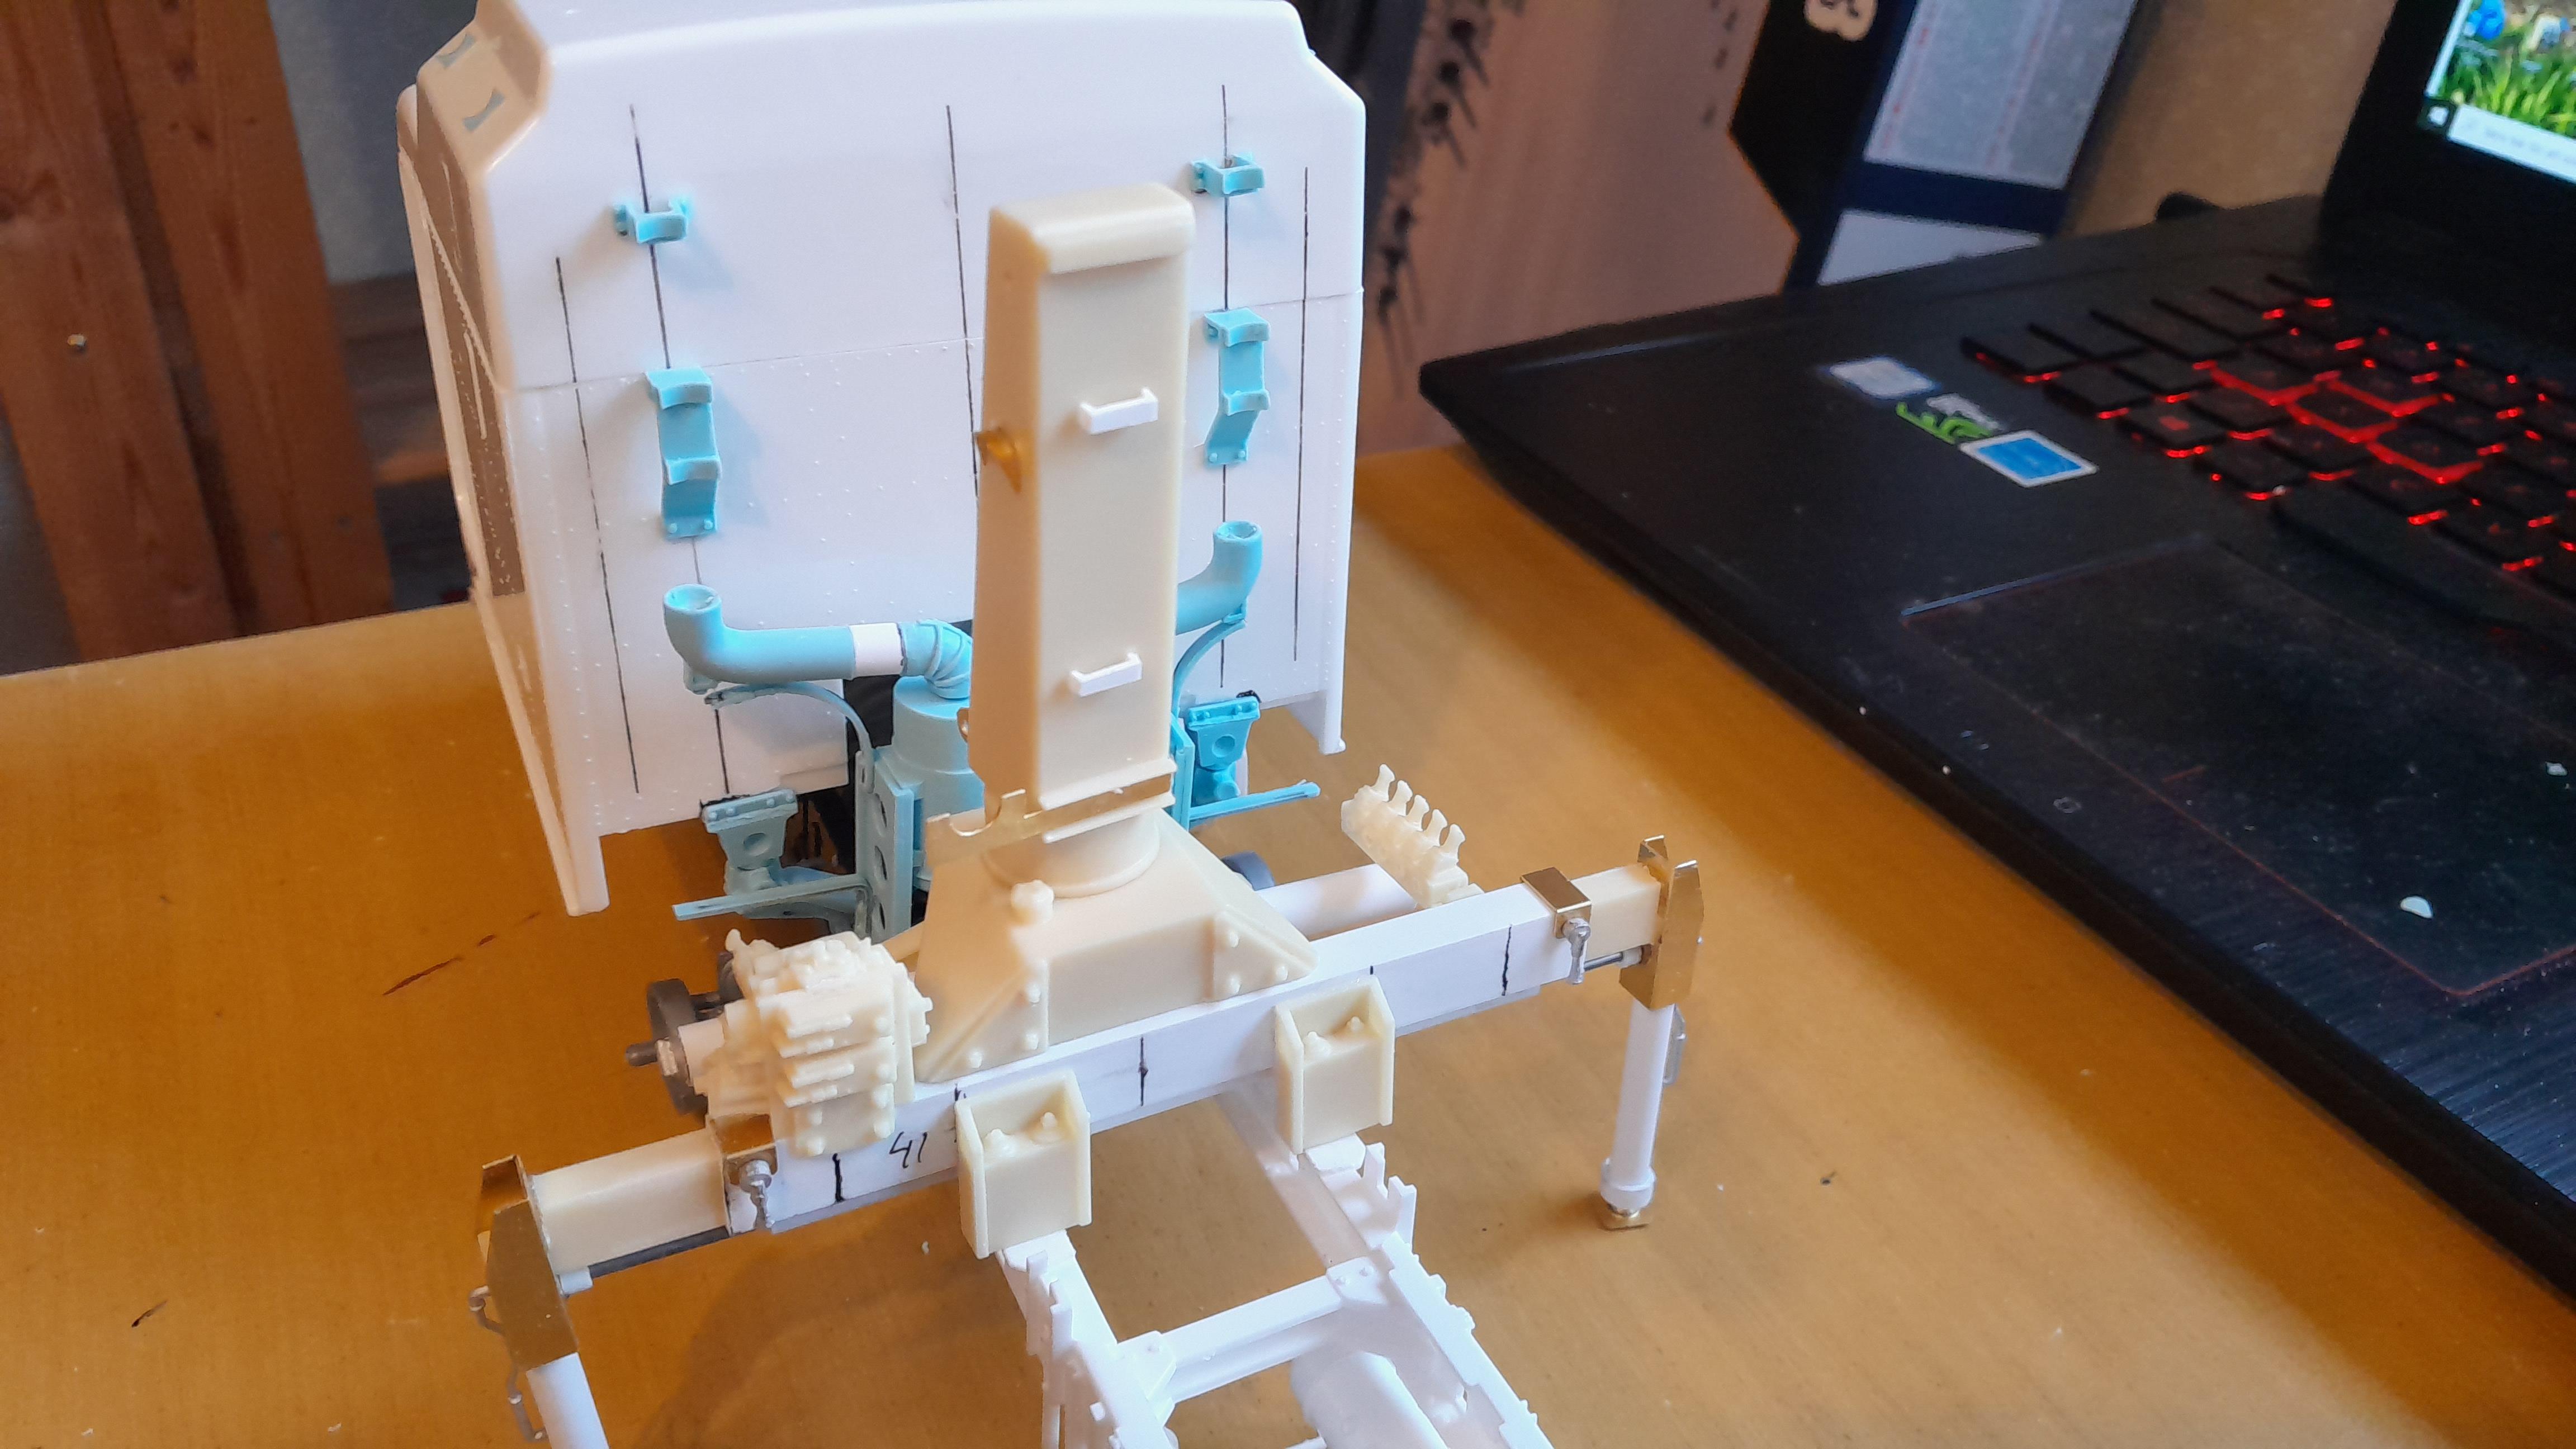
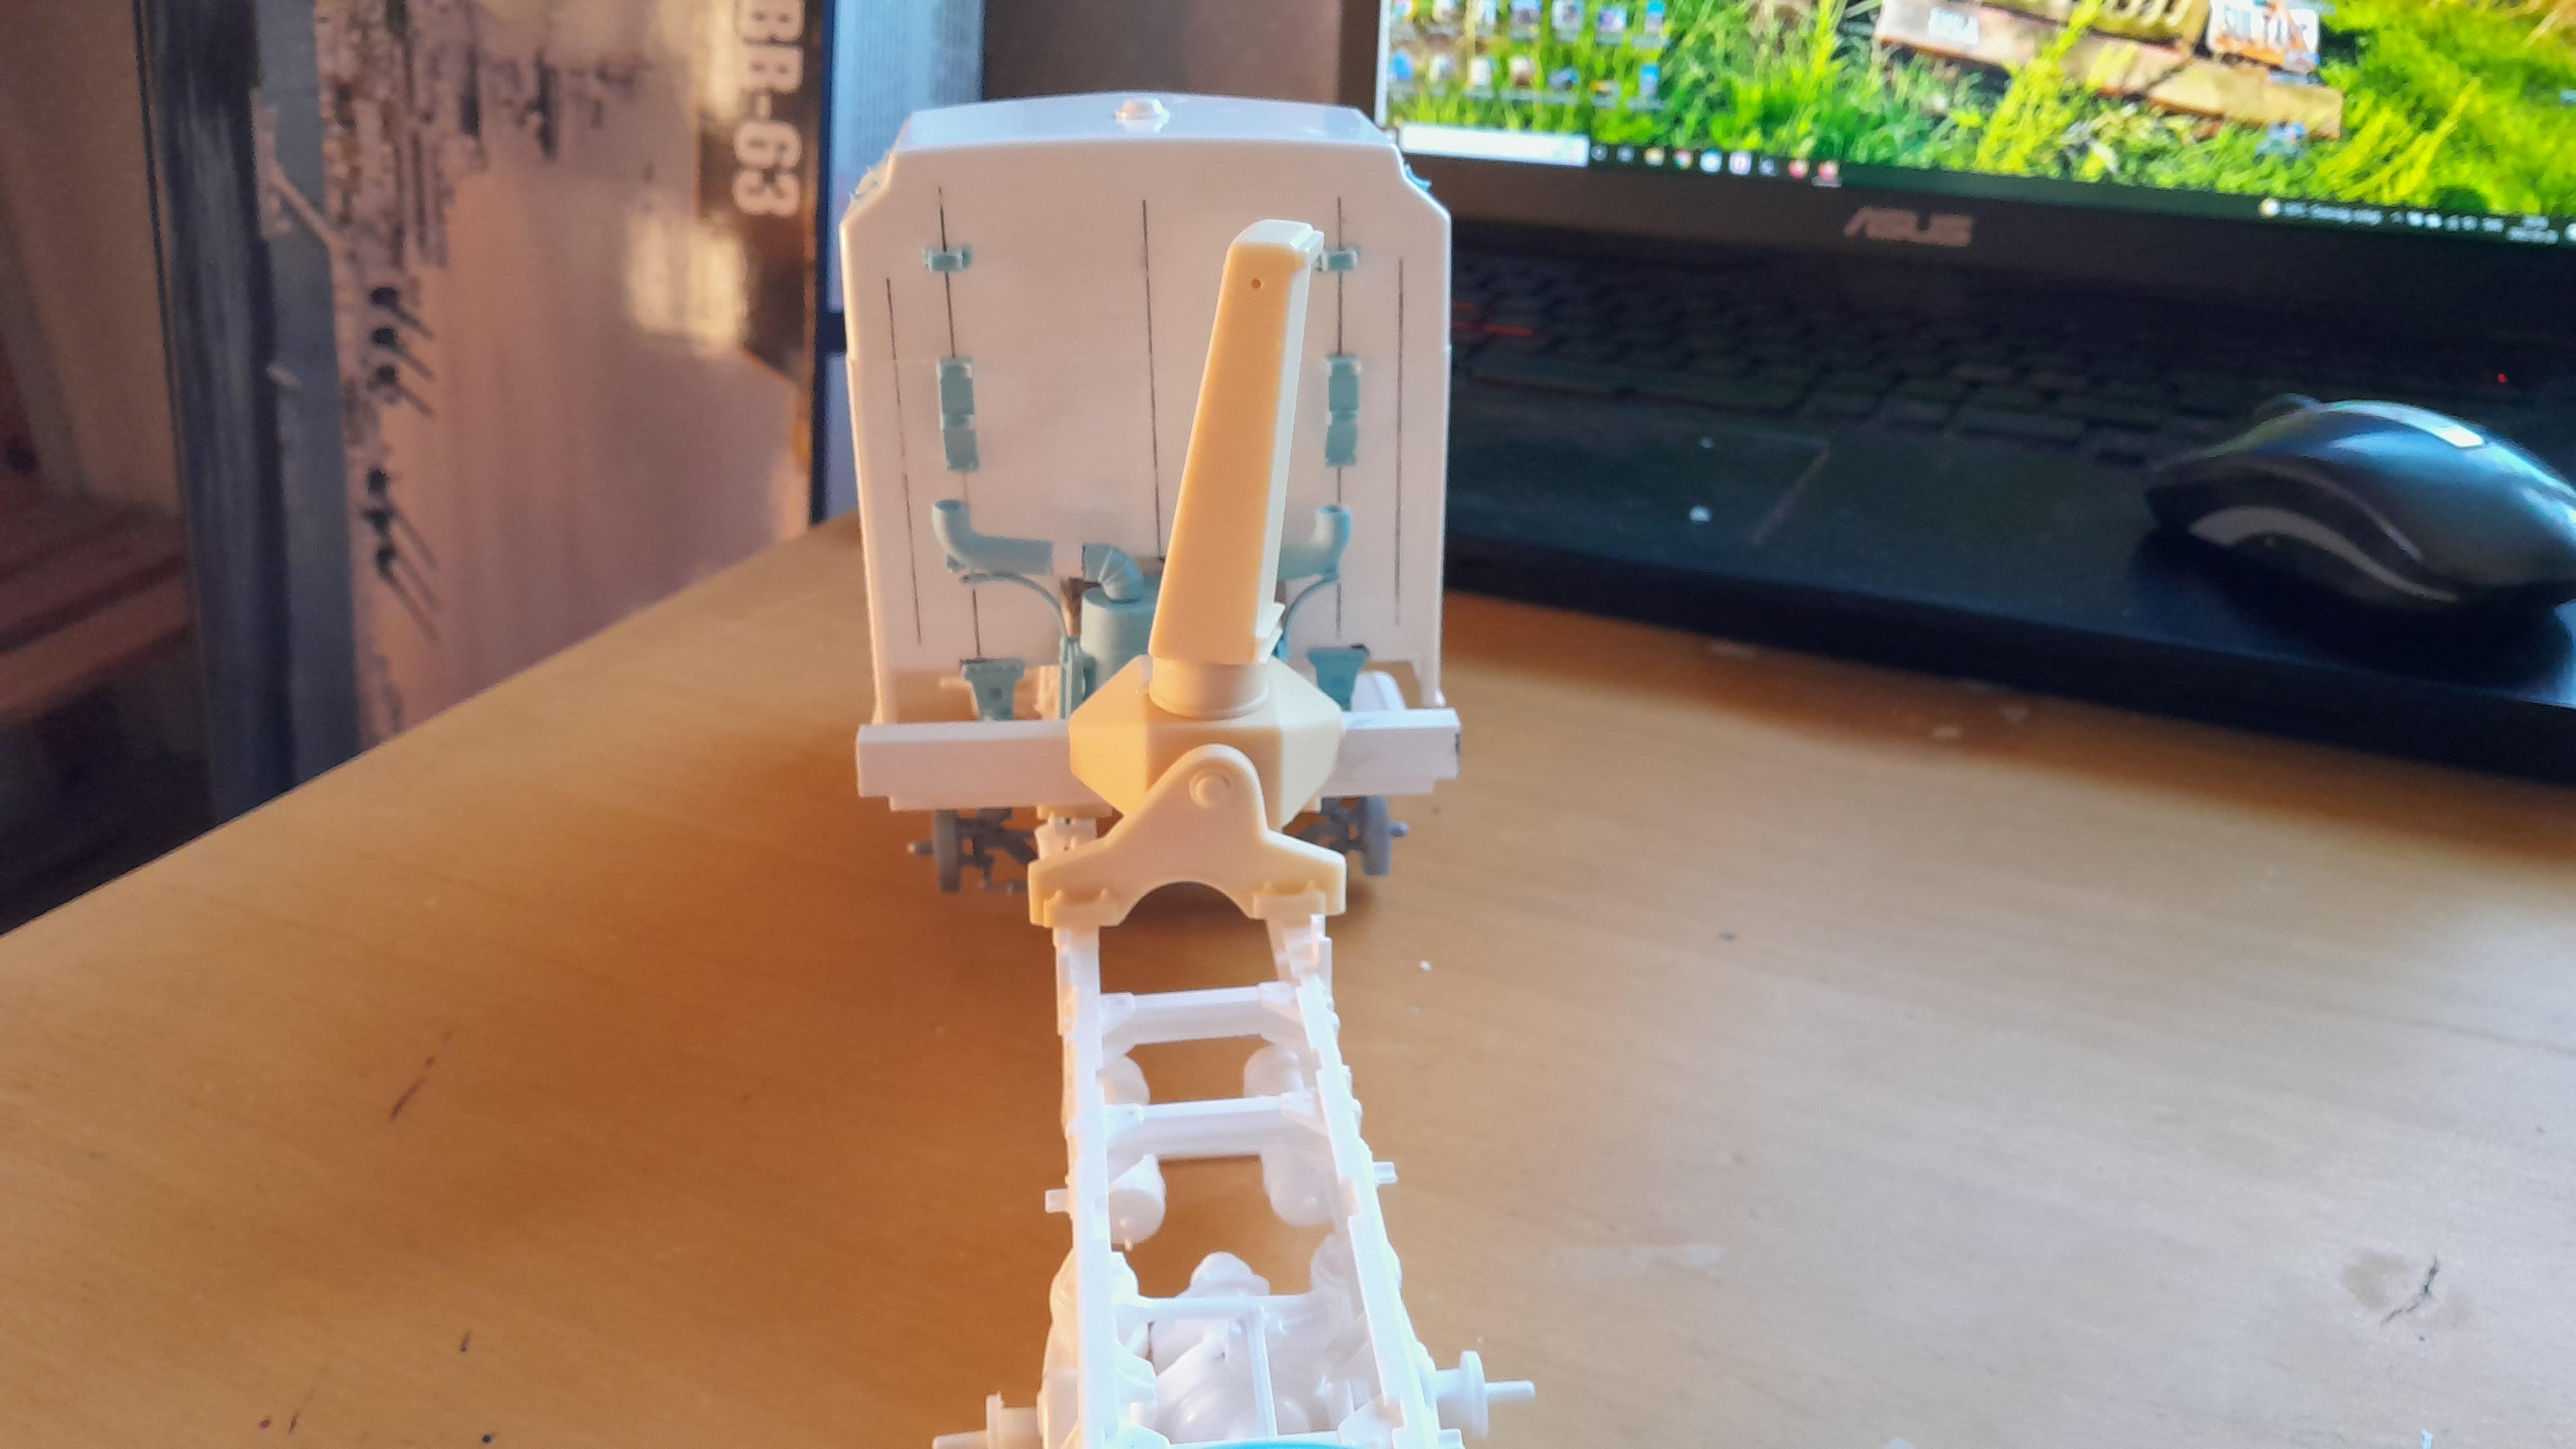
Got the mast for the crane done, it just need the rams in the cylinders mounted. Started on the main jib and got about halfways with it before i felt like taking a break from it.
-
Kenworth K100 twinsteer triaxle
PierreR89 replied to PierreR89's topic in WIP: Model Trucks: Big Rigs and Heavy Equipment
Did some work on it today and got the base done and started on the mast for the crane. I had forgot how to work with photoetch but i figured it out in the end, still alot more to go. Also just realized that i put it on backwards when i took the photos of it....
-
Kenworth K100 twinsteer triaxle
PierreR89 replied to PierreR89's topic in WIP: Model Trucks: Big Rigs and Heavy Equipment
It is to save wear on the kingpin on the trailer and fifthwheel. They are mostly used with heavy haul trailers that rarely gets disconnected from the truck. They have a locking mechanism that locks on to the kingpin so that it can not turn in the fifthwheel like they do in a normal fifthwheel. Instead the fifthwheel and kingpin will stay in the same position and when the truck takes a turn the ballrace turns around instead. When they turn the fifthwheel will stay in the same position as if the truck is drivning in a straight line and the ballrace is doing the turning. Edit: I just remembered that it is not the fifthwheel that locks the trailer so it can not turn. It is the trailers, they have a welded wedge behind the kingpin that fits between the toungs on the fifthwheel locking it in place so the trailer can not turn inside like they usually do. That wedge forces the ballrace to turn when the truck is turning on the road. Some of those trailers have linkages going from that point to each axle if they are steerable and that way the axles can steer in the direction the truck goes. -
Kenworth K100 twinsteer triaxle
PierreR89 replied to PierreR89's topic in WIP: Model Trucks: Big Rigs and Heavy Equipment
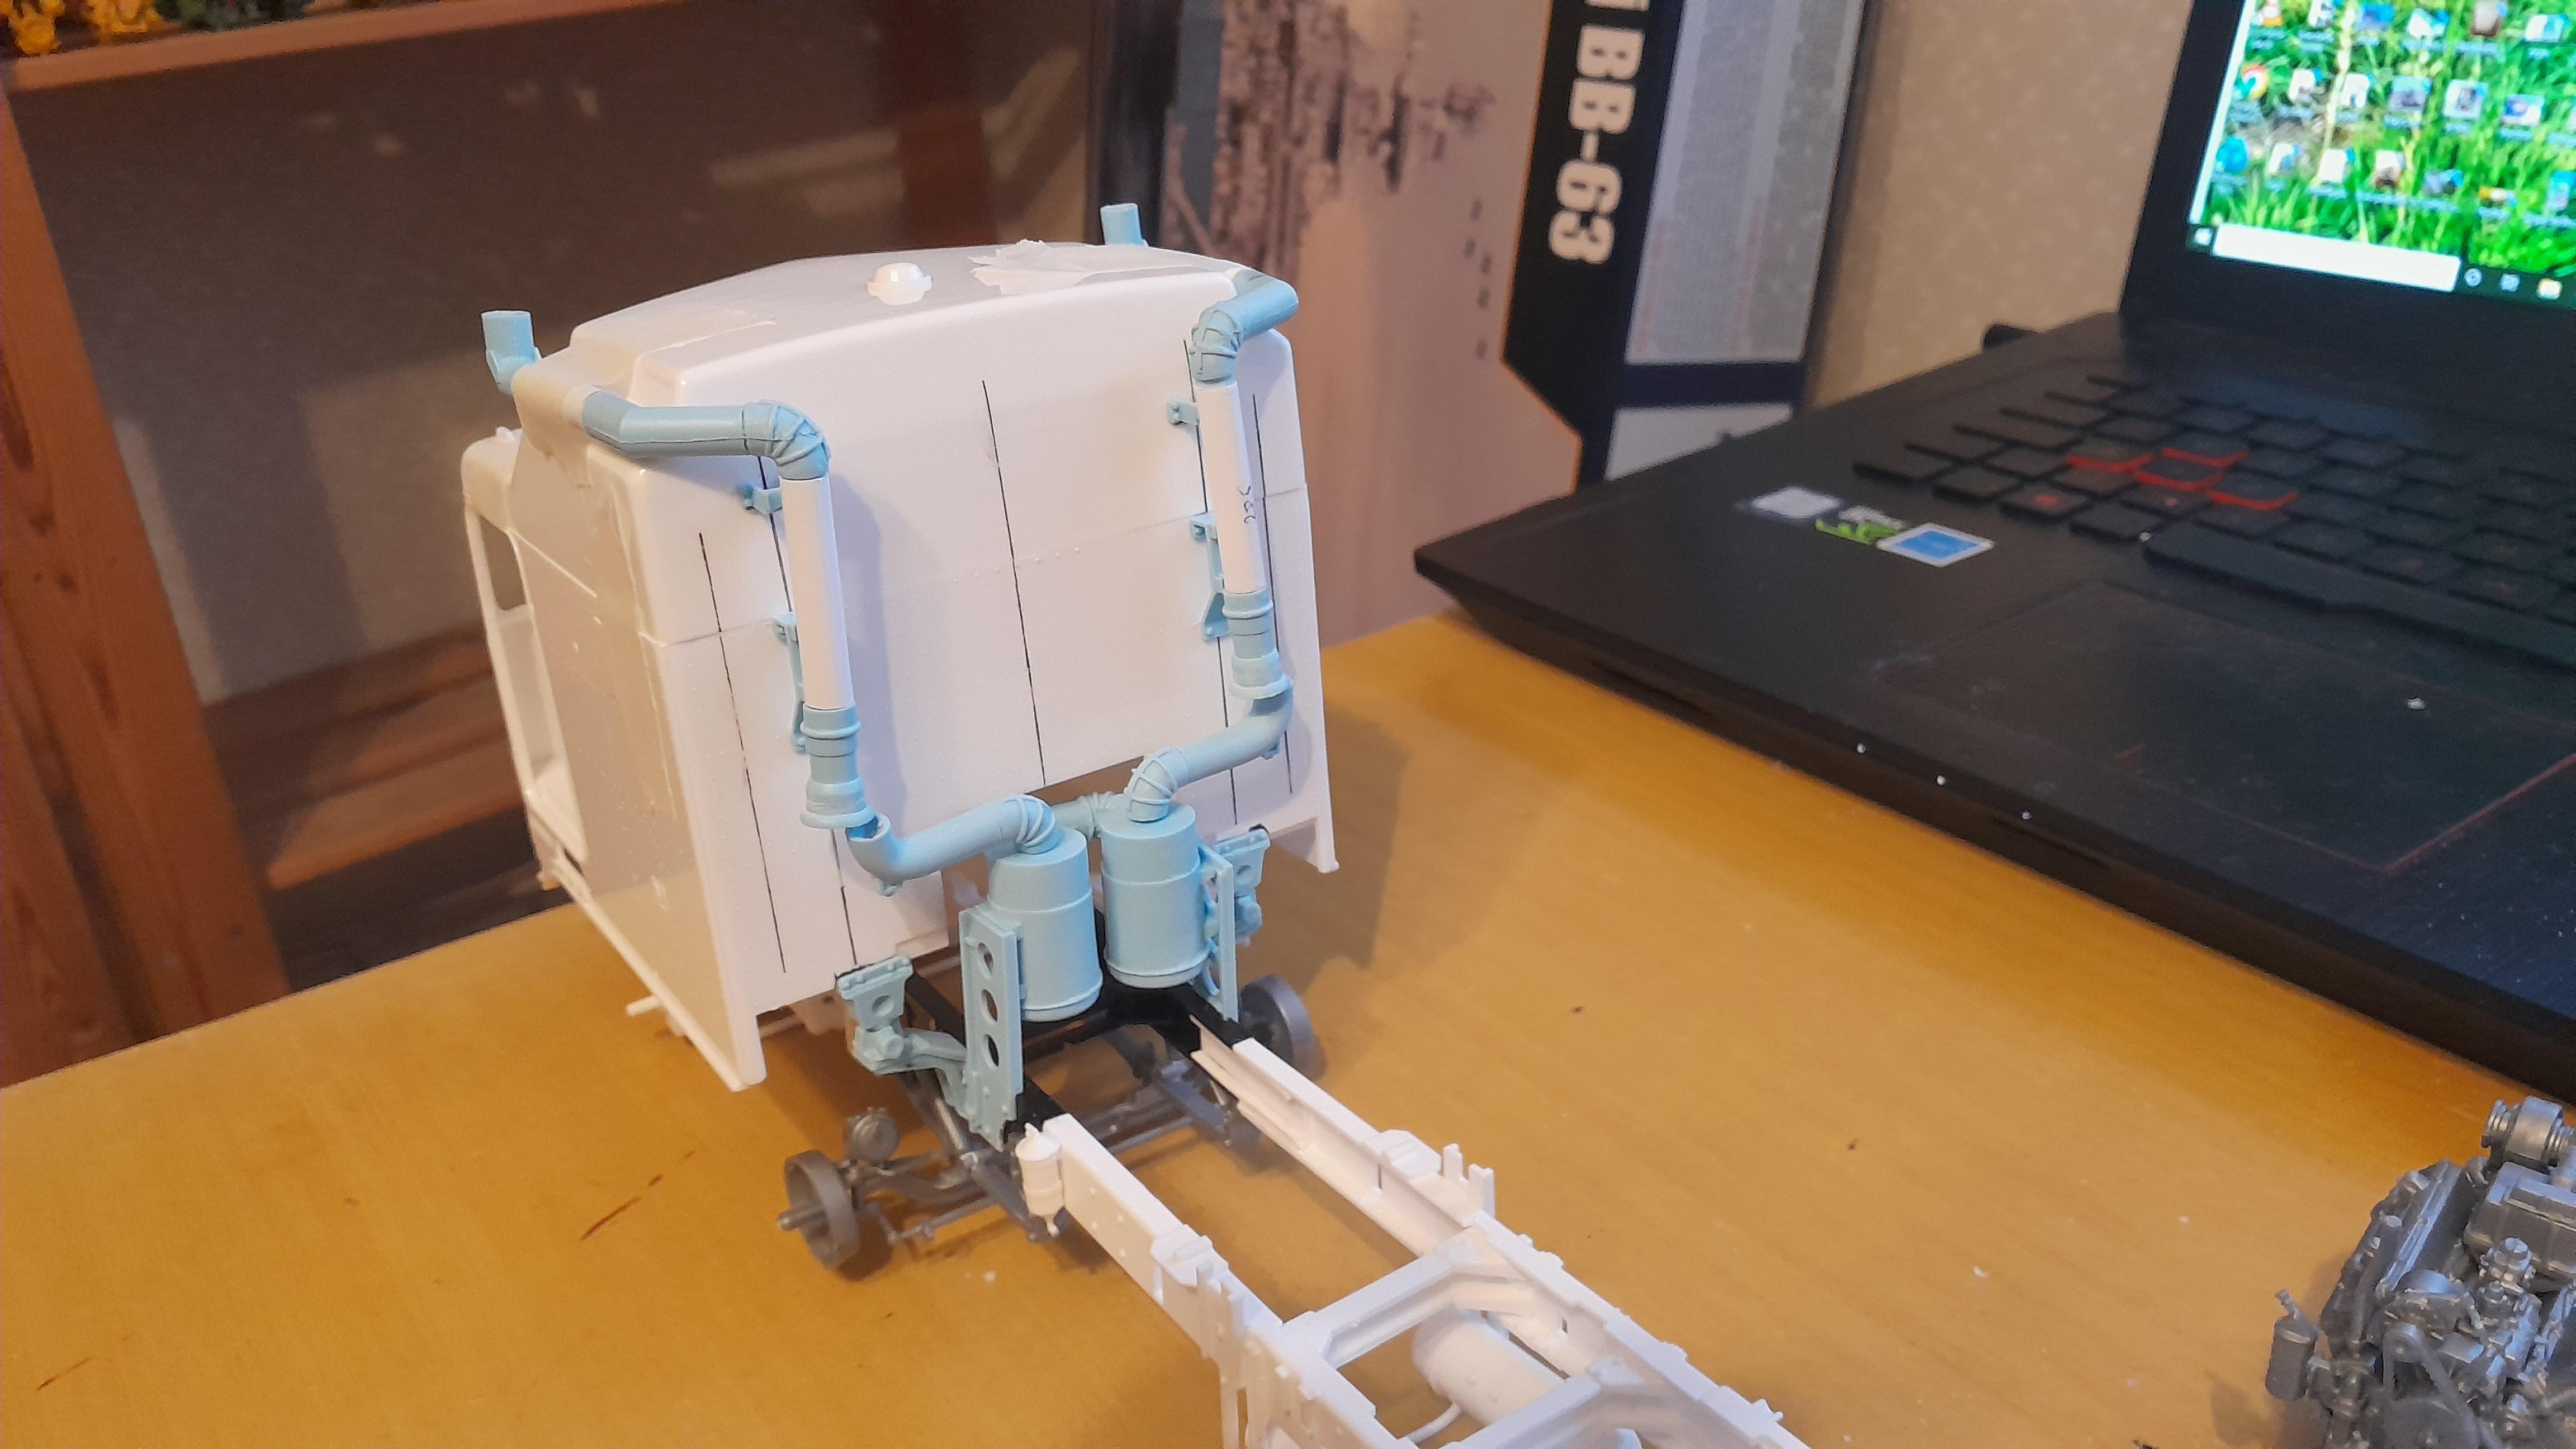
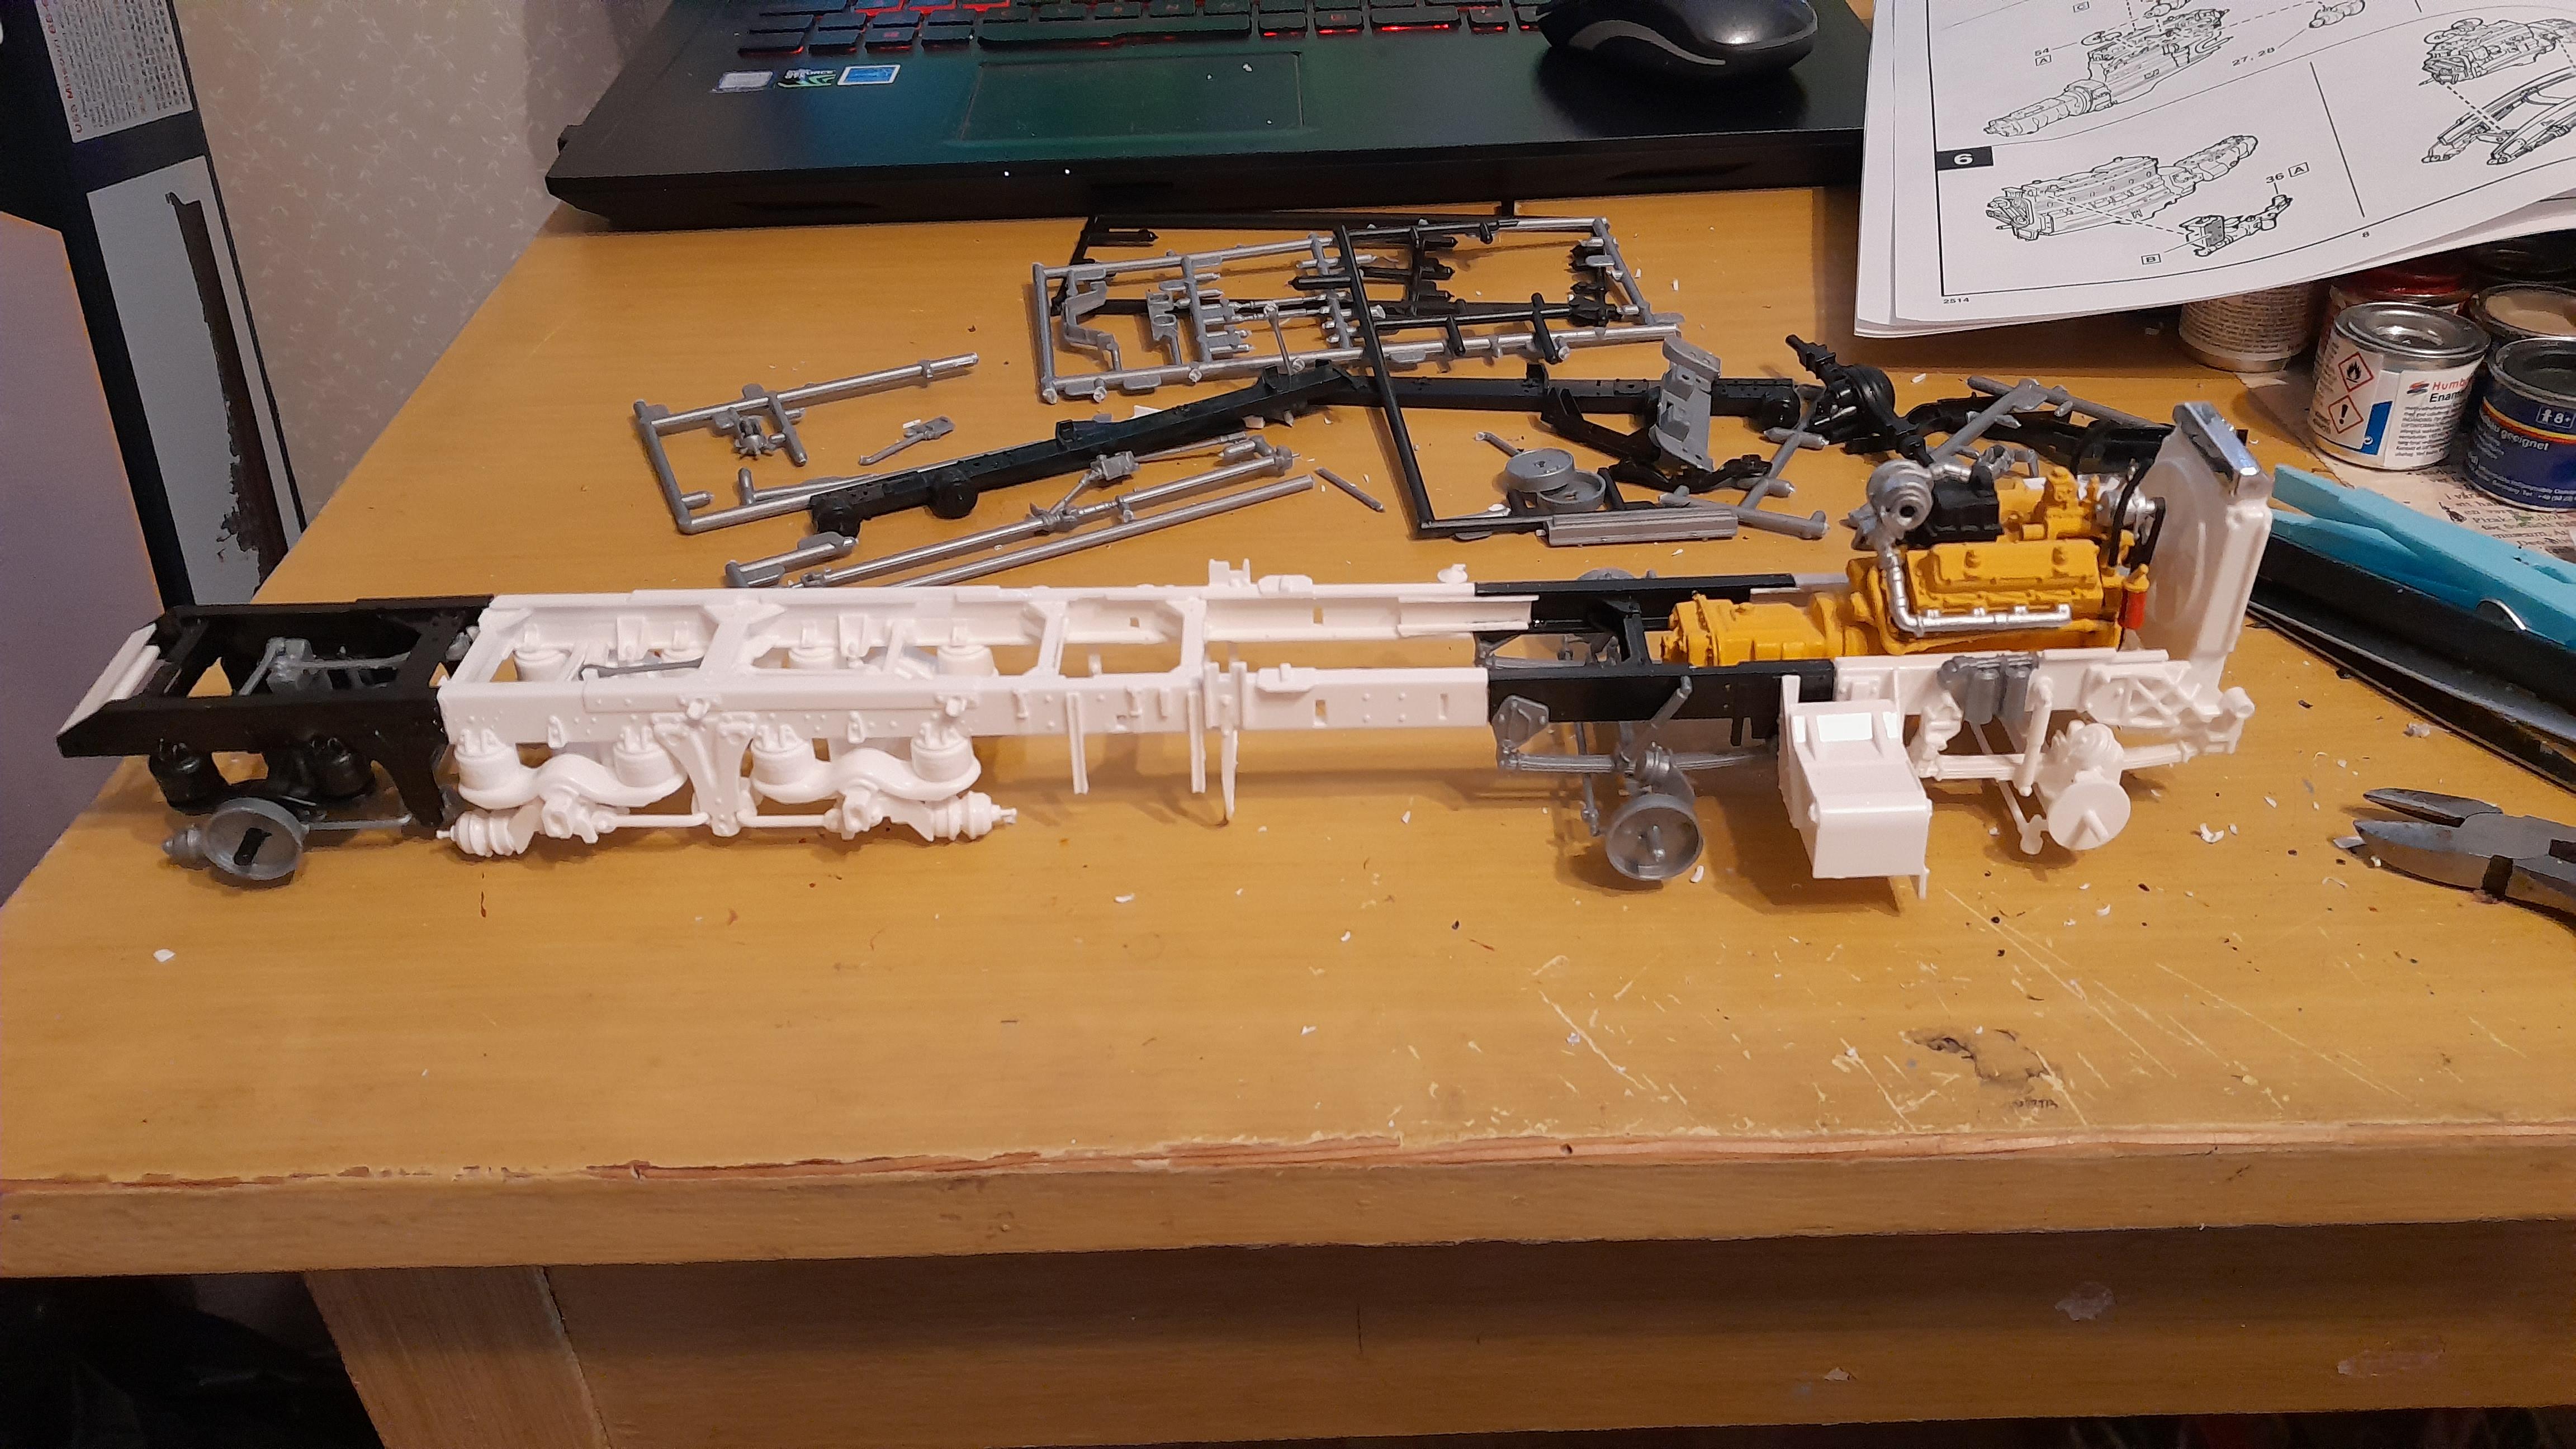
Made som small adjustments for the aircleaner set up and made the exhaststacks ready to be mounted when it is time for them. Have to wait to do the exhaust from the engine untill the stacks are mounted to the cab as they will decide were the pipe from the engine will be placed, other then that the aircleaners and exhaust is done. The last part to do on the frame is to figure out where the fendermounts should go over the rear axles then it is ready for paint. Started to build the KFS crane for it today, but did not get very far with it. The base for it is done and roughly where it is going to sit on the truck.
-
Kenworth K100 twinsteer triaxle
PierreR89 replied to PierreR89's topic in WIP: Model Trucks: Big Rigs and Heavy Equipment
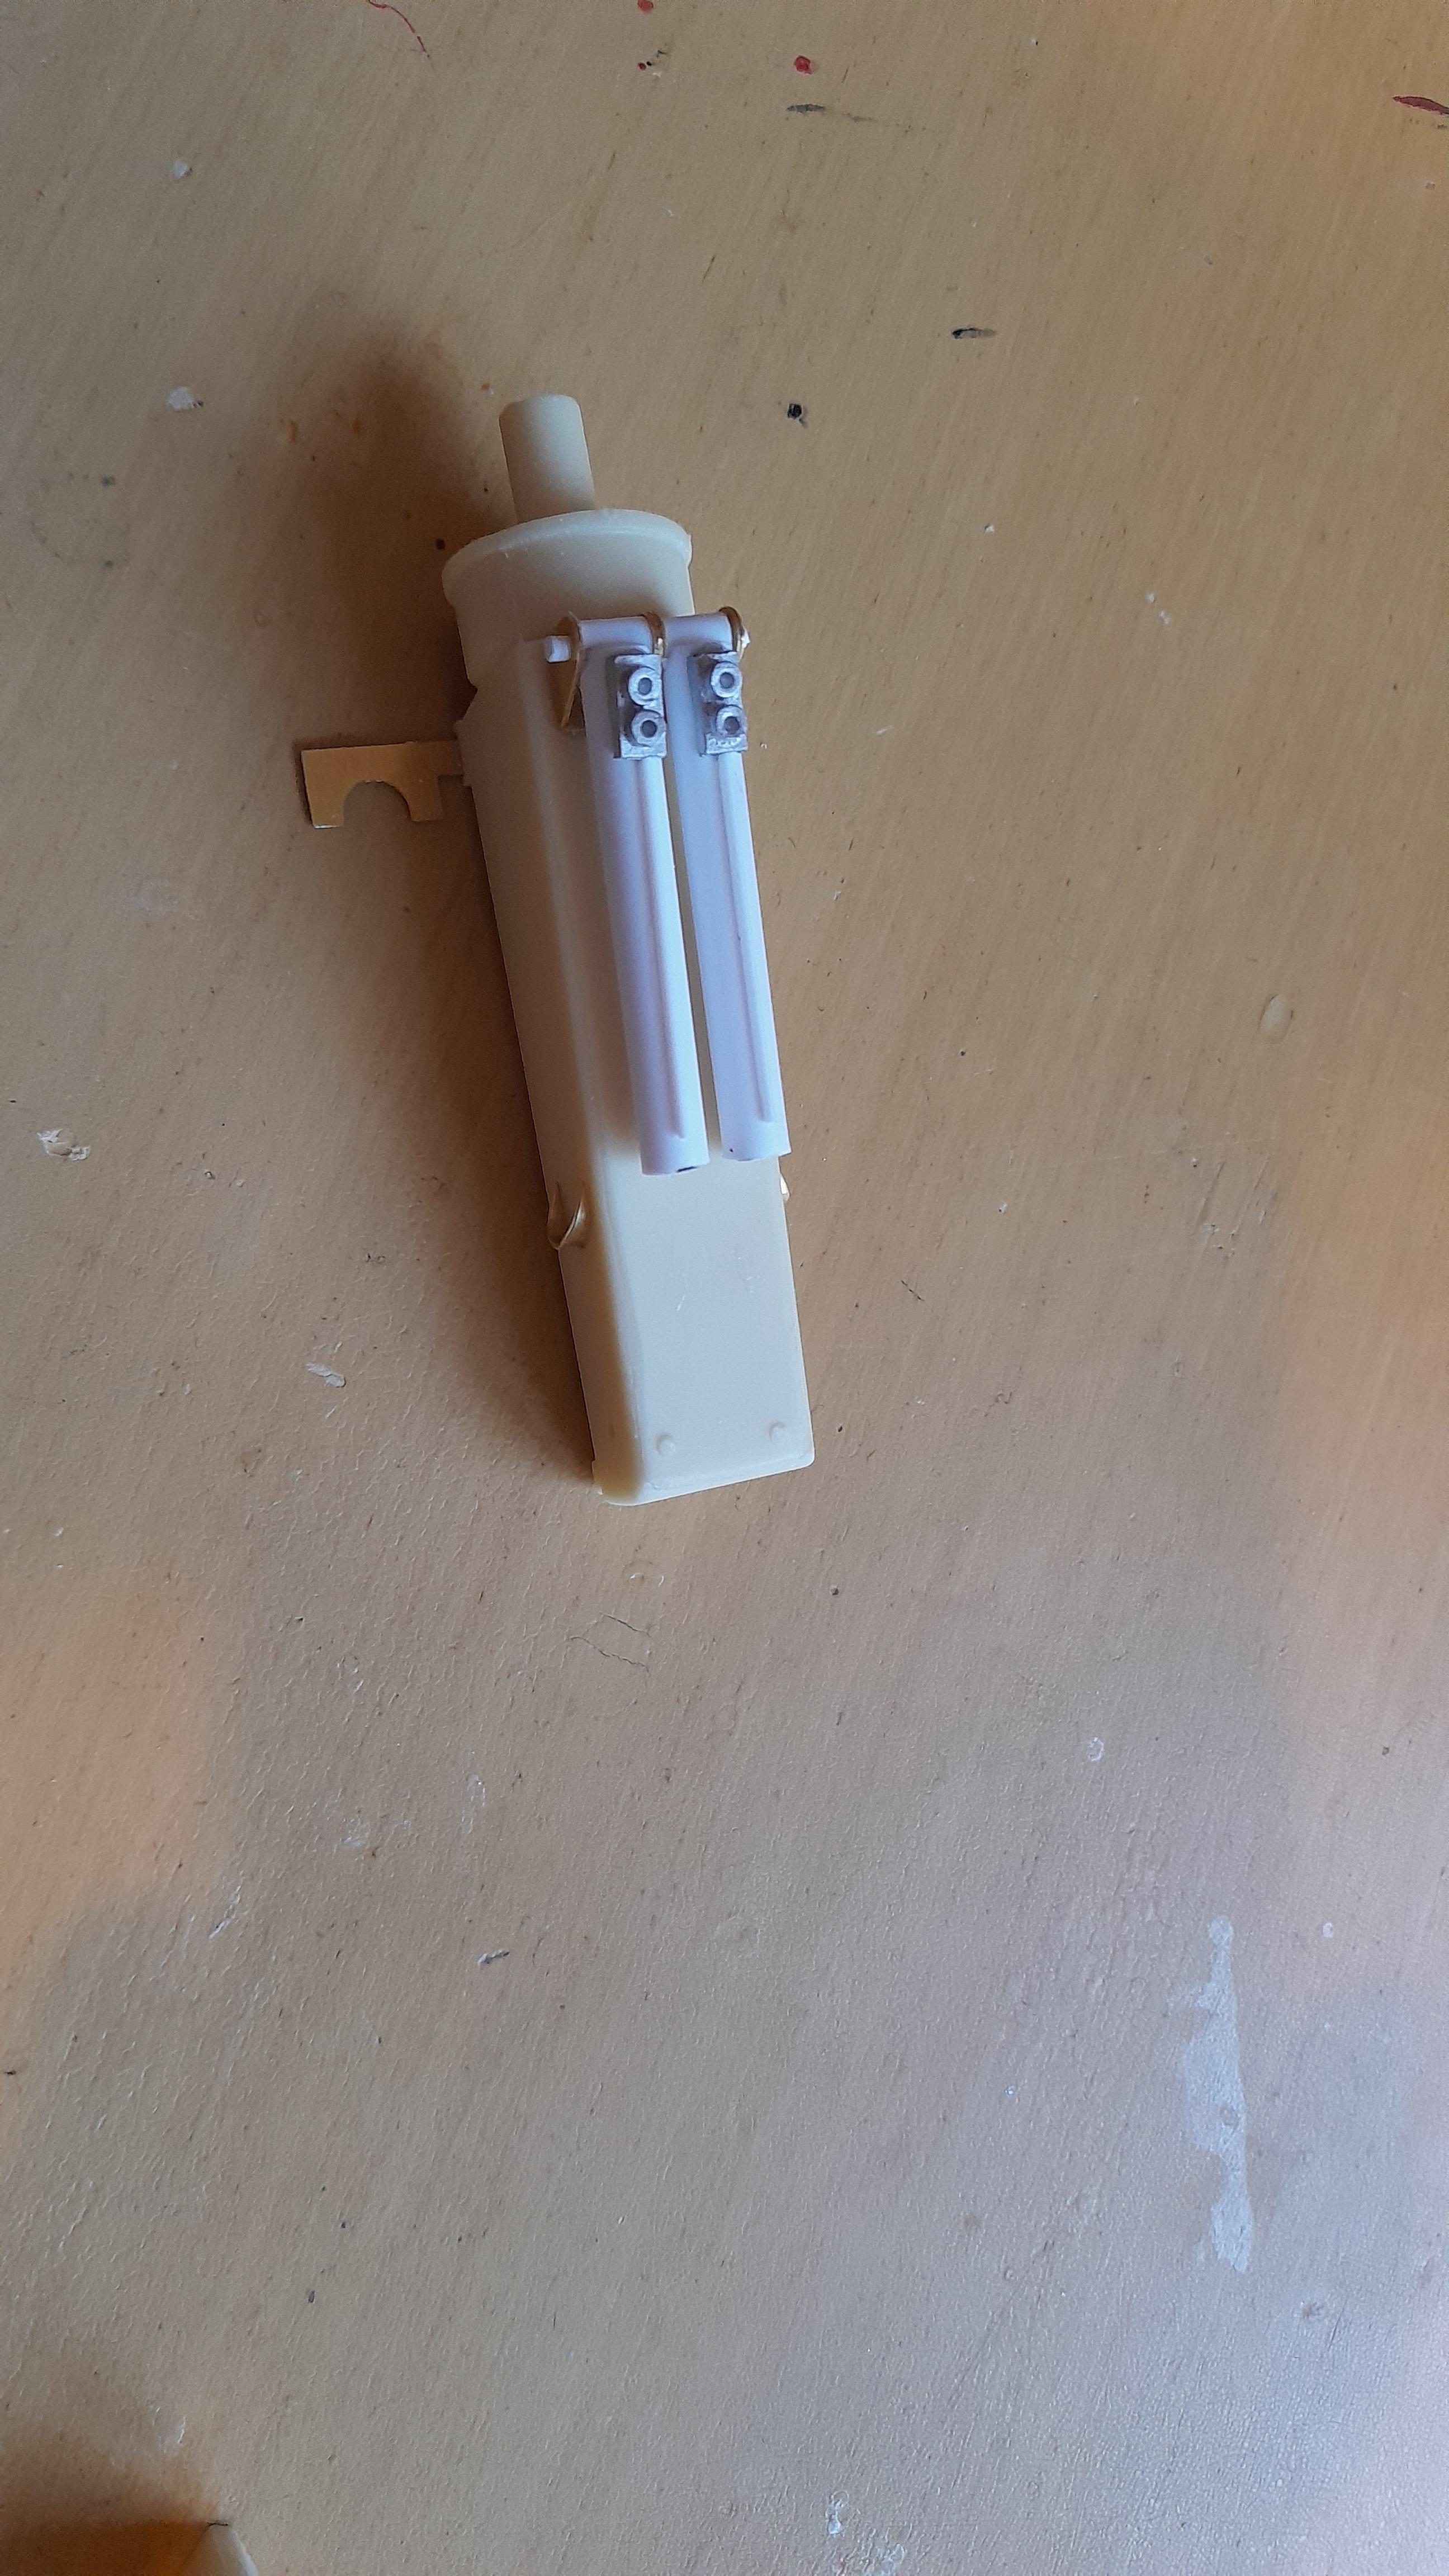
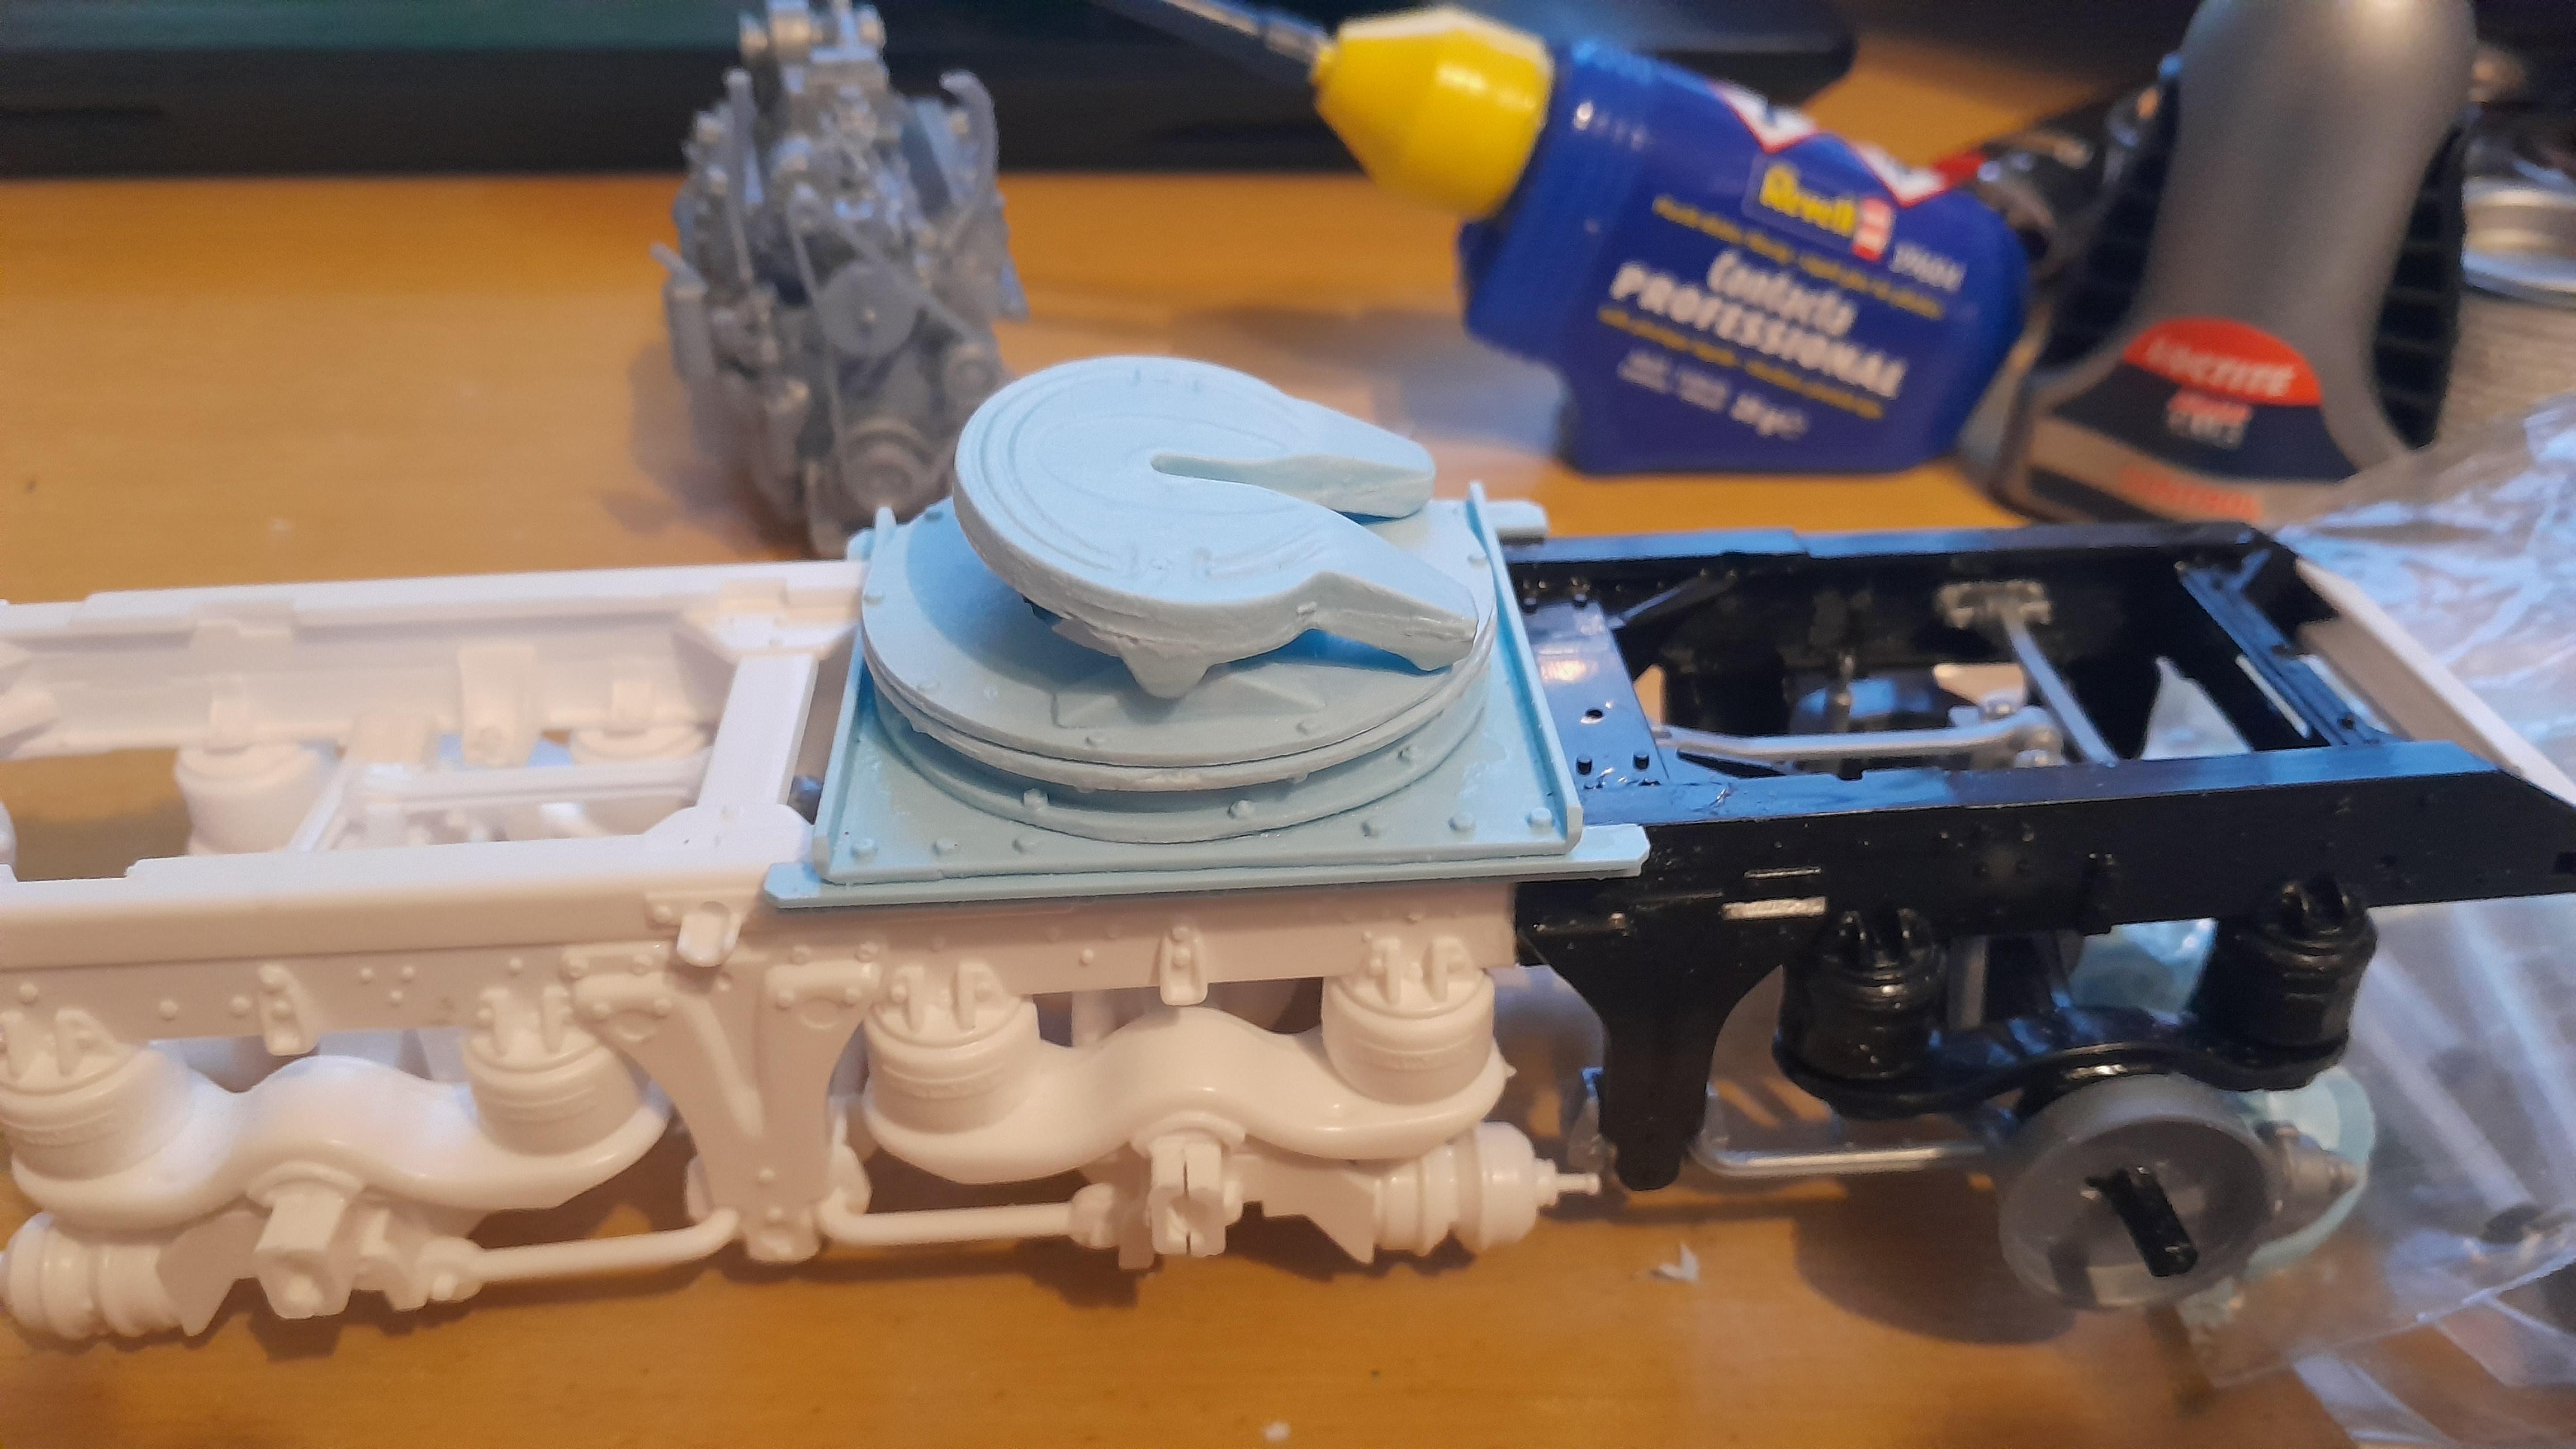
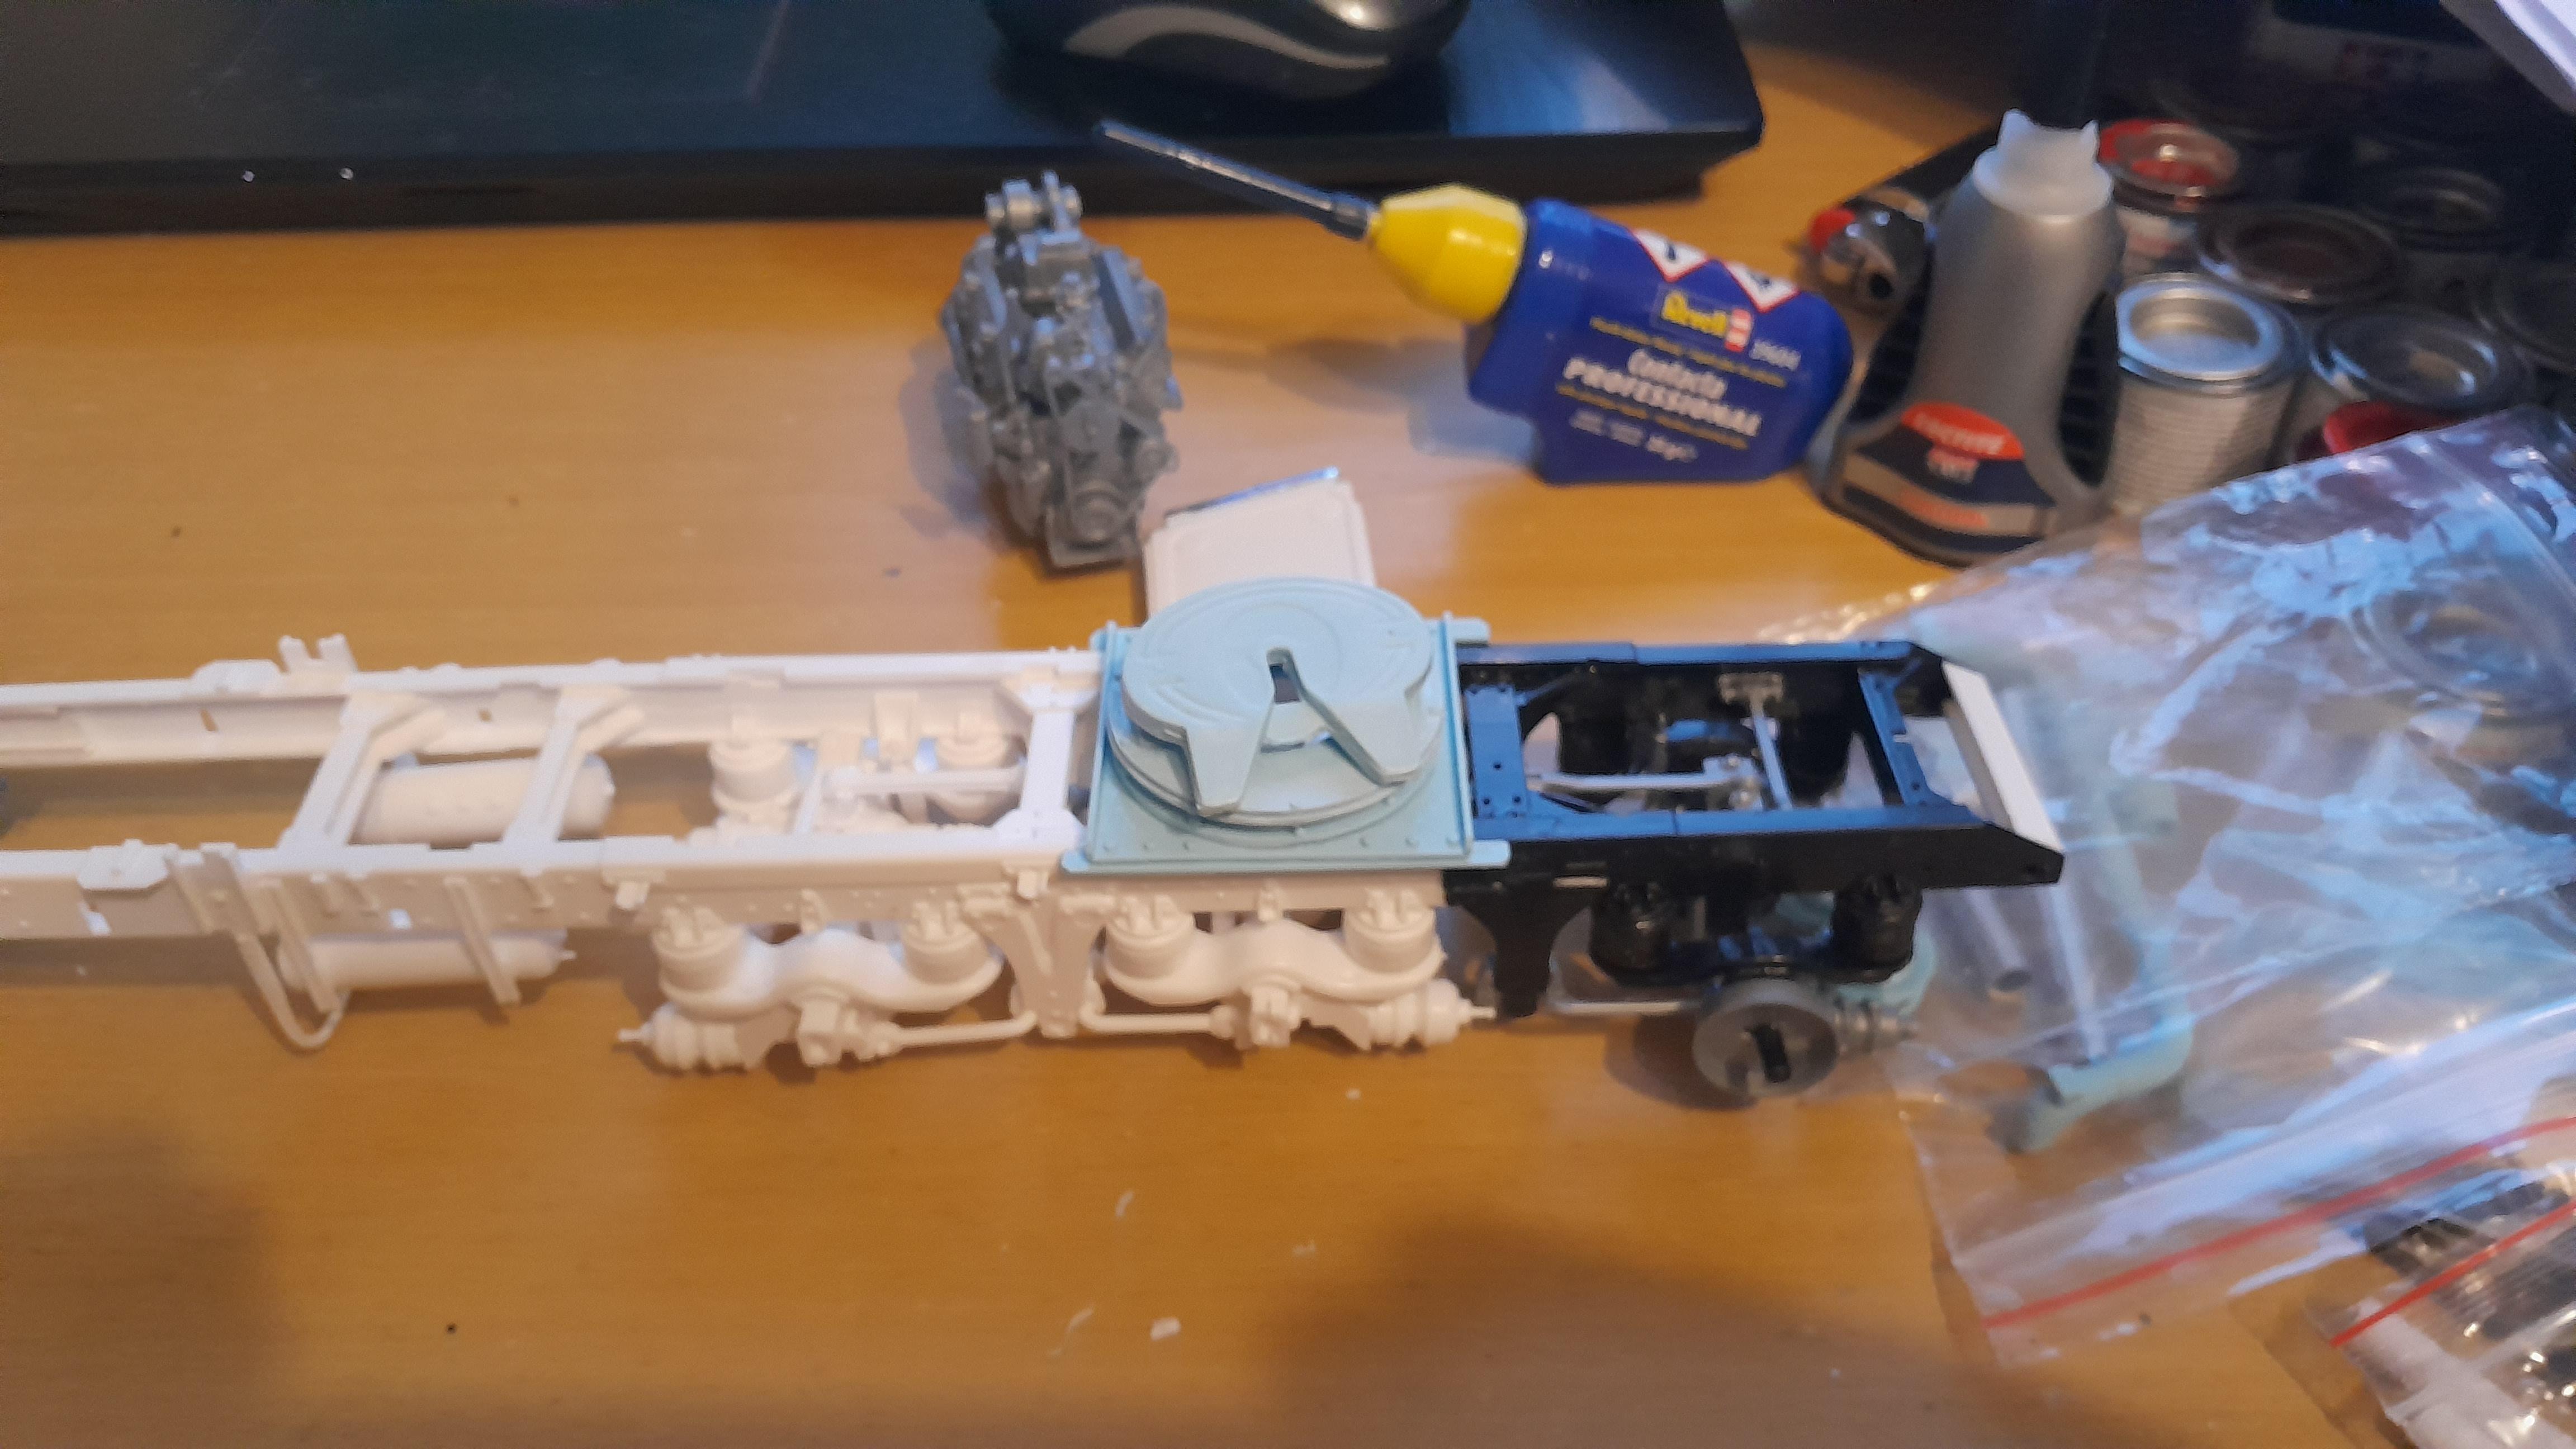
Started to make the aircleaner pipes, there are a few small adjustments i have to make before they look good. Pipe from the aircleaners to the engine is done. I had to modify the kit part to make it fit on the cat v8. Instead of the round airintake that was supplied with the aircleaner set up, i think i am going to use this type of ram tube instead. The fifthwheel is done and works like they should with being able to turn around.
-
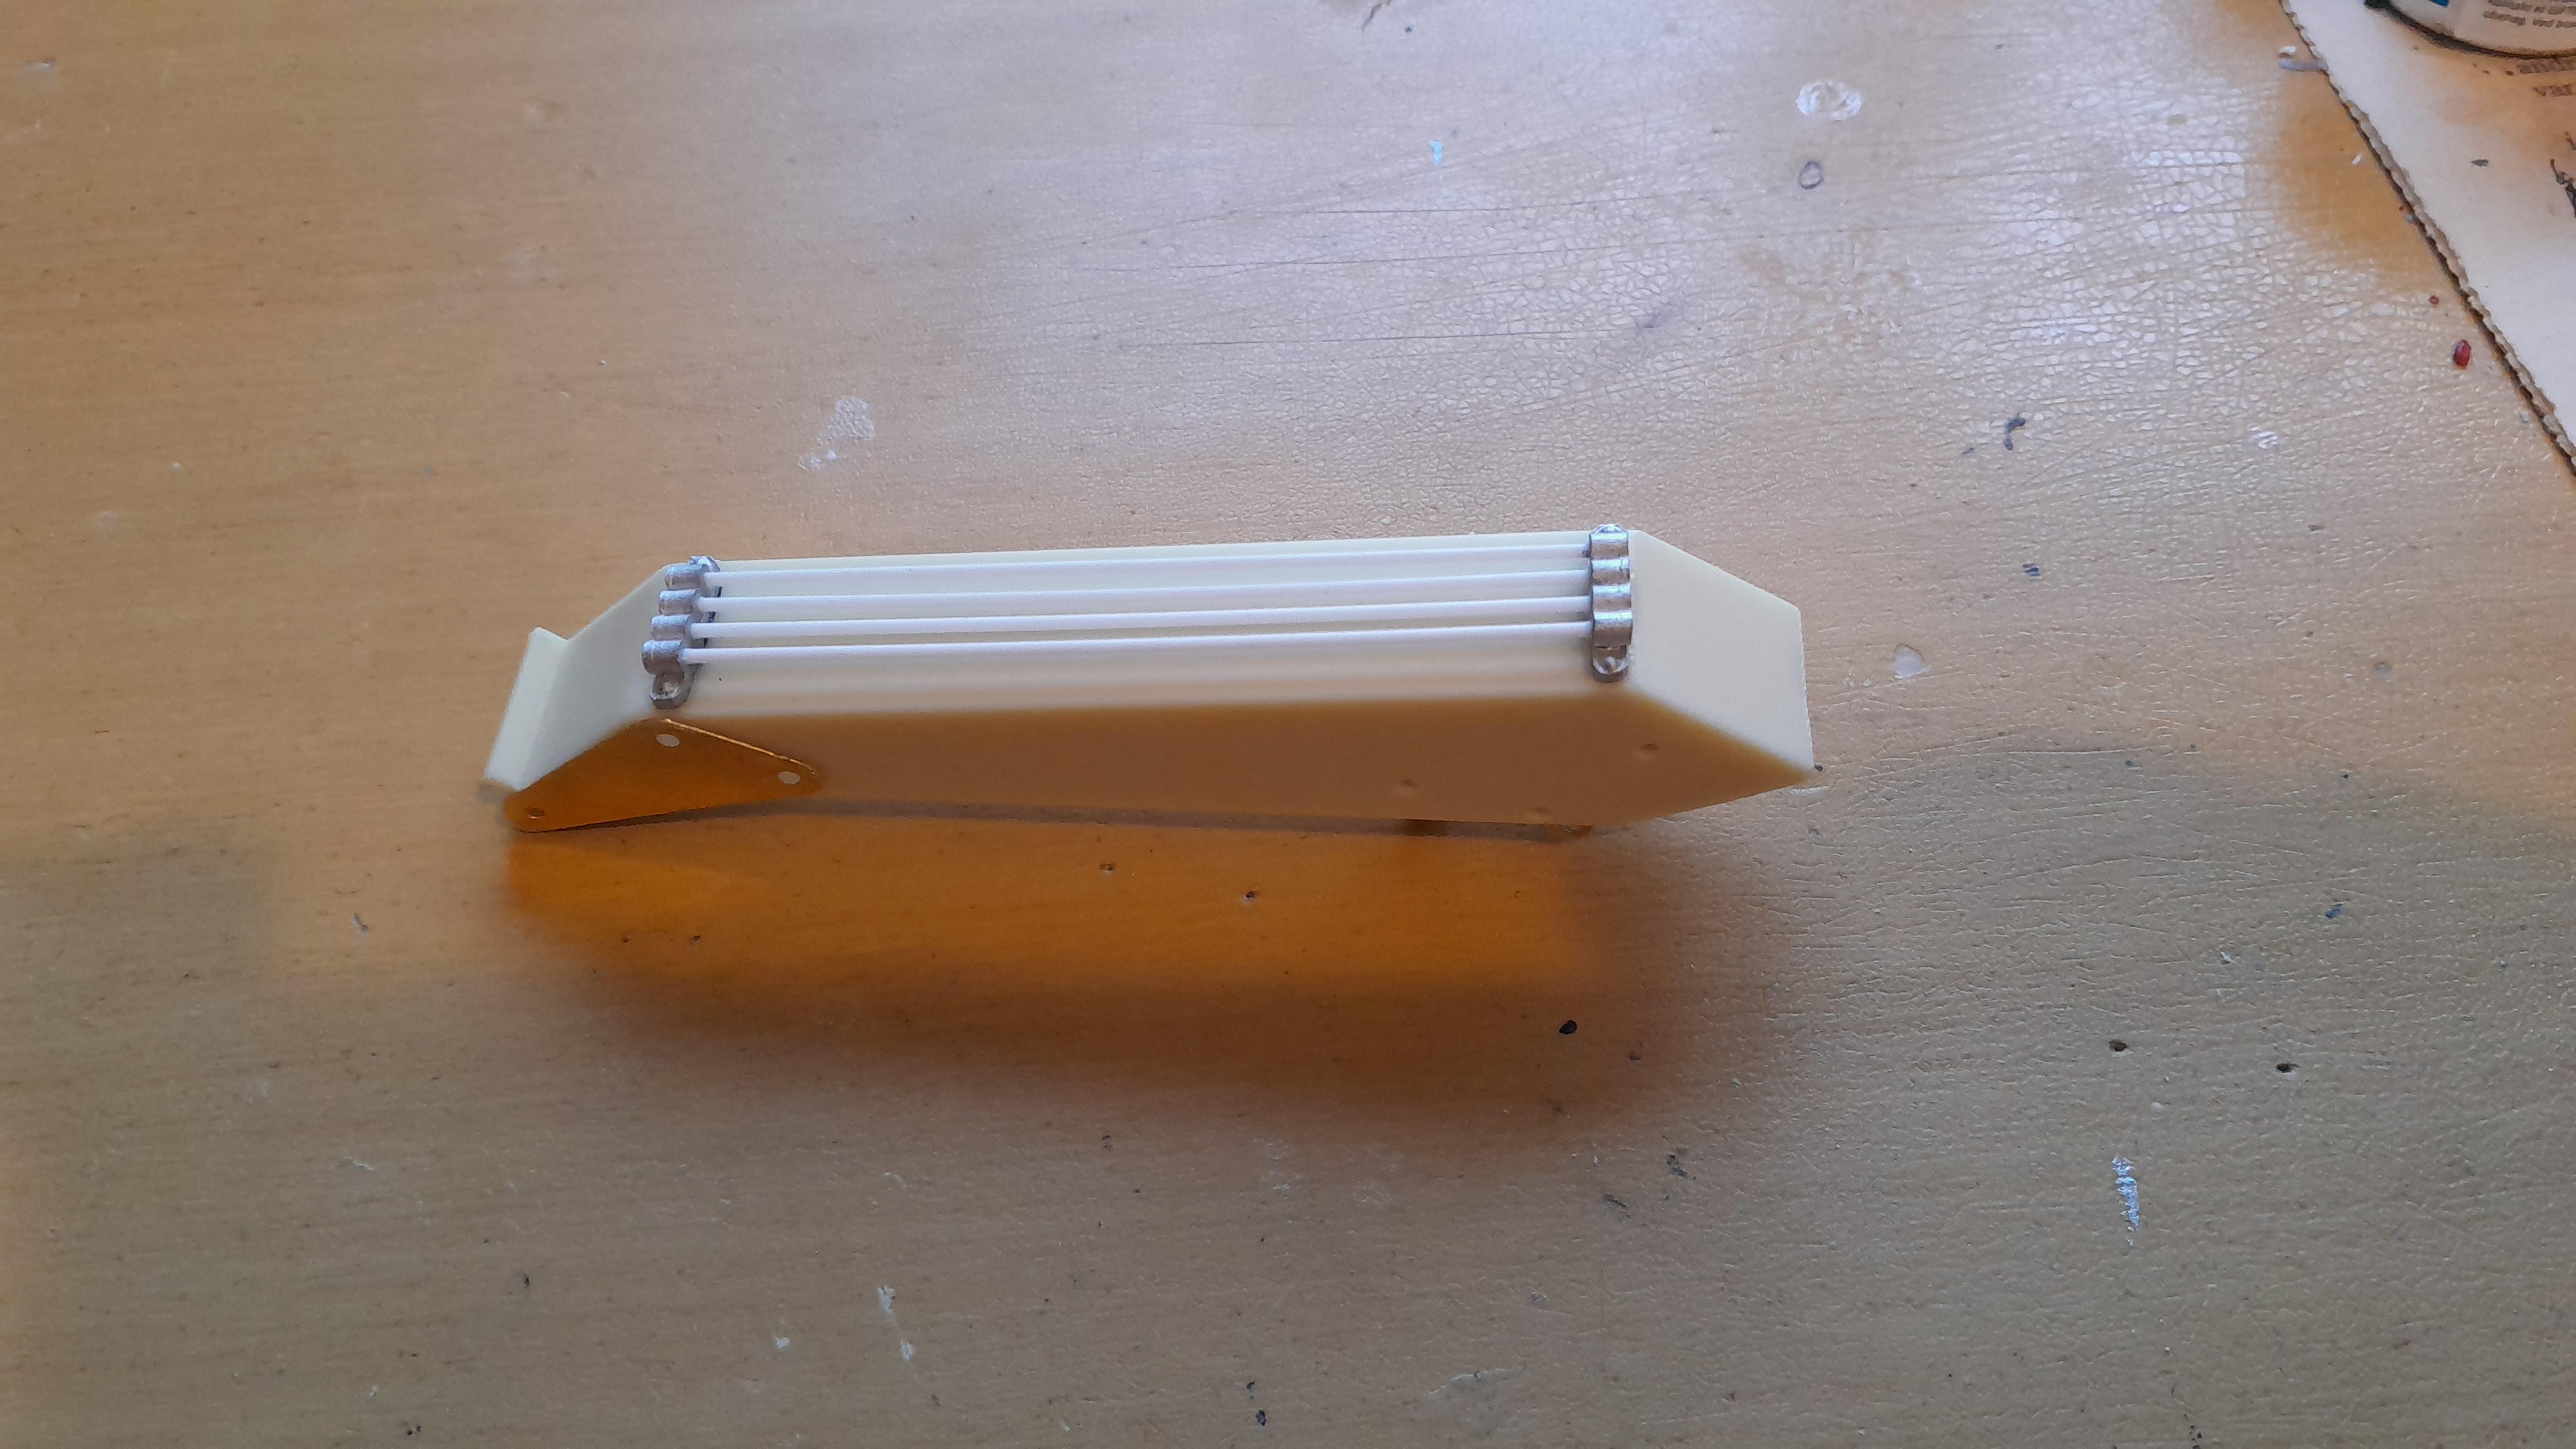
Kenworth K100 twinsteer triaxle
PierreR89 replied to PierreR89's topic in WIP: Model Trucks: Big Rigs and Heavy Equipment
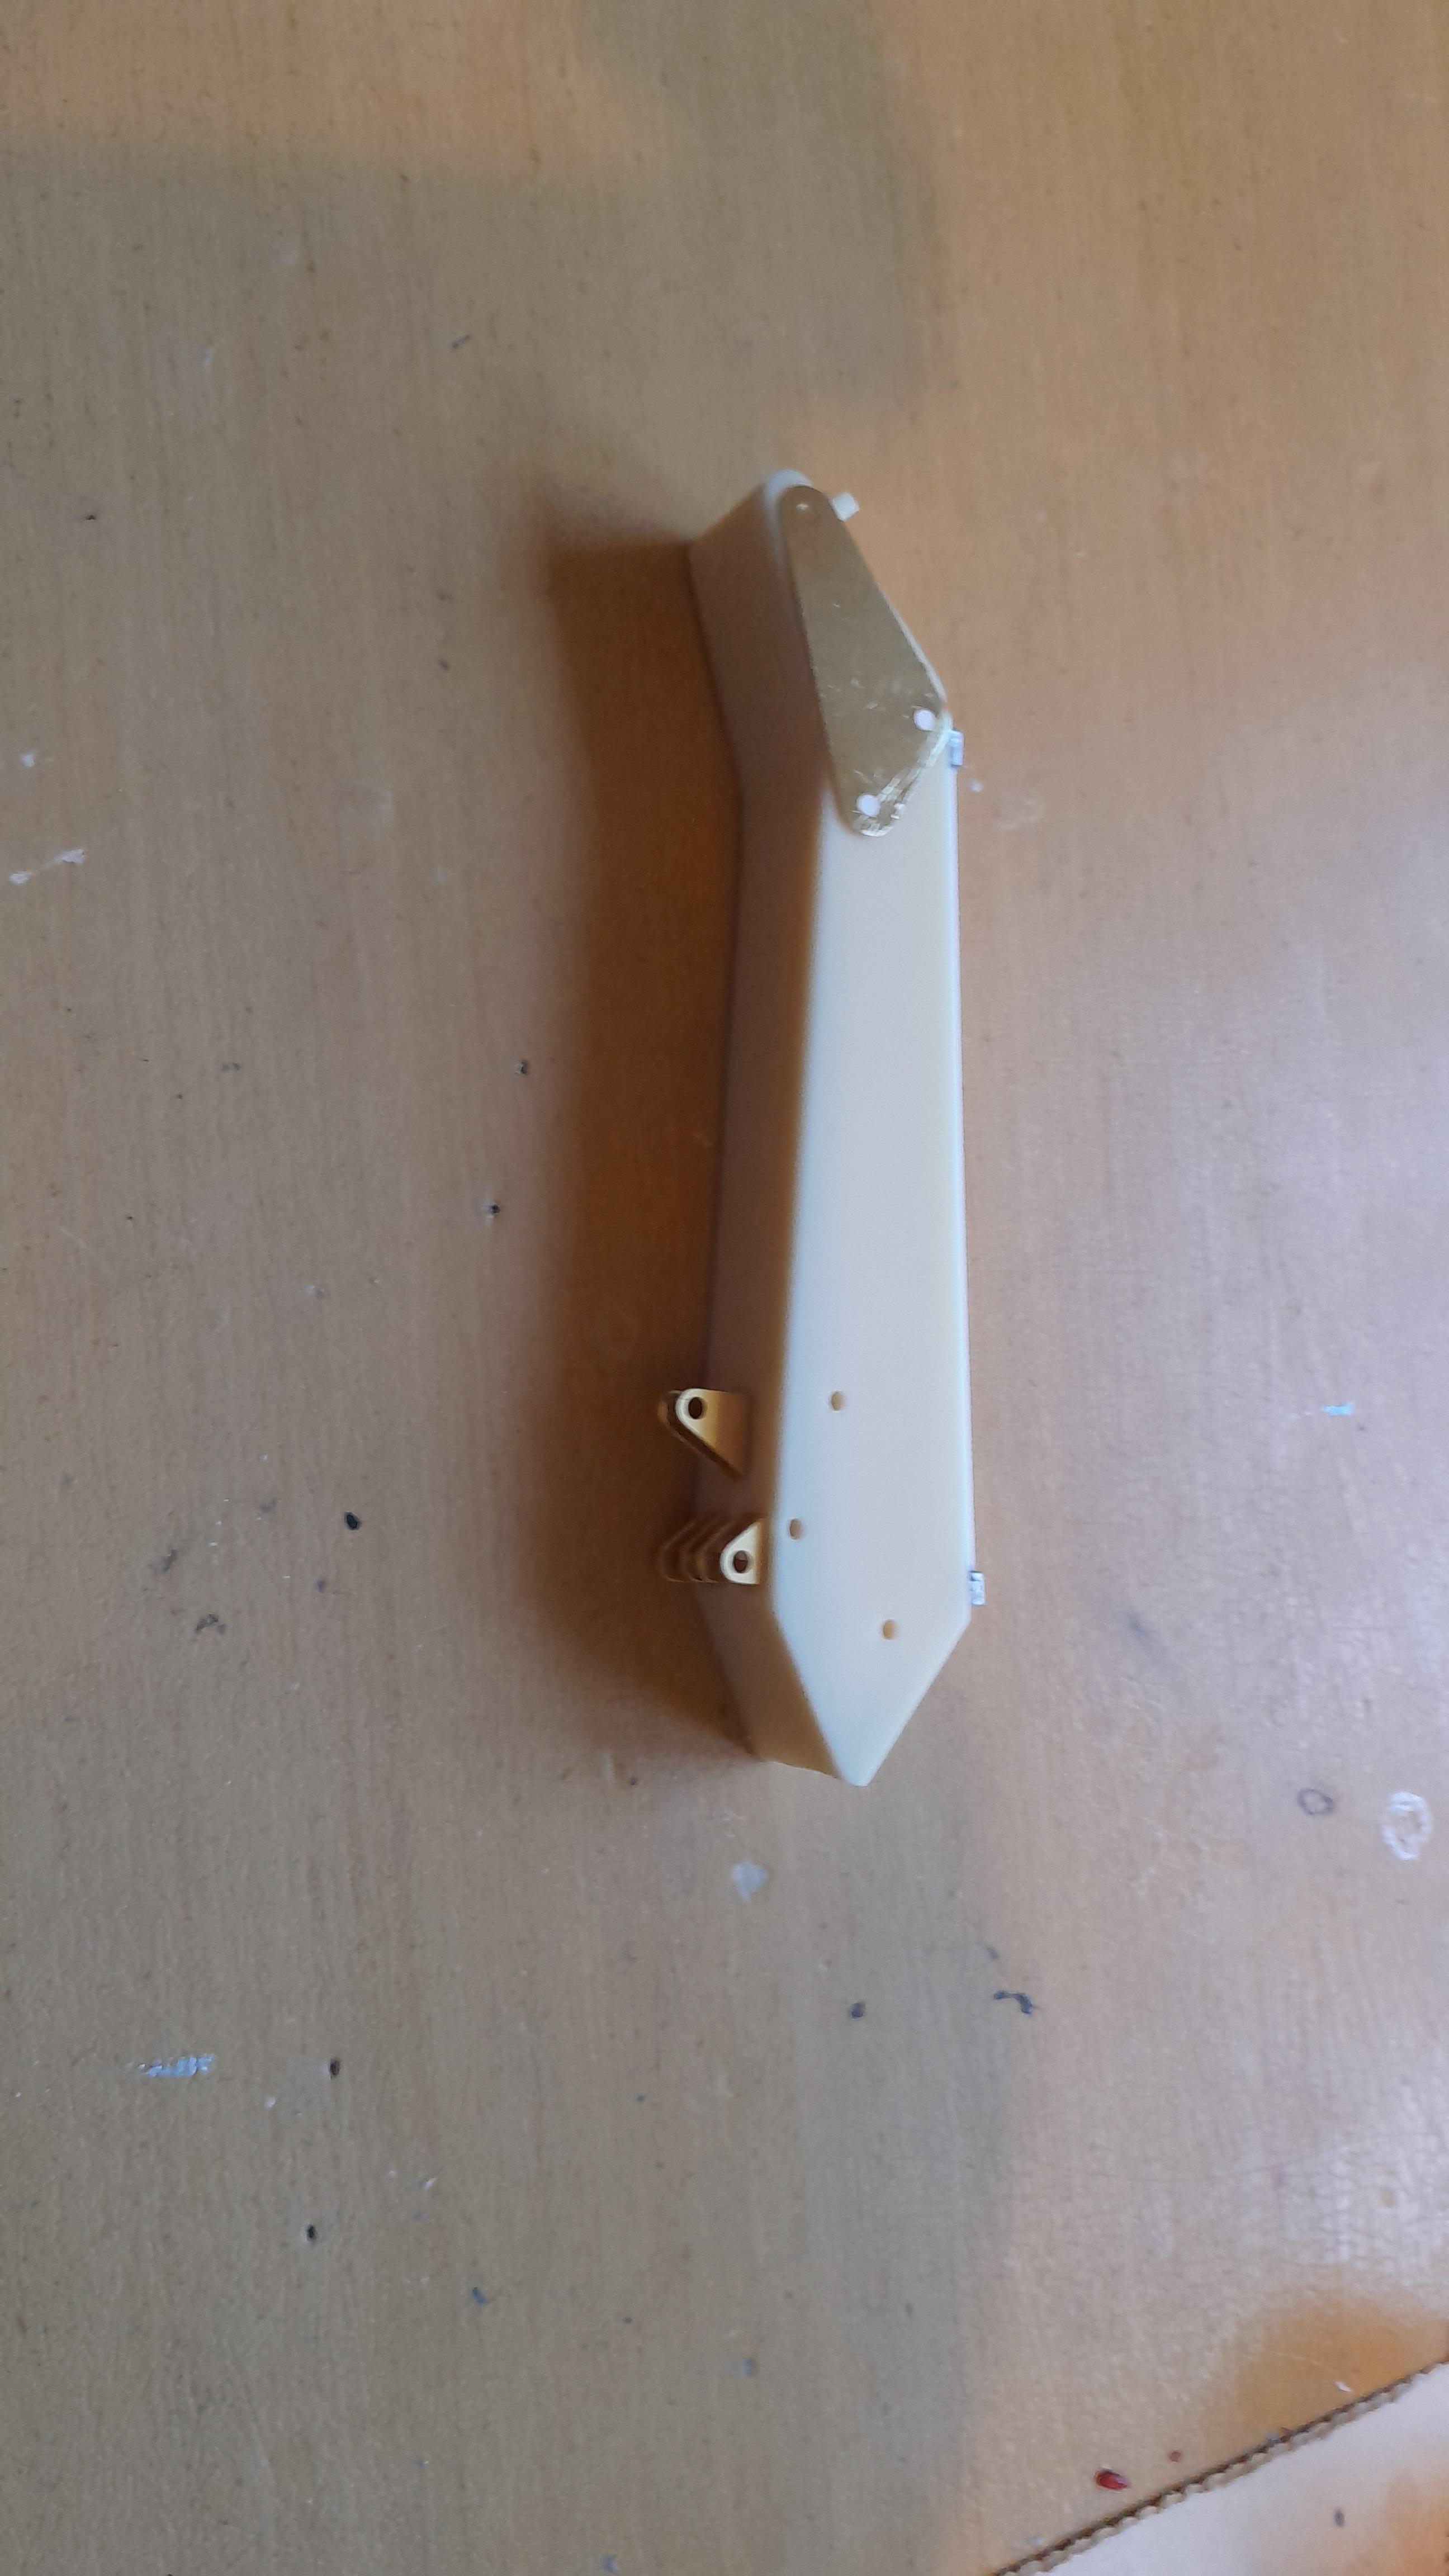
After a few hours i finally got the rear cabmounts and aircleaner pipe mounts fitted. The last pic is what i have thought that it should look like but just not with the Italeri crane, it is going to have the KFS Hiab crane just because it is a better size then the Italeri crane. The fifthwheel is a ball race fifthwheel from auslowe.
-
Kenworth K100 twinsteer triaxle
PierreR89 replied to PierreR89's topic in WIP: Model Trucks: Big Rigs and Heavy Equipment
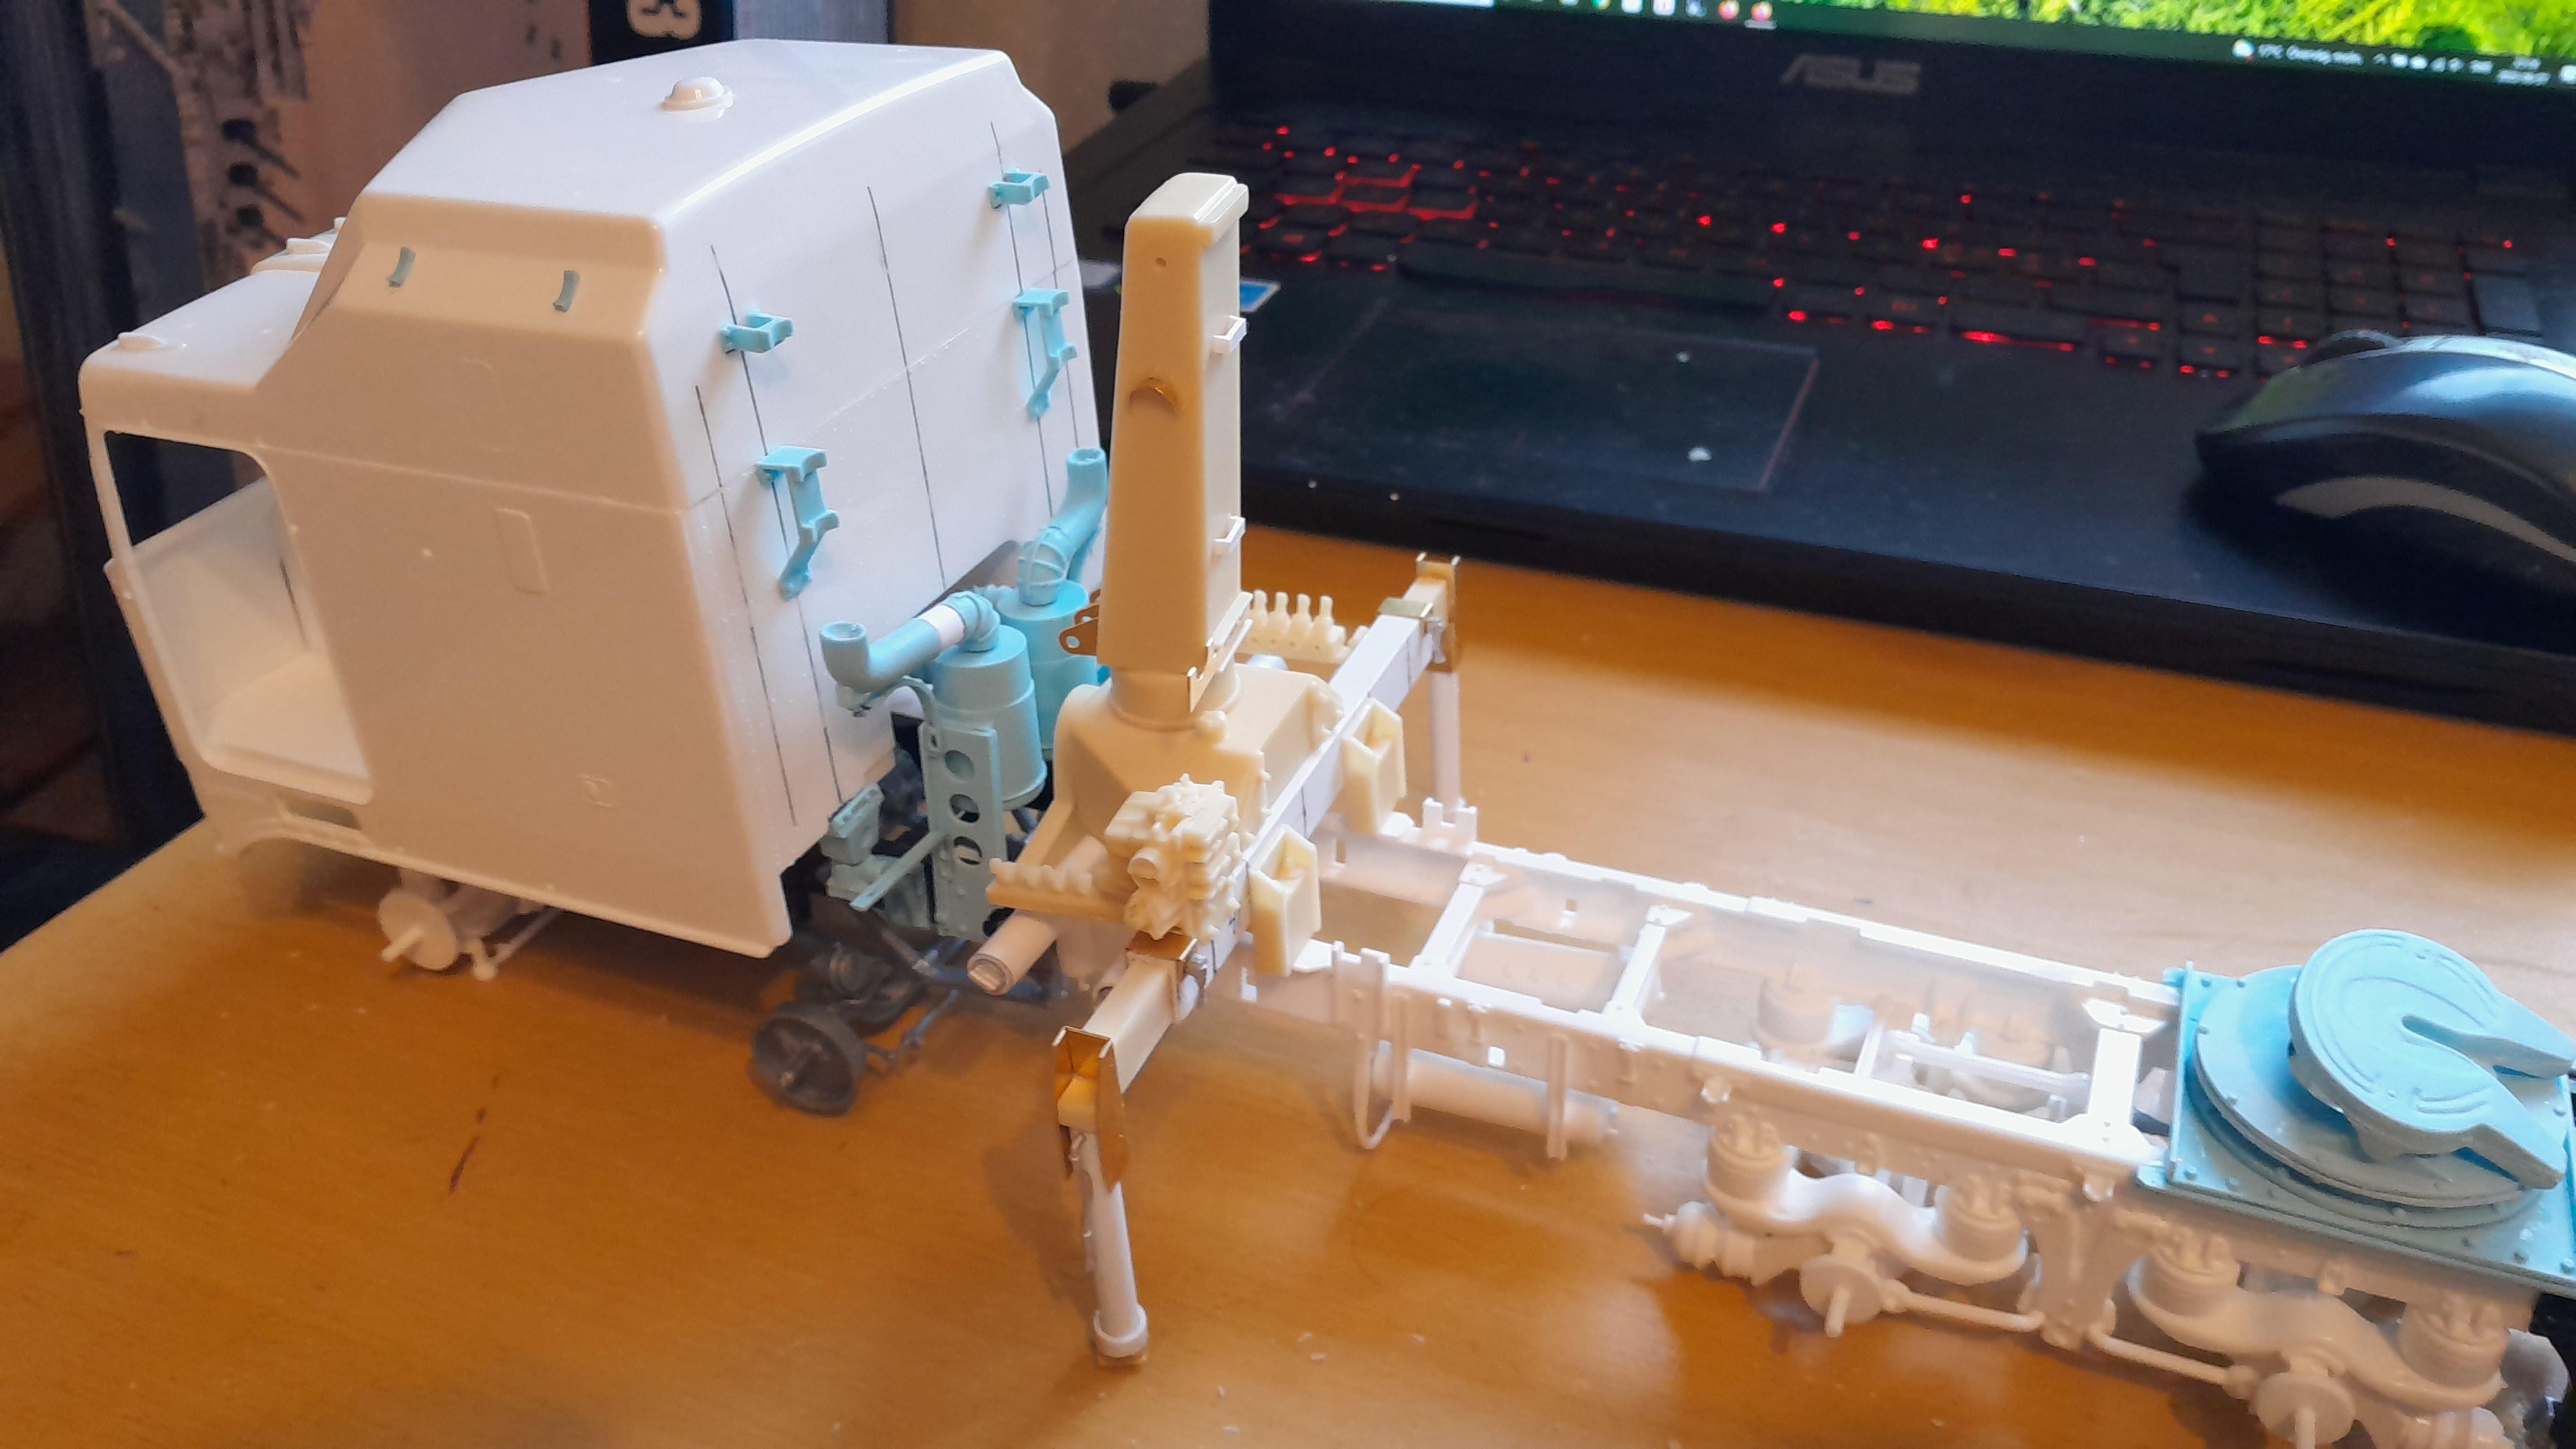
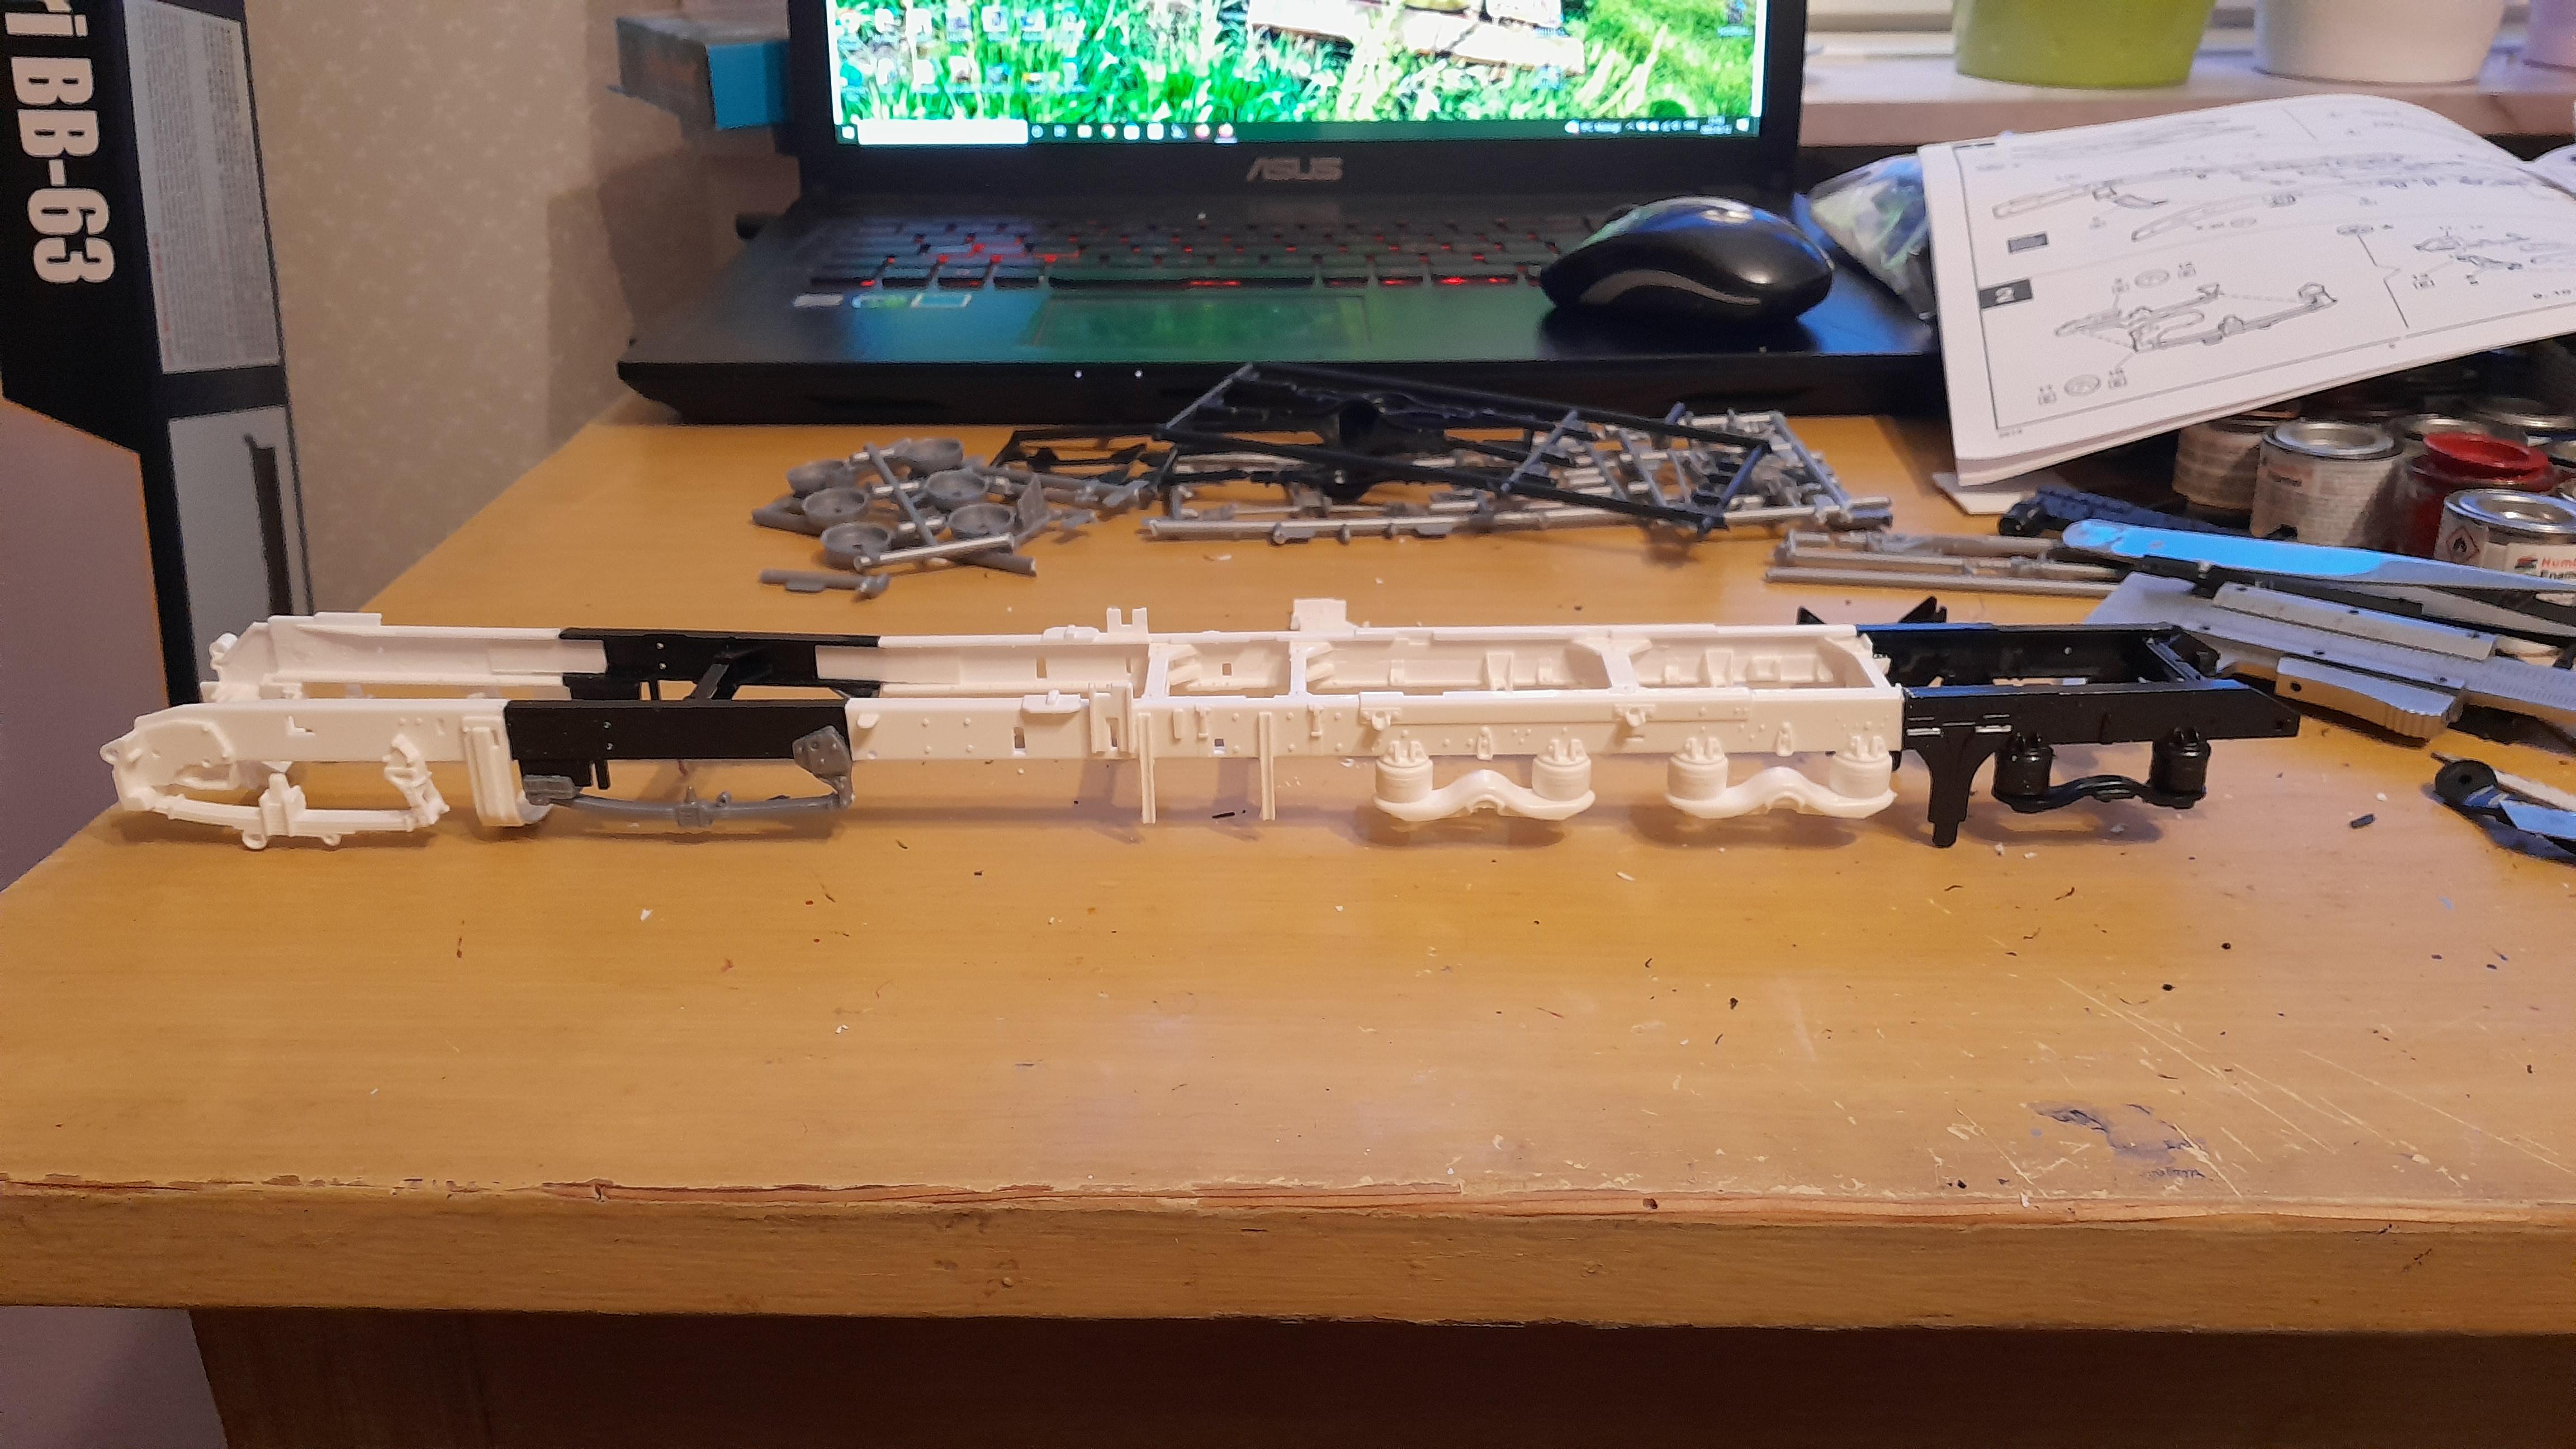
Did some work on it today and it is starting to look like something now. Just a few small things left on the chassie to do before i can start on the cab.
-
Kenworth K100 twinsteer triaxle
PierreR89 replied to PierreR89's topic in WIP: Model Trucks: Big Rigs and Heavy Equipment
It is mostly for better weight distribution. Most of the trucks that have large cranes mounted on them have twin frontaxles to spread out the weight of the crane so the axles are not overloaded and still be within the weight specs the manufacturer recomends. Overloading can lead to the axles breaking in half and thats not good drivning down the road. The springs can also break if they are constantly overloaded. -
Krupp Titan SWL80
PierreR89 replied to PierreR89's topic in Model Trucks: Big Rigs and Heavy Equipment
Thanks, Yes i think so to. If you build them please post them here so there will be a few more of them here on this site. Thanks. Thanks. -
Kenworth K100 twinsteer triaxle
PierreR89 replied to PierreR89's topic in WIP: Model Trucks: Big Rigs and Heavy Equipment
I have finally started on this project. I made the frame for it tonight and it turned out like this.
-
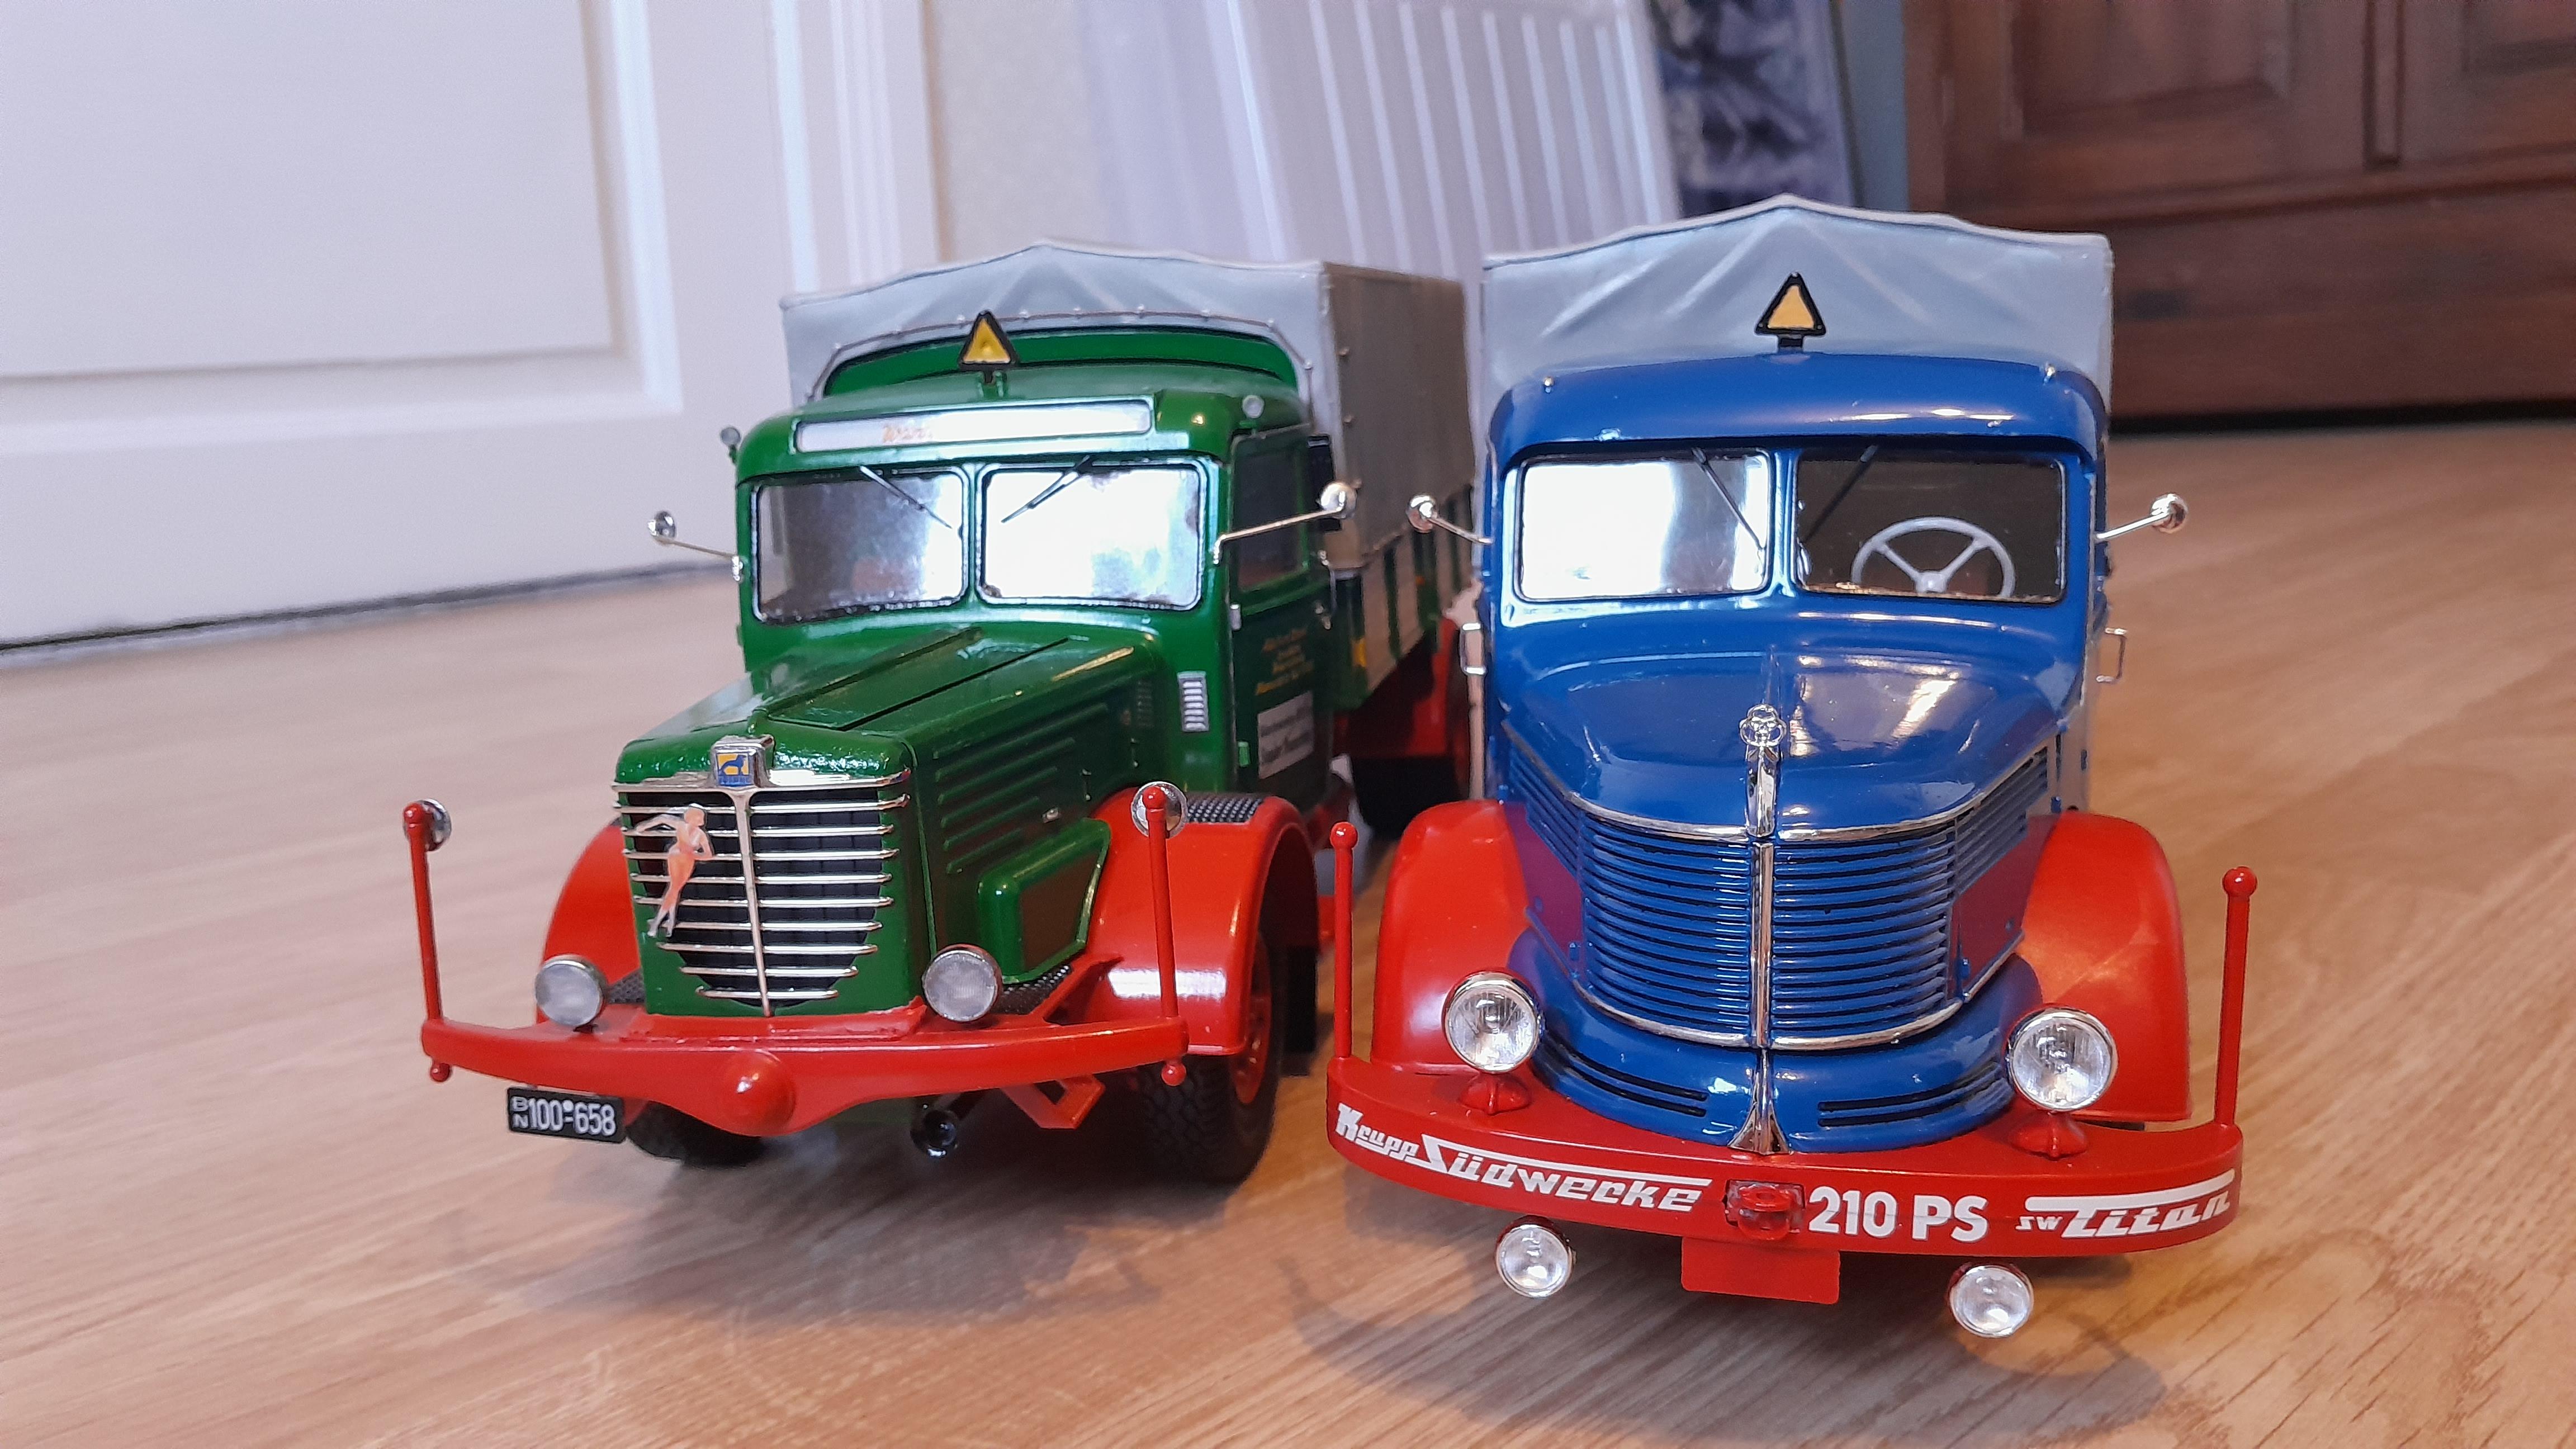
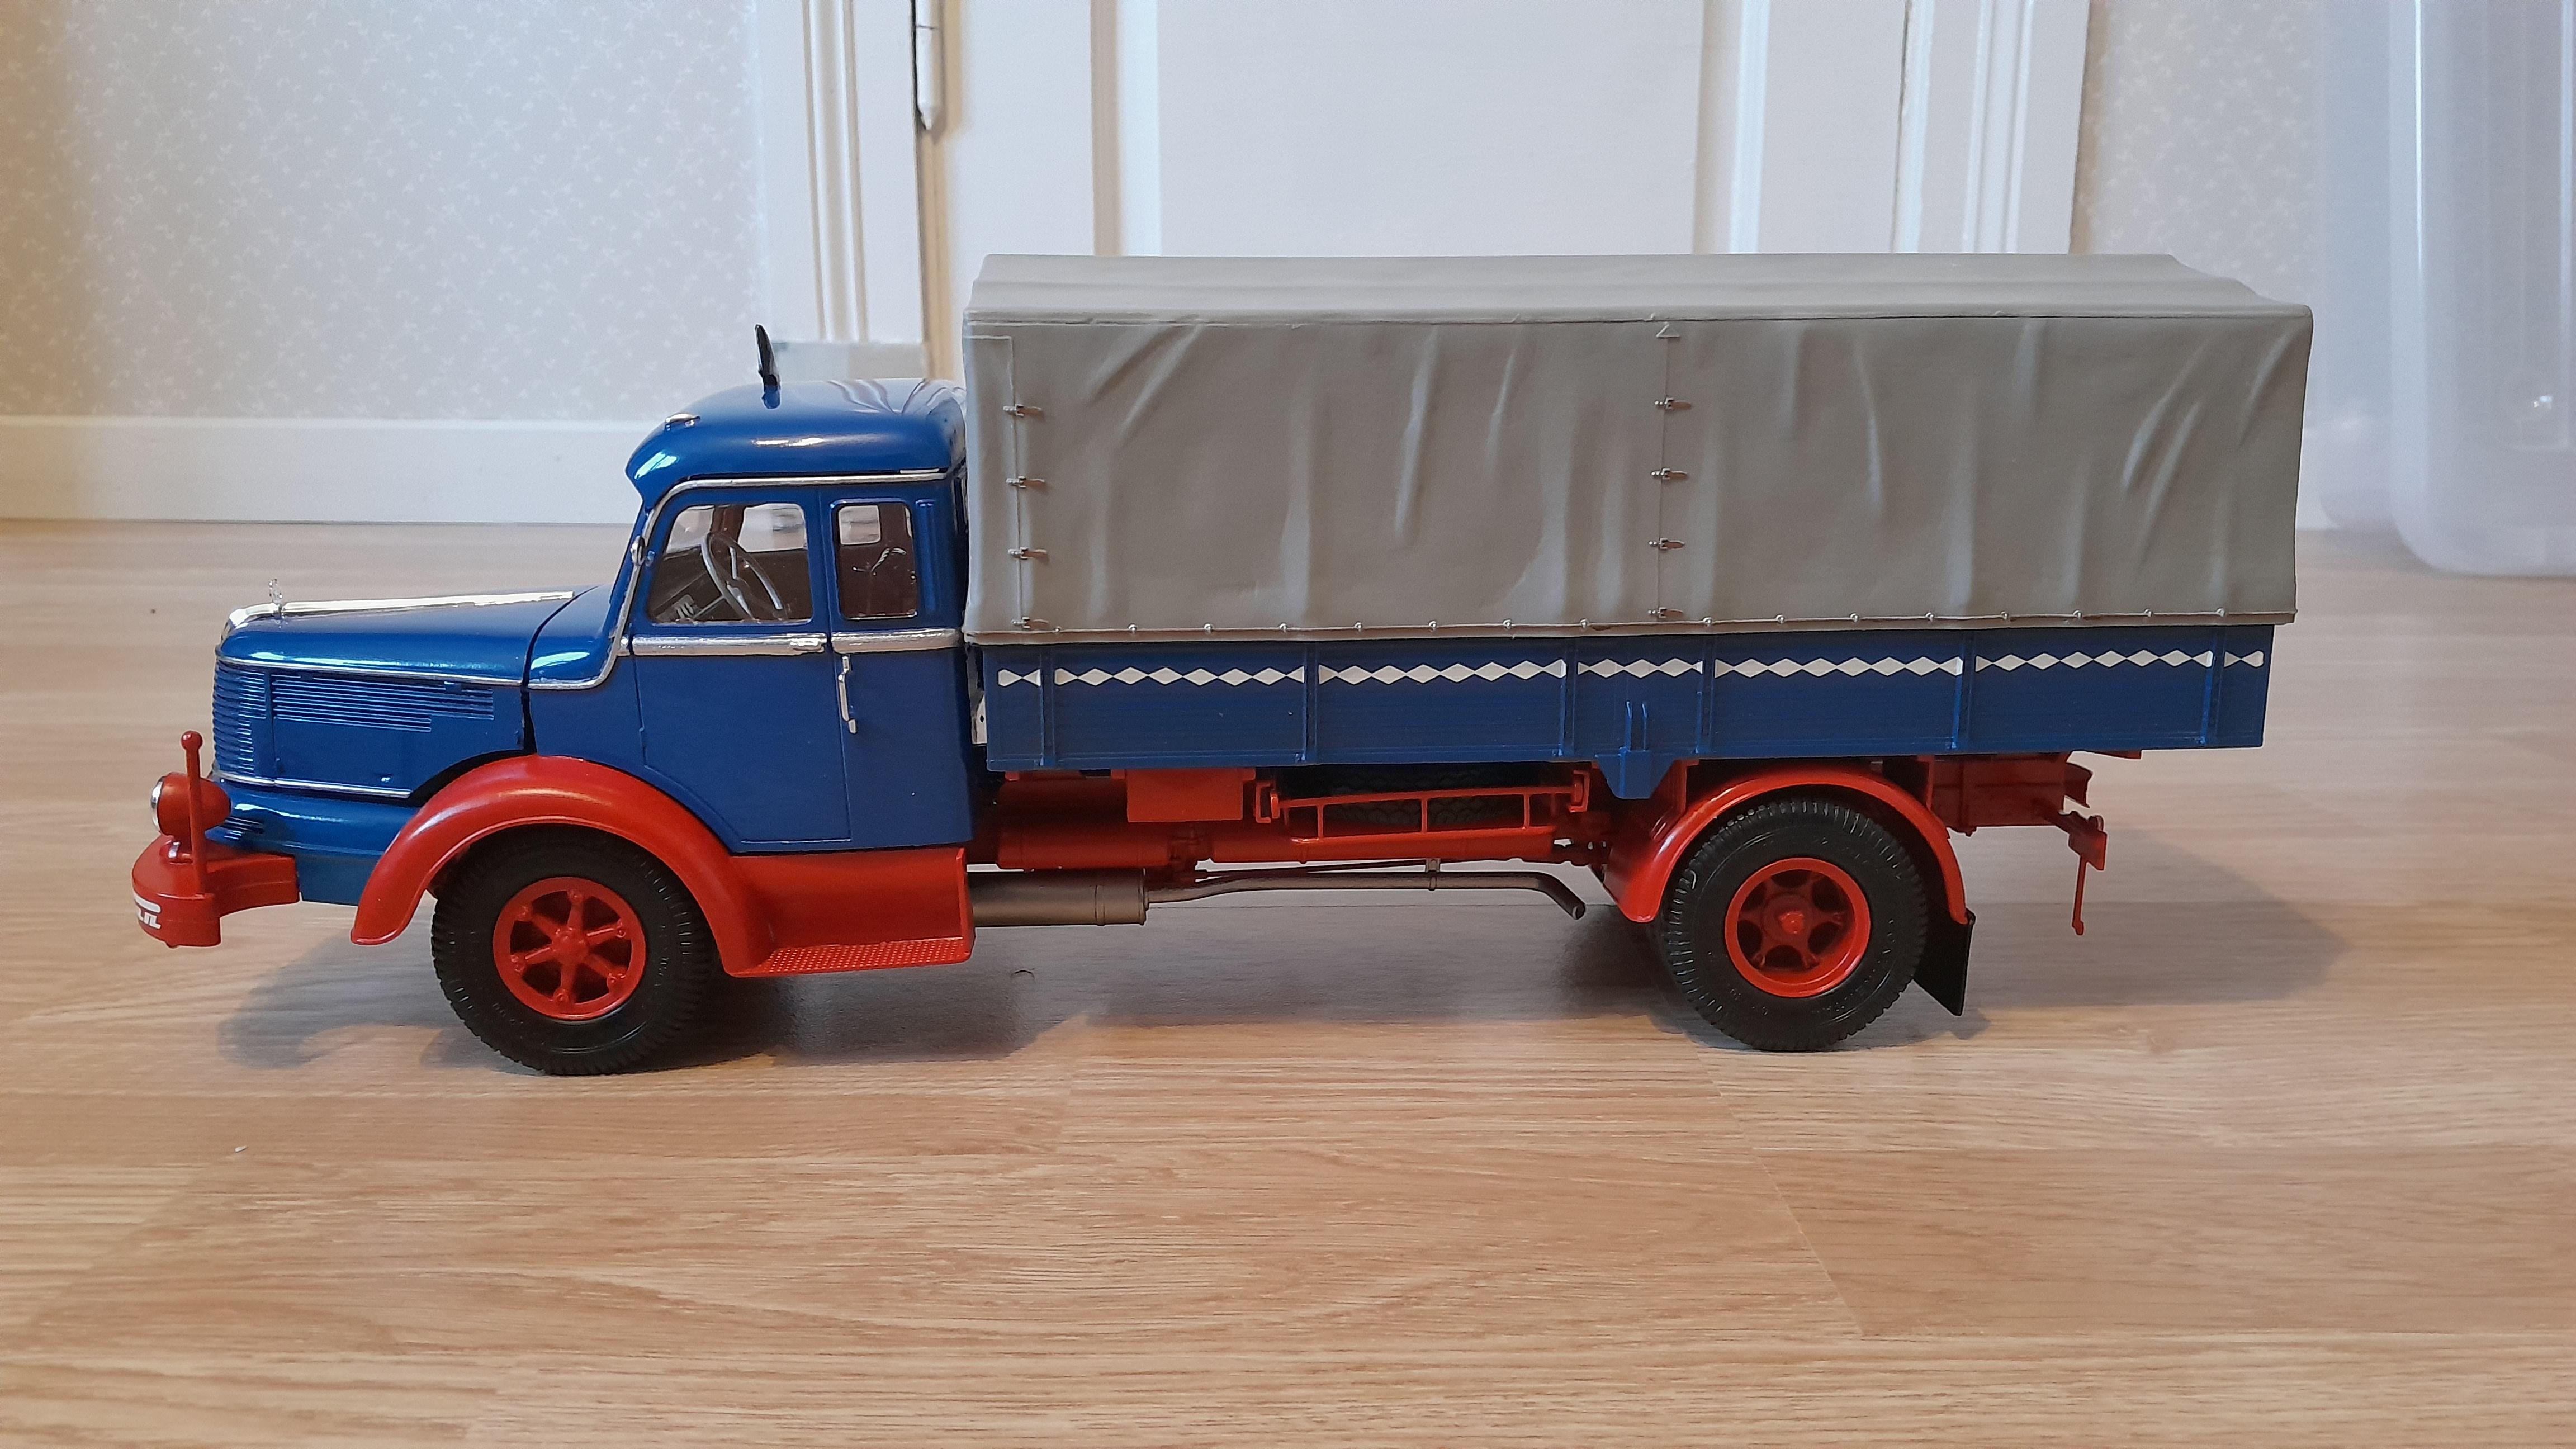
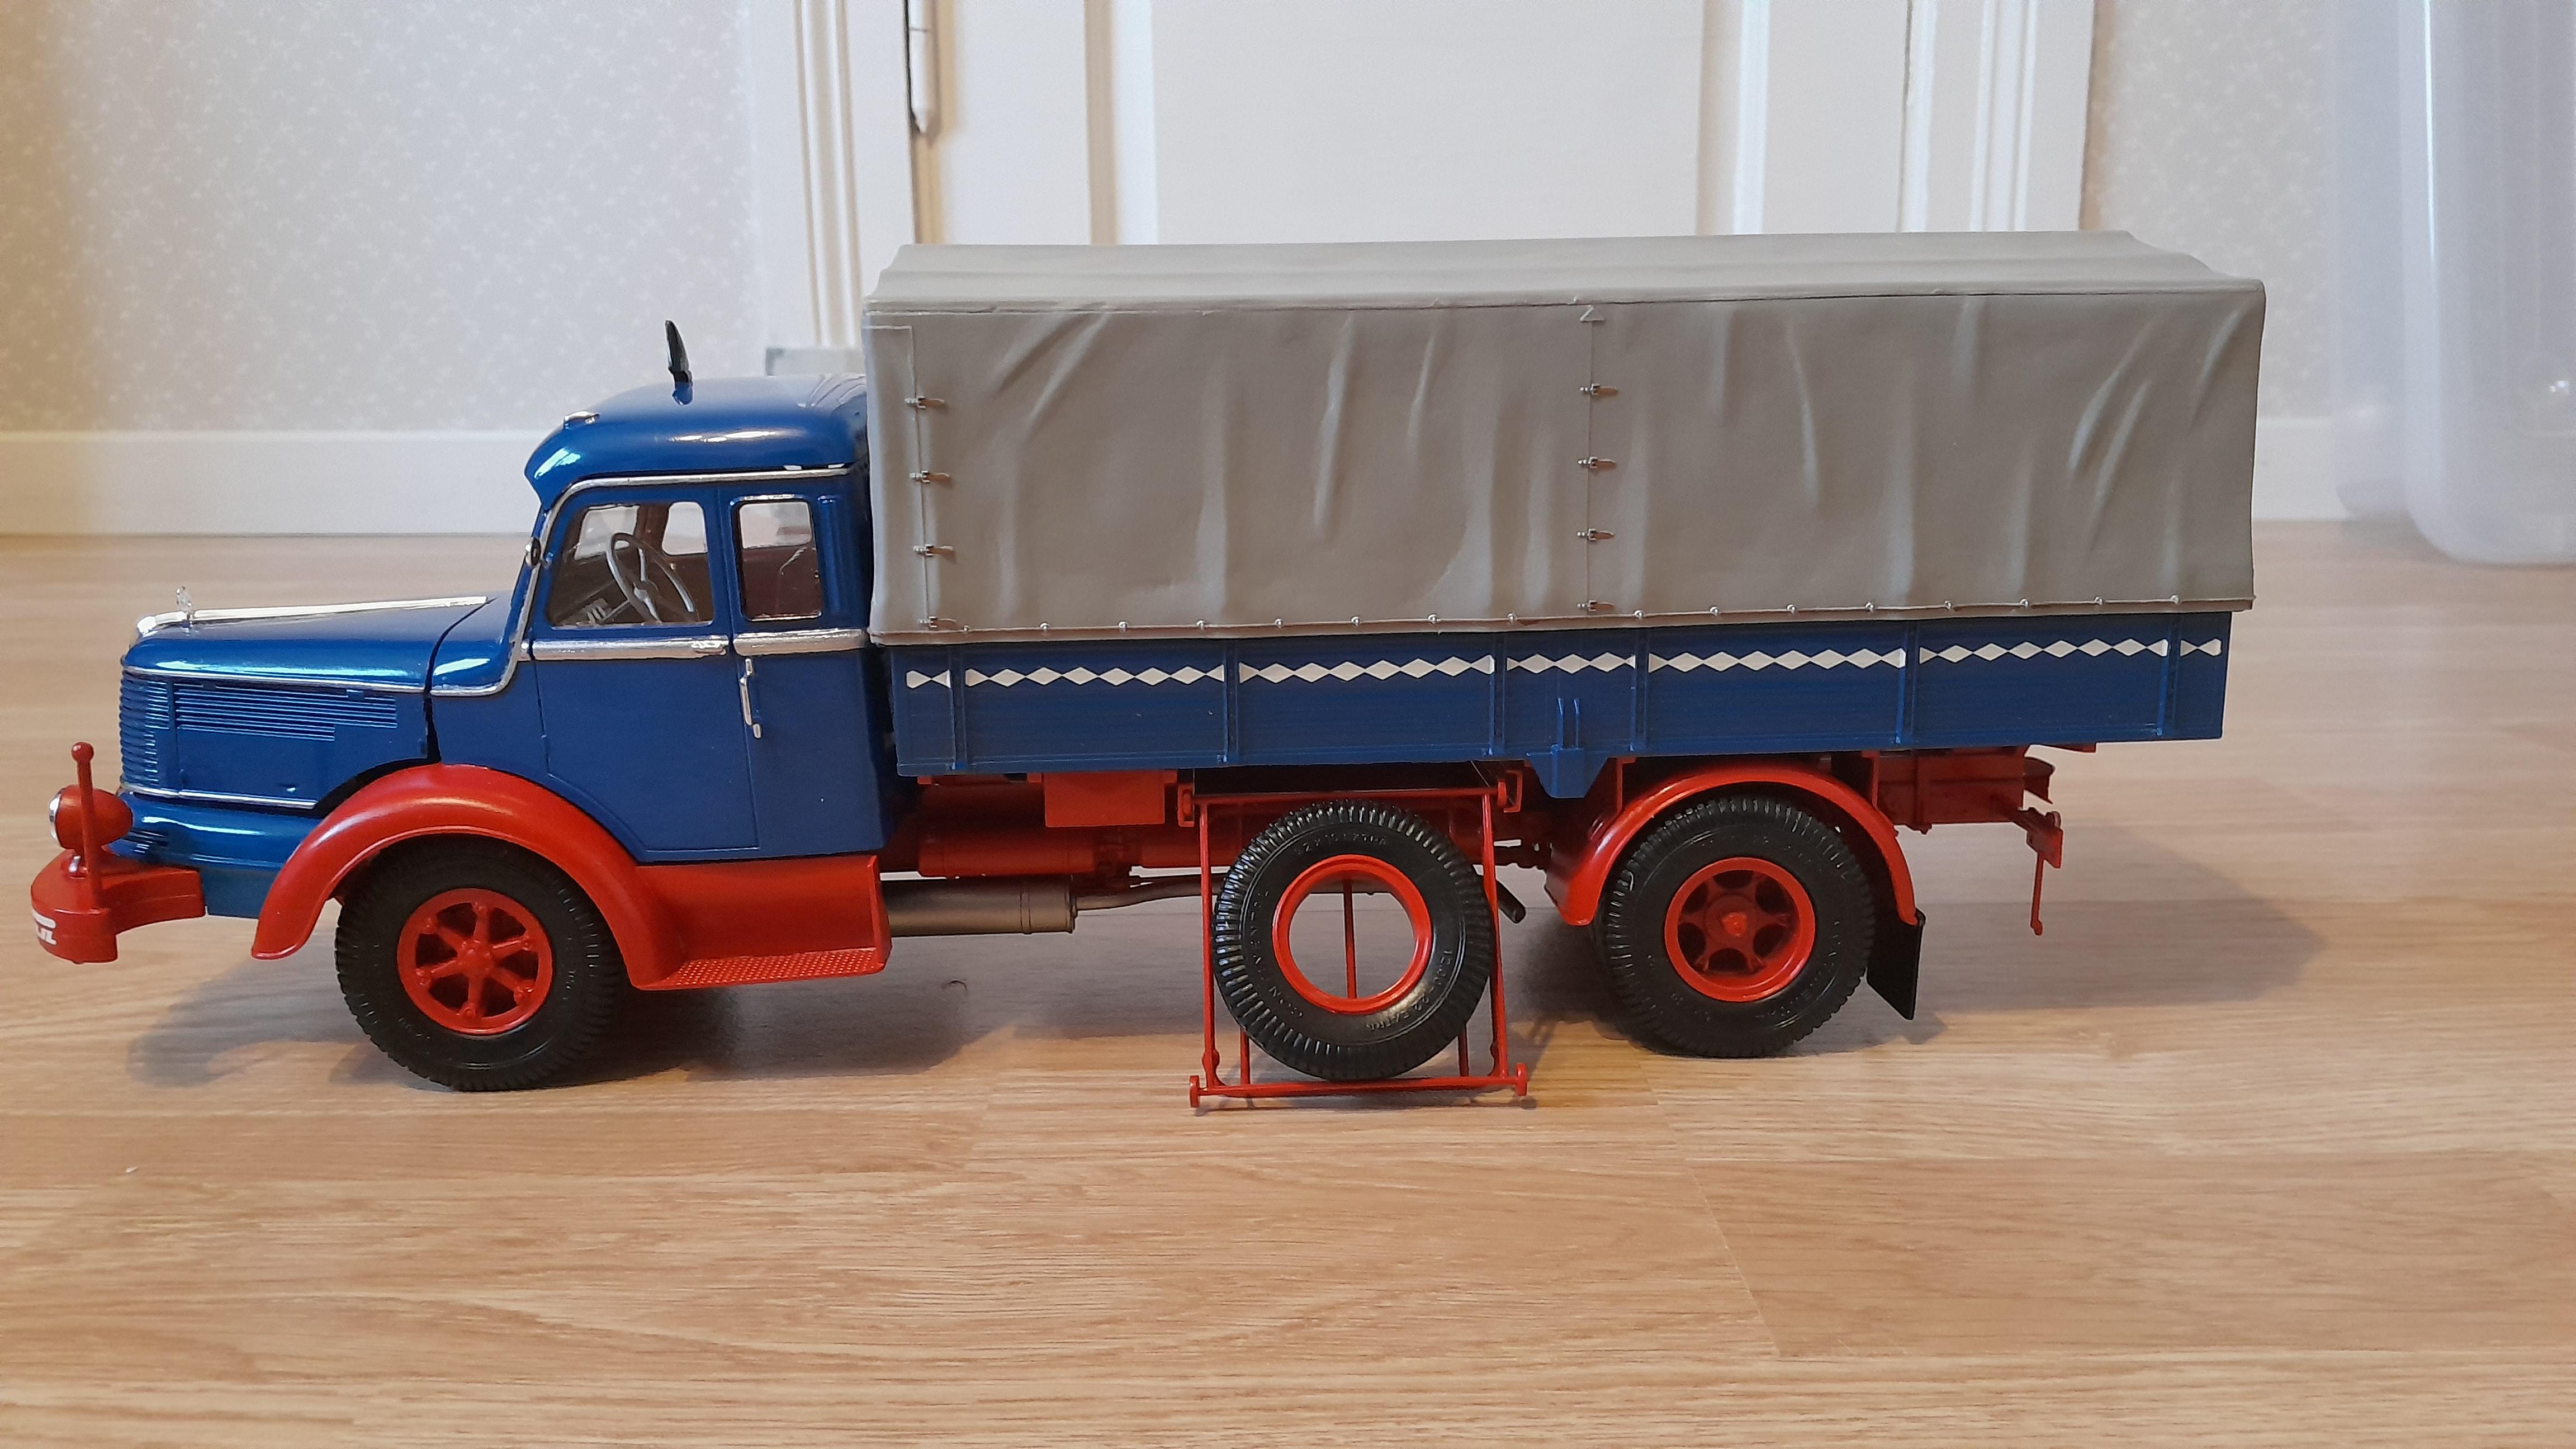
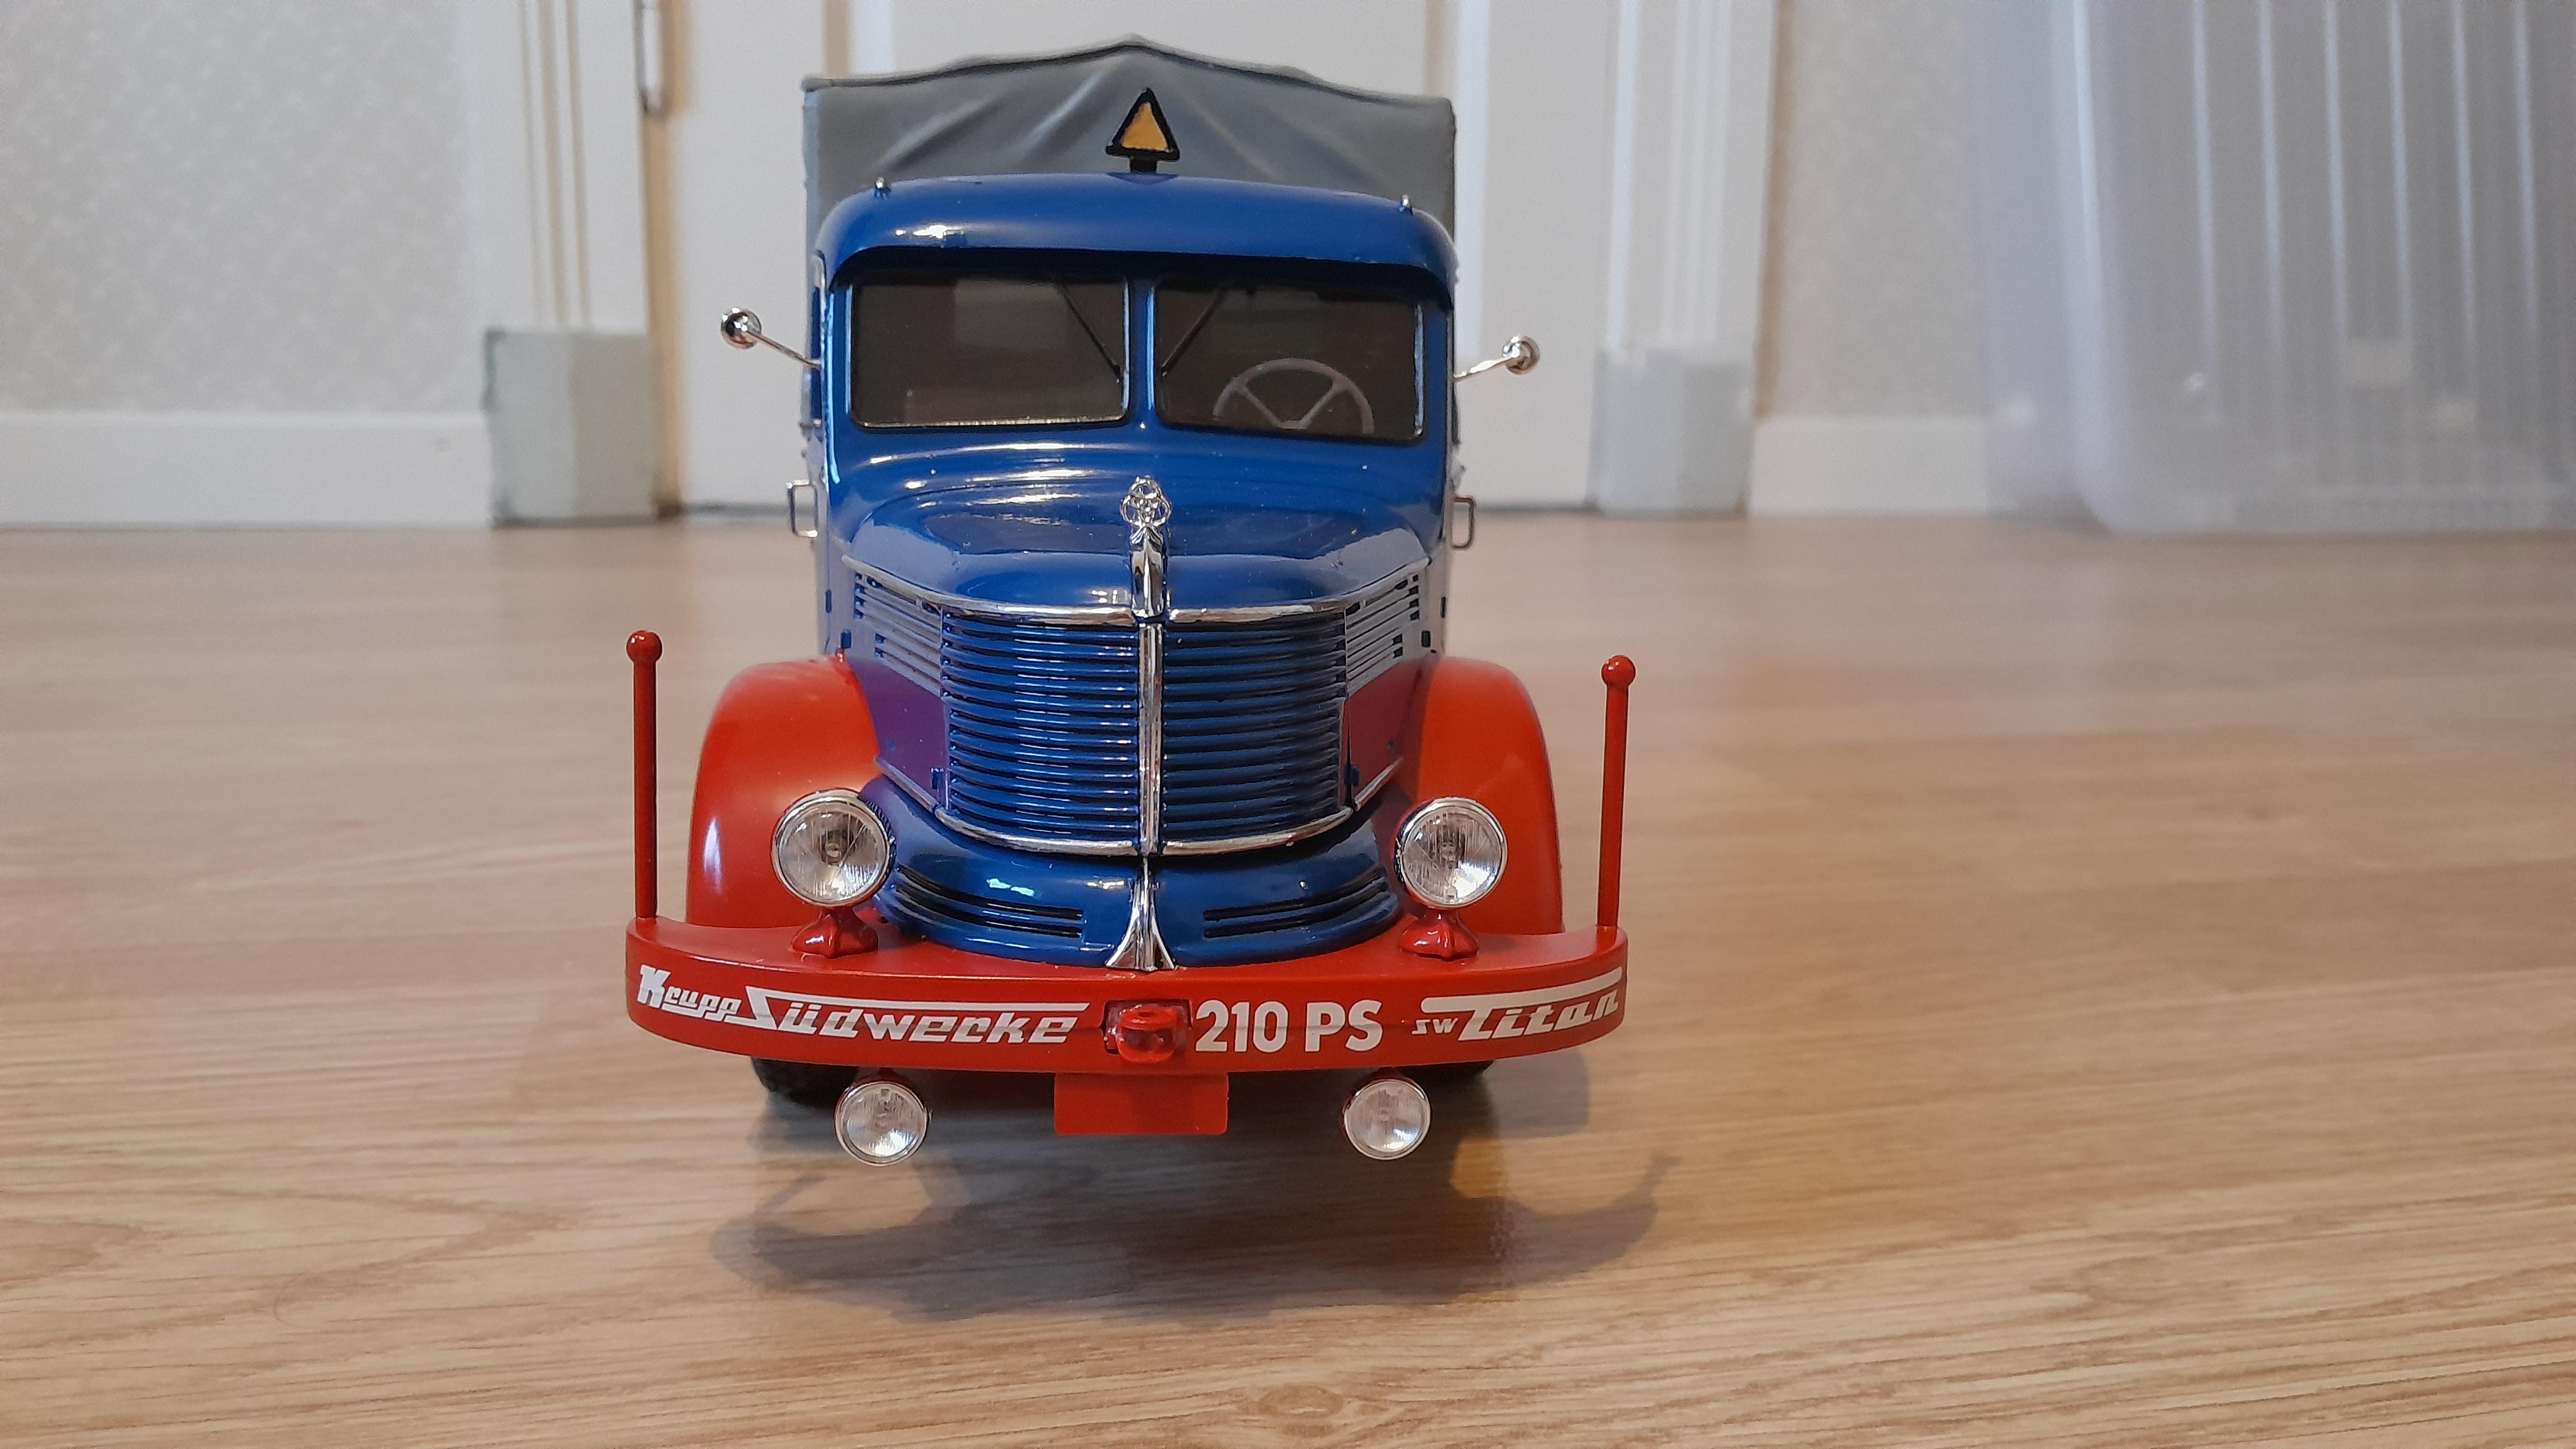
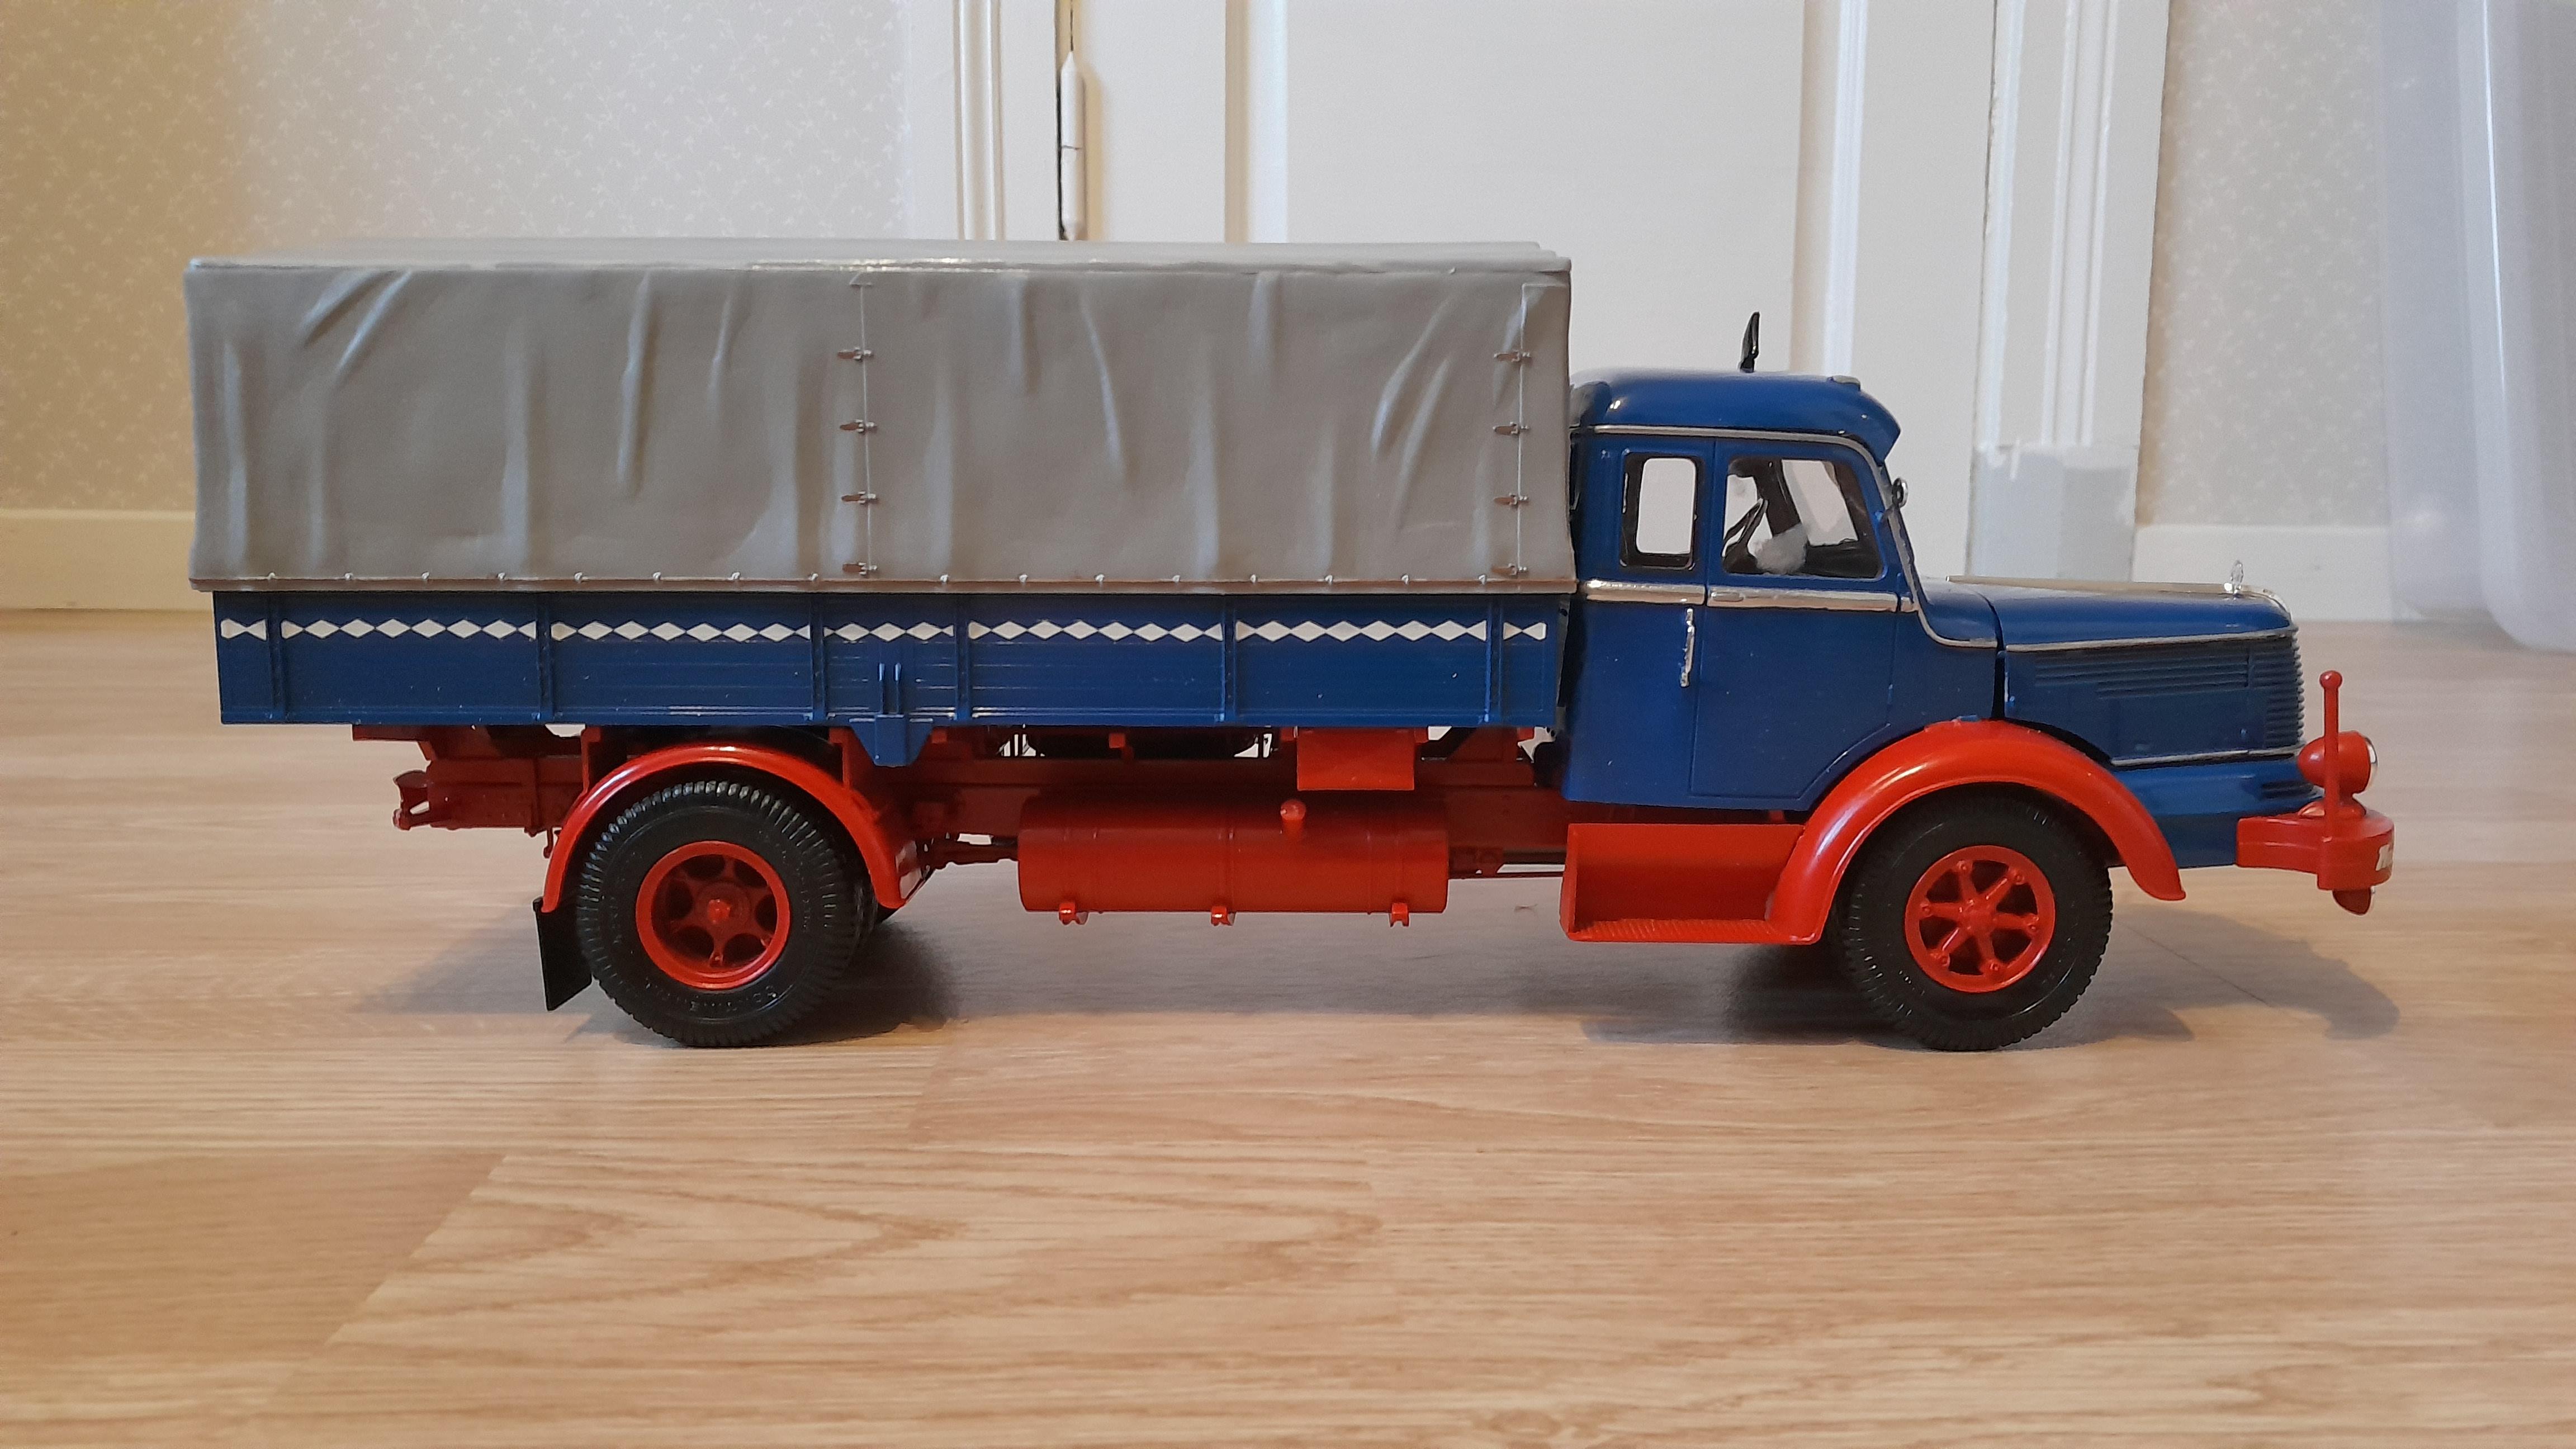
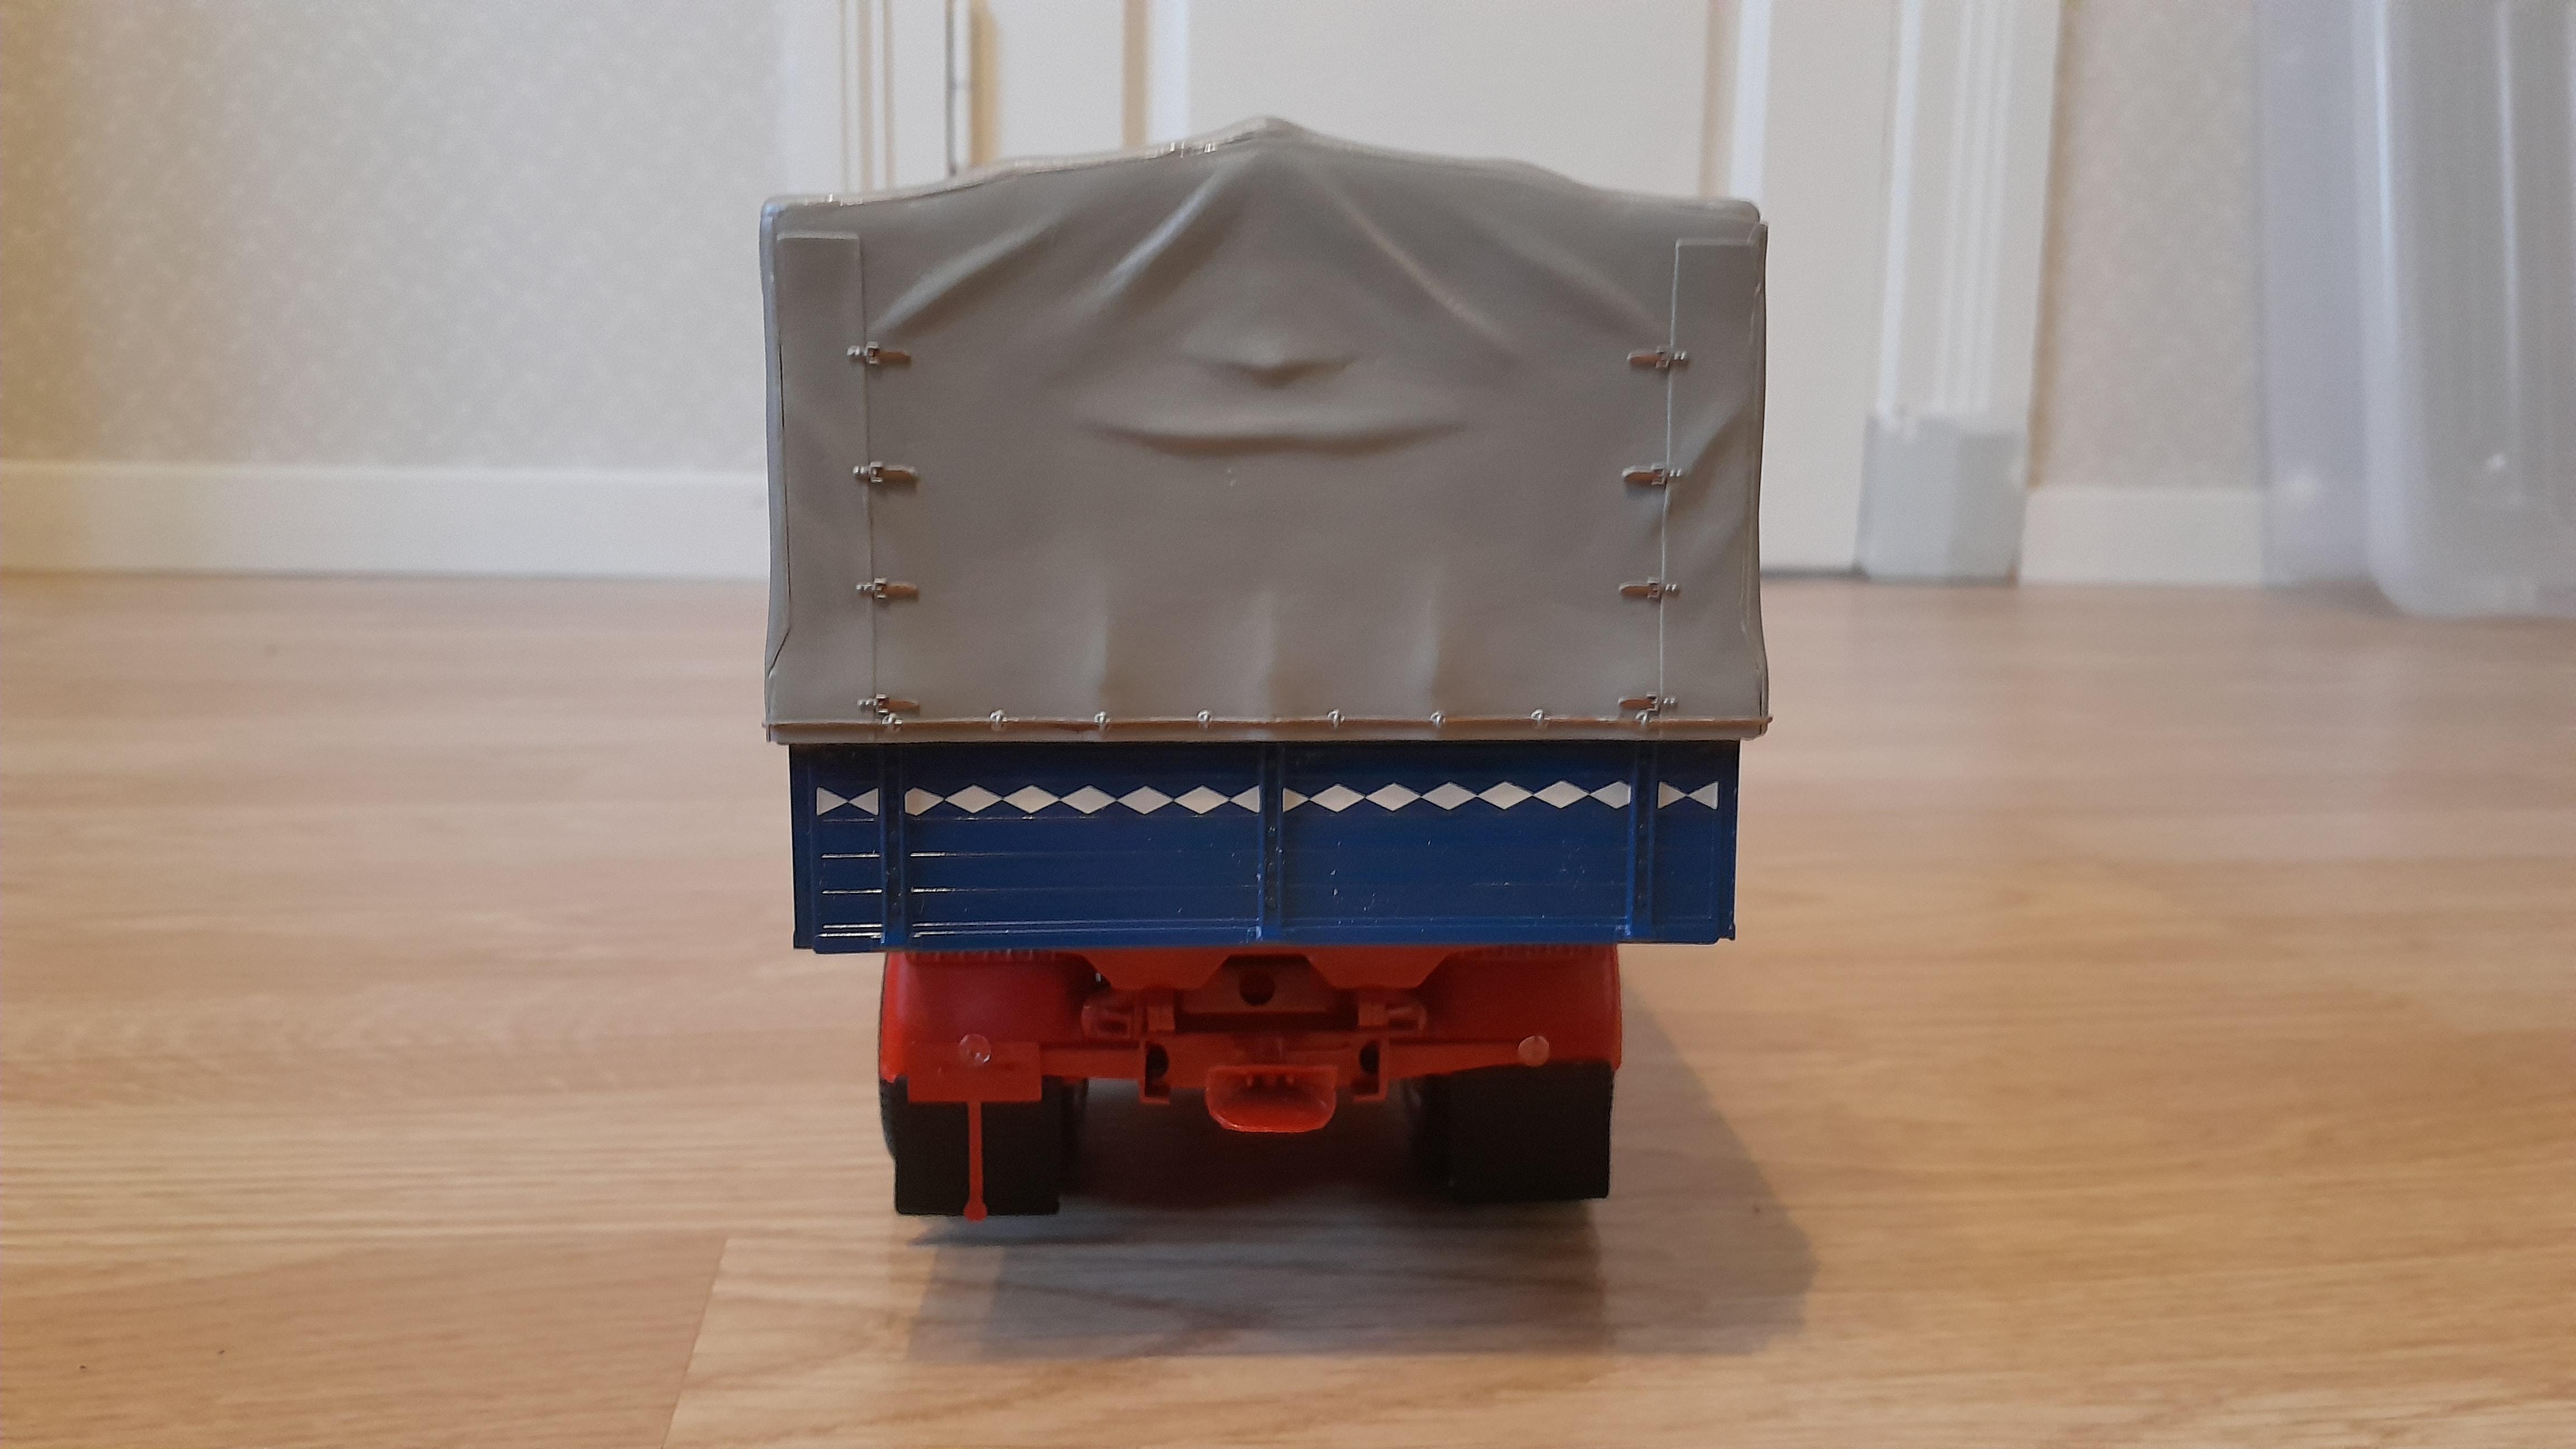
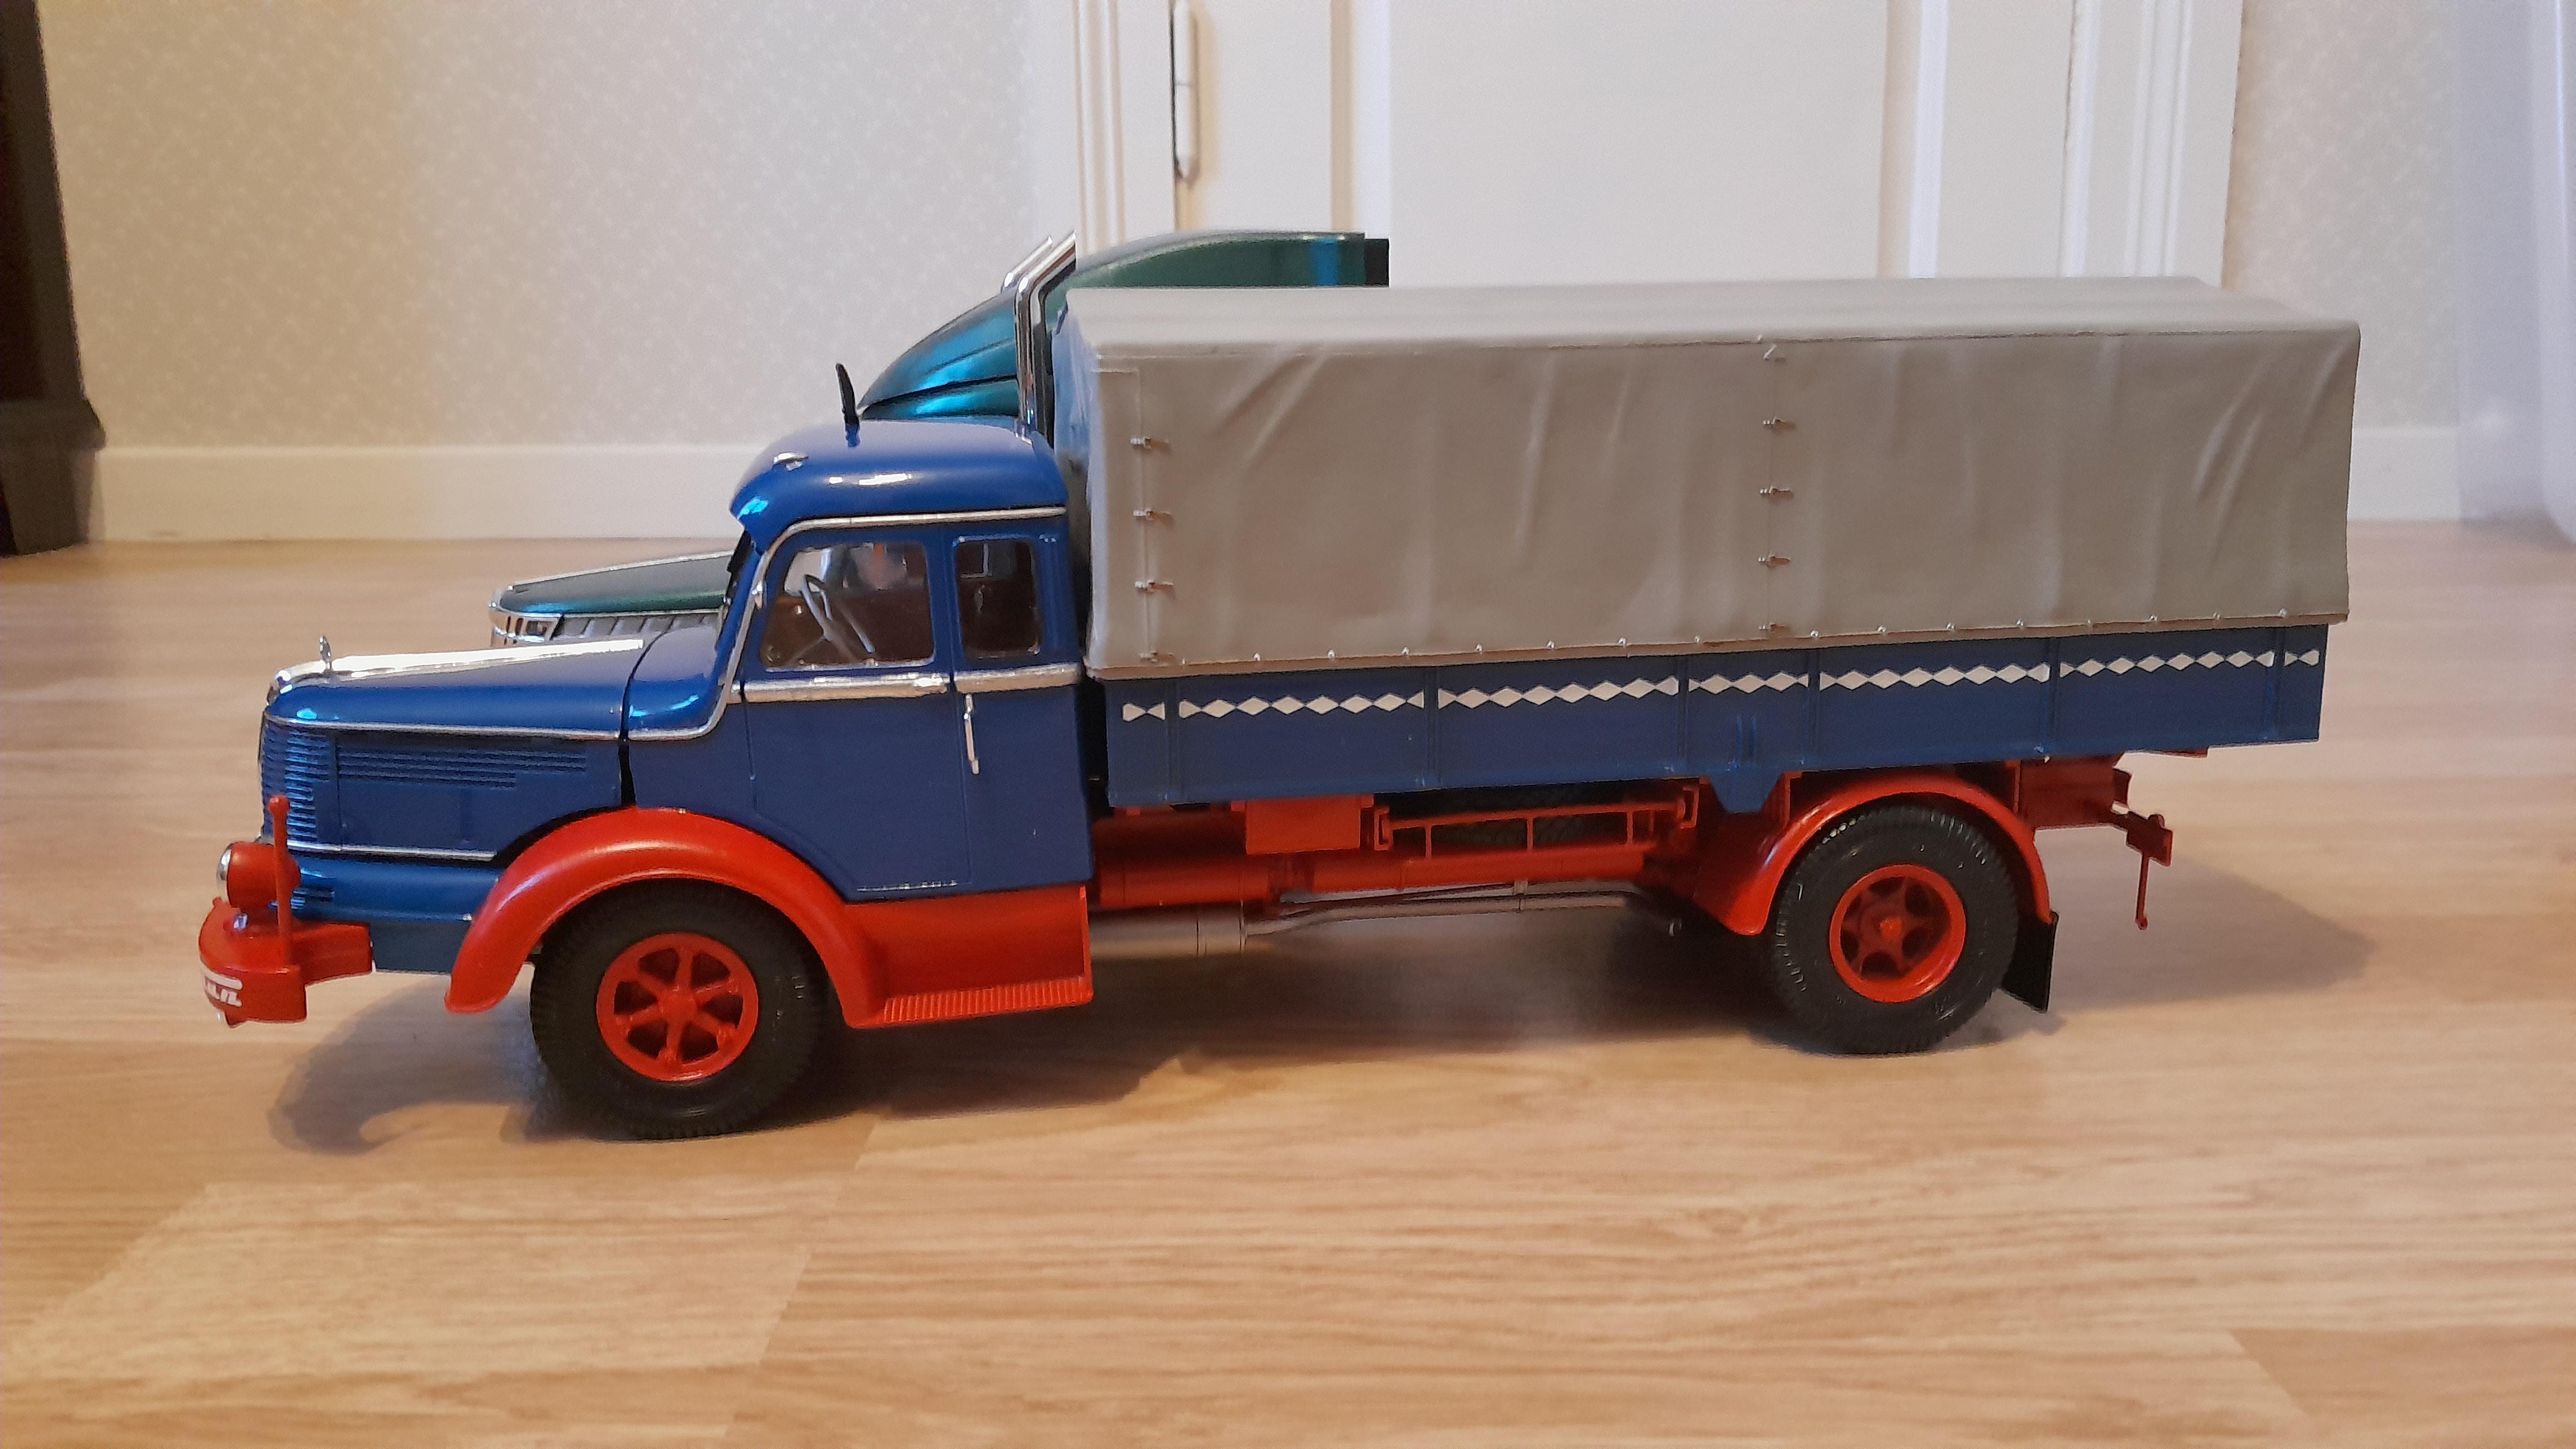
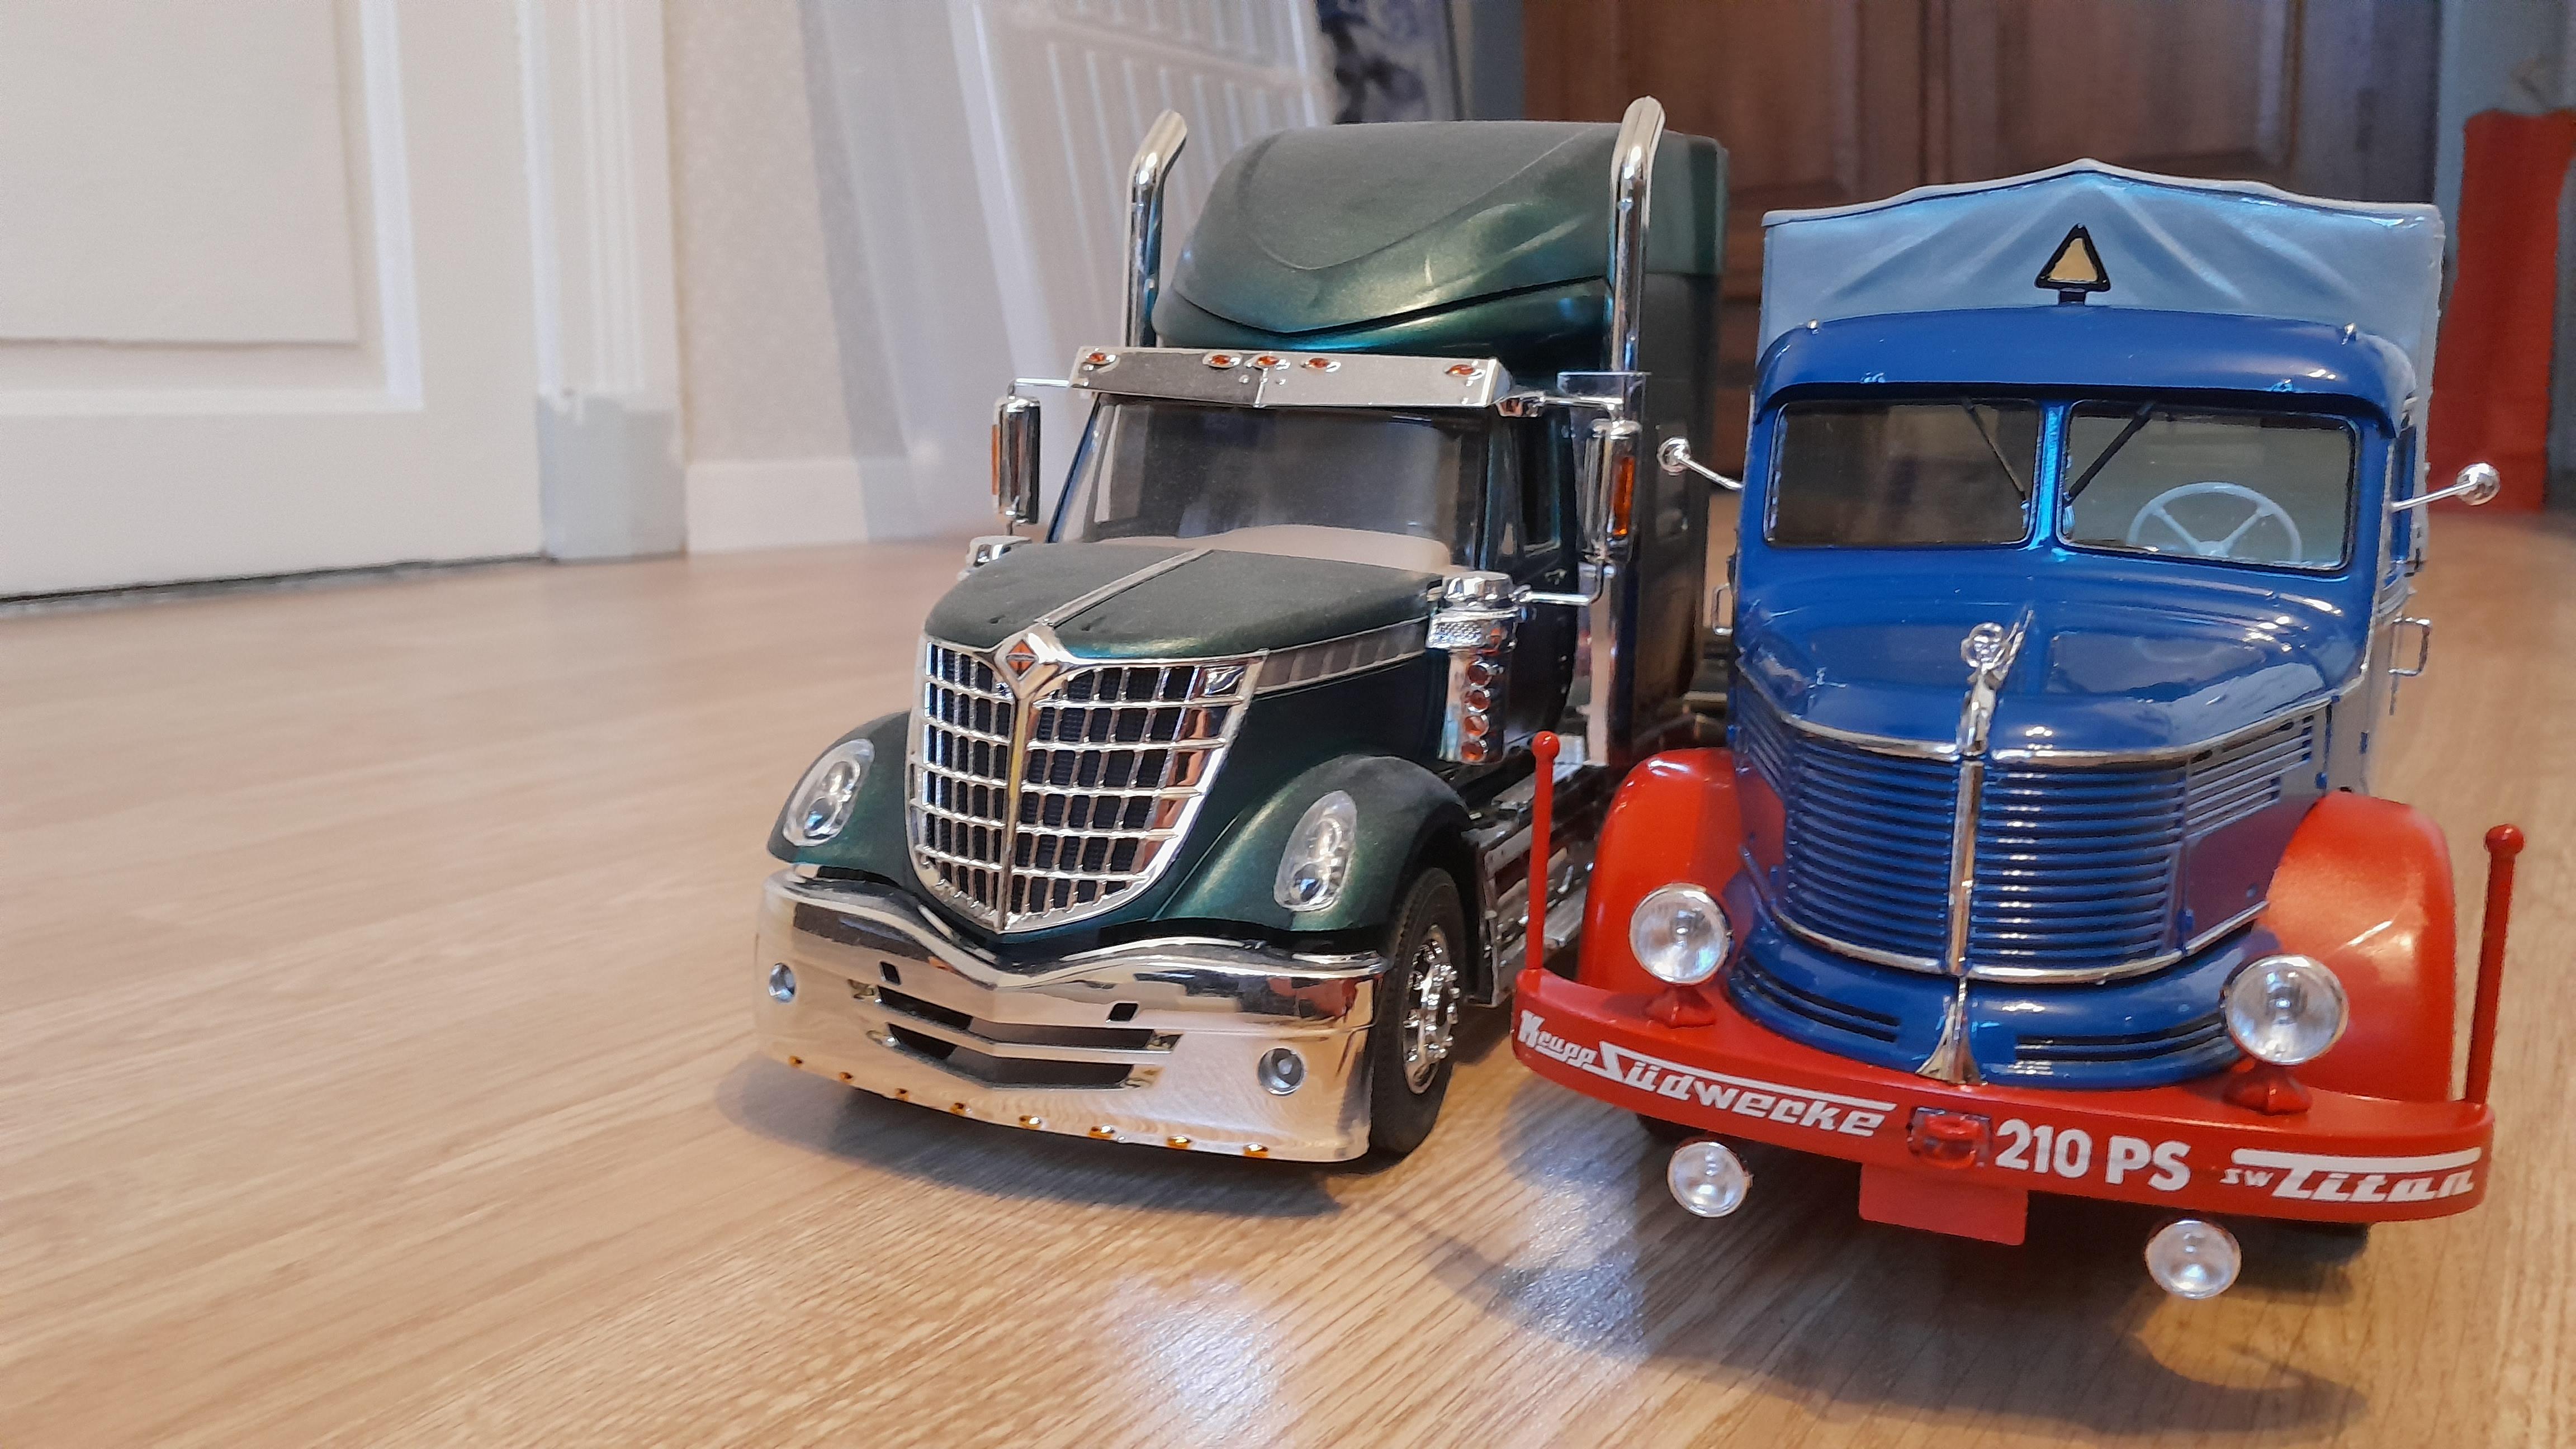
Here is another odd old German truck that i just got done with. The Krupp Titan SWL80. The engine in it is a 2 stroke diesel made out of 2 small 3 cylinder engines combined to make a 6 cylinder engine. It is just as big as my Büssing 8000 S13 is I put it beside the büssing just to see if they were the same size and they were, also did the same with my Intrenational lonestar just to show the size of a German truck from the 50's compared to a modern truck. The decals on the bed gave me some trouble as they were old and just separated from eachother when i tried to attach them so instead of sections of white diamond pattern i had to line up them one diamond by one... That took some time... I also had some other fitment issues with parts being warped probably because of the age of this kit, it was made in -98 and is not the reissue that has been out a few months now. For those that wonder what "210PS" stands for, it is just that the engine has 210hp in it.
-
Volvo F12 Low Roof
PierreR89 replied to PierreR89's topic in Model Trucks: Big Rigs and Heavy Equipment
Thanks, now i need to build the F12 globetrotter i have to be able to have them standing next to eachother. Unfortunatley that is the one that suffers from a shortshot on both framerails that i must repair before i can build that kit. -
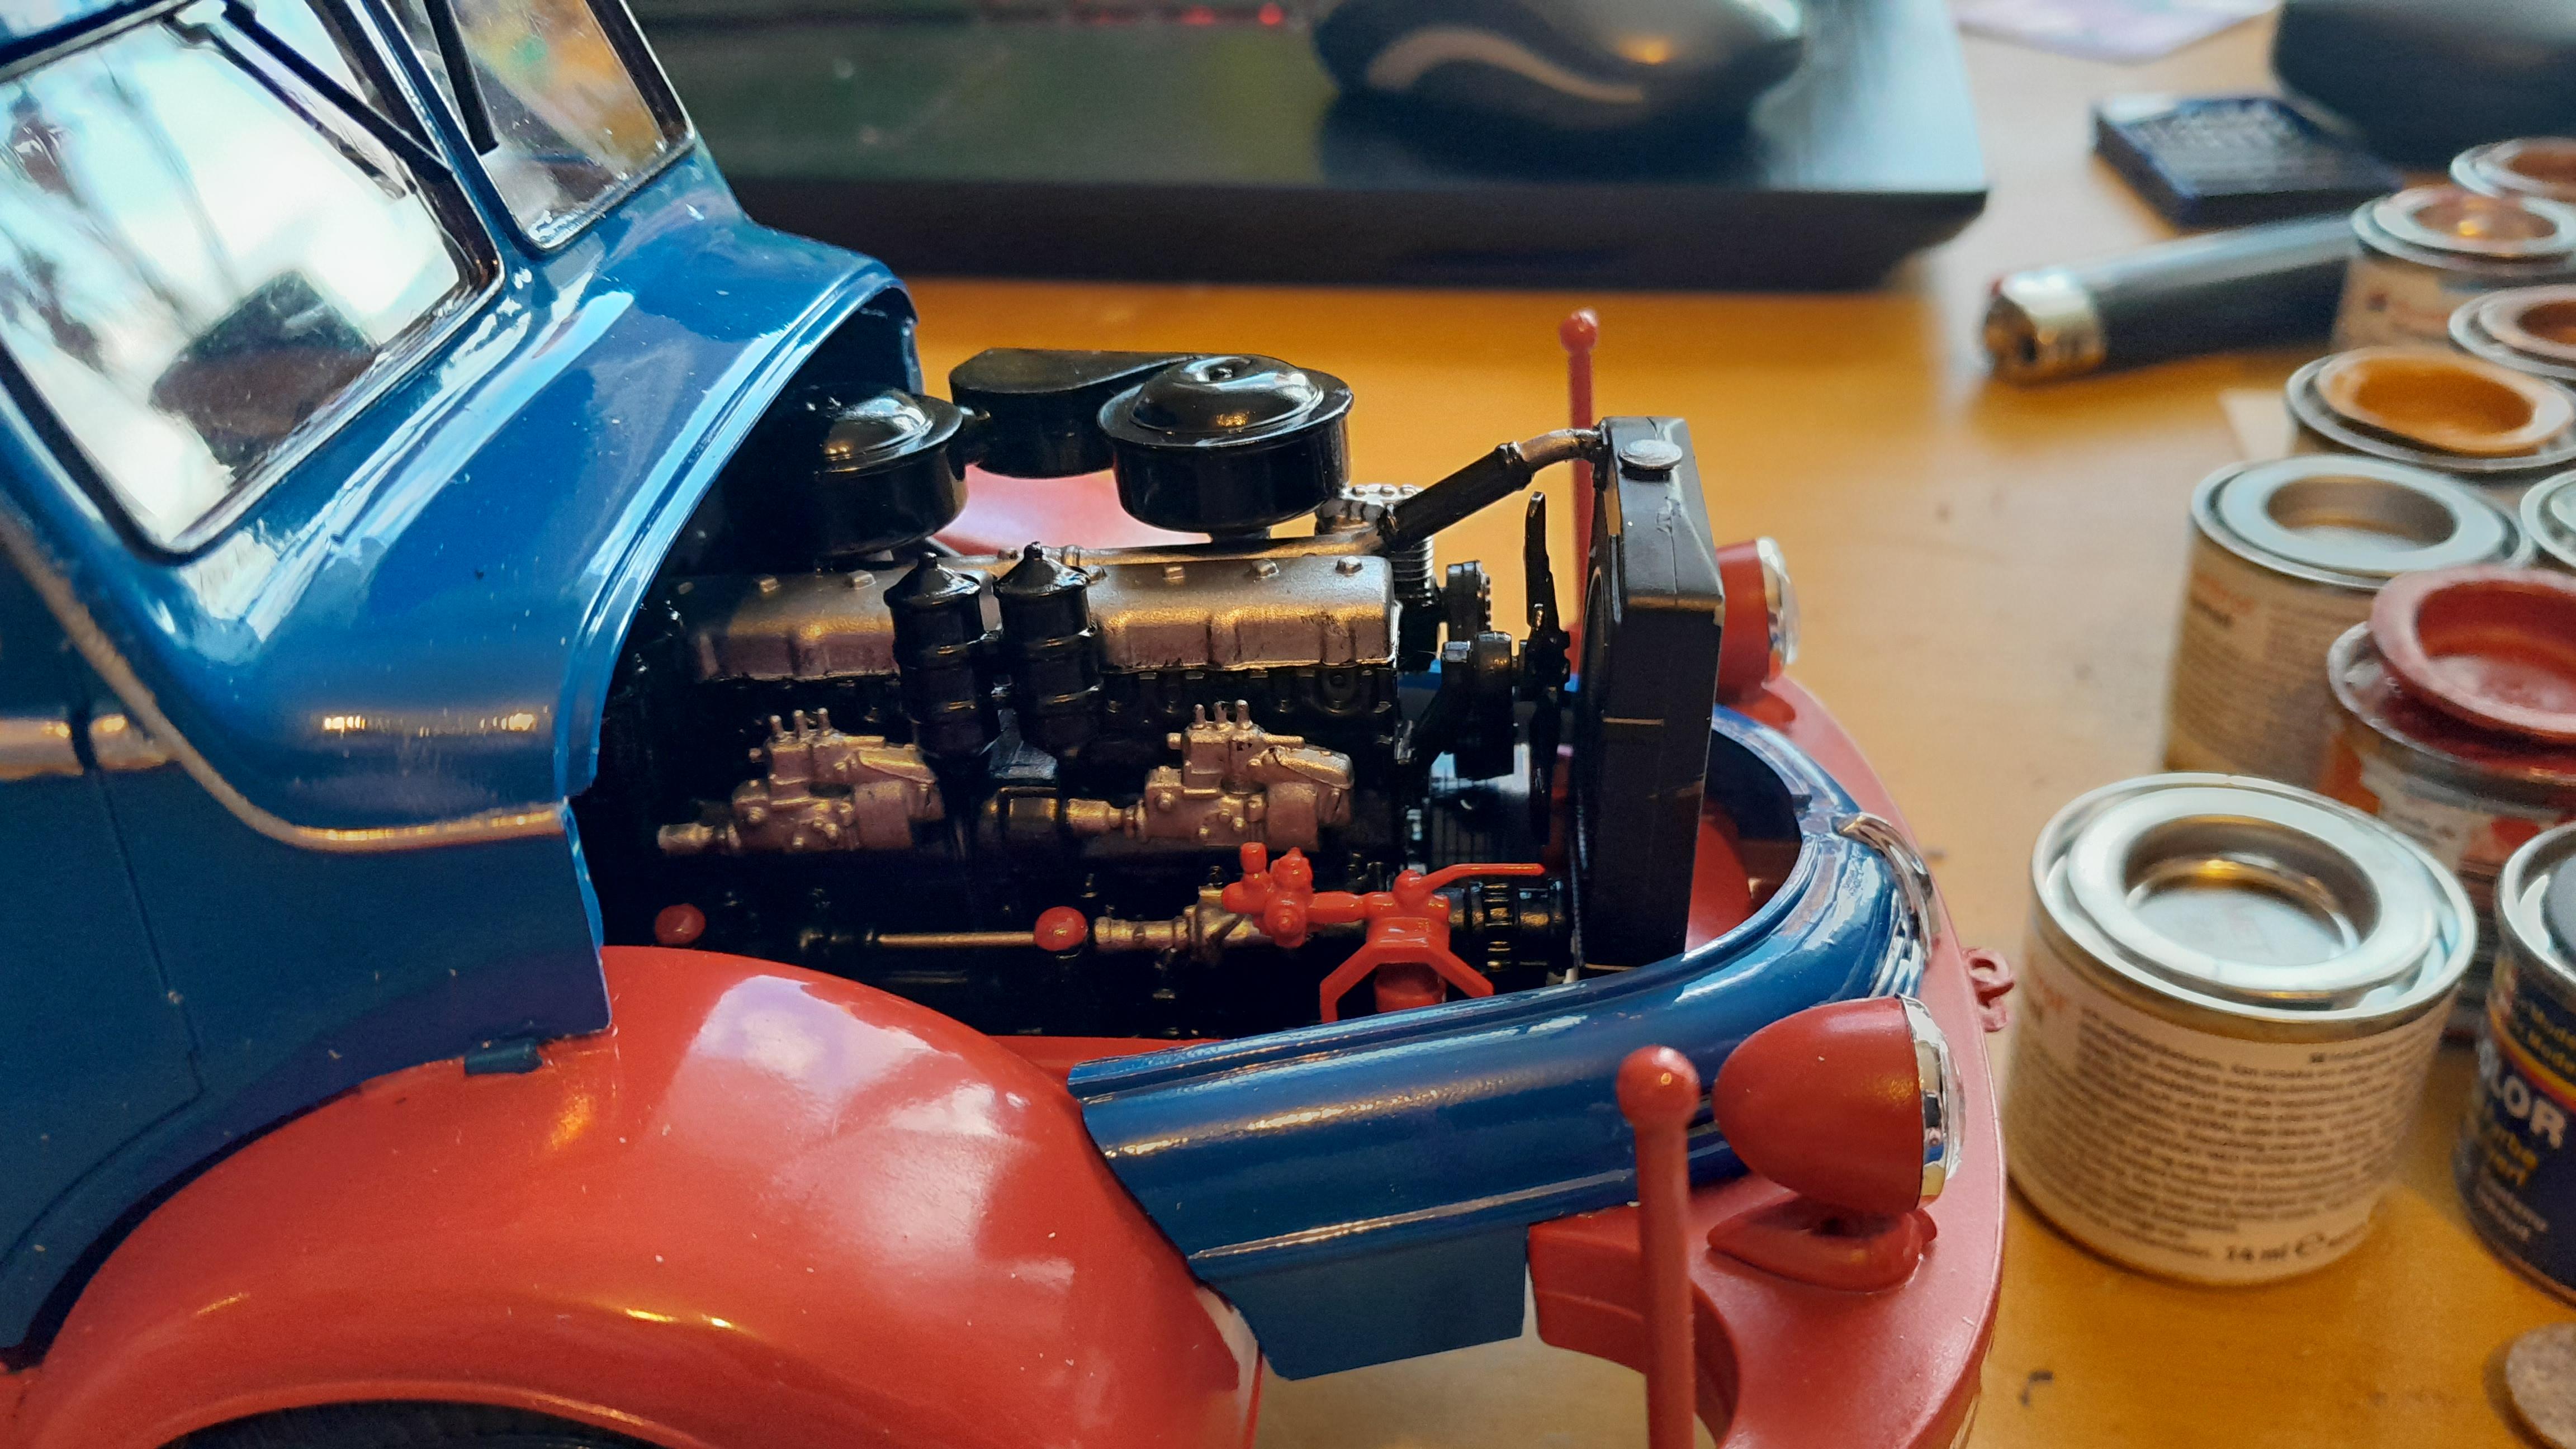
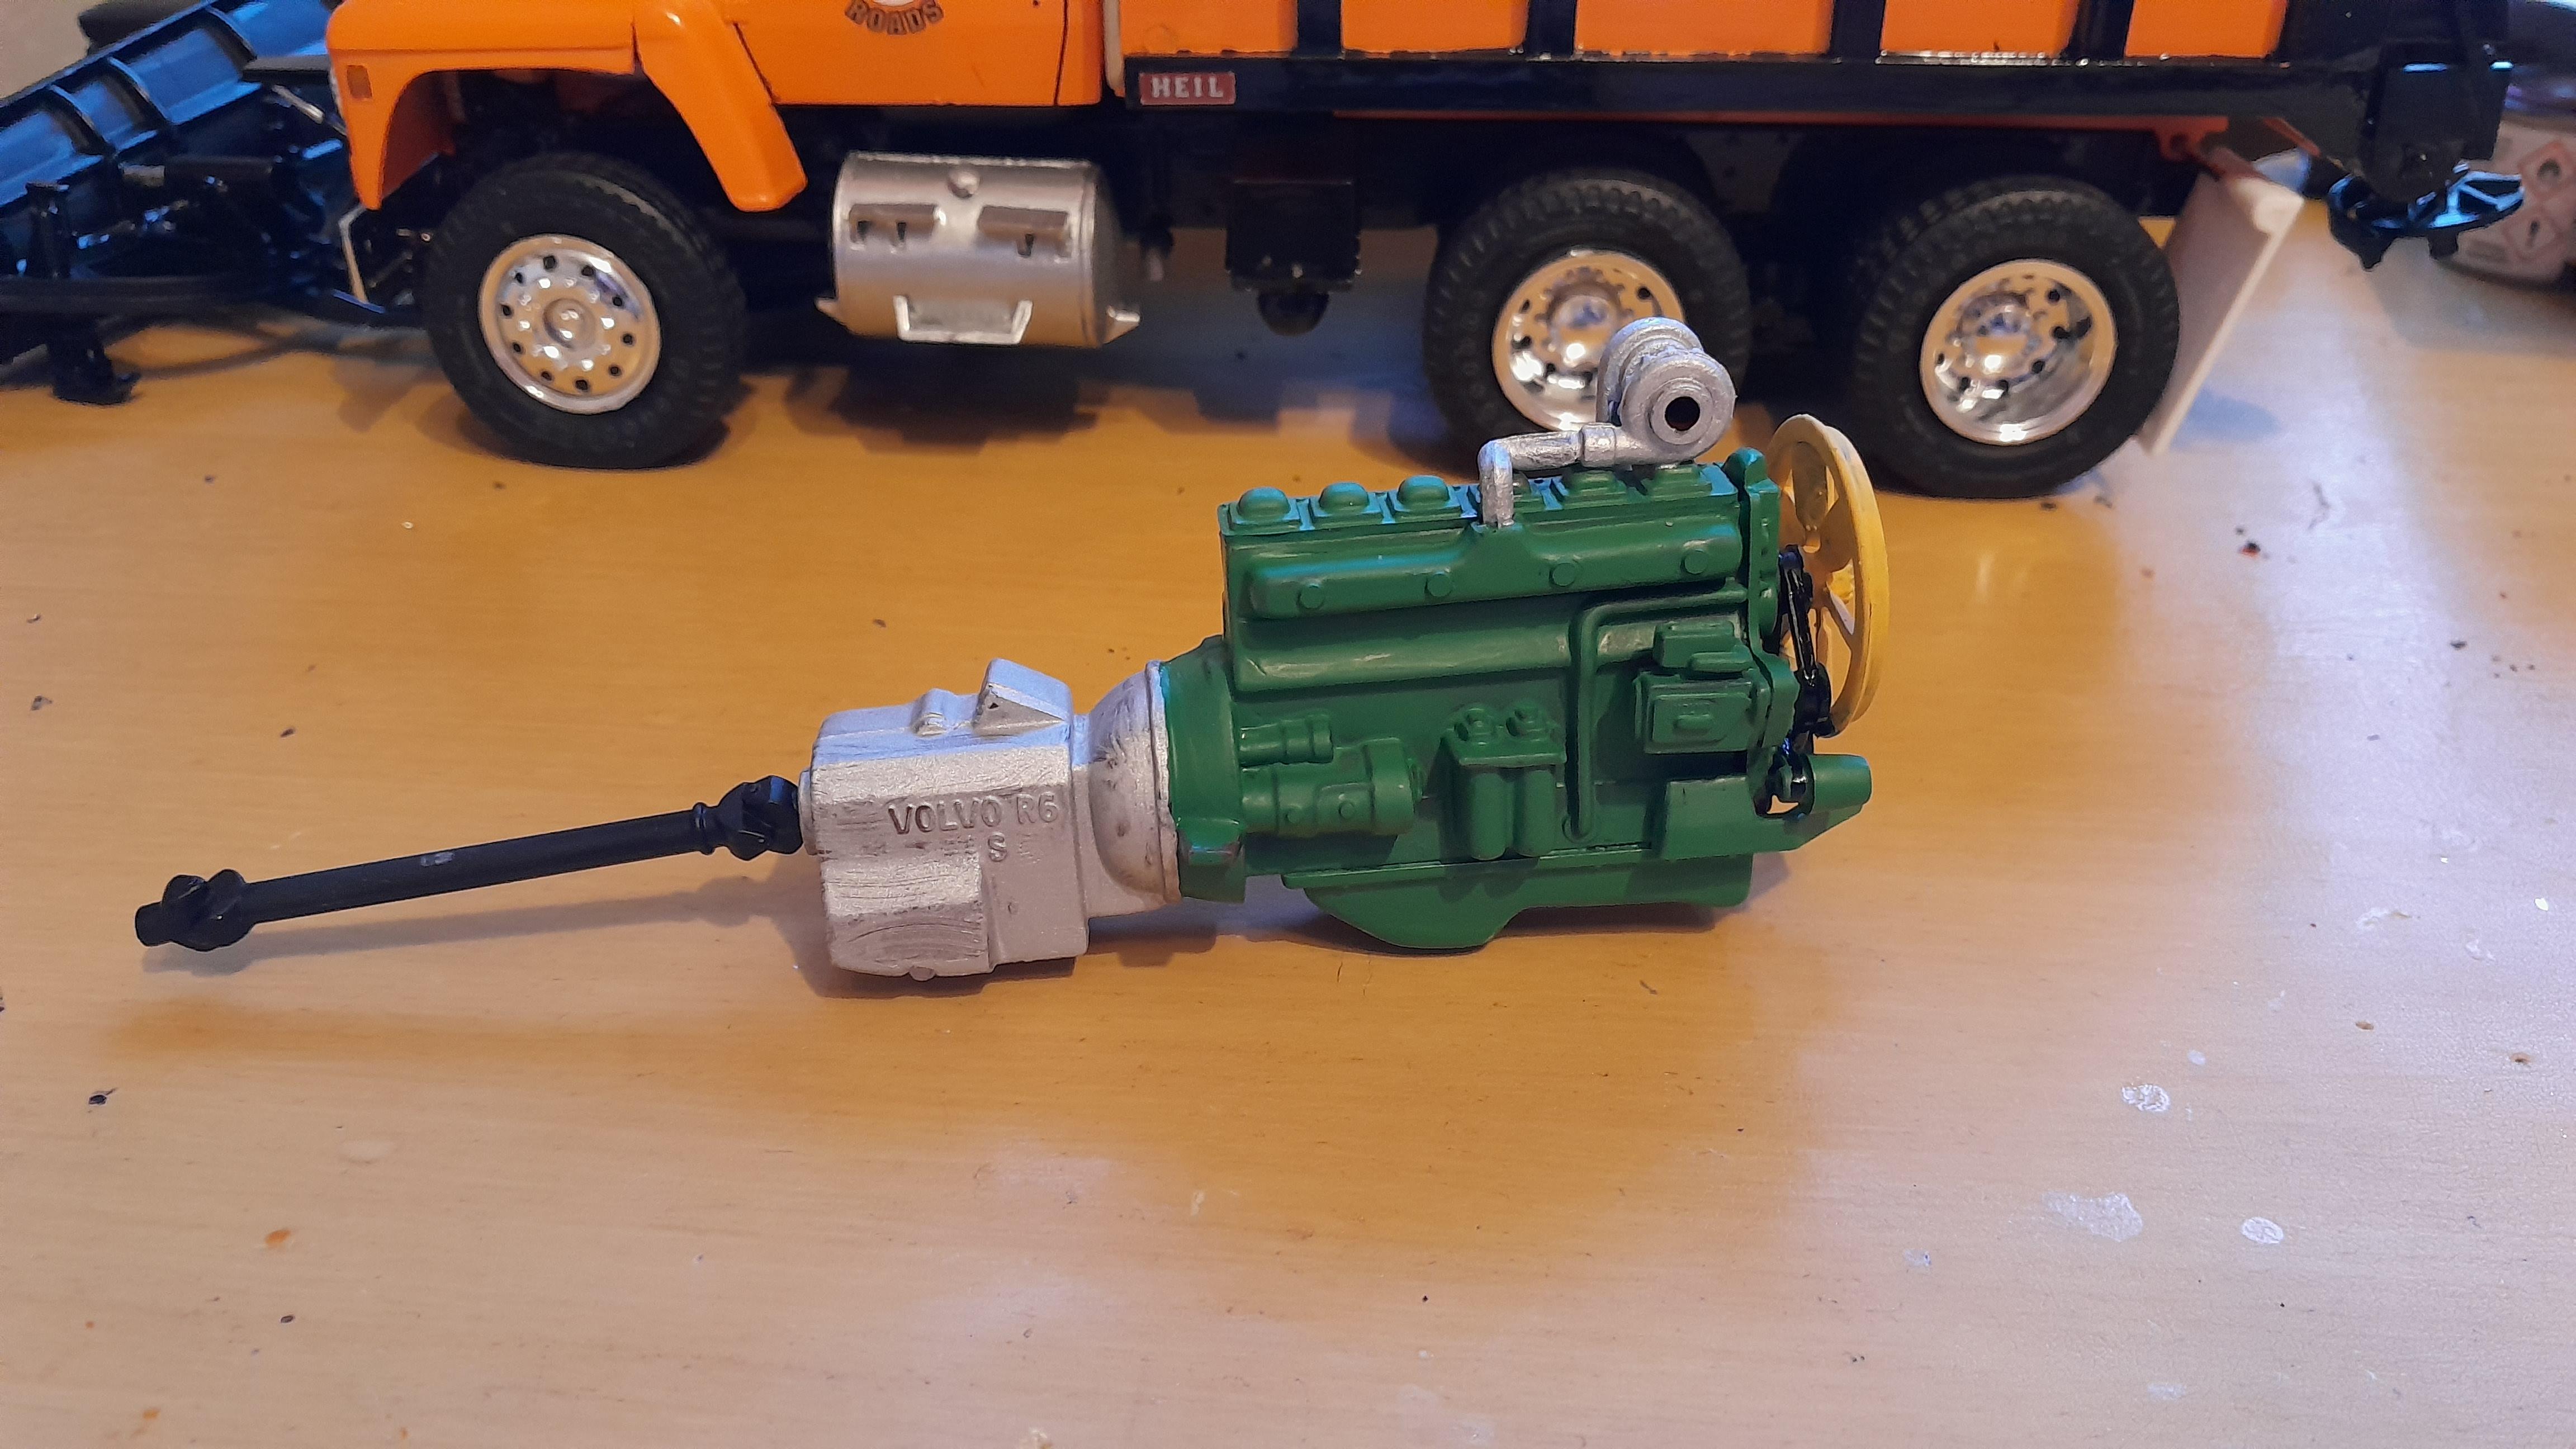
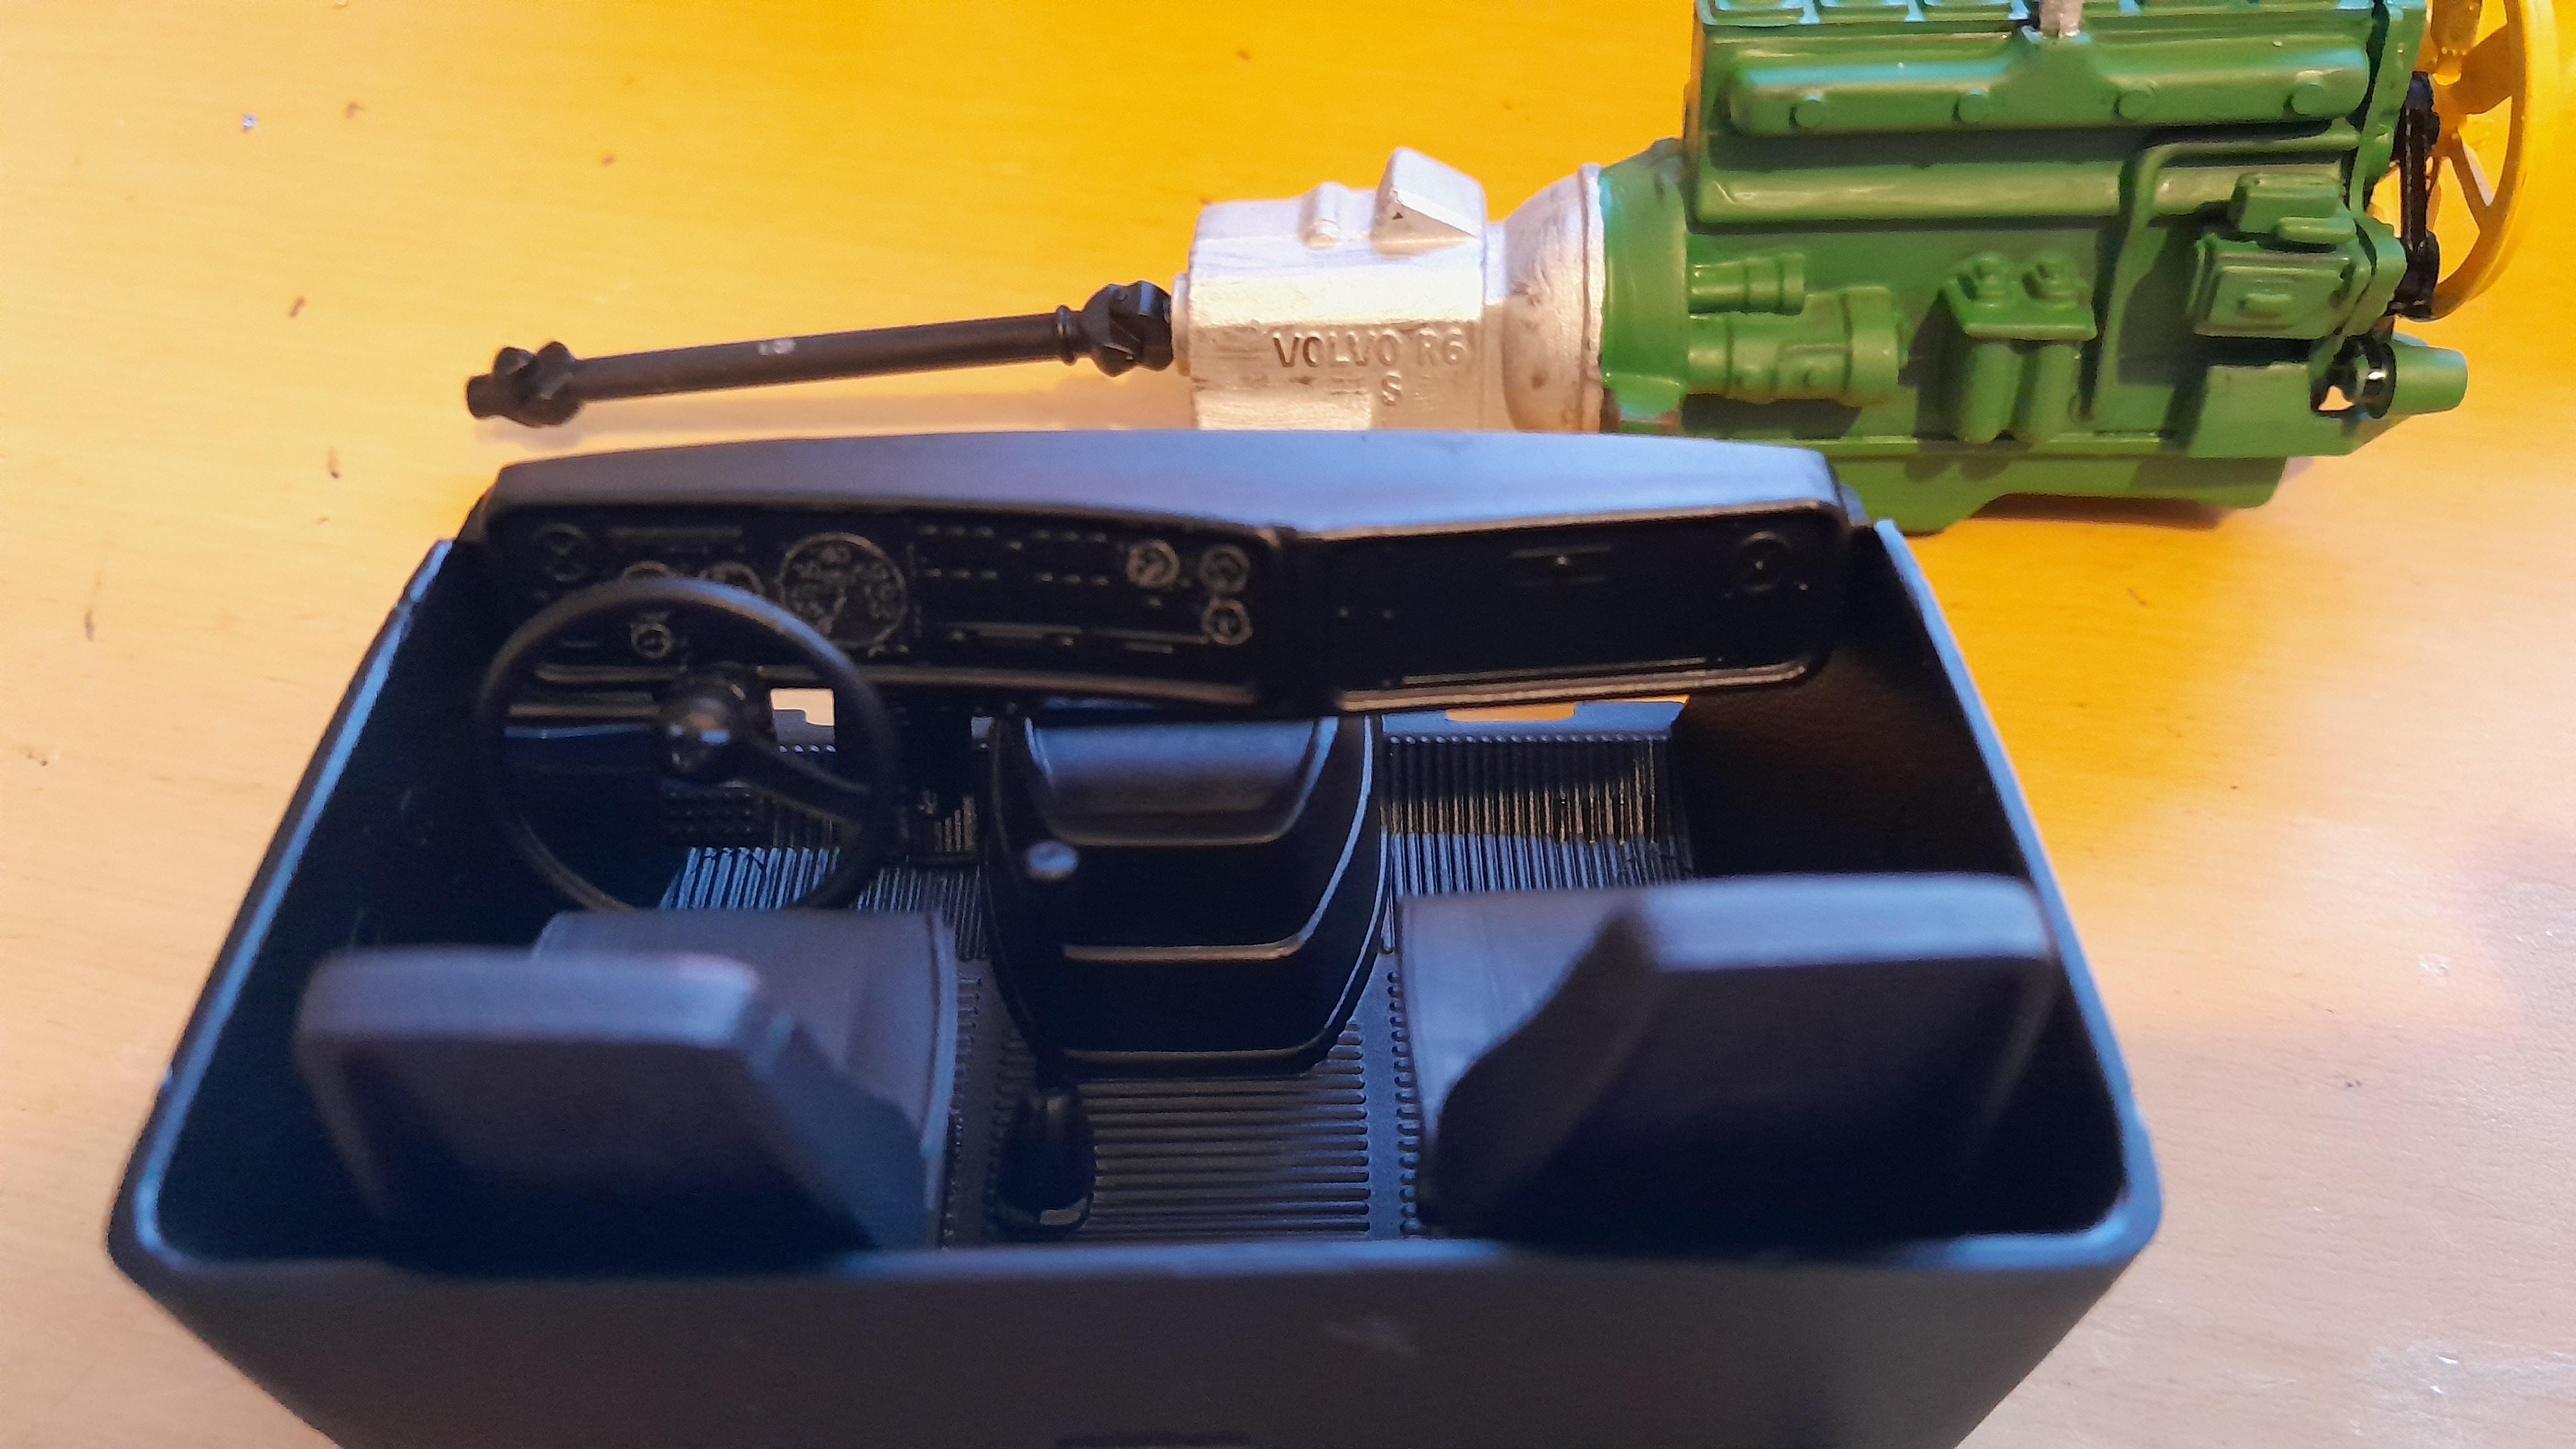
This was a quick build that i started last weekend. Only minor thing was that the cab can not tilt when the front bumper is mounted. Driverside window is rolled down (because i made a big mistake gluing it in and got glue everywhere on it...) The winddeflectors on the cab, headlight trim and bumper also looks weird because i got the wrong paint that did dry almost imediatly while painting.. Making it look bad so i had to sand that away and try to rescue it with another silver paint i have. The roof basket and ladder on the cab side was seen on many of these when i was a kid, the michelin mans on the basket was included in the kit with alot of other extra parts. Roof basket and ladder was also among the extra parts, there is another sunvisor, roof deflector, another style ladder, australian style bullbar, ac unit, 3 bigger michelin mans and 3 other mascots that are called "Flipje" a man/boy that looks like a raspberry with a chefs hat. Also a shovel, broom, fire extinguisher, VBG coupler for euro trucks that is not tractor trailers, roof sign used that was mostly used in denmark and a warning triangle. They also included decals for all of the gauges. I also wish that they would have made it an optional tandem drive truck and not a single axle as they are rarley used in scandinavia because of our winters (basically undrivable in snow or ice) Here is the engine that will probably never be seen again. At work we have one machine with this exact engine in it so i work on a real one almost once a week..
-
Thanks, so thats what they are called. It will hopefully go well, i had that plan to for mine but i did not feel like making my own dump bed so it stayed as a tractor. The one i had thought of making from this was my dads dumptruck it looked almost like the pic that 1959scudetto posted only difference what that his had a yellow cab with silver stripings and a silver/yellow bed. His also had a blue sunvisor above the windshield.
-
It was a fun build even if it was odd to work with diecast parts for the frame and steering. Only real problems i had was that the framerails were warped and it does not sit on all wheels and the decals gave me some problems with wrinkles and a few rips. But decided to let it be like that and simulate years of wear and pressurewashing on the striping. I added 2 things to the bumper (no idea what they are called) so that the driver would know where the hood begins in tight places. Also remembered why i did not like to work on the engine on the real trucks to replace headgaskets, exhaustmanifold and adjusting the valves, there is almost no room at all to do those things. Would build one again if i can find one at a good price.
-
ERTL Volvo N10
PierreR89 replied to PierreR89's topic in WIP: Model Trucks: Big Rigs and Heavy Equipment
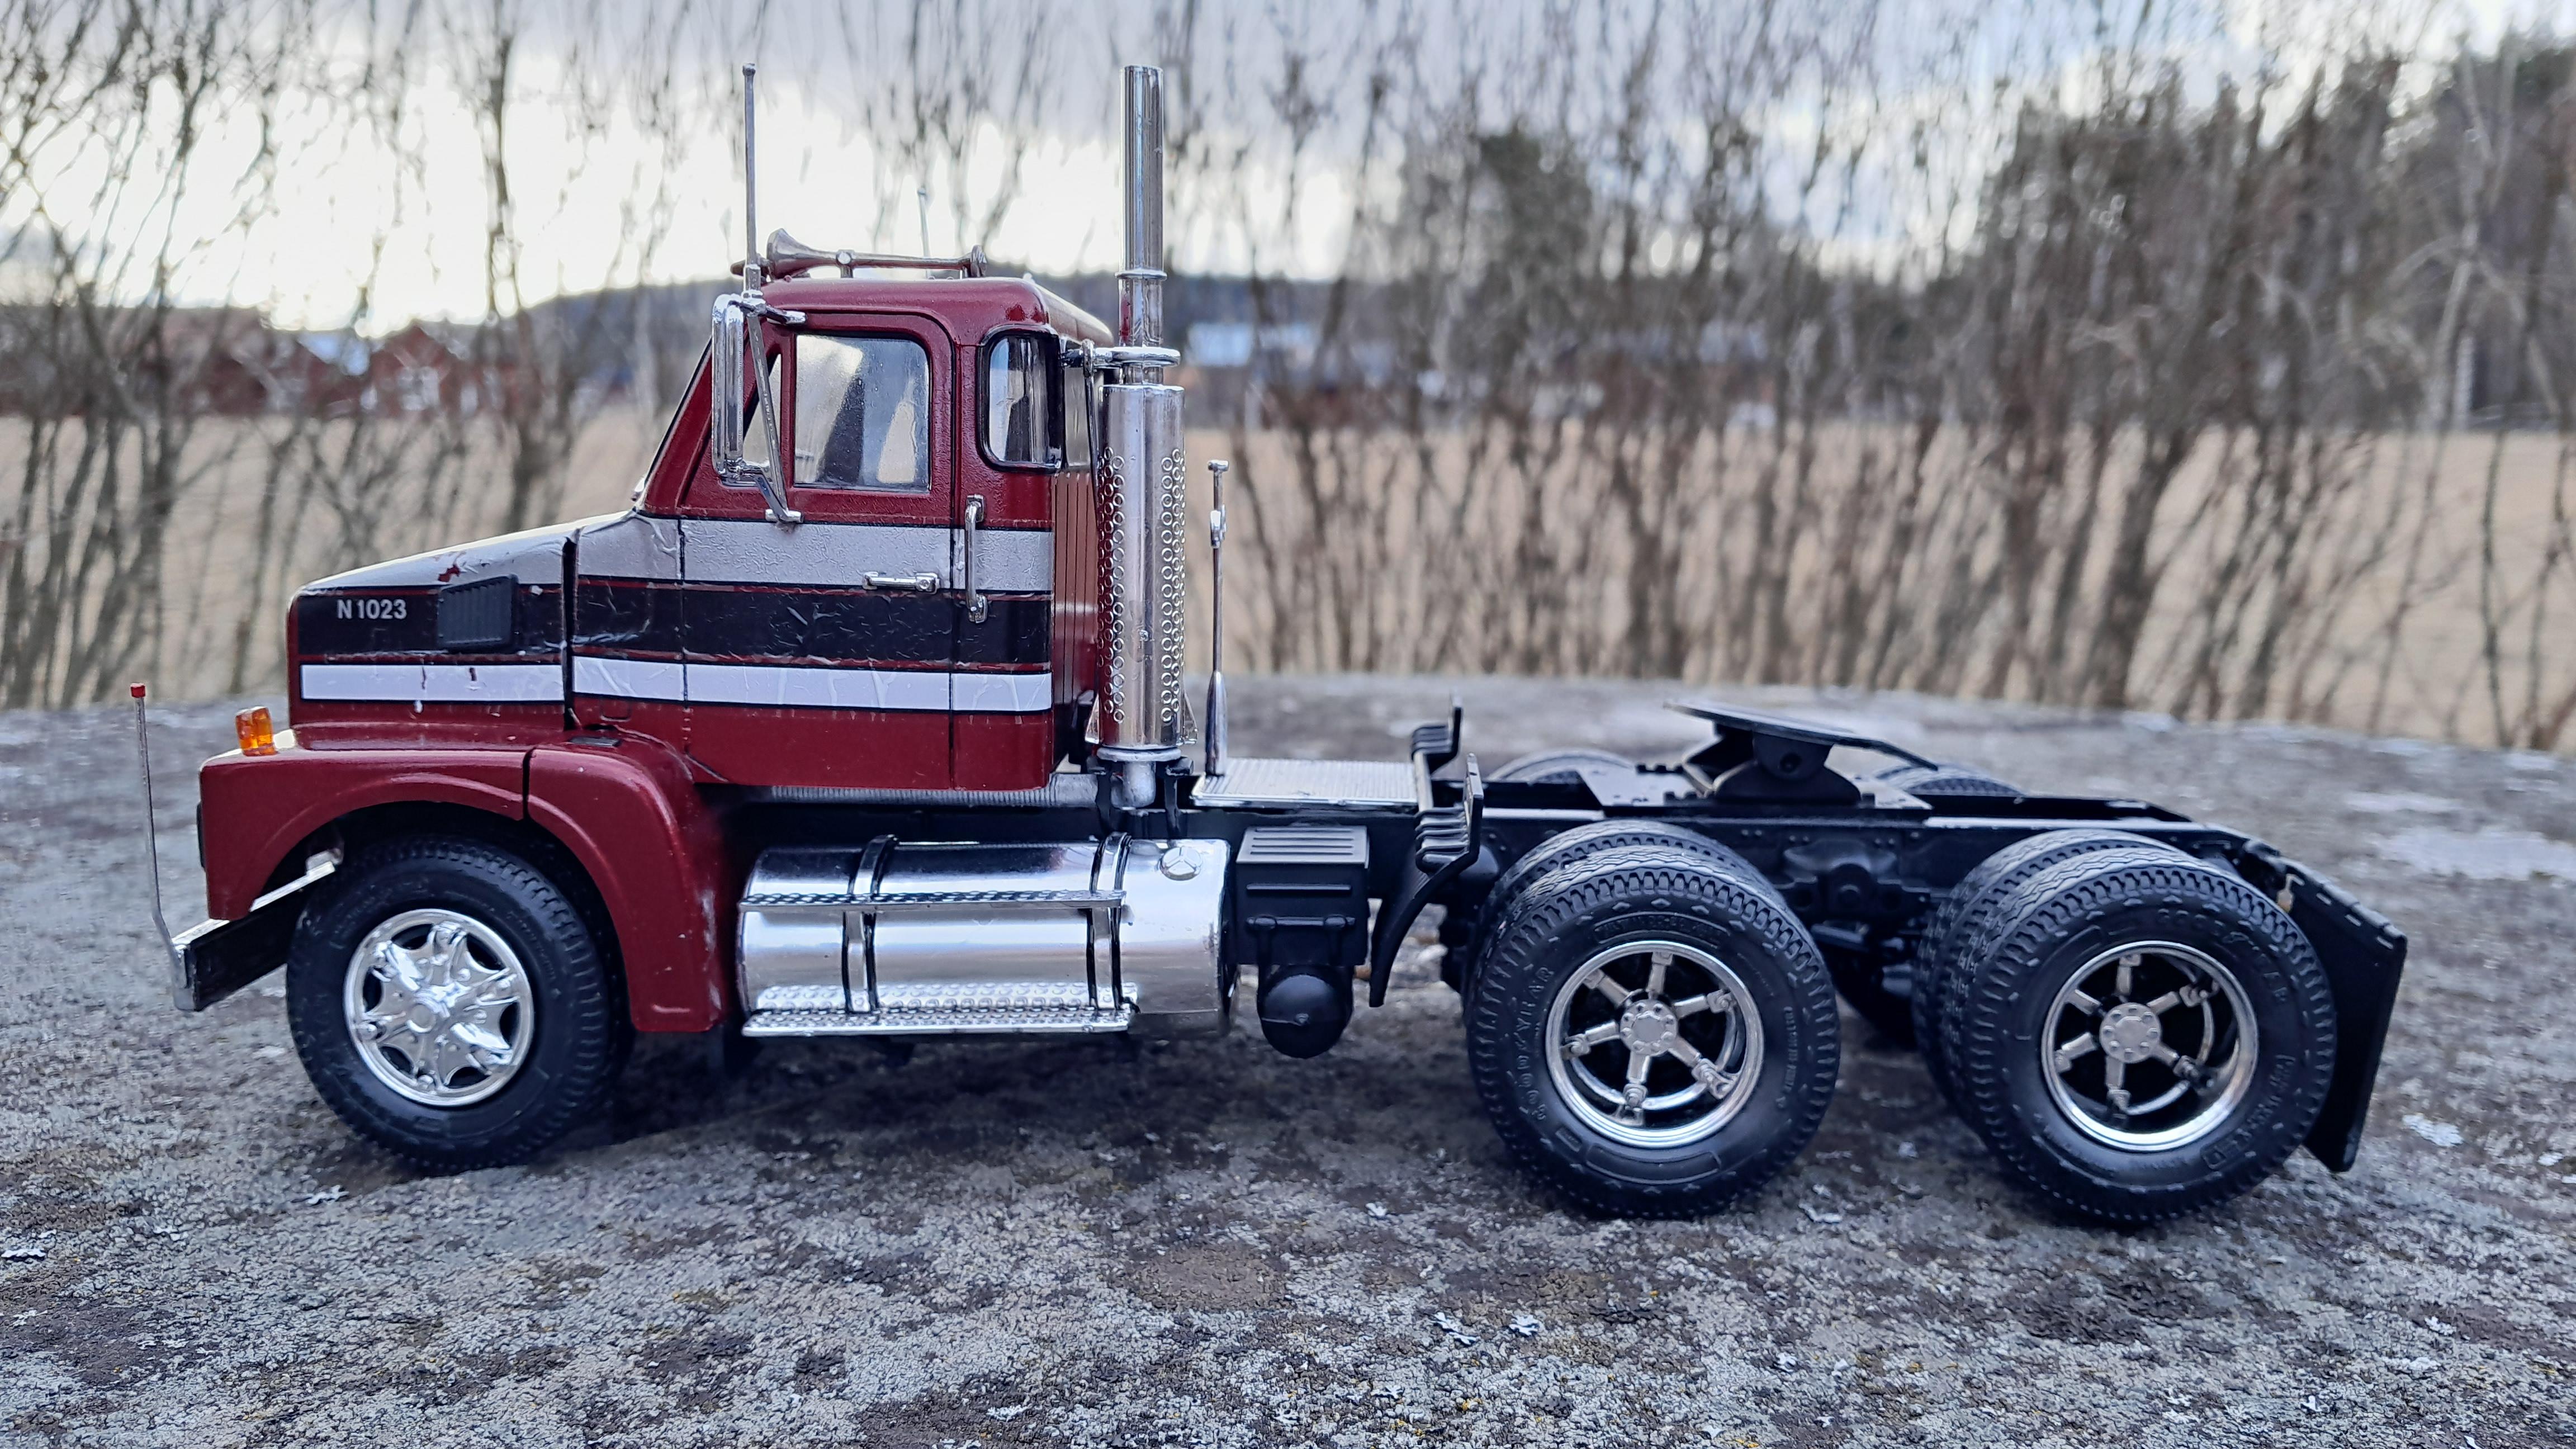
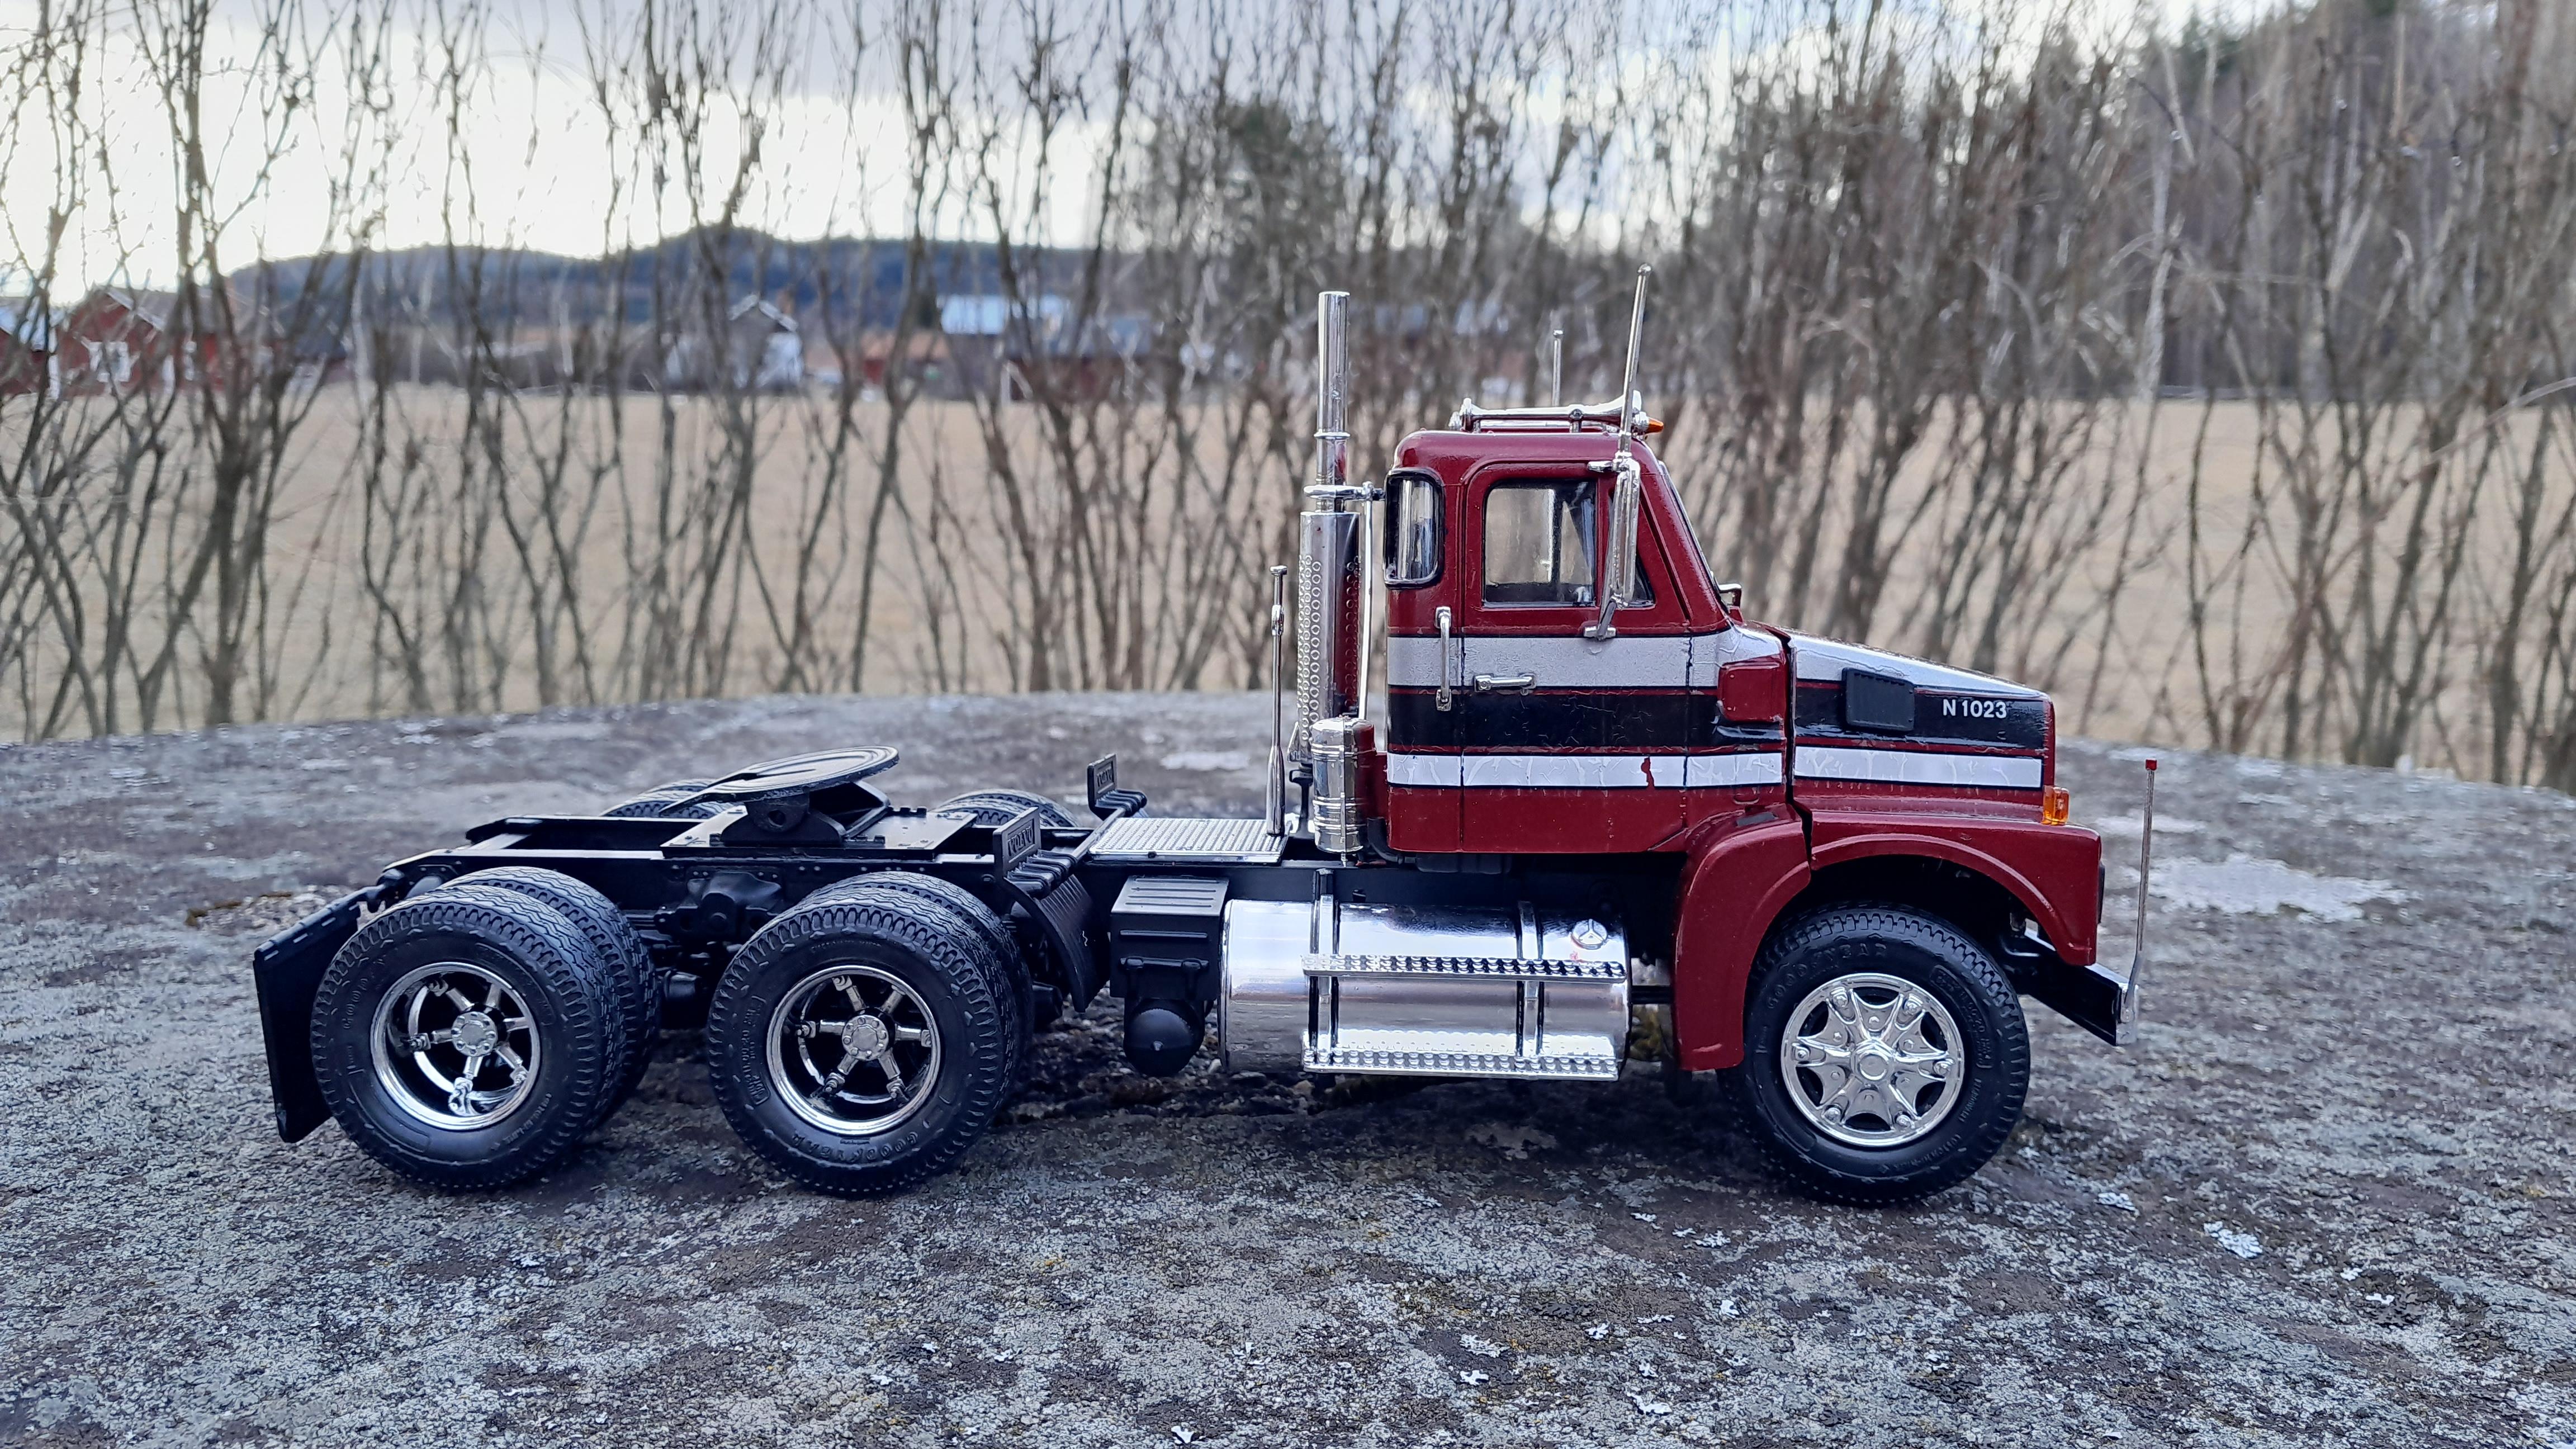
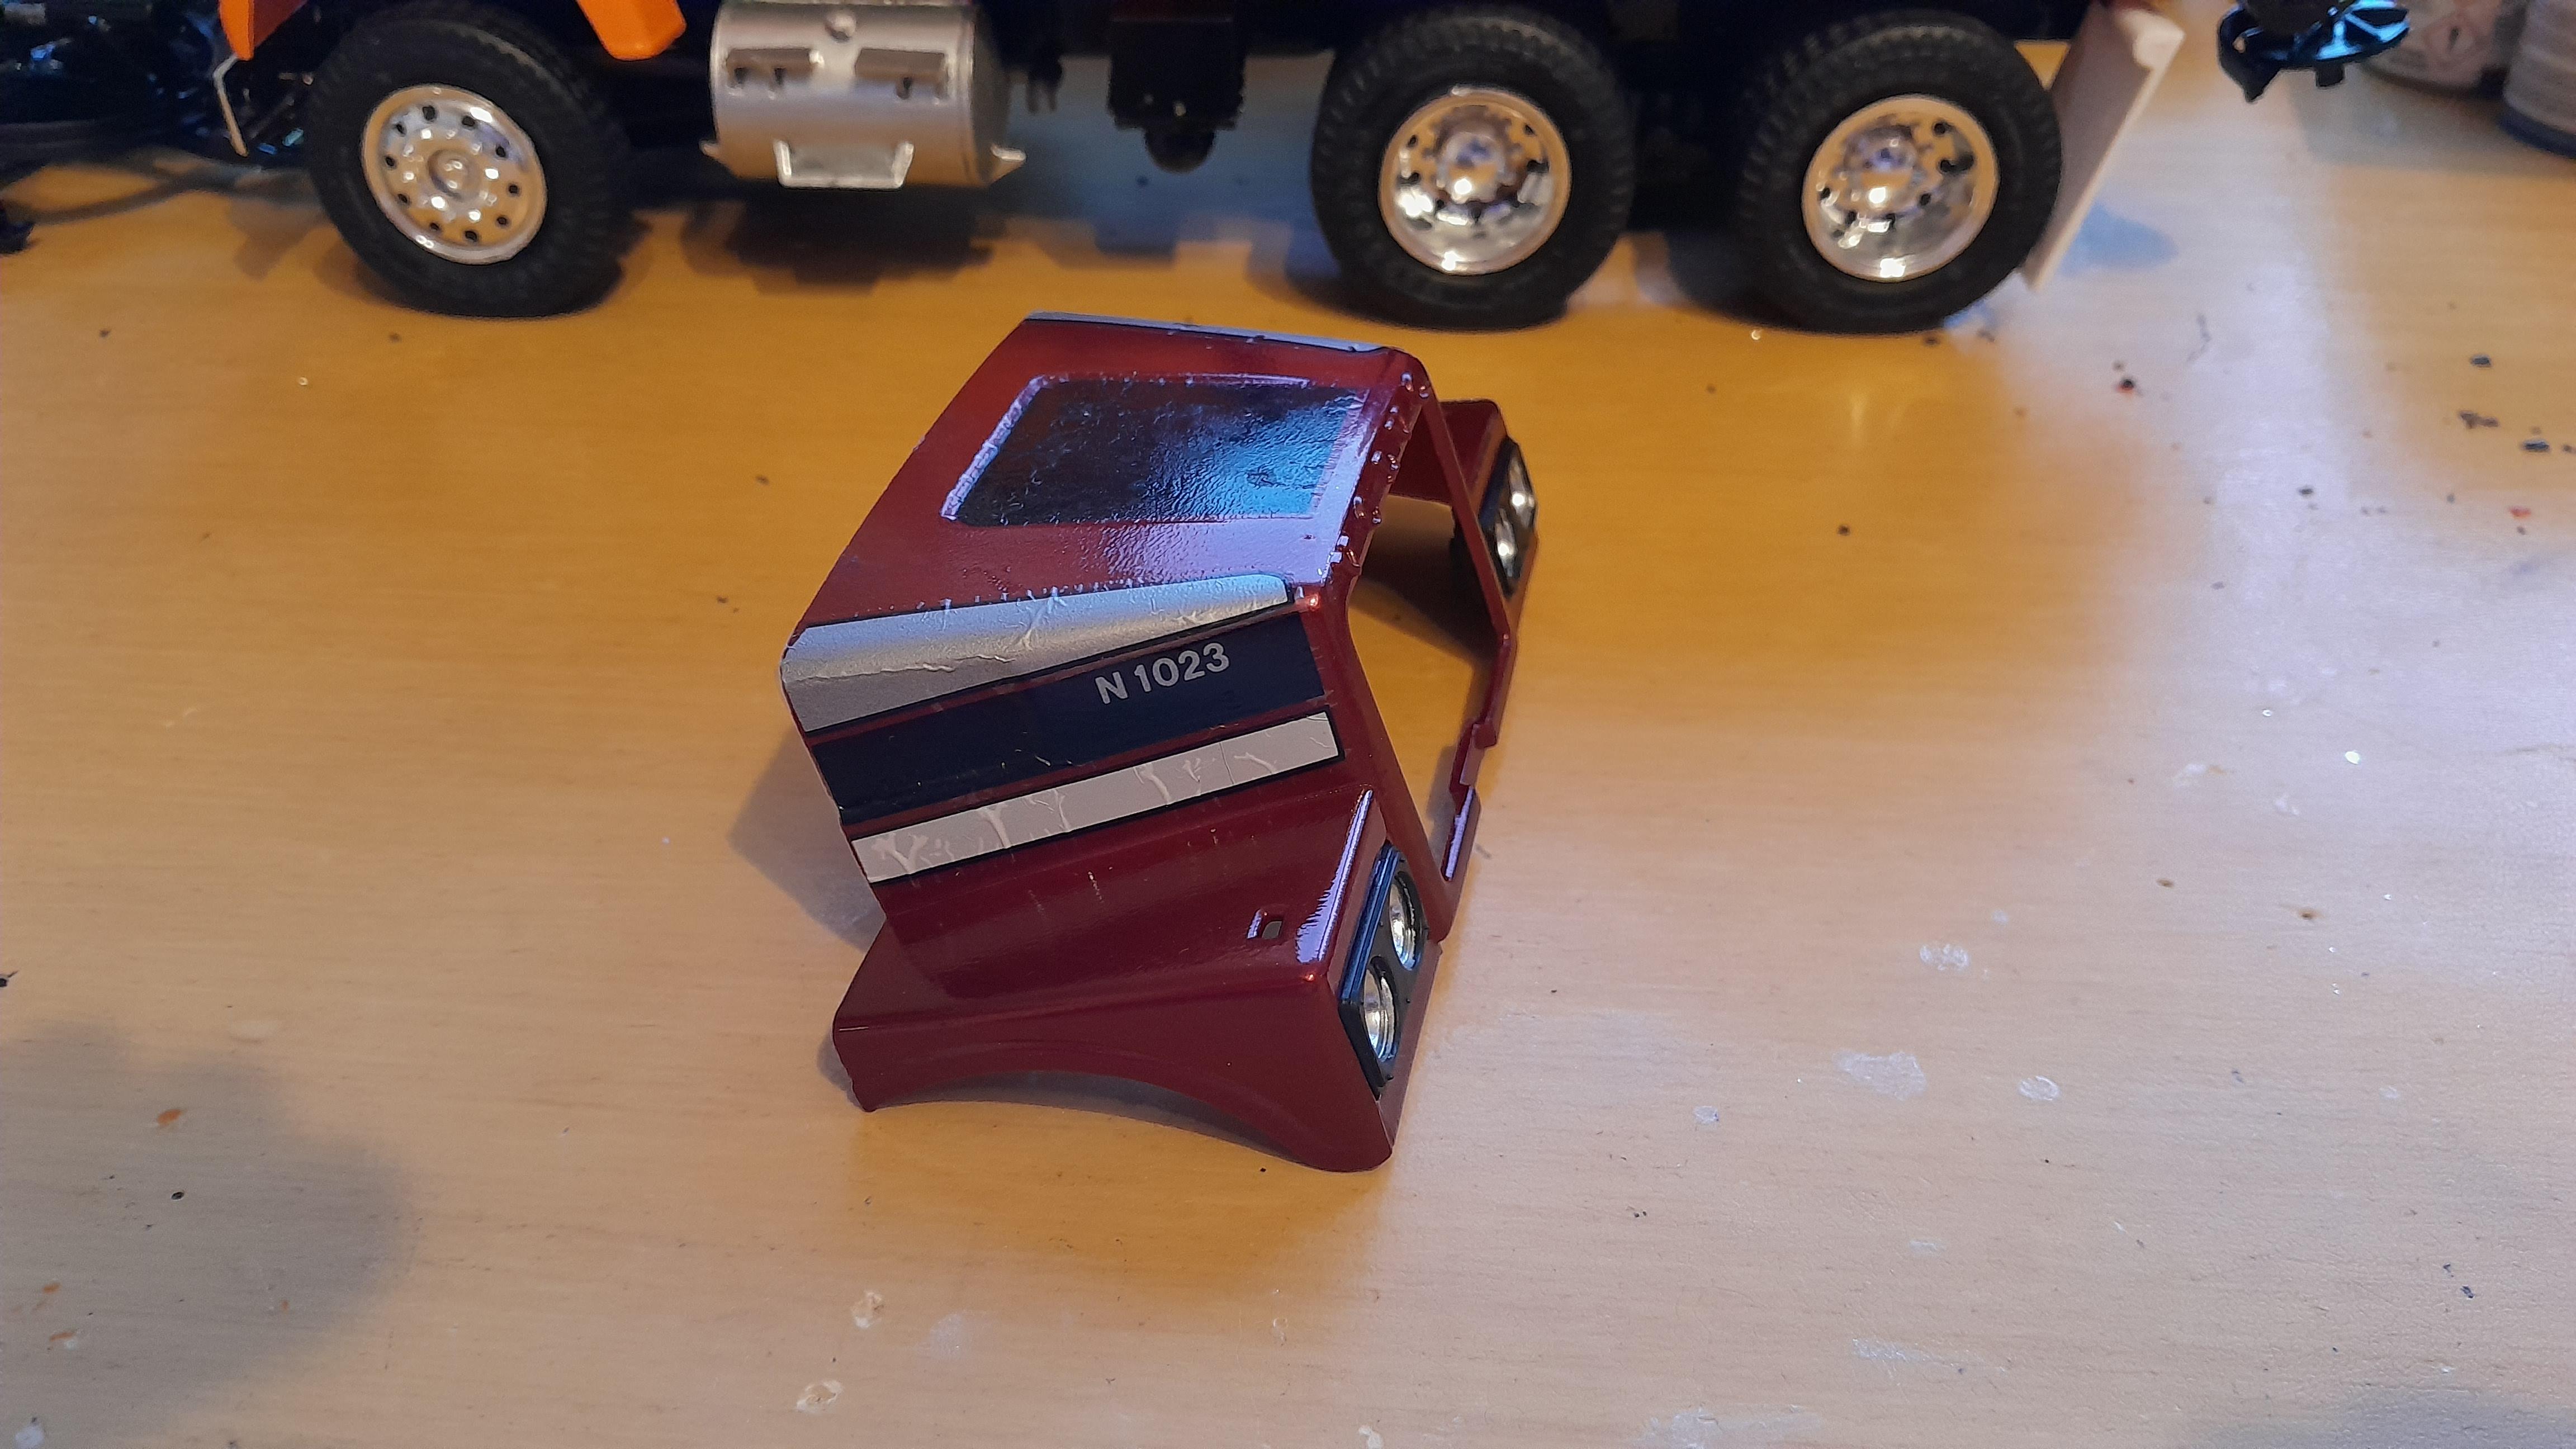
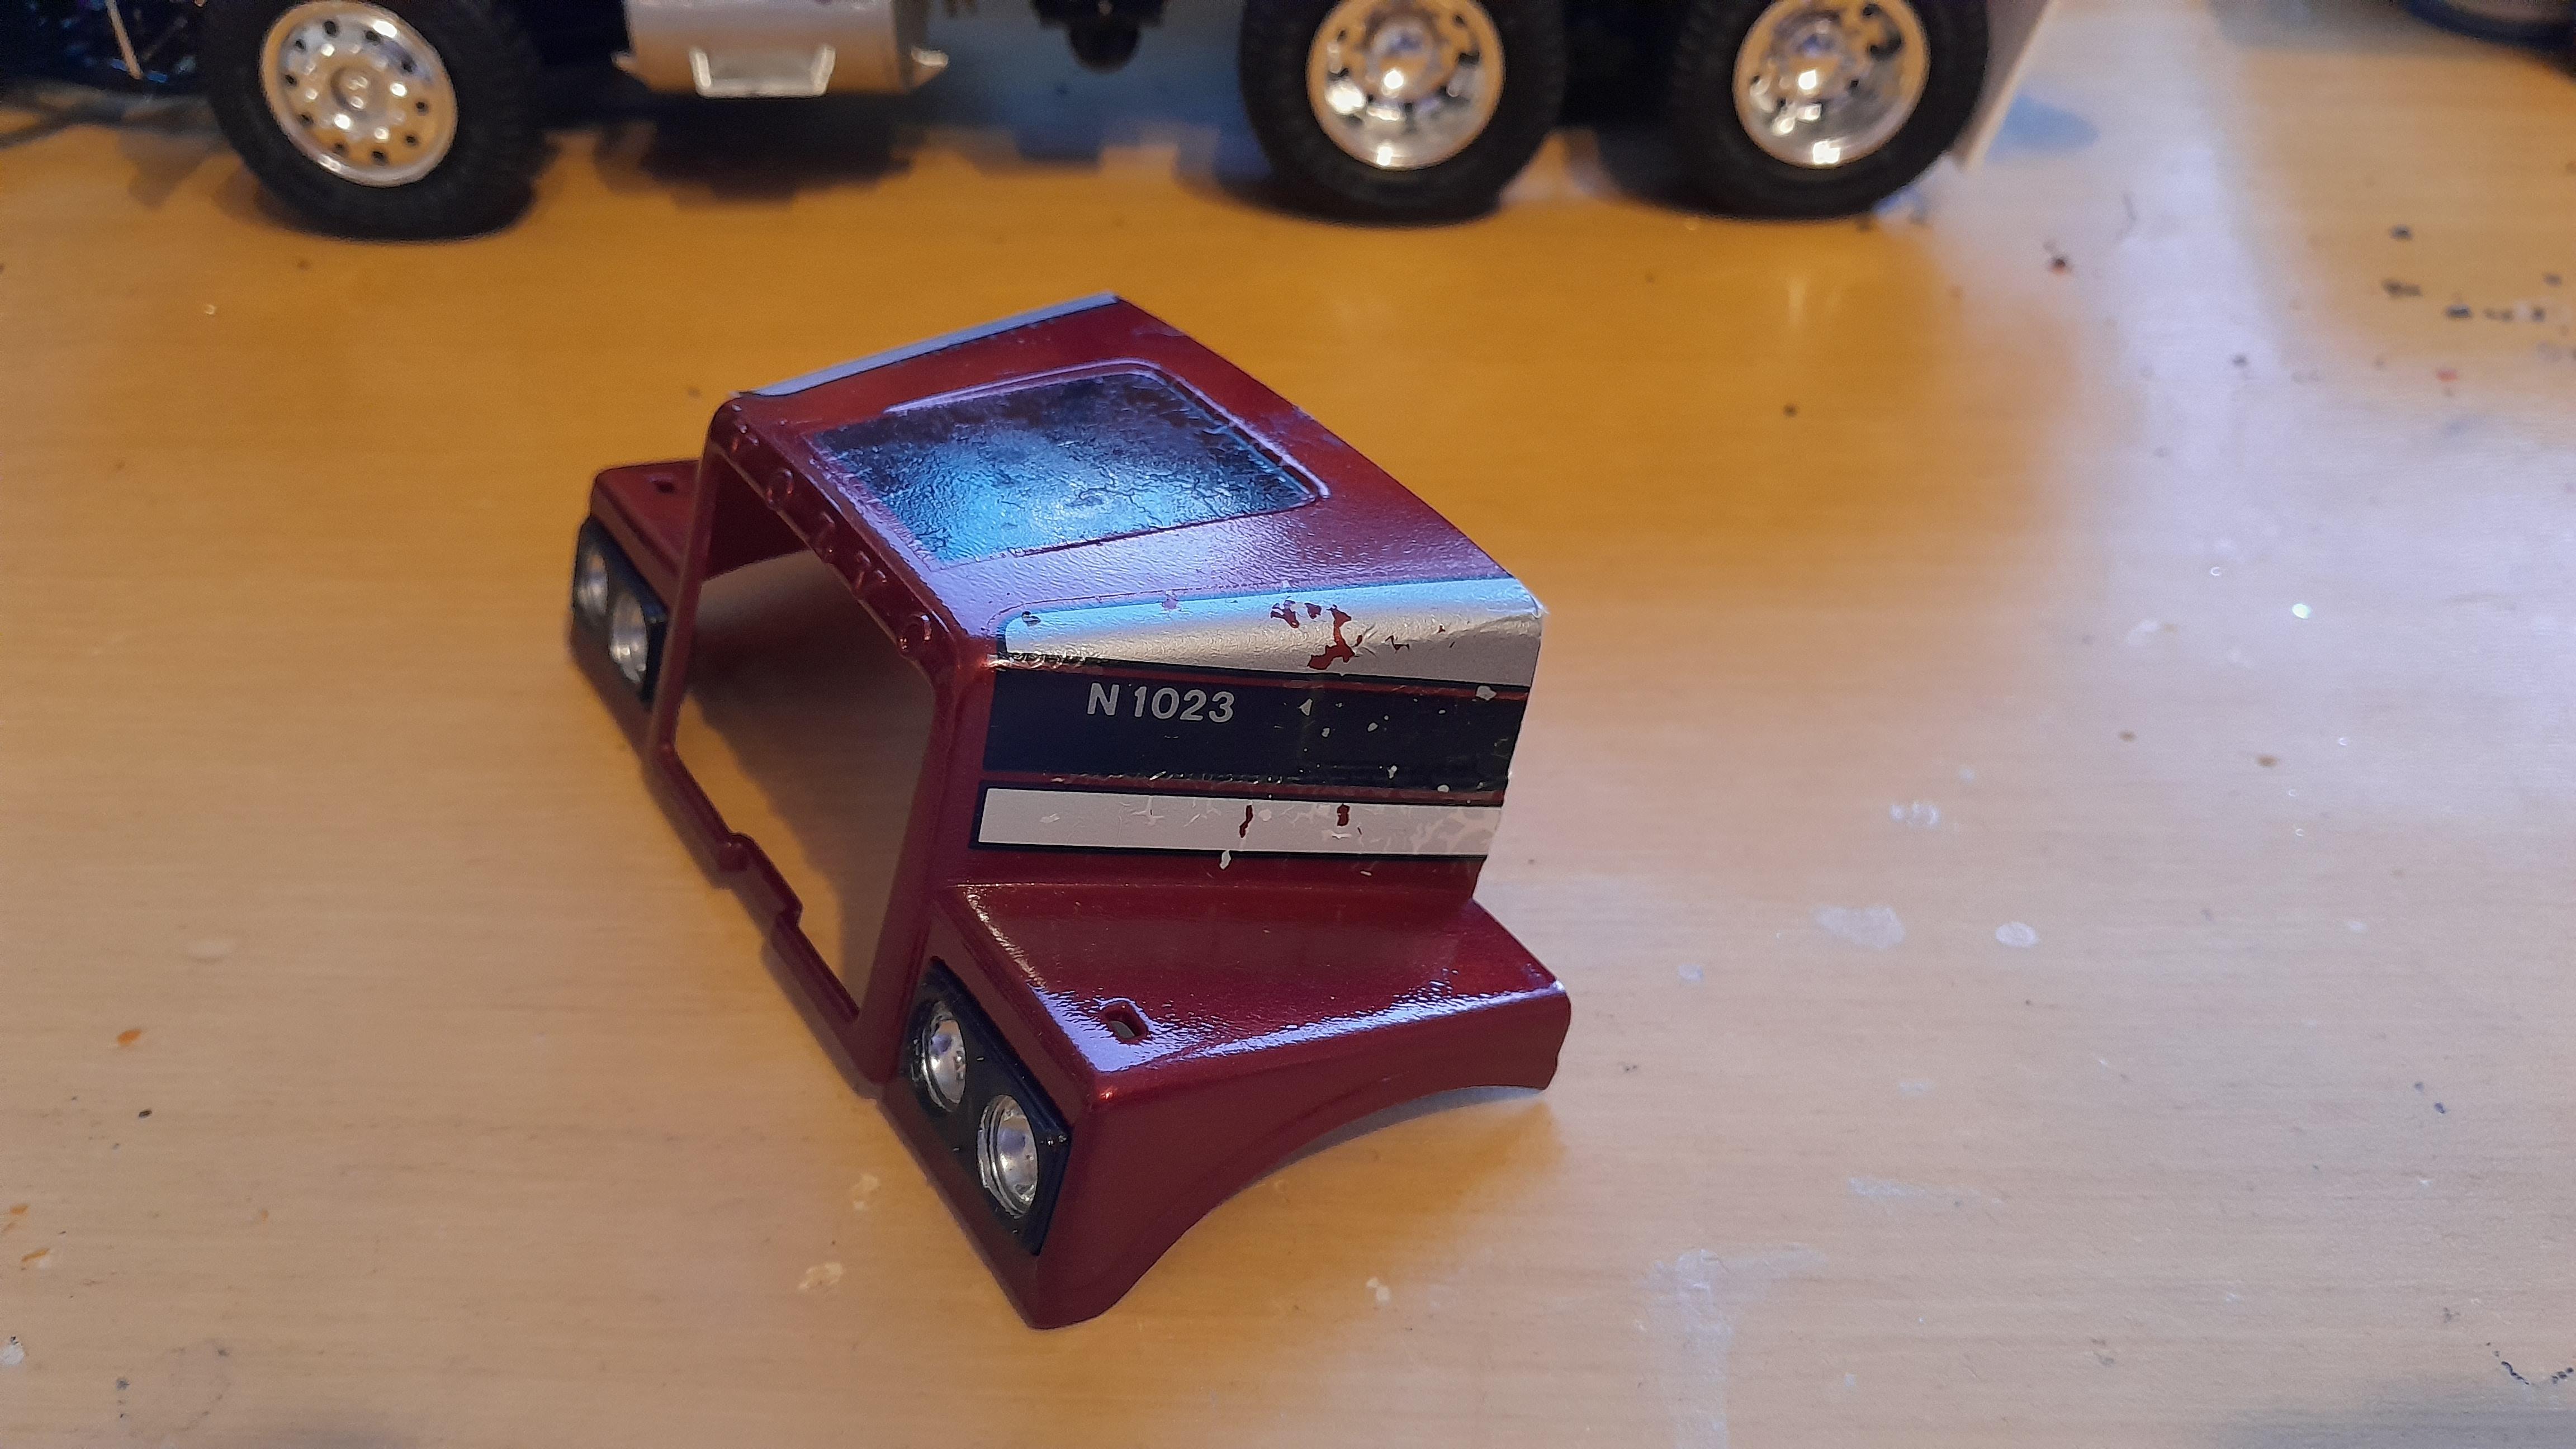
I decided to just leave it like this. It was not uncommon for the striping to look like this after a few years of use and washing with a highpressure washer. Also i did not have any more paint for this to get a respray. It is also in the under glass section now as i have done the final parts on it. -
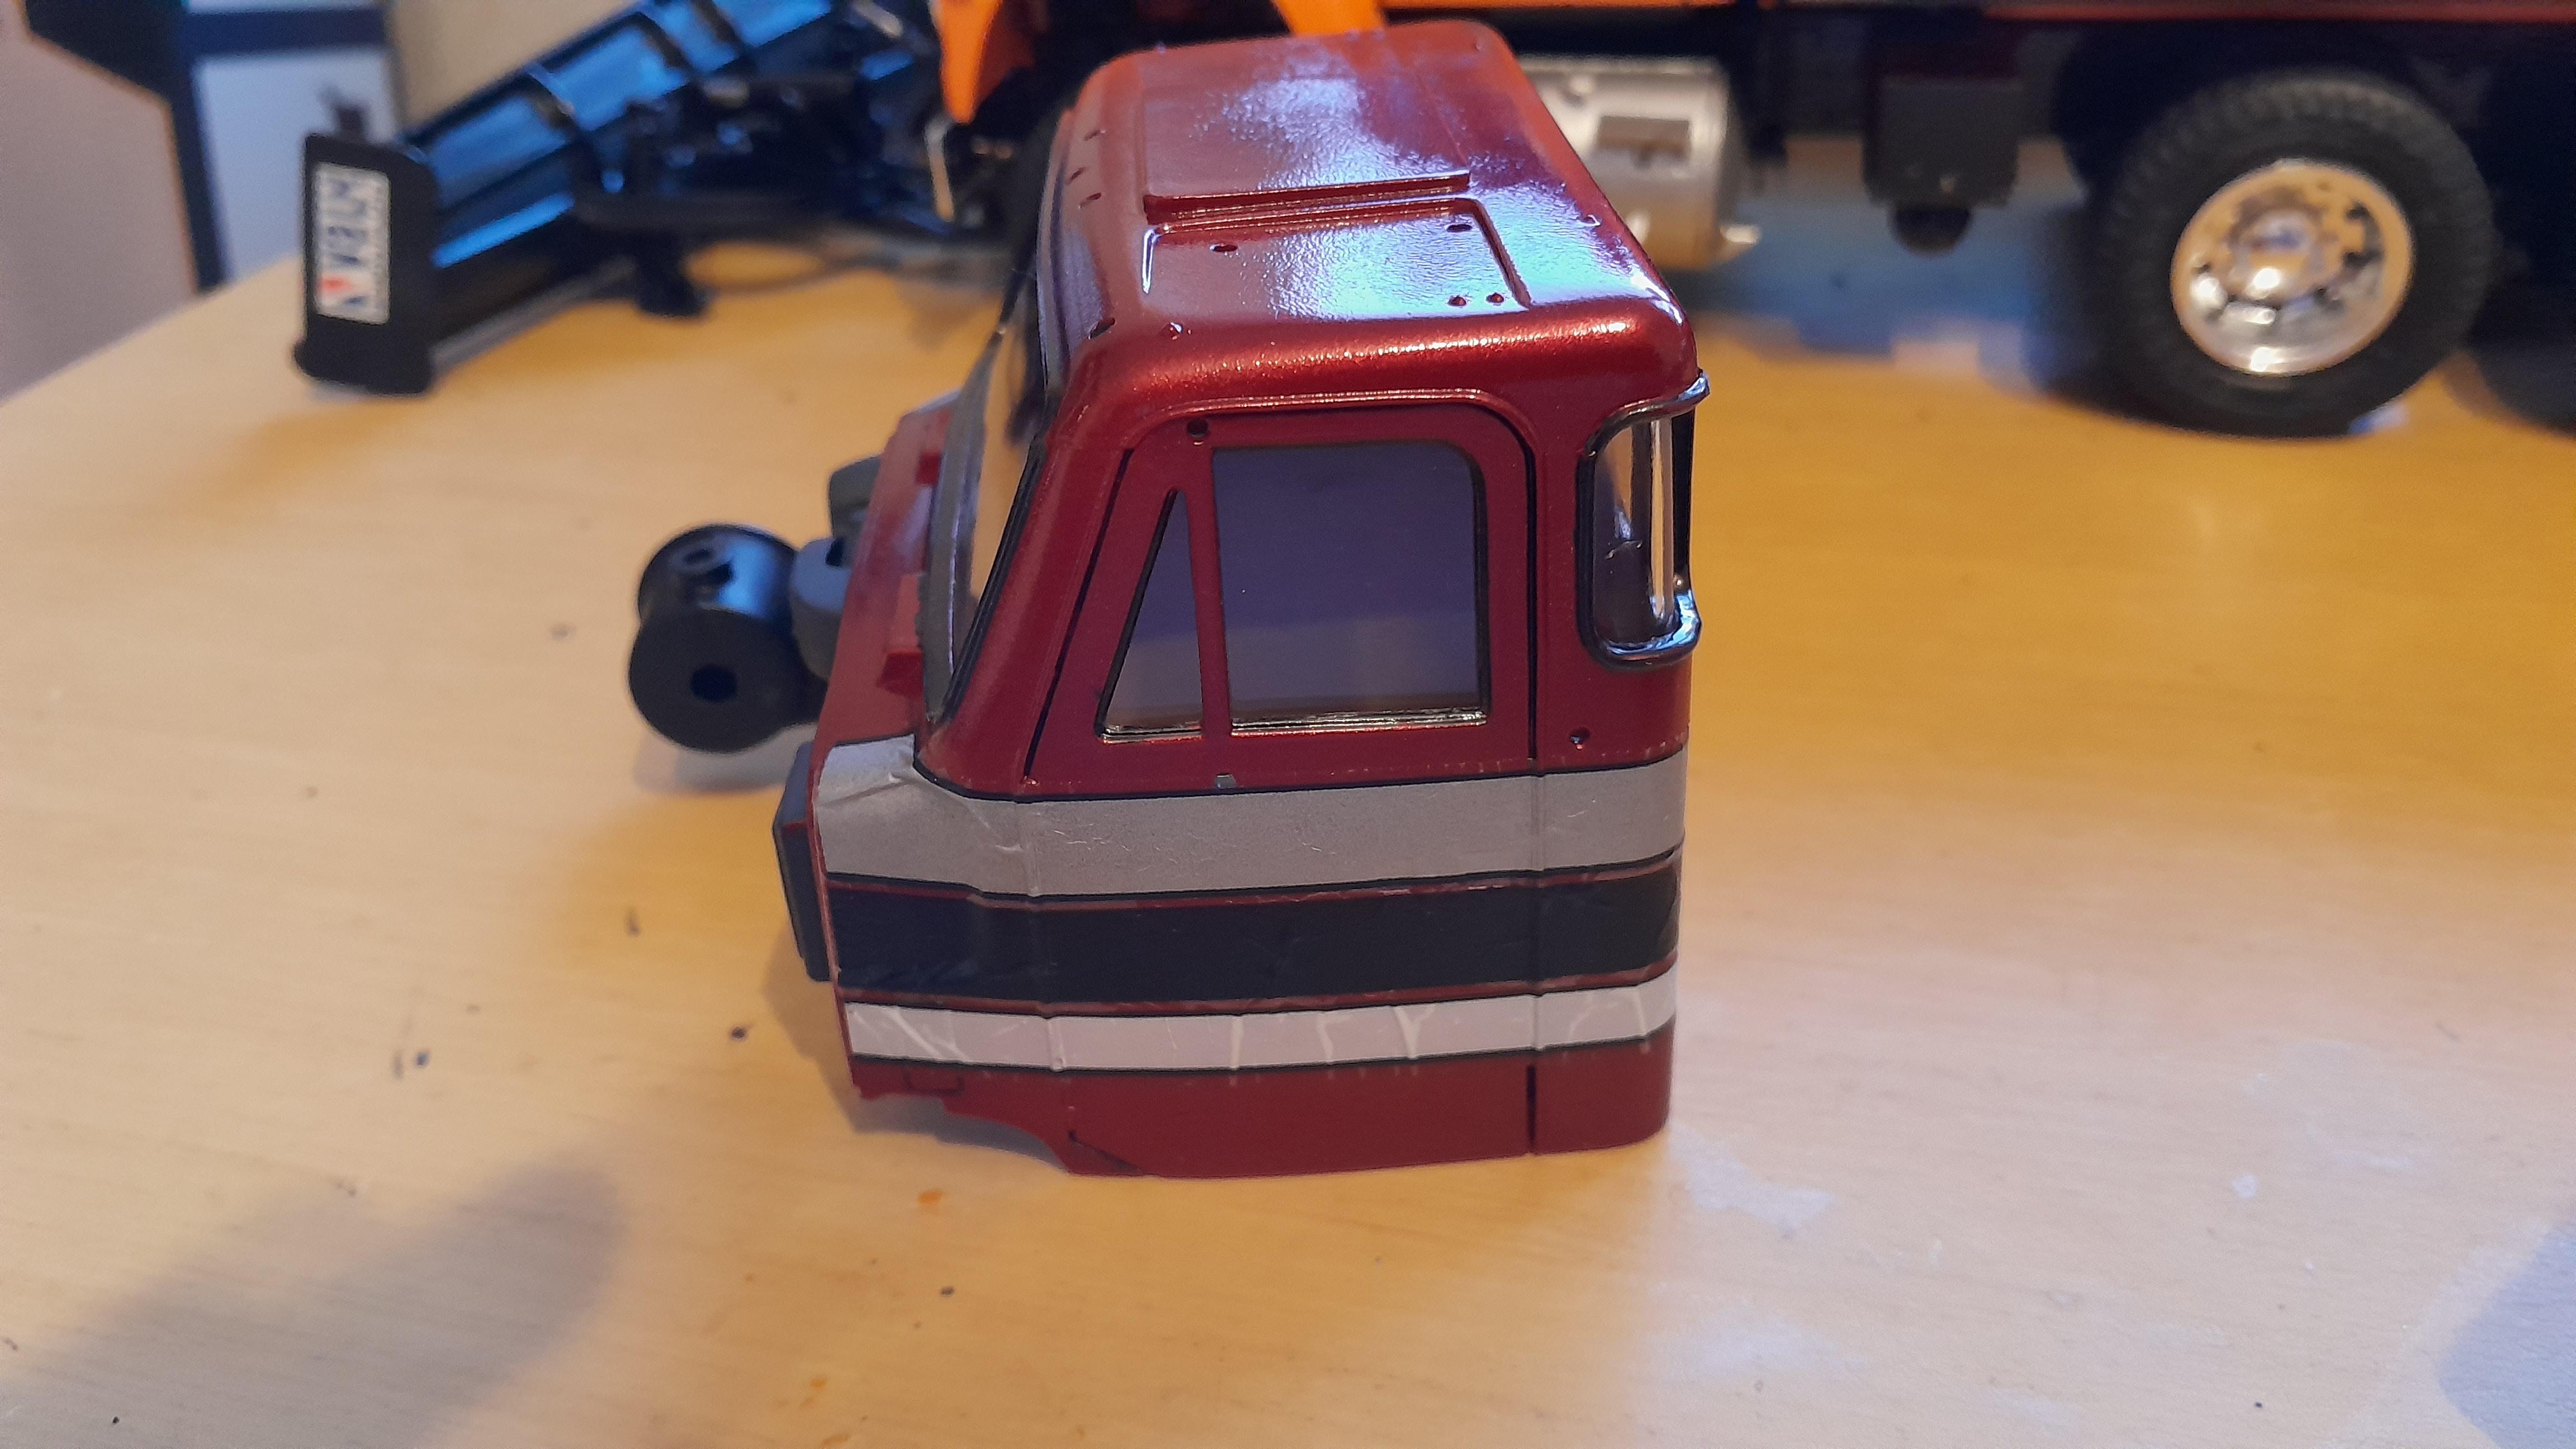
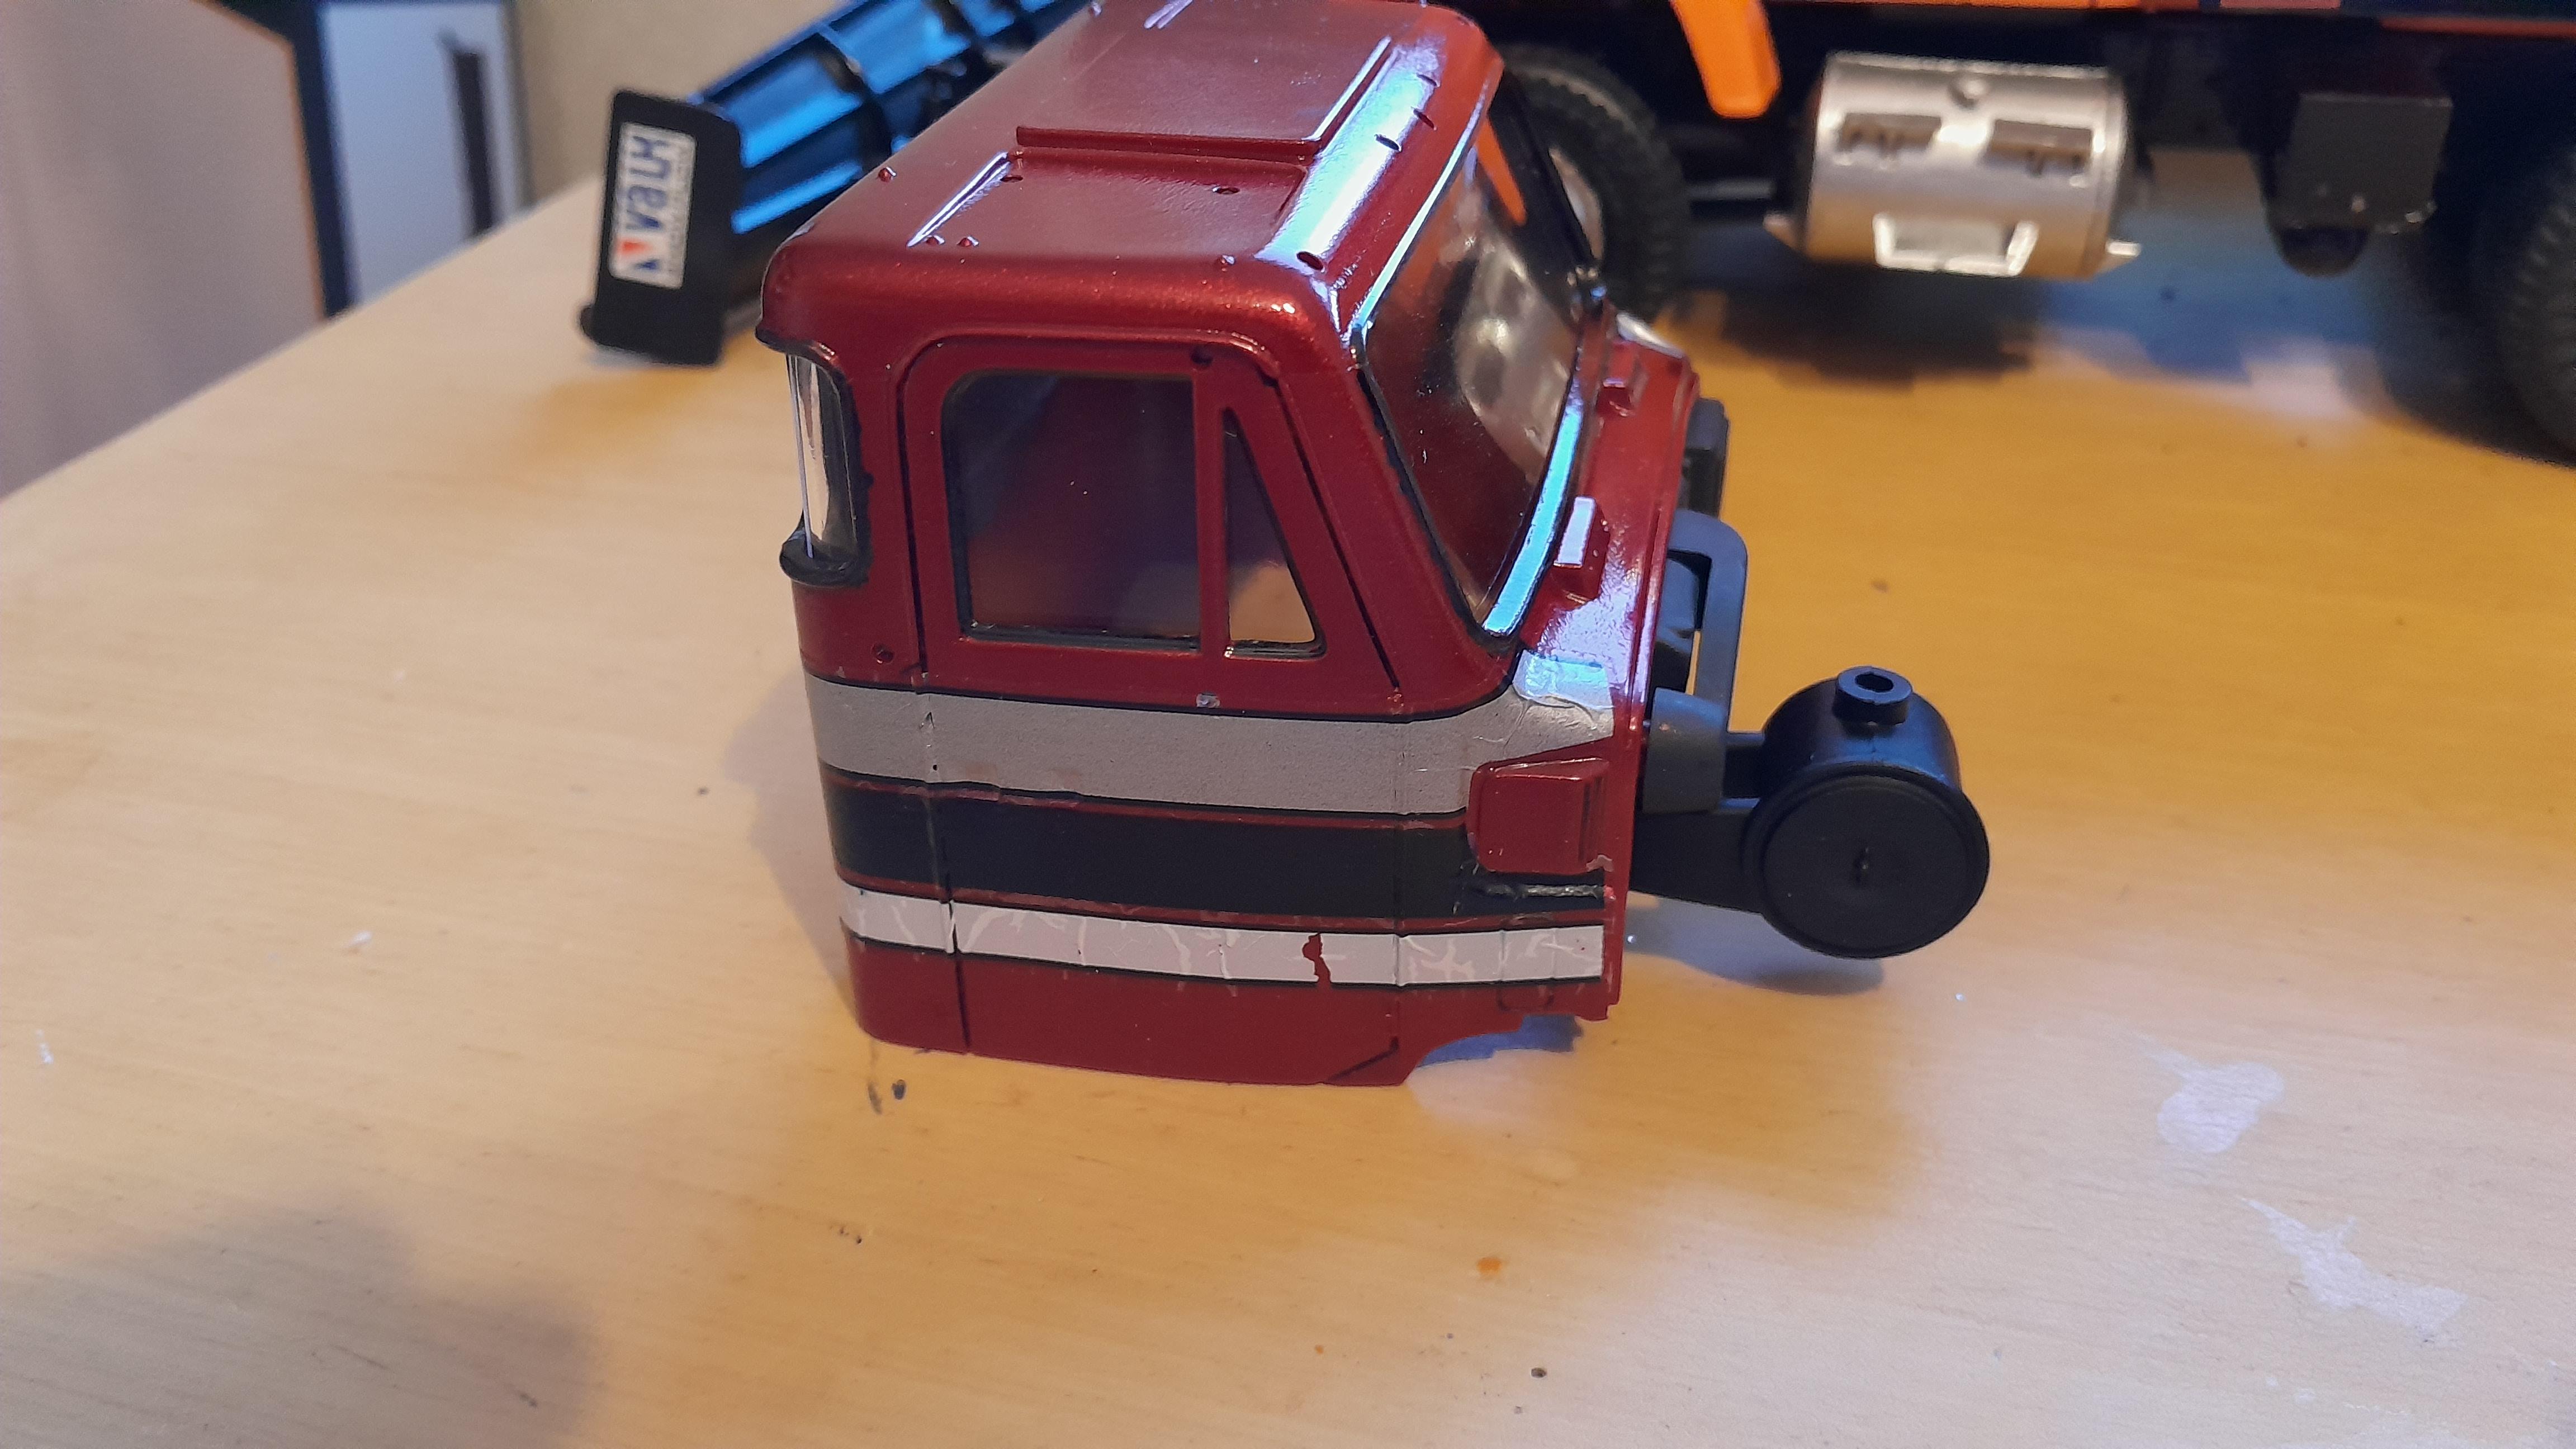
ERTL Volvo N10
PierreR89 replied to PierreR89's topic in WIP: Model Trucks: Big Rigs and Heavy Equipment
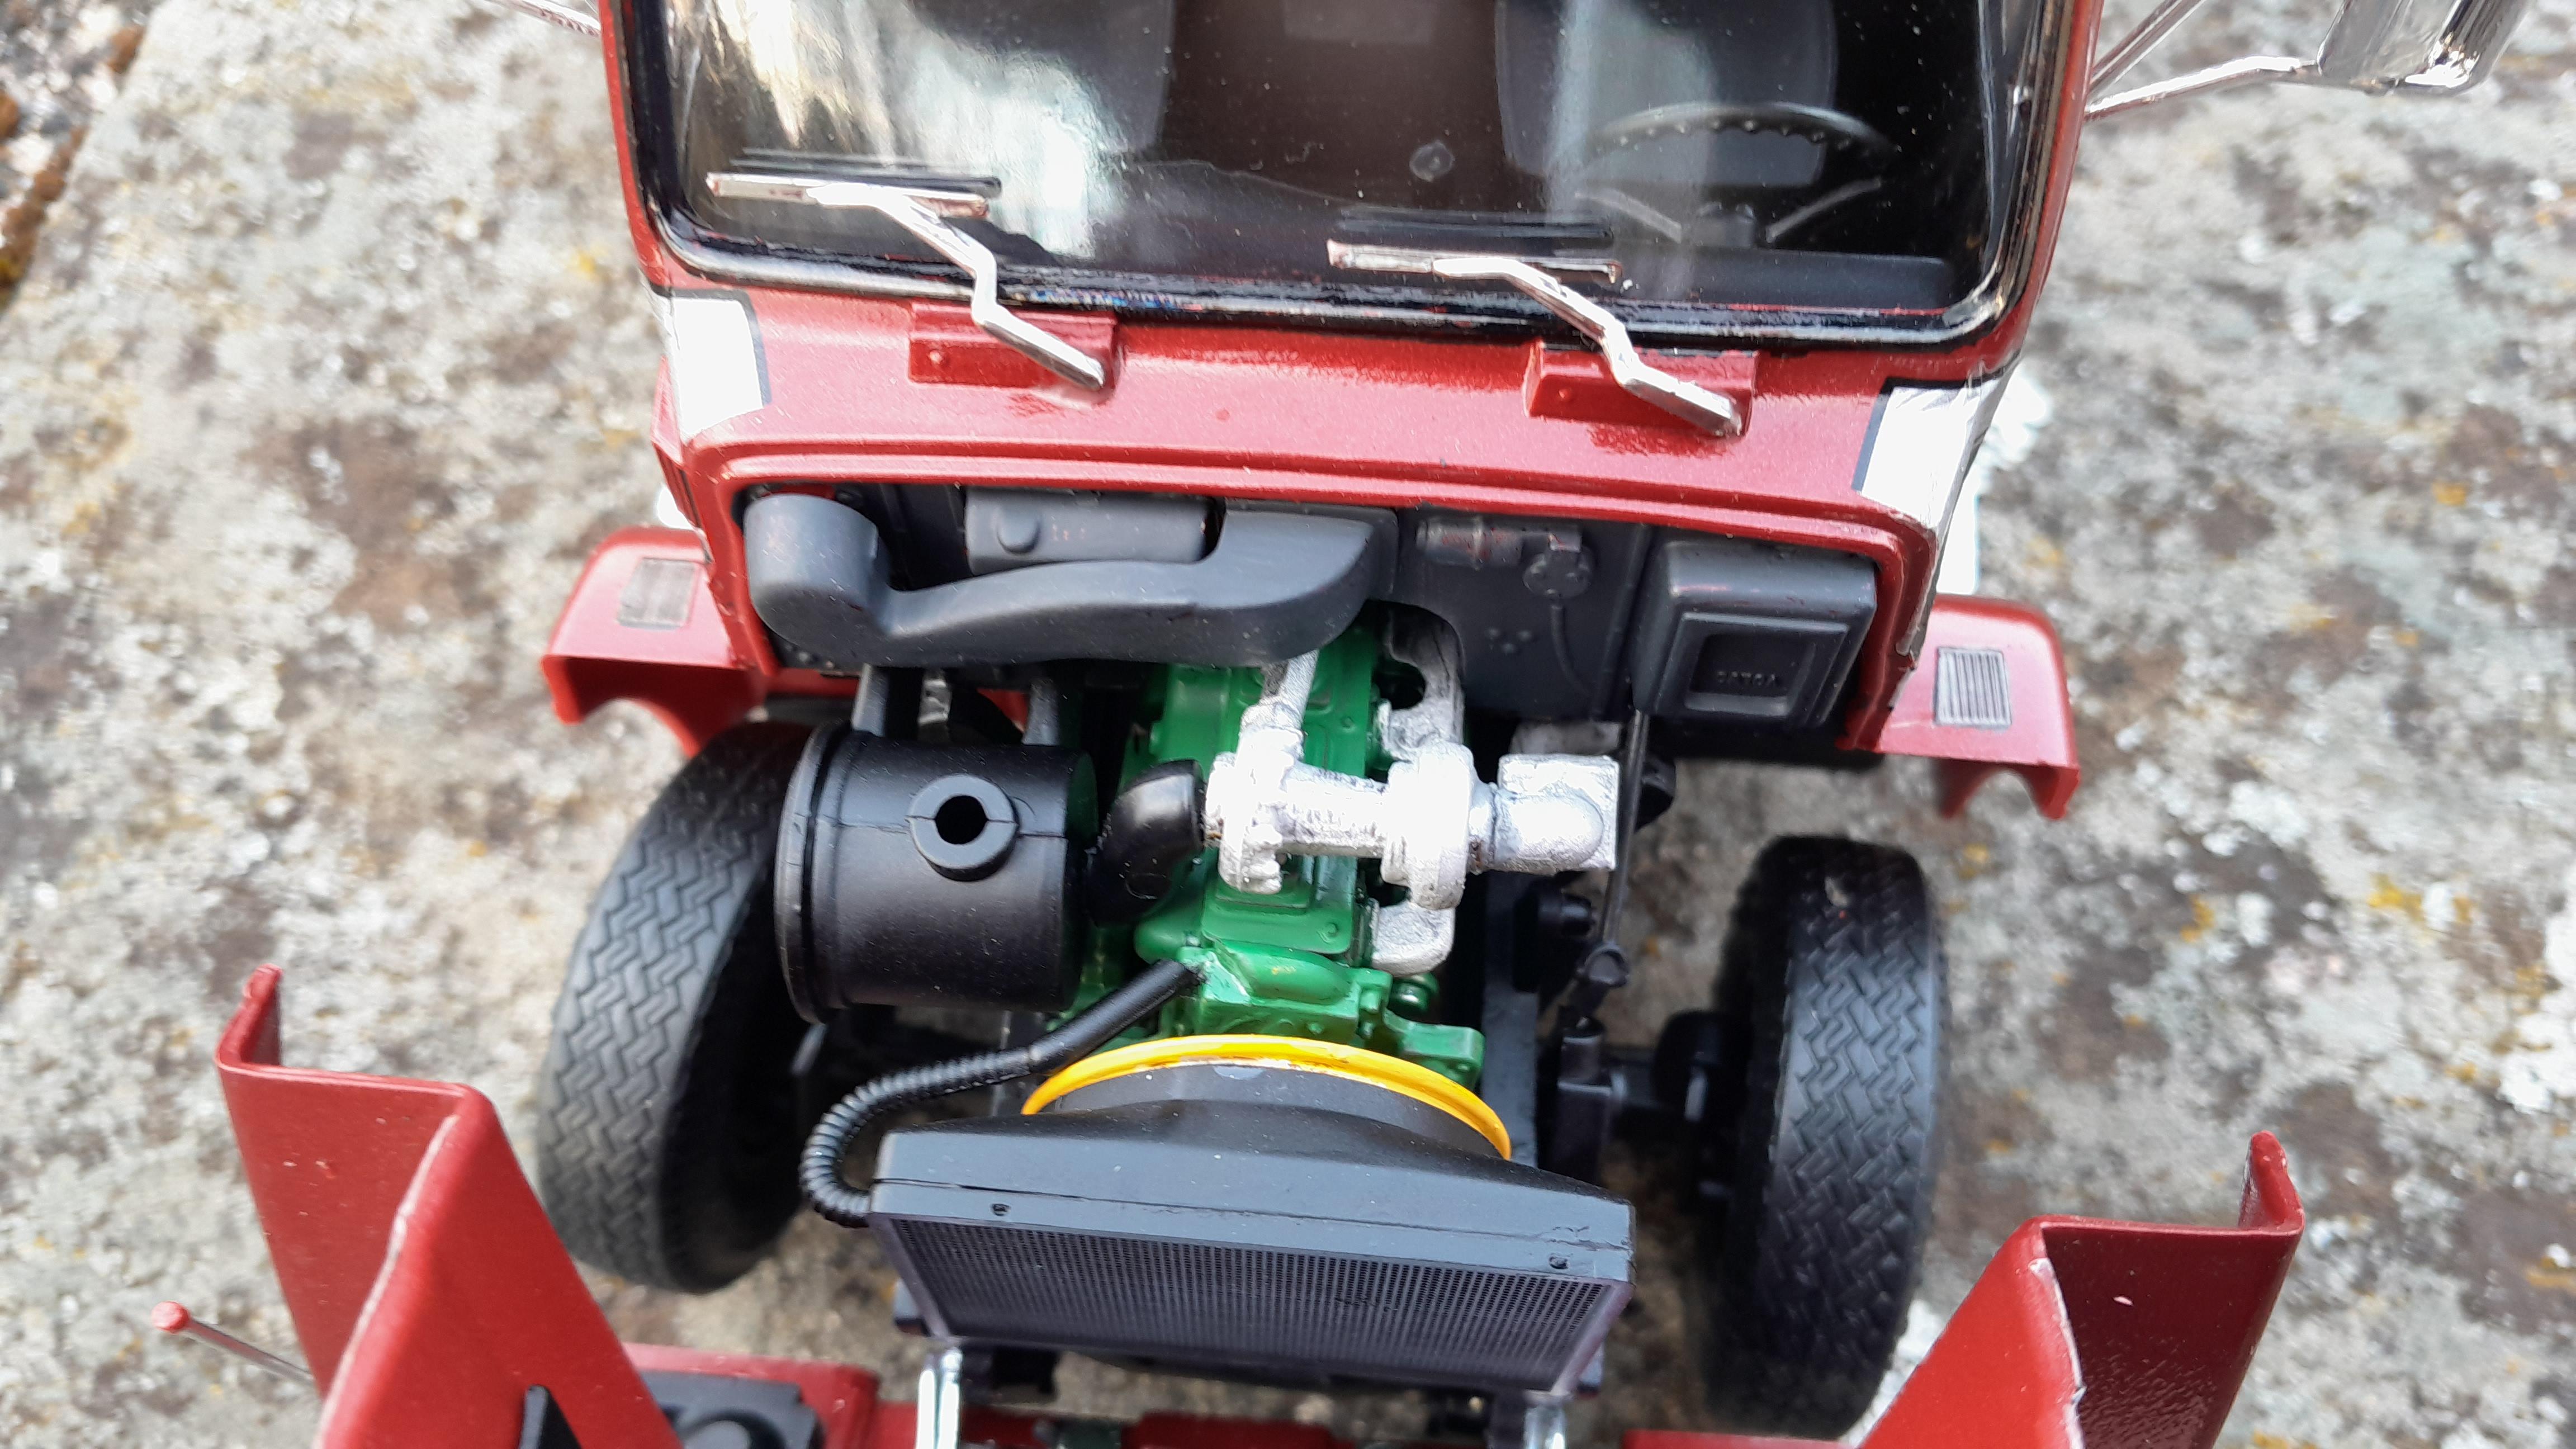
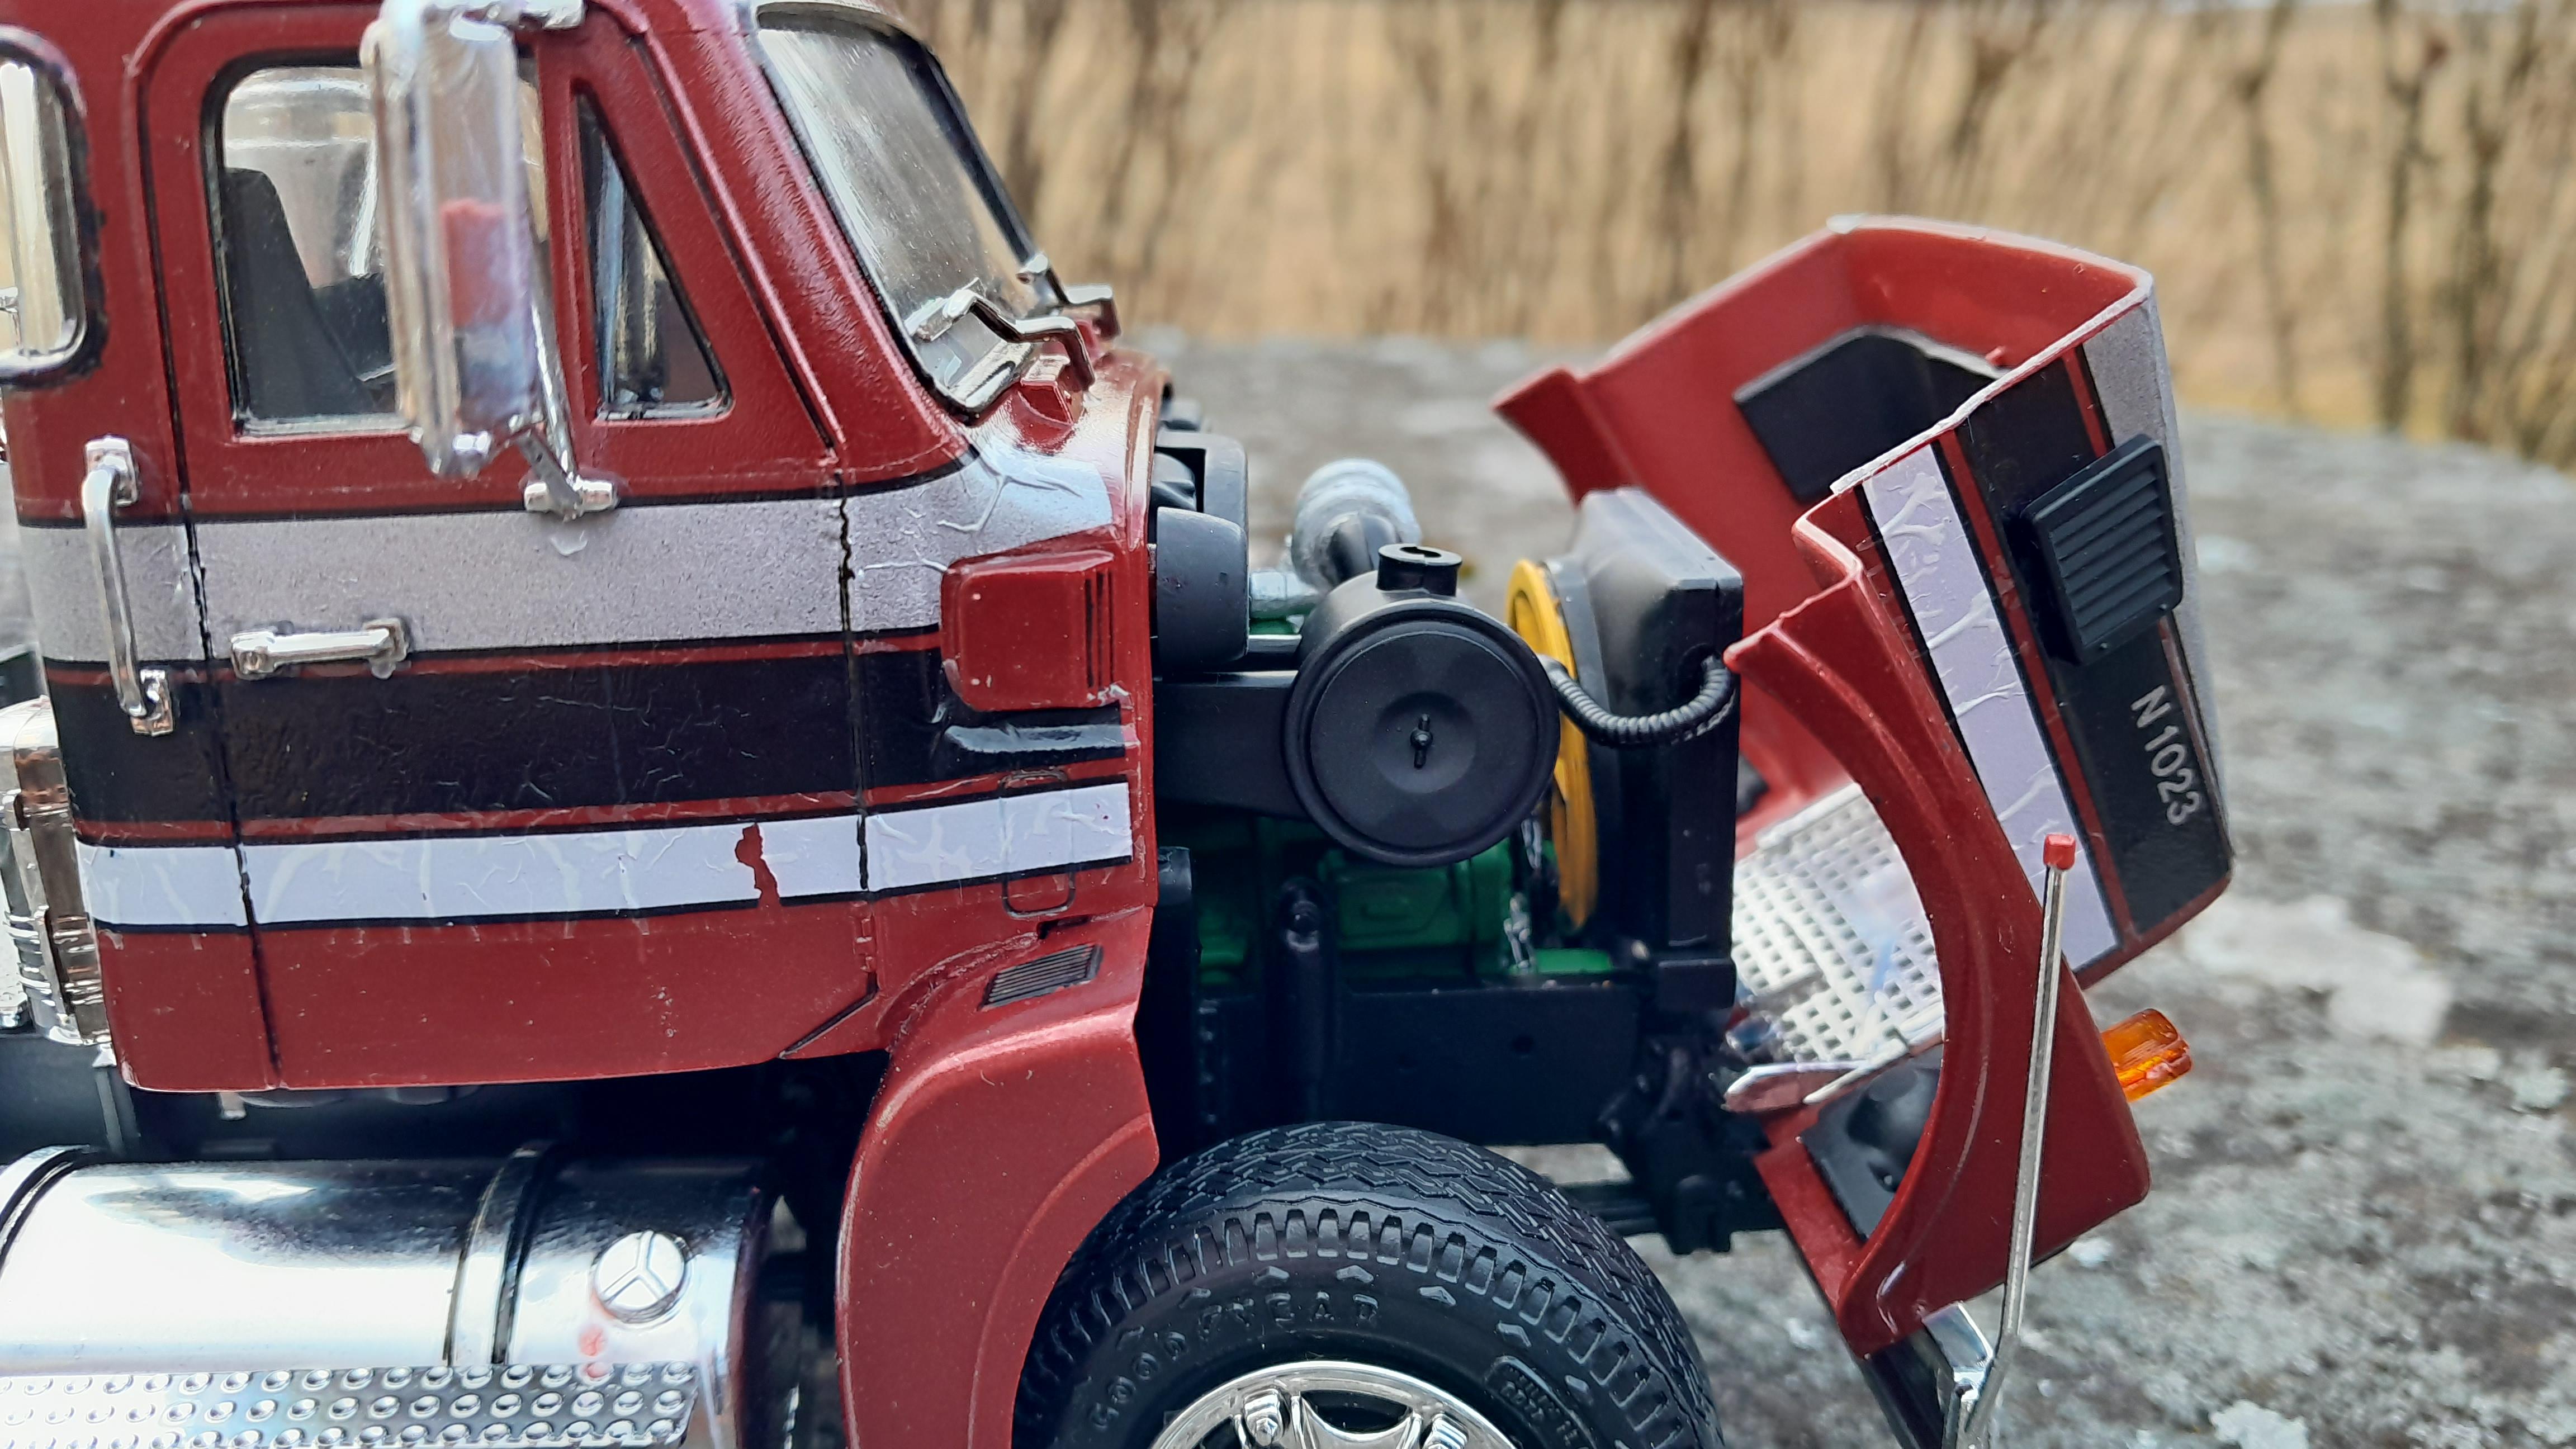
Done some building and painting on it now. Found out that the framerails are warped so one wheel sits slightly in the air. I did not notice untill i mounted the wheels on it.. Everything went well untill it was time for the decals and then this happend.... Not even micro sol and micro set could fix it. I dont know what to do to fix this exept remove all paint and start over. Engine and transmission just needs some final painting and then they are done. I have started to detail the interior but the pic is from before i started on that. Last pick is just a quick mockup of how it is going to look when it is done.
-
Ford LNT8000 snowplow
PierreR89 replied to PierreR89's topic in Model Trucks: Big Rigs and Heavy Equipment
Thanks.