PierreR89
-
Posts
532 -
Joined
-
Last visited
Content Type
Profiles
Forums
Events
Gallery
Everything posted by PierreR89
-
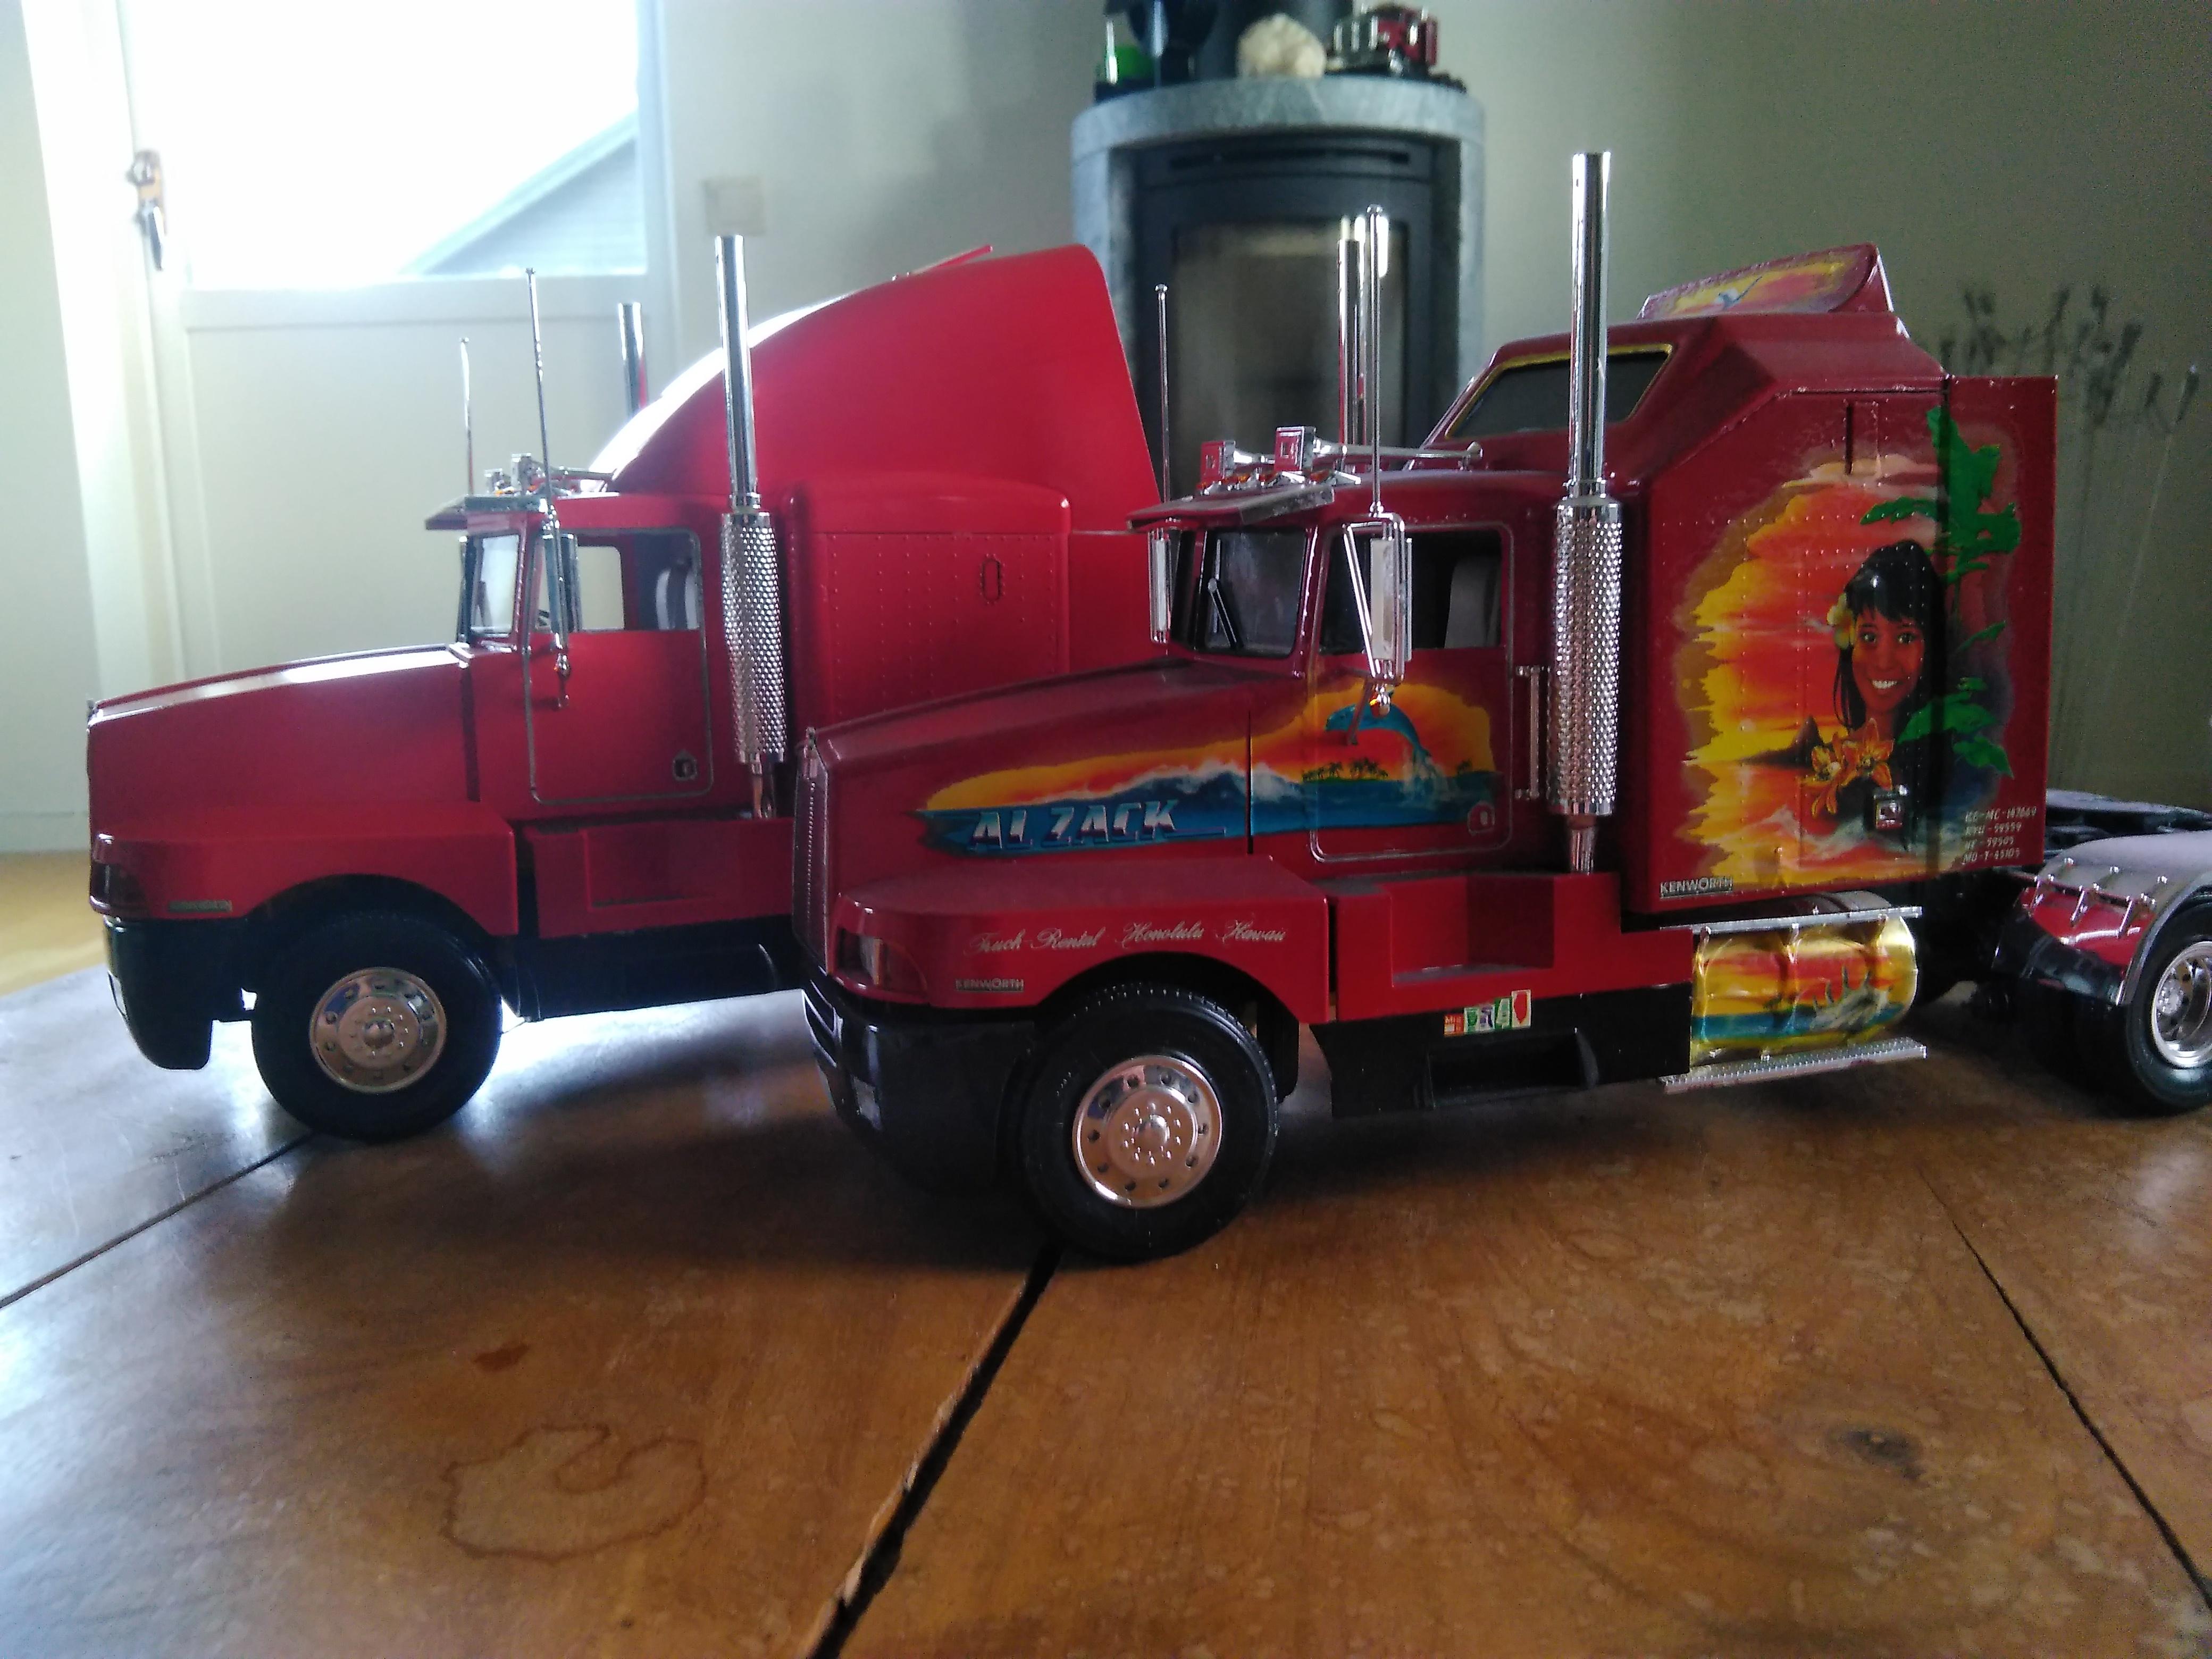
Kenworth T600 Big Sleeper Revell 1/25
PierreR89 replied to PierreR89's topic in Model Trucks: Big Rigs and Heavy Equipment
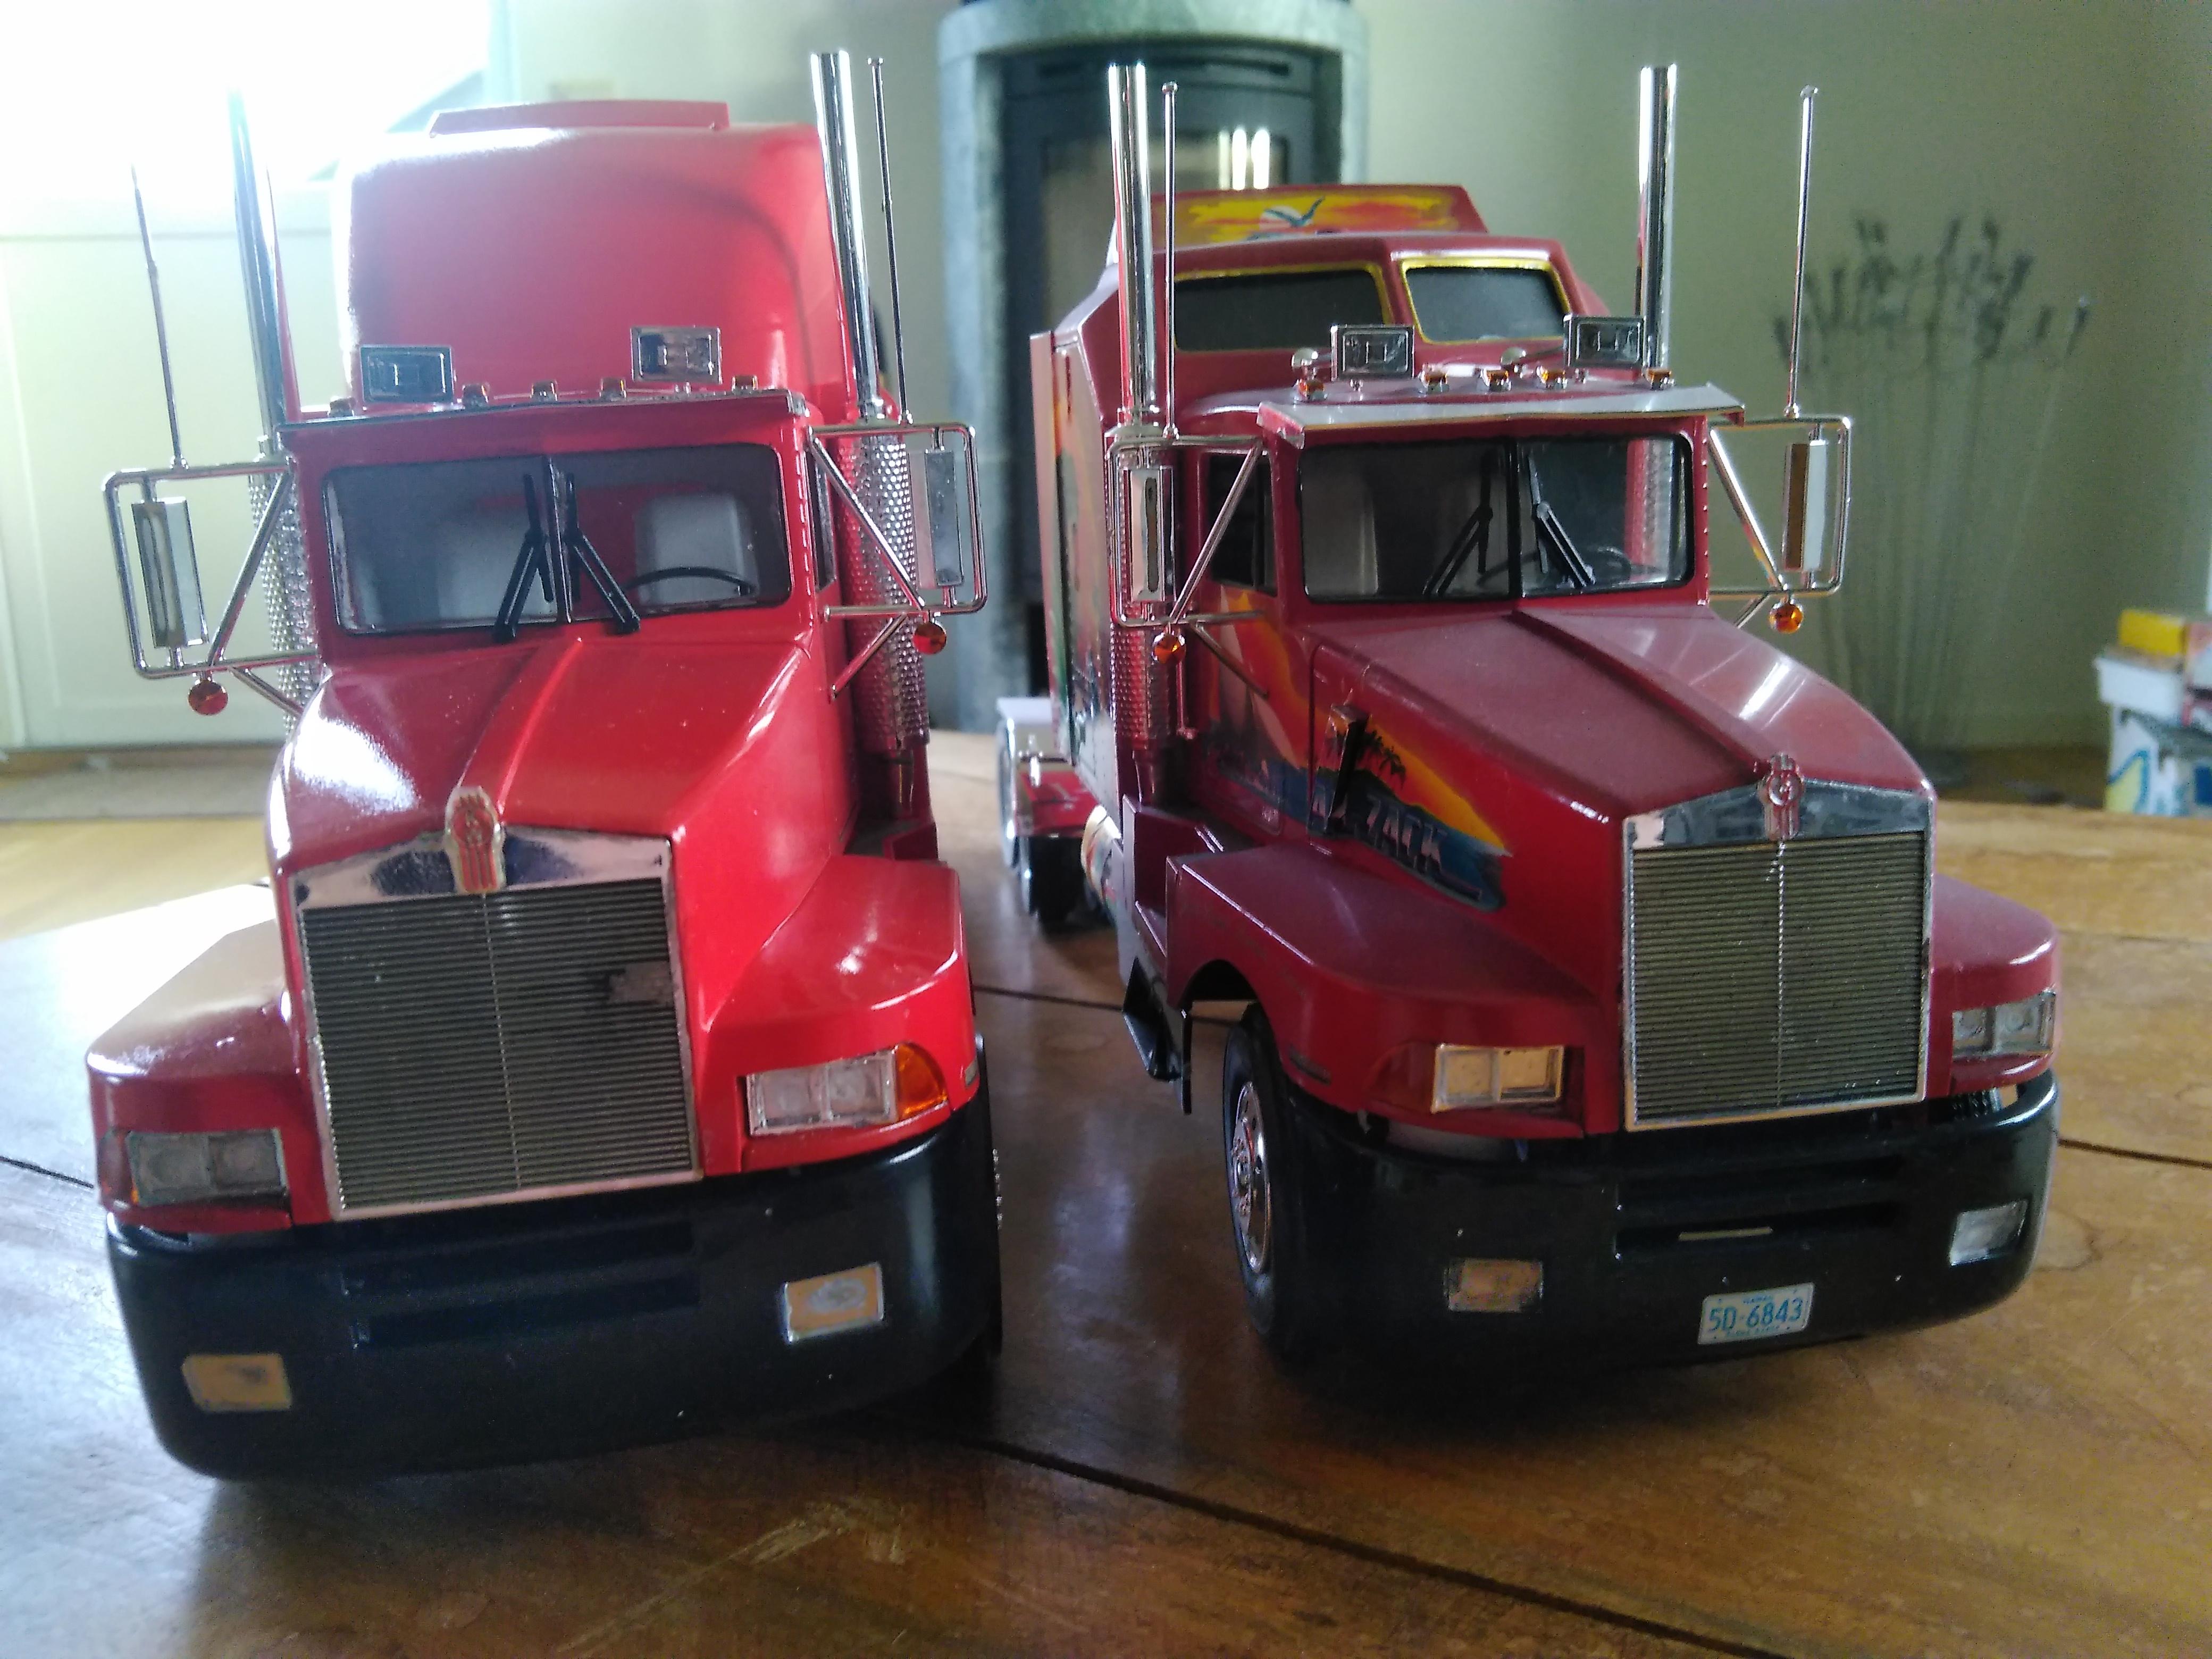
Thanks. Yes they are. The only other difference exept that is that the walkway (lost what it is called) behind the sleeper is different on both. The Aerodyne has a small square with diamondplate and the big sleeper has a large that stretches in under the sleeper, the sleeper sits on it using 4 locating holes. I like the one on the big sleeper version better because it helps to hold the frame where the front and rear parts are joined much better and stronger then the little square the Aerodyne uses. Thanks. I wanted them to be the same red but i could not find anymore of that color red that i used on the Aerodyne. Thanks. It was not that hard but i probably felt that becuase of the Aerodyne . I knew what to look out for and where there will be problems so i was prepared for them this time. -
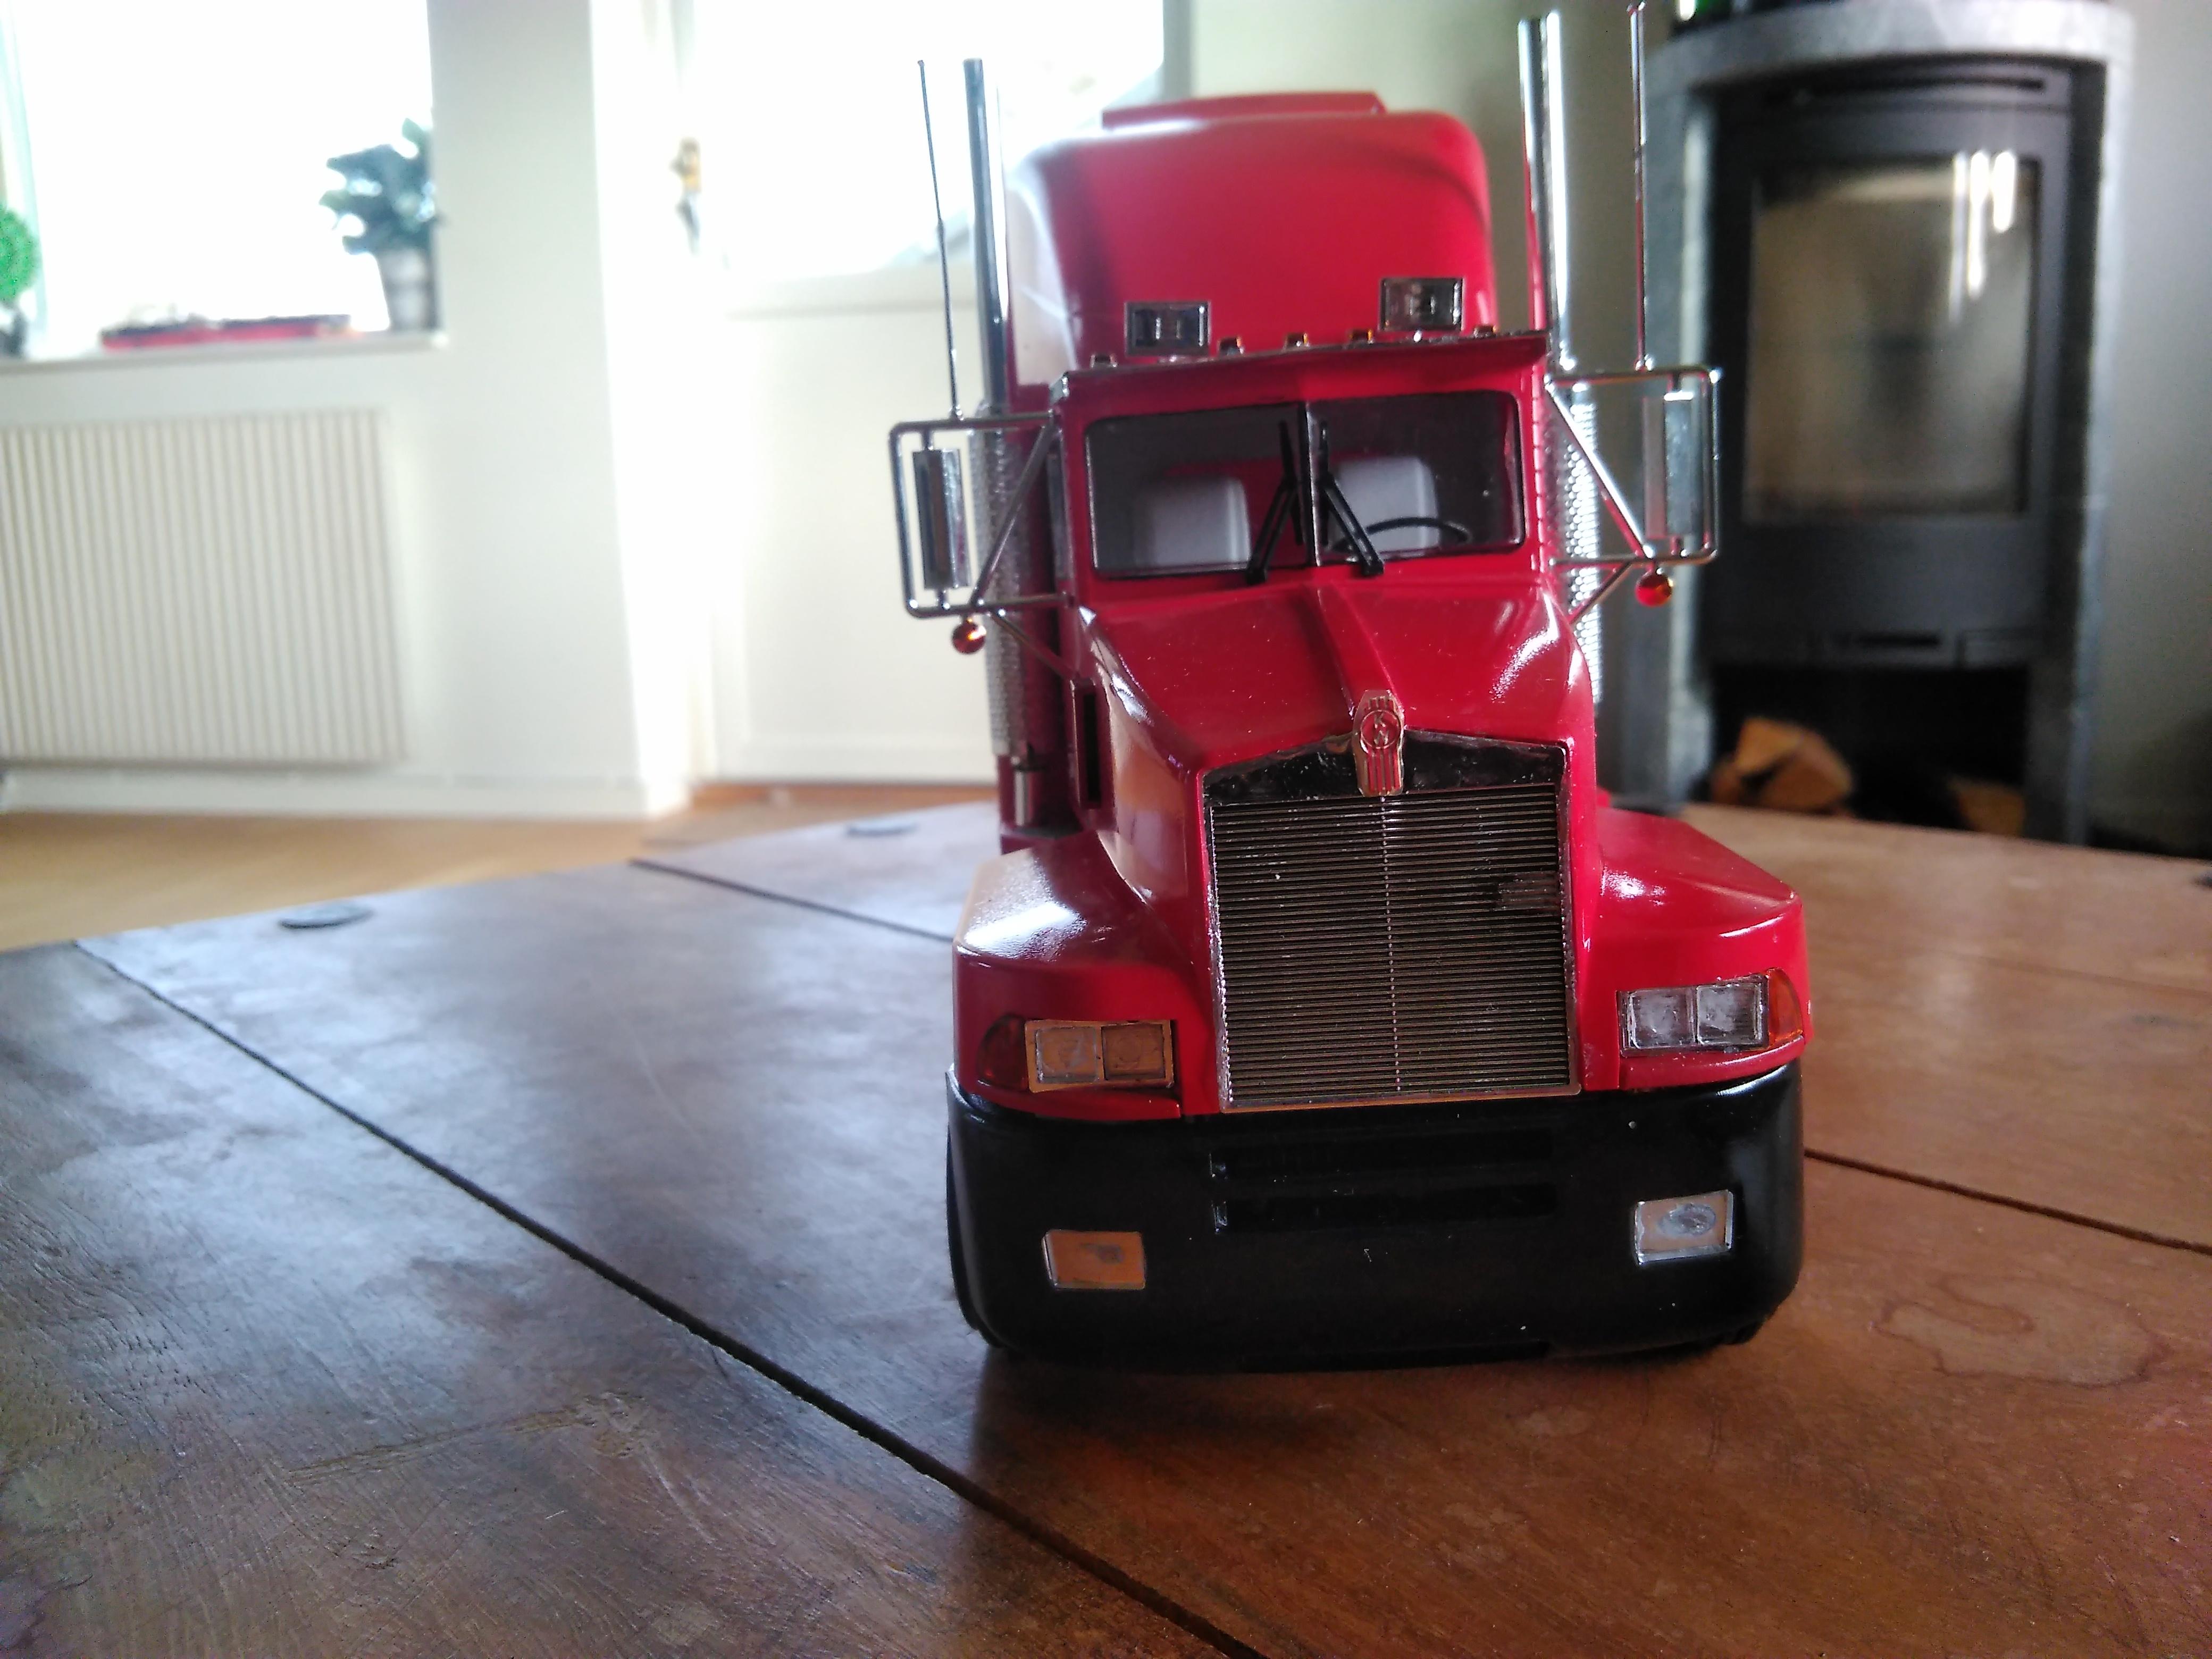
This is finally done. Did not start a WIP thread as there were no major disasters with this one compared to the aerodyne version. Still the same step one, that is cut the frame in half. There was one really odd part about it, some of the sprues molded in black felt like they were made of vinyl but not as soft, they were also not as hard as styrene should be. + side, alot of extra parts for the K100 kits in these T600 kits. Even the manual was about 99% correct this time and not about 40% as my aerodyne version had. It also had the right engine to build and not the unbuildable engine my other manual wants you to build. The engine pic on the box shows the other basically unbuildable engine with parts having to hang in the air, but it only shows from the left side where the exhaust is not shown and that the side with alot of problems. The hood and cab did not want to line up nomatter what i did to try and fix it so i just left it. The front bumper i had to modify a little to get it to look straight compared to the rest of the truck, unfortunally the hood will barely tilt up now

-
Year model of Big Rig Truck Kits
PierreR89 replied to leafsprings's topic in General Automotive Talk (Trucks and Cars)
Revell: Kenworth T600 Aerodyne/big sleeper, late 80,s based on the grille and cab shape. AMT: Kenworth T600A 1990. Accuracy of those kits, basically non existent Moebius/Revell: International Lonestar 2010 Moebius/Revell: International Prostar 2011 Italeri American (Mack) Superliner 1977-1993 -
The clerk was wrong. A few things i think have happend. When the package arrived to sweden the post here changed the trackingnumber, they love to do that for some reson... Then when the postoffice in the buyers area got it they sent* out a notification with through a textmessage, email or a letter letting him know it was waiting for him. * = Thats what should happen in a perfect world... But in many cases they just dont care and dont let you know that the package has arrived and after 14 days it will get sent back to the sender. During that time you cant track it, it will just say that they have recieved information about it and it is on its way/ in transit or waiting at a terminal somewhere to be sorted. Then they change the trackingnumber and the one provided is basically useless. I cant count how many times i have had to go to the postoffice and use the provided tracking number to get a package i am waiting for, but thats only if it have the original trackingnumber. Have they changed it well good luck with that... I have also had to tell them the dimensions of the package and my name and that it should be there, every time i have been right.. Also noticed that when customs get their hands on a package it works much better for some reason.
-
Cleaning paint dust from models?
PierreR89 replied to PierreR89's topic in General Automotive Talk (Trucks and Cars)
Its just dry paintdust that has landed on them and after a while it will not get stuck but it will be harder to remove from them. I was thinking that i could try the airbrush and use that to blow off the paint dust from them but i dont know if it will have enough pressure to do that. Some decals are sealed but most of them are not -
This might be the completly wrong section and the mods can move it to the right section. Anyone here have a good way to clean of paint dust from built models? I have a few standing on shelfs in my hobbyroom and because i mostly use spraycans to paint them there are some paintdust from them that will land on the models. I would move them but i have no other place for them. For the parts without decals i cleaned them with soap and water and that worked. But what will happen if i use that on the parts with decals on them? Will they come loose again or it is no problems at all? Maybe there is a better method that i dont know about? Also is there a easy way to remove dust from them without damaging the models? How do you clean the models you have built?
-
I am not surprised, there are not cheap here either for that brand. They were reasonably priced before the company went under and almost the next day the parts were 2-3 times as expensive because now they were "rare" and not certain that part x would ever be avaliable again. That problem mostly solved it self thanks to the aftermarket but the prices still high because now it is a "rare" brand..
-
Prices of spareparts for cars and trucks over here... I decided that i need to rebuild the steering on my suburban because i think it might be time now and if they are from the factory they have 350 000km,s on them + neglect from previous owners that never cared about the grease fittings on them. When i looked at a few swedish sites all the parts i needed would have cost me $960 Sure i would have had it by monday but at that price they should come with a guy that installs them to... So i gave ut that and headed to where i end up anyways and from them the parts cost me$270 including shipping to sweden from usa. They are the exact same parts from the same manufacturer and partnumbers..
-
Surpringly not as much as i thought they were going to be. The photoetch spokes made it easy as they were in one piece and not seperate spokes. Thanks. I dont know, it could be? But its not the first, i have seen someone post a WIP of one but then it stopped.
-
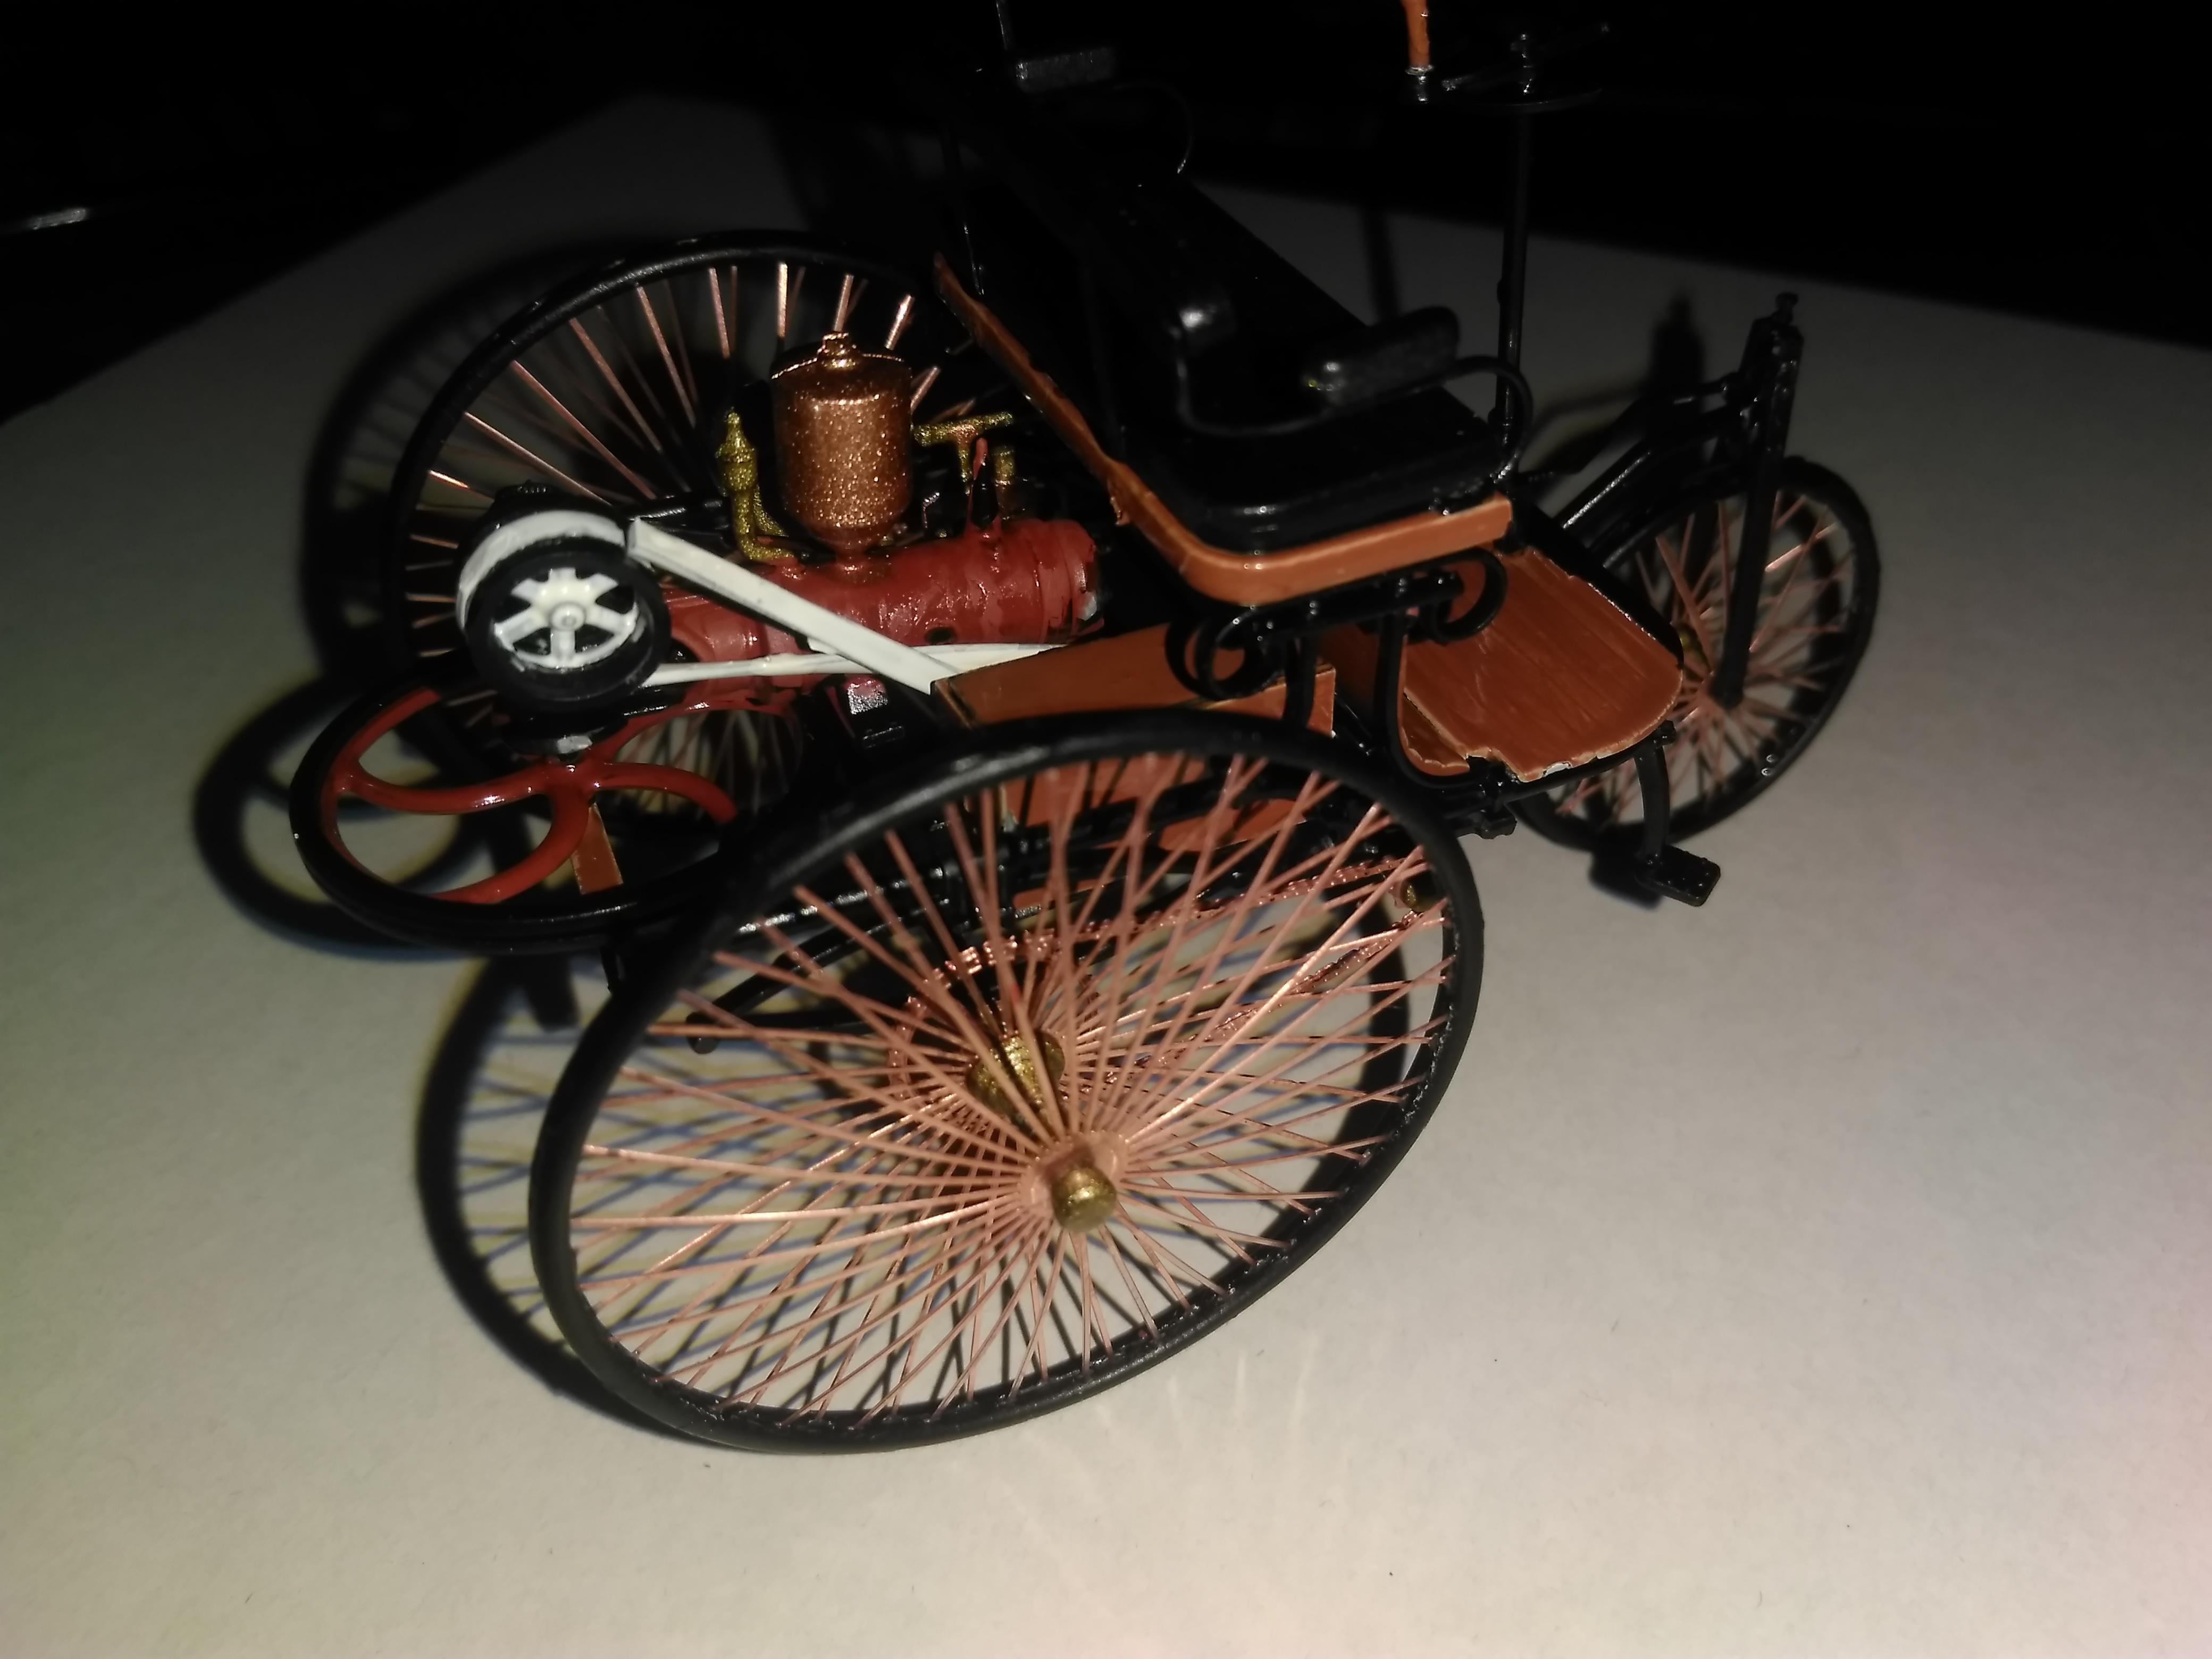
Thanks. I have not seen that many built of it either but the kit is still relative new so that might be why. Also dont know how big ICM,s brand is in other counties but in europe they are easy to get. That was mostly the reason to why i bought it, probably none of my trucks and cars would exist if this thing were not invented and started everything. So it seemed right to have it sitting next to something more modern, the jump from this from 1886 to my 2010 International Lonestar is quite big. There is quite the size difference to between a truck and this, this fits in the same space as the truck has its dual driveaxles.
-
It was fun to build, not that many parts but a few that where really small Also it felt like the plastic was more brittle then what i am used but i did not break any parts. The instructions could be a bit better but in most cases where it is unclear it is just to look a few steps ahead and you will see how the parts go. Dont do the same mistake as i did with one of the wheels. Each wheel is made out of 2plastic outer parts and then photoetch spokes. To be able to put it togheter easy they give you a template made of plastic and then there are 4 holes in it, look at the sprues where the wheel sits and it has 4 pegs on the sprue. They fit perfectly in the template and is there to help you get the photoetch centered. I did not look and cut out one wheel and then realized my mistake, but i managed to get that wheel centered to it was a bit more difficult. Its hard to explain but once you open and look at the parts you will see what parts i am talking about and how the wheel/tire template looks like.
-
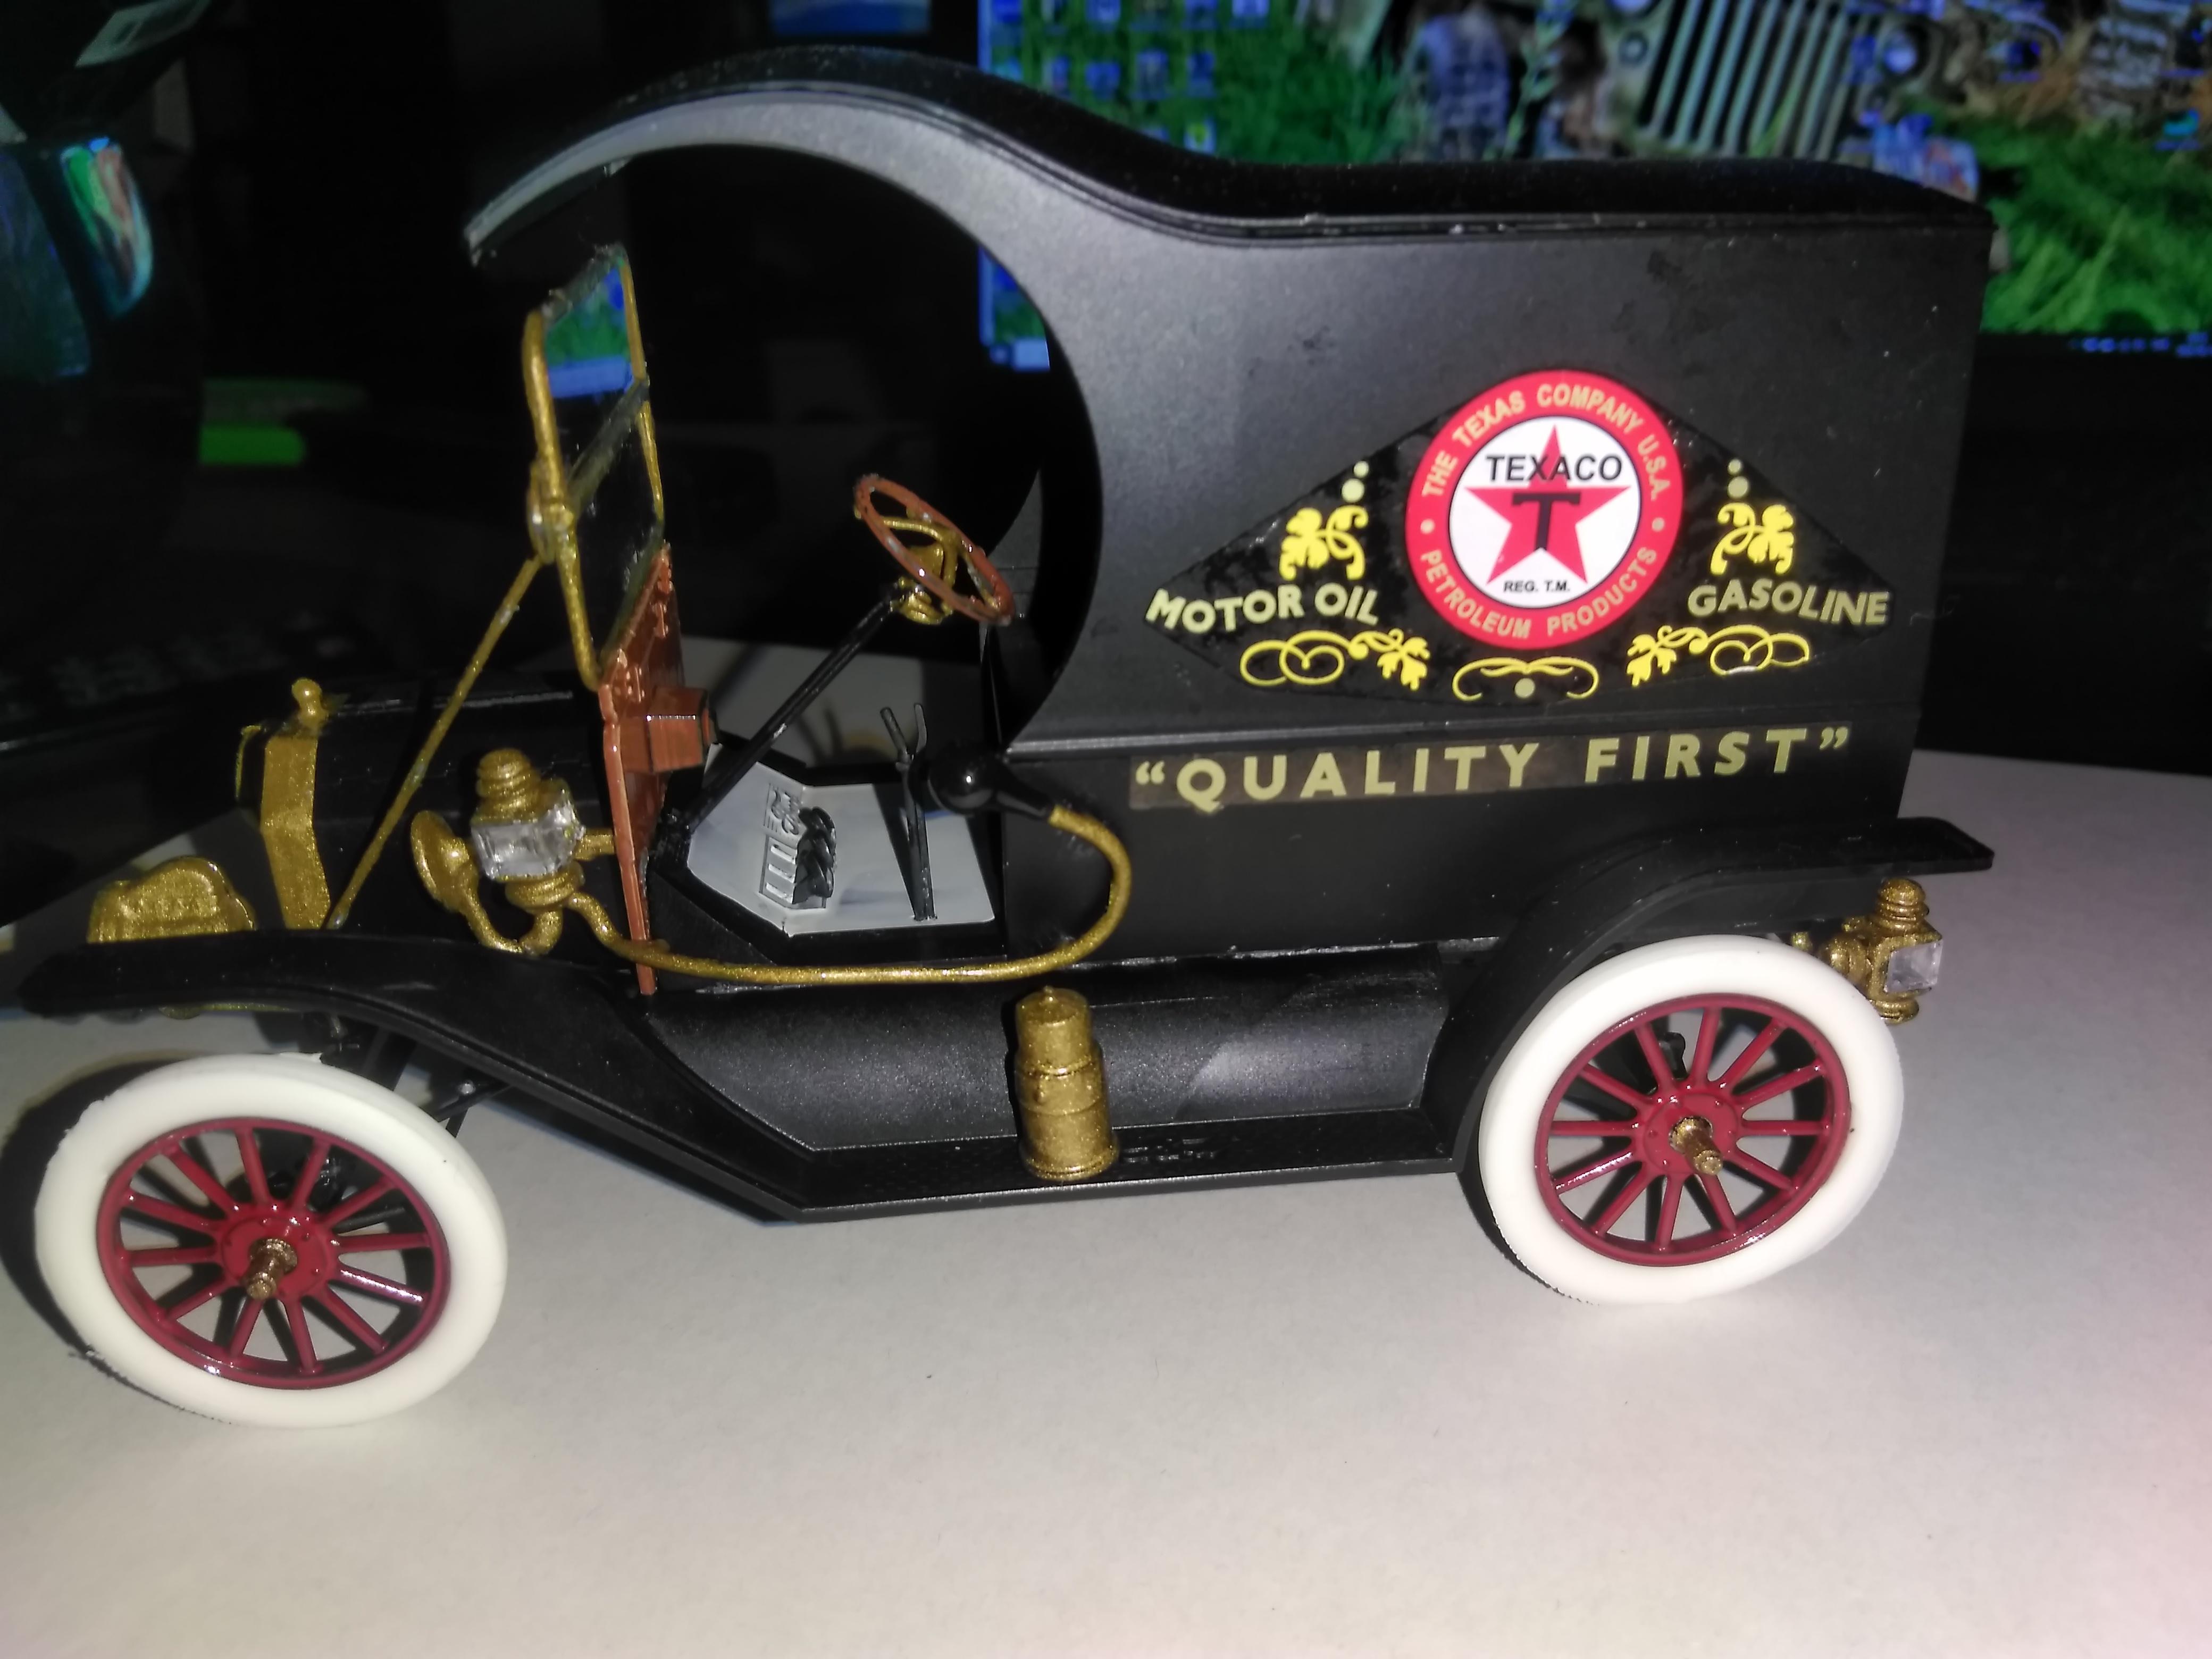
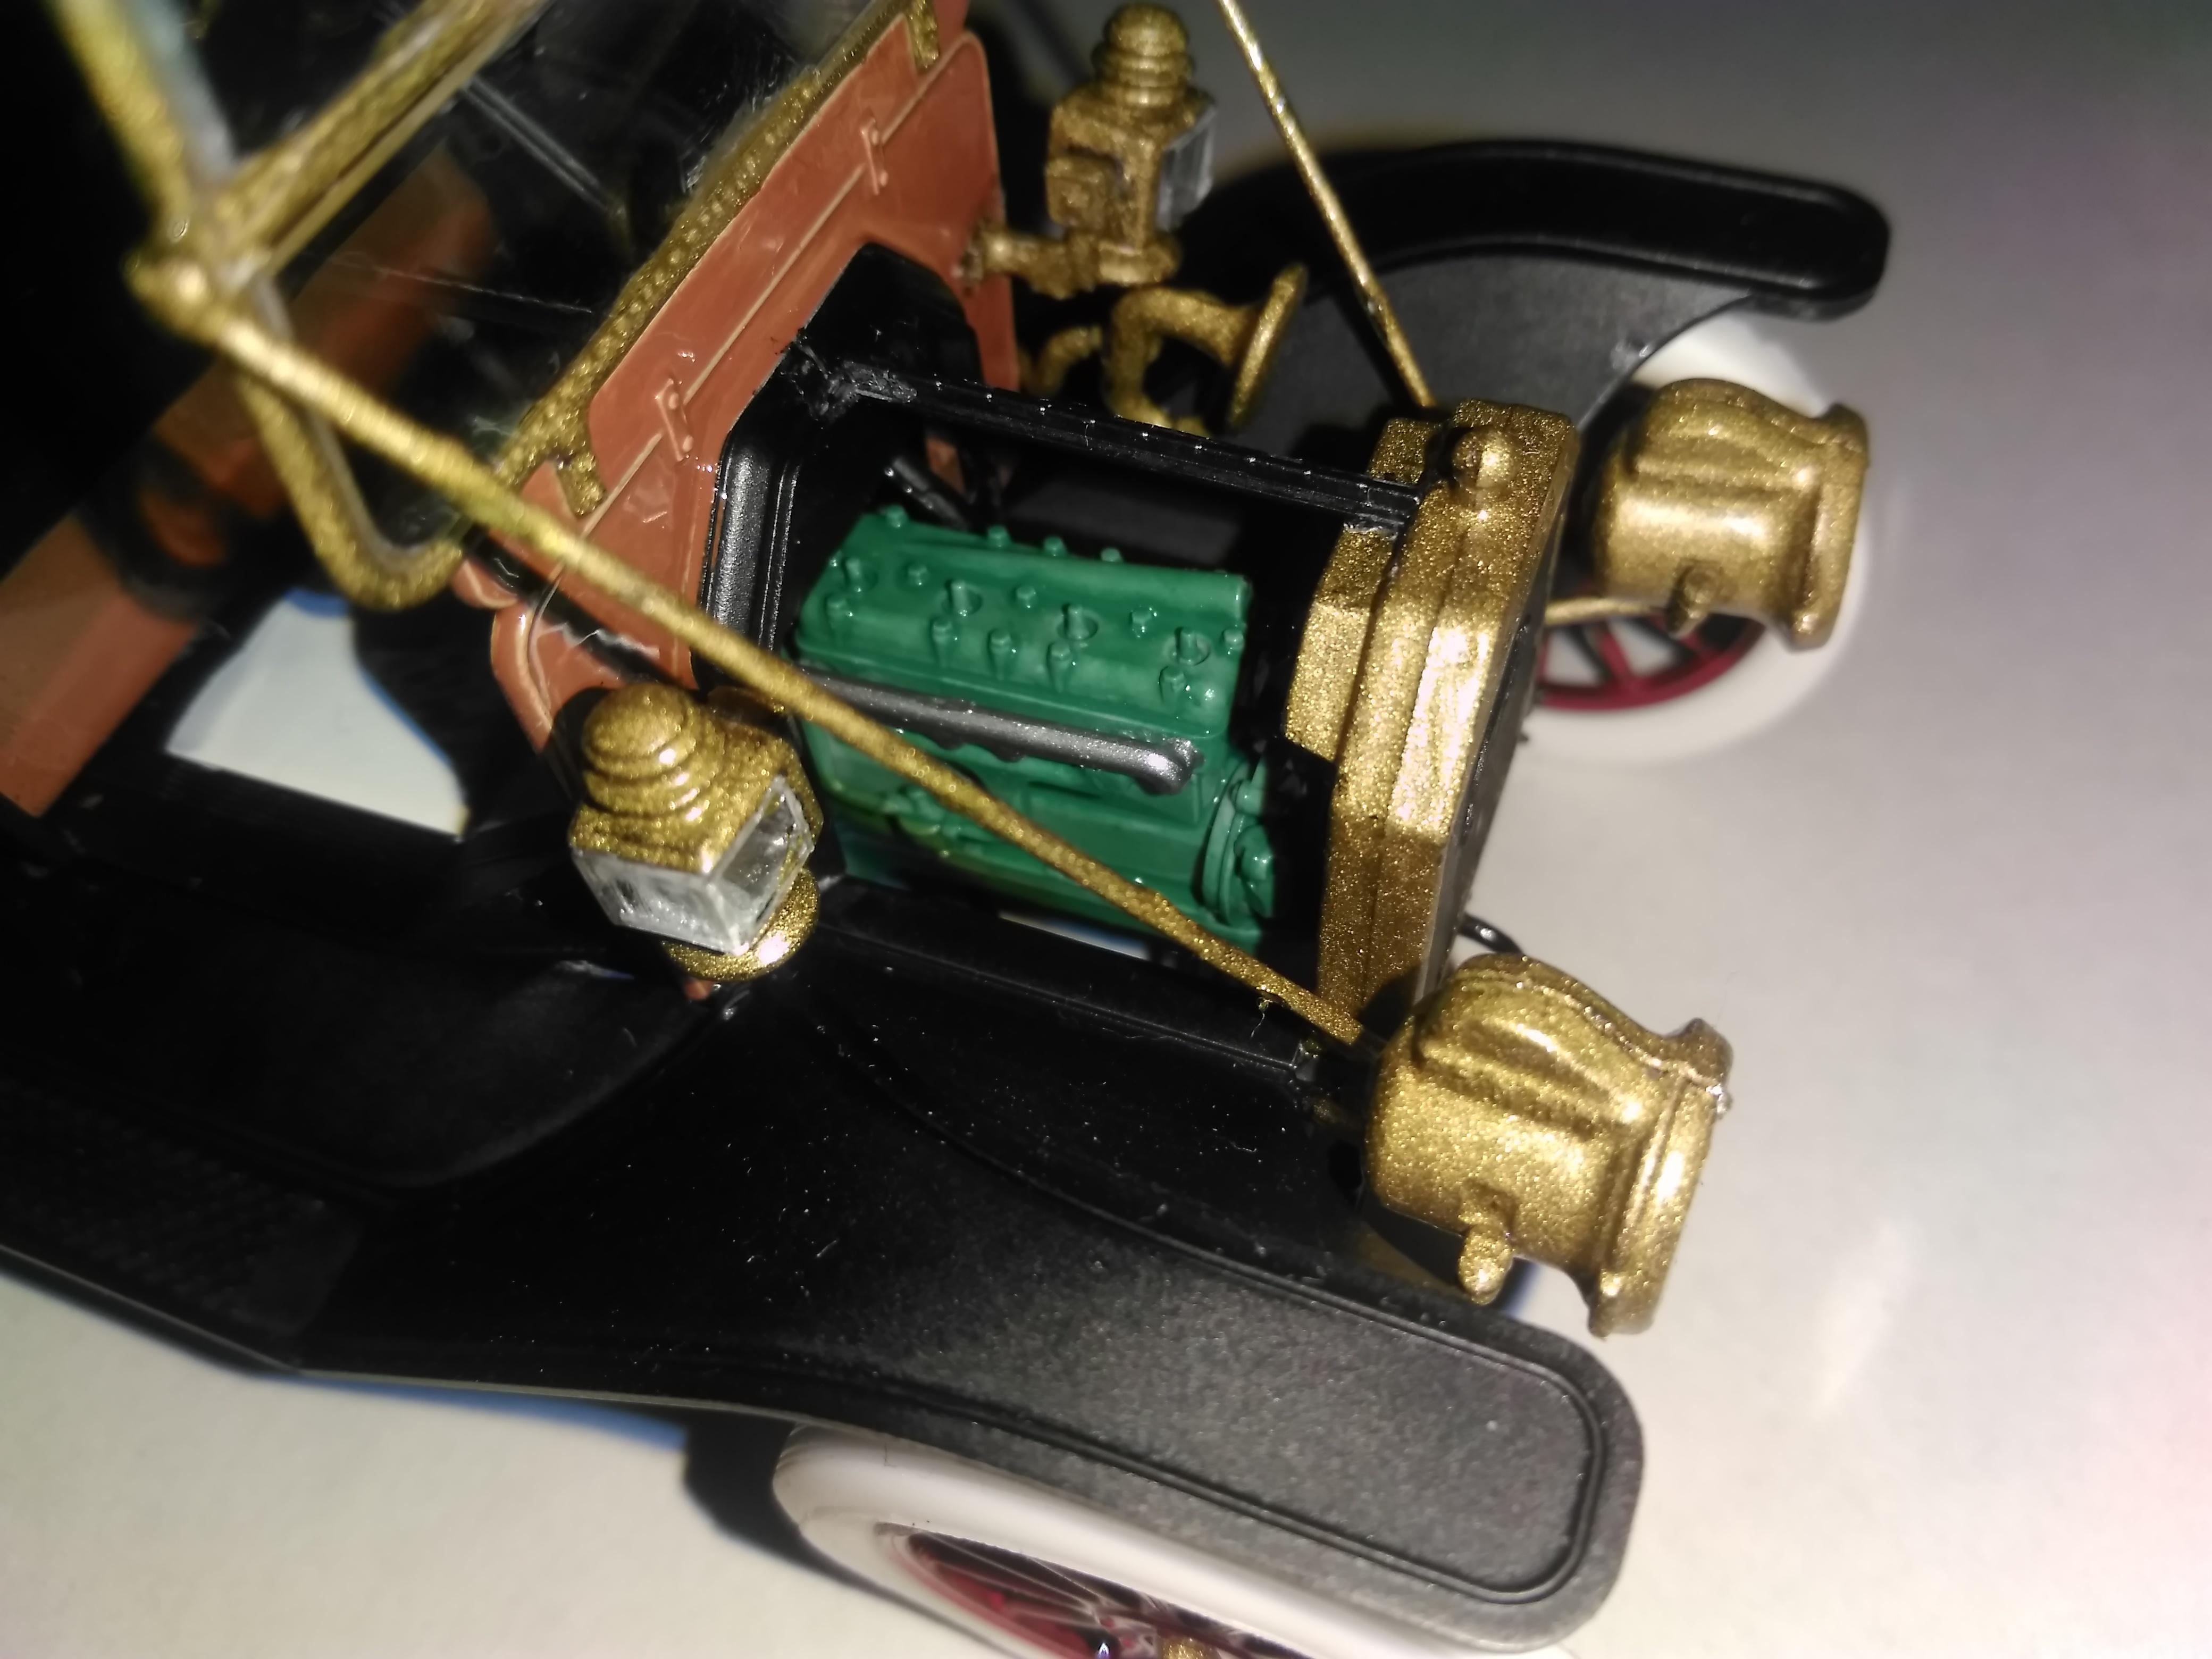
Been building this for a few weeks now ant it got done during this week. There are 2 figures included in the kit and a few different gasoline cans but i decided not to use any of them If i could build a diorama i would use them. The part that is a little odd is that the boxart shows black tires but the ones included are white. The instructions is unclear sometimes with where the parts should go and wich way they should face so some parts ended up backwards other were so small that i simply could not attach them. Others are way overcomlicated i think, like the horn it is 4 different parts.. steeringwheel and steeringshaft is 6 parts.. Not really happy with how it turned out but here it is:
-
First time for me in this section i usually stay in the big rig section. I have been building this Benz patenwagen for a about a week and got it done today. Absolutley not used to as small parts as there are in this kit when i mostly build big rigs and nothing is small on them. I left the spokes in the wheels and drivechains in the photoetch color because i liked it that way instead of black/grey they should be. Still have some minor cleaning up to do on it but here it is:
-
This arrived today after just 2 months wait. Also this: A paper model of the oiltanker Jahre Viking in 1/400 scale I have another oiltanker in the same scale from revell (Esso Glasgow) and its about 40cm long (almost 16") The Jahre Viking in the same scale is 114cm long (almost 45")
-
I also do almost all of my own repairs by my self. I only let a shop deal with the stuff i refuse to touch ever again, brakelines is one of those things + i am allergic to brakefluid as my hands swell up to almost twice the size when exposed to it. When i worked as a truck mechanic our shop never ripped anyone of. Since i was one of the younger guys there i wanted to learn as much as possible (which i did) and because i was young and want everything to be perfect. It helped alot that the one who decided to teach me had worked on trucks for over 50 years when i started, he learned me alot. Many of the drivers wanted me to service their trucks and trailers as i noticed something small that would be cheap to fix right now or very expensive when it finally breaks. I was also the one who took them down to the pit and showed them what was broken or about to break, they all appreciated that. Some even got scared.. The one who turned white was the driver who just 30 minutes before had come down a long hill with a full load (65-70tonnes) The reason he turned white was because i showed him that the tierod between the steeringknuckes was so worn out i could yank it of by hand without much force. If it had let go he would have had a useless steeringwheel. We barely wanted to drive it out from the pit to one of the bays and that was just a few meters. One thing that i still remember and thinks are really funny was when i was looking over a drivers trailer and noticed that one leaf in the leafspring had snapped of and was loose in the leafpack. I managed to remove it and then took it with me when i went to look for the driver. When i found him i just said "hey, i have a present for you" and handed him the busted leaf. His response was on the joking side " i hate leaving my stuff for you to service as i always have to bust out my big wallet, you always find something wrong" He also added: which is good, i want to know and fix it right away when i have time or wait untill we have time to fix it (usually within a week)
-
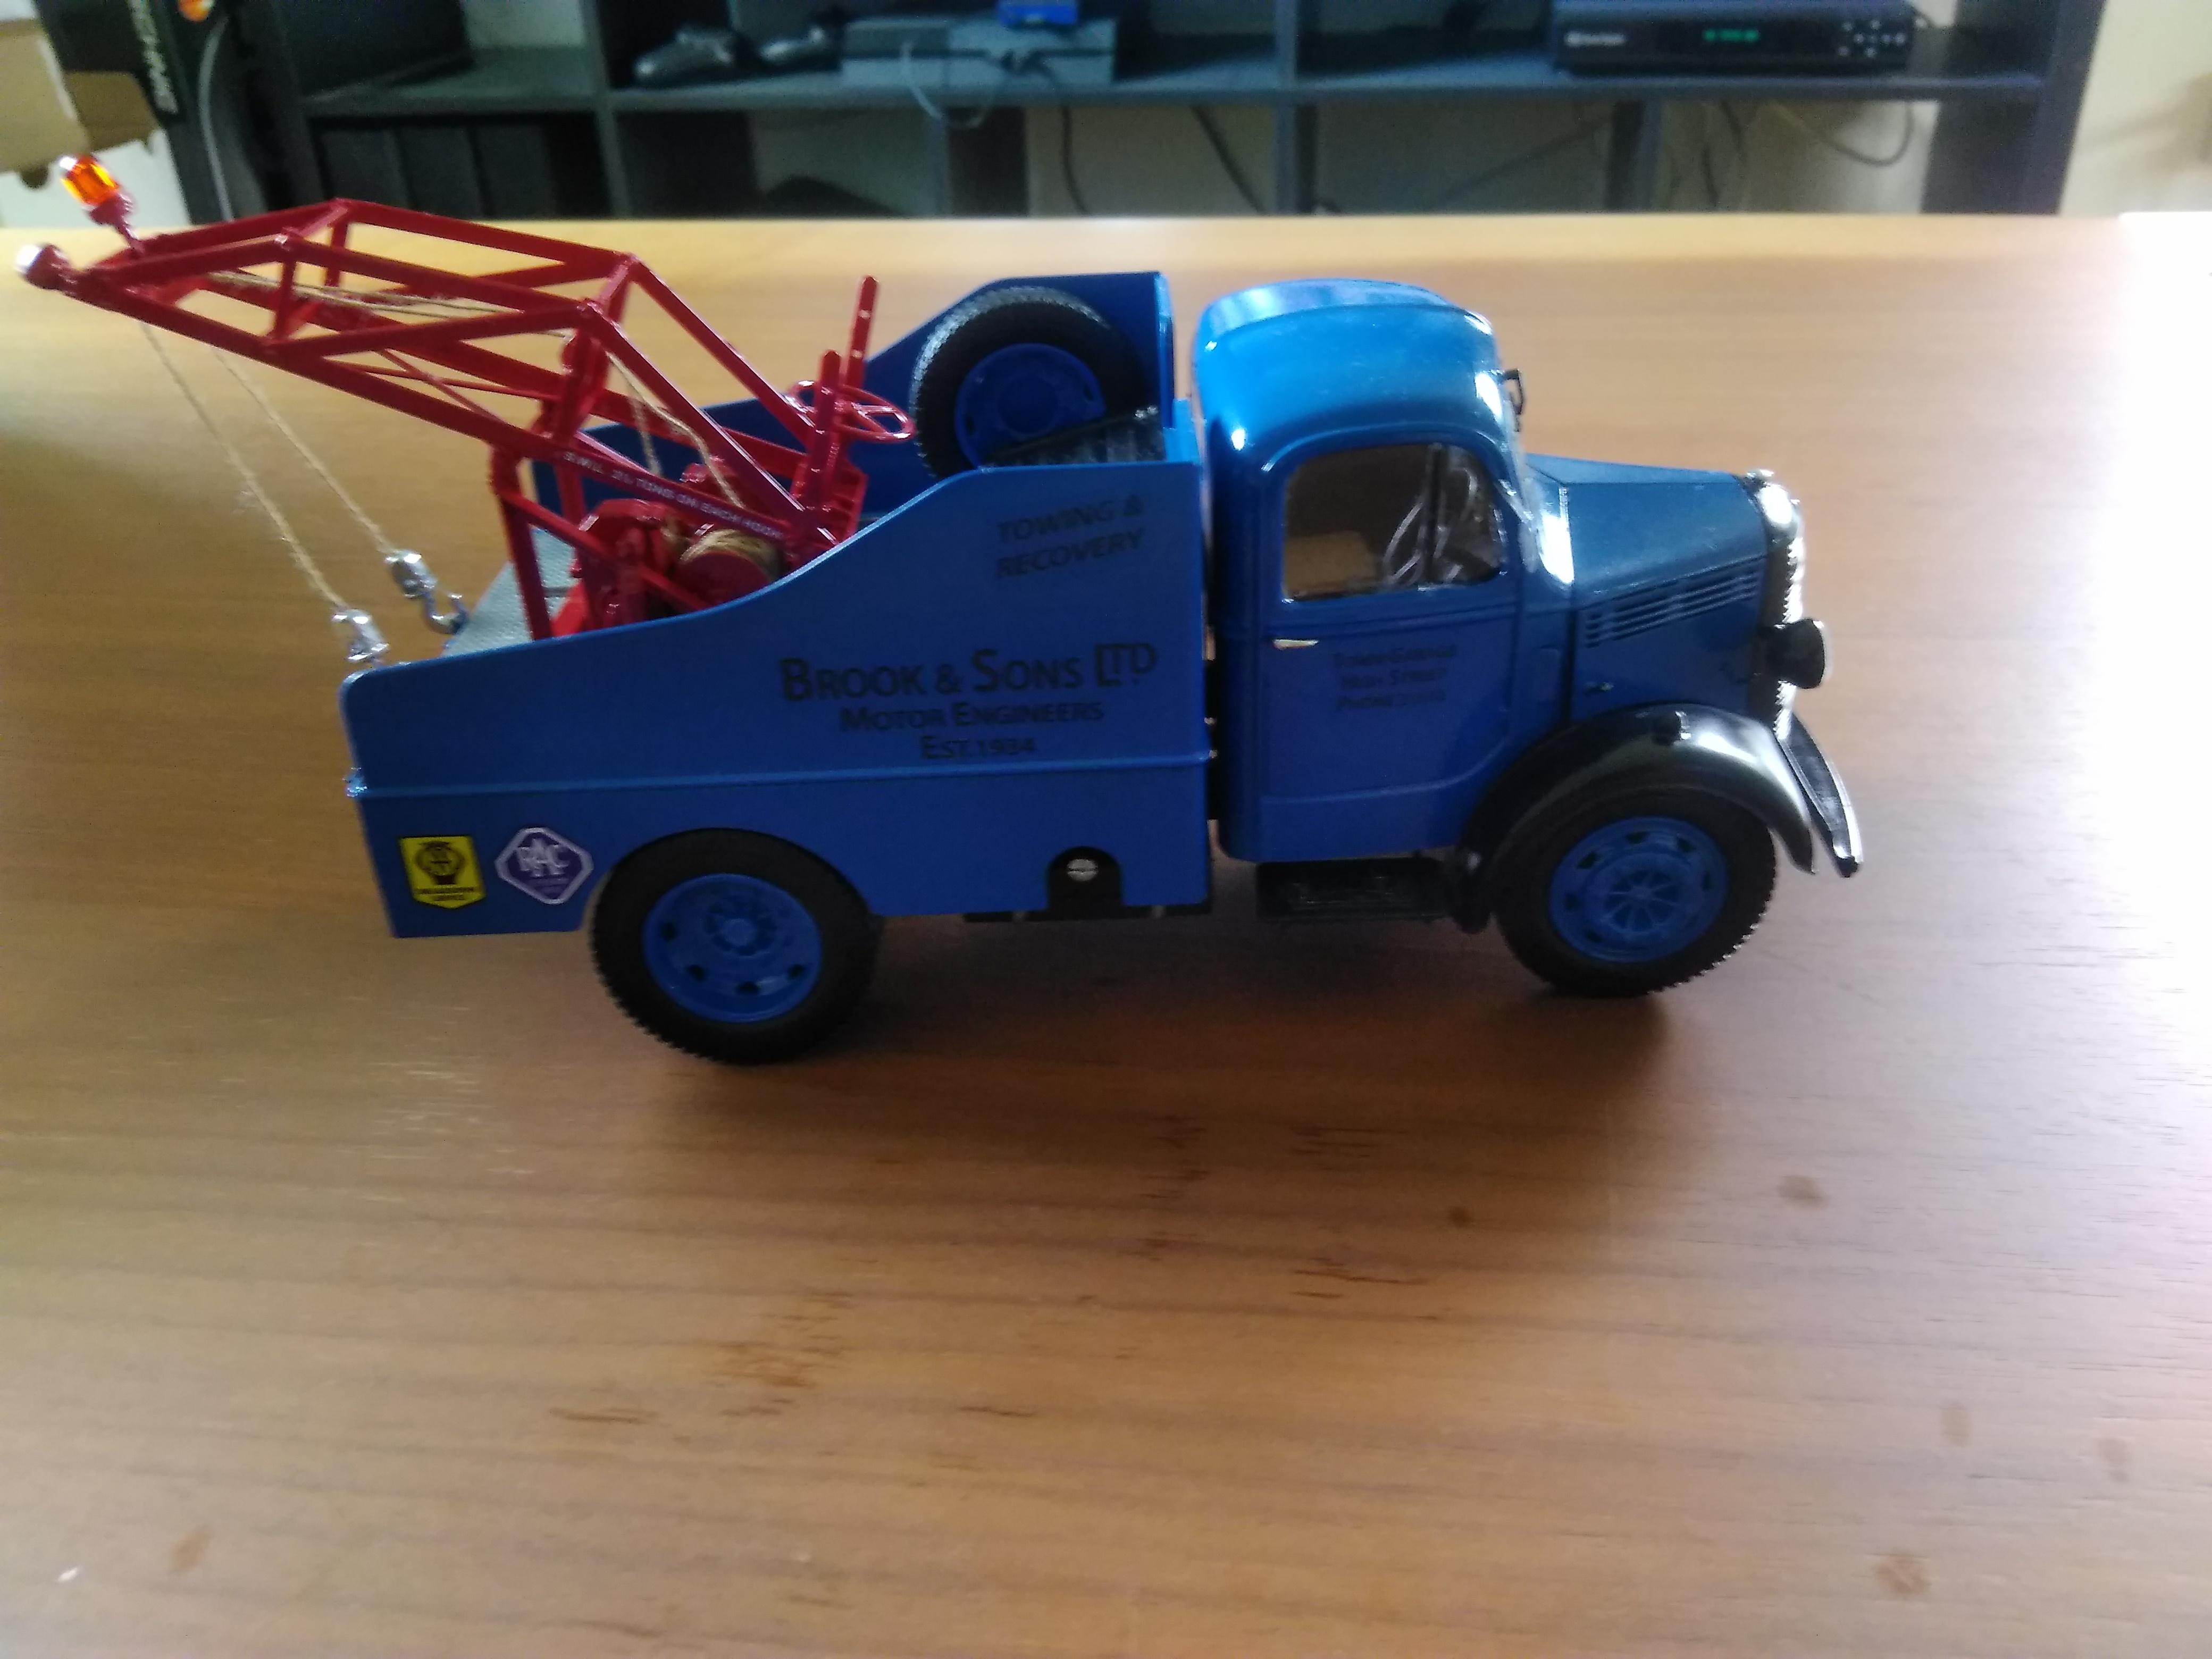
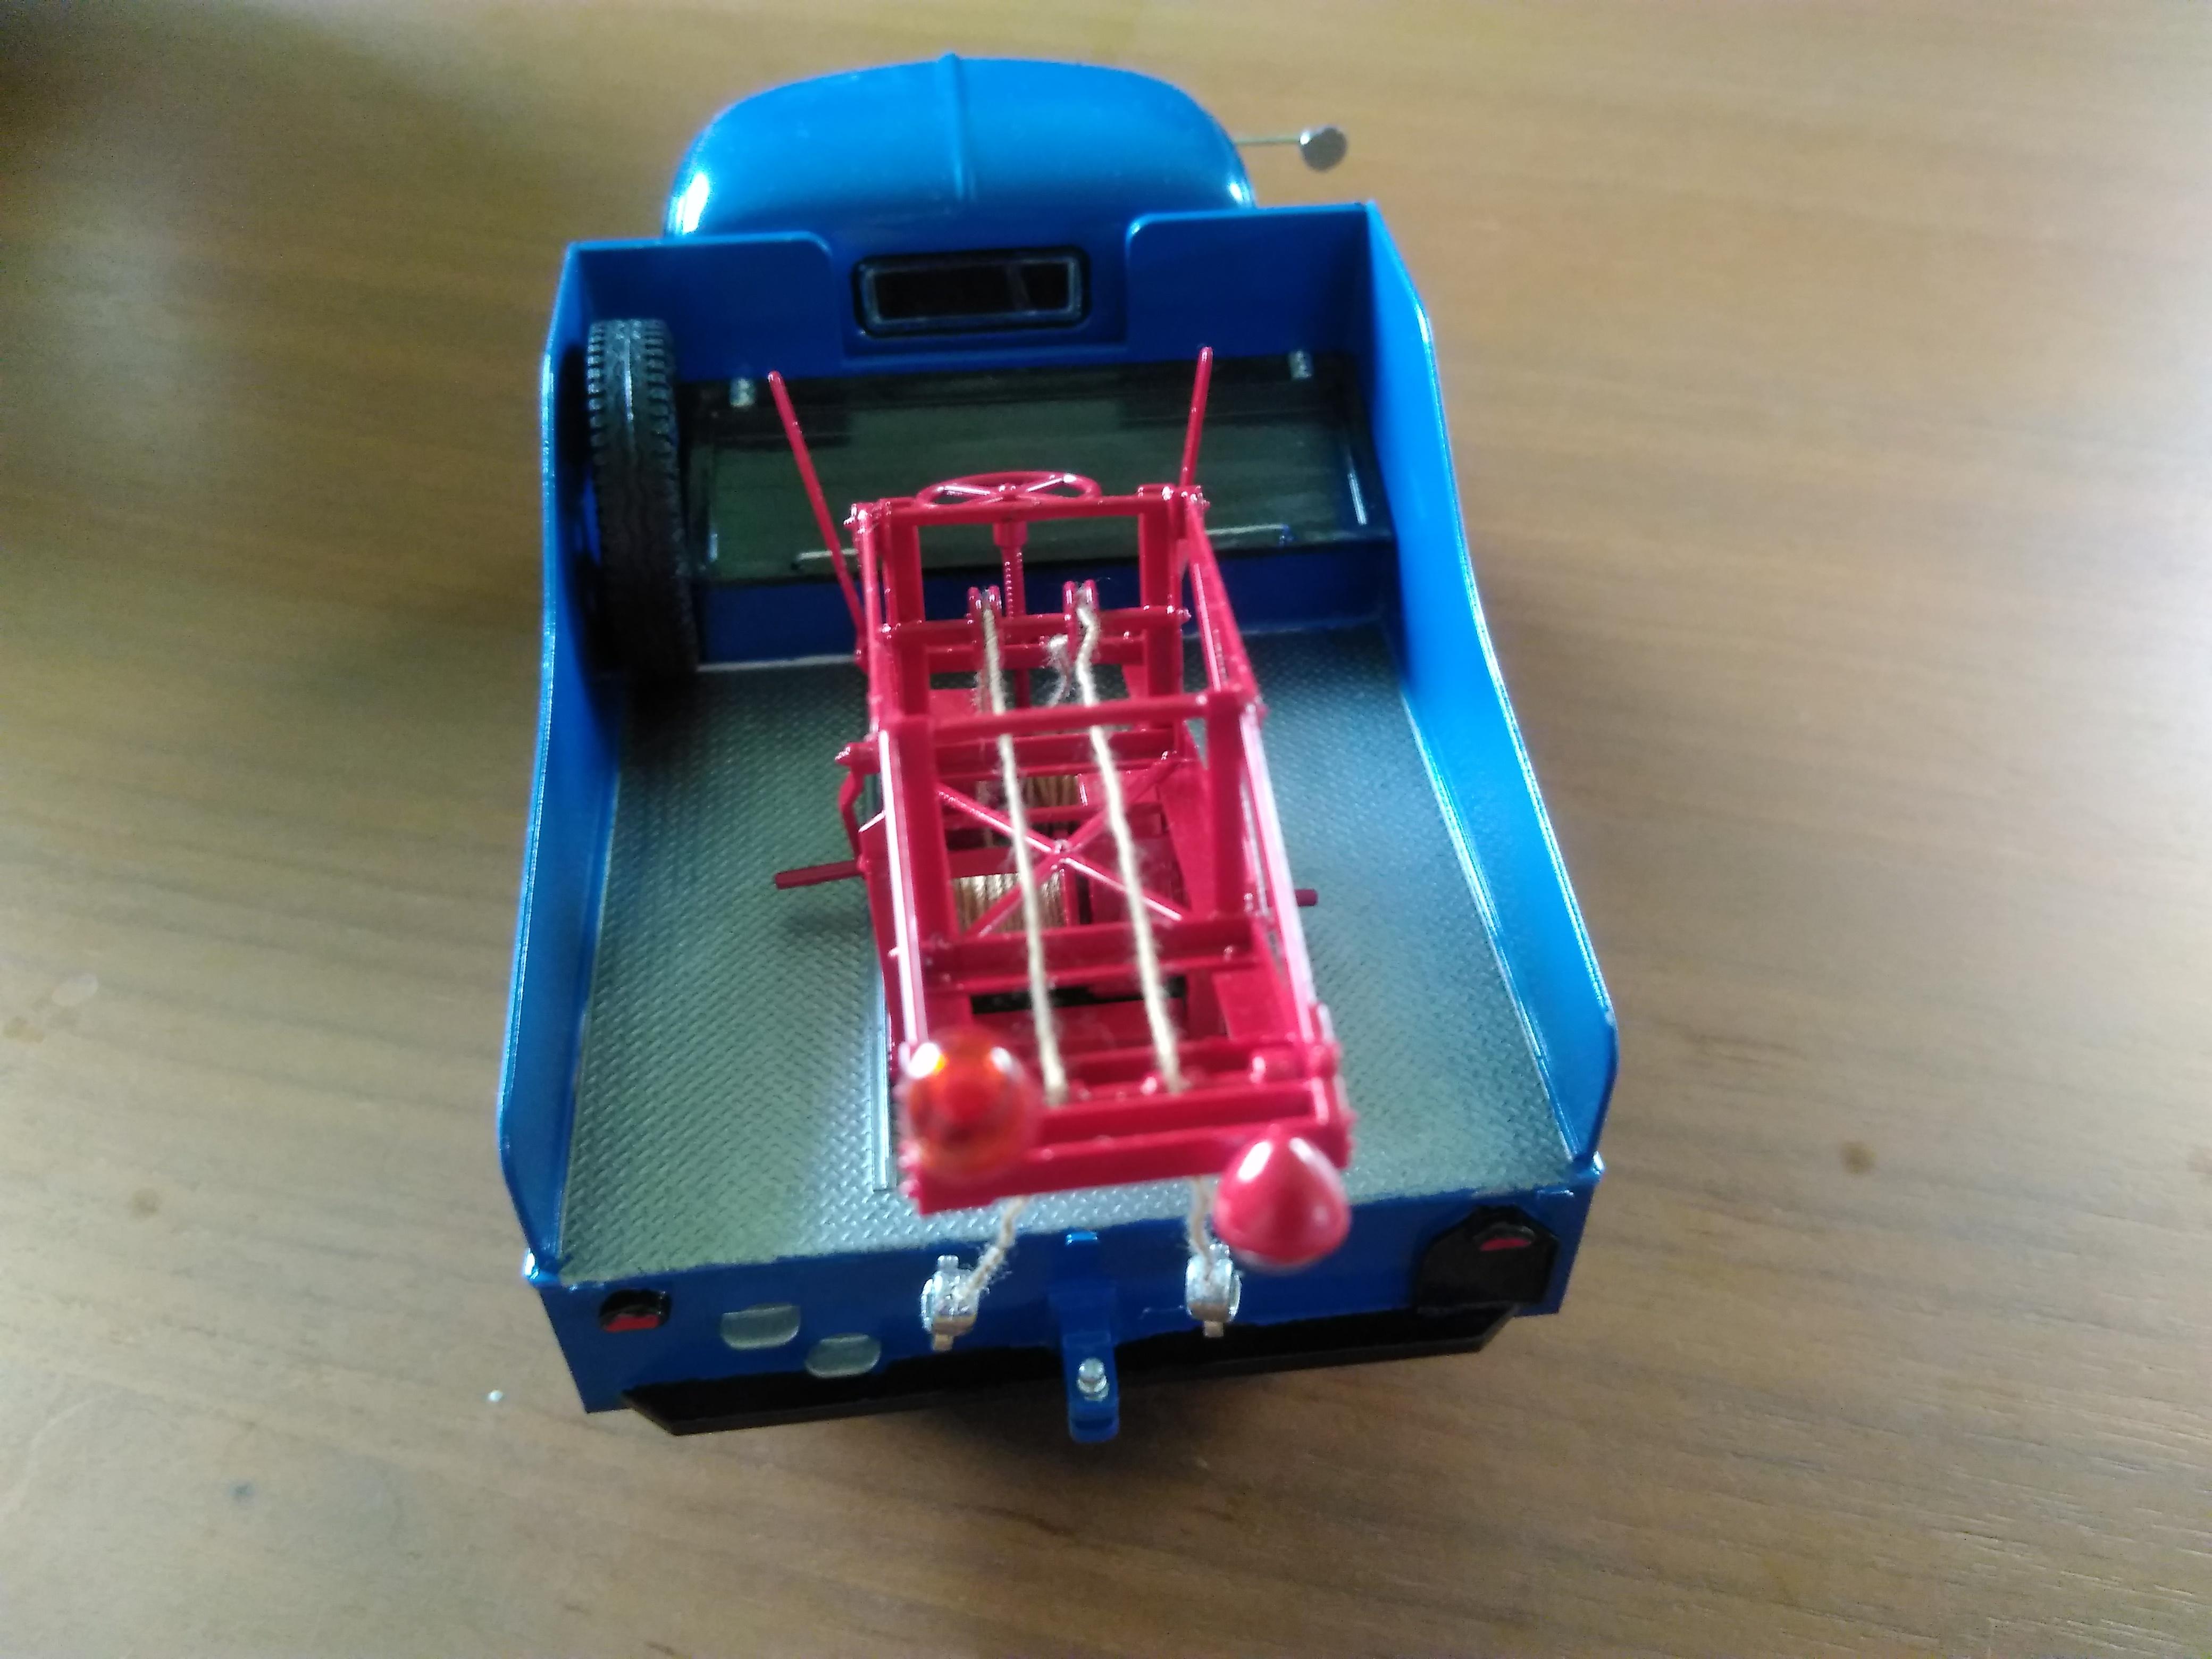
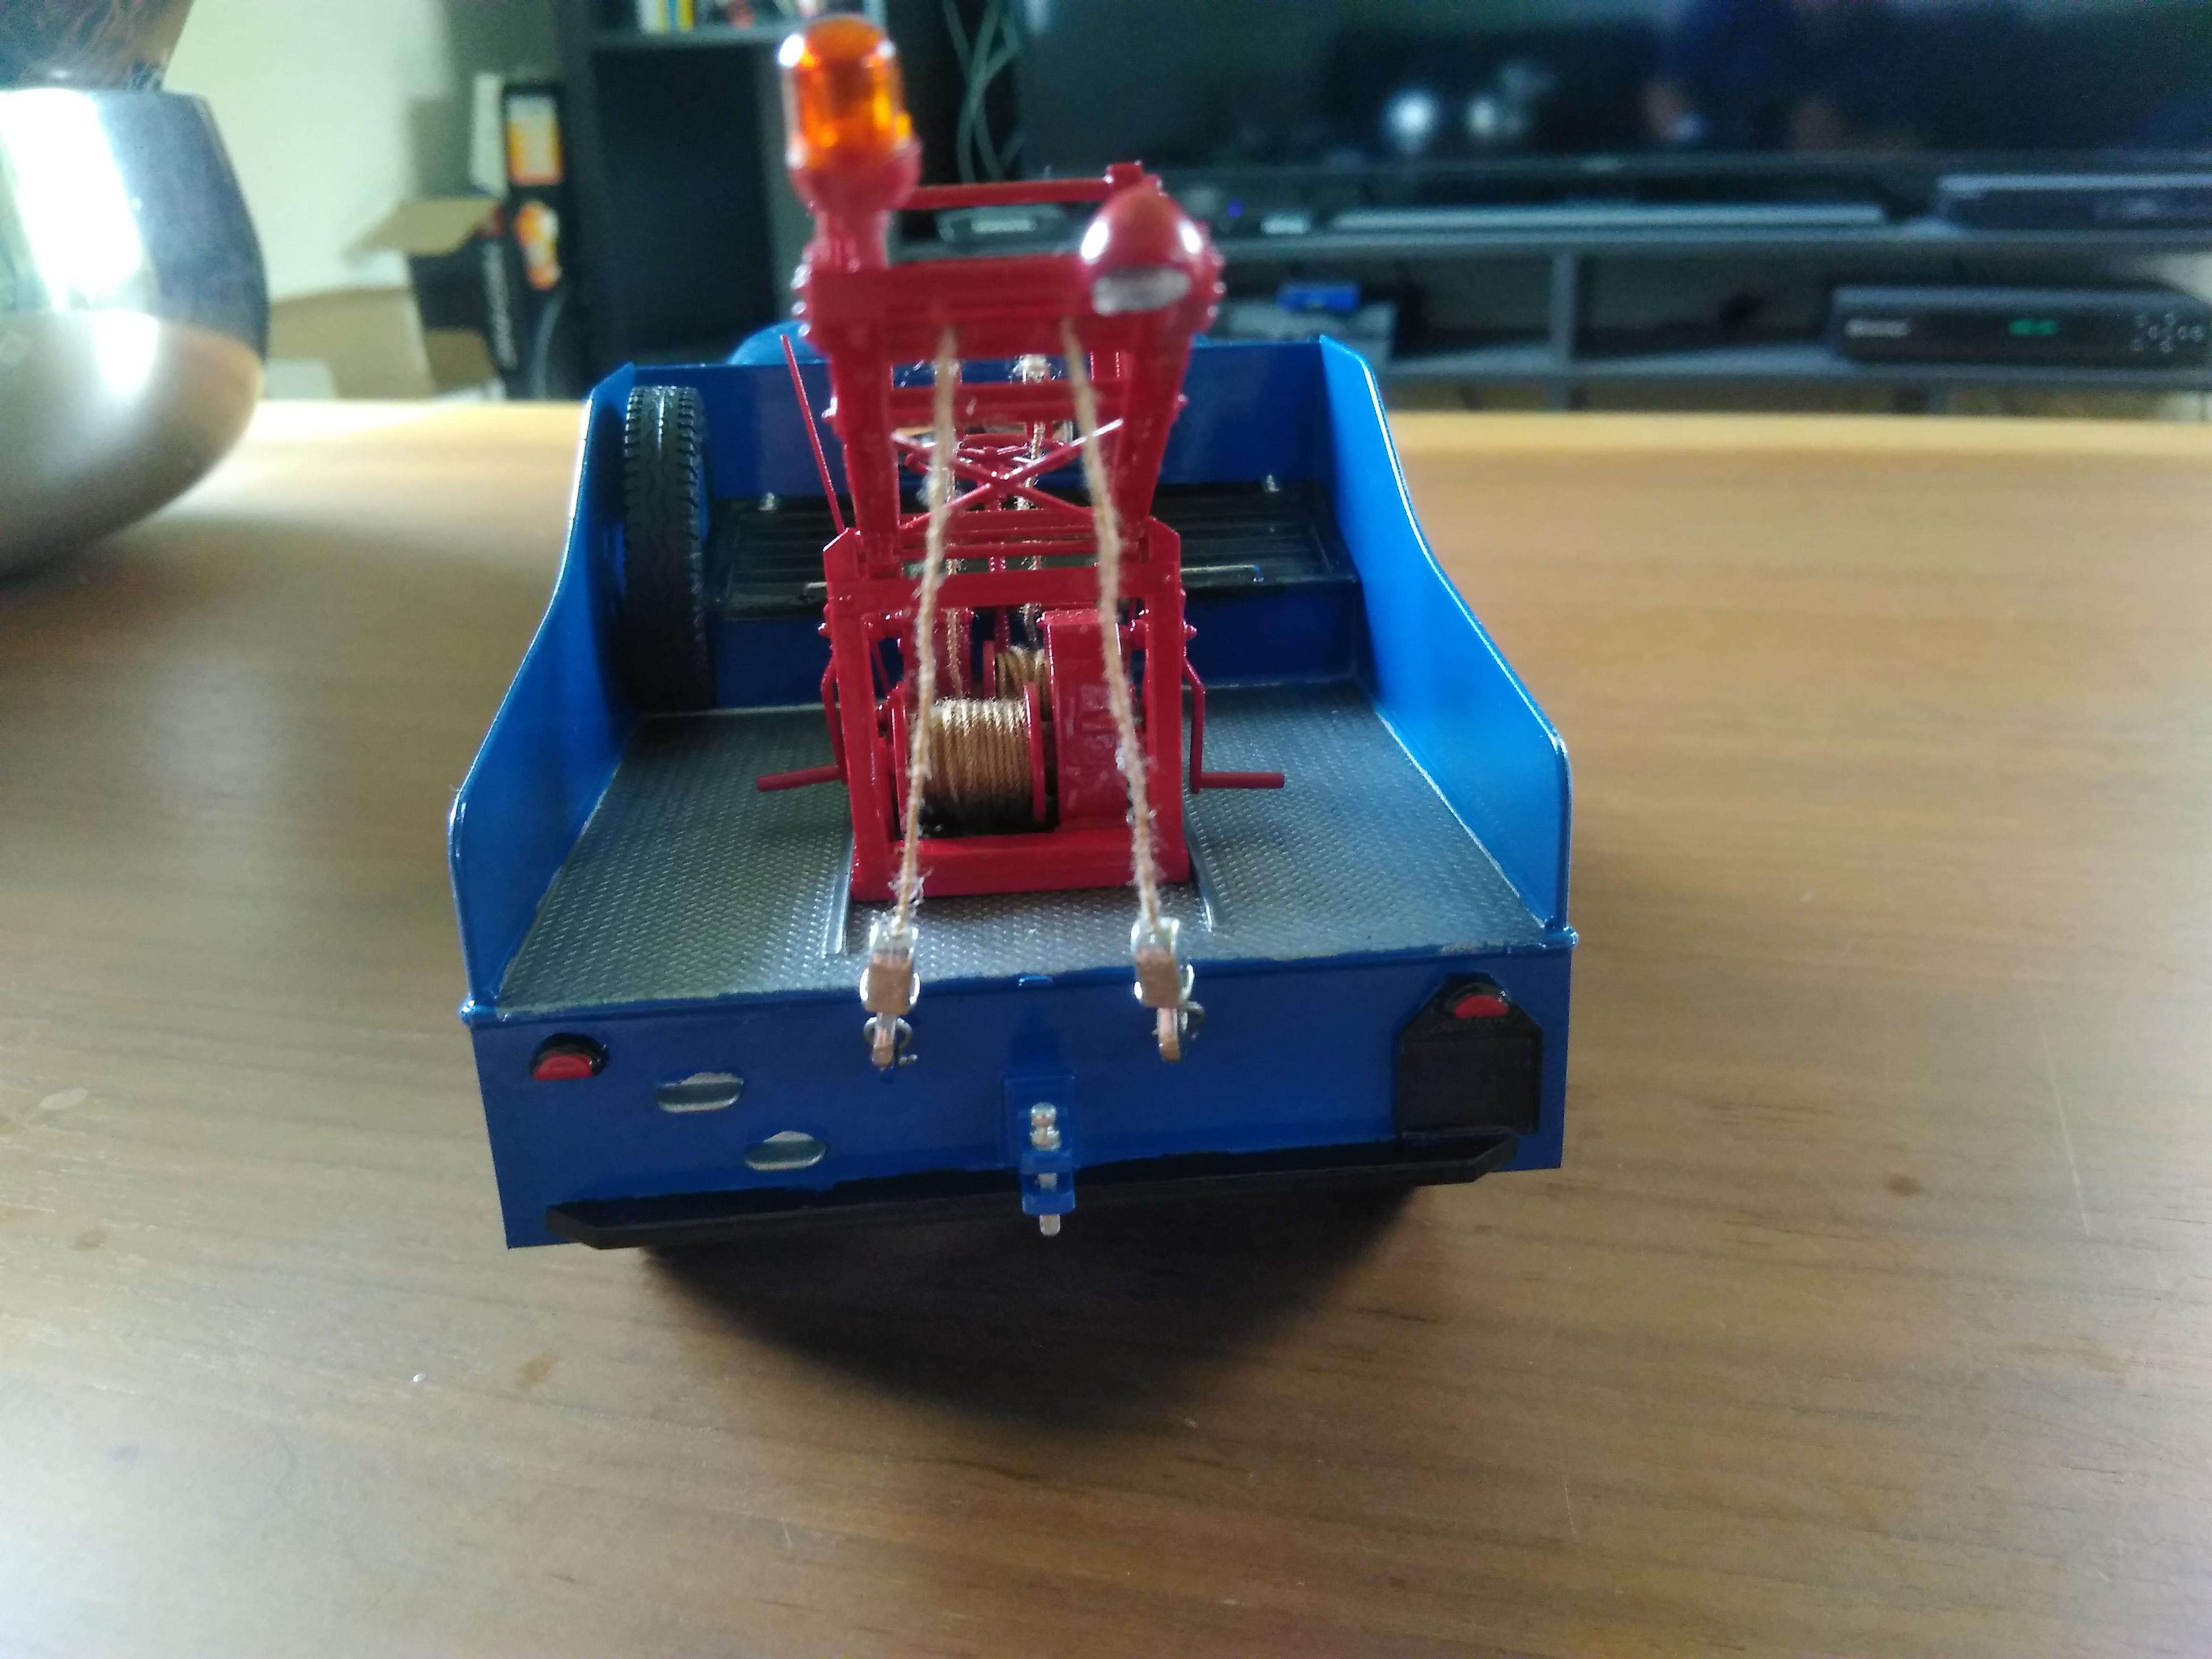
Bedford recovery truck
PierreR89 replied to PierreR89's topic in Model Trucks: Big Rigs and Heavy Equipment
Thanks. I am sure all of you can make the kit look way better then mine. There is one thing that makes this kit a little more fun then others, it is that the winchdrums can rotate in the boom, its the only way to attach the string to them also. Both drums has about 1.5meter (around 4feet) of string on them so it took a little time to make the string look good on the drums. For anyone willing to put in some extra work i am sure it will be easy to modify it so the wheel on the boom can lower/raise it by turning it. There are already threads molded in to the long screw the wheel sits on. The lid on the toolbox in the bed just need some real hinges on it so it looks natural when opening it, i just placed mine on without glueing it in place I was planning to add ignitionscables from the ignitioncoil to the distributor and then to the sparkplugs (its old enough to have a gas engine and not diesel) but i did not have thin enough steelwire to simulate them. -
After all bad things i have read about these 2 kits and already experienced Revell's T600 aerodyne i got these 2. Already know that it is not going to be easy to build either of them Cant wait to find out what disasters awaits me with them??
-
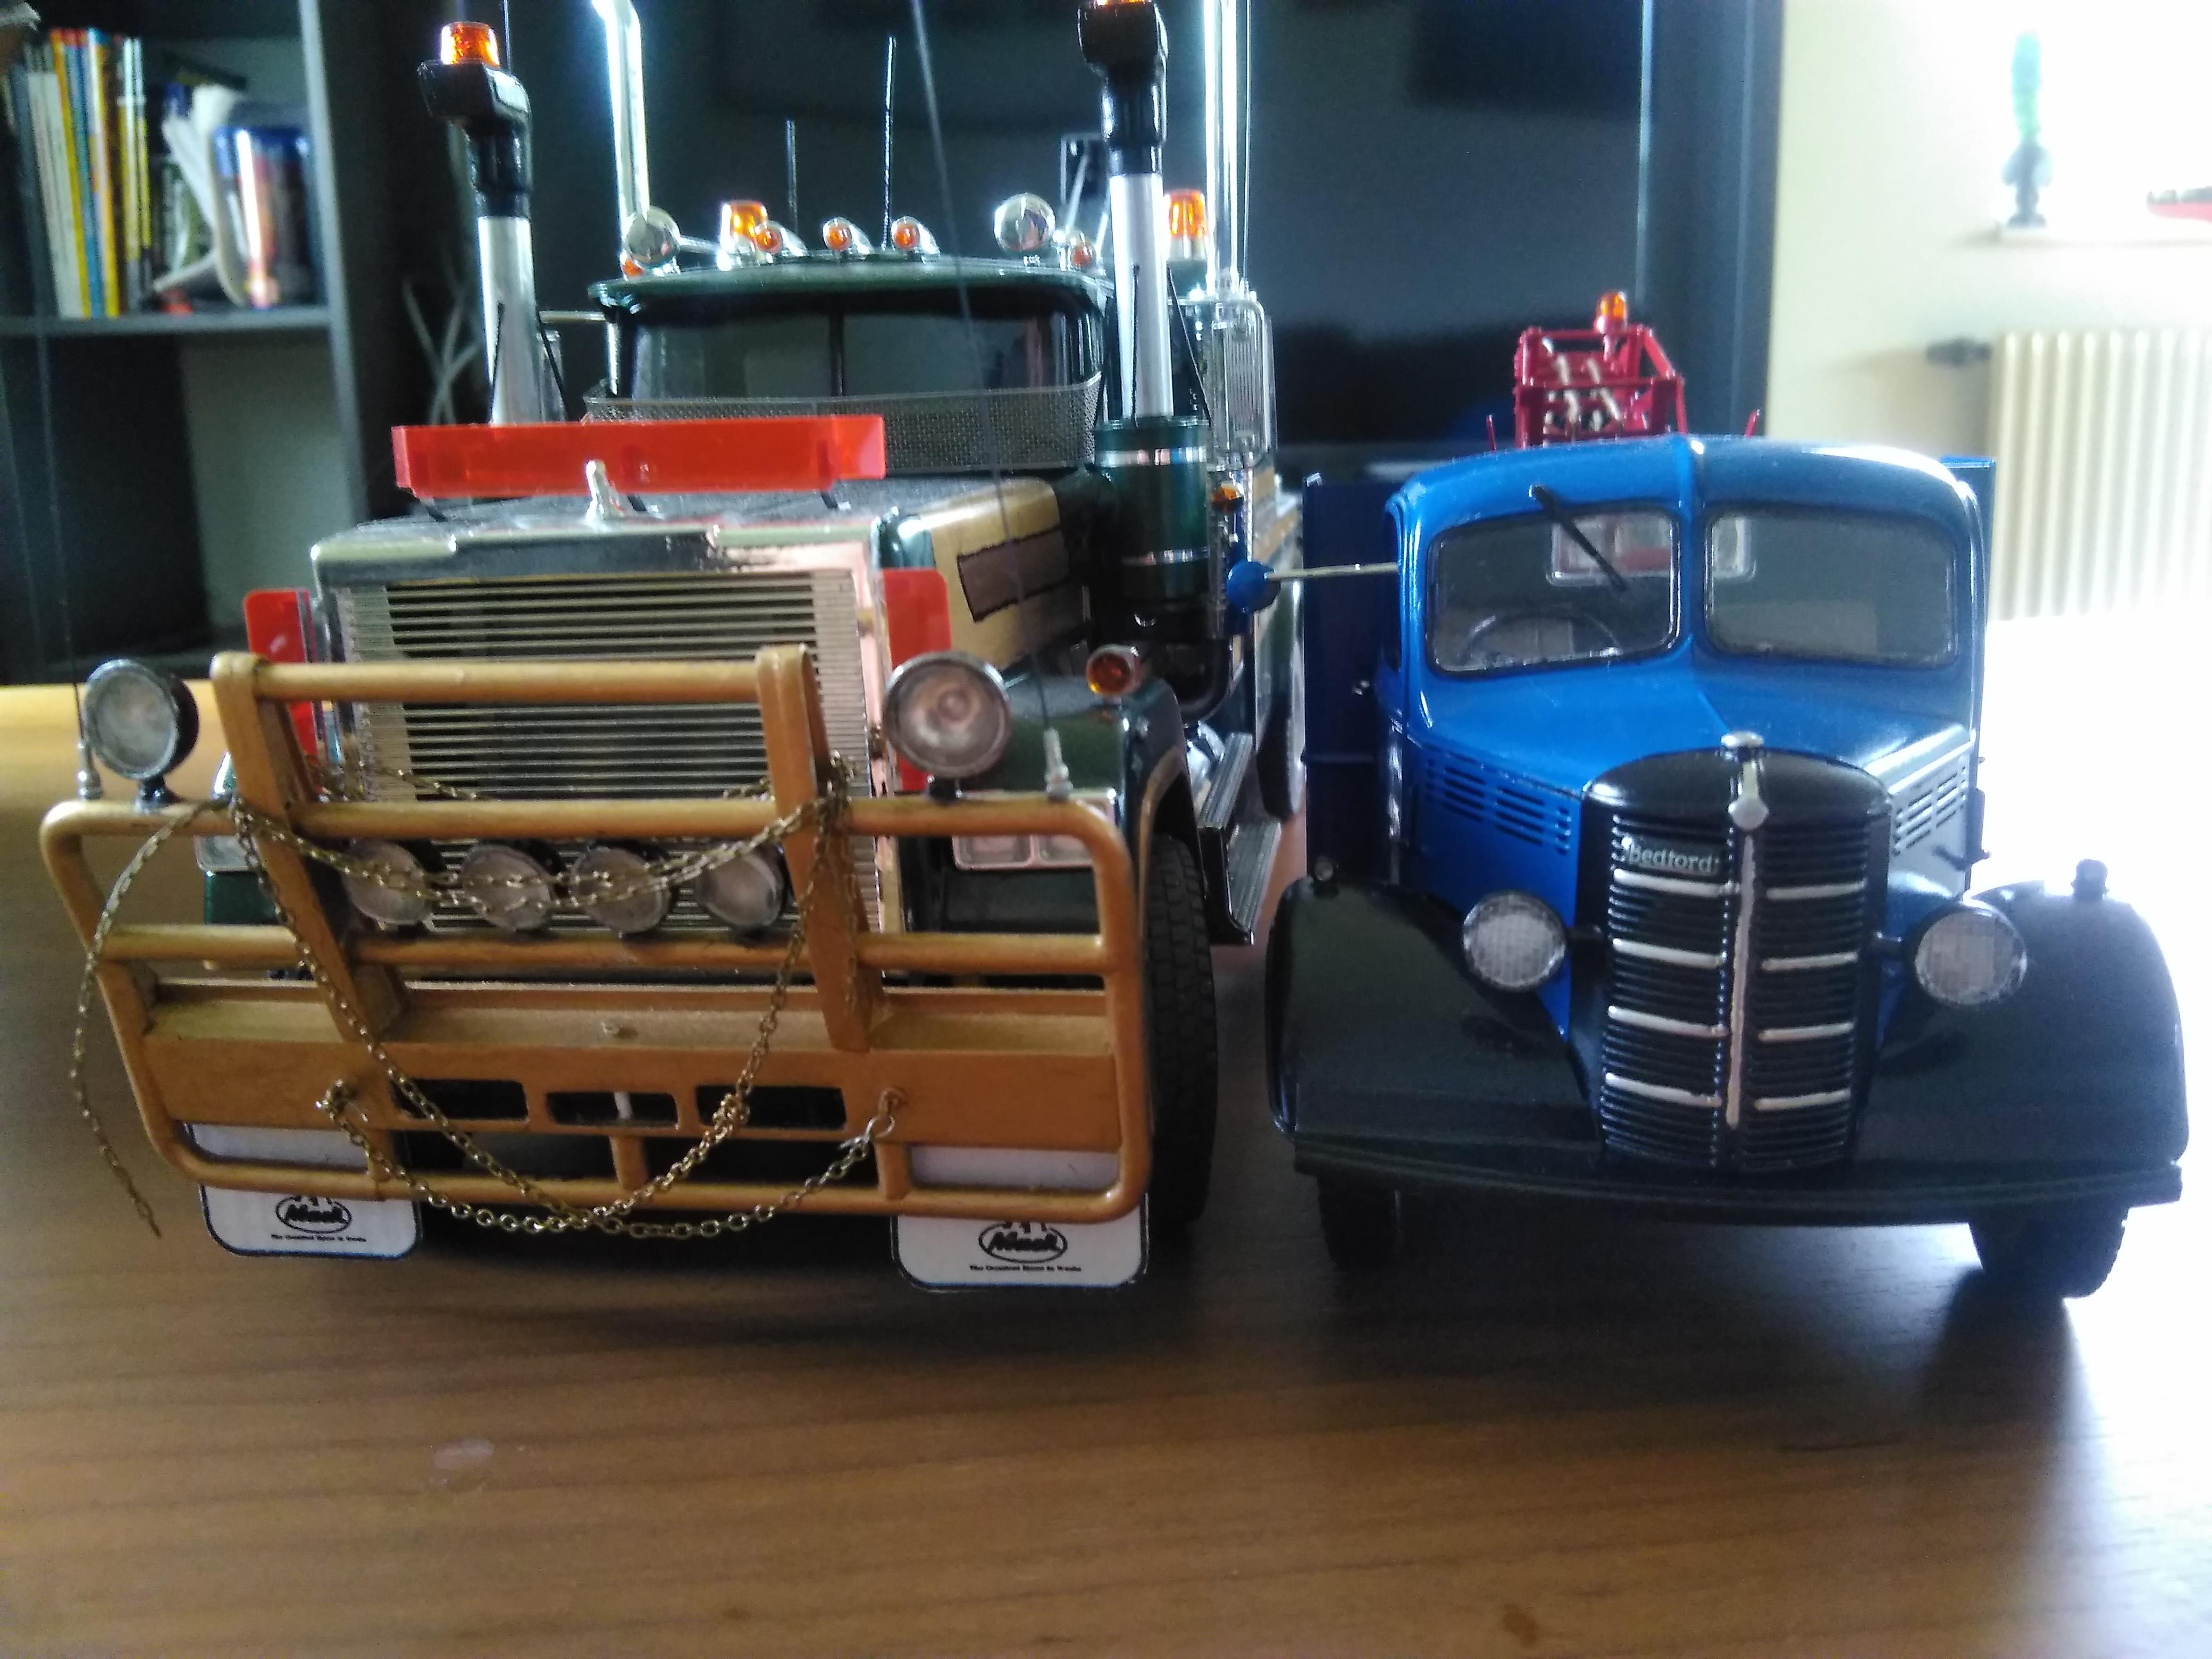
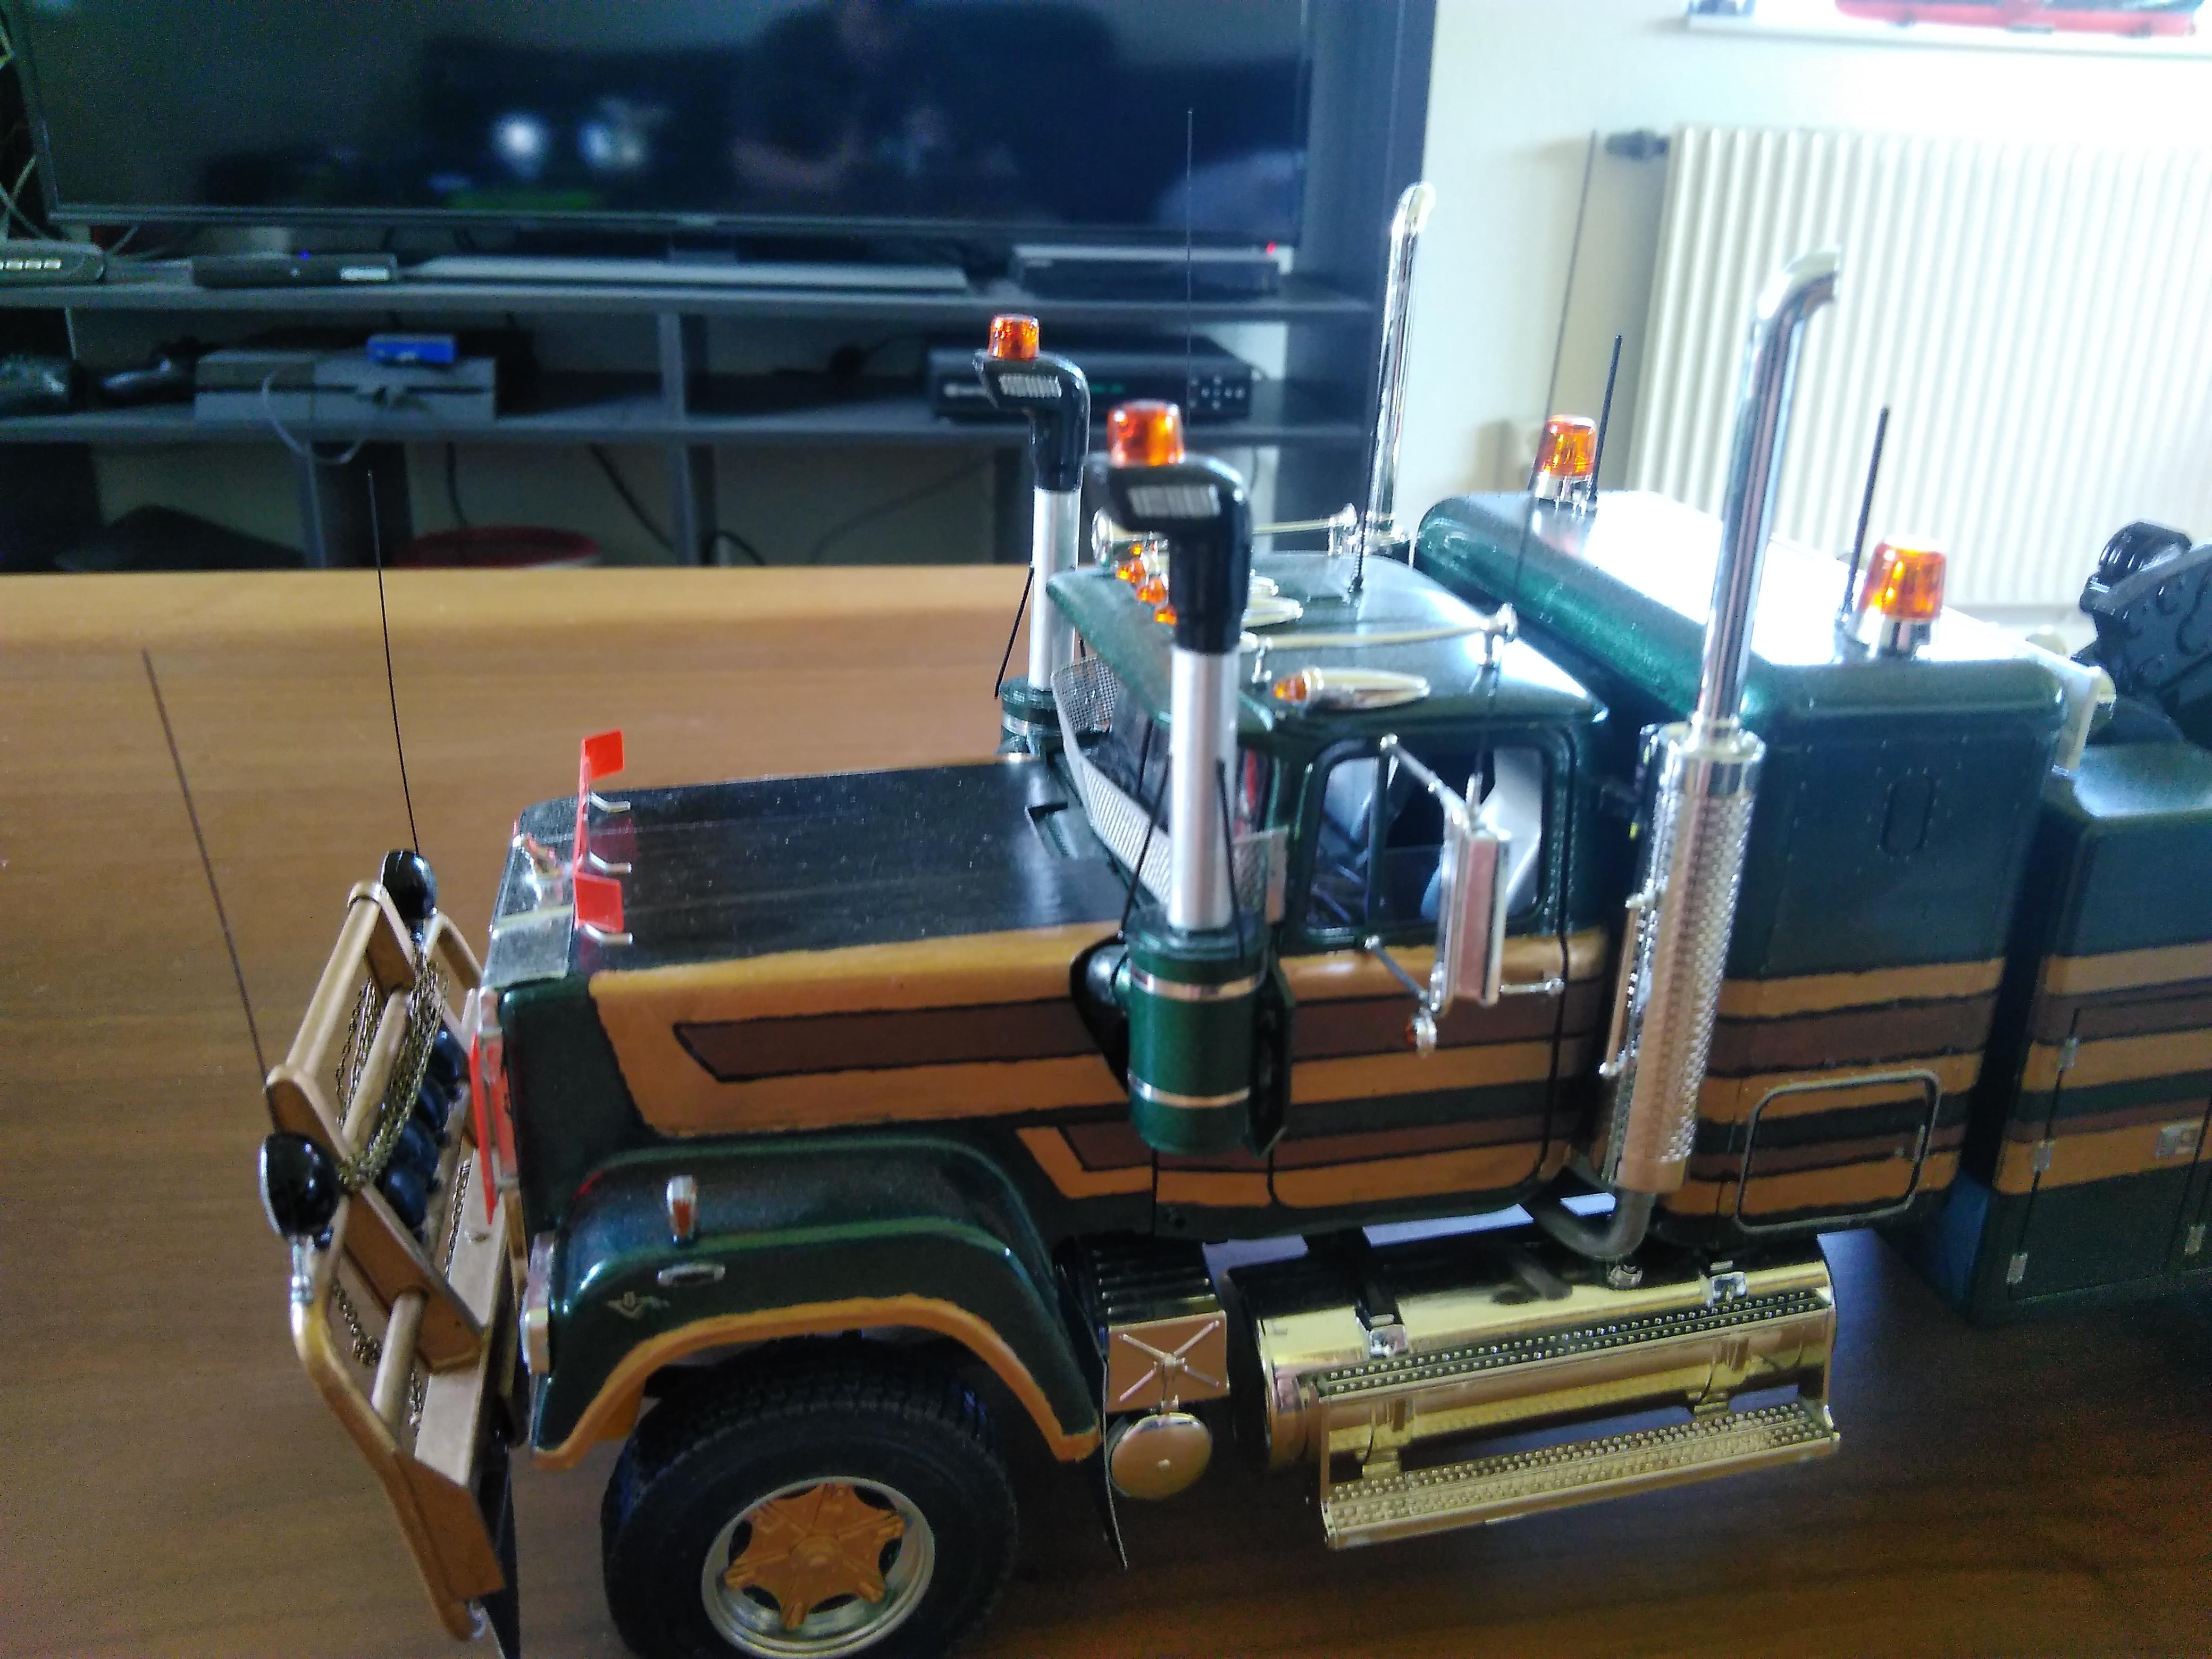
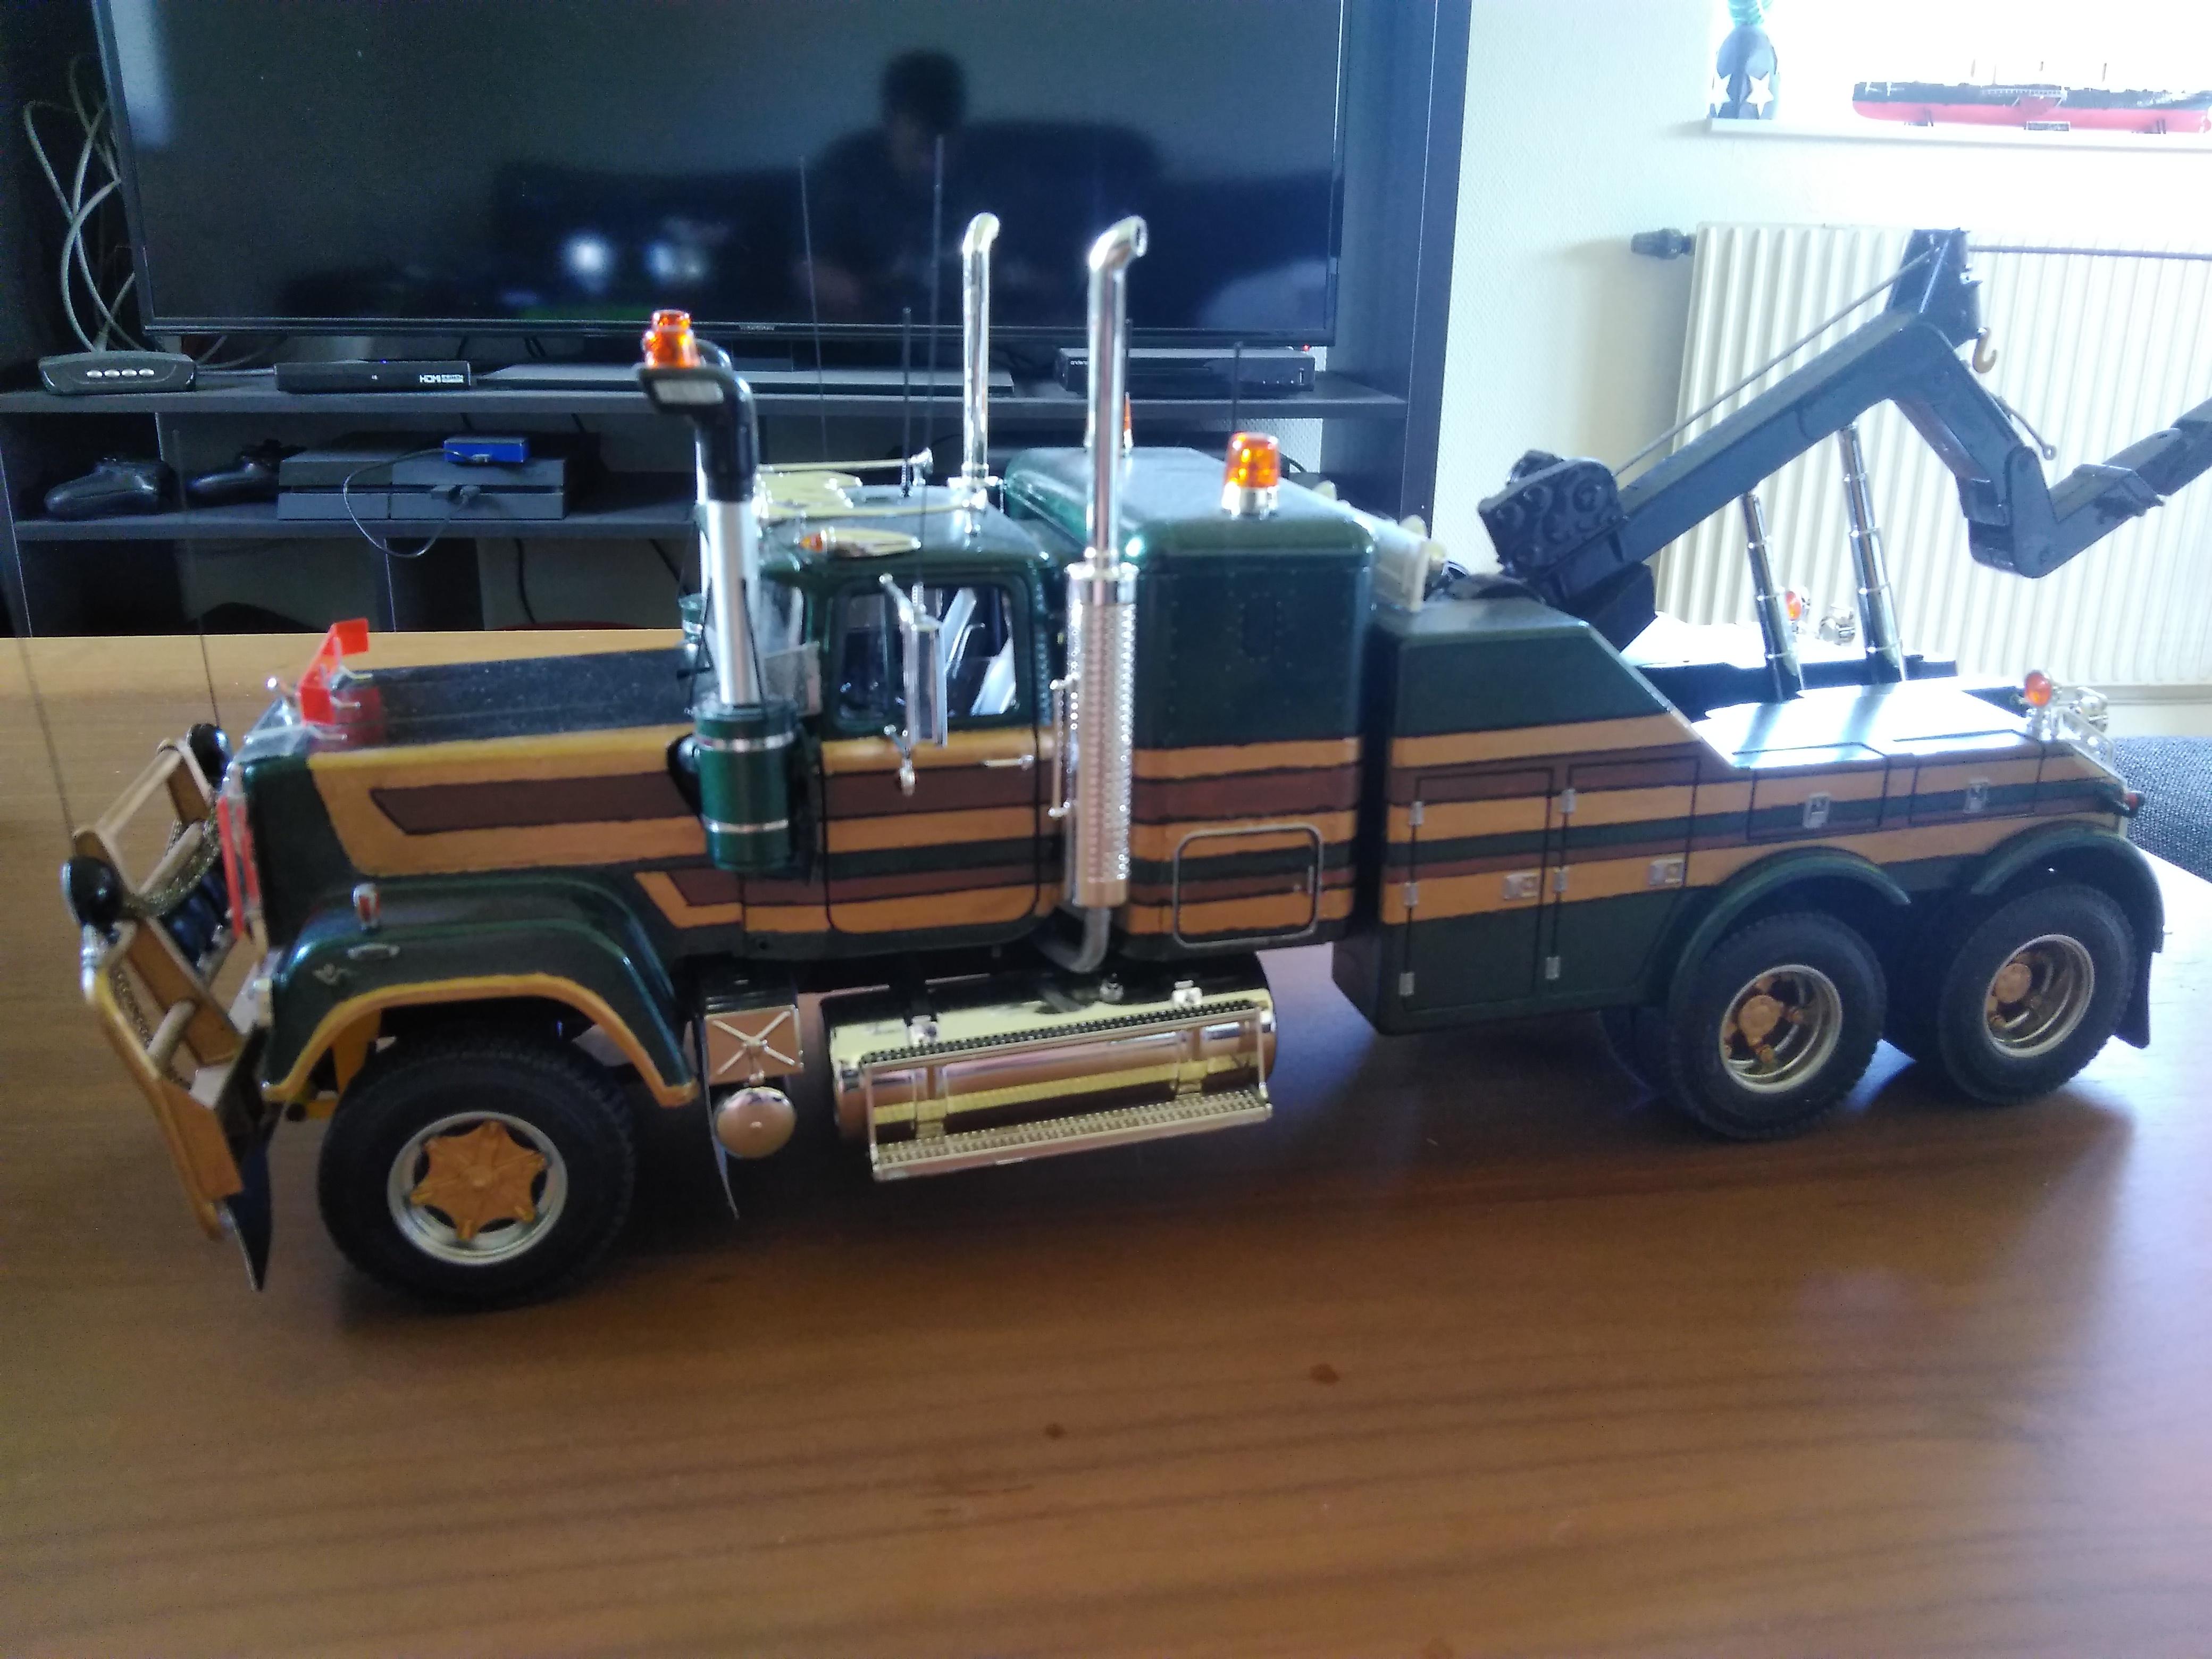
Do this fit in here with the heavy trucks? The last 3 pic's are just to show of the sizedifference between this and my Mack wrecker as both are in 1/24
-
Have you looked at volvo,s own performance upgrade? Its called polestar and because it is Volvo that made it all warranty's (if there still are any) will be valid It is avaliable from year 2005 and up on XC90 You should buy 2 of these and put it on the front fenders to match the grille emblem?
-
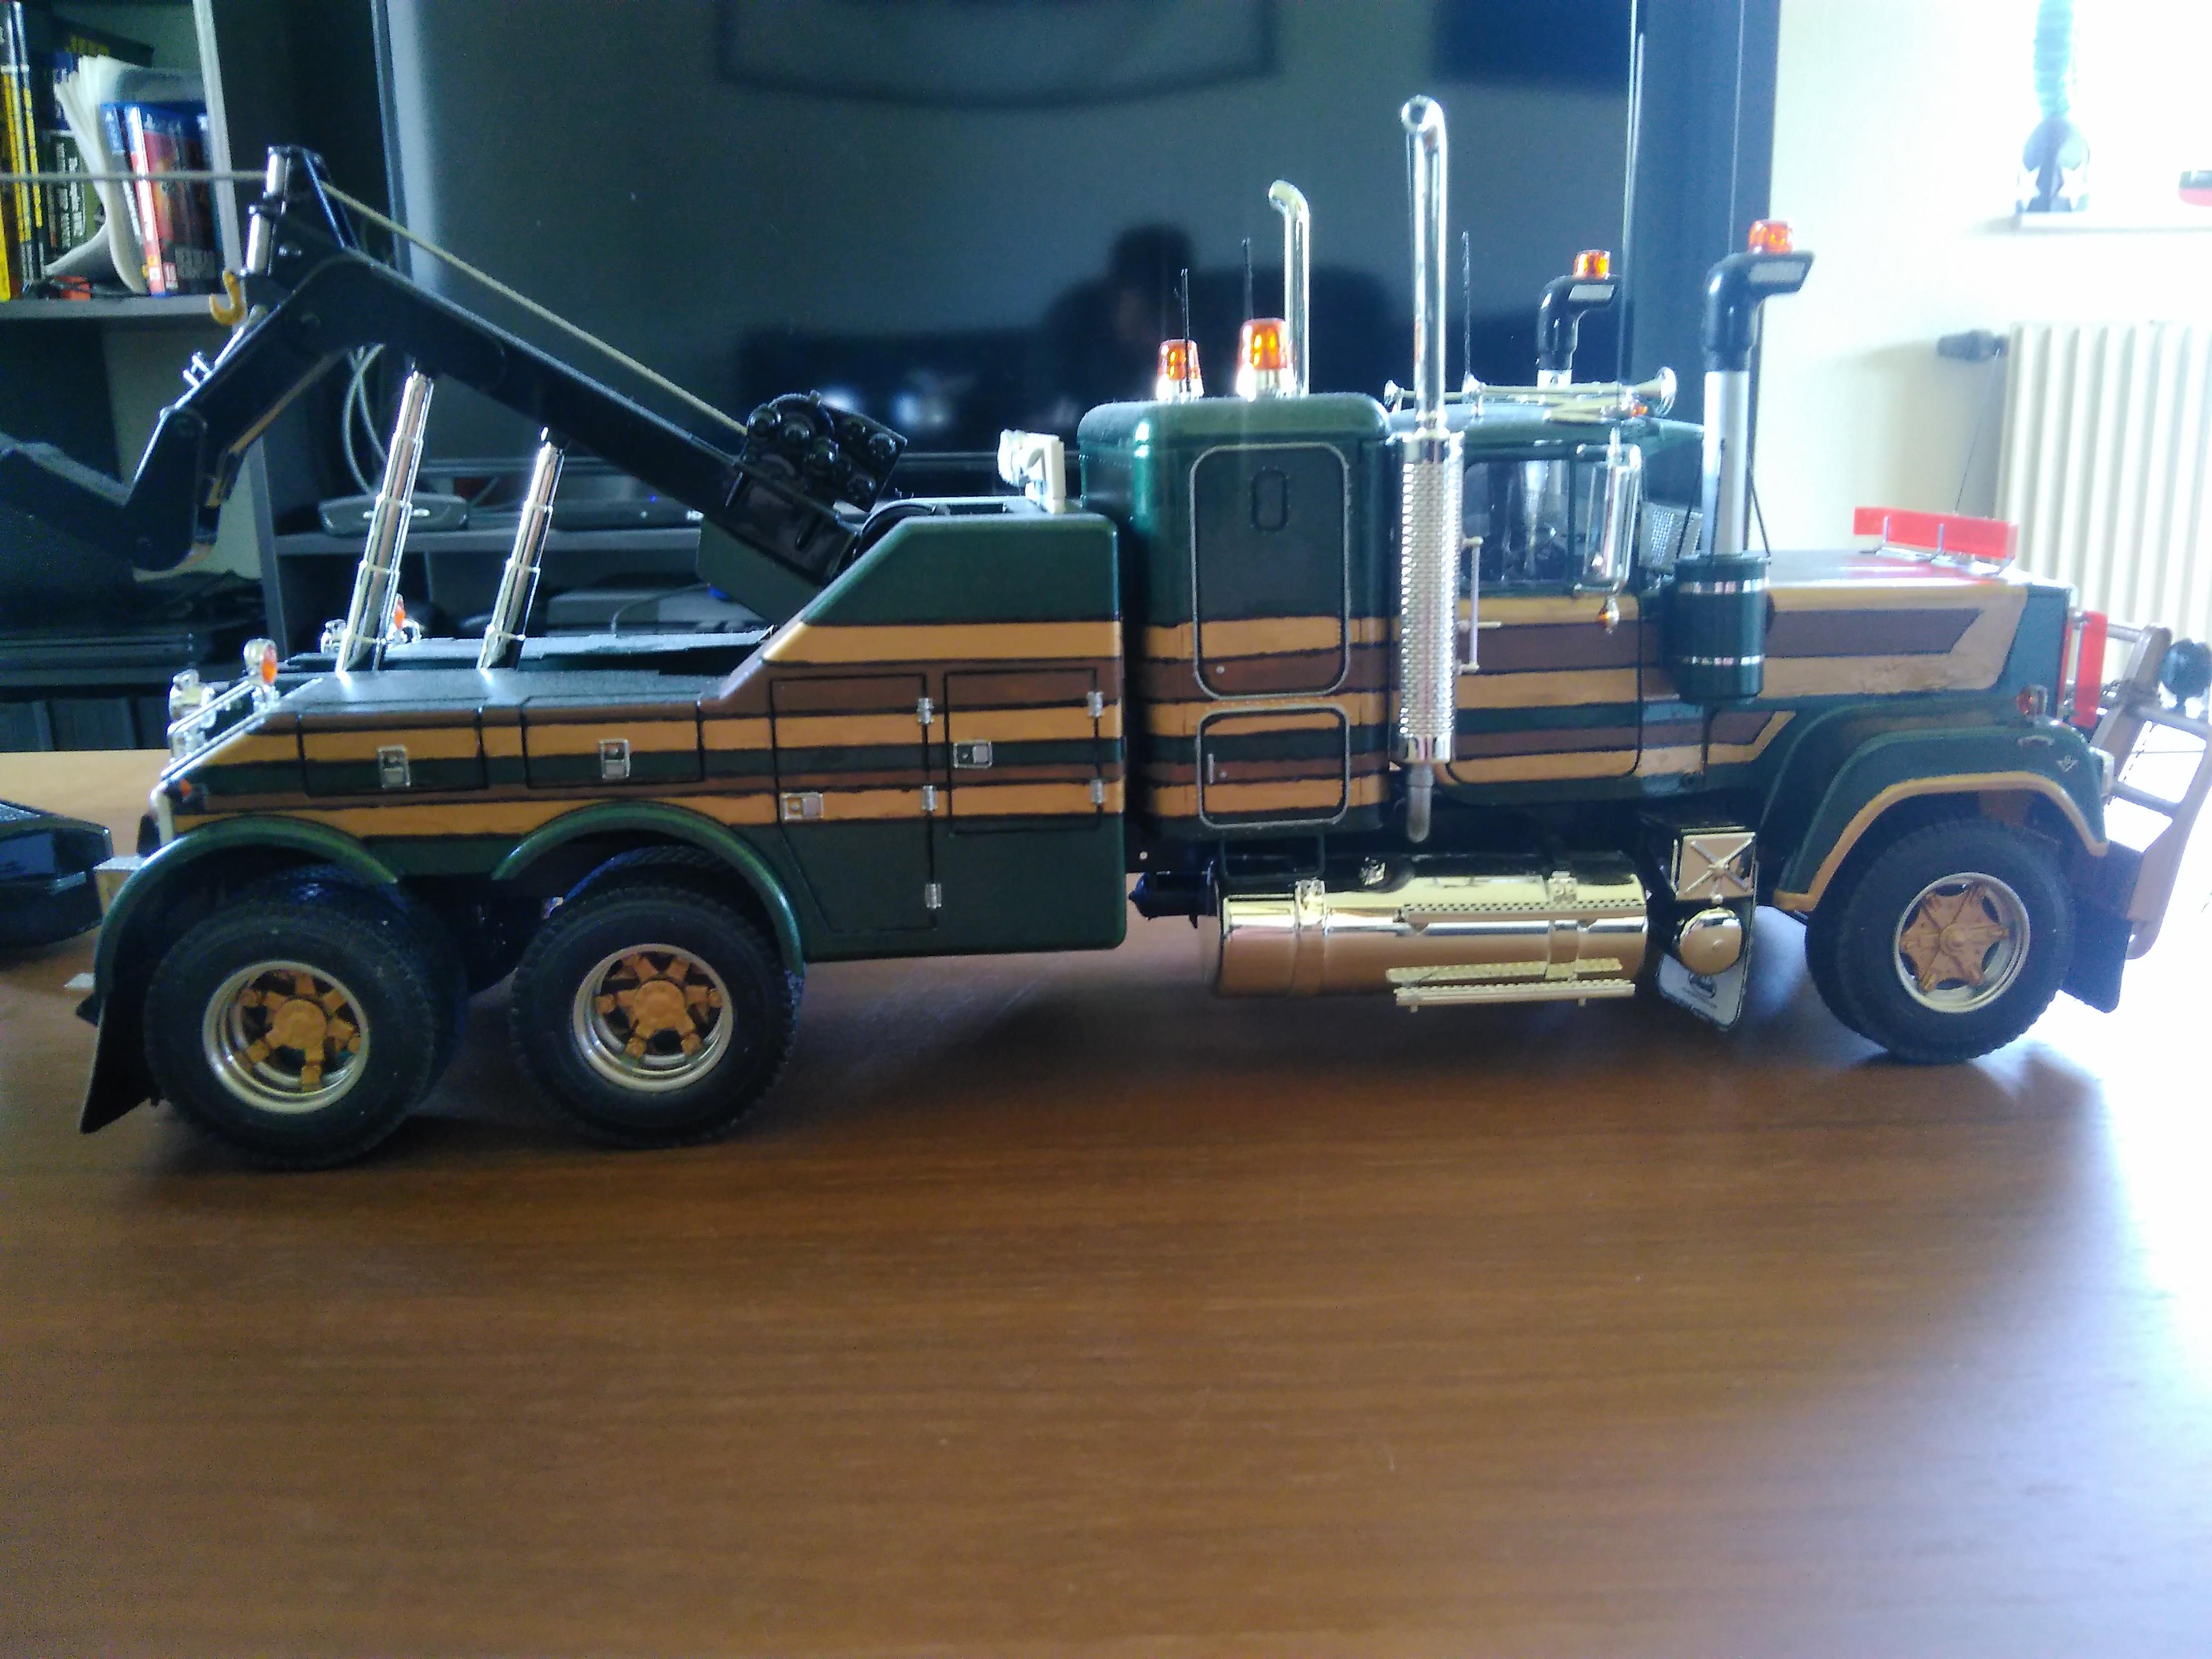
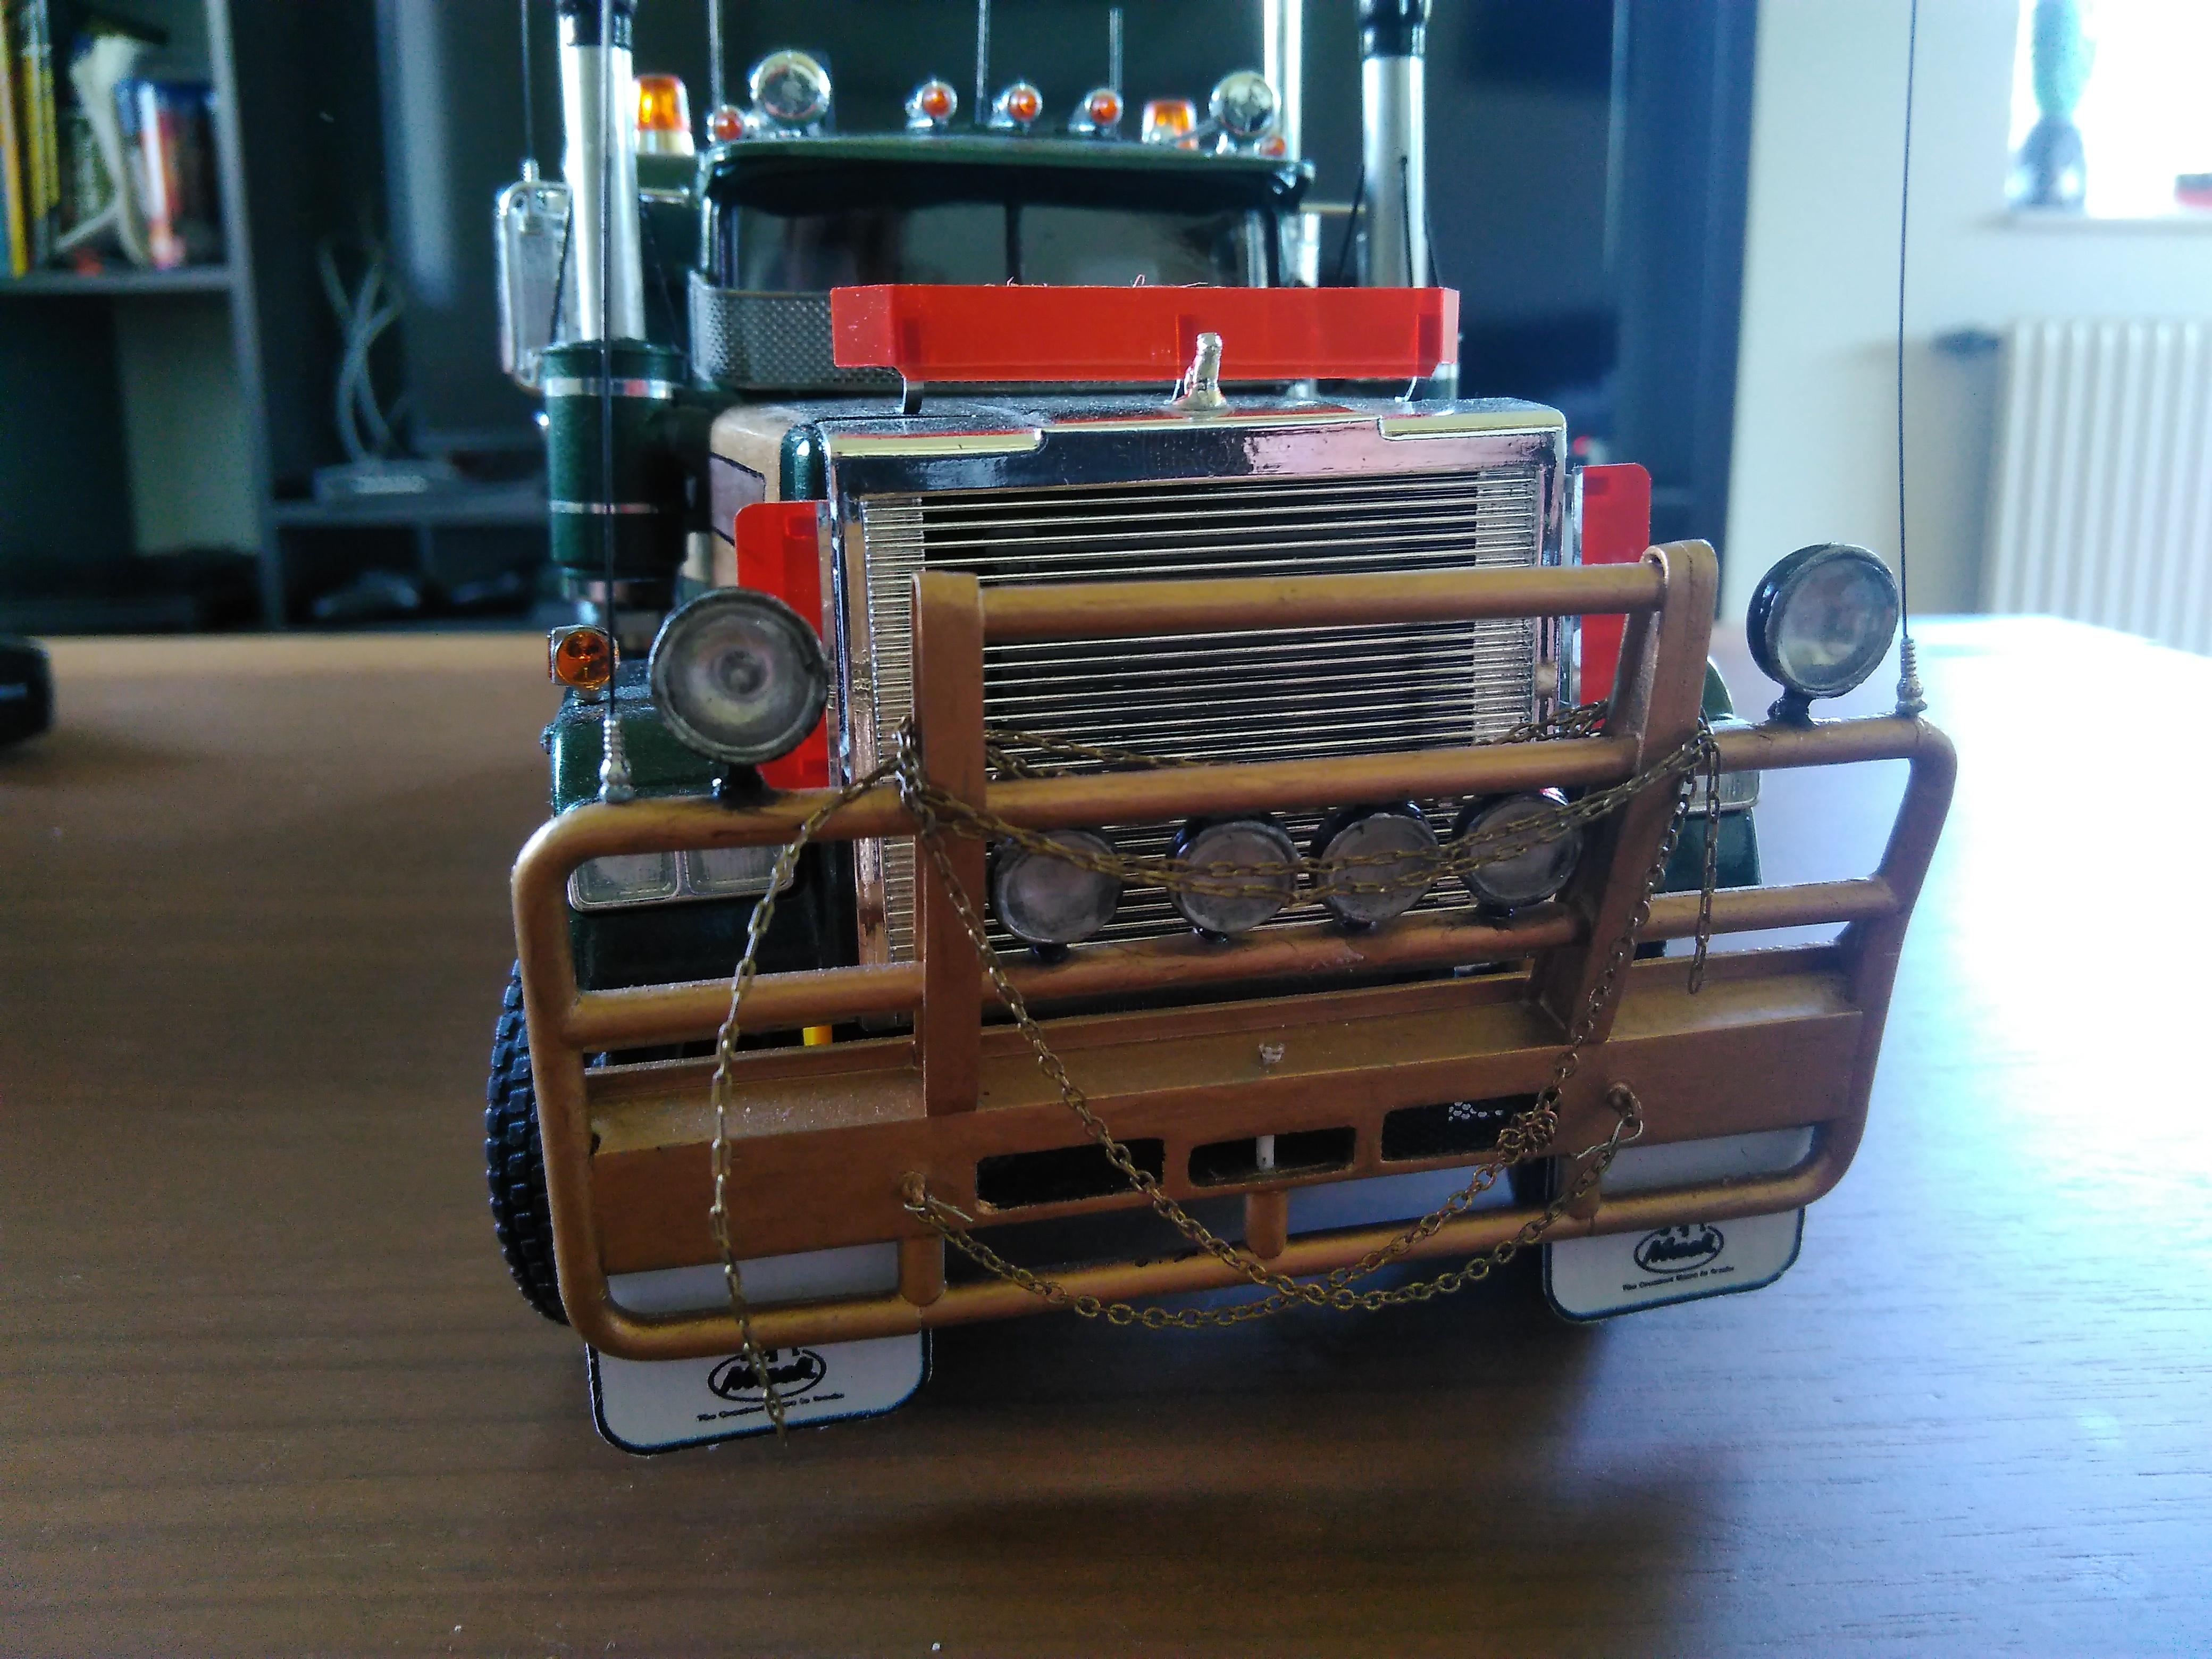
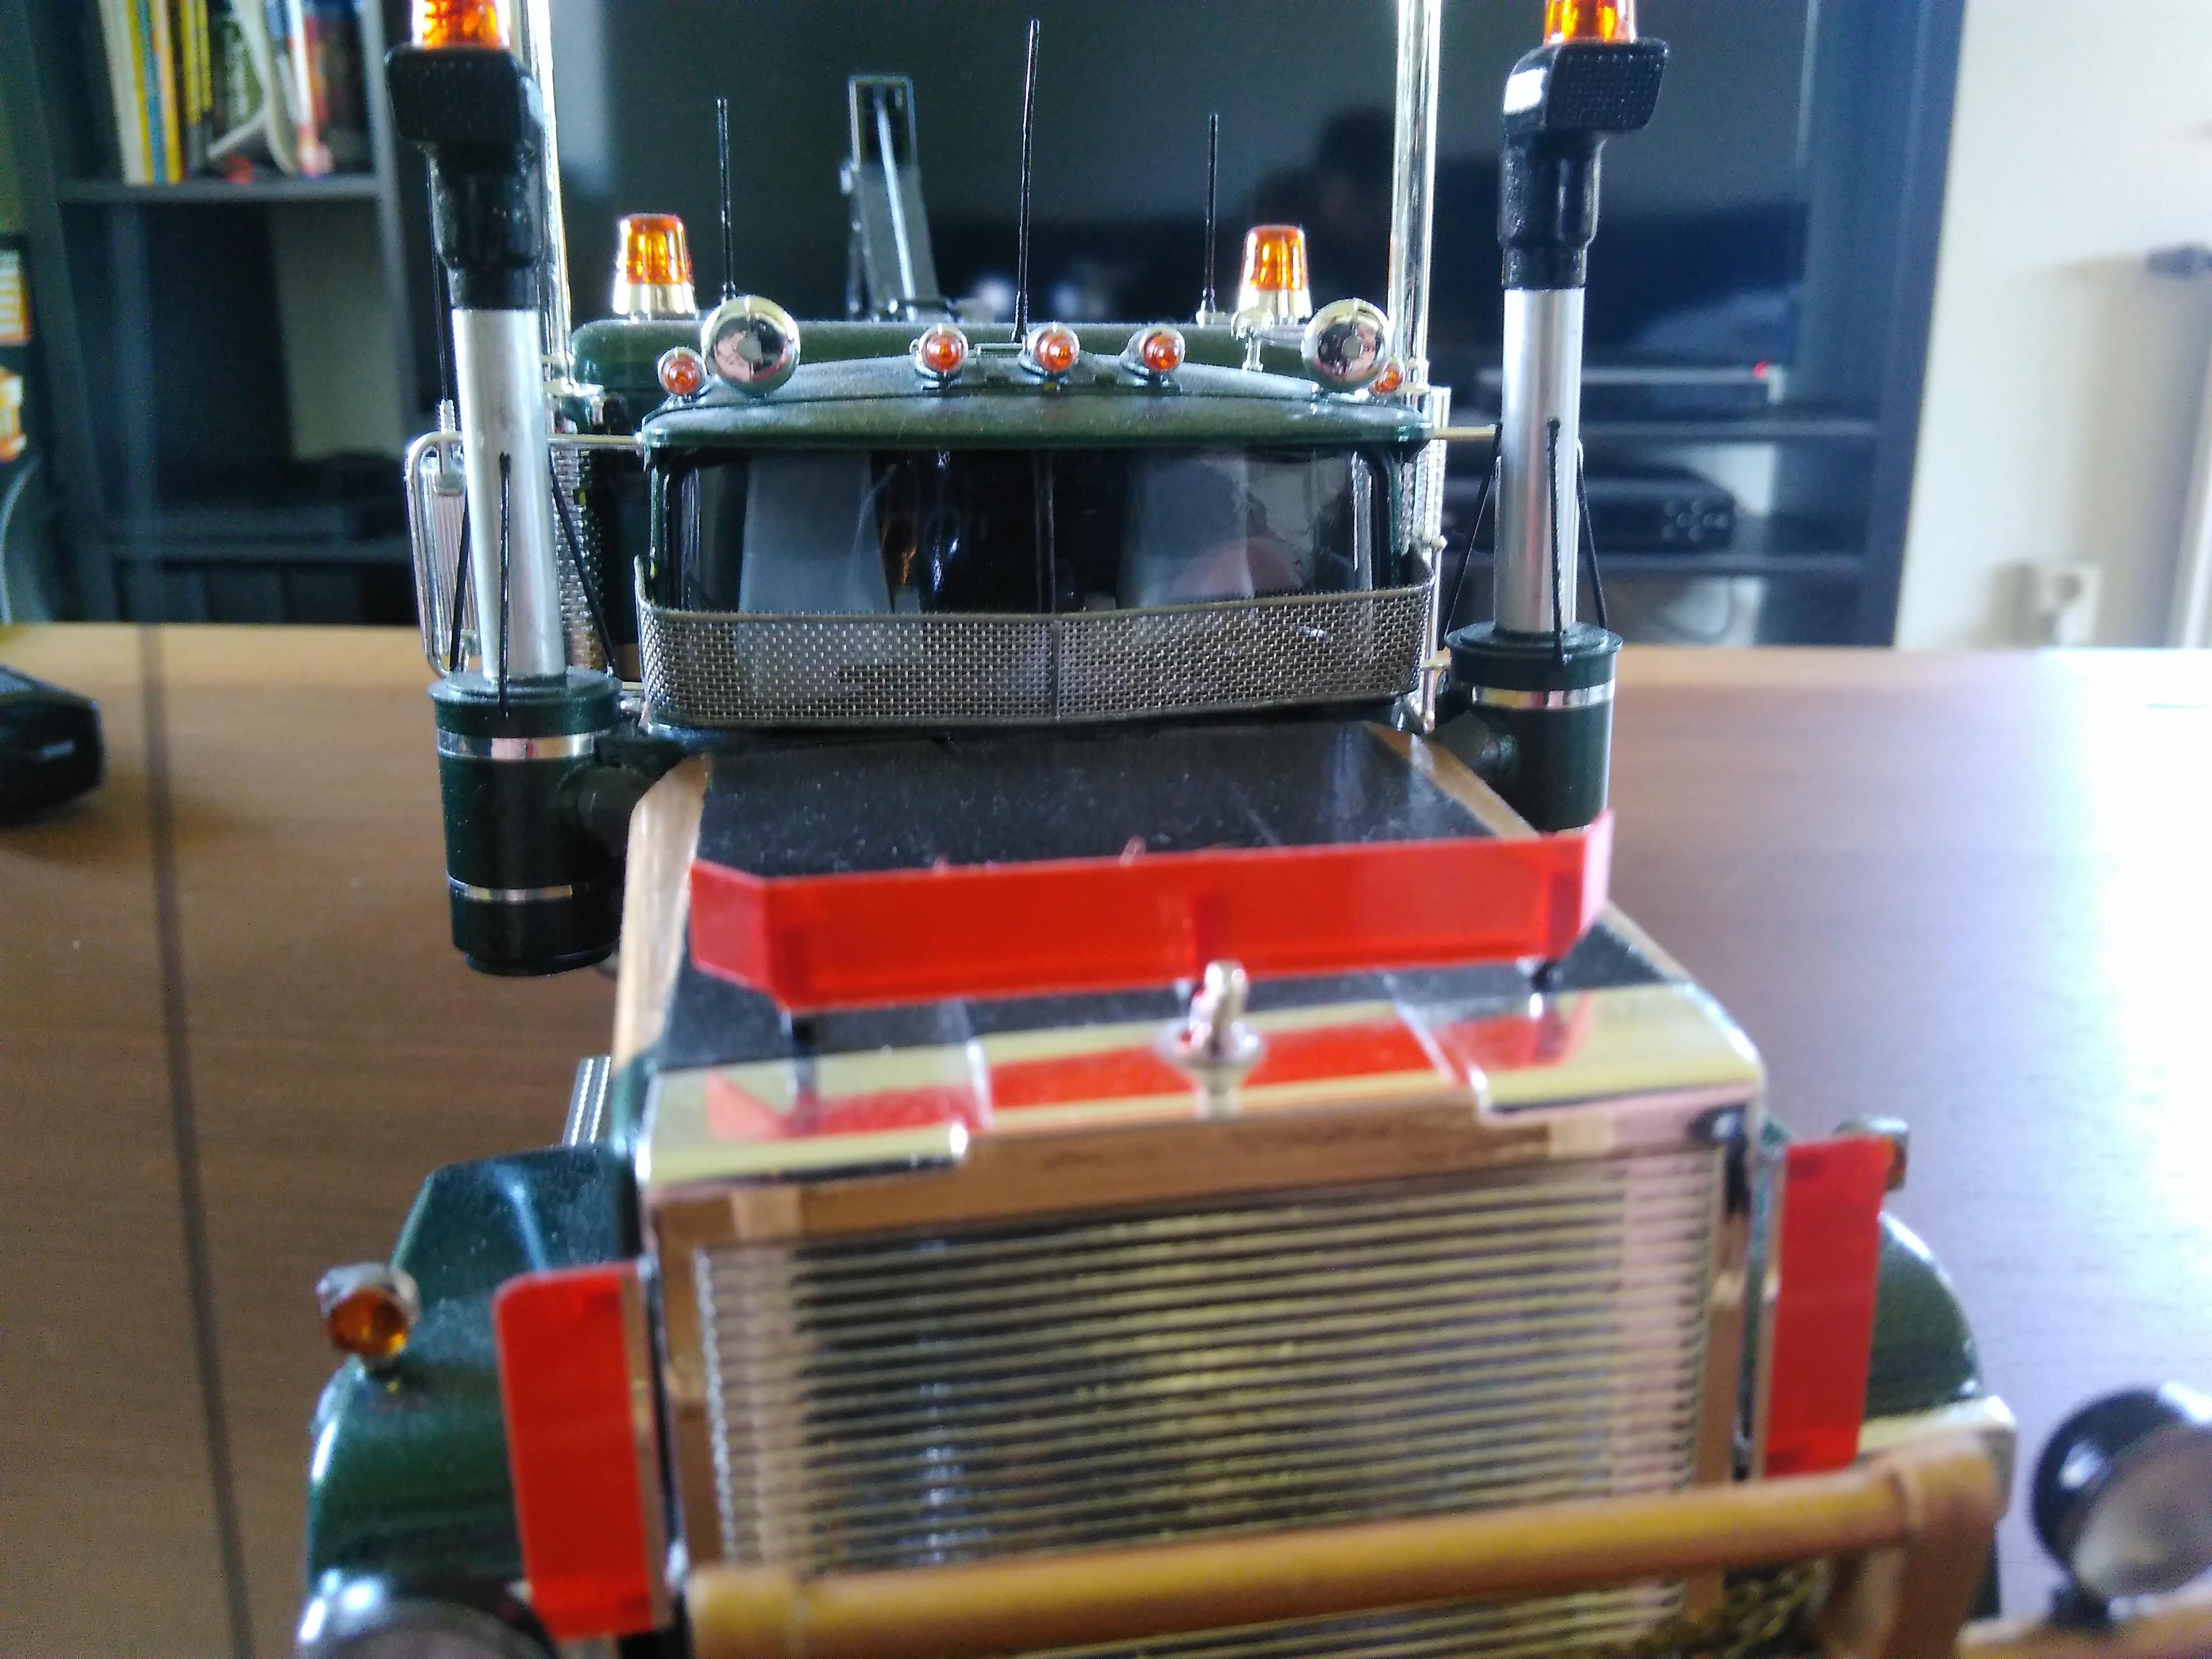
Mack Superliner Wrecker
PierreR89 replied to PierreR89's topic in Model Trucks: Big Rigs and Heavy Equipment
Now this wrecker is about 99.9% done. Still waiting on photoetch badges. Is has new tires,wheels bugshields, stoneguard, Mack bulldog, aux lighting on the bullbar and 4 extra aerials 2 on the bullbar and 1 on each mirror.
-
I ordered some things from them in march and got the package today.
-
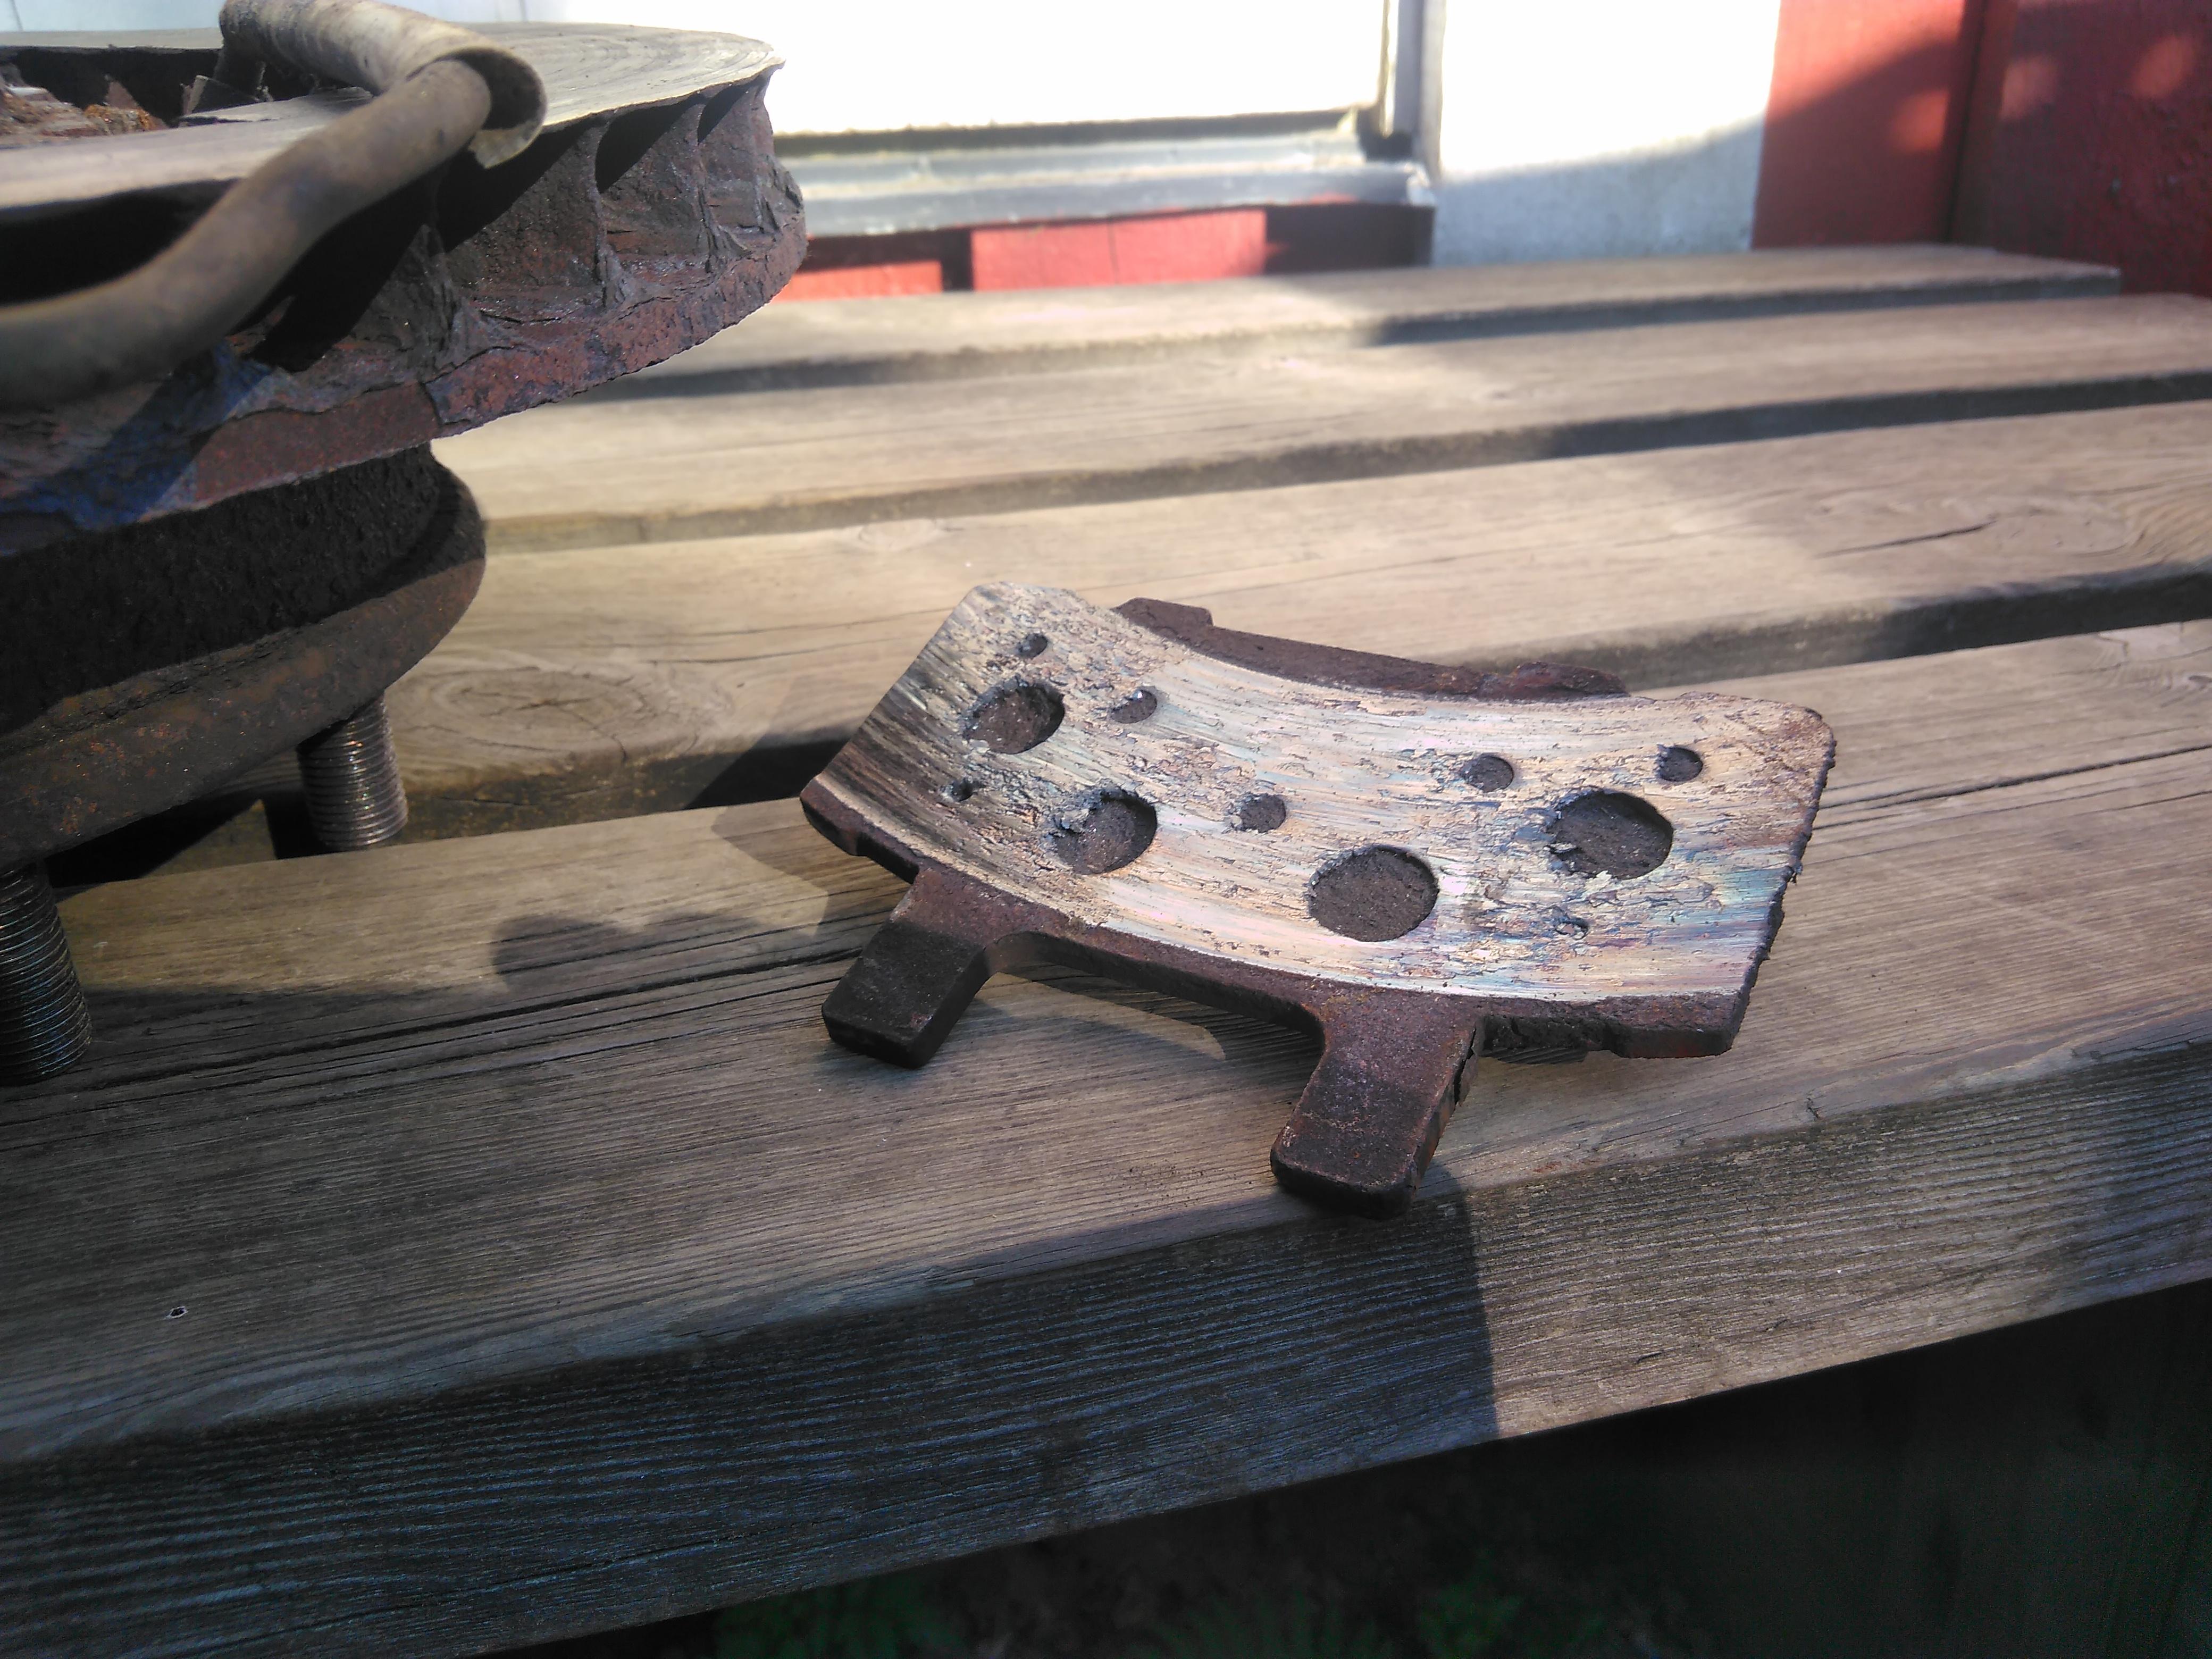
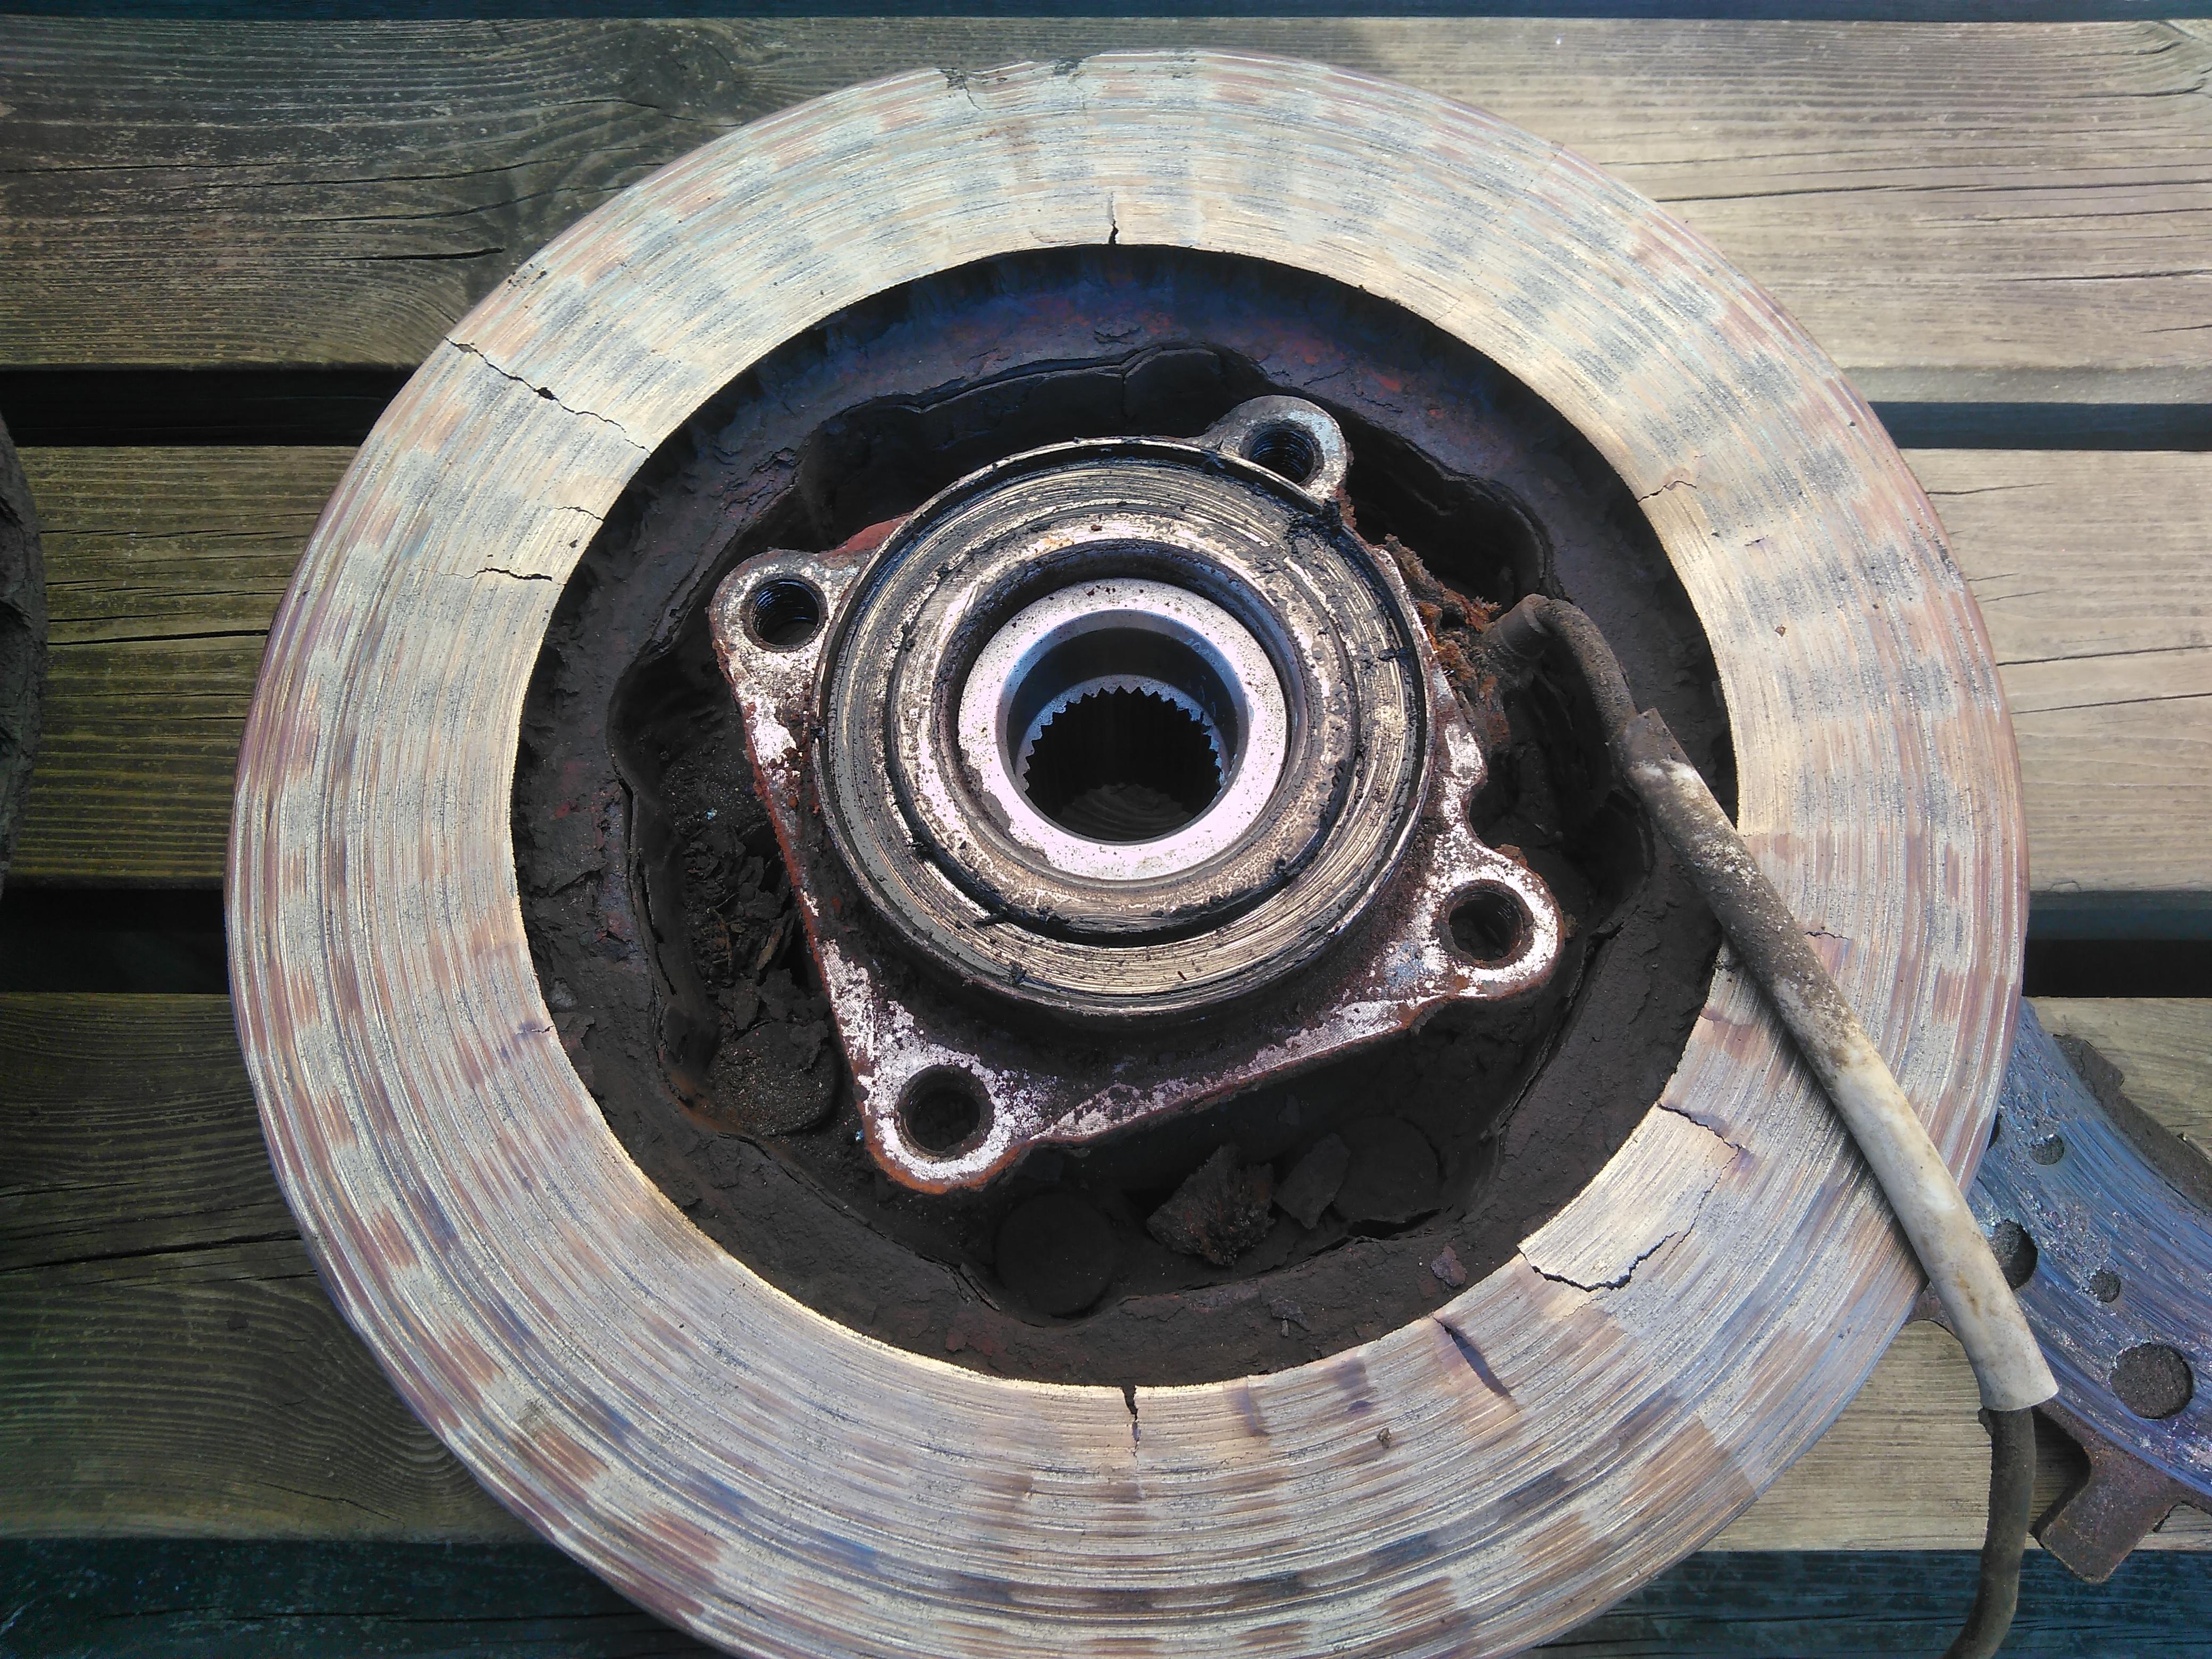
The caliper is still good and both of them are about a year old and when i replaced them the disc was not bad or to worn down. They never do here, they just check the brakes on a braketester to see if they are even and then a quick visual when they are under the vehicle and then maybee a quick glance when they are checking the wheelbearings. The rotor on the other side was good, still well within the minimum thickness. The friction material on the brakepad could have cracked and fell out so it was metal to metal after i had it inspected. I would probalby have noticed the sound if it had not been having squealing noices ever since i replaced the calipers and pads. Only thing i did noticed what that the brakepedal behaved like they do when the disc is warped. Even now with new discs, pads and bearings it still have squeling noises when i step on the brakes.
-
I do. Thats why i found it
-
Had my suburban inspected during the yearly mandatory inspection here 2-3 weeks ago and have driven less then 2000km,s (1200miles) since then and for some reason i decided to check how the brakes looked like. Mostly highwaymiles where the speedlimit is 120km/h (74mph) and i usually hold 130km/h (80mph something) Here is the brakedisk on the driverside... I am going to show it to them and ask how they could miss that since it is really easy to see but that passed, instead they failed me on 2 rusted bodymounts that are no danger at all it they just fall off. But if this had exploded and locked up the wheel it would have sent me in the either the centerbarrier or oncomming traffic and at that speeds there is only one option for how it would have ended for me and the unlucky one that suddenly got 3500kg (7700lbs) of suburban aimed at them at 60-80mph... This is the second dangerous thing they have missed on any of my vehicles.. On my Jeep ZJ they missed that the upper left controlarm/trackbarmount was damaged by rust, i found out when it broke when i hit a pothole..
-
Mack Cruiseliner
PierreR89 replied to PierreR89's topic in Model Trucks: Big Rigs and Heavy Equipment
Thanks. I was unsure about the green i painted it in because it was very green until i added the chromeparts and filled in the black lines on the doors and hatches on it. The engine was supposed to be a matte gold but i grabbed the wrong spraycan and it ended up this high gloss gold. After that screw up i decided to do the exhaustpipes chrome and have as much shiny parts as possible under the cab. I am thinking of painting the bulldogs on the mirrors gold just to match the other 4 bulldogs that i did paint gold.