Csaba aka felhasznaaloo
-
Posts
72 -
Joined
-
Last visited
Content Type
Profiles
Forums
Events
Gallery
Everything posted by Csaba aka felhasznaaloo
-
Jo-Han '70 Oldsmobile Toronado
Csaba aka felhasznaaloo replied to Csaba aka felhasznaaloo's topic in Model Cars
Thank you, but it's just the low resolution photos. -
Jo-Han '70 Oldsmobile Toronado
Csaba aka felhasznaaloo replied to Csaba aka felhasznaaloo's topic in Model Cars
Thank you! I just use my phone to take photos, do it outside in natural light, and add/increase contrast afterwards. -
AMT '70 Chevy Impala Lowrider
Csaba aka felhasznaaloo replied to Csaba aka felhasznaaloo's topic in Model Cars
Thank you. Unfortunately I don't have a lot to show. At the front, I drilled into the shock tower tops to accommodate the modified kingpin(?) and made pivot points at the front of the K frame(?). At the rear, I made pivot points for the thinned out suspension arms, cheated by shaving the top of the diff, and removed some of the floor board above.
-
Jo-Han '70 Oldsmobile Toronado
Csaba aka felhasznaaloo replied to Csaba aka felhasznaaloo's topic in Model Cars
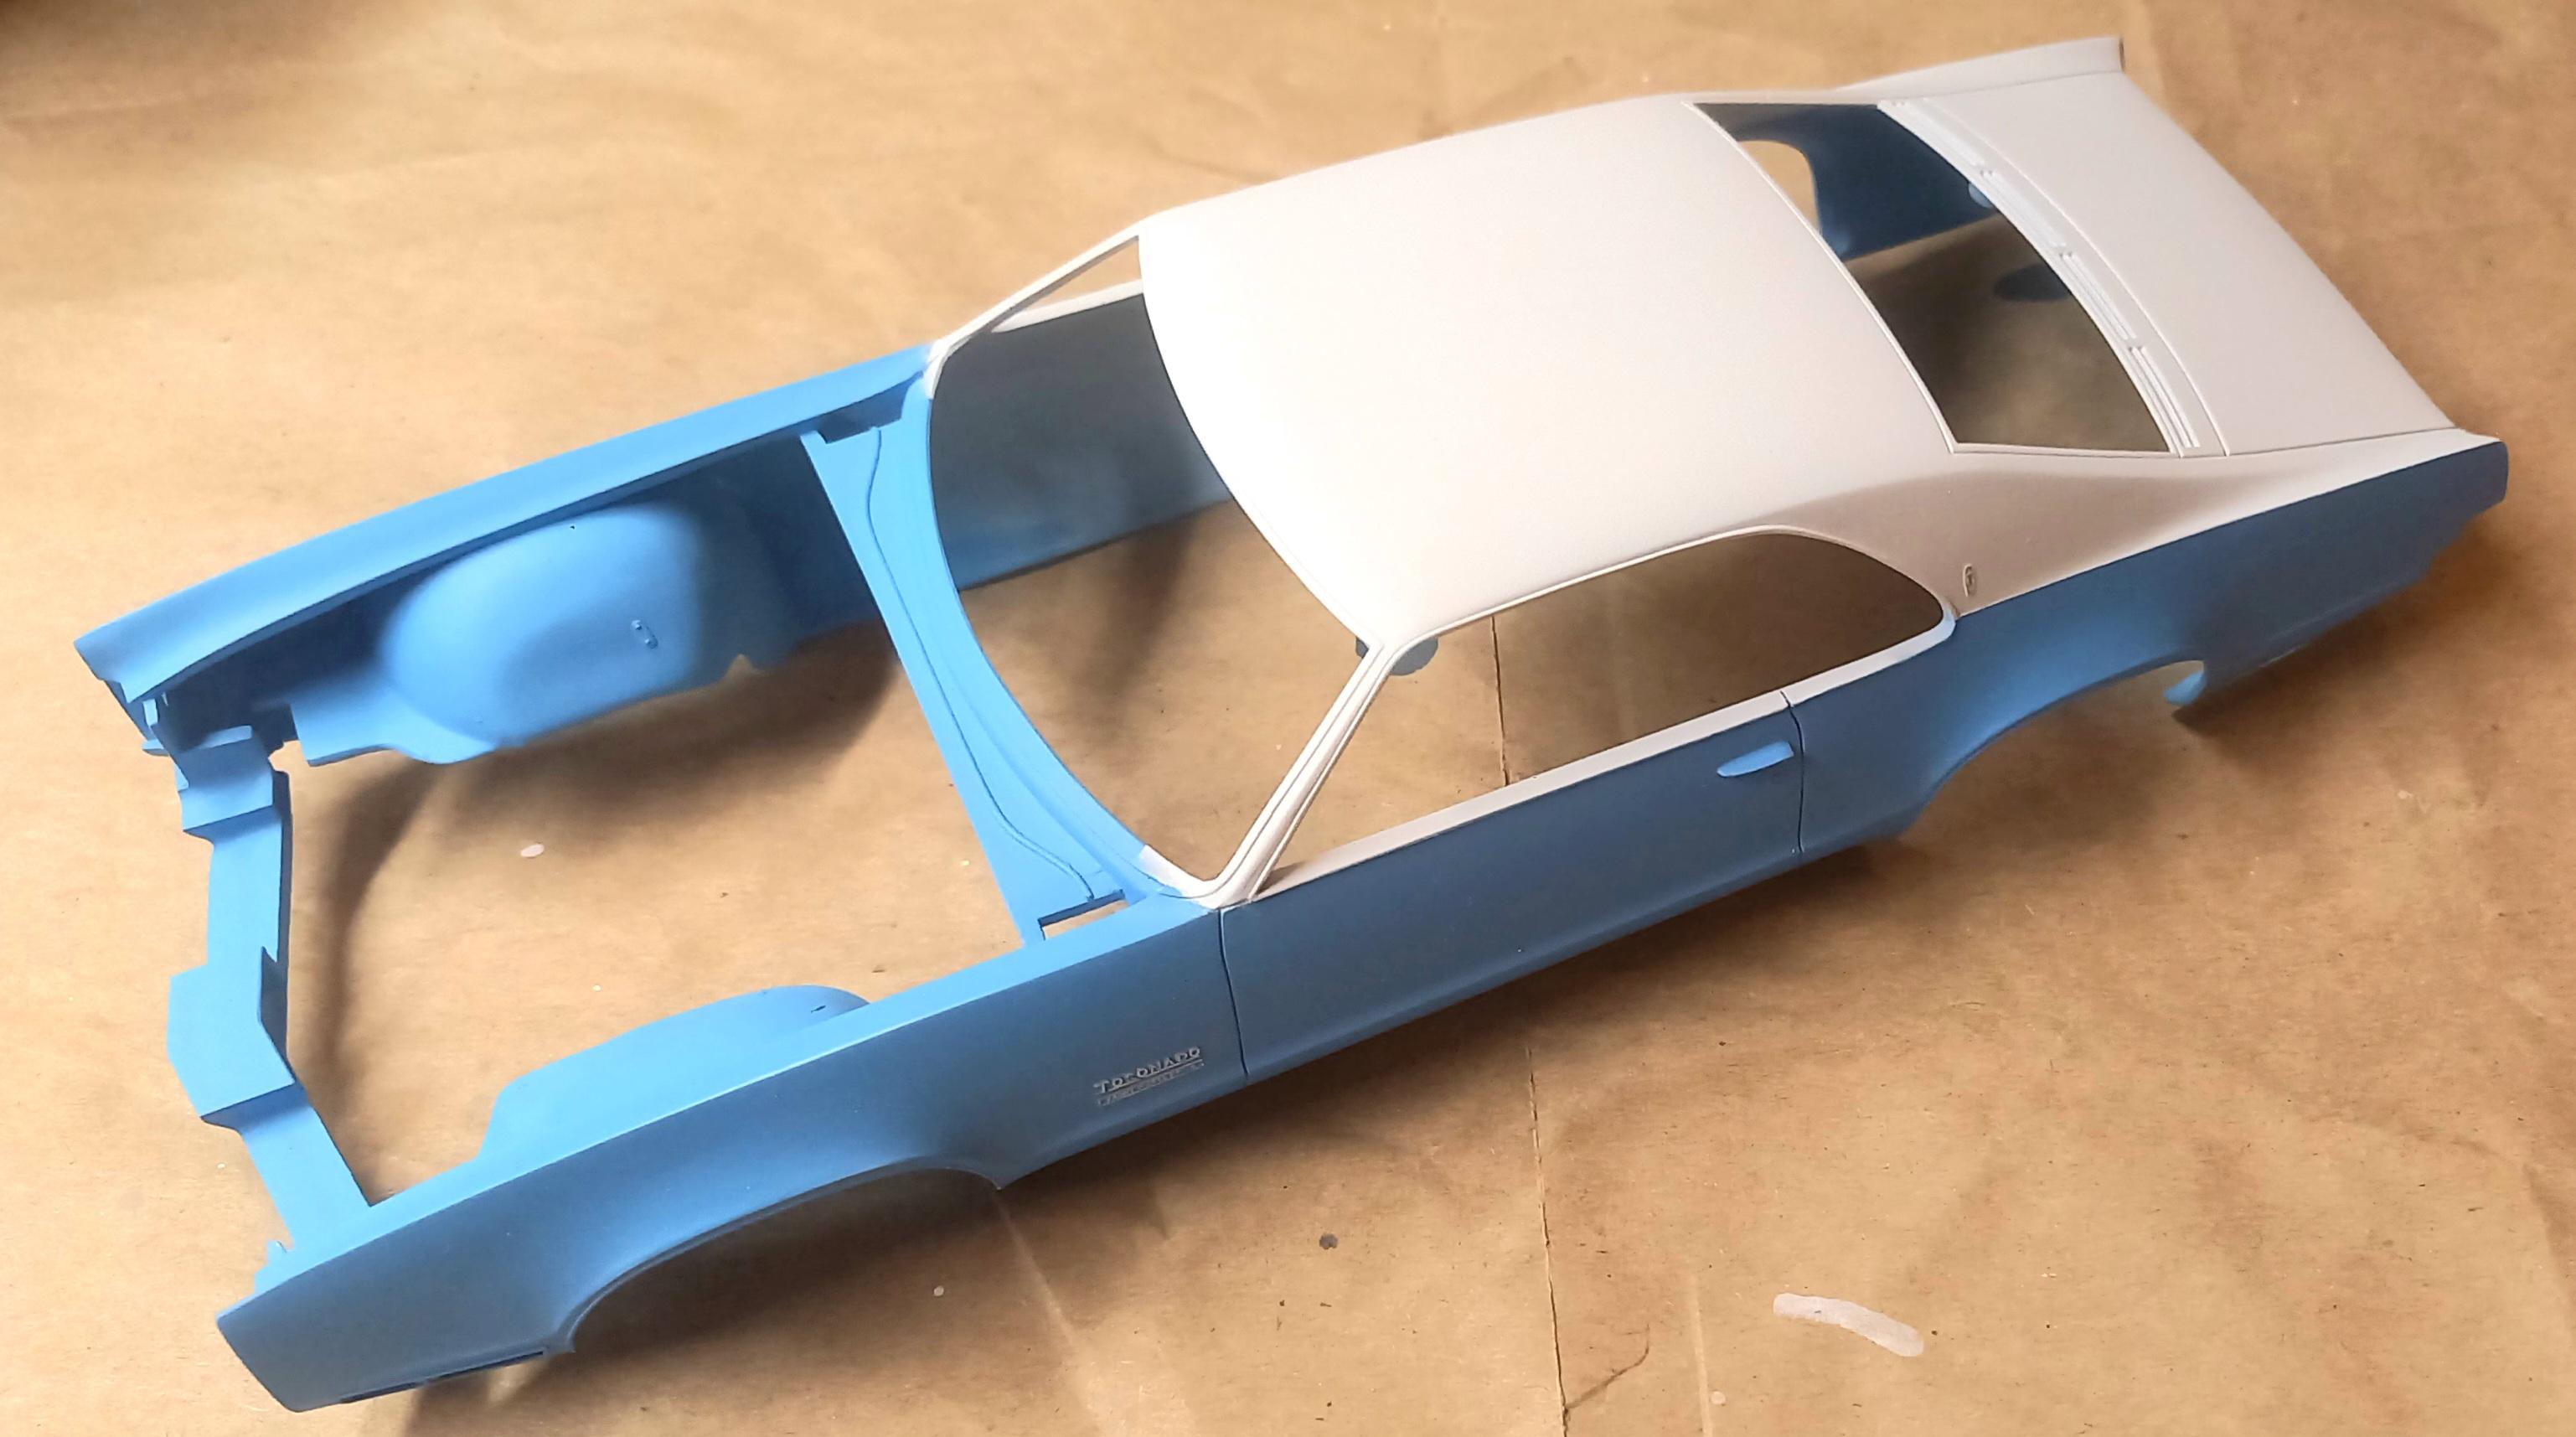
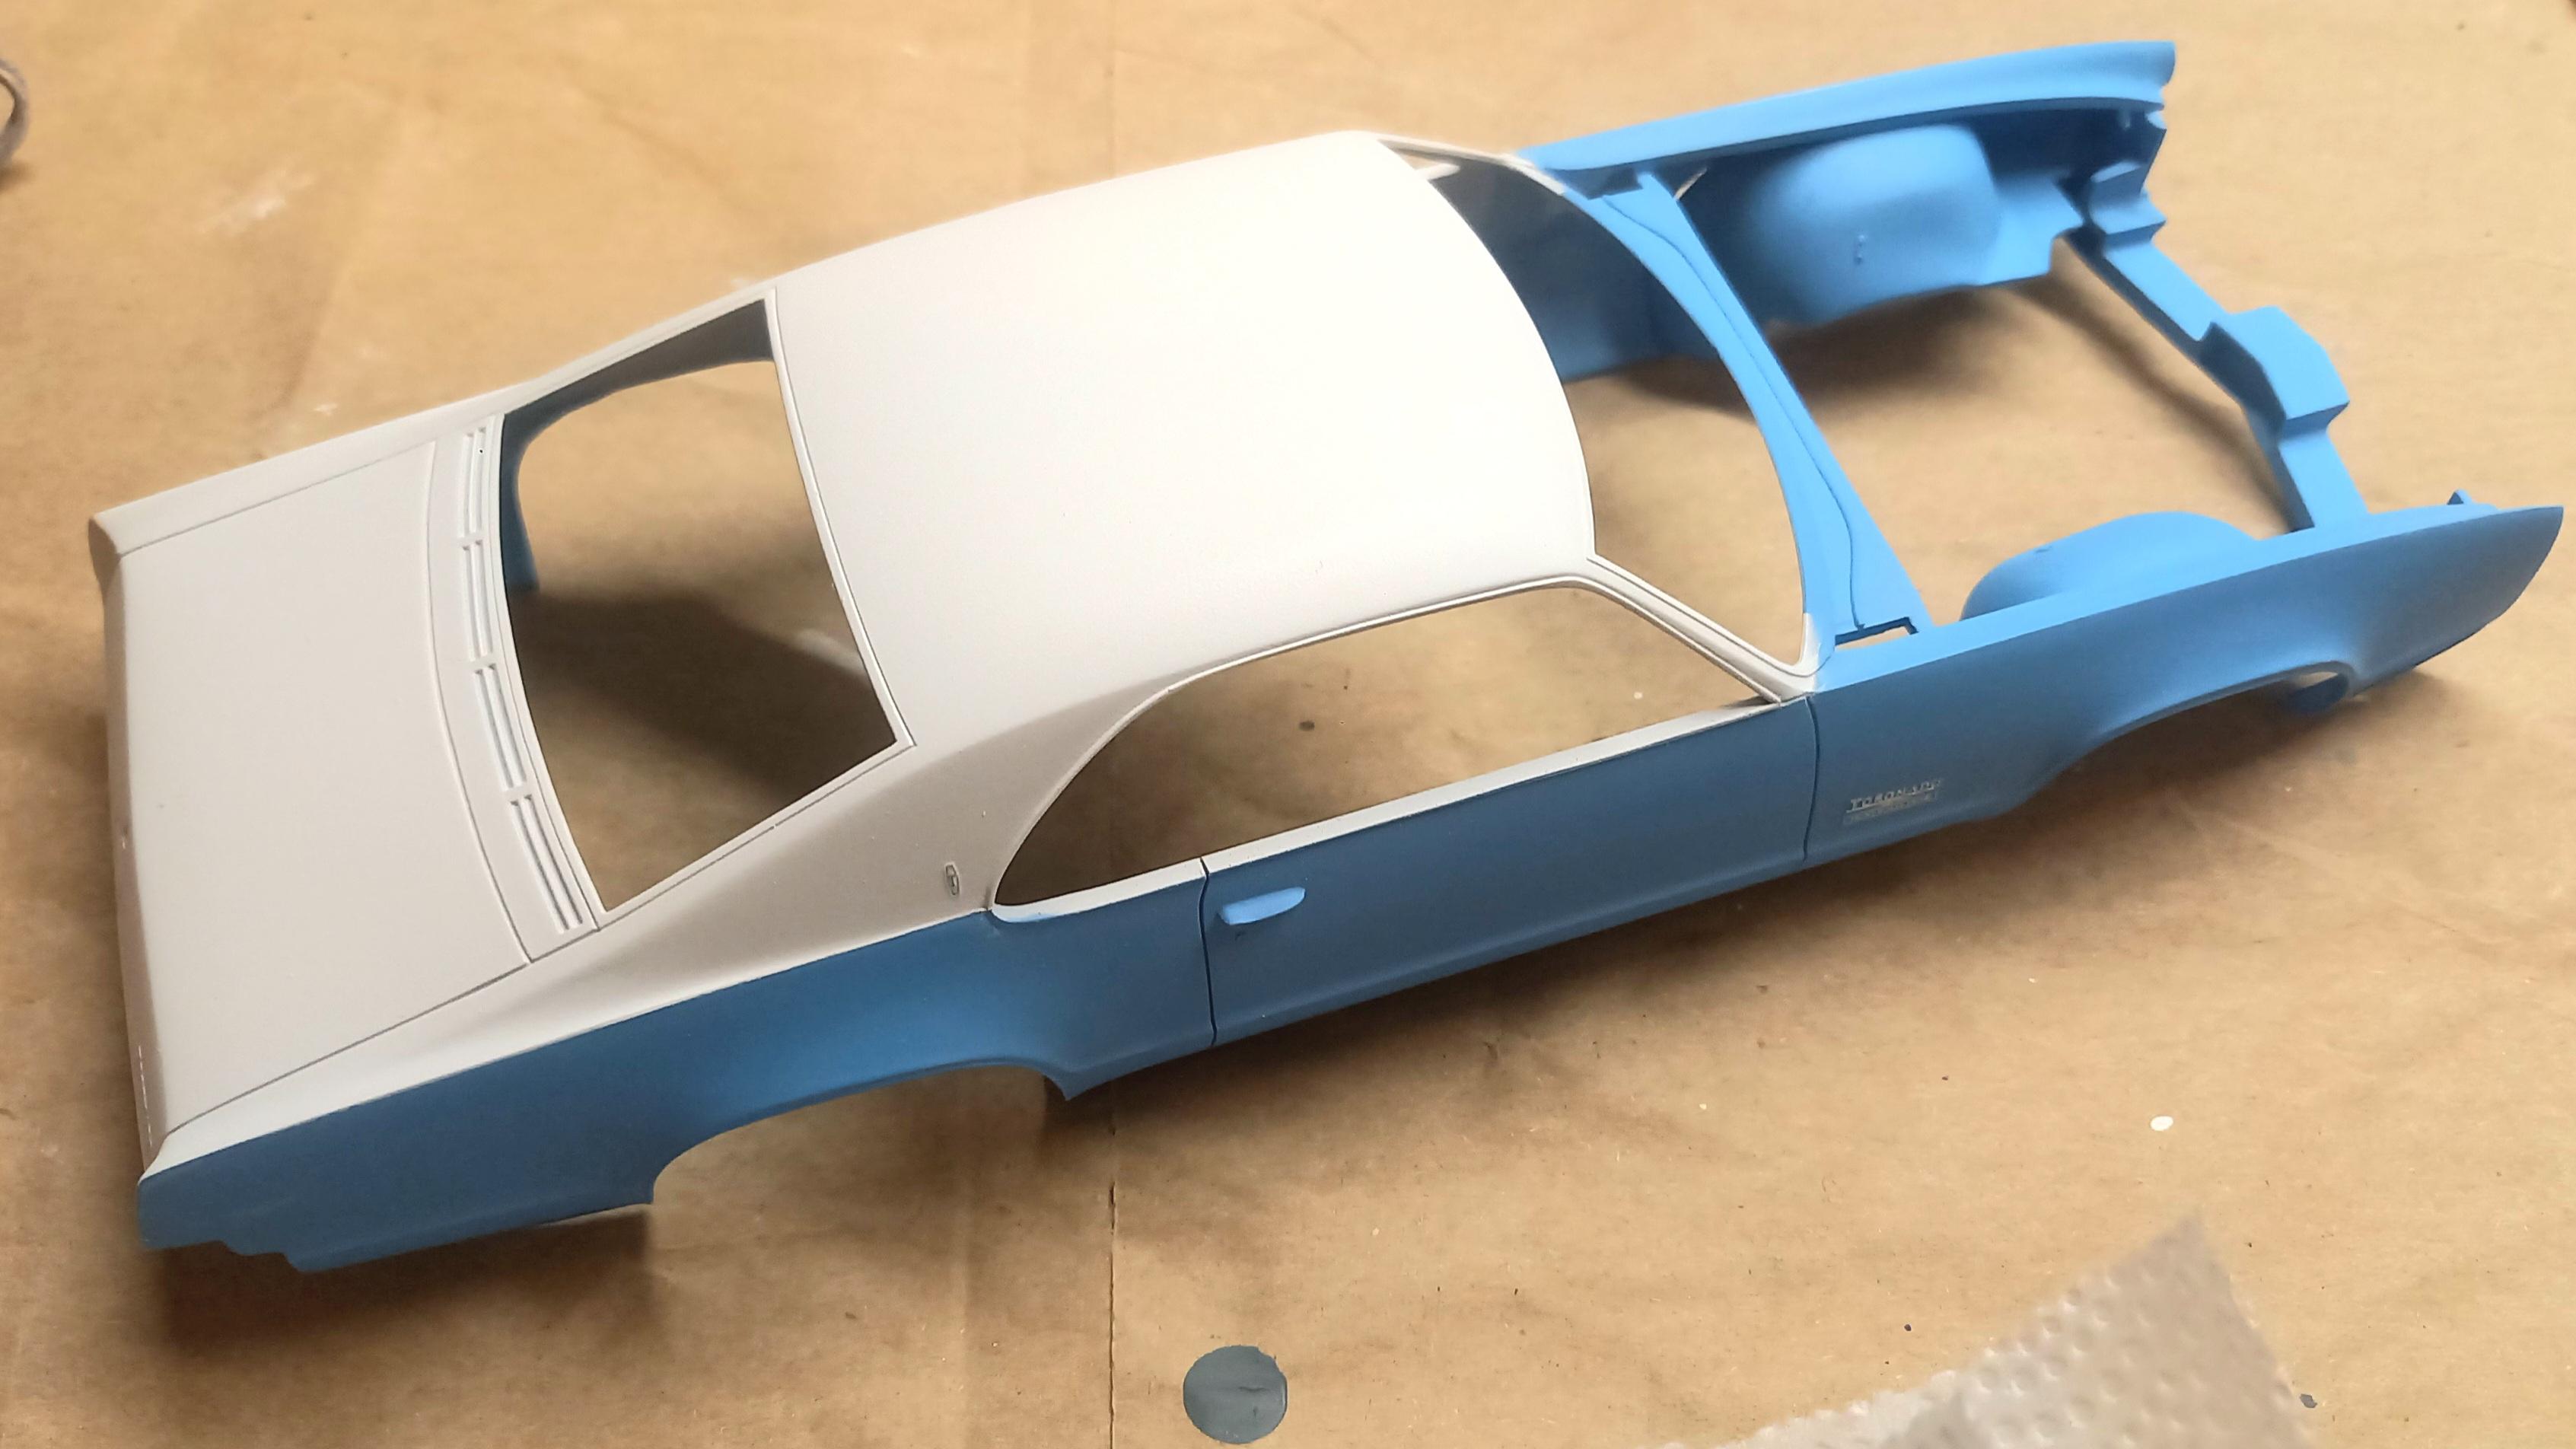
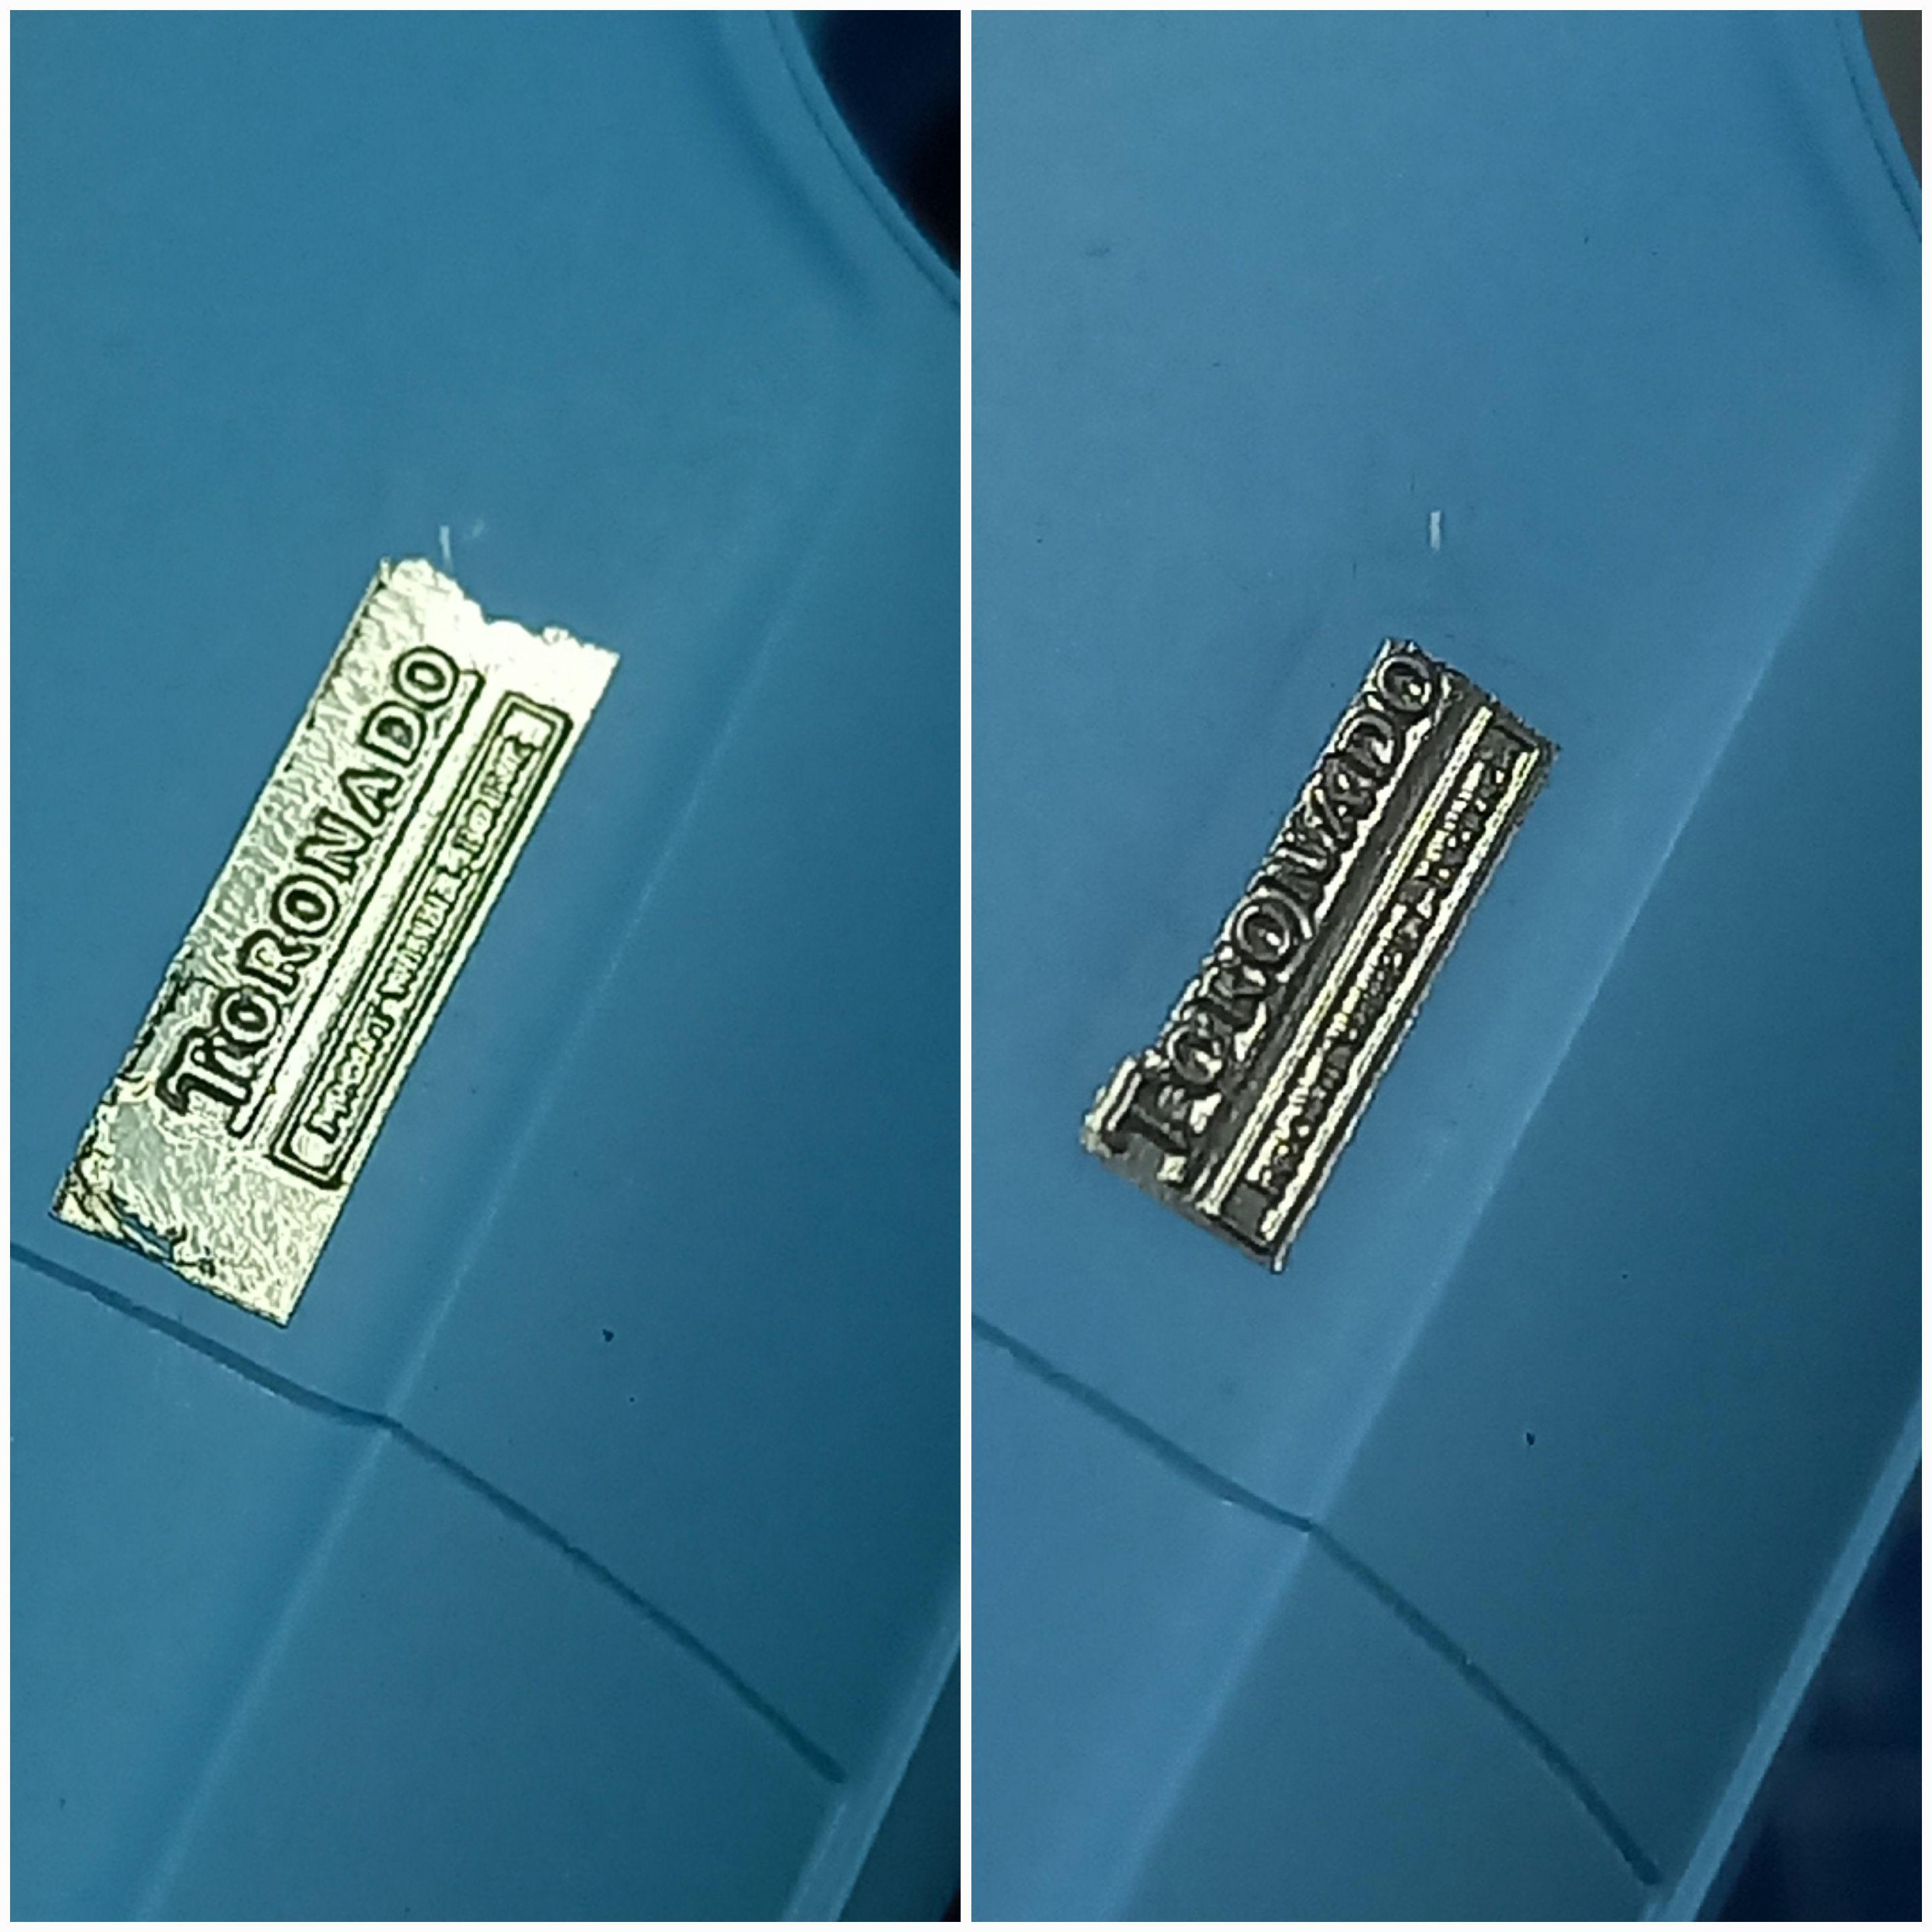
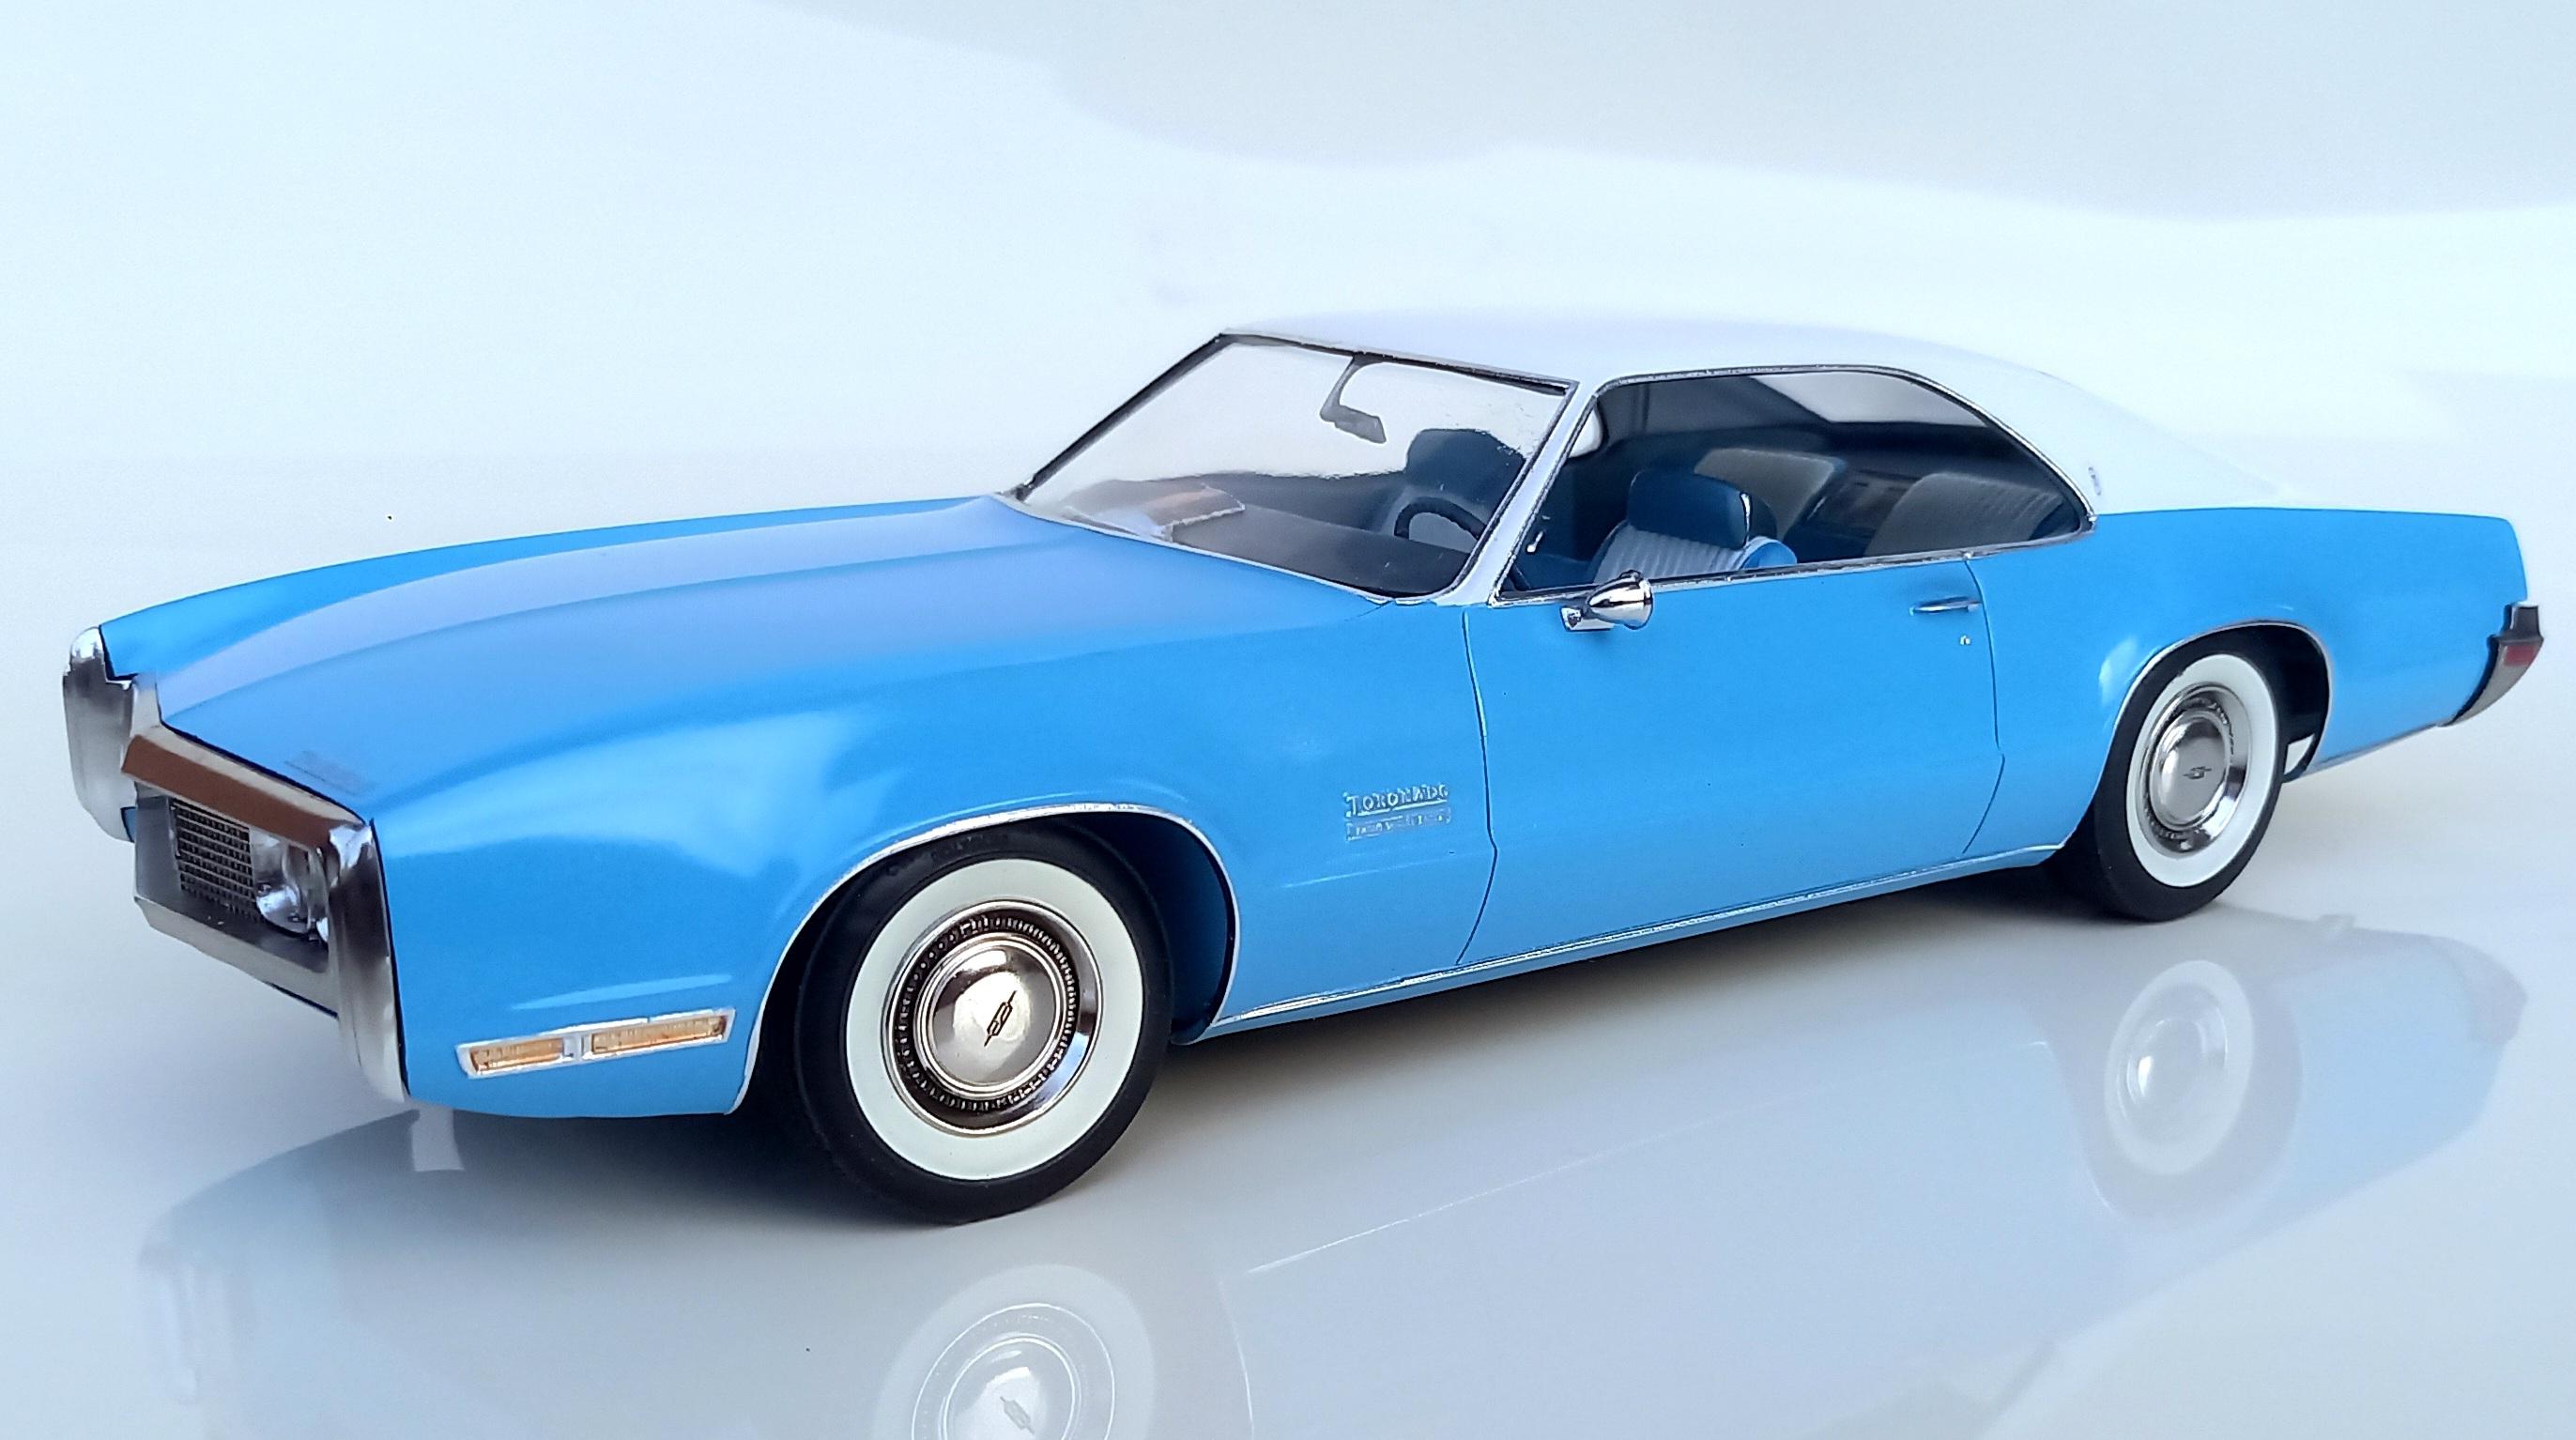
Thanks! Yes, same kit, molded in light blue. Most of it goes together nicely, although the pedals are a bit high up if attached to the dash, and the seats needed some shaving to fit in the interior tub. The 'Toronado front wheel drive' emblems on the front fenders are extremely finely cast, and are definitely worth preserving and foiling before any paint touches them.
-
Jo-Han '70 Oldsmobile Toronado
Csaba aka felhasznaaloo replied to Csaba aka felhasznaaloo's topic in Model Cars
Thank you! A blackwashed them, then glued over them 'lenses' that I punched out of thin soft clear acrylic sheet. They give them an illusion of some depth. (I did not want to go thru my usual 'drilling out, making buckets, lightbulbs and lenses' affair this time.) -
Very inspiring... as always, I must add.
-
Jo-Han '70 Oldsmobile Toronado
Csaba aka felhasznaaloo replied to Csaba aka felhasznaaloo's topic in Model Cars
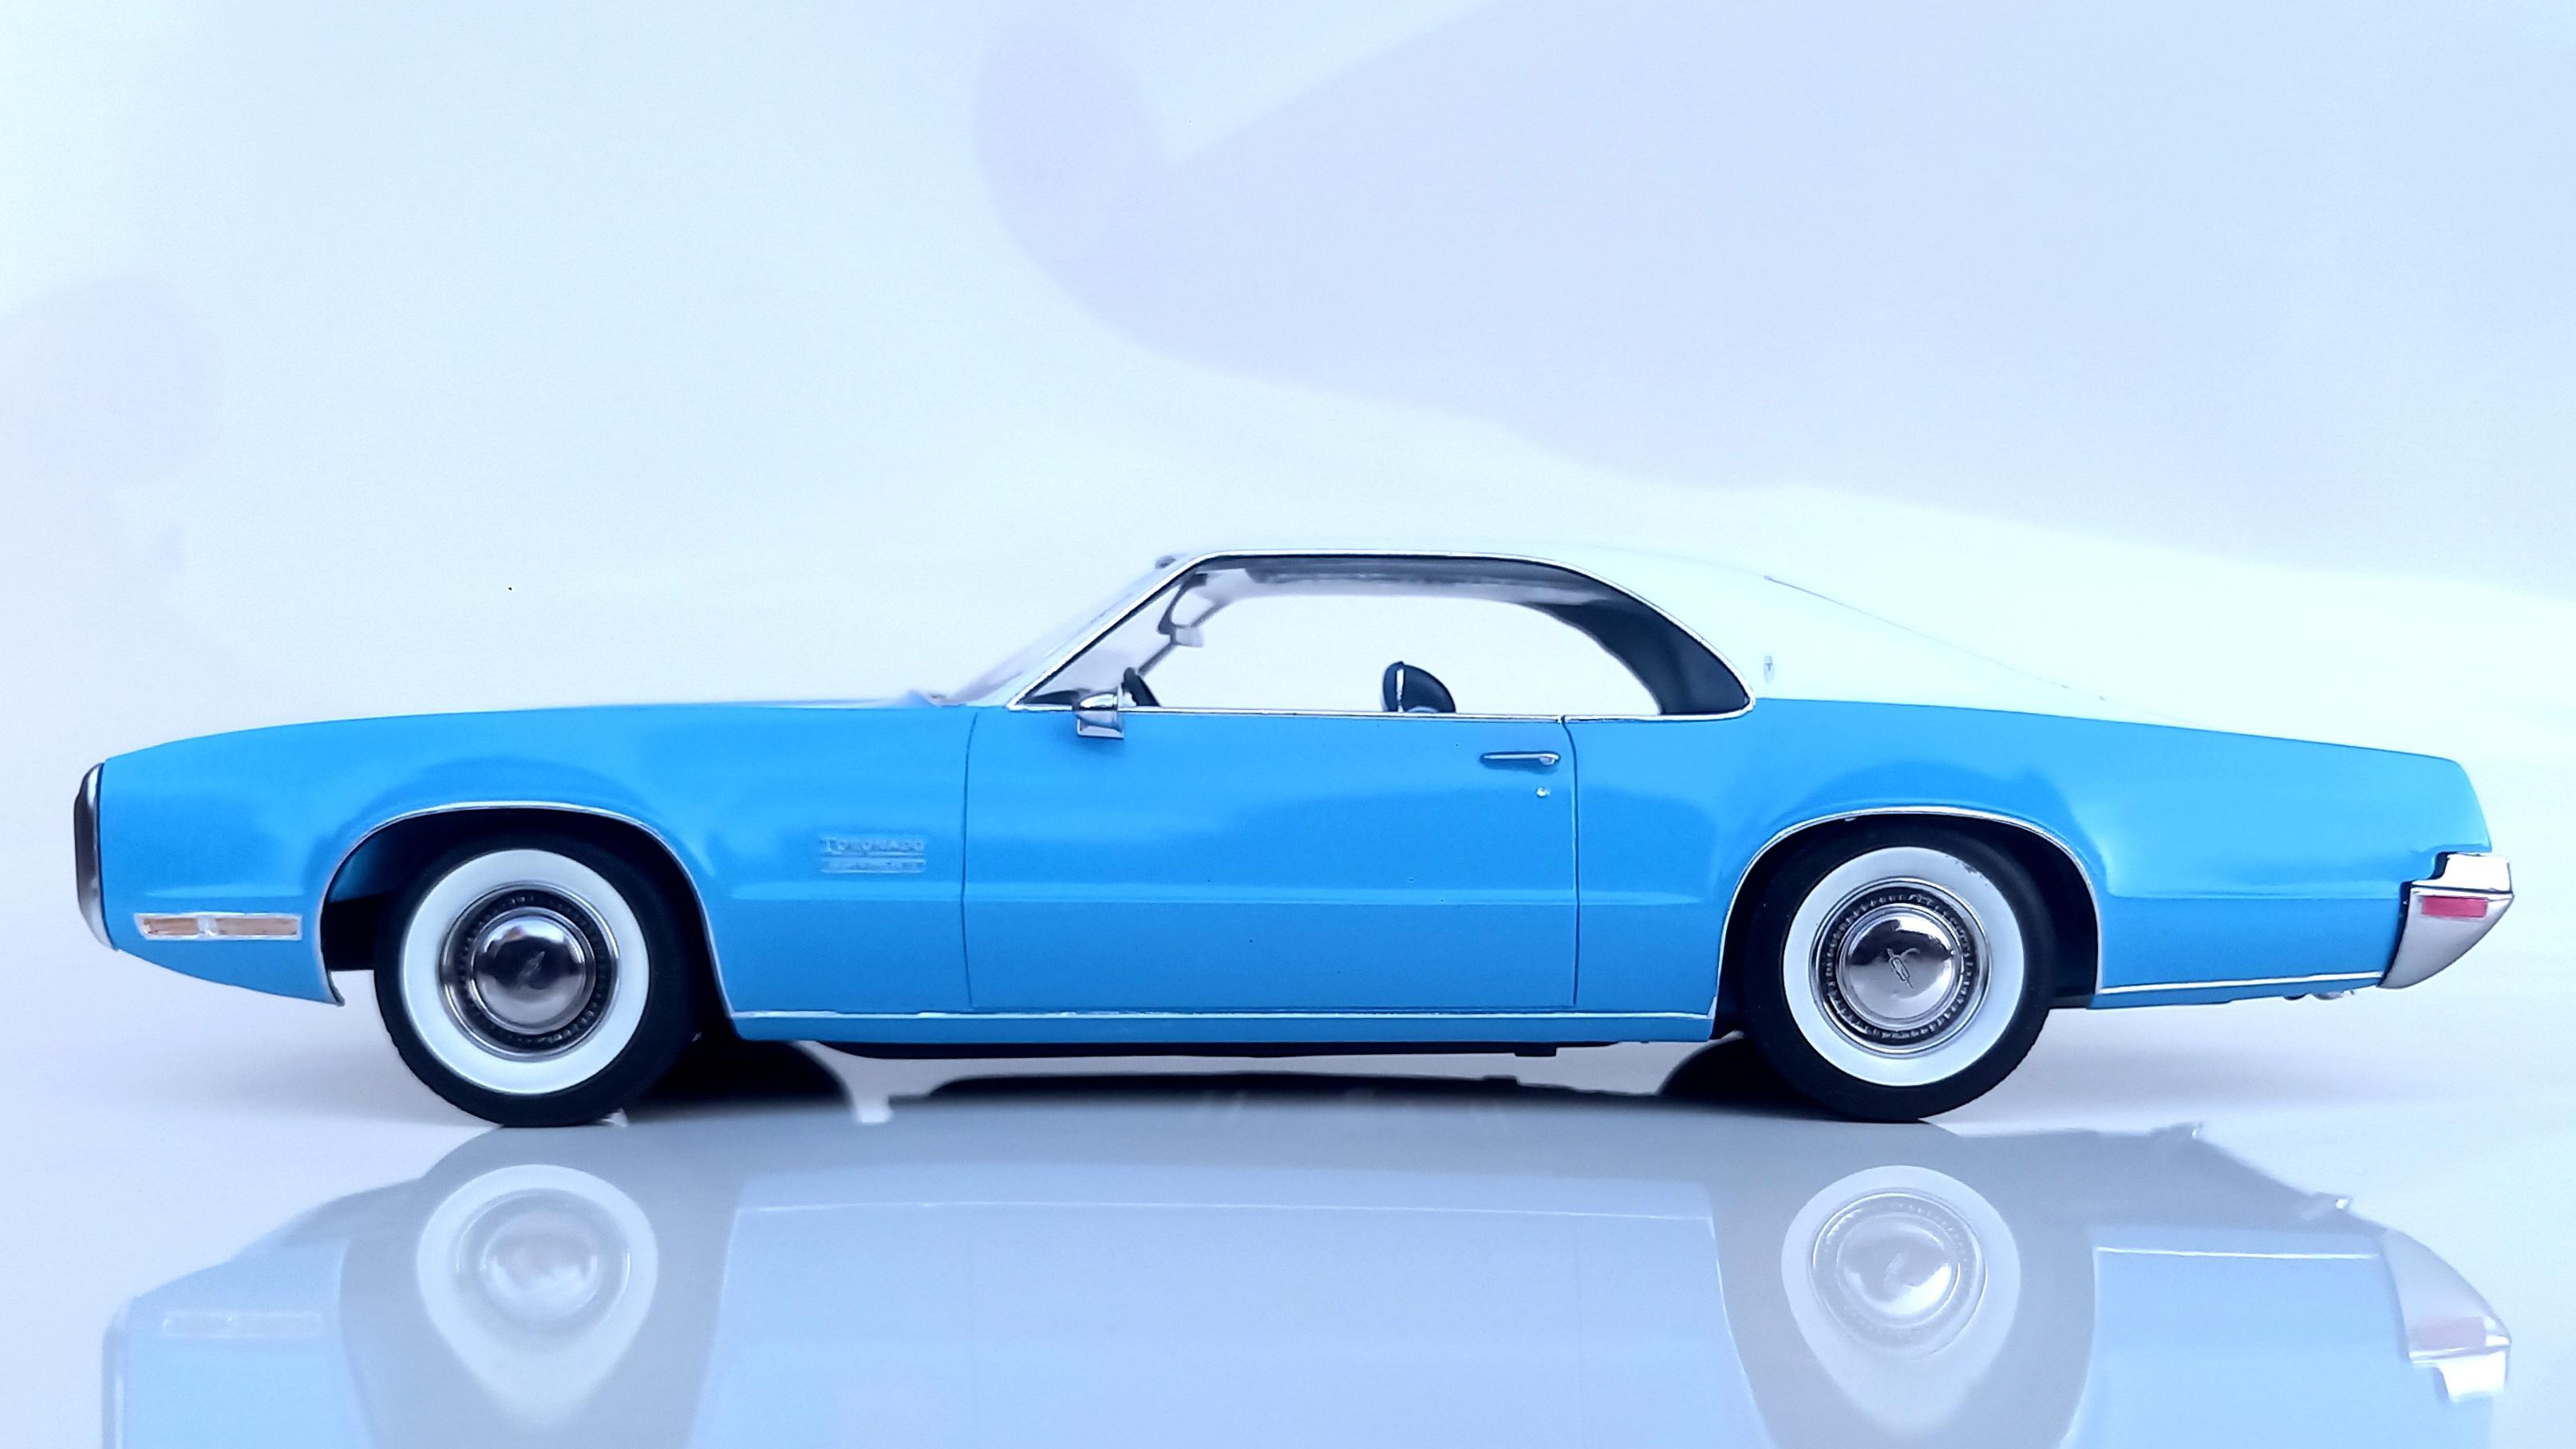
Thanks. After the original whitewalls from the kit cracked, while I was trying to 'turn' them with the drill, I ended up using these tires from the AMT '70 Impala Fire Chief kit. -
Jo-Han '70 Oldsmobile Toronado
Csaba aka felhasznaaloo replied to Csaba aka felhasznaaloo's topic in Model Cars
Thank you all for the really kind words. -
AMT '70 Chevy Impala Lowrider
Csaba aka felhasznaaloo replied to Csaba aka felhasznaaloo's topic in Model Cars
Thanks! Does not lock in place, it is just tight enough to hold the weight of the model. -
AMT '70 Chevy Impala Lowrider
Csaba aka felhasznaaloo replied to Csaba aka felhasznaaloo's topic in Model Cars
Thanks! Believe me, my other paintjobs don't even come close. All you need is, devote it some extra planning time, masking tape cutting time, masking time, cursing time never forgetting a light coat of clear after a new layer of masking... a very rewarding thing to do. -
AMT '70 Chevy Impala Lowrider
Csaba aka felhasznaaloo replied to Csaba aka felhasznaaloo's topic in Model Cars
Thanks! Not my idea though, saw it on the forum. -
Thank you all.
-
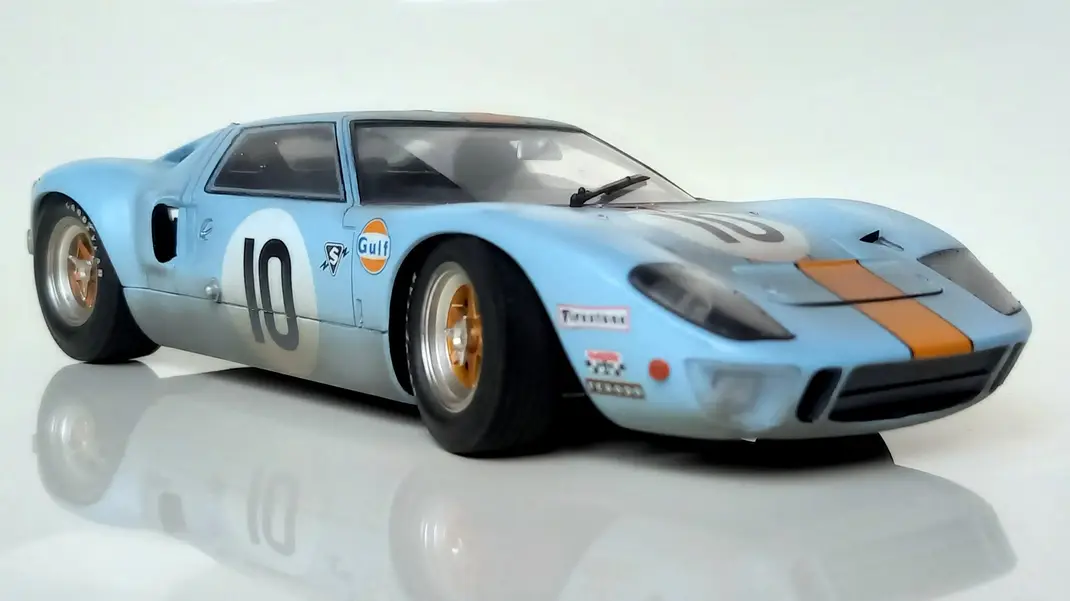
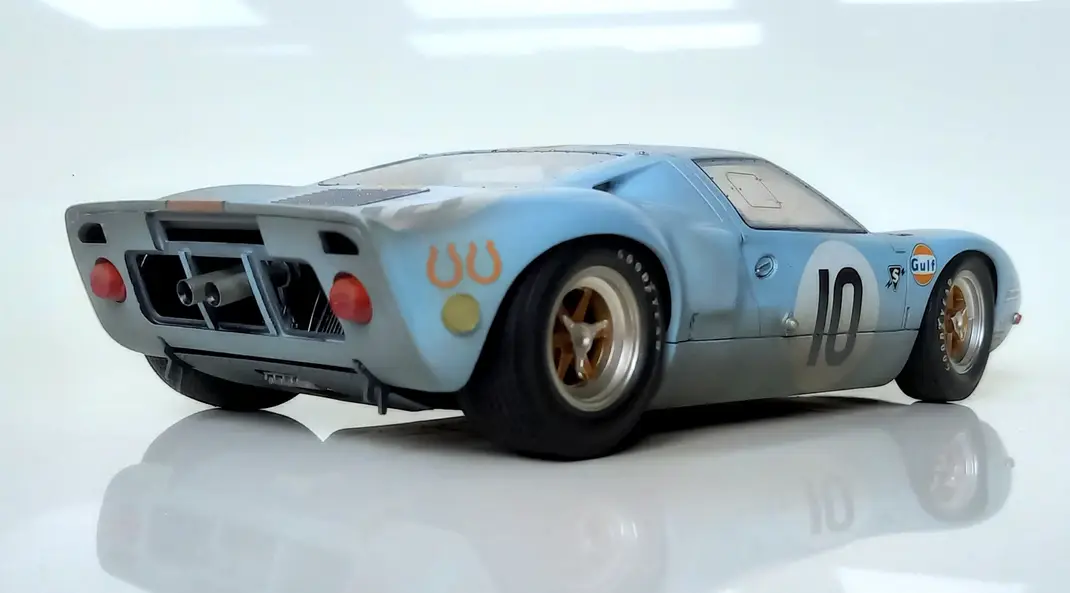
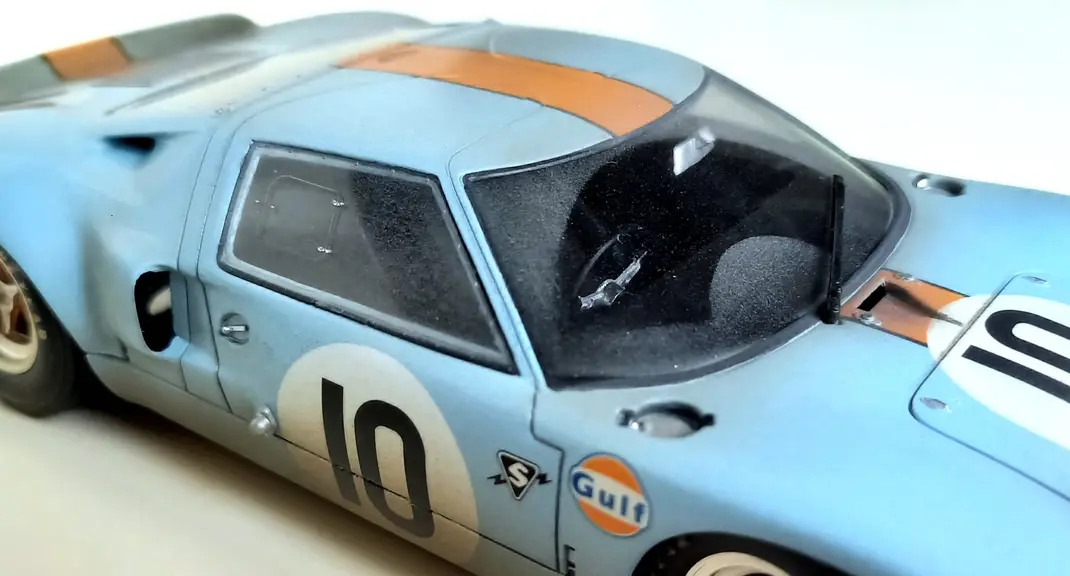
This one is built from the Fujimi kit, and I really didn't mind that the motor is not included, unlike in recent kits (made by Meng, if I remember correctly). In this version, only the transmission and some of the exhaust is replicated. This is an after-the-race look. And because in 1968, there was rainy weather before and during the race, the model is weathered accordingly.😉 Thanks for looking!
- 17 replies
-
- 11
-

-
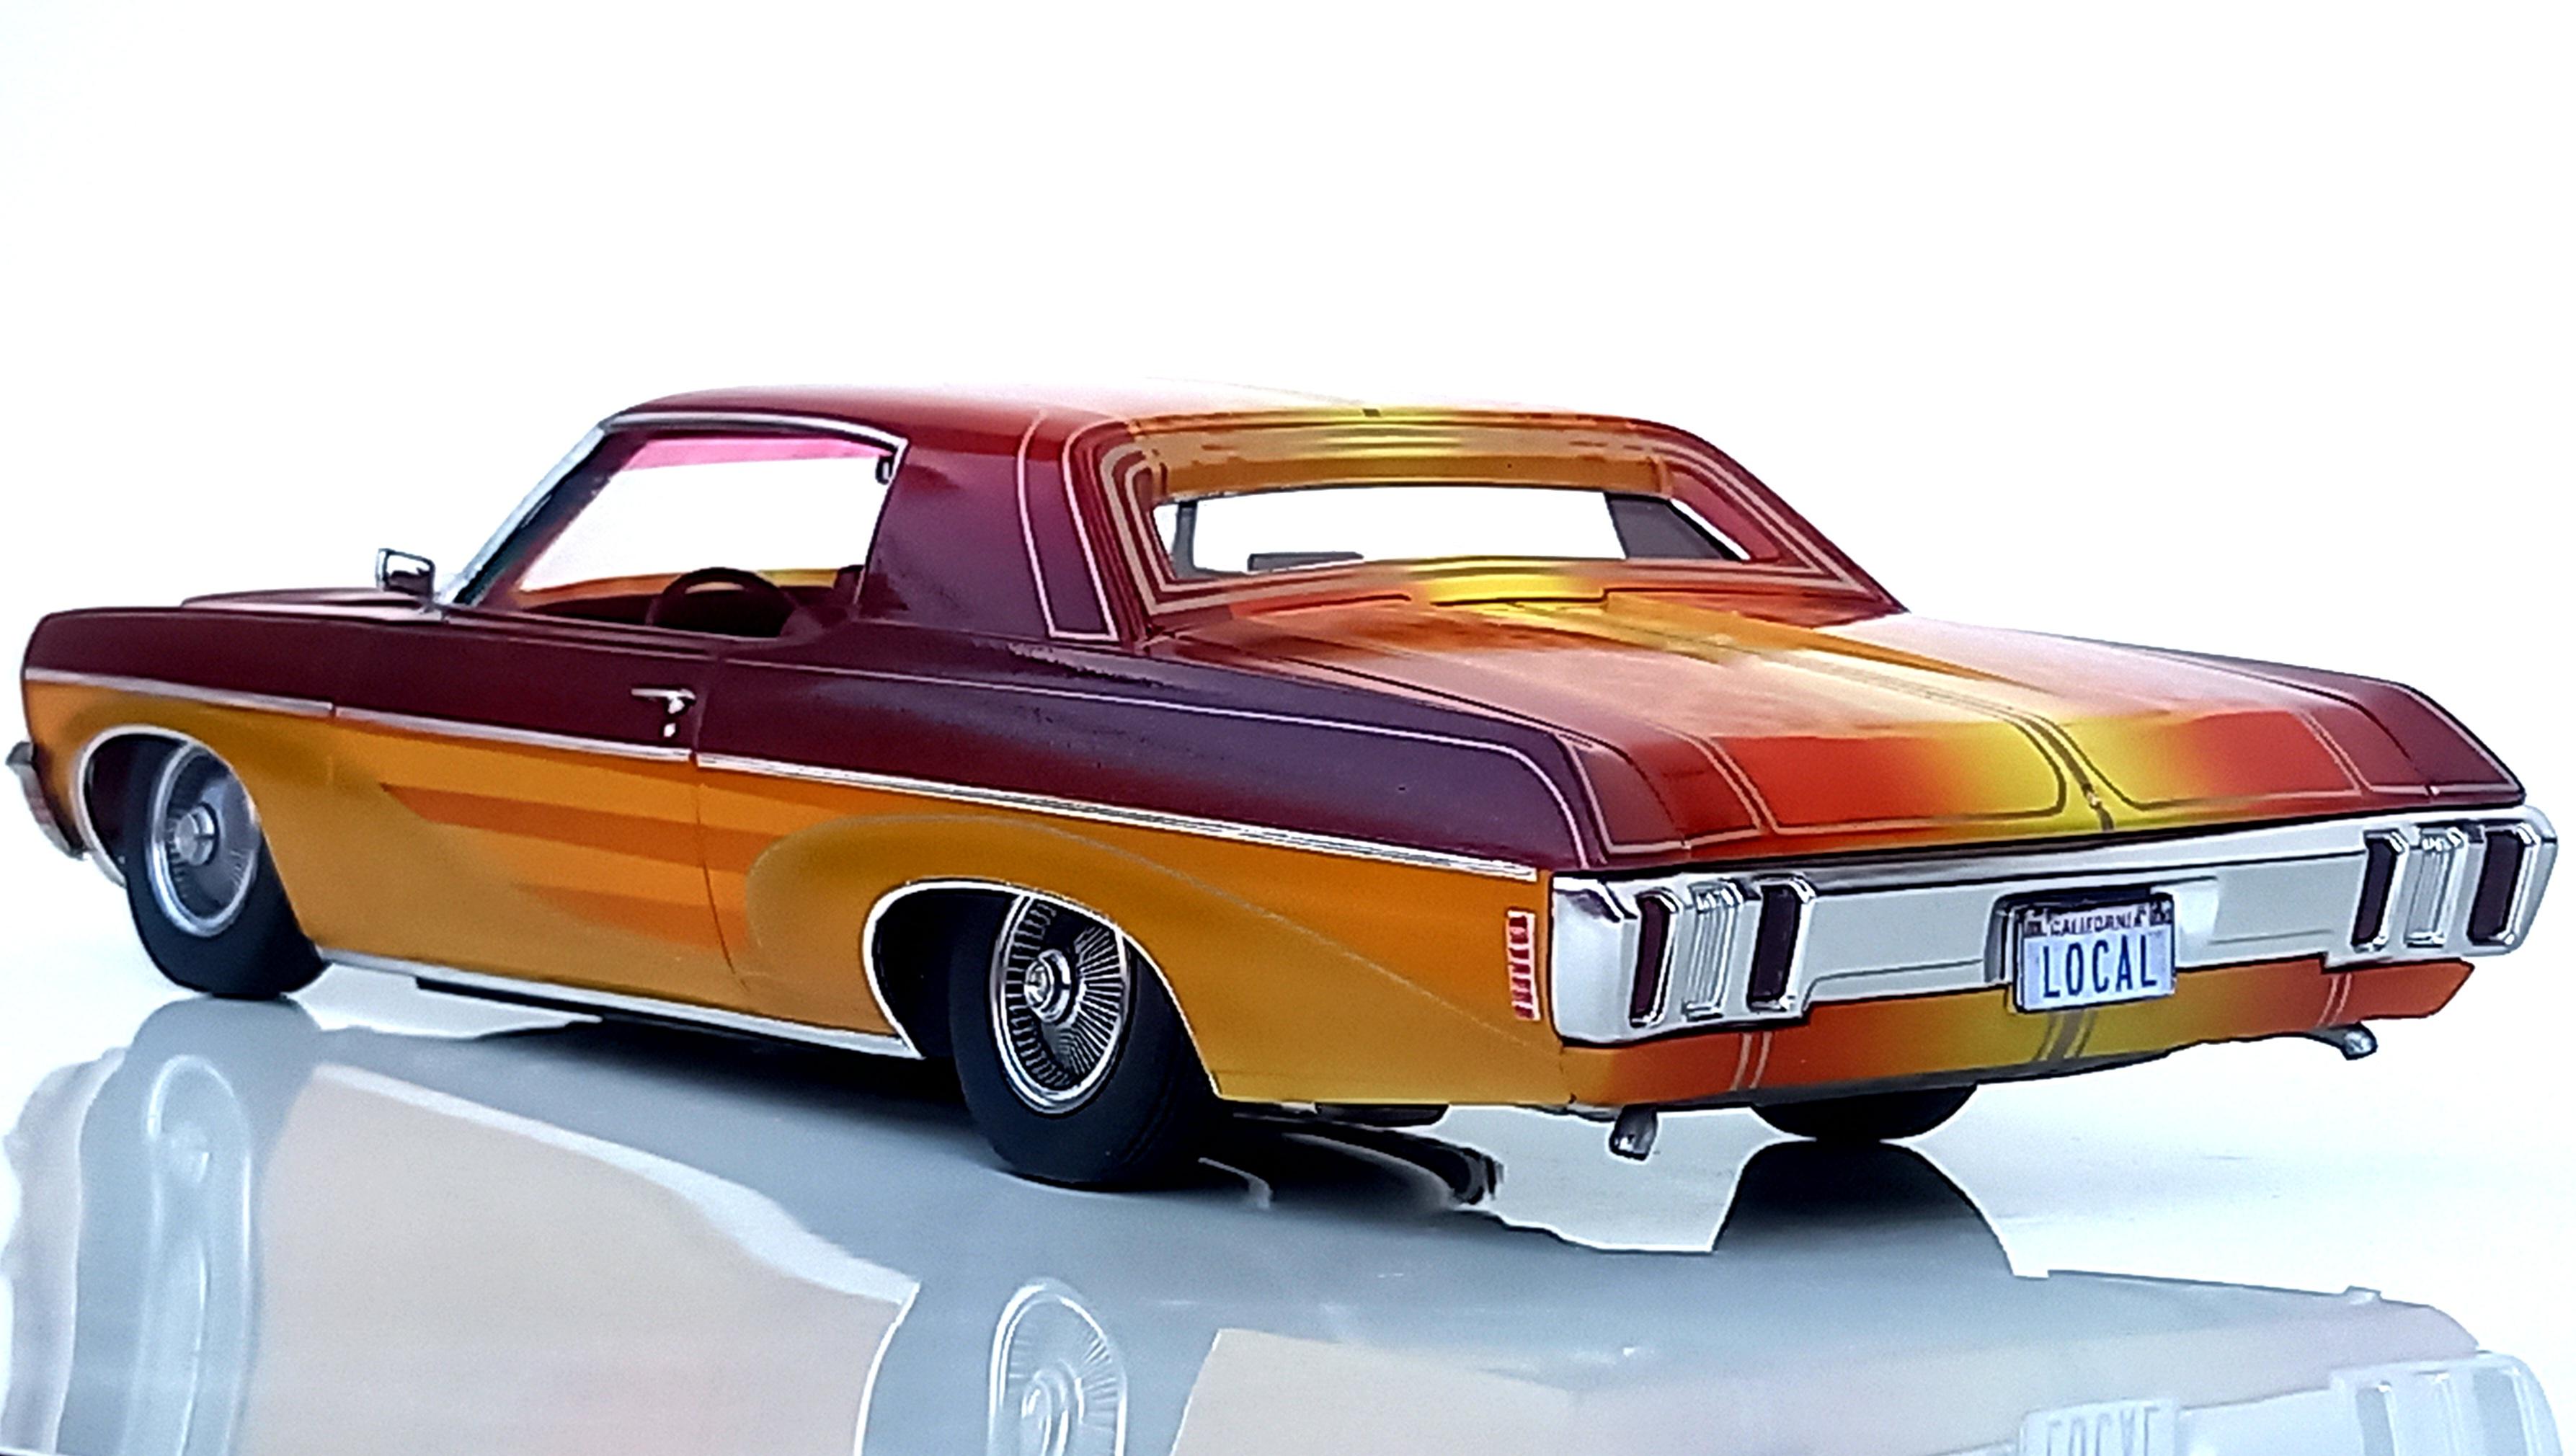
This is built from the Fire Chief kit, with extensive modifications to the chassis and suspension front and back, to make that lowrider stance happen. I also wanted the car to be able to 'stand tall', so the suspension can be adjusted to display the model with various ride heights and rakes. The paintwork was a lot of fun to do, lots of layers... my first time masking pinstripes, and also some cotton lace to imitate that flower-kind-of pattern. The last layer was supposed to be purple 'wire fence' motif over the maroon beltline, but it is just barely visible. Oh well... next time. Unbelievable but I only made one mistake during the unmasking process, which I was able to correct afterwards. Thanks for looking.
- 38 replies
-
- 11
-
-
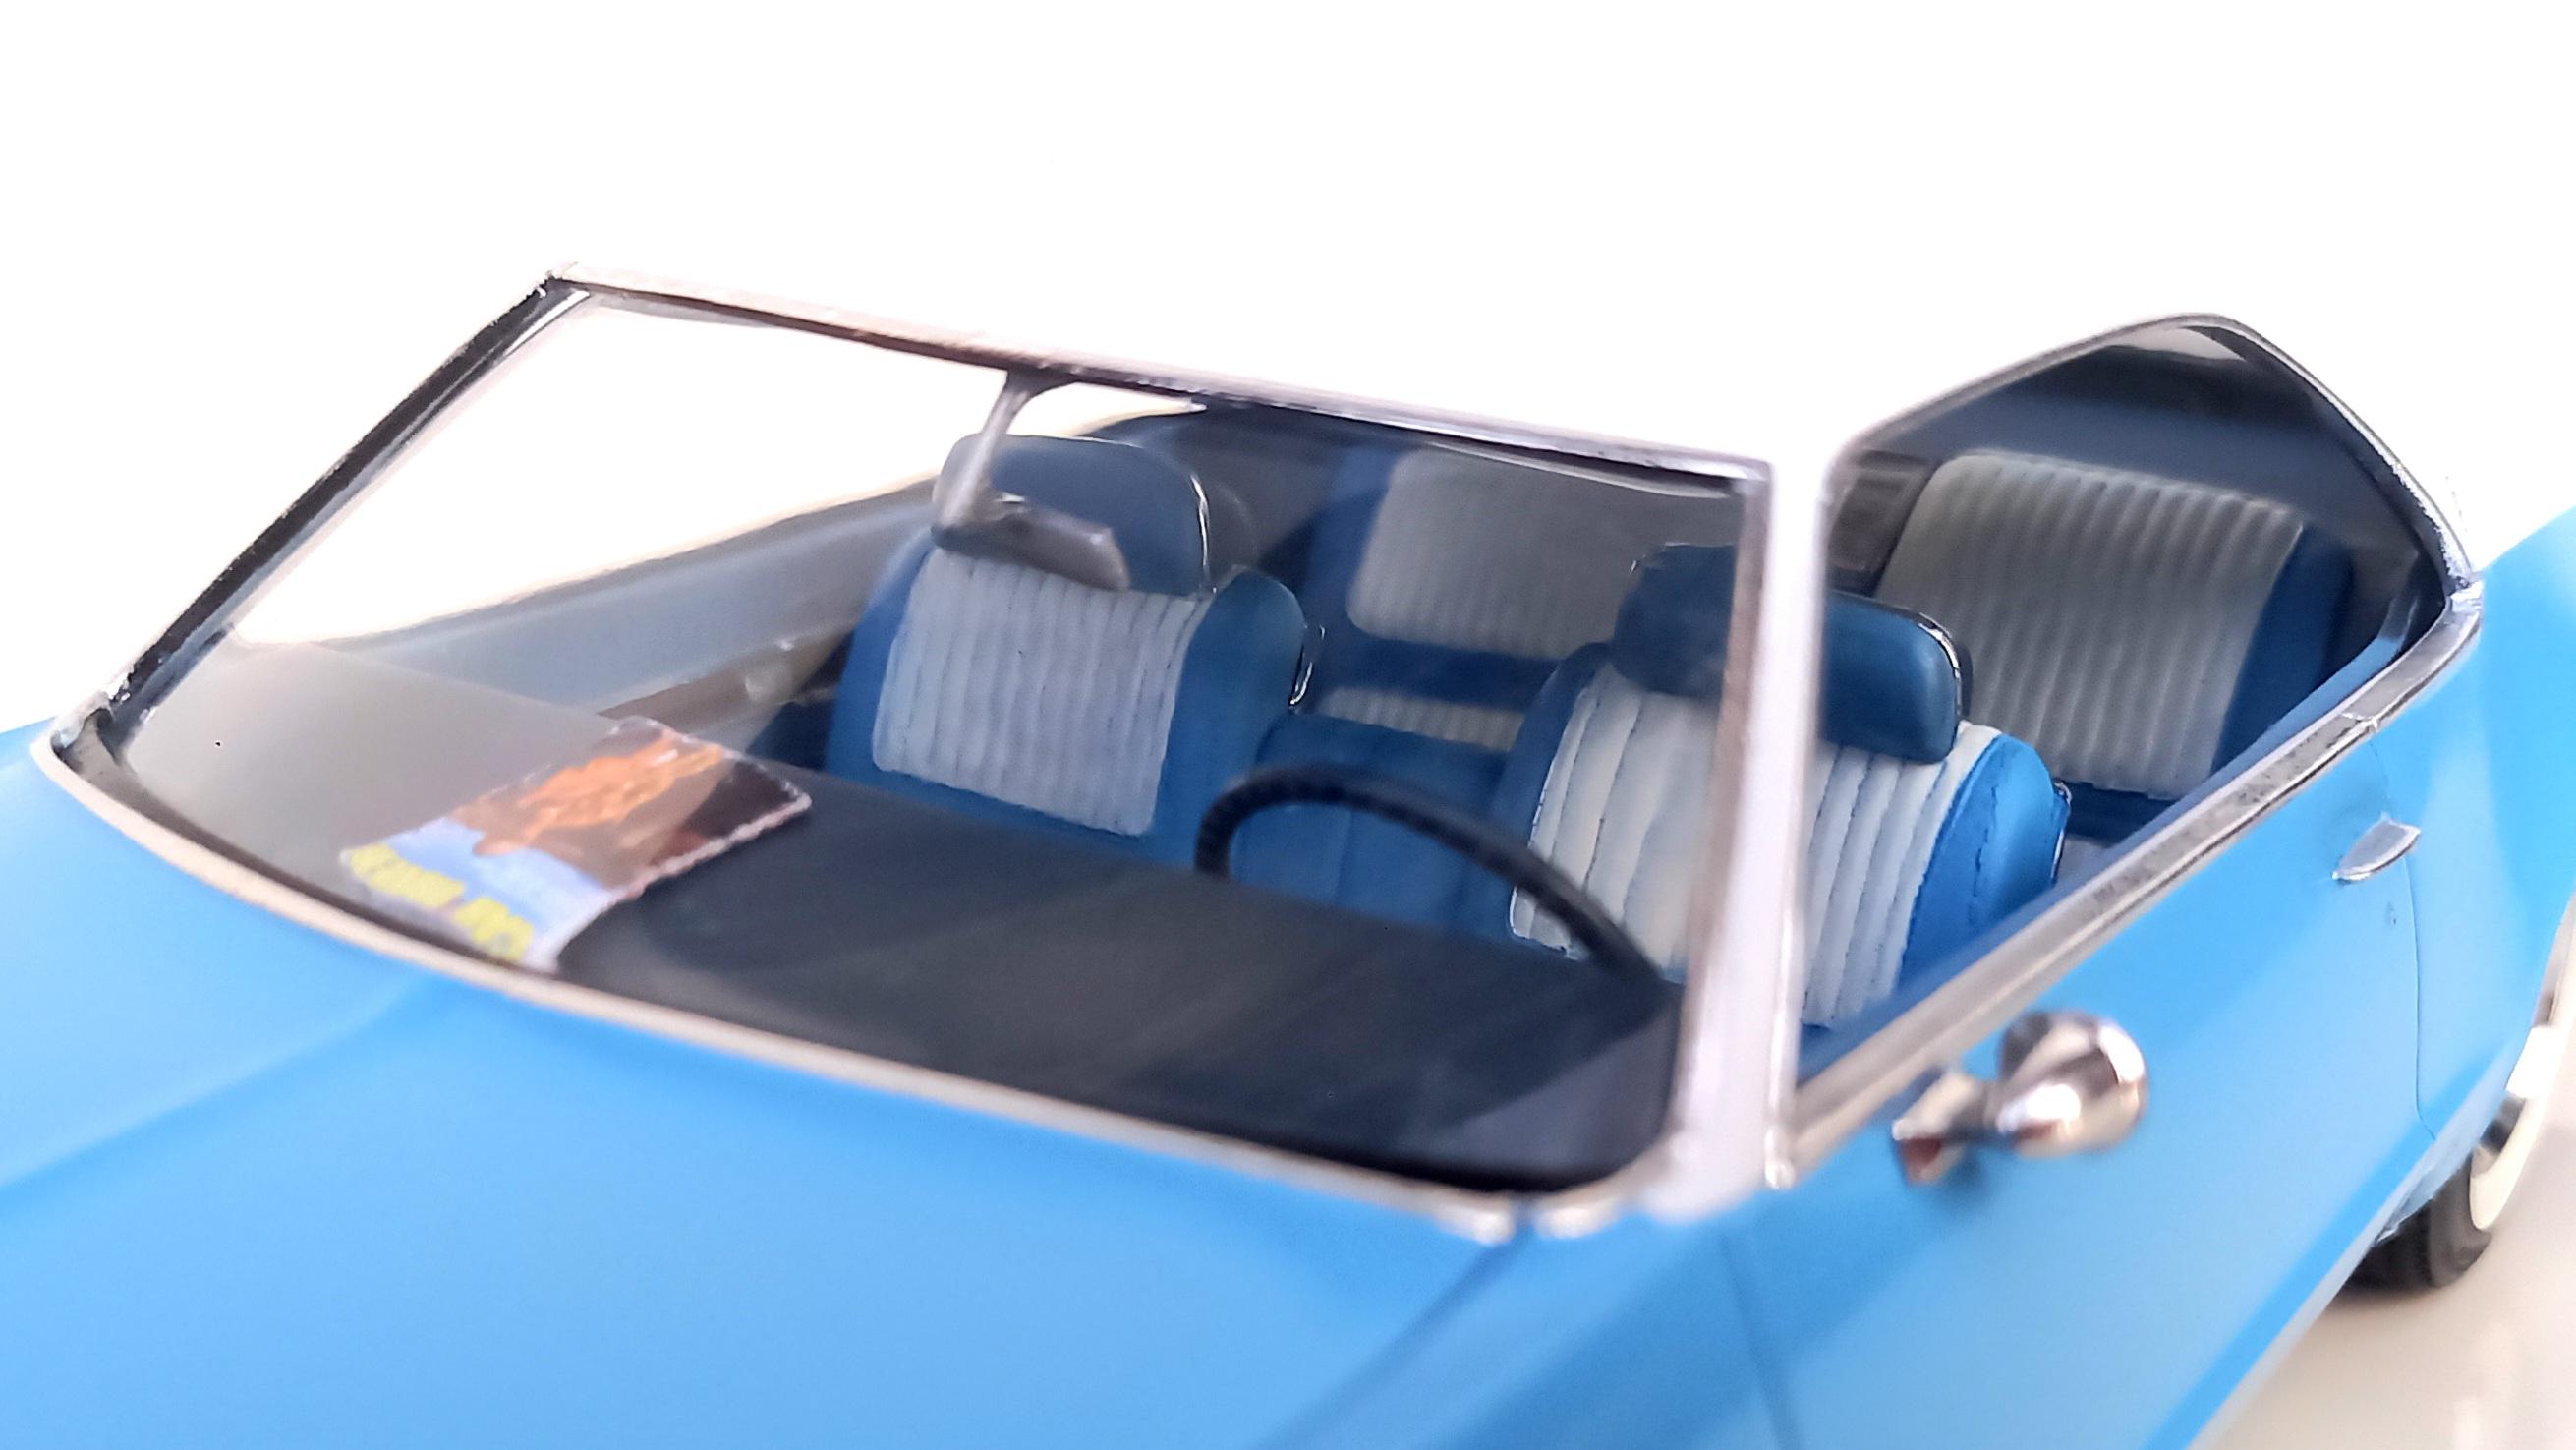
This one turned out to be a challenge, not because it is a bad kit, just me dropping parts and messing up paintjobs. I even accidentally scratched the top of the dash, and I did not have any left of that shade of paint I mixed for that. So I threw a copy of Car&Driver in... Thanks for looking.
- 39 replies
-
- 13
-
-
Very nice.
-
DeLorean DMC-12
Csaba aka felhasznaaloo replied to Csaba aka felhasznaaloo's topic in WIP: Model Cars
Thank you! -
DeLorean DMC-12
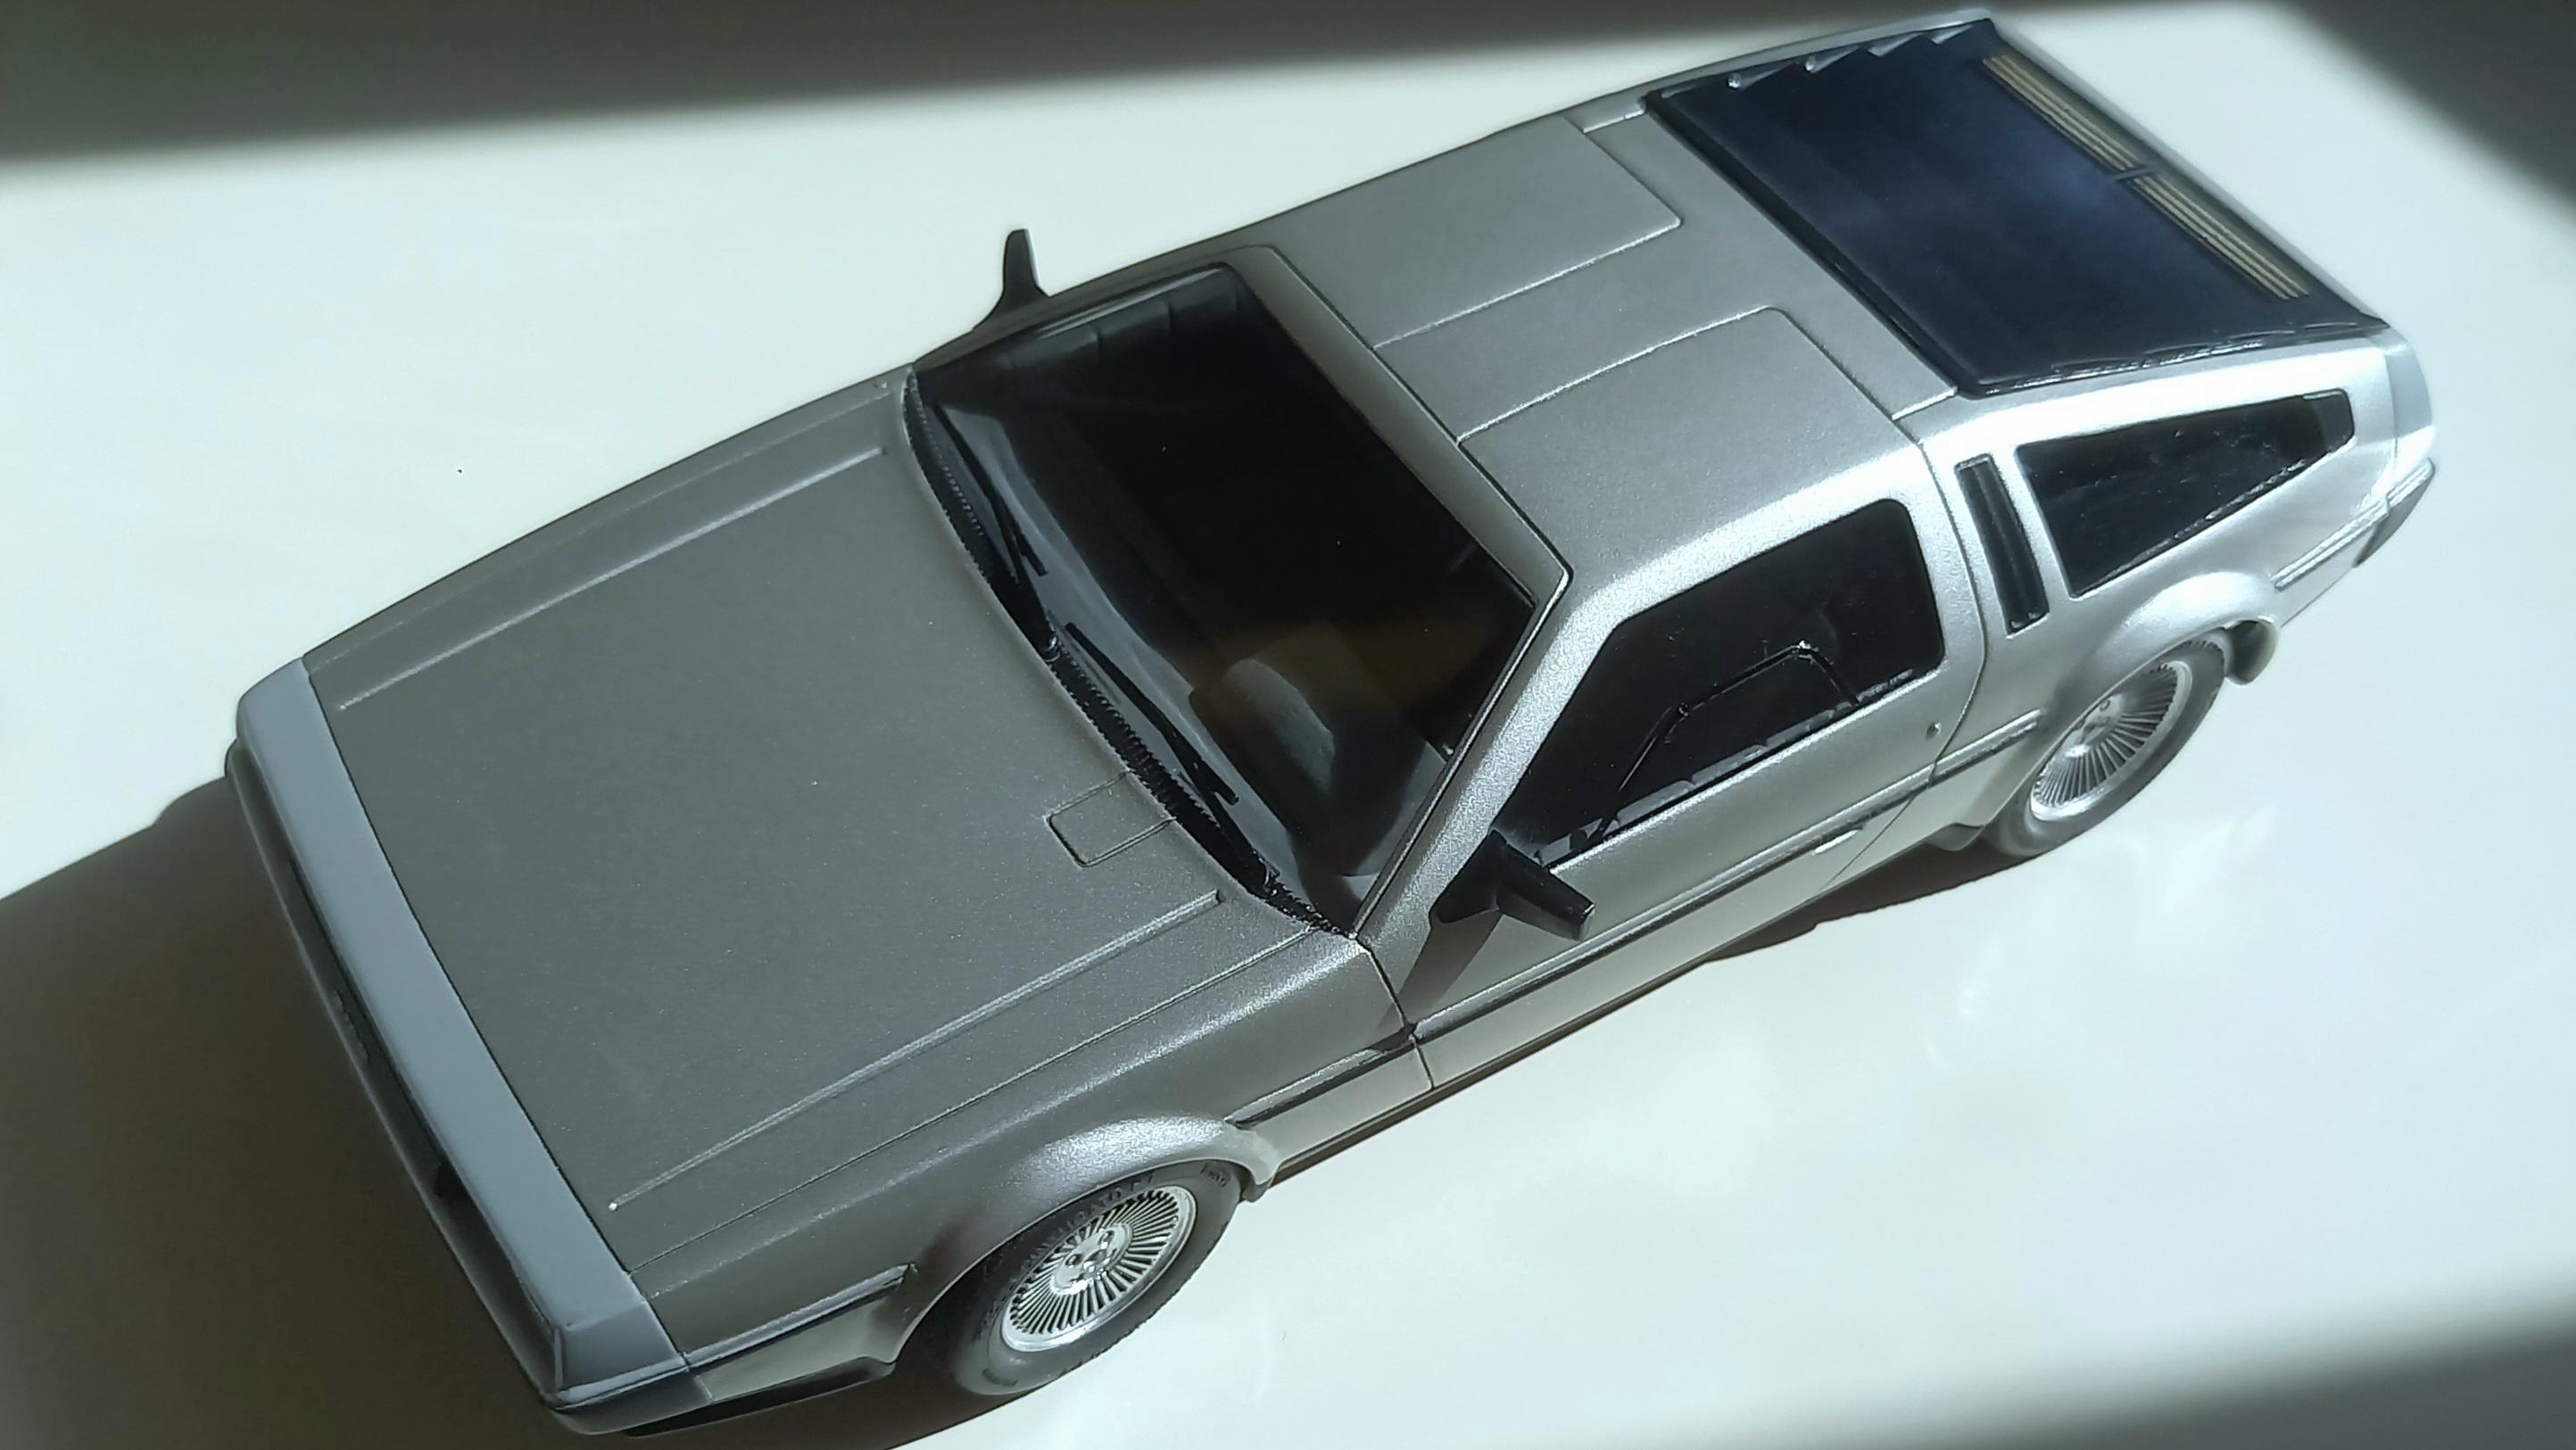
Csaba aka felhasznaaloo replied to Csaba aka felhasznaaloo's topic in WIP: Model Cars
Finished this one. Added exhaust pipes coming out of muffler, made an "axis hinge" for the louvers from AWG30 wrapping wire. About 0.2 inch from the ends of the piece of wire, I carefully cut the insulation but left the 2 insulation pieces on, so they can turn on the wire core. Glued the long center section of the wire to the body, and the 2 "loose" insulation sections to the louver panel. This way I can lift it to see the engine cover, which is also a photo printed on thick photo paper (just like the louver panel). Was a nice experiment, but due to paint not coming out very good, this will end up in the back row of the display cabinet.😉 Just noticed I forgot to paint the front indicator lights. Thanks for looking.
-
Jo-Han '70 Oldsmobile Toronado
Csaba aka felhasznaaloo replied to Csaba aka felhasznaaloo's topic in WIP: Model Cars
Painted the top today. Might not repaint the blue part, although it did not turn out very good. Anyway, this will not be entered in any model contest, so might just go with it.😉 This is Vallejo Model Air flat paint, and plan is to shoot Zero Paints clear over it.
-
Bobby Allison's Miller Buick
Csaba aka felhasznaaloo replied to Csaba aka felhasznaaloo's topic in NASCAR
Nothing that I remember. Good kit. -
AMT 1970 Impala, Using '67 Supernatural Chassis
Csaba aka felhasznaaloo replied to doorsovdoon's topic in WIP: Model Cars
Very nice! Reminds me when I was building a '70 Challenger T/A and 3 years (!) into the WIP I realized there are no wipers in the kit.☺️ Making and adding those and then fighting the hood not closing all the way was the most memorable part of the build. -
DeLorean DMC-12
Csaba aka felhasznaaloo replied to Csaba aka felhasznaaloo's topic in WIP: Model Cars
Thank you. The top of the glovebox area needed to be filled in after I removed the time machinery from there, plus the air vent outlets, radio, and HVAC controls needed to be scratchbuilt for the center console, per photo above. -
Bobby Allison's Miller Buick
Csaba aka felhasznaaloo replied to Csaba aka felhasznaaloo's topic in NASCAR
Thanks. Yep, started out like this😊
-
Bobby Allison's Miller Buick
Csaba aka felhasznaaloo replied to Csaba aka felhasznaaloo's topic in NASCAR
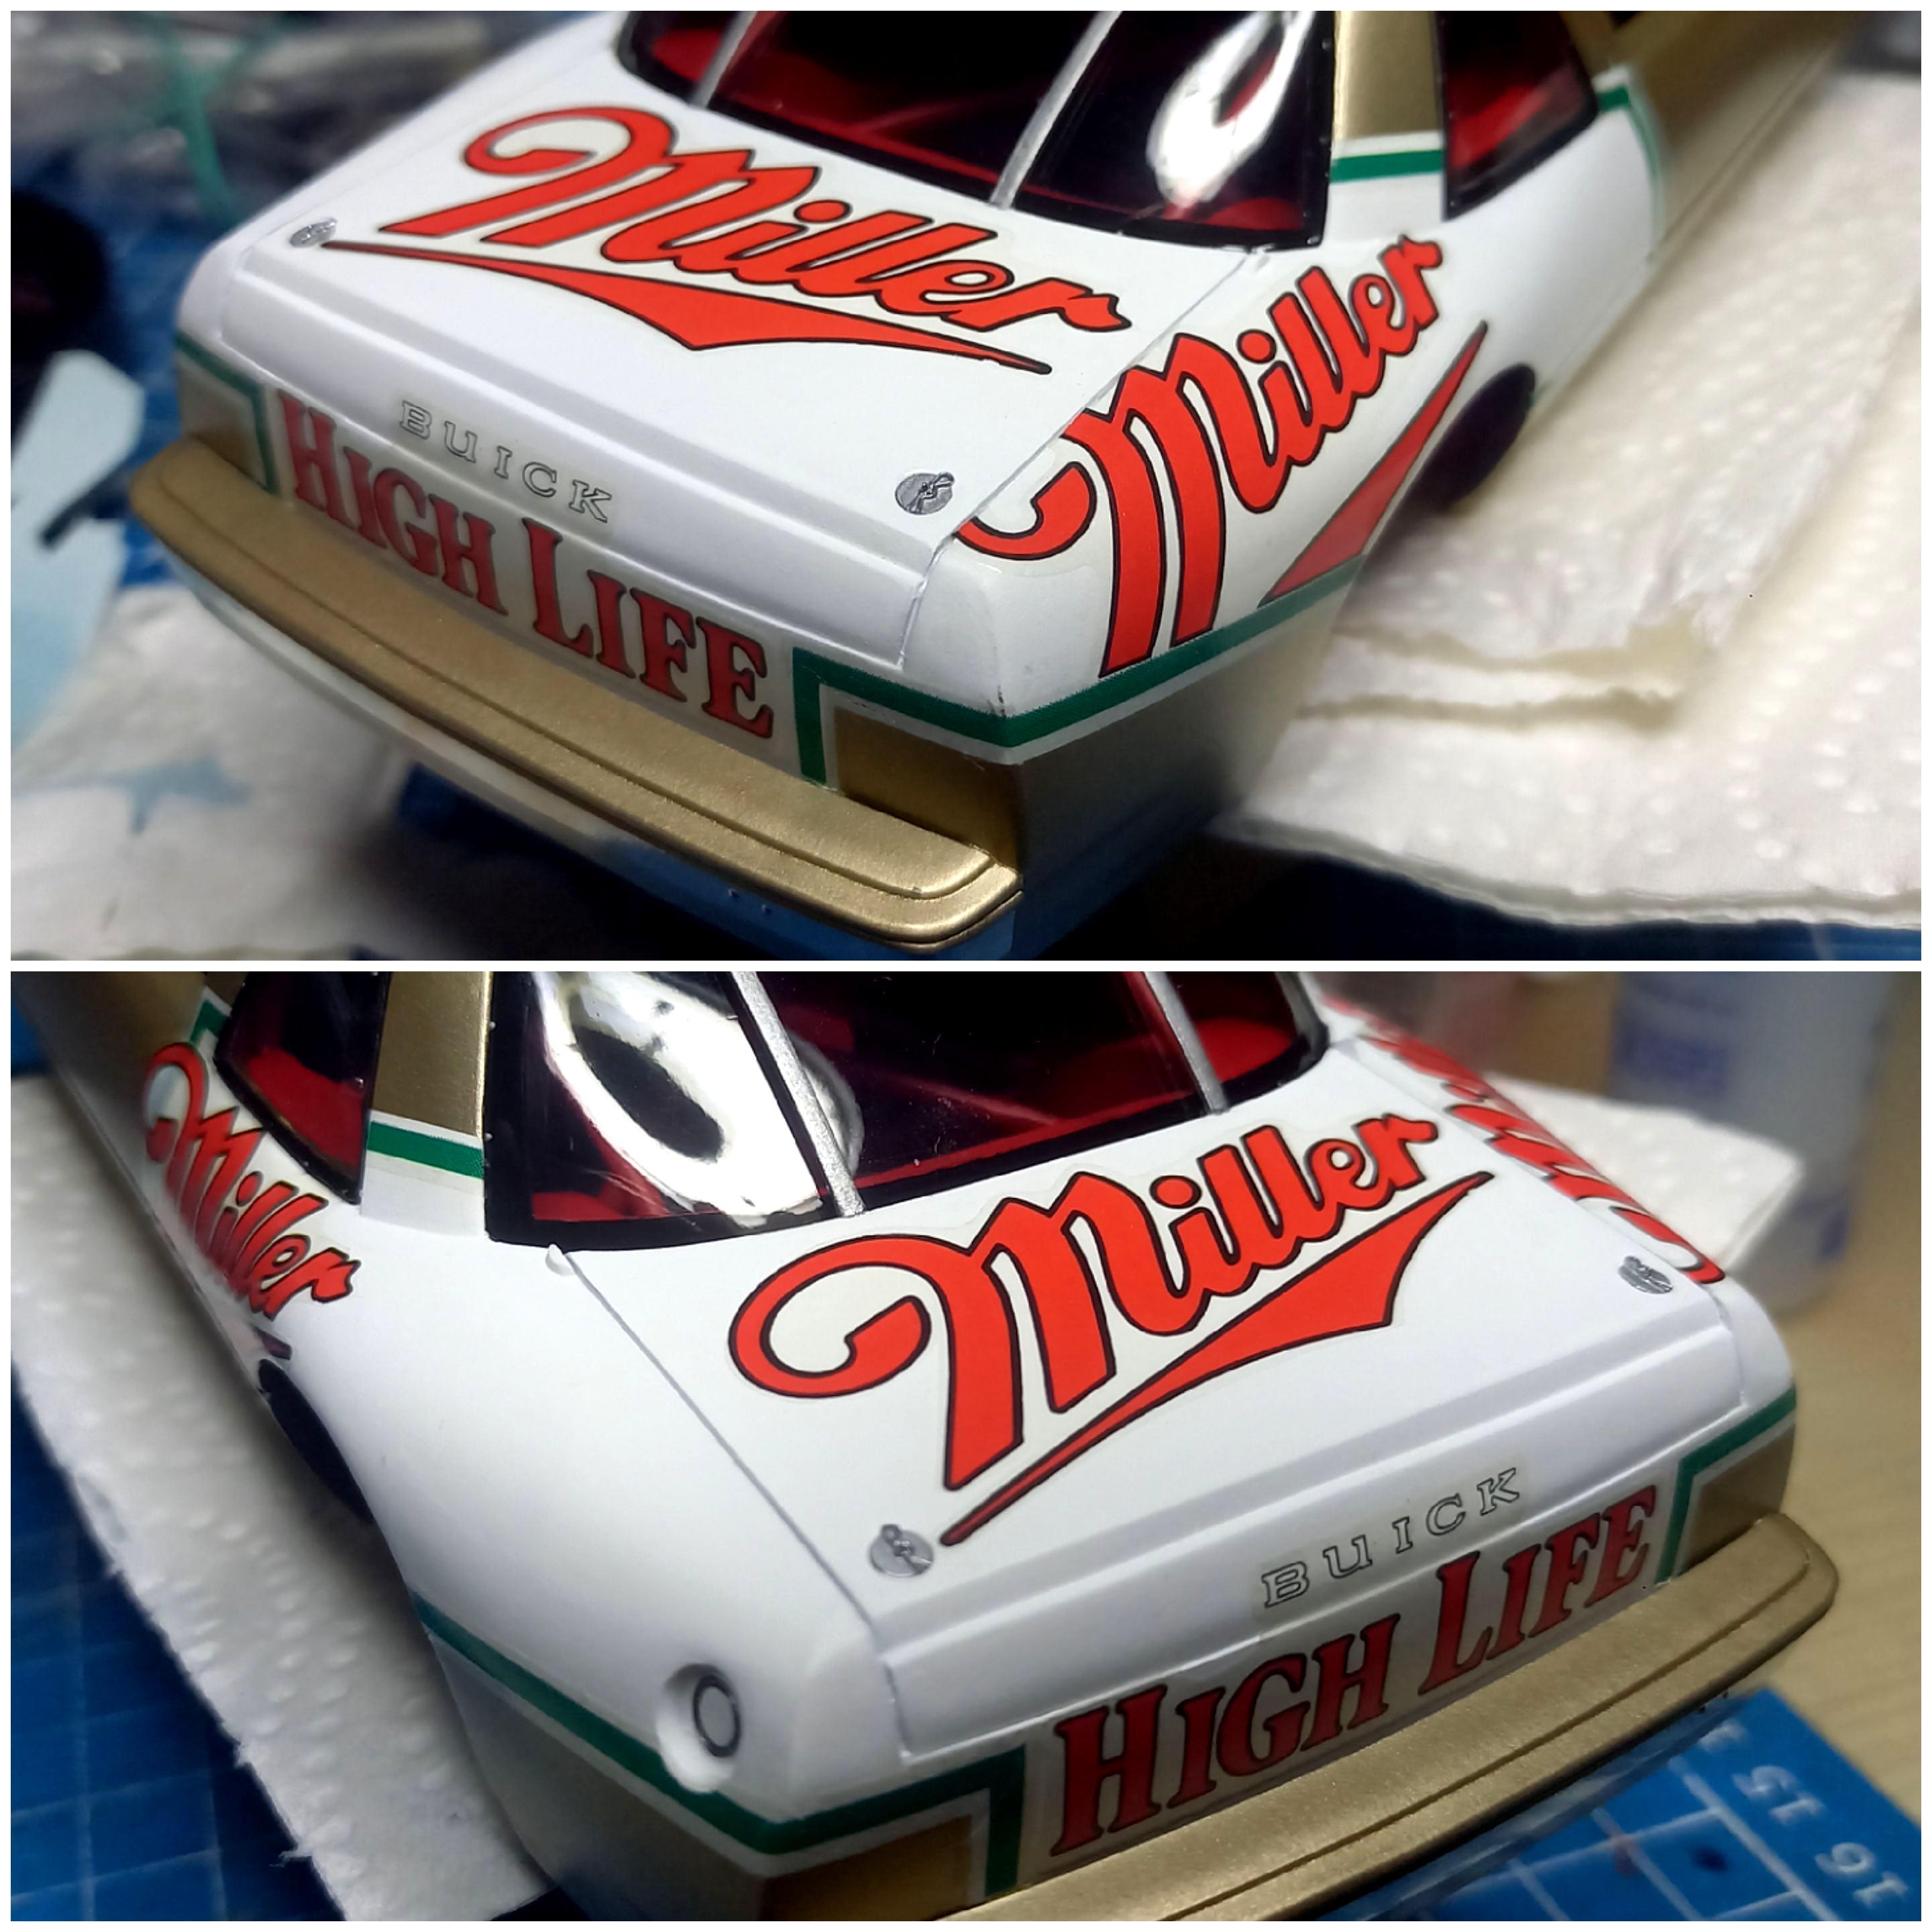
Thank you. Decals cooperated nicely. The hood decal overlaps to the cowl panel and fender tops, prepare for that. The rear fenders, trunk top and rear panel need to be painted white and the edge of that white area needs to be aligned with the green stripe decals, so that requires some careful planning (sorry if I'm explainig the obvious here). The #12 decals I found too tall, so I sectioned them.
-
DeLorean DMC-12
Csaba aka felhasznaaloo replied to Csaba aka felhasznaaloo's topic in WIP: Model Cars
It must be a JDM thing...😉 https://en.m.wikipedia.org/wiki/Japanese_domestic_market


.jpg.75d37cad41ac3f2a001392fb00234e99.jpg)