Devilsnake98
-
Posts
425 -
Joined
-
Last visited
Content Type
Profiles
Forums
Events
Gallery
Everything posted by Devilsnake98
-
Thanks all for the kind words! Jeff was my fav because he would race hard but clean.
-
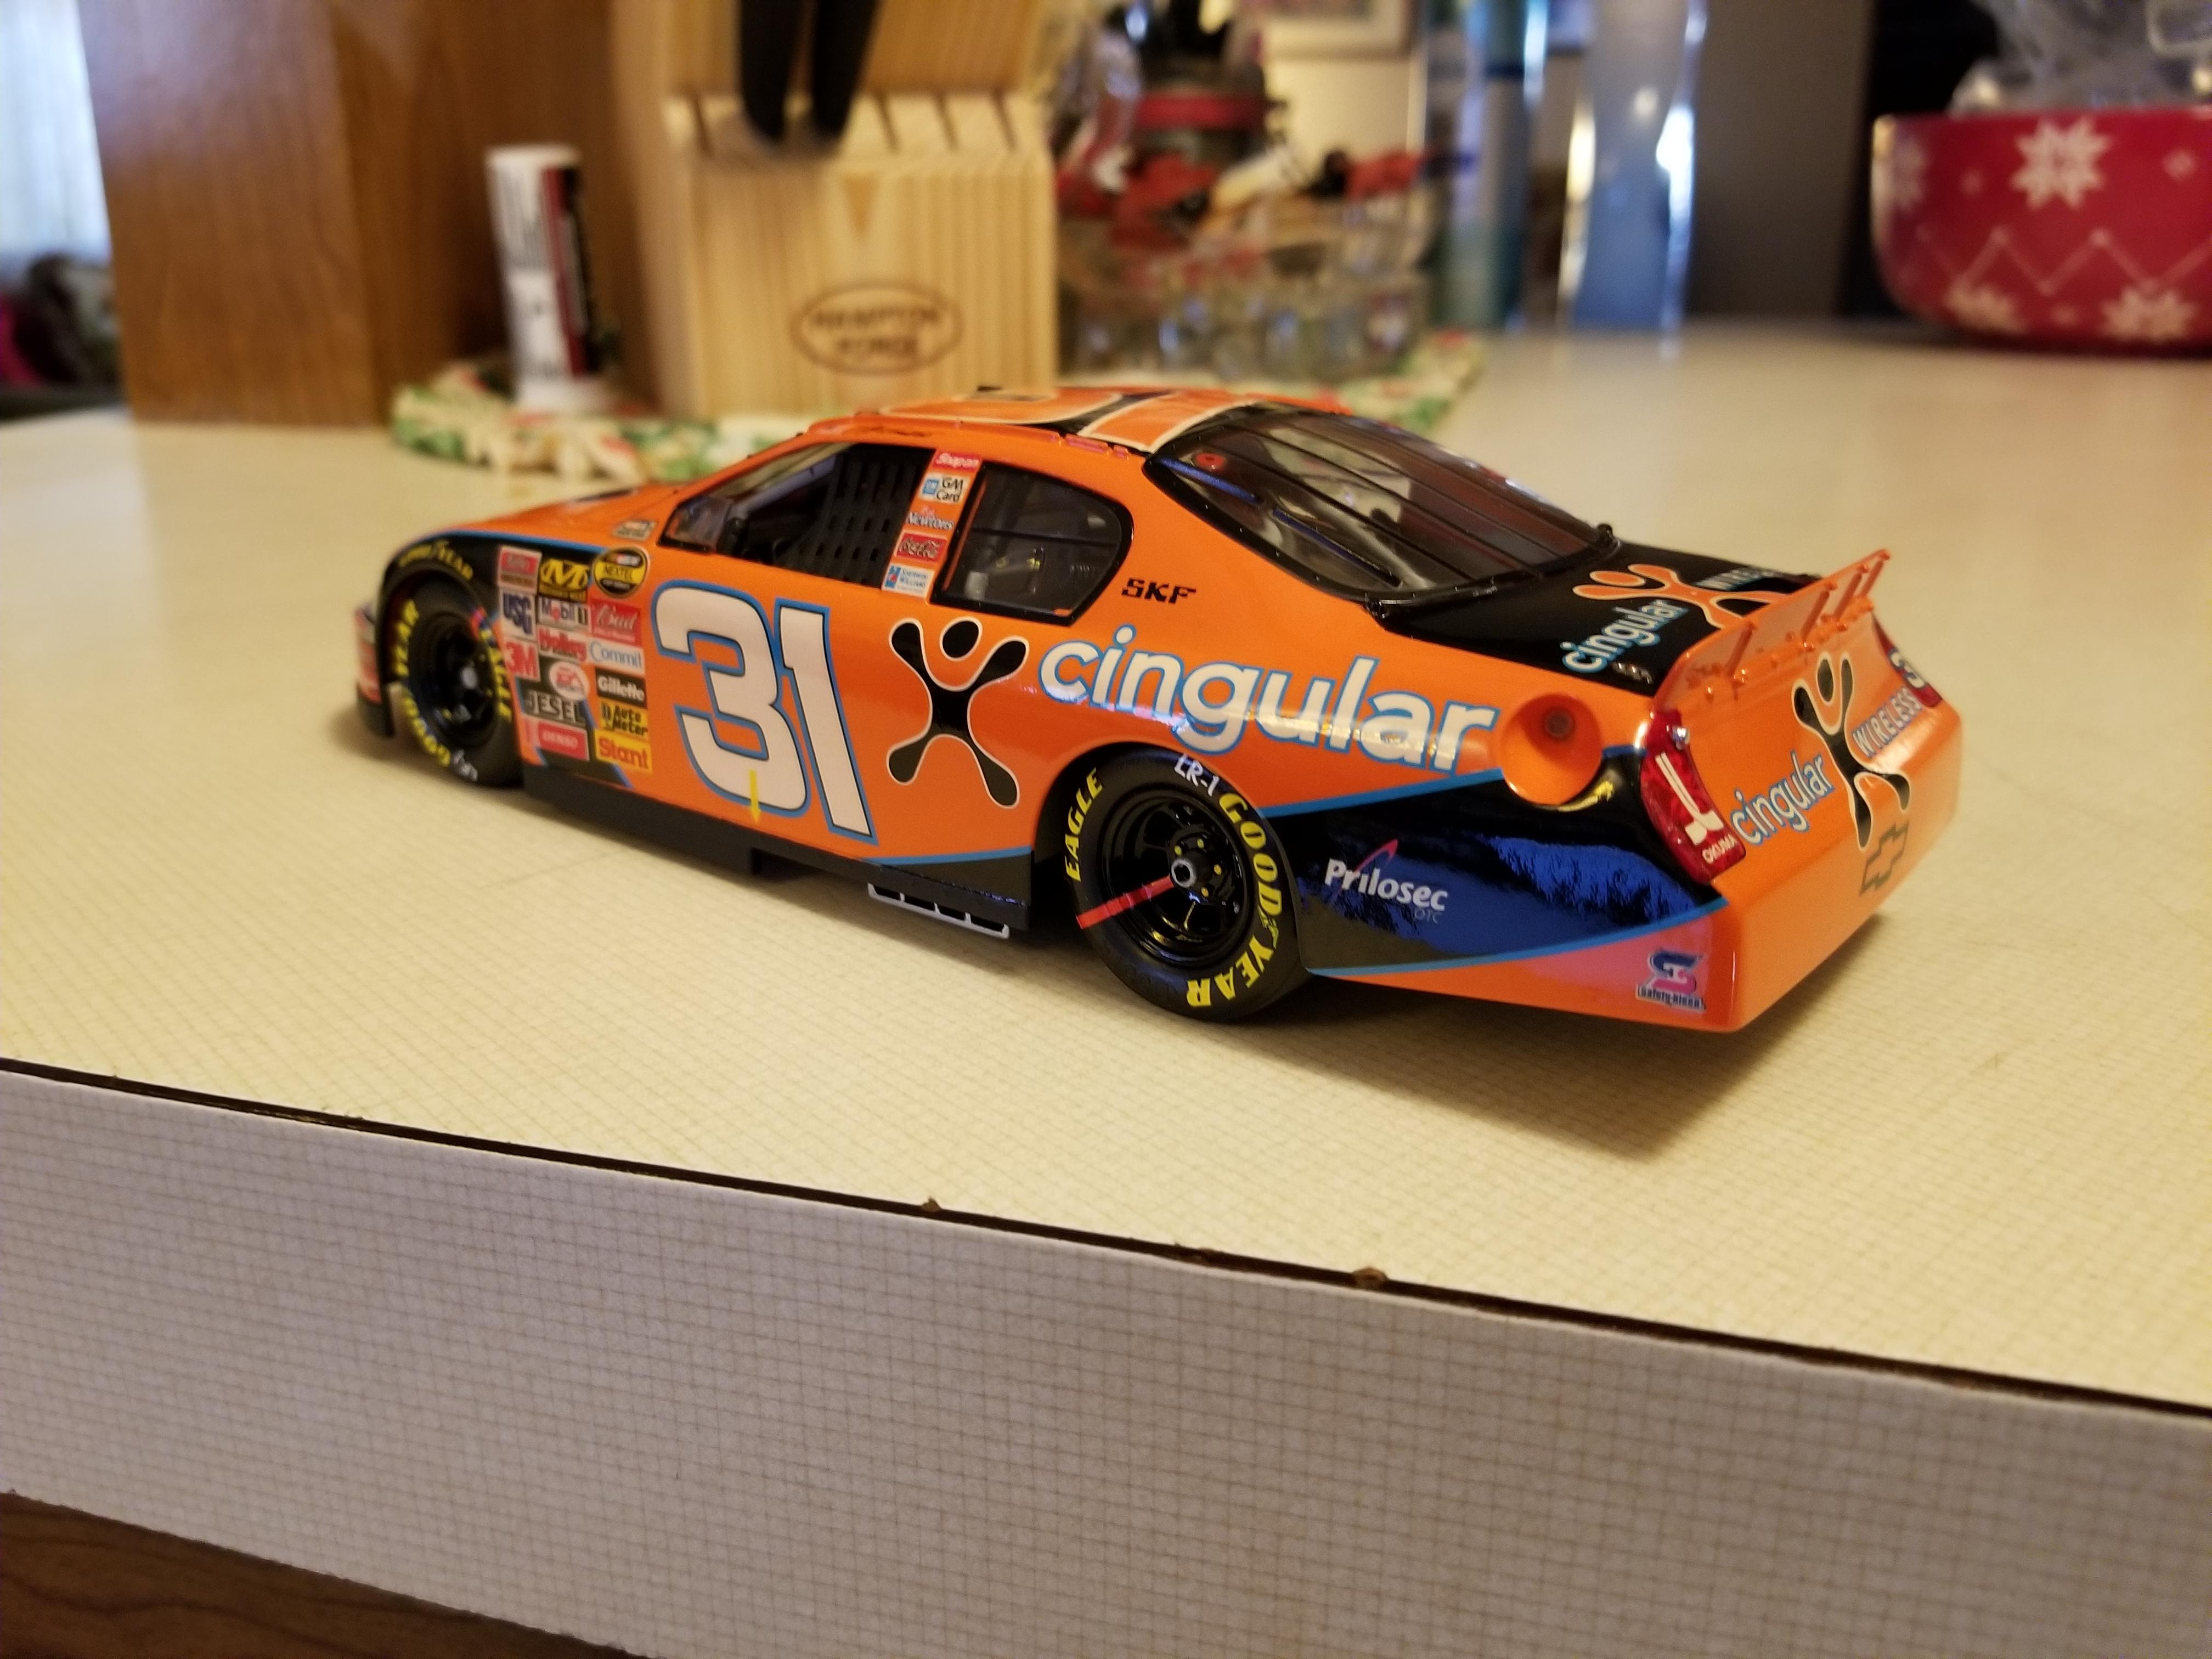
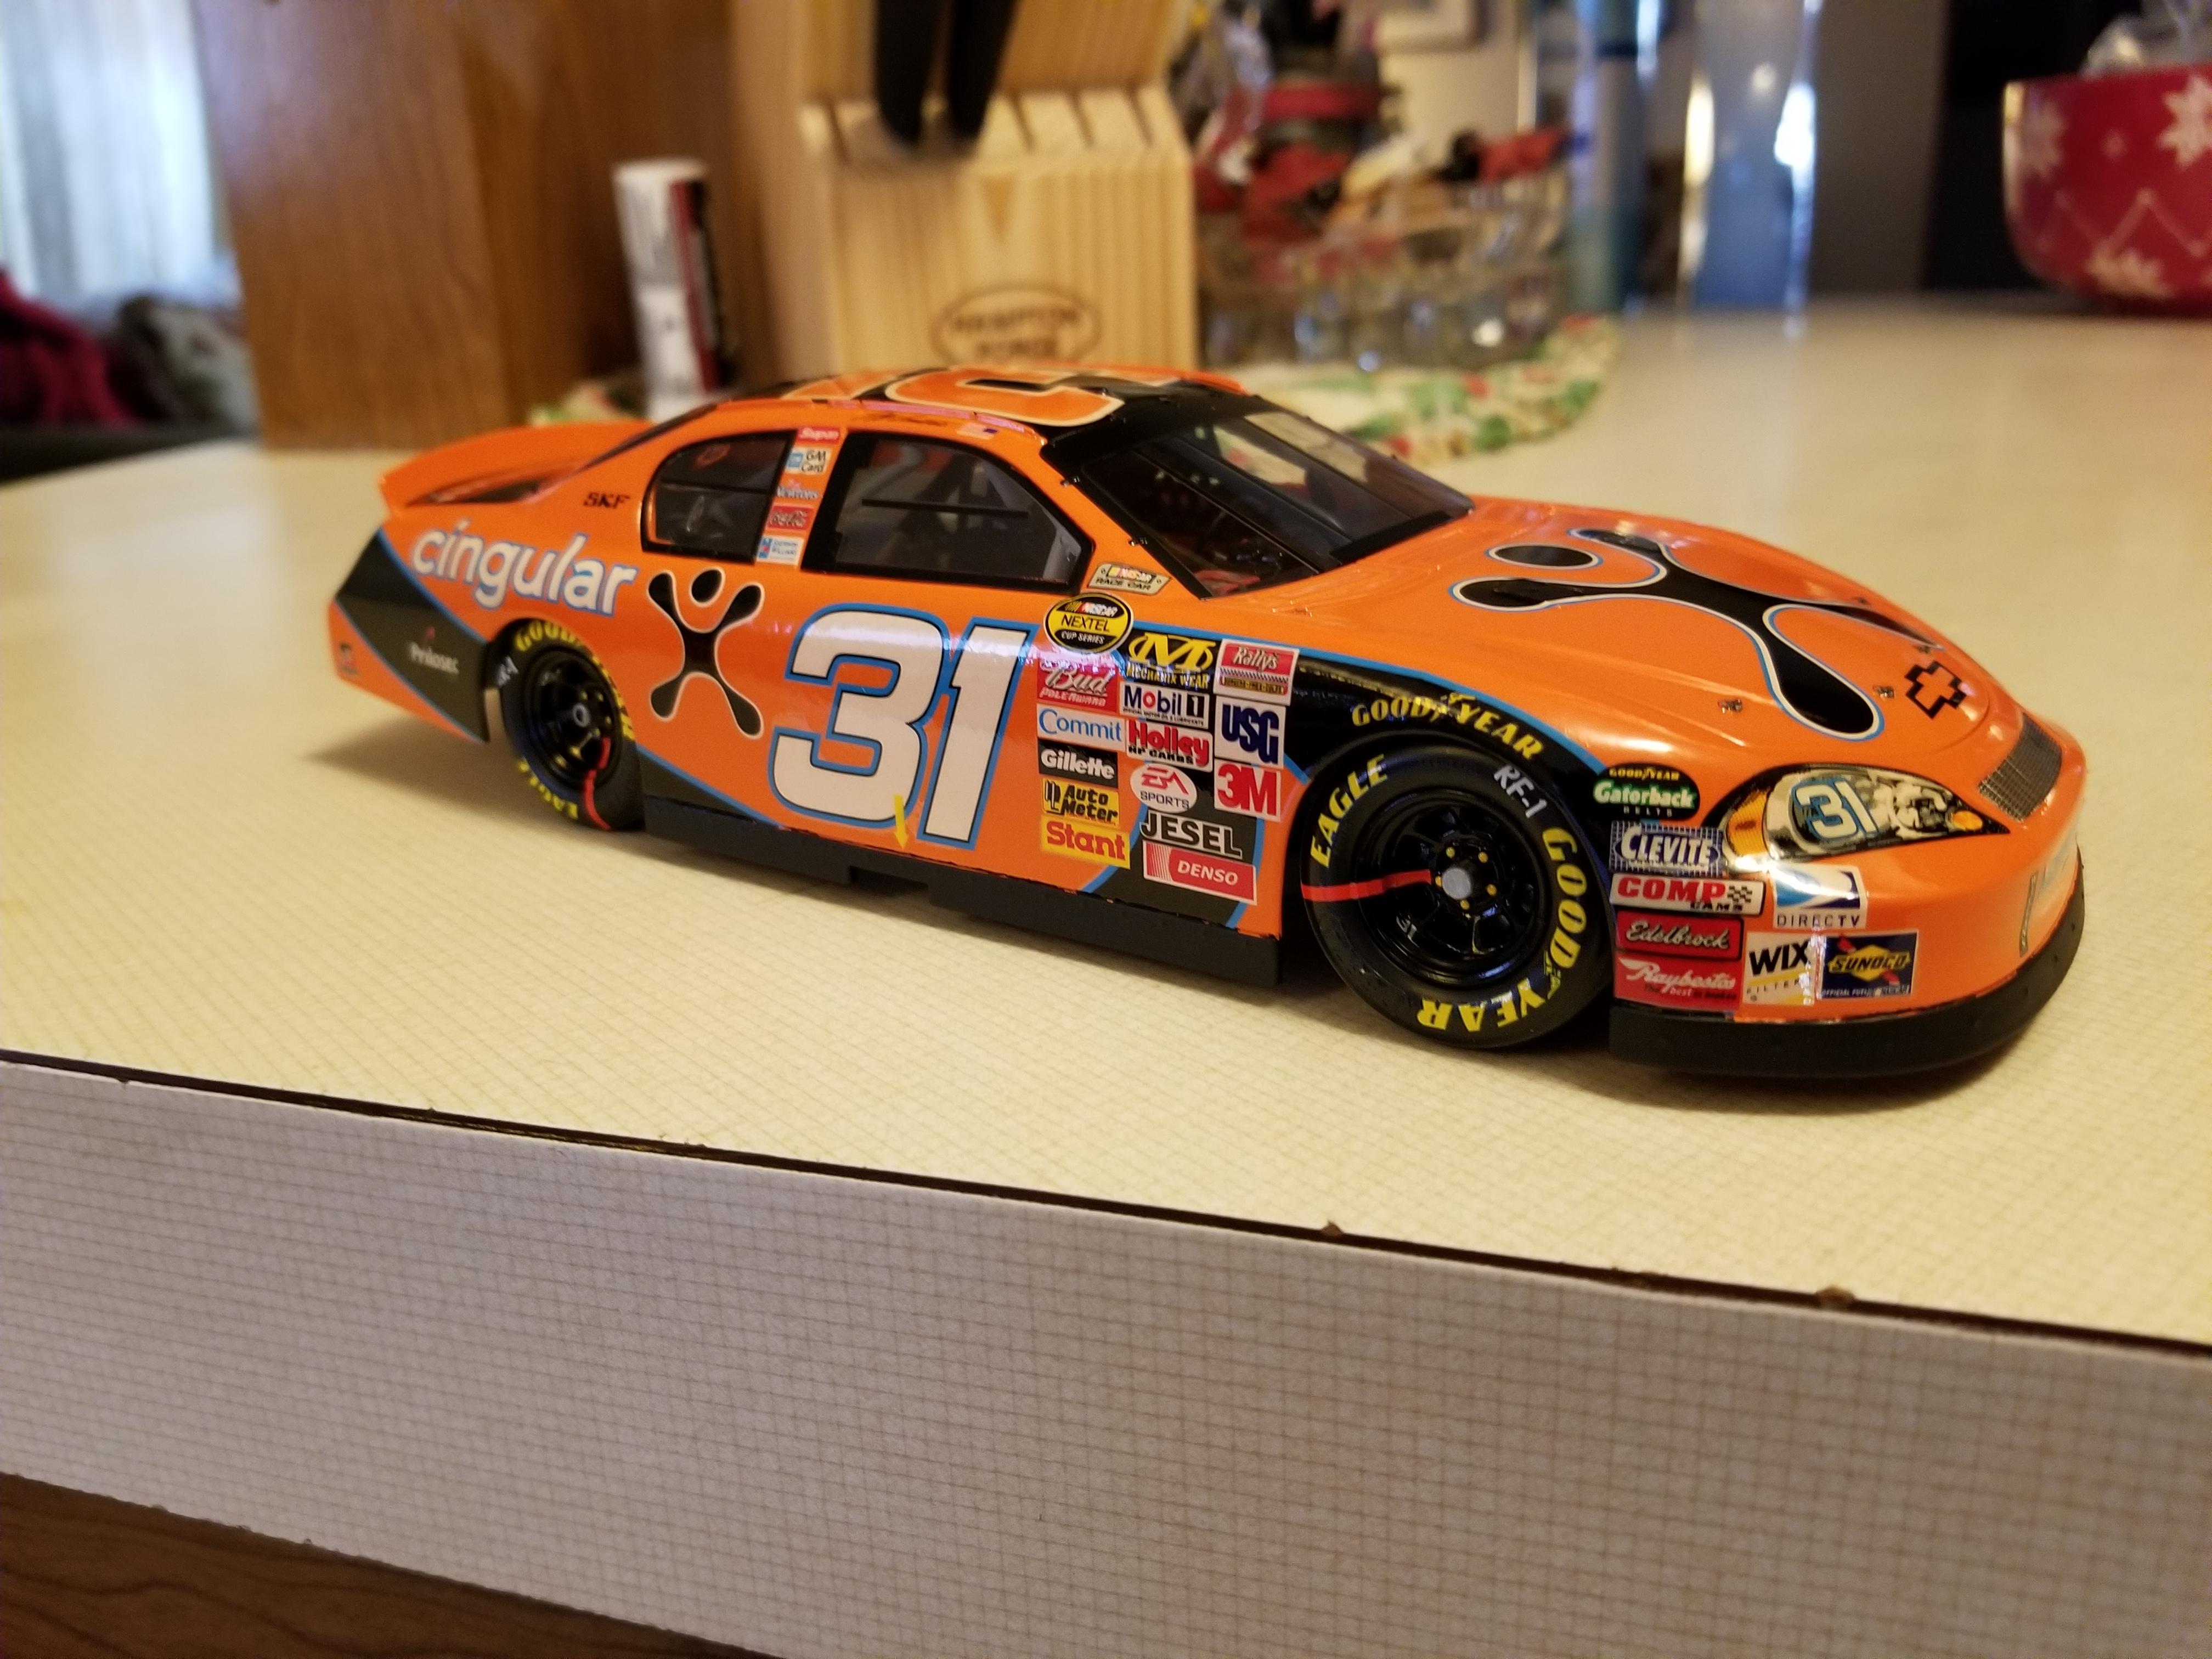
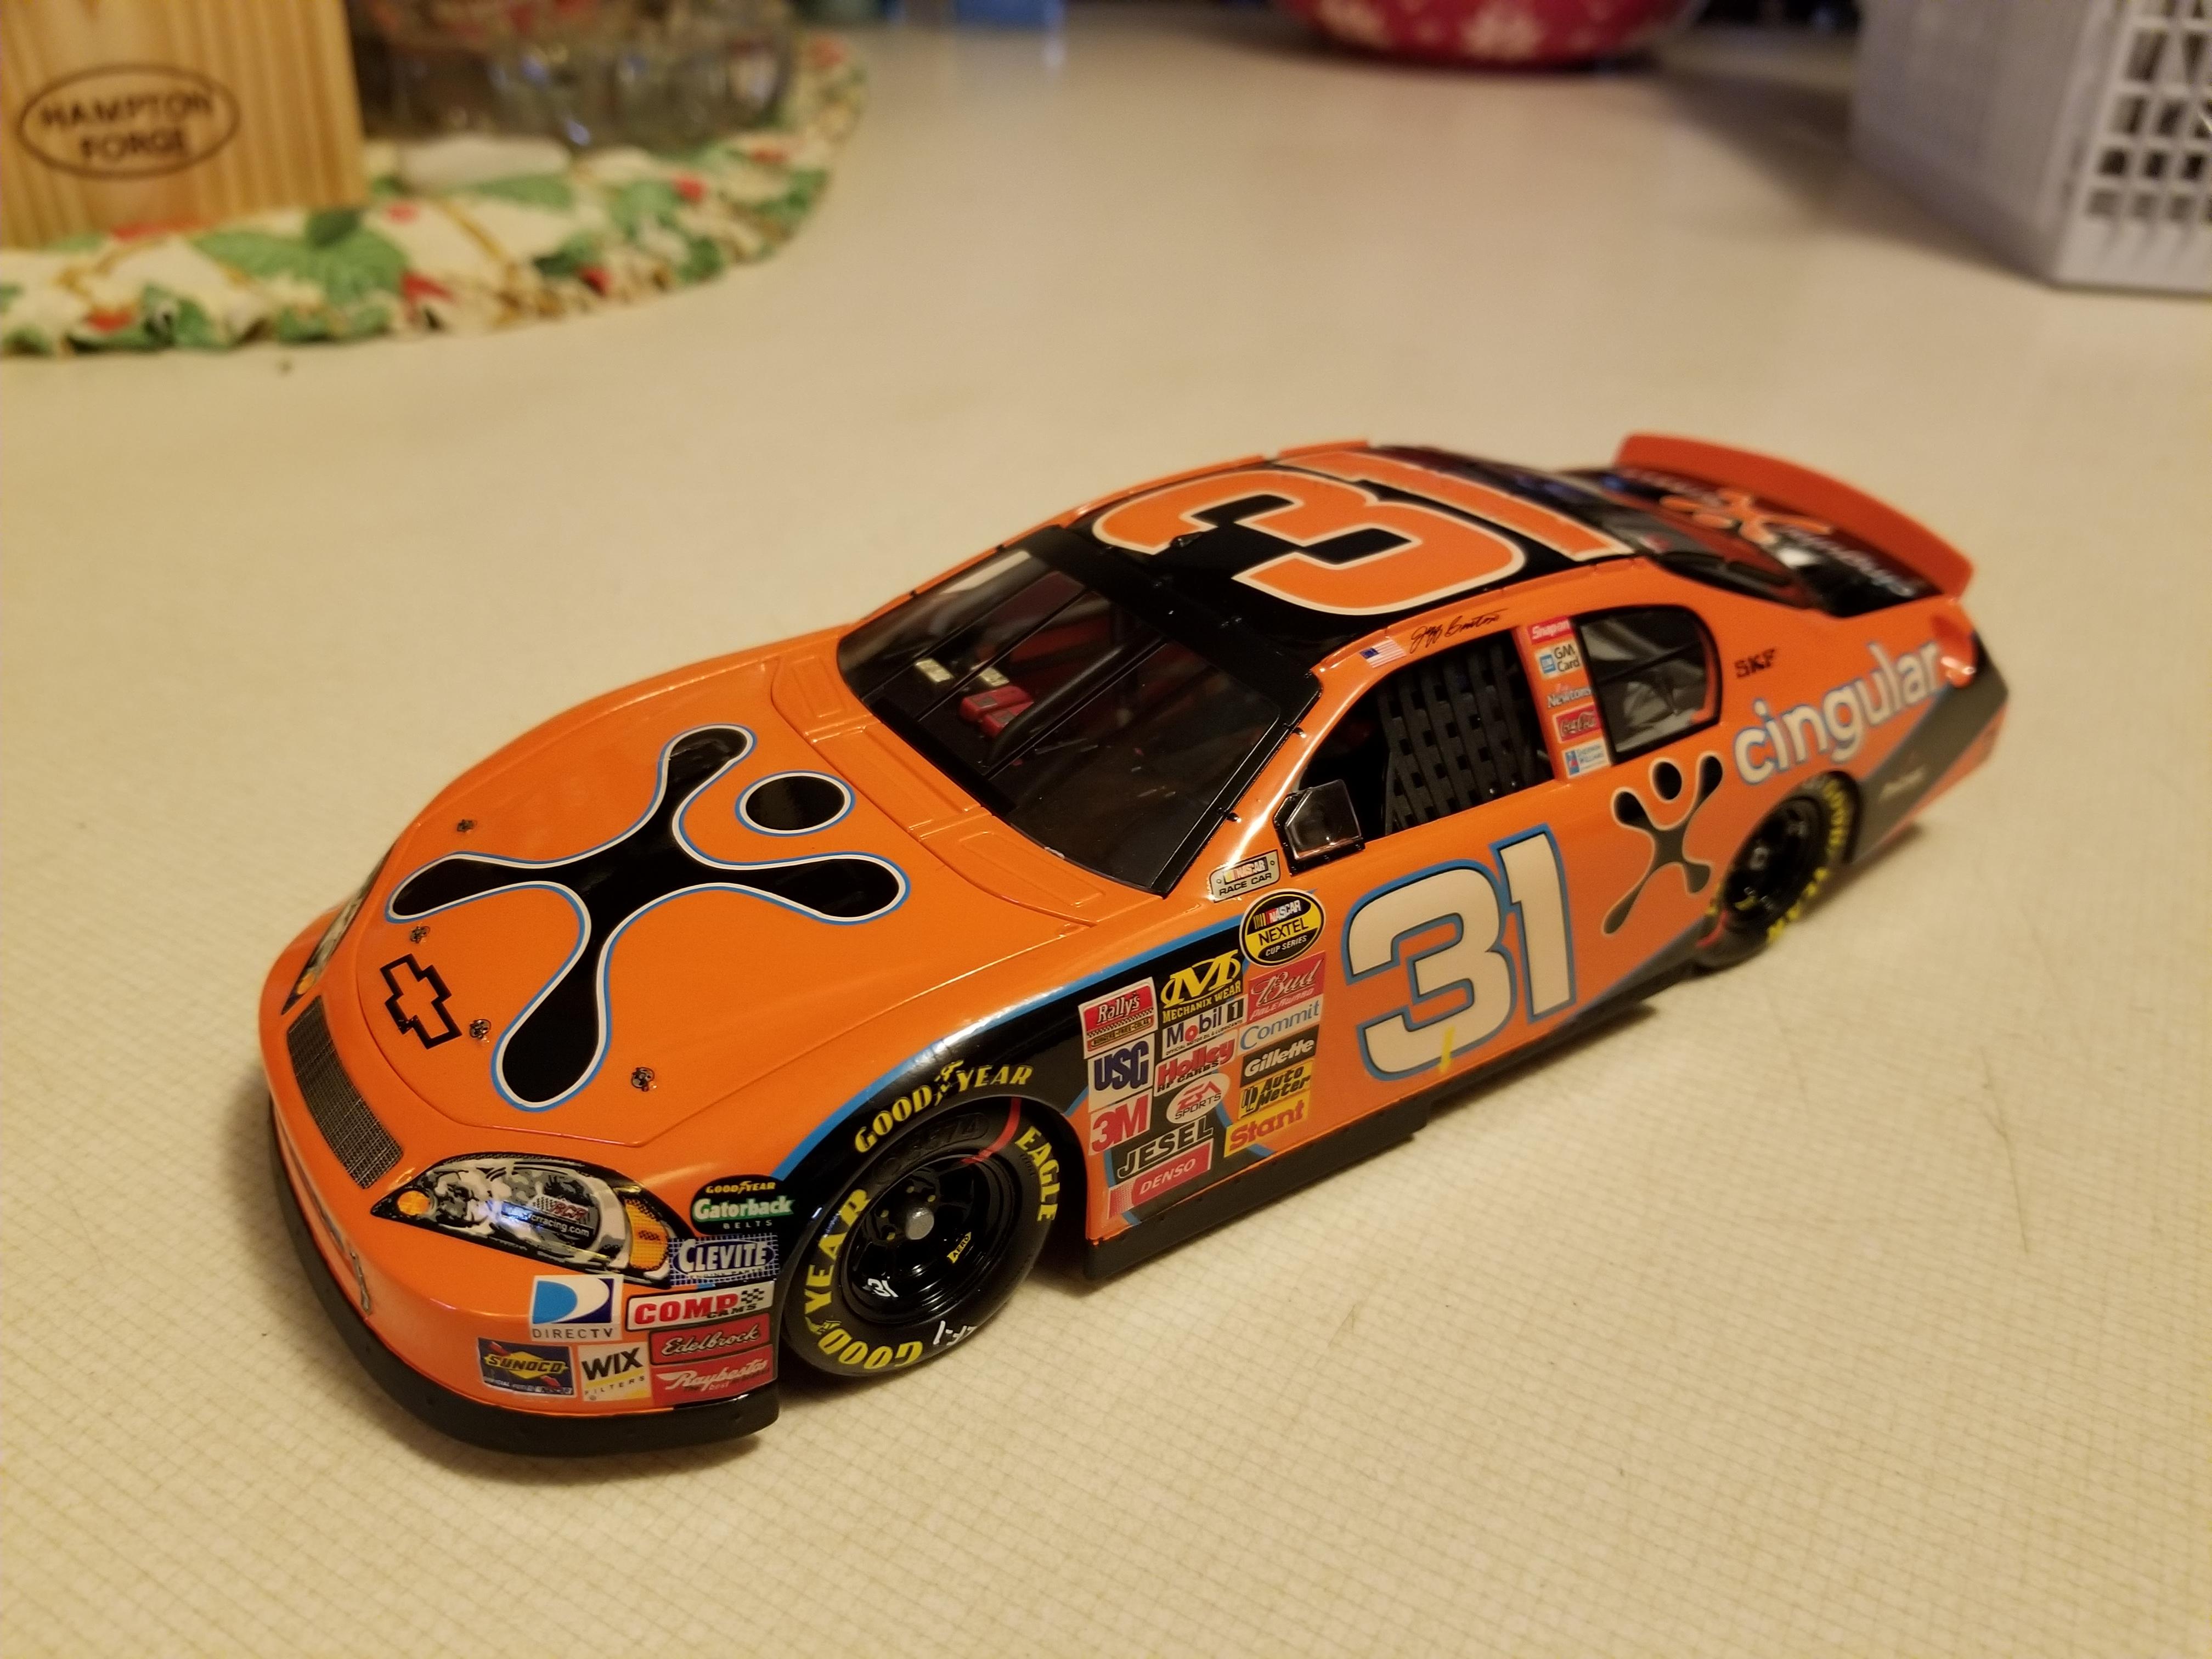
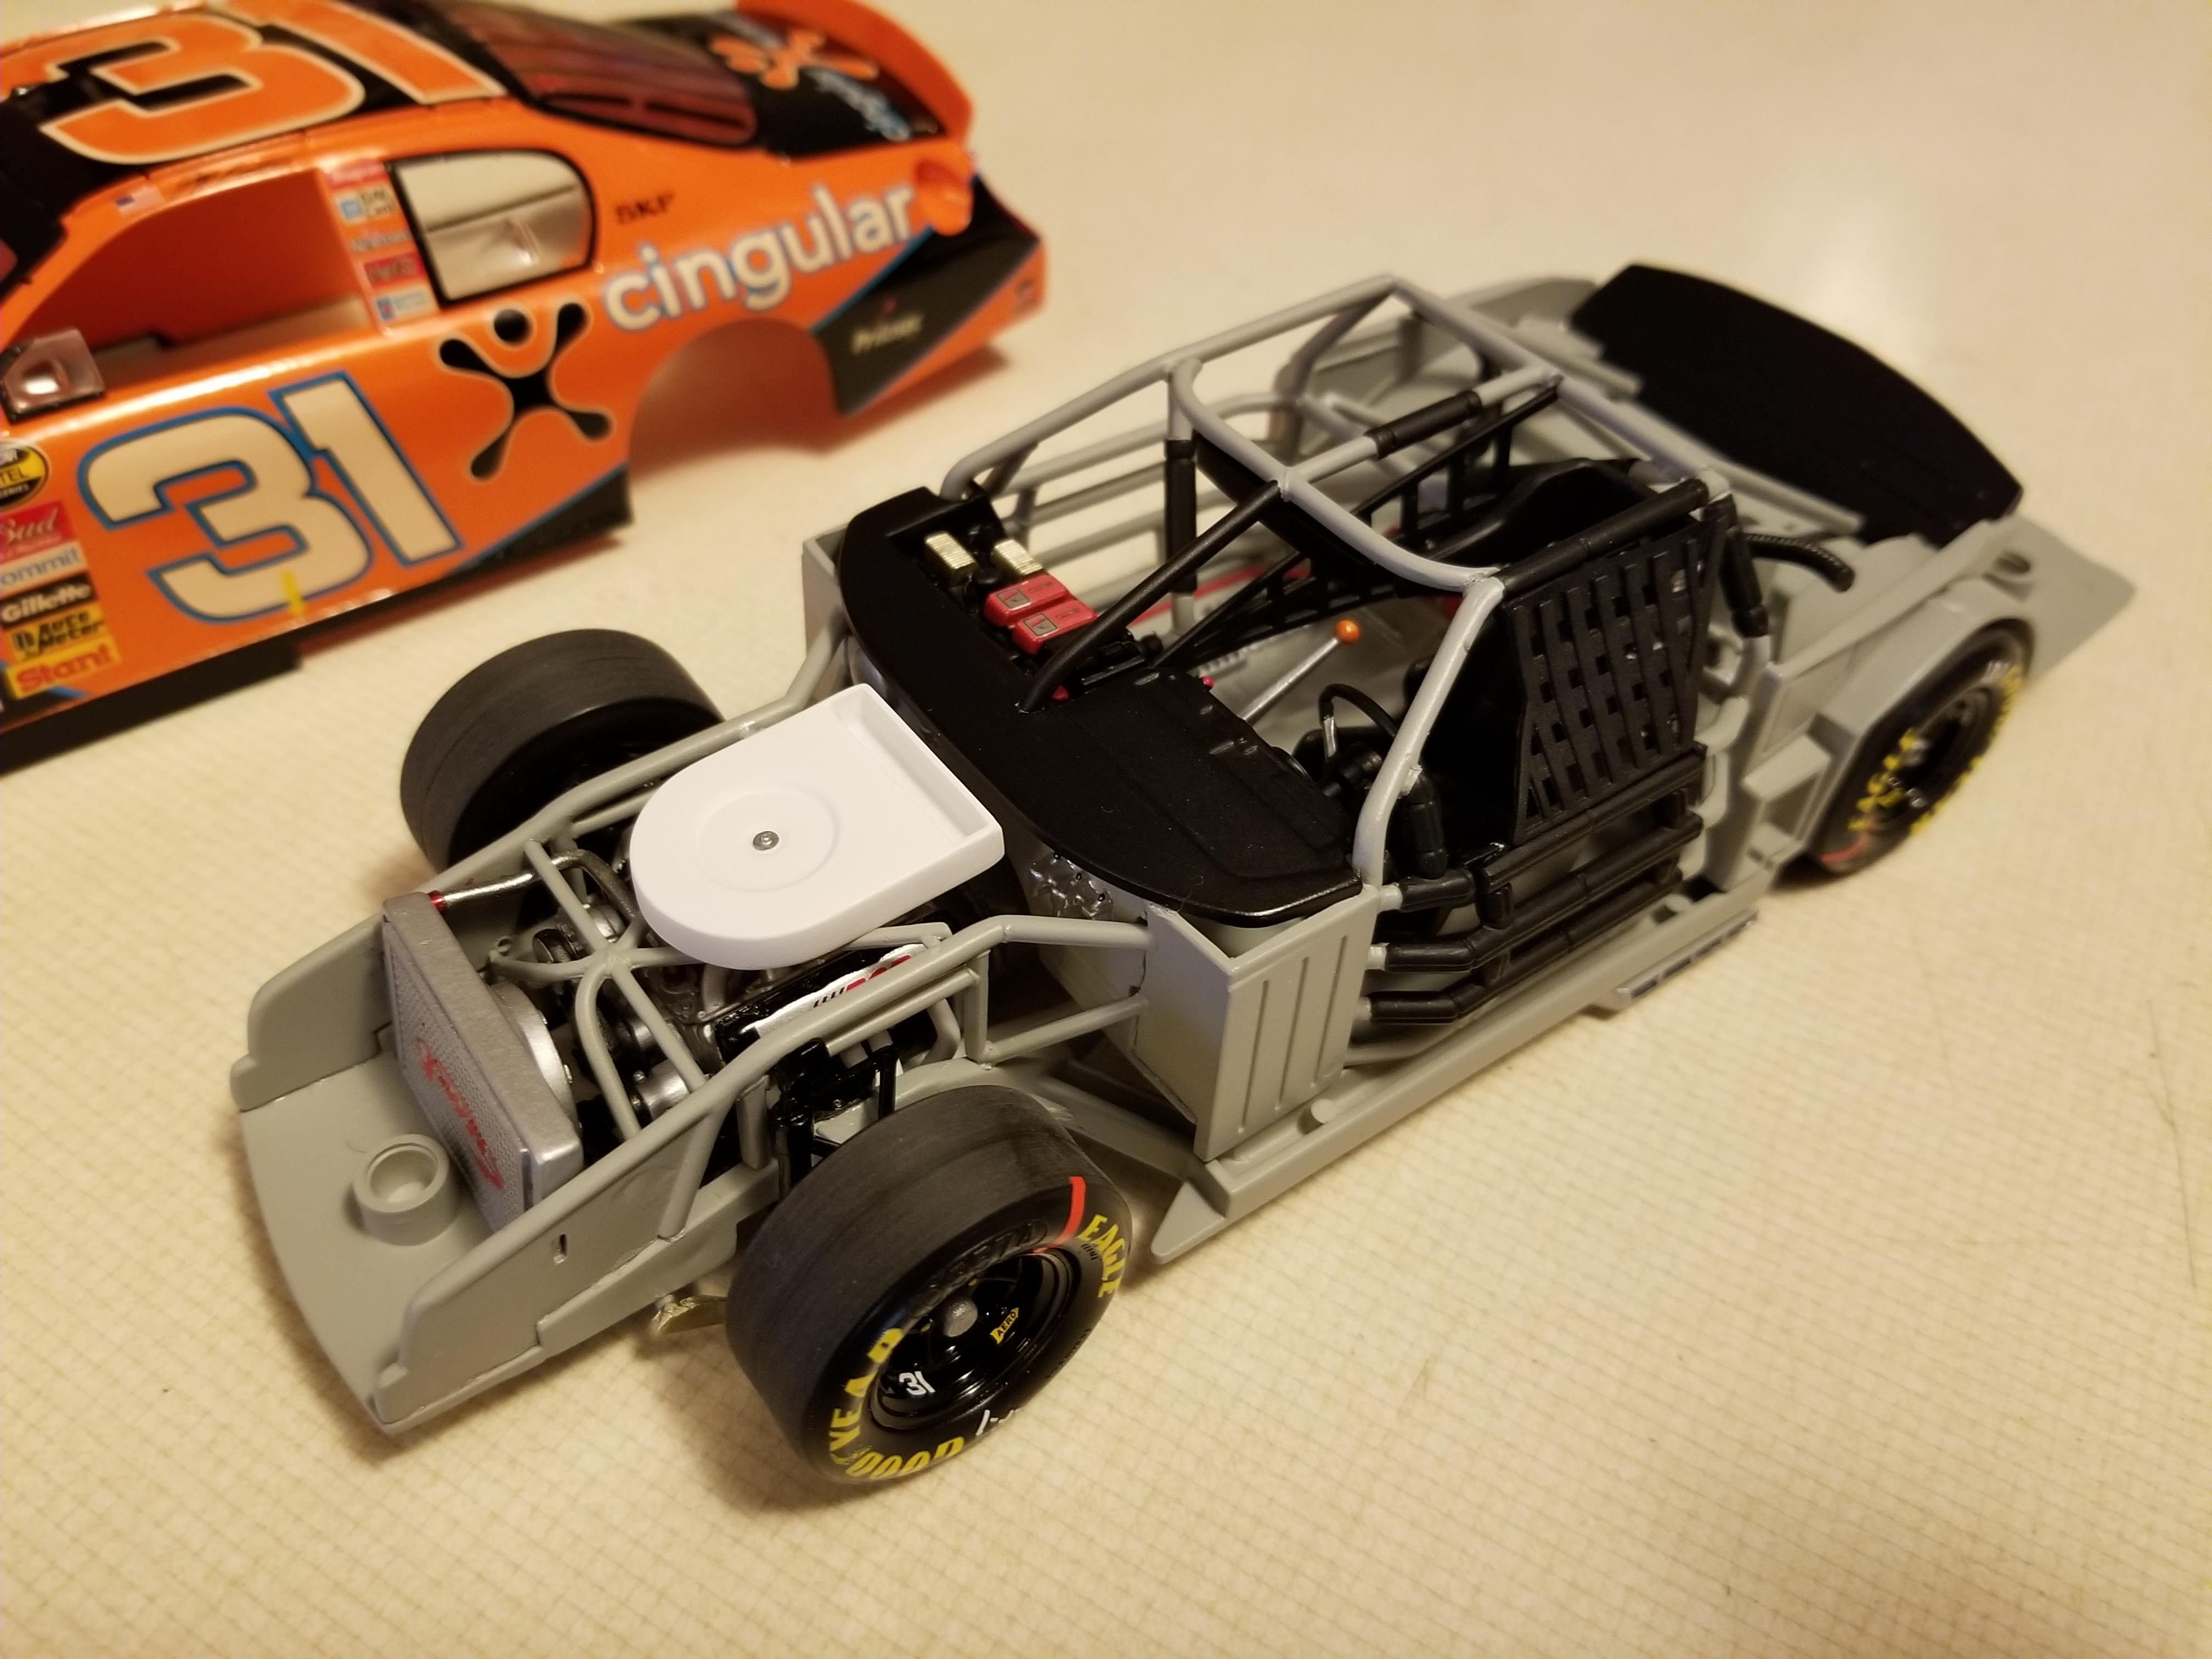
Revell Dale Jr. 2006 monte carlo ss kit. 2006 jeff burton cingular decals bought at Mike's decals, they are jwtbm/powerslide so they are nice. Paint is tamiya ts-98 pure orange, cleared with testors clear top coat 2936 over paint and decals. The chassis color is ts-81 matte royal light gray. Built box stock minus lowered front suspension, added engine and tire/ wheel detail decals, and gauge and ignition box decals. Thank you for looking!

-
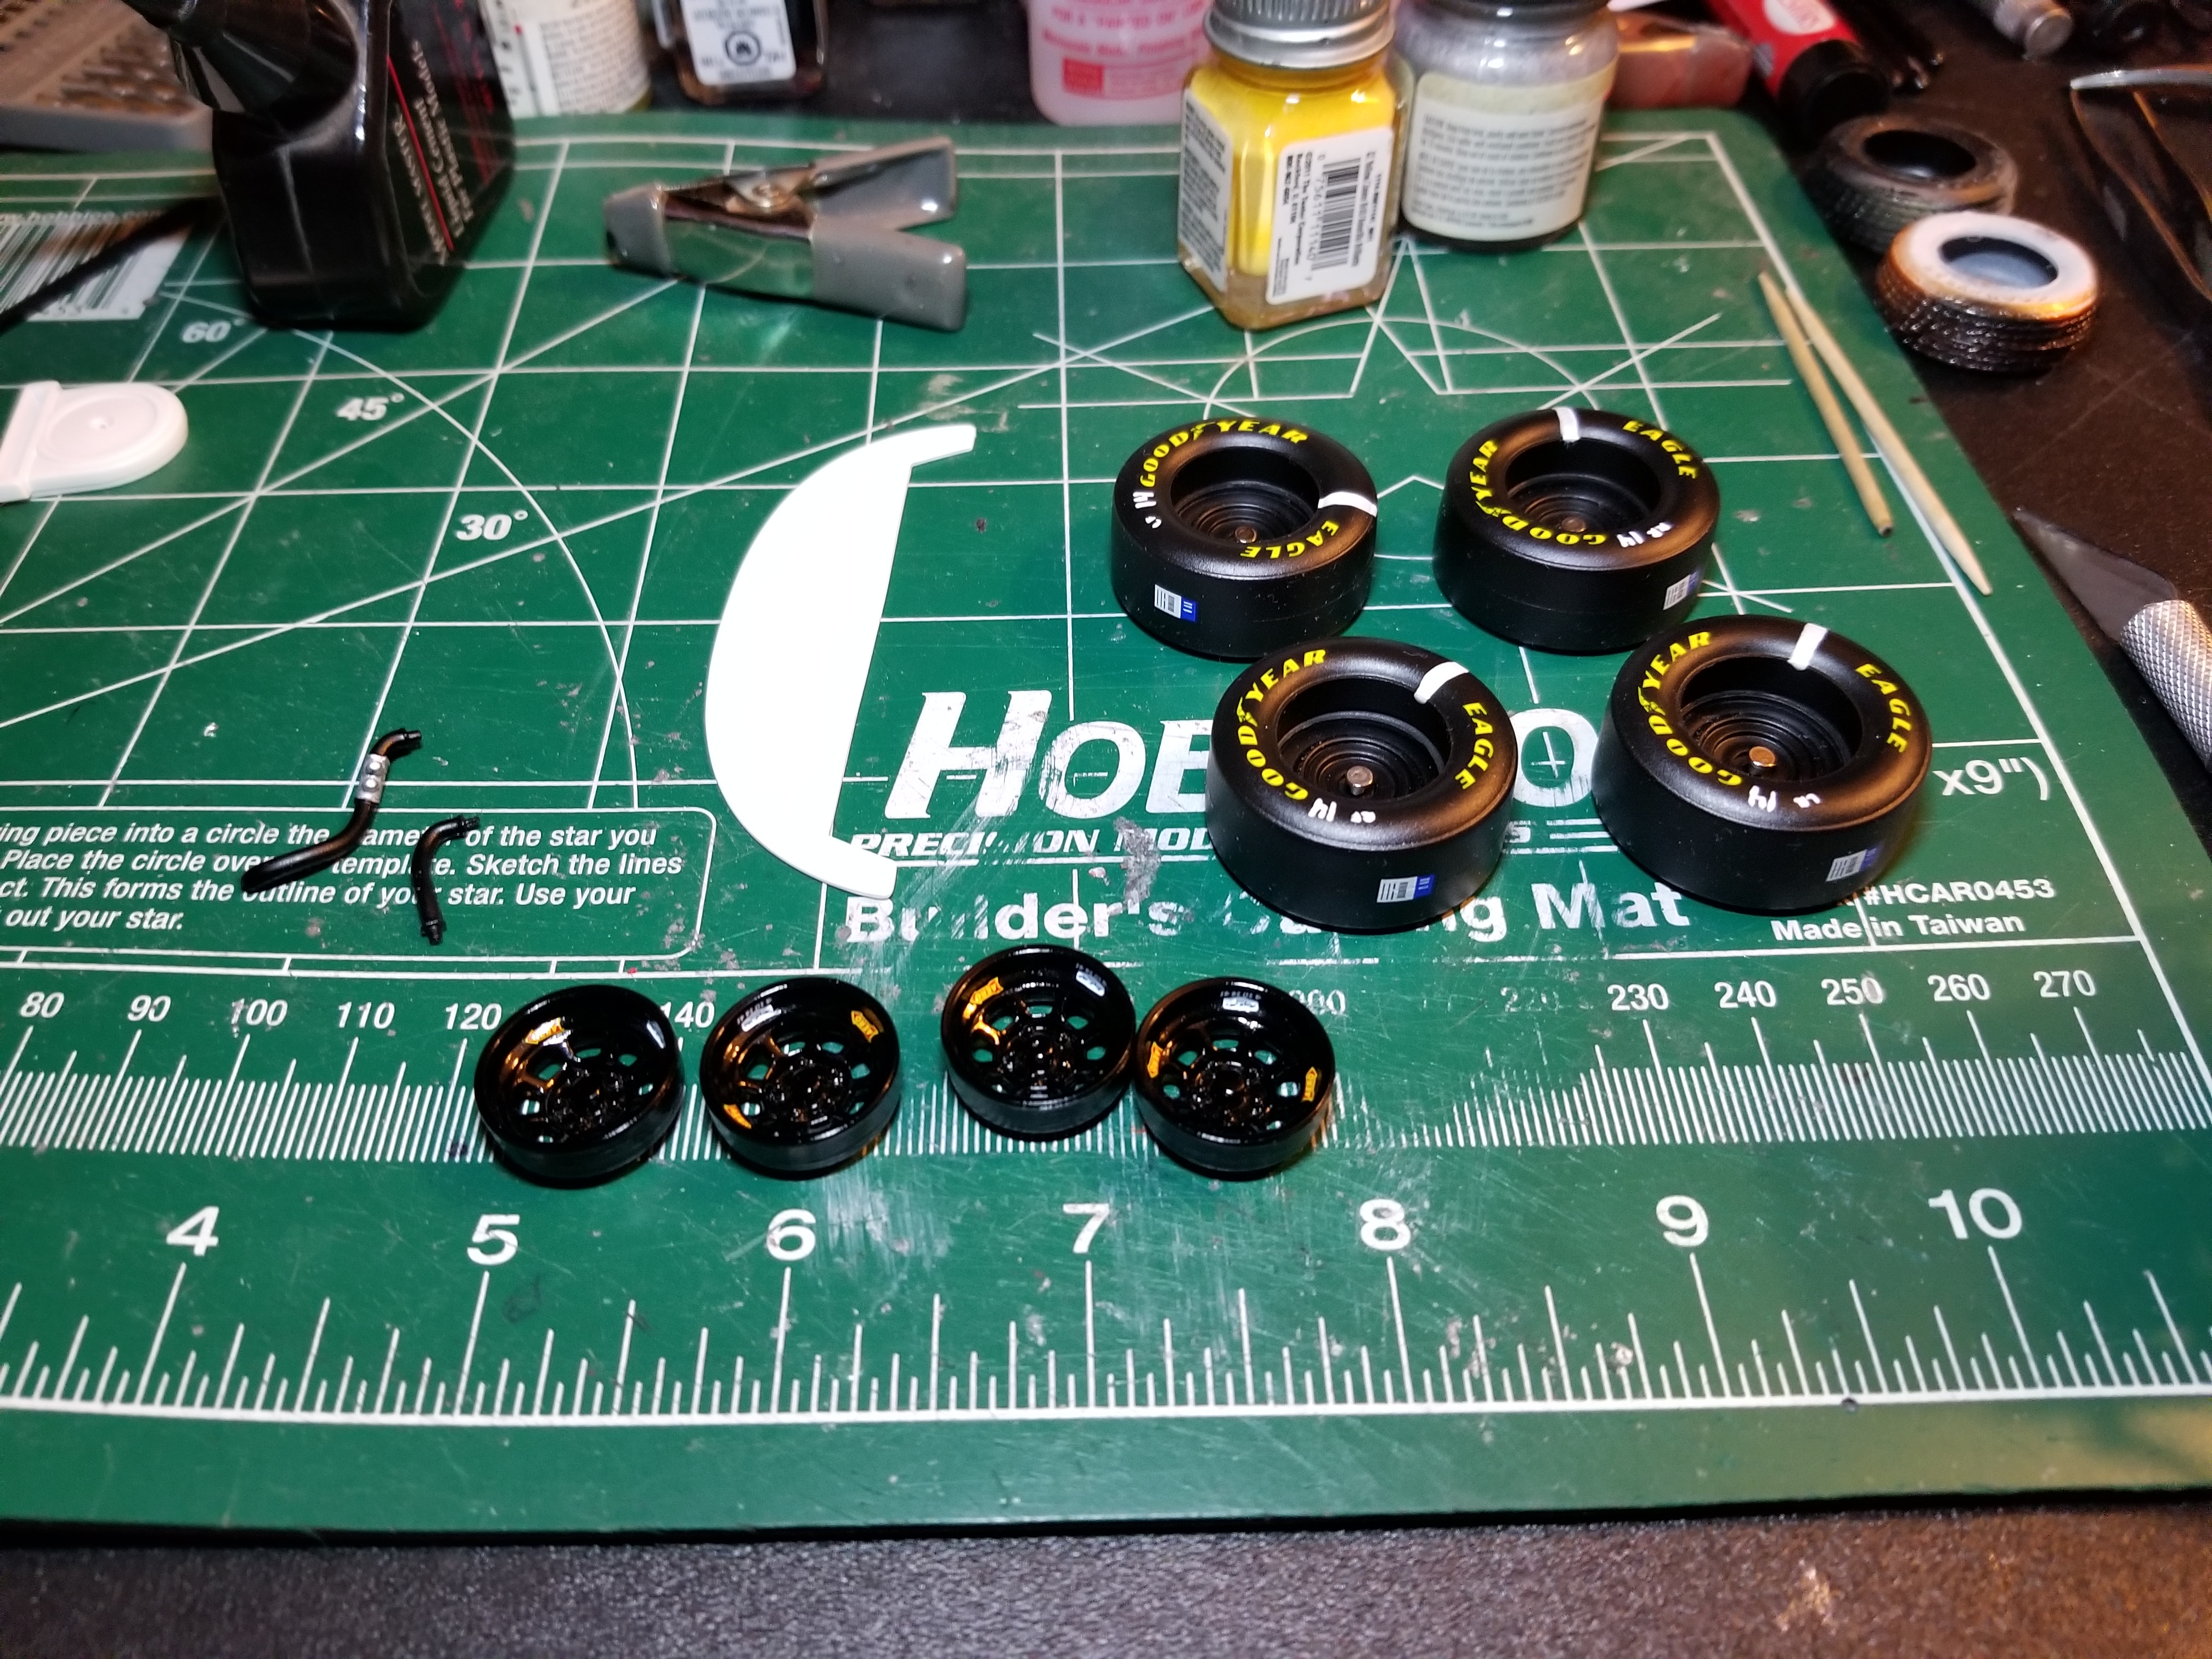
Got a little bit done today, detail painted the wheels, assembled the wheels and tires and installed them, finished the radiator and hoses. Ride height isn't as low in the front as I thought I had it, but I don't want to break the front wheels back off, the next one will be lower for sure. Now just have to wait on the weather so I can clear the body.
-
Thanks, I actually flat cleared the tires so they are protected.
-
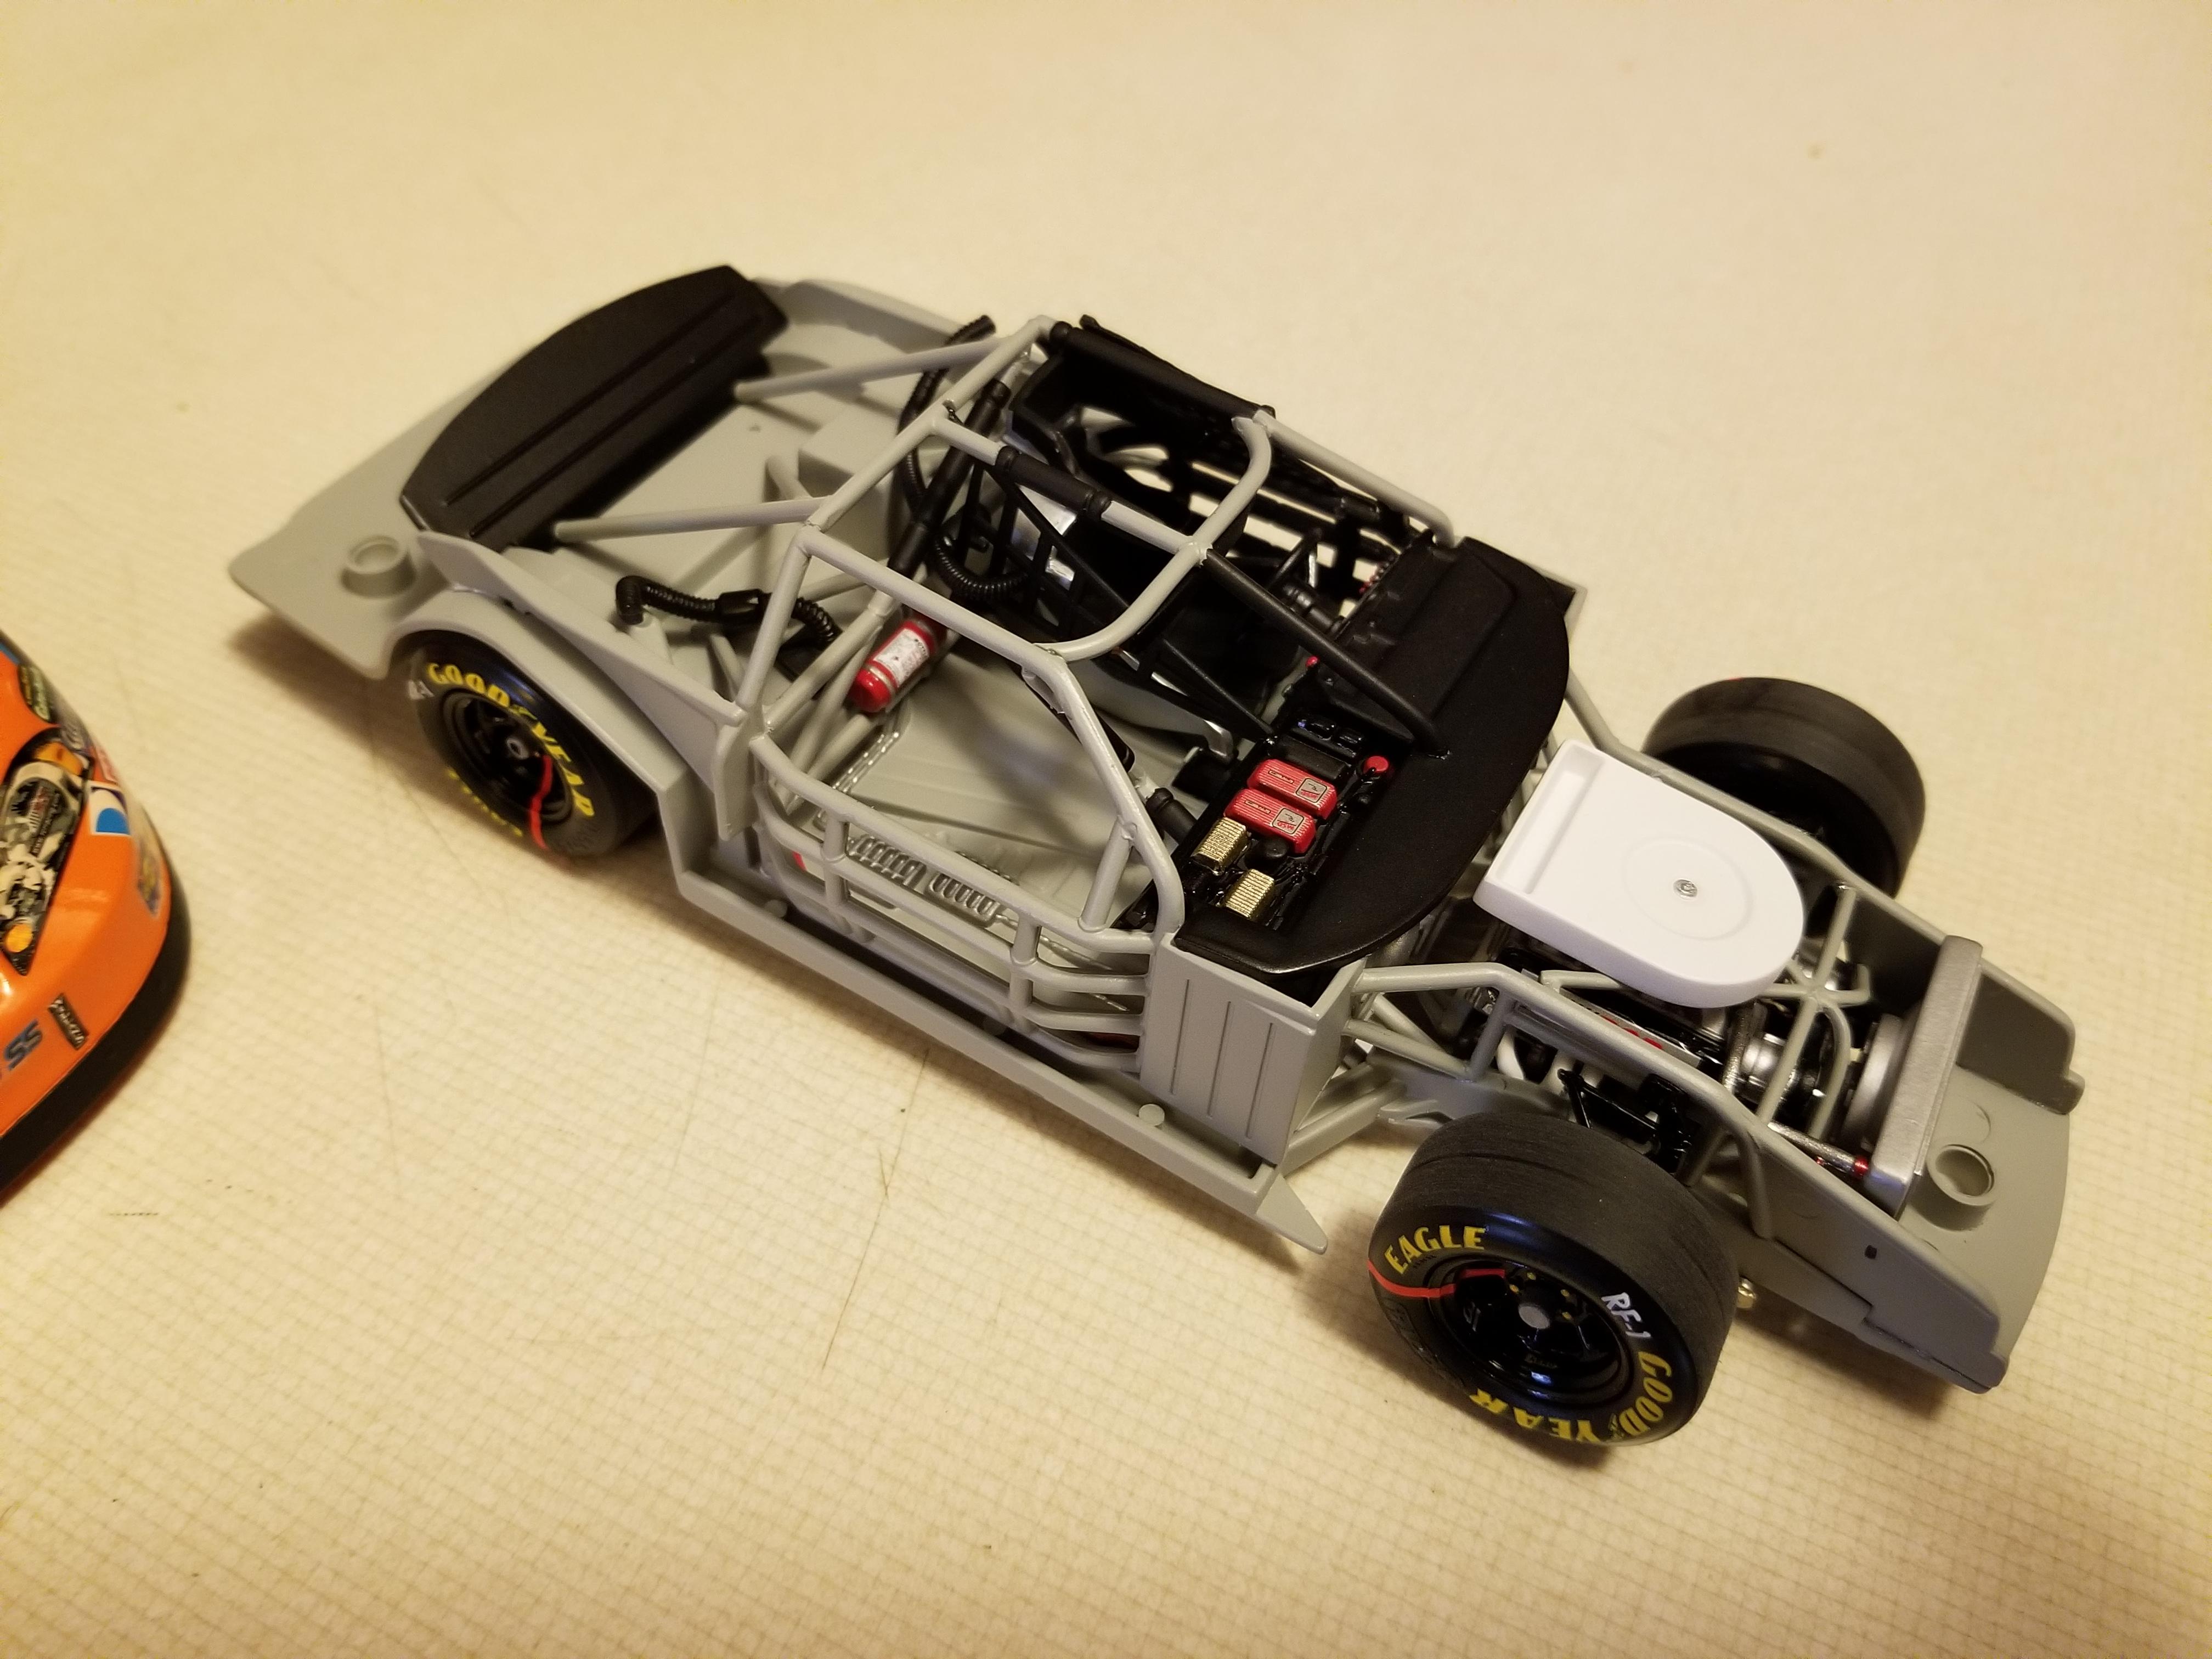
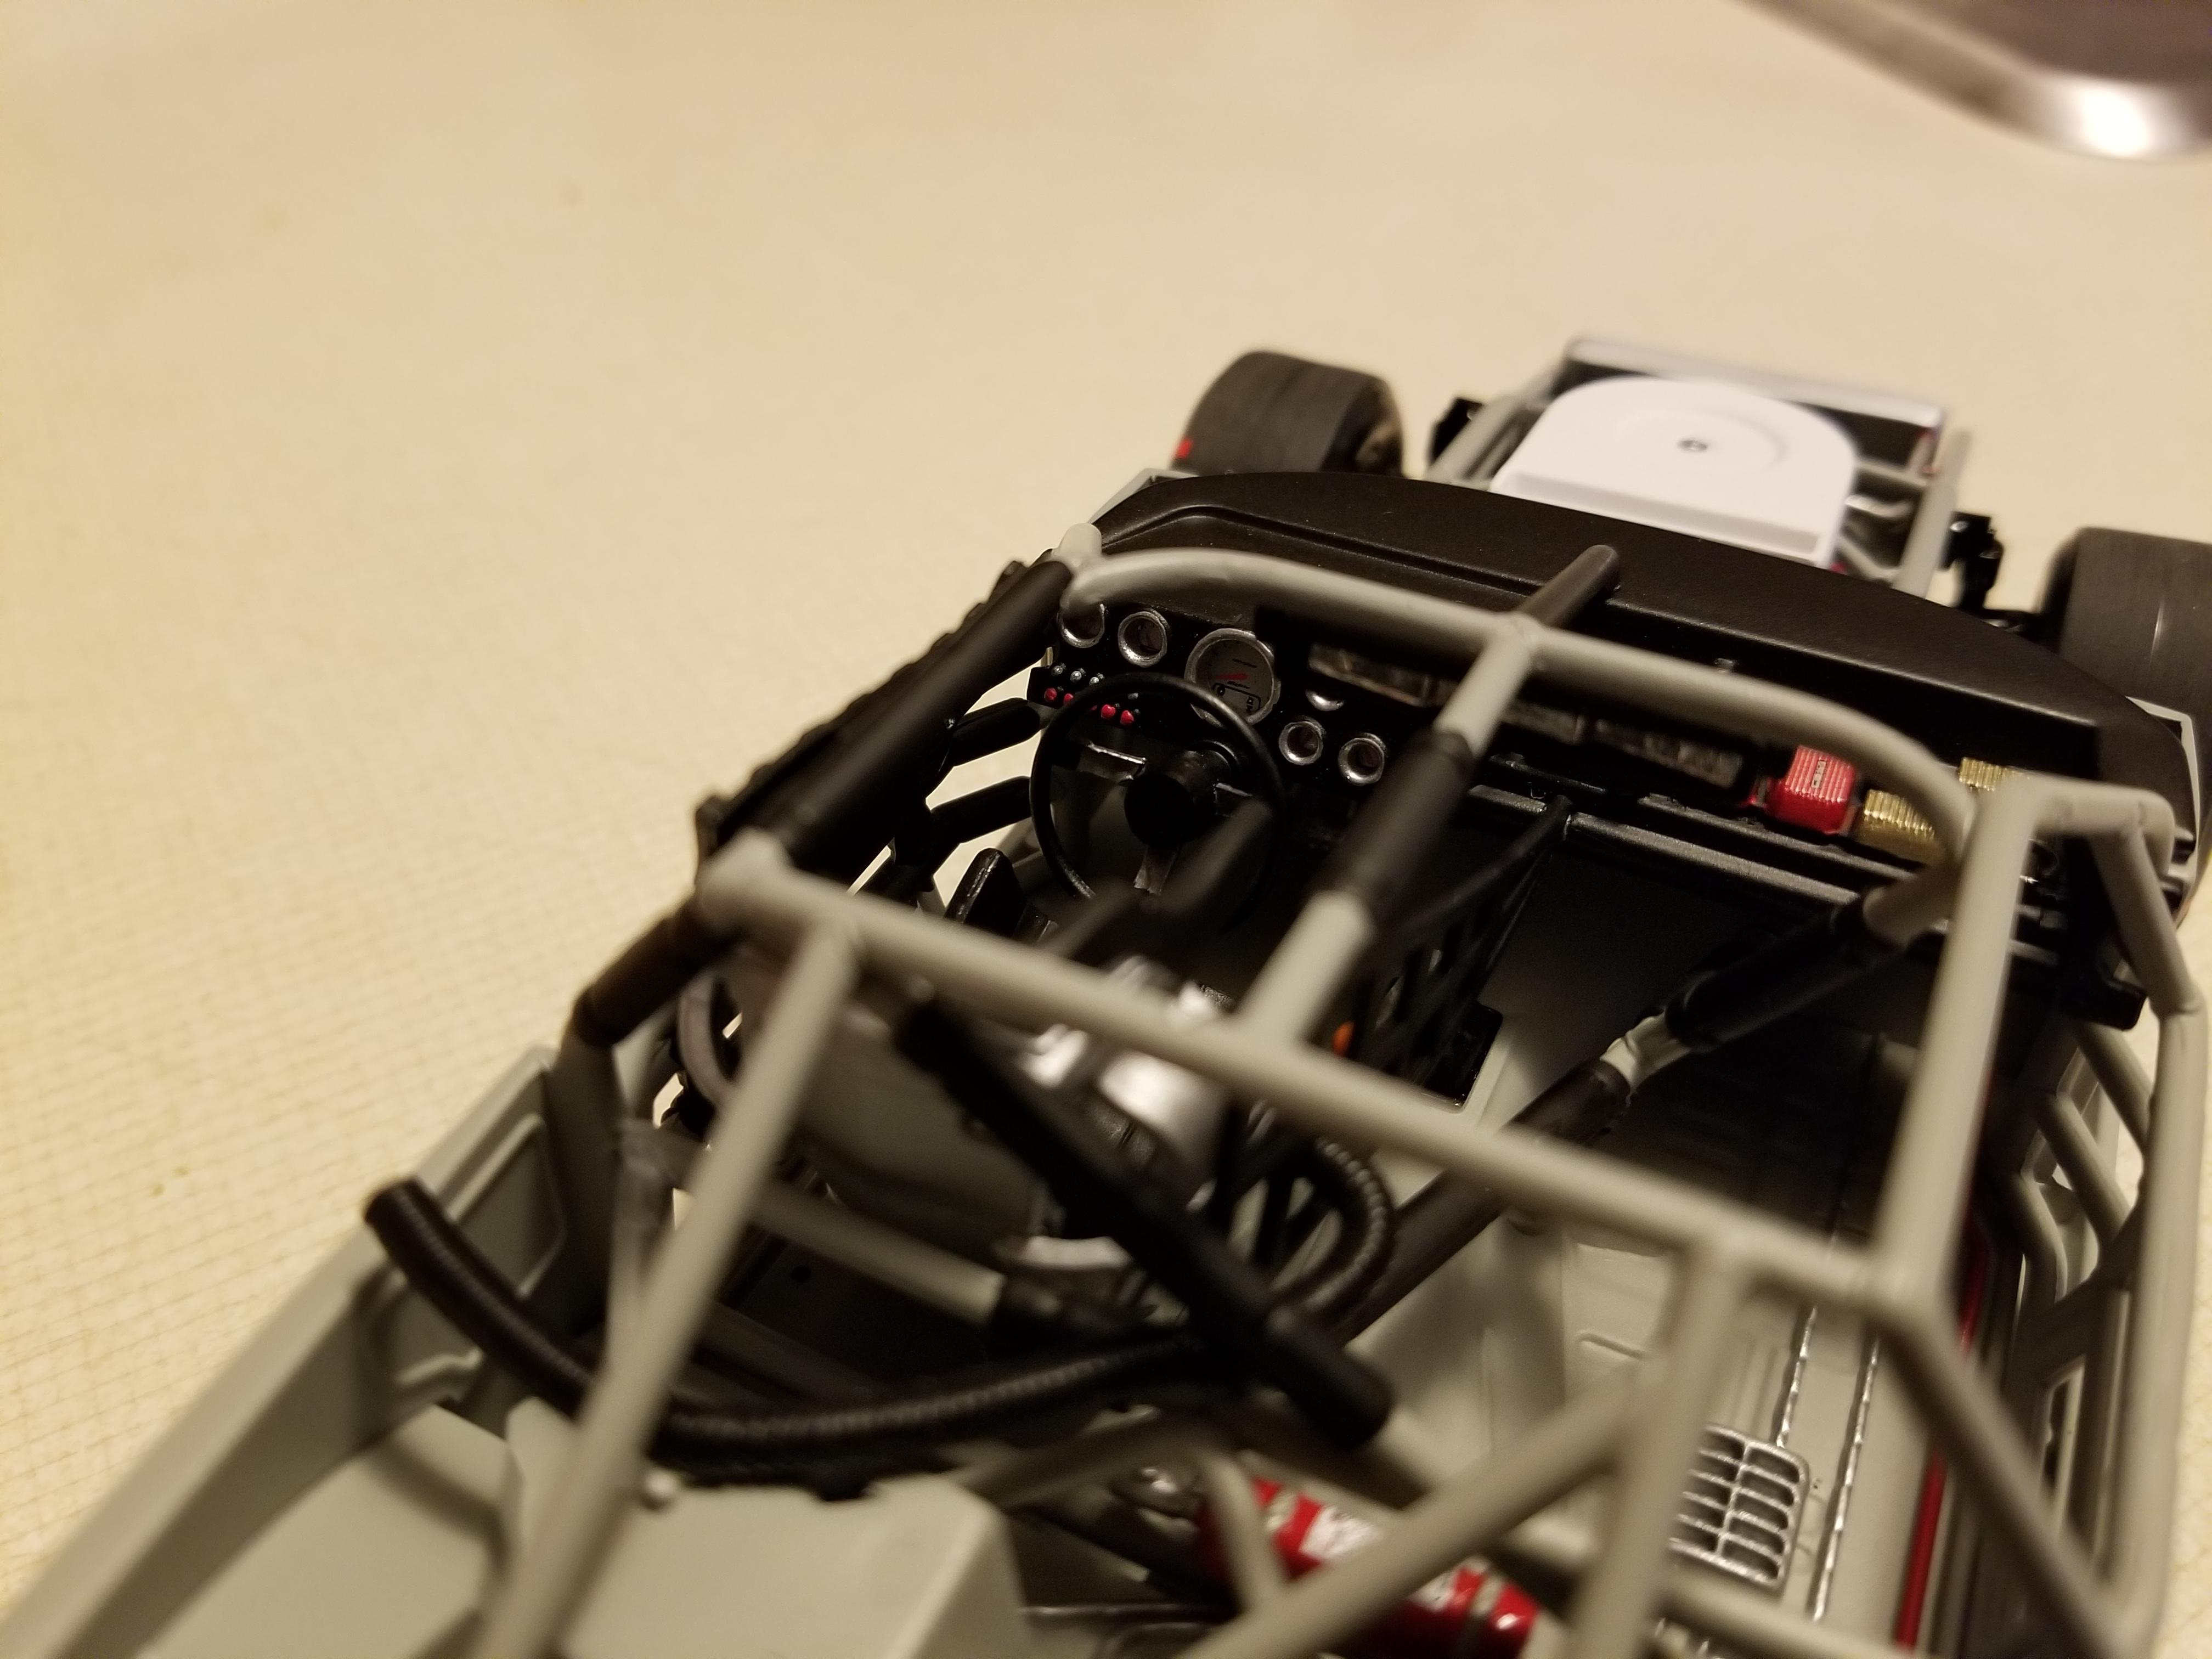
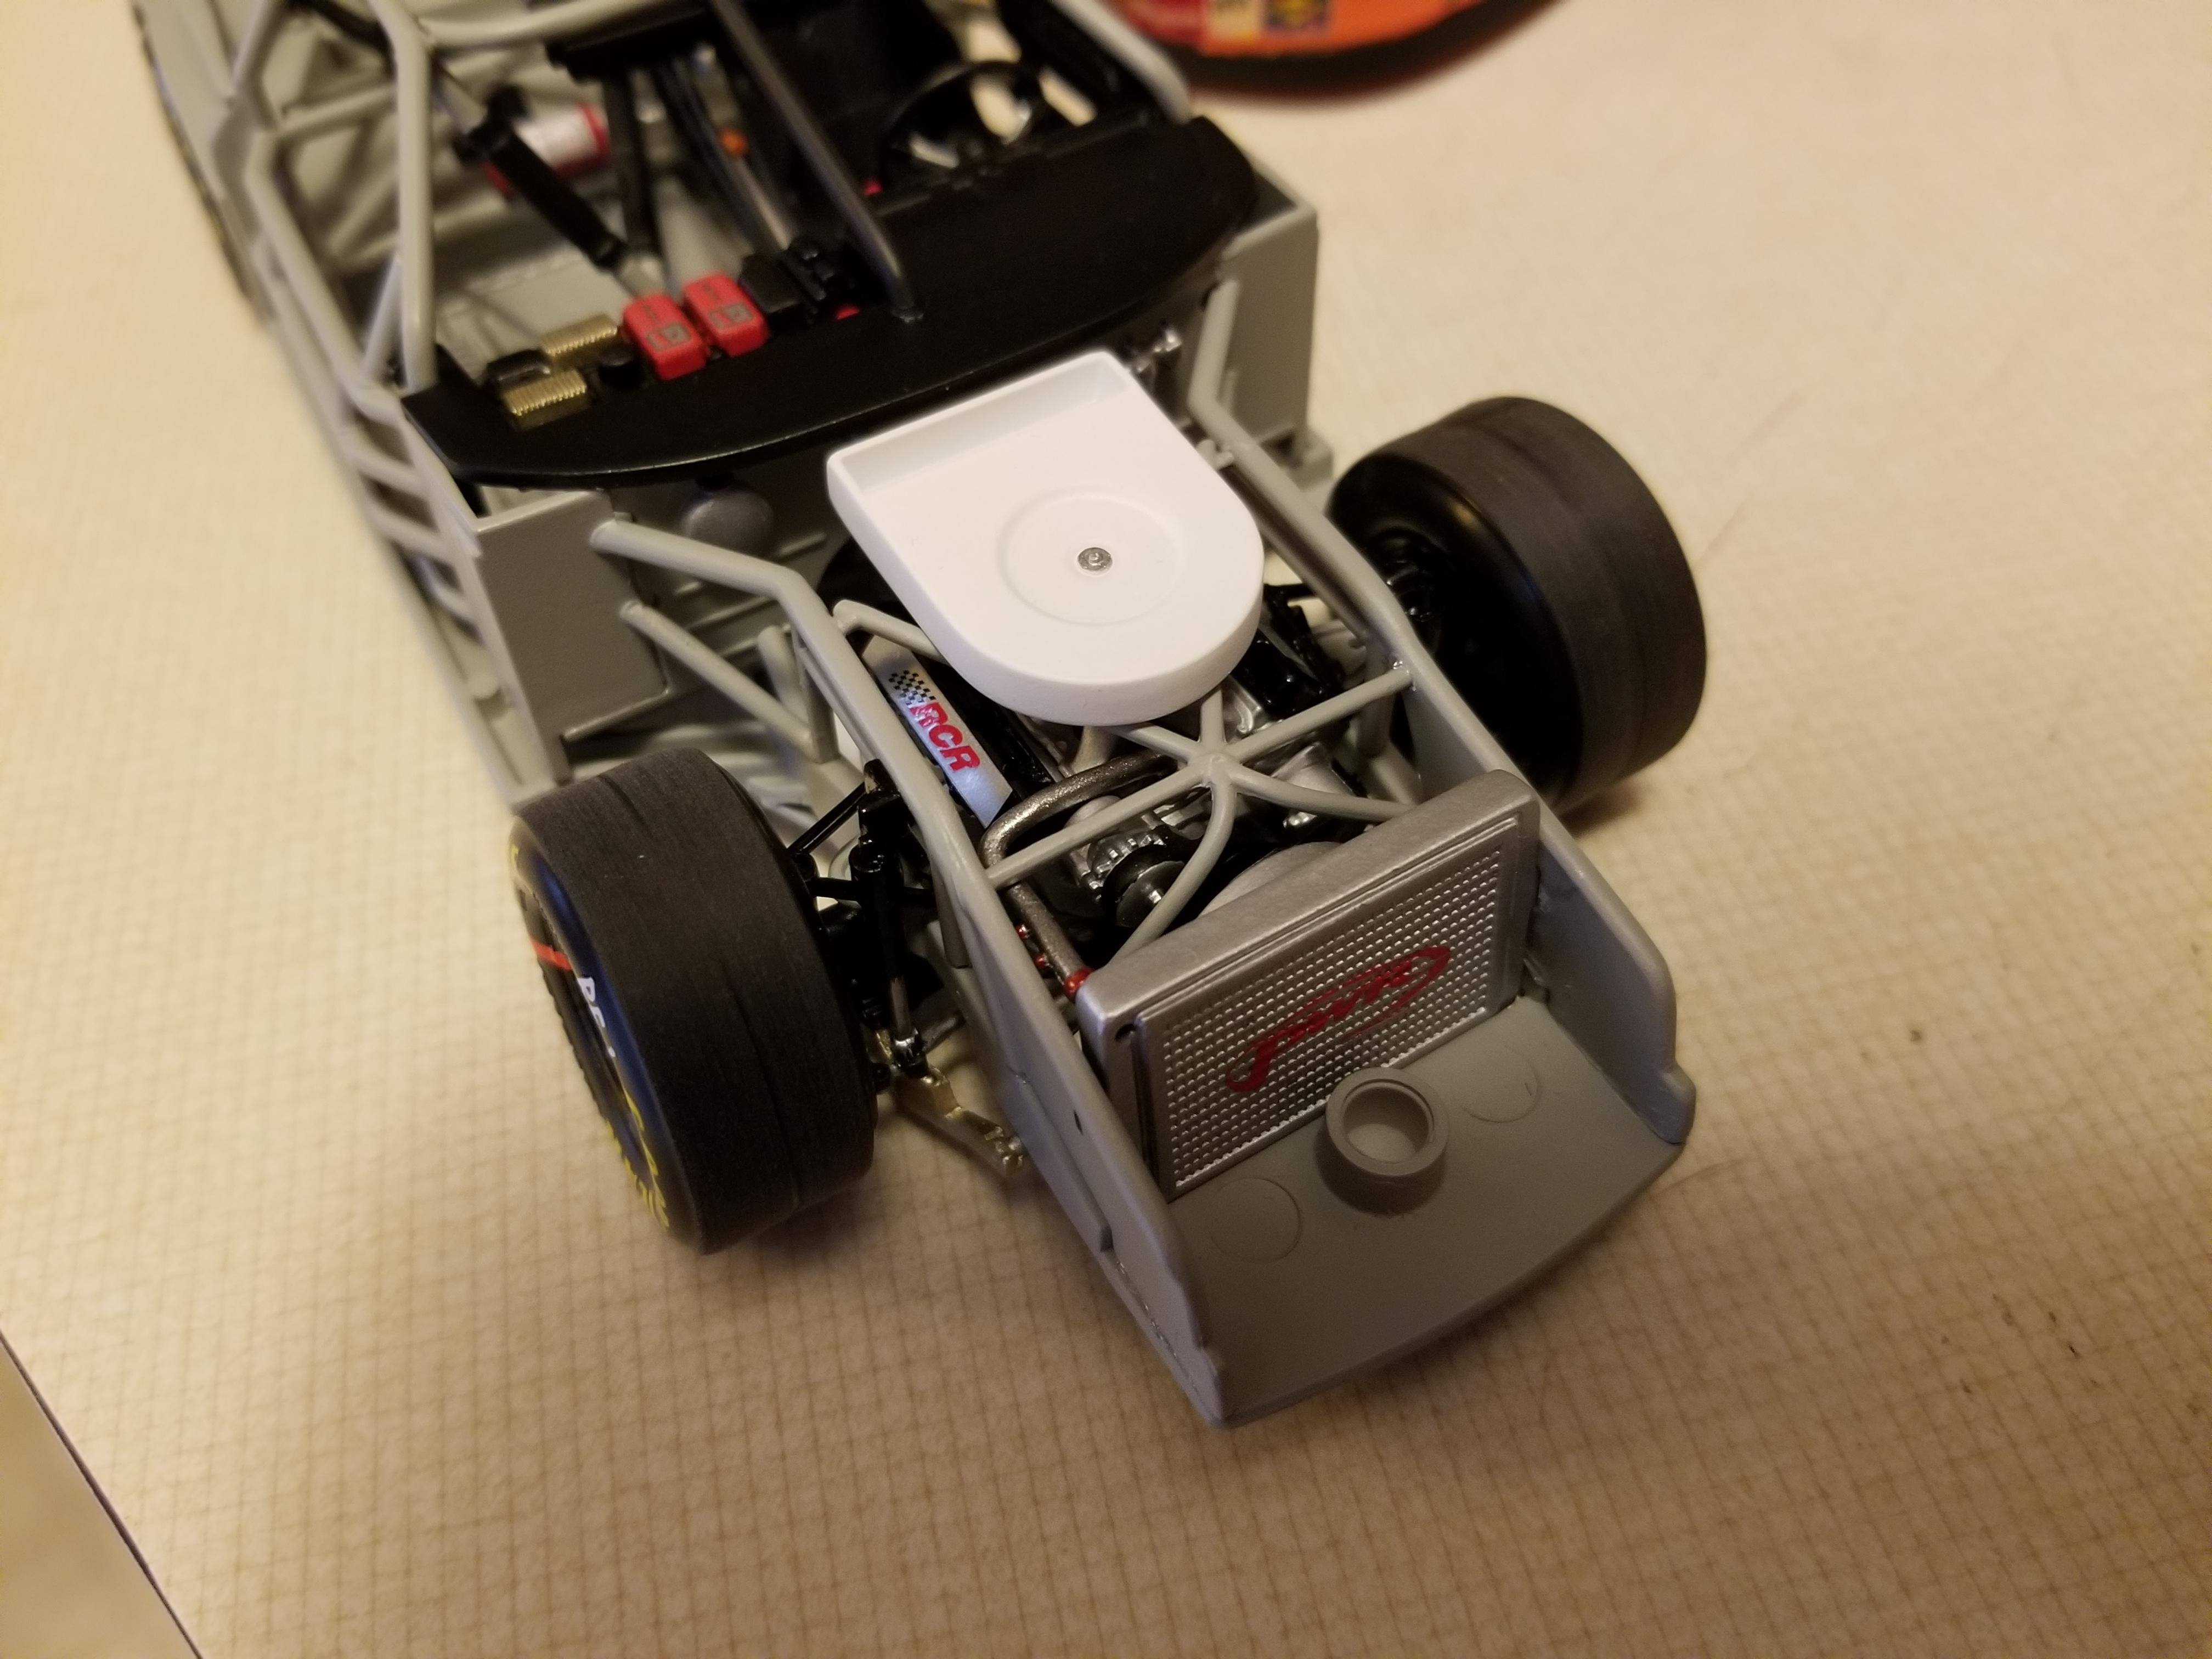
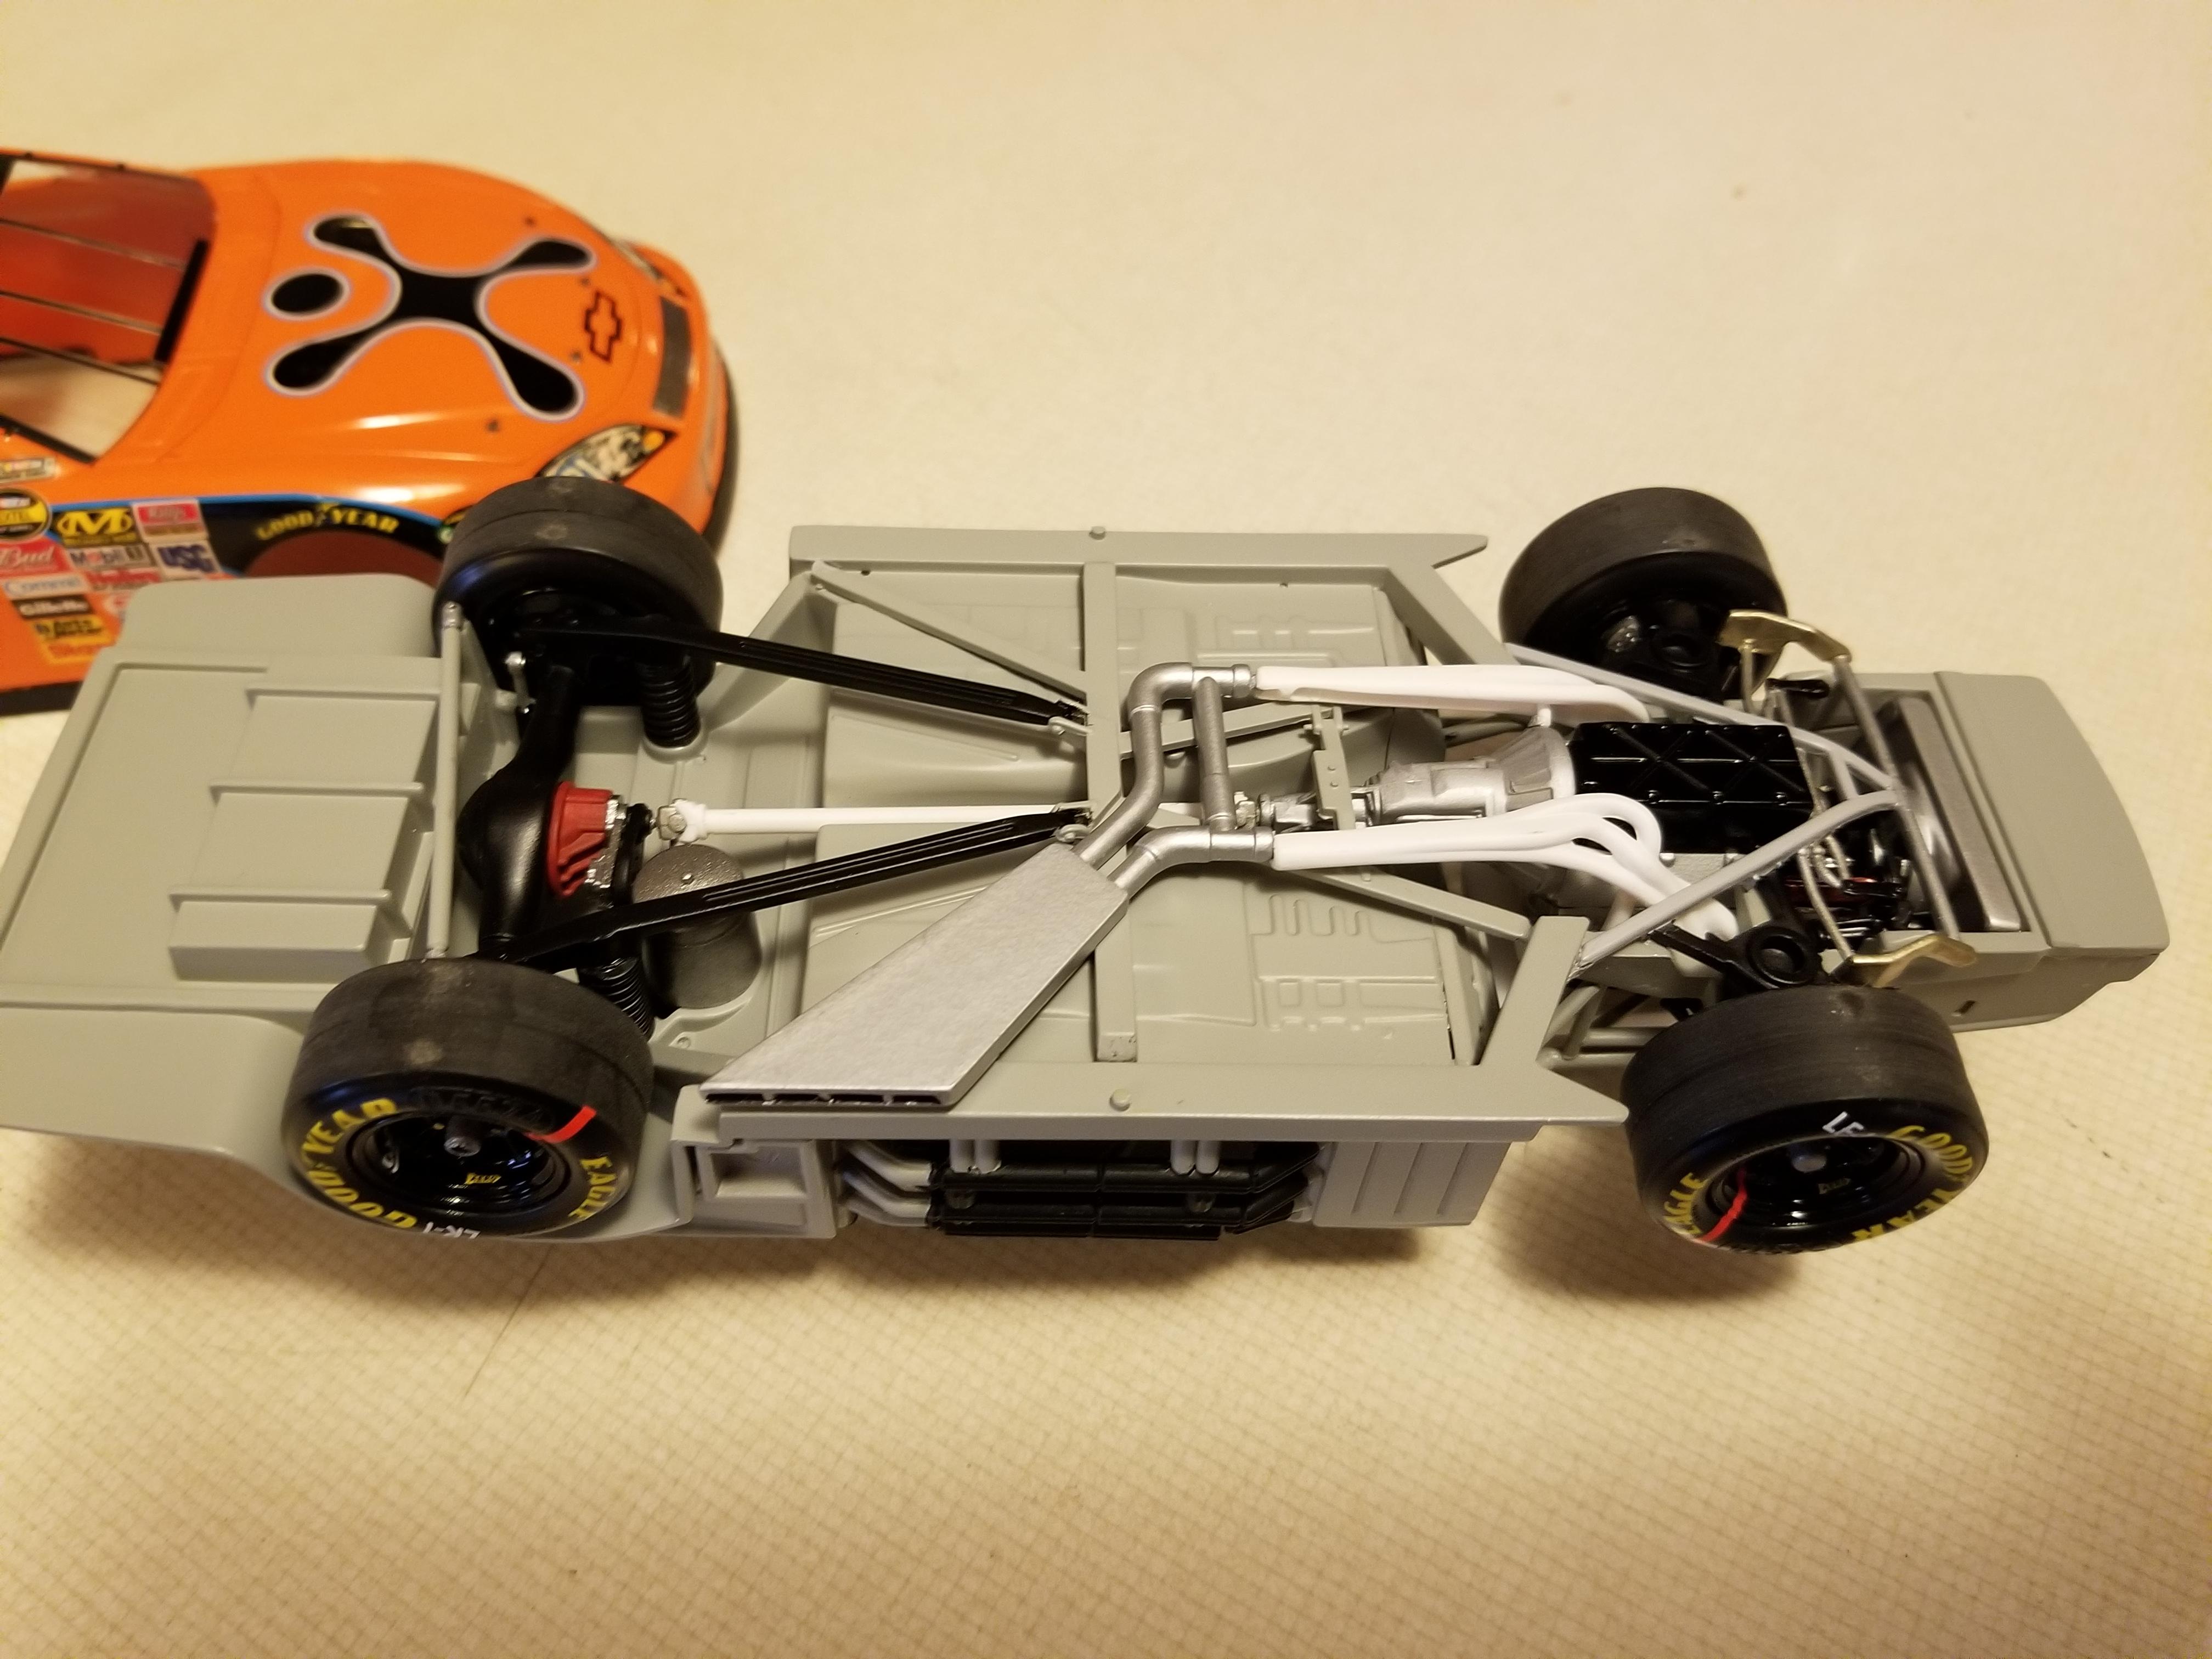
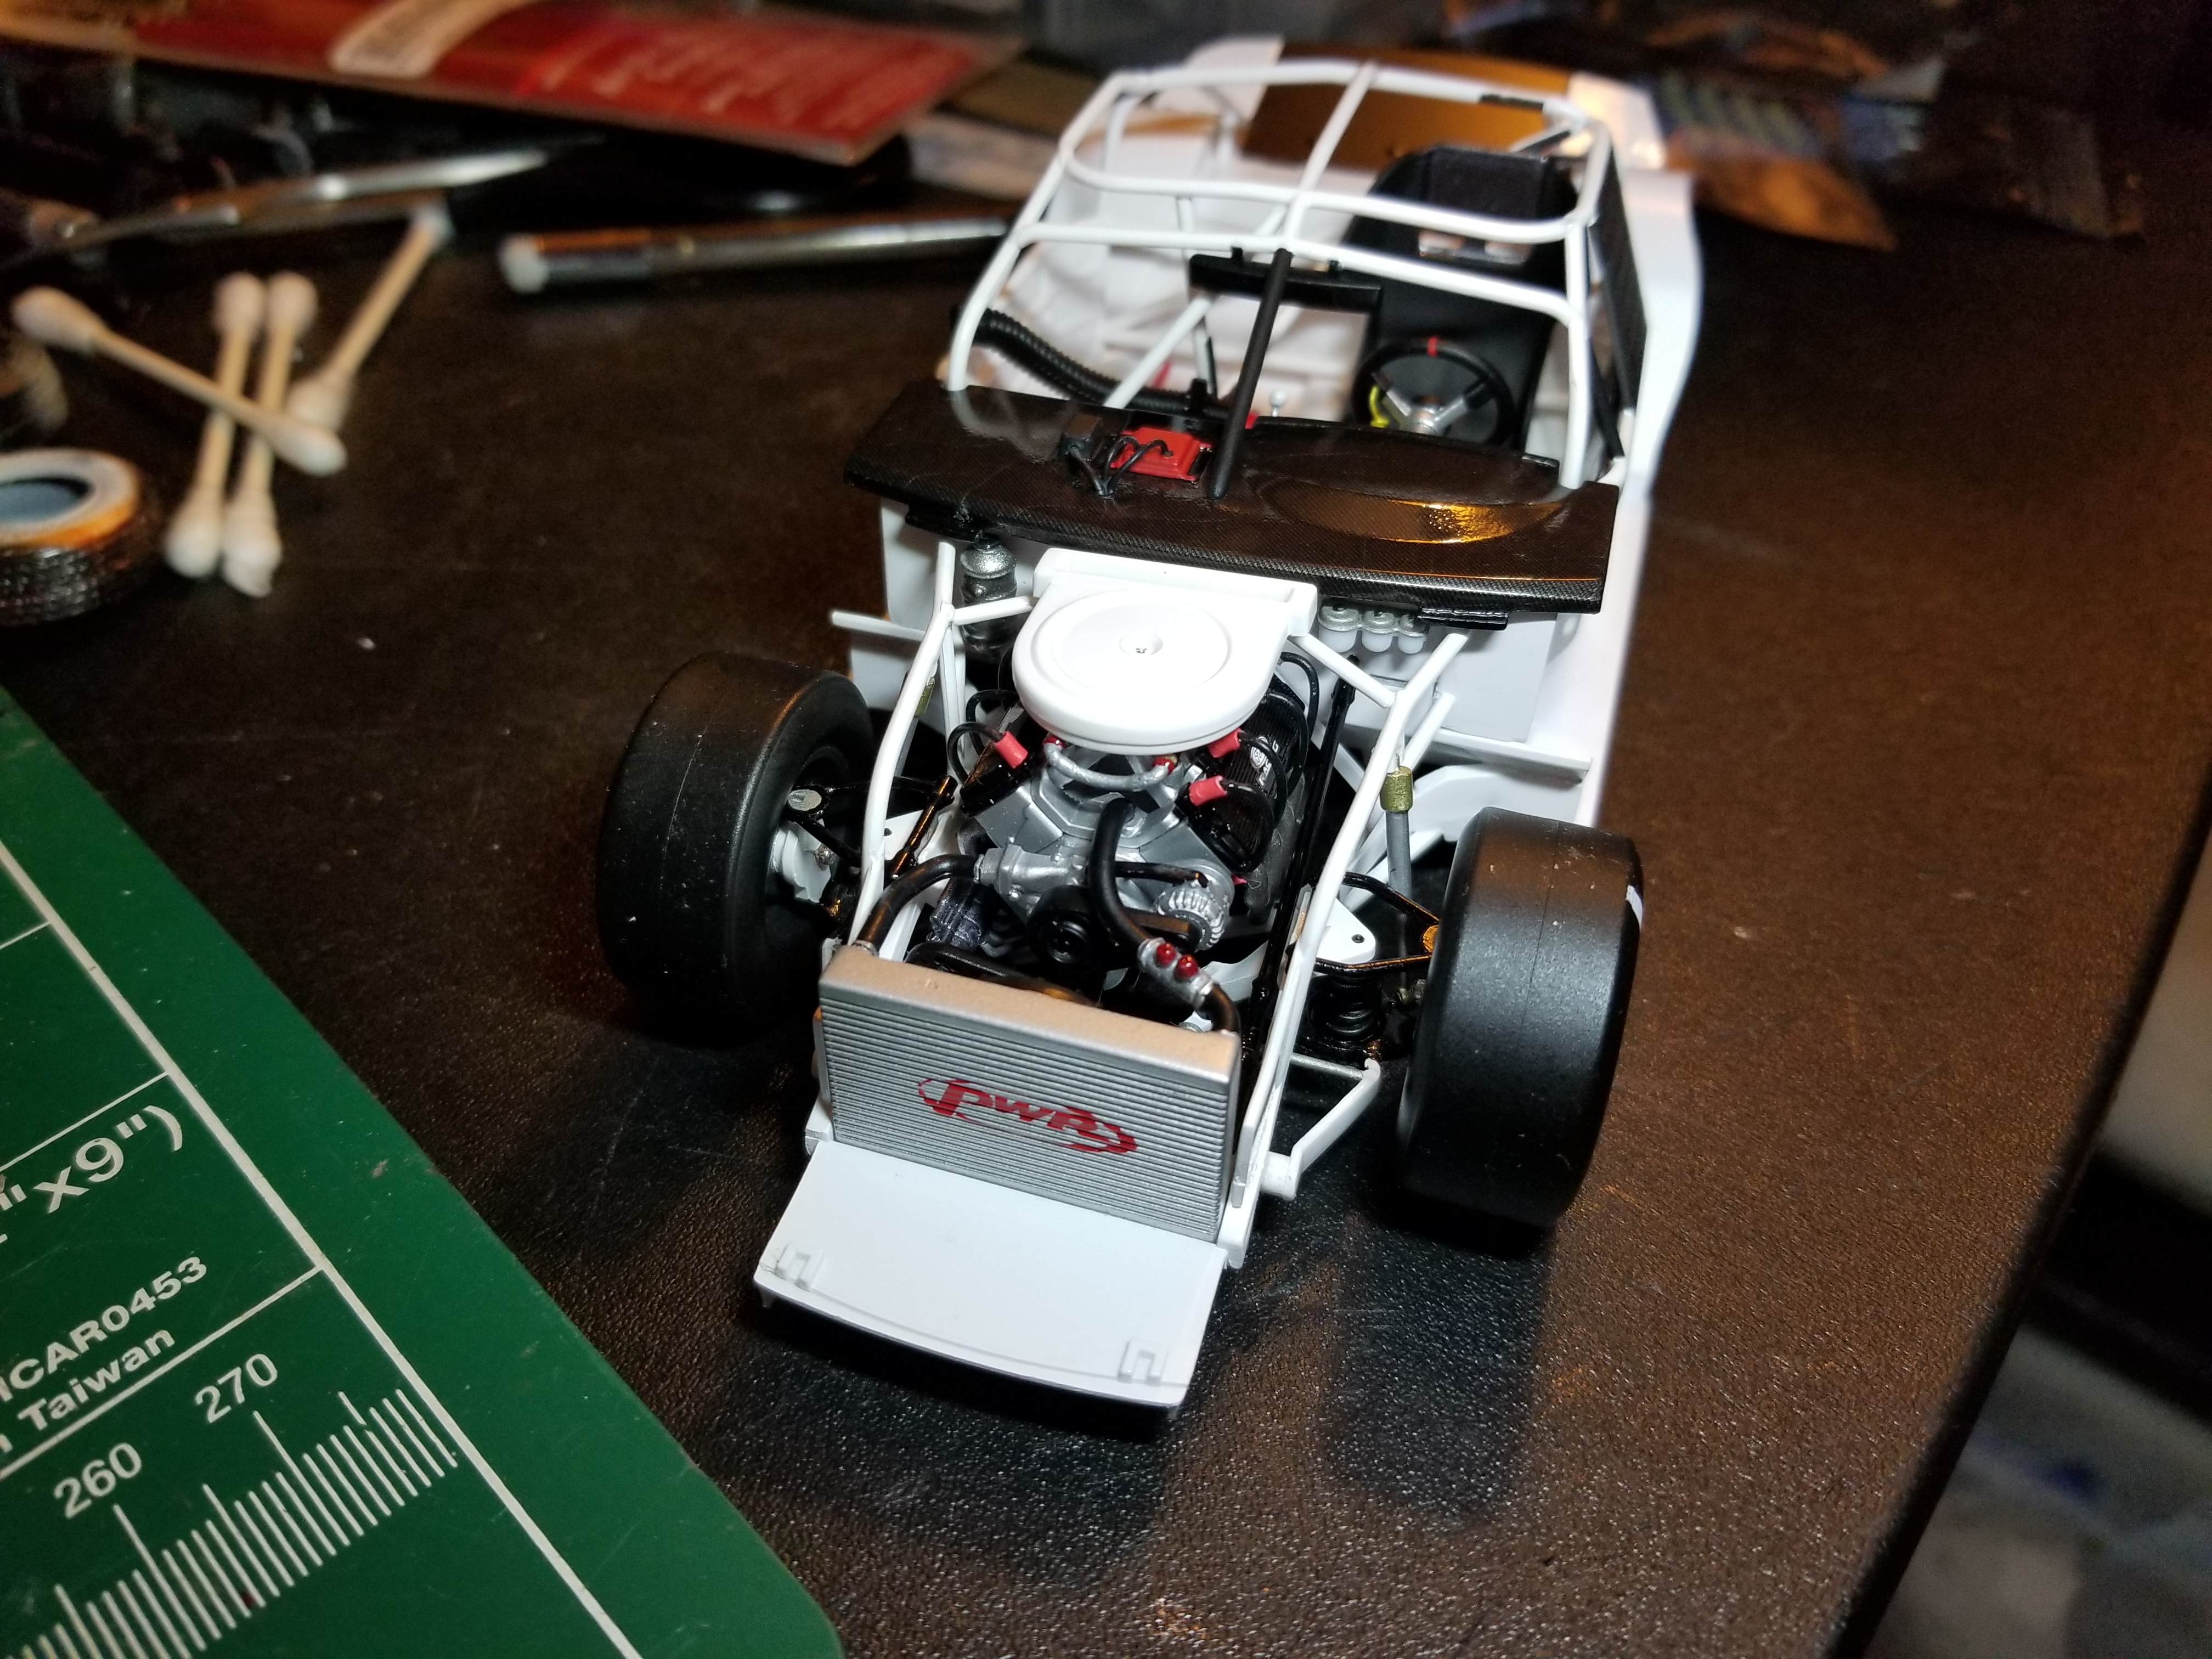
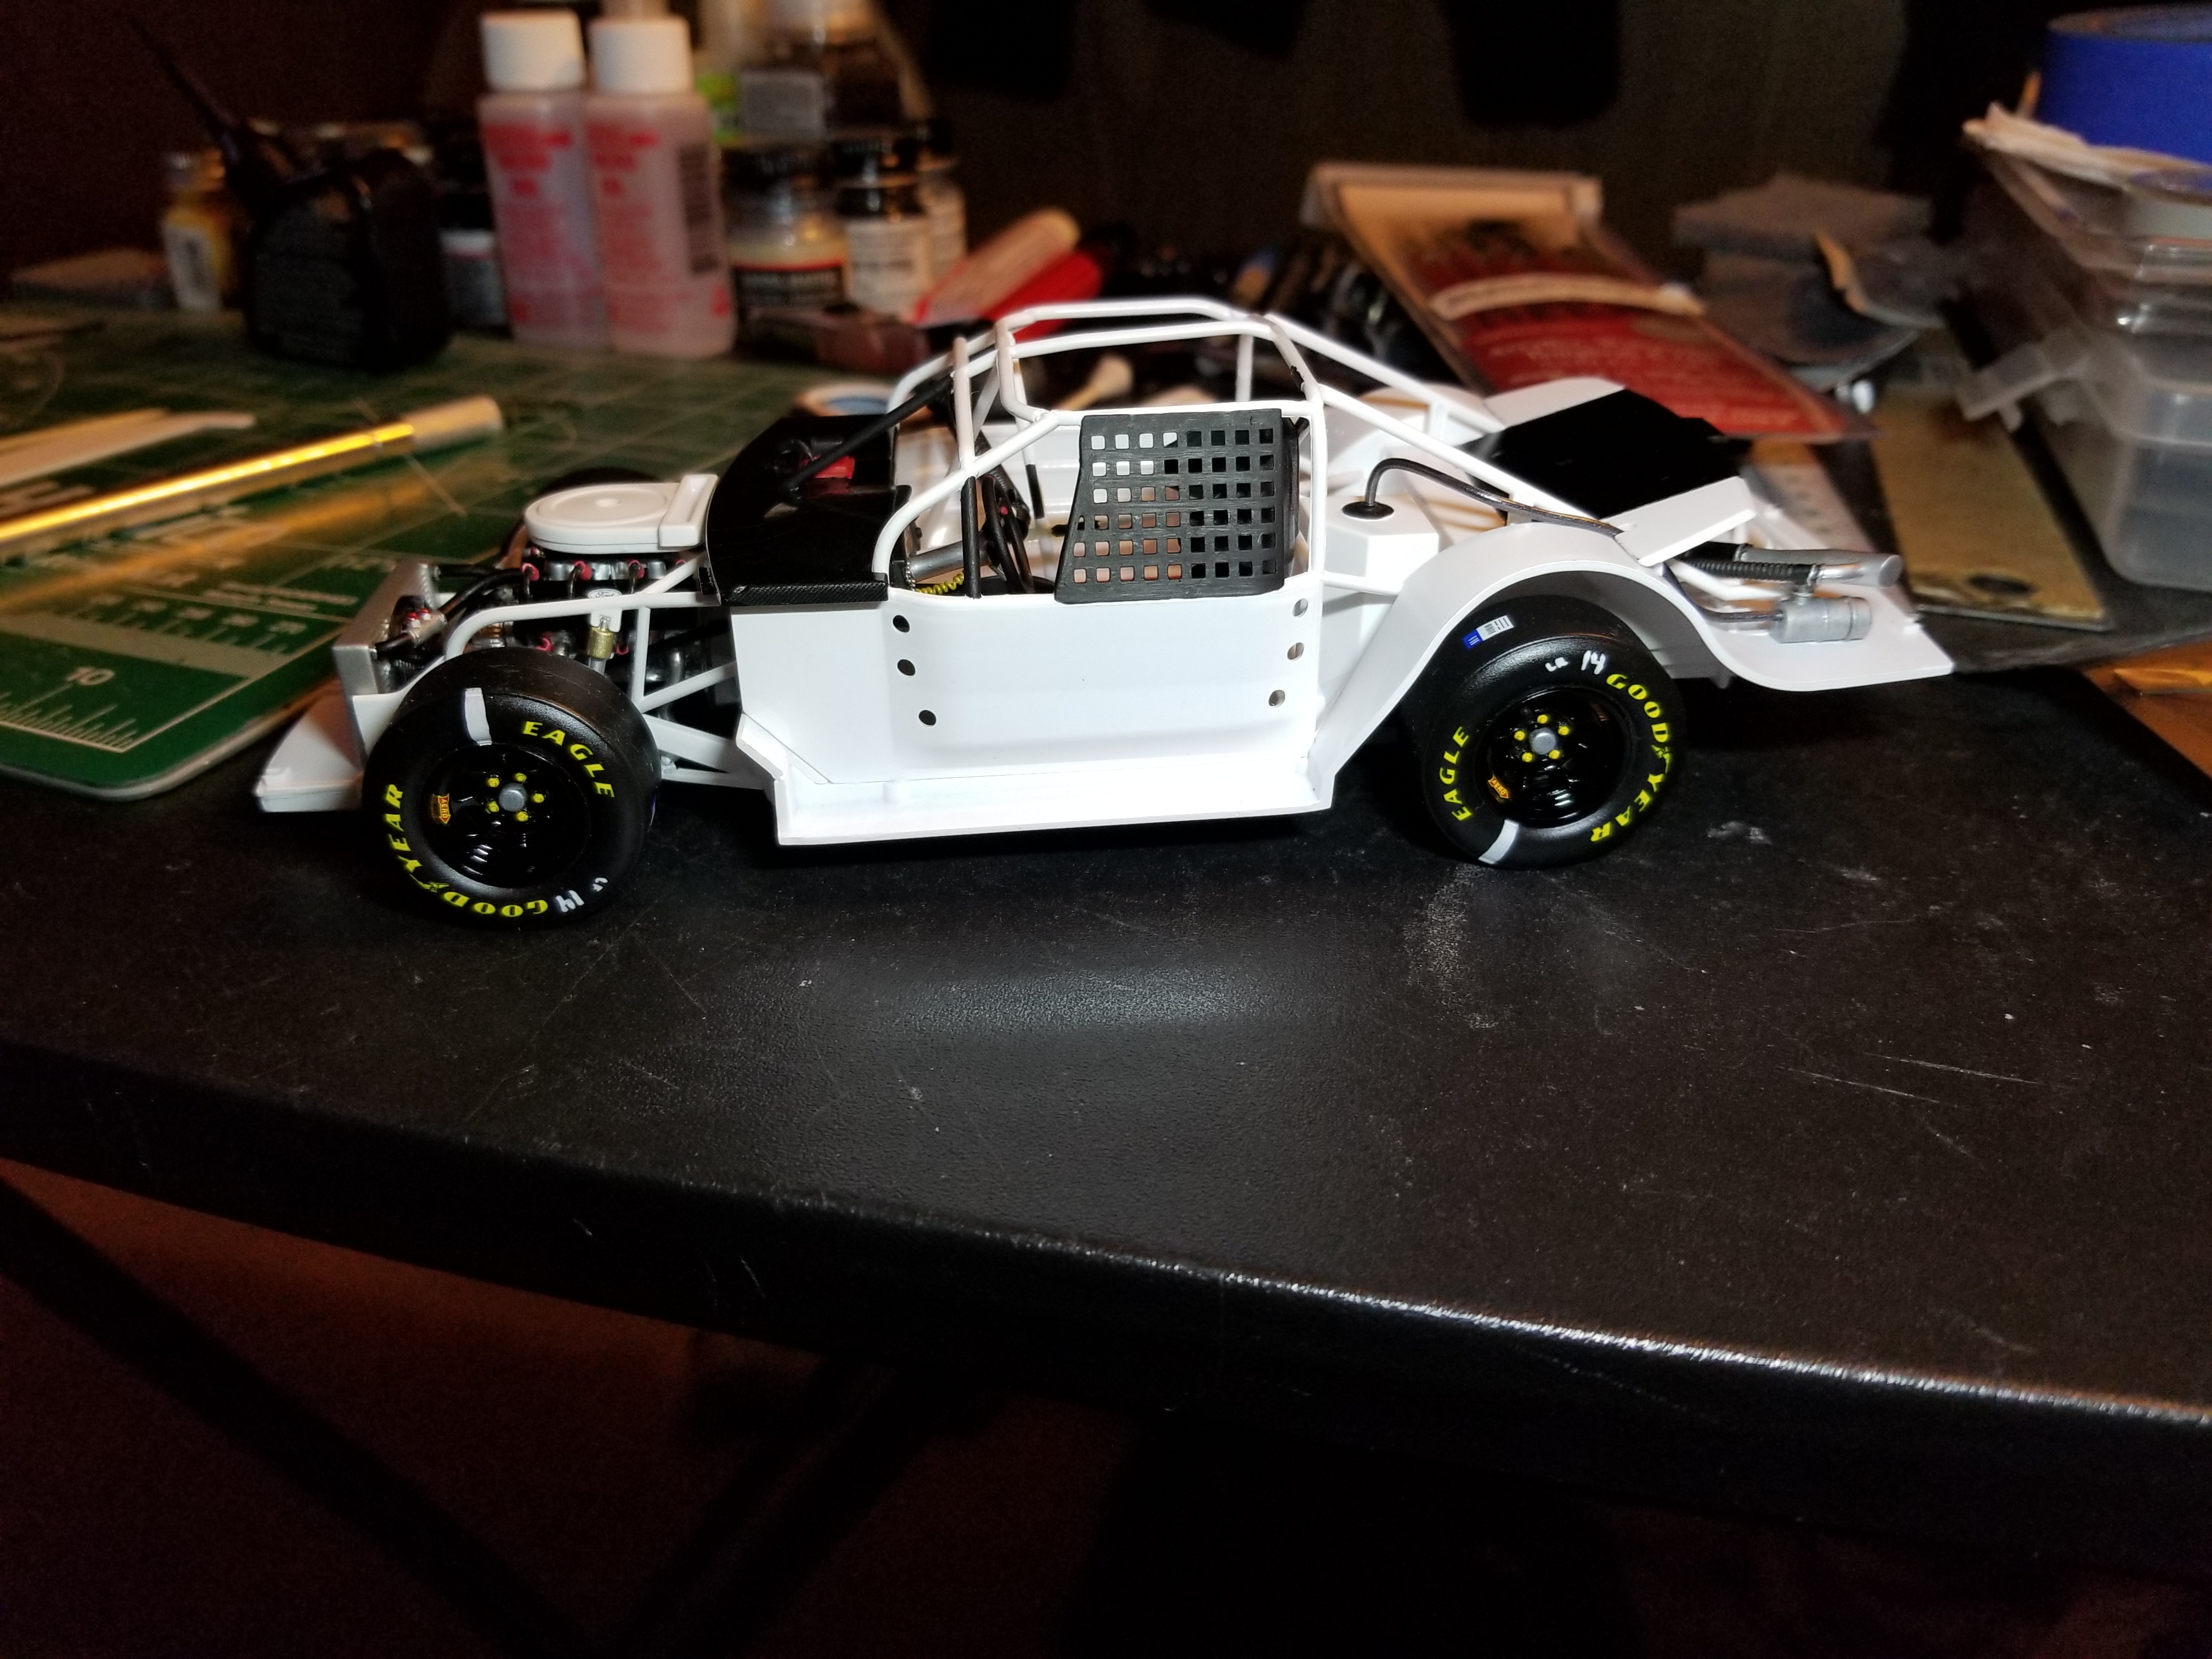
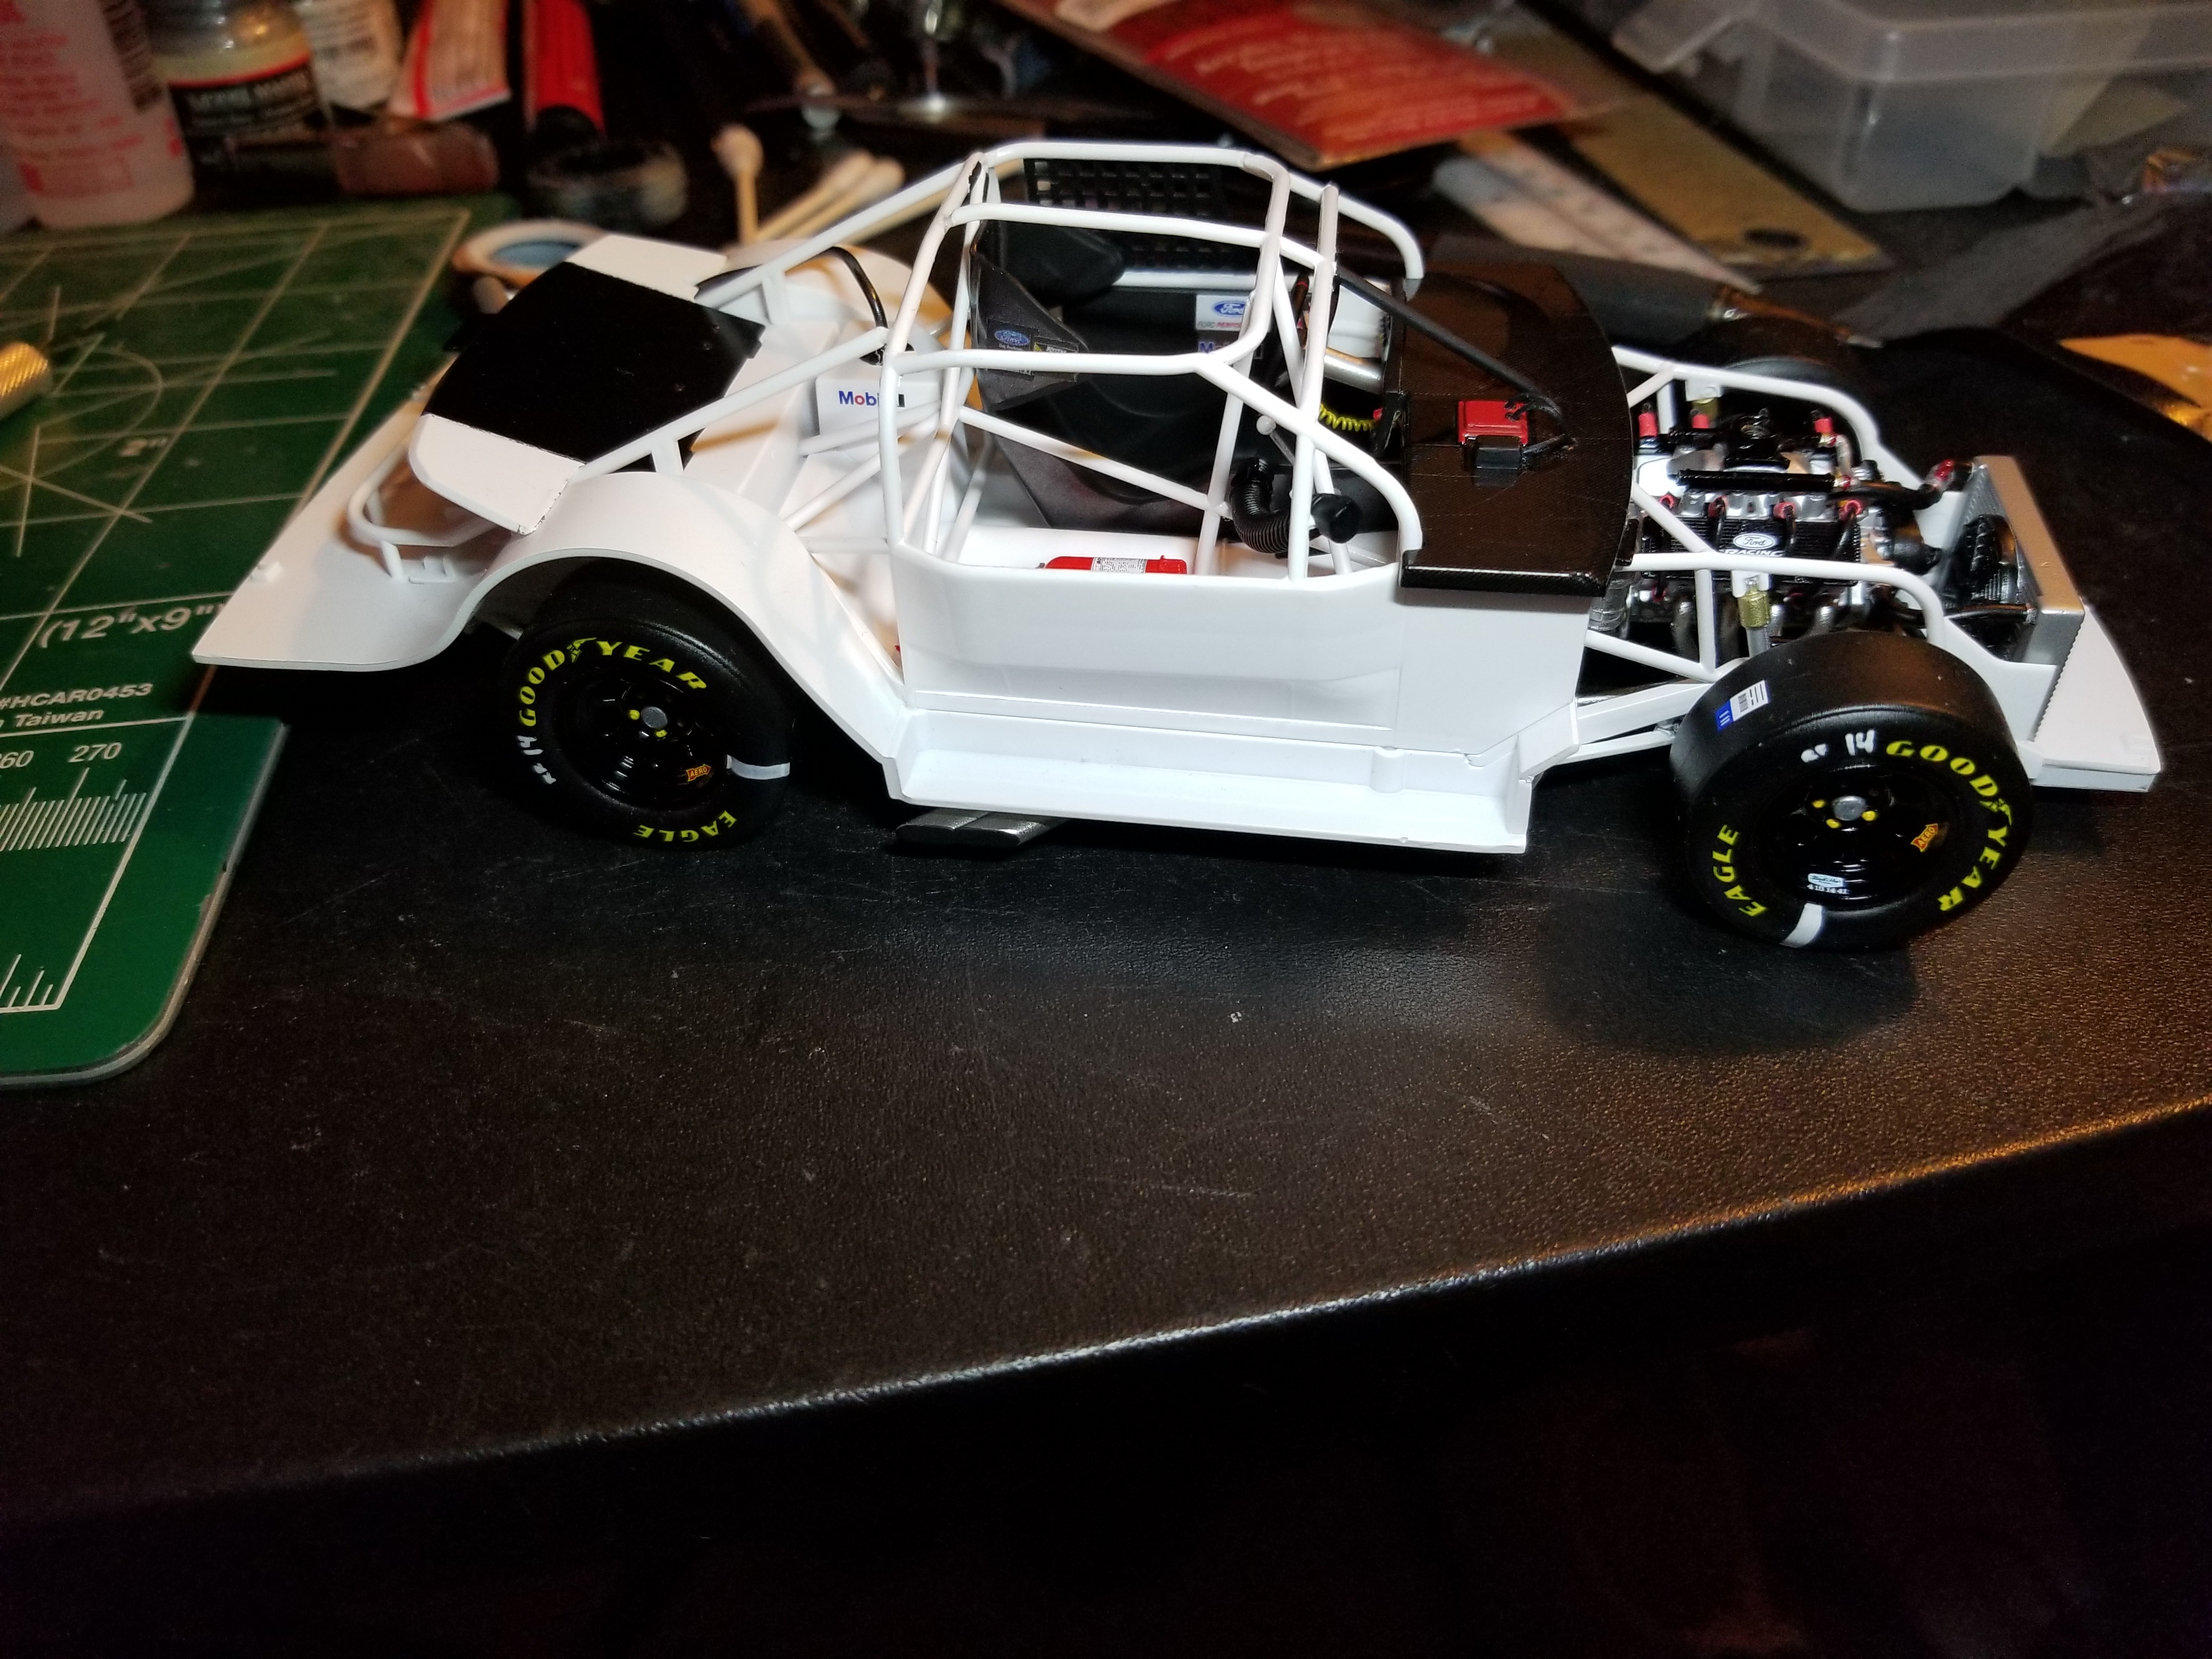
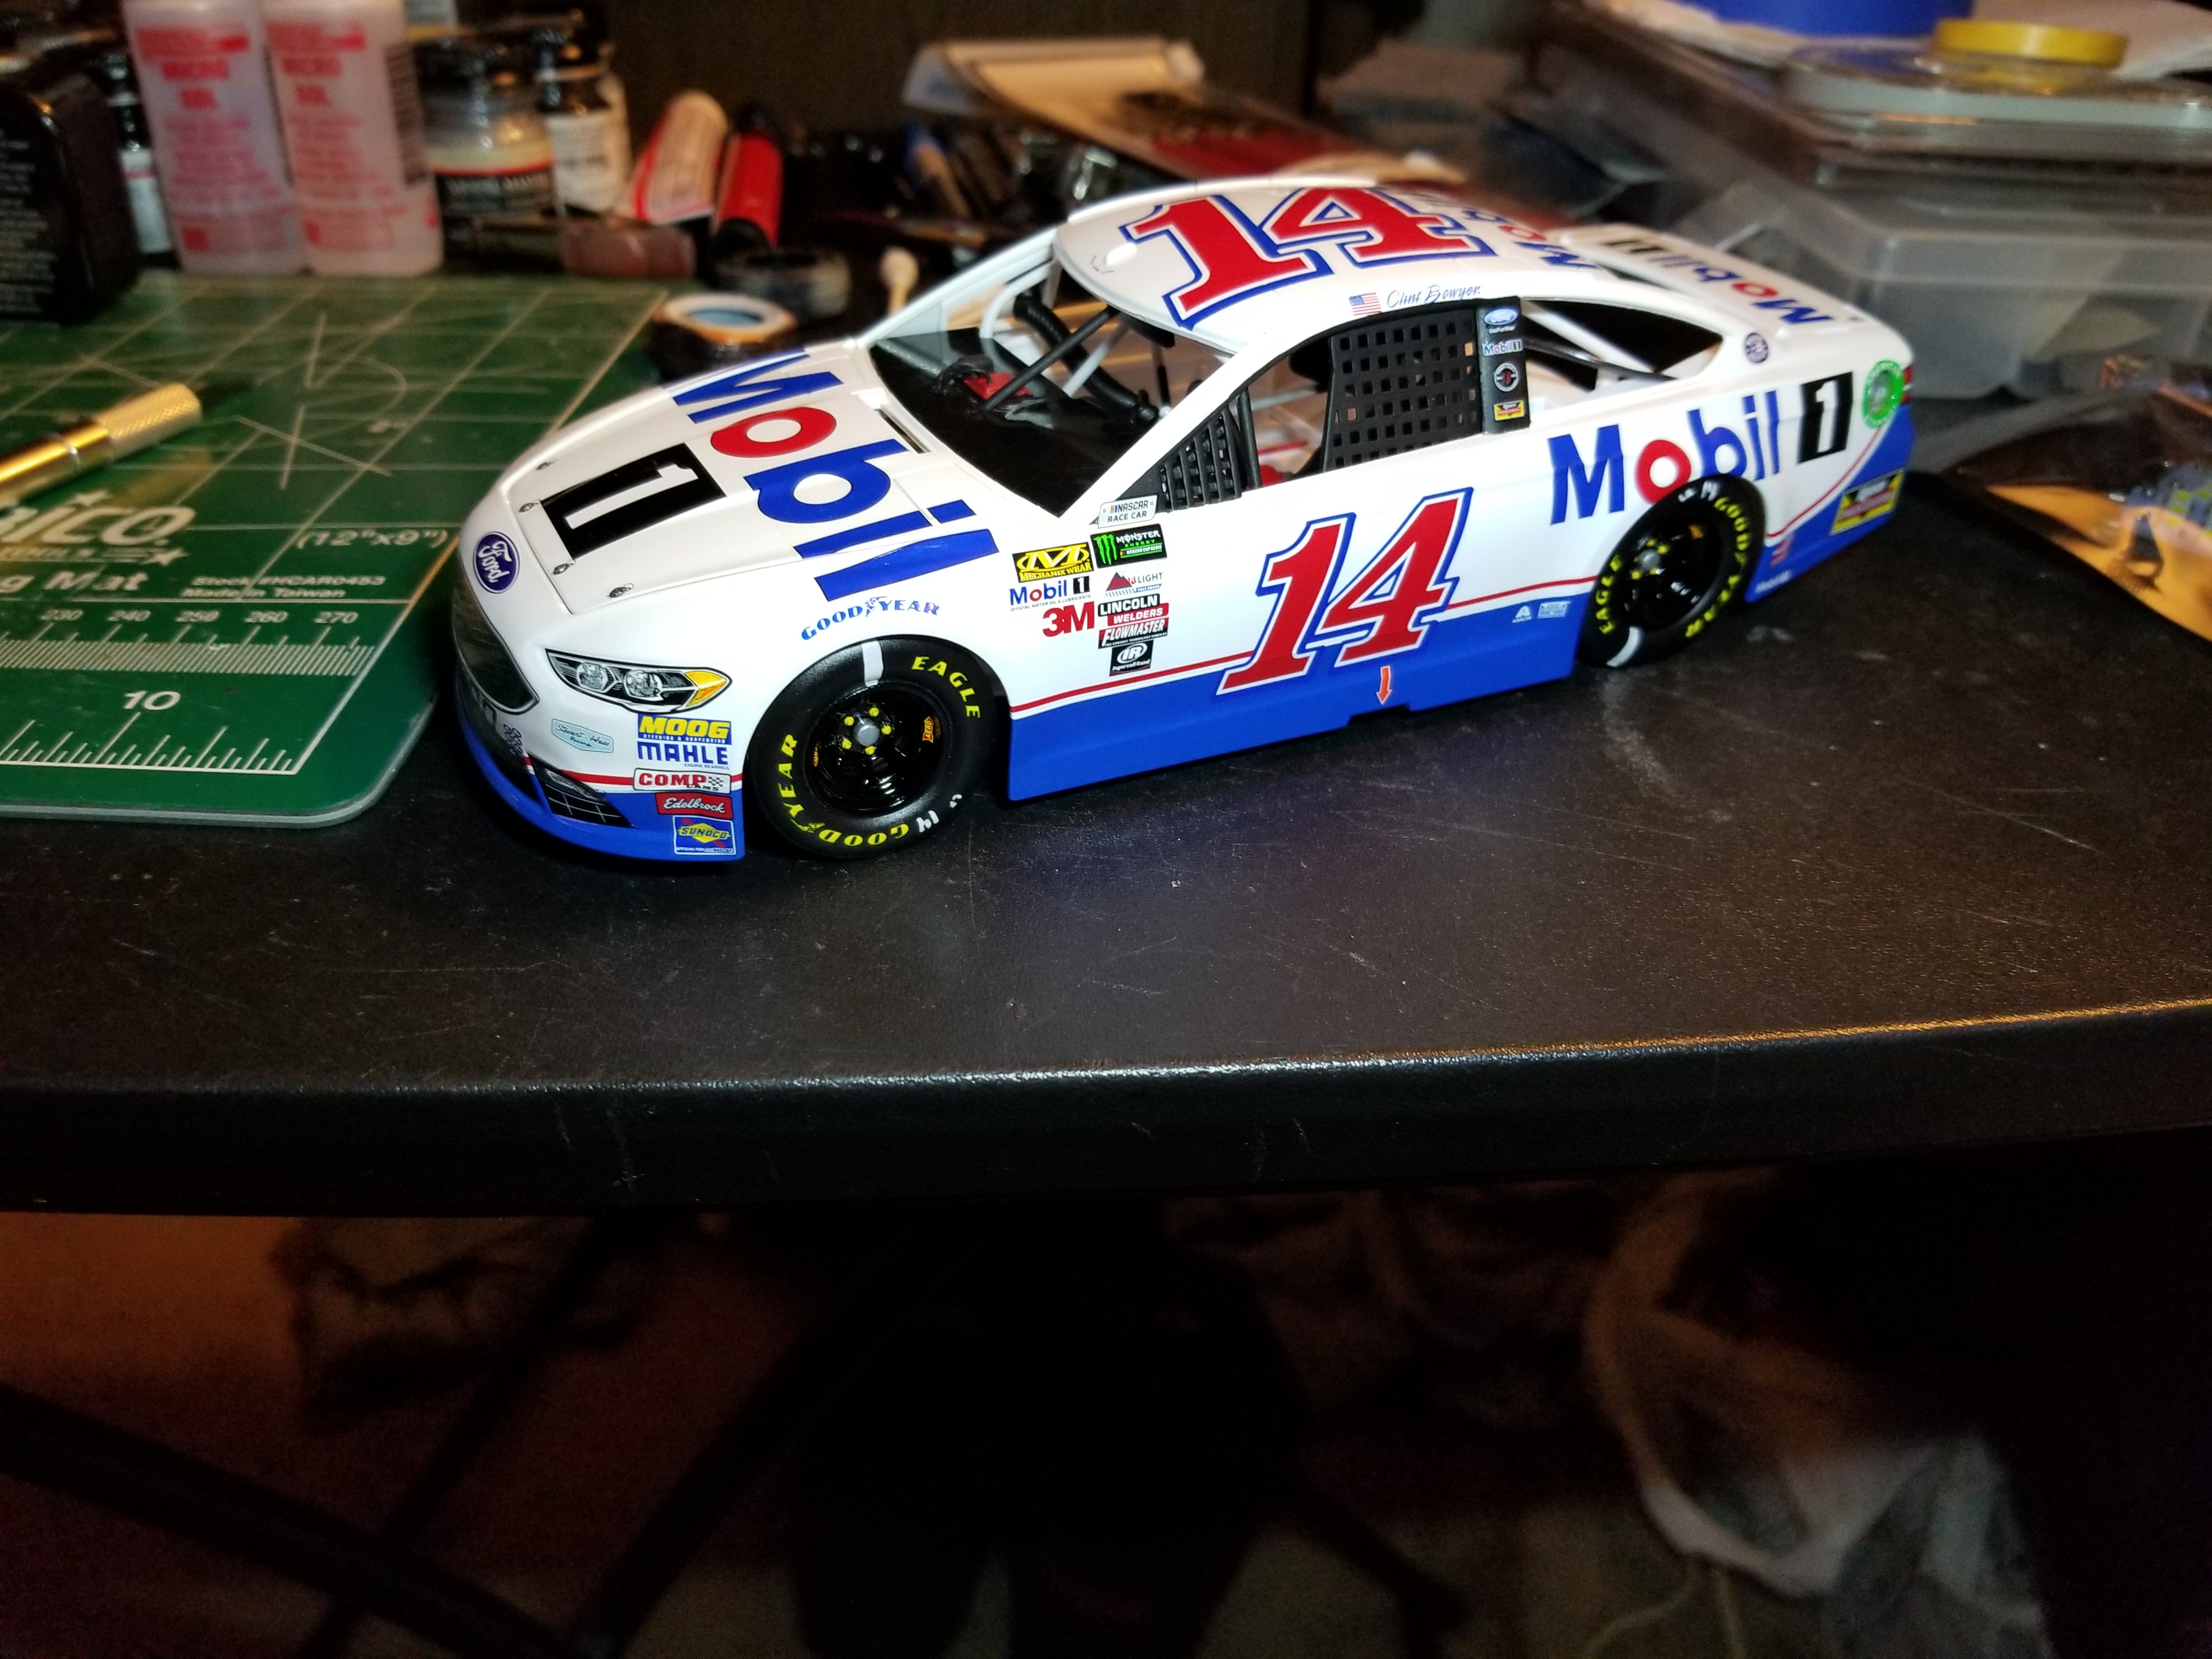
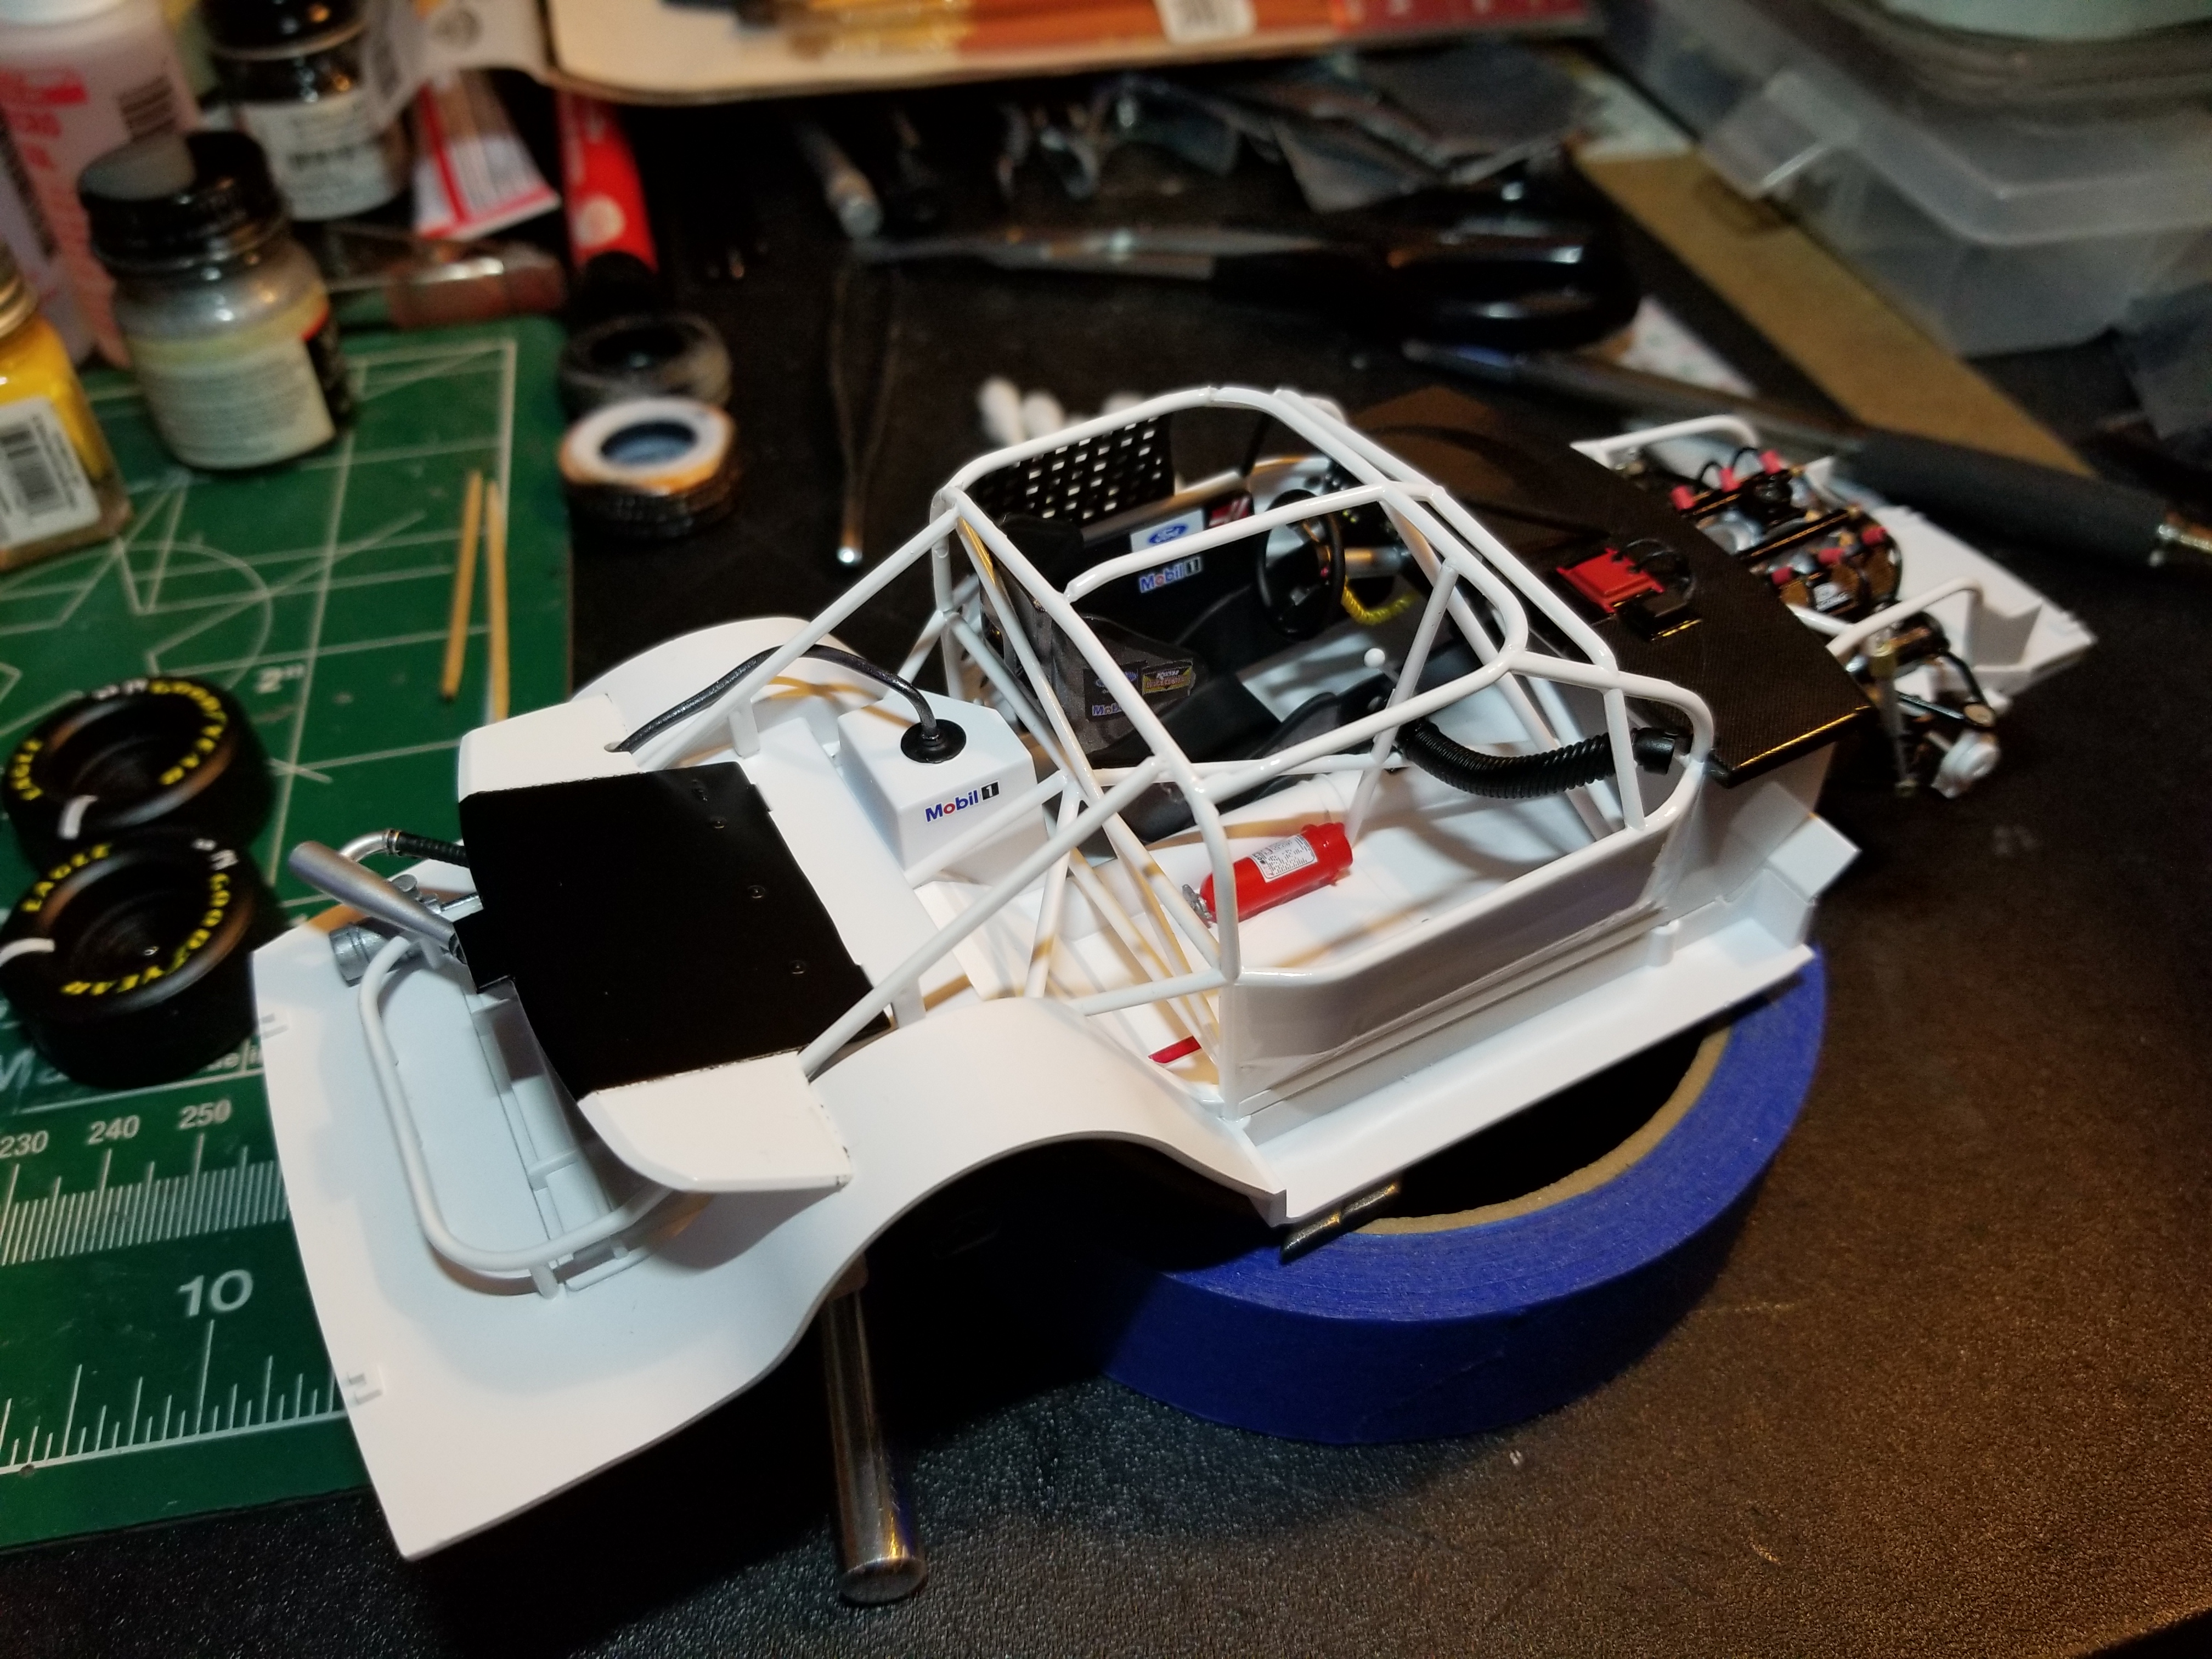
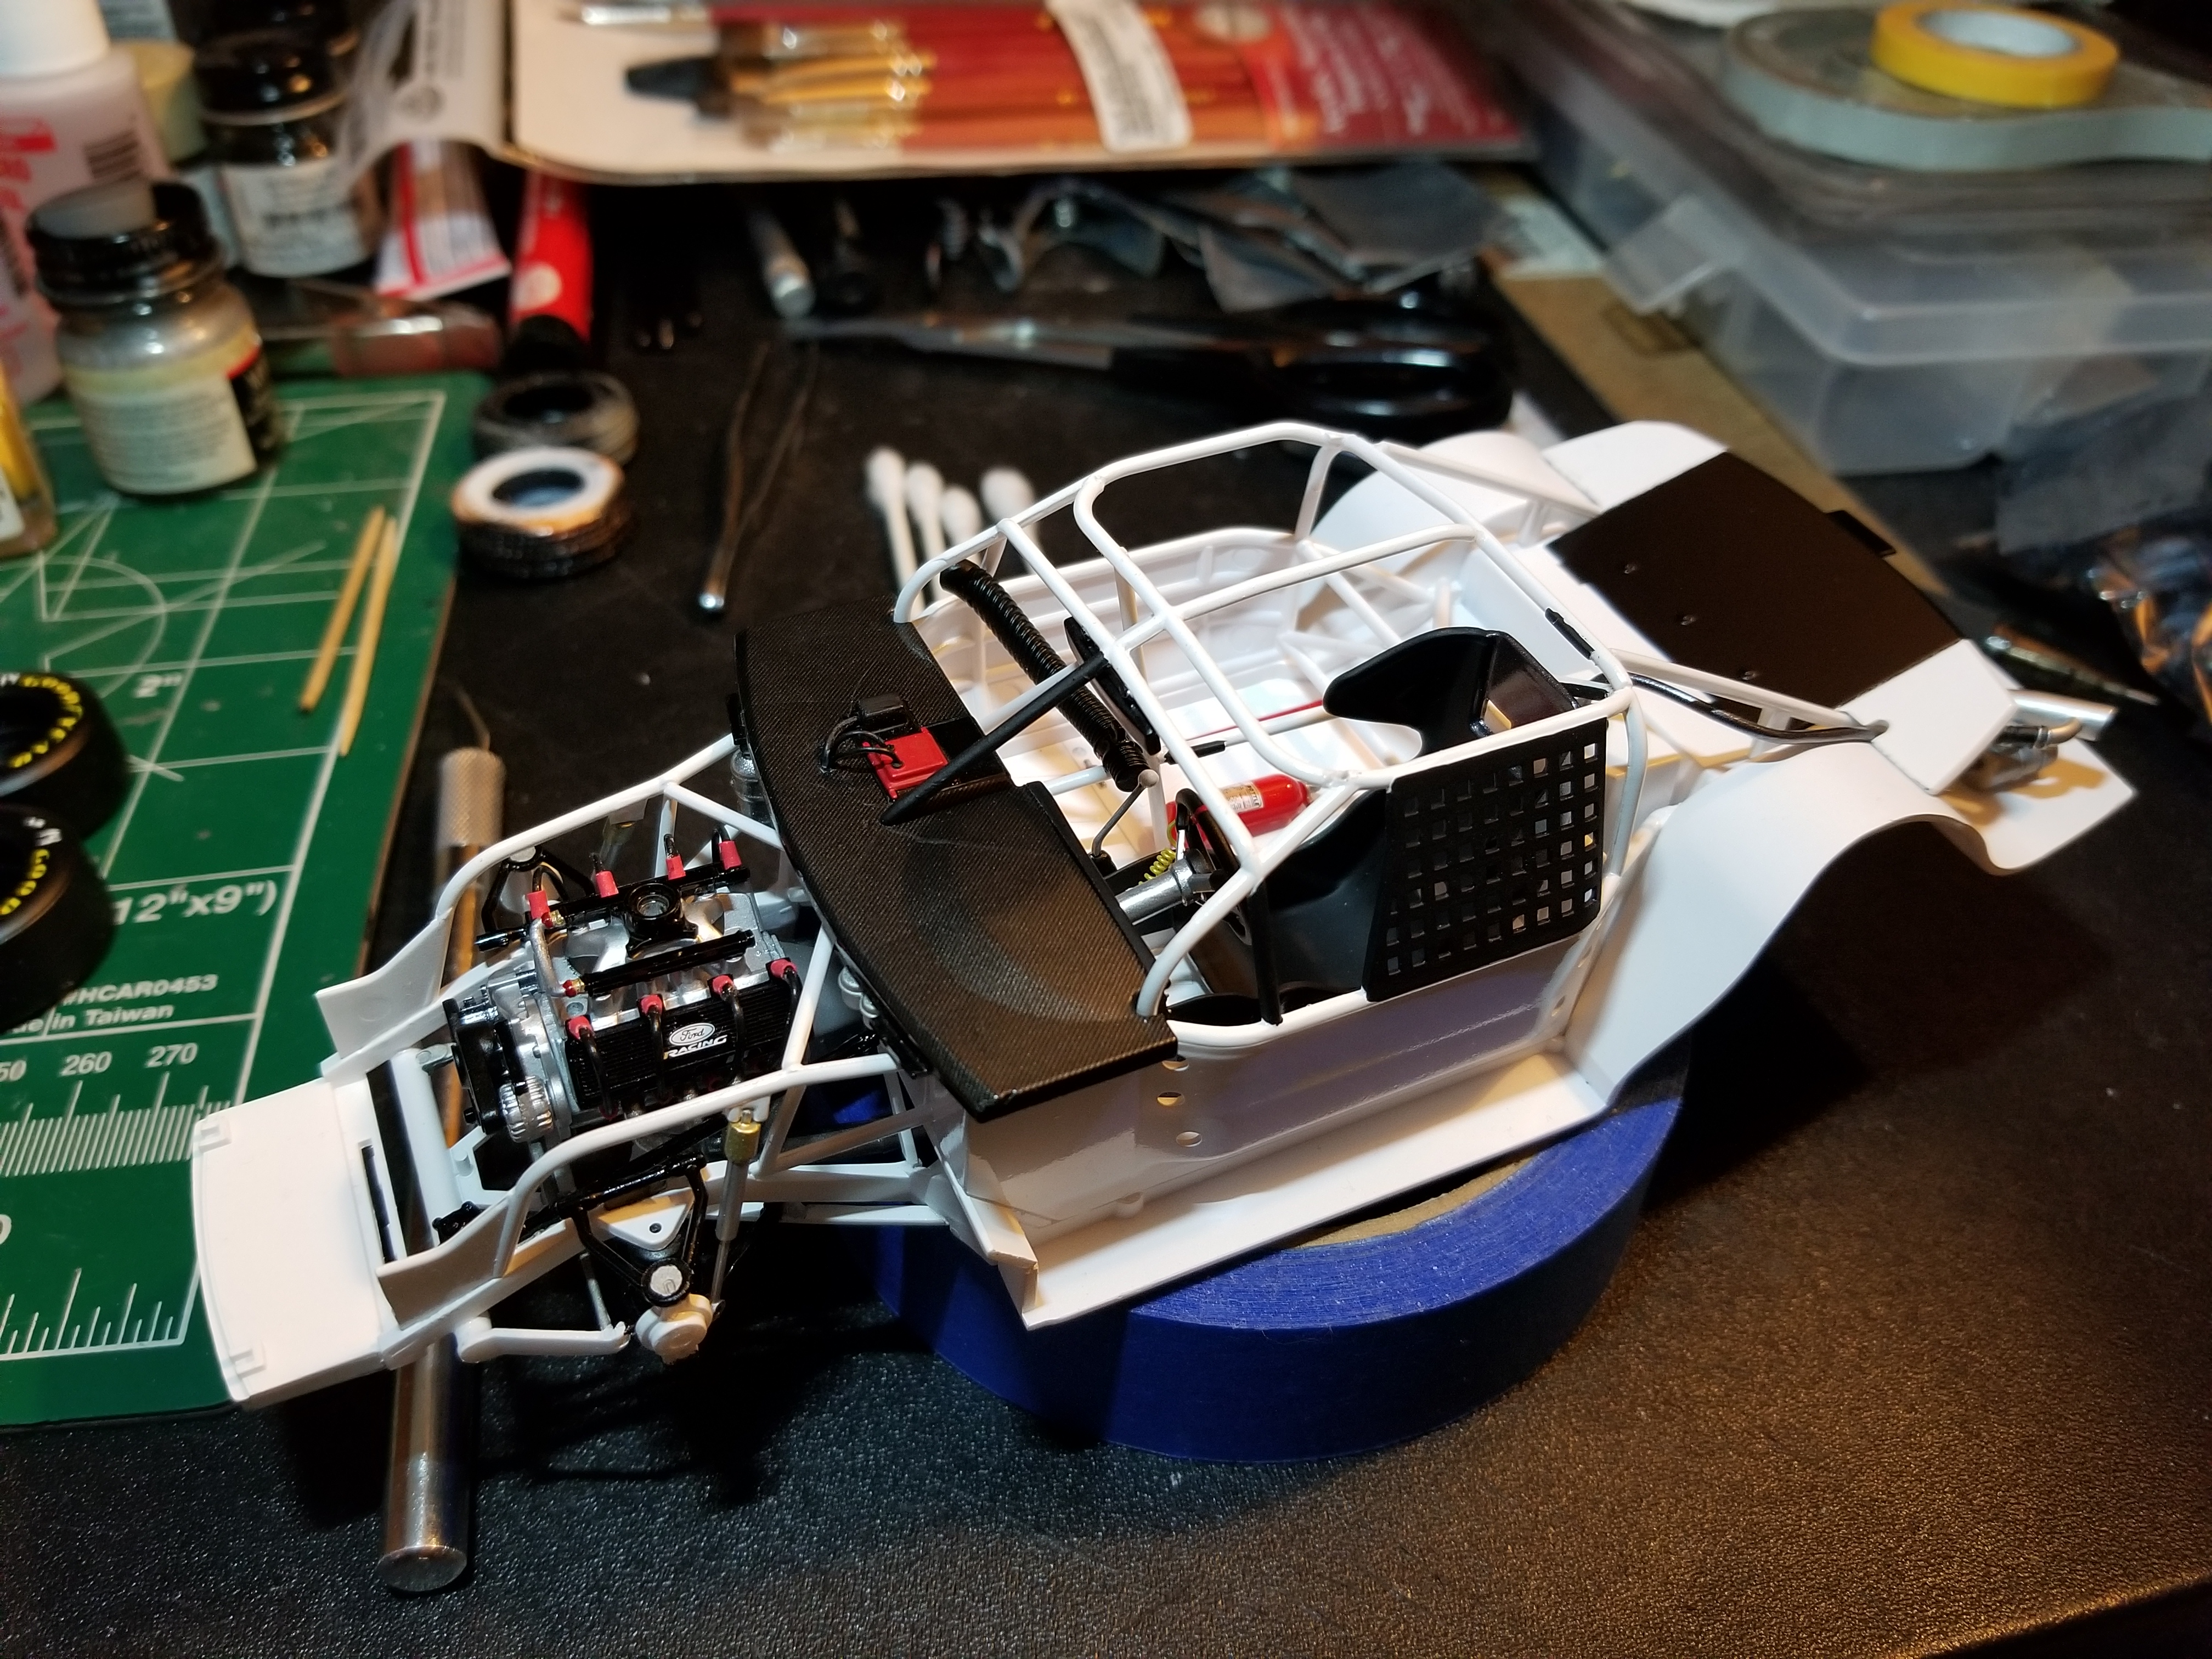
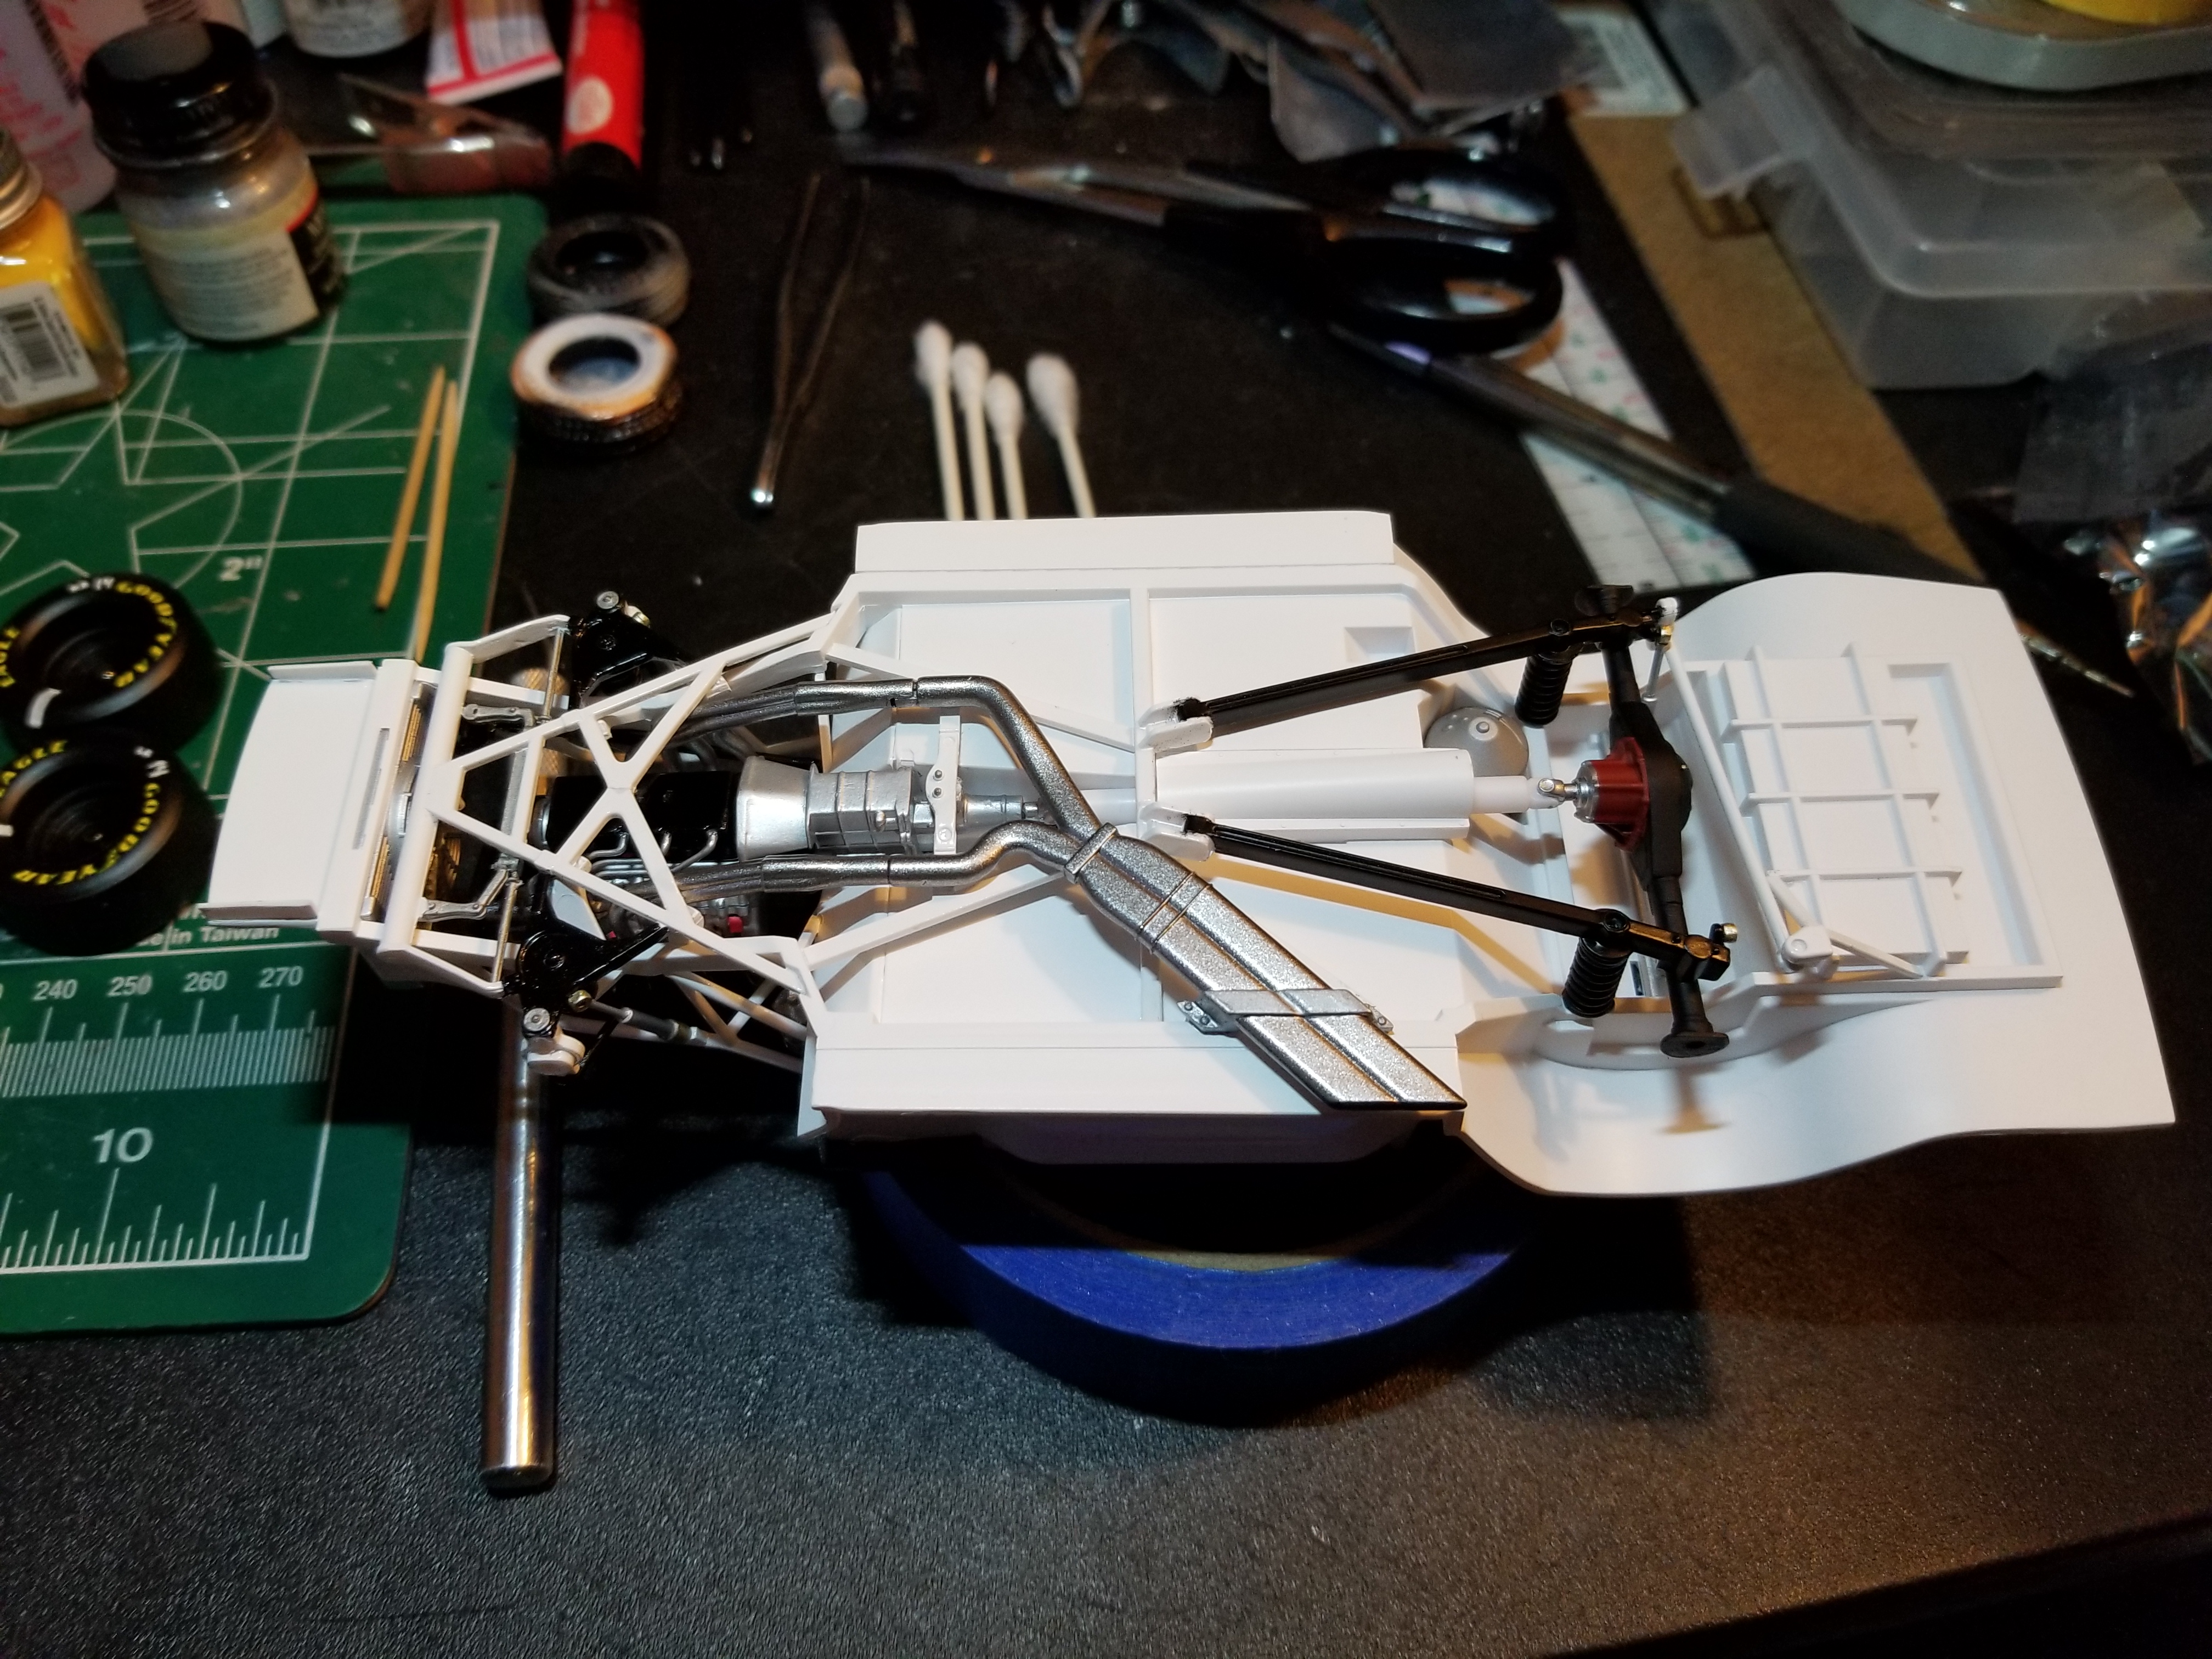
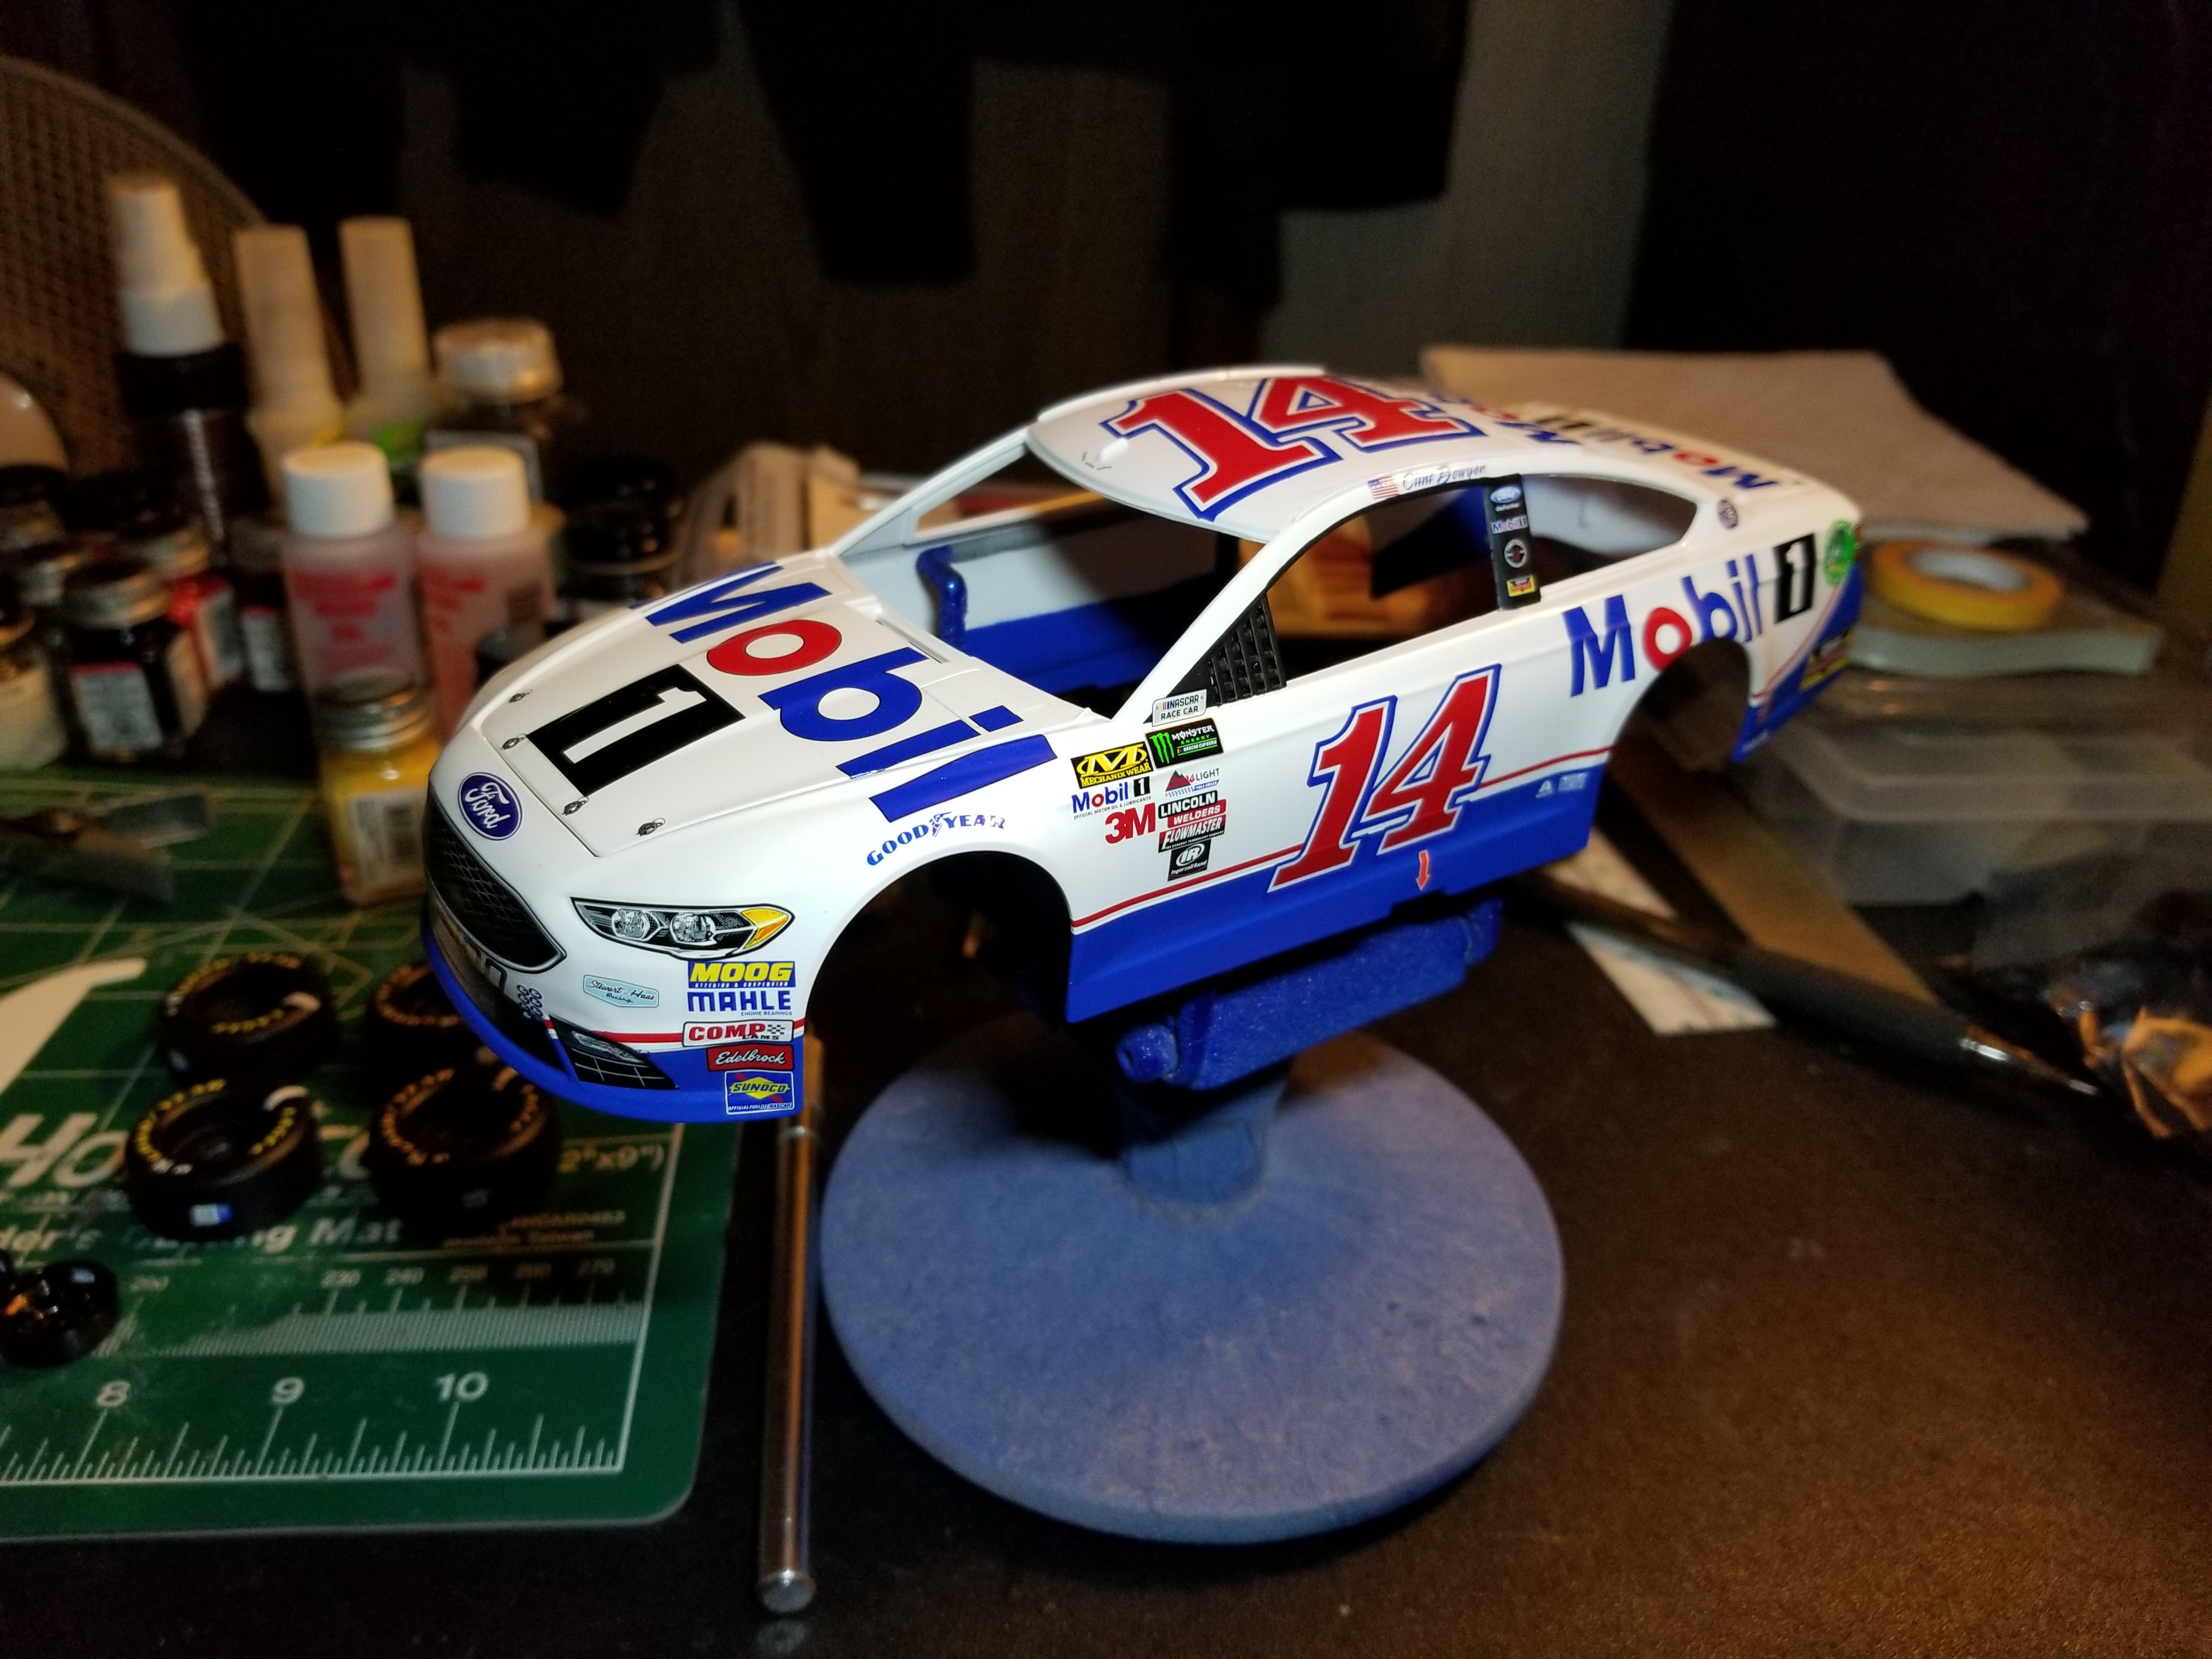
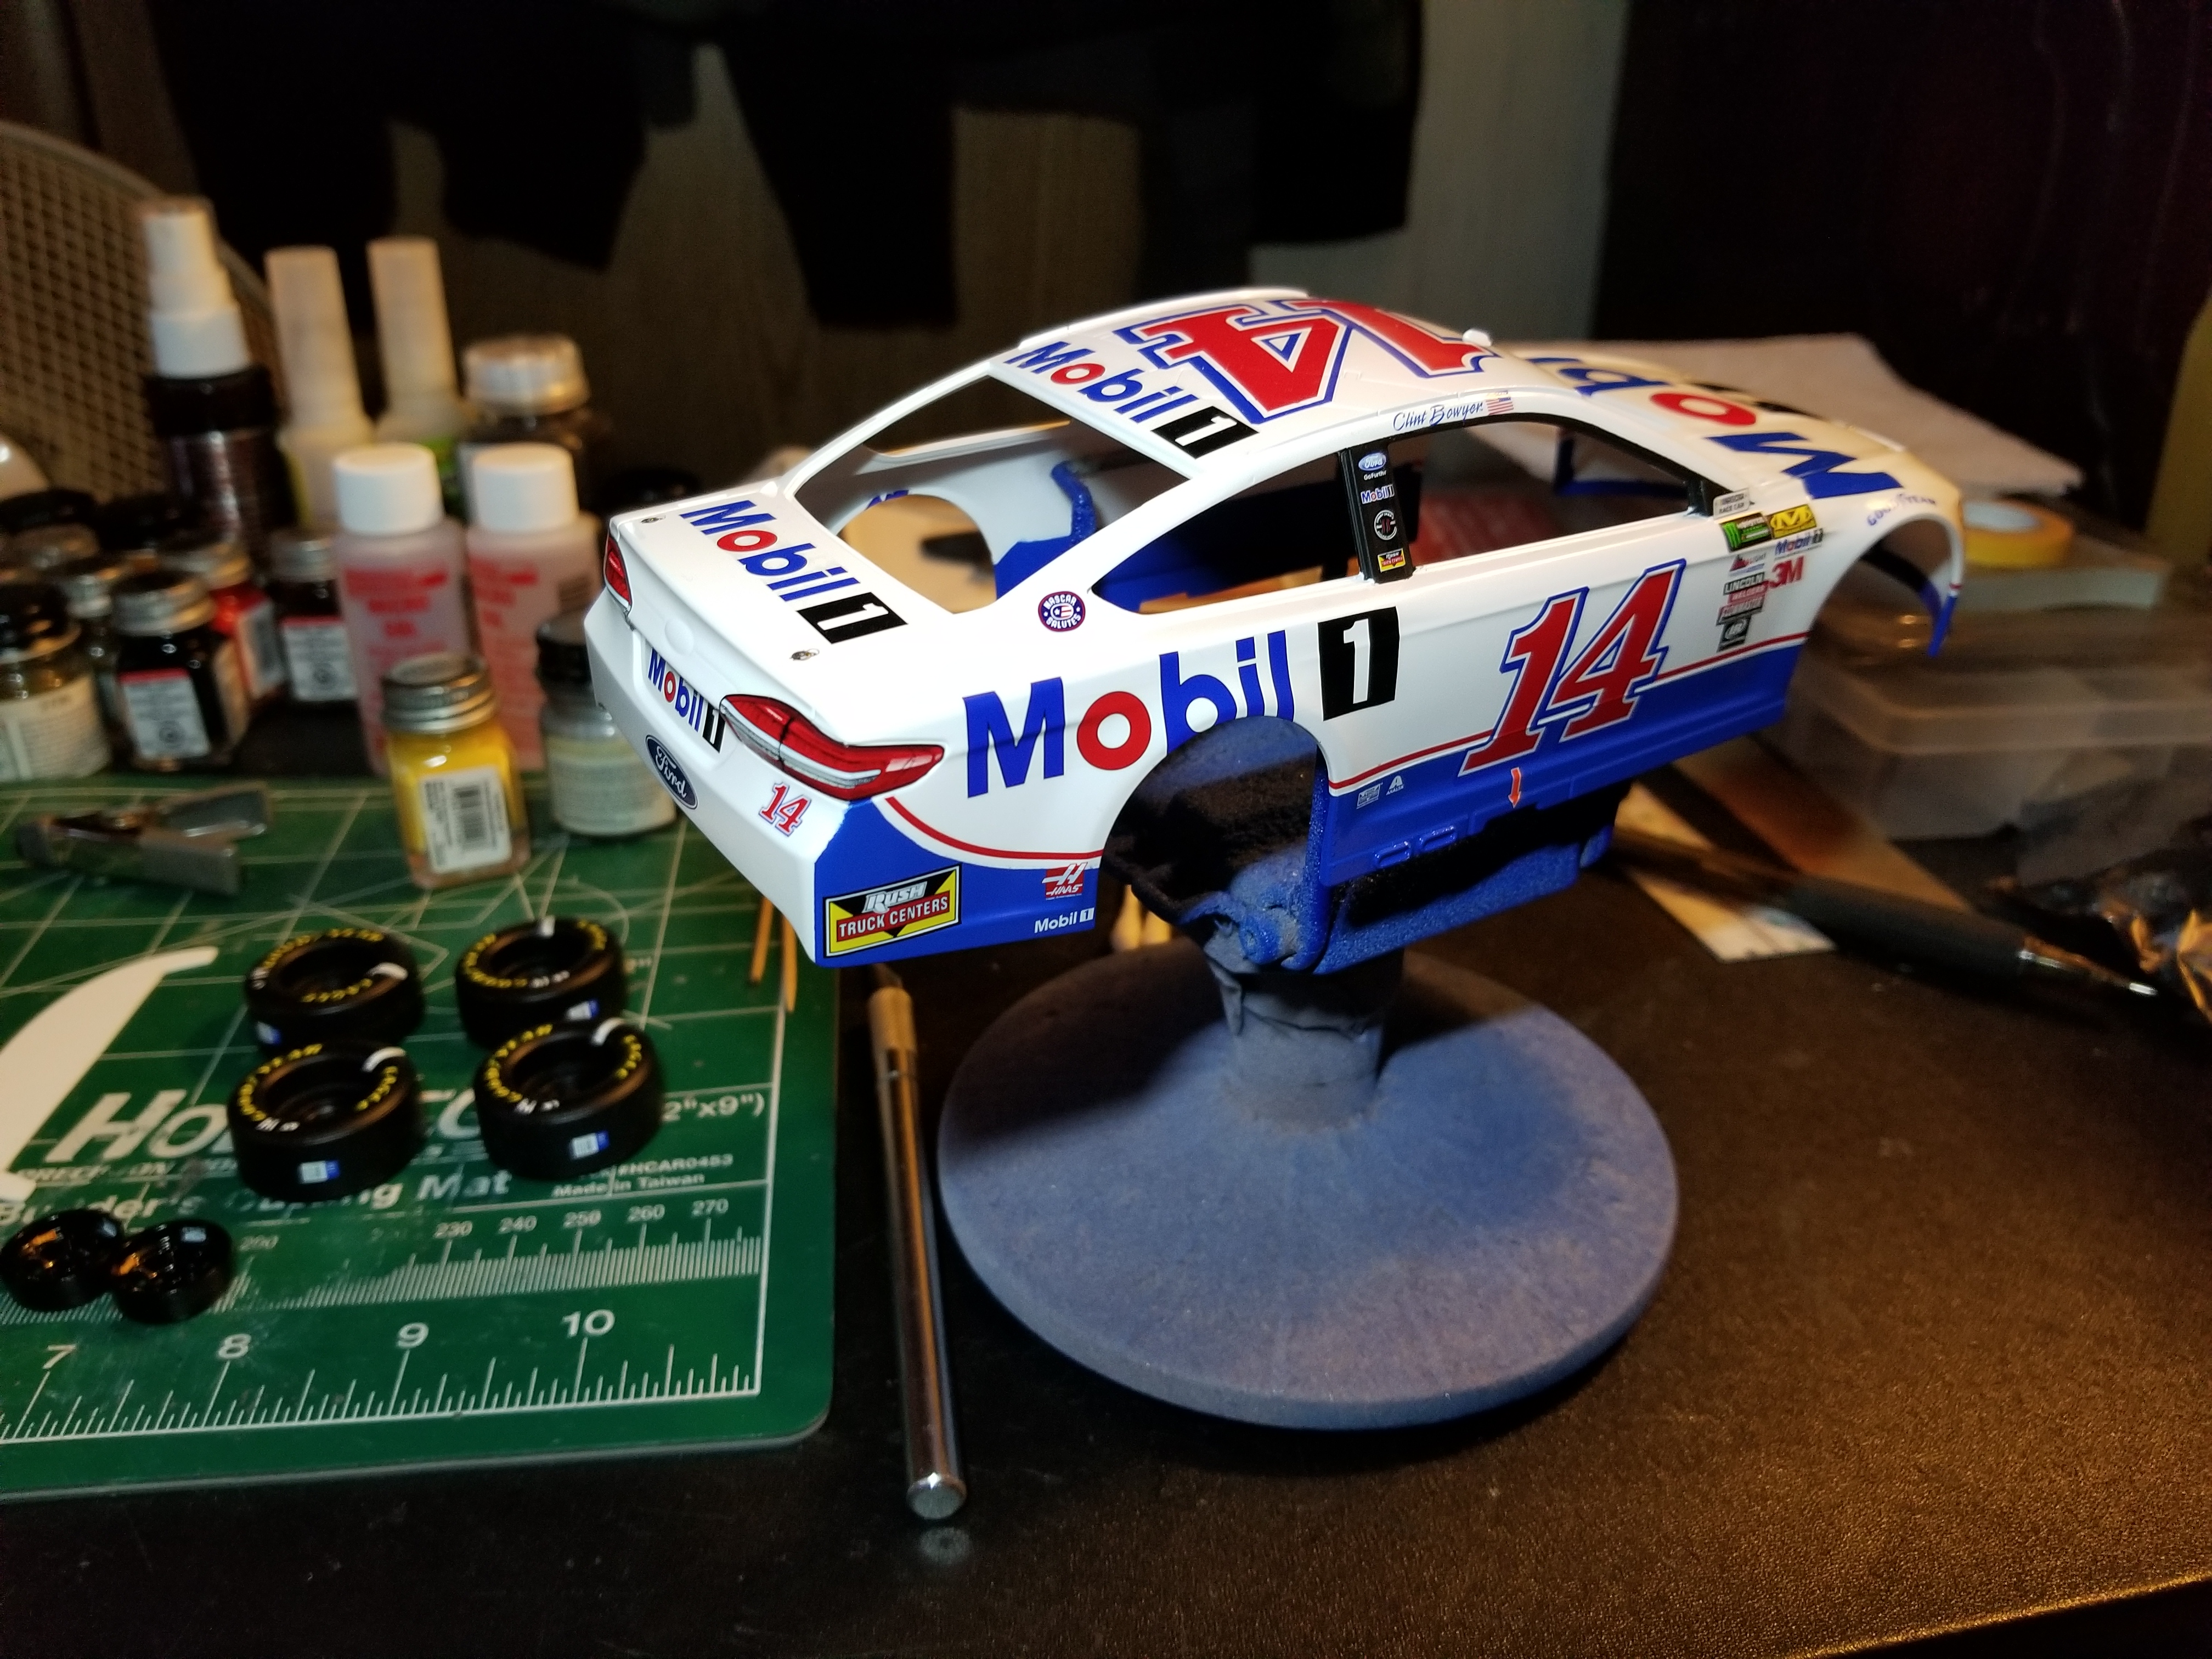
This is my progress so far on the current Revell Ford nascar kit. Clint Boywer Mobil 1 scheme from 2017. Decals are powerslide from Mike's decals, paint is tamiya pure white and tamiya brilliant blue. A few details added; plug wires, engine decals on the valve covers (also powerslide), seat extensions and roll bar pad next to seat, a couple cage bars that were left out, decals to the wheels and tires (again powerslide), front splitter, carbon fiber decal on the dash, ecm wiring, steering wheel radio button and cable, and the ride height will be lowered. I'm waiting on some decent weather to clear the body, gotta finish the detail painting on the wheels, then install the windows and it'll be under glass. Thanks for looking.
-
That looks great! Congrats to Joey on the championship. Way better he got it than Busch or Truex, they're both kind of cry-babies in my opinion. Again great job on the model, I've been using it and you're other modern cars as a reference for my own build. (hope you don't mind haha)
-
Joey's Shell/Pennzoil 2018 Ford Fusion ( wip)
Devilsnake98 replied to martinfan5's topic in WIP: NASCAR
That's good to know, I just picked up this decal sheet and the revell #10 as the donor. I'm gonna try and add the round of 4 playoff colors and markings on mine. -
Joey's Shell/Pennzoil 2018 Ford Fusion ( wip)
Devilsnake98 replied to martinfan5's topic in WIP: NASCAR
It looks like the red sections all matched up ok, how is the fit on those large red decals? Did they need much modification? -
I'd go with the ts-49 bright red, I did a spray test on a white plastic spoon and it looks really close to the color on the snap-on #2 car. If you have the paint already, try it yourself and see. Hope this helps.
-
Joey's Shell/Pennzoil 2018 Ford Fusion ( wip)
Devilsnake98 replied to martinfan5's topic in WIP: NASCAR
I'm so curious how the large decals (the red portion over the front fenders and on the front bumper) are going to lay down, even with some kind of decal set they look like they're gonna be a bearcat. -
Scale Models By Chris (SMBC)
Devilsnake98 replied to Chi-Town Hustler's topic in Car Aftermarket / Resin / 3D Printed
Think this might help, found in the aftermarket section. -
70 Chevy Nova Outlaw..updates (11/08/15)
Devilsnake98 replied to tyrone's topic in WIP: Drag Racing Models
That looks so mean. Love all aspects of the build, just top notch all the way. -
70 Chevy Nova Outlaw..updates (11/08/15)
Devilsnake98 replied to tyrone's topic in WIP: Drag Racing Models
That color actually looks really good, I'm usually not a fan of that shade but it works on this, Barefoot Ronnie Pace would be proud. The build is killer as always keep it up. -
Very true, thanks for the info.
-
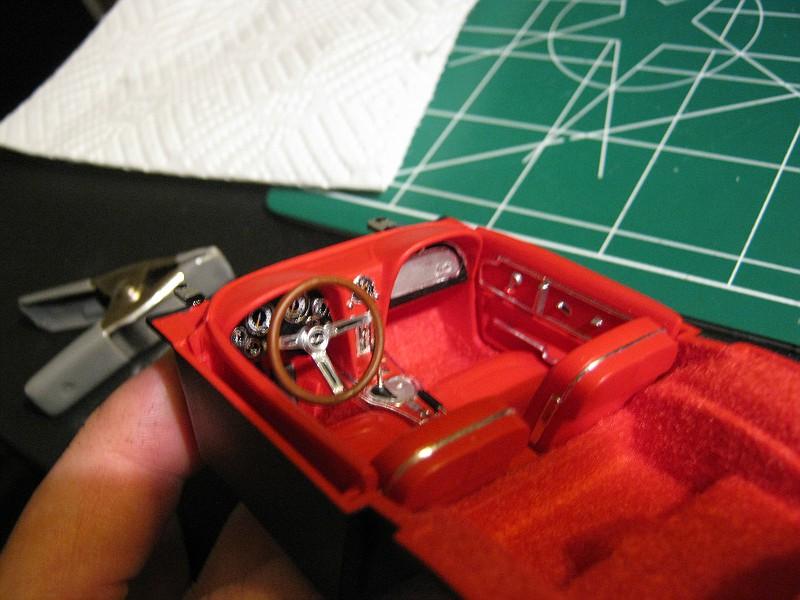
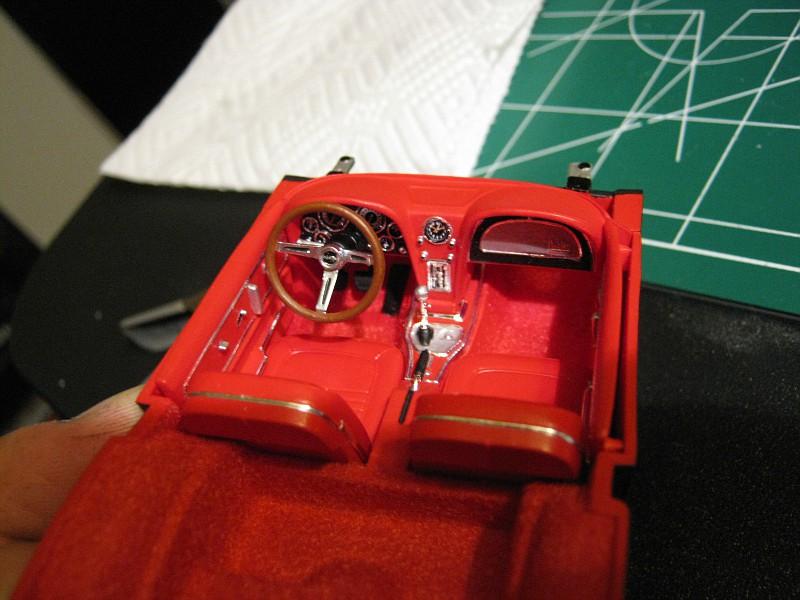
I just realized that I didn't post any pics of the interior complete. So here's a couple.
-
Very cool to see this pic for reference, I was actually going off of another 1:12 scale corvette build I found on this forum. Thank you and the cables on my build will be simple to change. Again, thank you to everyone else for the comments and following along, will have the next update soon.
-
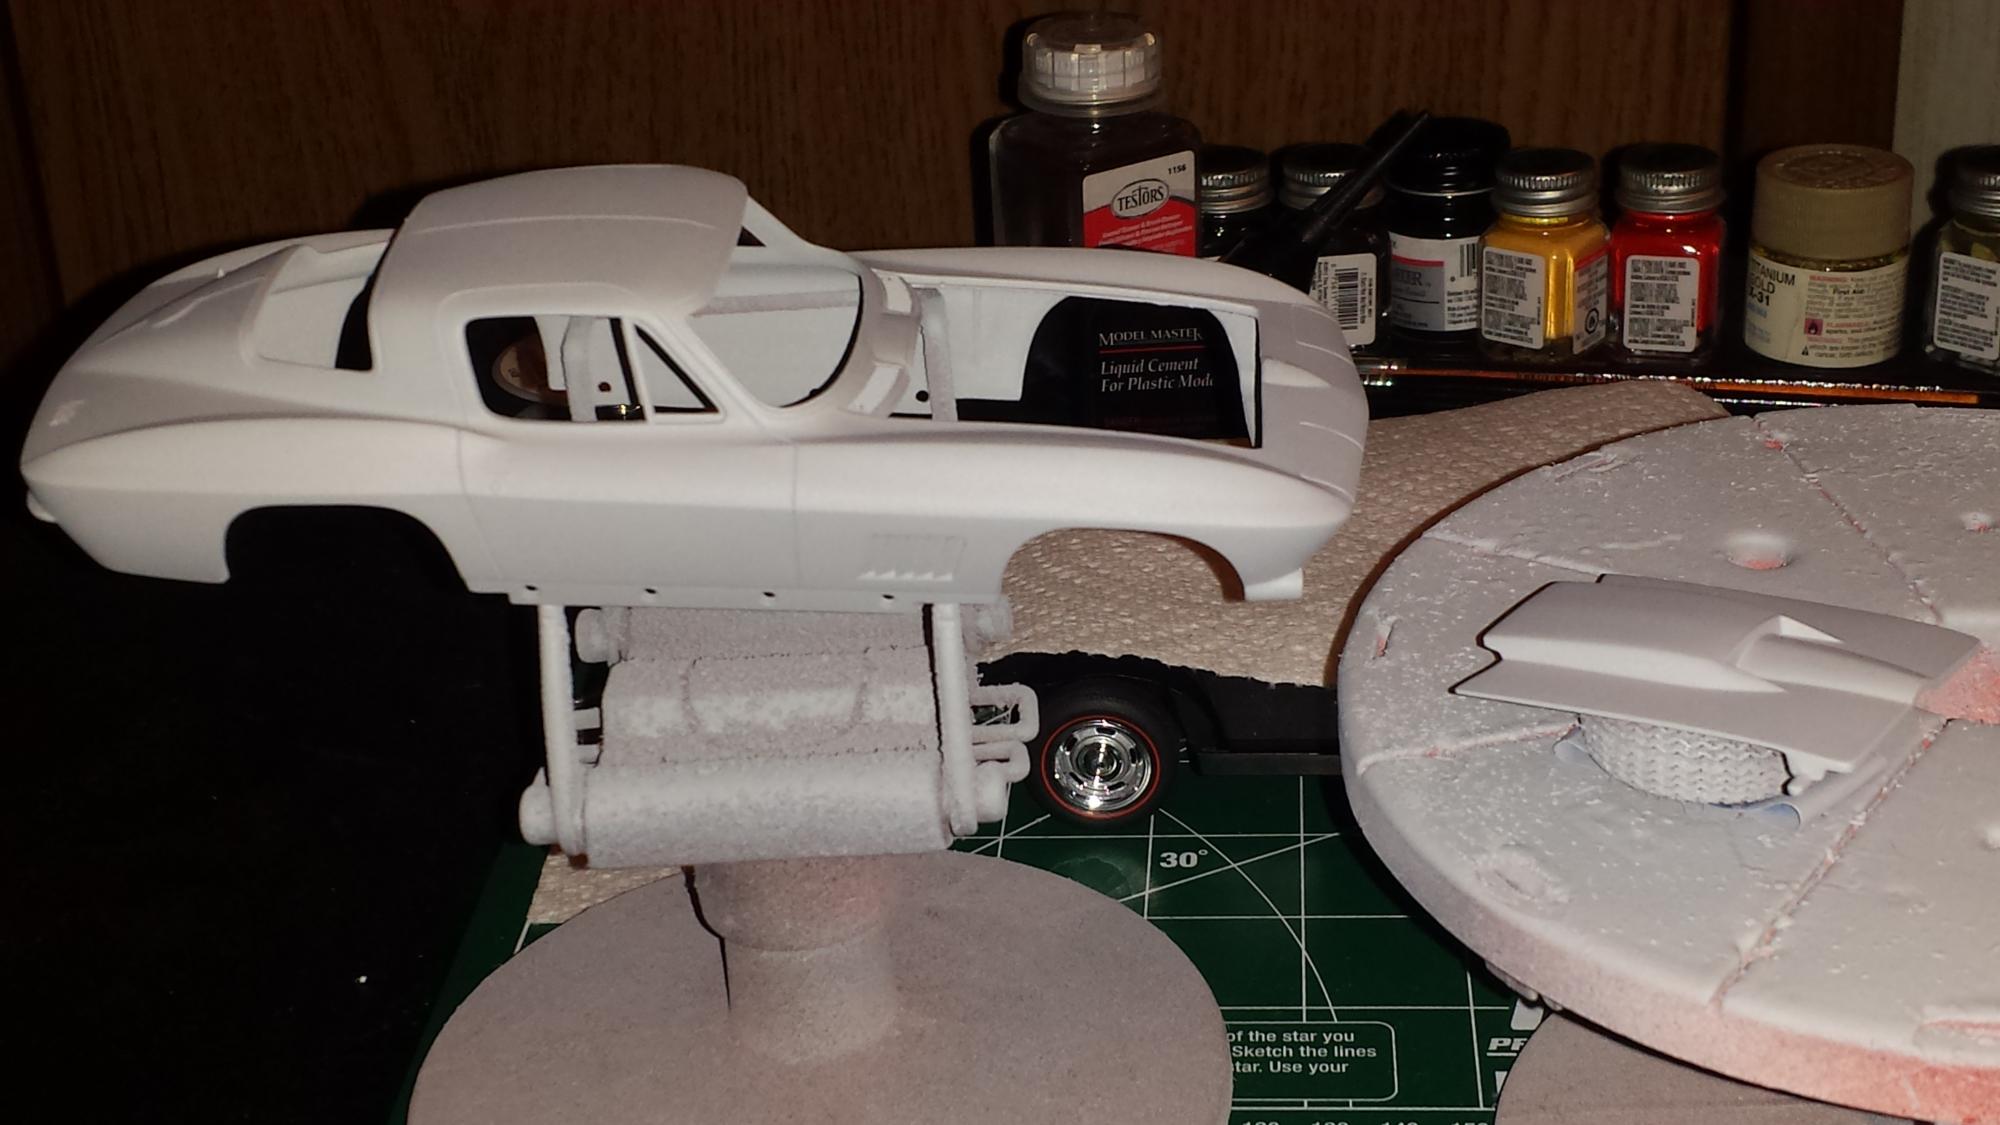
Not much of an update on the vette. Just finished getting the body cleaned up of imperfections and mold lines, then shot 2 coats of duplicolor filler primer on it. Gonna paint the panel lines black to help with painting, then "block" it with 1000 grit so the black goes down smooth.
-
It's nice to see one of these built up instead of used as a parts kit. Looks very nice and clean, well done!
-
The bmf definitely took a while, and some patients too, but well worth it. Thanks for all the positive comments everyone, it means a lot. I'm currently cleaning up the body and getting it ready for primer. Nothing really picture worthy but will have something worth showing in a day or 2.
-
As promised got the front inner fenders in, washer fluid tank, radiator assembly, and upper and lower hoses in. A little less exciting of a update than the 1st, but it's something haha.
-
Thanks you guys, it's kind of weird doing a stock build but I'm liking it so far. I will get the inner fenders, radiator and hoses done probably tonight, then body work can start. I'll update with more pics.
-
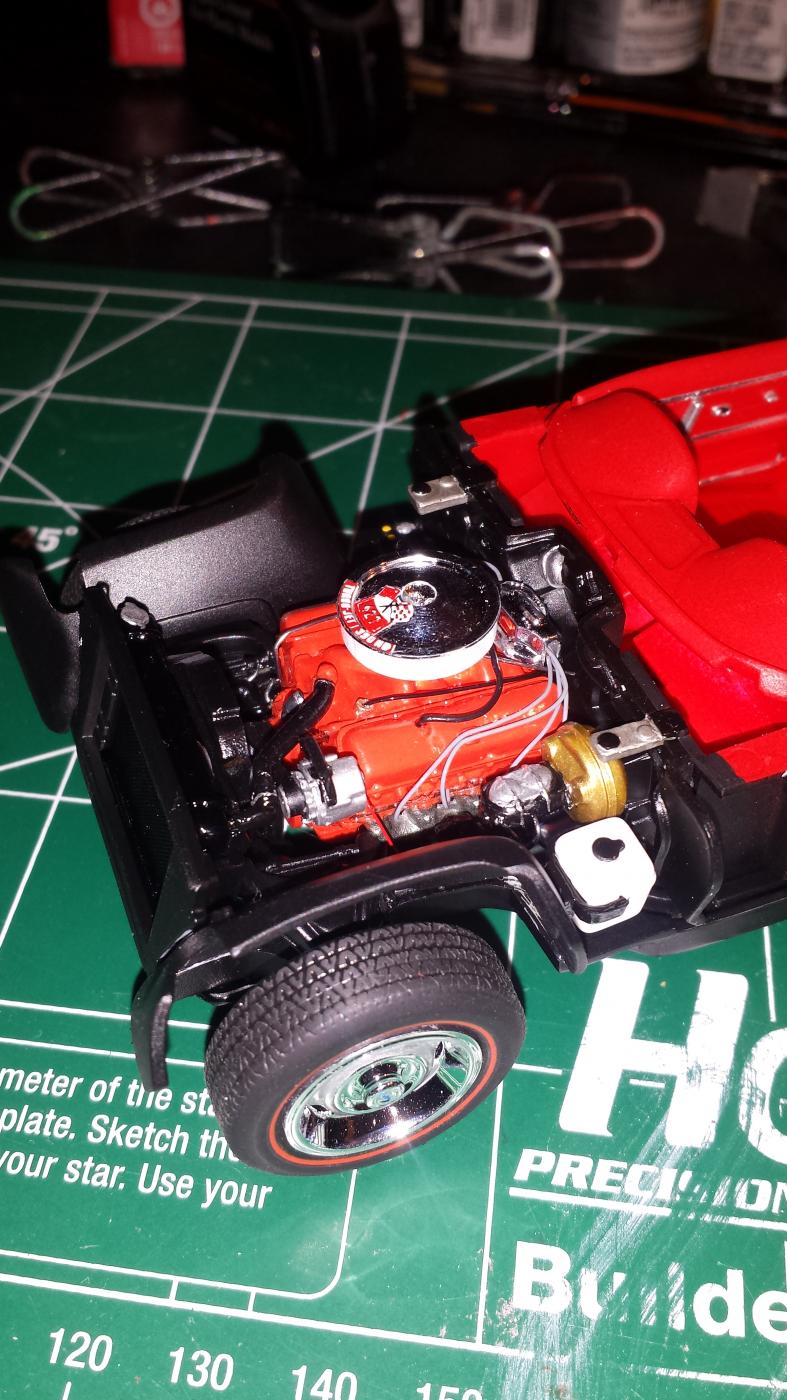
Here is my new project I have going right now. Revell 1967 Corvette Coupe. Doing it up as the base 390 hp 427 available in 67 instead of the usual big 435 hp version, black paint with a red hood stinger and red interior. Also doing a build I usually don't do, and that's completely stock, except adding as much obvious detail as possible. I have the engine done and detailed with plug wires in the correct routing, dipstick made and installed, temp sender and wire installed, breather and PCV hoses and fuel lines installed and in the correct routing, and exhaust manifolds with just a little orange overspray. I also have the complete interior done, in duplicolor universal red on all panels, dullcoat applied to the dash and door panels, the natural finish of the duplicolor left on the seats to give some contrast of the shined up leather/ vinyl look. I used bright red flocking for the carpet, BMF'd all chrome accents on the seats, door panels, dash, and console. Also installed the kit gauge decals and covered them in clear enamel paint to simulate lenses, painted the steering wheel in a rust color that was close enough to the rosewood wheel that's in the real car. More in a sec. And last for now is the chassis, all OOB with details. Painted in semi gloss black, the green colored sections are the floor boards, they are fiberglass that is gelcoated and covered in etching primer, so I used etch primer to simulate this. All components detail painted, brake lines are added where necessary( even though most cant be seen), e-brake cables were added, Wheels were detail painted, tires were sanded smooth, red line decals applied, and then dullcoated. The engine is now installed along with the entire chassis is done except the radiator and front wheel tubs. Thanks as always for looking and all comments and crits are welcome.
-
Thanks again everyone, I'm really happy with the way this thing came together. Now I just need to get a display case for it so it doesn't get dusty sitting on the shelf haha.
-
Thanks for all the kind words, the resin body does make a difference that's for sure. Dennis- I bet that cobra motor swapped fox did run harder than in the cobra it actually came from. I had a 86 lx 5.0 notch that weighed 3150 with me in it, then later on I had a 98 cobra coupe that weighed 3600 with me in it, so that right there would produce some decent gains.
-
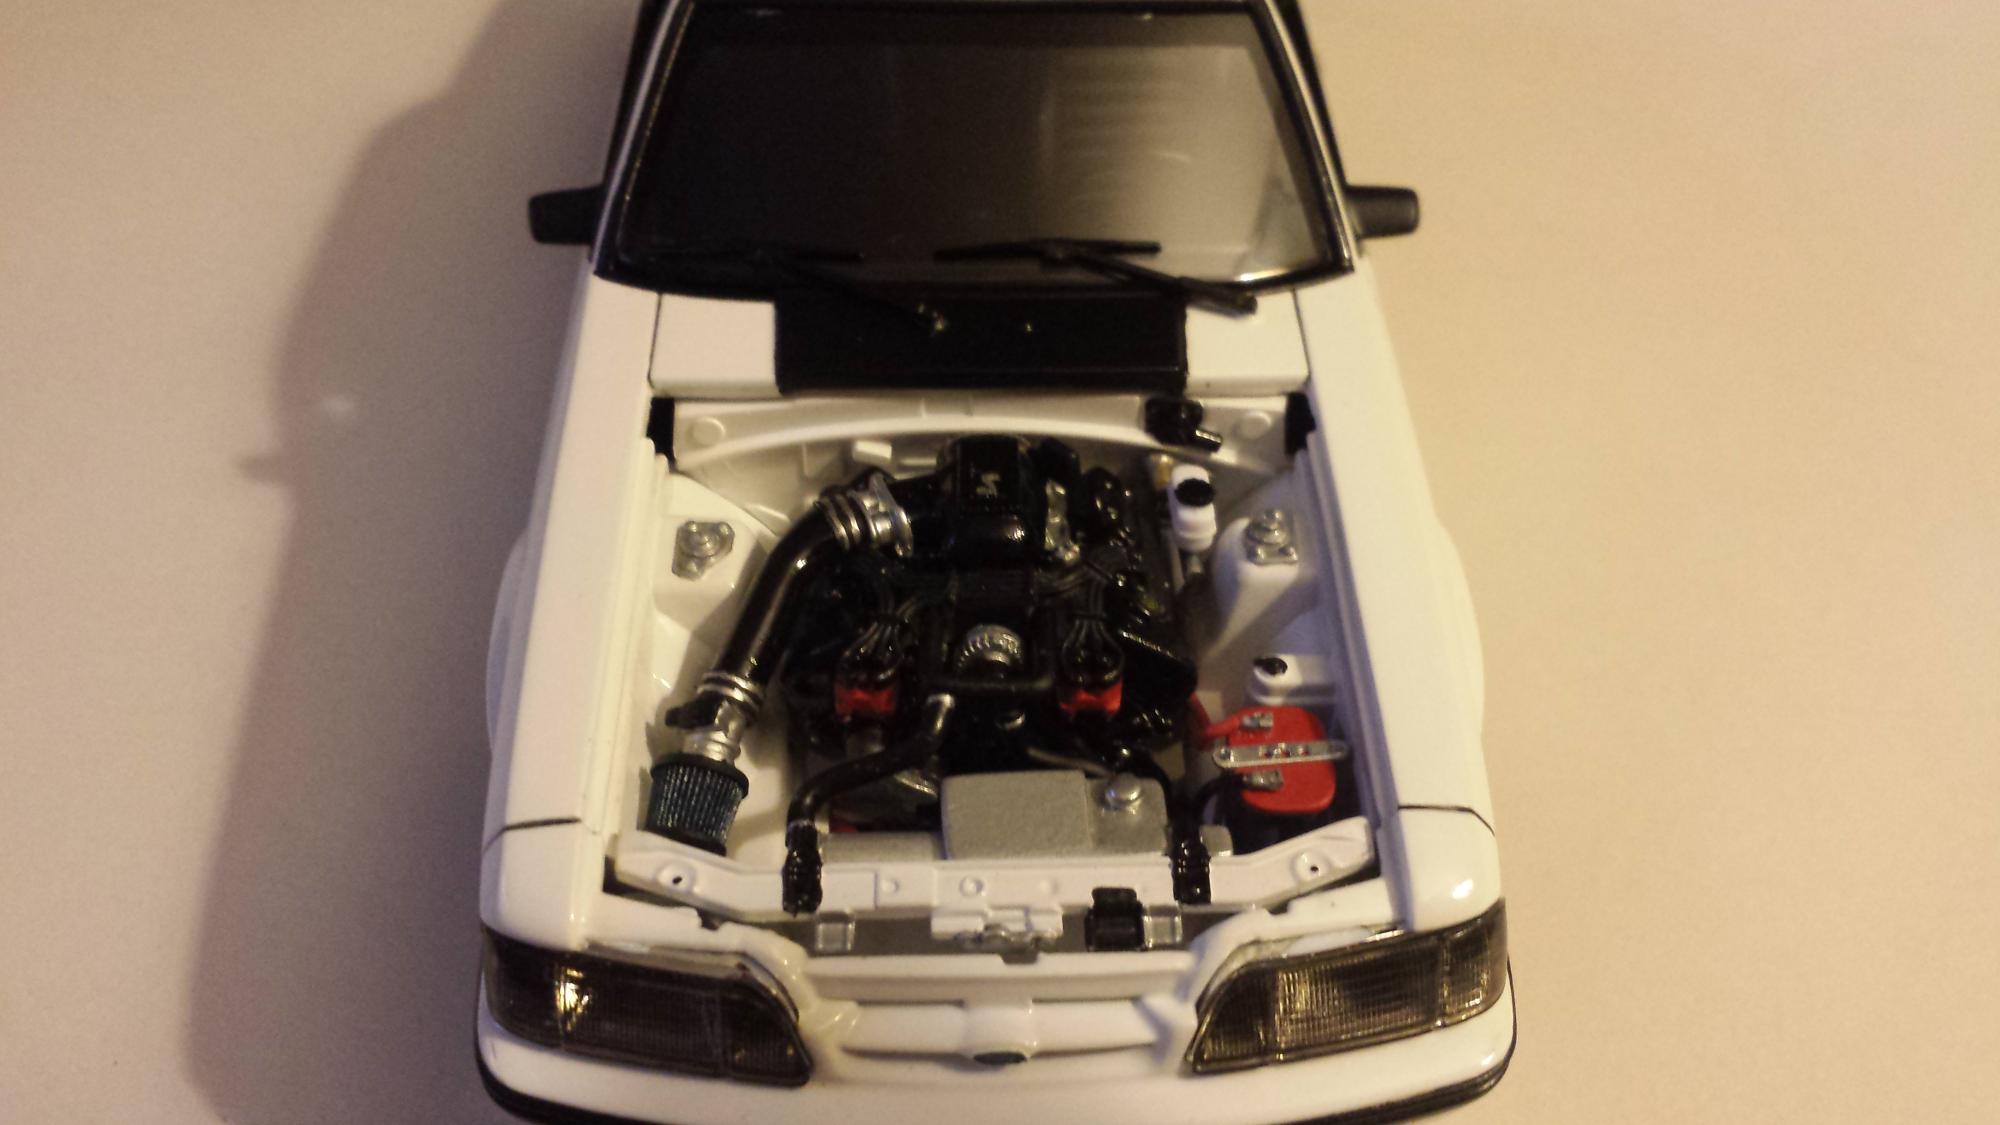
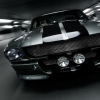
This is my 1990 mustang lx. Been a work in progress since this kit first came out, finally decided to push myself to get it out and finish it. I swapped in a 96-98 cobra dohc mod motor from the amt phantom Vicky kit, wheels from the revell 08 bullitt mustang, tires from my stash, brakes and seats from the revell 07 gt500, lowered stance, scratch built exhaust, plenty of other small details of course. I didnt go nuts but enough to make it better. This is the corrected resin body mastered by Mike Schnur and wonderfully resin casted by Greg Wann, these bodies are very very nice. Also i used a resin 2-3" cowl hood, paint is tamiya ts26 pure white with u-pol spray can clear cut and rubbed, tinted head and tail lights with Tamiya smoke. Thanks for looking, any comments/ criticism always welcome. Here is my previous wip thread, pics look a little caddy-wompus( on my phone at least). http://www.modelcarsmag.com/forums/topic/79350-another-revell-90-mustang-lx/?page=1