StevenGuthmiller
-
Posts
15,078 -
Joined
-
Last visited


Recent Profile Visitors
33,500 profile views


StevenGuthmiller's Achievements
MCM Ohana (6/6)
-
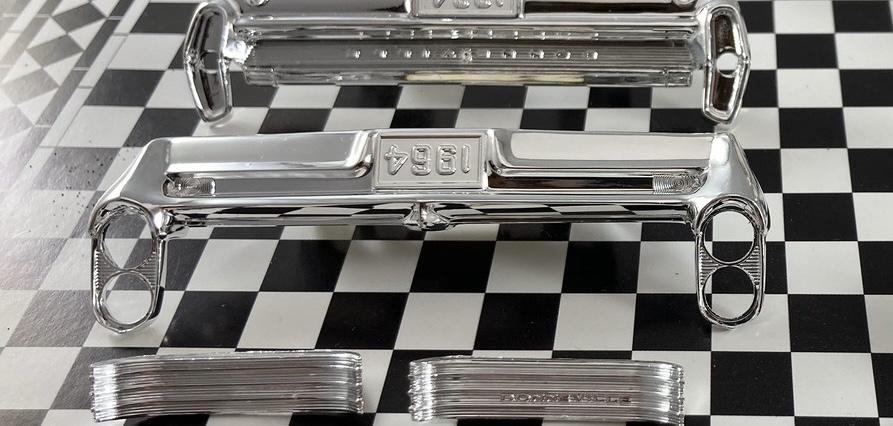
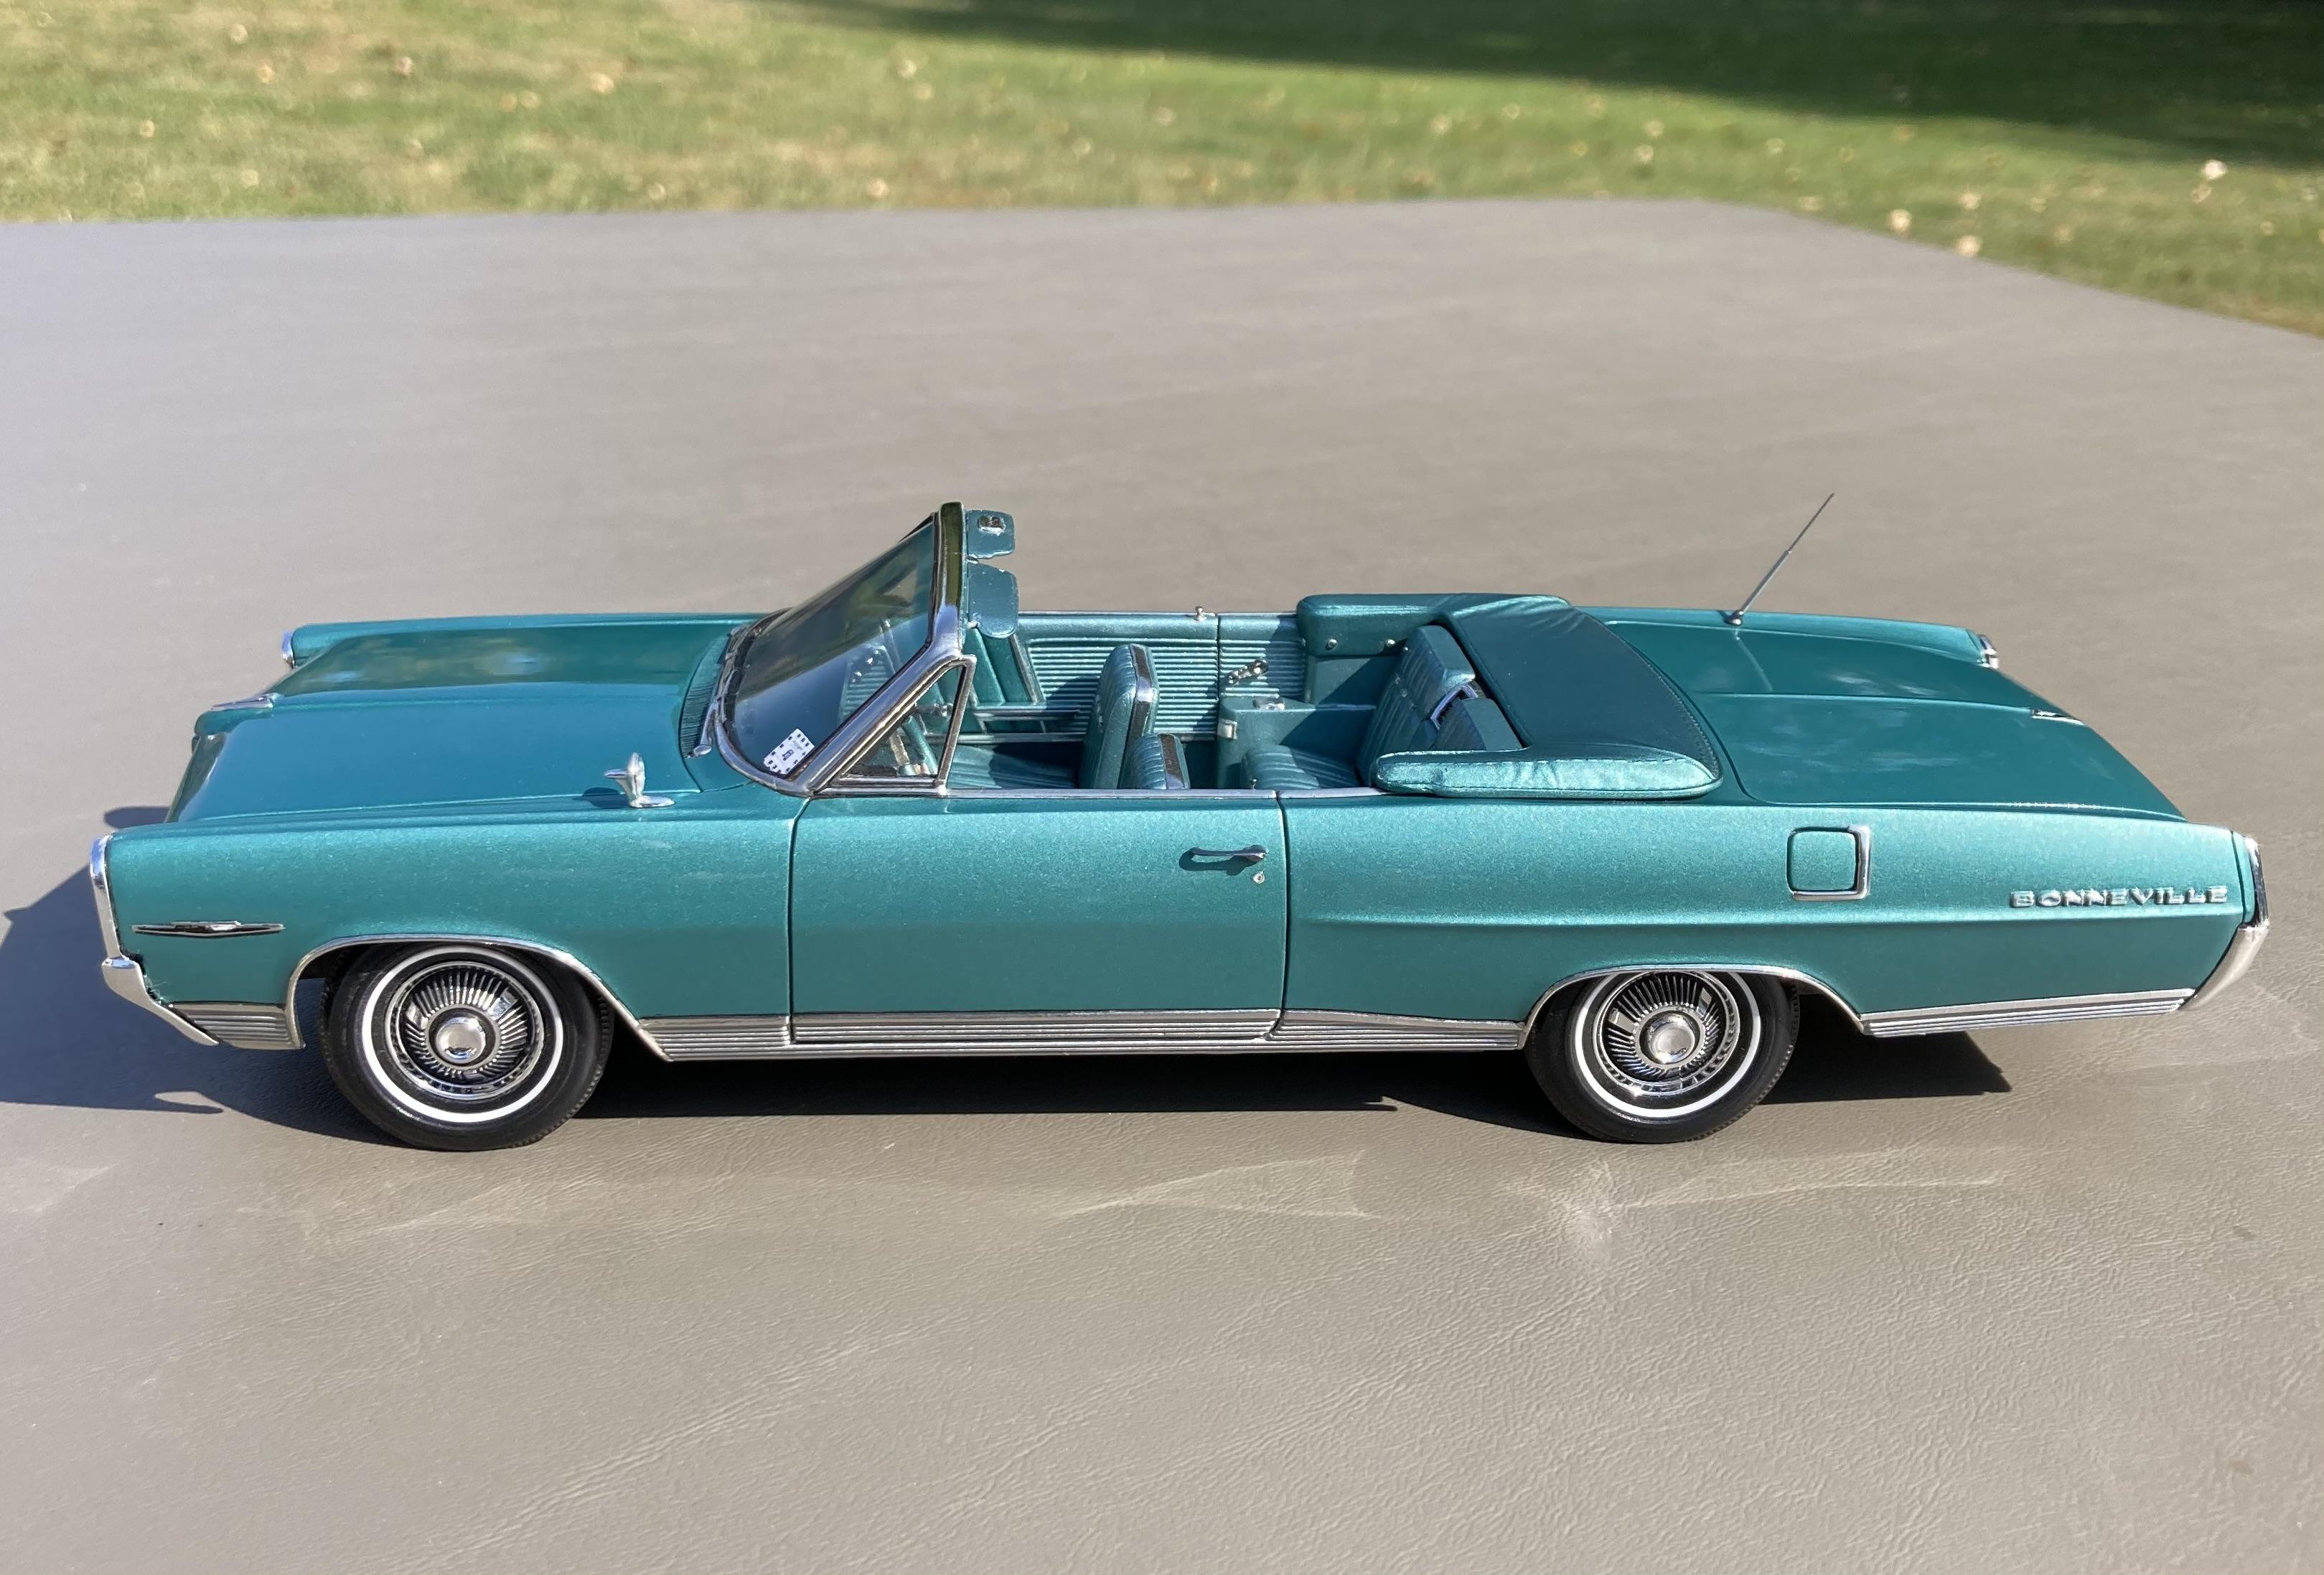
I only use a drill bit to drill a pilot hole. I then use a variable speed Dremel on low speed with a variety of reamer bits to get close to the opening size and then finish up with round files. Of course you have to be careful and steady with the Dremel, but I always worried about breakage with a drill bit, especially with grilles where you have very little “meat” surrounding the headlight opening like on my ‘64 Bonneville. You really have to be careful not to force anything in some instances. Steve

-
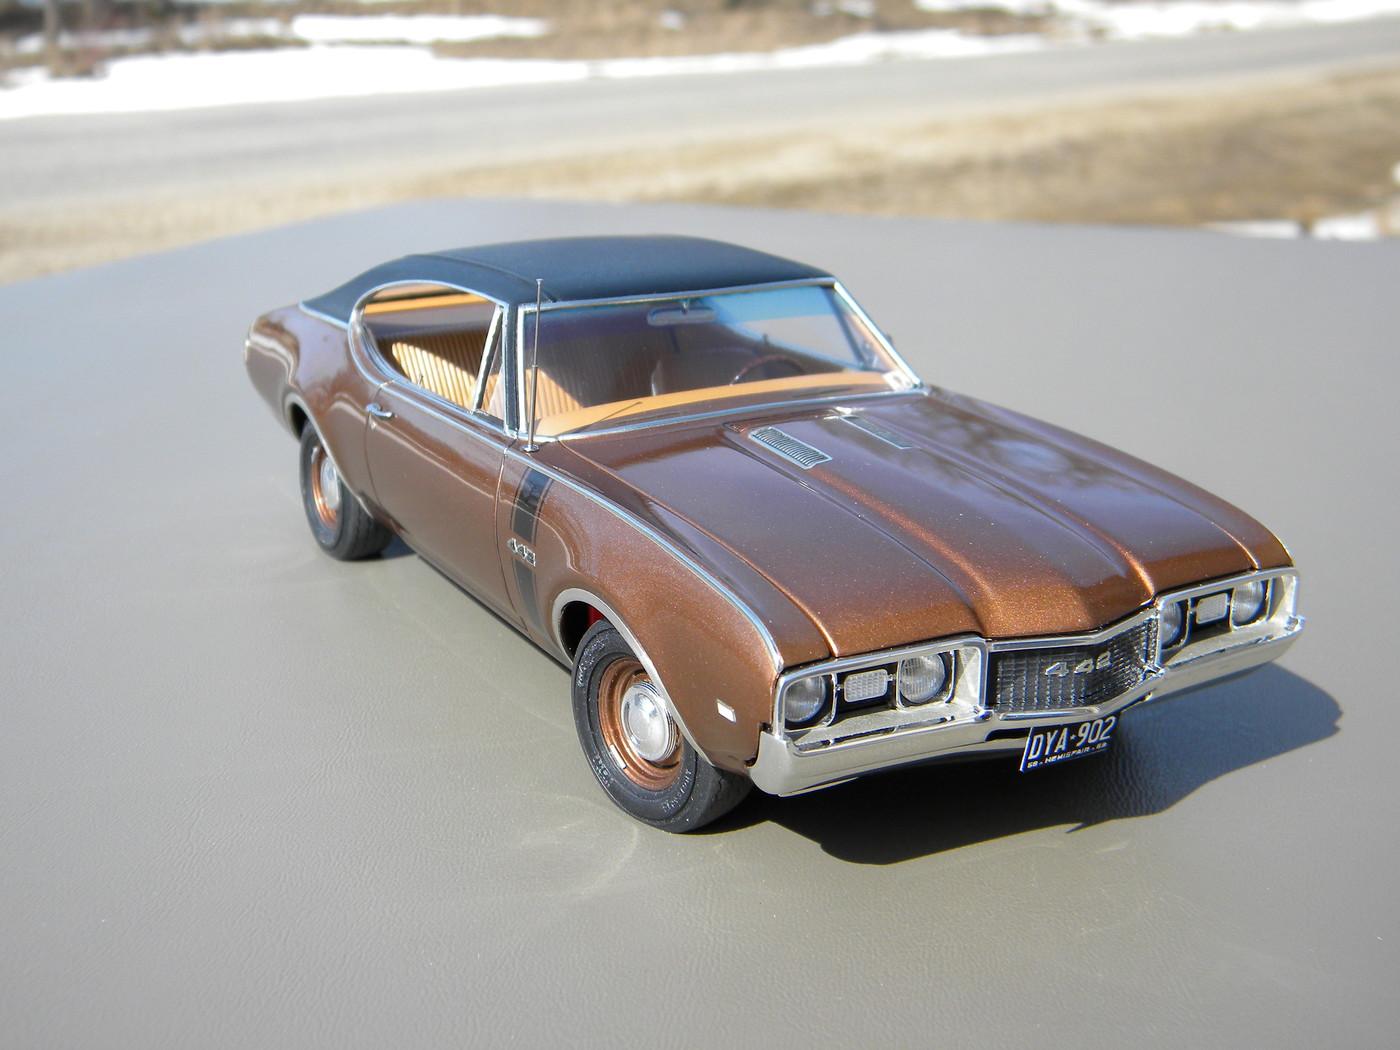
Looks like it’s a 442 grille modified to resemble a standard cutlass. The ‘68 442 didn’t have the vertical members, and a regular cutlass kit was never produced. Johan was the only one to ever do a ‘68 442 in plastic, and it was just a regular 442. I modified one of the Johan kits to represent a W-30 package using the applicable parts from an MPC ‘69 442. By the way, the headlights on this build were also drilled out and replaced. Steve
-
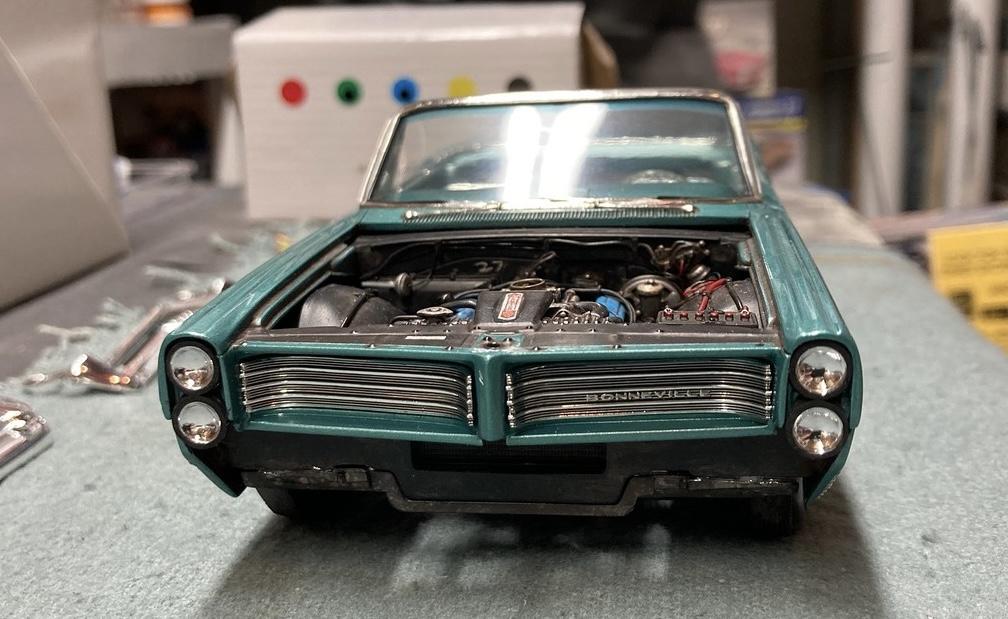
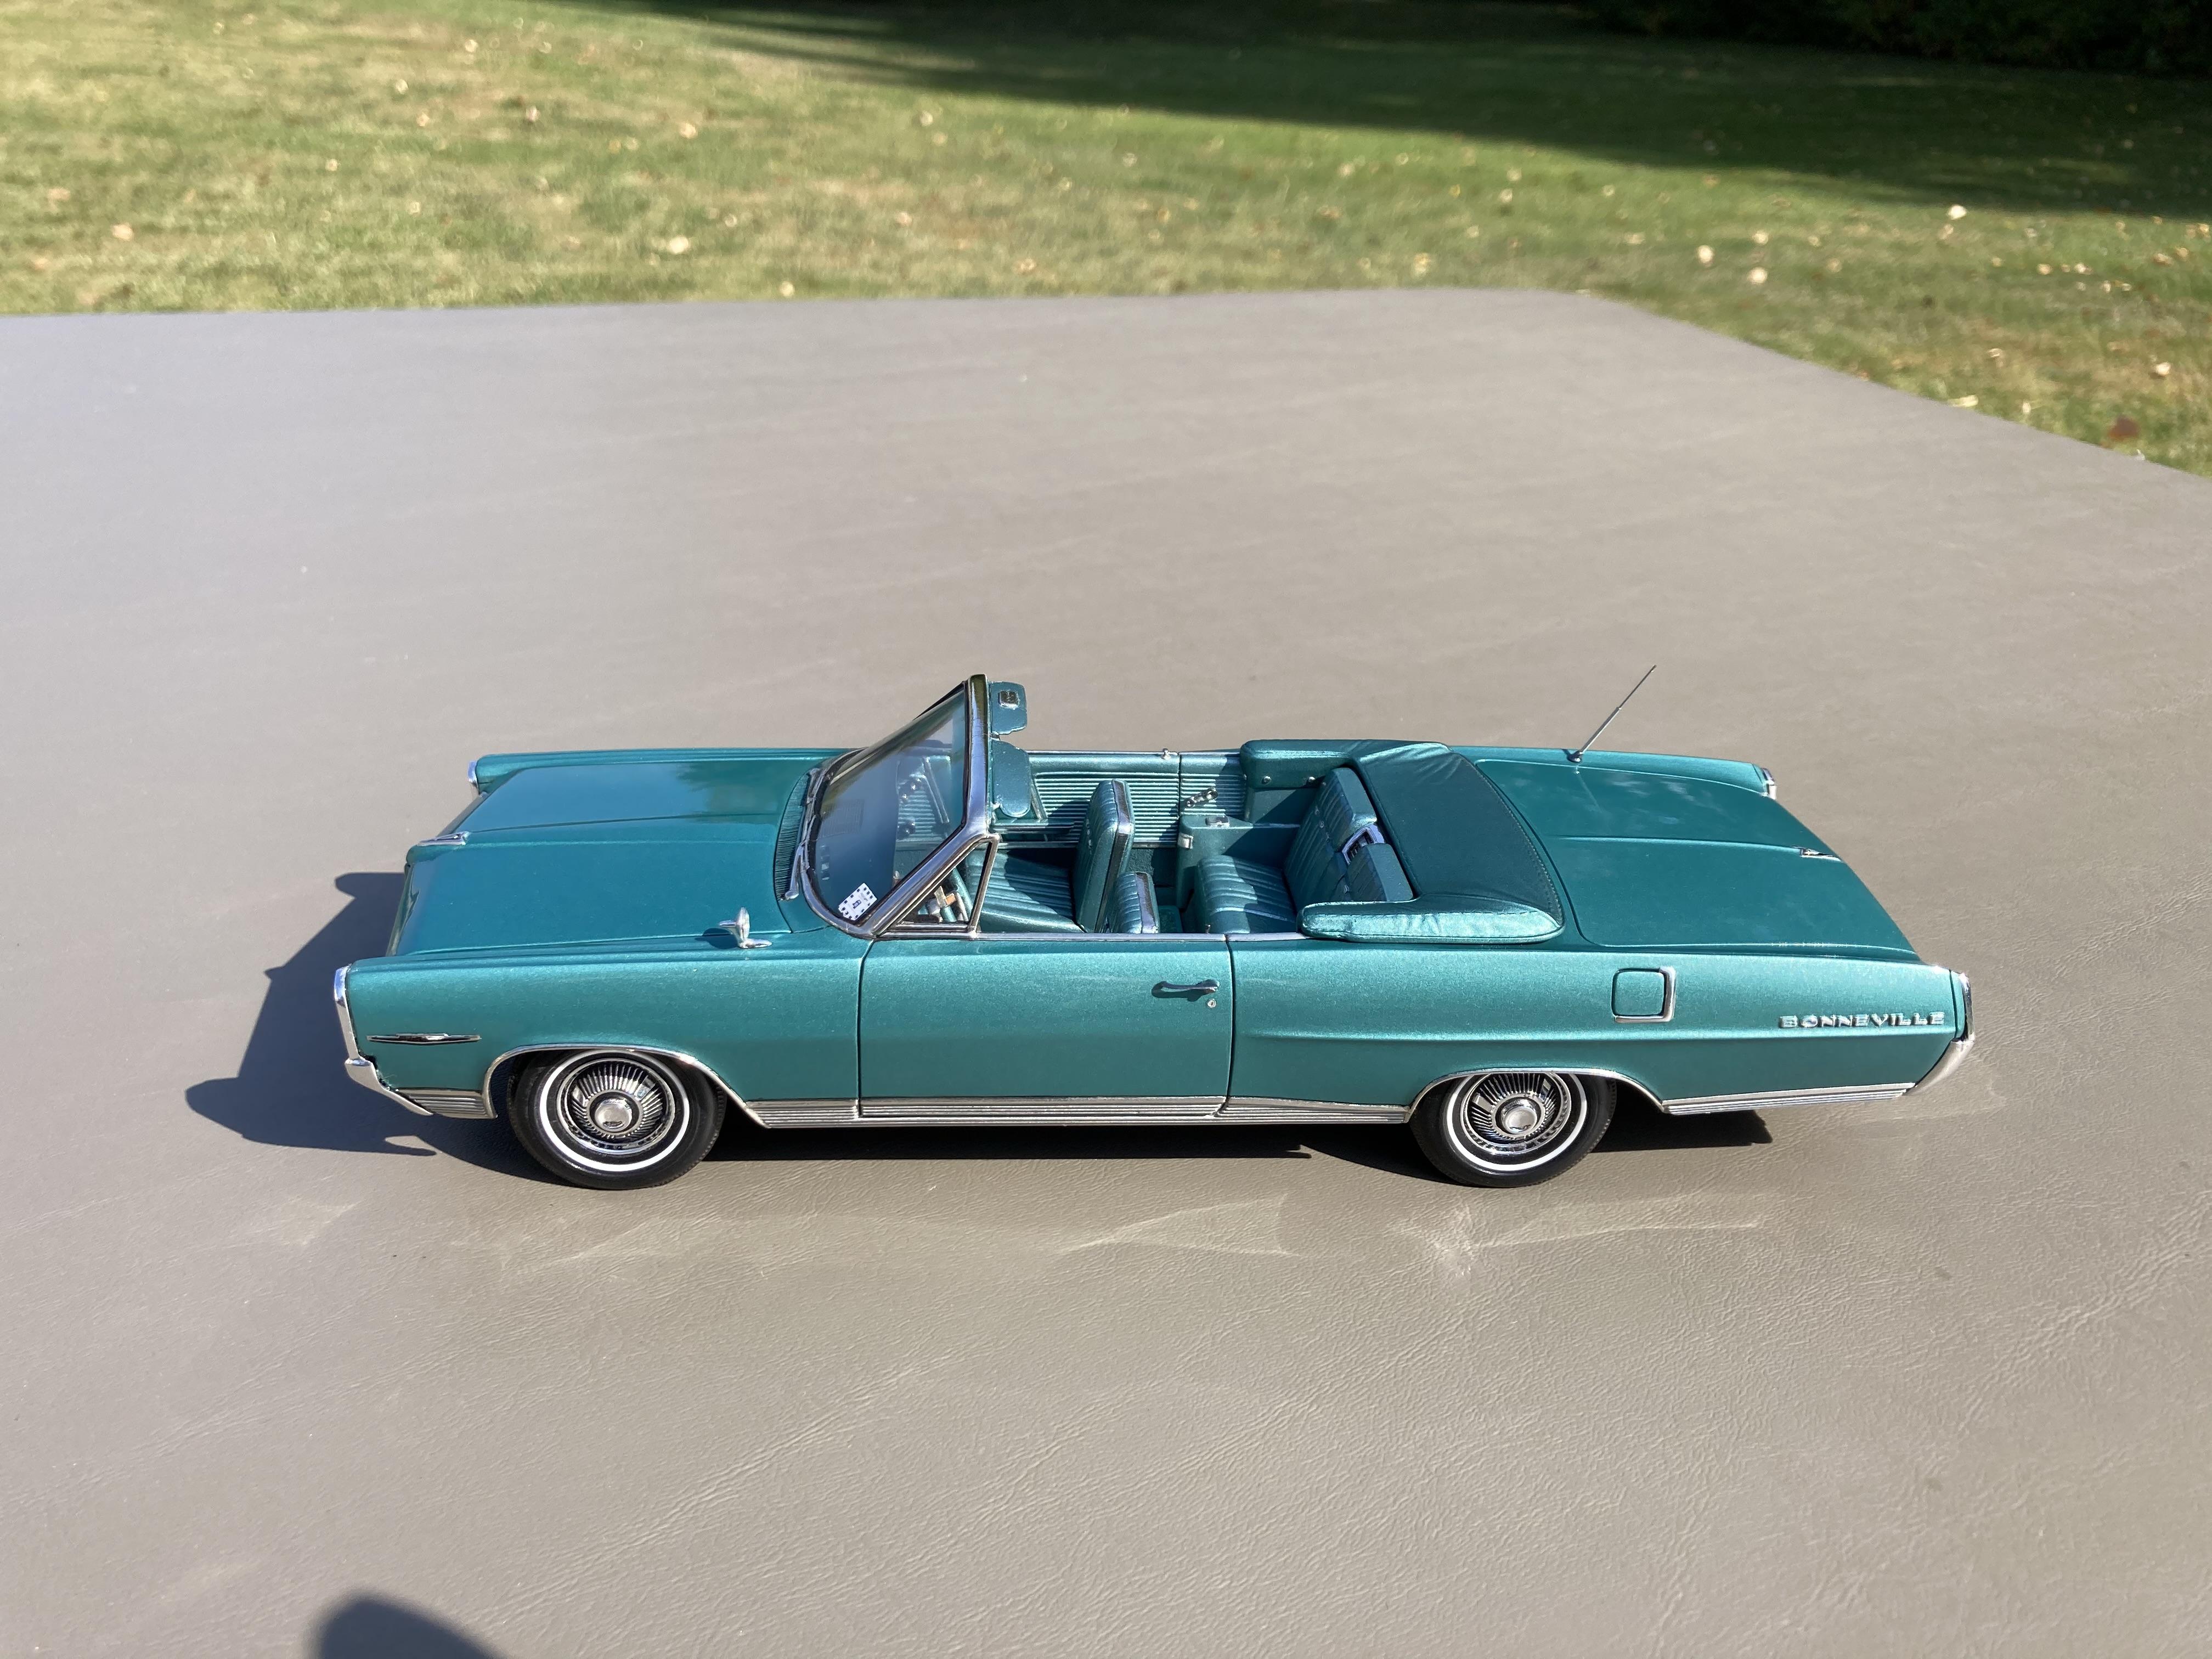
I agree with this also. It’s one of the first thing that I do with kits with molded in lenses, and it’s become a necessity for me. I usually drill out the chrome lenses prior to re-plating, and then I’ll use whatever I can find for reflectors and just paint them with Alclad chrome. I cut out a set of reflectors from a Moebius ‘61 Pontiac to create reflectors for my ‘64 Bonneville. I didn’t have to paint them because they were already plated. I think they look very realistic. Steve
-
I agree. Steve
-
 Just my opinion, but a remake might work with a better lineup of actors, and better directing, but I still wouldn’t change the car itself. Steve
 -
I have another, less interesting word for it. 😉 Steve
-
Possibly, but the modern Chrysler 300 has very little character or style. It’s just a big, boring box. Just my opinion of course. Steve
-
I hear that often. In all honesty, I wasn’t a huge fan of either one, but I respect their appeal. I enjoyed the story line and seeing the cars in Christine, but it was rife with bad acting. Not in my top 100 favorite movies list. Just my opinion. Steve
-
Modelhaus tire sizes ?
StevenGuthmiller replied to jdcar32's topic in Model Building Questions and Answers
According to Google, a 1969 Corvair would have been equipped with 13 inch tires. The Modelhaus site has 2 sets of 13 inch tires available. Black wall, or narrow white wall, both copies of later 60s AMT kit tires. I would assume that these would be exactly what you would need. Steve
-
Too easily destroyed with Ozempic. ☺️ Steve
-
Modelhaus tire sizes ?
StevenGuthmiller replied to jdcar32's topic in Model Building Questions and Answers
Most of Modelhaus’ tires are listed by what they’re intended to replace. Usually listed by the make and era of “kit” and the type of tire that you’re replacing rather than actual tire sizes. It’s best to cross reference according to the tires contained in those kits if possible. In other words, if you’re looking to replace a 14 inch Good Year tire from an MPC 1966 Pontiac Bonneville kit, look for a mid 60s MPC Good Year description on the site. Granted, not all of the tires are listed as such, it’s a start. I will say that I’ve never been disappointed with Modelhaus tires, and I’ve always found uses for all that I’ve ordered. My favorites are the the old American Satco reproductions. Steve
-
While you may be correct about vent window scale, (undoubtedly due to strength considerations) poorly foiled vent windows, (as with any other poorly done foil job) is entirely because of bad application by the modeler. Vent windows are no different than any other surface that you might apply foil to. They just take a little more time and thought, and often, patience may not be a strong suit for some. Steve
-
How would you know that they can repair themselves. 😂 Steve
-
Possibly, but just like trying to substitute anything other than a ‘58 Plymouth for Christine, I think a LOT would be lost in the translation. Steve
-
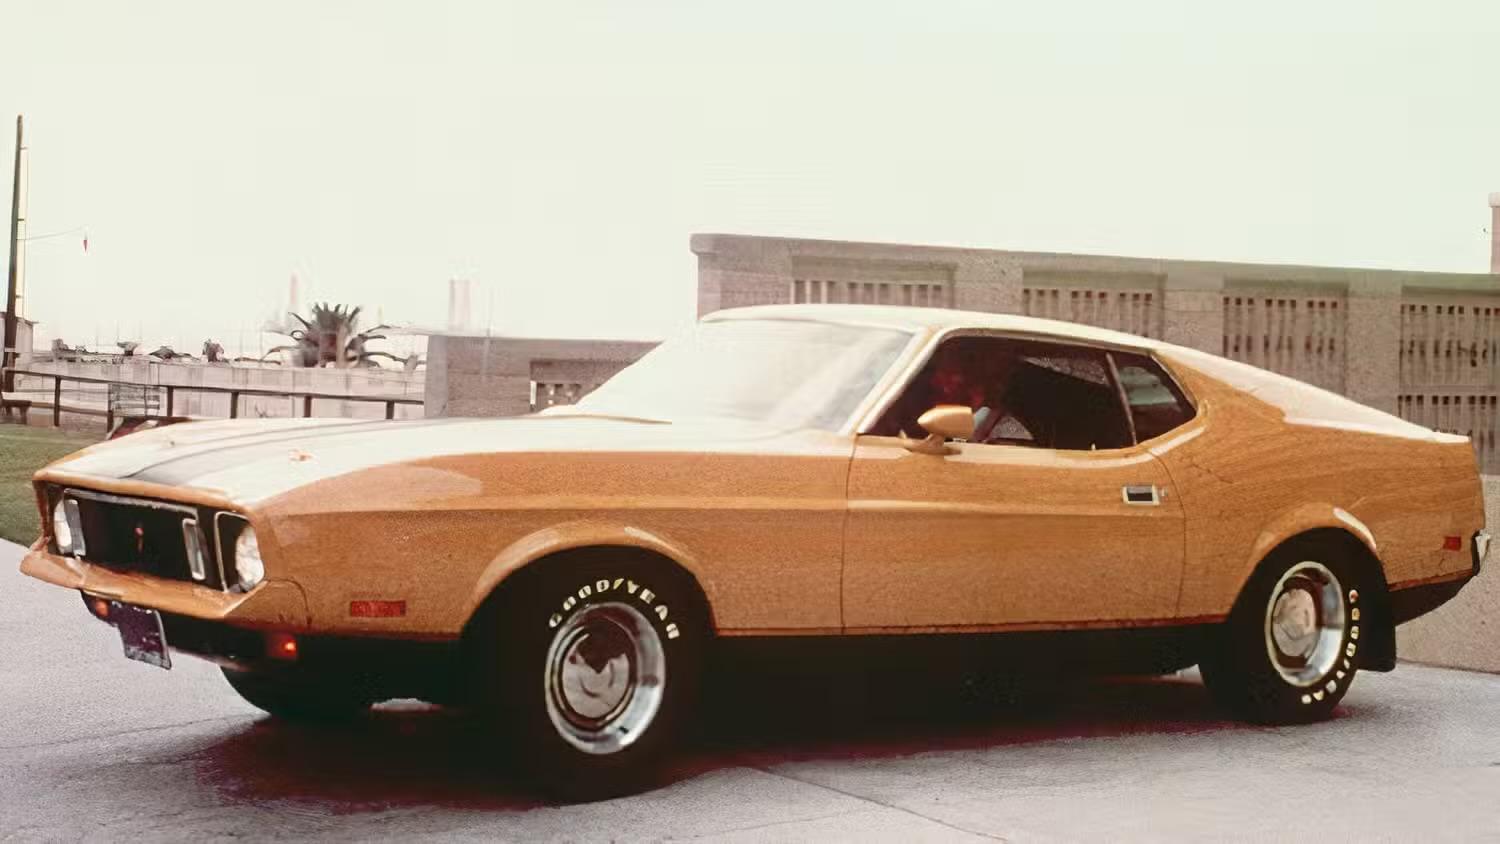
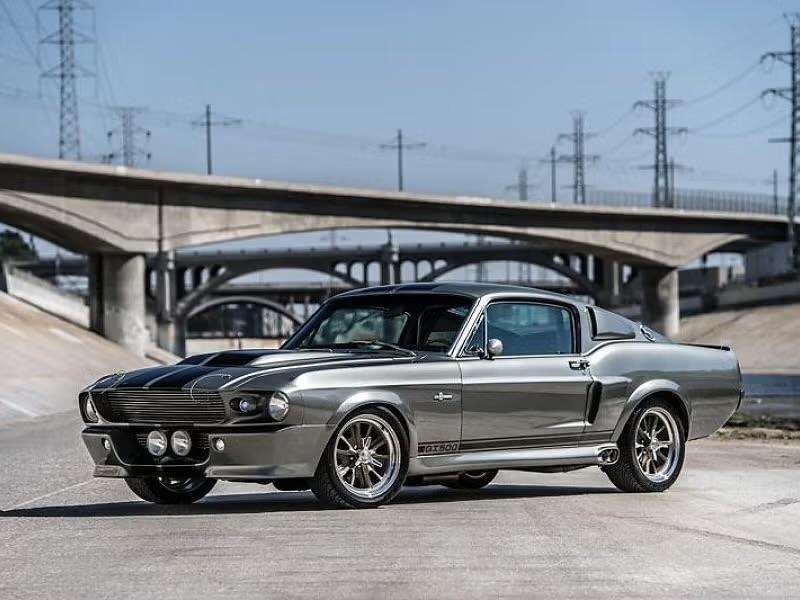
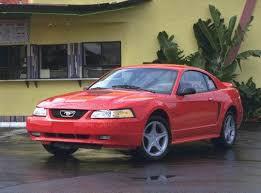
In all fairness, what we think of as “Eleanor” was already a “remake”. The original “Gone in 60 seconds” film from 1974 did in fact feature a “modern” 1971 Mustang. The 2000 film actually “regressed” to a ‘67 Shelby. Even the producers of the 2000 film knew that in order to produce an iconic movie car, a 2000 Mustang wasn’t going to cut it. 1974 Eleanor: 2000 Eleanor: Alternate 2000 Eleanor? Not even!! I certainly wouldn’t risk prison for stealing this! 😏 Steve