customline
-
Posts
3,791 -
Joined
-
Last visited
Content Type
Profiles
Forums
Events
Gallery
Everything posted by customline
-
Amazing detail work going on here. Wicked cool!
-
Oh yes! Nice chop, Ferbs! I gotta follow this one. 🤓
-

Monogram '32 roadster: a red-headed step-child.
customline replied to customline's topic in WIP: Model Cars
Thanks, Bil. These days, everything is "fiddly" 🥴. -
Monogram '32 roadster: a red-headed step-child.
customline replied to customline's topic in WIP: Model Cars
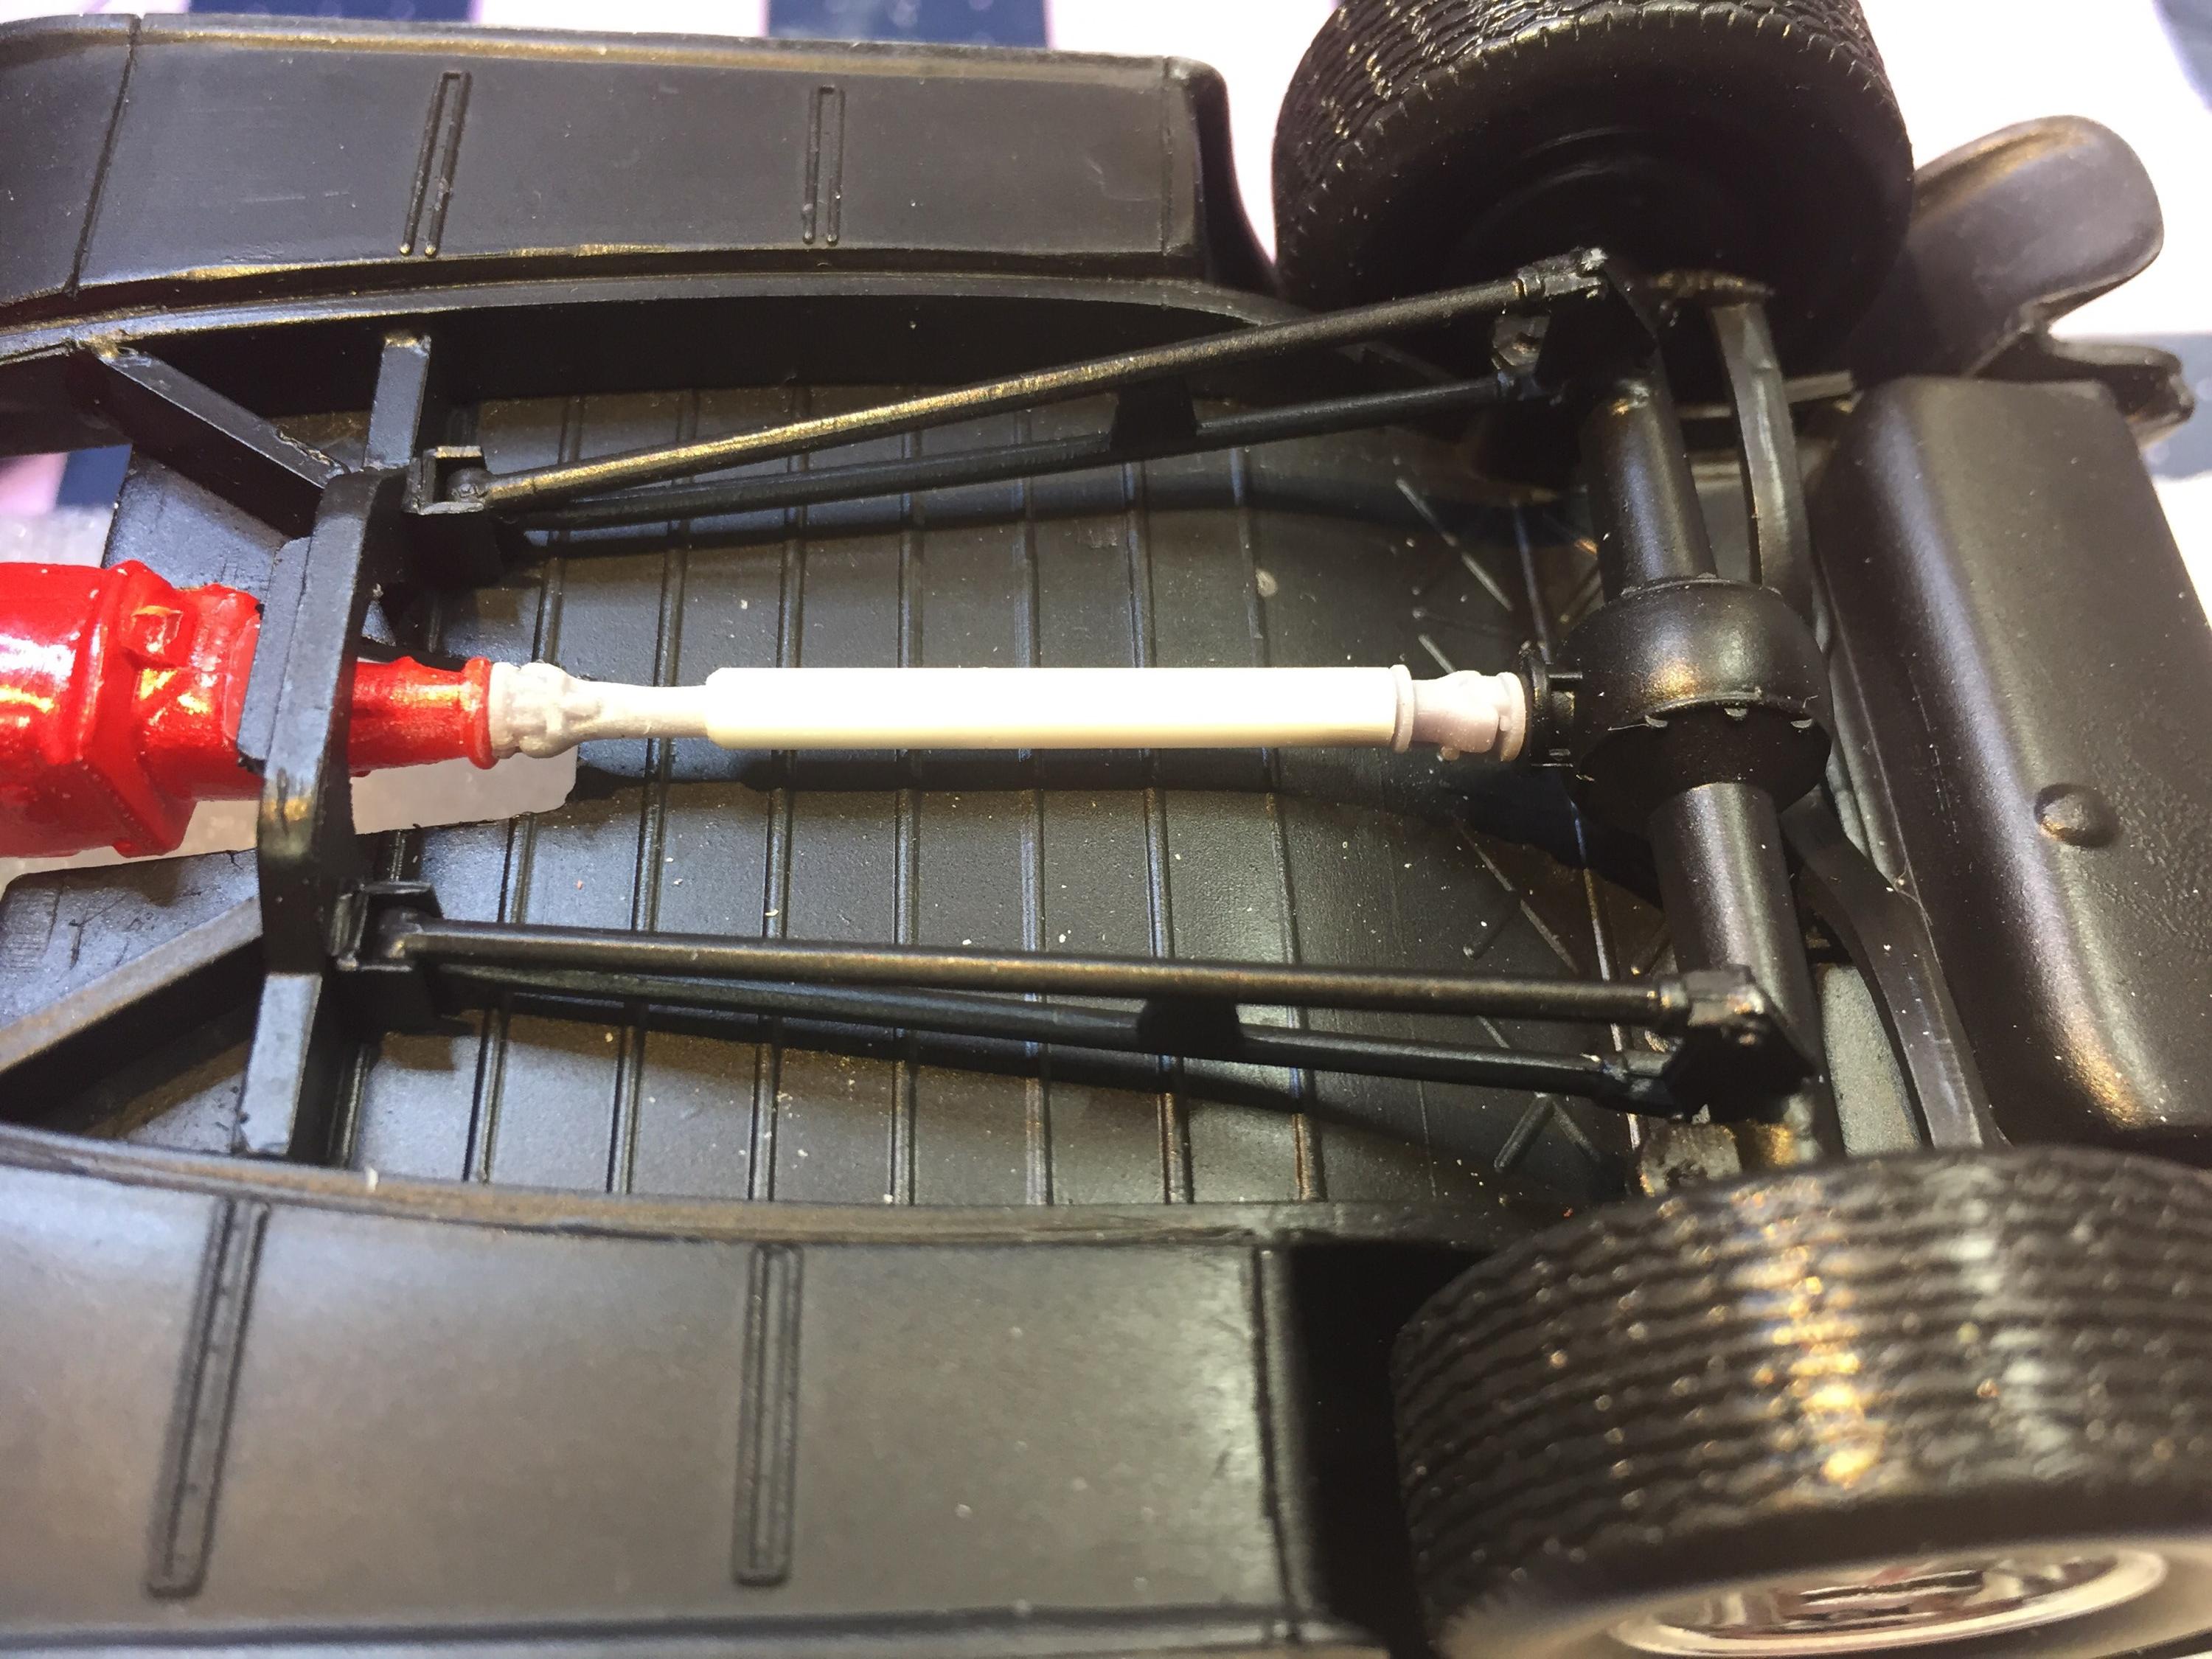
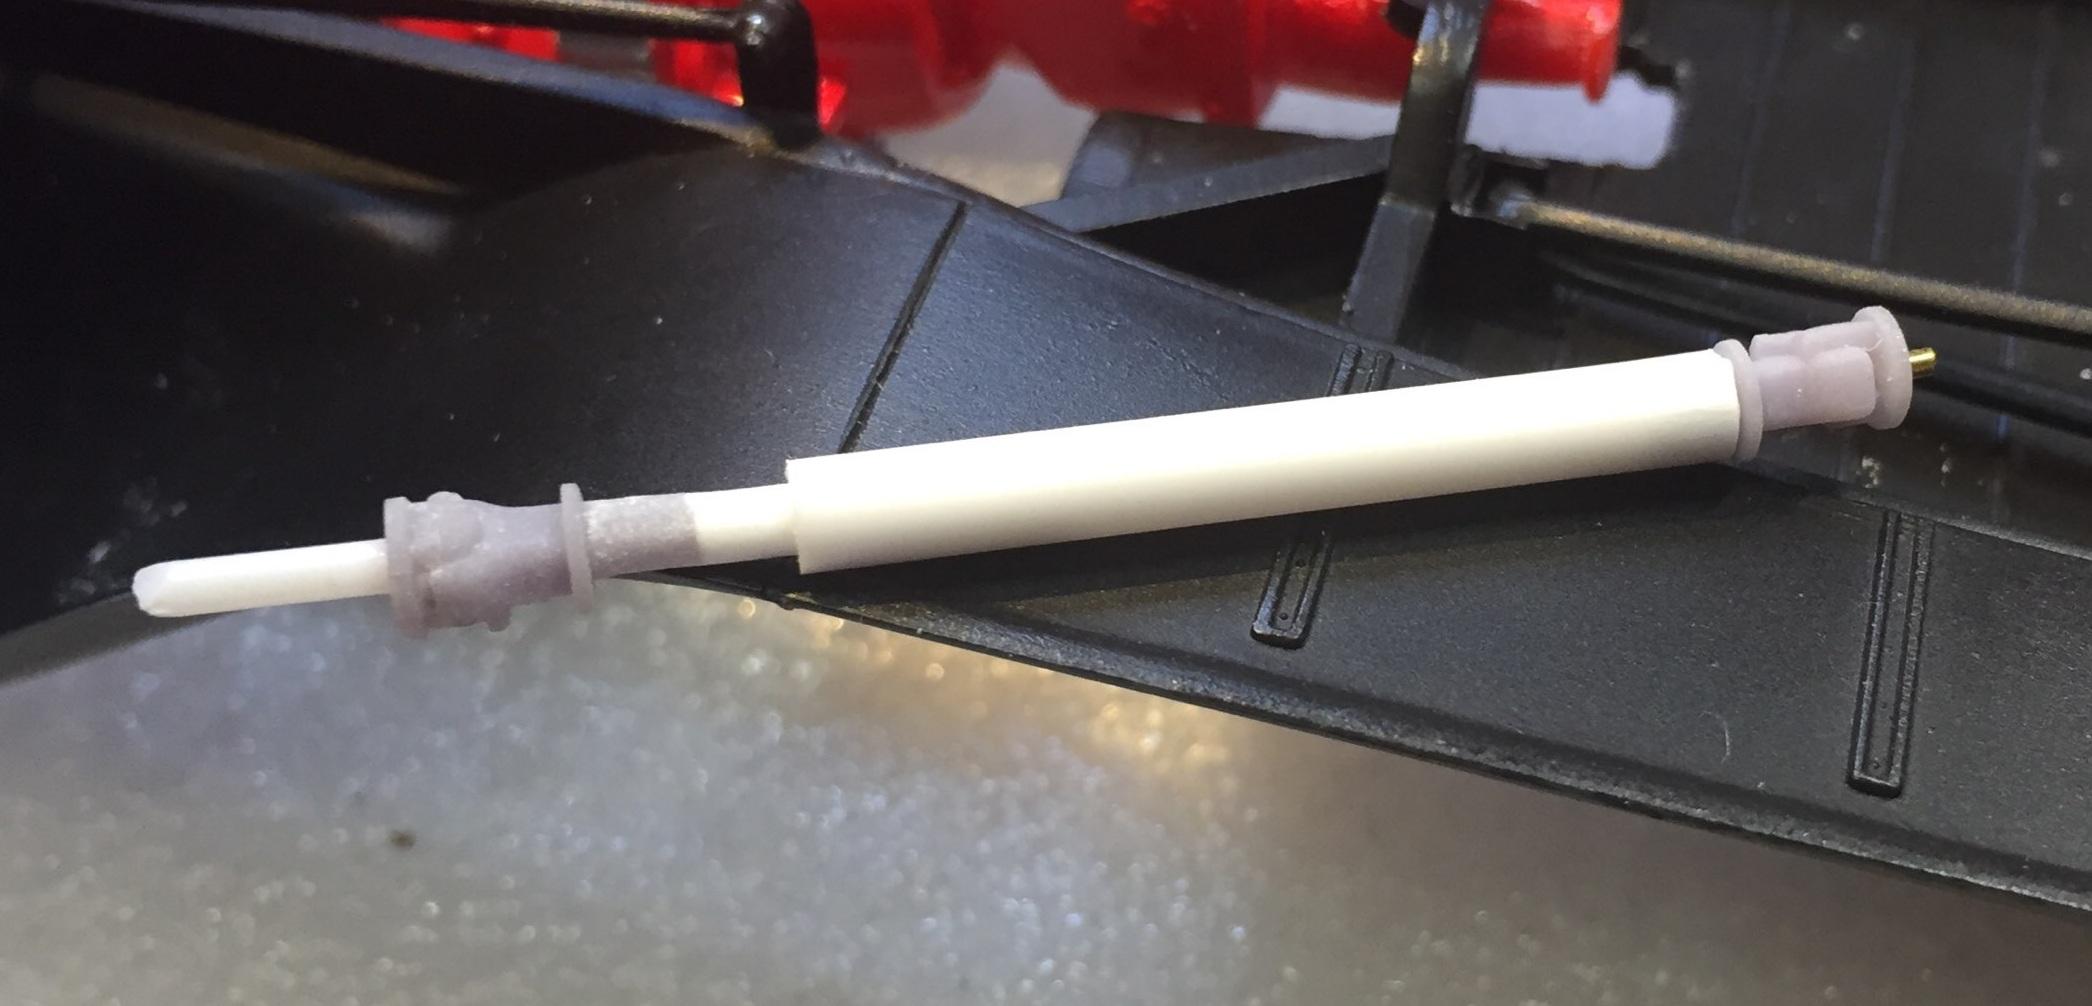
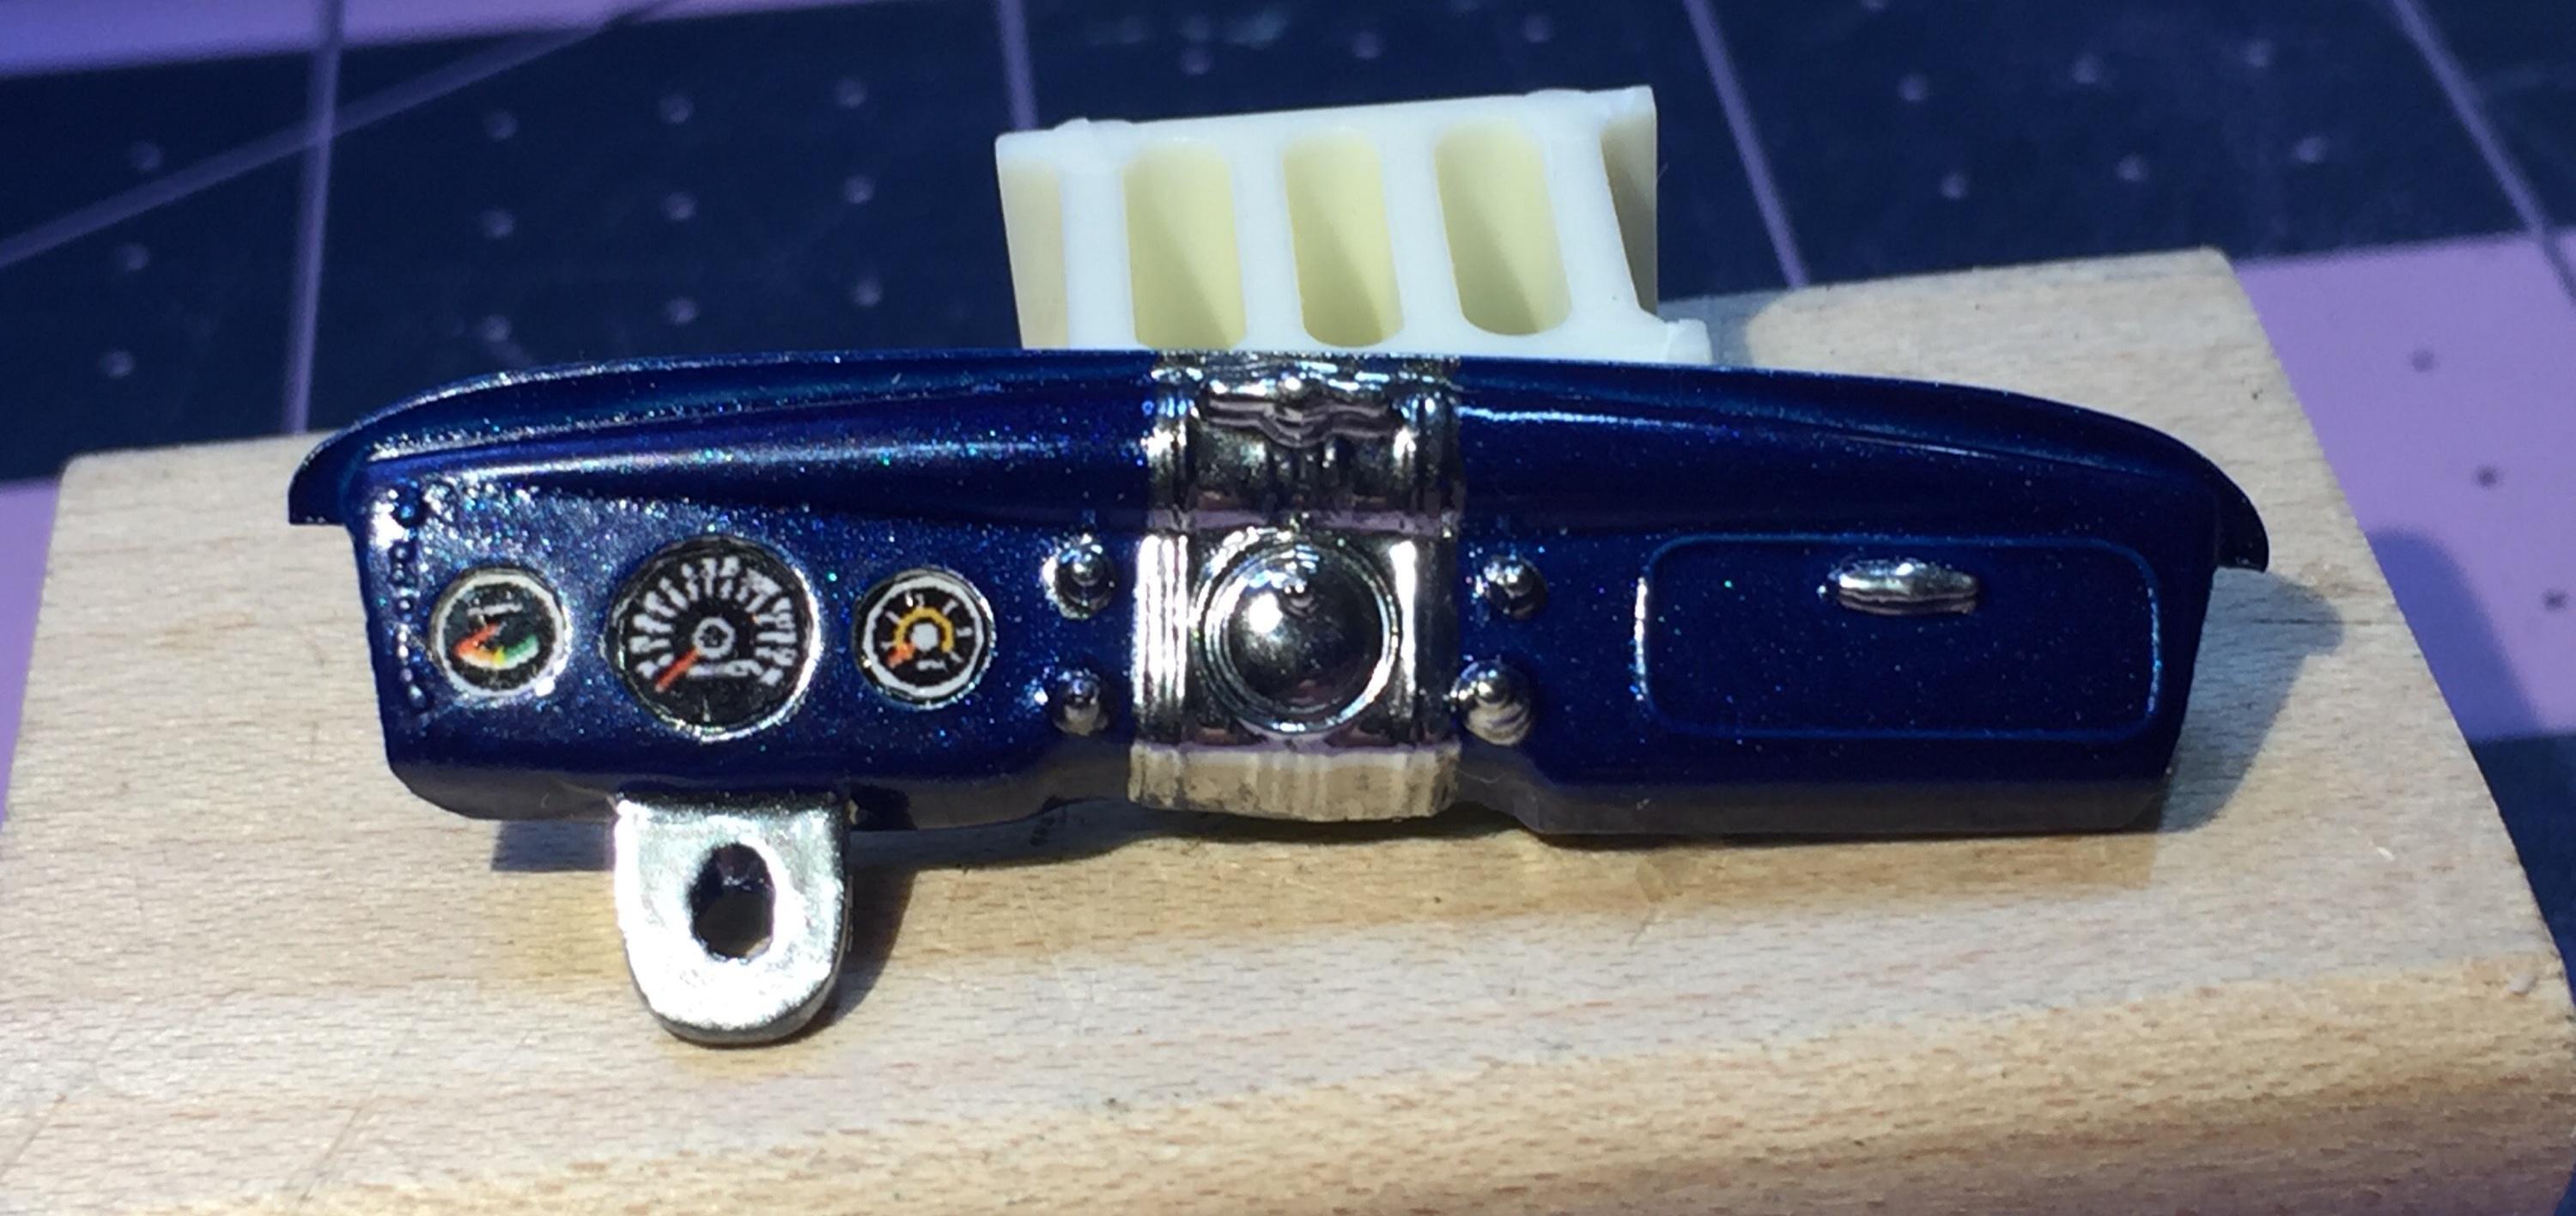
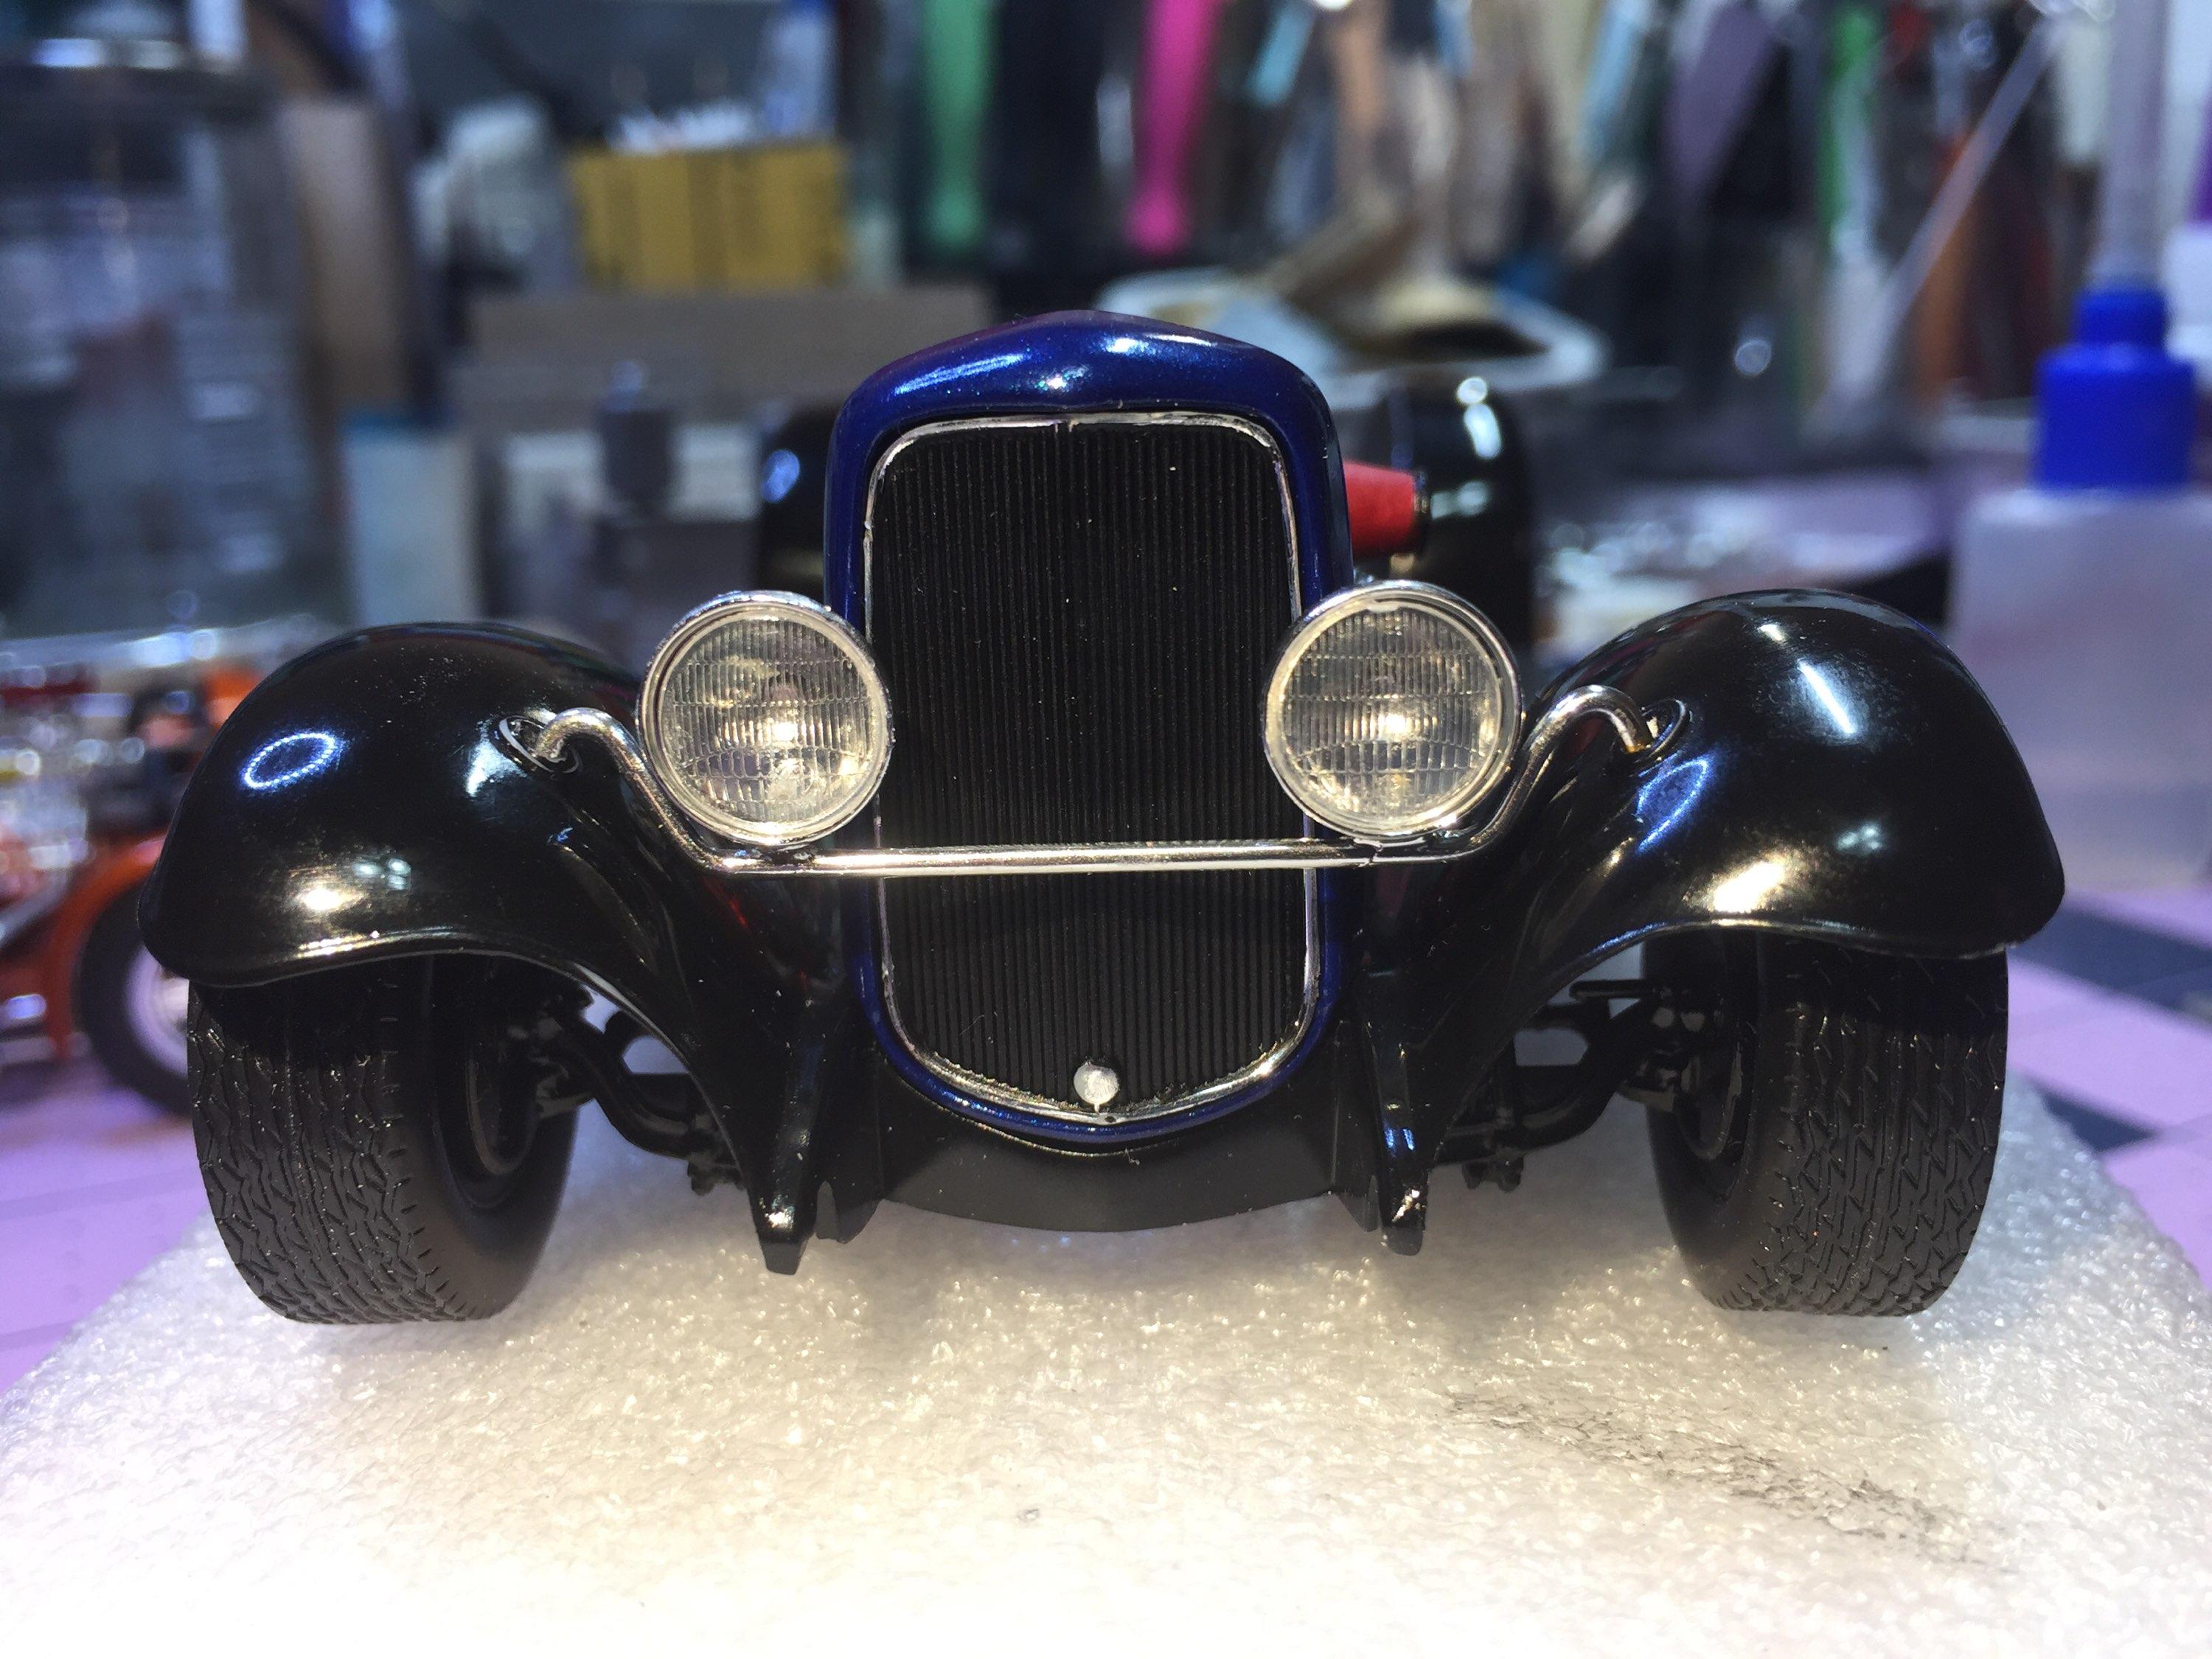
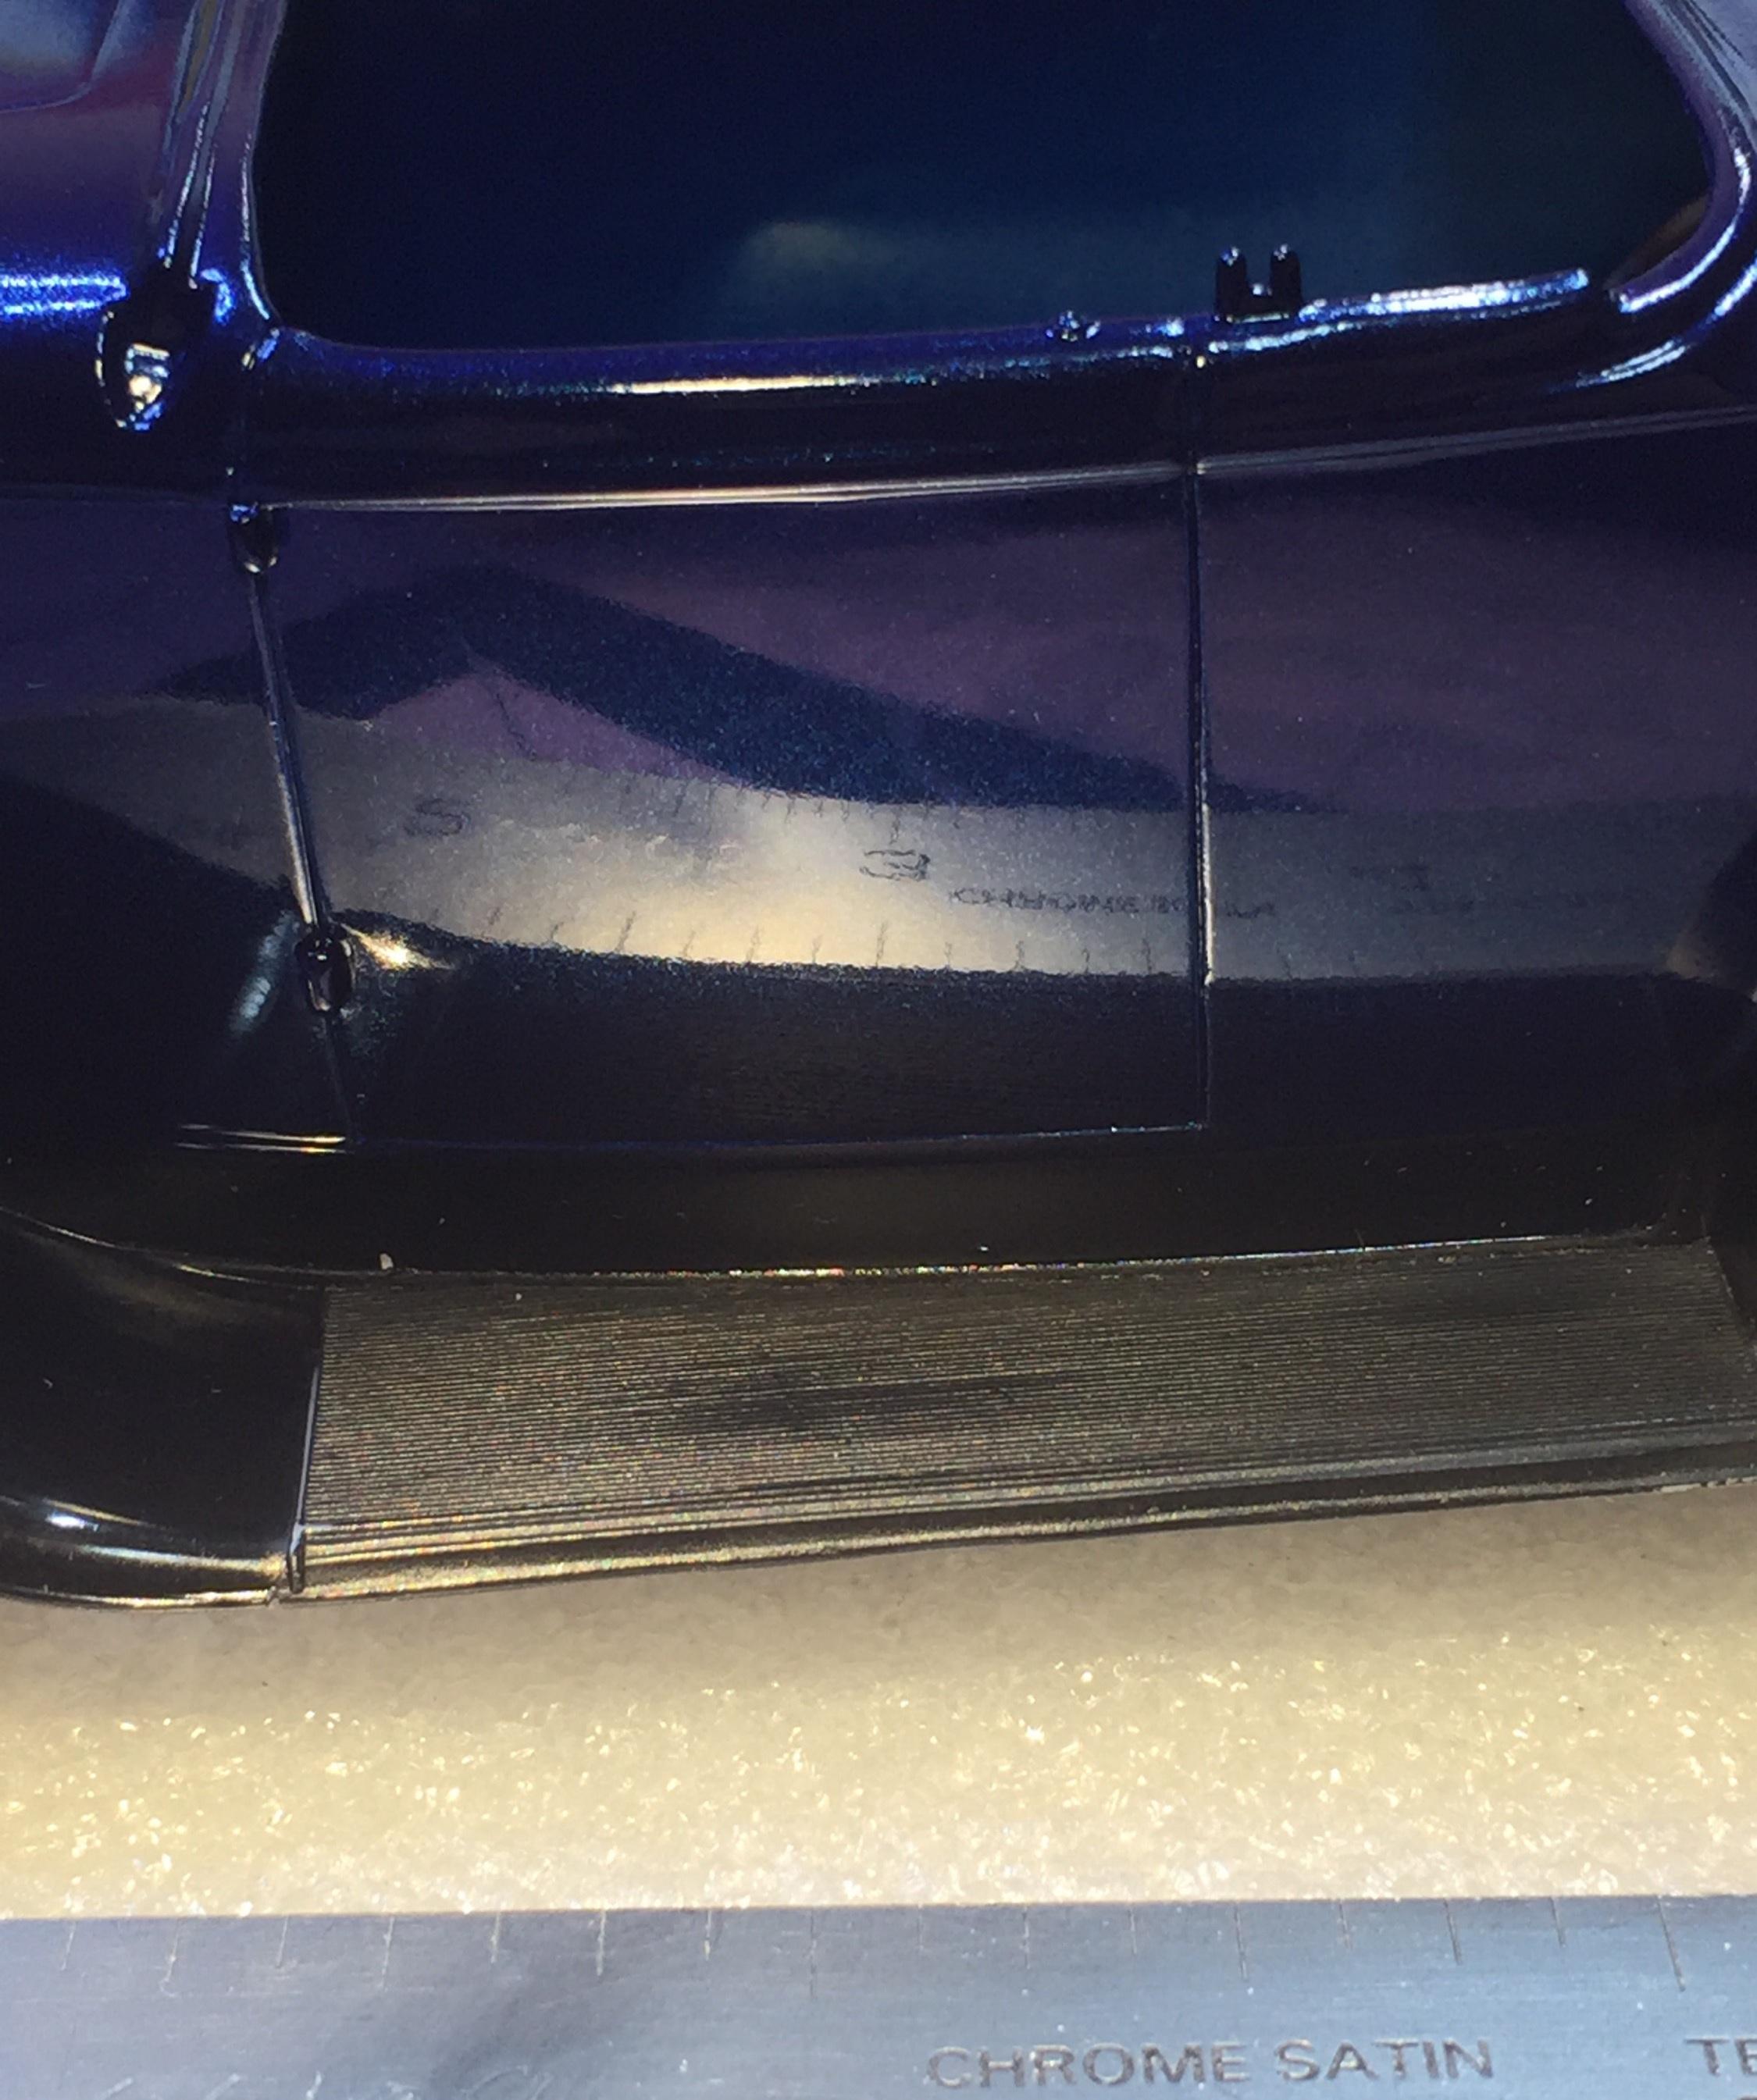
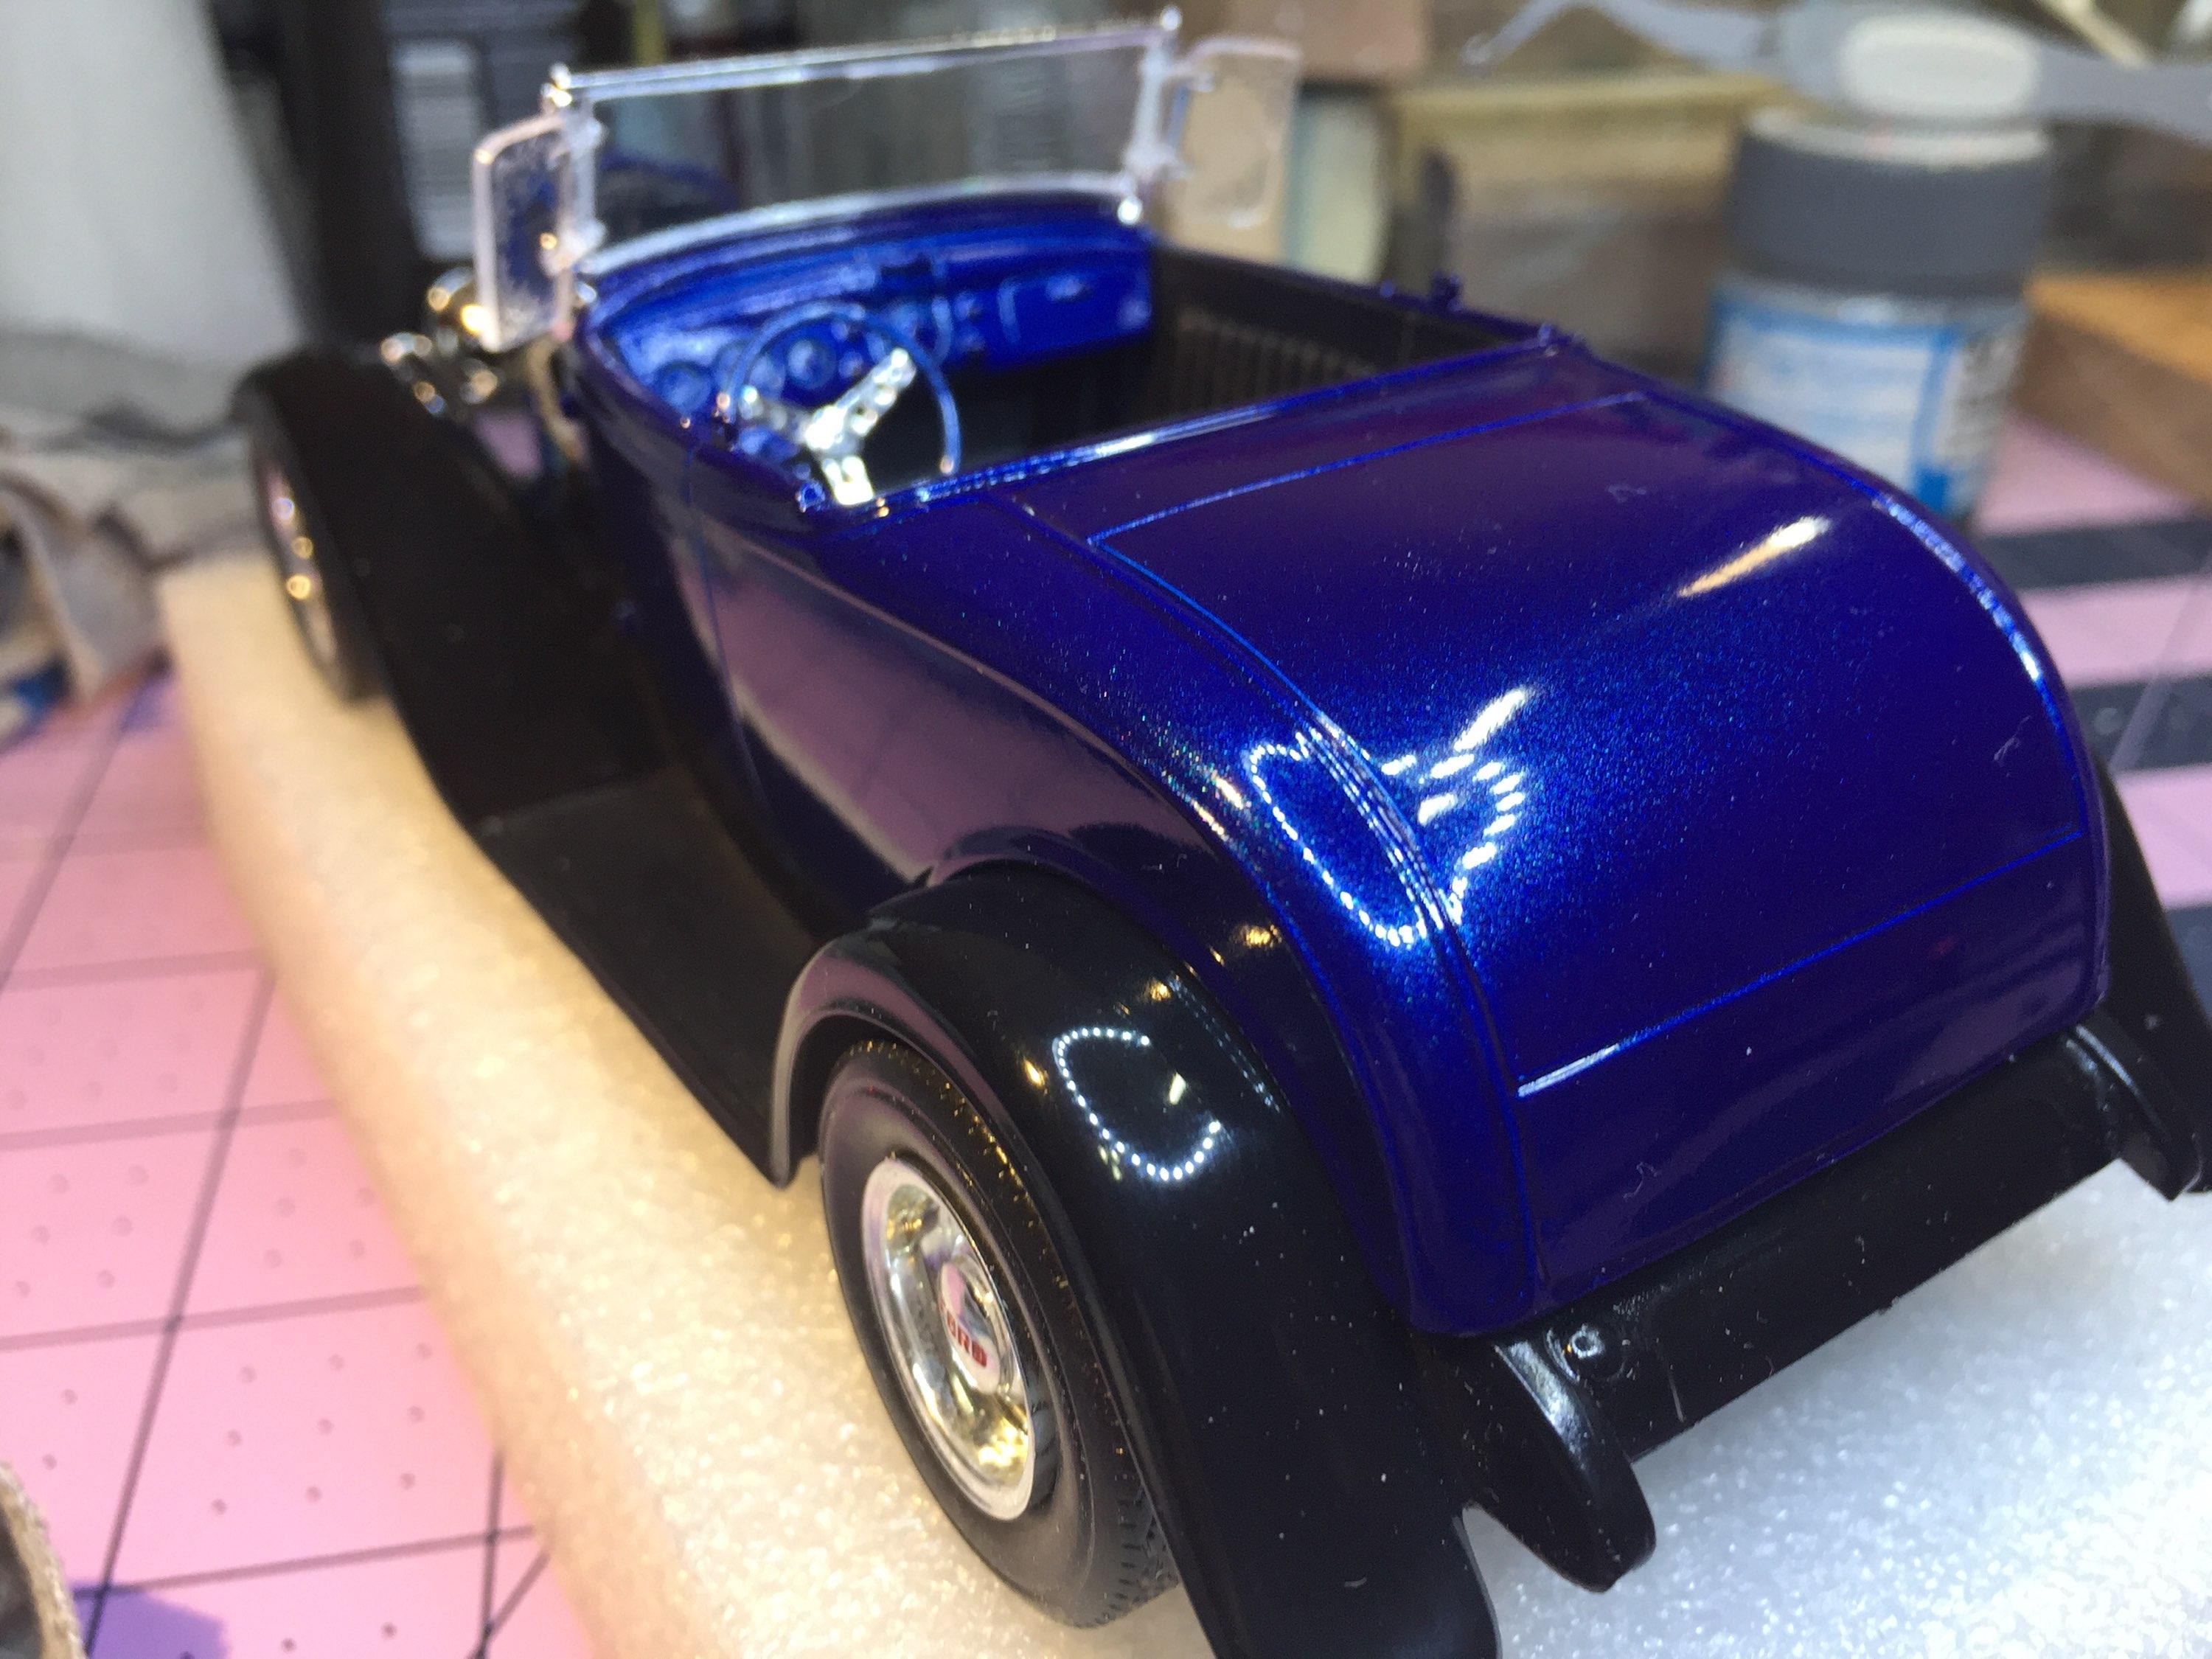
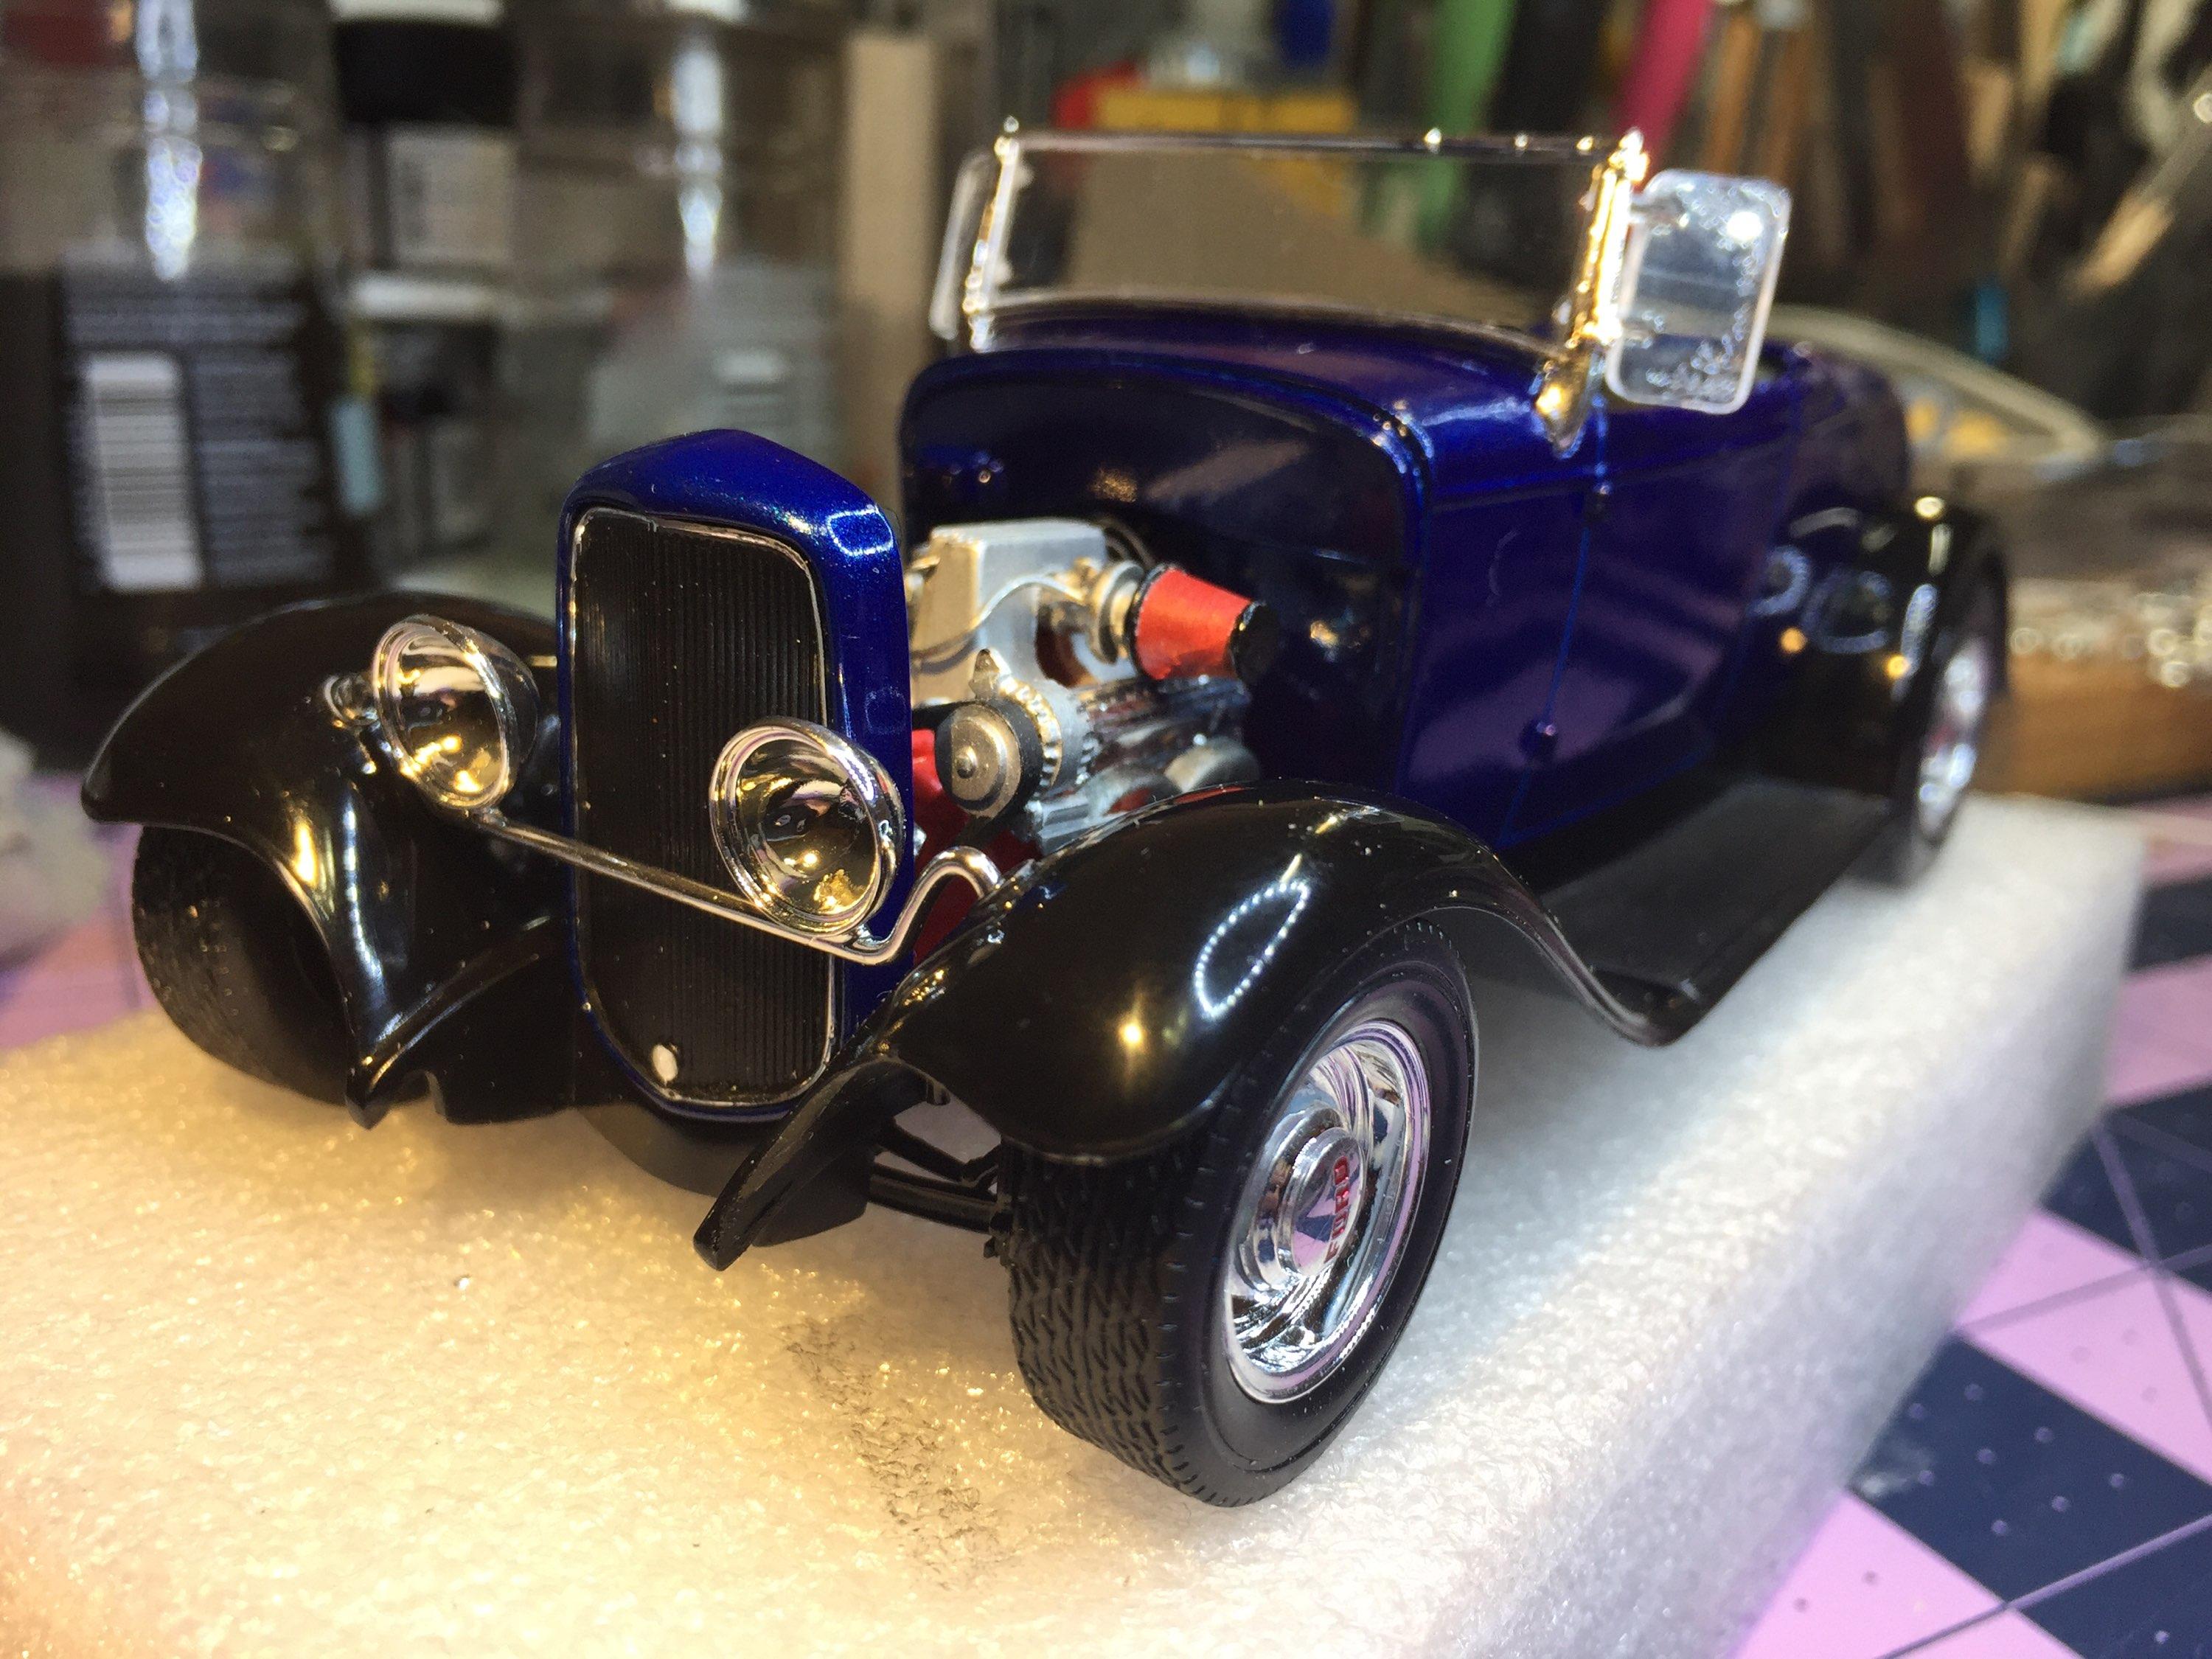
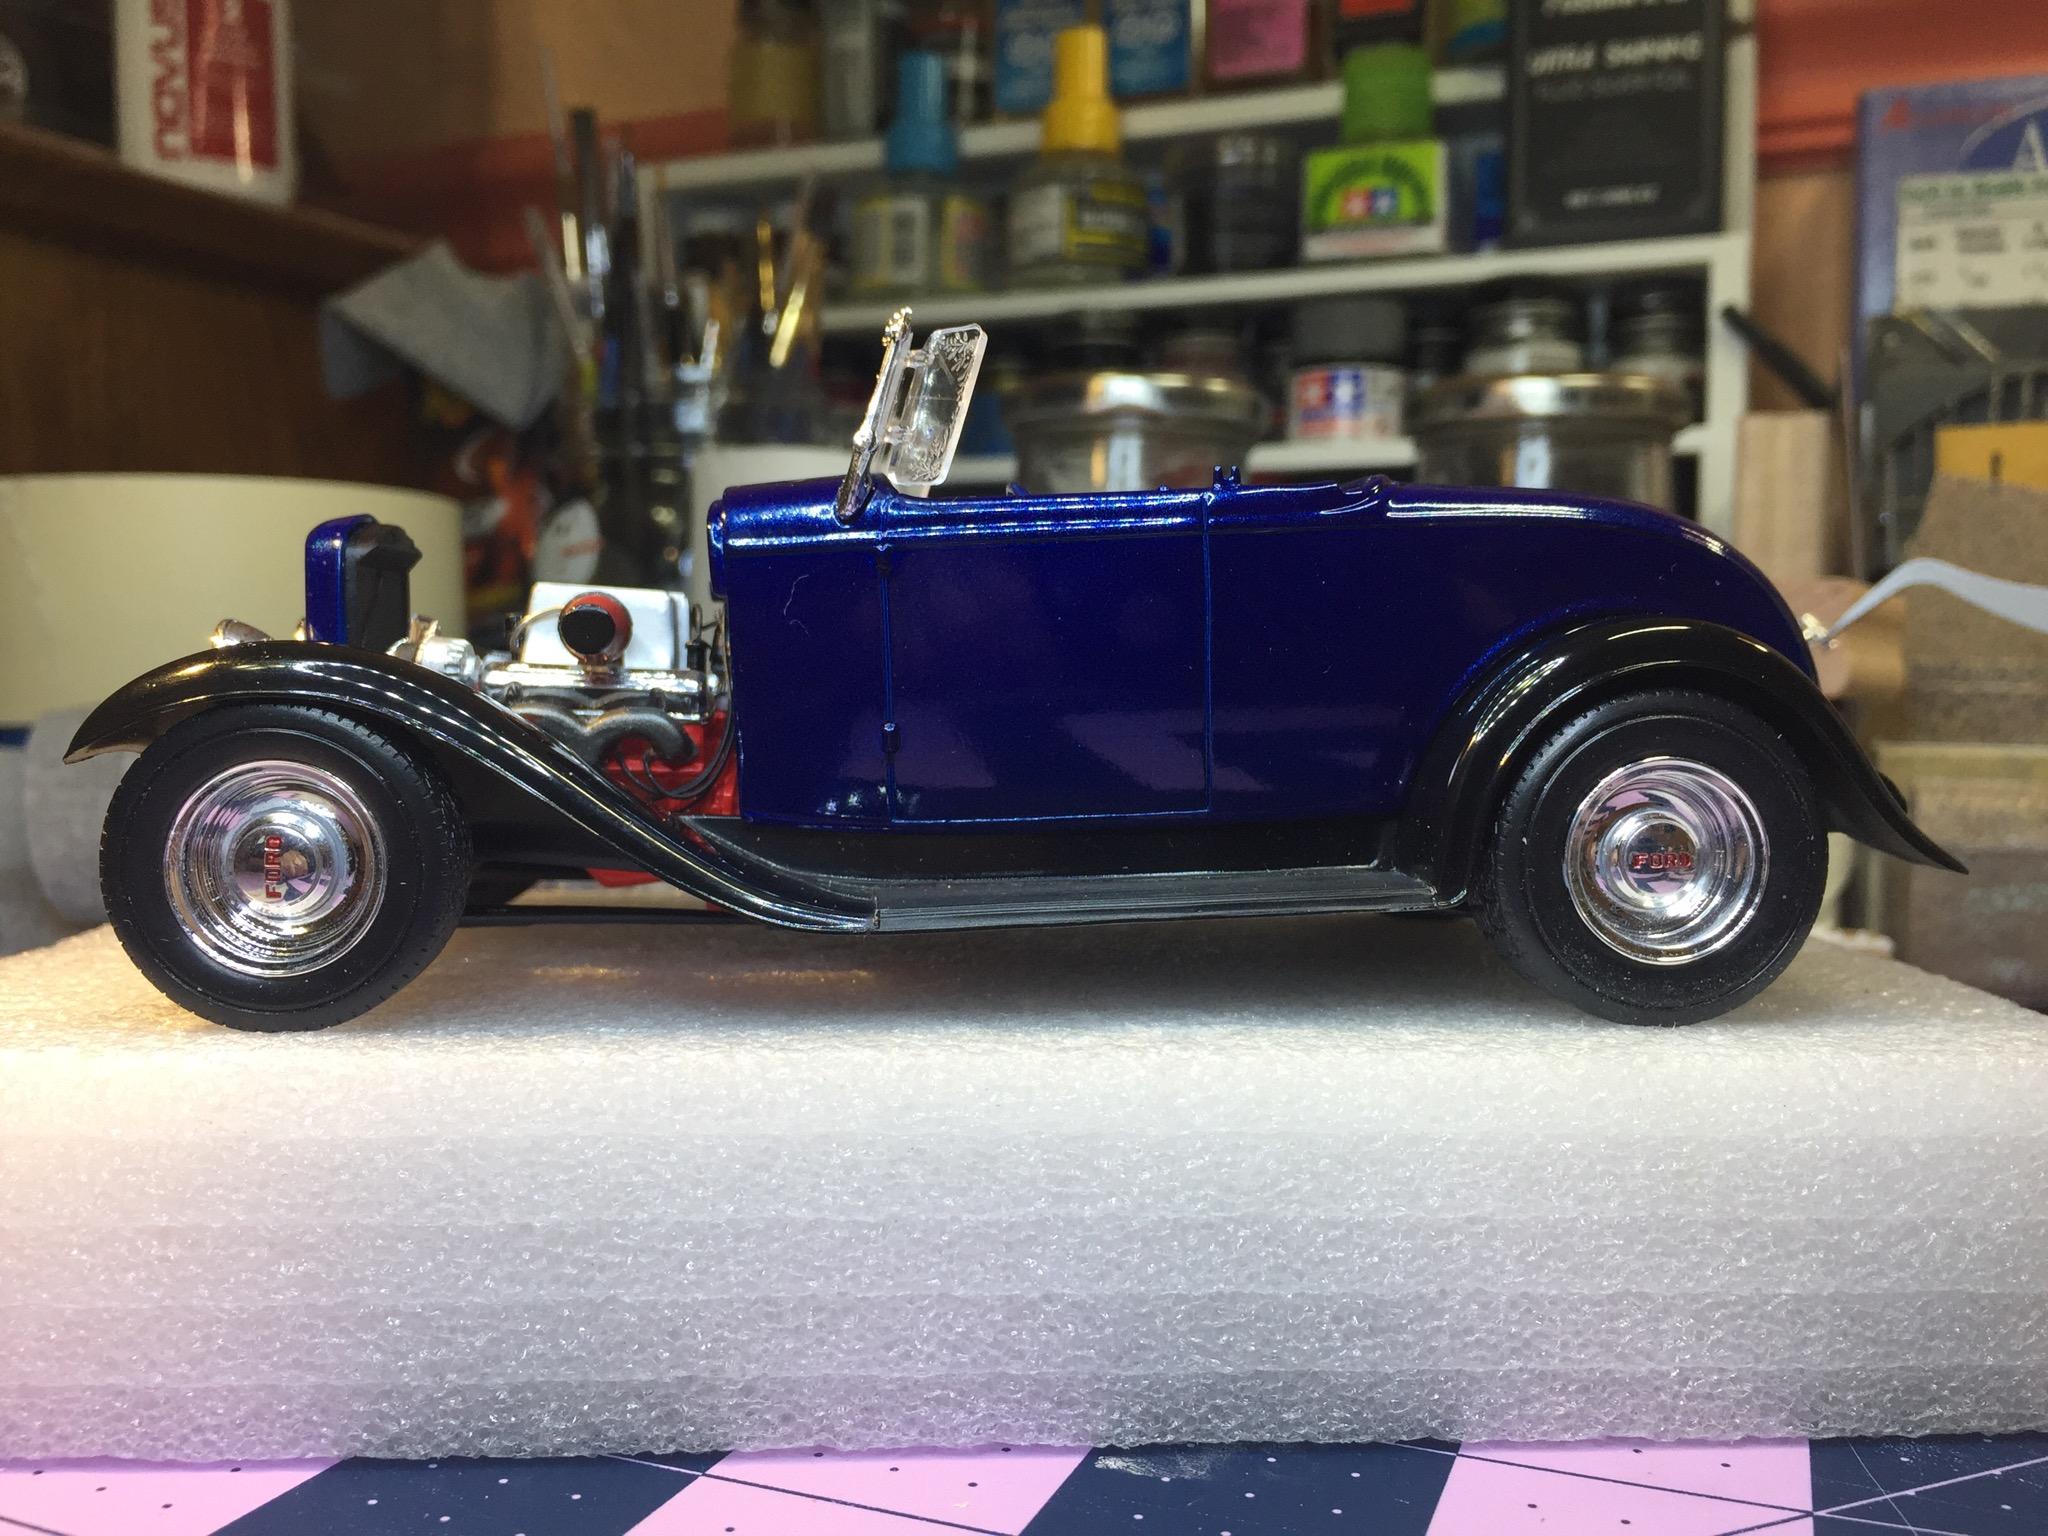
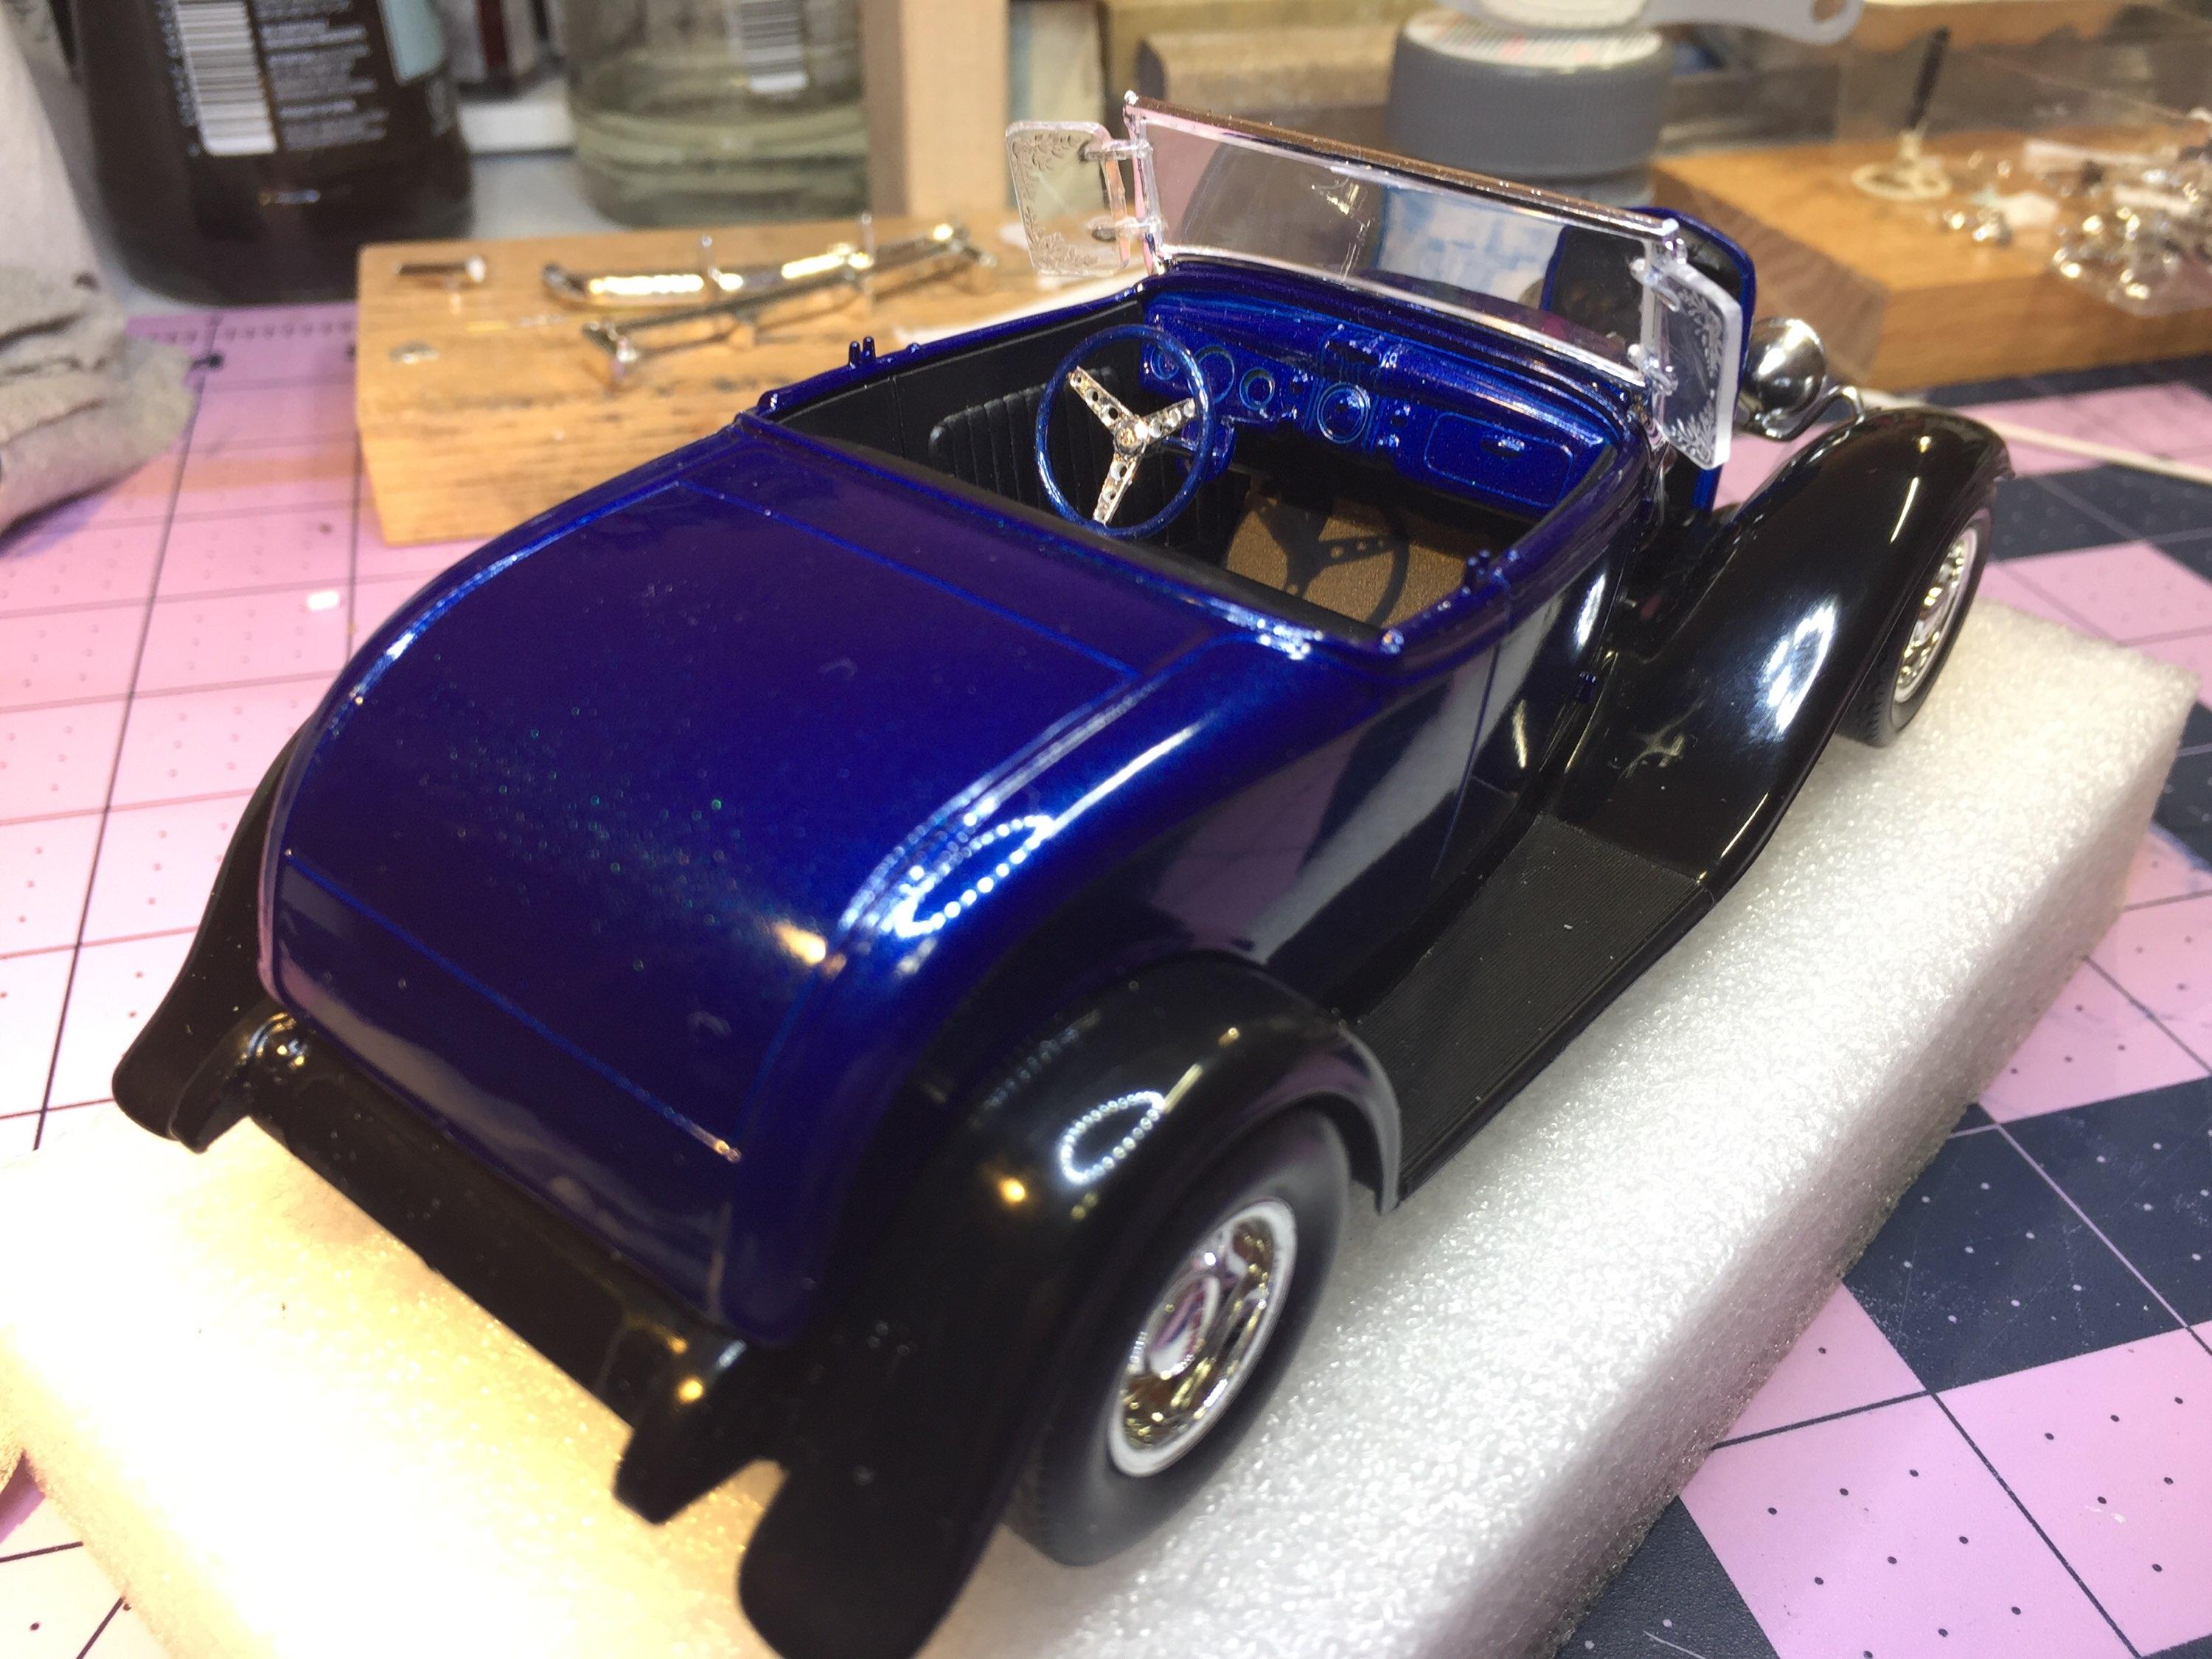
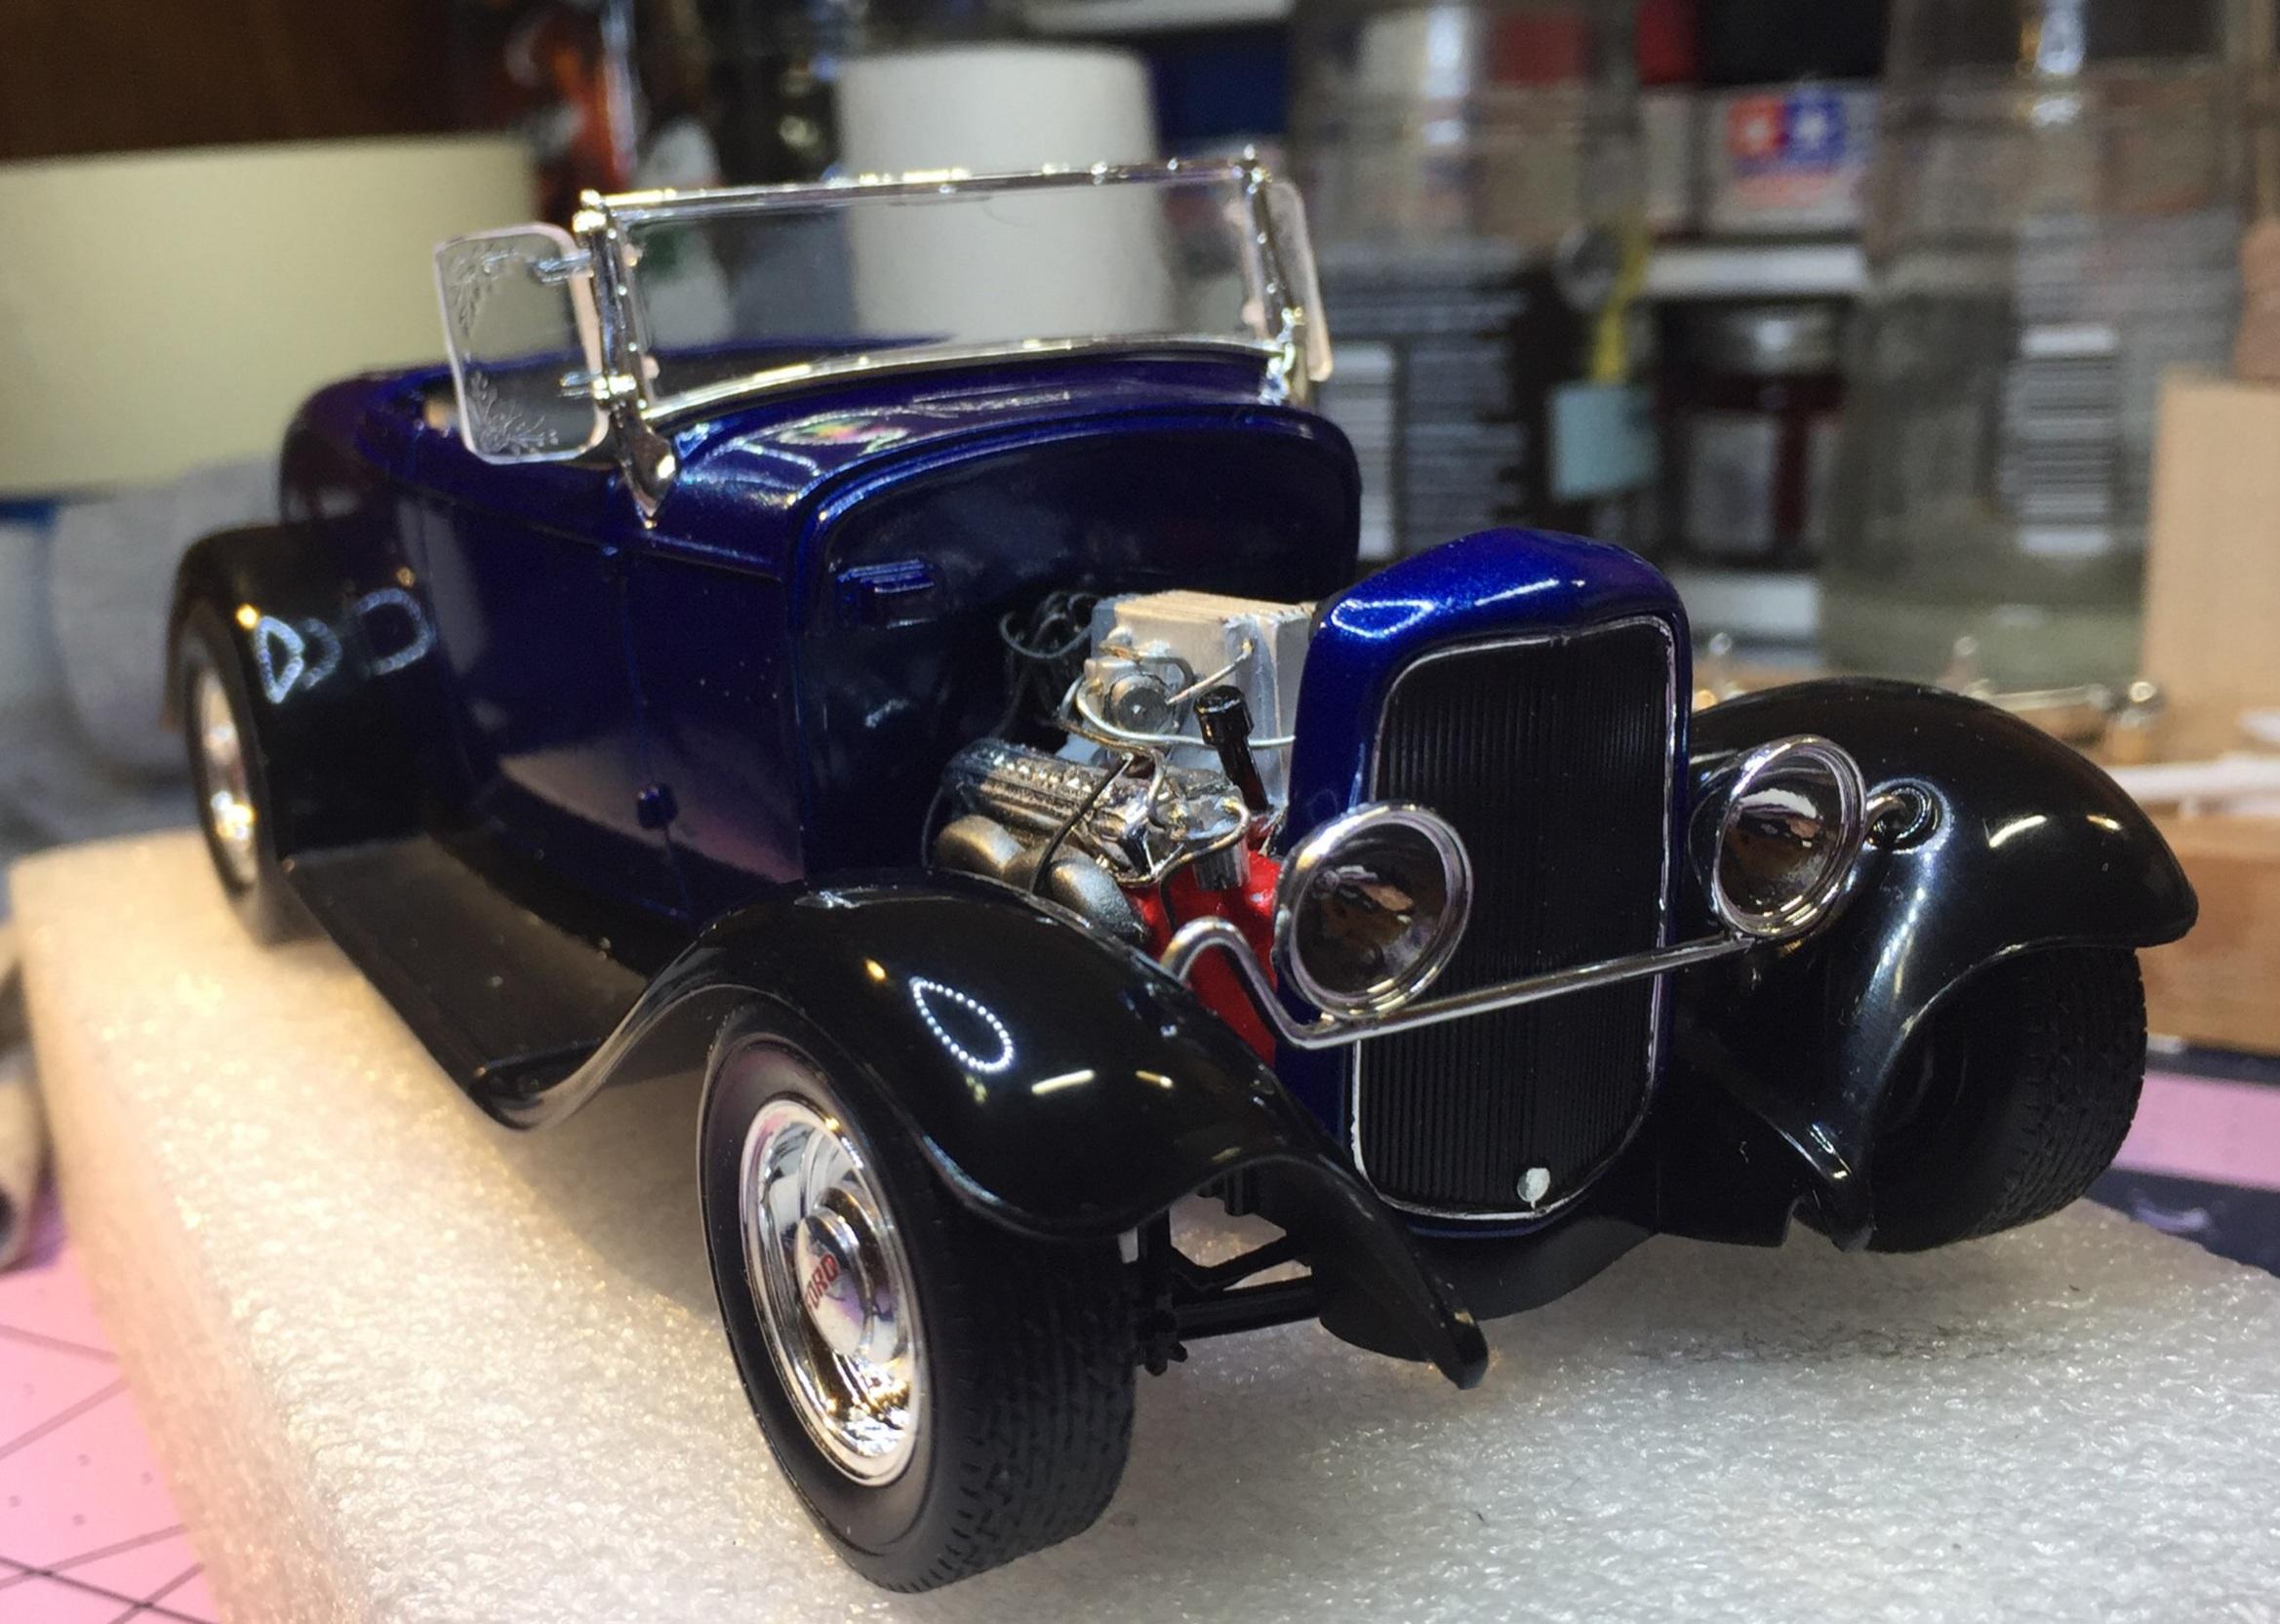
Okay, then, I've been a tad lazy lately but I knocked out a few items on the punch list. I detailed the dash with "liquid silver foil" and some guage faces I had laying about. They don't match but they are colorful 🙂. Then I had to make a drive shaft. I used Iceman u-joints. I hate that half of the joints on the 3D tree are bent on an angle. Why not sell just straight ones and just bent ones? The joints are kinda brittle, drill with extreme care. The shaft is Evergreen tube and rod, prepared to slide easily upon installation. The joints are pinned with .020 brass. I glued the engine in place without a shaft intentionally 😛 this time so I could get my money's worth from the u-joints. 🧐 Frankly, they're not very crisp. Ive had better u-joints from kits. Gotta be better stuff out there. The sparkling blue body needed some panel line darkening so I figured I'd try Tamiya's stuff. It said on the bottle you could swab off the excess with enamel "thinner" (I thought they meant any enamel reducer so I used Testor's airbrush thinner (an enamel reducer). Well, it turns out Testor's is a bit too hot to use on lacquer. So I wet-sanded that nice blue paint with 4000 and later on I gave it another coat of blue. It's an improvement. Maybe enough for just a quick rub with scratch-x. There's just a hint of OP. Gotta decide on clear or not. The root of my indecision is that the fenders are rubbed out and the body needs to match the finish. This coat went down on a smooth sanded body and the raw finish is so darn close to perfect its a shame to "fix" it. There's another reason to go fenderless. But I couldnt. I wanted to. 😪 Oh...got lenses in. Yes, they are not level. Well, one is 🙂. I use clear enamel, mostly, for lenses. Or lacquer. Thanks as always for your attention to this confusing, rambling dissertation.
-
Monogram '32 roadster: a red-headed step-child.
customline replied to customline's topic in WIP: Model Cars
Thats what I did. I have a dozen cans I bought to take advantage of a Hobby Town coupon that saved me $30. I chose some colors randomly. I'm just not happy with that decision 🙁. All I can say is it's okay. Nobody will say they don't like it. Even if you dont. 🥴. -
Why not re-shape the kit skirts to fit the openings?
-
Ahhhh.....50 shades of gray.....😛
-
Is the IMC the same as the Testor's kit?
-
Okay, okay....I'm following 😀....good stuff going on here.
-
The squirrels have migrated south. They are here. I think they're after my nuts.
-
Monogram '32 roadster: a red-headed step-child.
customline replied to customline's topic in WIP: Model Cars
Don't look at me.🤐 -
Monogram '32 roadster: a red-headed step-child.
customline replied to customline's topic in WIP: Model Cars
Oh, good luck with that 😂. Leaving New York, however, might be prudent. 🥴 -
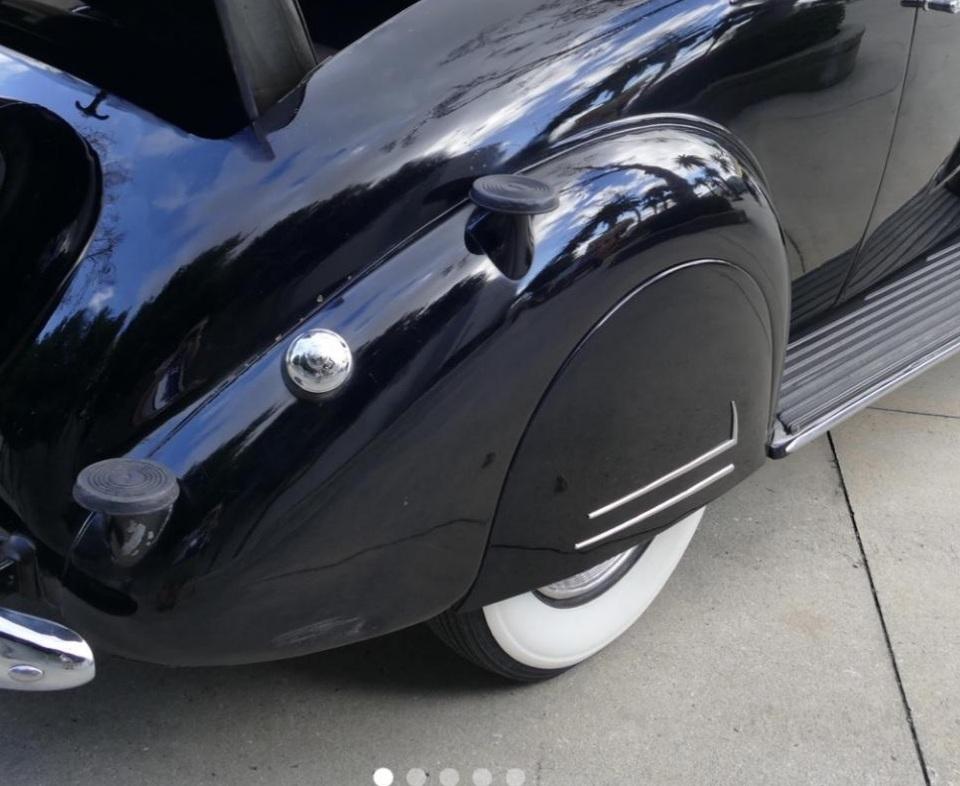
I stole this from Greg. 👇🤓 It's a '37 Chevy. Close enough 🥴....there's a slight convexity to it but it fits flush at the opening. Thanks, Greg!
-
Monogram '32 roadster: a red-headed step-child.
customline replied to customline's topic in WIP: Model Cars
Thank you, David. Got more to do on the blue yet. I spotted some gafs on the black, too. -
I would like to drop an idea here on the skirt issue. I don't like the kit skirts. I do think it needs something, though, maybe a flush fitting skirt? The fender has a character line that complicates the visual when the skirt is in place. It's that skirt that doesn't work. Maybe smooth out the fenders, lose the character line? A similar skirt, shaped differently (longer). Maybe a re-shape of the opening to close it up....I'm just throwing it out there, Bil. 🤓 I built this kit with a slanted the B-pillar. Big mistake. It looks like a Plymouth. Don't listen to me.
-
I would love to get my hands on one of those. Where can I get one, Rudolph?
-
That weird, Topher.
-
Okay, this is cool....you have my attention, Jon.
-
Monogram '32 roadster: a red-headed step-child.
customline replied to customline's topic in WIP: Model Cars
Blue on black....Kenny Wayne Shepherd
-
Monogram '32 roadster: a red-headed step-child.
customline replied to customline's topic in WIP: Model Cars
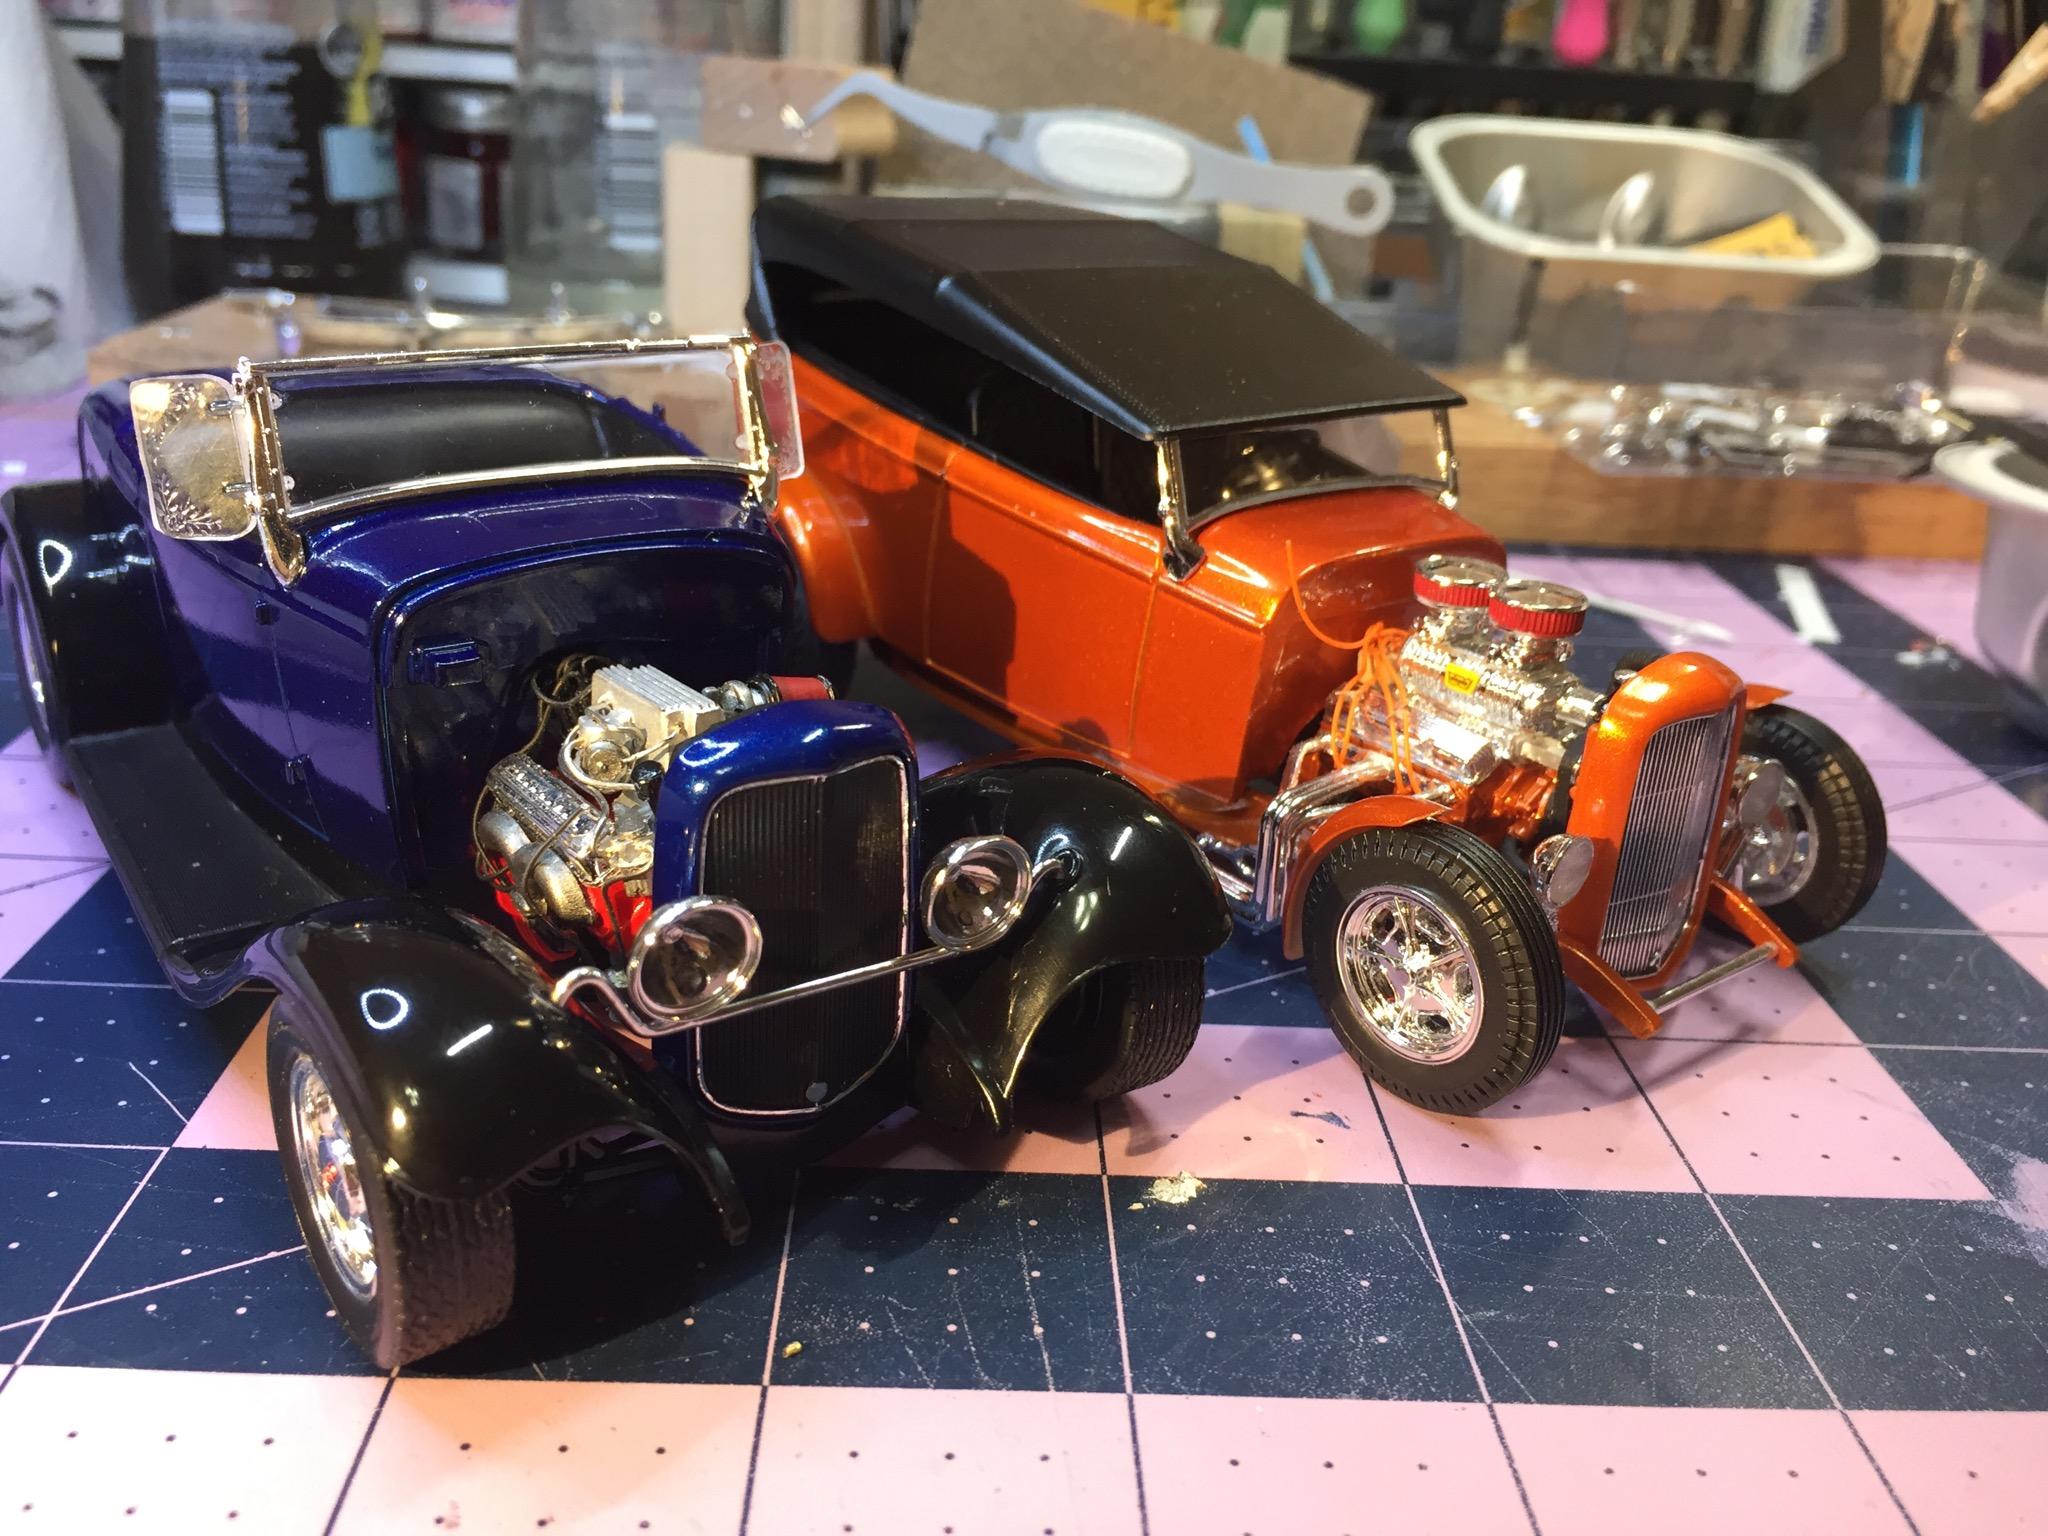
I do have another one 🤔. Nah.....time to do something completely different 🥴. The paint stays. I've scratched my deuce itch for now, Greg. -
Monogram '32 roadster: a red-headed step-child.
customline replied to customline's topic in WIP: Model Cars
Thanks, Jon. -
Monogram '32 roadster: a red-headed step-child.
customline replied to customline's topic in WIP: Model Cars
Here's the mock-up as promised 👇🤓 This is why I wanted a medium-dark color. I want the grille trim to show up well.
-
Monogram '32 roadster: a red-headed step-child.
customline replied to customline's topic in WIP: Model Cars
In scale, it's more a flake...It's a dynamite color. But it's not quite right in my mind (which, as you suspect, is not one they'll be preserving in a big jar.) I love it, though, Dave. On a 69 Nova. Anyway, I'll clear it and rub it out and be thankful I didn't screw it up. -
Monogram '32 roadster: a red-headed step-child.
customline replied to customline's topic in WIP: Model Cars
Thank you David! I'm happy that, so far, everyone says they like it. If I can't find somebody to agree with me, I guess it was a good choice. 🤓 heh heh heh....it's probably "buyers remorce". I just didn't have the colors on the shelf that I needed unless coral blue counts. I wanted a medium-dark non metallic blue or green. I wanted the arctic shade of blue but in a solid. That's about what I've got here but in what they said was "pearl"....is it me? Have I finally crossed into.... -
Monogram '32 roadster: a red-headed step-child.
customline replied to customline's topic in WIP: Model Cars
Sorry, Bil. Couldn't help it. 😔

.jpg.04590fbb70d8adf3fe1730fc3e1c8c44.jpg)