

customline
-
Posts
3,791 -
Joined
-
Last visited
Content Type
Profiles
Forums
Events
Gallery
Everything posted by customline
-
You've got a nice rubber rake goin' on. I wouldn't take any chances with it now, after all that front end work.
-
What a wild show car! Awesome paint, Seth. You must be saving up for a can of Revell chrome paint, right ? 😁
-
I don't think those front tires look bad, Len. The first shot is looking through the grille opening giving the impression of too much air but when it's all buttoned up it may be just fine. I love those rims. Very sharp.
-
They look like the stainless steel they're supposed to be. Nice work. I recall you cast some of these. I tried it. Not for me.
-
I looks pretty good and It's a time saver, for sure. You can probably seal it but, of course, it will affect the brilliance. Handle them with tweezers till you're ready to install them. I wonder if anyone has decanted it for airbrush yet. That would maybe get more mileage from that little can. Less wasted, right? But there goes the convenience 😕. I dunno, Len.
-
I have a real problem with the price of that stuff. From what I've read on this forum, the Revell chrome paint is only just a little better than more reasonably priced chrome paints. I've had success with Alclad and will use it up before trying anything else. I wasn't serious about actually buying that stuff. Maybe some day when my dementia kicks in.
-
I guess it's time for a pedicure 🦶😕 No, actually it goes in more, I just didn't want to push it in. It's resin and I don't want to break it. I guess I could sand the bottom a bit more, get rid of the calluses 😏
-
Greg may have something, Dennis, I'm open to taking another look. This project is a sort of testing ground. The kit provided some good choices and I had some in stock also. What I didn't have was a solid plan. I didn't plan on bumpers but y'all sorta pushed me in that direction. I have another rear bumper to try. It's much lighter looking than the Del Rey unit and I'm hoping for success with that. It will be a cleaner look and it may help to decide on the front treatment. Thanks for helping!
-
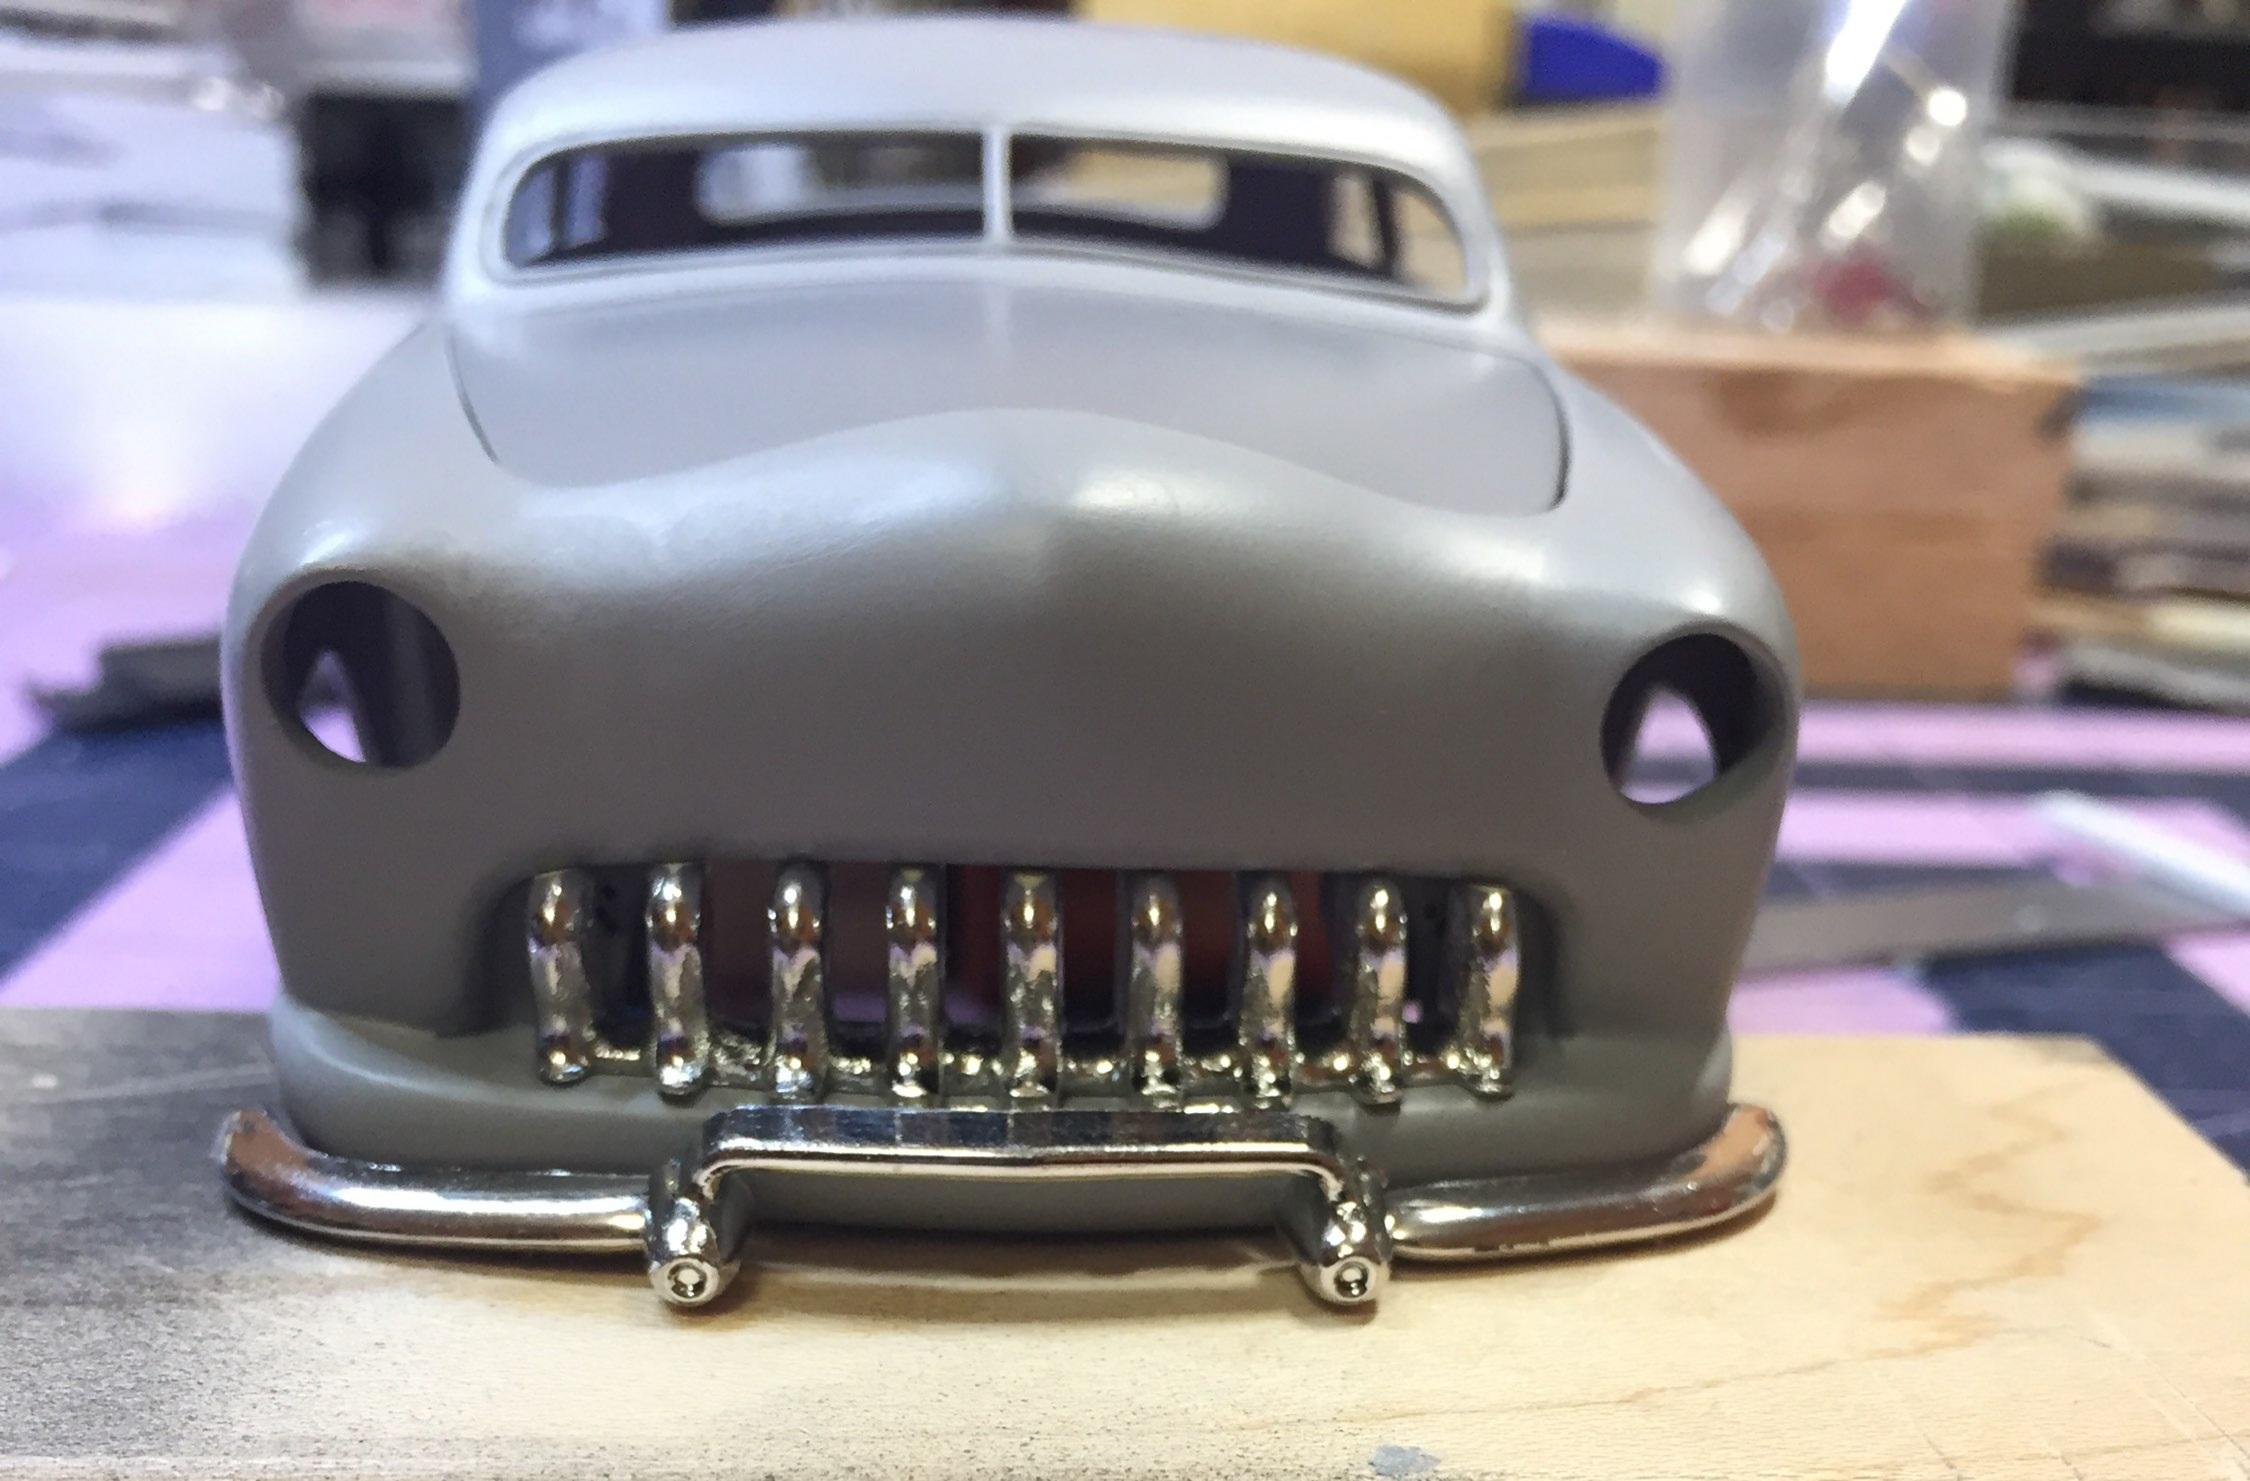
I tried that, Greg, but quickly rejected the idea. It doesn't sit in the opening well enough to look right. The shape of the "teeth", upside-down, doesn't work. I'll try it again and put up a photo later. Maybe I was too quick to judge.
-
Yes there is, David, but not in this situation. This is my second favorite automotive subject. The early '50s lead sled is both a platform for one's imagination but also one for imitation. It's a genre like rock & roll or science fiction, firmly imbedded in American car culture (ooo...that was kinda philosophical 😂). I'm throwing it all at the wall to see what sticks. Having some interested eyes on this thing will help me make a decision, David, and every opinion is valuable.
-
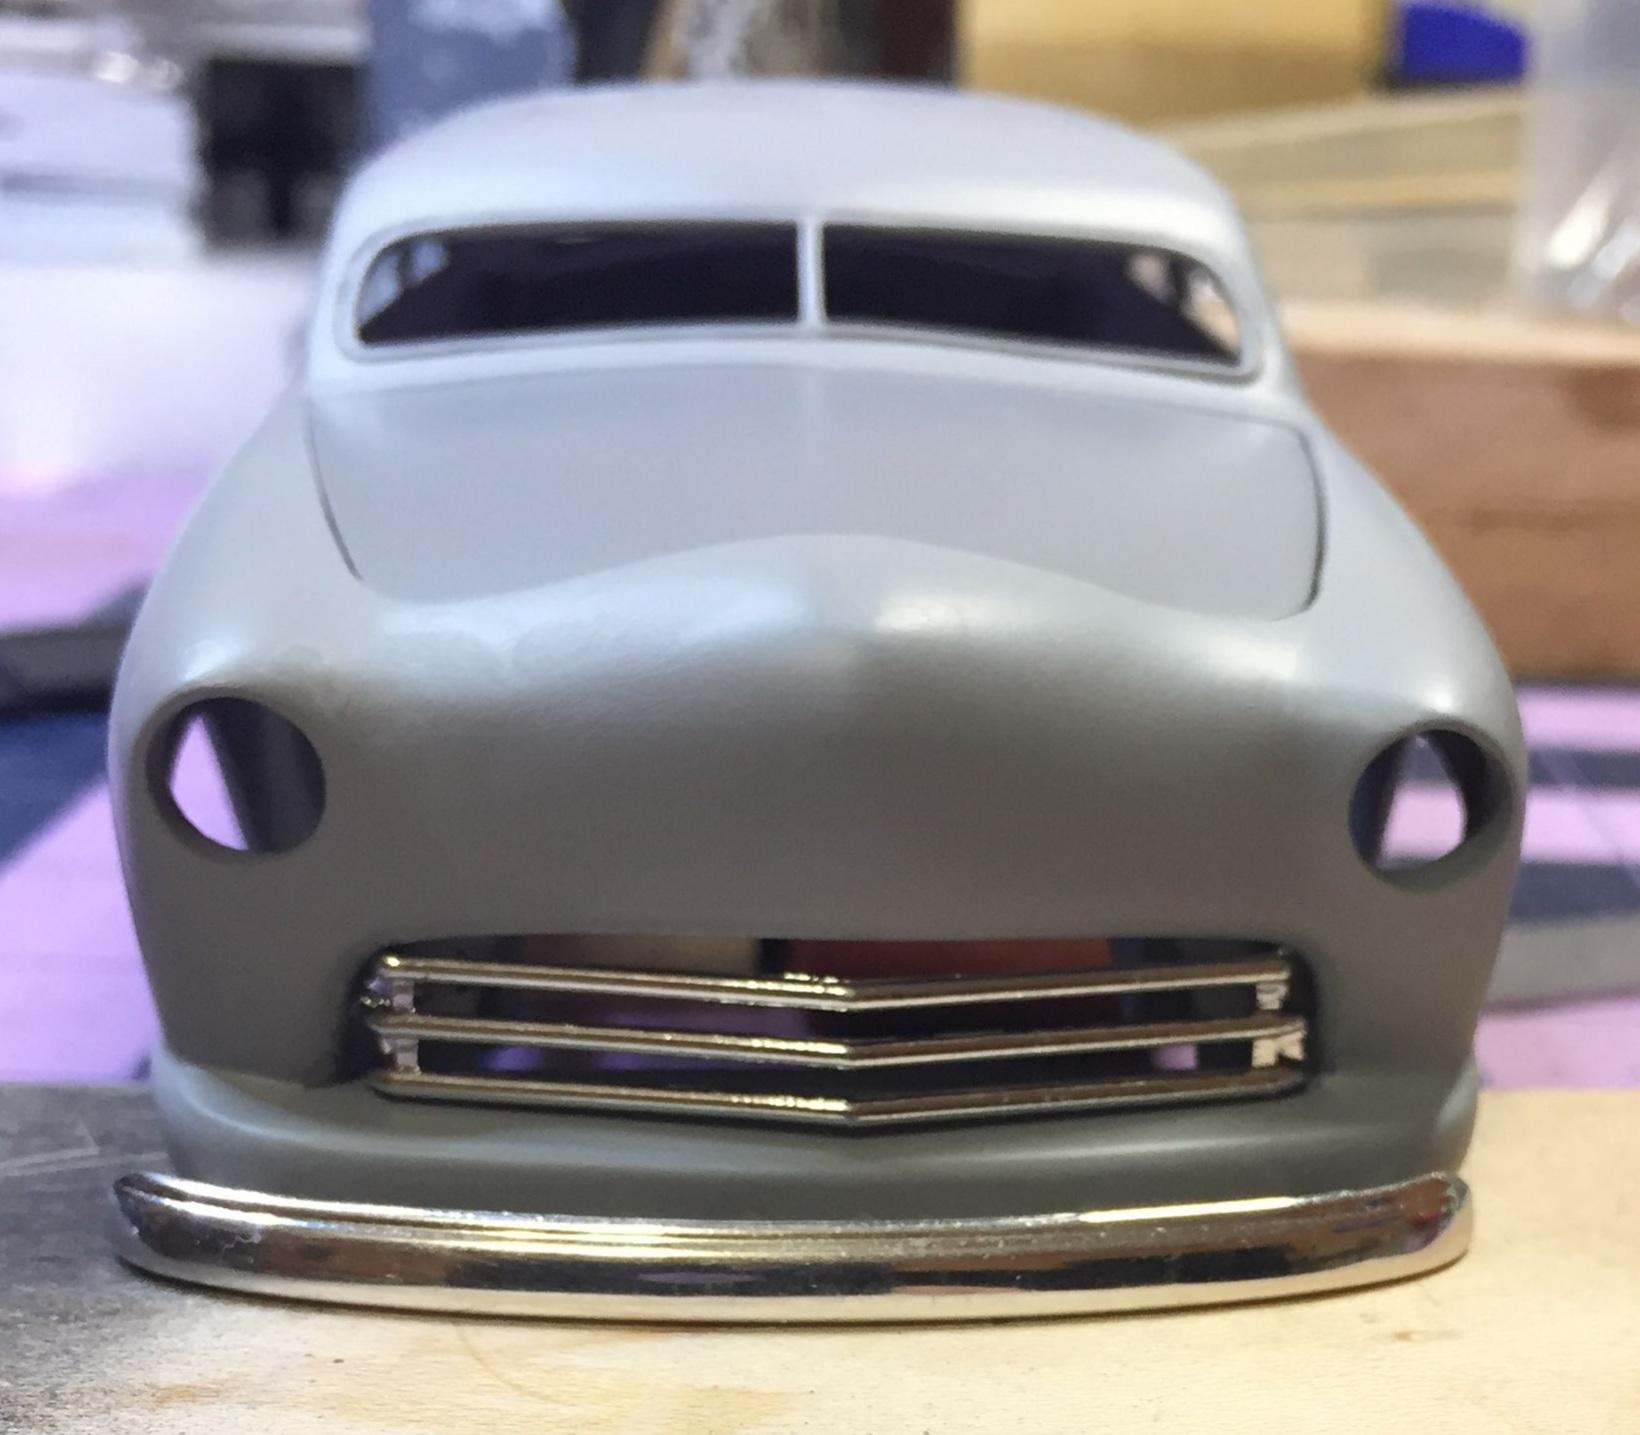
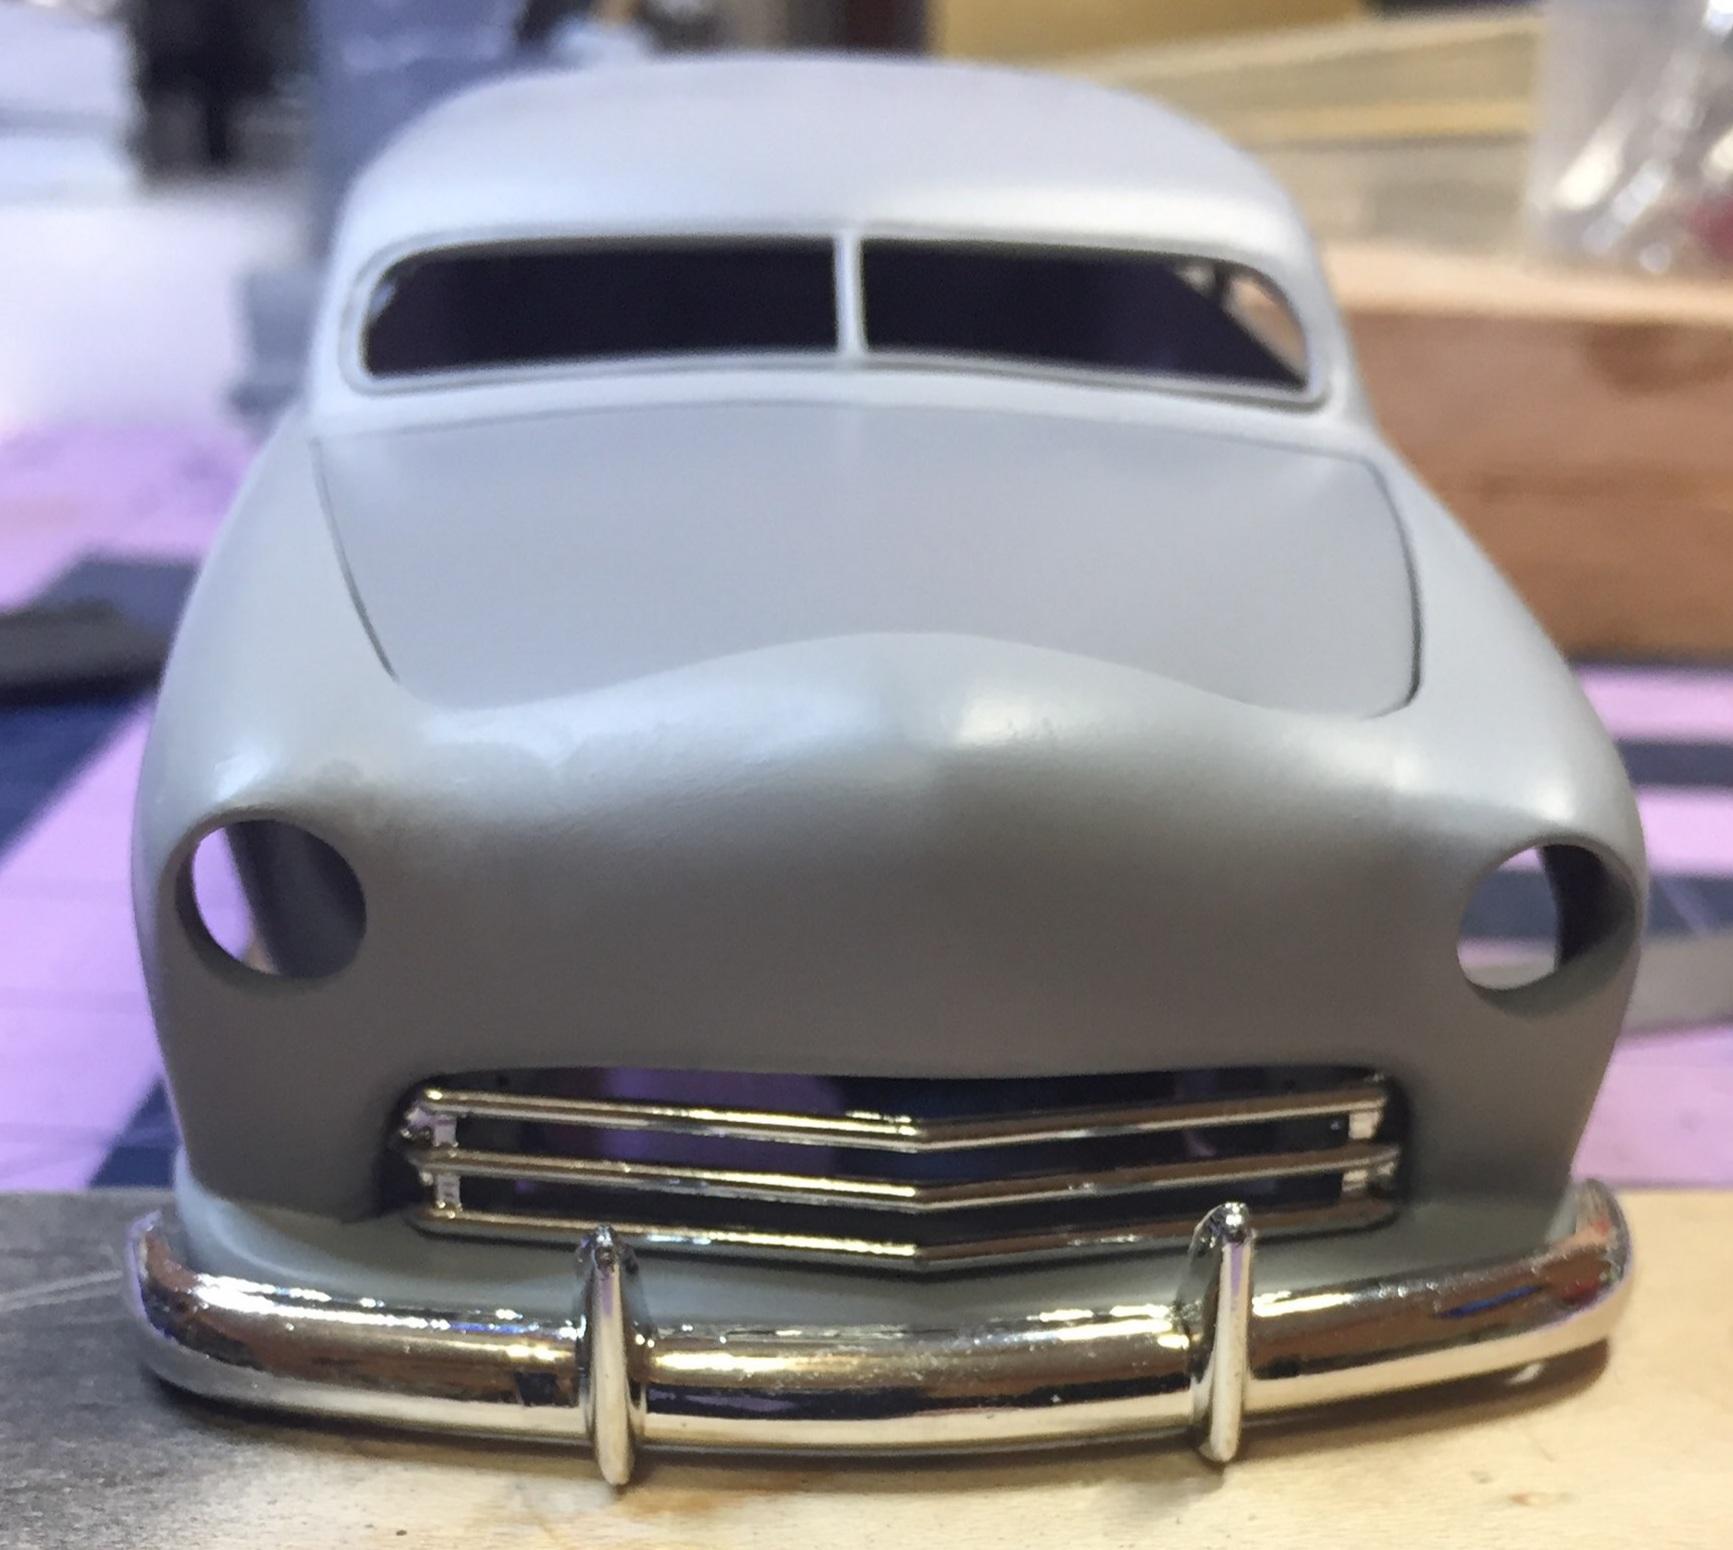
It just so happens, Dave, I took these shots, just now, of the '54 Desoto unit with 2 different bumpers 👇

-
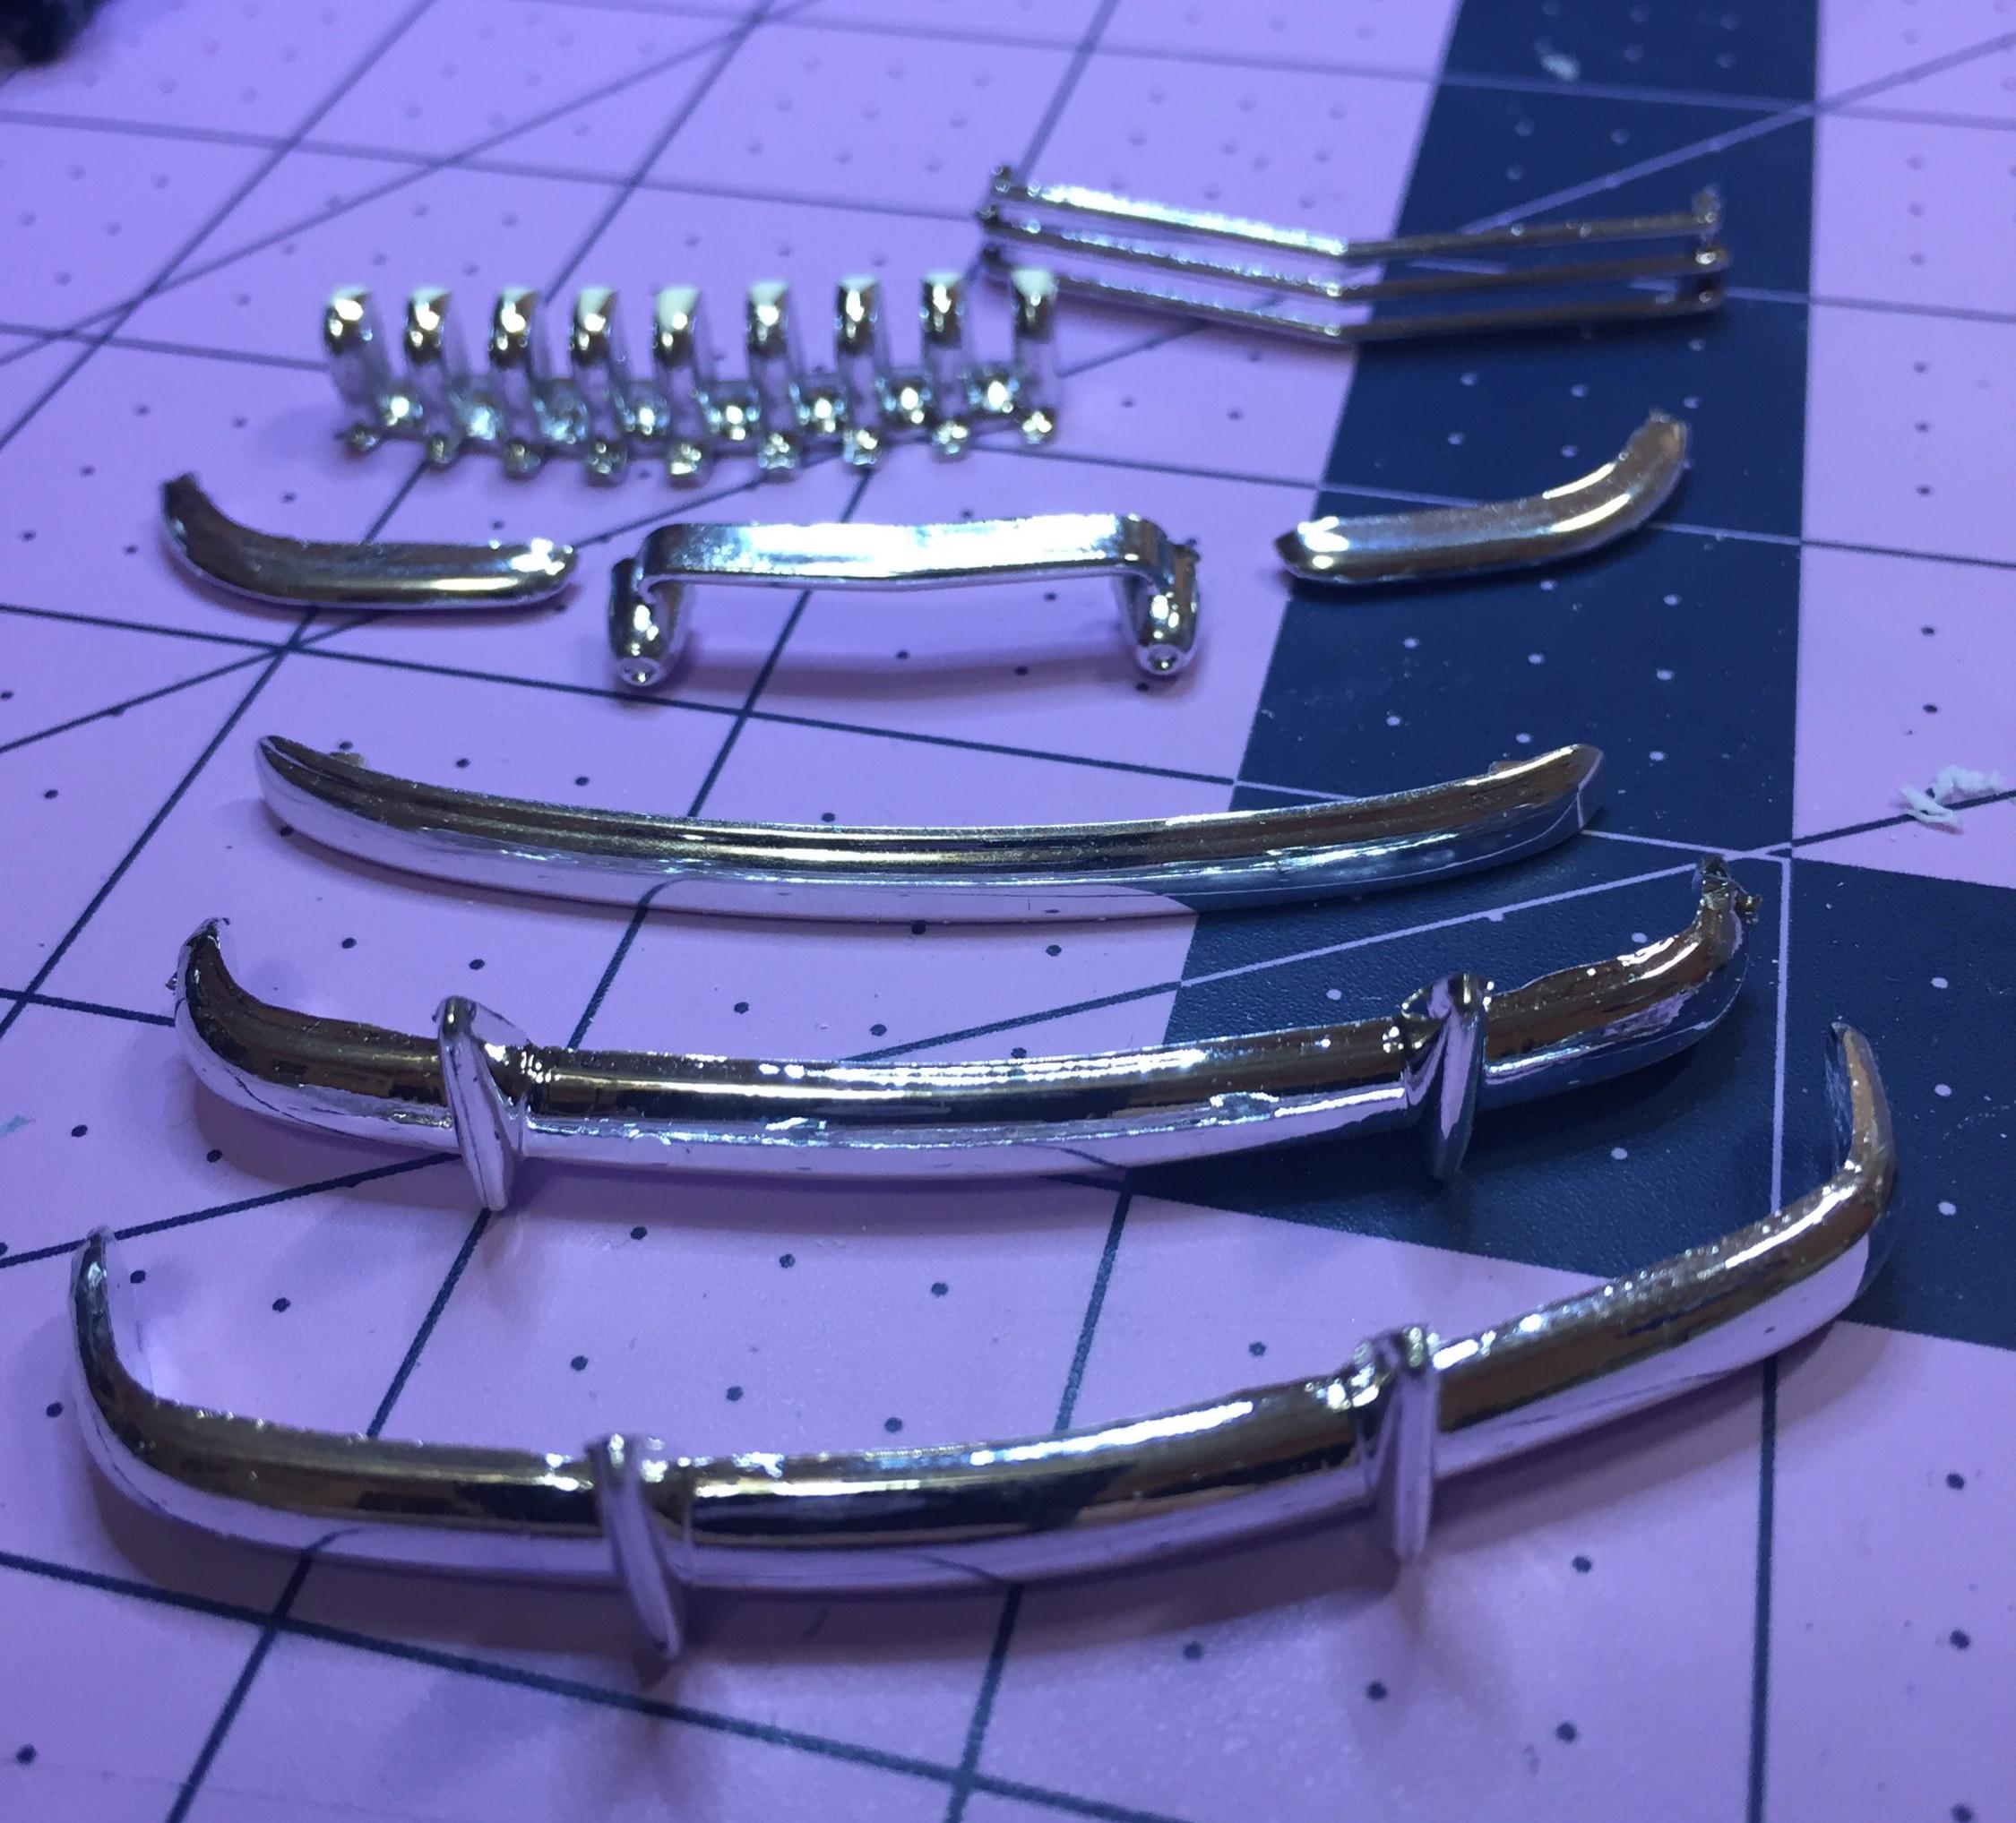
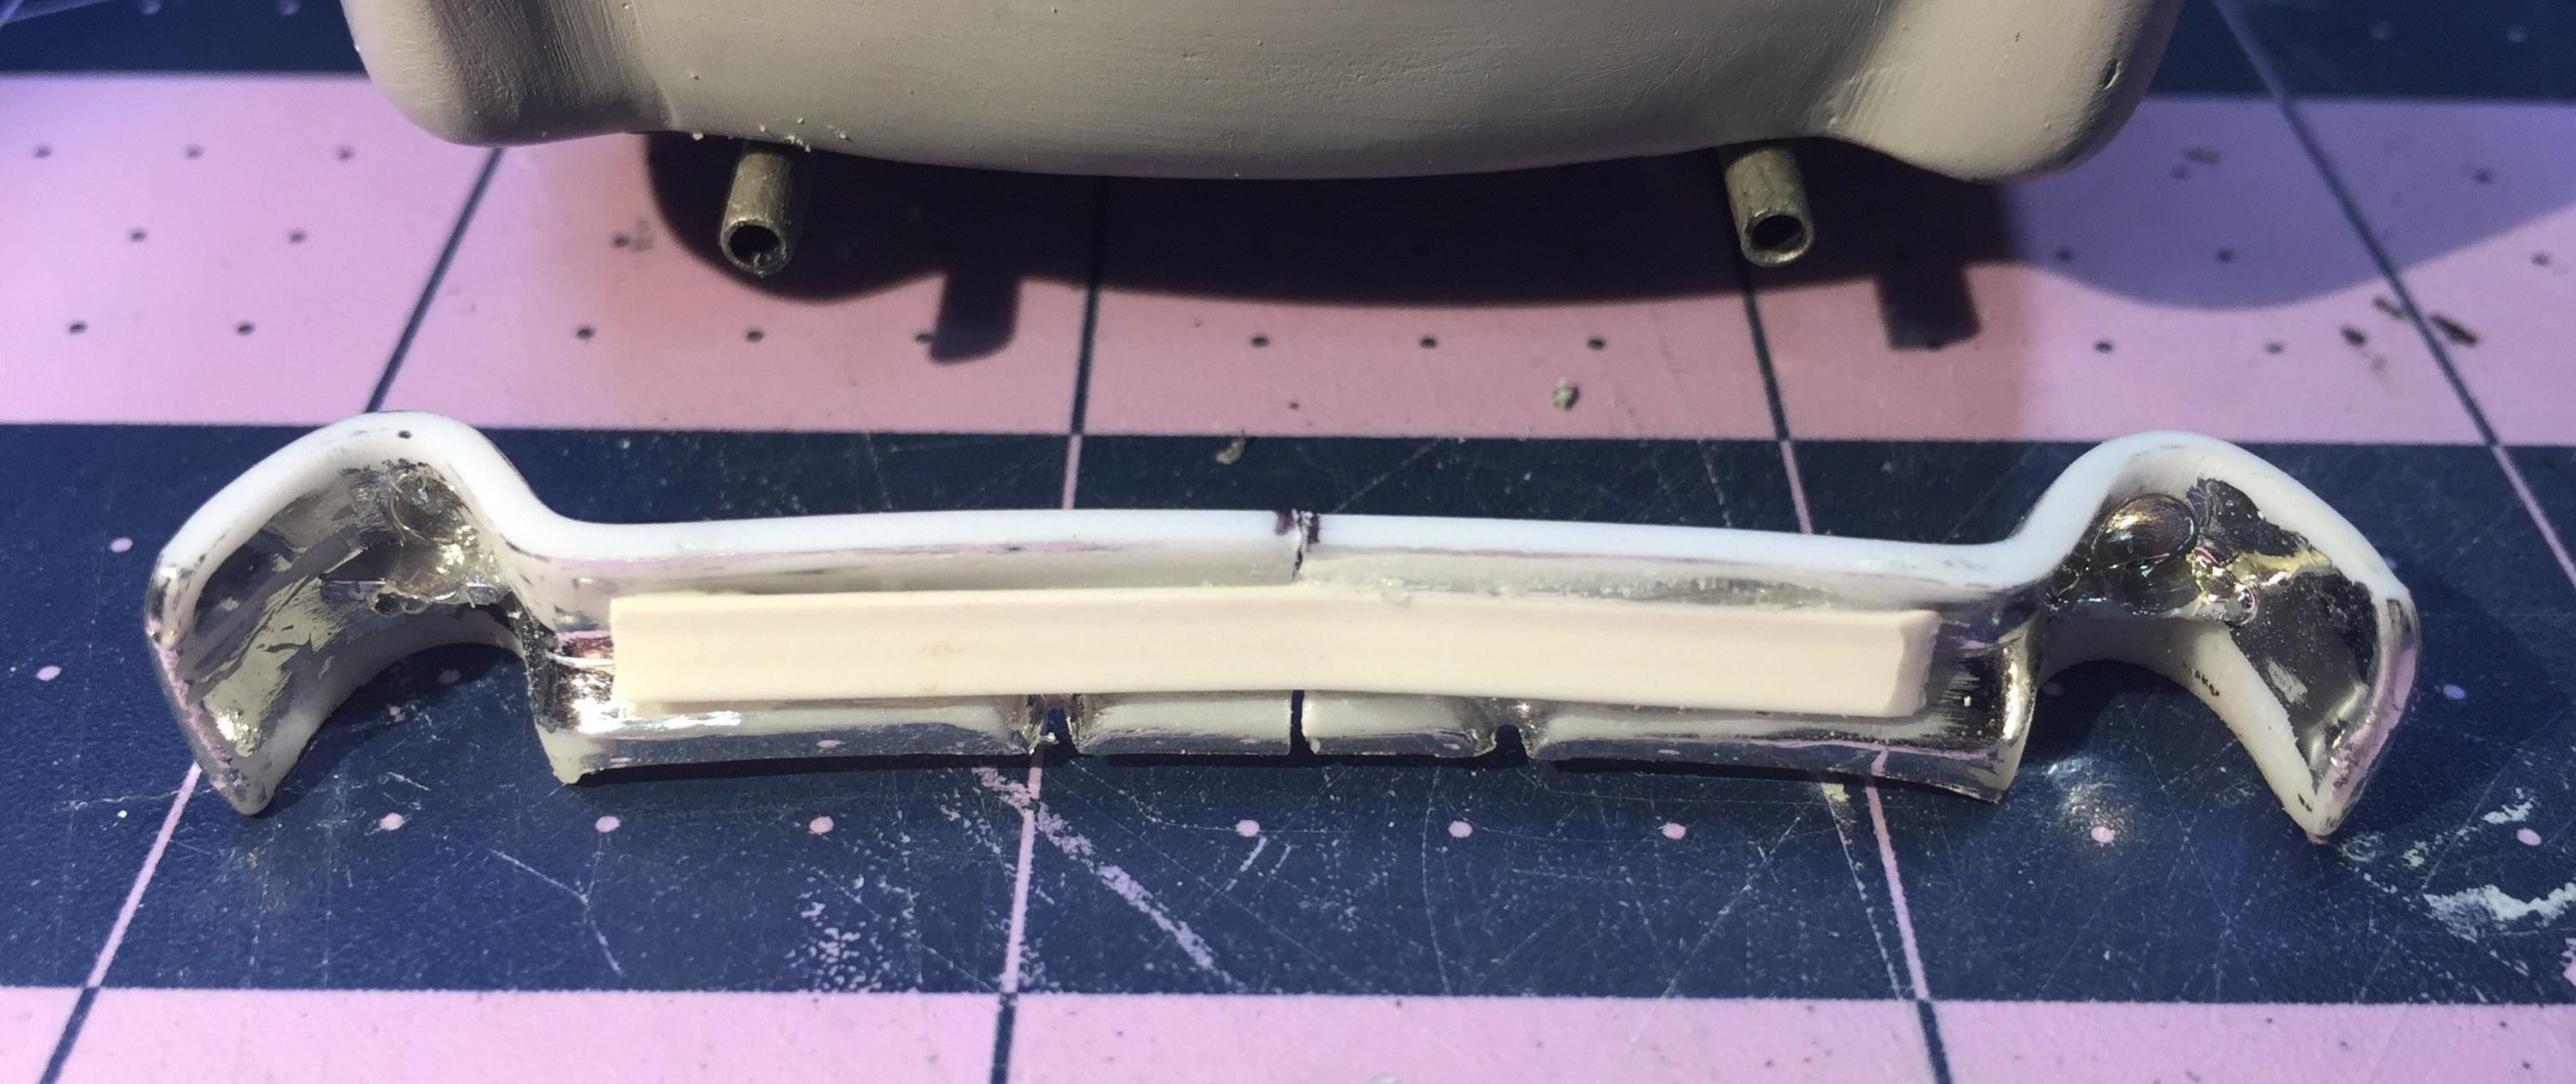
Since the side trim thing is resolved and chiseled in stone (well, okay, plastic), the efforts have been focused on b-b-b-bumpers 🥴. There's not much to work with. This is everything, although I may revisit the '54 DeSoto option (the holes are drilled if I change my mind).👇 Below is about three hours work resulting in a somewhat rough rear bumper and a nice neck ache. The Del Rey bumper is 1:24 scale and a little large so the ends have been closed up a bit. It will be installed upside-down, close to the body using brass rod inserted, hopefully, into the chassis. However, I remembered I had leftover parts from a previous build of a custom '53 that did not use the stock bumpers. I plan to modify it so as to eliminate the bumperettes while narrowing it. Less is more 🙂 And now I have some choices for grille and bumper combos. What to do, what to do ☹ Maybe I can bring back that '54 Desoto unit. We shall see. Thanks for looking in!
-
Yup. You are among the many, Harry.
-
I wouldn't recommend that, Jimmy. You certainly should not do what I did with this one. For a first chop, if you want something let's say...a bit advanced but not too difficult, I would try a '50s pickup like the '50 F-1 or maybe a Cameo. And don't go radical. Keep it reasonable. The '49er is do-able if you keep it mild and leave it a coupe. I stretched mine to look like a tudor and it was a train wreck.
-
That's how I spent my afternoon, David, on that Del Rey bumper. I'm matching it to the sheet metal and matching the sheet metal to the bumper. I'll have a few pix soon. I have something for the front also. Your input is appreciated, Dave.
-
He was certainly enamored with aircraft design.
-
Yeah, I had to stand back and really look. This old girl has a skinny butt. The "fusilage" tapers to the rear for, I imagine, improved air flow 🥴. It needed some balance back there and, well, I needed an excuse to spend $35 for a can of spray paint.
-
Thanks, Eric, I shall. Yeah, sorry about the gold tooth, Dave. Actually, I'm still not sure about a grille yet. It's an important element that establishes an attitude. The '52 Desoto may be the one after all is said and done. It plays well with the radical chop and lends balance to that new bumper in the rear. Maybe I should go through my bumper stash again and find something a tad heavier for the front? 🤔....
-
So yes, I have been thinking, and that can go either way for me. Sometimes for the better but that's a matter of opinion. After looking at every shoebox lead-sled Bing could show me, it became apparent that bumpers are quite prevalent and most make a statement. I decided to try it. Here's what I have so far. Close enough. I have others that might be more suitable but they all have bumperettes and this one is clean and shaved. For the rear I needed something that would look like it belonged there. I found it. It's from the Del Rey kit. I cut it and spliced it with a piece of half- round and it will be bent to conform better to the rolled pan contour and then treated to some thick CA in the middle. Then I can fill and smooth it..... all that. Maybe spring for a can of Revell chrome. I'll need to tweak the ends a bit too. Overall, I think the 'niner will look better with bumpers - more complete. WDYT?
-
🤐
-
Sometimes that's hard to do, Len. Especially for Poo 💩
-
Yay! 😀. Nice build, David, with all the improvements and the care taken on this esoteric subject.
-
Gentlemen, thank you all for your interest and advice on this side trim issue. After much consideration, I have decided to just keep what's there. The winner is #1 - stock location! Lenny spent a lot of time trying to help me and I really appreciate it but after all of that, I feel the original trim is just fine. It's clean and it divides the sheet metal into very acceptable proportions. The amount of body below the trim is approximately equal to the greenhouse height. To my eye, it makes sense. I need to concentrate on the tail light mod; it still needs work and I'm not happy with it yet. Thinking about another project is distracting me now so I need to get this one in paintable condition. None of the advice and comments received is wasted. It made me think.
-
Yeah, I sorta had a kinda half-baked notion that could be the case 🤤
-
Getting the curve right is tricky, Len. I've been trying to make a template on paper. I think I'll try your suggestion with tape on the body. Thanks for hangin' 🤓


.jpg.f446fbe97f1d87797aa8b13f2ccde092.jpg)