customline
-
Posts
3,792 -
Joined
-
Last visited
Content Type
Profiles
Forums
Events
Gallery
Everything posted by customline
-

"The 777" Tasca Ford '63 lightweight Galaxie
customline replied to customline's topic in WIP: Drag Racing Models
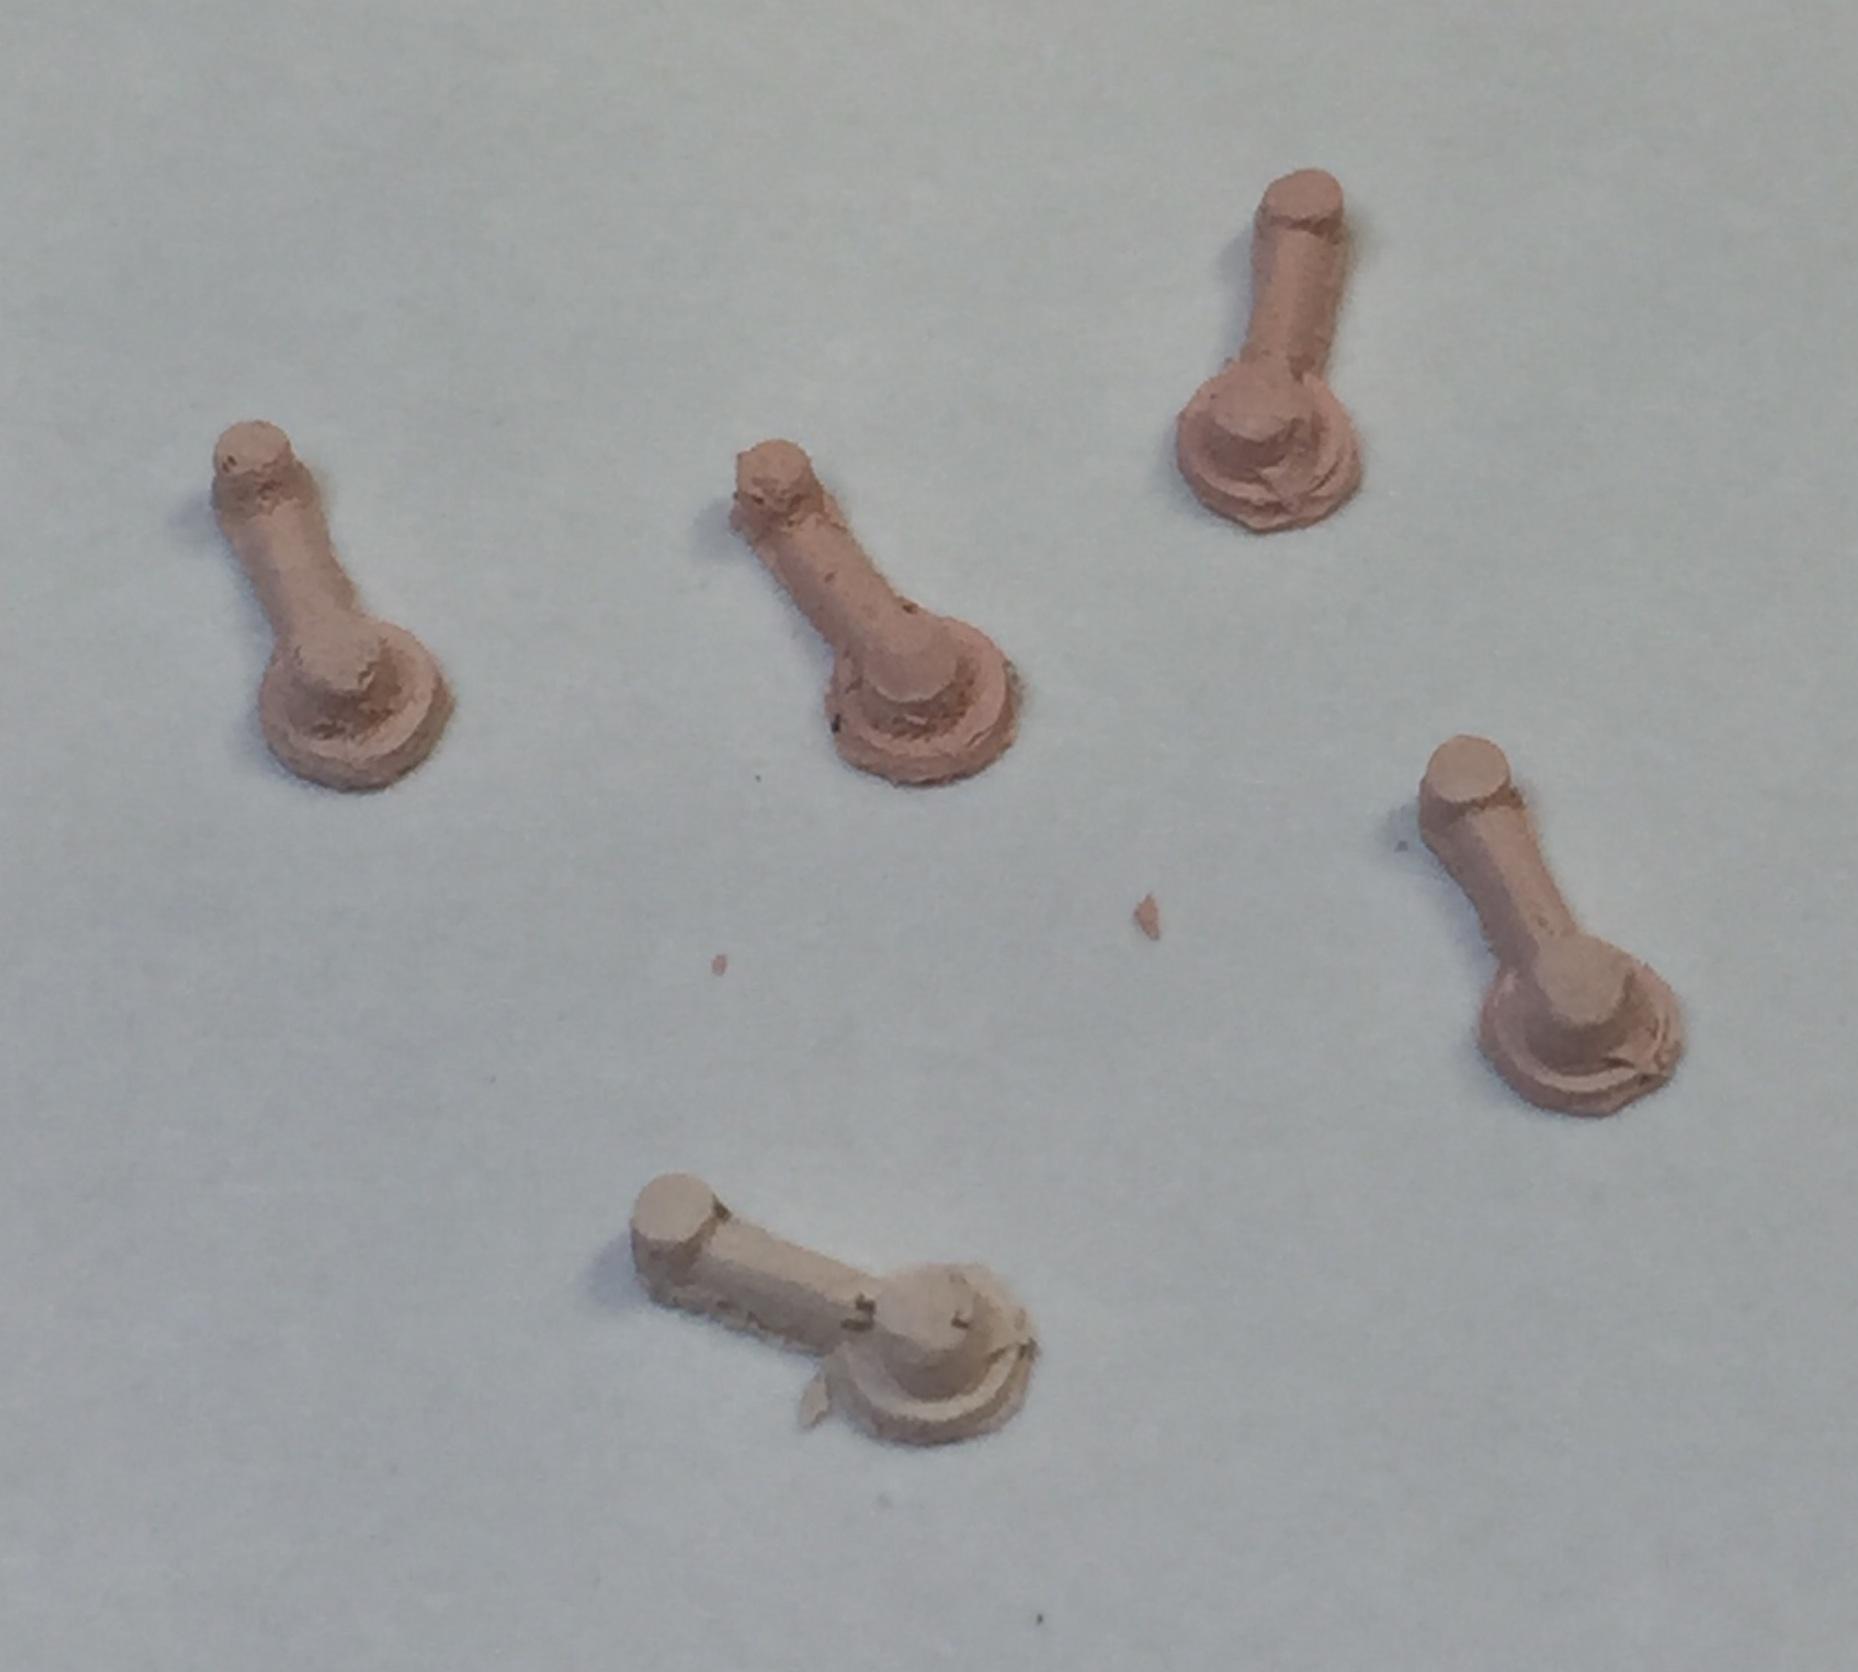
And here it is in primer....see? Not so bad. I found some silicone molds that I made years ago and made some window cranks out of.... yup....Bondo ?. I plan to seal them with clear lacquer or enamel and then hit 'em with Molotow after they have been installed. I will never understand why the 1:1 mfgrs. thought cranking a vent wing was something a driver would want to contend with. Powered maybe, but cranked? ?.....I dunno. so what now.....? I guess I should get the frame and the floor top painted satin black and the floor bottom red oxide. I need to prep the body and order the paint. The fun continues....
-
If I got that many fish eyes, Len, I'd be headed for the bait shop. That looks like a serious incompatibility issue or surface contamination. This is why I don't look forward to painting ?. I'm never sure of what's going to happen. Looks like you got it locked, though.
-
"The 777" Tasca Ford '63 lightweight Galaxie
customline replied to customline's topic in WIP: Drag Racing Models
Got a bit more done today. The interior upholstery from scratch using my vast Evergreen stock. I don't hope to be accurate, only to create the illusion of the lightweight's interior, hitting the key points- maybe it will suffice. It's tedious and time-consuming and it's the only way. Thanks for stopping by. It's a little janky but it'll be fine with some paint and foil....... trust me ?
-
Monogram's 1955 Lincoln Futura Concept Car: WIP
customline replied to David G.'s topic in WIP: Model Cars
I appreciate you supplying this wonderful video, Ace. That was totally ? amazing! So this is how they invented tinker-toys! ?! No, really though, it cleared up a very dark, murky corner of the root cellar that serves as my brain. I do know one thing about differentials, though, from first-hand experience...if they leak, check 'em once in a while ?. -
Monogram's 1955 Lincoln Futura Concept Car: WIP
customline replied to David G.'s topic in WIP: Model Cars
I could never get my head around how a differential works ?...or posi-traction ? -
Is There Room For Another 41 Plymouth or Two?
customline replied to LennyB's topic in WIP: Model Cars
I'll probably forget......never mind ? -
Monogram's 1955 Lincoln Futura Concept Car: WIP
customline replied to David G.'s topic in WIP: Model Cars
May I suggest you glue them solid to the axles so they don't make a lot of noise while it is rolling. Think "that shopping cart " -
Is There Room For Another 41 Plymouth or Two?
customline replied to LennyB's topic in WIP: Model Cars
Oh my...remind me to never buy any of that stuff.? -
Is There Room For Another 41 Plymouth or Two?
customline replied to LennyB's topic in WIP: Model Cars
Len, do you wipe down with alcohol before painting? After handling a car body between coats I will wipe the suspect areas with an IPA dampened piece of cotton t-shirtjust in case. A stray fingerprint may cause a problem if that finger was not freshly cleaned. -
Is There Room For Another 41 Plymouth or Two?
customline replied to LennyB's topic in WIP: Model Cars
Looks great, Len. What causes fish-eye? -
"The 777" Tasca Ford '63 lightweight Galaxie
customline replied to customline's topic in WIP: Drag Racing Models
I have them for you, Lenny, just got 'em done. They will need some minor touch-up after primer but it got cold and rainy. Thanks for checking in Wifey and I just scuttled a guest bedroom so we could set it up for our "hobbies". It's working out well......and we have our dining room back ? Thanks, Scott.
-
Monogram's 1955 Lincoln Futura Concept Car: WIP
customline replied to David G.'s topic in WIP: Model Cars
Good one, Lenny ?. -
Monogram's 1955 Lincoln Futura Concept Car: WIP
customline replied to David G.'s topic in WIP: Model Cars
Well.....they'll never go flat on you. ? -
"The 777" Tasca Ford '63 lightweight Galaxie
customline replied to customline's topic in WIP: Drag Racing Models
Still got a ways to go, Tom. I ve been neglecting my duties around the house ?. Spending a lot of time in the garage with my Dremel. More of that today. Oh well....? -
"The 777" Tasca Ford '63 lightweight Galaxie
customline replied to customline's topic in WIP: Drag Racing Models
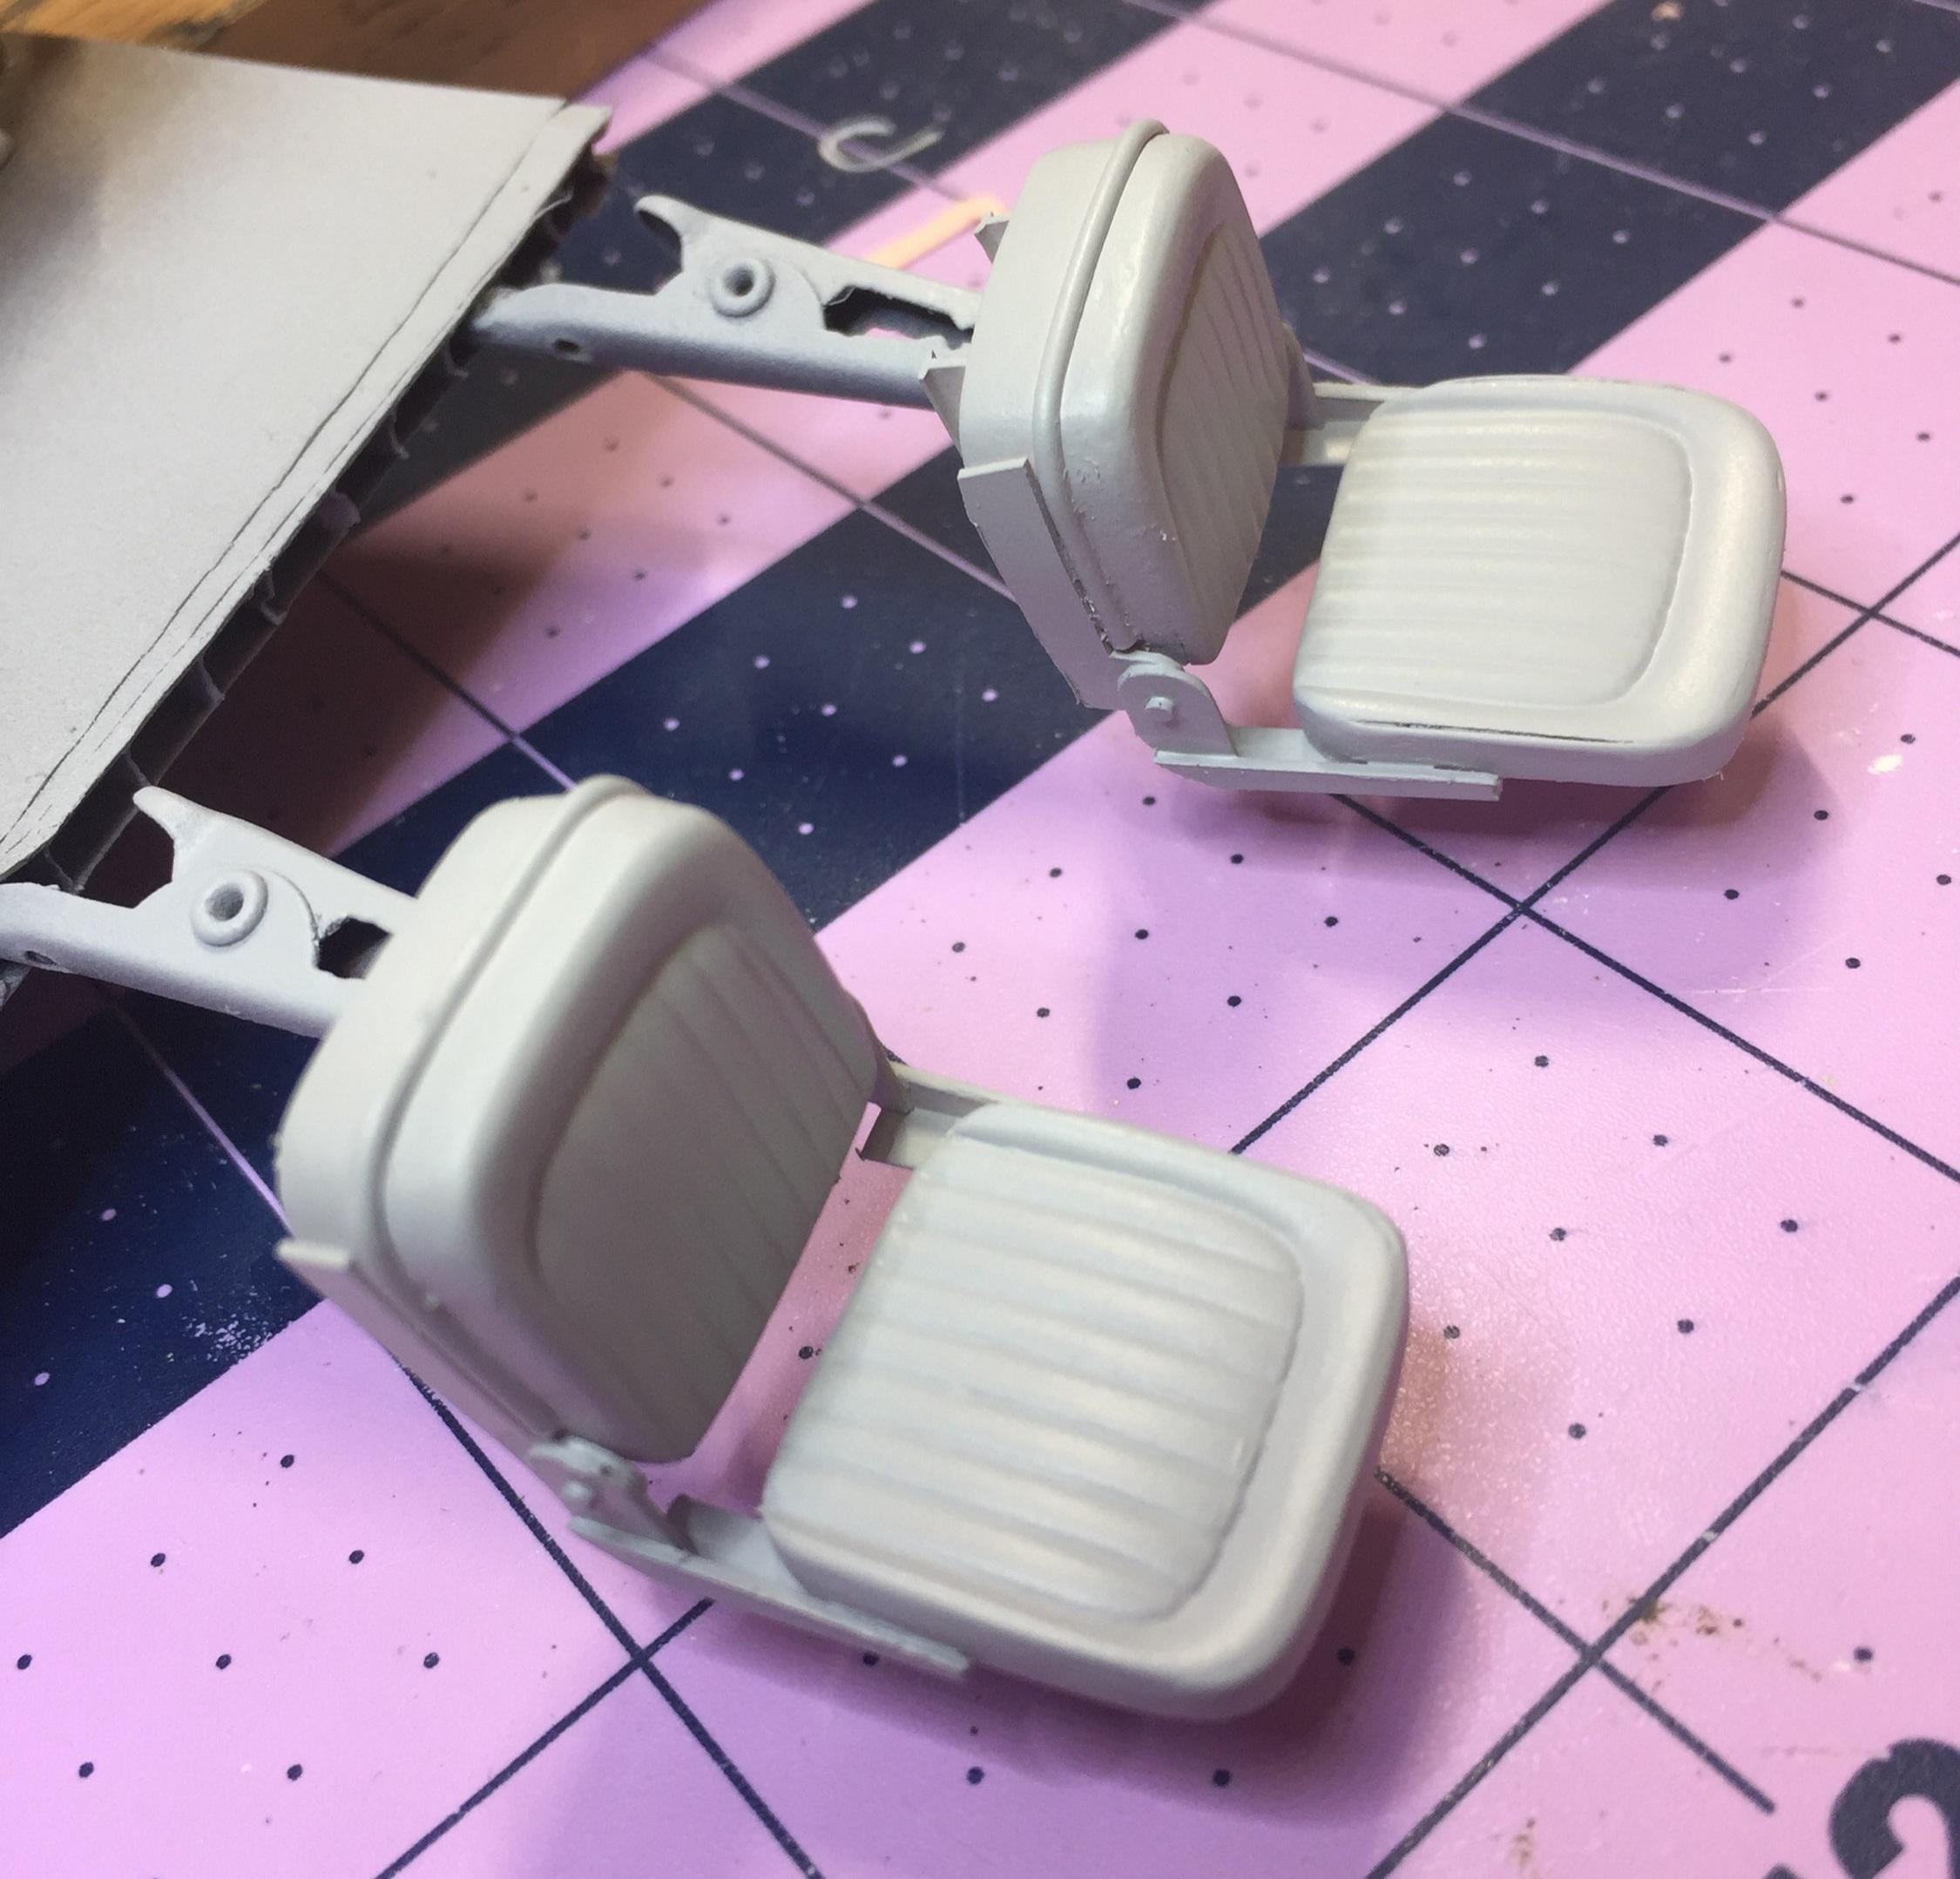
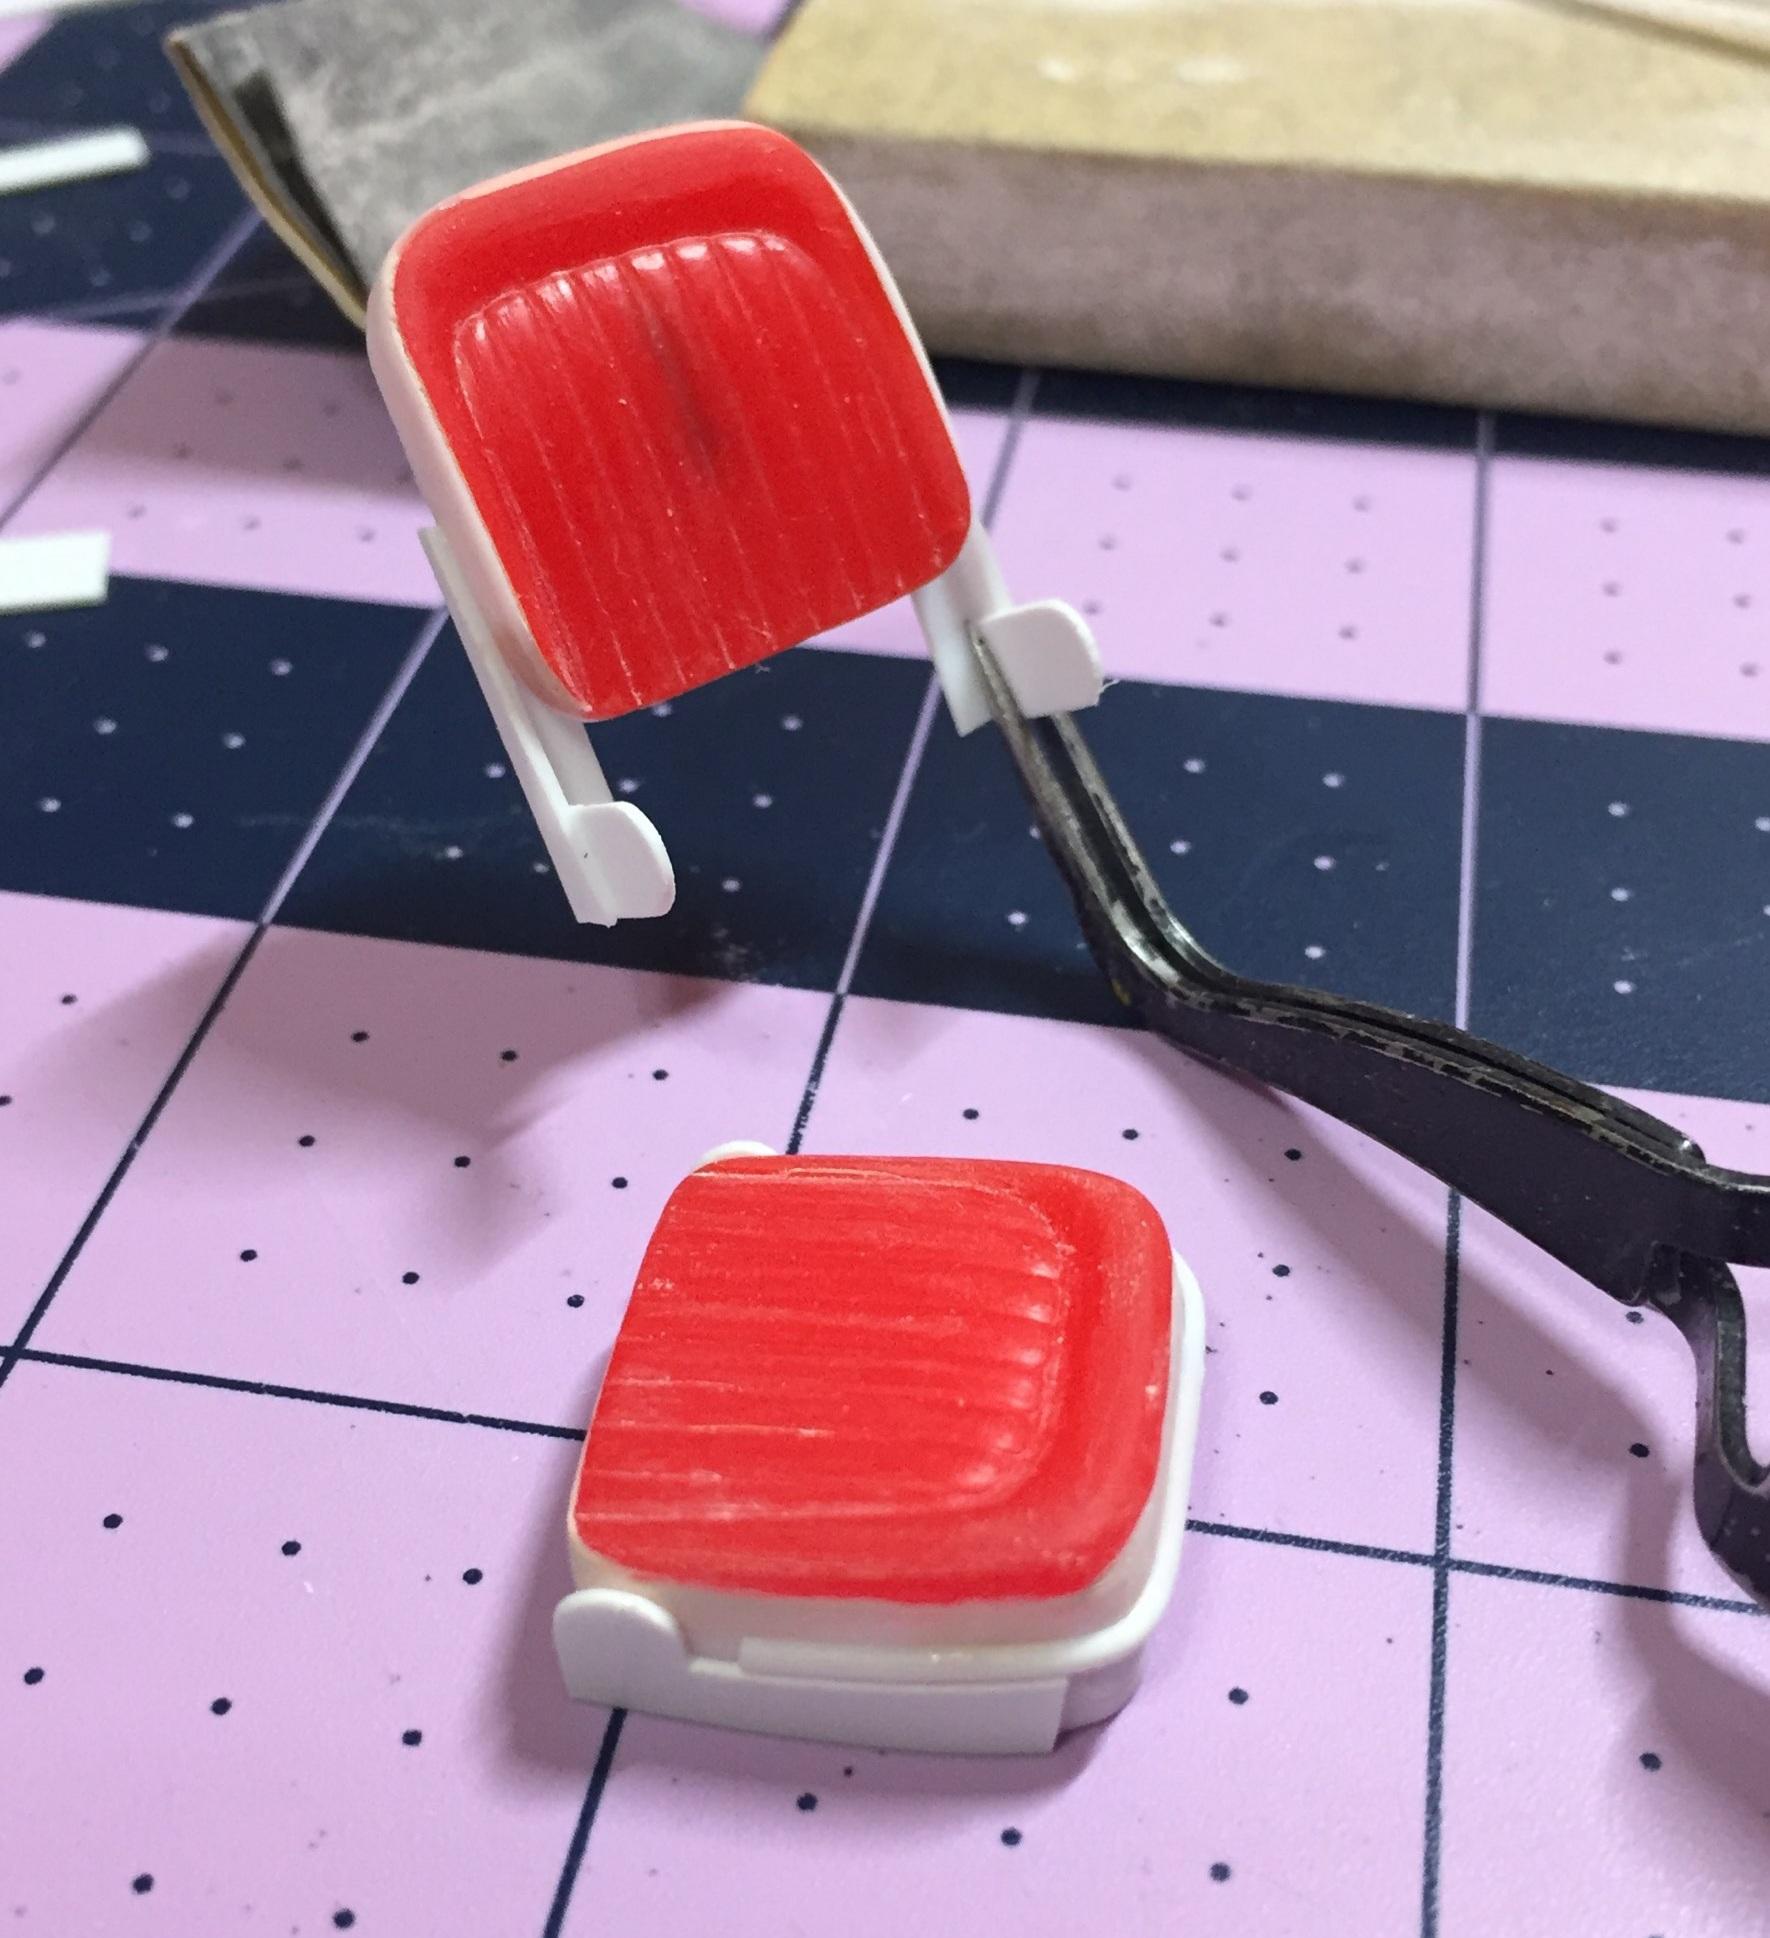
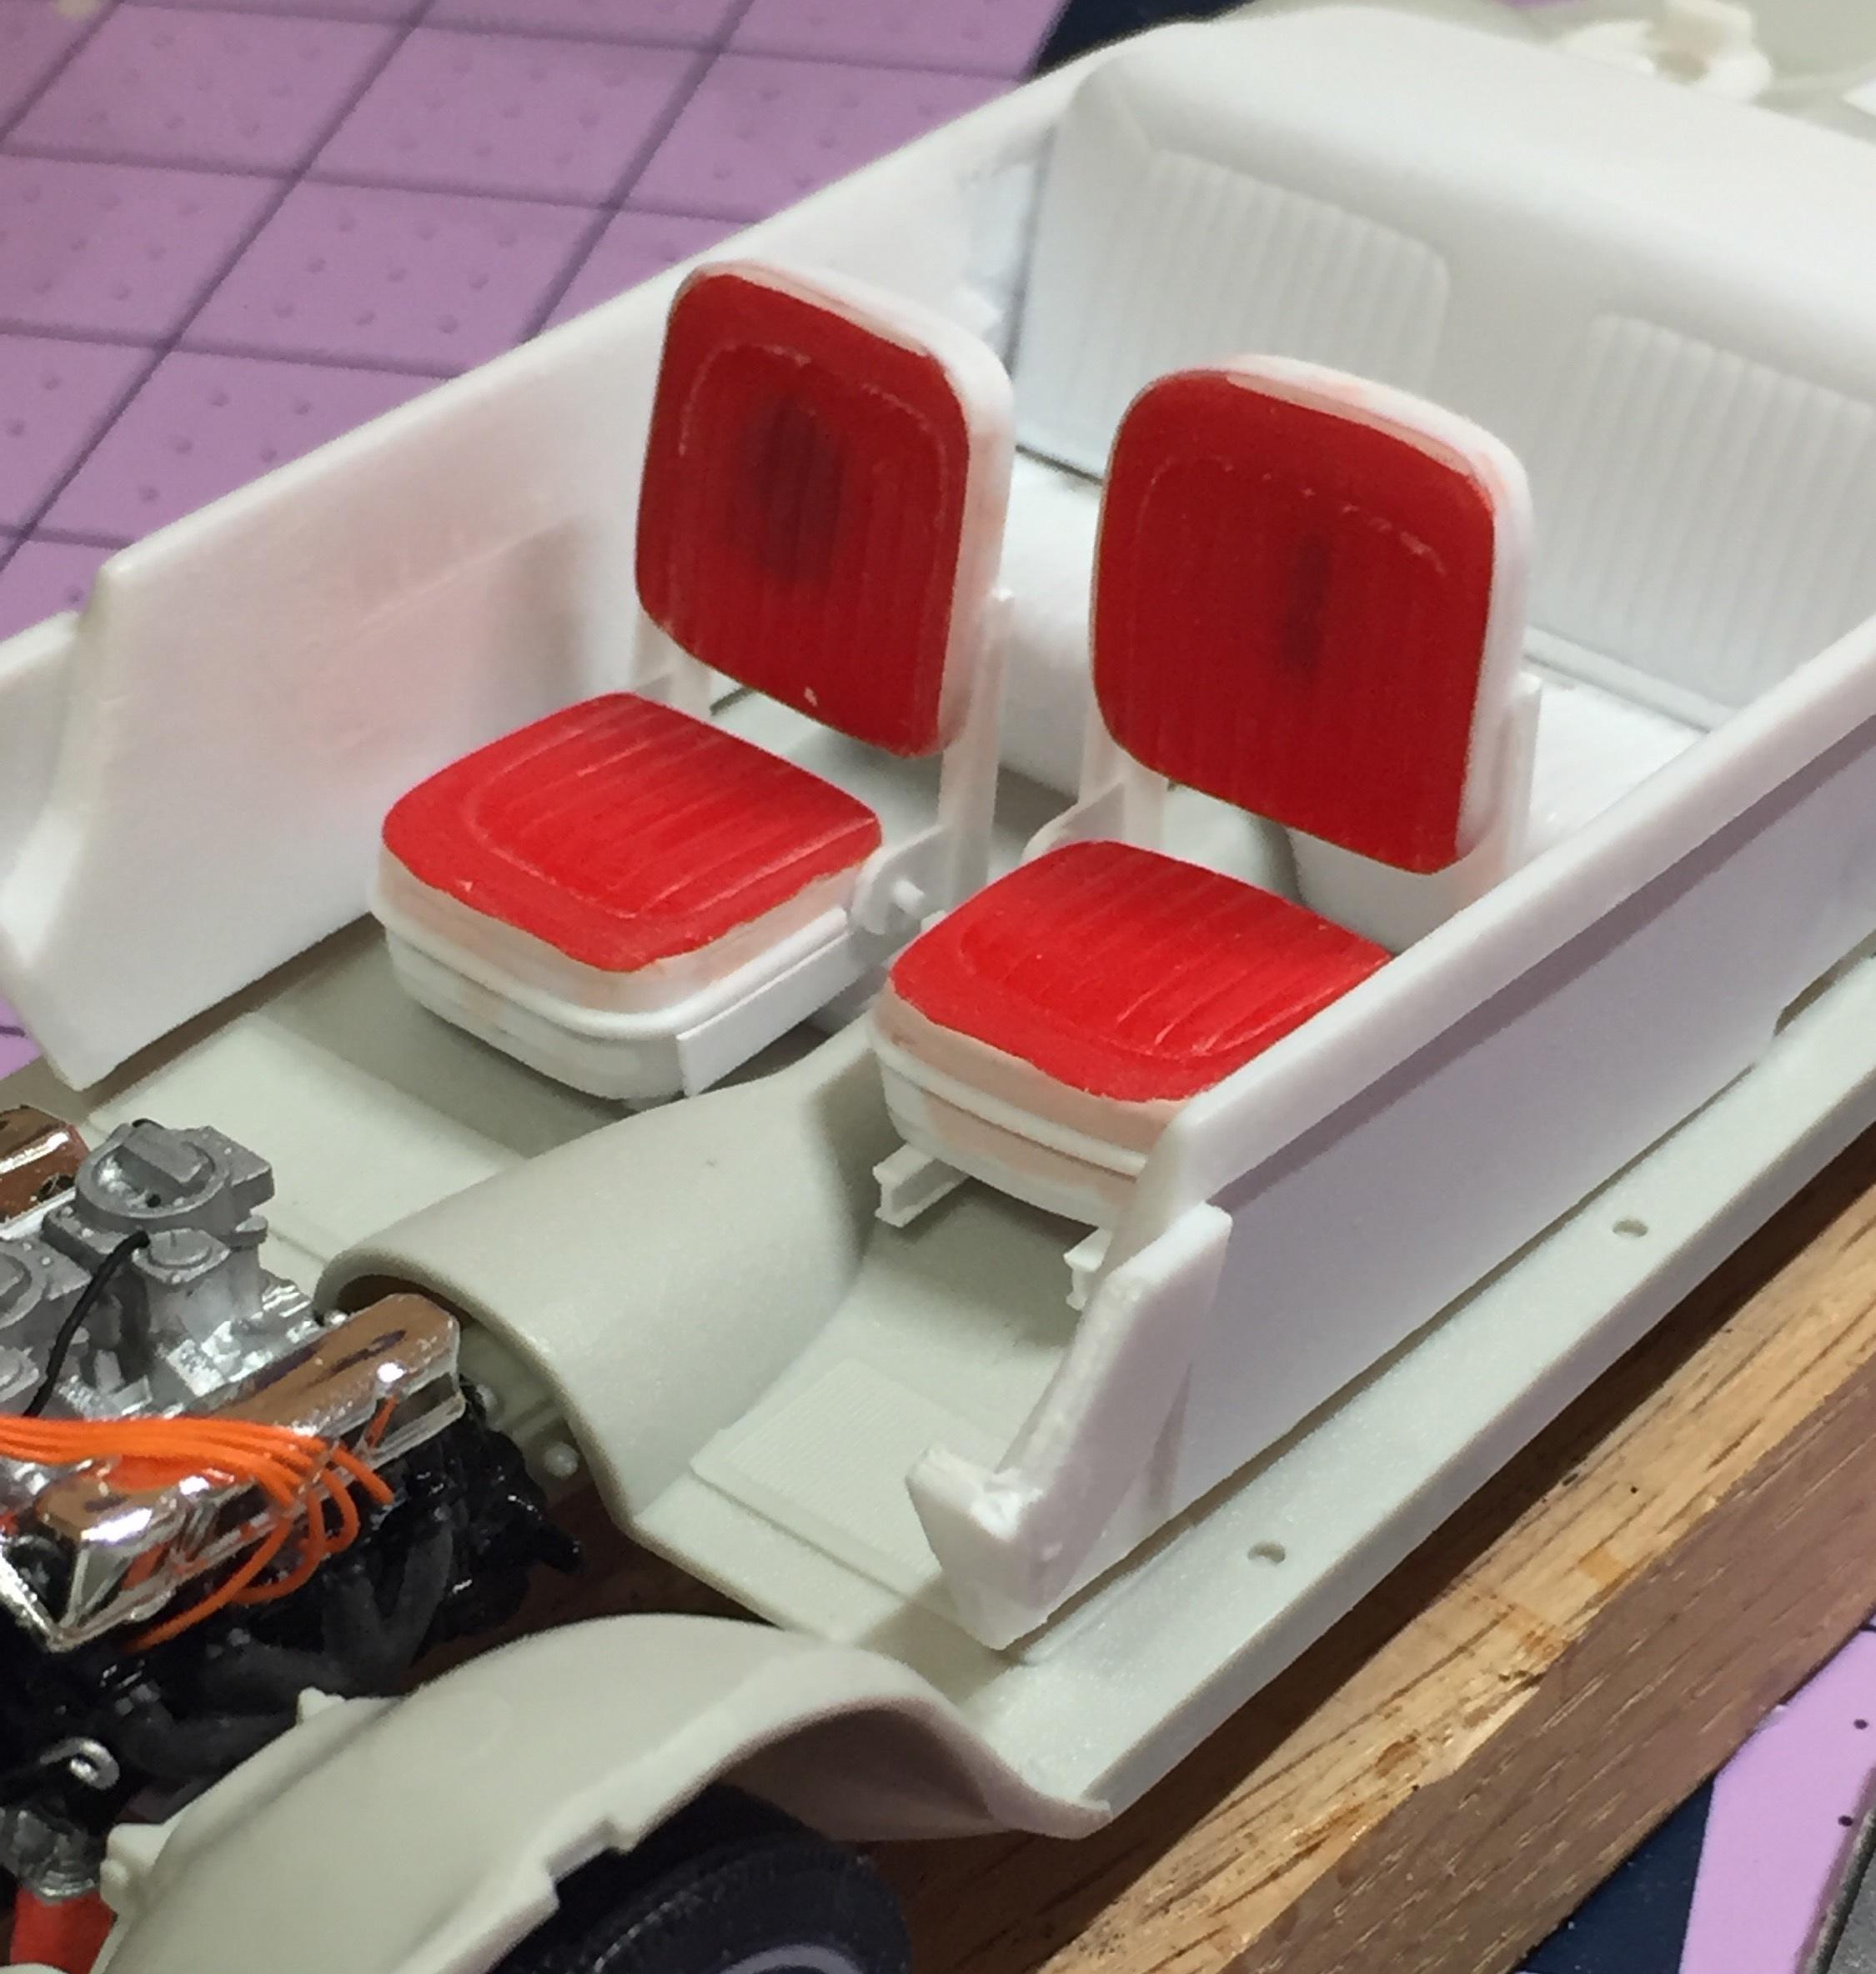
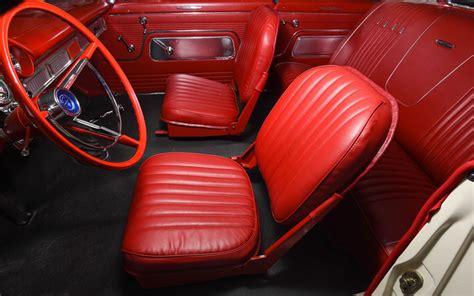
This is what my interior should look like: Unfortunately it won't. It will, however, look like this but in red: oh, c'mon....it won't look this bad. There's a ?-ton of work to be done yet. Lots of filling and sanding. Be patient ?. Another week or so. The front seats are a total scratch-build using junk seat parts, cut up and not toasted. Right now this is what that looks like: thanks for taking a peek ?.
-
"The 777" Tasca Ford '63 lightweight Galaxie
customline replied to customline's topic in WIP: Drag Racing Models
Yessir! That's how we do it here at AMT! ? -
"The 777" Tasca Ford '63 lightweight Galaxie
customline replied to customline's topic in WIP: Drag Racing Models
There must have been a ragtop as an annual. It clearly is a convertible interior because of the narrowed seat-back and the surrounding top rail bays. It's not the first one I've run into, Tom ?. -
"The 777" Tasca Ford '63 lightweight Galaxie
customline replied to customline's topic in WIP: Drag Racing Models
Yeah, I get it and I'm glad you brought it up. Gotta be more aware of this sort of thing. Thanks for coming by, Tom, your input is appreciated. -
She's a real beauty, Dave. Be proud!
-
"The 777" Tasca Ford '63 lightweight Galaxie
customline replied to customline's topic in WIP: Drag Racing Models
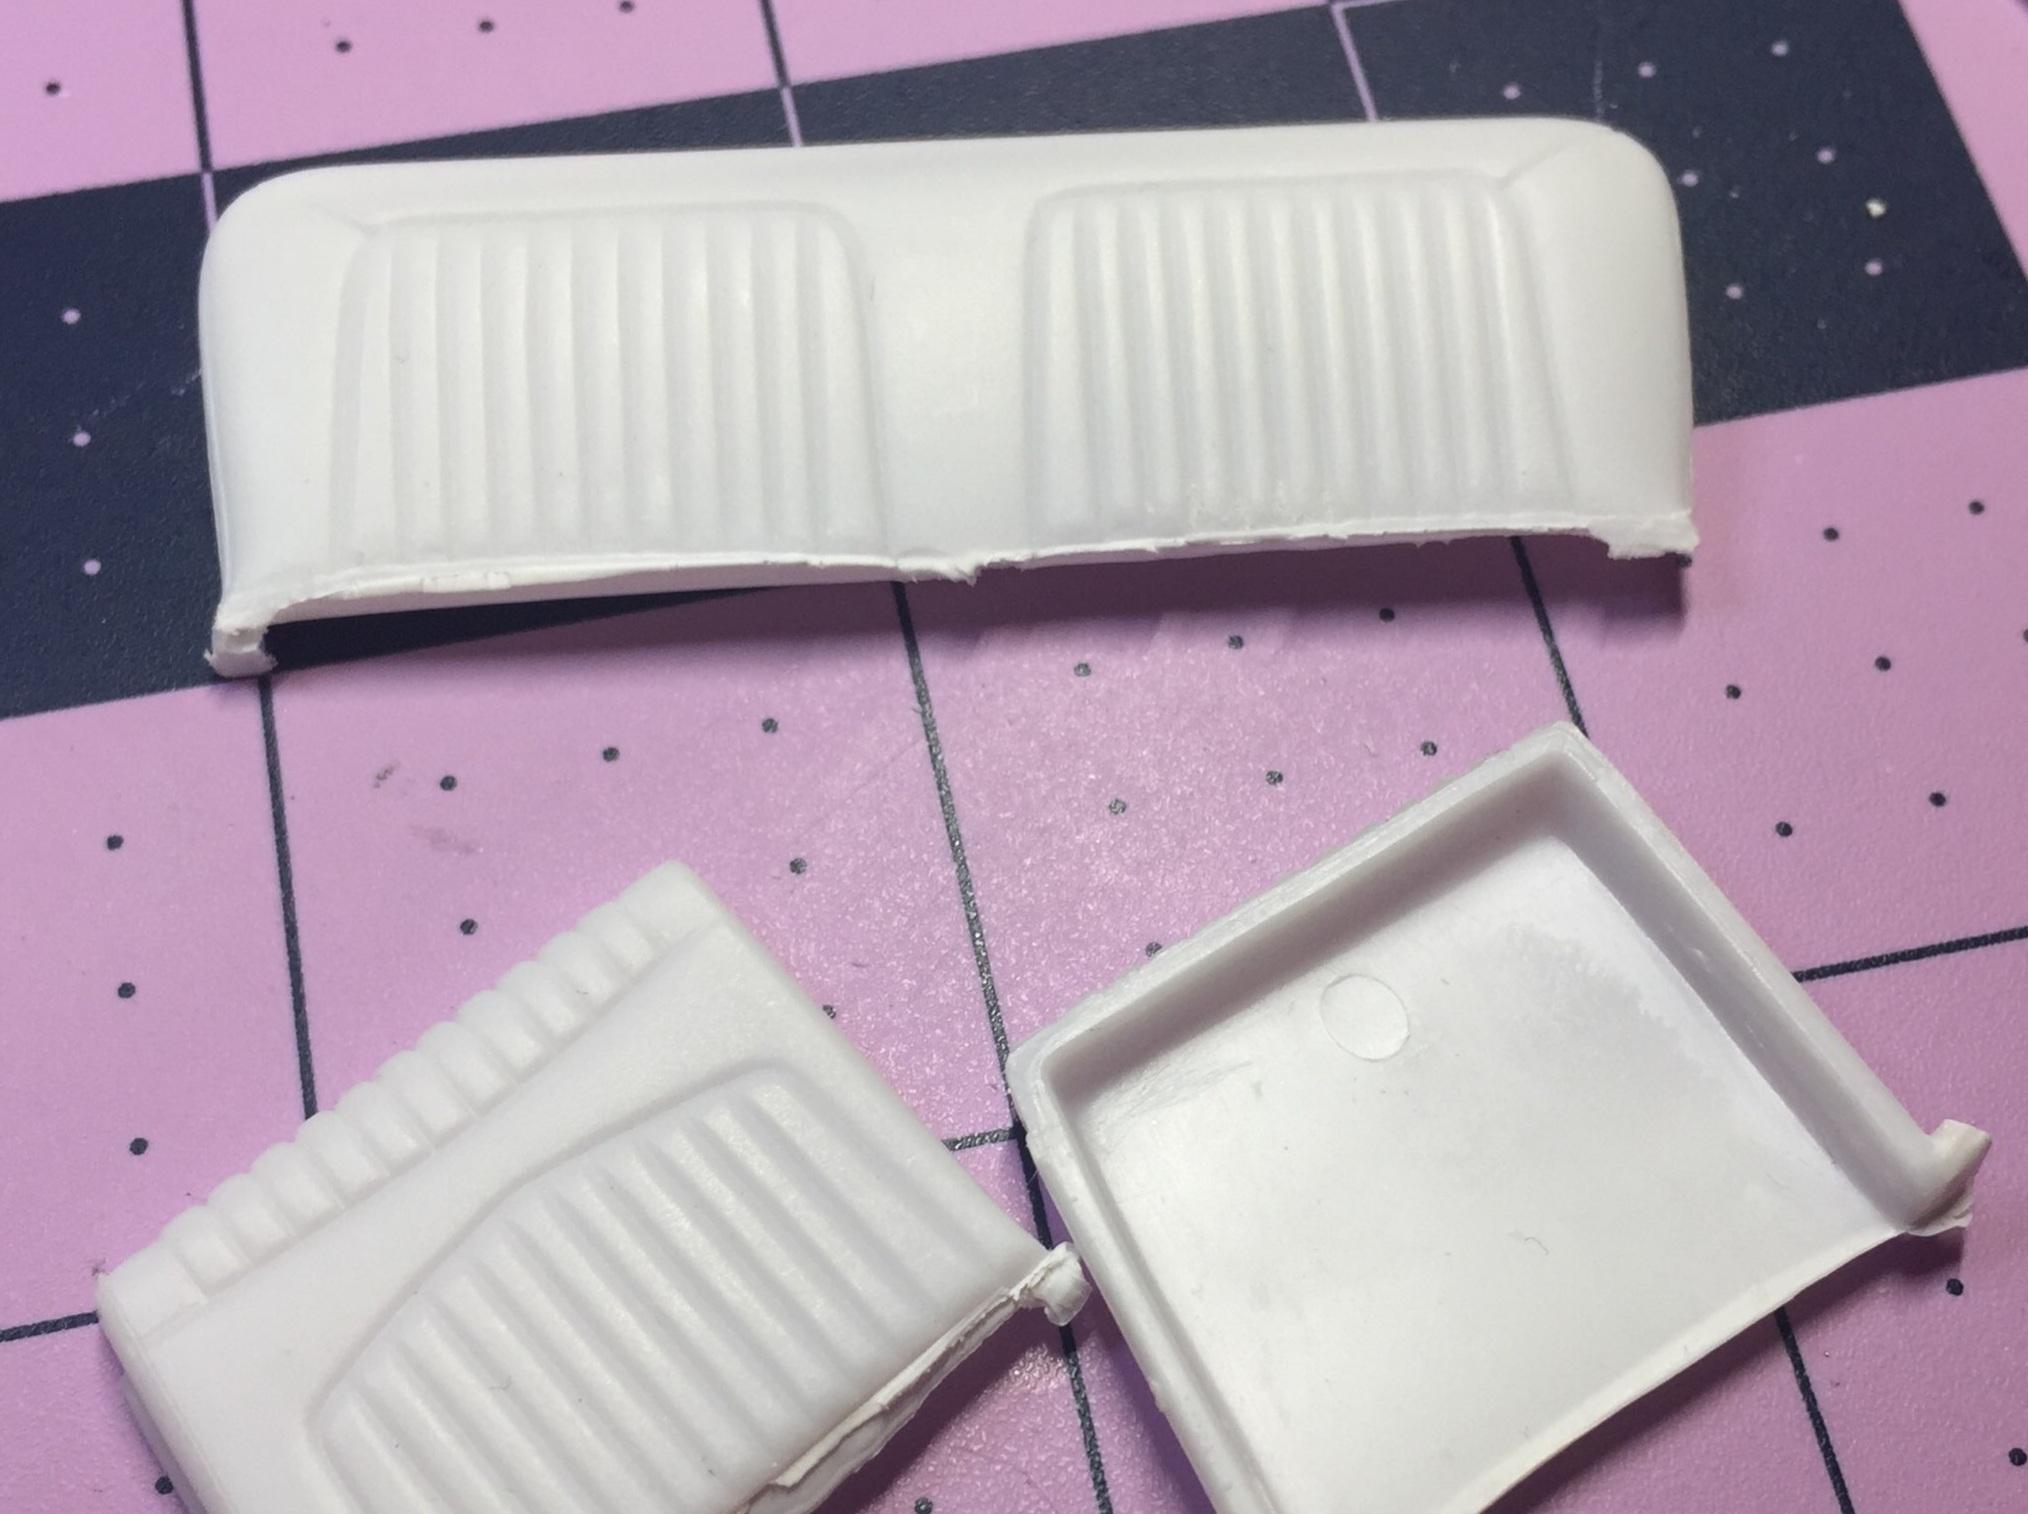
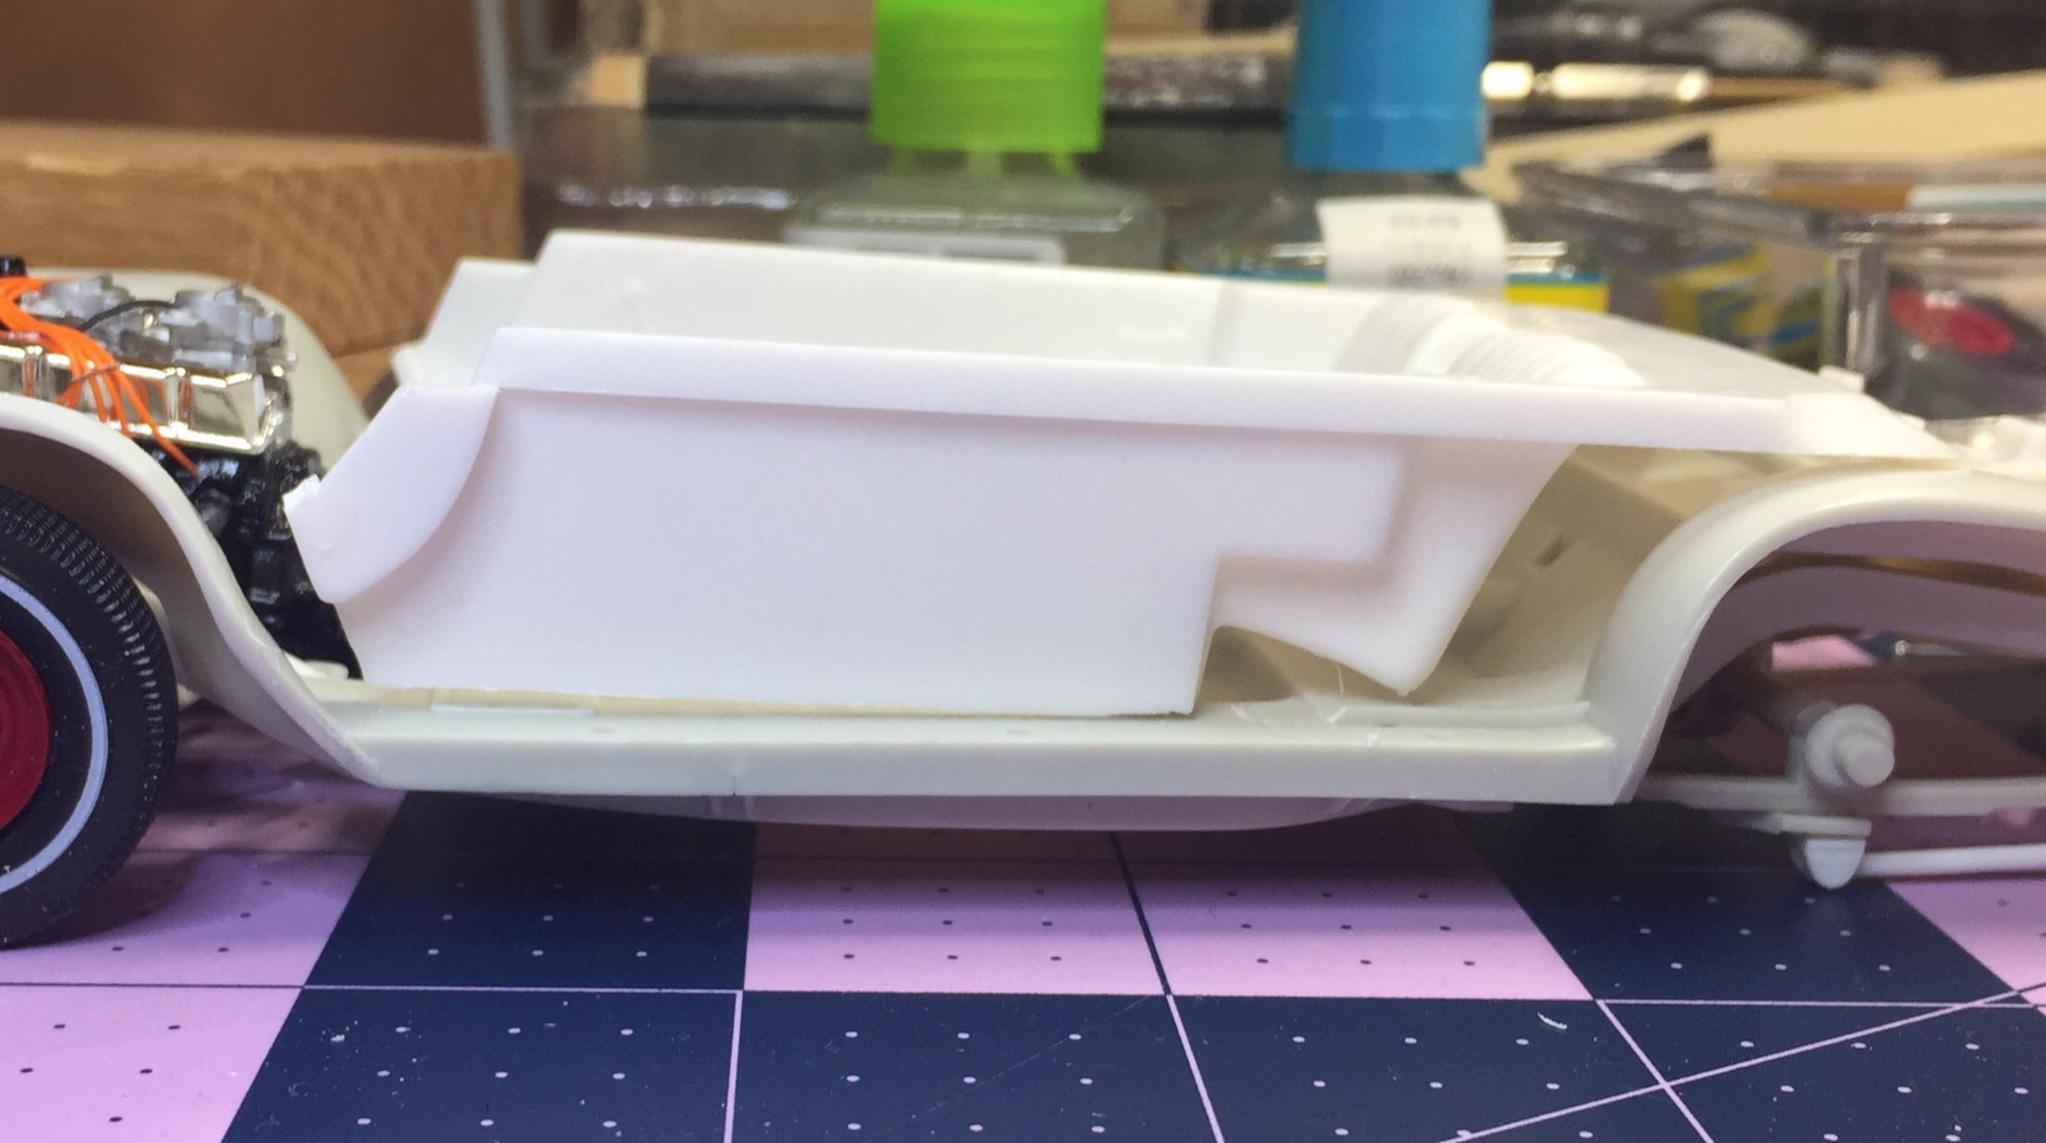
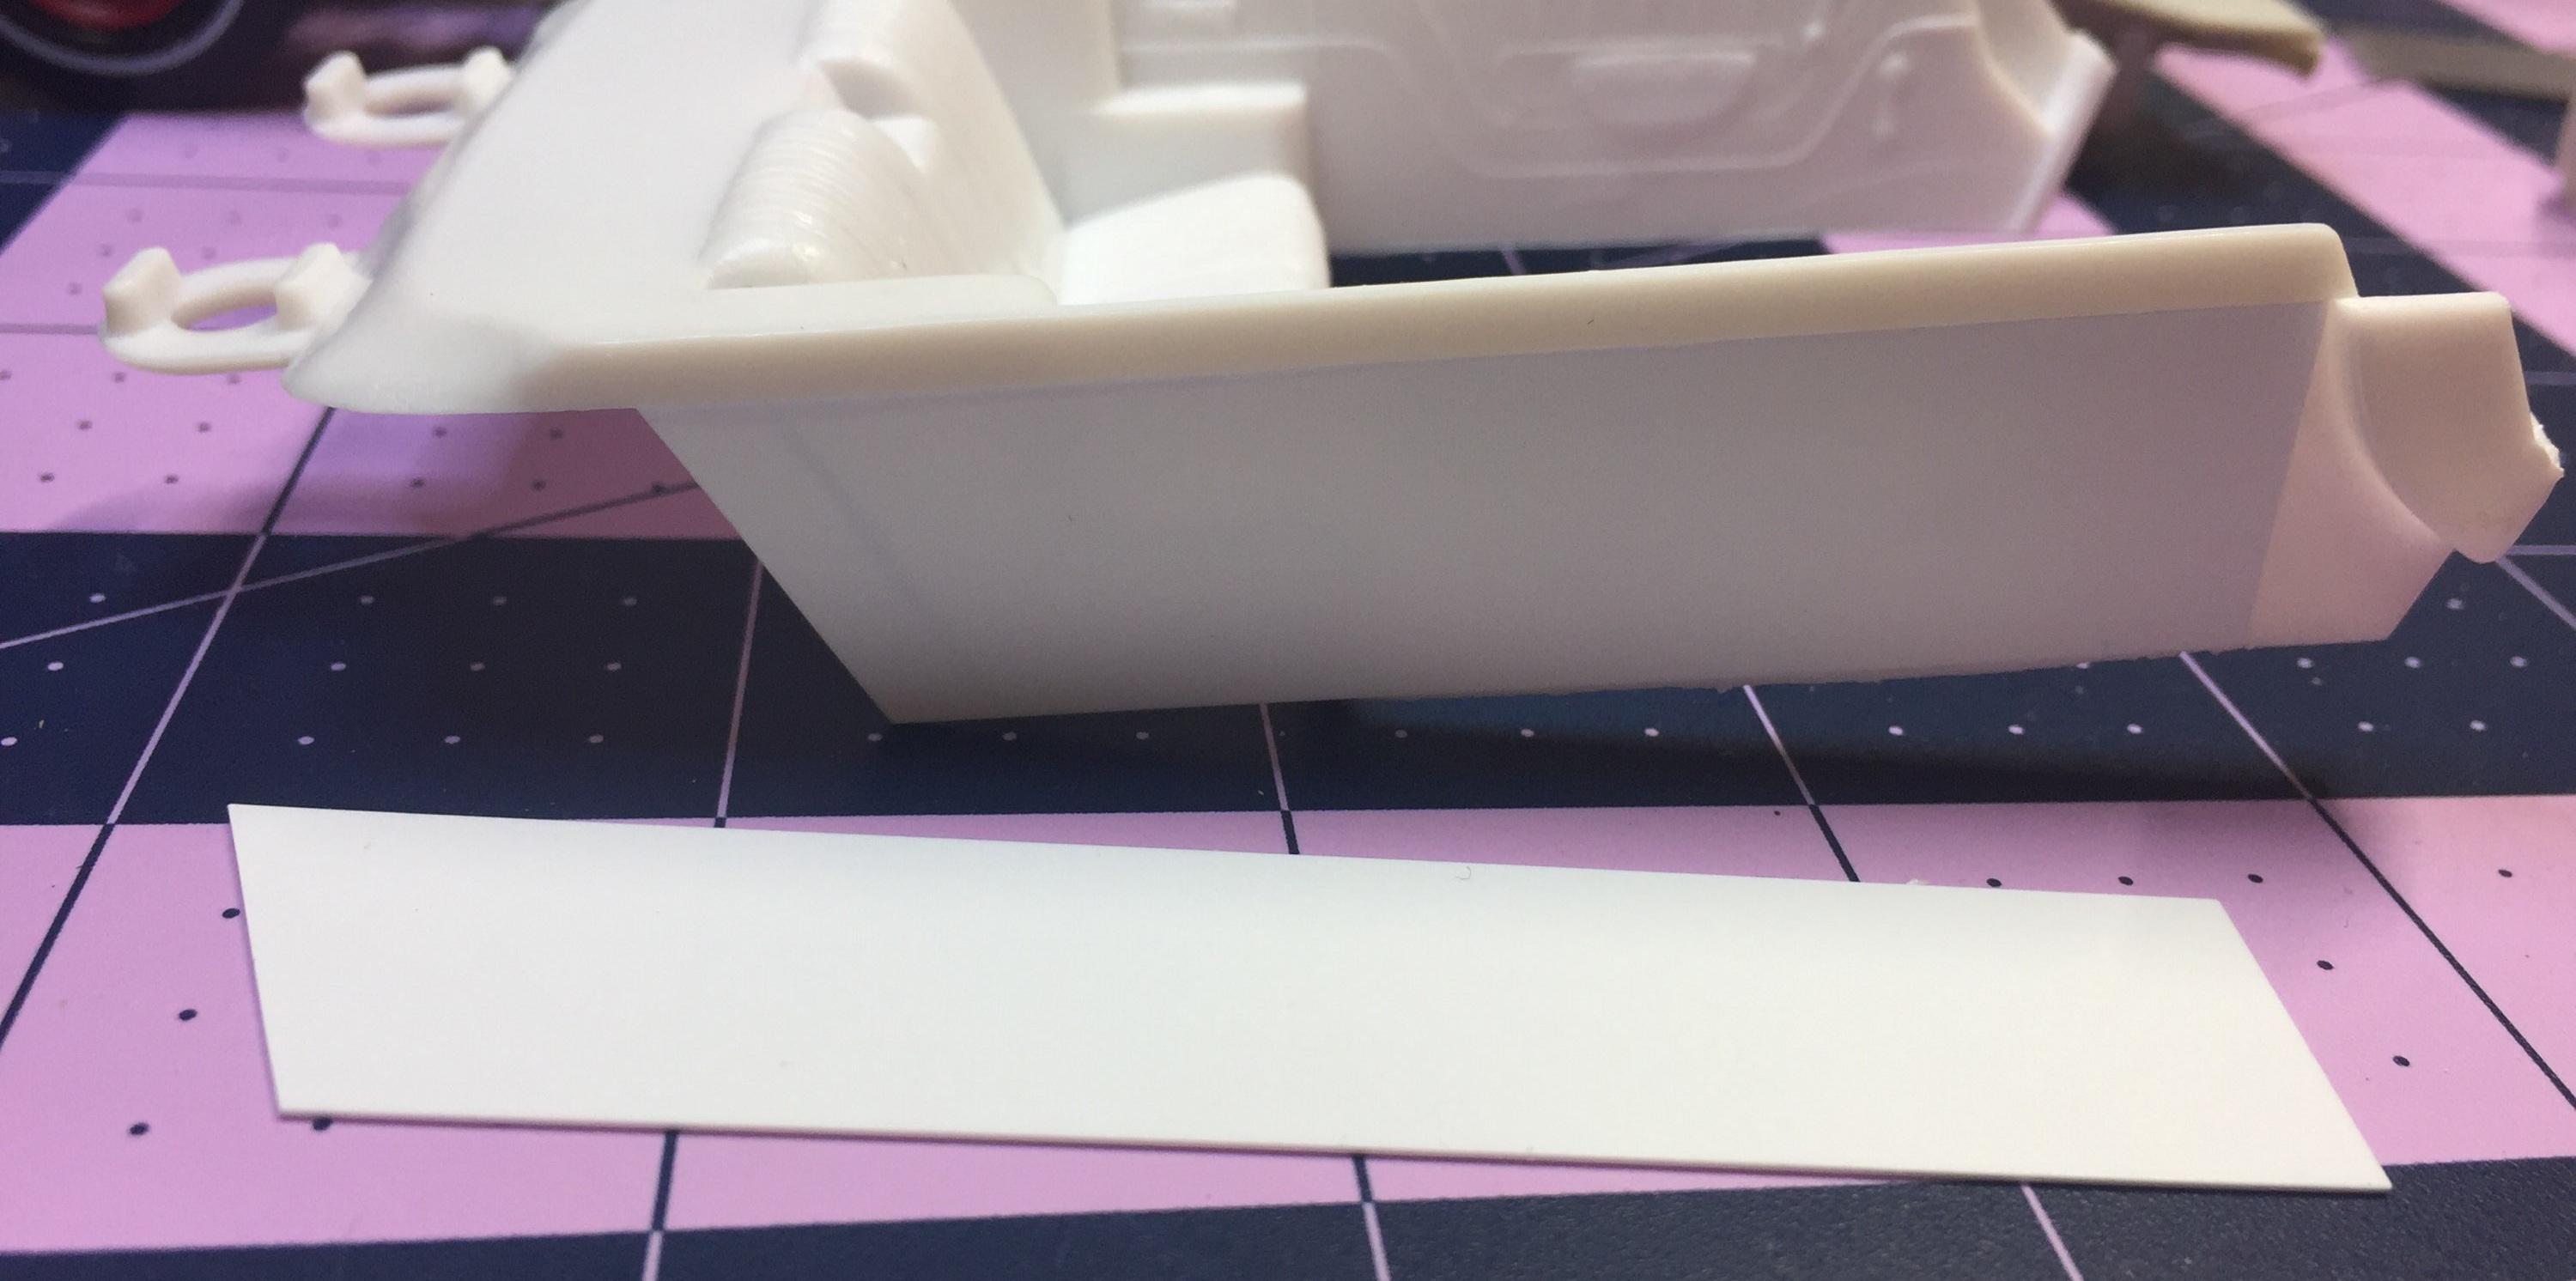
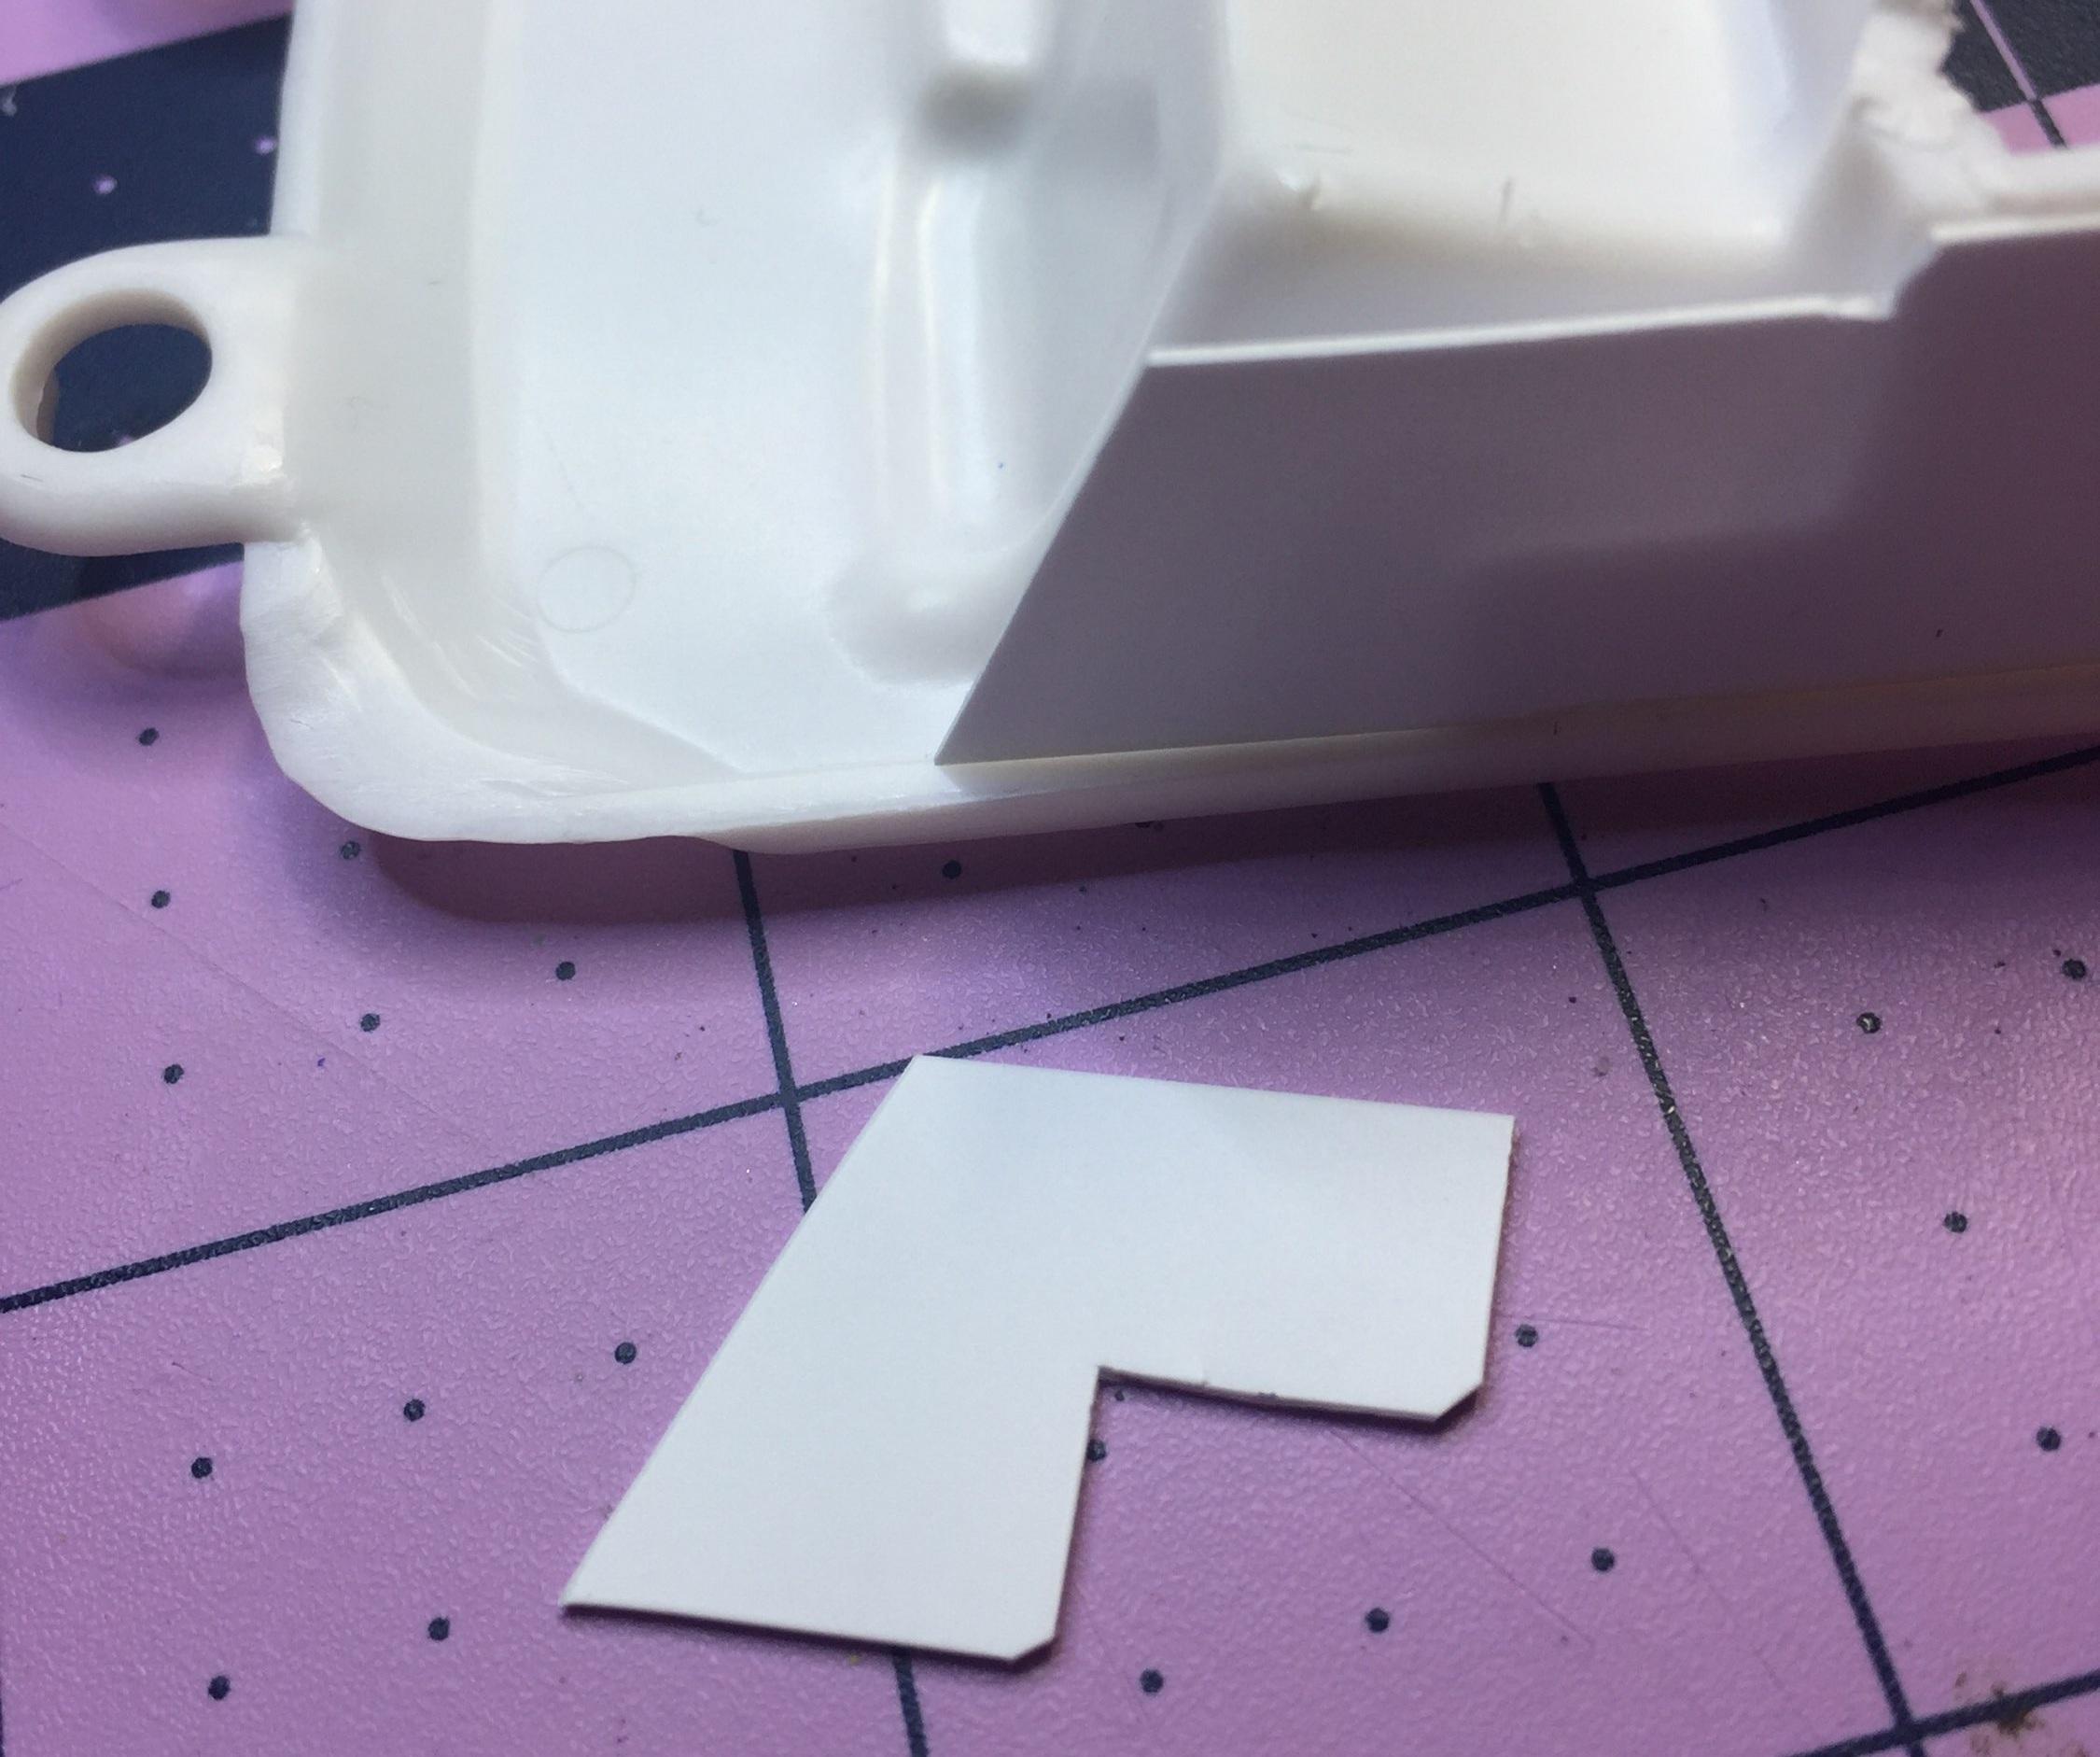
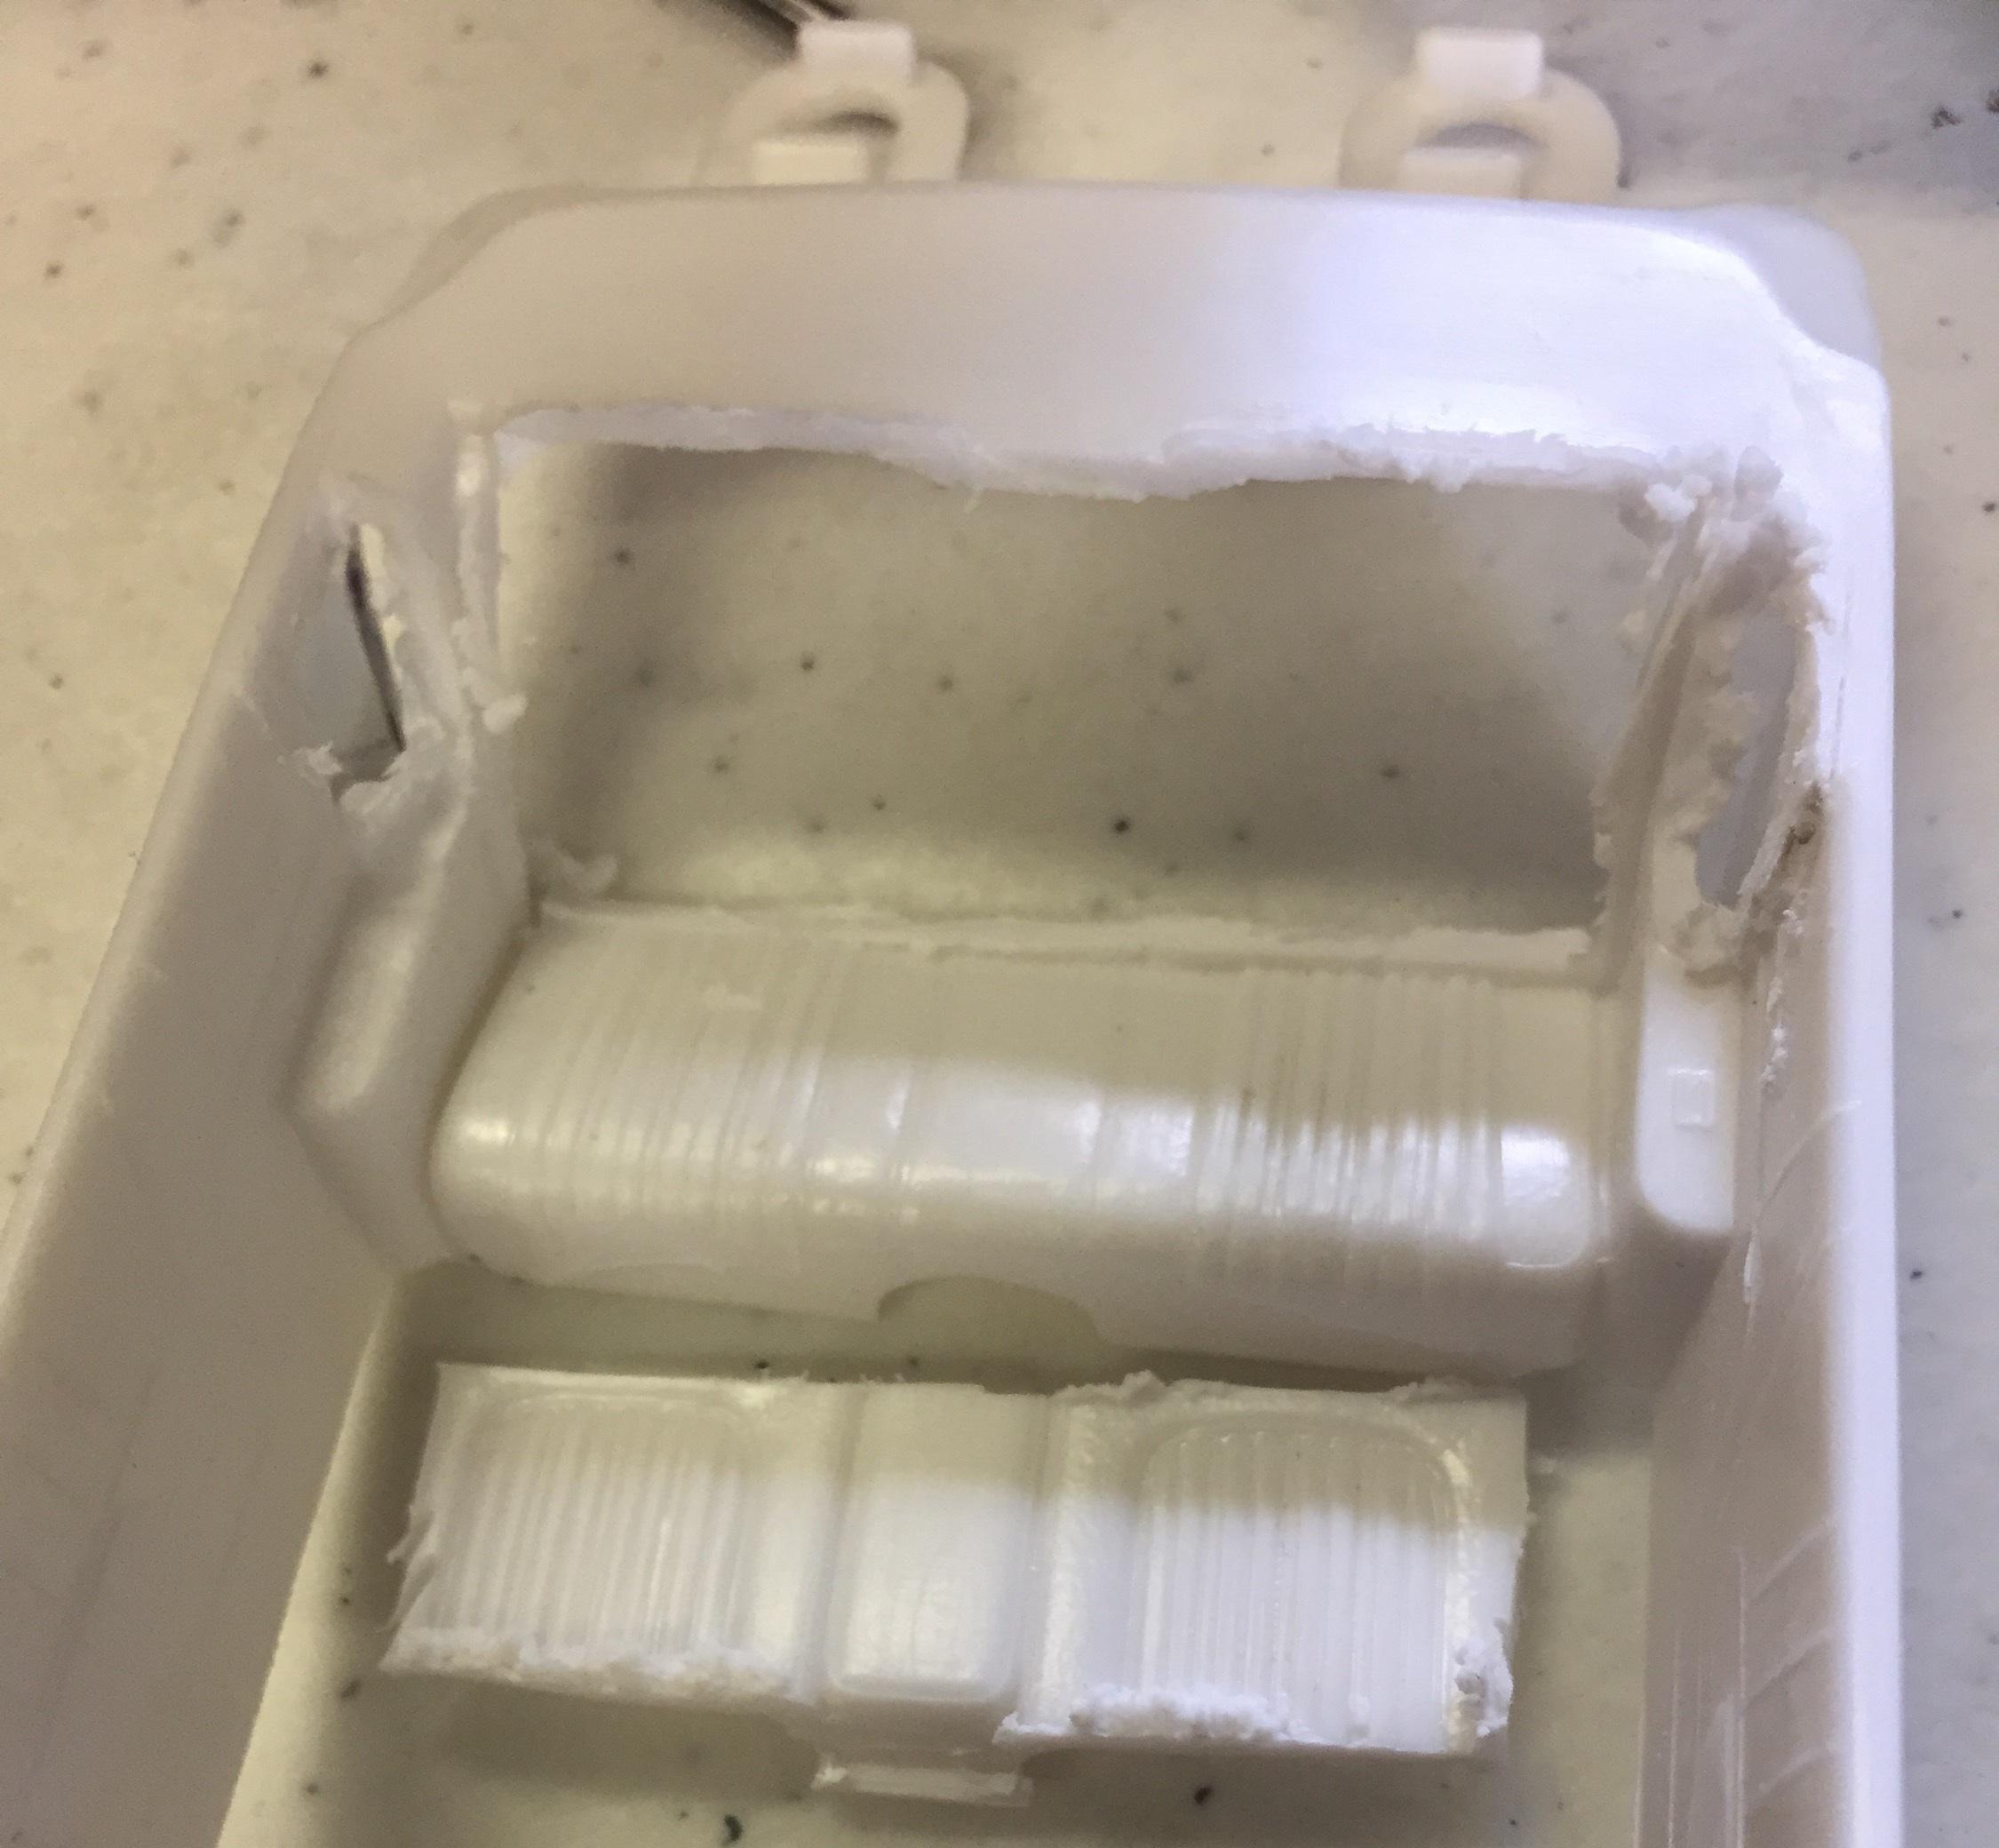
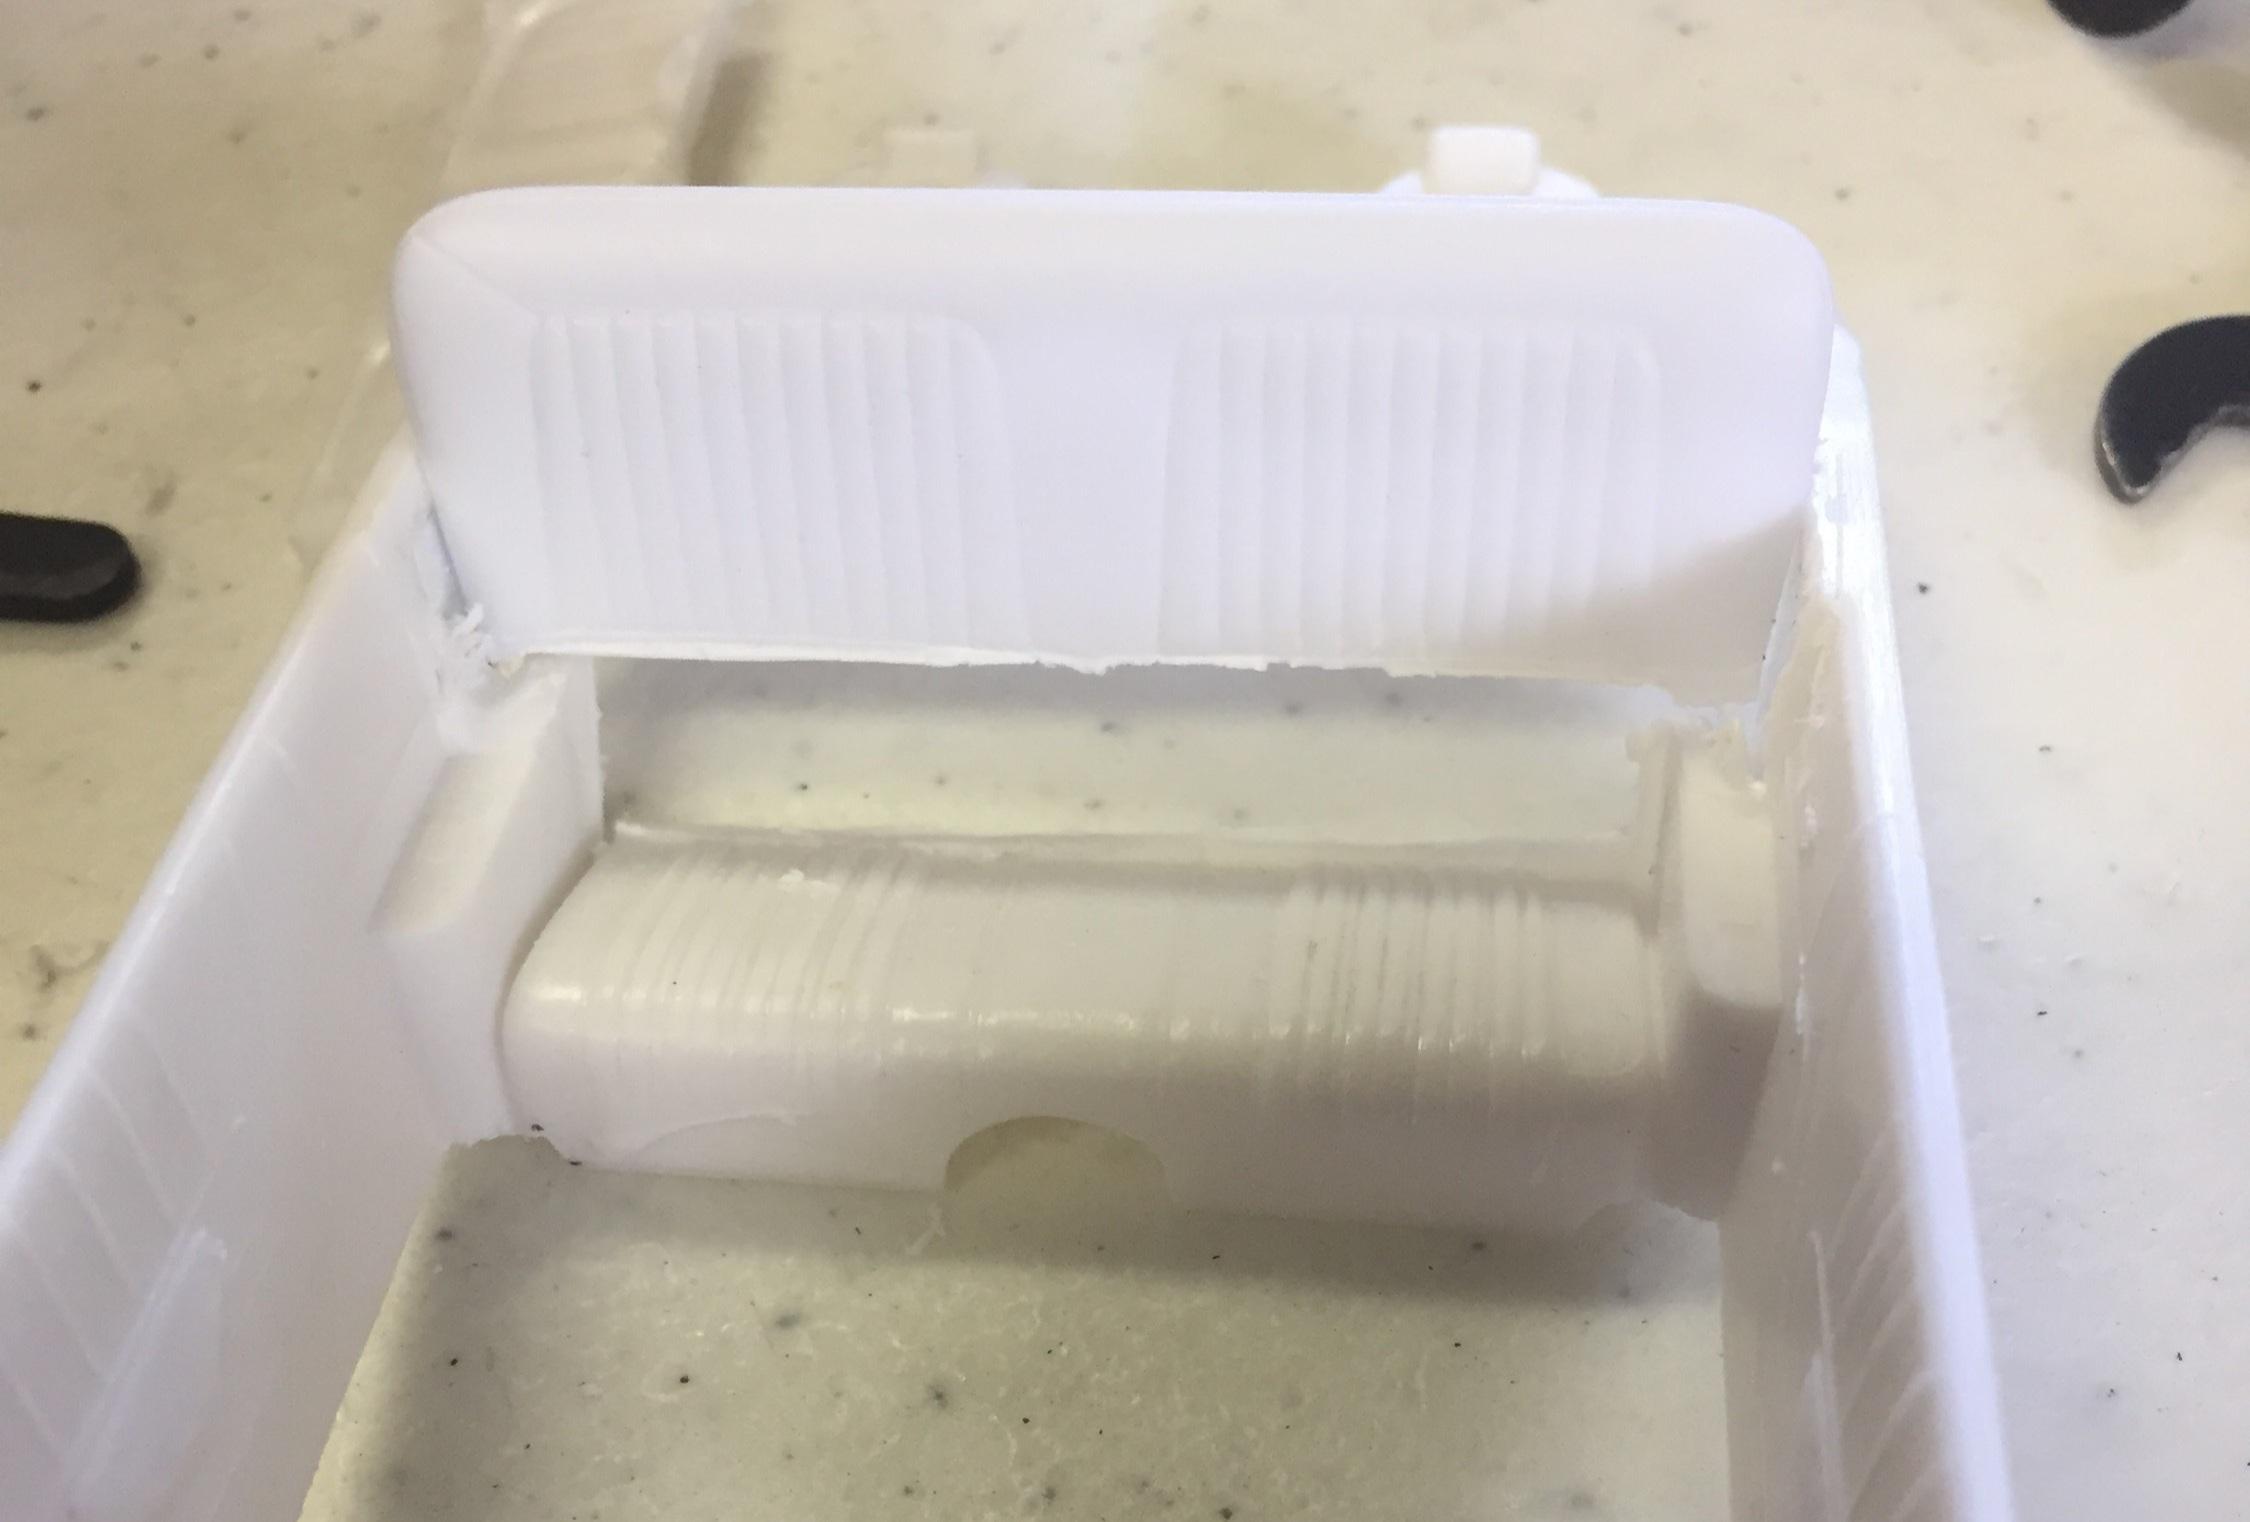
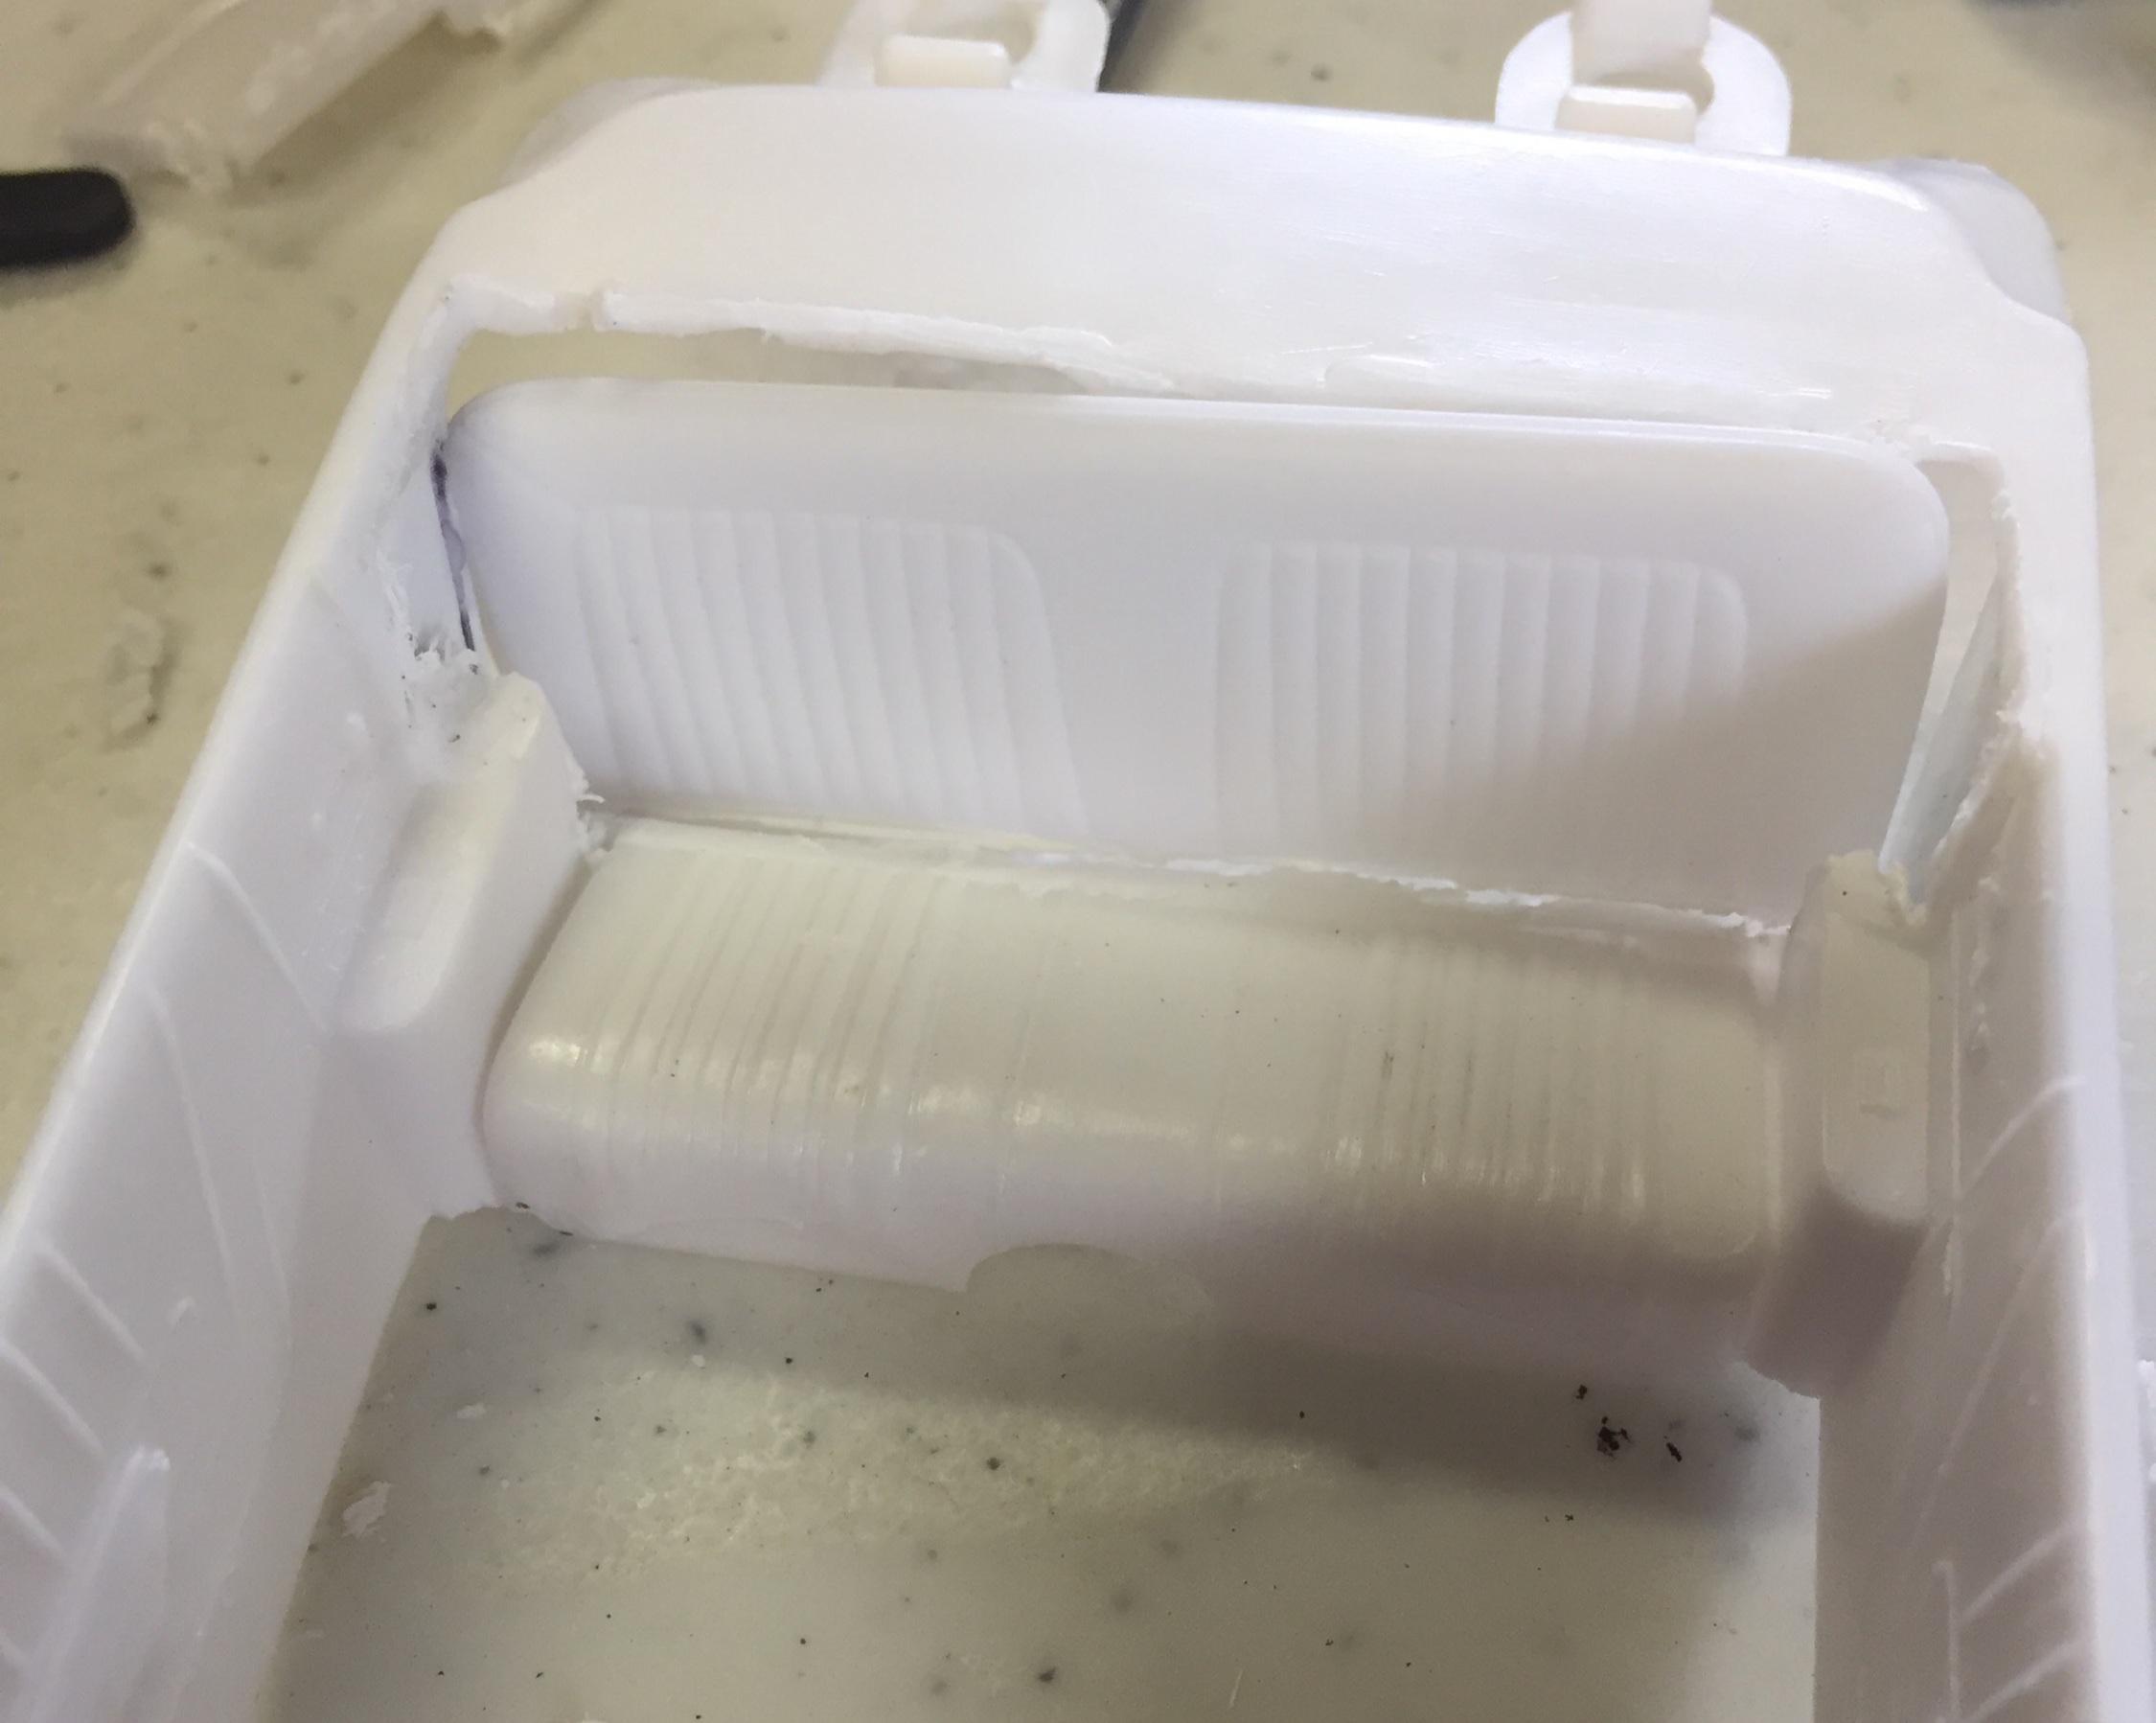
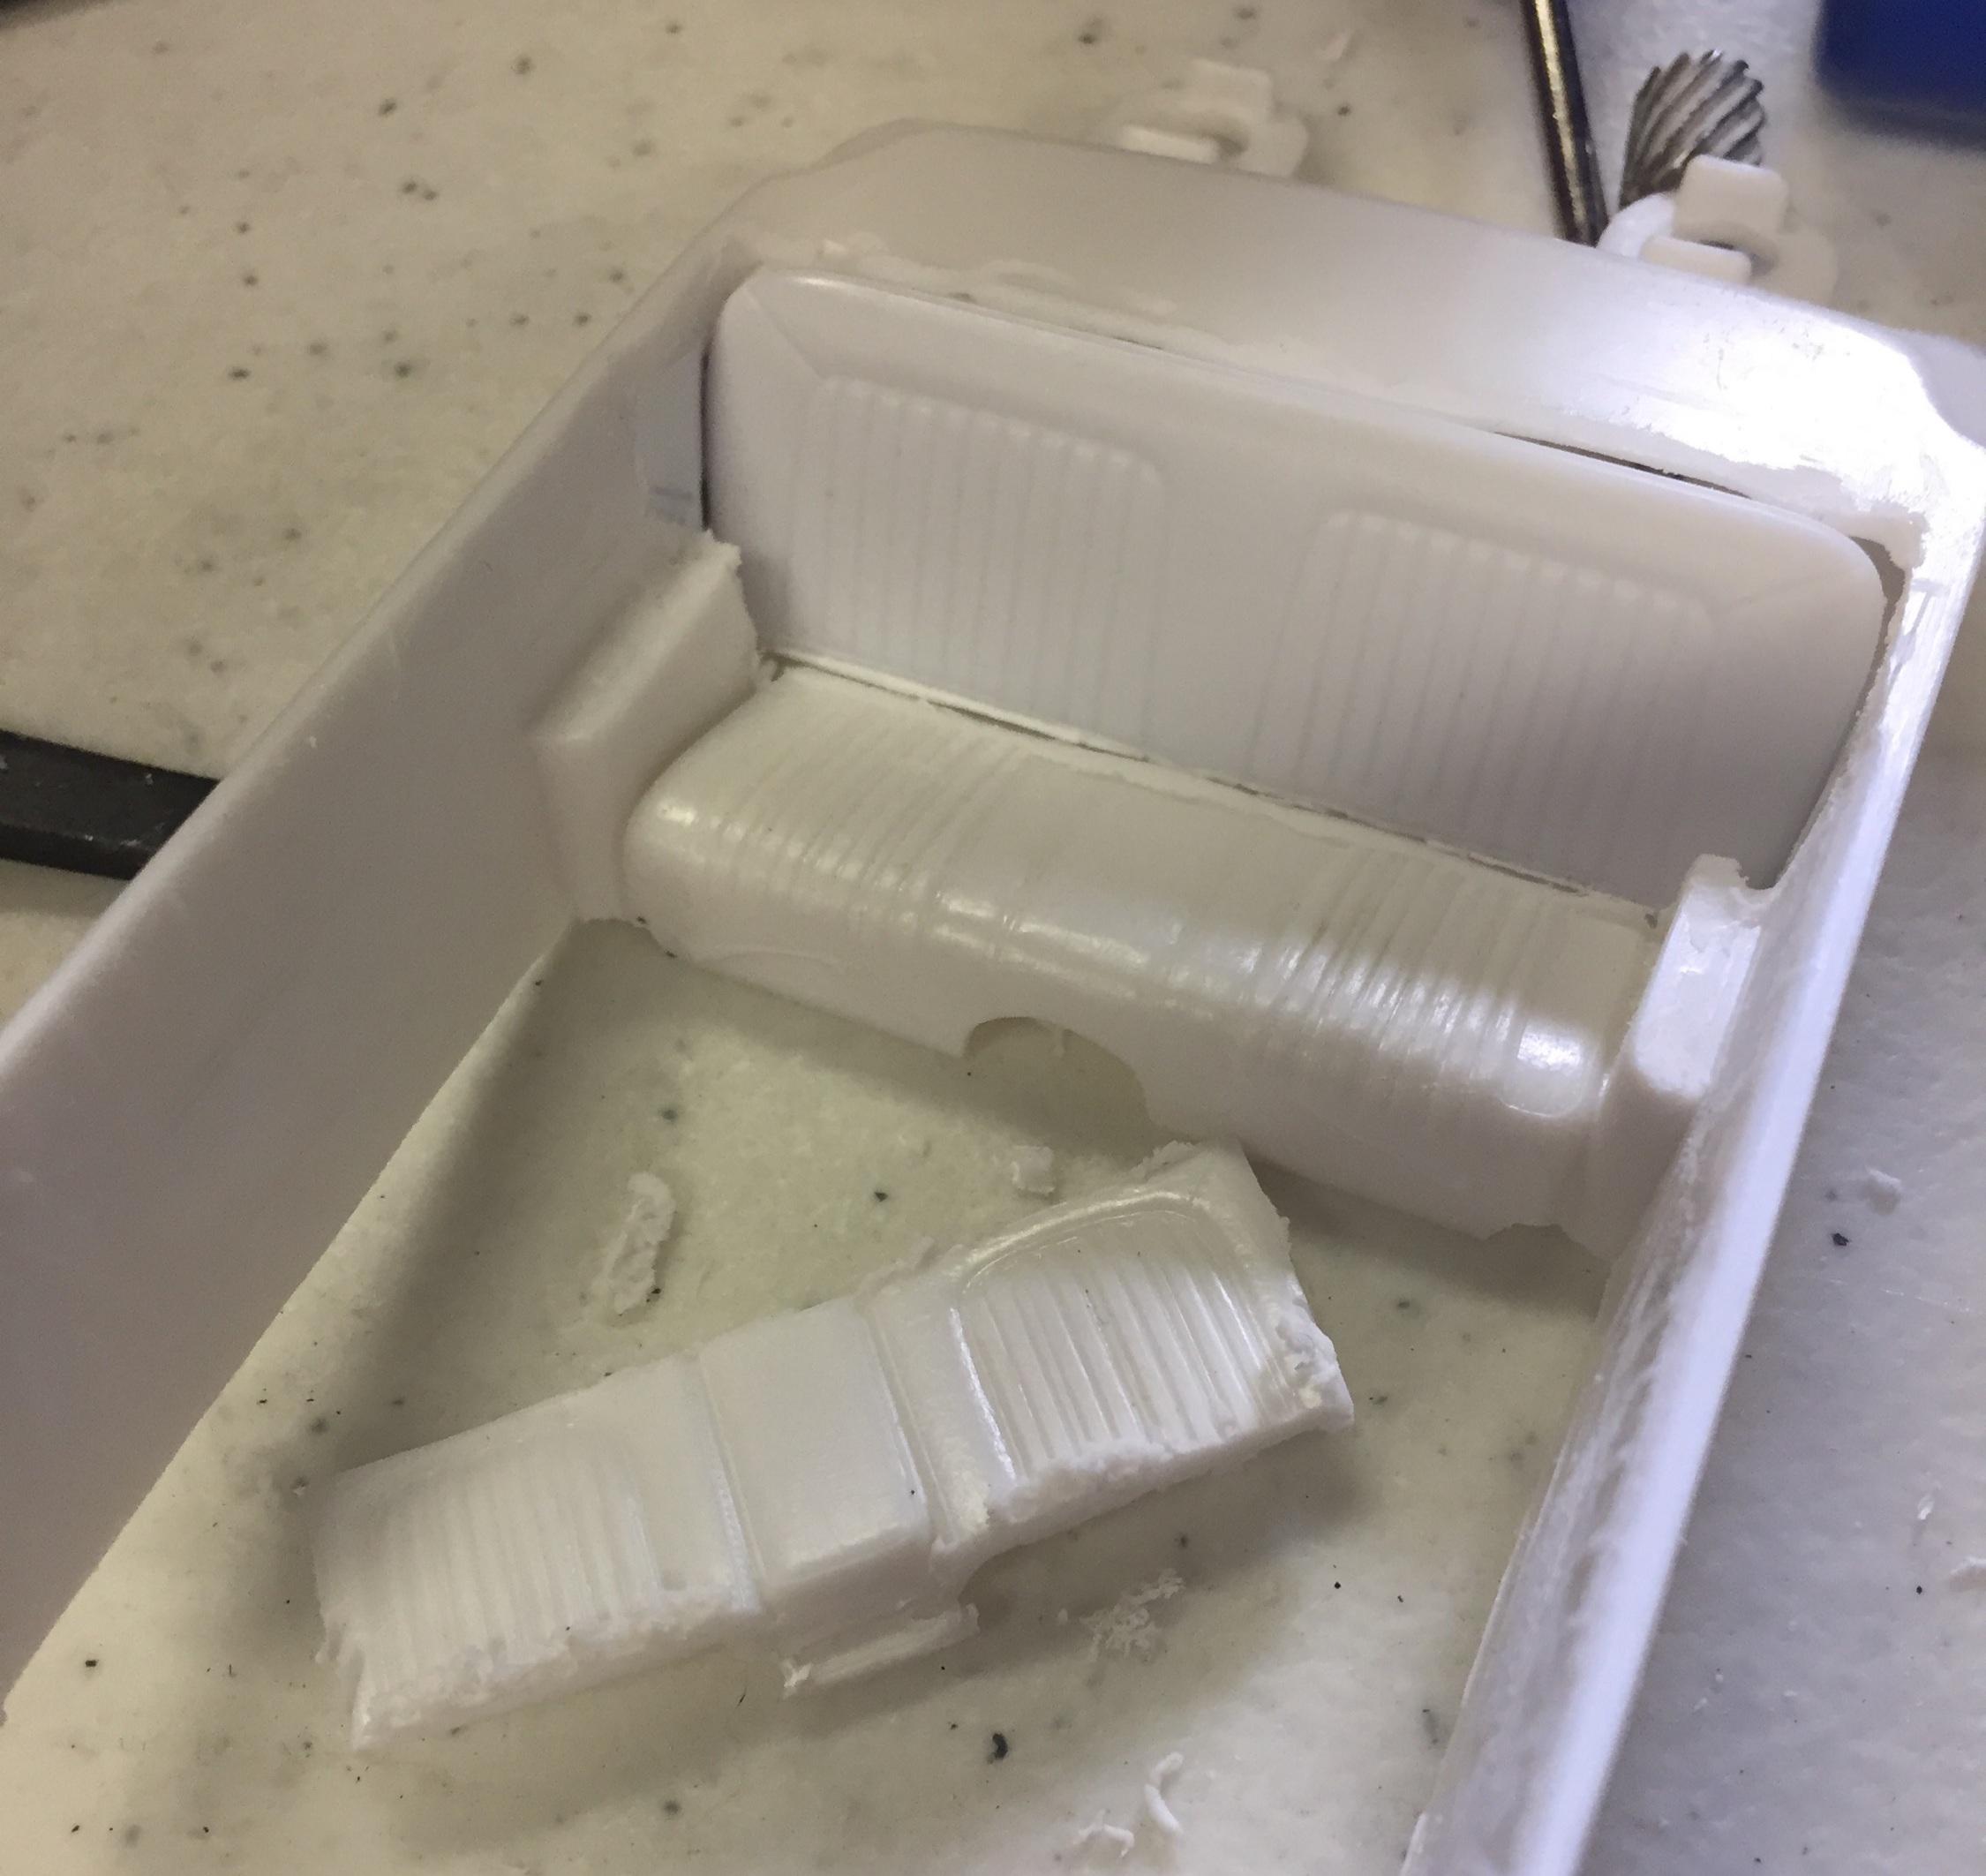
Moving right along..... I have committed to modifying the '63 interior tub due to the the unavailability of the MCW resin kit. So here we go! The '63 tub is a pretty fair P.O.S and was produced as a convertible interior because who would know, right? ?. My first task was to make it look like a hardtop interior by...well...look at the pictures. The part of the new rear seat-back is played by an obscure extra of unknown origin. I grafted a piece of .020 sheet to build a foundation for subsequent construction and added a small piece of .030 inside for further reinforcement. Then the fun began with Mr. Dremel and his good friend Mr. Circular Saw. There will be quite a bit of clean-up but, basically, the heavy lifting is done. The new details will be produced on sheet stock and then grafted to the smoothed interior. That's probably the easiest way to do that. Wish me luck ?
-
"The 777" Tasca Ford '63 lightweight Galaxie
customline replied to customline's topic in WIP: Drag Racing Models
Maybe they bought molds from different mfgrs. to produce in their "Asian" facility under their name ?. -
"The 777" Tasca Ford '63 lightweight Galaxie
customline replied to customline's topic in WIP: Drag Racing Models
Yup. I've opined about this before but I had forgotten about it. Yeah, you have got to scrutinize these things because the mfgrs. make a lot of mistakes. To be fair, many builders don't really give a ?. What it boils down to is don't trust them and look very closely if you care about authenticity! BTW, what is "Model King"? Is it an entity like Round Two? -
Monogram's 1955 Lincoln Futura Concept Car: WIP
customline replied to David G.'s topic in WIP: Model Cars
I was thinking F-16 -
Monogram's 1955 Lincoln Futura Concept Car: WIP
customline replied to David G.'s topic in WIP: Model Cars
I agree. Just zap it and sand before it cures completely. It stays soft like the styrene for a while. I will use it for small pits and depressions. No waiting, David ? ! Then you can do a final with "spot putty" before a fine sanding. -
'58 Impala - "I just love tuck 'n roll."
customline replied to SpeedShift's topic in WIP: Model Cars
So you used what, specifically (brand and type), for a liquid solvent cement? In some of my attempts to use a solvent on a thin strip that was being pulled into a radius like that it would just weaken the strip and it would break. I found I had to use CA in those circumstances of a bend like that. Maybe what you used was "cooler" than what I've been using.