customline
-
Posts
3,791 -
Joined
-
Last visited
Content Type
Profiles
Forums
Events
Gallery
Everything posted by customline
-

Is There Room For Another 41 Plymouth or Two?
customline replied to LennyB's topic in WIP: Model Cars
I see you have a bottle of ivy green. Nice choice. How's the bottom look on this one? This is the best looking of the stacked headlight Galaxies, IMHO. Party on! -
Monogram's 1955 Lincoln Futura Concept Car: WIP
customline replied to David G.'s topic in WIP: Model Cars
Yeah. I can't help it. Thanks for understanding ? -
Is There Room For Another 41 Plymouth or Two?
customline replied to LennyB's topic in WIP: Model Cars
By God, I'll tell you what I think Lenny! Problem is they won't allow those words on this forum ?. Seriously though, the kit isn't really suitable to be an accurate model of a '41 Plymouth, obviously. It's just raw material to be fussed with and maybe customized and, I dunno, Lenny....it's a cool body style to be made into something other than an accurate '41 Plymouth. Don't feel bad. You have done as much as humanly possible to make it right but it's time to say "good enough" and move on to maybe a ....um.....ahh.....uhhh.....an an AMT '57 T-bird!...uh no, don't do that ?....a Moebius Chrysler kit! ? BTW, you might try to lower the rear and see if it looks any better. It might be a geometry problem. Just a thought. -
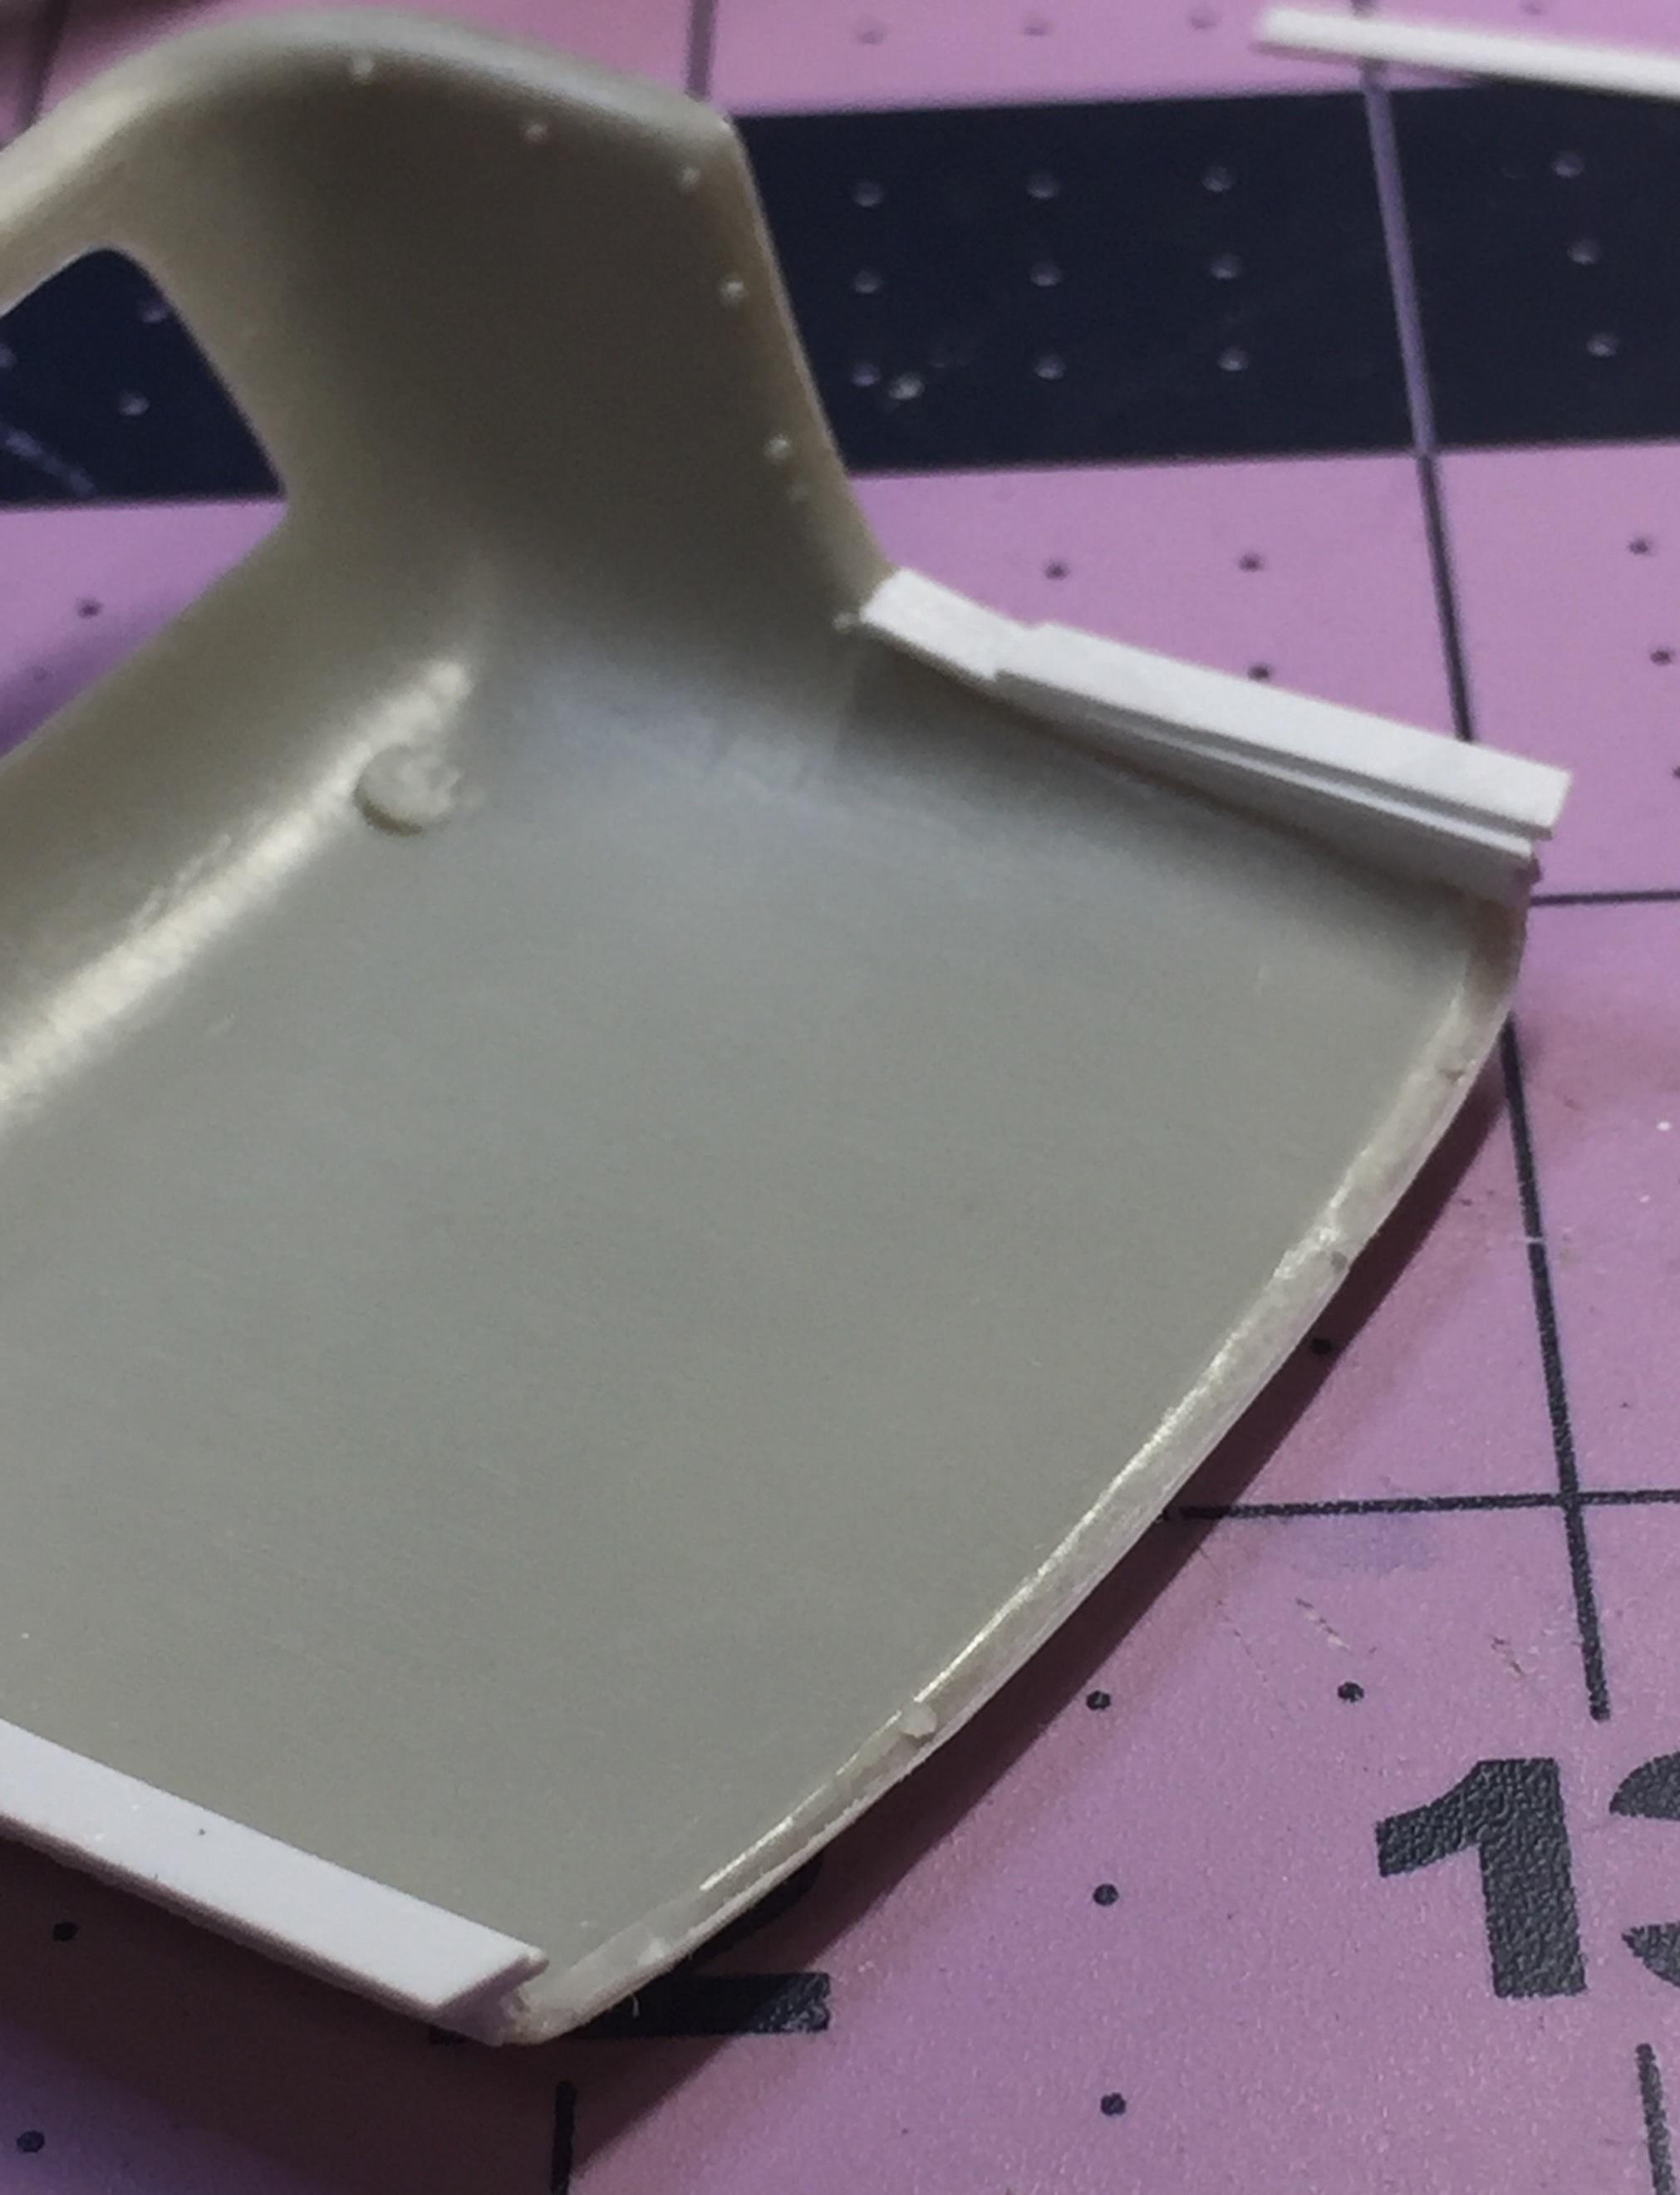
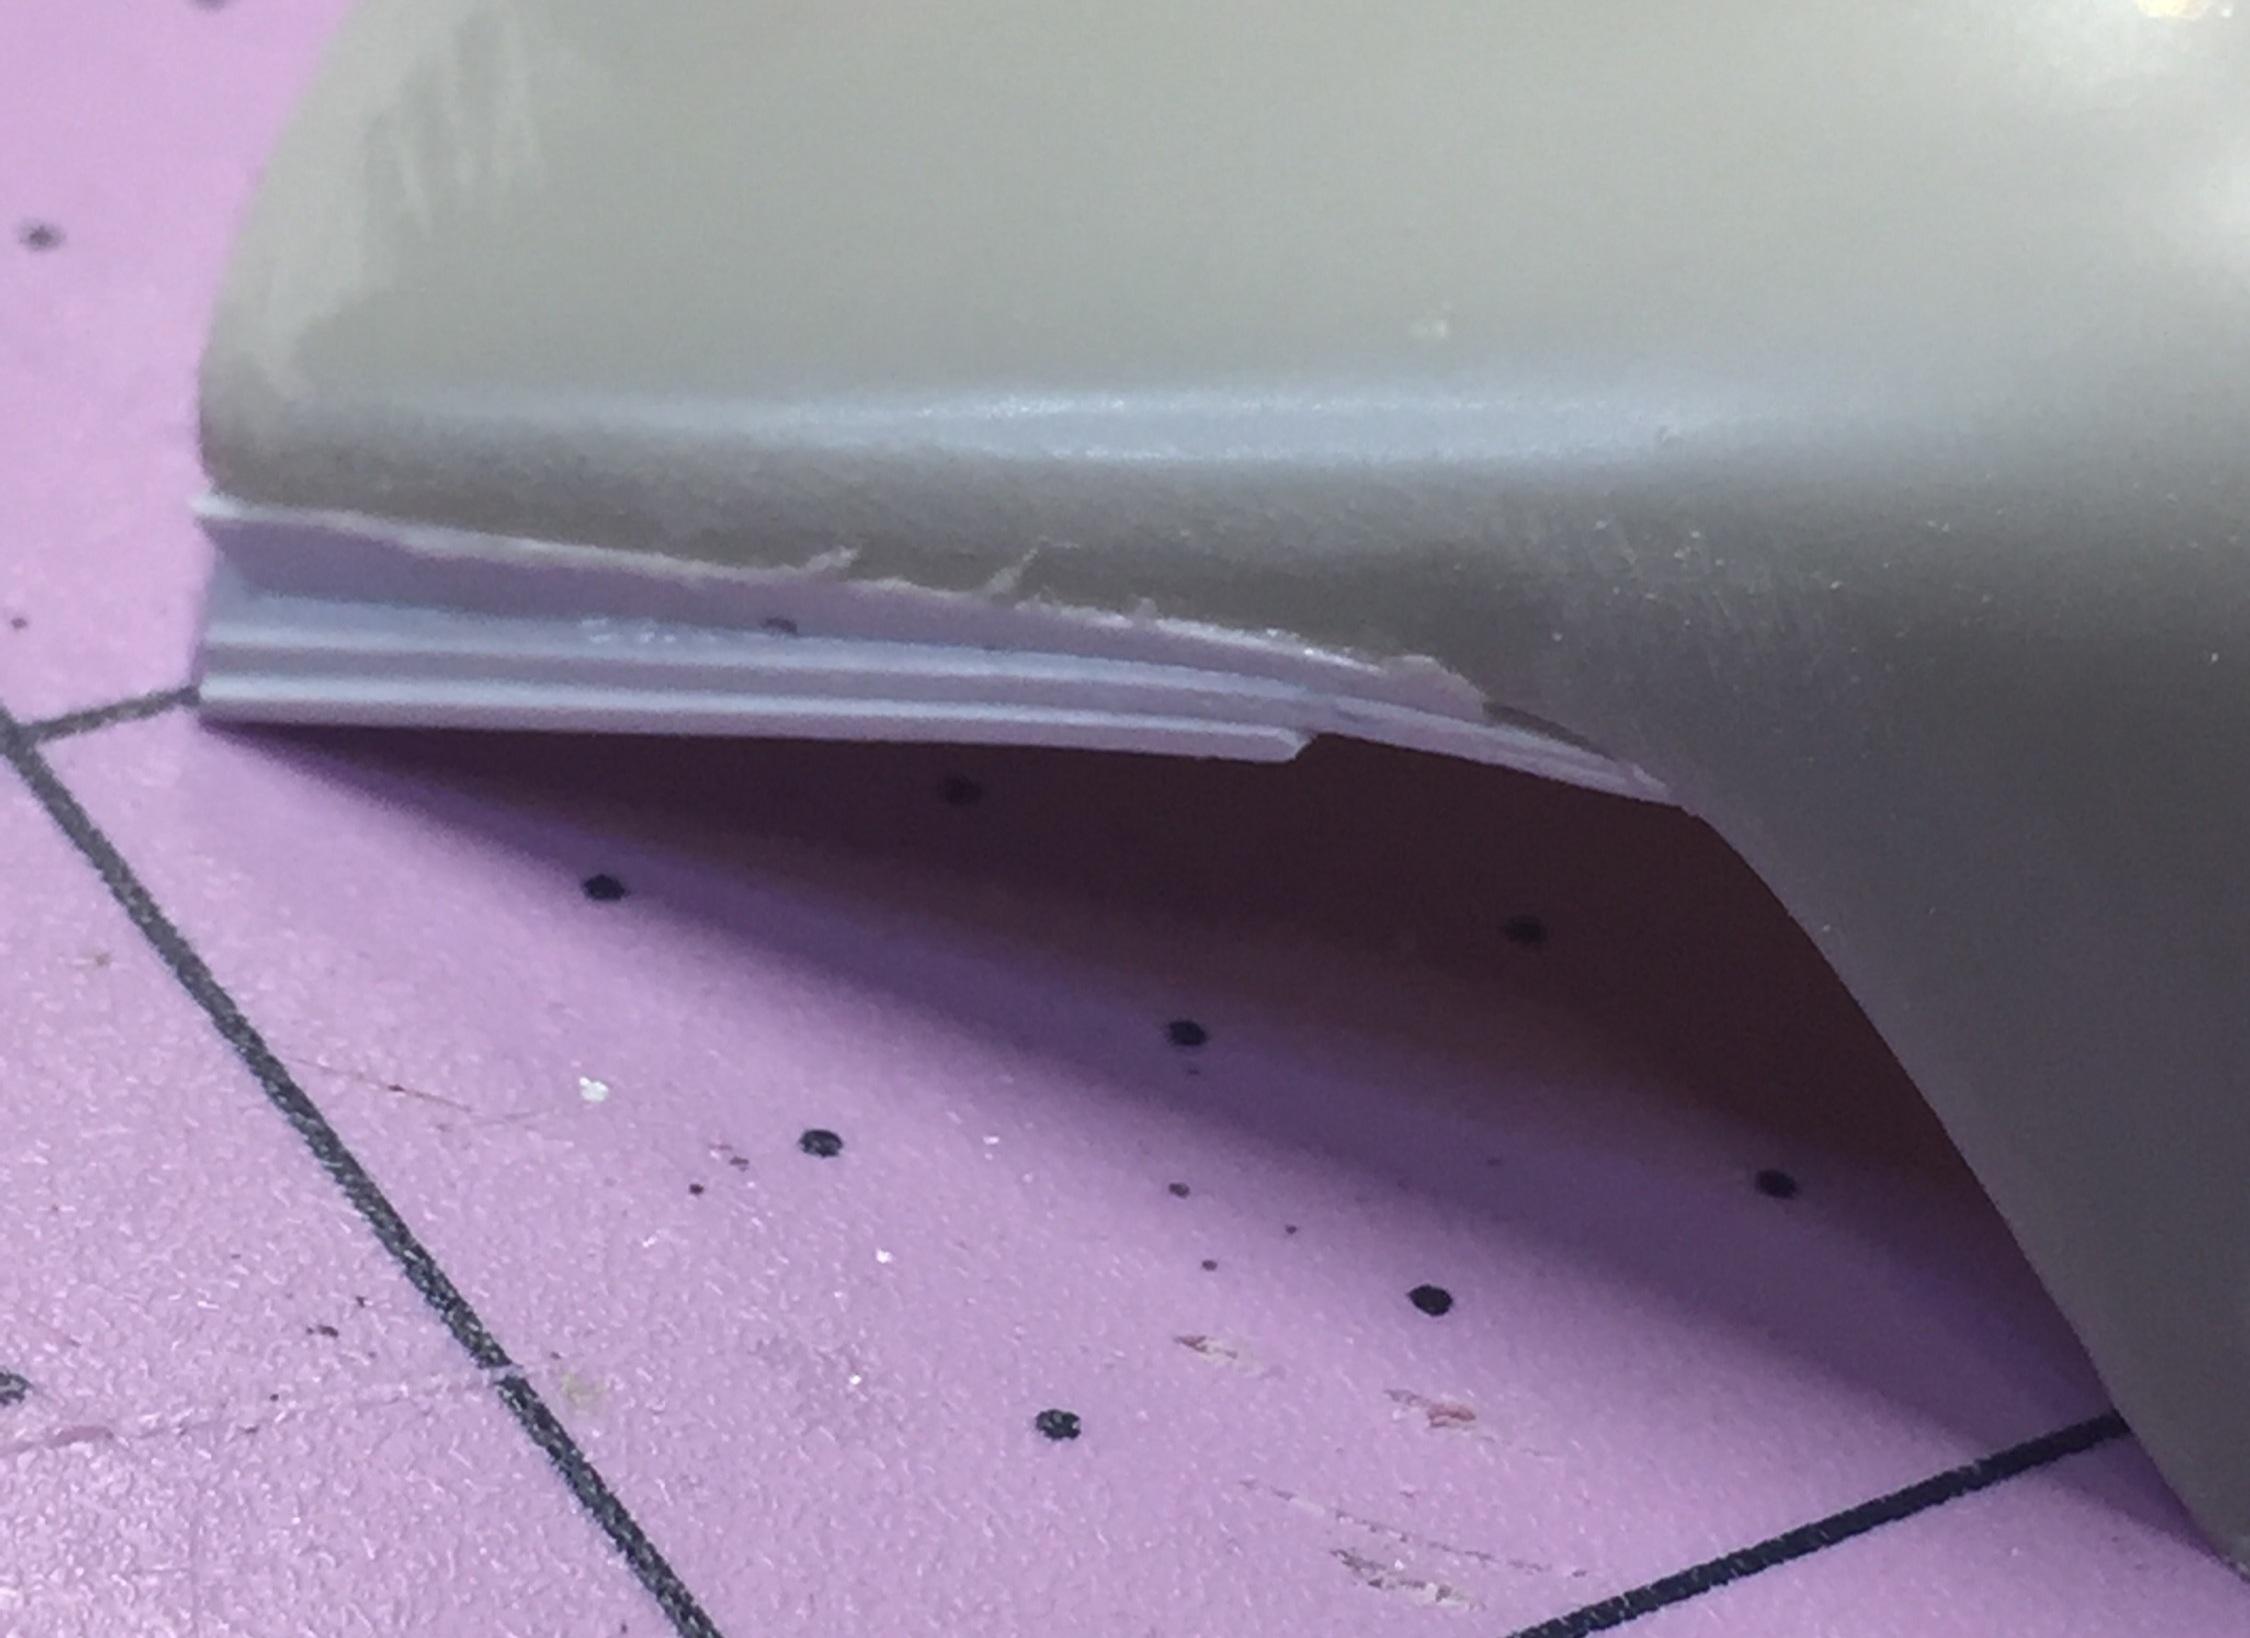
Today's update: Continued reworking the "stock" hardtop to get it looking like the stock hardtop. I did more Bondo work last night and its close enough so I added some .040 half round Evergreen to form the chrome trim. This was sanded to a flatter contour. Then I needed to find a pair of round items to approximate the porthole trim. I settled on what looks like headlight bezels from my chrome junk stash. Size matters in this situation and these bezels looked pretty close. I drilled holes and set them in with solvent. When I attempted to center punch one to facilitate drilling out the inside, the punch fell right through. Yay. Gotta let them stiffen up though, before I use a drill bit on them. Again, it won't be super accurate but it will be good enough for an old screw-bottom. ? Thanks for checking in!

-
Yup, you are right. I had a 1:1 '54 and it had the modernized ball joint set-up and an X member. The '53 is not going to work. Oh well ?.
-
I look forward to seeing what you can do with this kit, Bill, armed with this good Information. I would not have thought of the '56 but I did think about the '53, since I have two of those somewhere. I gotta look at that....hmmmm
-
Thanks, Justin, I agree totally that this subject rendered in new tooling would be a sure-fire hit with all levels of model car geeks. It's iconic and historic and a true classic. My hope is that a manufacturer like Revell Germany or Galaxy or Moebius would produce a kit of this car with a high level of detail. Just a stock version, in true scale. I won't hold my breath.
-
Thanks, Andy. Yeah, man, I know about the air cleaner. The "D" pin on the part locates it backward. Lots of stuff like that in this kit. I have resigned myself to making some corrections and a few repairs of crappy molds. It-is-what-it-is. I bought this kit off of ebay in my ignorance and now I am dealing with its shortcomings. It's kinda fun, though, like resurrecting a gloo bomb. I appreciate your heads-ups on these issues. I'm not sure I get the grille fix, maybe you could expound a bit on that.
-
Monogram's 1955 Lincoln Futura Concept Car: WIP
customline replied to David G.'s topic in WIP: Model Cars
Oh...sorry, Dave W, I was just clowning as I am especially fond of doing. There is an abundance of members that have been given that great Biblical moniker. I have known many in my life. Davids are there in my earliest memories; some were very good friends. No apologies needed...uh...David ? Sorry, David G, I had to clear that up. -
Yes, Bob, ignorance is quite blissful ?. It's amazing how much fun it was when we didn't know any better. ?
-
Monogram's 1955 Lincoln Futura Concept Car: WIP
customline replied to David G.'s topic in WIP: Model Cars
Oh boy...." hey Dave, Dave M needs some help, go grab Dave D and Dave J and on the way over pick up Dave A and bring him along...." ? . I know all about that. I was JD for 19 years. -
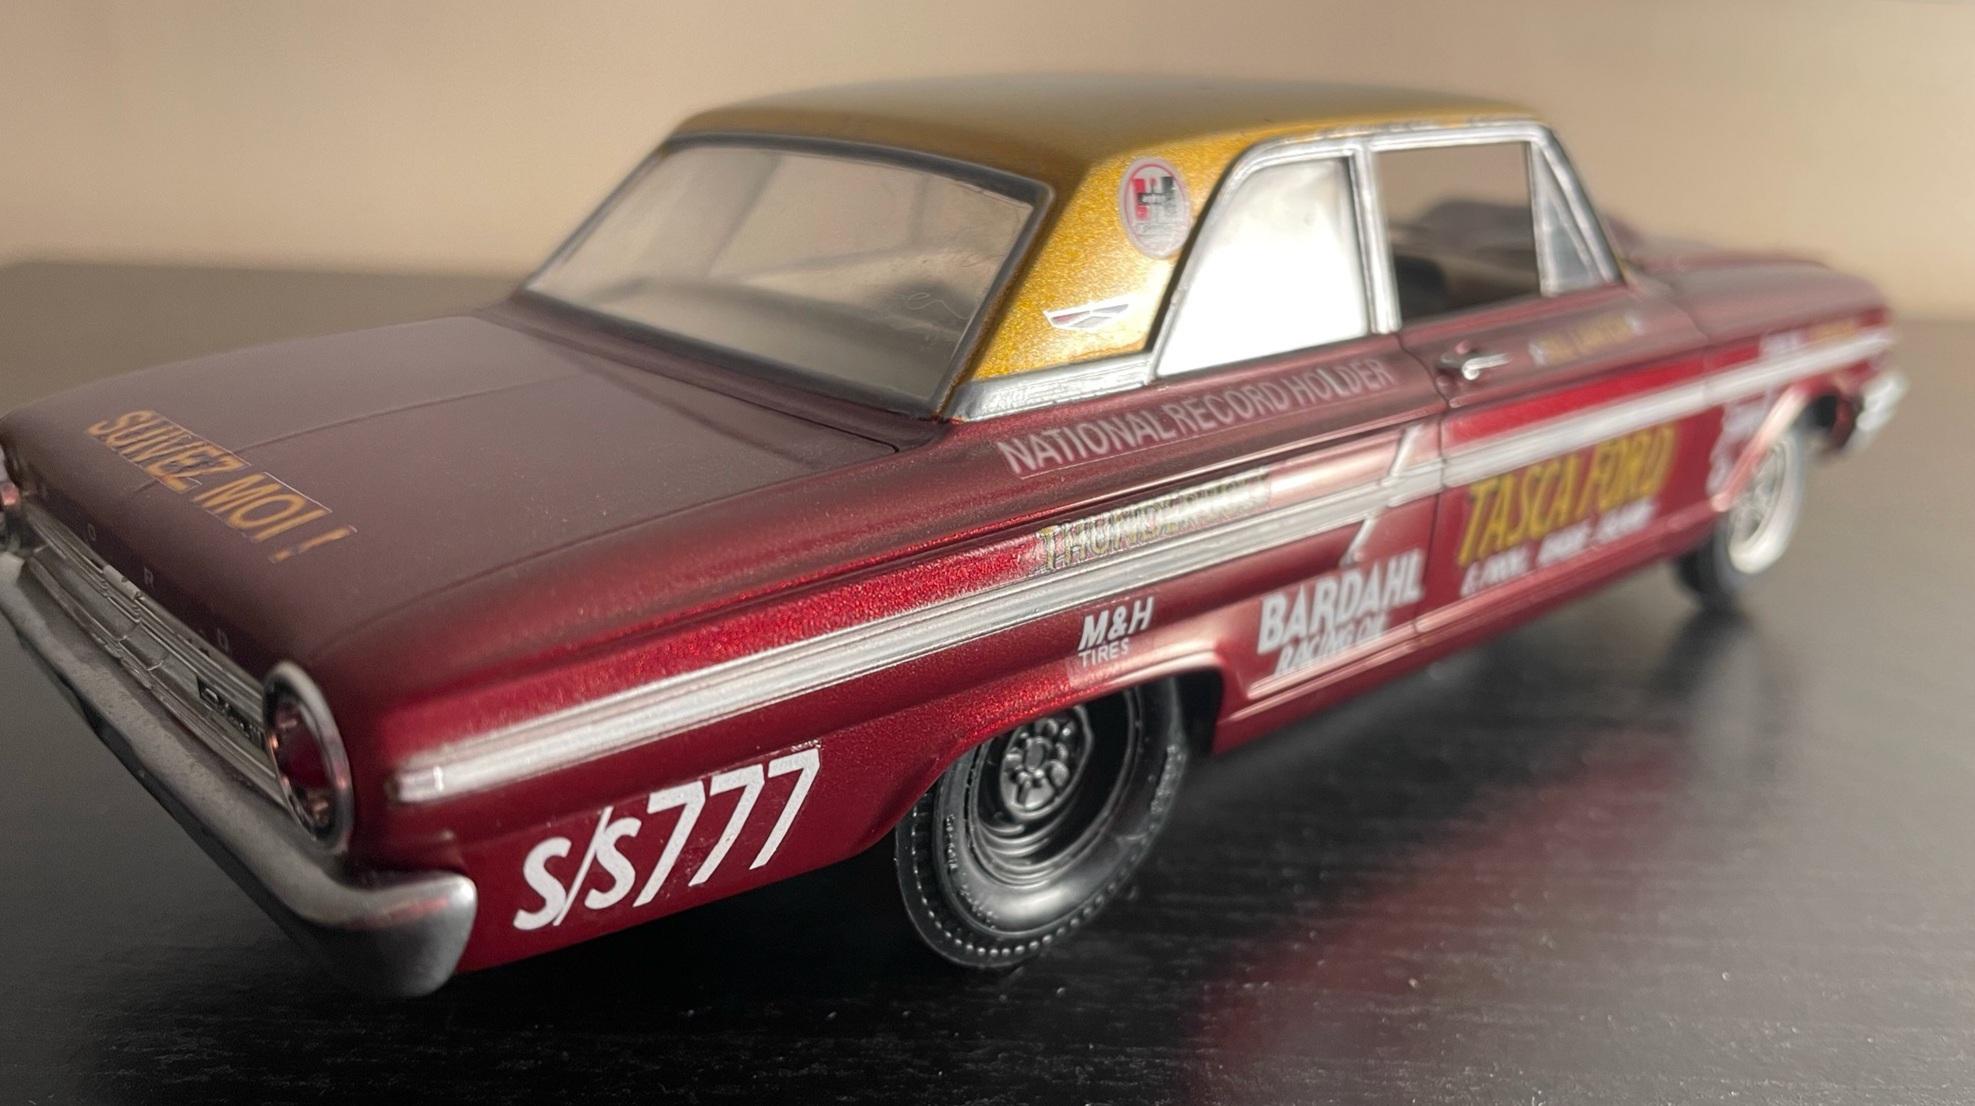
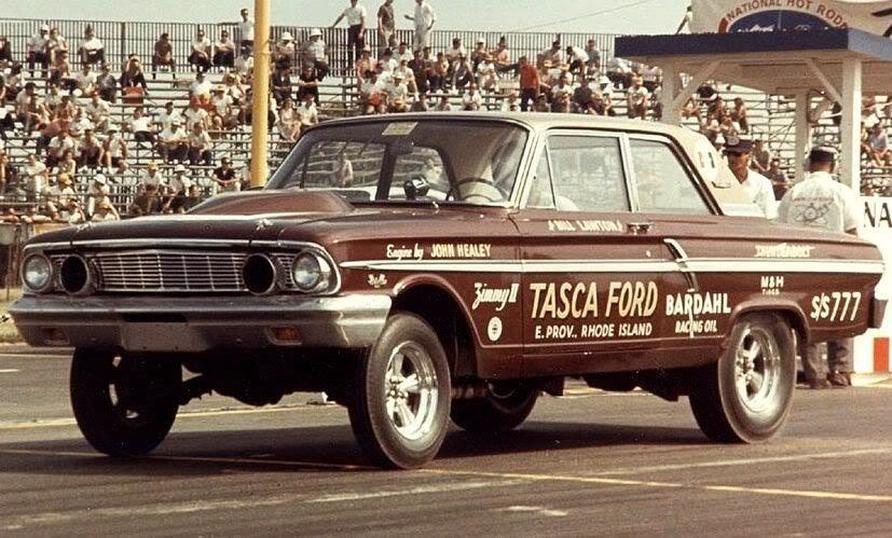
"The 777" Tasca Ford '63 lightweight Galaxie
customline replied to customline's topic in WIP: Drag Racing Models
Notice the hubs and their relationship to the rocker panel on the 1:1 and then on the models. Big difference. Got to get 'er up higher. That'll be my priority. Can't wait to start it (a big problem for me ?) -
Monogram's 1955 Lincoln Futura Concept Car: WIP
customline replied to David G.'s topic in WIP: Model Cars
I'm confused....there's too many David's around here. ? I'm not sure who's talking to who! -
Yeah, they do look too big, Dave. They are the same exact size as the ones in the kit. I dunno, Dave, they had a 6 volt battery in it too so all they had in the boxing department that day was black wall 15s from the '41 Plymouth. But it's a pretty small car so...they're staying, dam it! ?. I'm out of options without busting another kit. Now.....I've been busy..... Now with the skirts on its a bit easier to accept the " big feet" attitude. The bumper fell off for the side view. It may improve the look with it on. I'm going to go back down in the rear. See how that looks with skirts. And then up on all fours...just to see ?. I started on the roof "improvements" . There is a roof by Drag City but it looks like a clone of the kit's. I had to take matters into my own hands. I shaved off the trim (to be replaced later.) I added some Evergreen to the roof, reinforced with CA. Bondo followed. Still need to add more to match the windshield curve. Then I will need to add vent wings. This was supposed to be a quick, easy one....? a couple of small issues to keep me busy; the right tail light area had mold defect as did the rear lower trunk. Thanks for hangin' out!
-
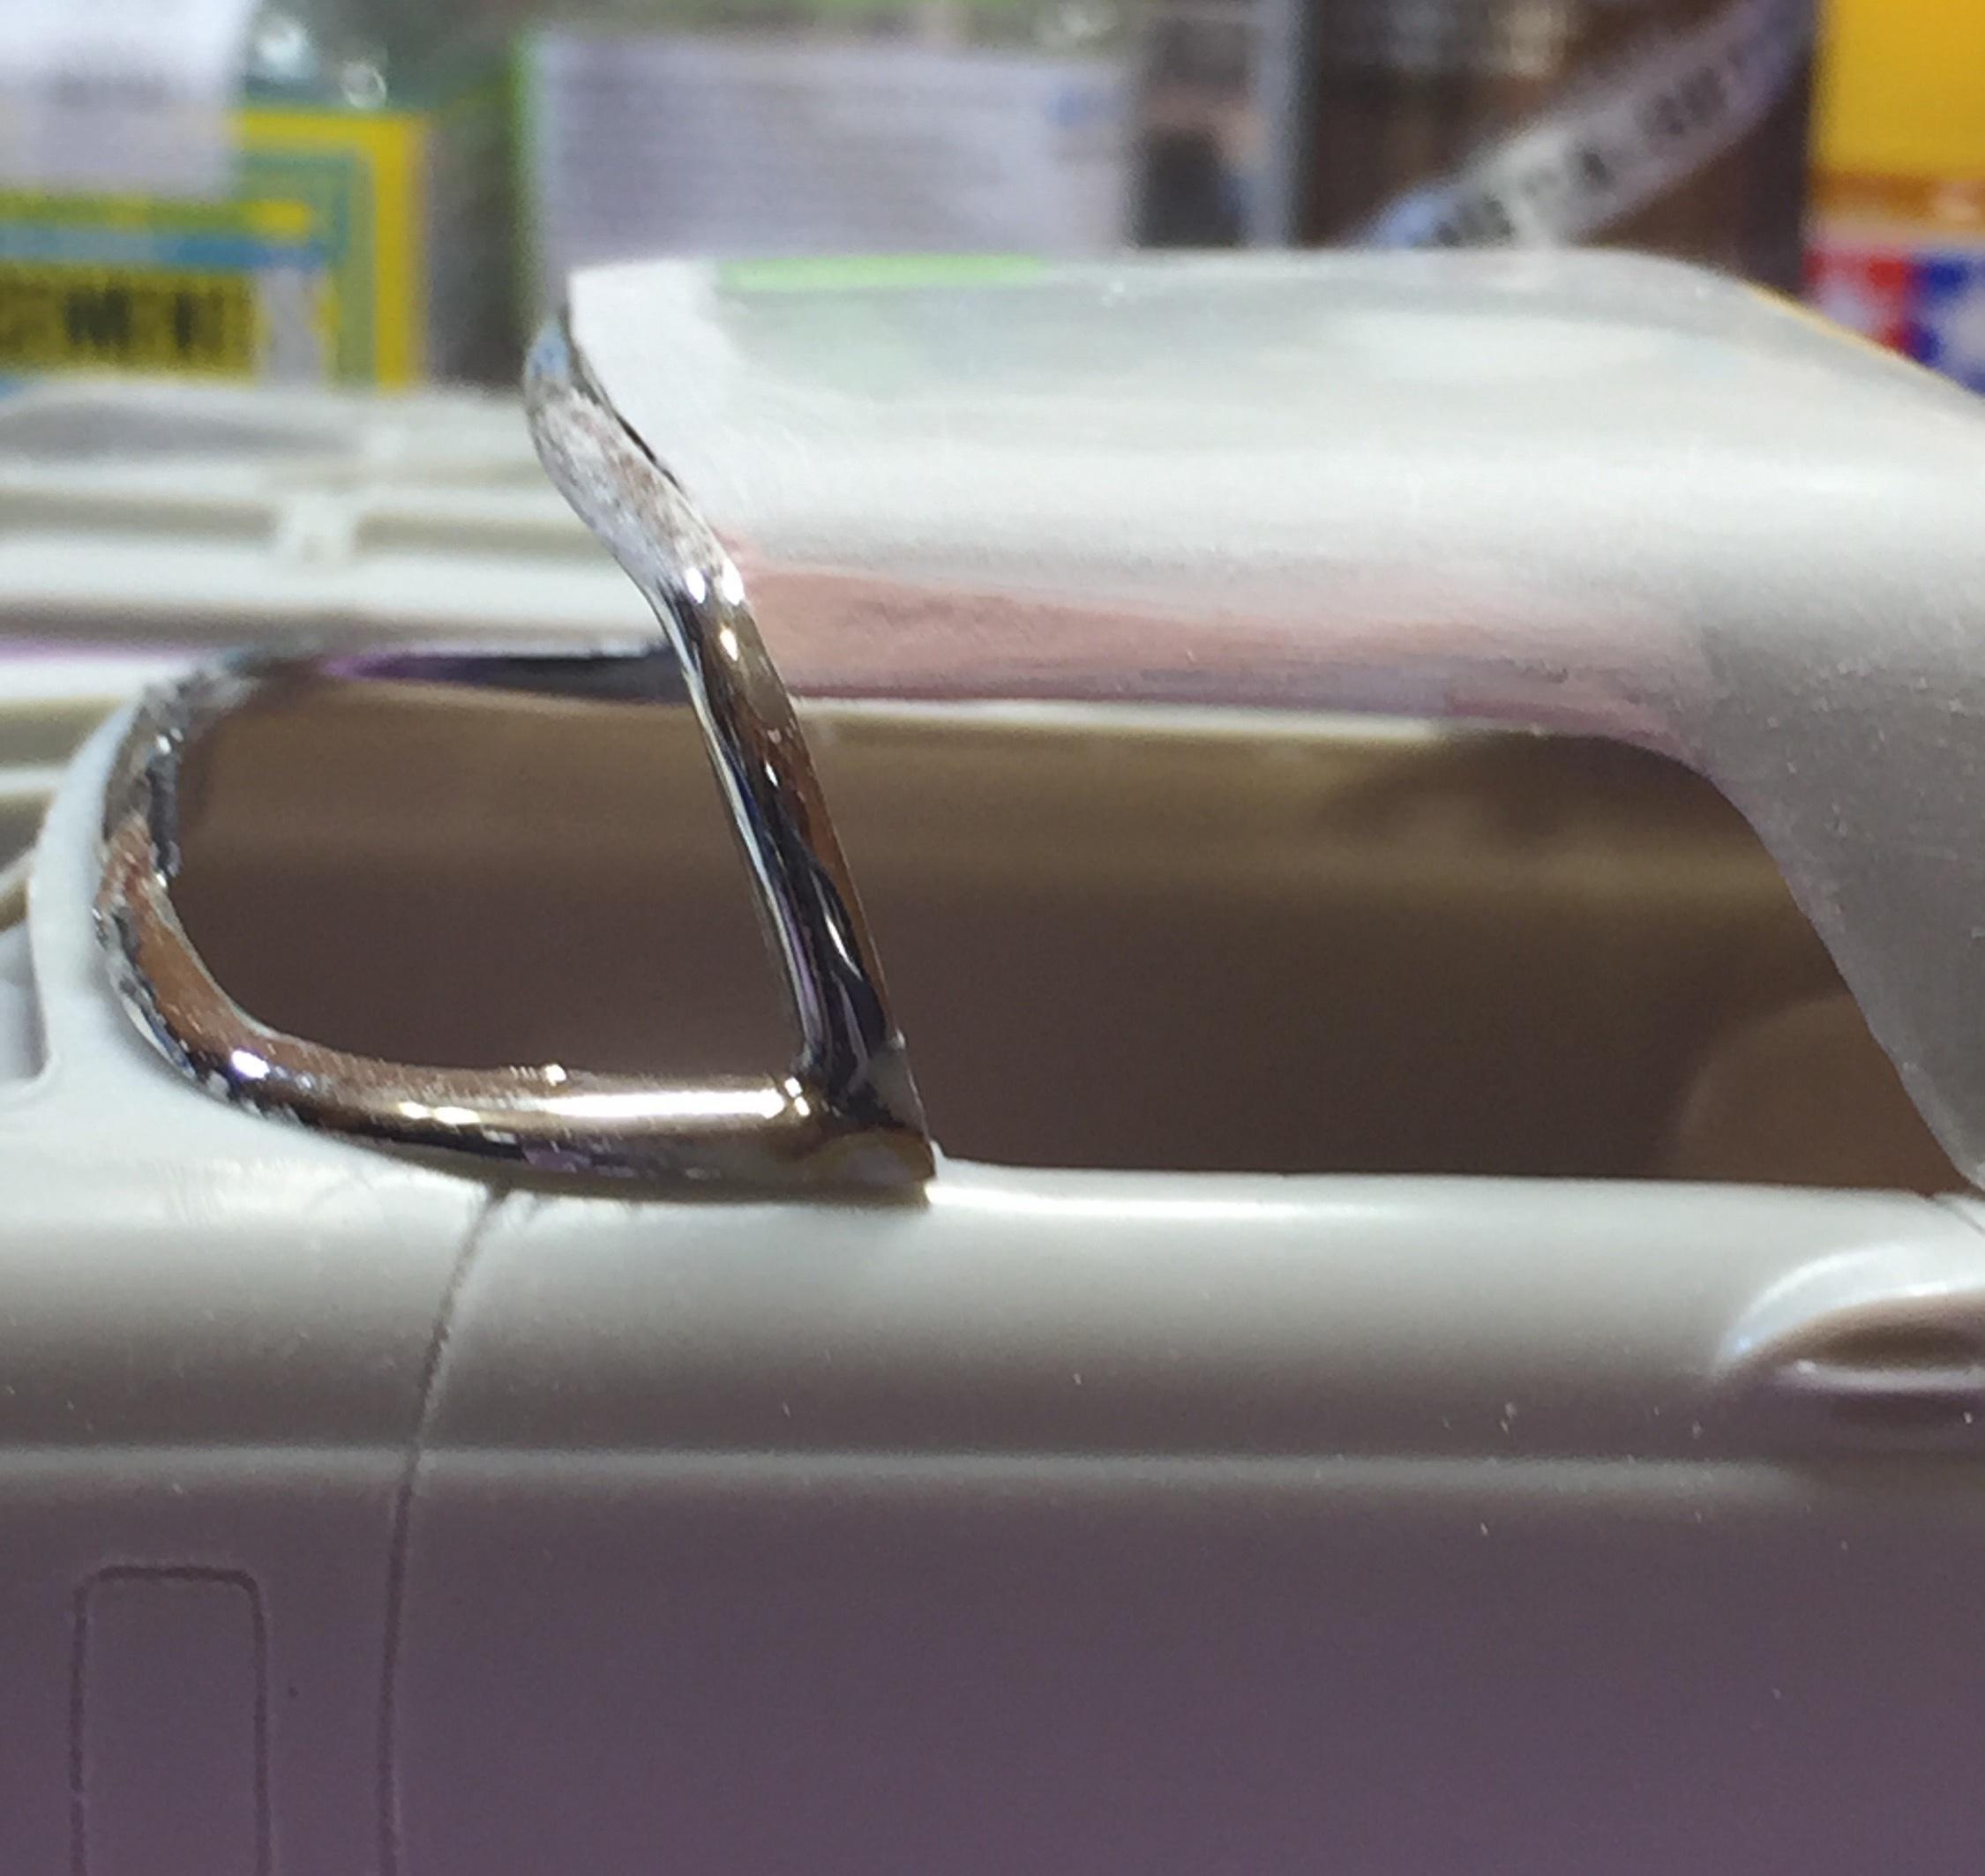
The top picture says it all. I need to "improve" the roof. Is there a correct porthole roof out there somewhere? In resin, maybe? I can make vent wings easily enough and modify the roof but the porthole might be .....not much fun?? It's the chrome trim around the glass...hmmmm ?
-
I don't know, Greg, what I see now is the top of the body is level to the ground and the taper of the body to the rear makes the rake. I will need to mock it up with the skirts on and see how that strikes me. Thanks for weighing in. Oh...I remember how I would smear that filler on with my fingers. I can still smell it ?. Yeah, the windshield....that's not going to be fun. It's causing me some anxiety. I'm glad you mentioned the vent wings. Gotta look into that. I was noticing the curve of the A pillars and how the roof meets at the top. Very curious ?. Thanks for your input, Bob.
-
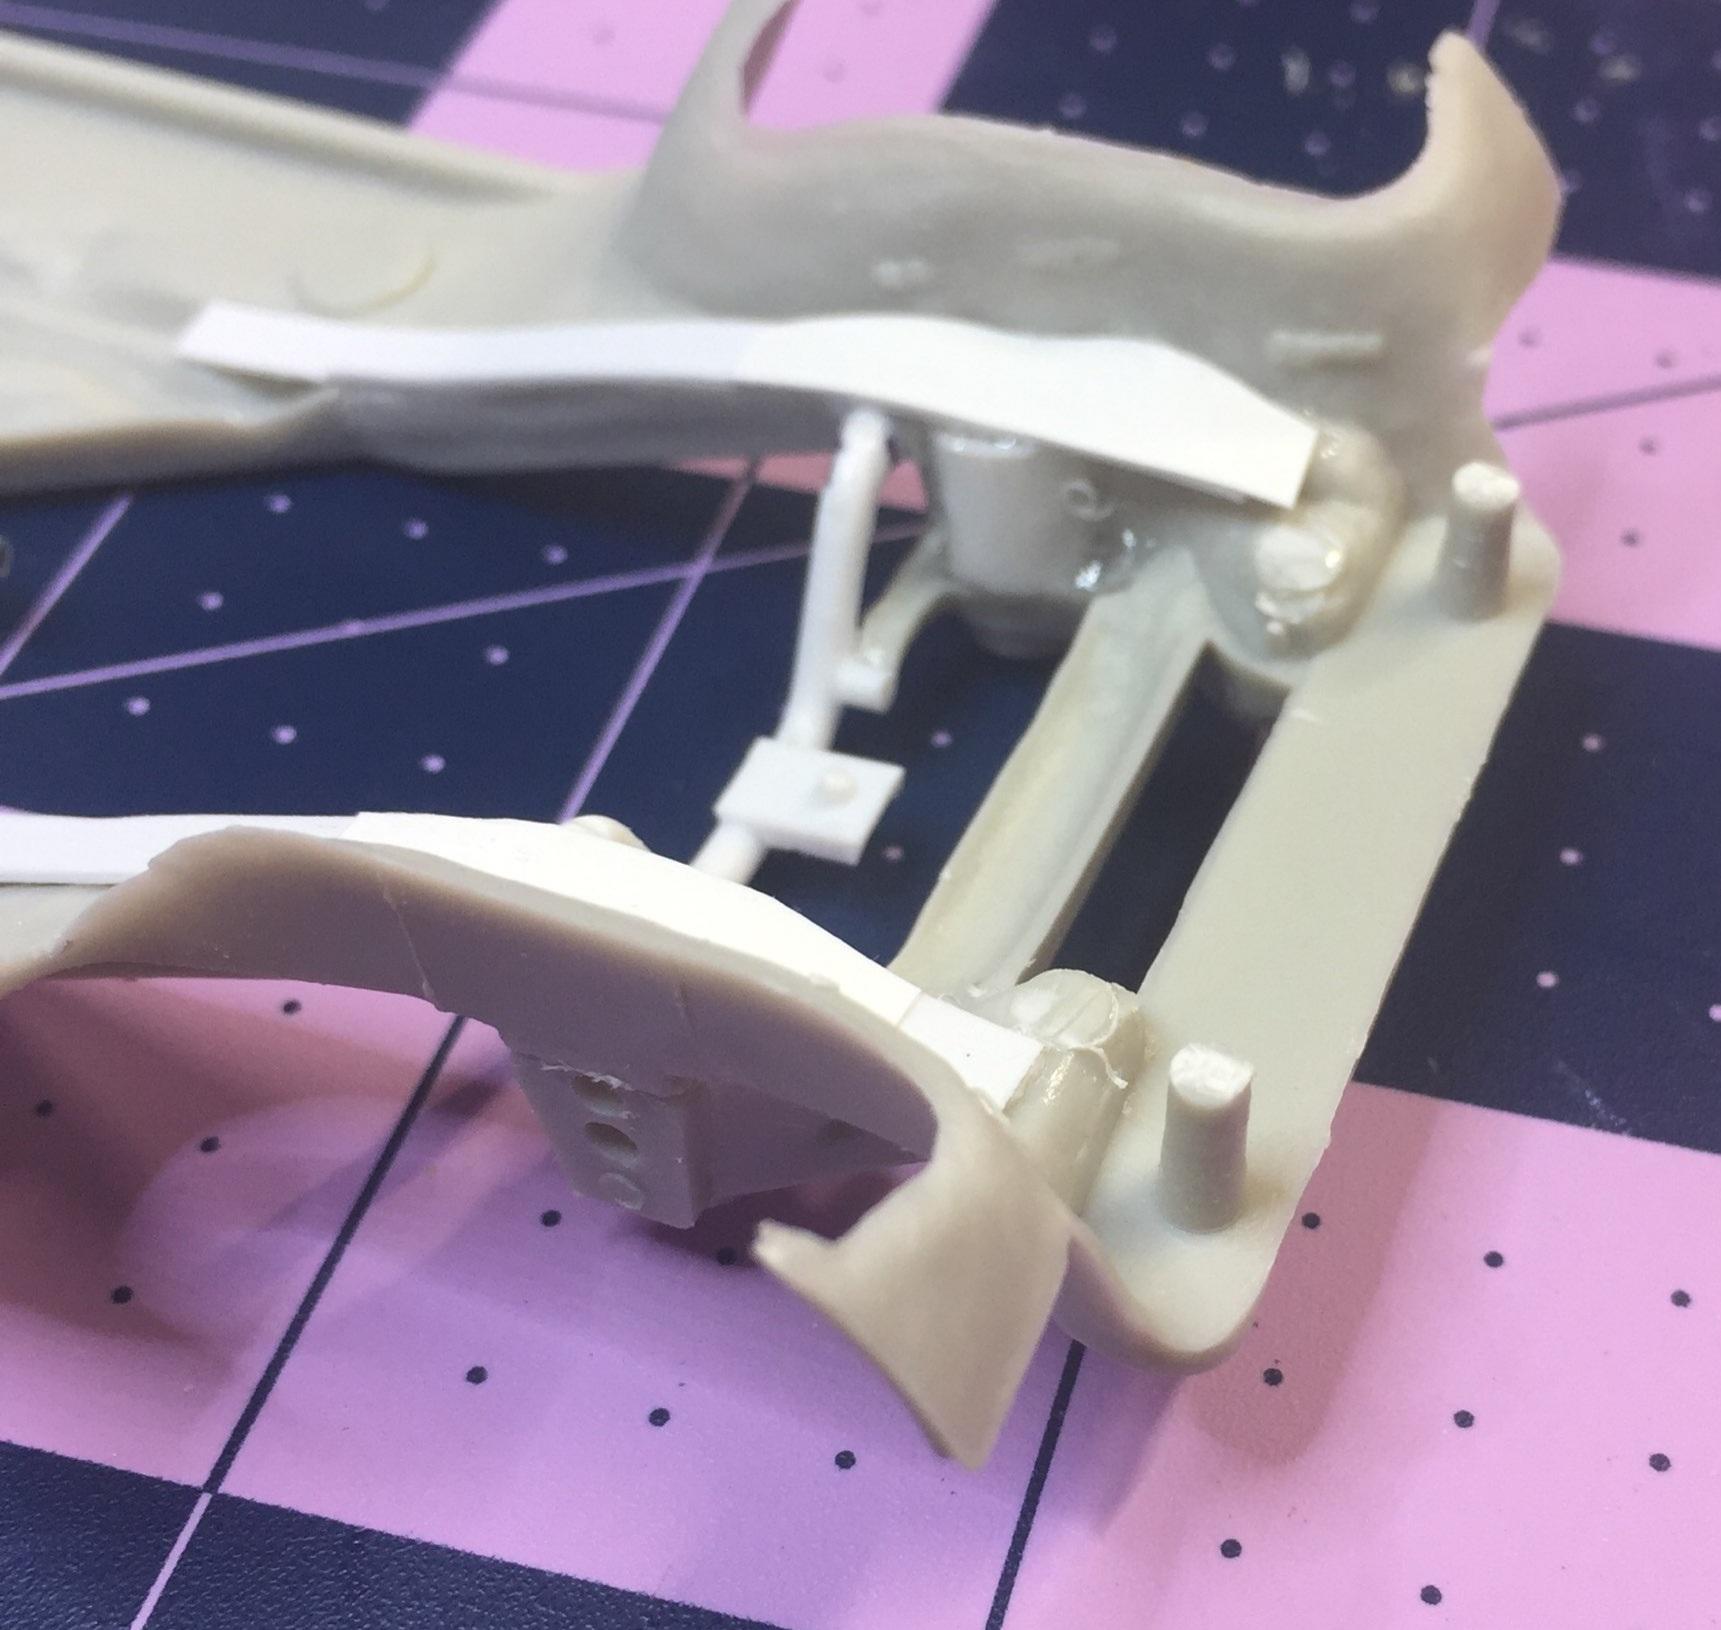
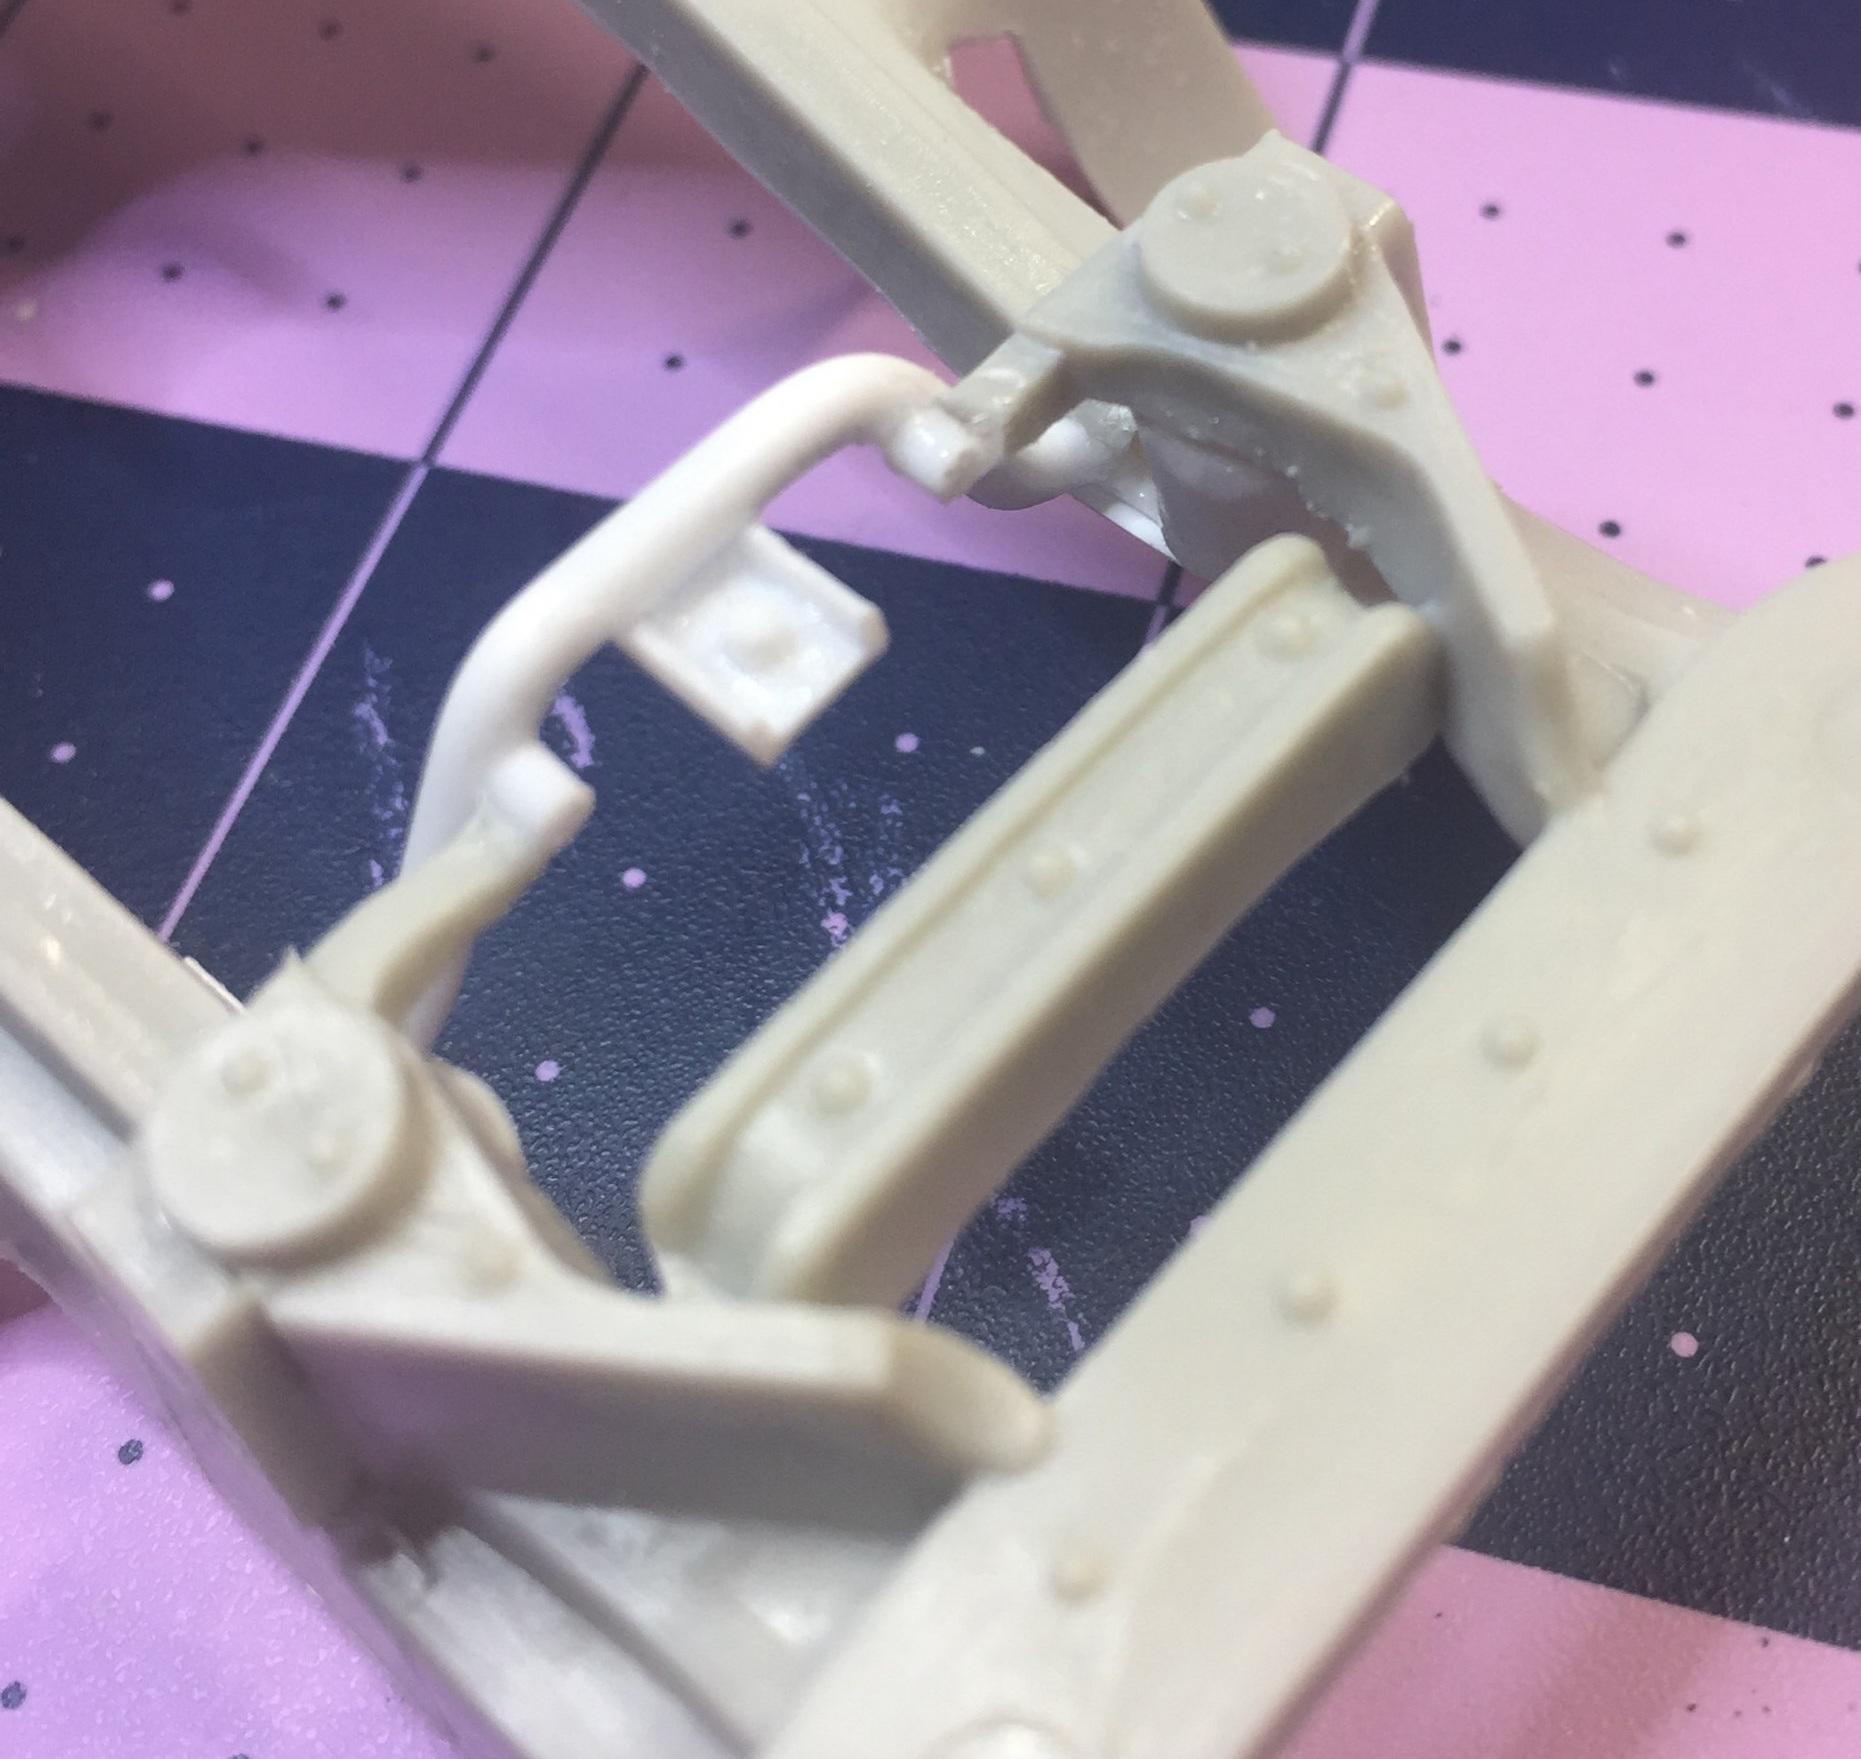
A bit more improvement on the front of the frame. I wanted the lower A-frames to attach to something so I faked a front cross member and frame horns. It's about all I could do for it. Anyway, here's some mock-up pix for your inspection. Here I have located the rear wheels in the stock height holes and the fronts in the "lowering" holes. A little rake - good? bad? Thanks for looking and your comments are welcome
-
This was an open box special, Bob. It was on Ebay for $12.50, I offered 10.00 and it was accepted. With shipping and tax it totalled $18.93. All the bags were sealed except the big chrome tree.
-
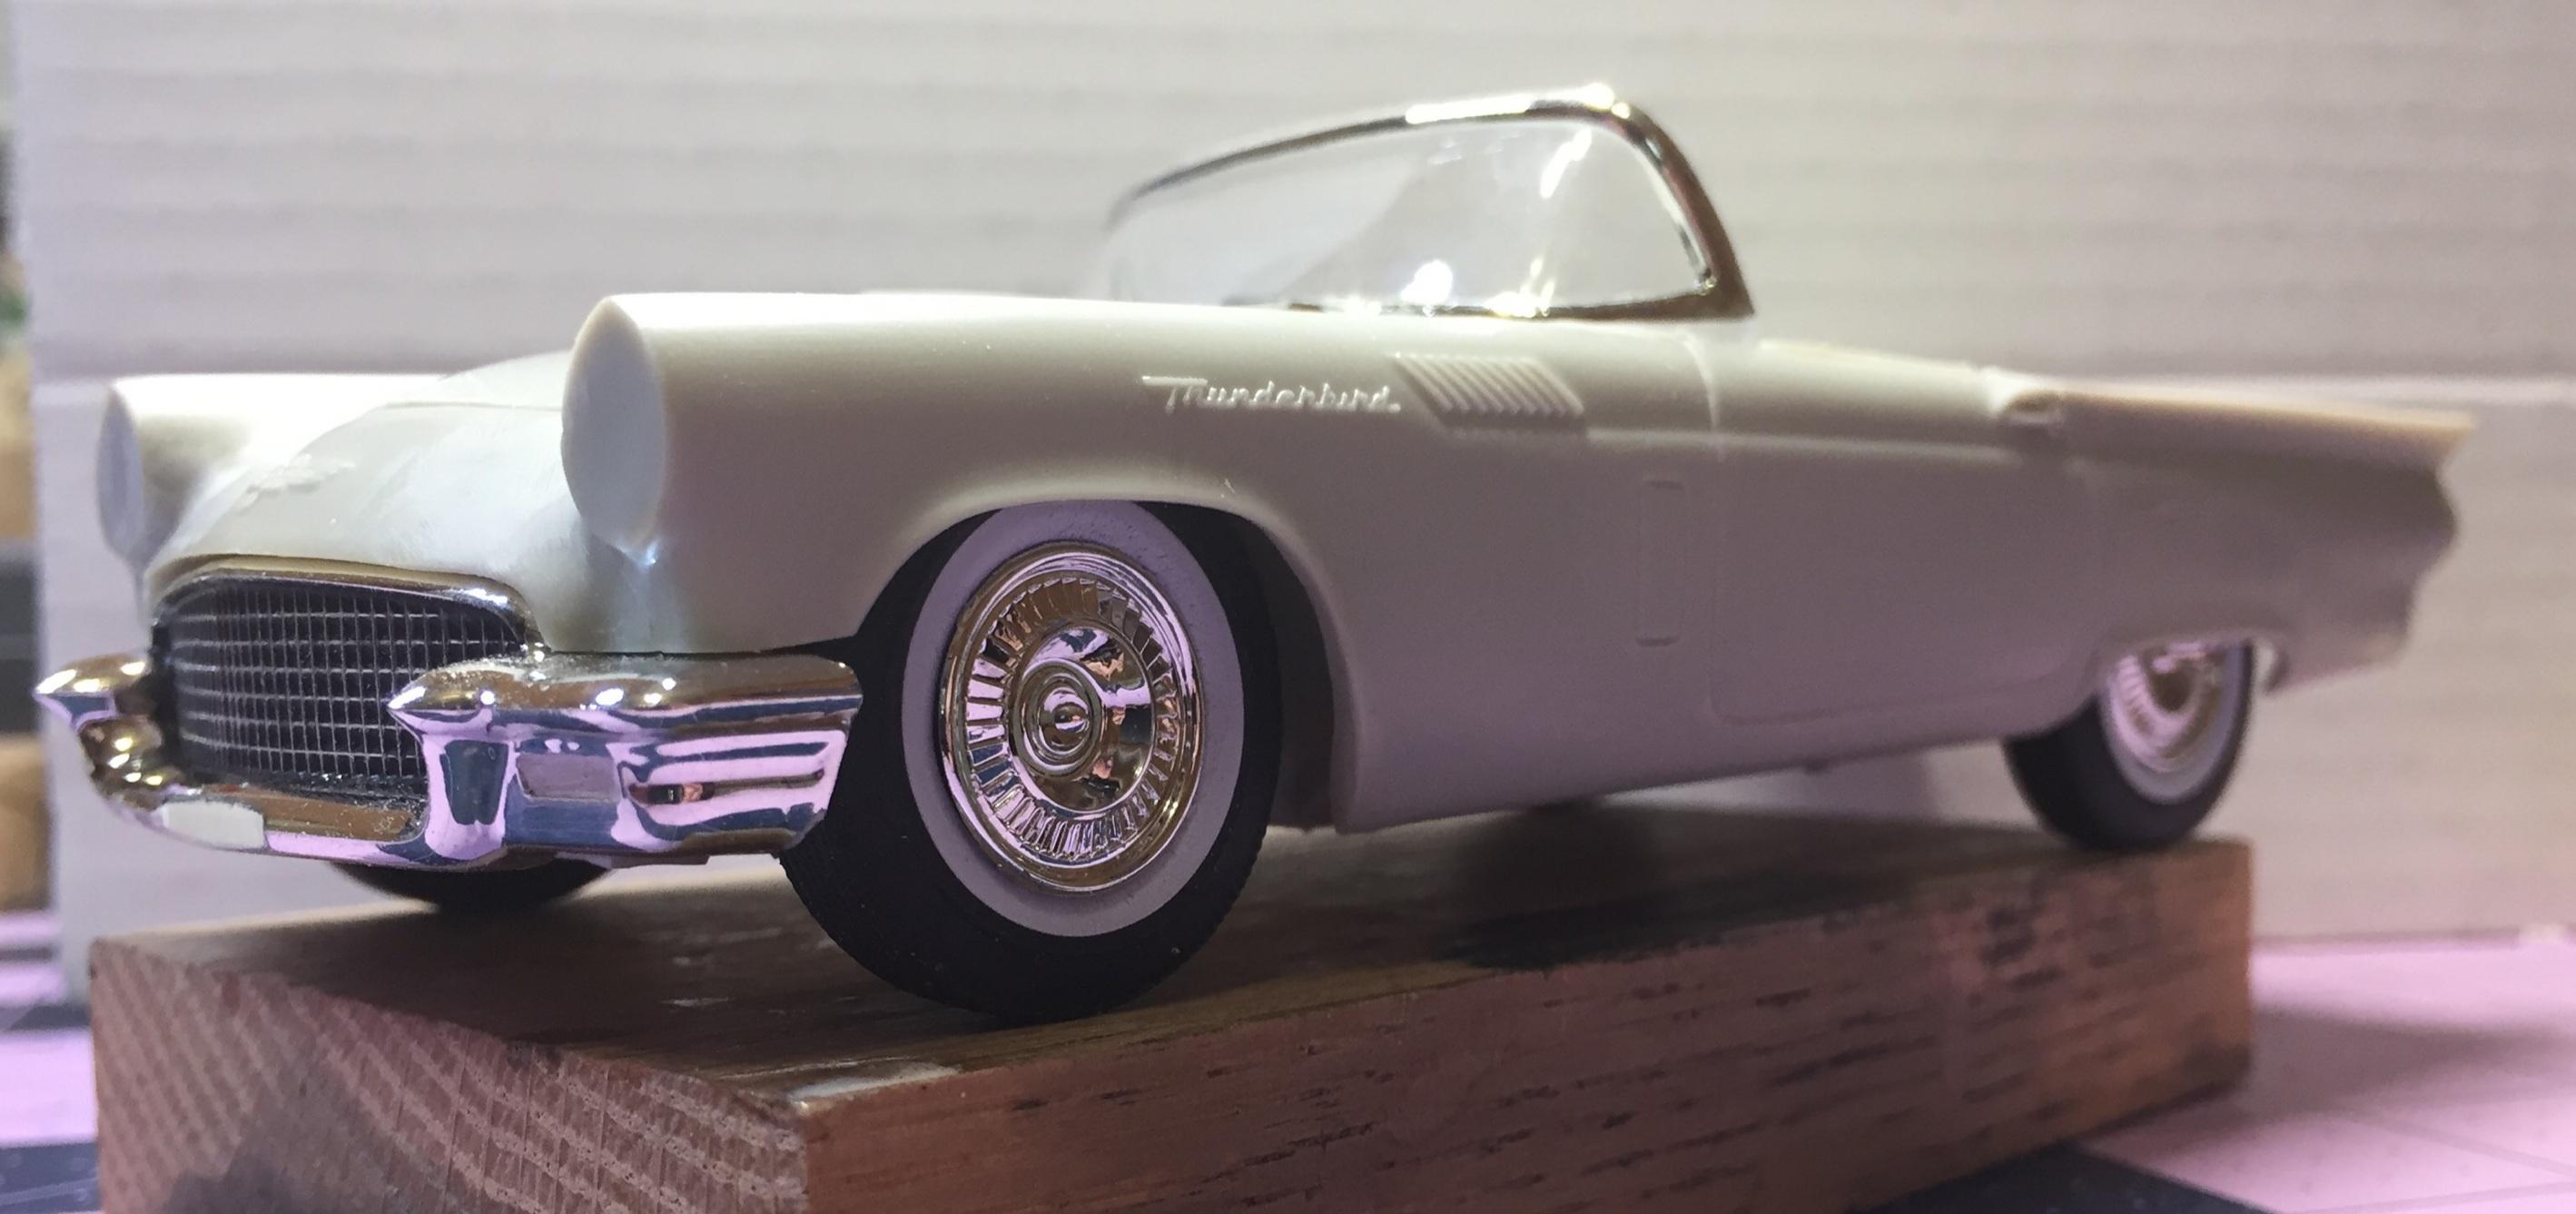
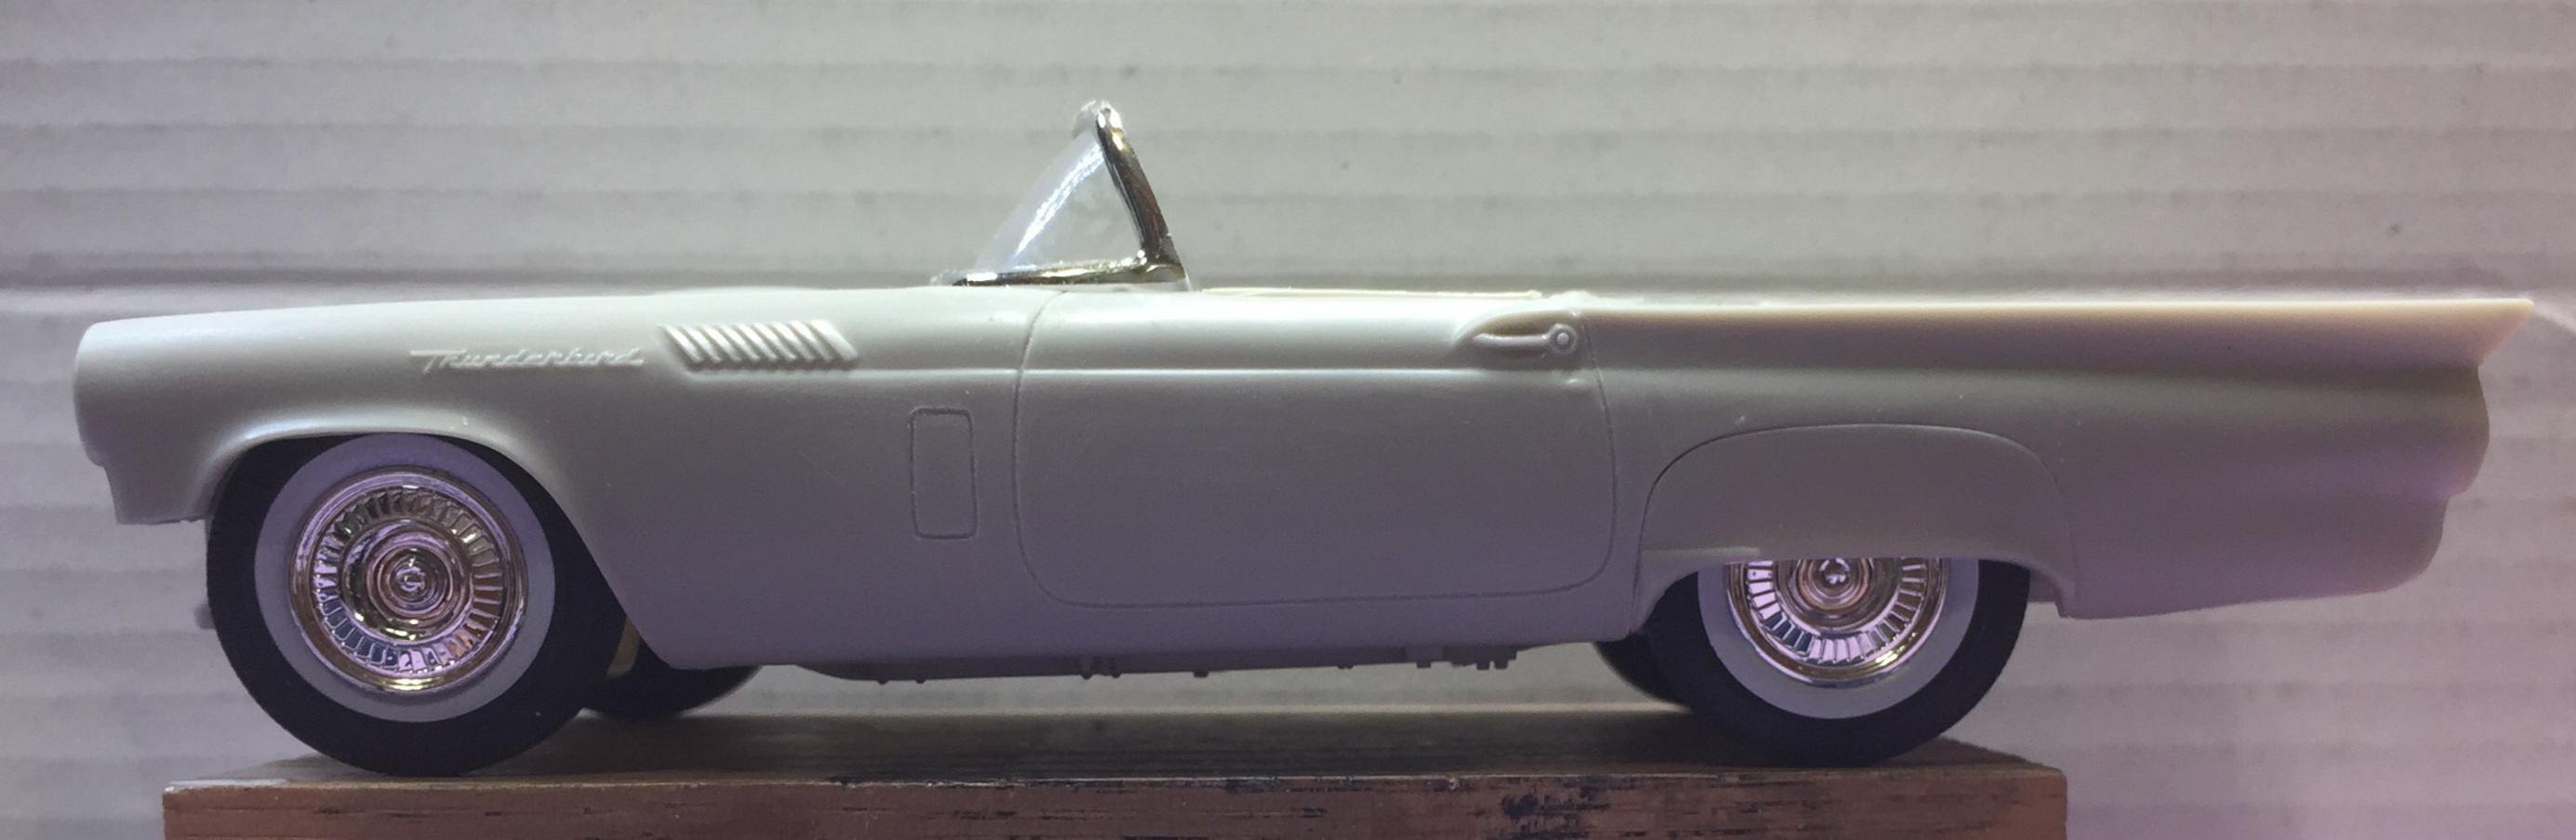
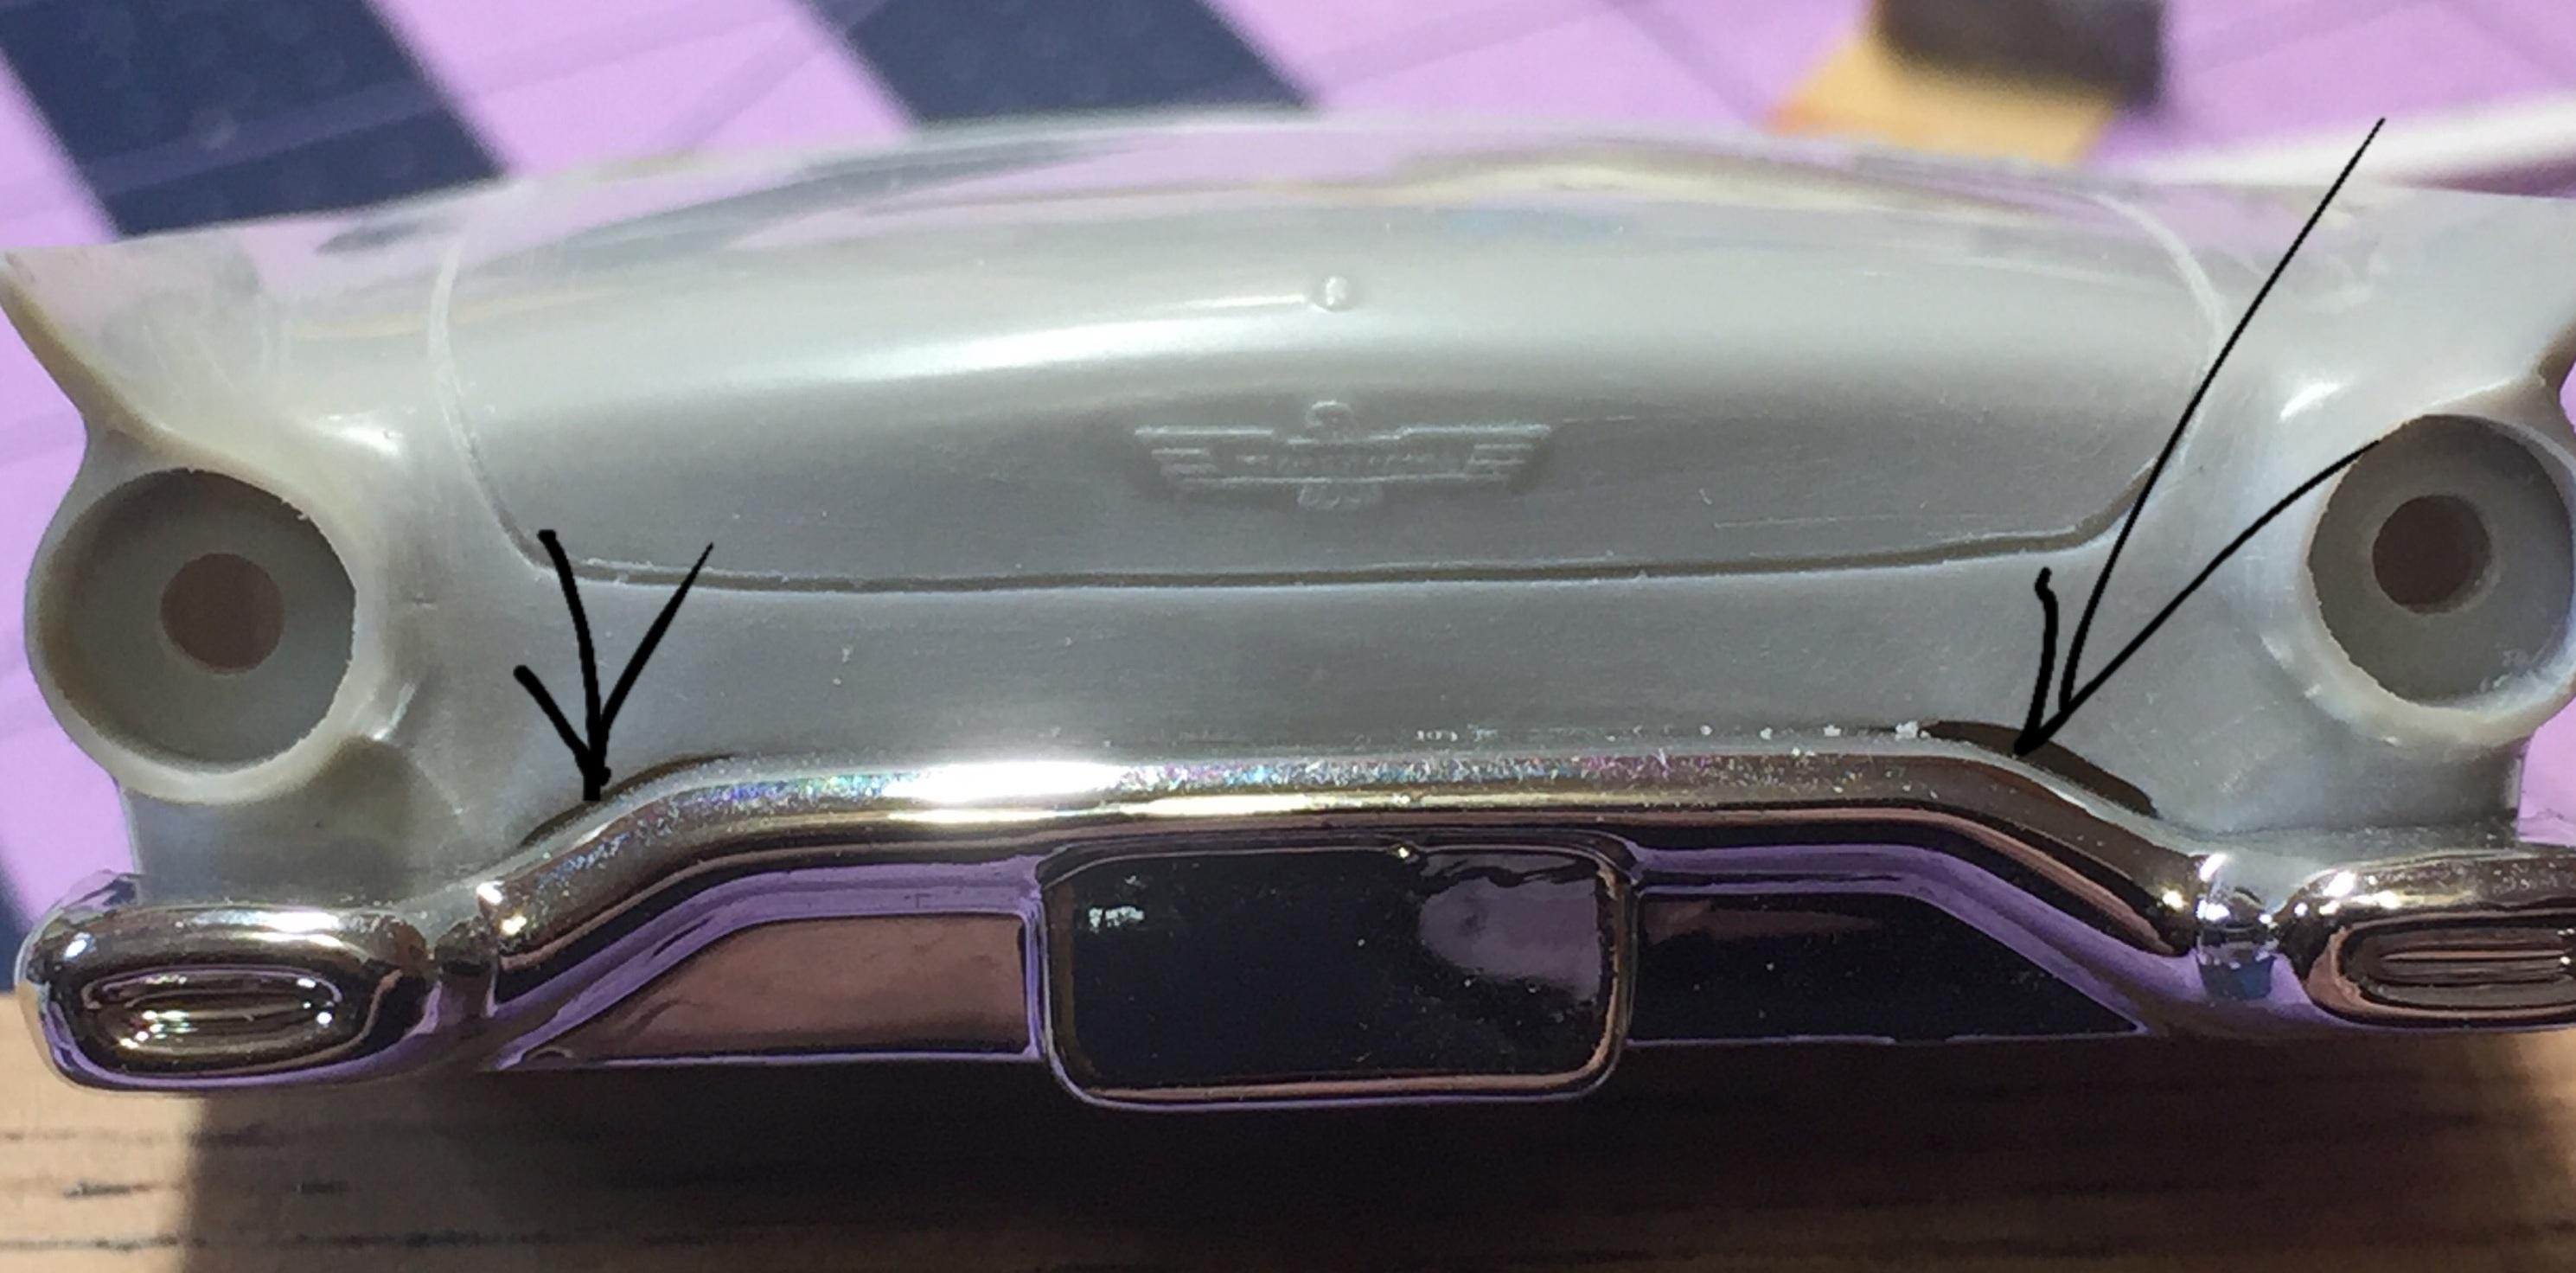
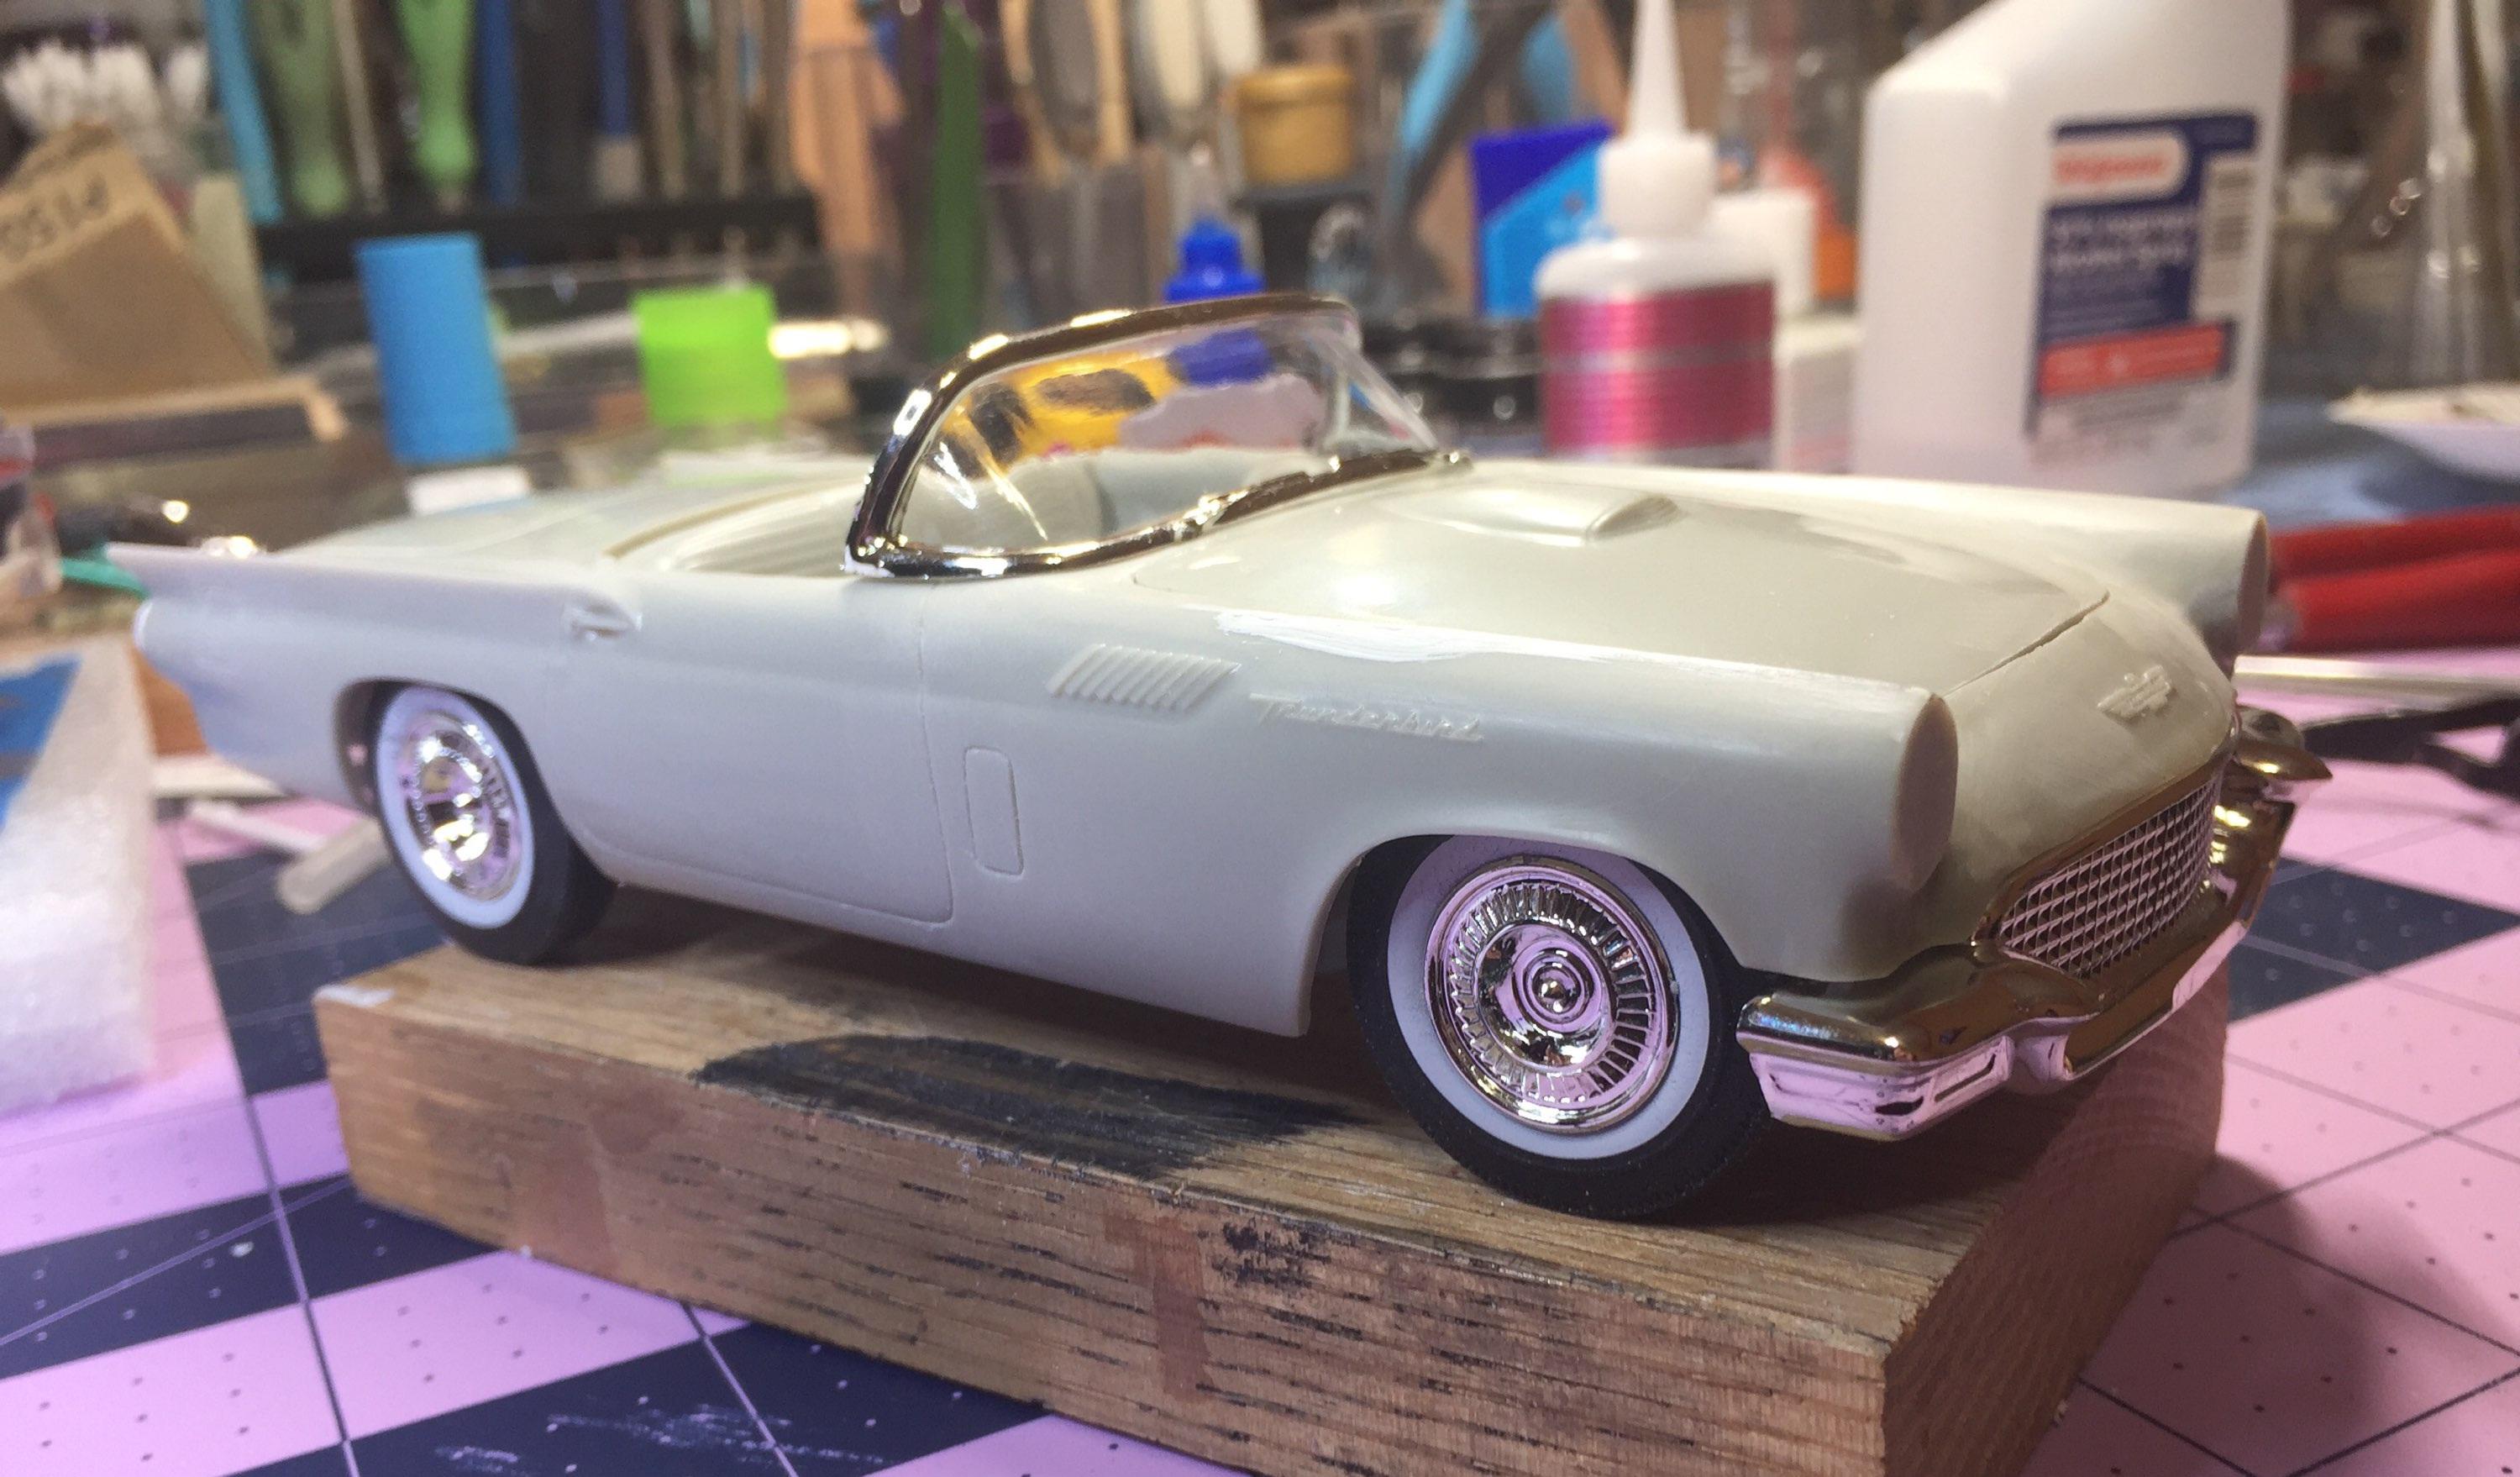
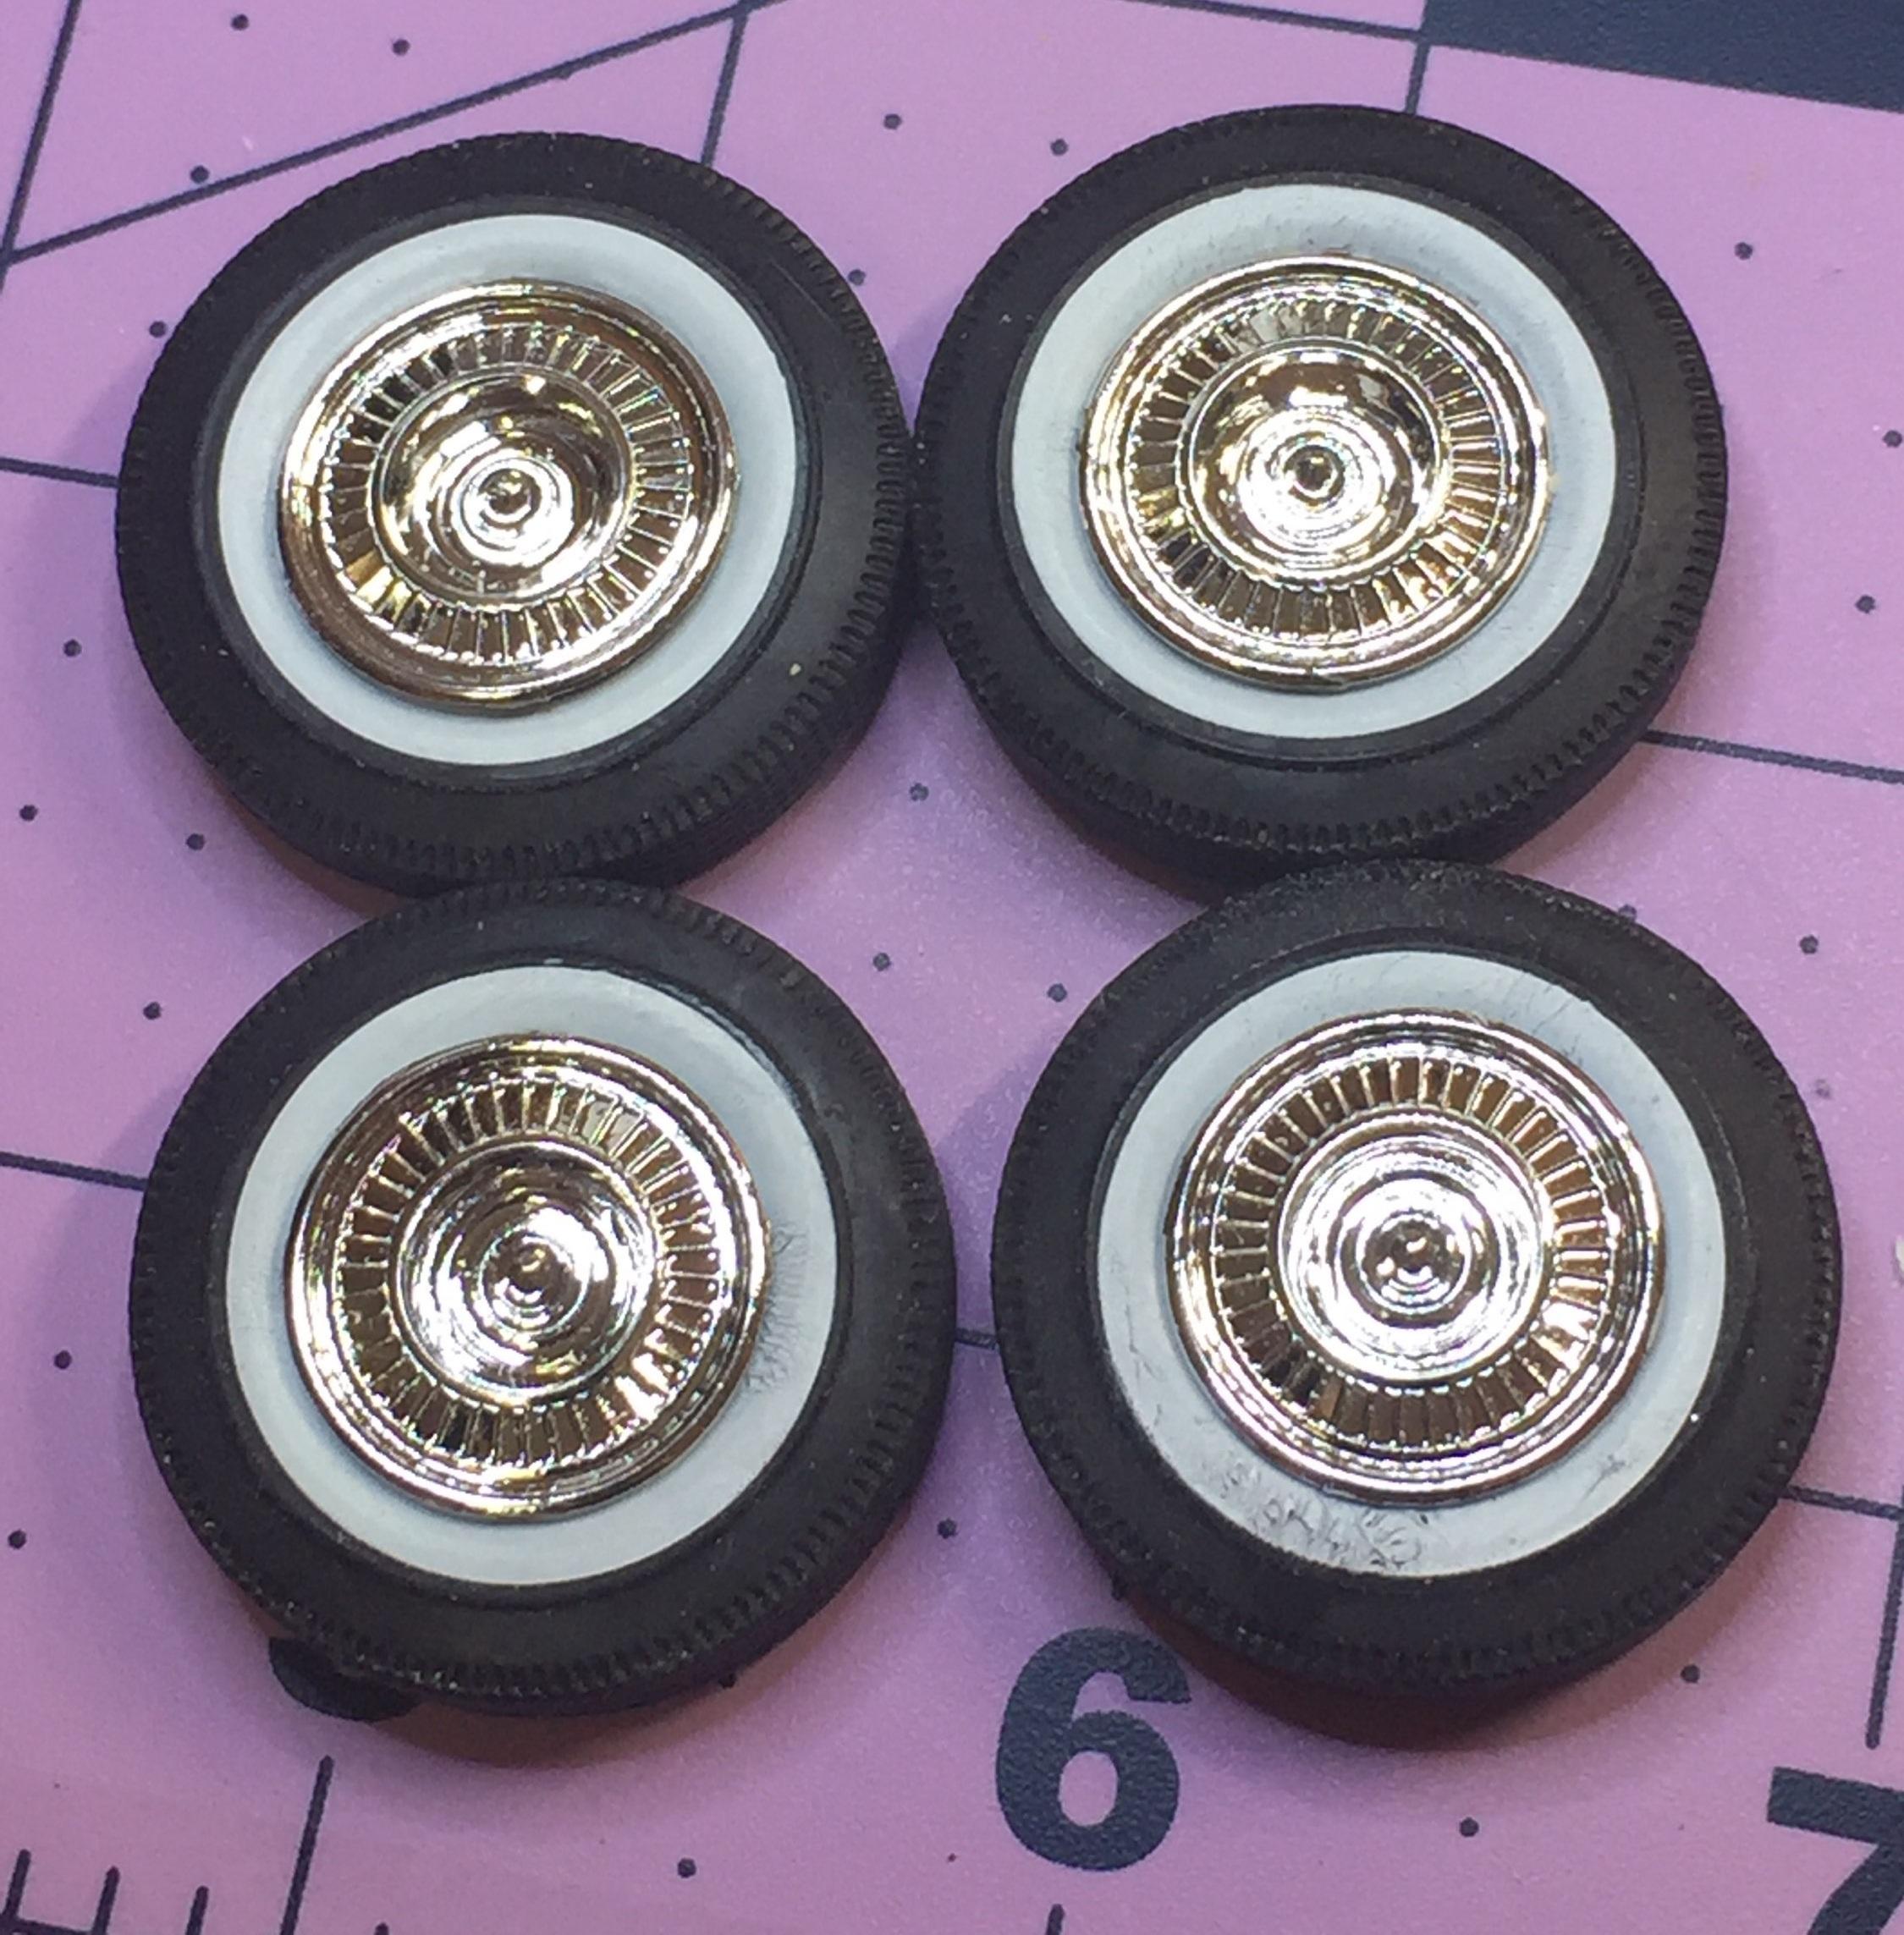
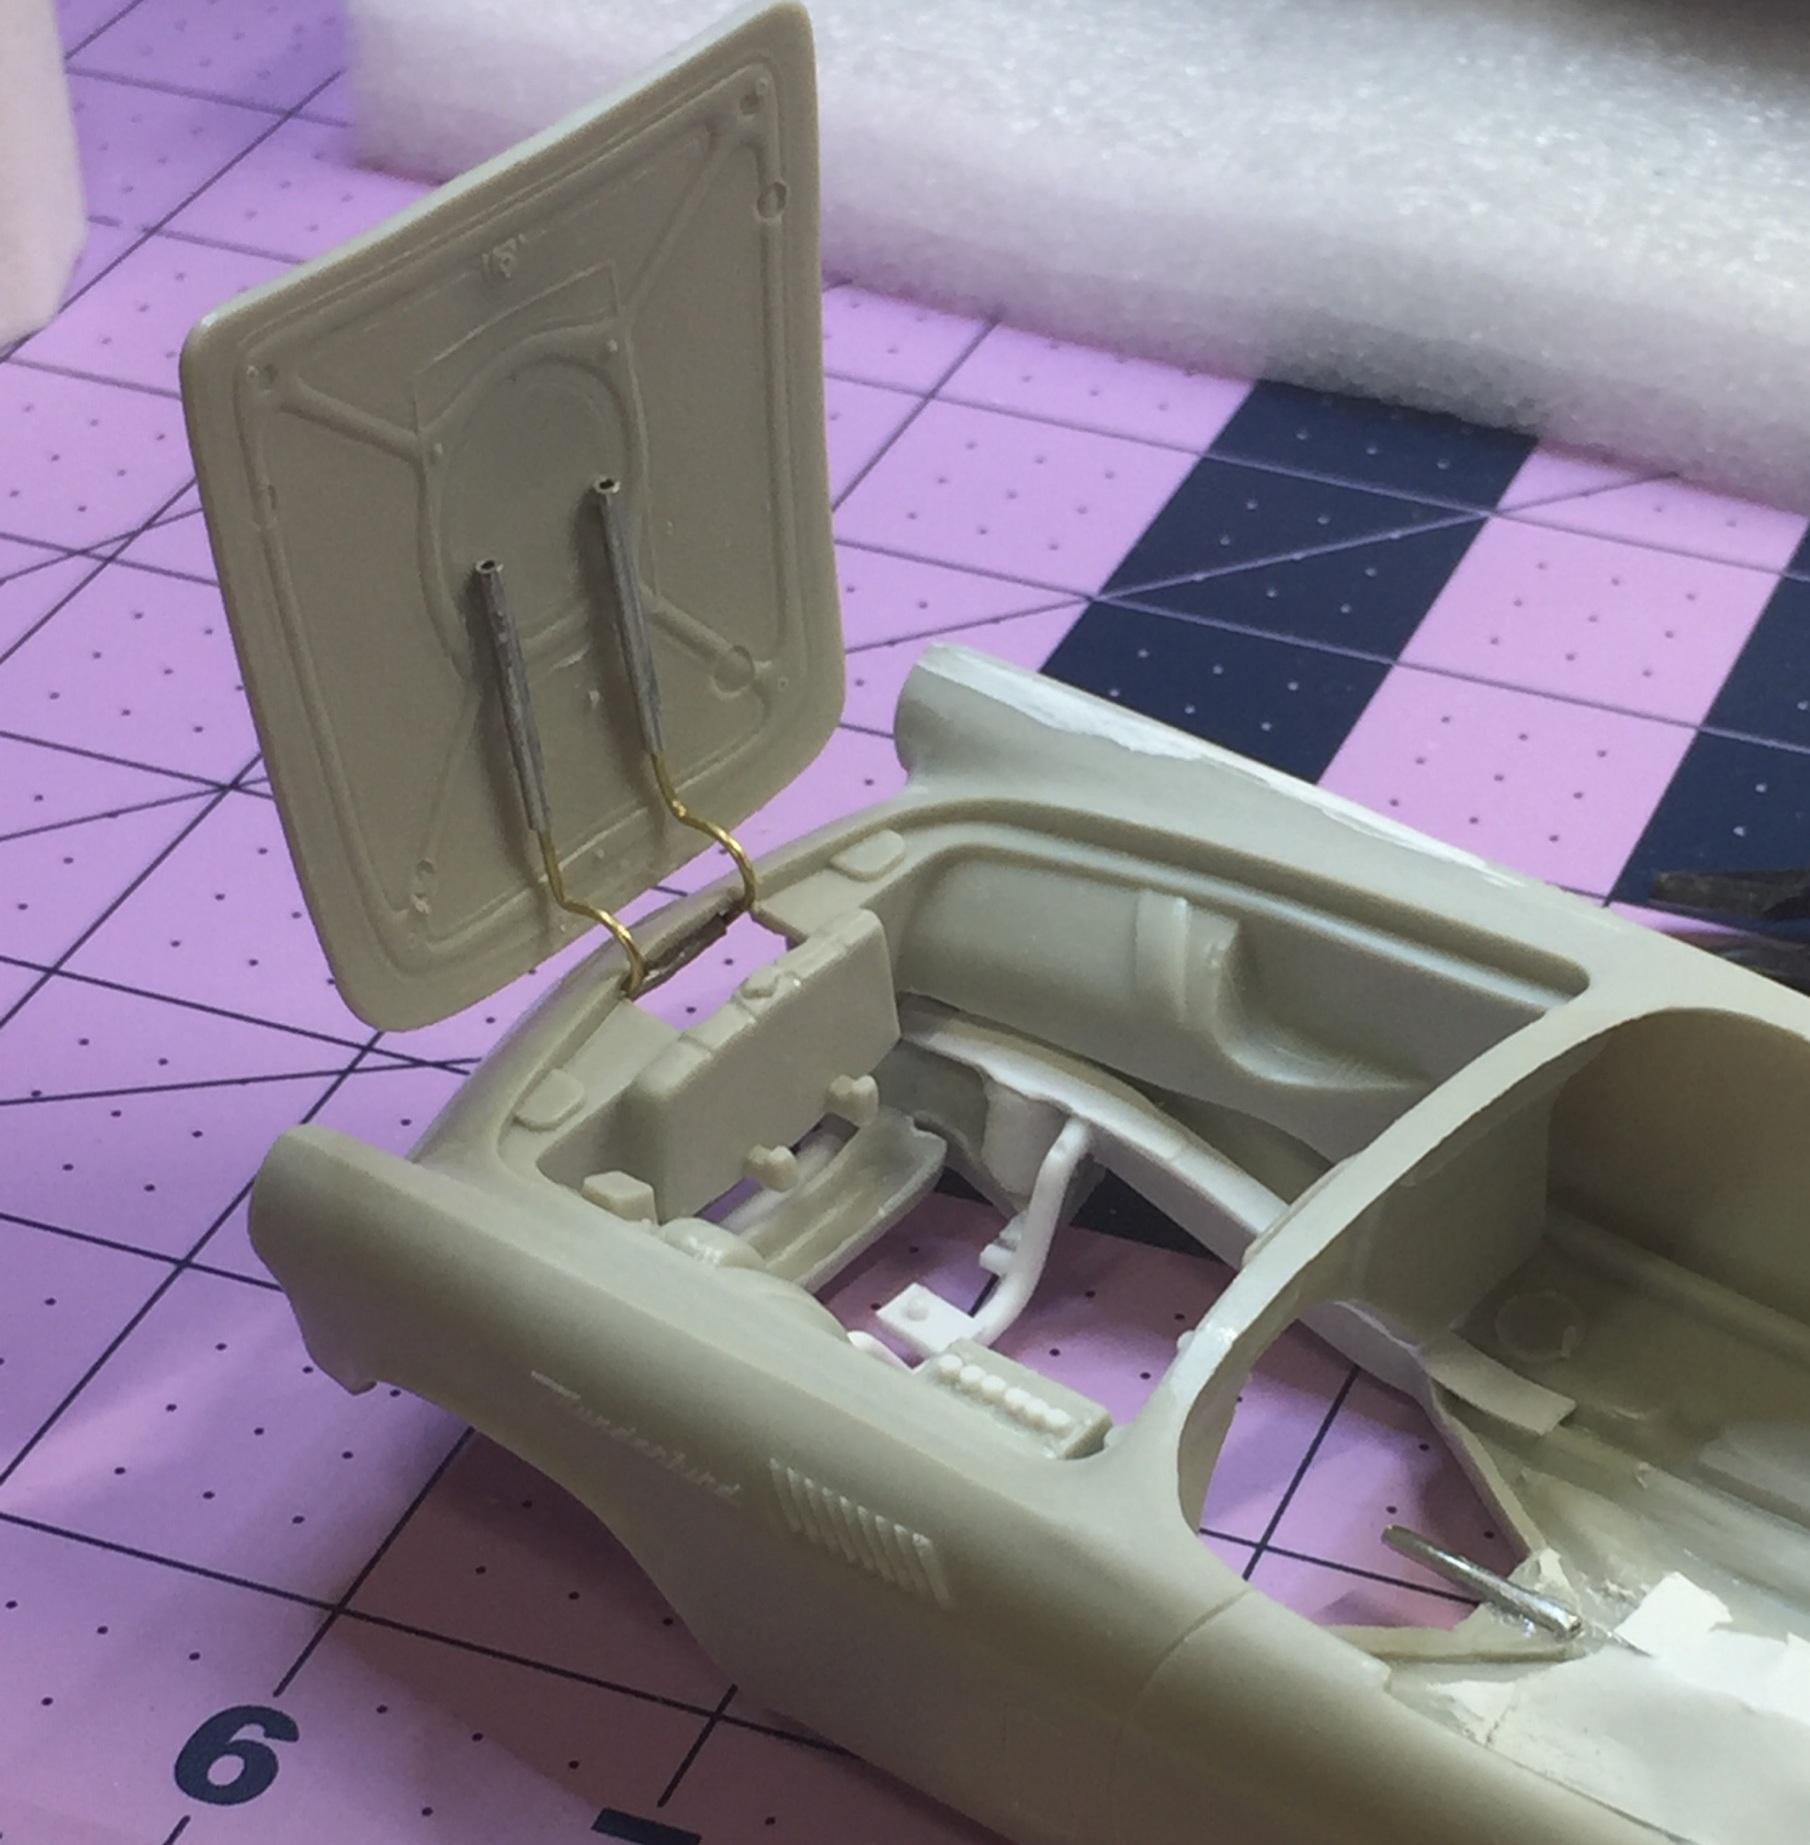
Oh David....yes it does look like it's ready for a day at the lake. This is the inners without the outers- they kept falling out ?. But never mind, I cracked open one of my....wait for it.....'41 Plymouths and lo and behold.... WHITE WALL TIRES! I remembered this from a previous endeavor( that I still haven't finished ?.) Perfect fit! Now this is the sort of thing you find in a kit like the ancient AMT '57 Thunderbirď It seems my inner wheels have contracted a case of Monkey Pox. Well, after some moderate fiddling I got the hood hinge to work reasonably well. I know, but I had to try. There was no spring clip in the box so ....anyway, this project continues to provide me with a fair amount of "fun" so maybe I'll finish this one. Note to self: replace radiator tank.
-
I watched some of this. Everything was fine until HPI guy started on the chrome engine. It made me very ......I dunno....I couldn't watch it. Knowing where it was going, it was full stop for me. I appreciate you putting it up though, it was enlightening ? to say the least.?
-
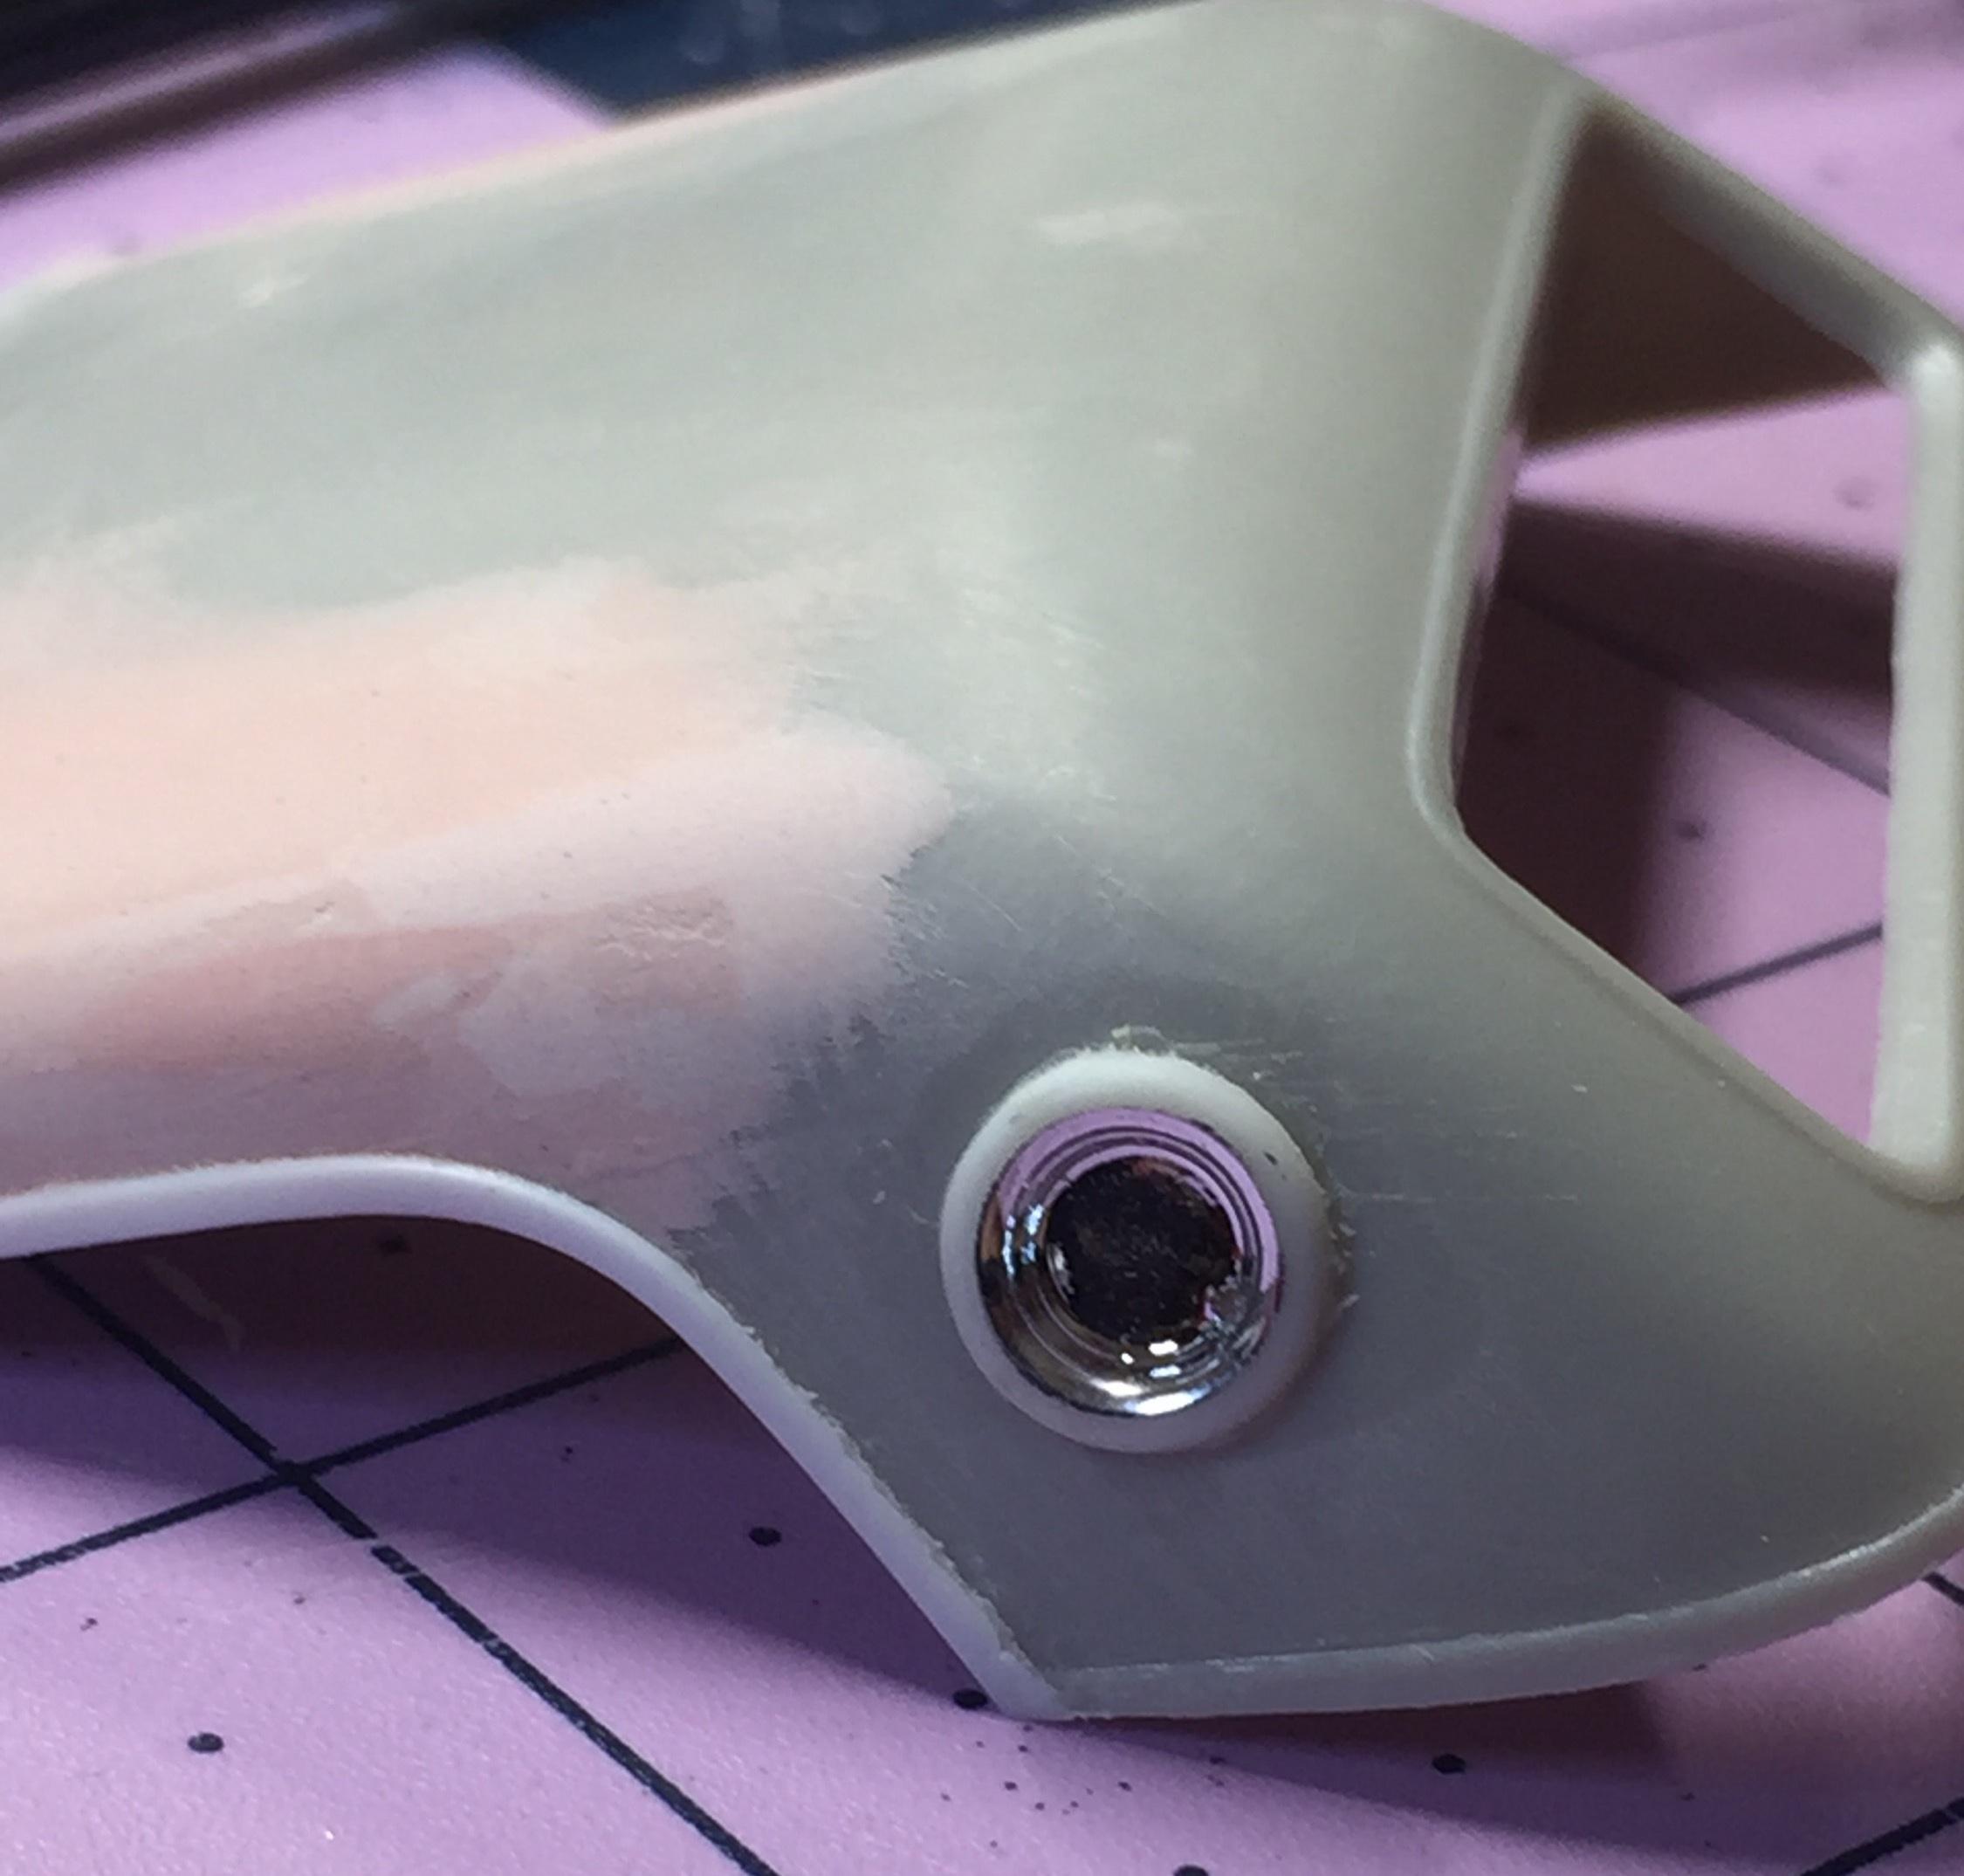
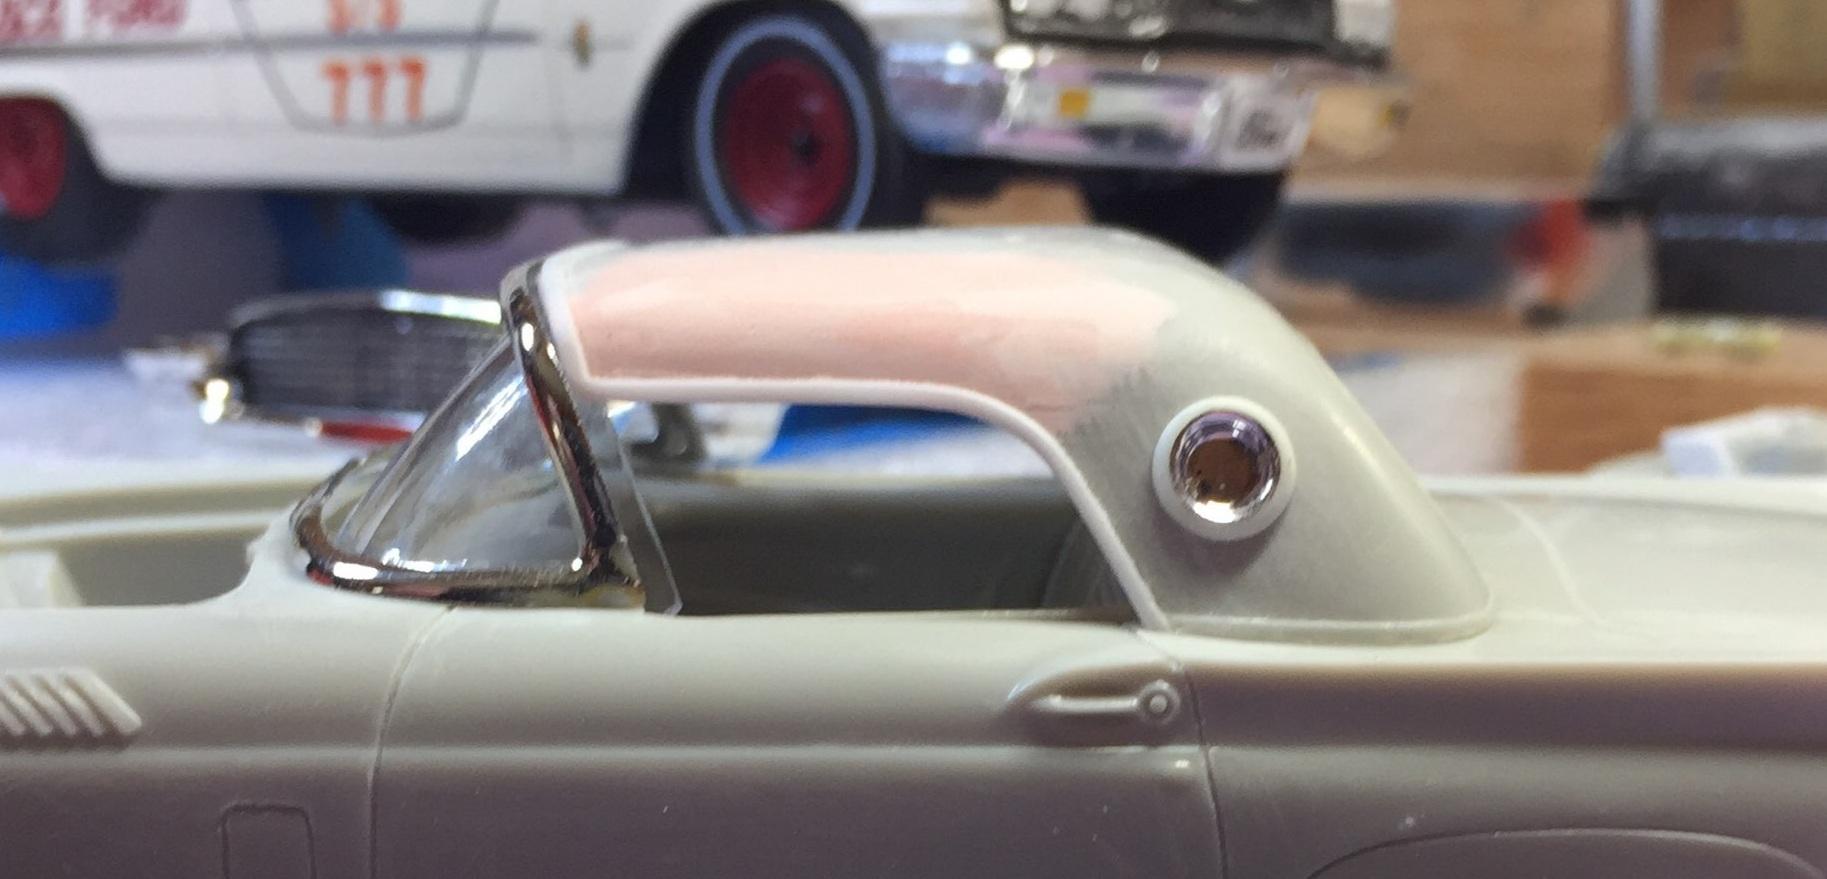
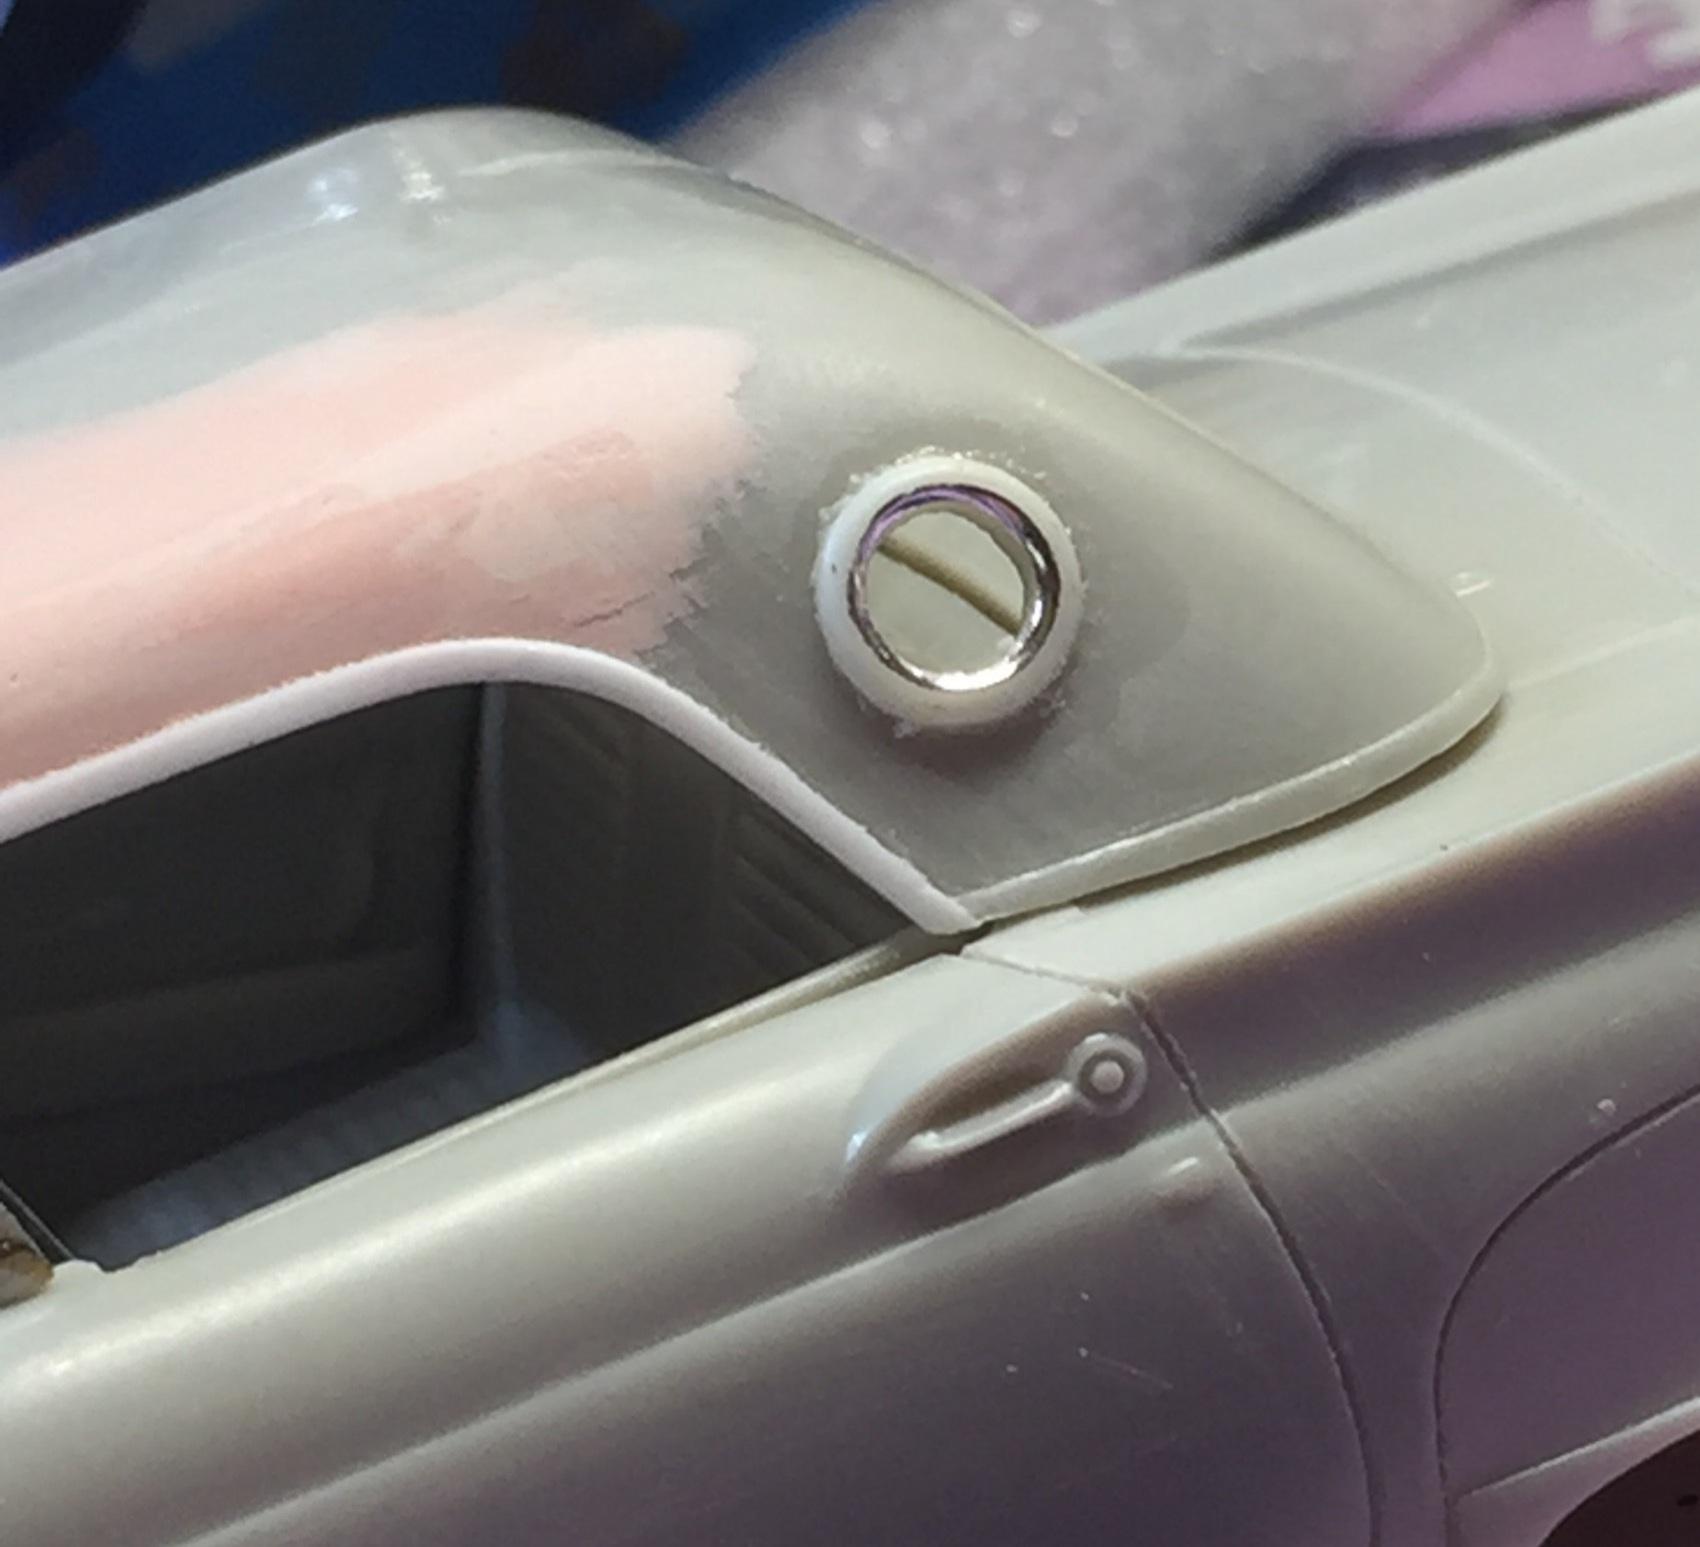
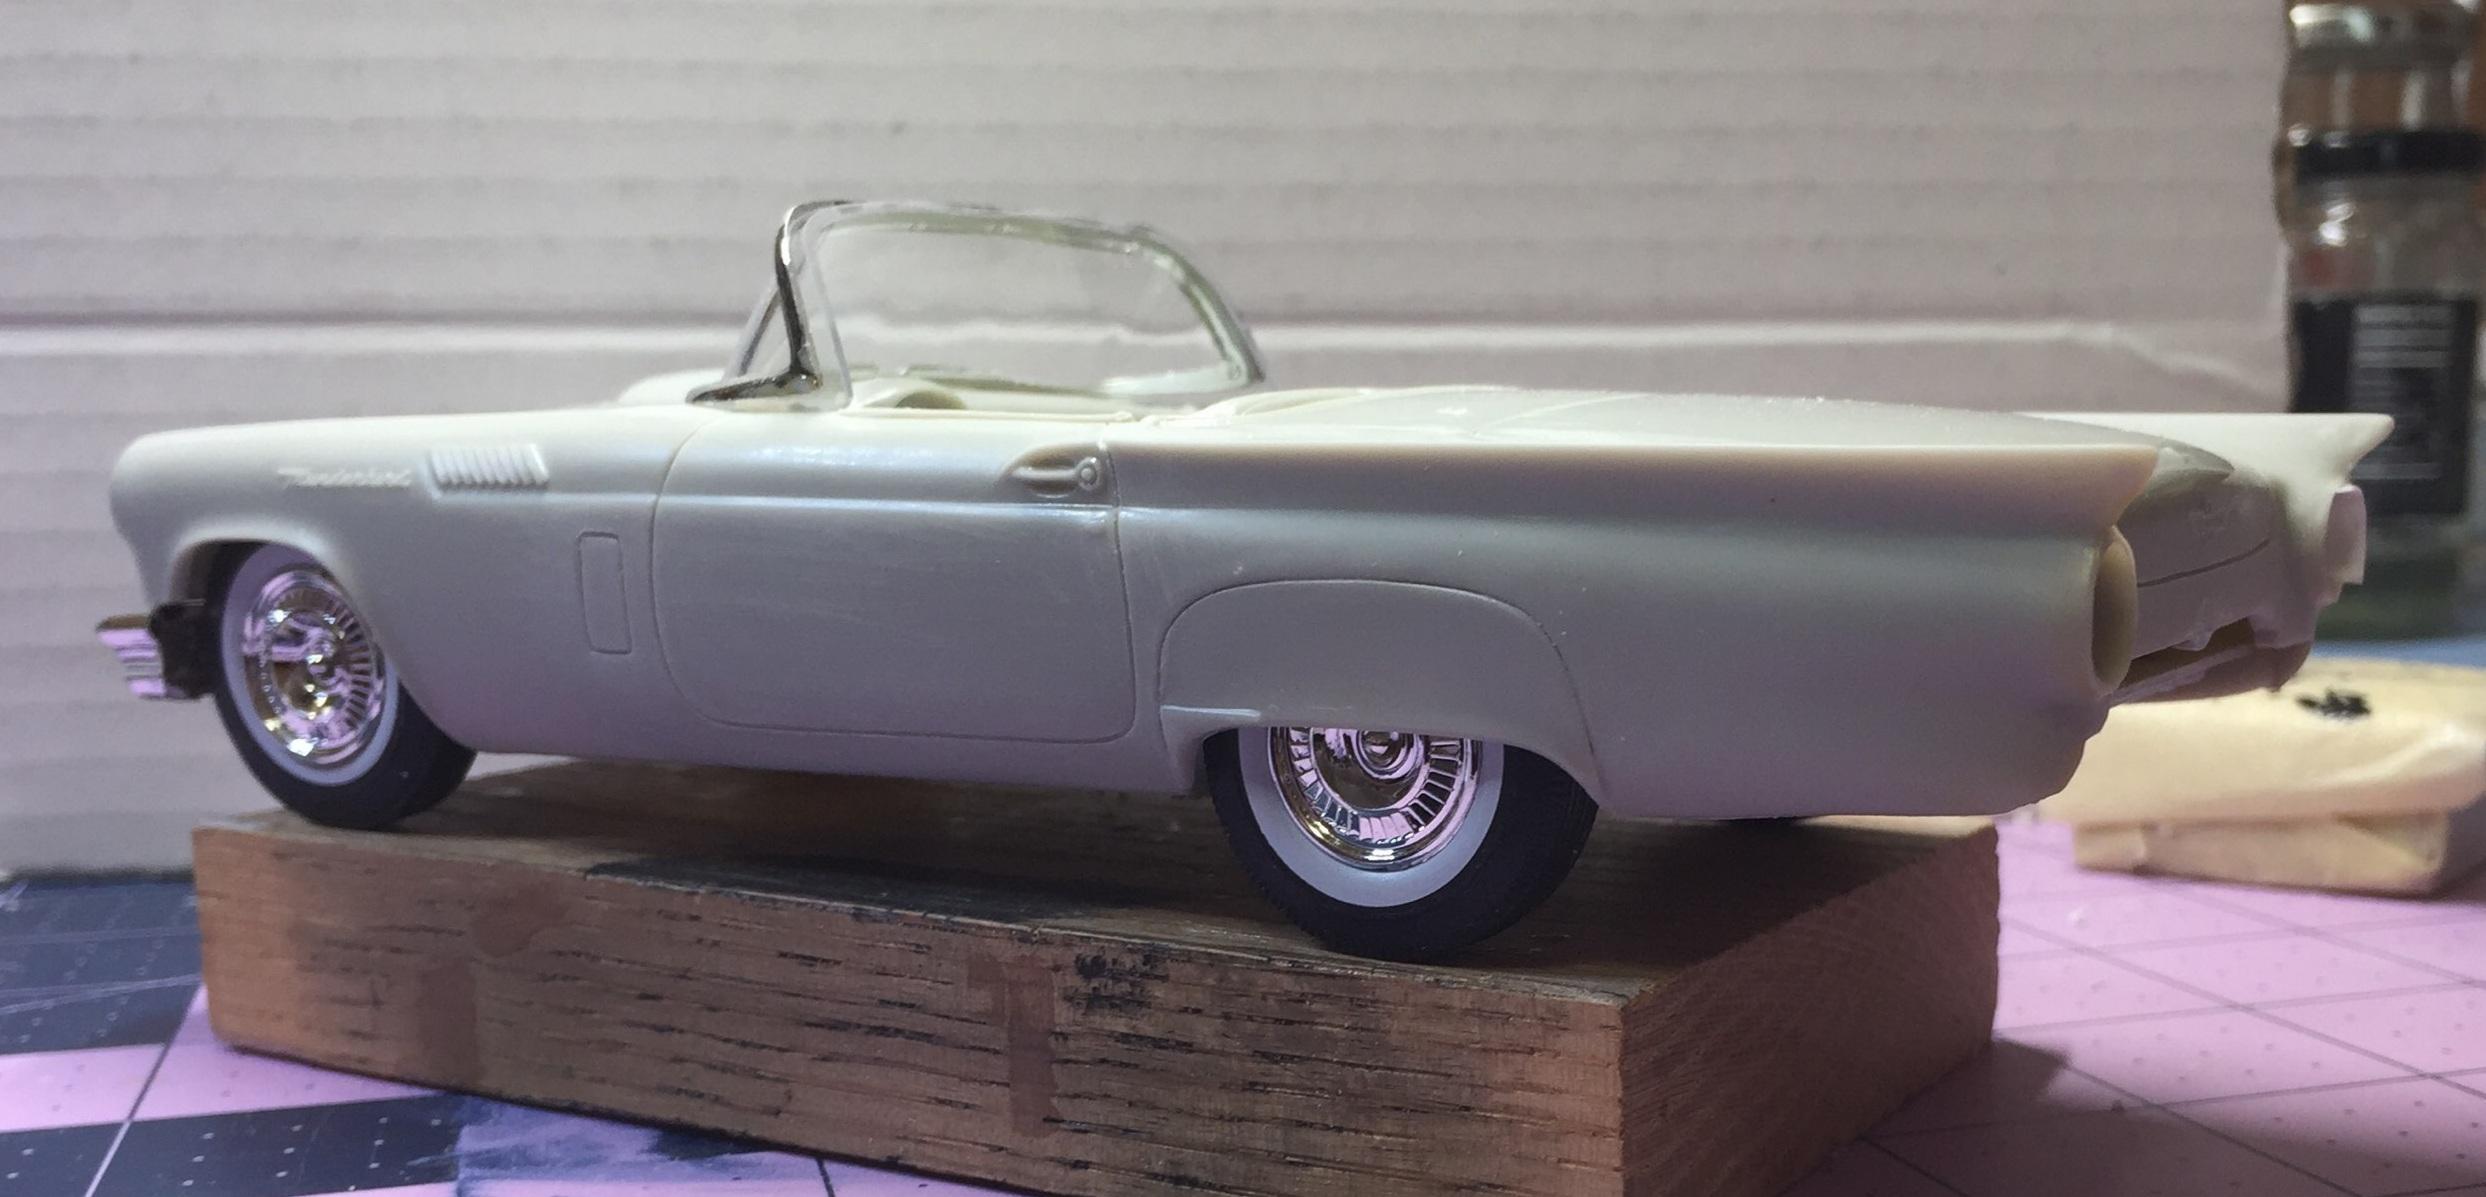
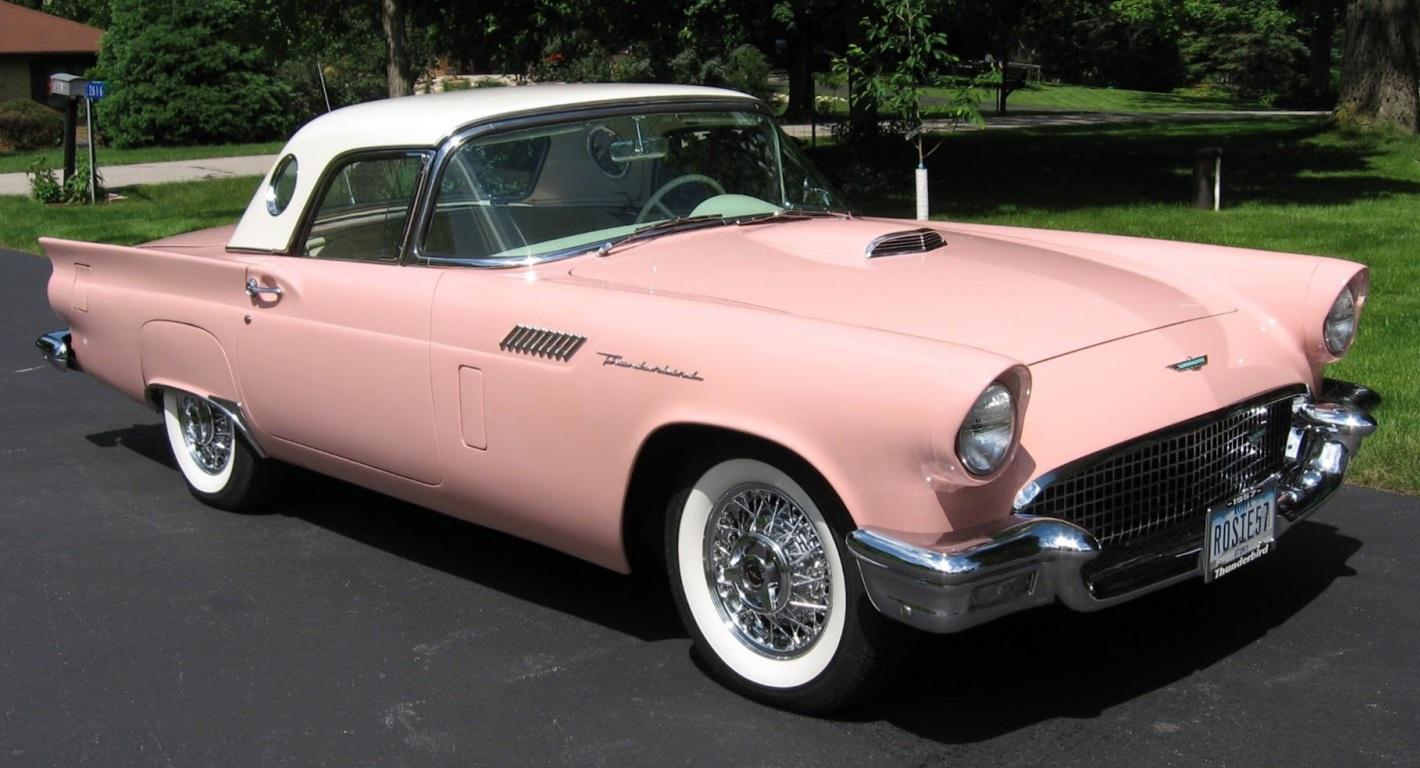
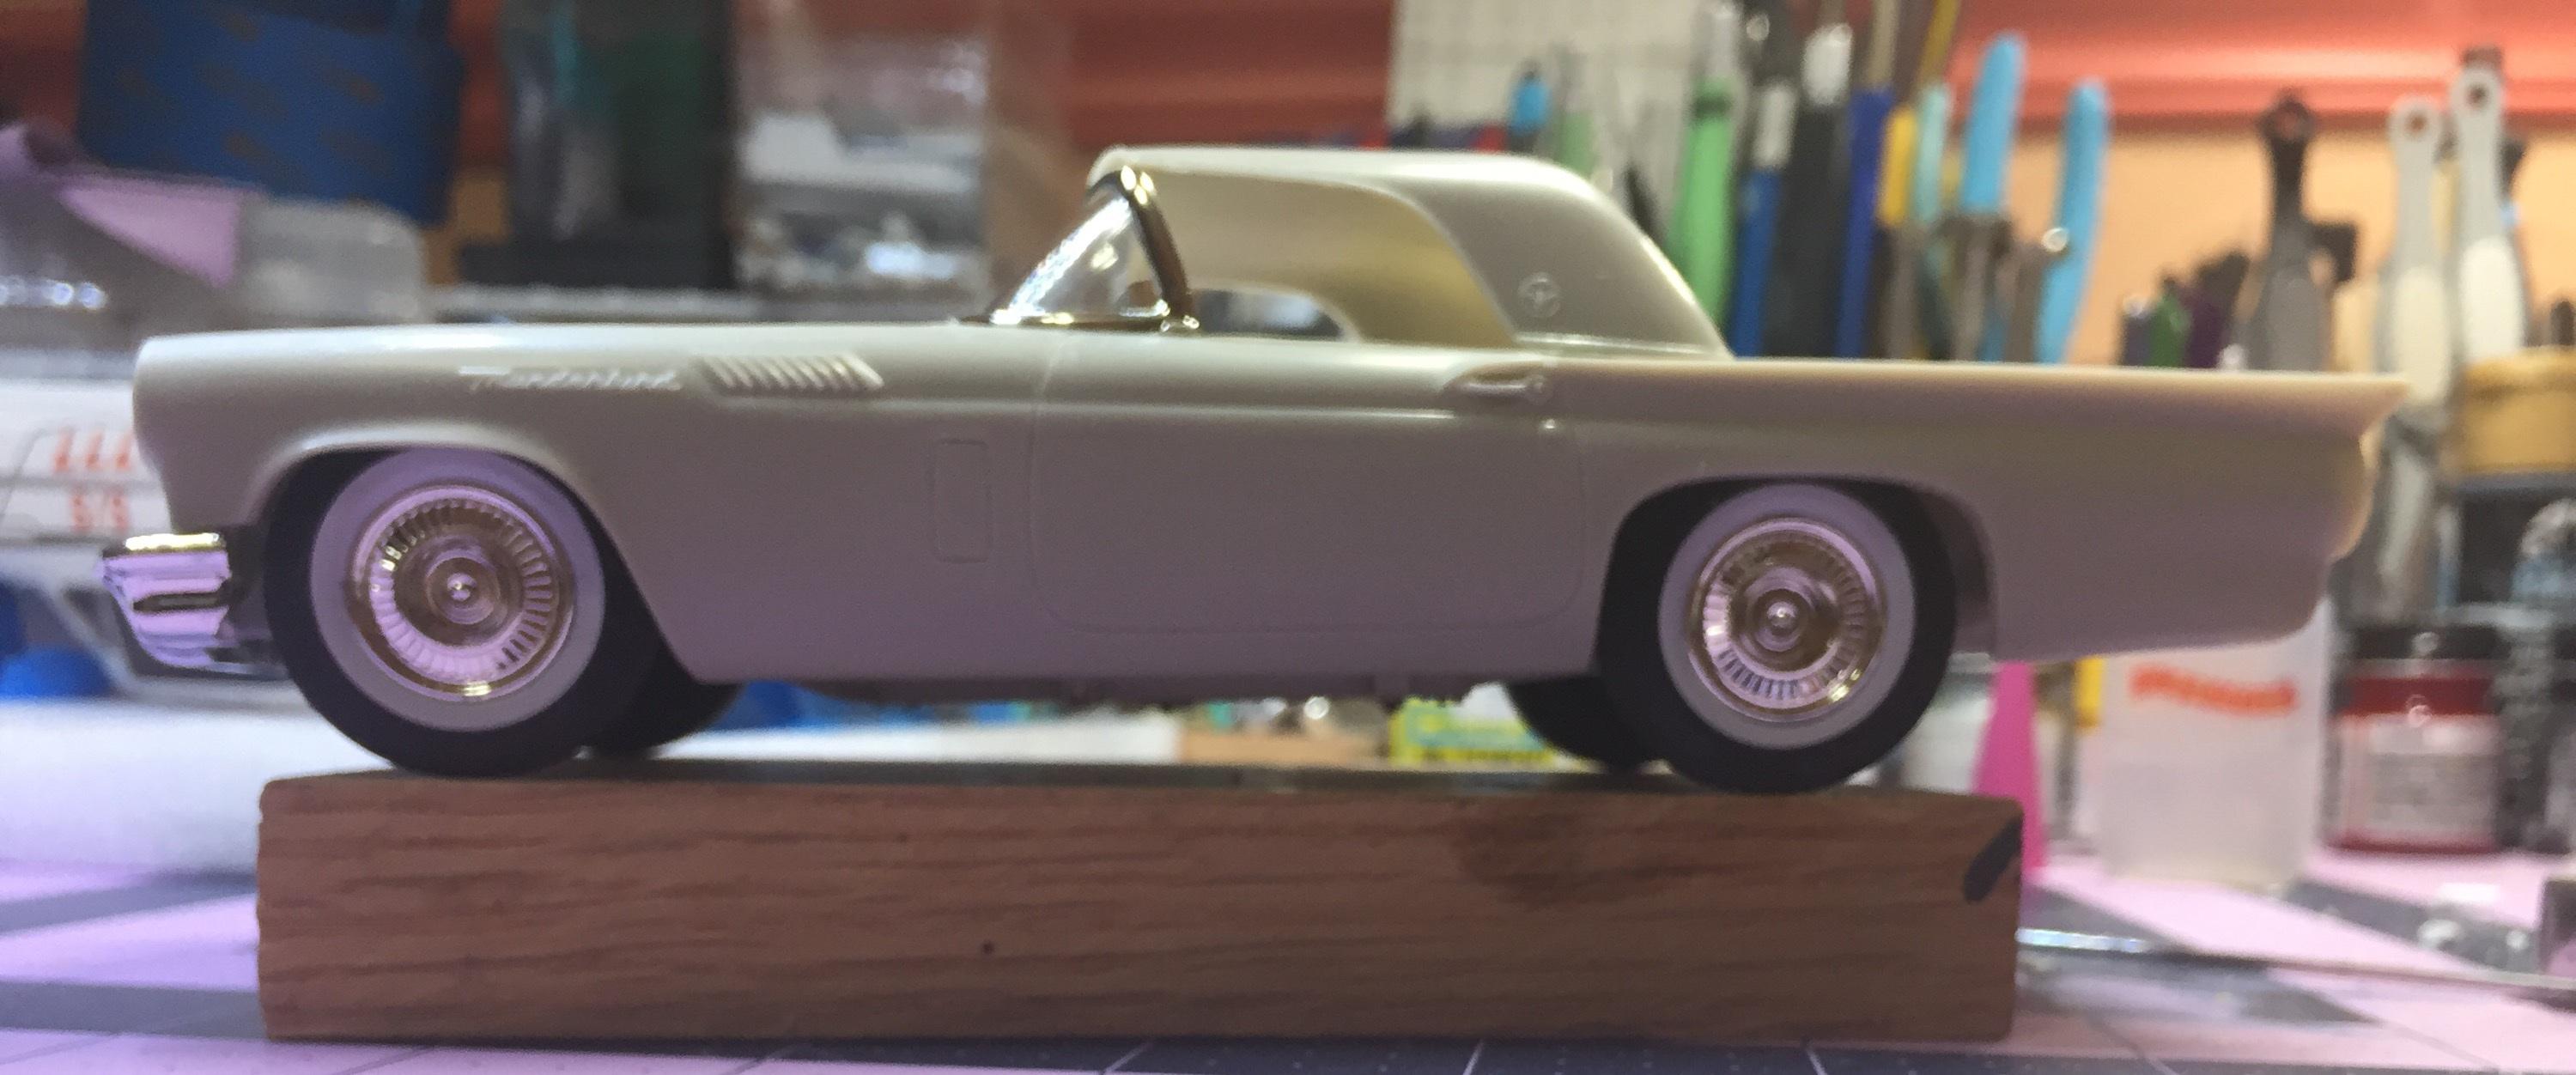
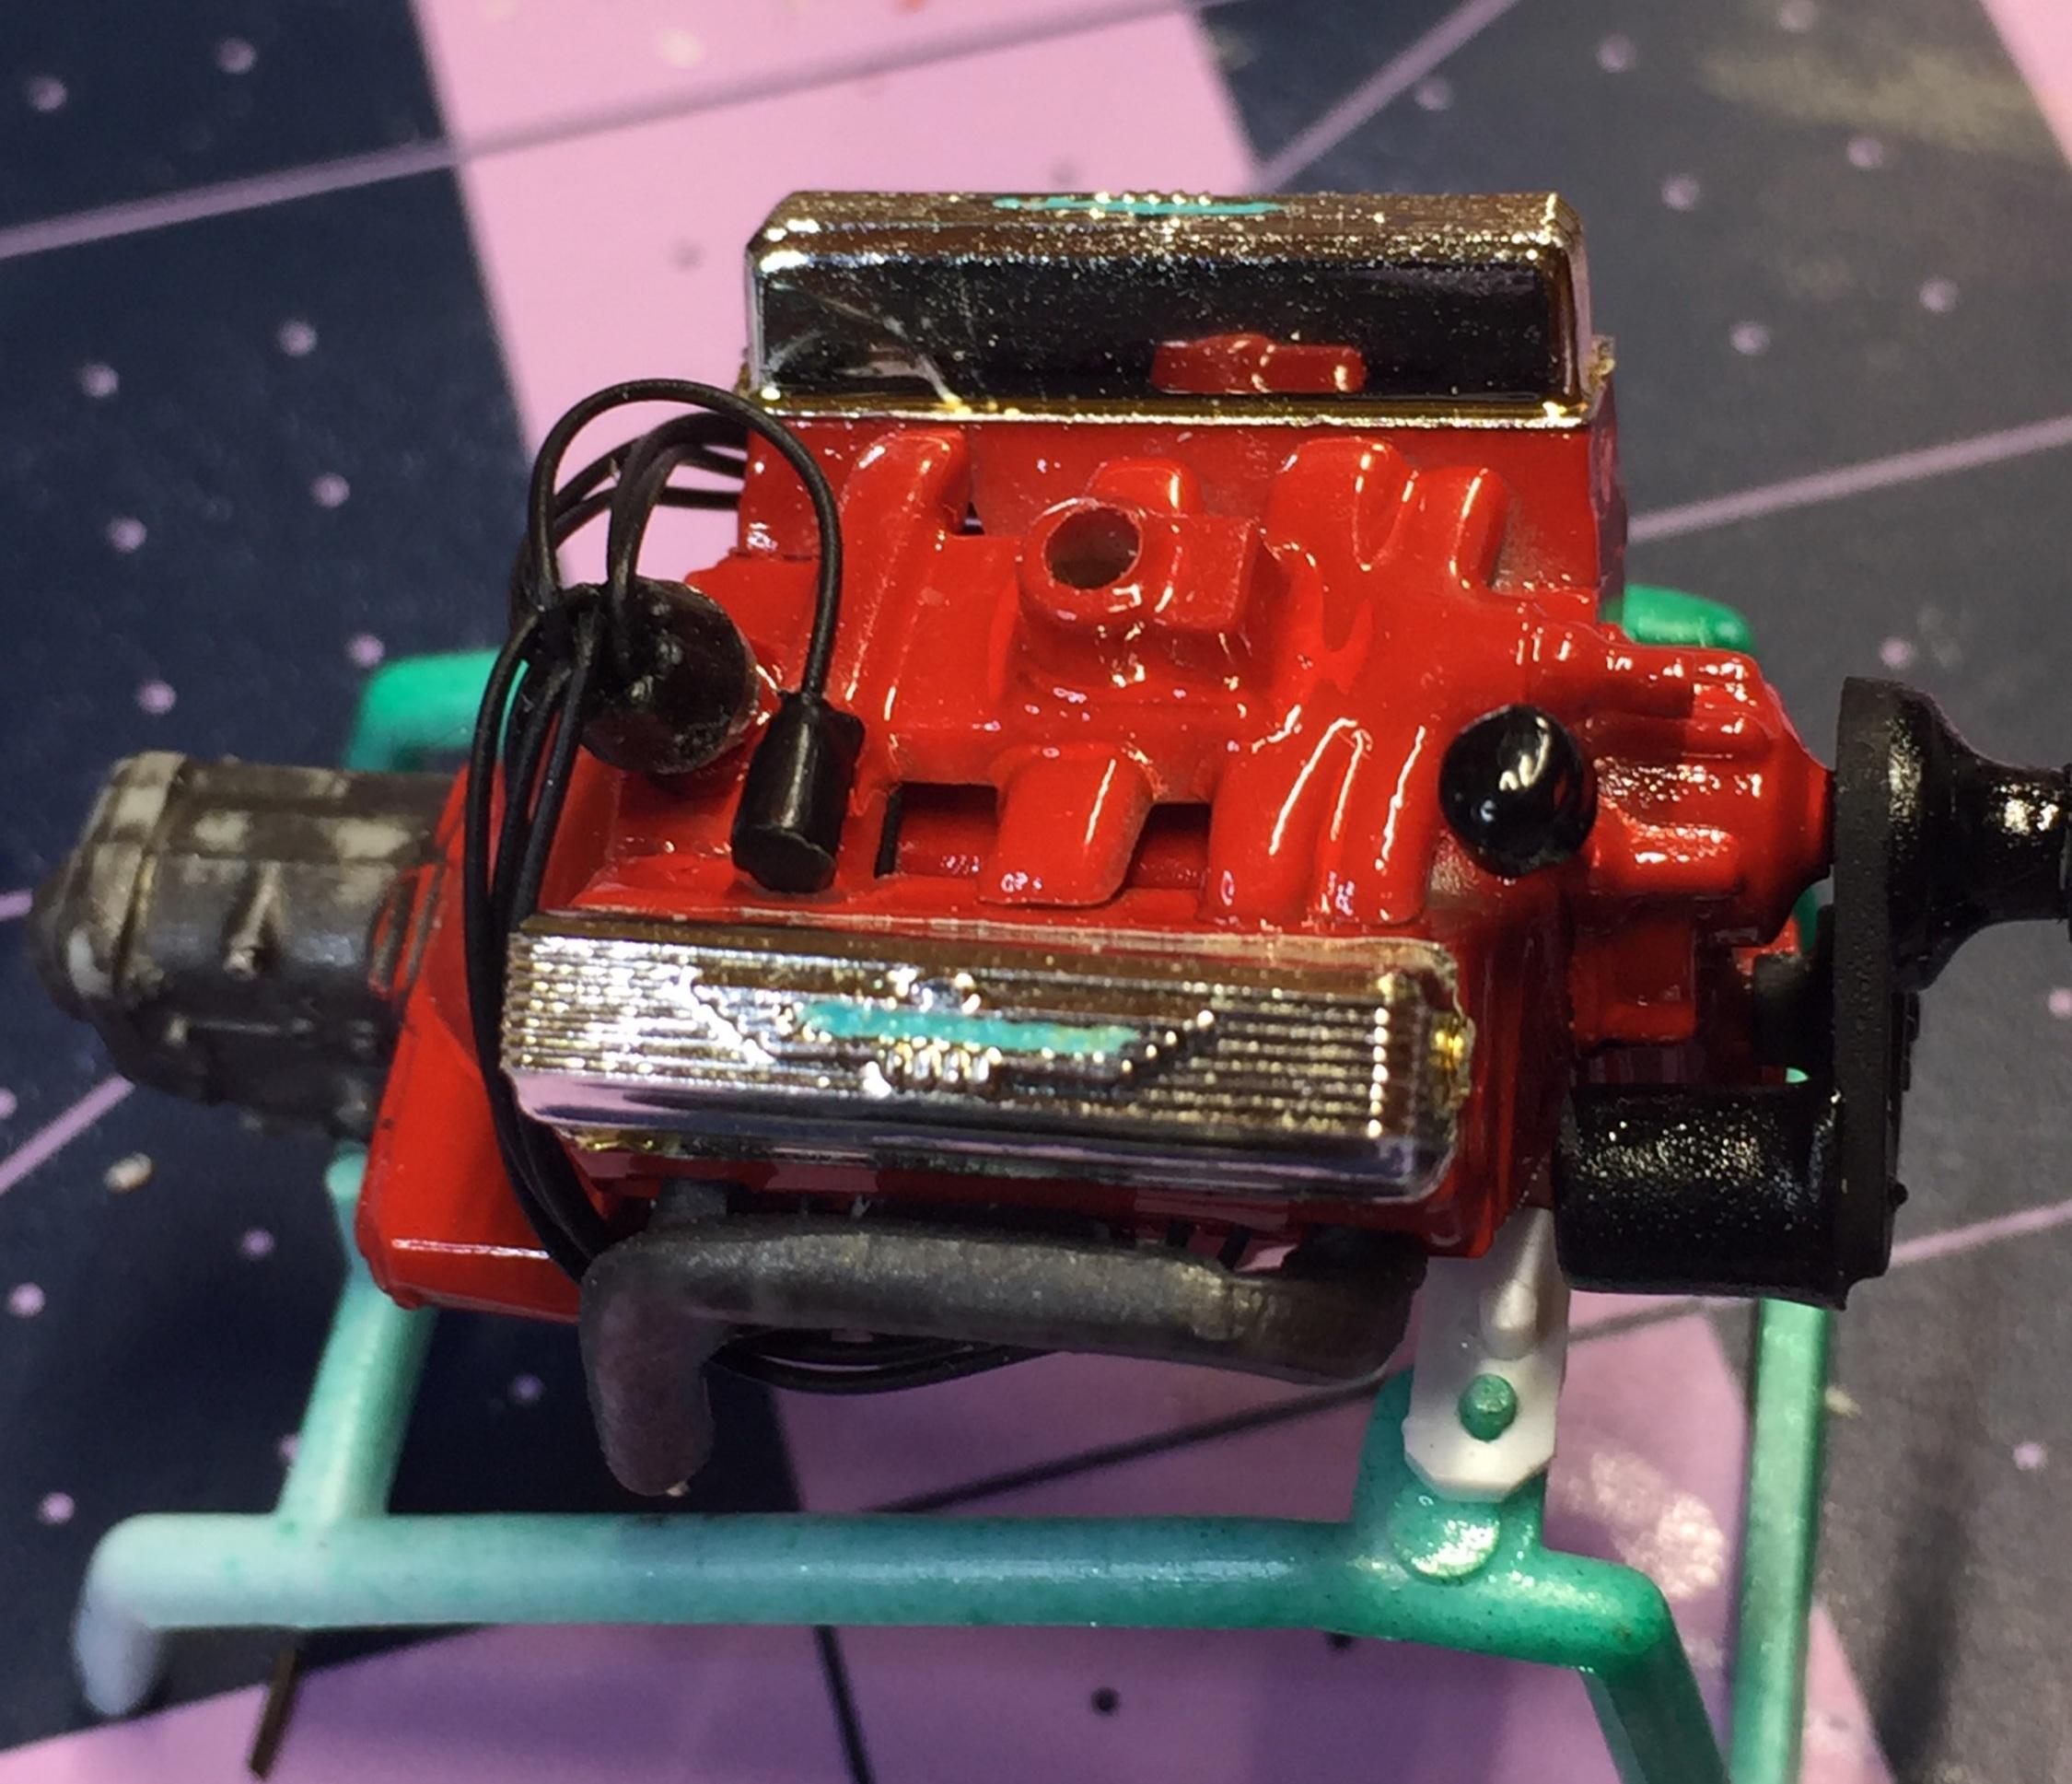
Beauty is in the eye of the beholder....hey, what do you call it when you buy a thunderbird and then you fix it up and re-sell it for a profit? I'll let you think about it. ? Got the engine put together. Not the greatest Y-block out there but good enough for an old screw-bottom. Had to swap out the 6V battery for a 12V. Nobody told them, I guess. Decided to hinge the hood. I hope it works. My inner wheels are still in the bleach but they're nearly done. Too slow for my liking. Gotta get some commercial grade oven and grill cleaner. Zero chrome in 5 minutes. I must say, though, the lacquer coating under the plating seems to be dissolving in the Clorox. We shall see. Here's some pix. Many thanks for everyone's comments. BTW, I agree with Bill about the styling of this 'Bird; I may forego the Continental kit. And the stock hard top - something doesn't look right about it. Could be me, though. ?
-
Exactly. ?
-
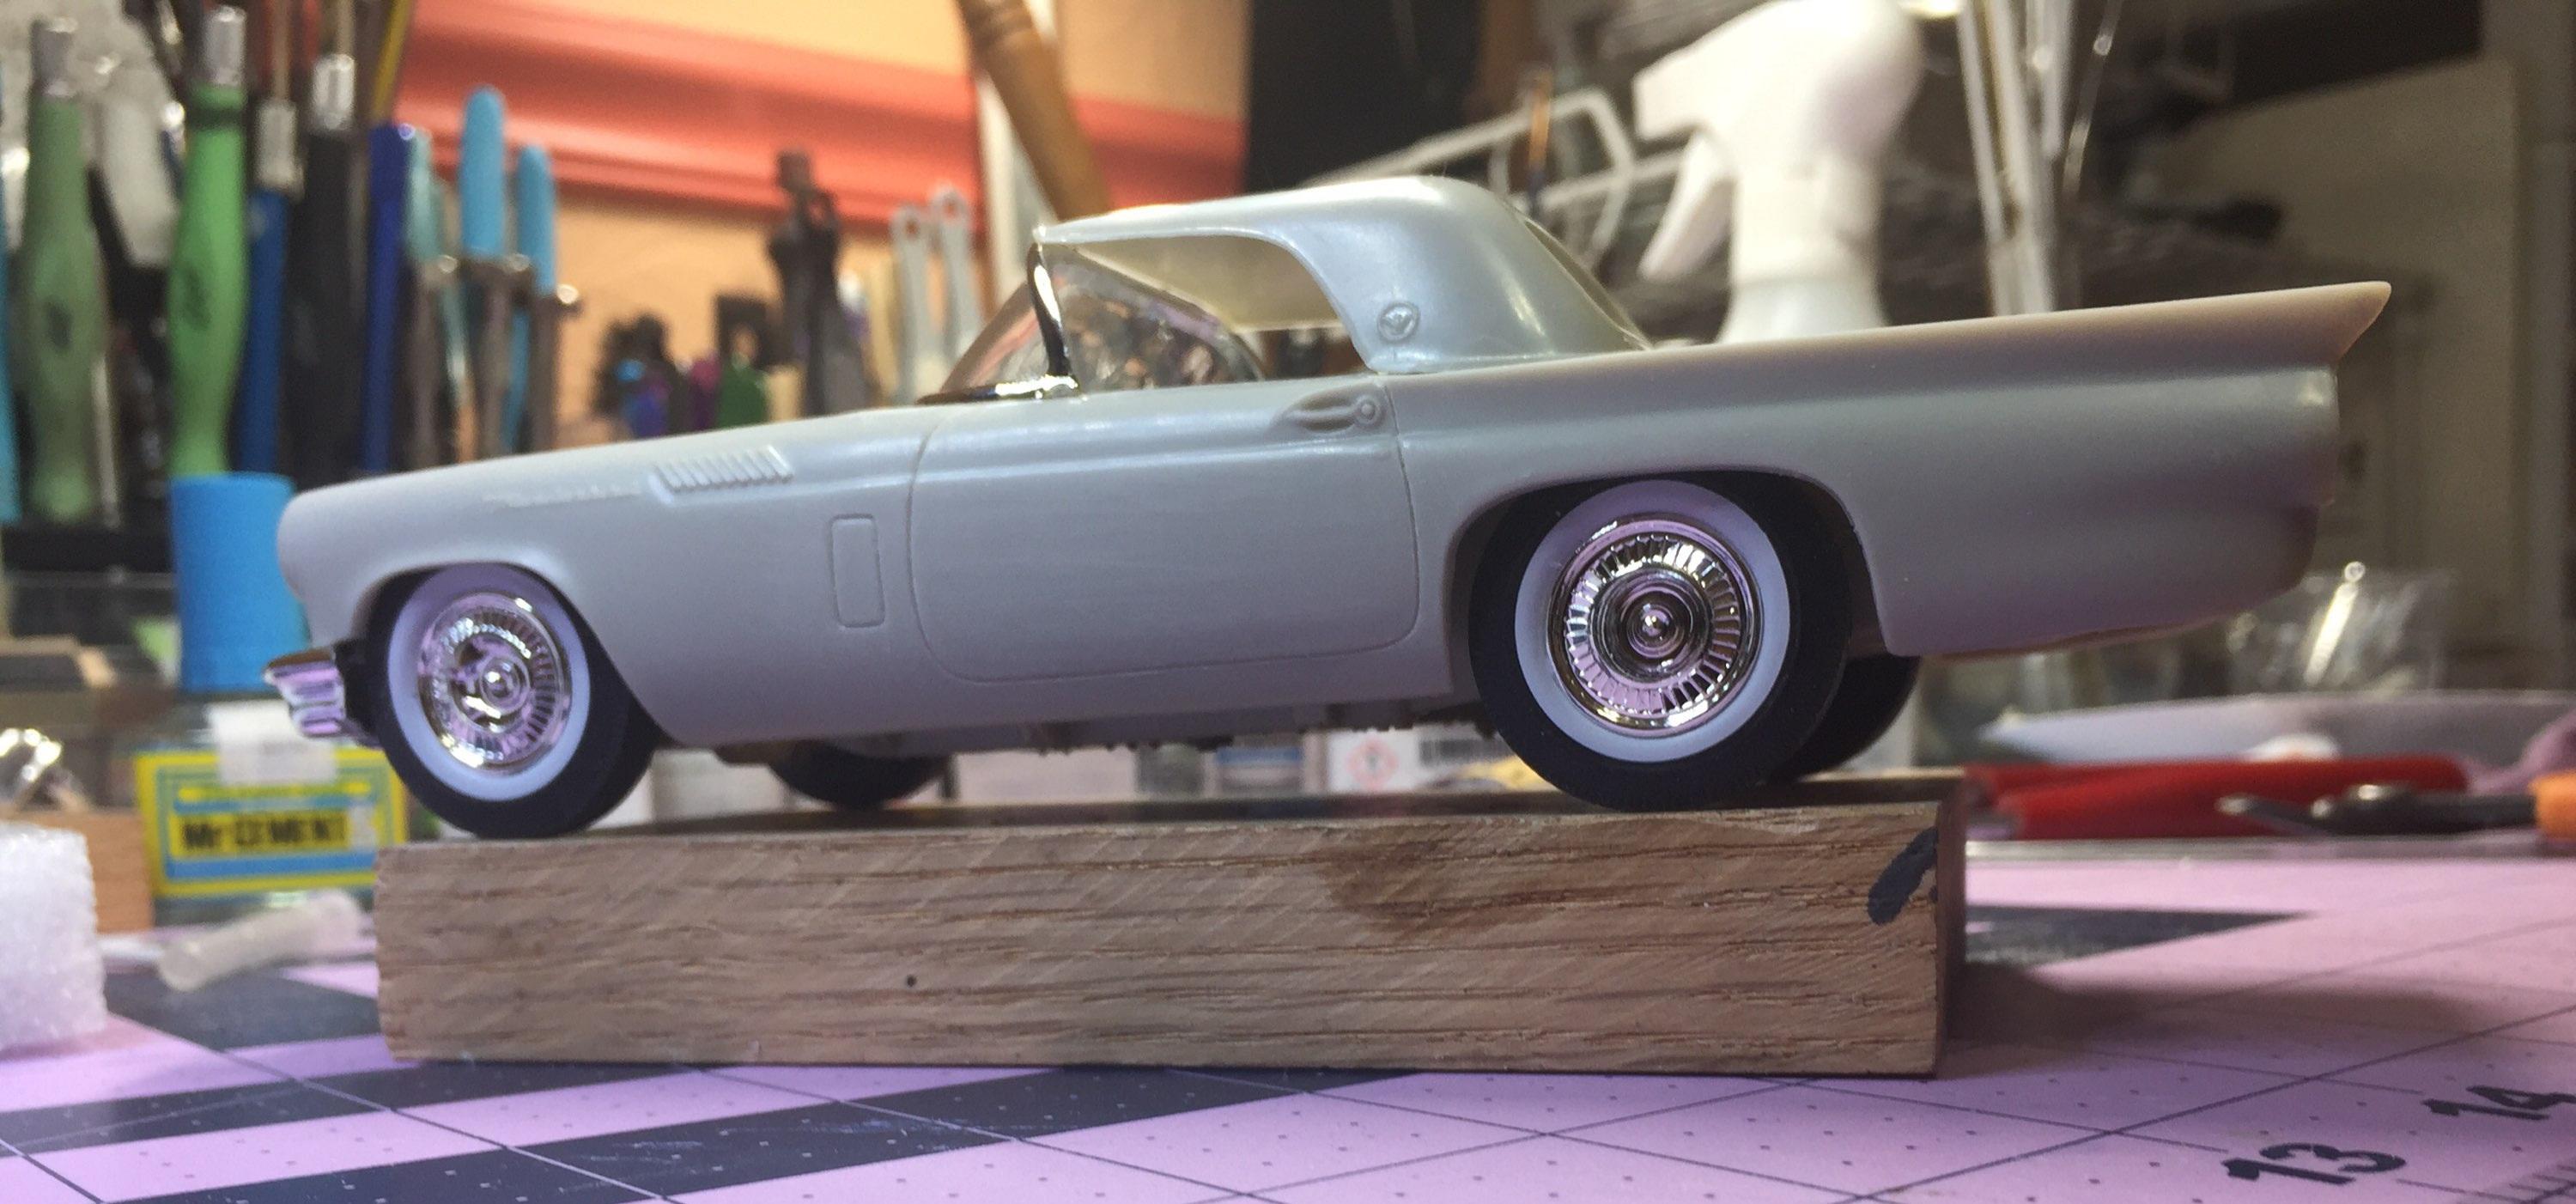
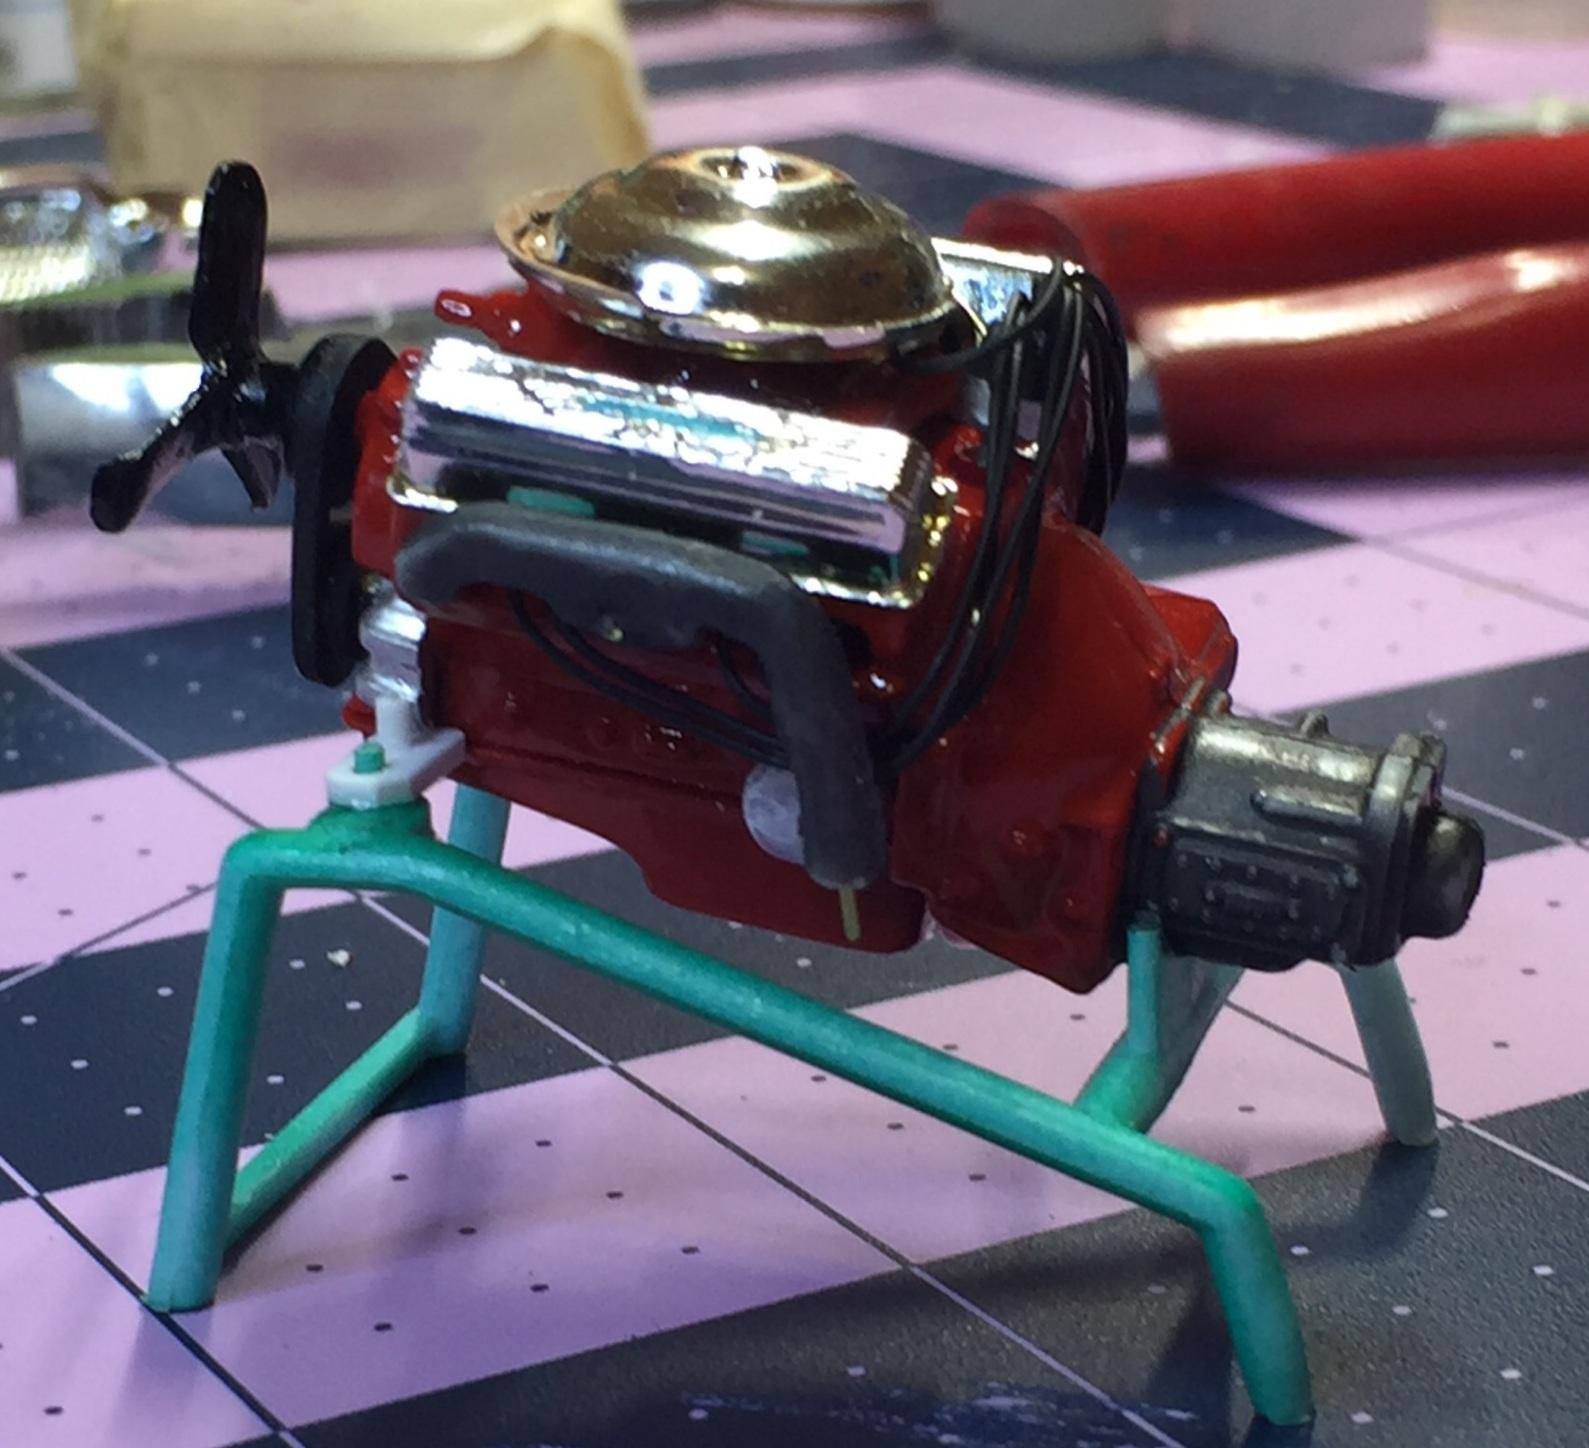
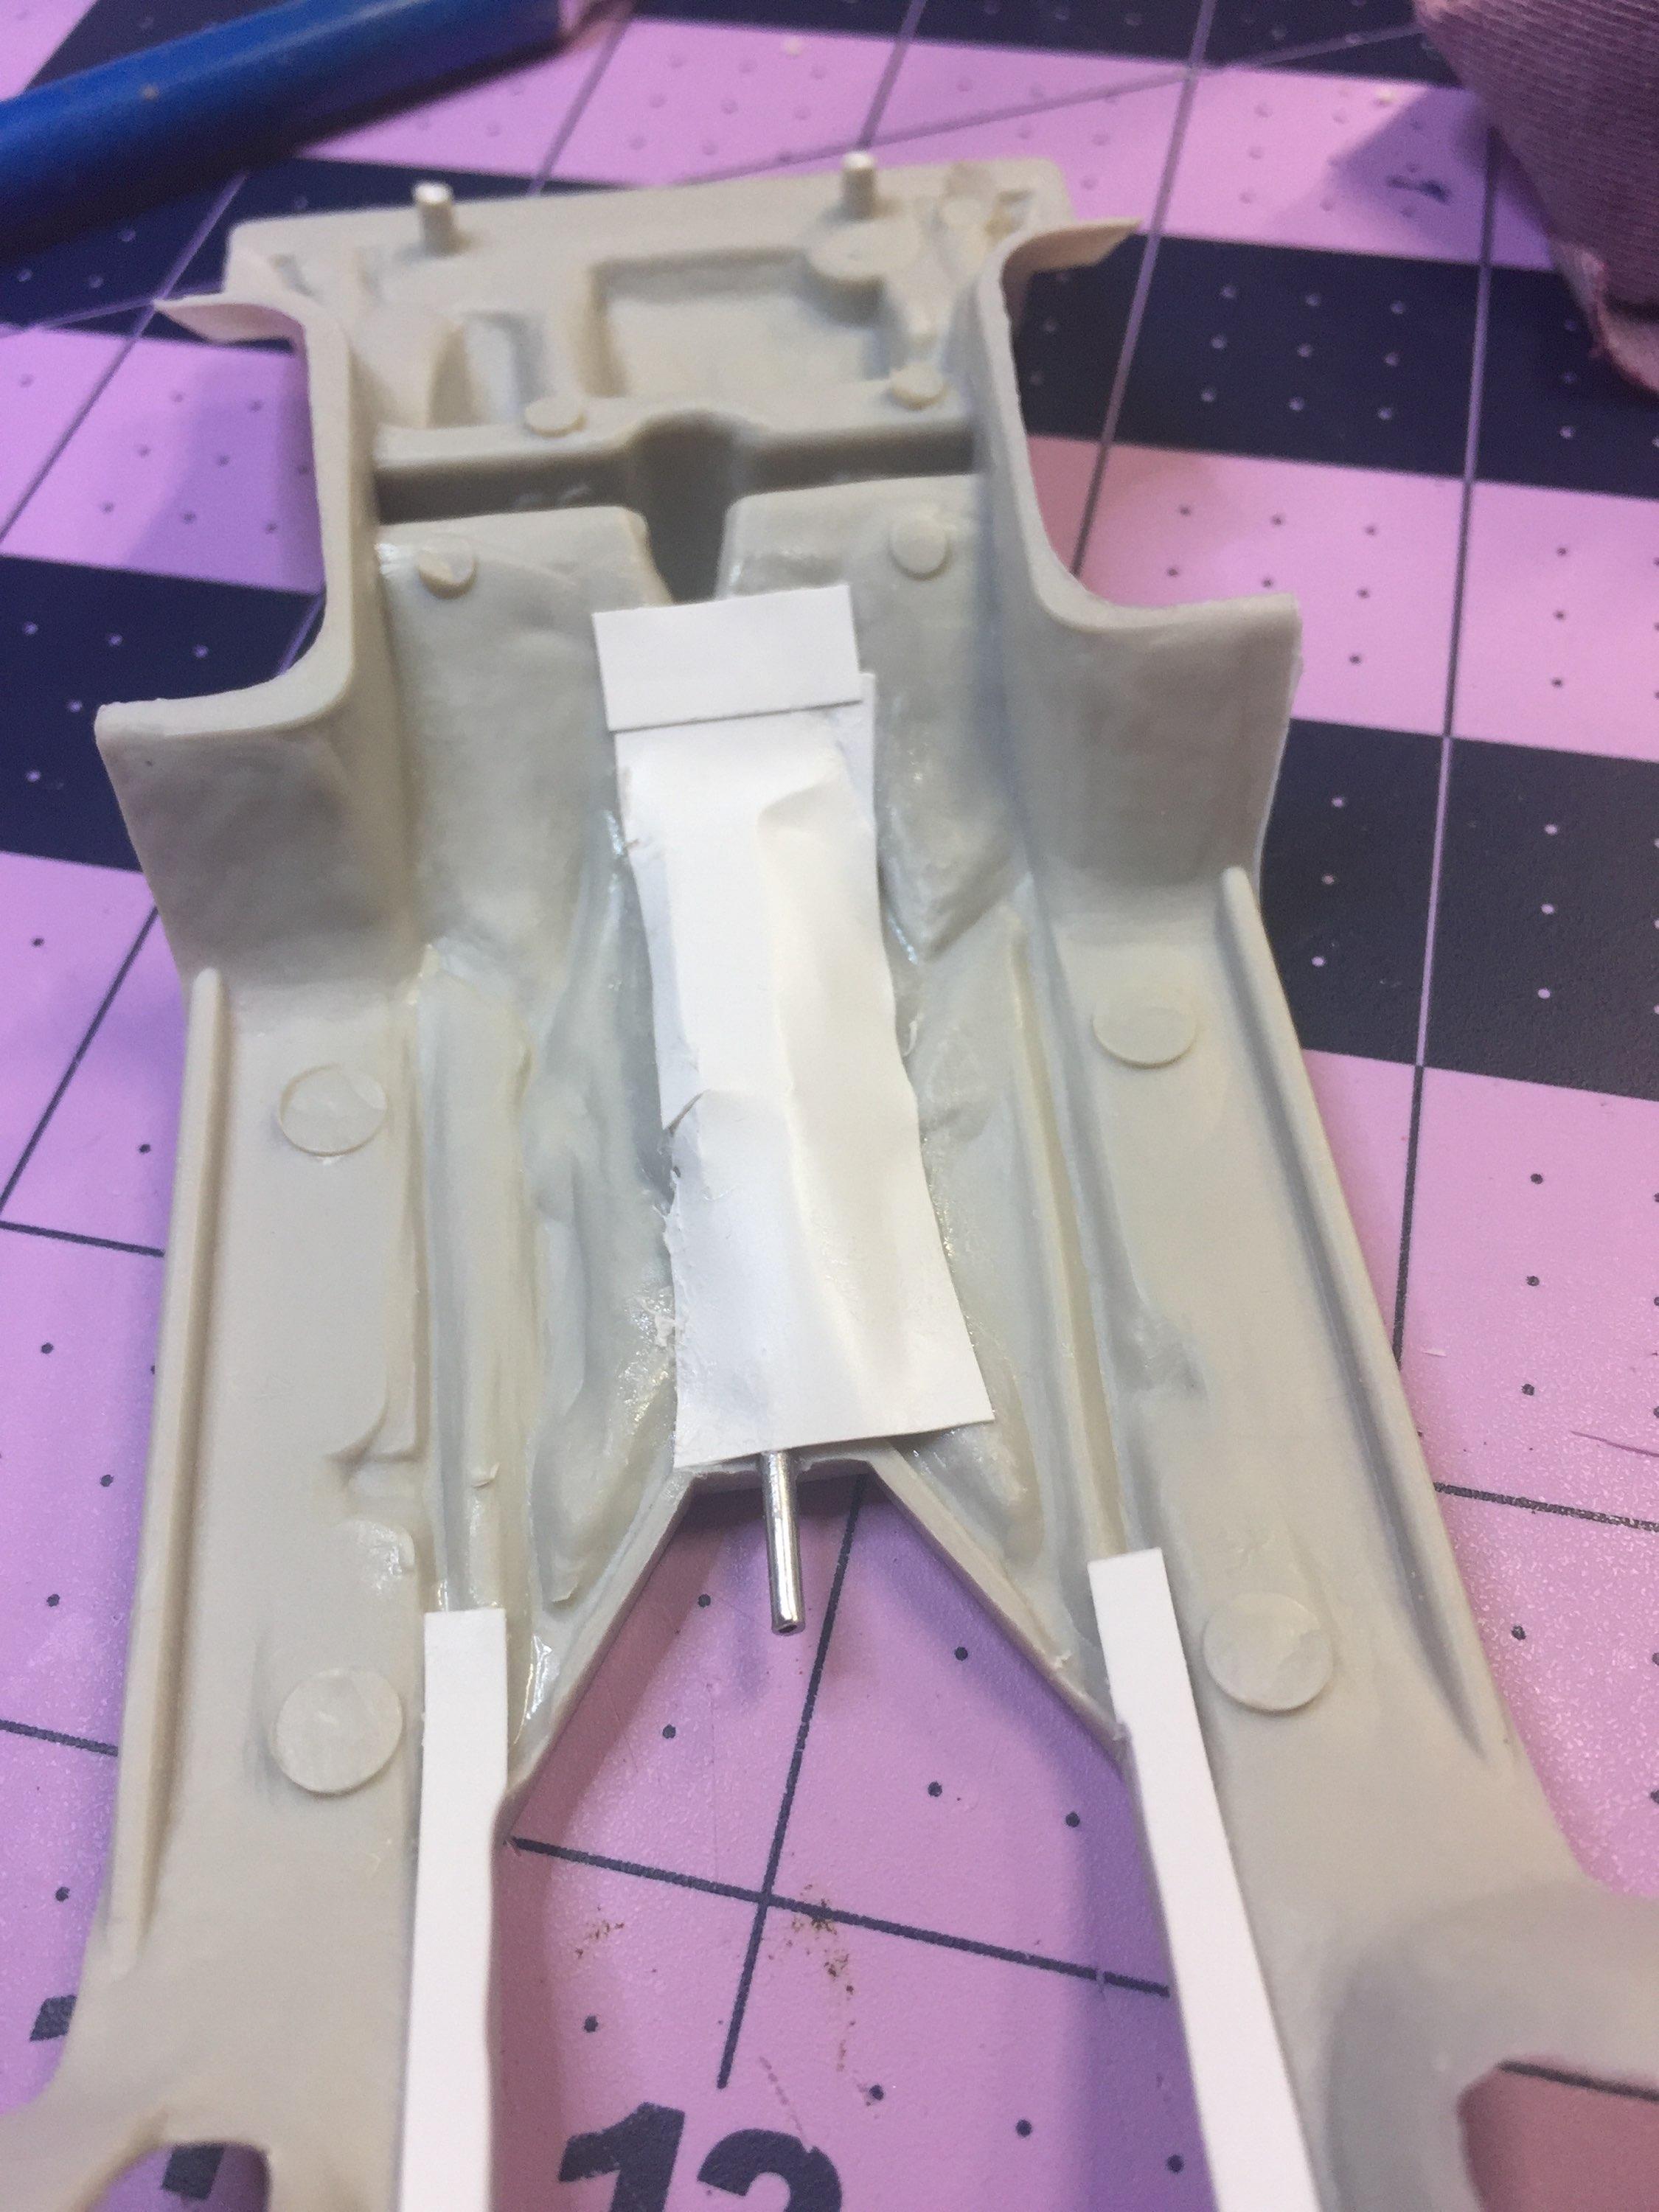
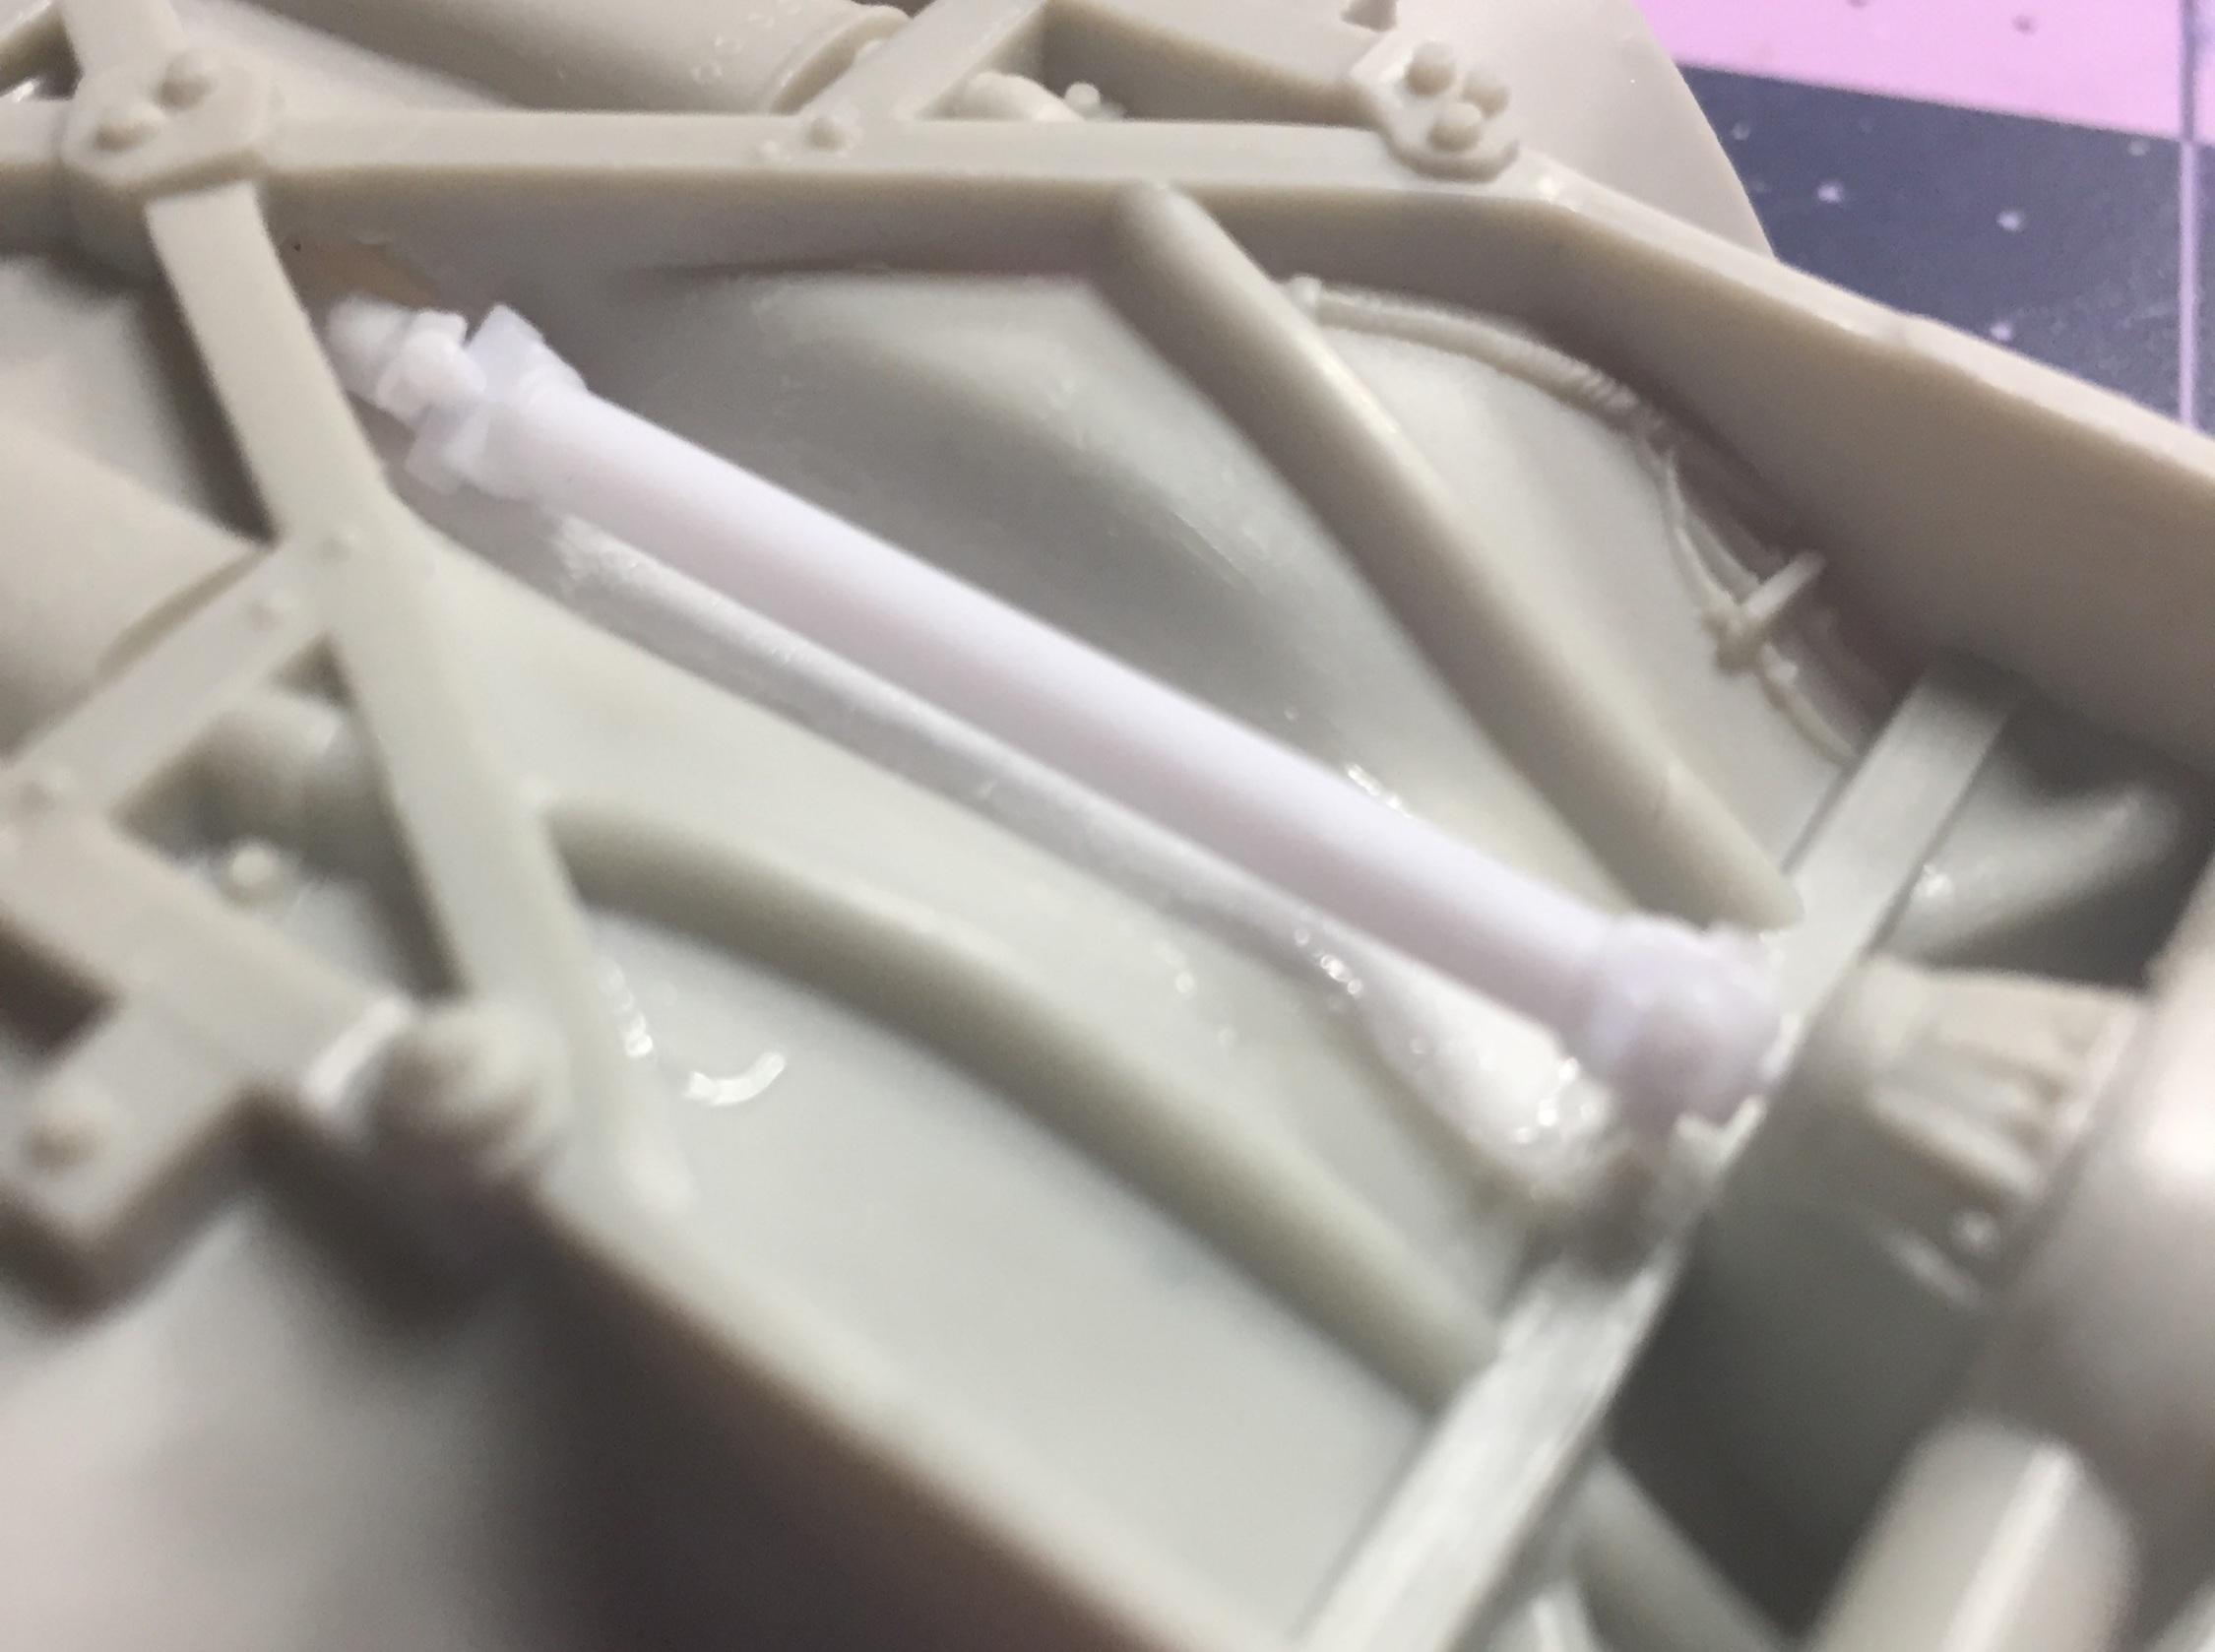
Well I'm just having fun with this little 'Bird today. I added more plastic to the front spring areas to make the frame look more "there". It's not very accurate but it's a slight improvement. More can be done in that area but I thought I should do something about the driveshaft- it's been bothering me. The material is very thin around the "shaft" and I was able to slice across the u-joint and just run my #11 down both sides. Gone-zo! Wrapped some .005 over the top and found a shaft from one of the Revell coupe/roadster kits. I added a "snout" to the front joint so it will look like the tail shaft housing poking through the "X". Behold: I think that replacing the blob rear end with a "real" one wouldn't be difficult but I'm happy with leaving it here. This was going to be a OOB build ?. The engine was painted yesterday with very well shaken Ace gloss red and it seems like it doesn't want to dry. I chased all the panel lines because they were kinda weak. One of the front fenders needed some repair work. Some parting lines needed sanding but mostly the body is good. The inner wheels are in a bowl of Clorox for the night... that's about it. Thanks for your interest and I welcome your thoughts ?
-
"The 777" Tasca Ford '63 lightweight Galaxie
customline replied to customline's topic in WIP: Drag Racing Models
The Tasca T-bolt is planned ( I built it once but gave it to my son ) and one of the mustangs if I can score one of those kits The kit was built box-stock but the next one will sit higher. A lot higher And the roof will be a better color match ?
-
Just looked at the old kit instructions. The "Judge" version had a great instruction sheet. Information that I can certainly use. Thank you ! You have to wonder about the thinking on the sheet in my kit. It's almost like they didn't care ?. The way this kit devolved is pretty sad.


.jpg.8d813ef729c54d73b14df8fbbe57e660.jpg)

.jpg.f18580f9763fee469f79de27c6906747.jpg)


.jpg.5e25c273299c71fe1c96f87bfee37147.jpg)
.jpg.81633f1294da9bf601eb776762c44e7d.jpg)


.jpg.c289df3822882532fc76710fb297f1c1.jpg)