customline
-
Posts
3,791 -
Joined
-
Last visited
Content Type
Profiles
Forums
Events
Gallery
Everything posted by customline
-

The "waste-not-want-not" Starliner project
customline replied to customline's topic in WIP: Model Cars
Thanks, Dave, I will give that a shot when the time comes. ? -
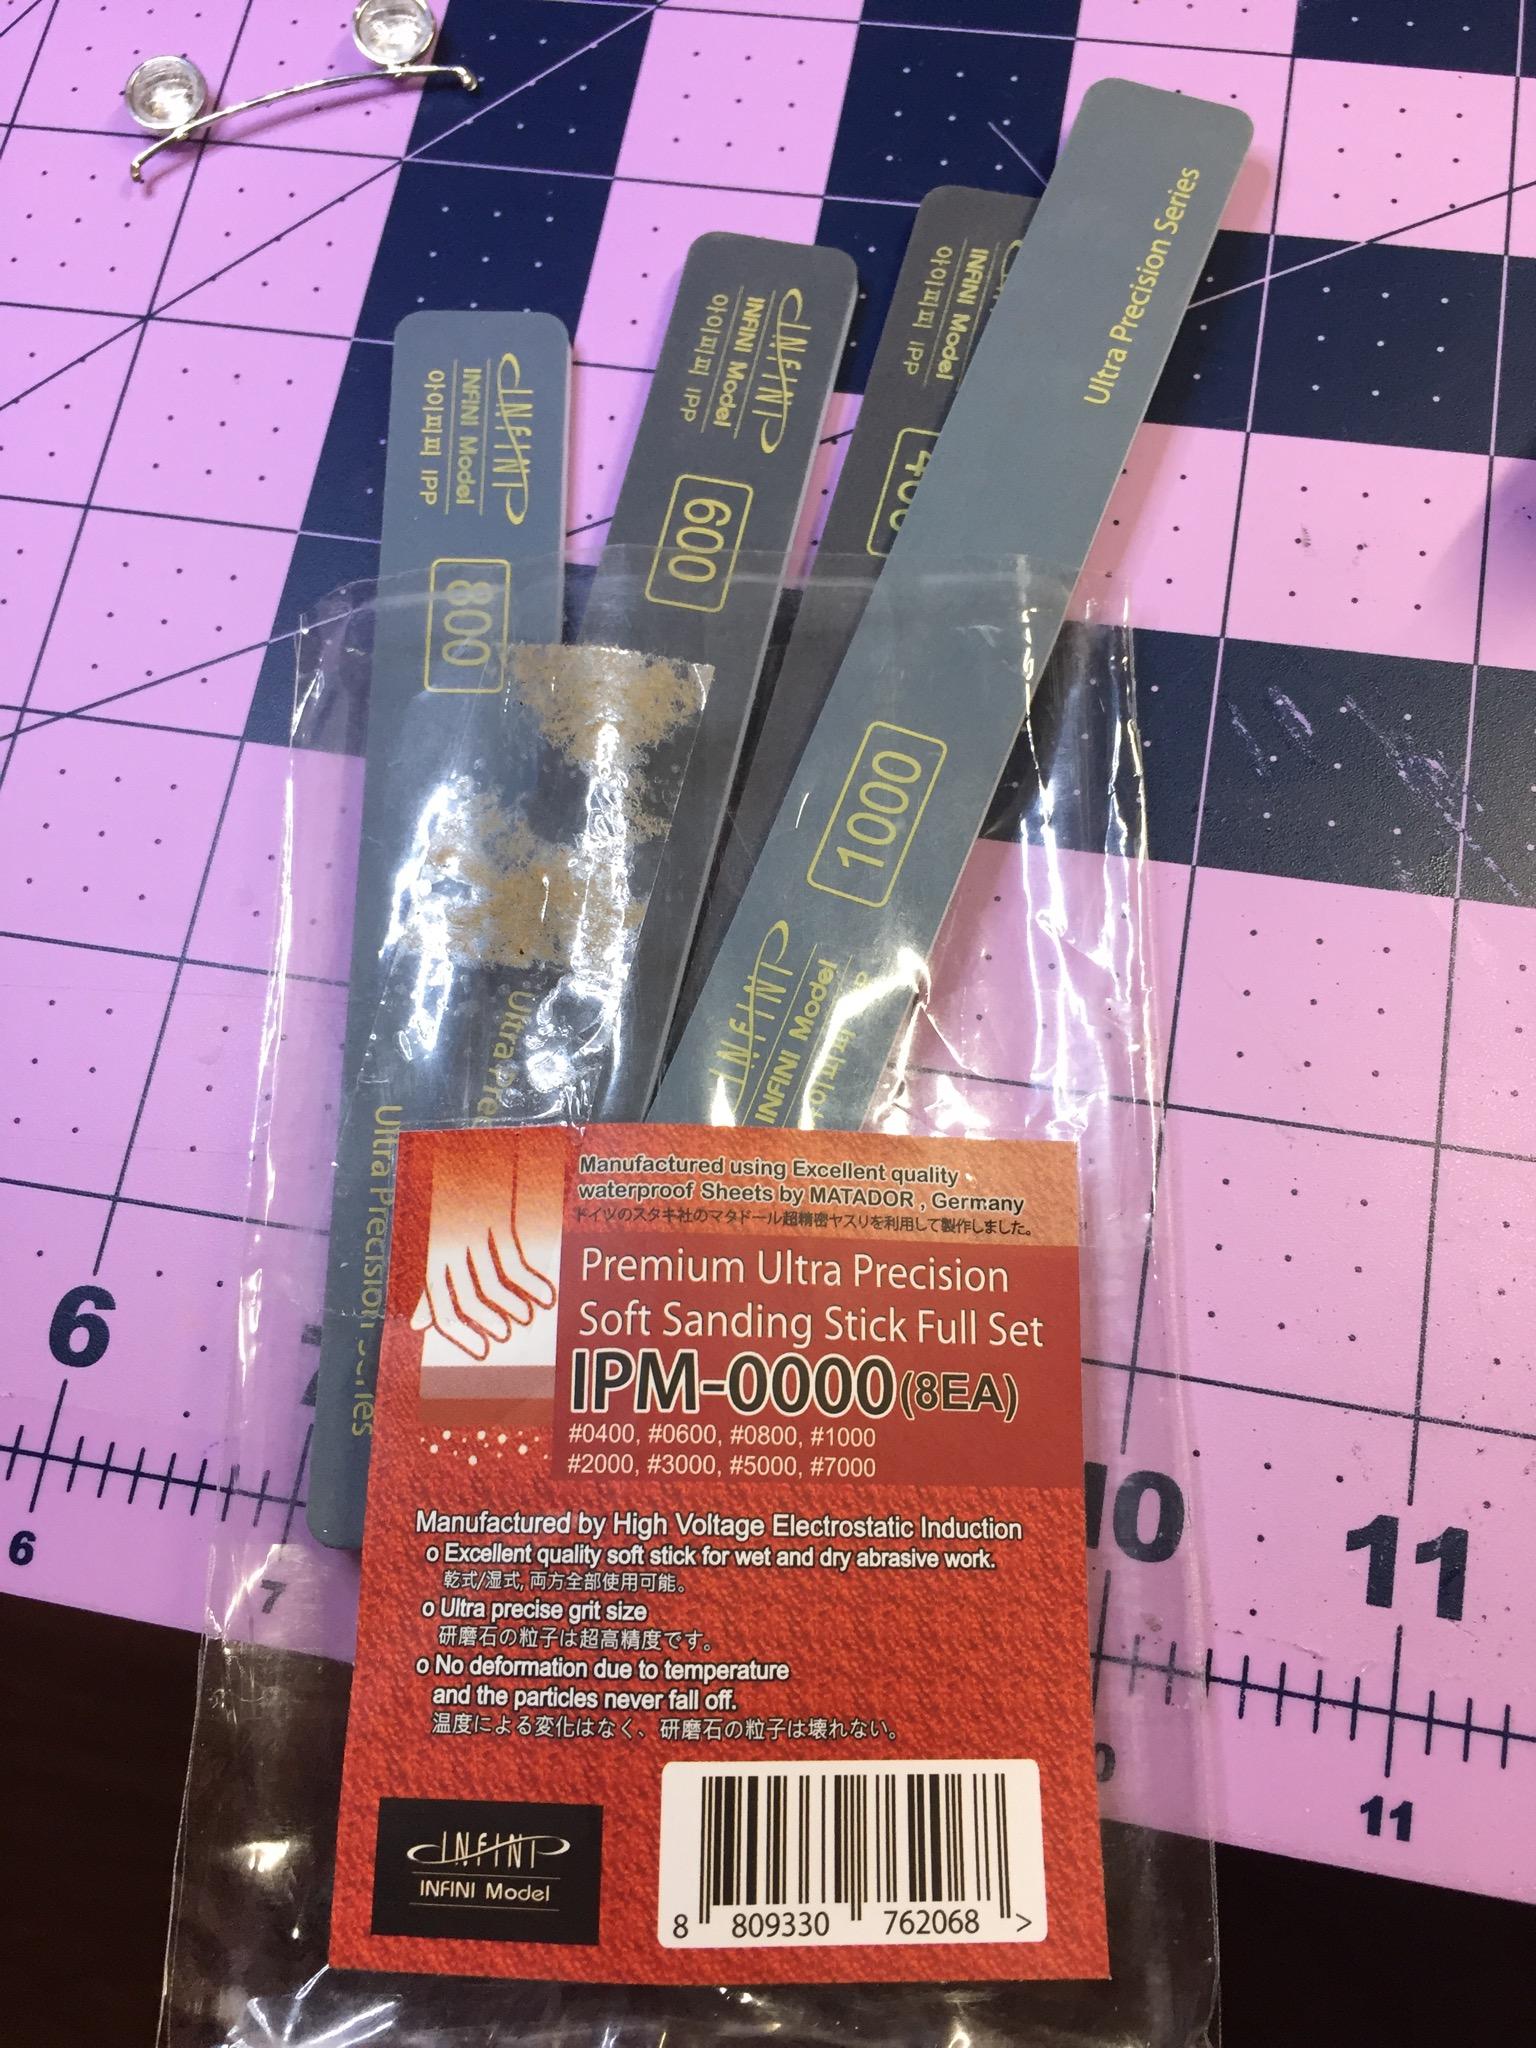
I did more sand/polish on this thing today, I wasn't happy with it. There are areas on the fender module that are quite difficult to sand and polish like the first photo shows. The second photo is something I picked up years ago, I think, at Hob Lob. They are high quality sanding boards. They worked quite well but I did need to cut the ends square in order to get in the corner tight. The finest is 7000 so you'll have to use your regular pads (cut to fit) to bring it all the way to 12000. I'm happy now. ? I think I'm gonna work on the exhaust now........naaaah.

-
Well, Bob, I prefer the chrome frame. My kit did not include one so I'm just going to use the one that was included. Let's just call it "my bad luck" ? Edit: I like the ride height on your roadster.
-
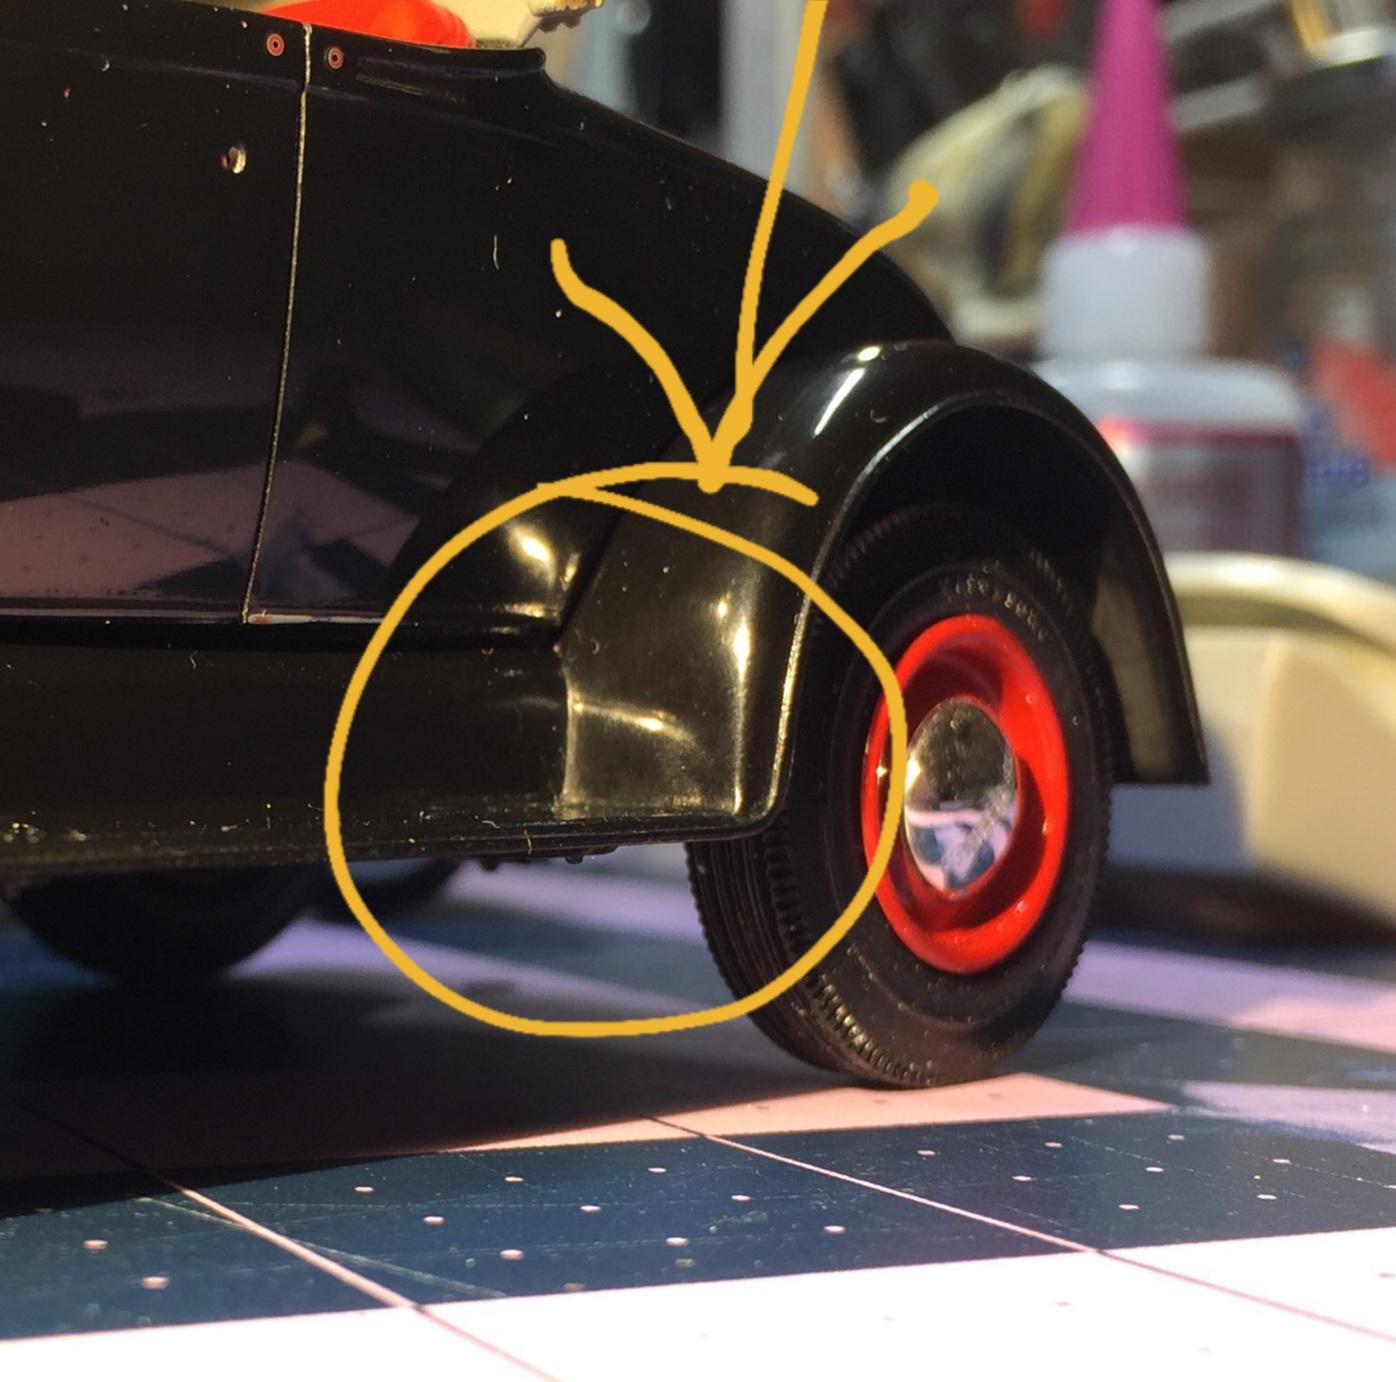
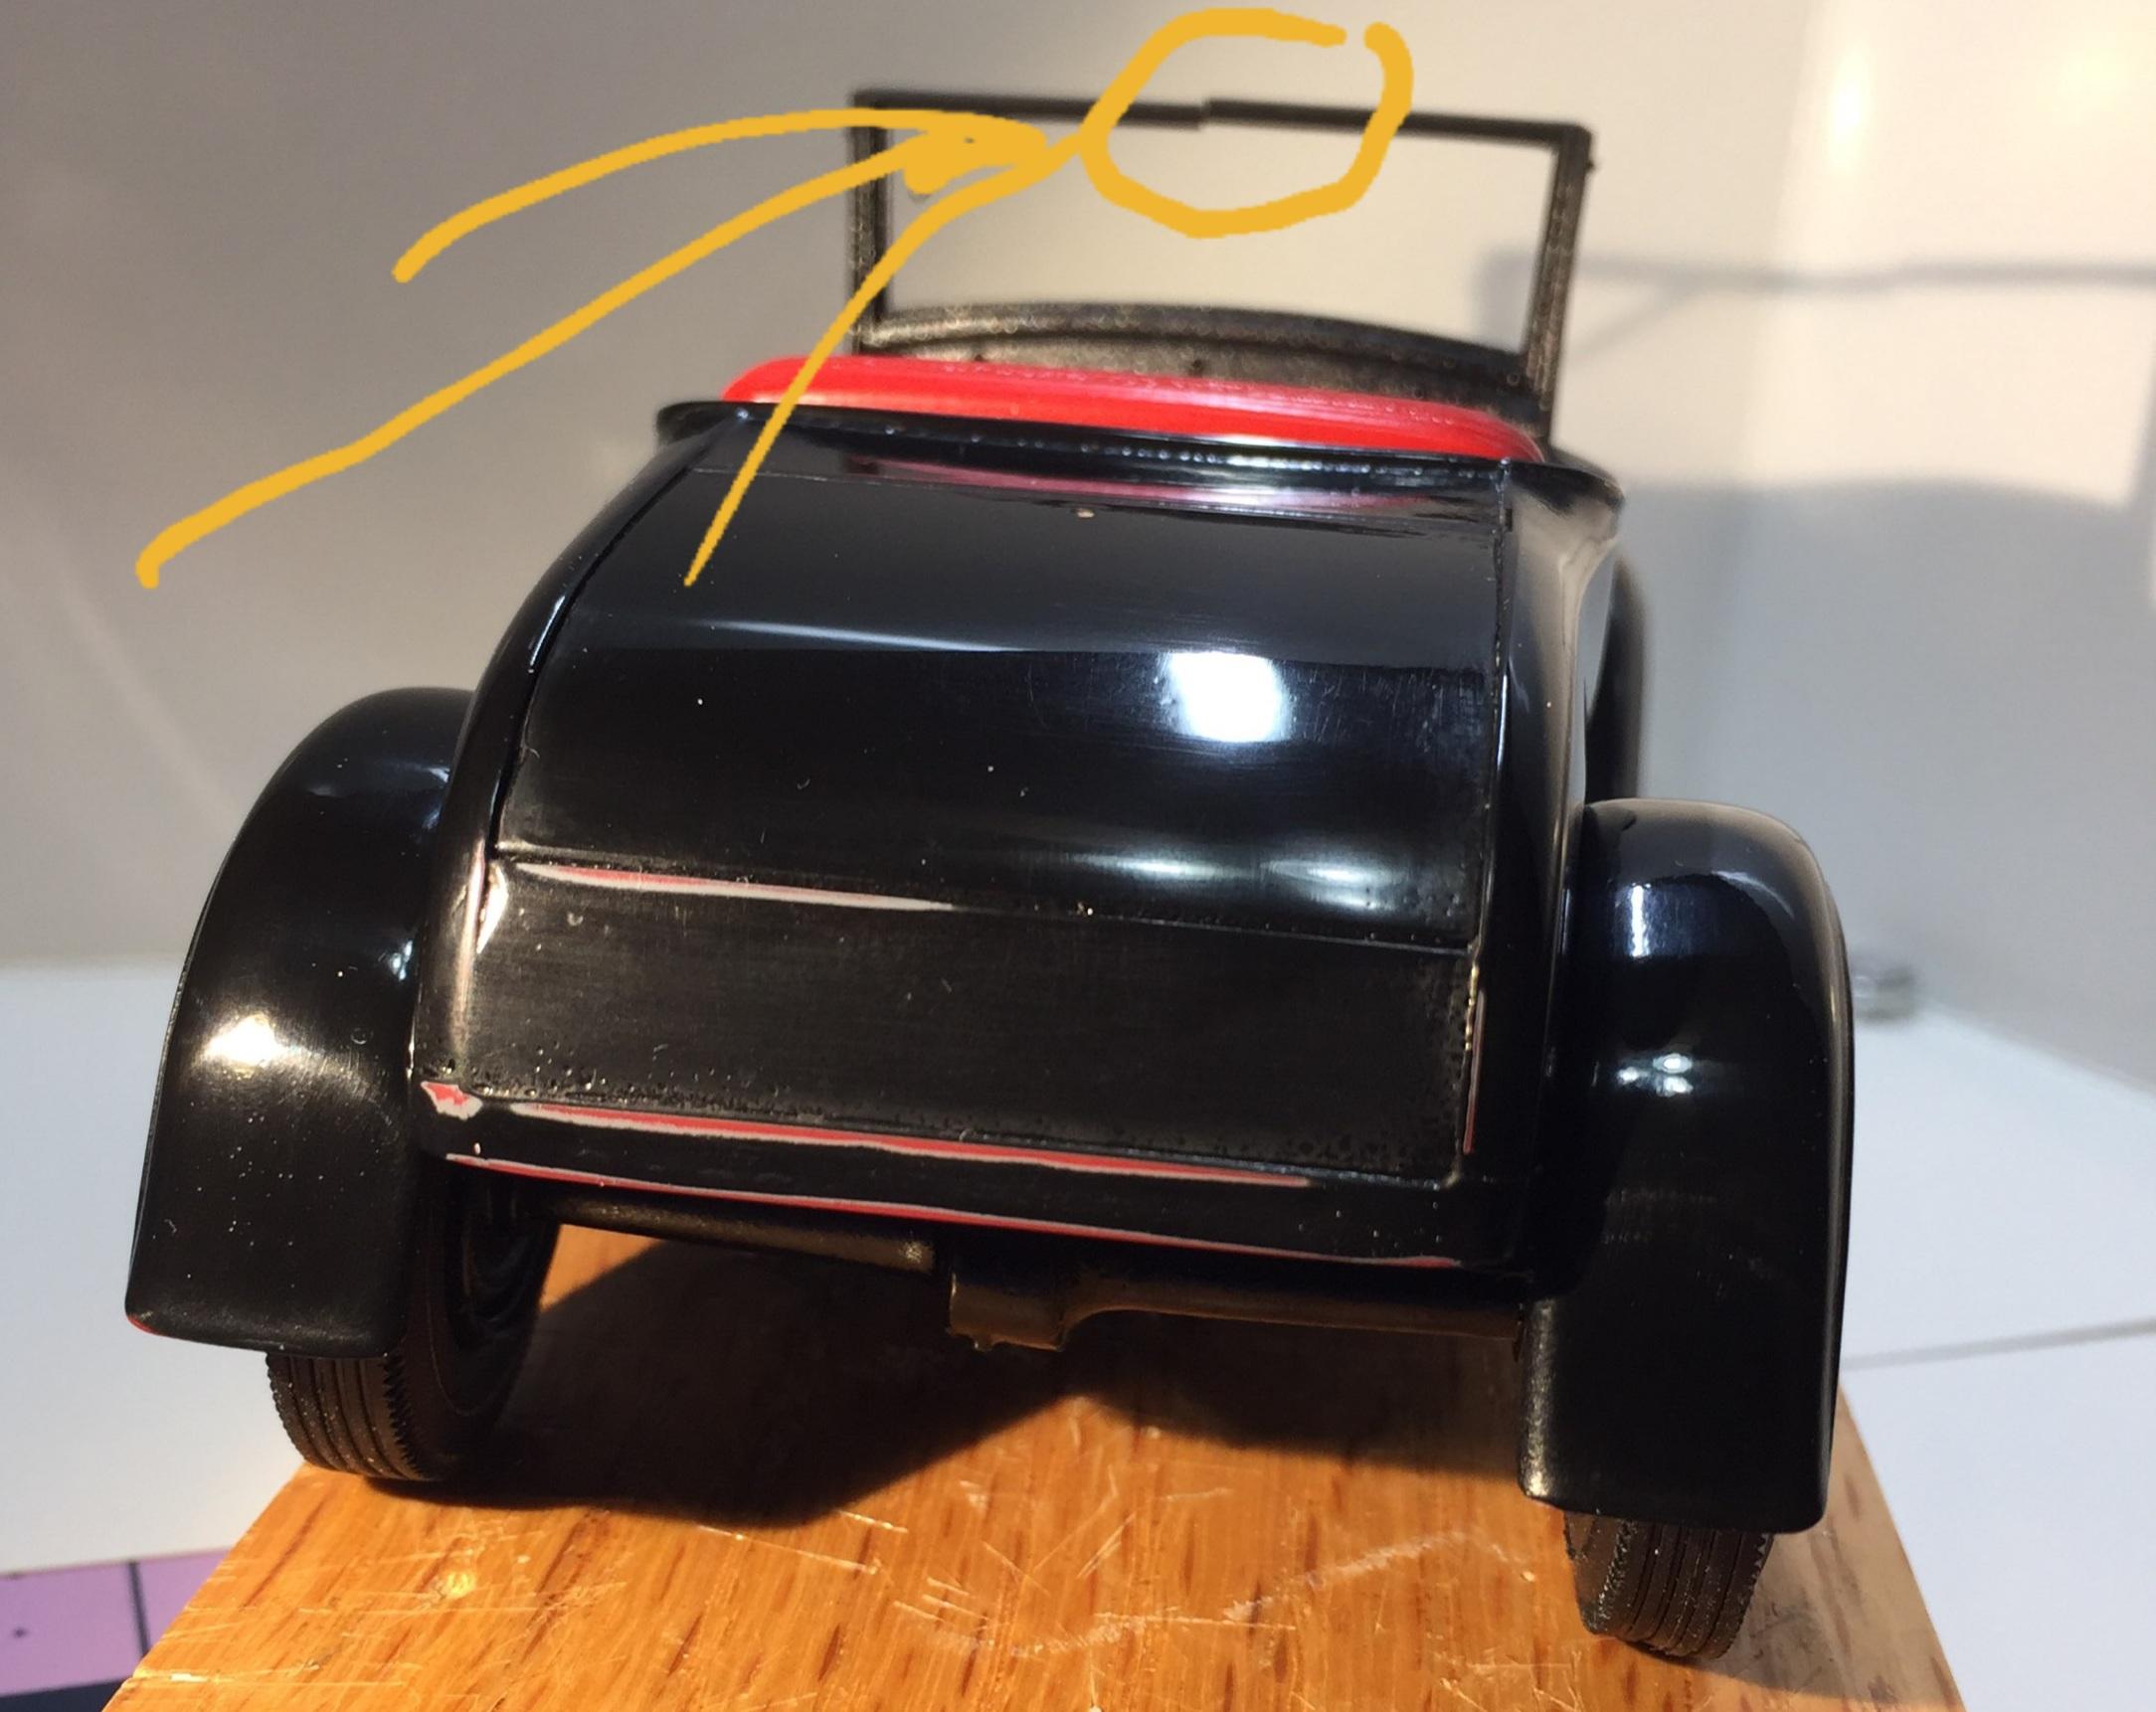
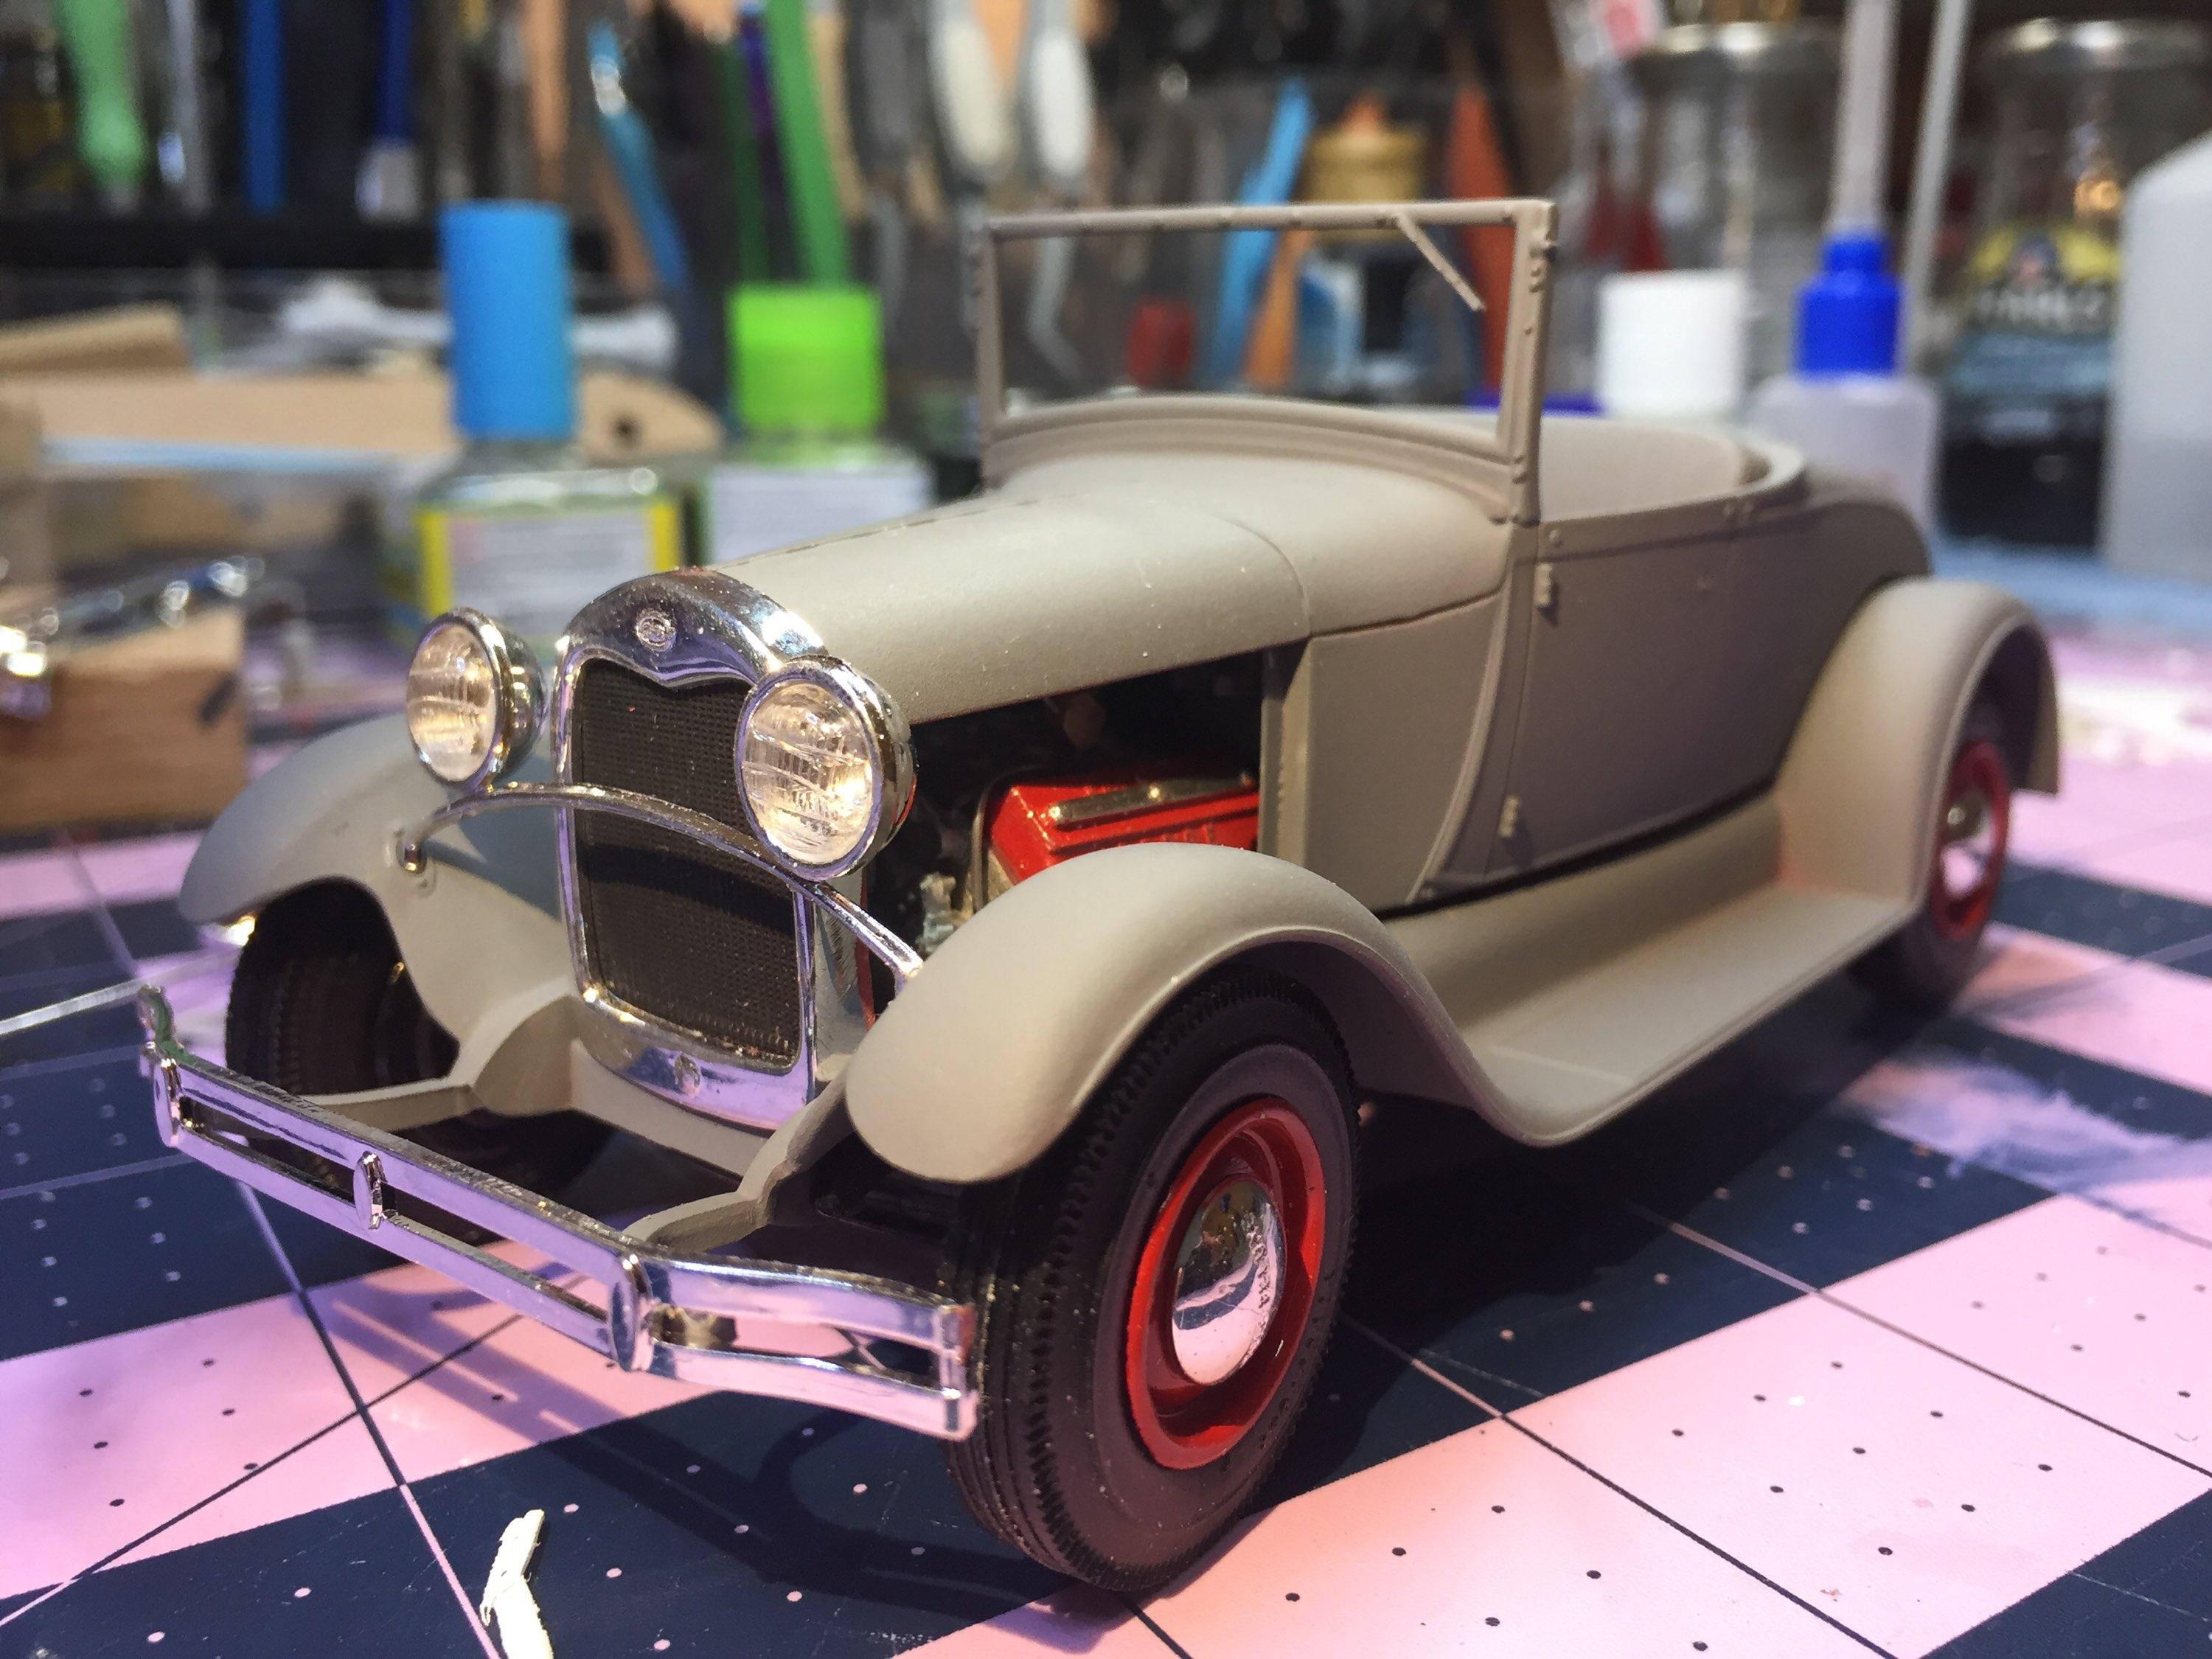
Quick update. I wet-sanded and polished it out but it needs bit more work. The rub-through on the rear will need some paint but it should be okay. We'll see. In the process of sand-polish, two things were mysteriously broken: the windshield frame and a bumper bracket (which is most likely in my sink trap where it will stay.) ? Its a process. Thanks for checking up on me ?
-
You think it's ethereal ? Hey, maybe I'm on to something ?.
-
Yup, a learning curve, for certain.
-
Thanks, Carl. I'm a big fan of the Boyd's line and have a few bottles for "special" projects. Too bad they dropped the whole MM line, Especially the Metalizers. I was devastated.
-
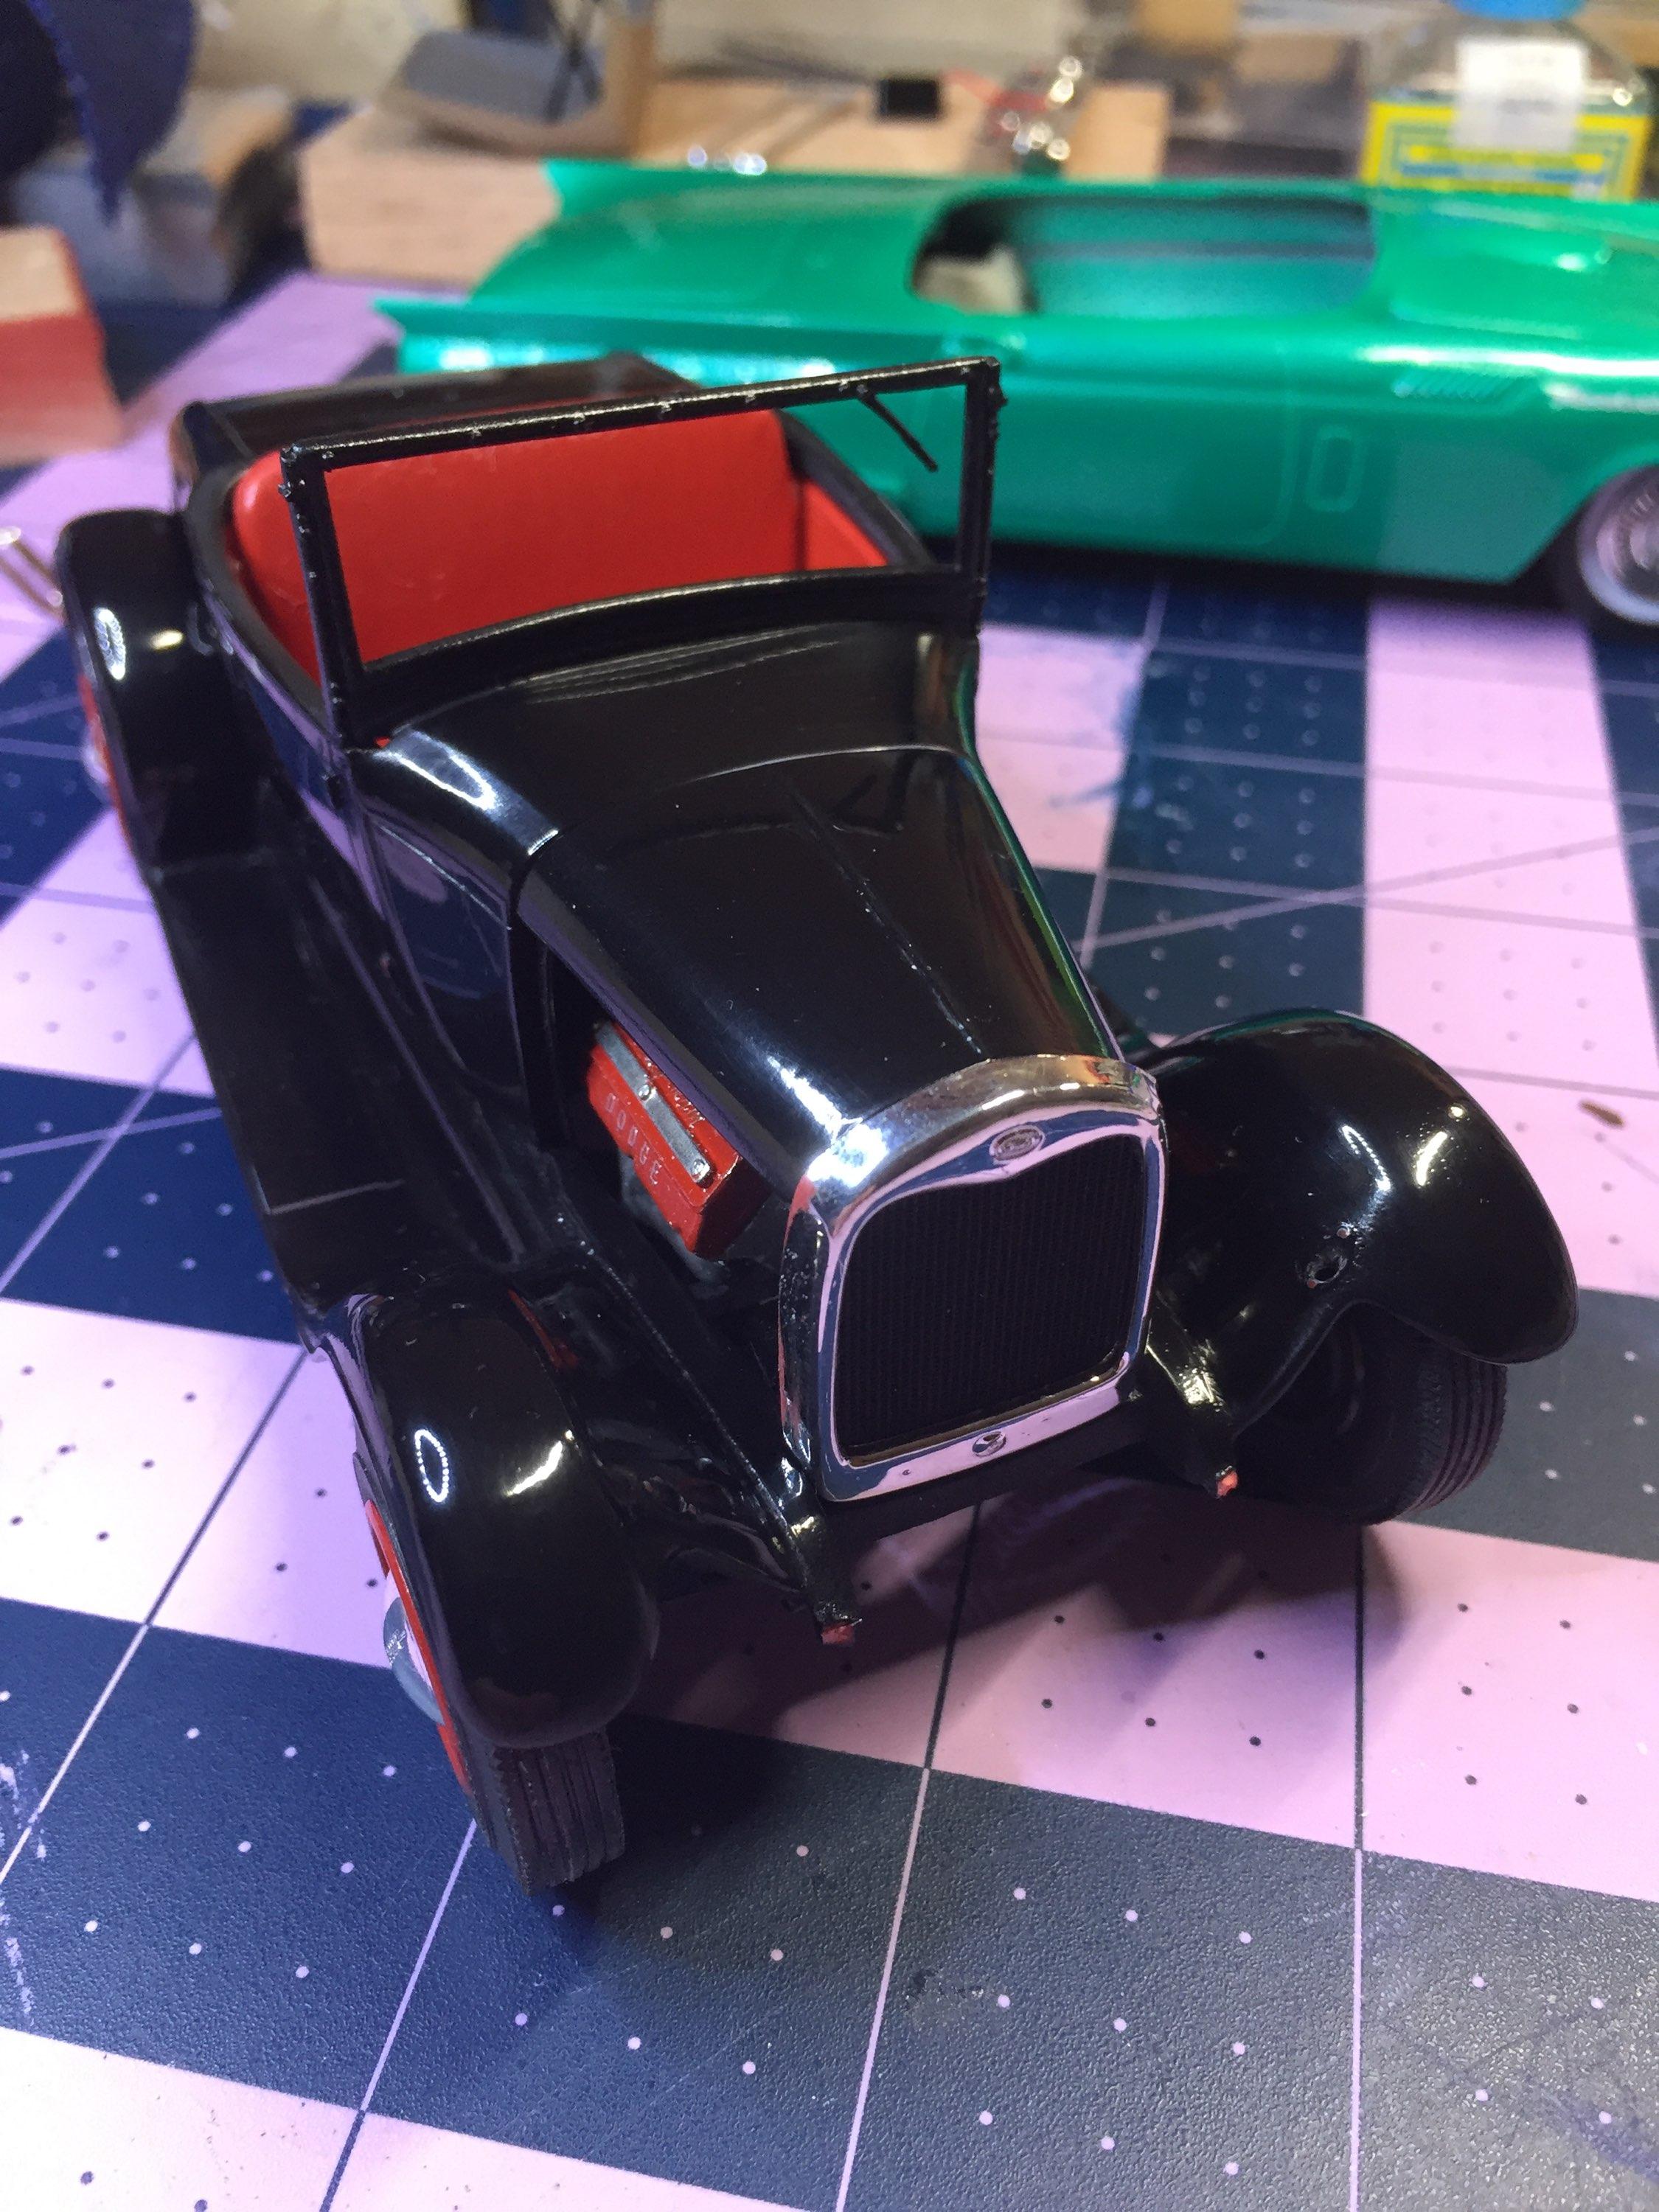
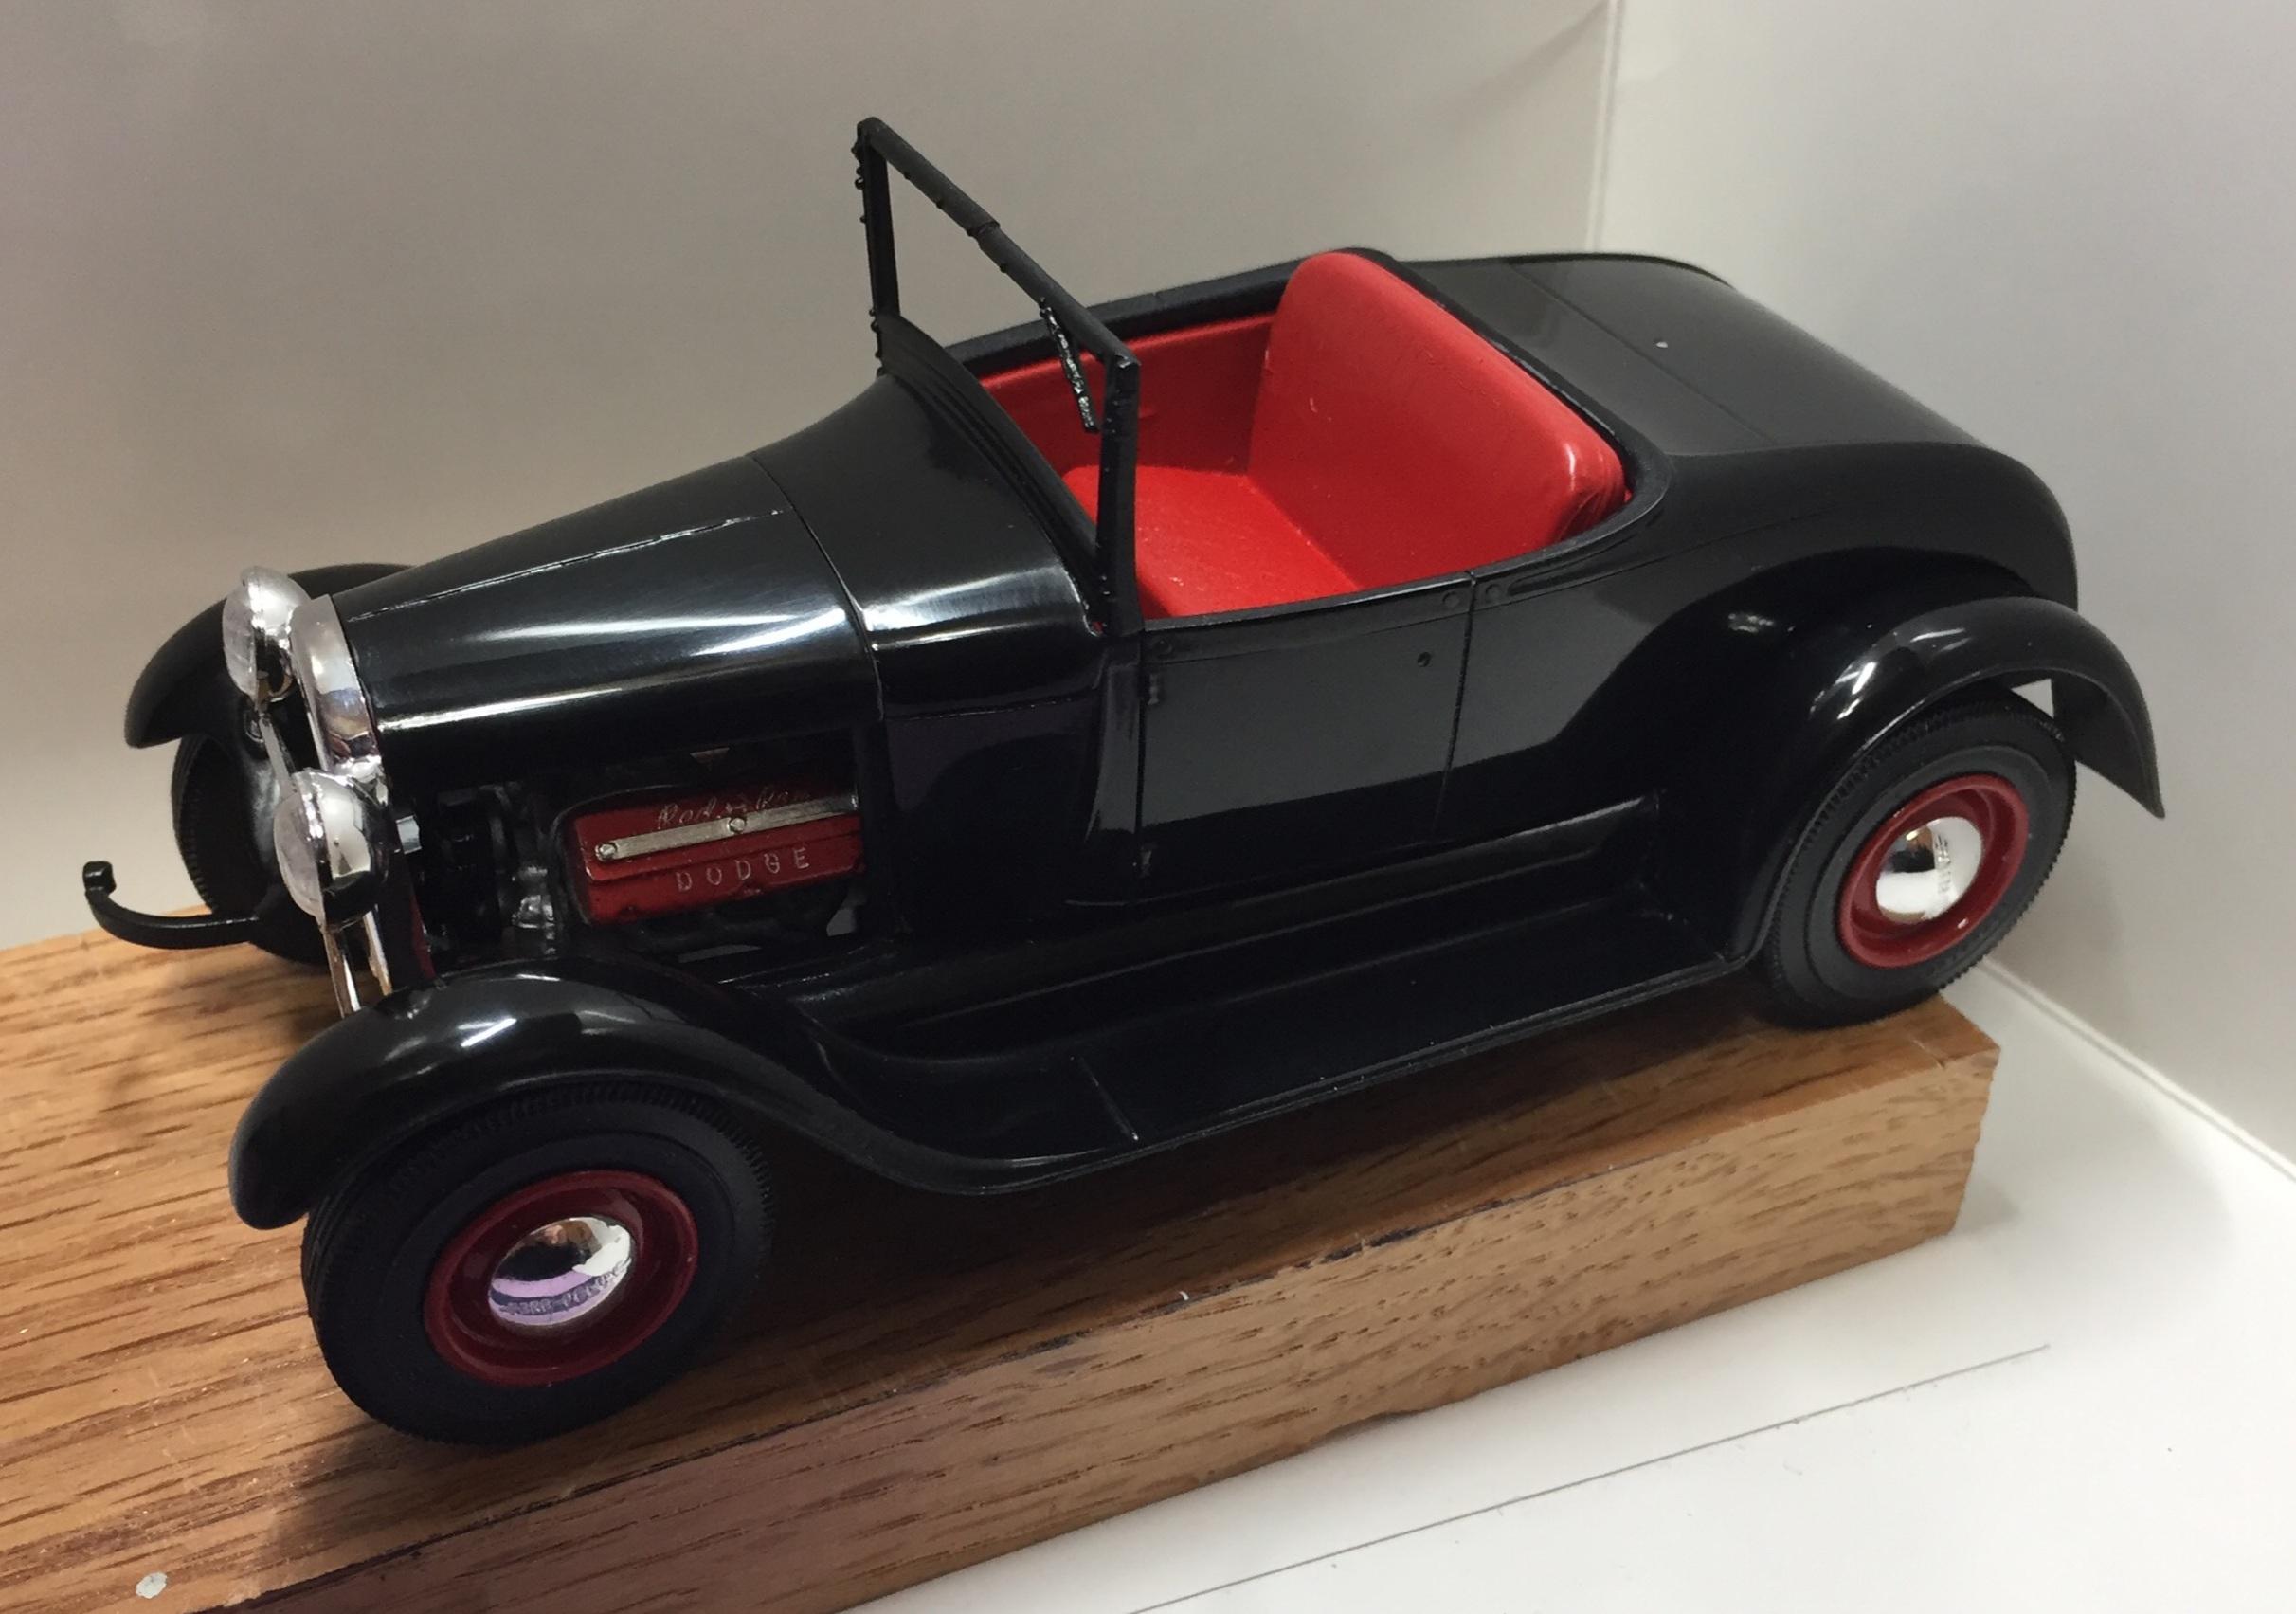
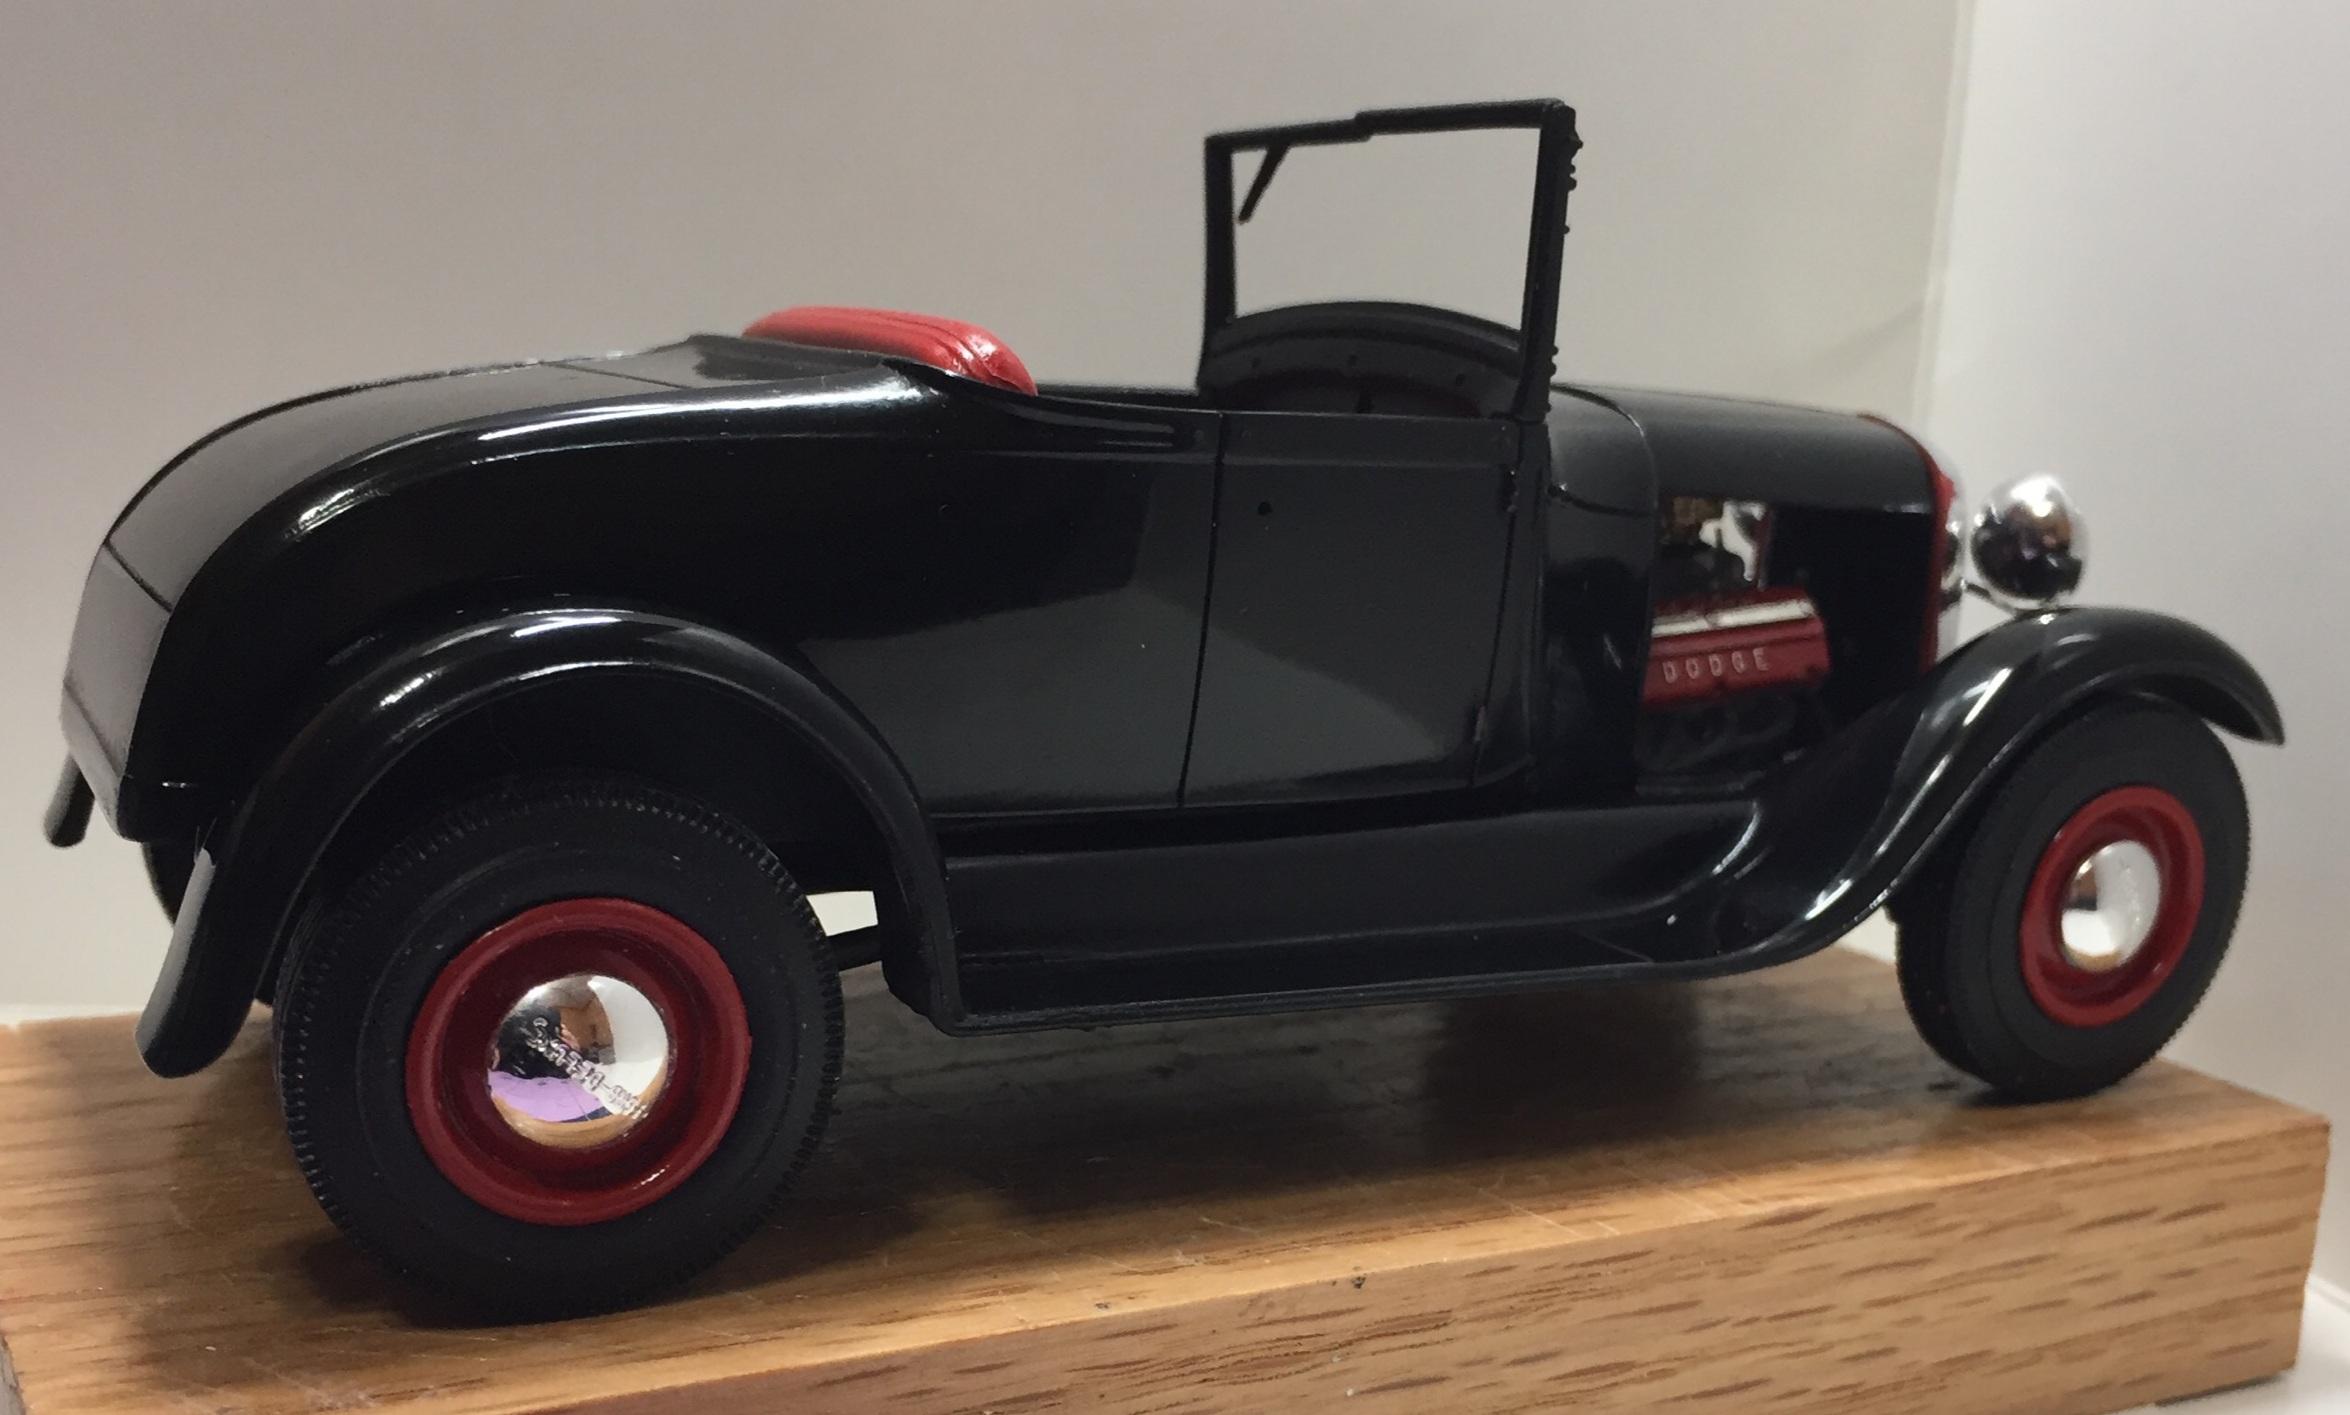
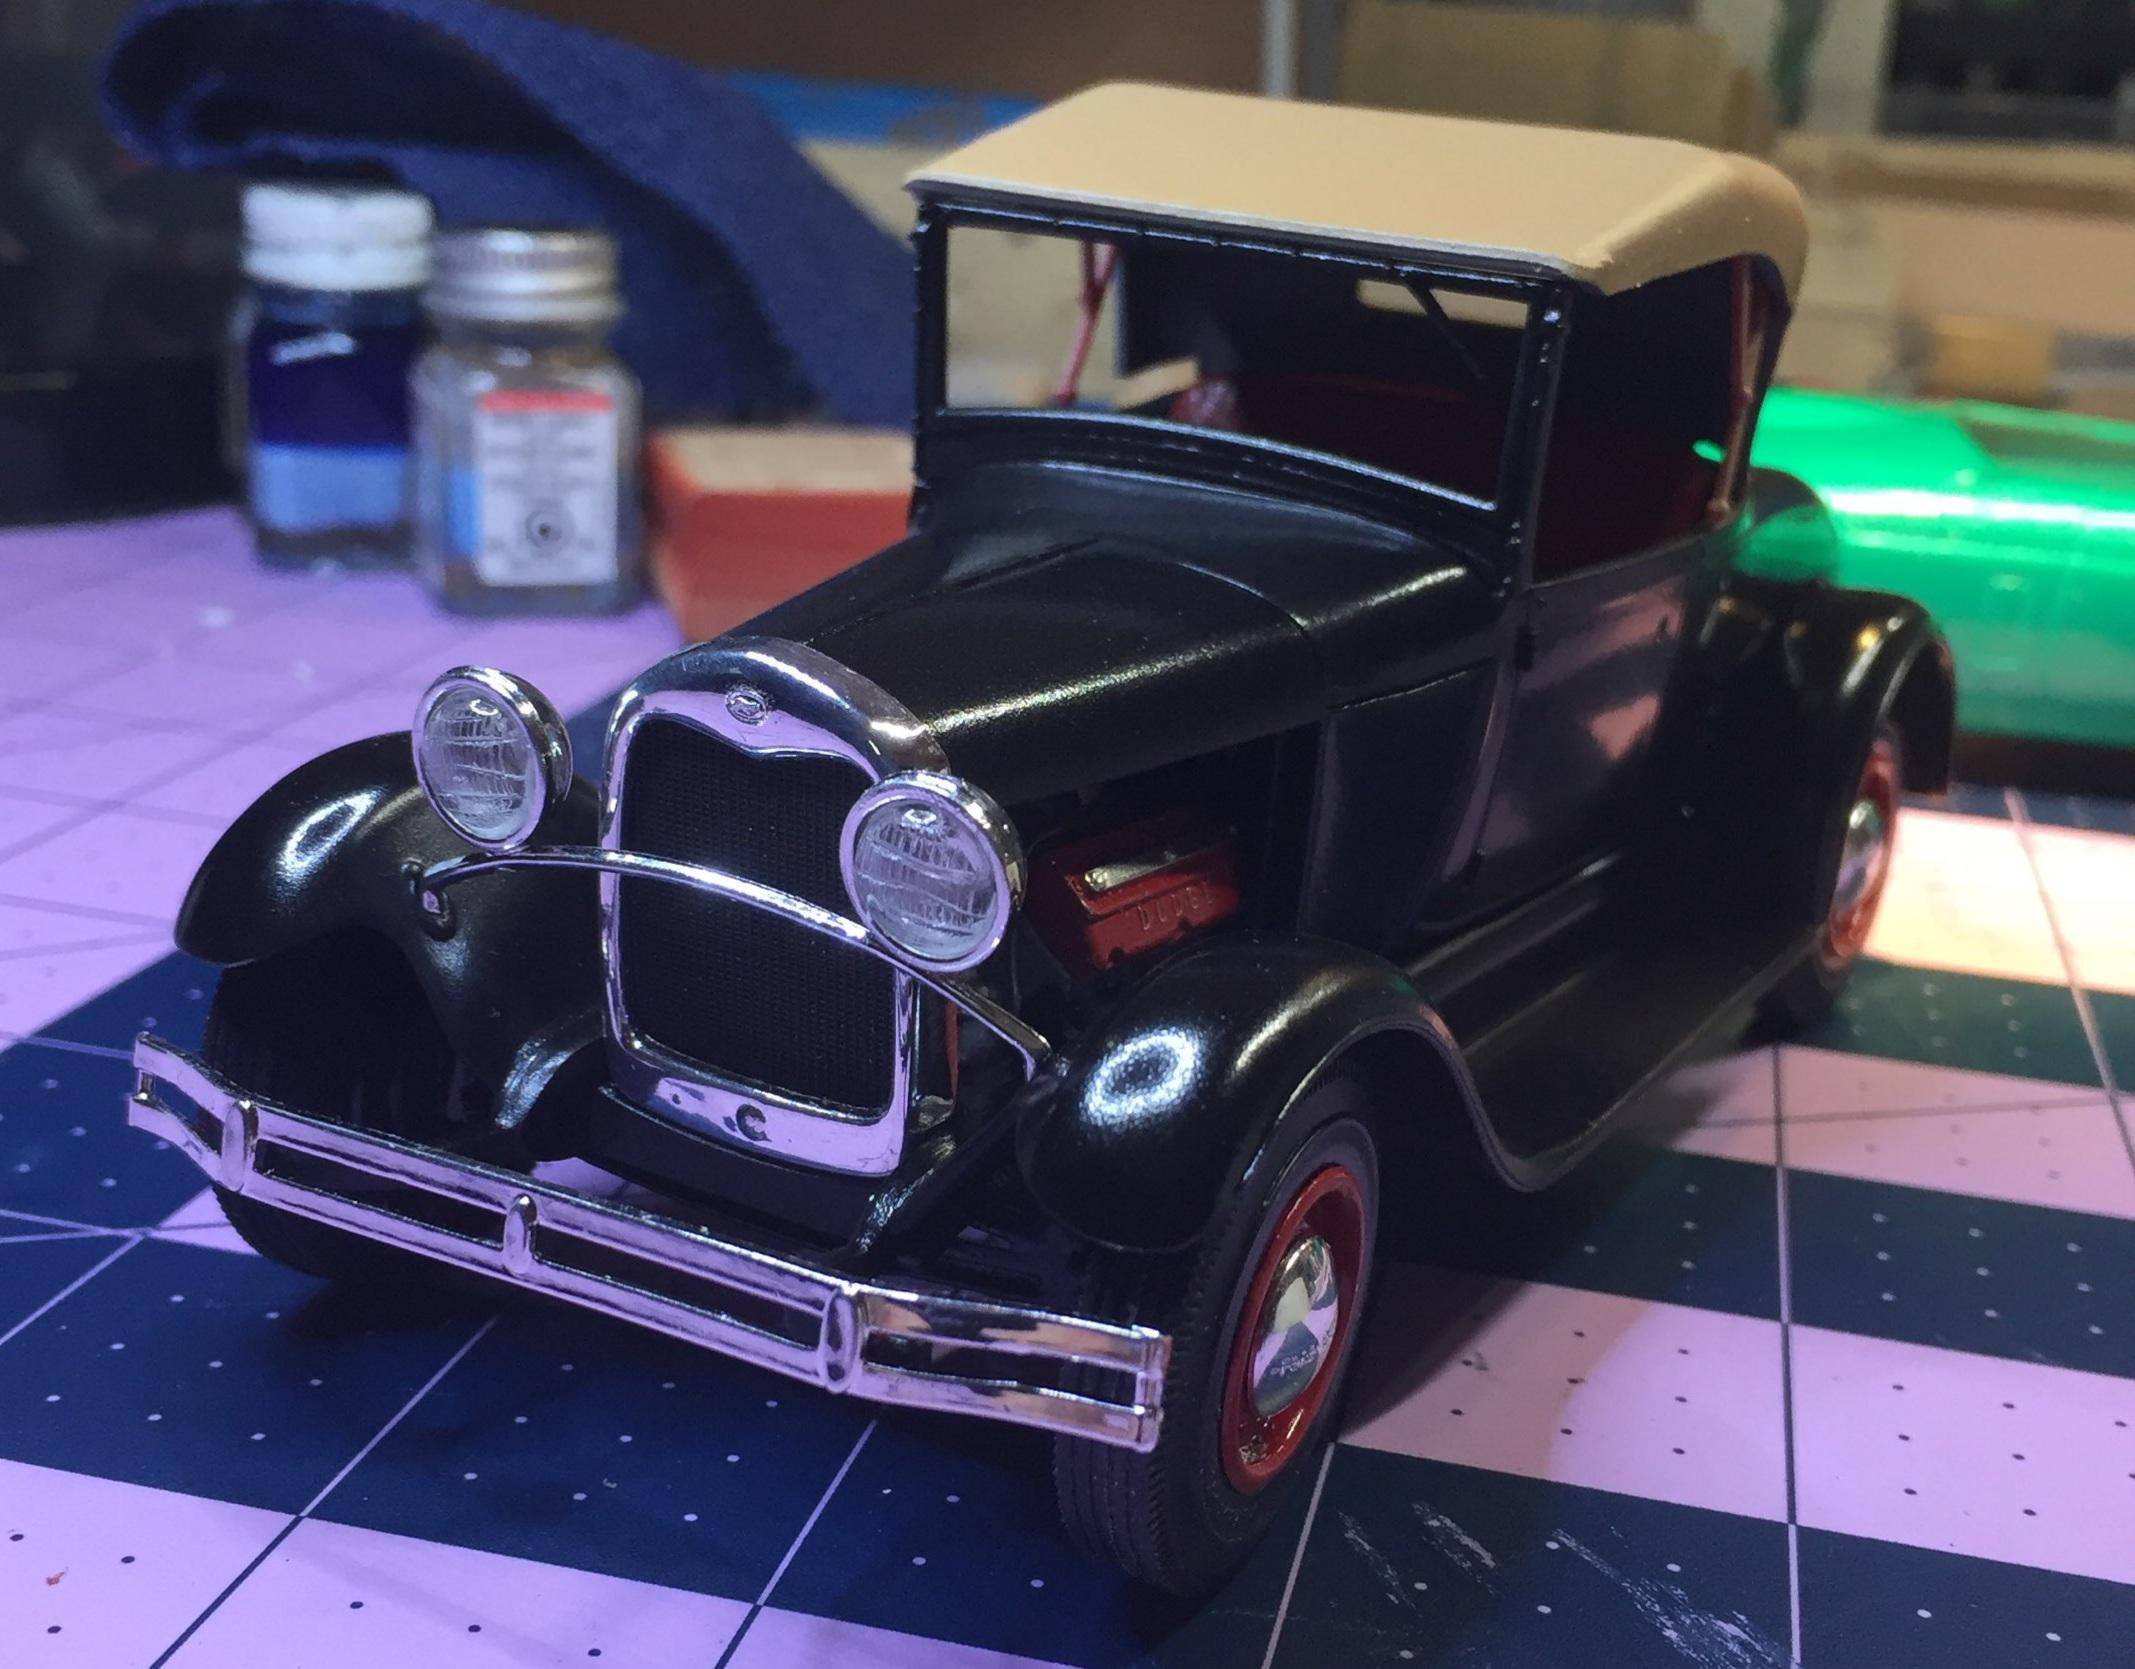
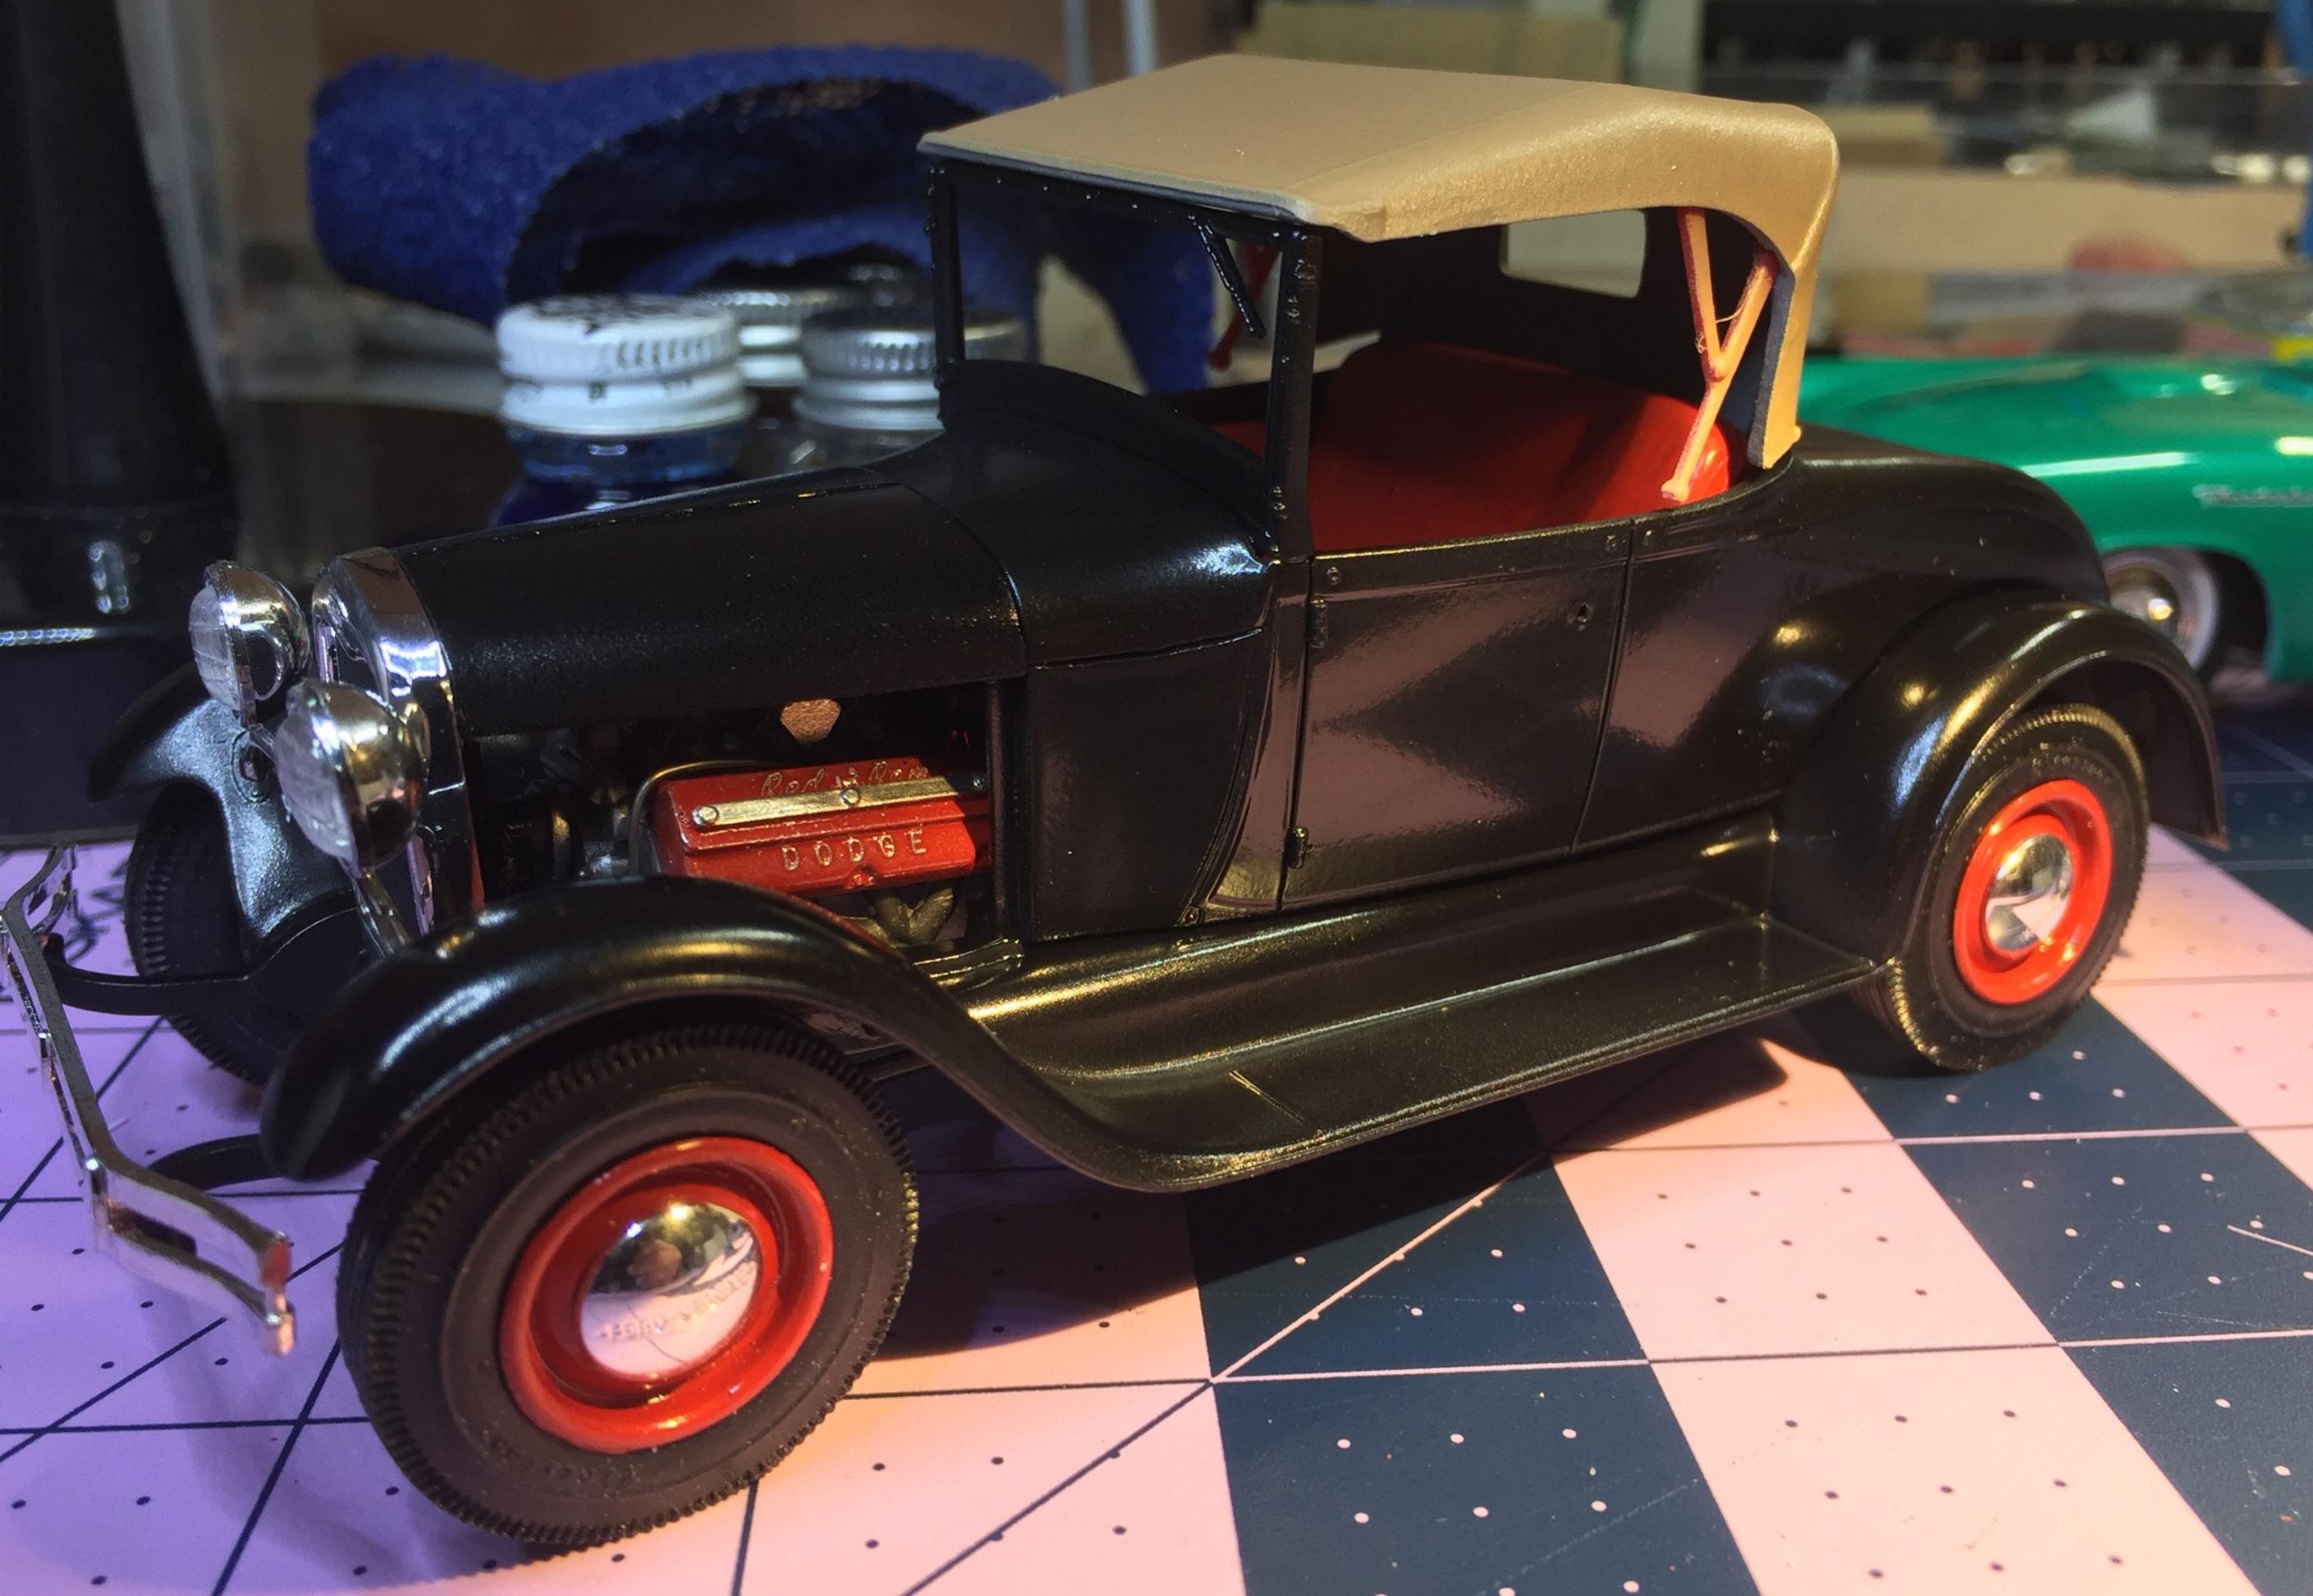
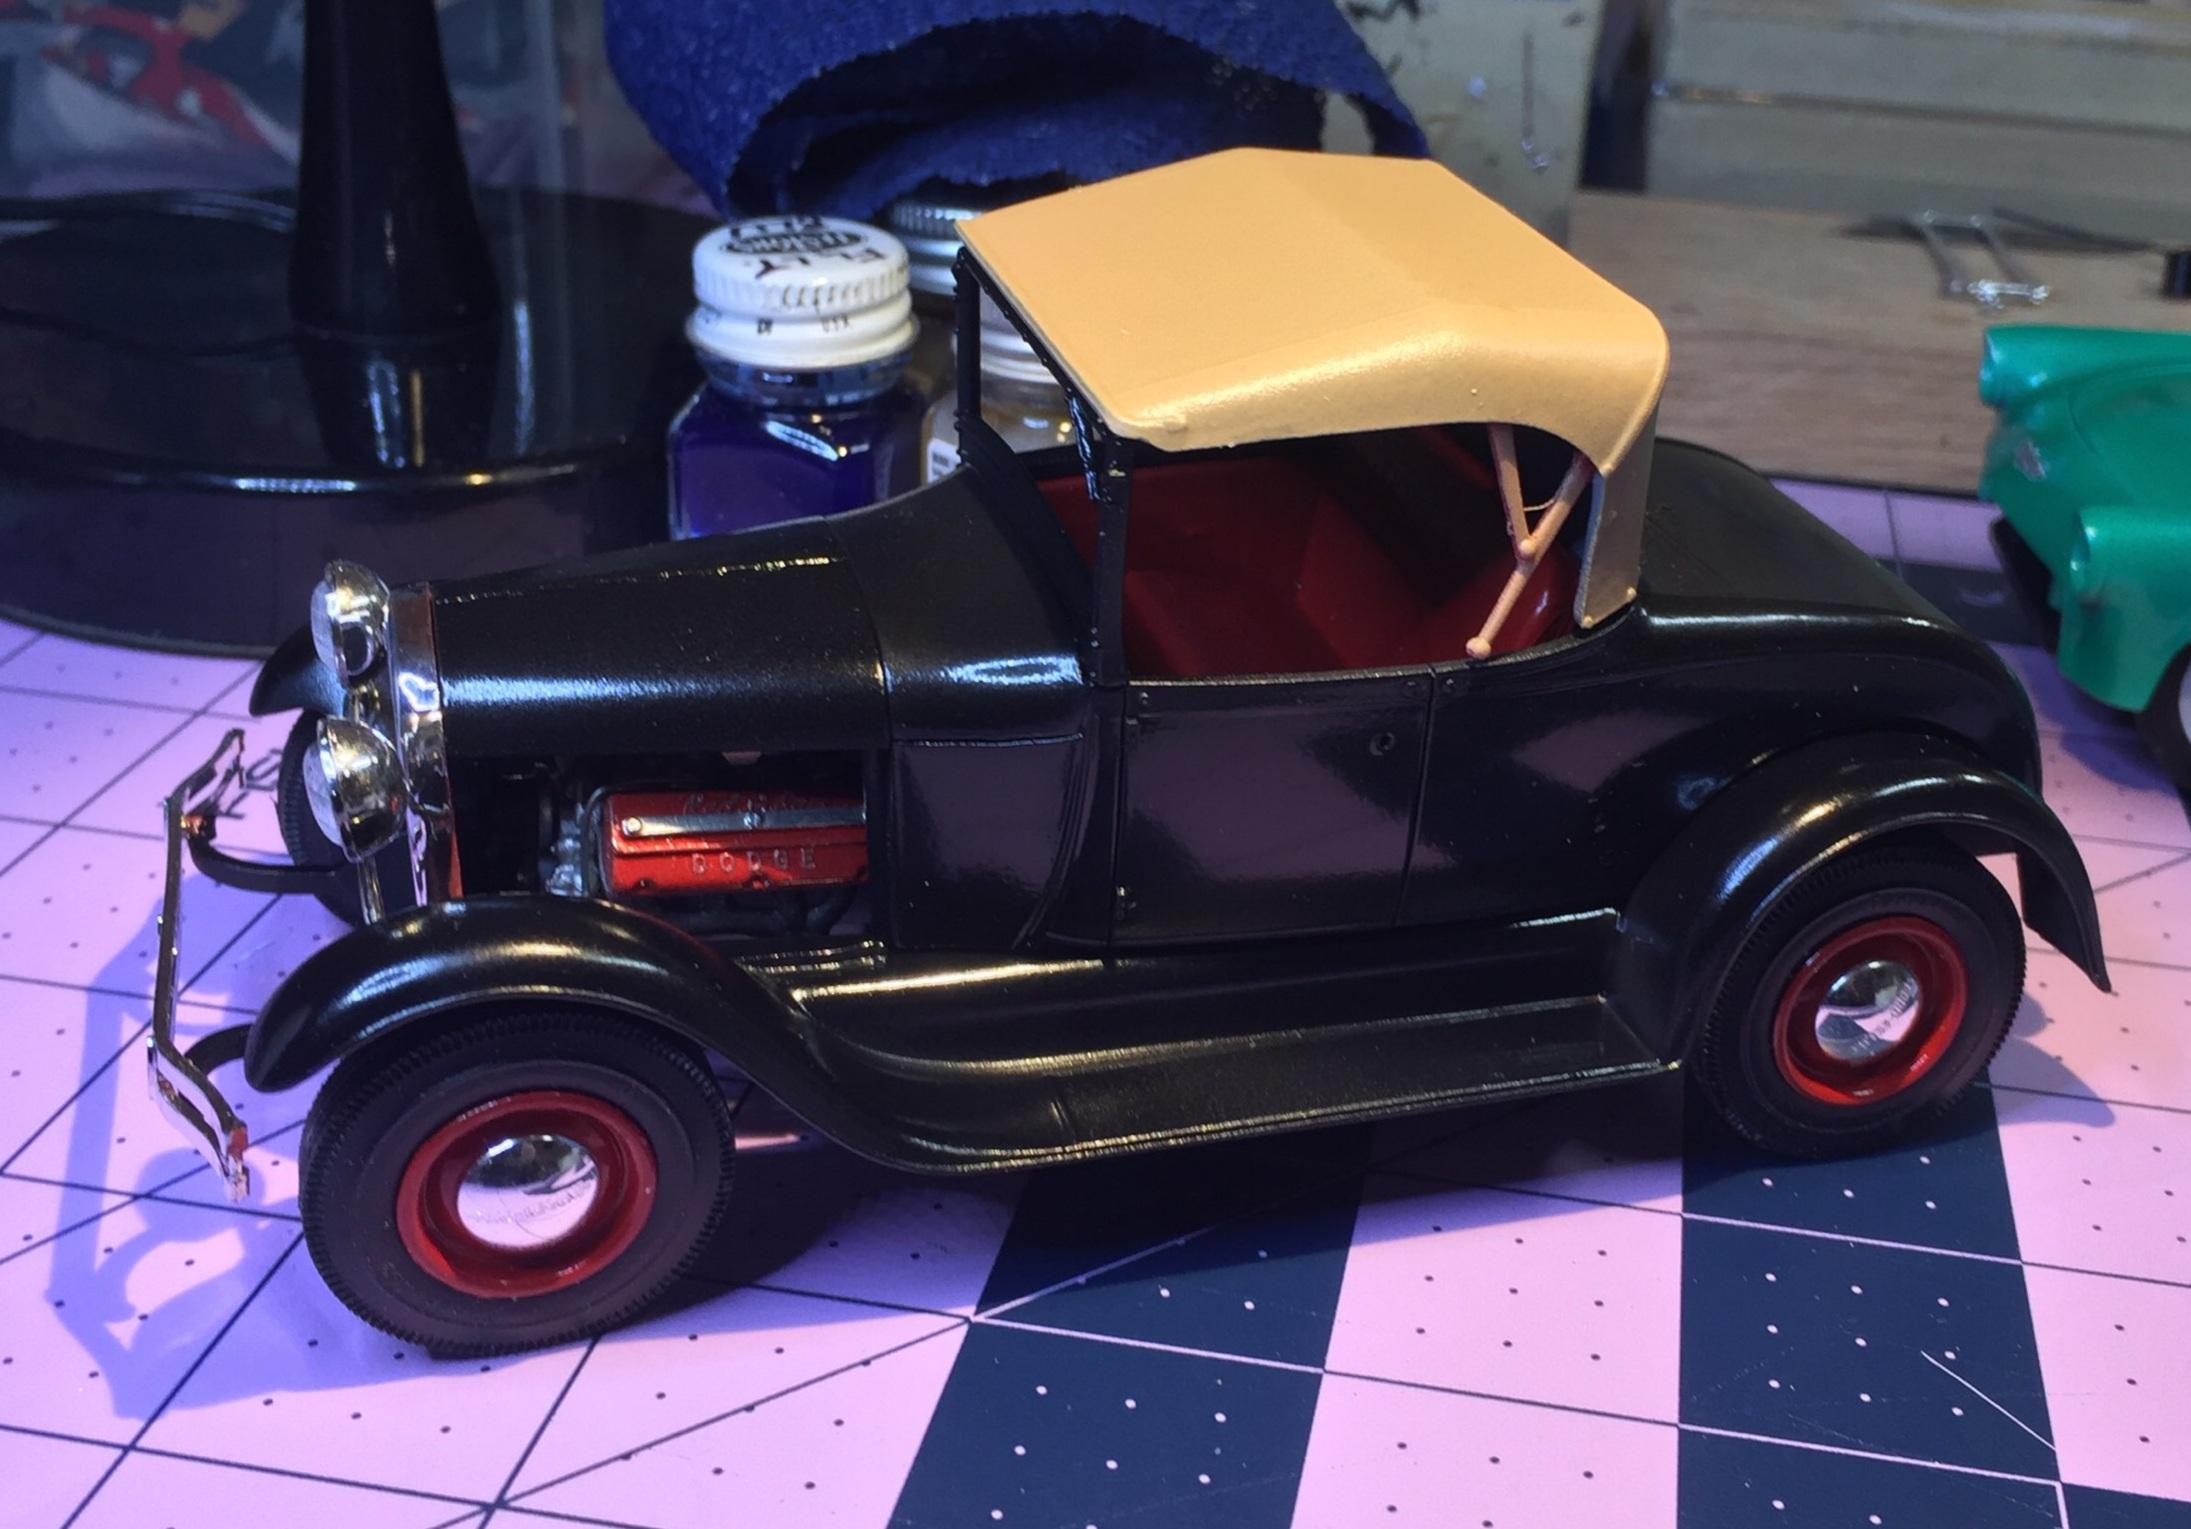
According to our back-story, those tires on the car now are brand-new re-treads. Our "rodder" is a kid with a gas station job. Ideal. But it's not a lot of dough. The Red Ram came out of a wreck behind the gas station. It's a stock 140 HP 7:1 CR, "economical" hemi. Quiet and smooth. The tri-power is just for looks. No-go-show-boat. The chrome windshield is a Revell item and the one I have is the chopped version. This kit is the AMT '29 roadster. I couldn't find a way to make the Revell frame work; my AMT windshield is an extension of the dash so I considered cutting the frame off and grafting the chrome frame to the body somehow....anyway, I didn't want two frames I couldn't use. I'll keep the original wind screen (that's the English ? term) and retain the up-top option. ?
-
Wow! Very nice!
-
71 Olds 442 W30 (replica of my brother in law’s car)
customline replied to Steve H's topic in WIP: Model Cars
Outstanding ! ? detail this thorough is pretty rare. -
Thank you, Carl. The color was a last-minute decision. I have a few of those Testor's cans and I want to use them before they start to leak.
-
I'm on board, Mr. Mike! I just "won" one of these old Monogam kits a couple weeks ago. Mine is a bit better than what I see here, though ?. Good luck and don't break anything!
-
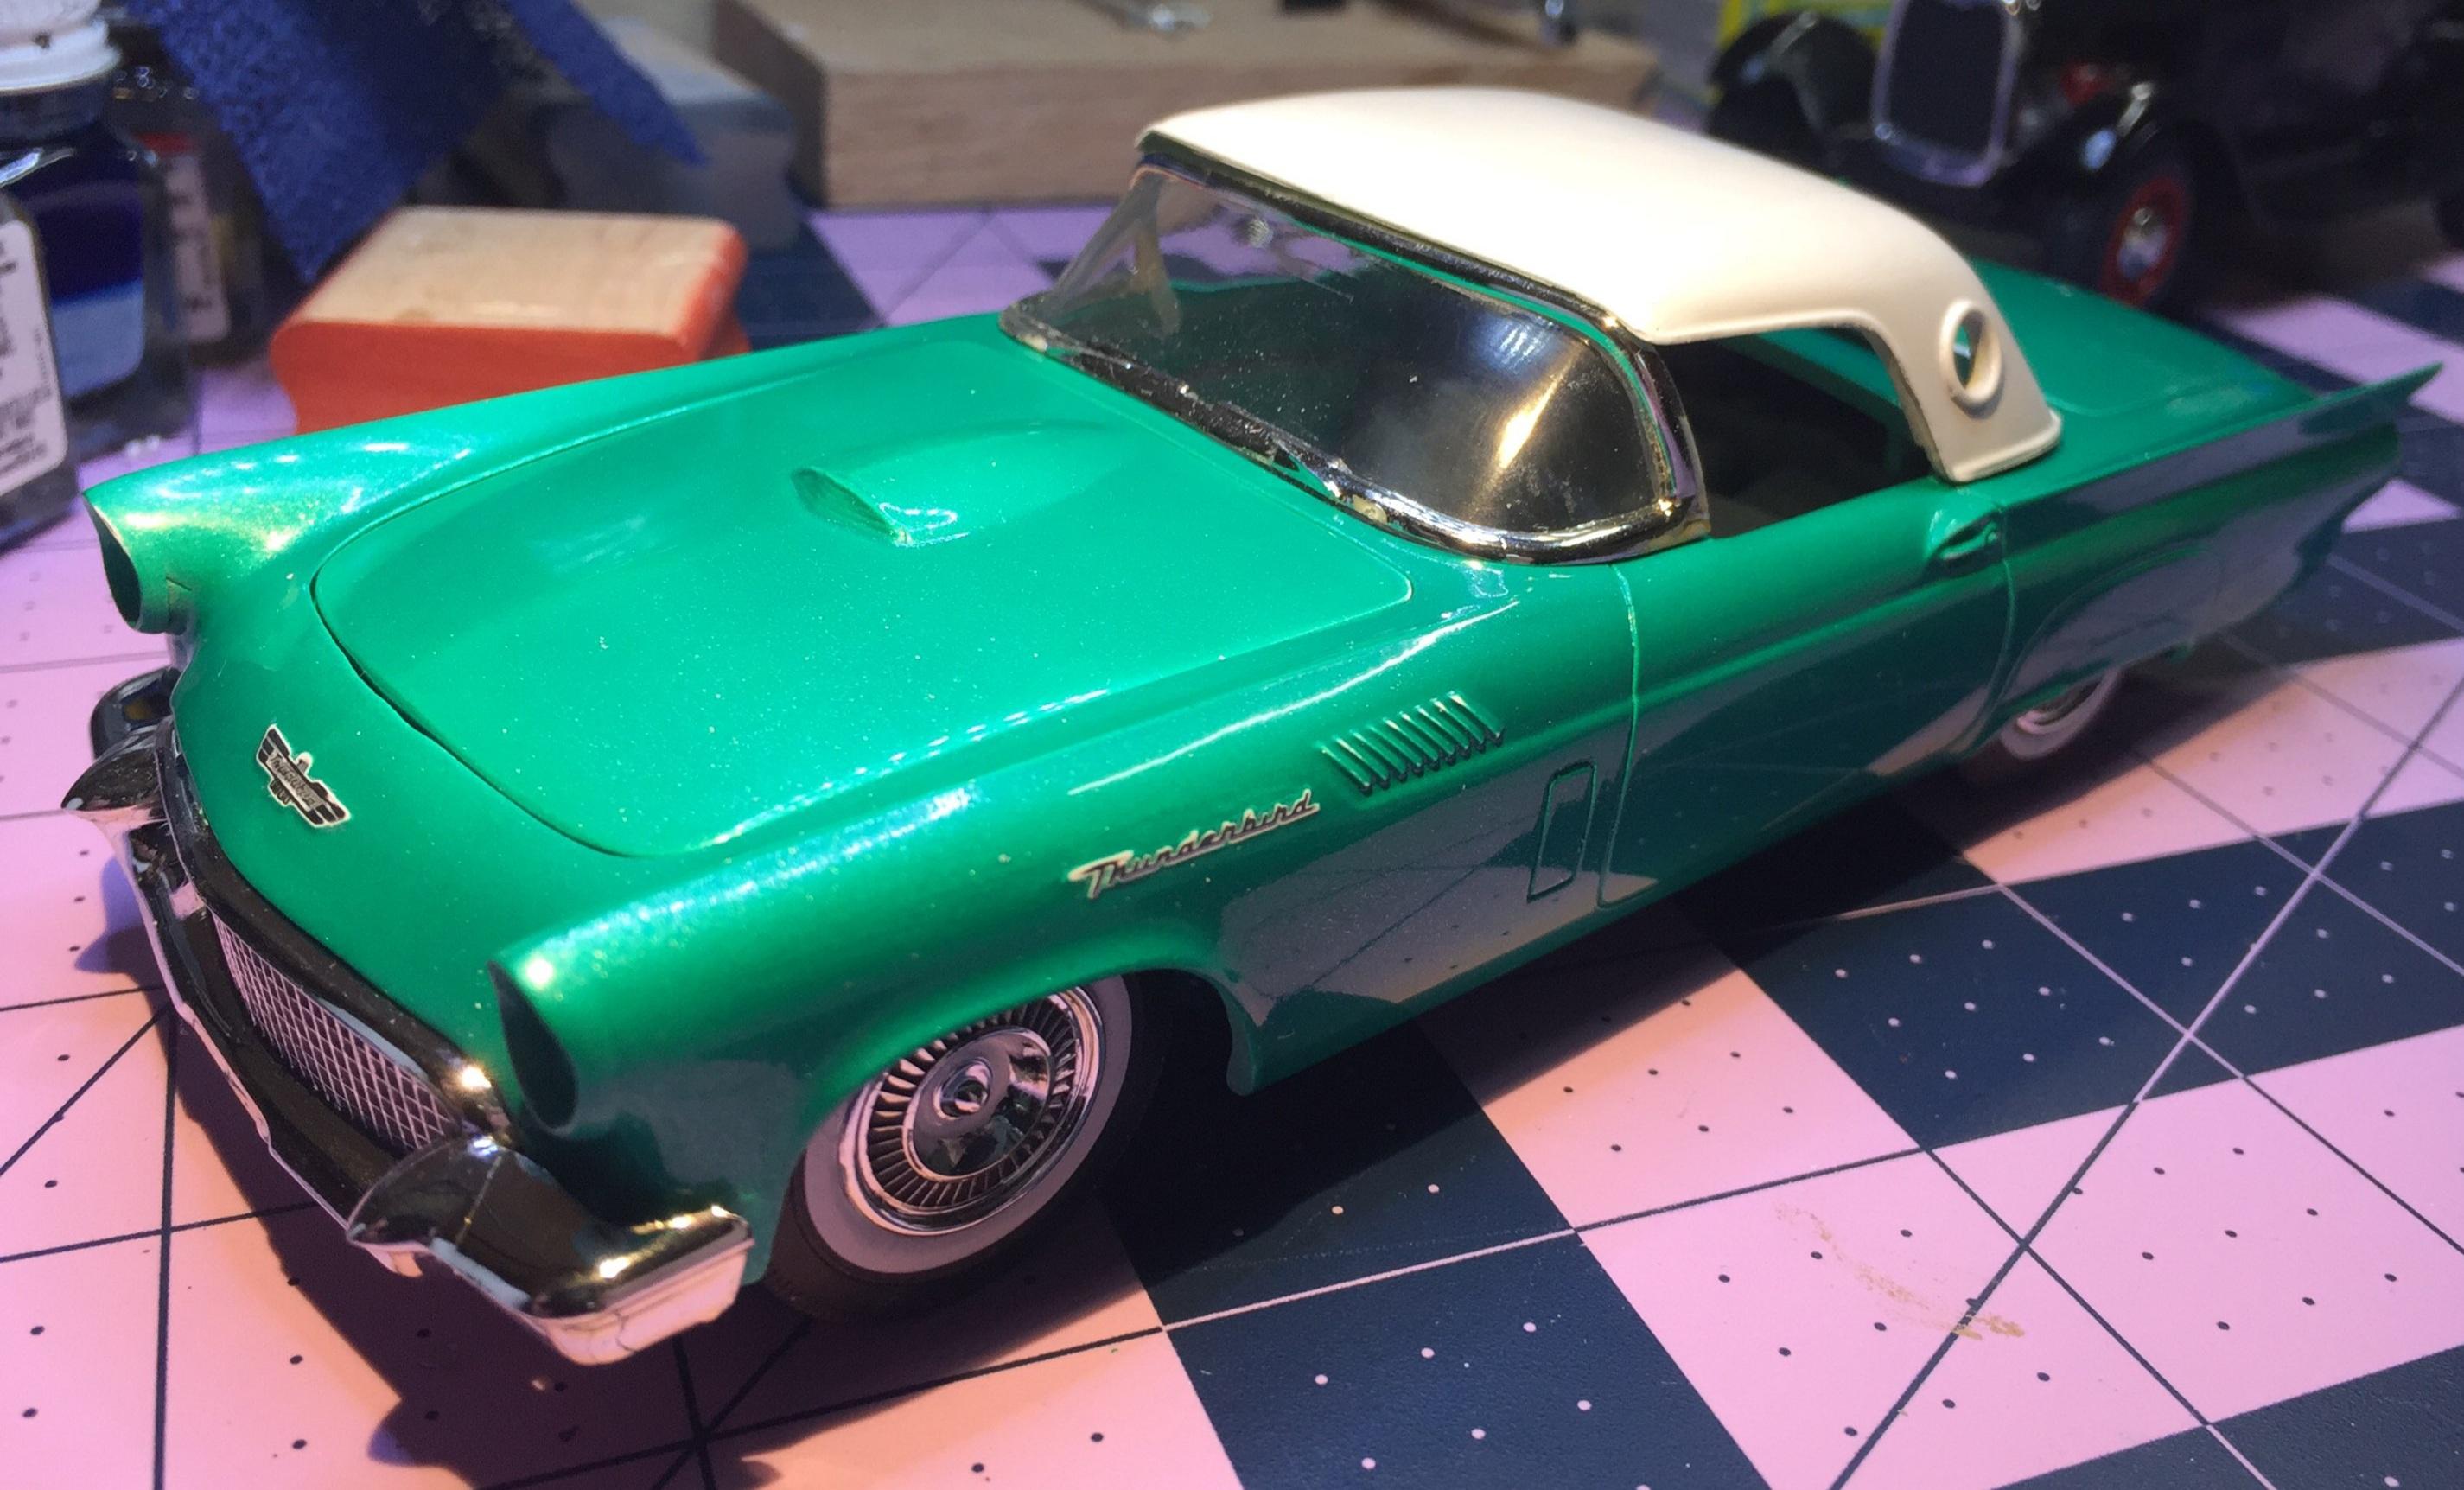
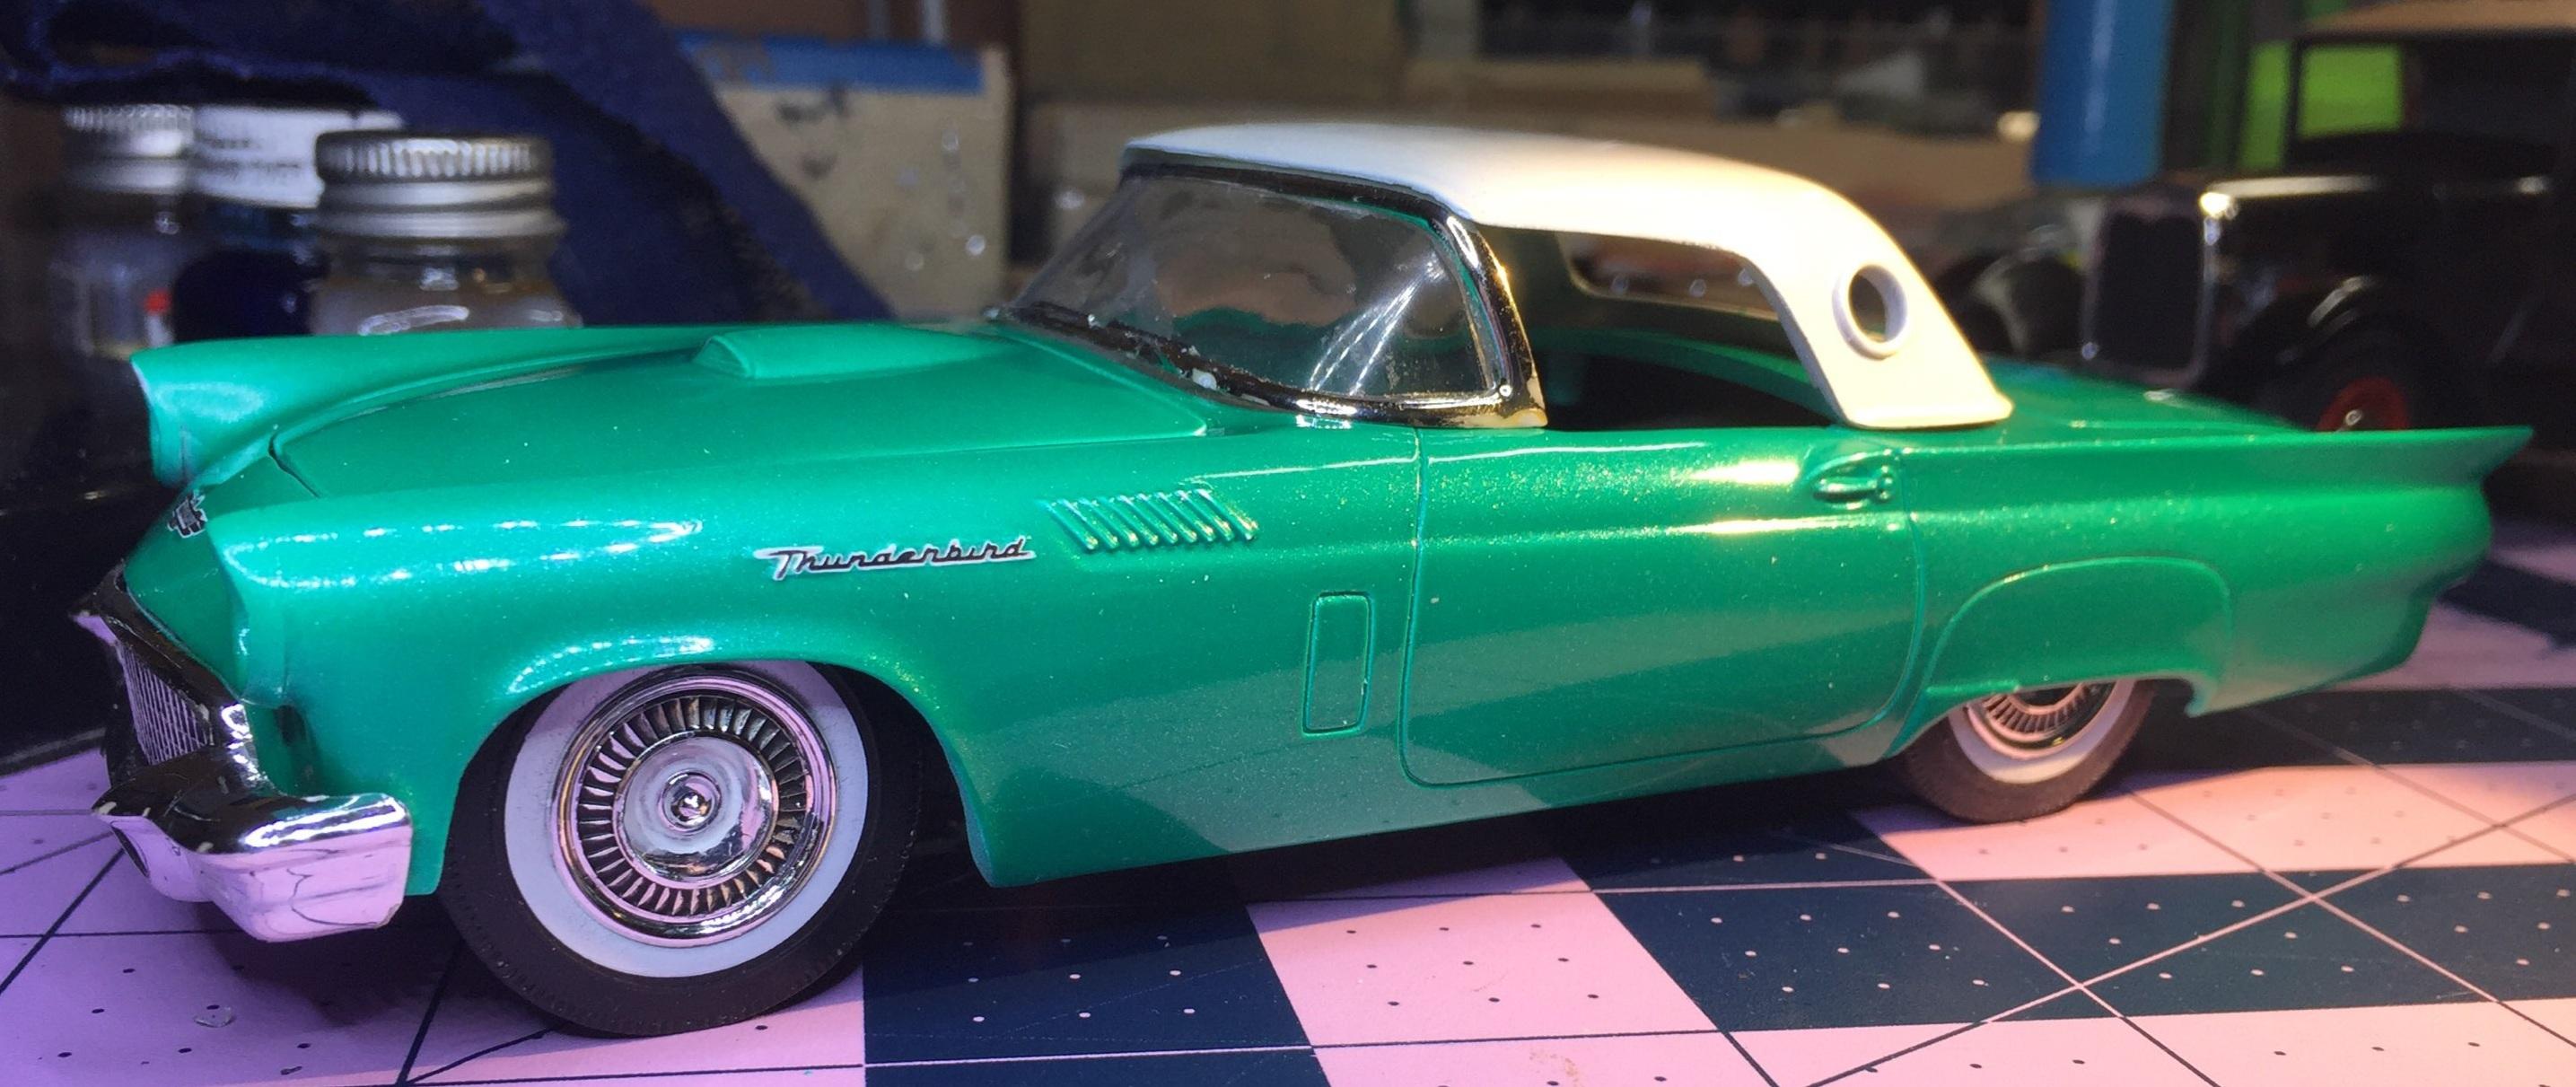
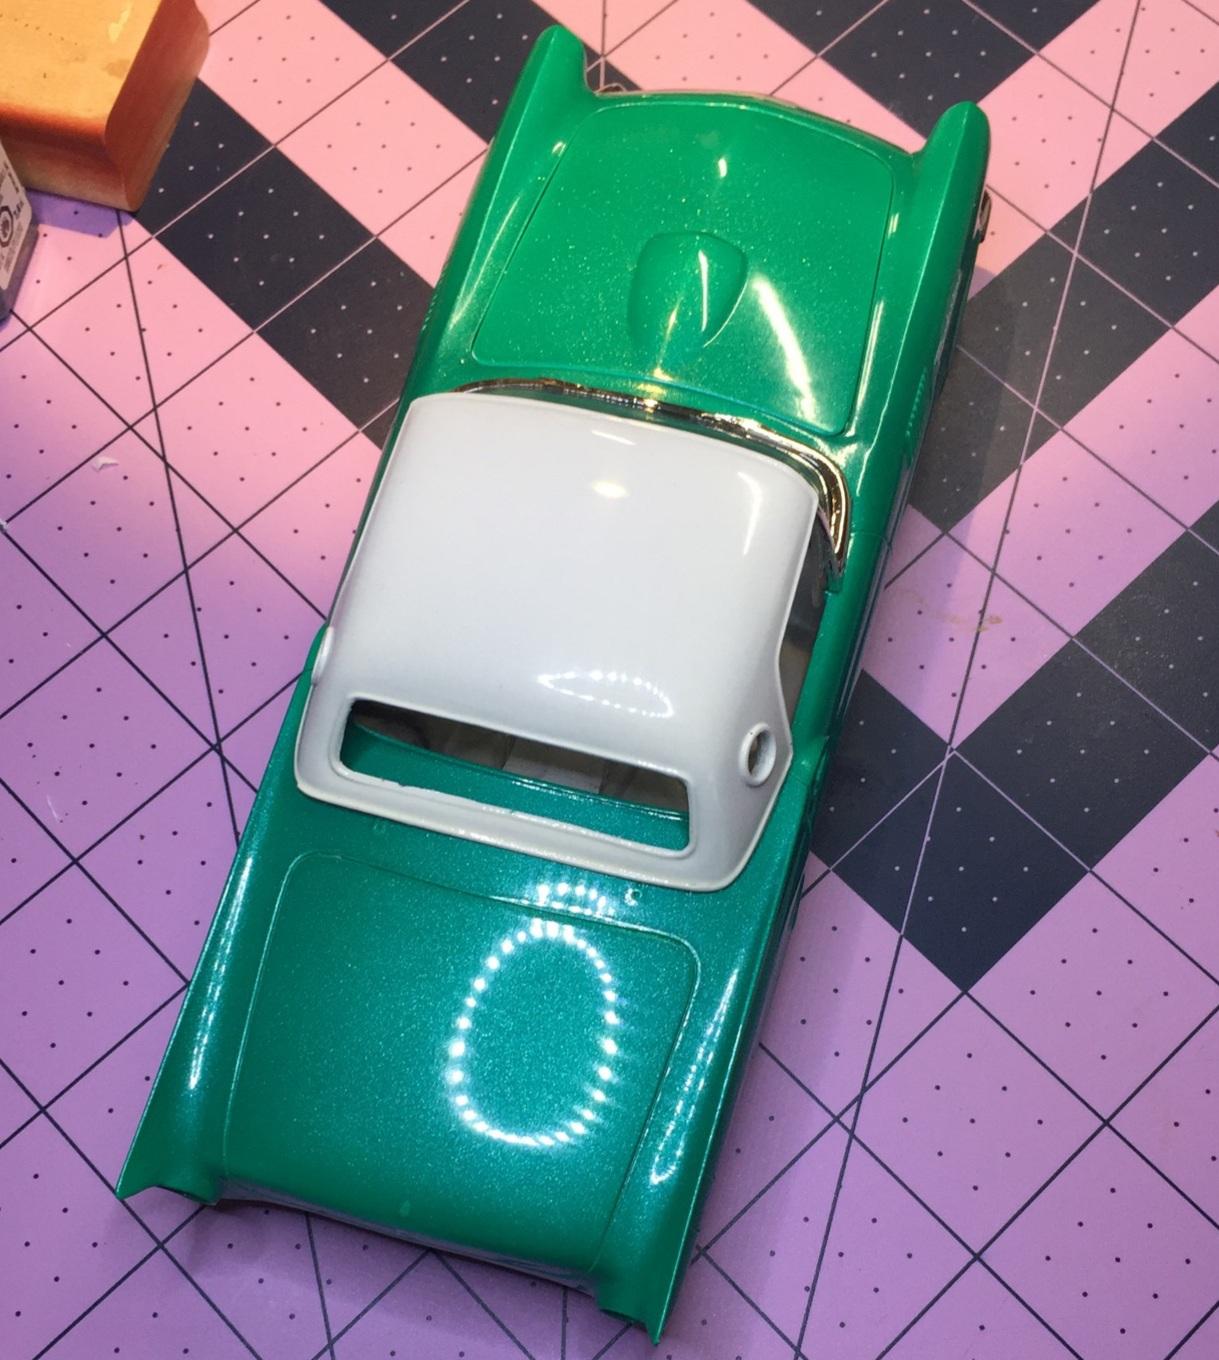
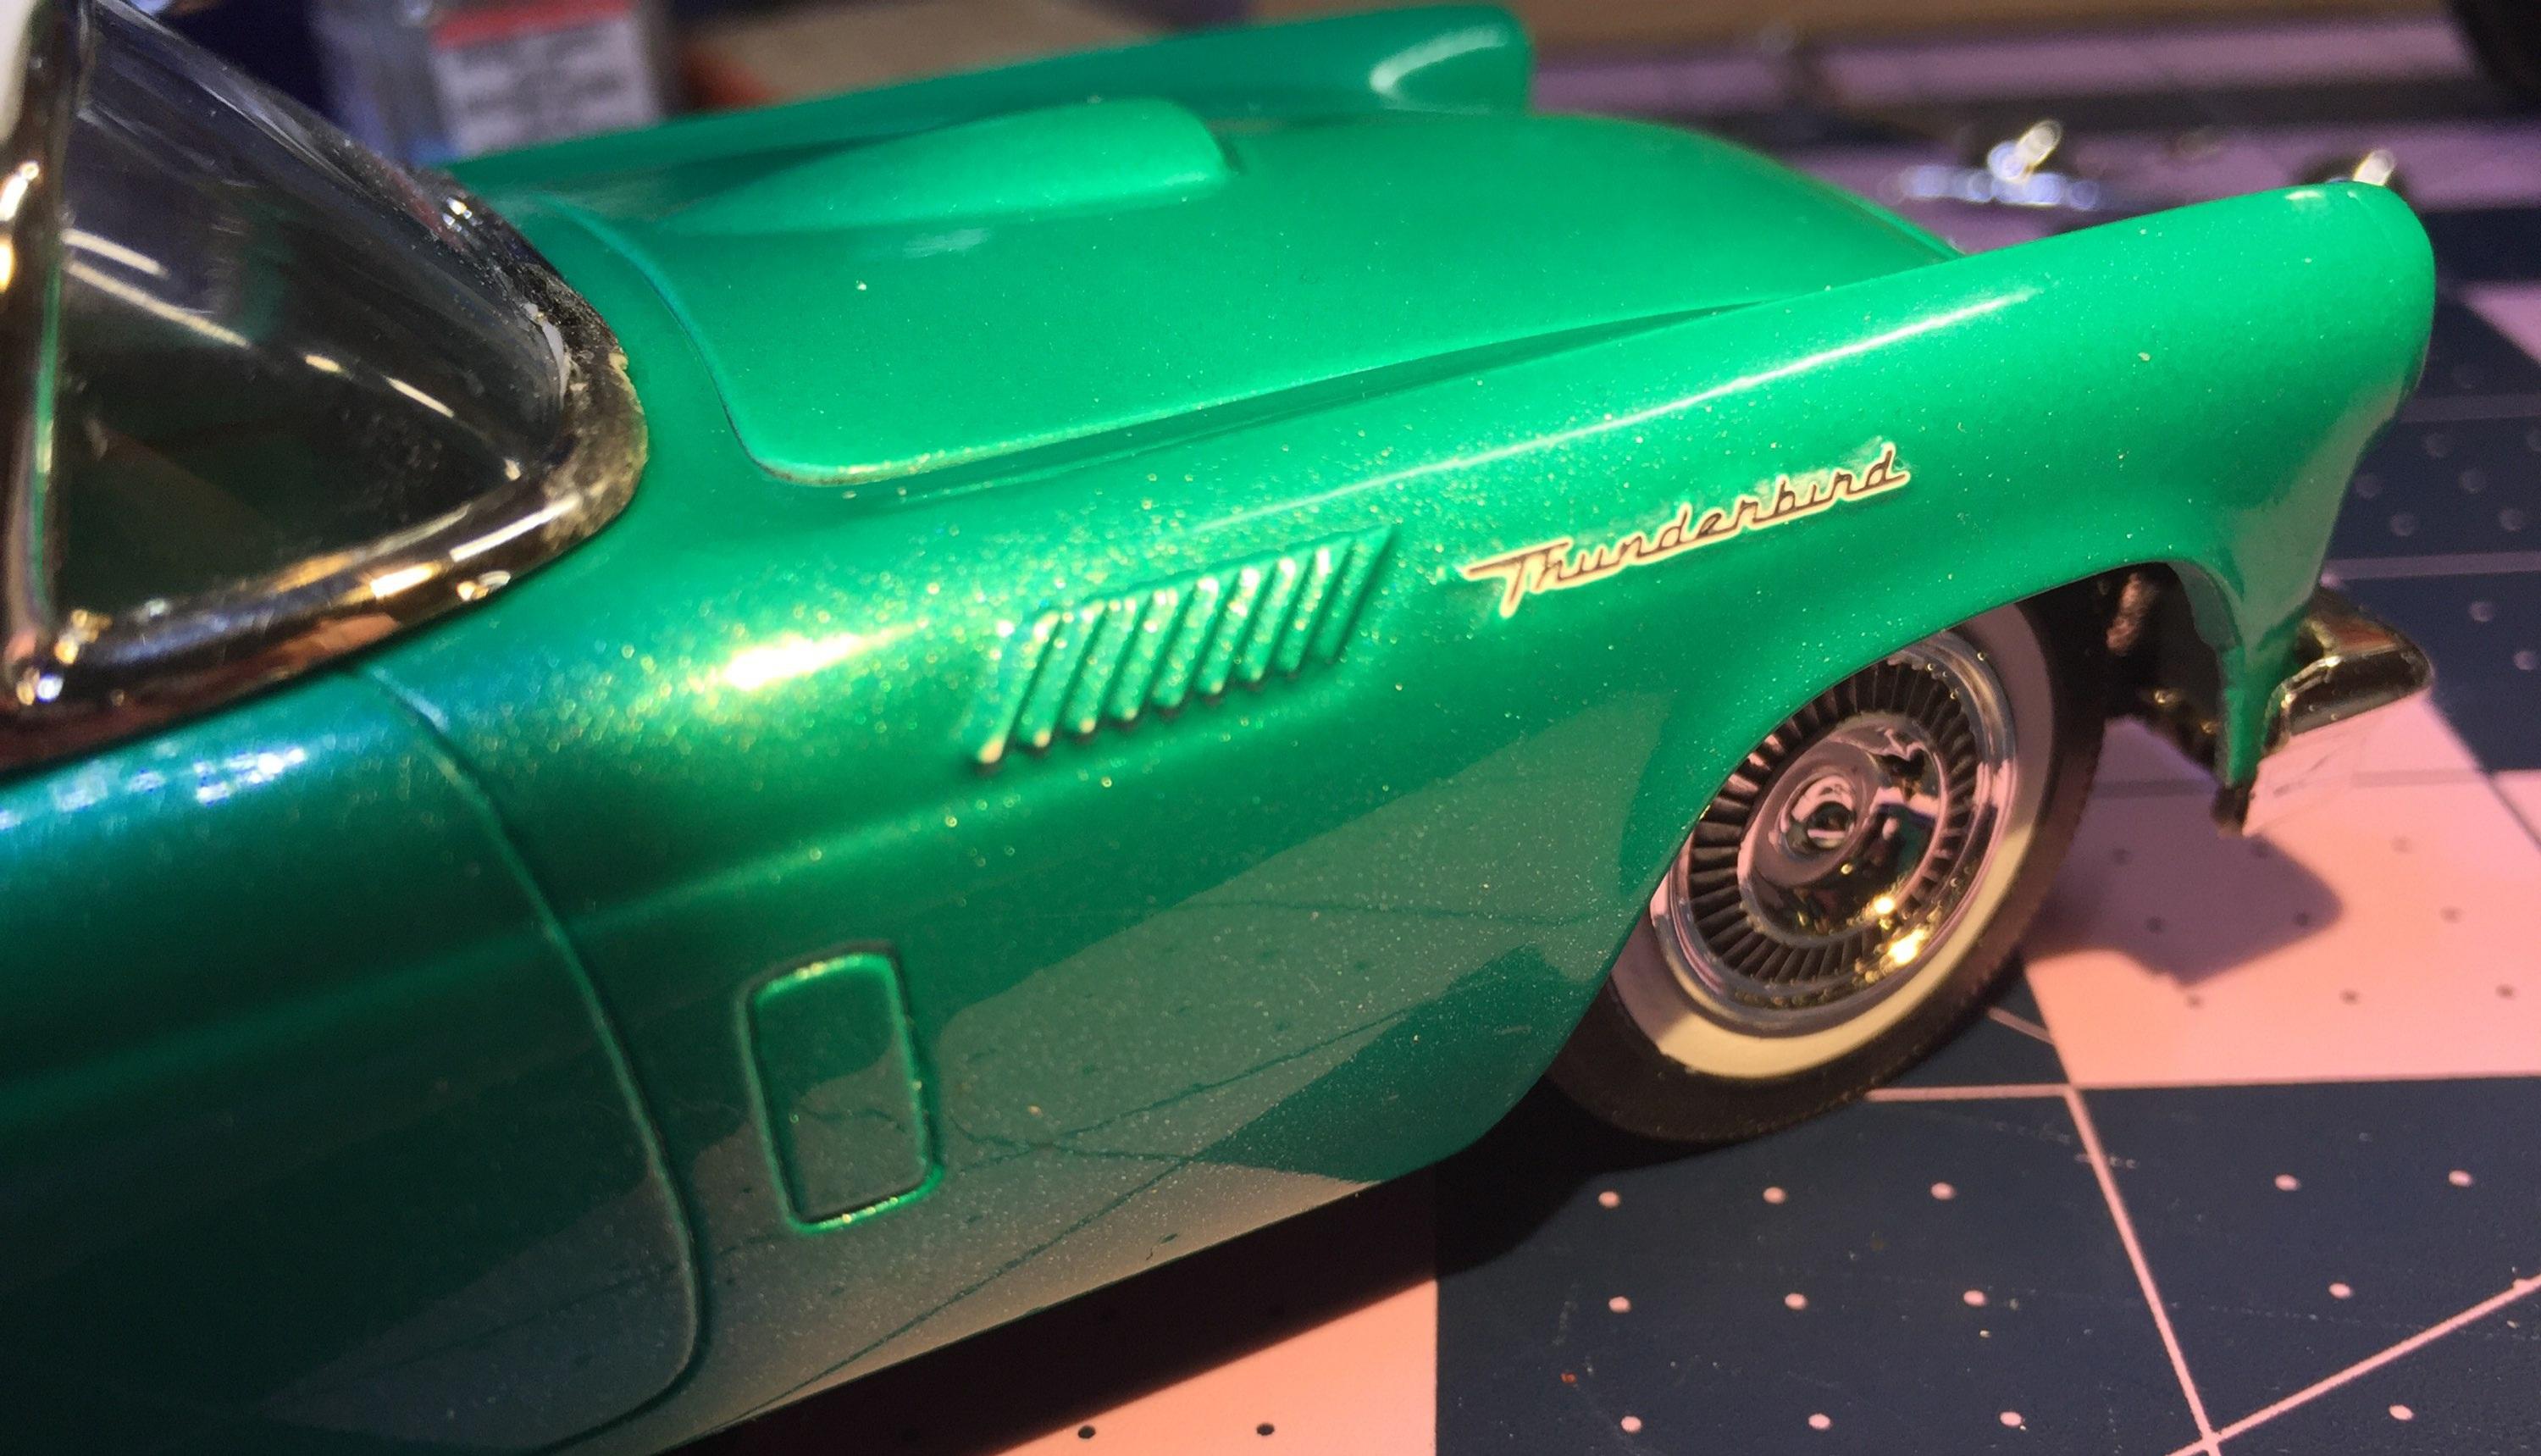
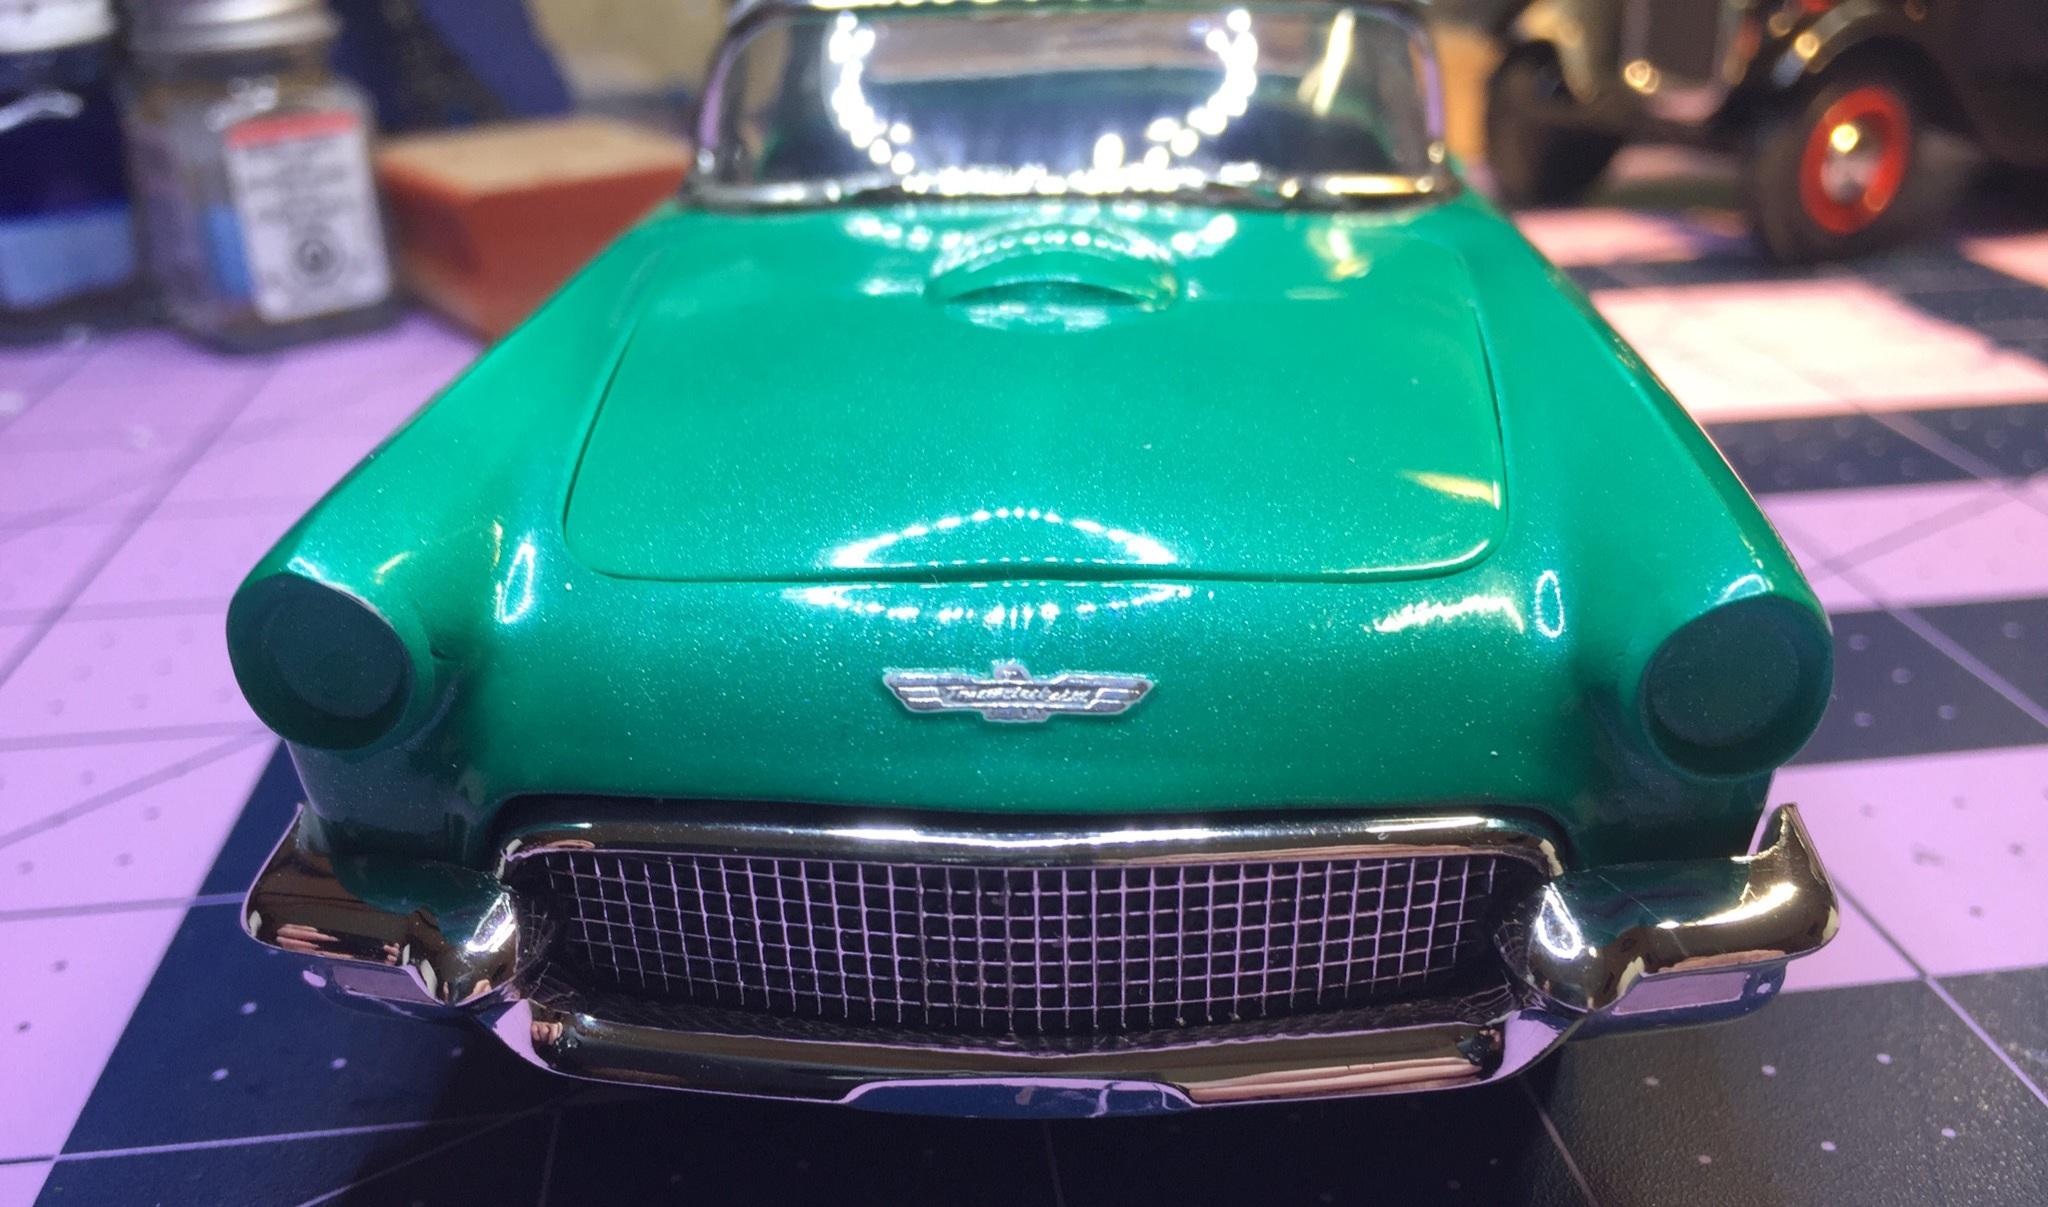
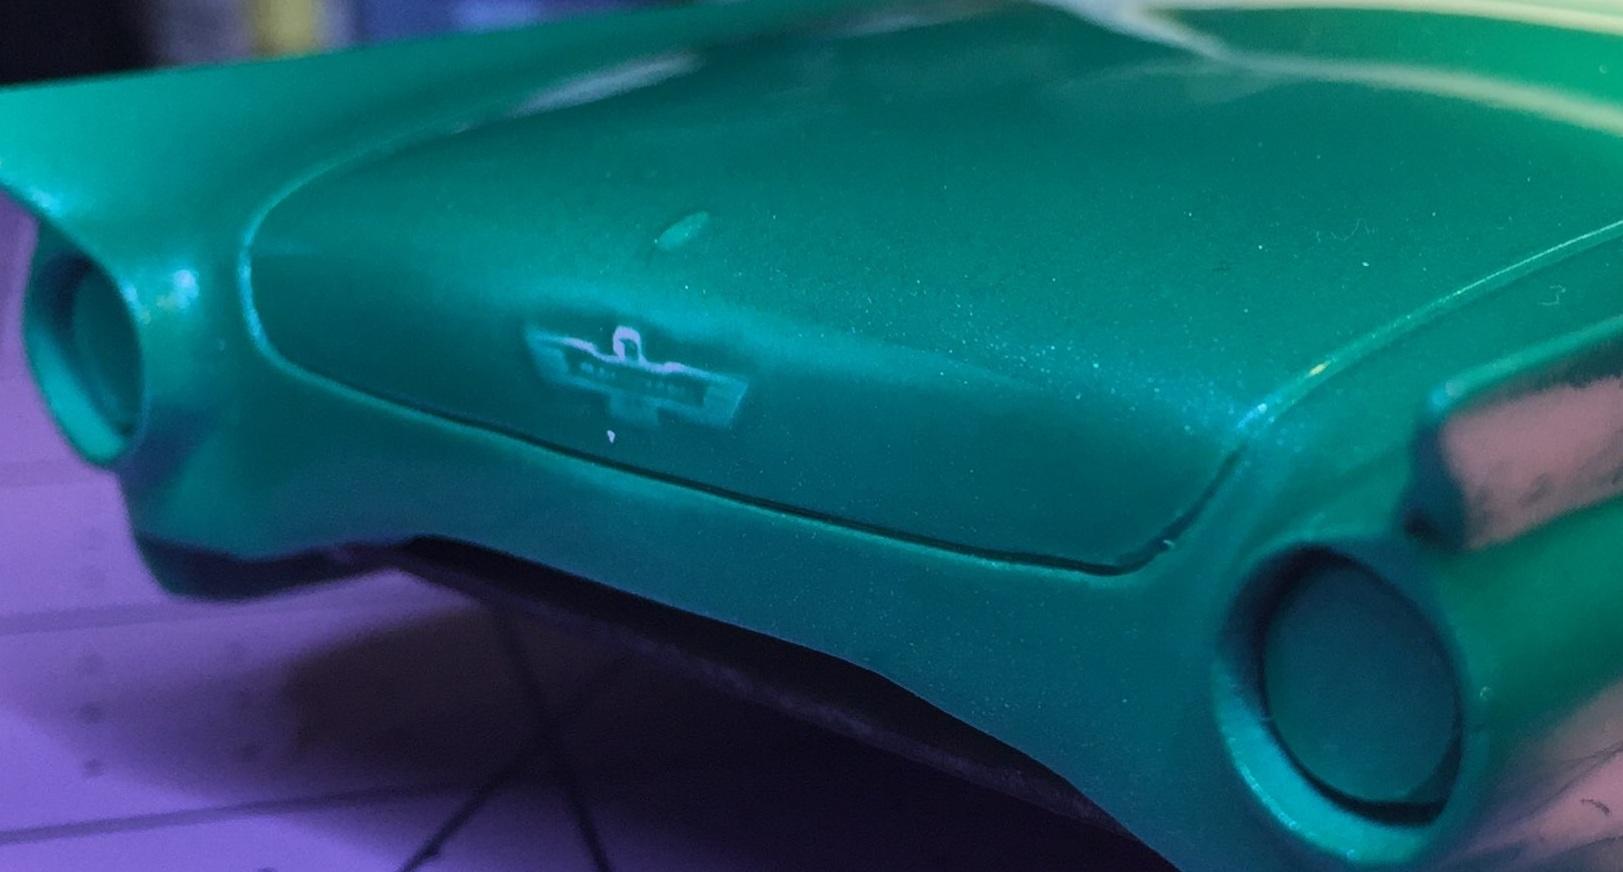
Progress! Yesterday the humidity was down so I spent some time in the garage catching up on the painting. Of the three I've been working on, two of them were ready for color. I decanted a can of Testor's Extreme Lacquer for the T-bird and shot it through my old Wren. Left the bird in the dehydrator overnight and did the polish-out this morning. It could have used another coat or two. I came very close to rubbing through on the front fender ridges and finally did on the tight radius of the deck lid just above the badge. ?. Gotta try an airbrush touch-up on it. It's small but it's obvious. the Thunderbird scripts survived the ordeal but the white outline from the fine white primer is evident. I'm OK with it. It was an experiment. Thanks for looking and your comments are valuable and welcome.
-
Well okay, it's black ! Black is always a gamble for me. I tried to paint it out of the can yesterday( Krylon) but that didn't work out so today I decanted it and shot it through my Wren. It was a little too thick so I added a few drops of Mr Hobby leveling thinner and the application got a lot better. The body will need some work but the fenders are quite good and will only need polishing. The interior was sprayed yesterday and spent the night in the dehydrator. Today I sprayed it with a satin clear from Ace and it started to emulate wrinkle paint. ?? Thanks for stopping by!
-
That's a beautiful black paint job, Tony. I did one of those yesterday, too. The RH was down to 48% so I headed to the garage with no fear of blushing. I use a mixer chucked in my Sawzall to make sure the paint is mixed well. I used Ace gloss black and it looked fantastic....till it started to dry. ? Yes, the humidity was way down but I had not opened up the garage to air out the humidity that was trapped in it from the previous week of rainy weather. ? I opened it up before the next paint job and that one was just fine. I just thought I would share that.
-
Yeah, me too, Greg, but I wouldn't want everybody to know. ?
-
I hate to say this but no, I have never had an impulse for painting something in the morning when I wake up. Painting stresses me out a little so no.....but vowing to build a kit strictly out of the box? Yup. All the time. And I never, ever do it. I can't do it. There are no kits that I have built so far that were good right out of the box. Not one. But your rattle can paint jobs look darn good, Tony, and this should be a quick build should you decide to continue with it. I'm following ☝️
-
Yeah, see? I'm not crazy! ( lazy, perhaps ?). But really, with the old hemi Dodge, this should be a young hotrodder's first project back in the mid '50s, maybe a little rusty, too. I just don't know yet. I need some inspiration.
-
Off to a flying start! I recently got this Studebaker kit and I'm eager to get to it. For now, though, I'll follow yours. It looks like a fairly well detailed kit. OK, then, get busy! BTW, I have a few bottles like that from the early 80's. There's no explanation. Remember when they cost a dime?
-
Yes, Gary, the little plastic ones, mainly. But we can discuss this in a philosophical context if you like ?. I'll start.
-
Yeah, me too Bil. 50 shades of gray. Can't screw it up no matter how bad your painting skills are ?.
-
Yes, I know...I know ?. I just really hate doing a black paint job. I was thinking a patina job. Just satin black with some sand-through spots and primer. A work in progress, a rolling project car. 100% shade-tree. ( Ohhh...the innocence ? ).....and much easier than all that tedious polishing. Or a flat light green, very shabby. The bright, shiny red wheels tells you what the owner is thinking. He just needs time and money. I think I need to pick out a Navajo blanket ? Thanks for checking in.
-
The "waste-not-want-not" Starliner project
customline replied to customline's topic in WIP: Model Cars
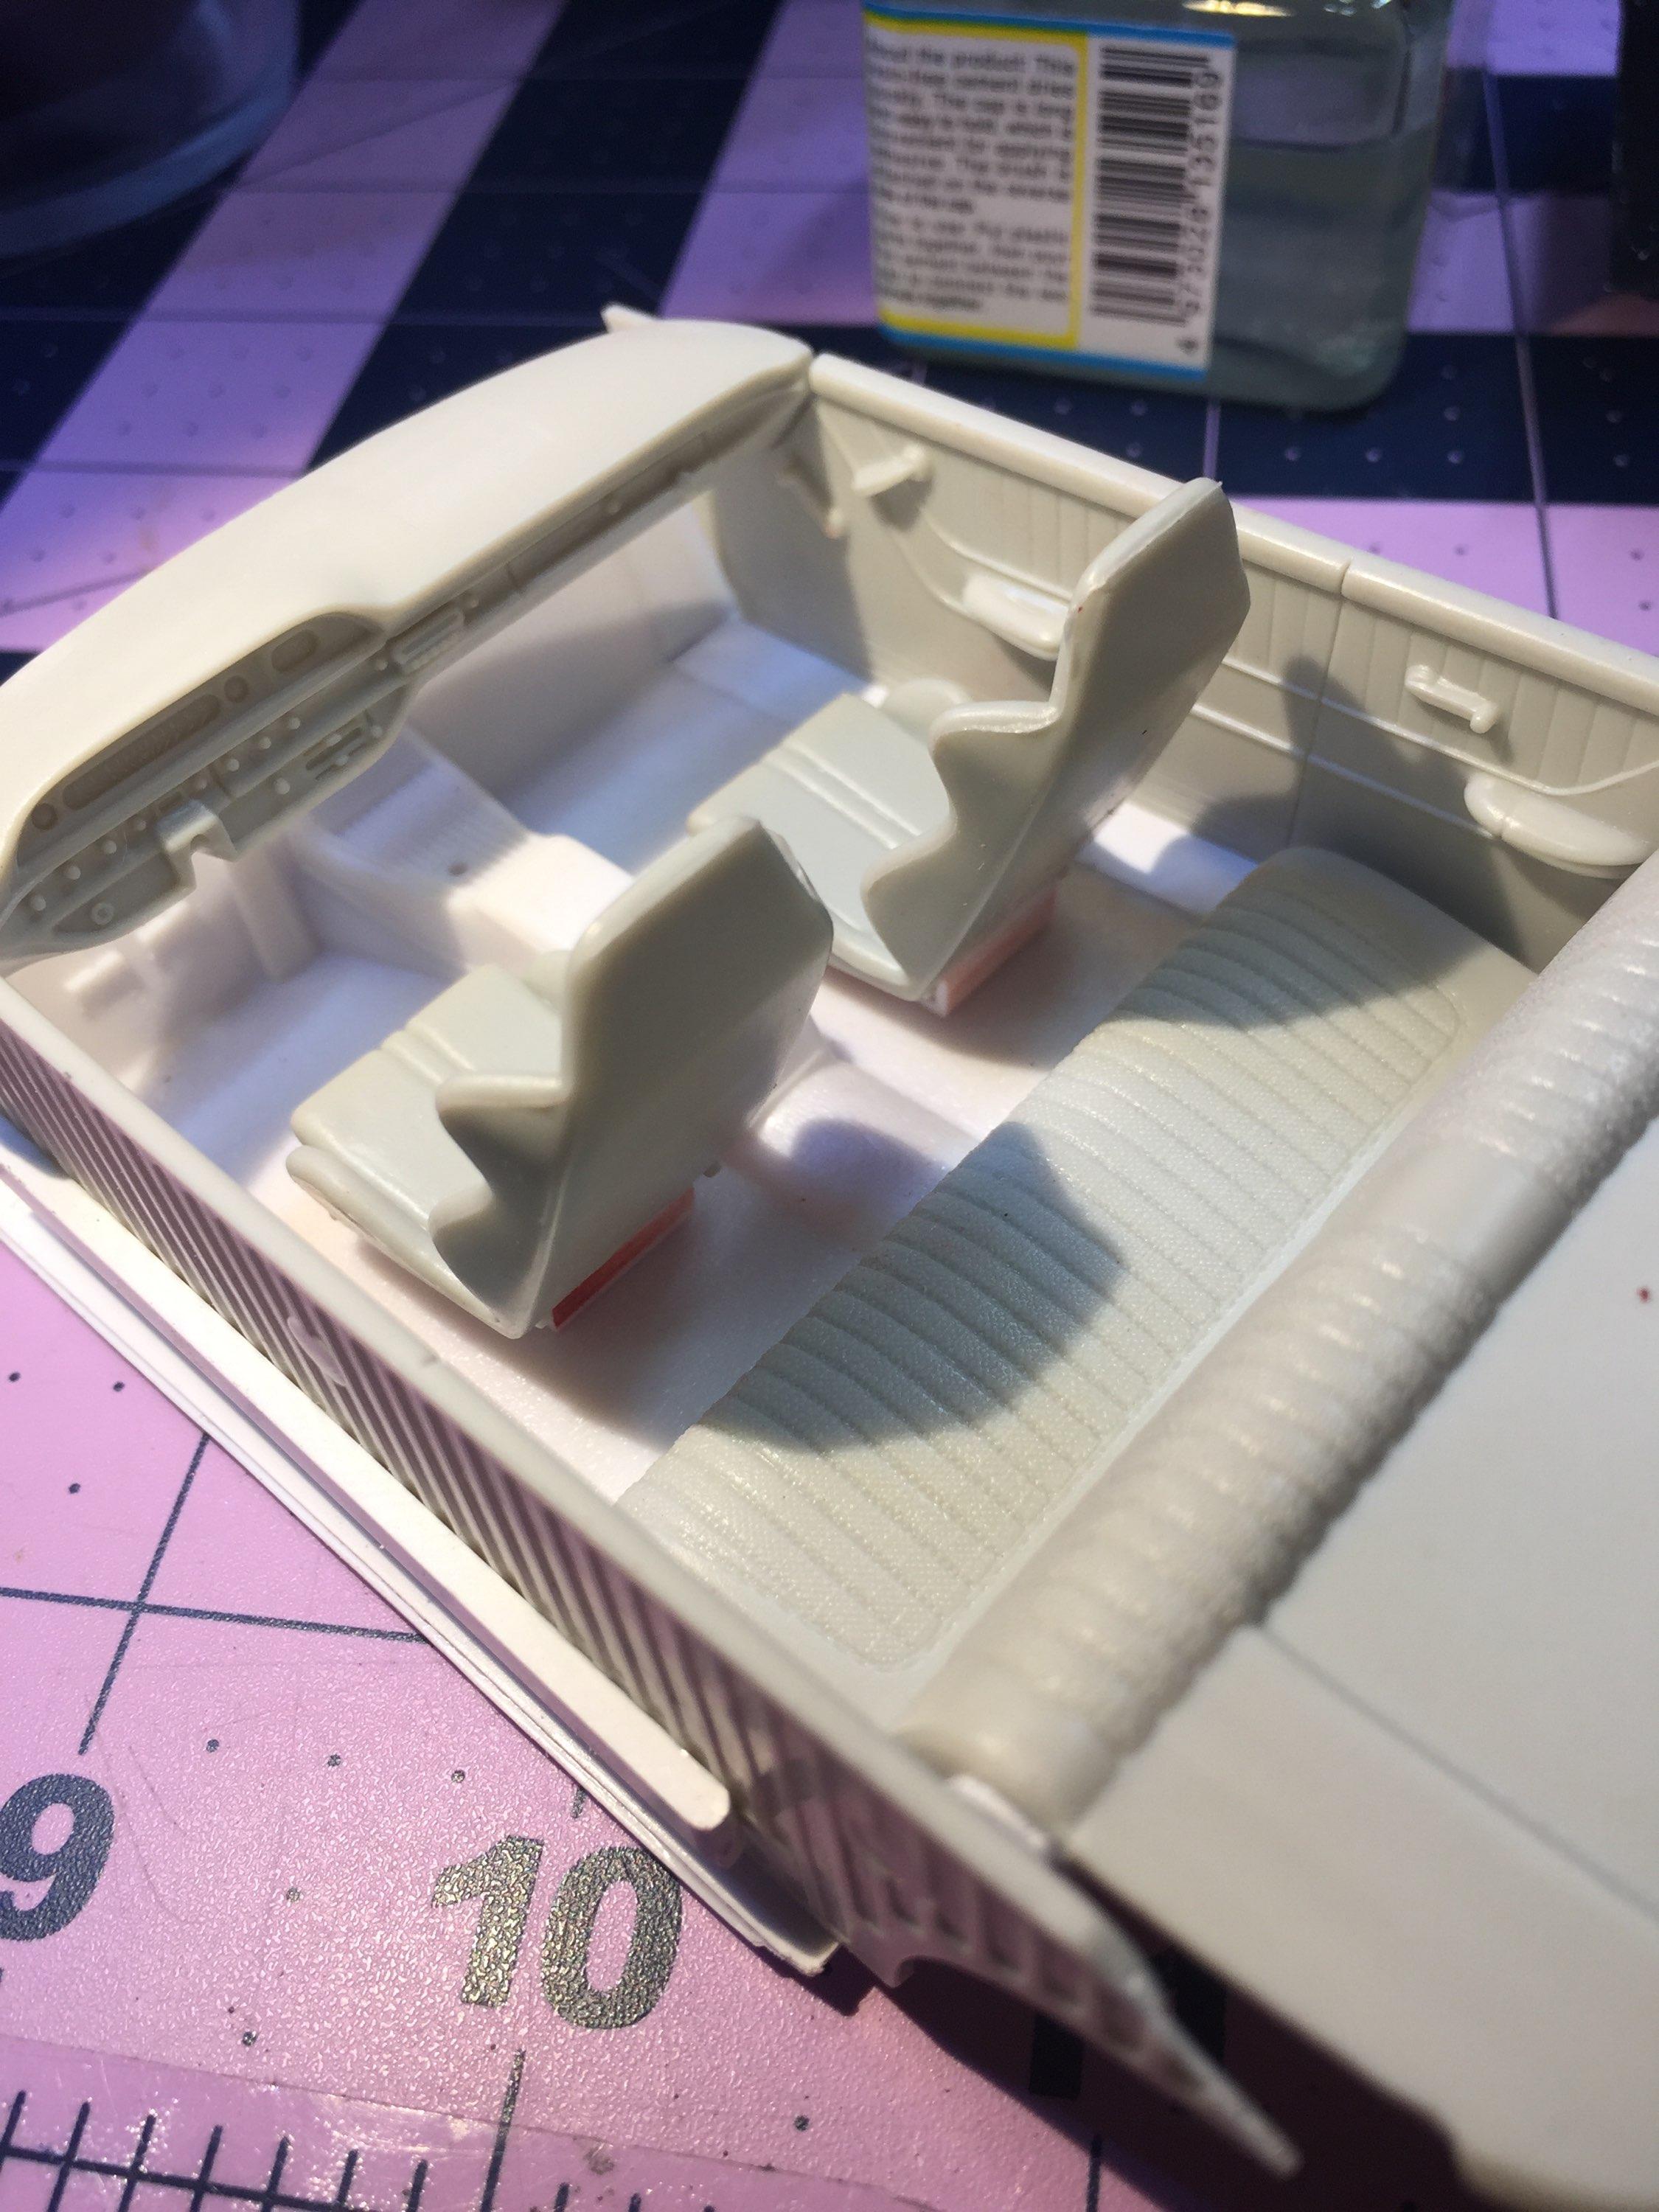
Well anyway, I spent a few hours trying to make sense of the interior. I needed reassurance on the interior fit so I tried taping it all together but....so I "tacked" with CA to get a "tub" that I could work with. I'm happy with it. As you may recall, it's a marriage of the two interior parts ( and the addition of a pair of high-end front seats.) The '60 door cards are nicely rendered and I want them accessible for detailing. A "tub" is difficult to detail and the '57 T-bird kit gave me the idea to split it in two with the doors and dash as one piece and the floor and seat the other. Thanks for strolling by ?
-
The "waste-not-want-not" Starliner project
customline replied to customline's topic in WIP: Model Cars
Thanks for your input, guys. This technique has been used successfully by many builders and everyone has their own way of doing it. I will give it a serious trial because, when it works well, it looks fantastic. It's almost fool-proof. ?. -
The "waste-not-want-not" Starliner project
customline replied to customline's topic in WIP: Model Cars
Yes, I have BMF gold foil sitting right here in the drawer. I don't want to remove the foil I put on because it worked so well. Dam. I just might remove the scripts altogether and go for the shaved, street custom look. Shave the gravel shields too. Make skirts. I dunno, it's a work in progress. I kinda like the example below. Edit: OK, Greg, I just ran through that thread. I'm just going to leave the "Starliner" scripts the way they are and follow through. I will, however, clean off the scripts after every coat of paint. The thicker it gets on the foil, the more likely it will be to screw up the paint adjacent to the script trying to get through a heavy build-up of paint. The solvent swab needs to be only damp to avoid wetting the surrounding paint. It requires a little practice but it's a good method with plenty of room for experimentation.