

pandamonium2112
-
Posts
201 -
Joined
-
Last visited
Content Type
Profiles
Forums
Events
Gallery
Everything posted by pandamonium2112
-
The Rich and Famous and hobbies
pandamonium2112 replied to CrazyGirl's topic in General Automotive Talk (Trucks and Cars)
Mr. Rogers played with trains on T.V. Gary Coleman was big into model railroading also. -
After using the Industrial purple for a couple of cars it got pretty dirty. Here's my solution. Also on a separate note: While soaking a car I put a heavy piece on aluminum on the car to get it submerged. A day later after pulling the car out, it had almost dissolved the Aluminum.. Learn everyday.. I bought a Mesh Colander and some Coffee Filters, grabbed a Funnel from the garage. Used them to pour the Goo back in the jug.. This is what was left over...
-
The Making of a Wood Steering Wheel
pandamonium2112 replied to CrazyGirl's topic in Tips, Tricks, and Tutorials
Nice work Anne. That wheel turned out amazing. Can't you just use a small round file to put the finger grips in the old one then re-varnish? Anyway keep up the good work. -
1/16 Scale Army Vega Funny Car - Finished 10/14/2018
pandamonium2112 replied to Mooneyzs's topic in WIP: Drag Racing Models
Thanks Chris. if you get a minute post a pic of the iron. I'm more interested in the wattage, it determines how hot it gets. I have 3 different ones. One is small, used mostly for IC work (Circuit boards, not as hot) Second is a larger one (40 watt), the one I used the other day for the experiment. Third is a solder sucker, it has a squeeze ball on it so you can heat up solder and suck it free of the joint (Really fun and handy) I was at Radio Shack a while ago and they have one with a dial on it so you can choose different wattages, pretty cool. Maybe some day.. Gotta focus on getting a set of Alclad paints first.. -
I'm a low budget builder also. Not that I wouldn't love to just throw a bunch of money at a model, but I enjoy making a component from scratch. This is what modeling is about, I do it too. start building and forget to take pics. Just enjoy the hobby....this build looks awesome so far...
-
1/16 Scale Army Vega Funny Car - Finished 10/14/2018
pandamonium2112 replied to Mooneyzs's topic in WIP: Drag Racing Models
Hey Chris...Don't take my statements to literal. after all I am my own worst critic. You're skills have inspired me though. I have a question: I don't think I have found this in your post (Or other's) but how do you weld you're brass to brass? I am assuming it's with a solder iron because I tried it today. It worked to a point. I could use something hotter in a pin point. I have several irons with variables in heat range, But my hottest is a 40 watt. it worked with some effort.. I am working on the front suspension and think that solder would be stronger that super or c/a glue. What can you throw my way that could help me out Thanks as always! Steve -
1/16 Scale Army Vega Funny Car - Finished 10/14/2018
pandamonium2112 replied to Mooneyzs's topic in WIP: Drag Racing Models
Watching all this epic progress to the Vega is really making it hard for me to feel good about what I'm putting into my Charger. I'm in utter amazement at the skills you have displayed here. -
Wow! This is turning out nicely. I'm starting to wonder what you were so worried about? Excellent work, Keep it up.
-
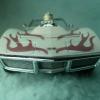
I think the second dash looks awesome! The gauge holes cut out so nicely too. Don't beat yourself up to much. This is a hobby, it's meant to be fun. I spent to much time stressing over a build that I couldn't get the steering to work or the car to roll. My solution was that I glued the tires on solid one day and called it perfect. Then I quit building for 5 years just so it would be fun again. Enjoy the Hobby! Here's a photo of the perfect build that won't roll of the table.
-
The Mattel Twins: "Snake" 1 and "Mongoose" 1 FED`S
pandamonium2112 replied to John Teresi's topic in Model Cars
John: I posted this at the end of the build thread, It's since been buried so I figured I'd repost it over here. You have done an excellent job. I love the final back drop photos, hard to tell they aren't the real thing. Which brings me to a question. I know you are working with the Alclad paints but did you do a wash on the engine, or does the paint come out naturally like that? Looking at the front of the Snake's blower, it just has such realistic depth to it...Fantastic Thanks Steve -
1/16 Re-Charger (Updated 5-29-13)
pandamonium2112 replied to pandamonium2112's topic in WIP: Model Cars
Let's see what we can make with a couple of left over soda cans. I've been using them for years to custom build all kinds of stuff, pretty cheap and always in supply. My first attempt at the fuel tank was an epic failure. Can you figure out why? I didn't even see it until it was all cut out. I had to laugh at myself.. The second try took a different approach. I realized I wasn't going to be able to make it in one piece like I had planned. I also decided to cut a wood block to hold the inside ridged, this will also help later on when I drill it out for the fuel lines. Here's the pieces before assembly. It's about time all that schooling in Wood and Metal shop to pay off, not to mention the 3 years in Auto Body class. I had to get it bent just right, then work the wood block inside without mangling it to badly. That wasn't so hard! Then I used Super glue to put the top and bottom pieces on. Here's a photo of the tank propped up in the trunk, not the right height yet, but that will come later. I have 2 Nitrous tanks that will be mounted on the black deck right between the wheel tubs. I still have to do some trimming on the top and bottom plates. And I have one more really sweet trick left to perform! You'll have to check back on the next update to see it. It has to do with filling in the small gap around the edges...I hope it works! Hopefully this next week I'll be able to put some real time into this build. -
1/16 Re-Charger (Updated 5-29-13)
pandamonium2112 replied to pandamonium2112's topic in WIP: Model Cars
Small update.. I finished the discs and mocked up the rear end. Looking pretty good I think. I got the tubs all sanded down and fitting properly into the body. I decided that the old fuel tank had to be replaced with an aluminum one. Also while digging around in my stash, I came up with a tube of "Testors Red Putty" that I've had for years and never opened. I played around with it on some frame work to see if it would be suitable for the rest of the build. I used some other stuff back in the 90's that had Tolene (think that's how it's spelled) and it was so hot, it melted and warped the project I was working on. Valuable lesson learned. I like it, and I didn't have to put out any money. Here's a photo of the rear end mocked up with the discs added. I'm going to trim off the U bolts and add some brass nuts on them when the final assembly comes around. I had to cut out where the old fuel tank used to be. Another view of the trunk area. I just had to through this photo in because this car looks so cool from the front. The blower is detached from the block that's why it's cock eye'd -
I love that hood! Which kit did that come in? Can't wait to sere the paint layed down.
-
Sweet build. You almost got this one knocked out. I just love these old vettes. I finally finished mine in Jan. If you are interested, you can check it out from the link at the bottom of this thread. Keep up the good work..
-
I've been watching this build. You have done an excellent job. I love the final back drop photos, hard to tell they aren't the real thing. Which brings me to a question. Back on page 7, thread 11, you have a head on photo of the engine in the Snake. I know you are working with the Alclad paints but did you do a wash on the engine, or does the paint come out naturally like that? Looking at the front of the Blower it just has such realistic depth to it...Fantastic Thanks Steve
-
Gorgeous! sums it up in one word...
-
This build is freaking incredible! I have so enjoyed looking over the progress again and again. My only regret is the thought that I will never see it in person though. There was a time when I would drive through Mo every other week but those days are gone and home is where I hang my hat now. I hope you don't mind if I use some of your ideas on some future builds. You have definitely pushed the envelope to a new extreme with this one. My congratulations on your skills. I am in aw of what you have accomplished. BTW that steering rack is out of this world!!!!!!
-
1/16 Re-Charger (Updated 5-29-13)
pandamonium2112 replied to pandamonium2112's topic in WIP: Model Cars
Ira, Anne and Andy: thanks for the replies. This has been a fun rebuild. not my usual work (new kit) I've had to rehash all those ideas that I had when I built it in the 90's when all I had was a kitchen table to work at, and use the knowledge and skill I've gained since, to pull it off. Greg: as for the color. I put it up for a vote and everyone said to keep the original color "Purple metallic flake" you can see it in the first photos. It was still in pretty good shape so I buffed out the hood to see what would happen and it came out like a new paint job. I would welcome your response though. I toyed with the idea of putting some graphics or something on it., but it is such a street sleeper that i'm not sure what I would even do to it. I have been working on the rear end (brakes and axle) It's almost done! Then on to the front suspension (oh boy!) I will have some updated photos soon. The yard and honey-do list has sapped all my time recently not to mention getting ready for the Wife's "Quattro De Mayo" party. Bring on the Margaritas and BBQ'd ribs.... -
1/16 Re-Charger (Updated 5-29-13)
pandamonium2112 replied to pandamonium2112's topic in WIP: Model Cars
I've managed to get a little accomplished in between all the other projects. I had to chuck up the rims and remove some plastic so I could fit the car with Disc brakes (original kit had drums on all 4's) Next, I cut some styrene squares and chucked them in the drill and stuck a knife to it to come up with the disc's. Laying them out for the vent holes was a little tricky and I came up with 2 different designs but one looked a lot better than the other. I cut more styrene for the bracket that holds the rear calipers in place. Then I got working on the calipers themselves. They are at a crude point right now but some putty and Dremel work should pull them together. Here's the work removing the lip on the rims. It was the only way I was going to get realistic sized discs and calipers added. The left is original, the left is after trimming. Here I got the disc's cut. I made 5 of them so I could sacrifice on while laying out the vent hole pattern. This proved to be a little time consuming. I used the hole guide and put punch marks on each of the lines, then dropped down 2 sizes and repeated the process. Then I took a pin vise and drilled them all out. 54 holes on one pattern and 86 on the other. I decided to go with the pattern on the left. Here's the bracket for the rear calipers. I can't complete it trimming it till I get the calipers finished. I had to chuck more pieces to build the calipers, but the scraps from cutting the discs will come in handy also. I really debated on buying some pre made calipers but decided that I would have more fun trying to make my own. They are at a pretty crude stage right now but if the plan goes well, a little trim and putty will pull it together. -
Back to the Hobby after 15 years - 41' Willy's Gasser
pandamonium2112 replied to Chickenfoot's topic in WIP: Model Cars
Great starting point! If all you do is put some plug wires on, then so be it! They look awesome! You have to find satisfaction in the build you are working on. You aren't the perfect builder and neither am I. The truth is that non of us are. these aren't 1:1 cars, they don't do a quarter mile in 10 sec. They are our dream creations and we are fine with that. Every build we create is a combination of what we have seen and what we can re-create at our skill level. You are doing an incredible job just by getting back into the hobby. Enjoy the journey.... BTW I would go with Teal blue and some white highlights....LOL -
Back to the Hobby after 15 years - 41' Willy's Gasser
pandamonium2112 replied to Chickenfoot's topic in WIP: Model Cars
Welcome back to the world of plastics and to this site. There is a lot of cool stuff going on here. Chrome? A lot of people use "Easy Off" I've heard it might warp the plastic after a while. The "Castrol Super Clean" has some good reviews. I couldn't find it where I live so I ended up buying "Industrial Purple Concentrate" (used full strength) at "Home Depot" It does the job in under 2 minutes and won't warp plastic even after soaking for 72 hours. That Alclad paint process is awesome. You need an airbrush to apply it though. I plan on getting a supply of it soon. http://alclad2.com/ Here's a couple links to some great builders and some of their Alclad use. http://www.modelcarsmag.com/forums/index.php?showtopic=72751 http://www.modelcarsmag.com/forums/index.php?showtopic=42096 Can't wait to see some progress photos on that Willy's -
1/16 Scale Army Vega Funny Car - Finished 10/14/2018
pandamonium2112 replied to Mooneyzs's topic in WIP: Drag Racing Models
Thanks Chris.. The first picture was quite clear to me on how it functions. Very simple design also. I don't think it should be to hard for you to duplicate..Probably going to be one of the easiest things you've done on this build..LOL Bill...That second design looks way more complex! Although from a mechanical stance, it seems that it would be a more sturdy, strong application though. Thanks for the insight and photos from you both though...Everything I see gets filed away in the gray matter and even the smallest design of something can be used over and over to create something else.. -
1/16 Scale Army Vega Funny Car - Finished 10/14/2018
pandamonium2112 replied to Mooneyzs's topic in WIP: Drag Racing Models
Hey Chris! It's looking great! Quick question though. I've never really had a chance to hang out in the pits or get a close up look. What does the front locking mechanism look like? The one that holds the front of the body down when they close it. All I've ever seen is the "T" handle poking out of the front of the car. Are you going to try and build one on the car? -
I KNOW STYRENE IS CHEAP BUT
pandamonium2112 replied to CrazyGirl's topic in Tips, Tricks, and Tutorials
The sprue's I will never throw away are the one's that head and tail lights come on. They get stored in a separate tote. That transparent (colored) plastic can come in real handy when you loose that one tail light lens to the carpet monster or scratch building some tail lights. Chuck it up and spin out a new lens. After you get it to shape, touch it with some 00 steel wool while spinning to bring it to a glass finish. -
Another twist on this tip is. Strip the insulation (Appropriate diameter and Color) off of some wire and slide the solder into it, then bend and cut it to length. I've even used solder in the center of braided fuel line. Possibilities are endless..