
DPNM
-
Posts
1,163 -
Joined
-
Last visited
Content Type
Profiles
Forums
Events
Gallery
Posts posted by DPNM
-
-
I am pretty certain that the Monogram 1957 Corvette has a separate frame. Although it's not in the time frame you list it seems it might be close to the length you are looking for. It should also be a relatively cheap kit if you need to buy one.
-
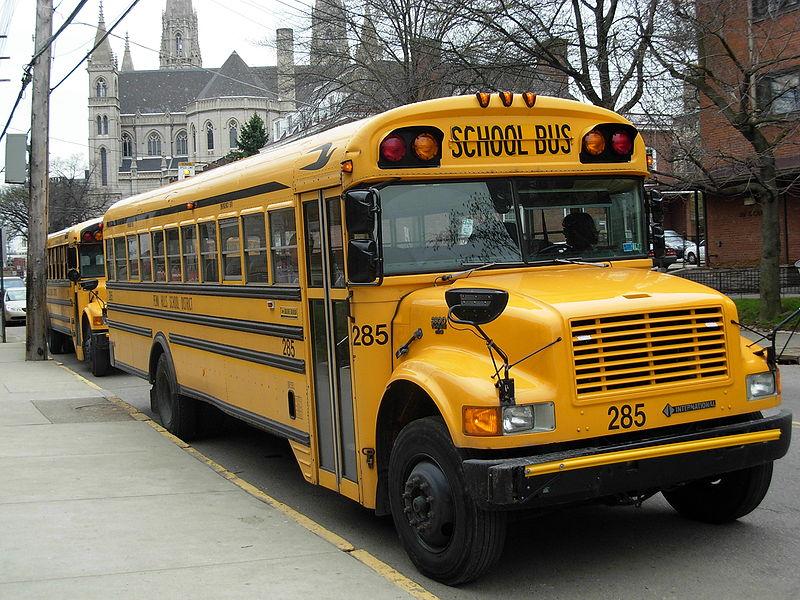
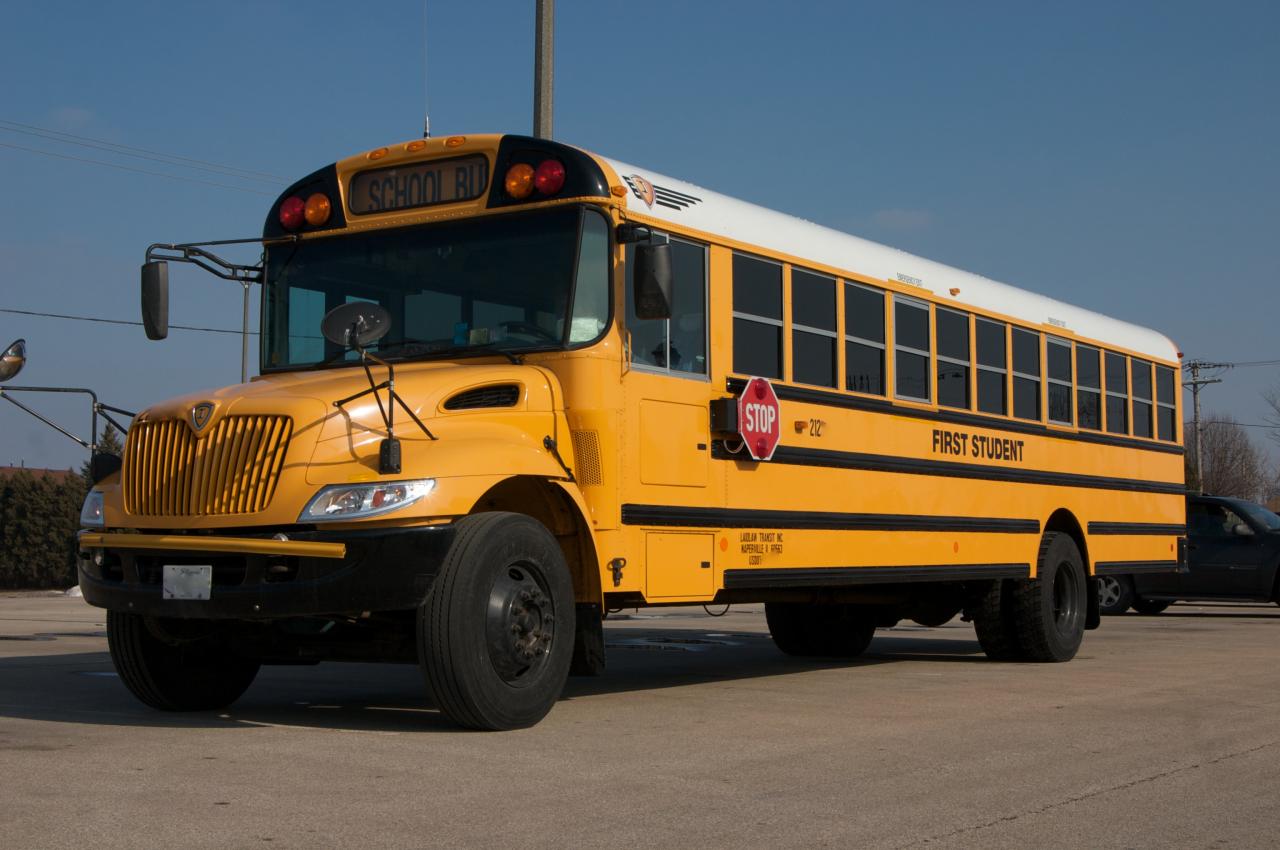
Count me among those that would buy a few school bus kits if they decide to model one. My preferences would be these:
Pics taken off the web and are in order of what I'd like to see made. I drove a school bus for a while but there is a lot you could do with one besides the chrome yellow student pick up and delivery vehicle

-
Either a Paasche H or the Badger 200 would be a good first choice. Both are single action and easier to learn and clean. You can often find them used kinda cheap on craigslist. Then again, a lot of people ask more for their used one than a new one costs, you just have to weed those out. Search the web for the lowest price on either. That would also give you an idea what a fair price on a used one would be. I have a small collection of airbrushes and I have gotten two off of craigs at a good price and I've gotten three off eBay.
Gotta watch eBay though, you don't want to get in a bidding war with an idiot.
-
I am not familiar with the specific paint you used but it looks like some type of a contamination issue. Did you sand the body first? If yes, did you sand the hood seam? If you washed it then dried it with a rag or towel, the rag or towel may have had something on it.
-
I, too, use both. I have learned to get very good results with a spray can and the airbrush is the only way to go for colors that are not available in a spray can. I use fingernail polish quite often and have, as yet, not found it in a spray can
. My airbrush is an old Wren single action. I have an Iwata SBS (double action) that I will learn to use with auto paint. I have a Paasche VL (double action) that I use for T-shirts so I am familiar with using a double action.Best advice I can offer is practice, practice, practice. Both with the spray can and, if you invest in one, an airbrush. I suggest tcpglobal on eBay as they seem to have the best prices on airbrushes (and compressors/kits) that I have found on the net. A good beginners airbrush would be a Passche "H" or Badger 200, both being single action (similar to using a spray can).
Good Luck
-
I agree with kc7wzl that you should not try to do everything you can on your next build, what I would suggest is breaking your next few builds down to subassemblies/models unto themselves. As in, if you are going to build a dragster try to focus your detail on the engine (plug wires, fuel lines,linkage? etc.) as the motor is exposed.
After that build try to focus on an area of a different model that could use some extra detail or maybe some scratch-building. Do a little on a few models and before long you should be able to jump into a completely detailed build.
-
I just got some off feeBay. It was a discontinued Dupli-Color color combo. Check their website, it is still available. A number of local auto parts stores carry Dupli-Color and if they don't stock it, they may be able to order it?
The kit comes with black primer as that is what you have to use so it will "work".
I painted a pinewood derby car mixed with the Blue/Green and the Magenta/Gold and you could see all 4 colors at different angles.
-
DupliColor offers a 3 step lacquer system with (black) primer, color shifting paint (base coat) and clear.
It is what they call Mirage and there are a few color choices. You can find these kits in some auto parts stores that carry DupliColor. DC is the only brand of paint I use but I also use (and recommend) finger nail polish. Lotta nice pearls with finger nail polish
. -
I sent you a PM with a pic of what I use for oil line routing on this type Harley (AMF/FX series/70s to early 80s) and a pic of a Lowrider which has an oil cooler where I tried to describe.
-
Joseph, If you look at the pics of my "Strip Tease" build I made an oil cooler (and oil filter). The model is based on a Softail. The lowriders (etc) of the time would have had it a little higher up the frame. Near where the brace is below the steering head. Looking from the front it would be more or less even/slightly above the front fender height.
I hope this makes sense to you.
-
Add me to the list of those that would like a 1/24th-1/25th scale school bus. I drove one for a while and there is a lot more that you could do with it.
-
This build gave me a good chuckle. A good idea I had never considered.
I can understand how some may be offended.I am new here but if you look at the bottom of your post, on the left side should be a box which reads: "Topic Moderation". If you click on it you should have the choice of "Lock" or "Delete".
If you still want it to show but not have any comments added choose Lock, to get rid of it completely, click Delete.
Nice build whatever you choose.
-
Dude is very talented and knows how to ride really well!!! Kinda makes me wish bikes had suspension back when I was young and fearless. 5 and a half inches of travel is what bikes had in my day.
The video is Excellent!
-
Like someone else said,I would like to have some vehicles that I used to own. All would be concours.
My first car and one I don't see: 1967 Mercury Cougar small V8 w/auto trans
1966 (or 67) Dodge Charger with a 440 and 4 speed
1967 Corvette Coupe 427 w/4 speed
one I didn't own: 1970 Plymouth SuperBird Hemi w/4 speed
Last would be one of the original three Corvette Grand Sport coupes.
My daily driver (and I'd keep it since I have to pay for repairs) a 1984 Volvo 244
-
I'd like to add Green Duster to this list. Made a trade and found out after mine shipped that there was a part missing from his kit that I (and he too I'm sure) was unaware of when we were bartering. He more than made up for it. I'm very pleased with the trade!!!!! Good Guy
I've had trades with 3 more members and I'd like to thank them all. They are Great Traders and they deserve to be on this list!!!
Toner283 (Chris)
Joe Chernauskas
and
AFX Charger (Mopar Mike)
I just completed a trade with Darren B and I would do it again anytime. Thanks Darren!!!
-
I'm new here but I like everything about this build, from the color choice(s) to the custom bodywork to the wheels/tires. My hat is off to you sir!!!
-
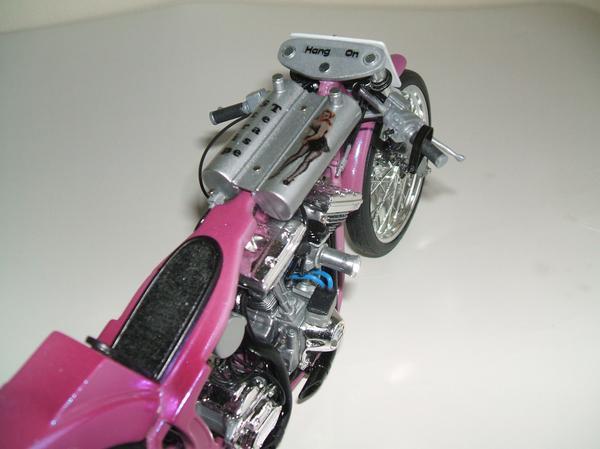
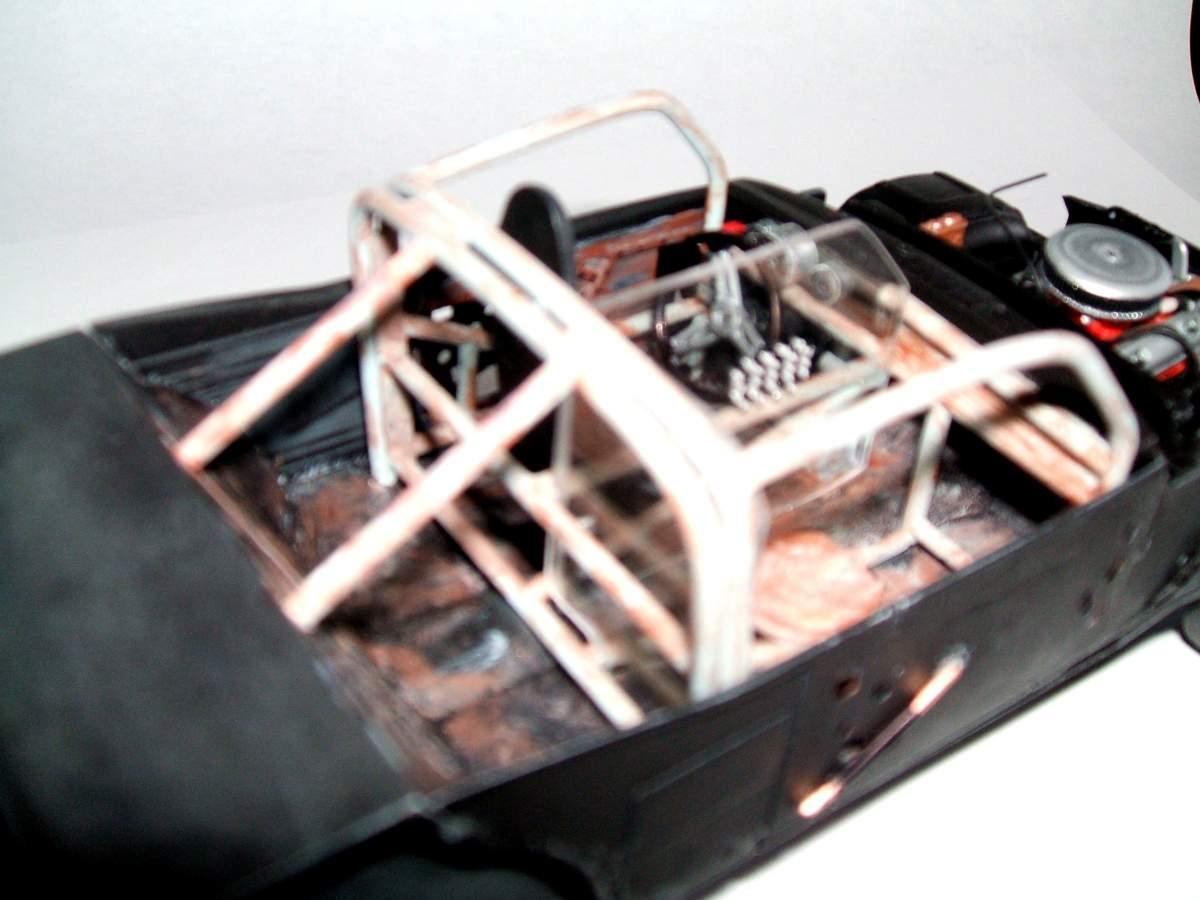
I am new to this site so I am posting some pics of the H-D dragbike I built, which was my first model after a 15 year lay-off from modeling. This model took 3 months to complete and it was completed a few years ago. I will try to describe what I did but it's been a while since it's completion and I may forget some things. Easiest I guess is to start front to back. I used the kit lower legs (although it was a Springer Softail kit it had the fork tube parts on the tree) and I made the fork tubes from aluminum tubing. There are springs in the lower leg so they do work. I scratch built the triple trees, clip-ons, numberplate, steering dampers(2) fuel tanks(2) oil tank, plastic seat base (with genuine imitation chamois insert painted black) rigid rear, rear set pegs, open primary cover (gears made from BIC lighter parts), velocity stack, shut-off tether, "Joe Hunt" type magneto, black box, fork brace, oil lines (correctly routed), oil filter, oil cooler, fuel petcock, carb linkage, drag pipes and all the decals. The handlebar levers move, as does the shifter and rear brake linkage (shifter required a "jackshaft" system). The paint is fingernail polish. The last pic should be a shot of the kit bike I started with.
As an aside, if you look at the number plate-anyone else disappointed with the NHL lock-out besides me?
-
Thank you all for the nice comments. I also have the Charger and the Challenger, both started and if I remember right-mostly complete. I plan to make a diorama for them.
I've been building another model on a different forum and may get back to these once it is completed.
-
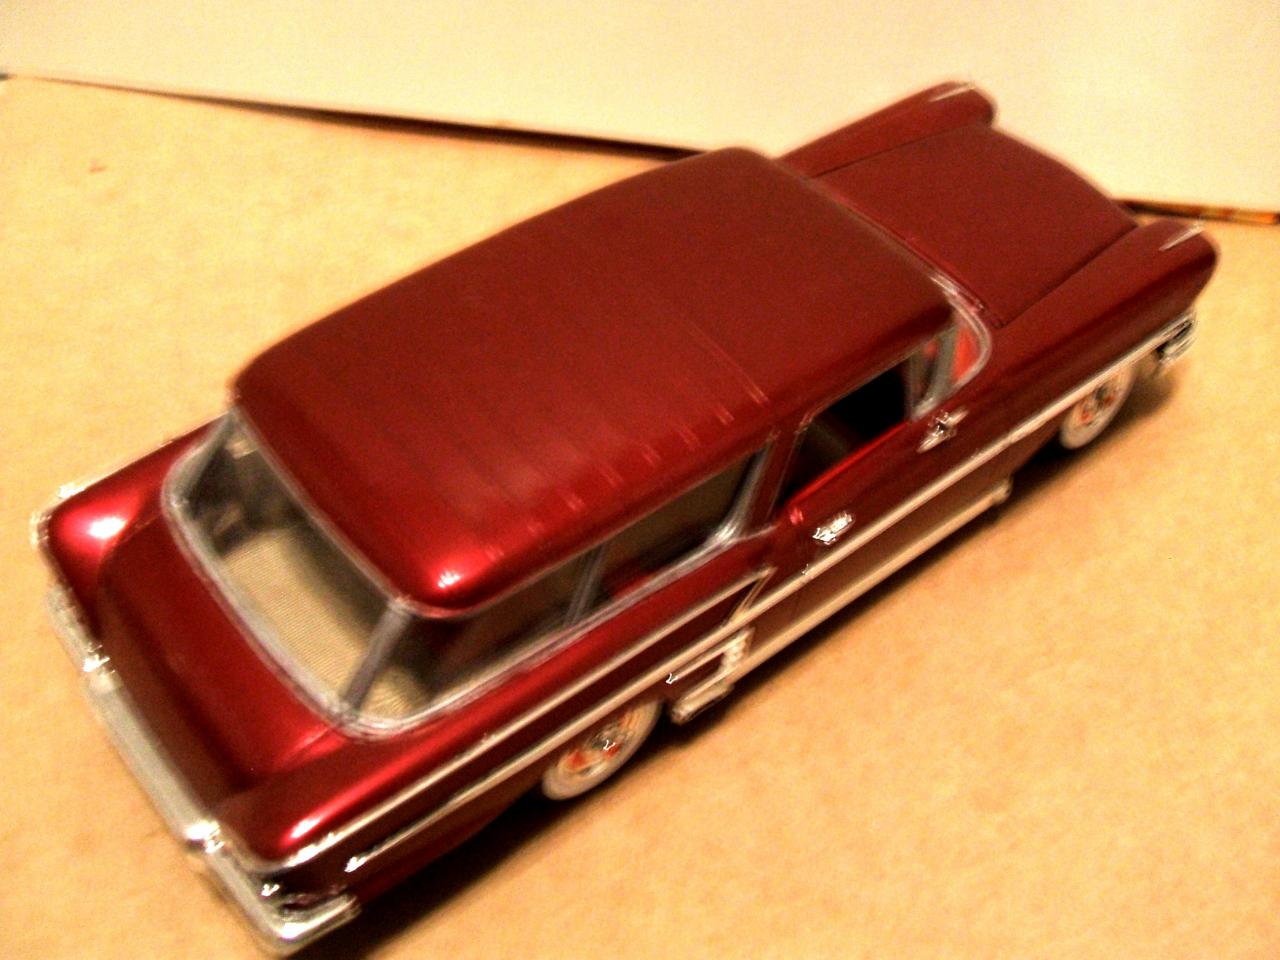
Lee, My initial plan was to use the tailgate from the '56. The problem I ran into is there was too much of a curve. The '56 tailgate was basically straight and I fooled around with it for a few hours. It just would not have looked right. If it fit at the bottom, the sides didn't line up and vice-versa. Maybe I should have added strip plastic "bars" to simulate the '56 though.
Bob, Thanks as I, too, have an affinity for wagons.
-
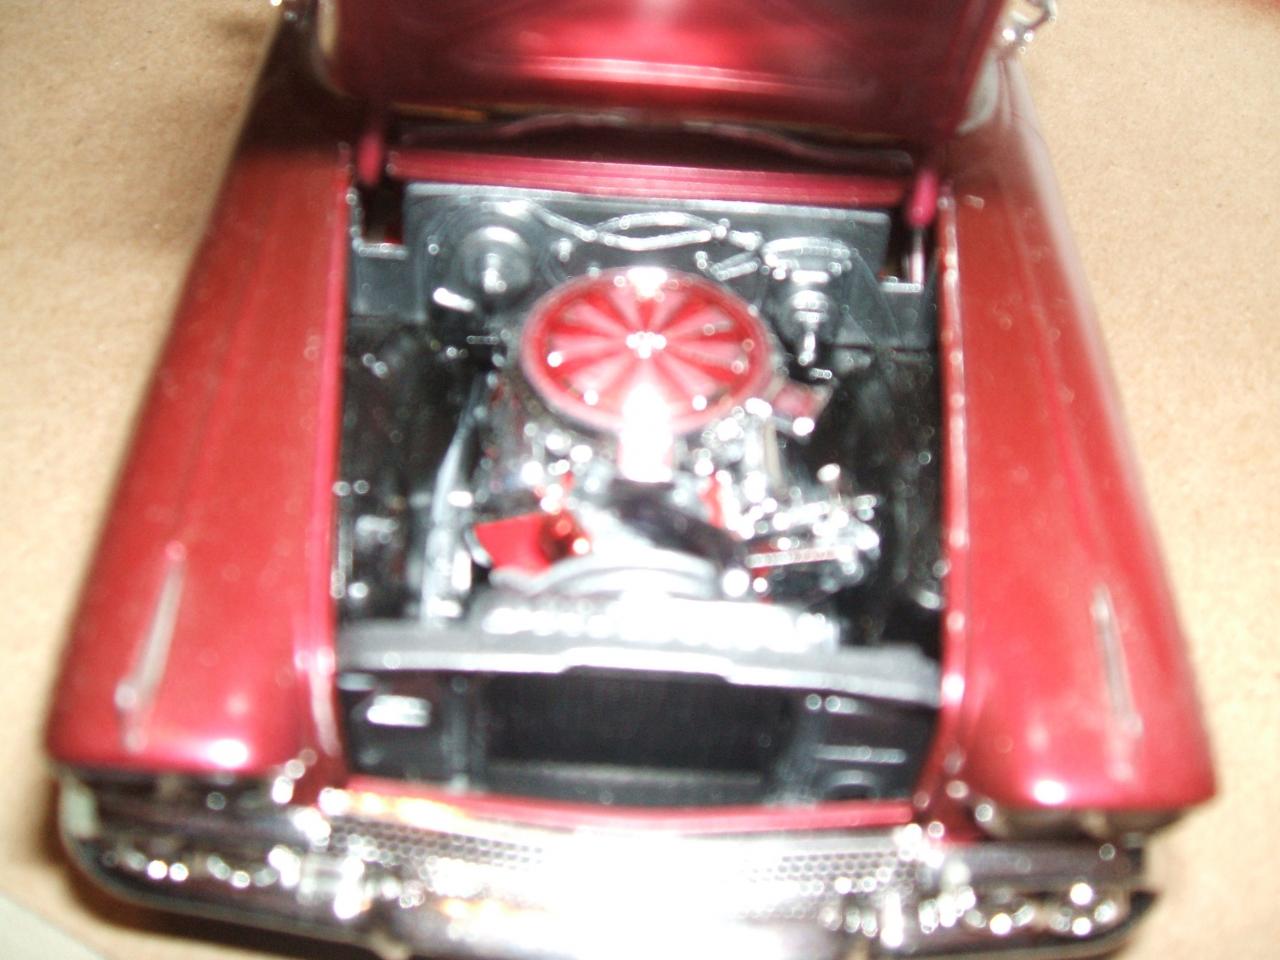
I, too, wish GM would have produced these instead of a plain wagon. I found a resin '58 on feeBay. Mine is made by grafting the top from a '56 onto the '58 body. Both kits were from Revell.
Exterior paint is fingernail polish. Interior is painted with DupliColor lacquer. Red and Sand Beige.
Sorry for the out of focus pics too.
-
This is another one of my builds. It's a car I think should have been. Roof is from a '56 Nomad. Sorry, I don't have any during the build pics.
Again, please forgive the dust on the model.
-
Hi,
I'm new here and thought I would try to post some of the builds I have or am working on. I'll start with my best effort (to me) and also where I took my user name from. I do belong to another model forum but it is for larger scale than 1/24-1/25th.
I built this car using references from a website of the"Interior Shot" car from the movie that the owner had posted on the web. I am really anal retentive in my building as I tried to replicate everything in/on that car, down to draping the plug wires the same as the pics showed on the website.
Please excuse the dust on the model and the out of focus pics.
 . My airbrush is an old Wren single action. I have an Iwata SBS (double action) that I will learn to use with auto paint. I have a Paasche VL (double action) that I use for T-shirts so I am familiar with using a double action.


Kit with separate frame.
in Model Building Questions and Answers
Posted
Tommy,
Here are a couple pics of the kit I am talking about. Monogram kit # 2227. The dollar bill is 6 inches long. Should be around 15cm???
I have since noticed that you are in Norway. The kit may be a bit pricey there.