ImpalaBoy
-
Posts
130 -
Joined
-
Last visited
Content Type
Profiles
Forums
Events
Gallery
Everything posted by ImpalaBoy
-
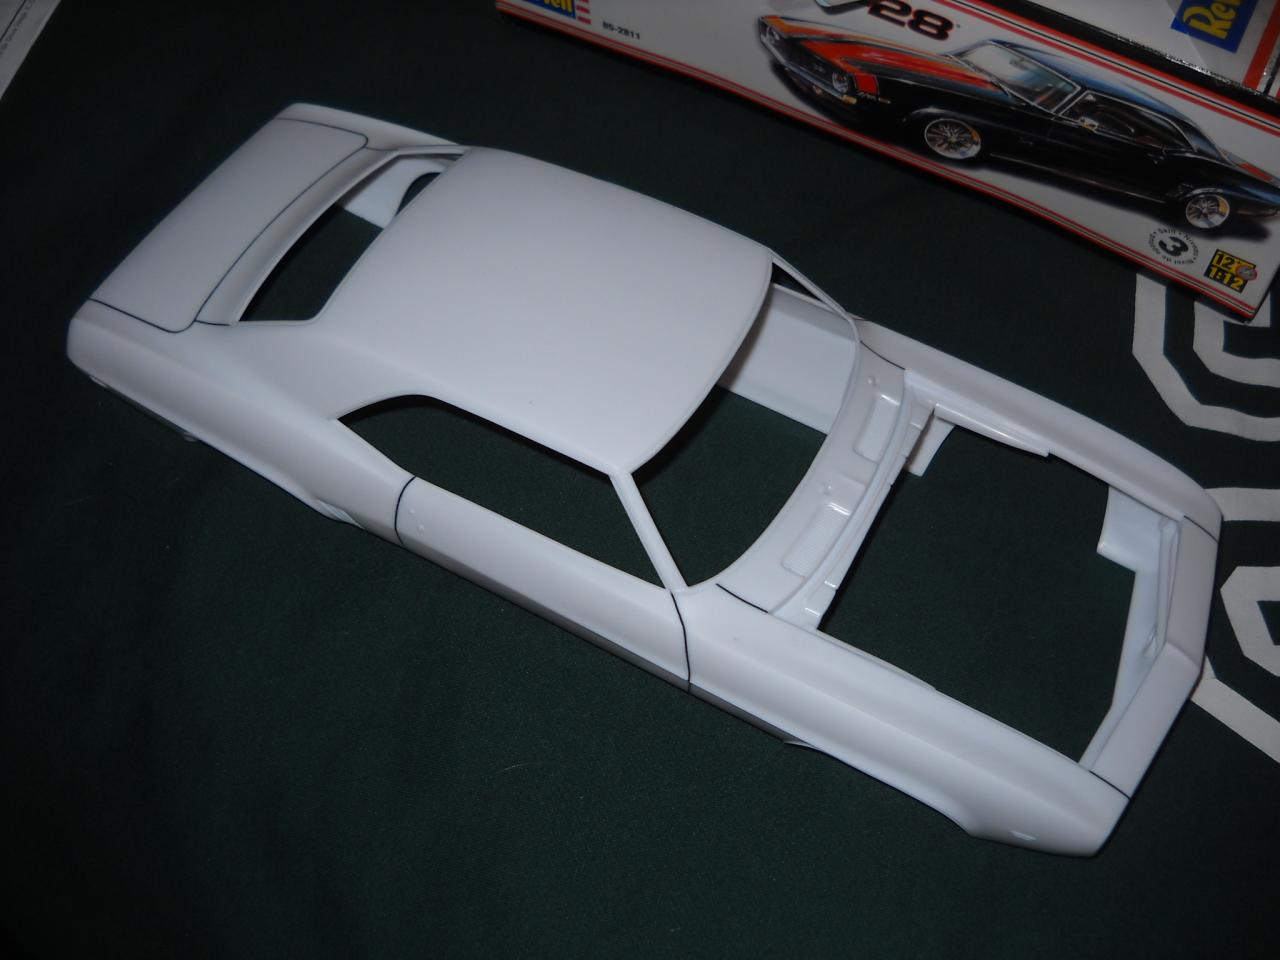
1/12 '69 Camaro Z/28 (New Foose Kit) BMF Done 6/2
ImpalaBoy replied to ImpalaBoy's topic in WIP: Model Cars
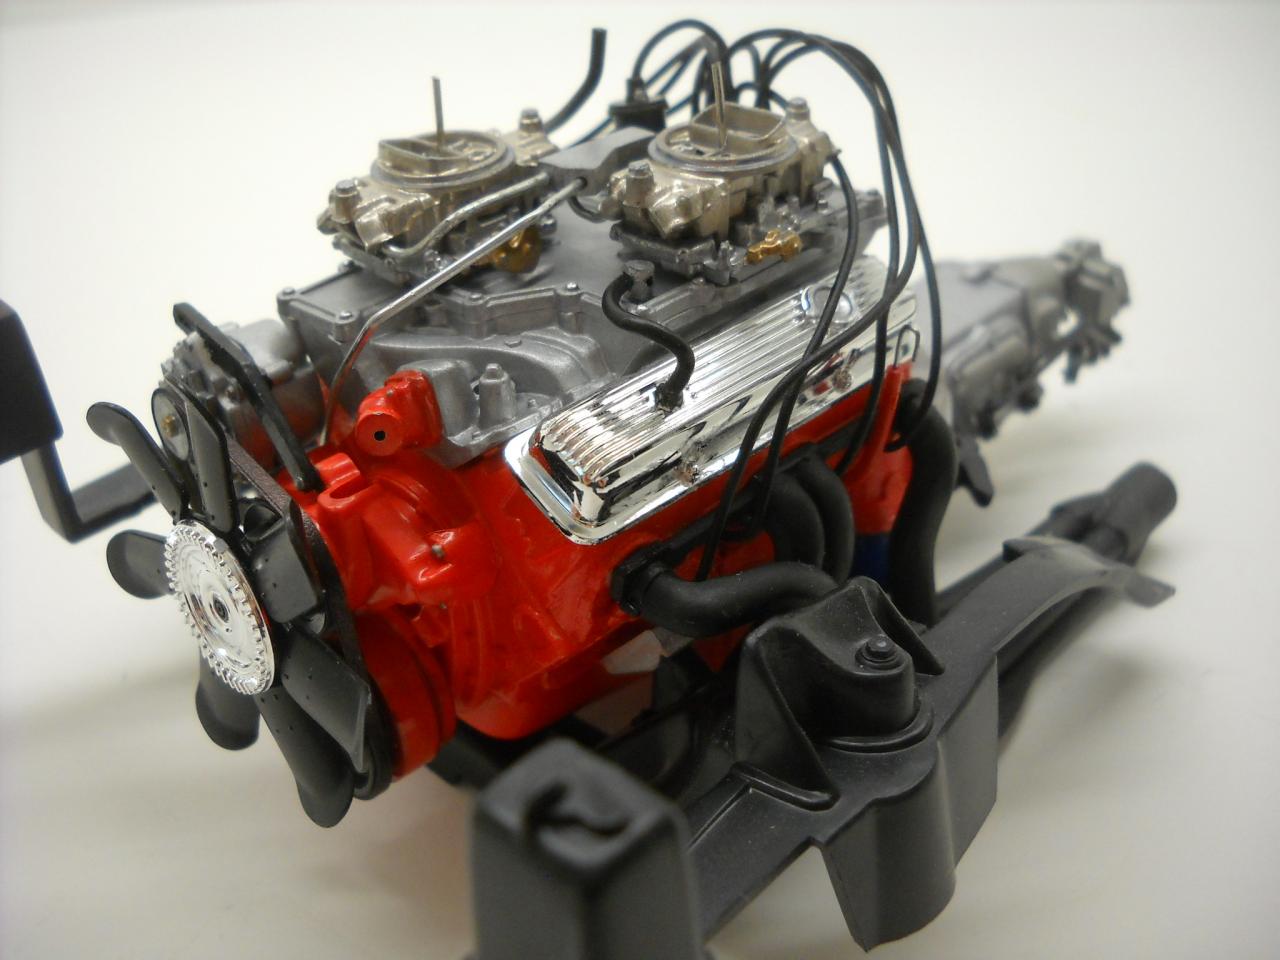
I guess it's not really an update, but I pretty much redid the engine. Originally I was going to build the engines from both kits and display one separately, but I ended up giving a few pieces away, so I just put a little bit more detail into this one. I did have one fairly major disappointment. I've been griping about how poorly the headers were designed pretty much the whole time, but this really takes the cake. They don't come out far enough from the cylinder head to allow the spark plugs I got to fit behind them At this point in time my scratch building skills aren't nearly good enough to attempt making my own headers, so I'll just have to live with it. Anyway, the main changes I made were painting the headers flat black instead of silver, switching the ignition wires from yellow to black, redoing the fuel lines, and detailing the alternator a little more.
-
Looks good so far, but you made the classic mistake of foiling the two middle "tines" on the "forks" in front of the rear wheels.
-
1/12 '69 Camaro Z/28 (New Foose Kit) BMF Done 6/2
ImpalaBoy replied to ImpalaBoy's topic in WIP: Model Cars
Thanks, everyone! Sorry it's been so long, but I'm glad it has been. It's been almost 3 weeks since I polished it and I hadn't really looked at it closely since then and apparently clear coat can change quite a bit in that amount of time. So I went to BMF it the other day and lo and behold: more orange peel. Oh well, back to the sink it went for another round of wet sanding. I'm actually really glad that I was forced to sand it again because honestly, I did a much better job smoothing it out than I did before, so now it's even shinier!! Now I can only hope I don't have to polish it again. Now the chrome trim is done, except for the rocker panel trim that I haven't attached yet.
-
1/12 '69 Camaro Z/28 (New Foose Kit) BMF Done 6/2
ImpalaBoy replied to ImpalaBoy's topic in WIP: Model Cars
I got the last of the clear coat on her last week and got her all polished up. She's not perfect, but probably closer to the factory stock finish I want than one that's been over-restored. I guess I probably start working on the interior some time soon, then.
-
1/12 '69 Camaro Z/28 (New Foose Kit) BMF Done 6/2
ImpalaBoy replied to ImpalaBoy's topic in WIP: Model Cars
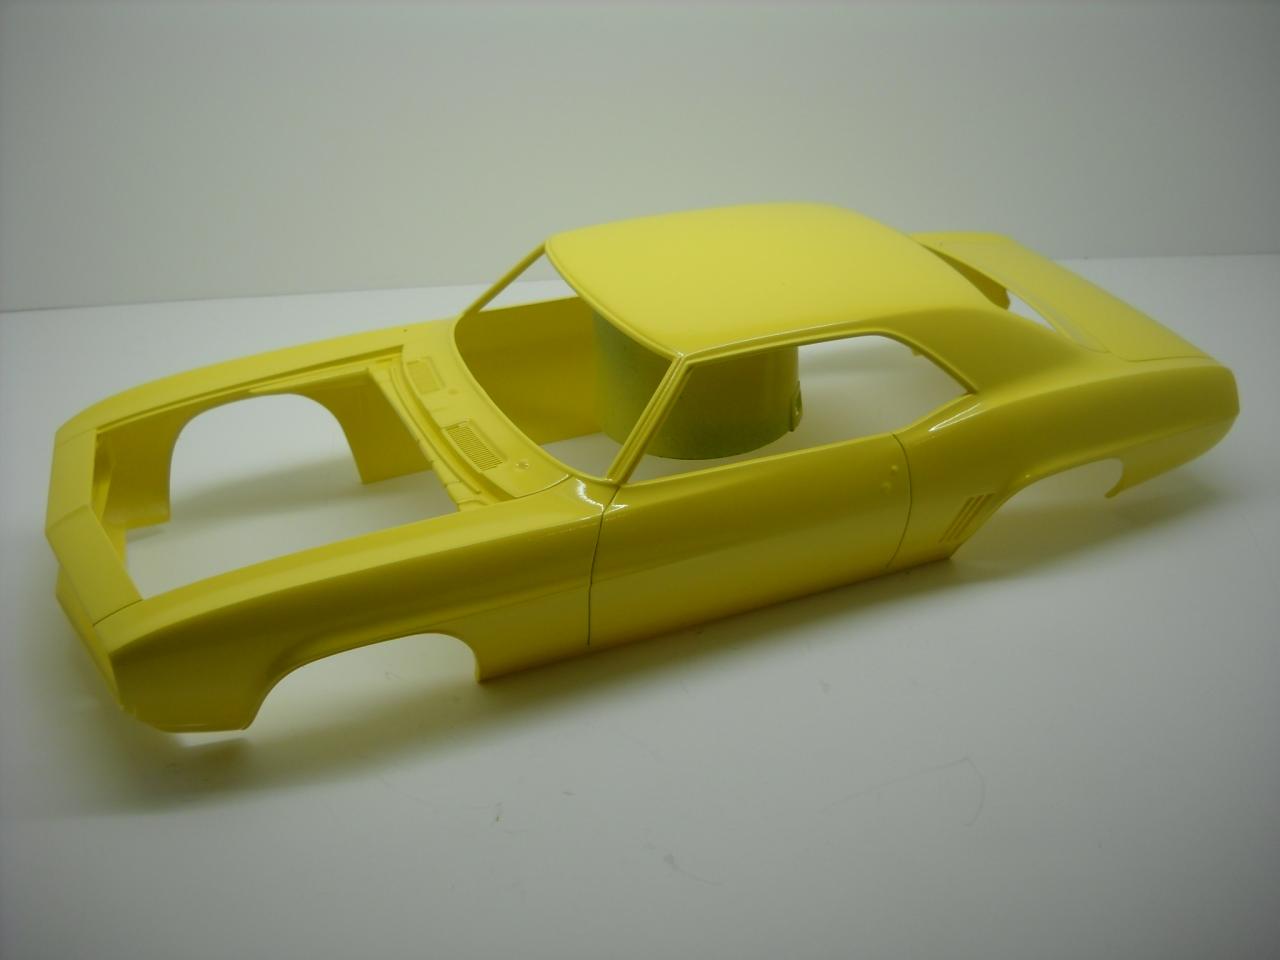
Sorry this isn't an update, just a couple better pictures taken in my photo booth. Hopefully I'll be able to get a couple coats of clear on it soon.
-
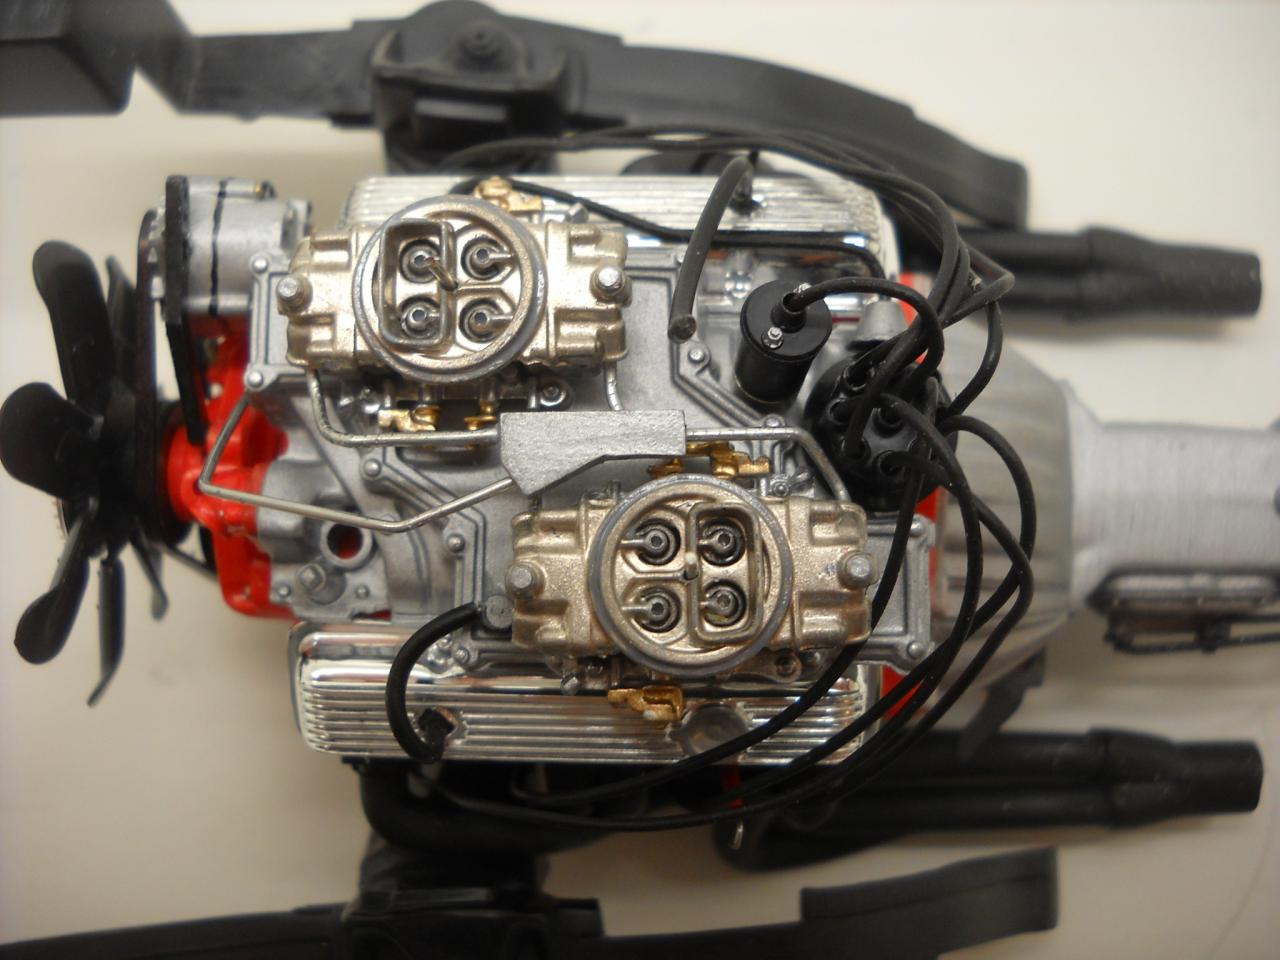
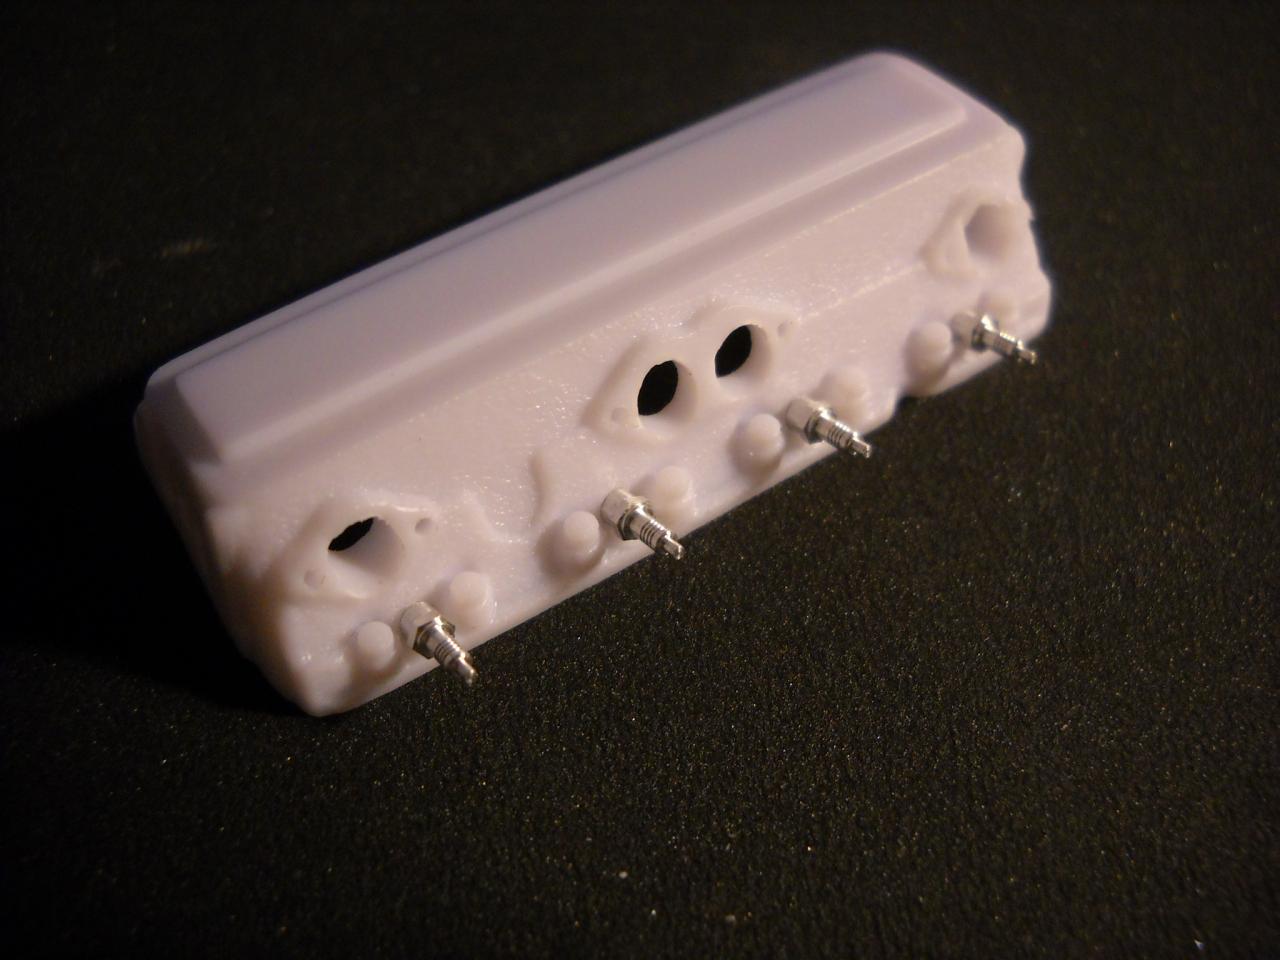
Seeing as how that's the transmission from my 1/12 '69 Camaro, I guess I might as well answer this There really is no paint effect there; it's just the molded texture of the plastic, which I assume is replicating sand casting. All I did was paint it with Testor's aluminum enamel. I realize this doesn't exactly answer your question, as this is just the case with this particular kit. However, there are tricks and special types of paint that I'm sure other members, more experienced than myself, can tell you about.
-
1/12 '69 Camaro Z/28 (New Foose Kit) BMF Done 6/2
ImpalaBoy replied to ImpalaBoy's topic in WIP: Model Cars
Ok guys, here she is. I just used the decals for the back since everything is so flat. They laid down just fine.
-
1/12 '69 Camaro Z/28 (New Foose Kit) BMF Done 6/2
ImpalaBoy replied to ImpalaBoy's topic in WIP: Model Cars
Thank you so much everyone! I hate to keep people in suspense, but I got sidetracked today with an old cuckoo clock my grandmother gave me. Tinkering with clocks is sort of another hobby of mine, along with playing the trumpet and arranging music. So if I'm not working on a model, there's a good chance I'll be doing any of those things. I might have time to do the rear stripes tomorrow, but I won't make any promises. -
1/12 '69 Camaro Z/28 (New Foose Kit) BMF Done 6/2
ImpalaBoy replied to ImpalaBoy's topic in WIP: Model Cars
Thanks guys! I couldn't be more pleased with how they came out. Hawk, I used good old Tamiya tape. I've never used any other kind, but as far as I'm concerned it's the best thing out there. What did you use for all of yours? They all came out just as good or better! -
1/12 '69 Camaro Z/28 (New Foose Kit) BMF Done 6/2
ImpalaBoy replied to ImpalaBoy's topic in WIP: Model Cars
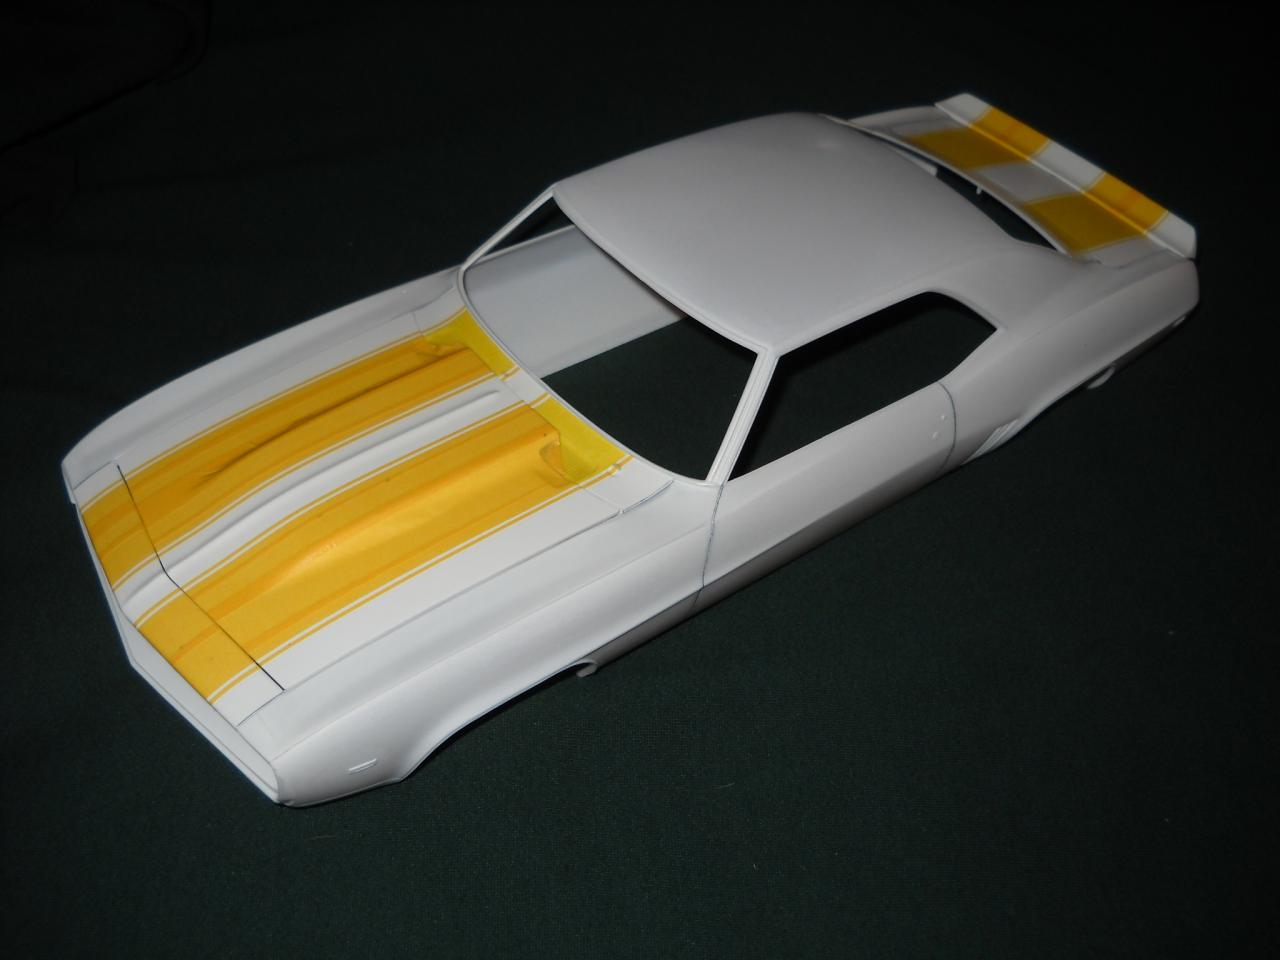
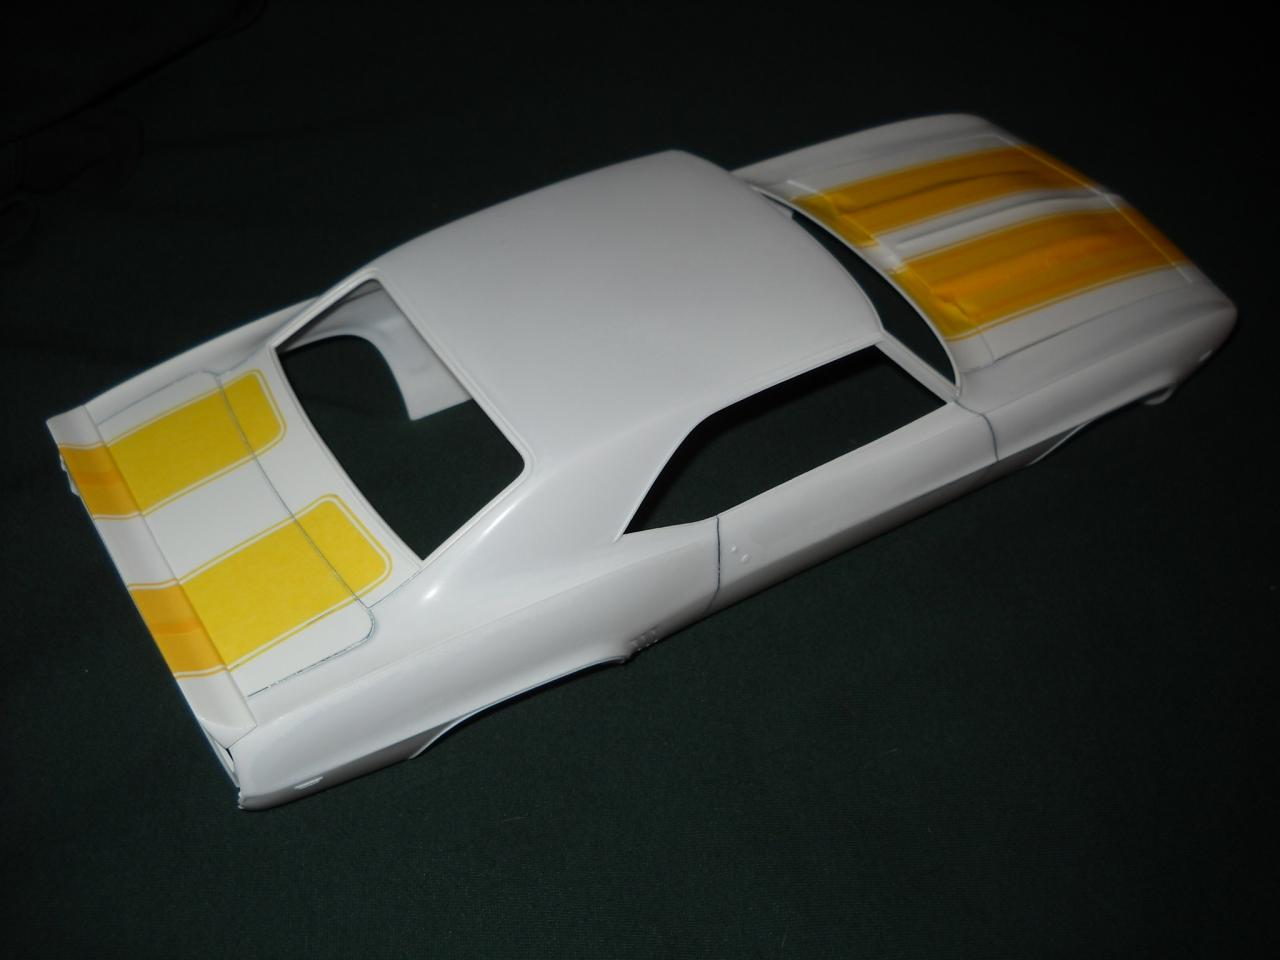
I haven't made my decision about the rear stripes, but I was able to do the front in the meantime. The decals were a definite no-go, so I reluctantly masked off the stripes, praying that I would do a better job than last time. They're not completely perfect, but they're about as perfect as I could ever hope to get them! I used Tamiya TS-29 semi-gloss black because I've noticed that I tend to have better luck getting flat or matte colors to lay down smoother than gloss colors. Plus, it'll get probably another 2 coats of clear over it. I've heard good things about Rustoleum automotive lacquer clear coat, product #253366.
-
1/12 '69 Camaro Z/28 (New Foose Kit) BMF Done 6/2
ImpalaBoy replied to ImpalaBoy's topic in WIP: Model Cars
I couldn't for the life of me get the decals to lay flat on the hood even with Micro Set and Micro Sol, so I'm thinking of a compromise. If I mask and paint the stripes on the front but use the decals on the back, after a couple coats of clear, do you out there think there will be any noticeable difference? I would think that since they have the expanse of the roof between them, even if there was a slight difference, it would be difficult to compare them anyway. I would greatly appreciate anybody's input. -
1/12 '69 Camaro Z/28 (New Foose Kit) BMF Done 6/2
ImpalaBoy replied to ImpalaBoy's topic in WIP: Model Cars
Wow!! That looks fantastic! I can't wait to see how yours comes out, either! I almost chose a darker yellow like that; more like the shade used on the 2010 Camaro, but I changed my mind at the last second and decided to go with the original 1969 color. Kind of funny that we're both building yellow Camaros at the same time, since before now, I had never seen one of these done in yellow. Where did you get your paint, and what is the shade called? -
1/12 '69 Camaro Z/28 (New Foose Kit) BMF Done 6/2
ImpalaBoy replied to ImpalaBoy's topic in WIP: Model Cars
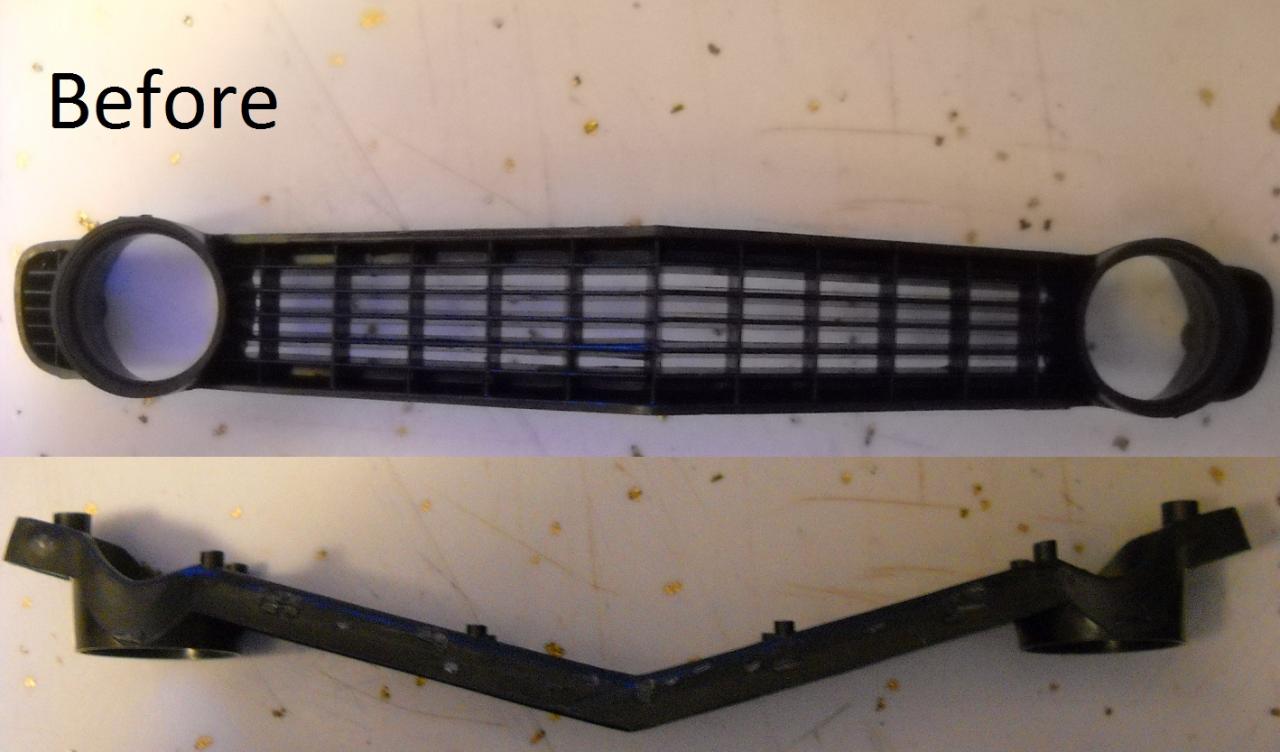
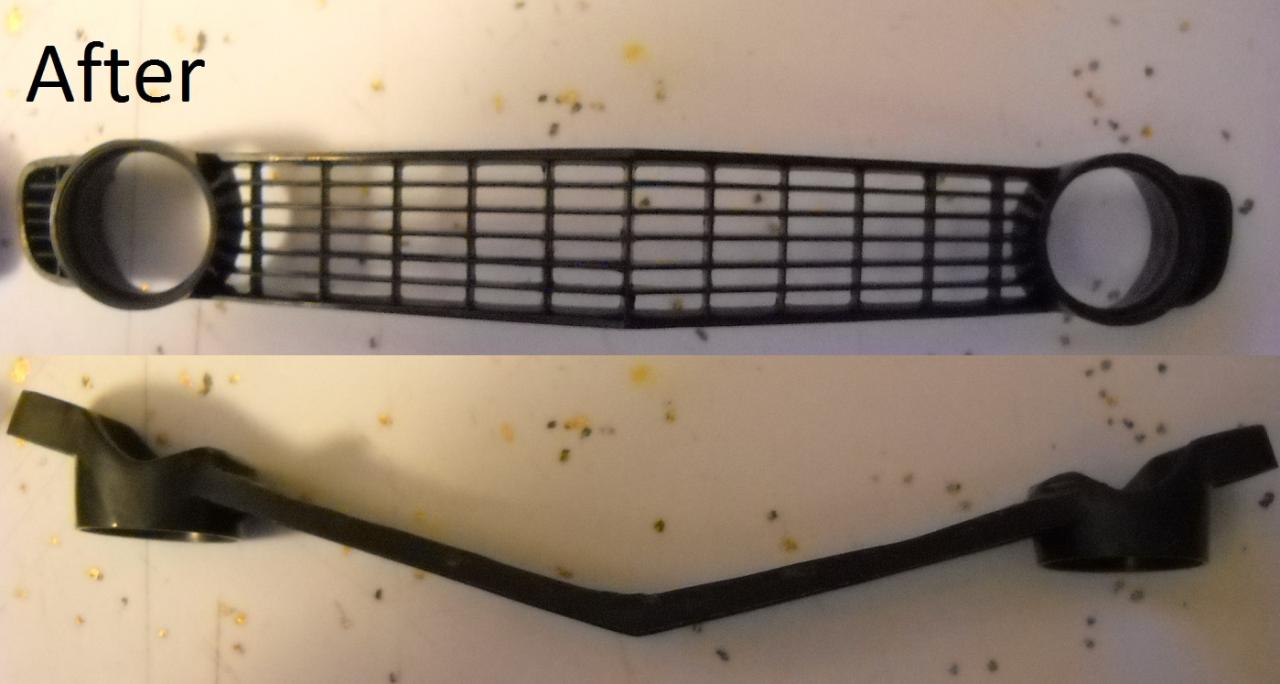
Thanks, everyone, I'm glad you all approve! Mrdarkmonkey, the rest of the grill except for the top and bottom rows is open, but about an 8th inch needs to be taken off the whole thing to make it look more correct in scale.
-
1/12 '69 Camaro Z/28 (New Foose Kit) BMF Done 6/2
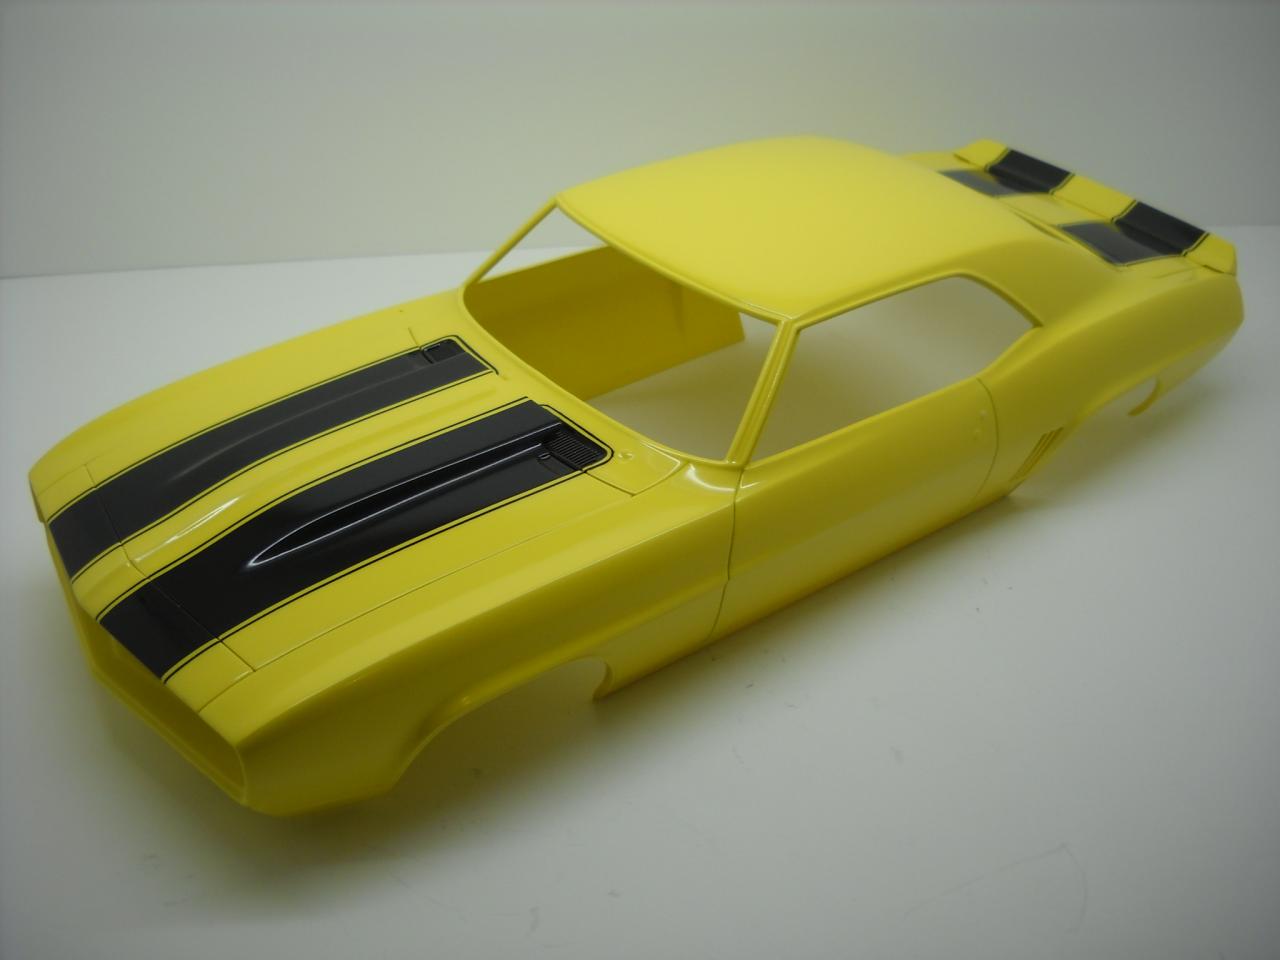
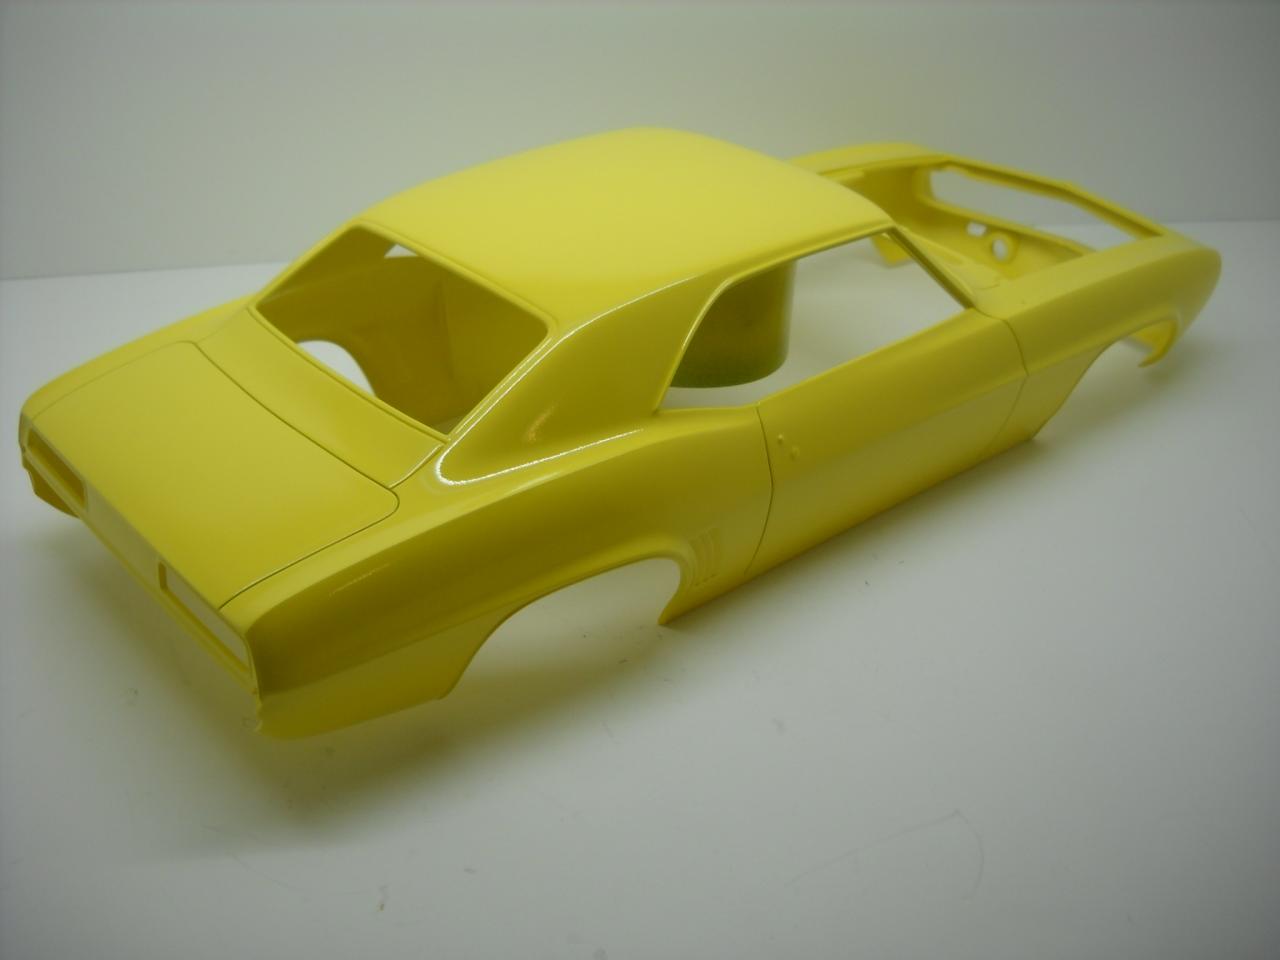
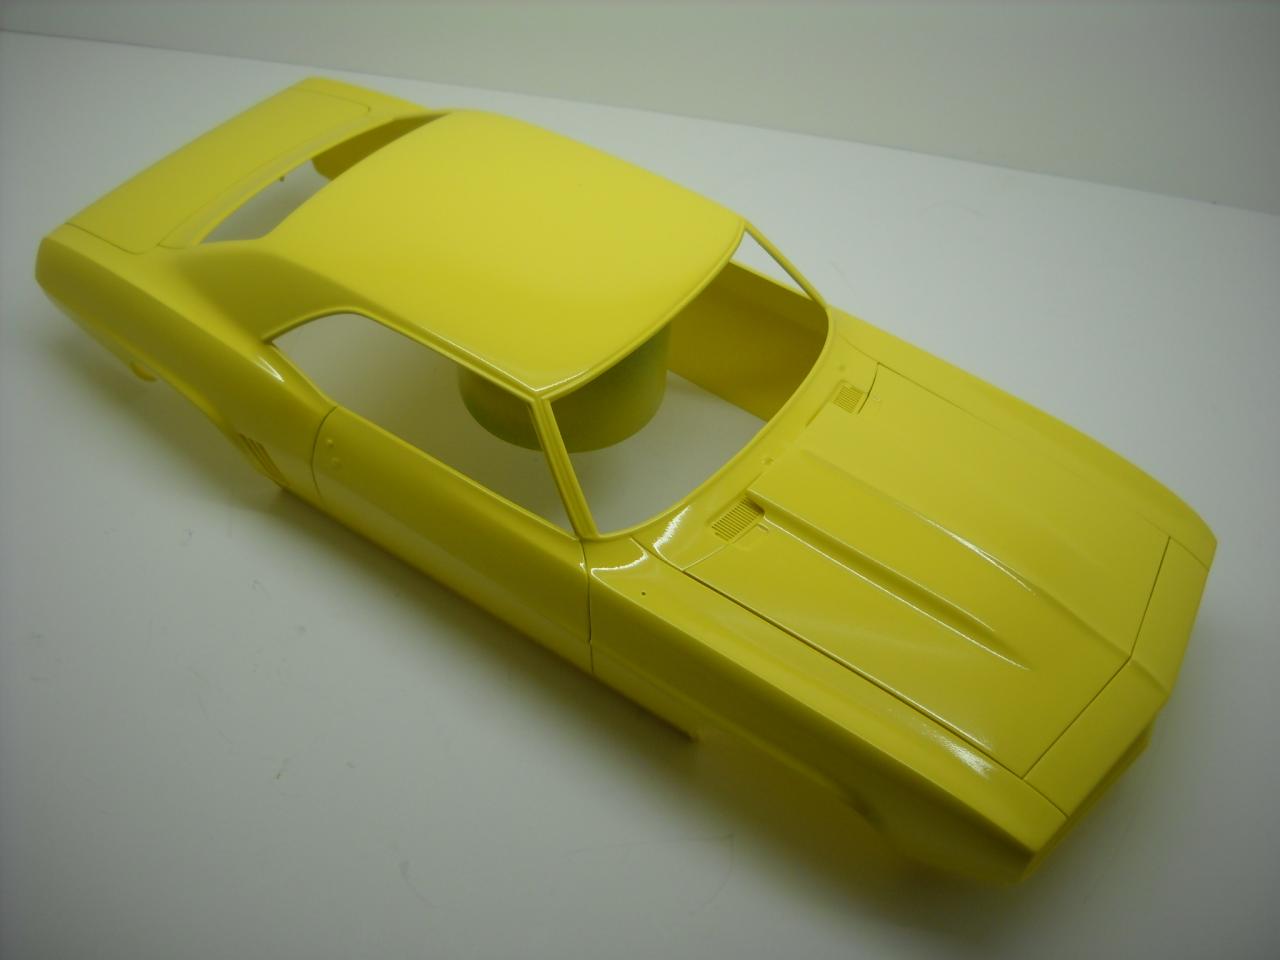
ImpalaBoy replied to ImpalaBoy's topic in WIP: Model Cars
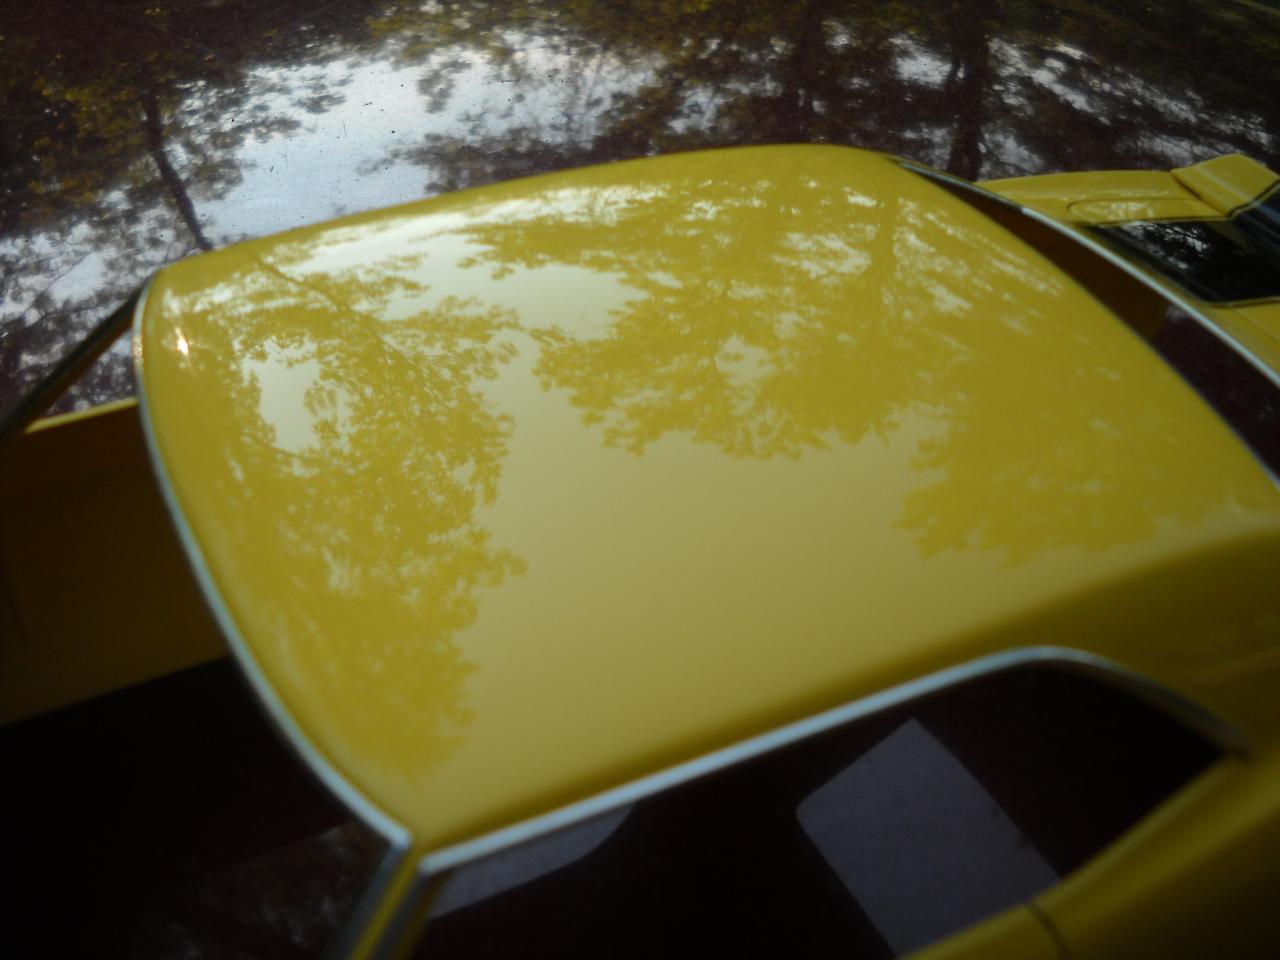
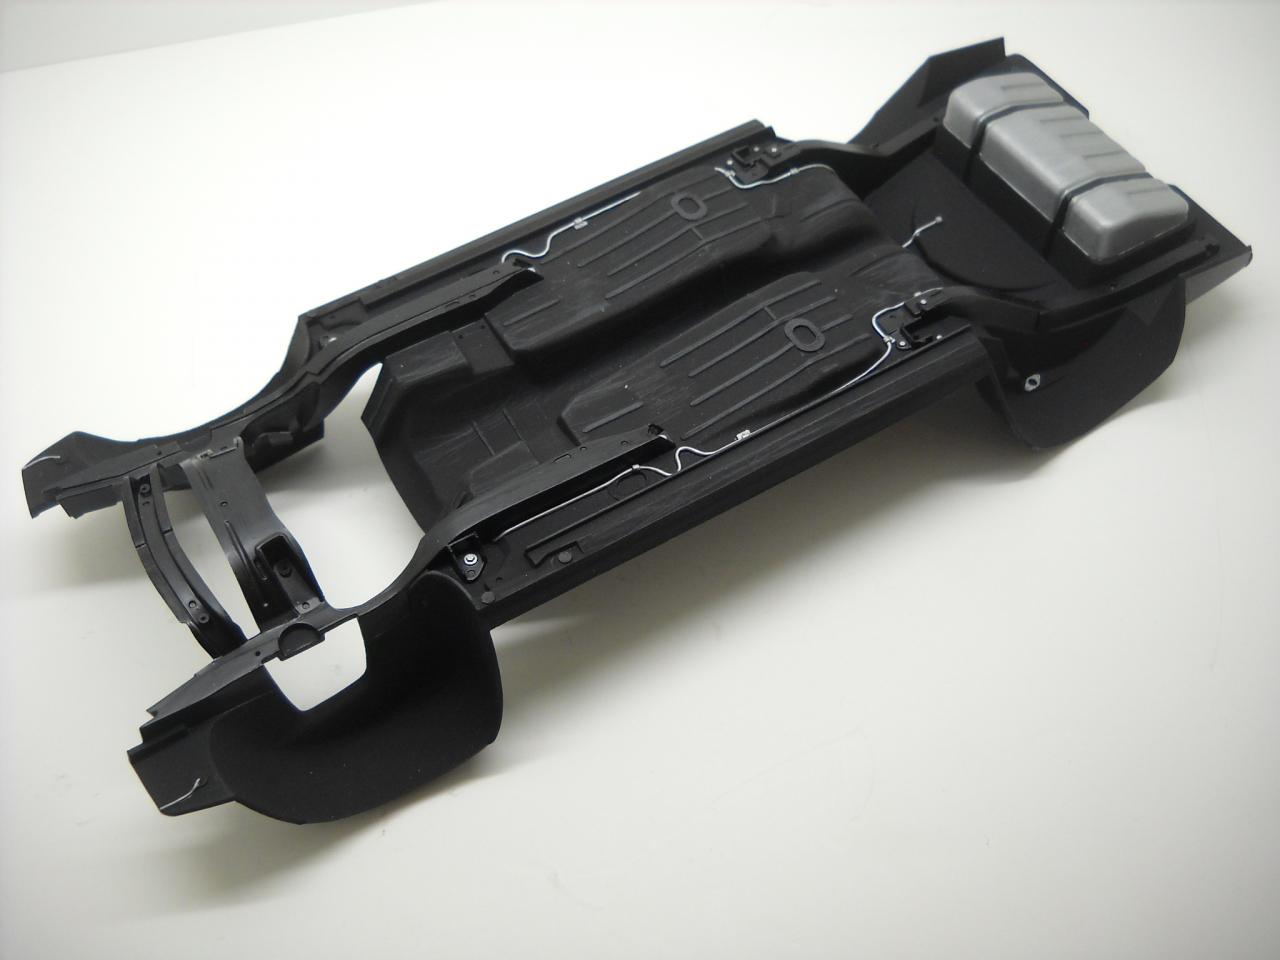
Daytona Yellow from Automotivetouchup.com. Three coats of color and three coats of clear. It needs a fair bit of polishing, but it came out pretty good. I will later add the black stripe decals and seal them with another coat of clear. I also did a bit of detailing on the chassis.
-
1/12 '69 Camaro Z/28 (New Foose Kit) BMF Done 6/2
ImpalaBoy replied to ImpalaBoy's topic in WIP: Model Cars
I certainly think so, considering the talent it takes to create them. They were $7.50, 8 in a package. -
1/12 '69 Camaro Z/28 (New Foose Kit) BMF Done 6/2
ImpalaBoy replied to ImpalaBoy's topic in WIP: Model Cars
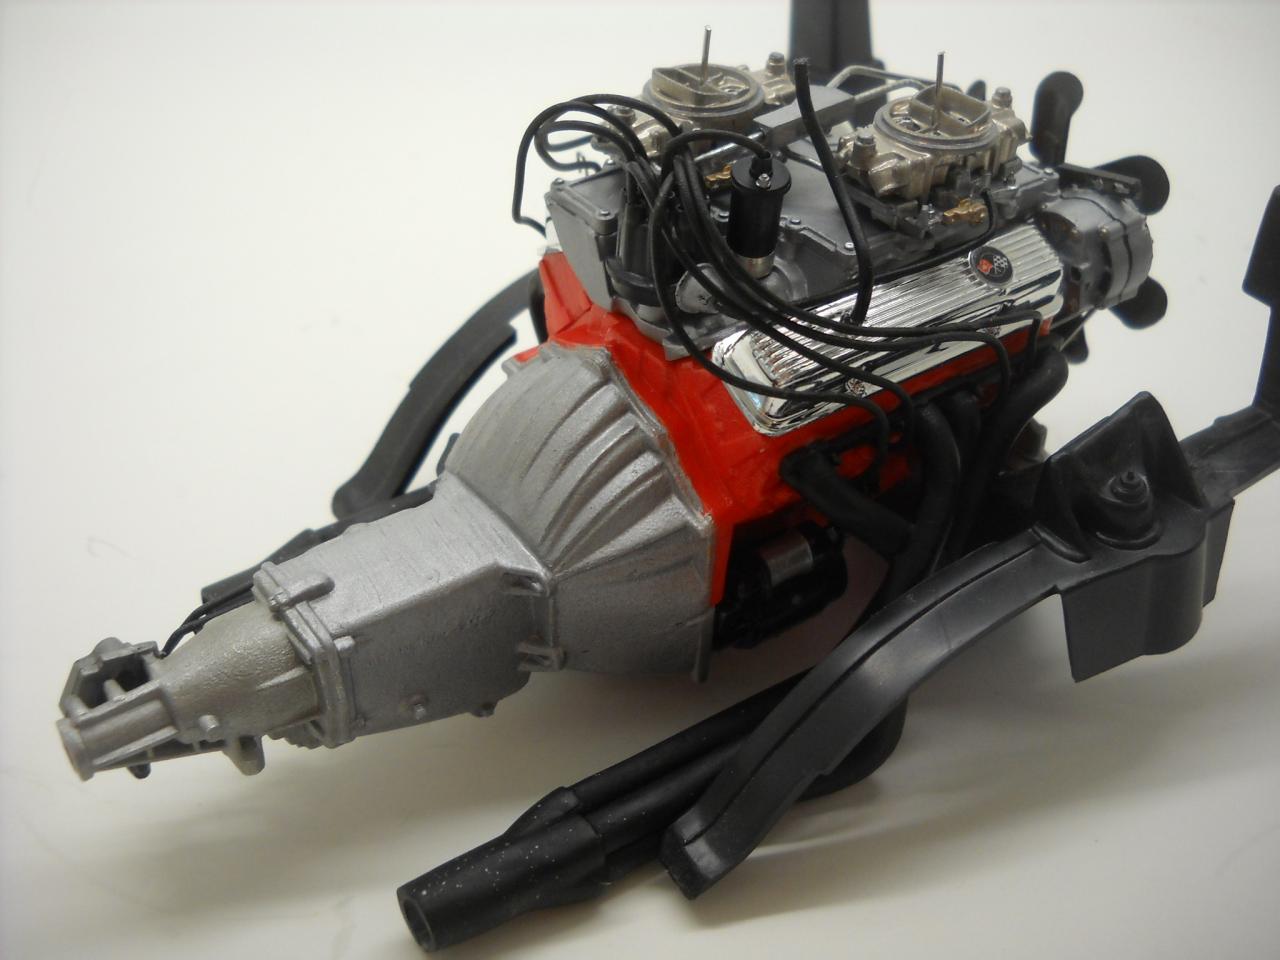
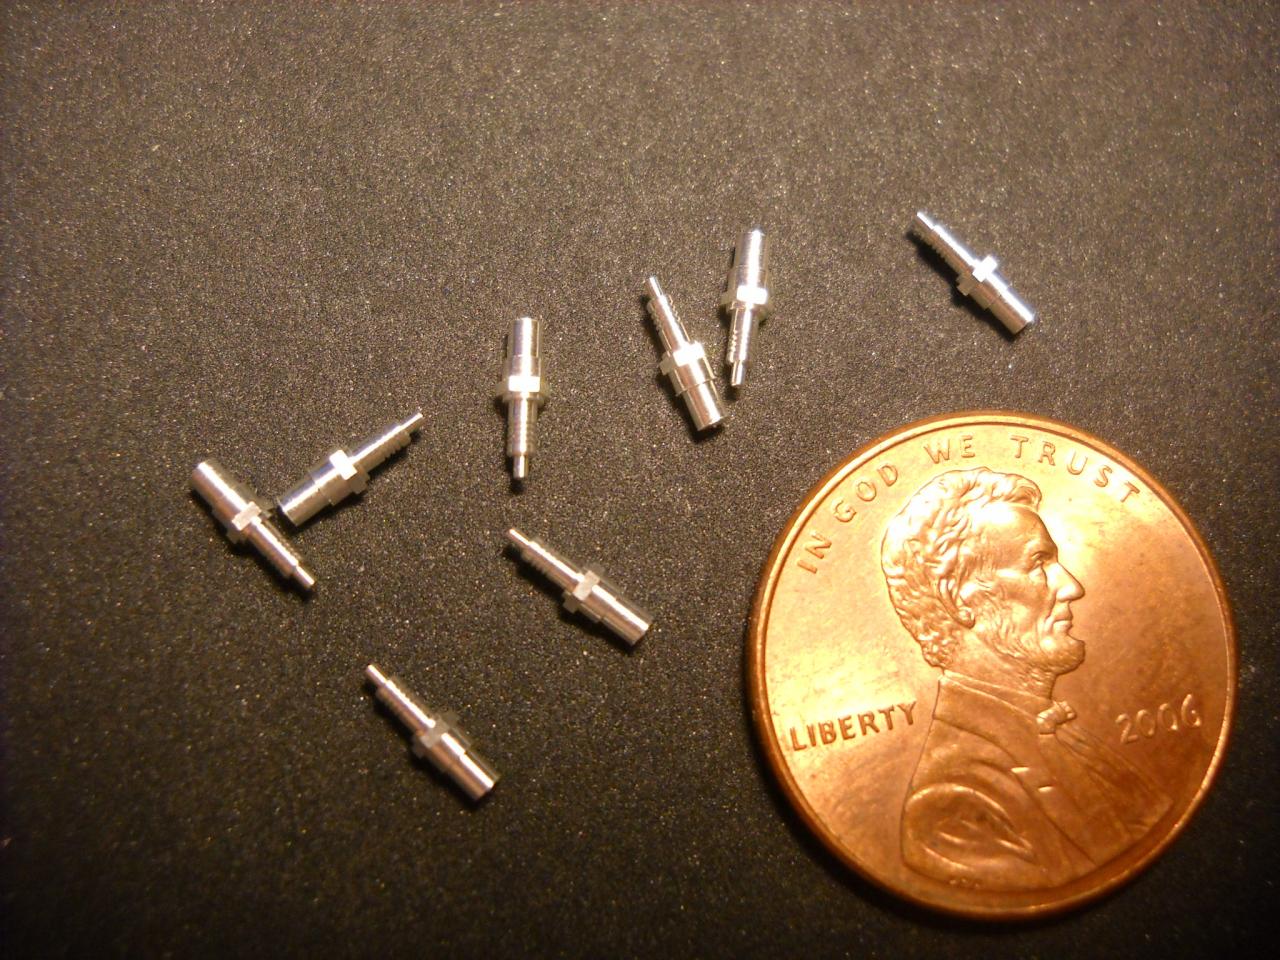
I decided I'm going to put the engine I've already done in the car and build the engine from the second kit separately to go in its own display. Therefore I decided to do as much as I possibly can with it. I ordered spark plugs and boots from R.B. Motion. They really are absolutely fantastic. I couldn't imagine working with these in 1/24 scale, but he makes them somehow. I'll display it without the headers, to show off the spark plugs, so I drilled out the exhaust ports, too. Even unpainted, I think this cylinder head looks pretty good so far!
-
Absolutely stunning build! That interior is immaculate and wood grain looks fantastic. Any tips on that?
-
1/12 '69 Camaro Z/28 (New Foose Kit) BMF Done 6/2
ImpalaBoy replied to ImpalaBoy's topic in WIP: Model Cars
Ok, nevermind. I'm starting this one over from scratch. I ordered a new kit, mostly for the body, so I will probably still use most of the stuff that I already have done. Well, the engine is really all I have completely done anyway. Even so, I think I'll build the engine from the new kit and see if I can do it any better. Whichever one I don't put in the car I'll just display separately. I've completely rethought my color scheme as well. The 'Medium Quasar' was a bit darker than I would have liked it to be and the quality of the paint just wasn't as good as I had hoped. I guess I should have listened to more of the negative reviews of Duplicolor. Mistakes were also made on my part in the preparation of the body, so I'm sure that didn't help. I'm looking forward to starting with a fresh body and learning from my mistakes. Anyway, the new paint scheme is Daytona Yellow, an official 1969 factory color, and I will most likely use the black stripes supplied in the kit. Yeah, I'm disappointed that my first attempt didn't pan out, but I'm really looking forward to starting over, especially with this color. I think the world needs more yellow Camaros. -
1/12 '69 Camaro Z/28 (New Foose Kit) BMF Done 6/2
ImpalaBoy replied to ImpalaBoy's topic in WIP: Model Cars
Well, so much for that. Let's just say it'll be a while until the next body update. In the meantime, there's still the interior and chassis to work on. -
1/12 '69 Camaro Z/28 (New Foose Kit) BMF Done 6/2
ImpalaBoy replied to ImpalaBoy's topic in WIP: Model Cars
Well, here's an evening's worth of work. It really took quite a bit longer than I expected it would; just over 3 hours. I sure hope it was worth it. Paint goes on first thing tomorrow. Wish me luck
-
1/12 '69 Camaro Z/28 (New Foose Kit) BMF Done 6/2
ImpalaBoy replied to ImpalaBoy's topic in WIP: Model Cars
Not much to actually show in the way of updates quite yet, but I have been able to do some spray painting the past couple of days. Just simple base coats and things for the interior, but nothing interesting enough to bother posting yet. Soon, though, I think. I thought I'd show you this, though, in case you're interested. I'm trying a new technique (for me, anyway) for panel lines that Harry P. discussed on a thread somewhere; a red '62 Corvette, I believe. Ah, this one: http://www.modelcarsmag.com/forums/index.php?showtopic=78813&page=2 Anyway, the trick is to deepen the panel lines and paint them black. Then, when you paint over it, the panel lines will be noticeably darker, but not unrealistically black. Harry, if you read this, thanks for the tip! I'm really looking forward to seeing how it turns out. Here's how she sits now, with the blackened panel lines. Soon she'll get a coat of white (the color of the stripes), then I'll mask off the stripes and give her a coat of Perfect Match "Medium Quasar." Certainly not a factory color for a '69, but an official GM color, nonetheless, and one that I really like.
-
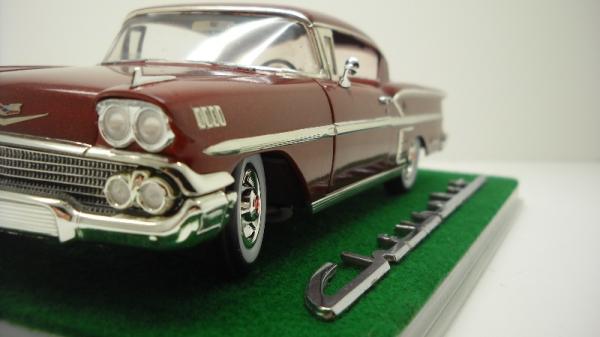
Brass knuckles for a shifter! Awesome!
-
1/12 '69 Camaro Z/28 (New Foose Kit) BMF Done 6/2
ImpalaBoy replied to ImpalaBoy's topic in WIP: Model Cars
It was 50 today!! I got some priming done on the interior pieces. What a pain it is to cover black plastic with white. Tomorrow we're supposed to get 6-12" of snow, so it will be a few days before it warms up again so I can do some more. -
1/12 '69 Camaro Z/28 (New Foose Kit) BMF Done 6/2
ImpalaBoy replied to ImpalaBoy's topic in WIP: Model Cars
Yes, it has been a while, but no updates. I'm not sure how the cold will affect the paint, so I'm putting off spray painting anything until it's at least 45-50 degrees in my garage. I think it could be warm enough today, but unfortunately I'm too busy to work on it :/ I've heard it's supposed to warm up again next weekend, though. -
As far as ugly cars go, this is right up there with the Nissan Juke. Great looking, cleanly built model, though!