ImpalaBoy
-
Posts
130 -
Joined
-
Last visited
Content Type
Profiles
Forums
Events
Gallery
Everything posted by ImpalaBoy
-
Sounds to me like you need to check your hardware, Harry. His voice is coming through loud and clear on my end; heard every word he said. If you're listening through cheap headphones/earbuds/computer speakers, that might be the problem. He's got a fairly deep voice that might not come out so well through equipment with limited bass response.
-
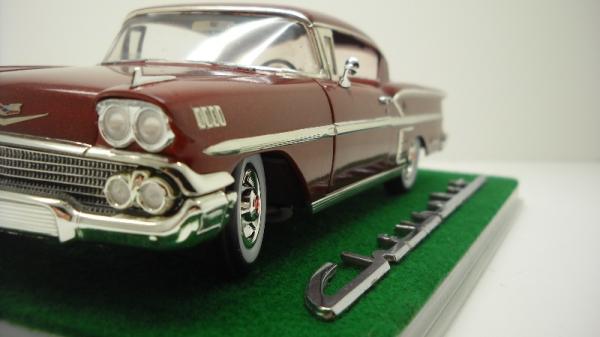
SMP '58 Impala ala Larry Watson! Interior Done, Final Assembly!
ImpalaBoy replied to John Goschke's topic in WIP: Model Cars
This looks fantastic! I greatly look forward to seeing it completed. If I may put in my own 2 cents, my only suggestion would be to scavenge a set of headlights from the Revell kit if you can get your hands on one cheap. -
I agree that what you did combines the best of both styles. Converting to a '98 front end was a very popular modification, so your model is in no way an inaccurate representation. A lot of people who owned '98s also went the other way and installed the '94 style tail lights. My first car was a '98 RS in Cypress Green and boy I loved driving it! I just recently got an '07 Civic simply because I couldn't pass up the deal, but I will soon be giving the Integra to my sister just so I know it will still be in good hands. I can't help you with the LaFerrari, but my first suggestion would be to see if there is a copyright date molded or printed somewhere on the chassis or on another large piece.
-
Any particular reason you're calling this a '94? This Revell model is of the '98-'01 front end style, though I noticed you painted the rear turn signals amber as they were from '94-'97. I suppose it could be a '94 with a '98 front end conversion?
-
1:12 1969 Camaro Z/28 as seen in the August '69 issue of Car Life.
ImpalaBoy replied to swede70's topic in WIP: Model Cars
The mold line on the fuel pump is accurate. Here's a link to a picture of a real one, if that's allowed. http://i.ebayimg.com/images/i/331443800283-0-1/s-l1000.jpg -
1/12 '69 Camaro Z/28 (New Foose Kit) BMF Done 6/2
ImpalaBoy replied to ImpalaBoy's topic in WIP: Model Cars
The gold color on the carbs is a mix of Testors 1144 Gold and 1146 Silver. The transmission and intake are either 1180 Flat Steel or 1181 Aluminum, all Testors enamel. -
1/12 '69 Camaro Z/28 (New Foose Kit) BMF Done 6/2
ImpalaBoy replied to ImpalaBoy's topic in WIP: Model Cars
Thank you very much. I see you're doing yours in the same color scheme. Well, the exterior anyway. I look forward to seeing how yours comes out as well. Maybe it'll give me a kick in the pants to start working on mine again! -
I think you did a fantastic job with the design and execution! I think it fits the car better as well. I get that the Rolls is the epitome of comfort and all that but honestly, in that reference photo it looks like someone just shoved their living room sofa in the back of the car, which I think looks a little ridiculous. I most definitely prefer the seat you made.
-
You said early on that you were planning to make a kit. Do you have any idea at this point how much you might end up selling them for?
-
I appreciate your humility, as I think there is not nearly enough of that trait going around these days. However, I do believe that anybody who can face a mechanical problem and can conceive and execute an effective solution is an engineer. You, sir, are an engineer. Don't let your humility hide that from yourself.
-
Why do you say that a screw with a finer thread would create a stronger bond? Wouldn't a finer thread be more liable to get stripped, especially in plastic? In my experience, fine threads are only good for machine screws, whereas coarse threads are best suited for wood, drywall, and plastic. Or does the courseness of the threads really matter anyway, since most of the work is being the done by the nuts clamping it together? I'm sorry I've never commented before, even though I've been following this thread for months. Your reengineering (hey, it's not often you see two double 'ee's in one word), scratch building, and detail work are just incredible.
-
Show us your 1969 Camaro (67 & 68 Camaro also welcomed)
ImpalaBoy replied to TheCat's topic in Model Cars
This looks amazing! The hood hinges say 1:25 but the rest screams 1:12! -
1/12 '69 Camaro Z/28 (New Foose Kit) BMF Done 6/2
ImpalaBoy replied to ImpalaBoy's topic in WIP: Model Cars
It was VERY tedious, I must admit. I was also glad I had two sets to work with, since I messed up one of them. I used an x-acto knife and 150 grit sandpaper to get the majority of the material off. I wish you good luck -
1/12 '69 Camaro Z/28 (New Foose Kit) BMF Done 6/2
ImpalaBoy replied to ImpalaBoy's topic in WIP: Model Cars
I didn't do anything to the tires, but I had to trim about a millimeter off the outside circumference of each rim. Left is before, right is after.
-
I just remembered a limerick I made up a few years ago: There once was a car named Camaro Whose speed surpassed that of an arrow. Any Mustang it faced It could beat in a race By a margin that was by no means narrow.
-
Having the rear stripes going down past the spoiler onto the trunk lid isn't necessarily wrong, it just means that the spoiler had been added on by the dealer, rather than at the factory. Excellent build altogether! The yellow and black is my favorite color combo, which is also how I'm doing my 1/12 model. All of these tips are spot on and I look forward to seeing your next rendition of this kit
-
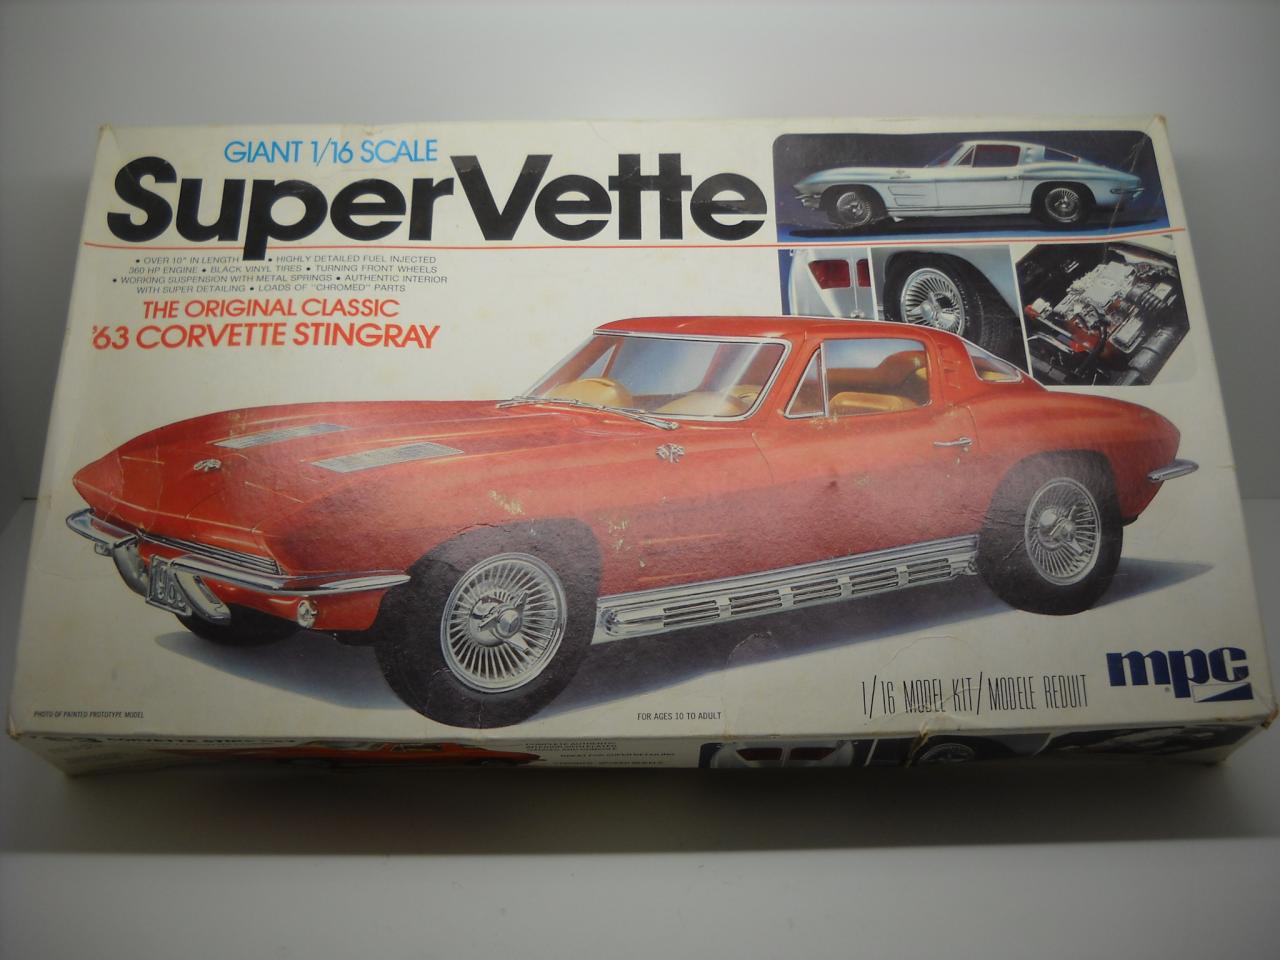
MPC 1/16 '63 Corvette Stingray "SuperVette"
ImpalaBoy replied to ImpalaBoy's topic in Car Kit News & Reviews
There are only 24 rivets in this photo. I think it would look better if there were 25. -
MPC 1/16 '63 Corvette Stingray "SuperVette"
ImpalaBoy replied to ImpalaBoy's topic in Car Kit News & Reviews
Wow, I really didn't expect to get this much feedback! The history is quite interesting. I don't know when I'll be starting this kit, since I'm hoping to finish the Camaro I'm working on first. -
MPC 1/16 '63 Corvette Stingray "SuperVette"
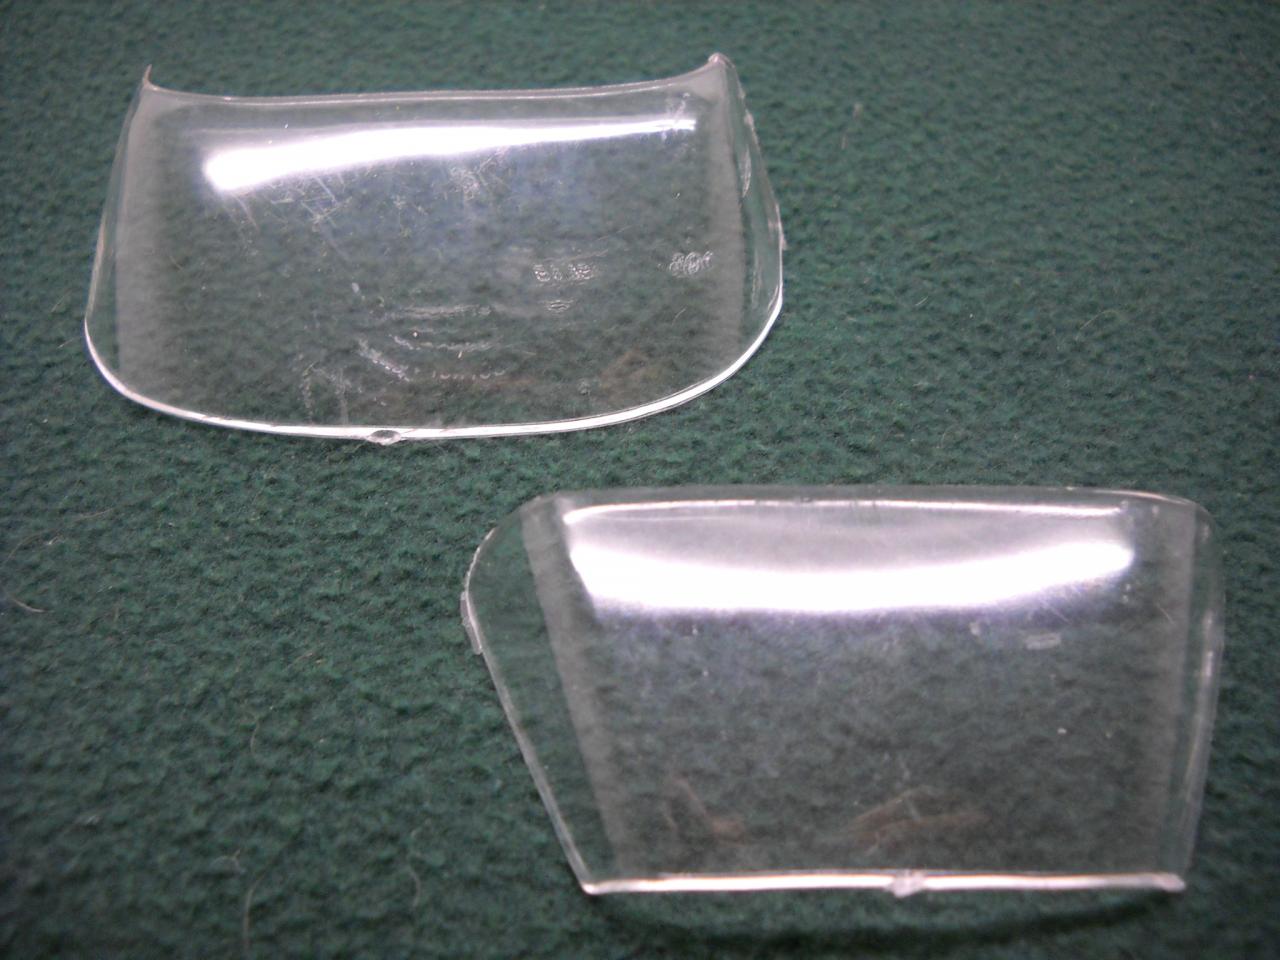
ImpalaBoy replied to ImpalaBoy's topic in Car Kit News & Reviews
Clear parts are in pretty rough condition, but I'm hoping I'll be able to polish them out. The shape is good and they fit well, so that's a plus. Parts that were in a ziploc bag in the box: springs for working front suspension, tail light lenses, oil filler tube, and one of the air cleaner covers for the optional triple carb set up. Decals, which are probably brittle and useless by now. Ok, that's about it. I hope this will be helpful to somebody at some point.
-
MPC 1/16 '63 Corvette Stingray "SuperVette"
ImpalaBoy replied to ImpalaBoy's topic in Car Kit News & Reviews
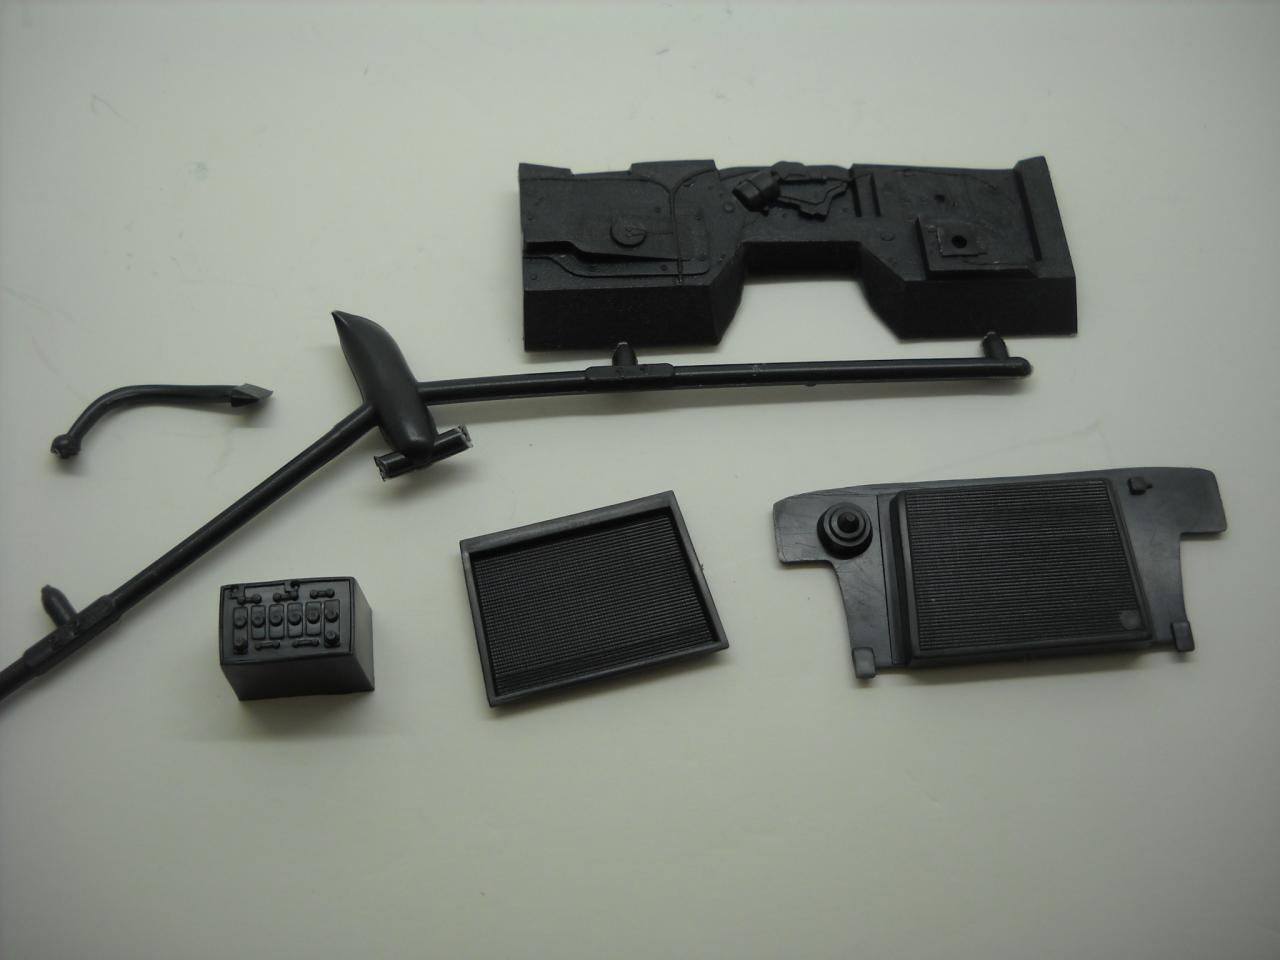
Engine halves and heads look nice. Oil pan is separate, but chrome plated, so that will get stripped. Inner wheels and optional roll cage. Very nicely molded vinyl Goodyear Polyglas GTs. Various engine bay parts. Various interior parts, including tub, which I suppose has fairly decent molded in carpeting texture, but very shallow door panel details. Various chassis and suspension parts.
-
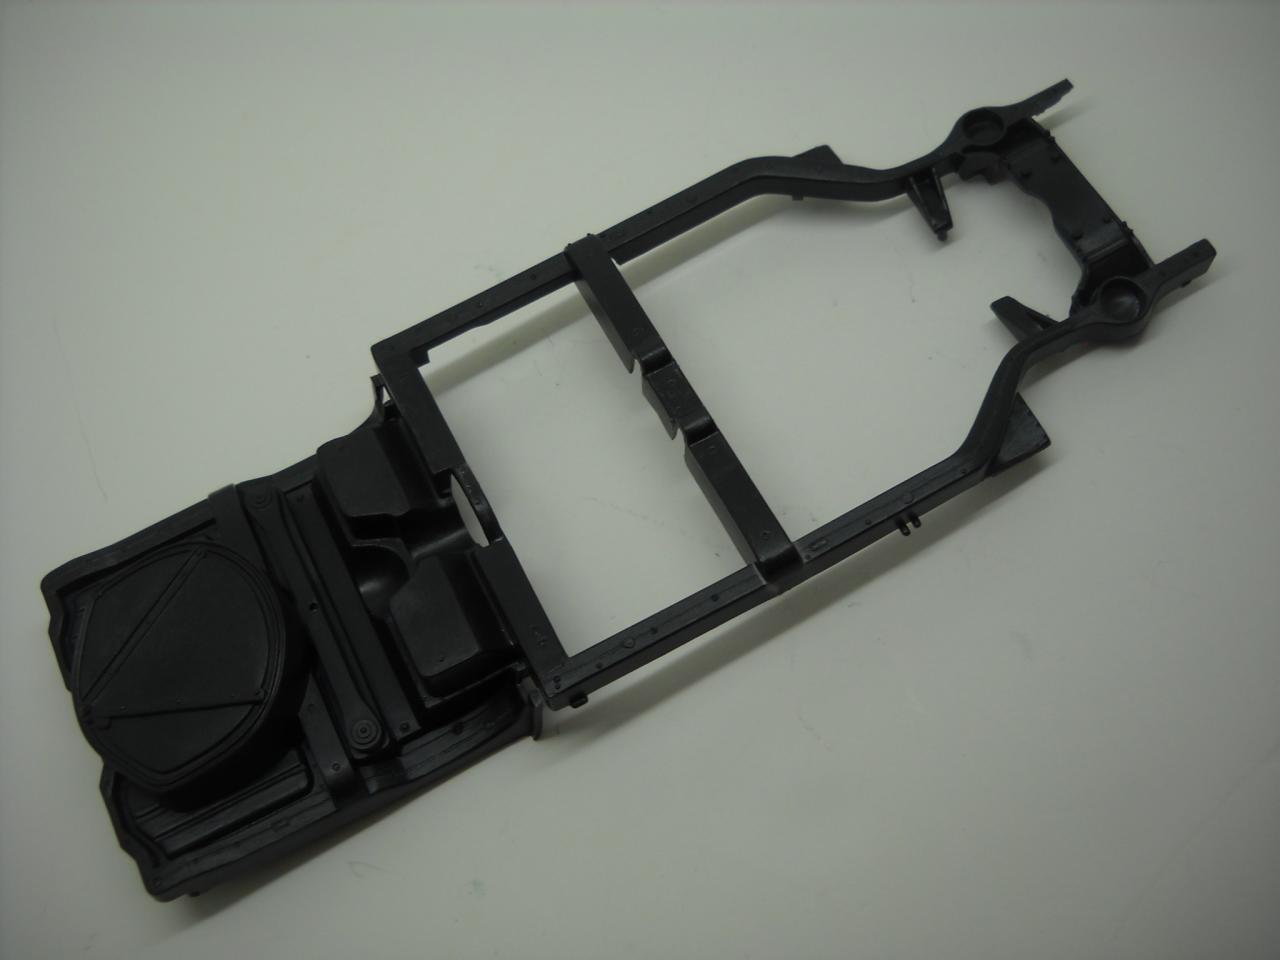
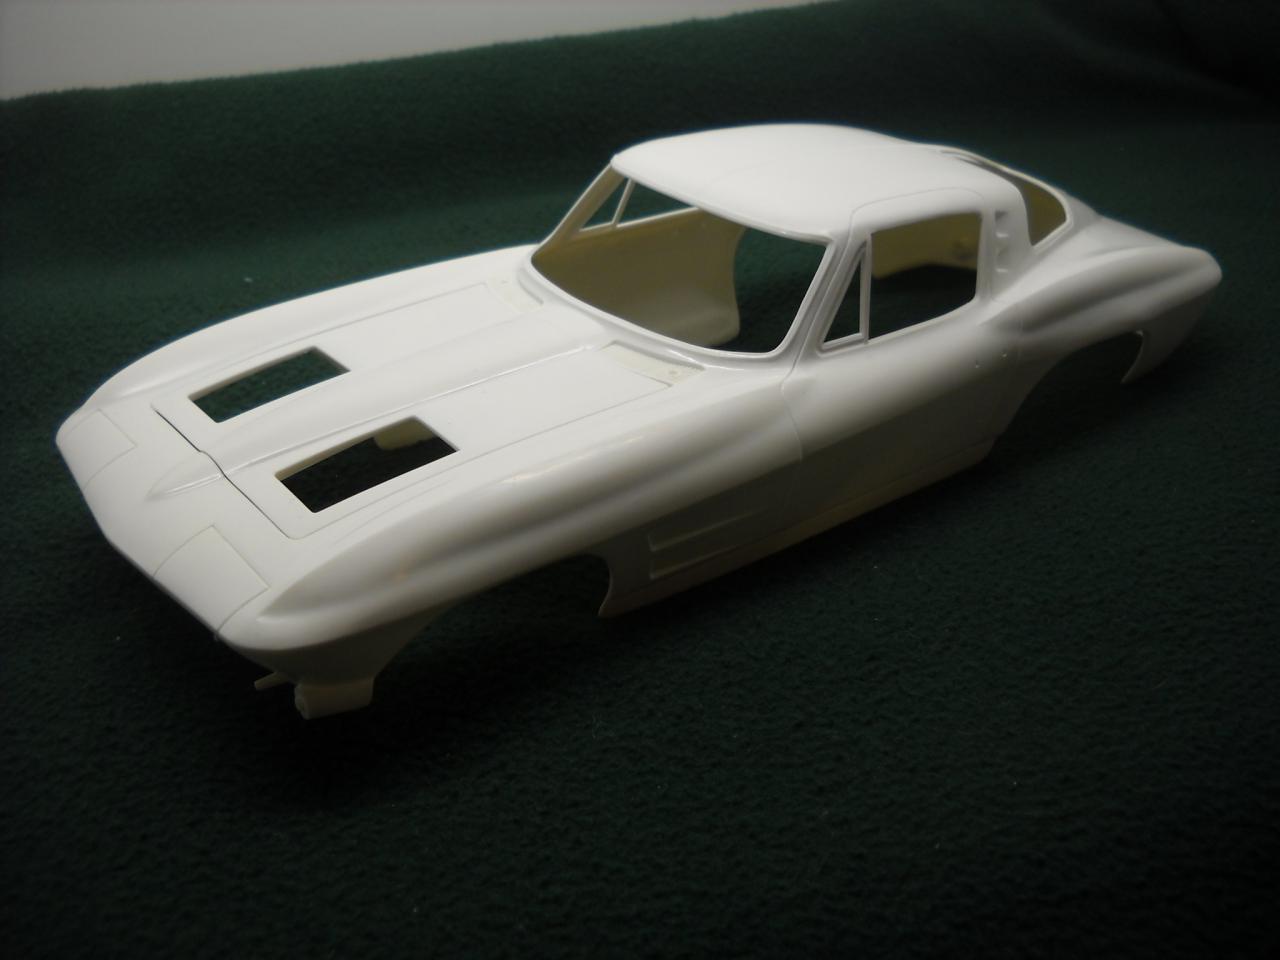
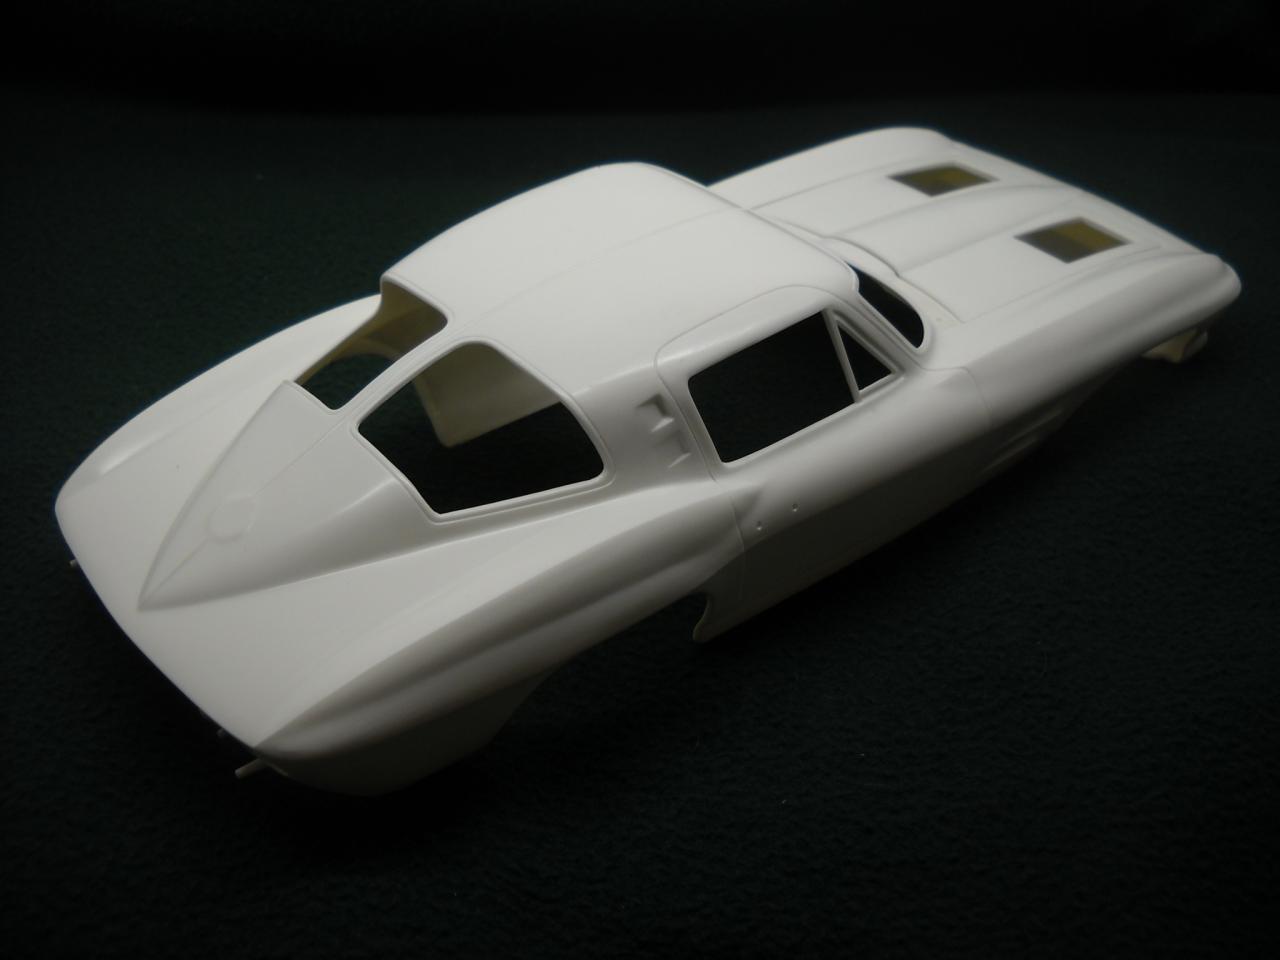
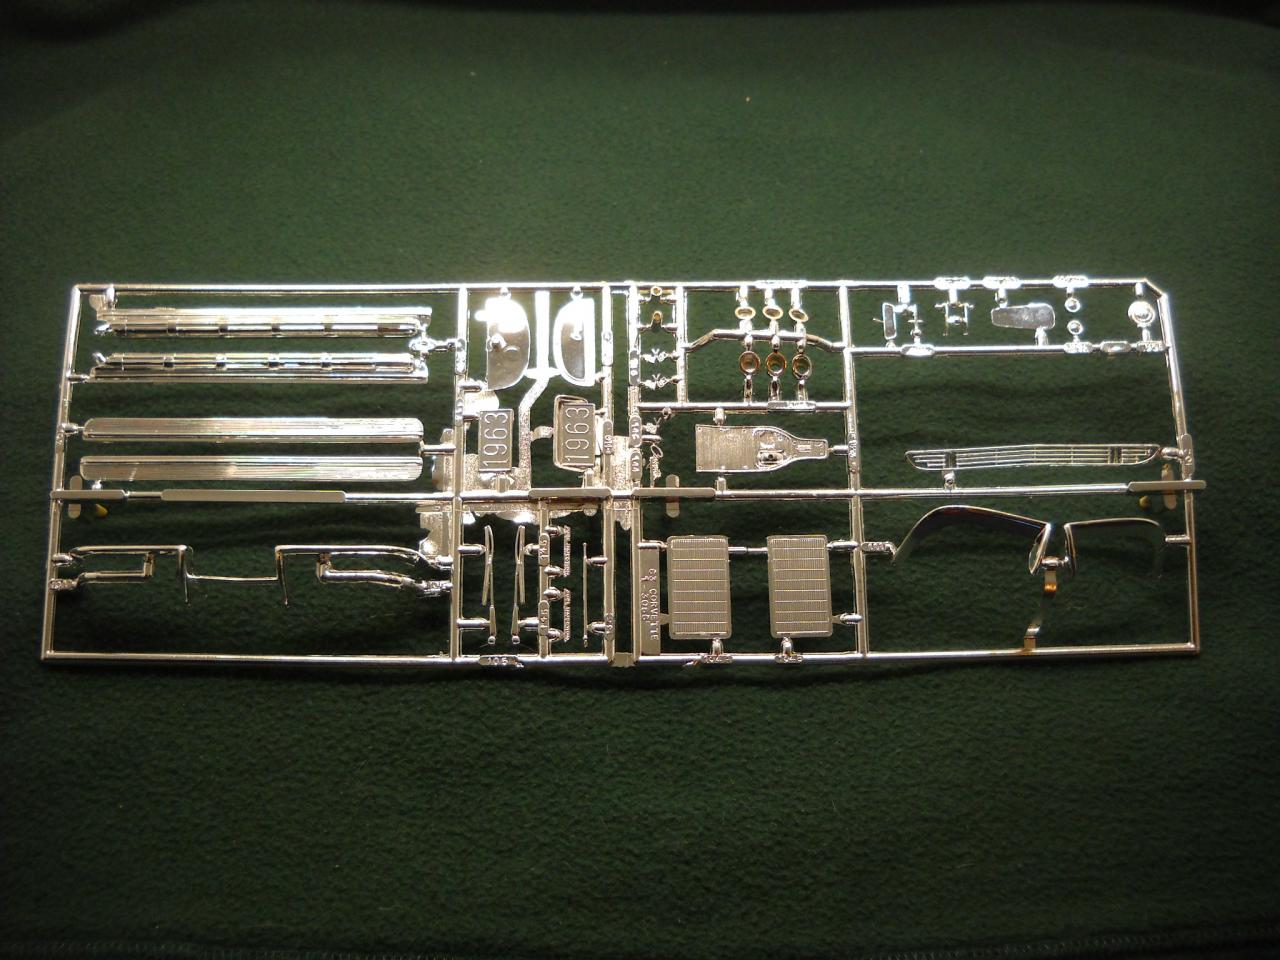
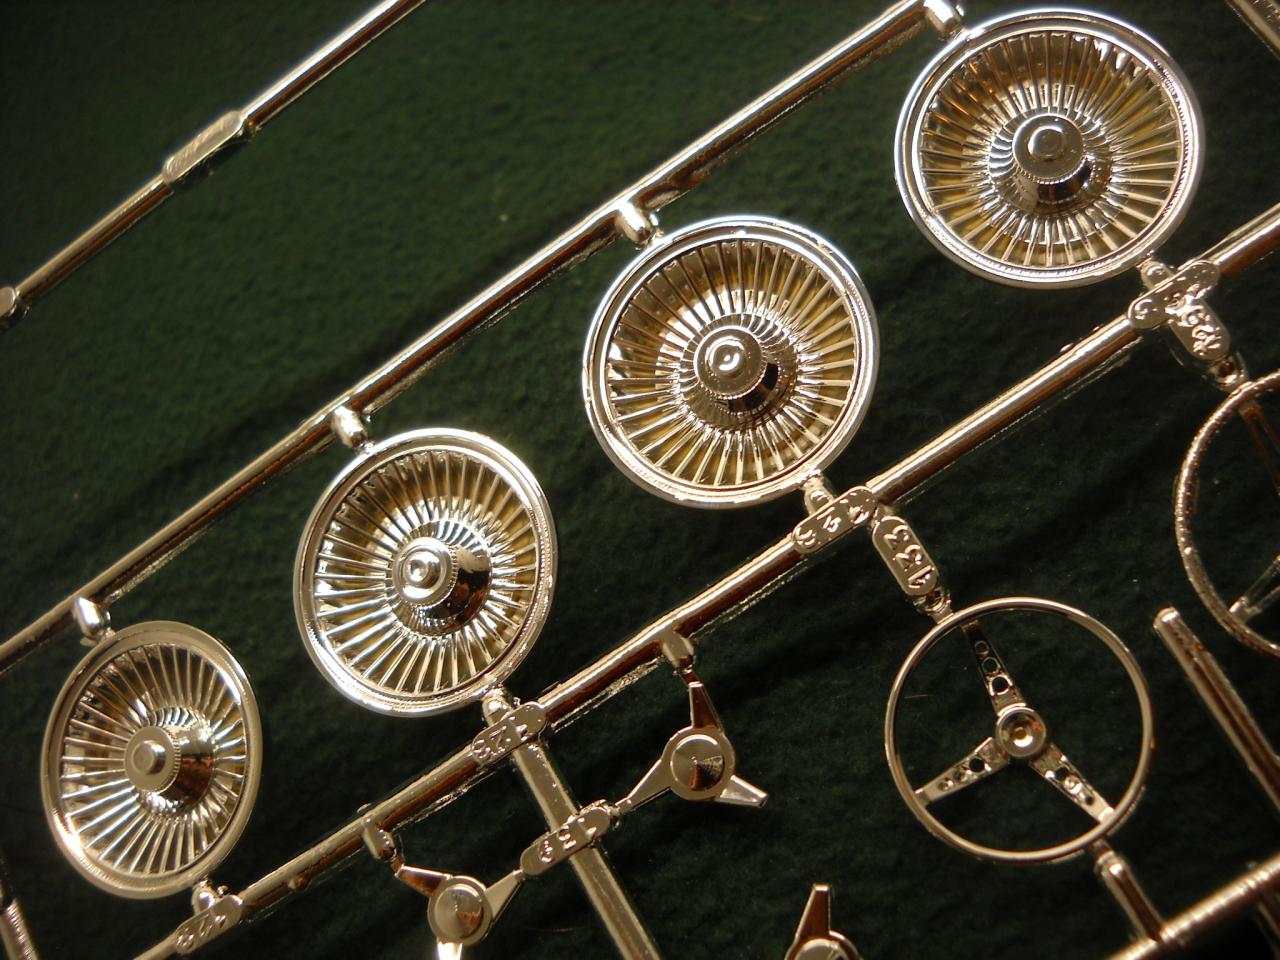
I just got this off of Ebay so I figured I'd do a review in case anybody's interested. It looks like it will be a pretty decent kit with enough work put into it. As far as mold quality and flash goes, this is the worst kit I have yet encountered. However, with A LOT of cleaning up, the shapes seem to be pretty accurate and I hope the parts fit will be okay as well. I didn't take any 'before' pictures, but here's the body after quite a bit of work cleaning up mold lines and deepening panel lines. It seems to be straight and accurate and pretty nicely done overall. Chrome parts are a bit lousy, but fortunately the bumpers are pretty good. Most of these parts will probably get stripped. Comes with optional side pipes or rocker panels. Two choices of steering wheels. Very nicely molded stock rims that look much better in person.
-
Nice job so far, the wheels look soooo much better! Check your fan clutch placement, though. You put it over the torsional damper, but it goes on the fan. I look forward to seeing more. Do you have a color scheme thought out yet?
-
1/12 '69 Camaro Z/28 (New Foose Kit) BMF Done 6/2
ImpalaBoy replied to ImpalaBoy's topic in WIP: Model Cars
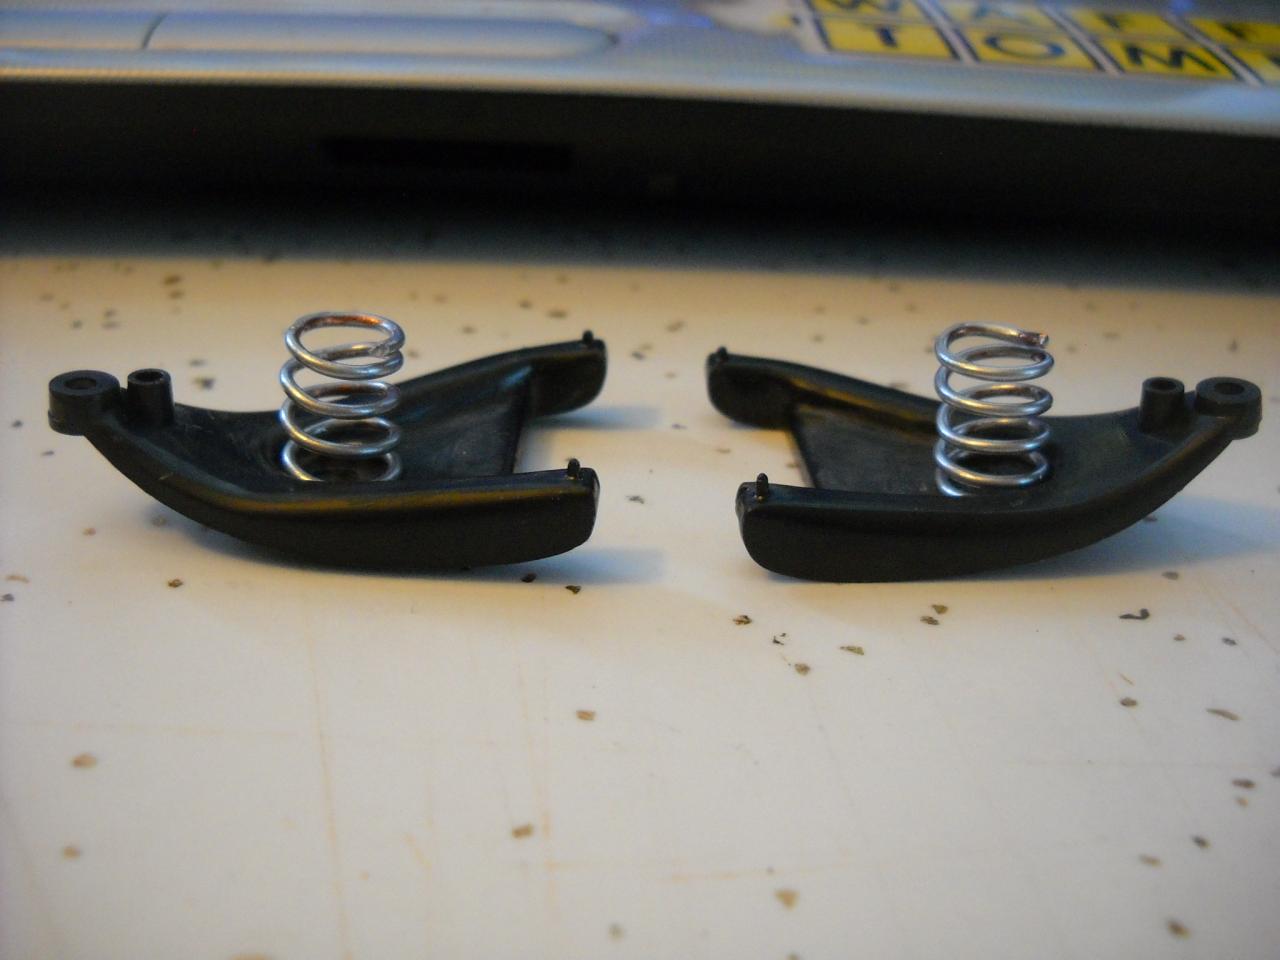
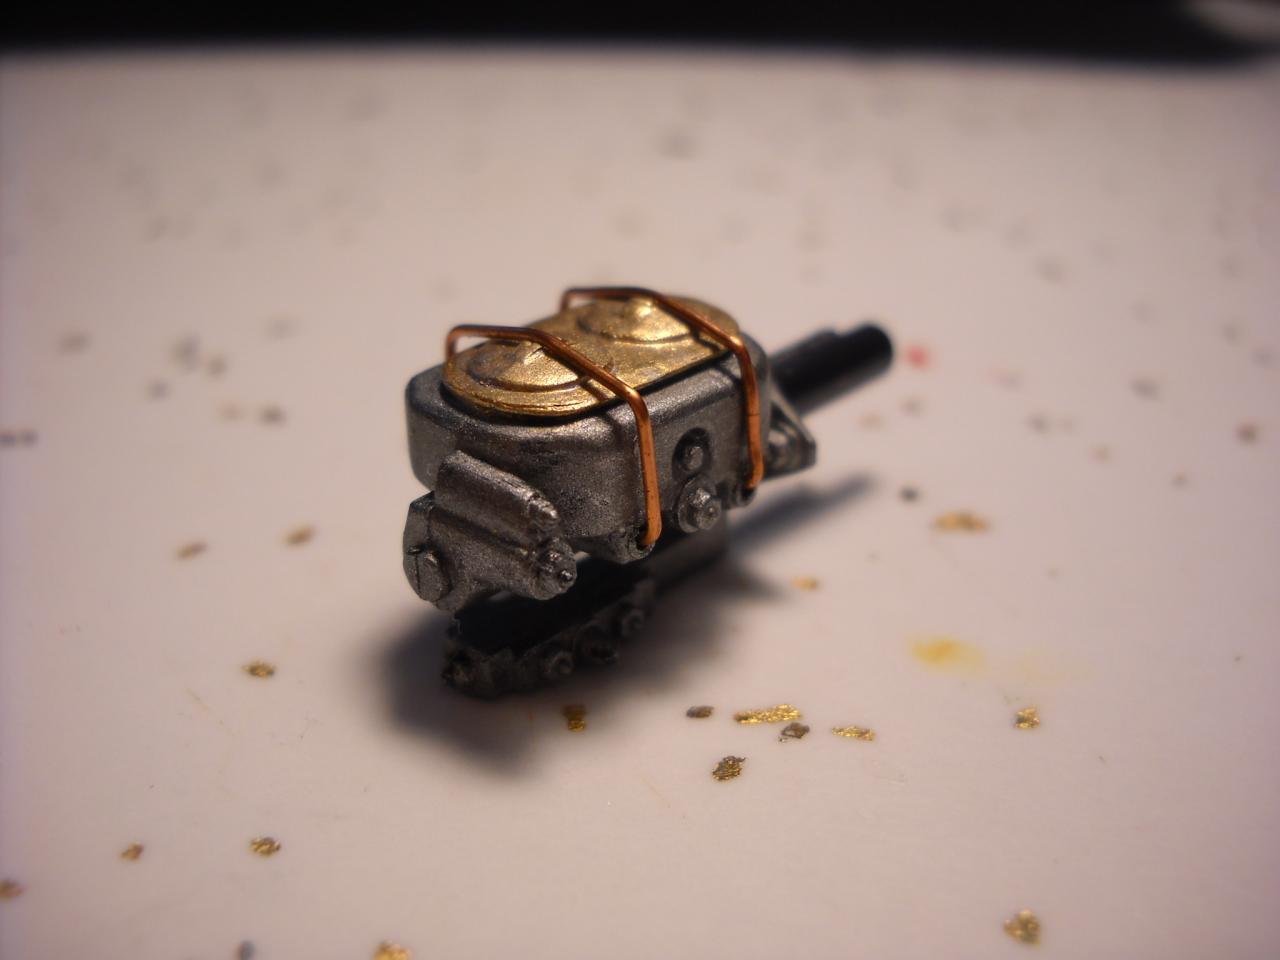
I decided to upgrade the suspension. I think having springs might make the ride a bit smoother. I also did a bit of work on the master cylinder.
-
1/12 '69 Camaro Z/28 (New Foose Kit) BMF Done 6/2
ImpalaBoy replied to ImpalaBoy's topic in WIP: Model Cars
I got the grill put together. I just can't get over how well those headlight lenses are molded! Also, if I haven't mentioned it already, I am using the MCG photoetch set.
-
1/12 '69 Camaro Z/28 (New Foose Kit) BMF Done 6/2
ImpalaBoy replied to ImpalaBoy's topic in WIP: Model Cars
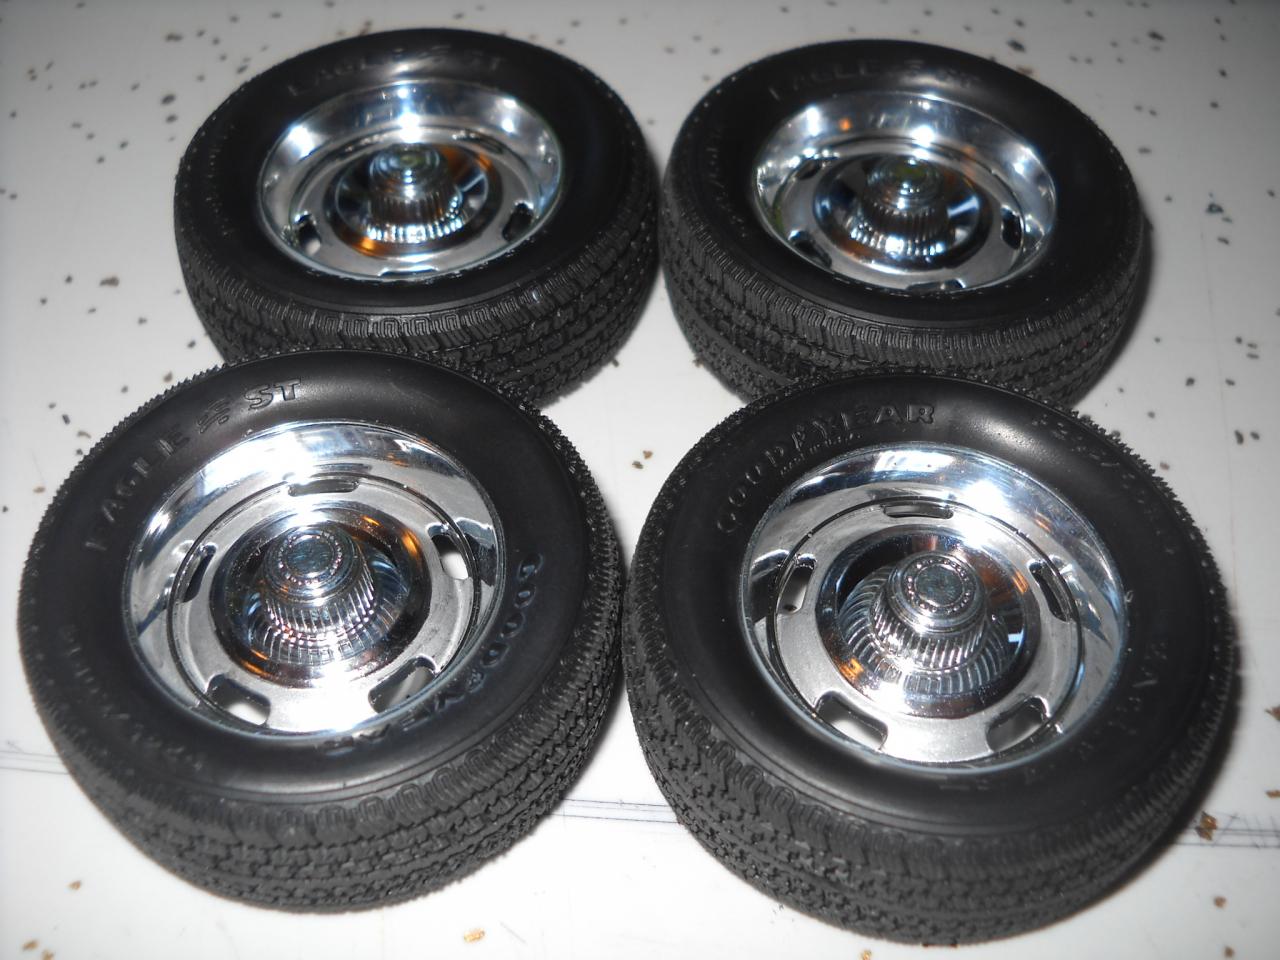
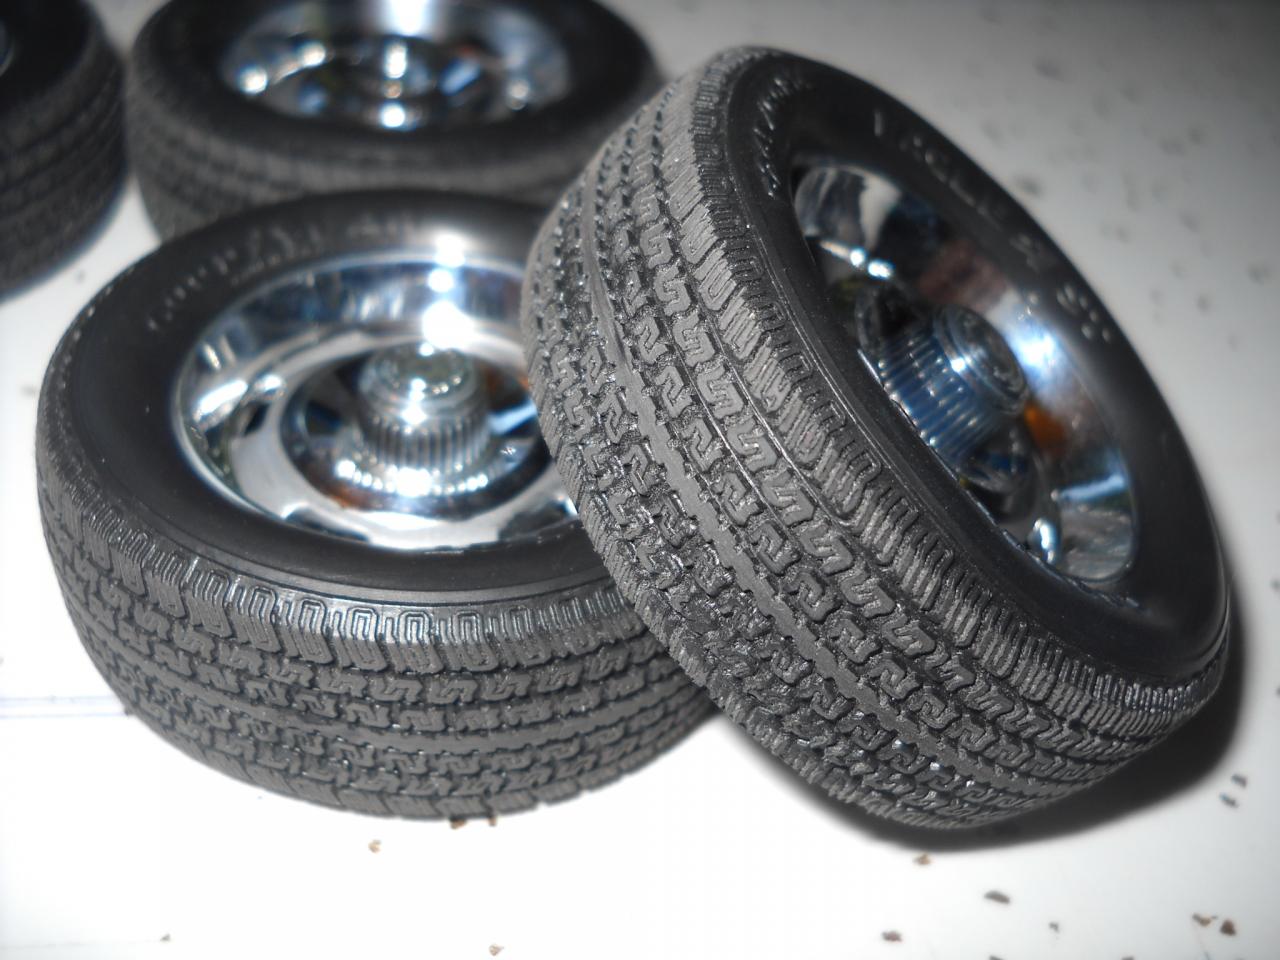
Thanks for the kind words, everyone! I, too, can't wait to see the finished product, but I guess that's sort of up to me I traded a set of my Foose wheels with 57peppershaker for these gorgeous Goodyear Eagles. (Thank you, again!) It took quite a bit of trimming to get the rally wheels to fit, but they sure look good. Any tips on painting the raised lettering?