ImpalaBoy
-
Posts
130 -
Joined
-
Last visited
Content Type
Profiles
Forums
Events
Gallery
Everything posted by ImpalaBoy
-
Sweet, looking forward to seeing it!
-
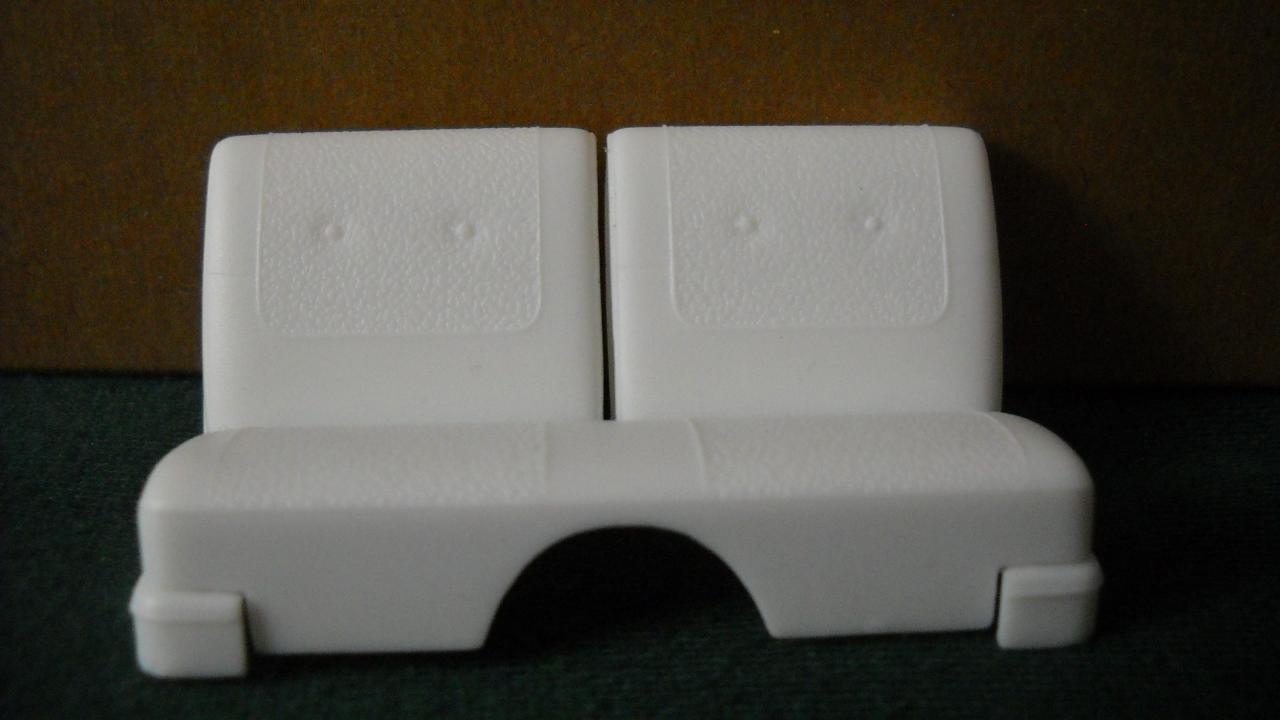
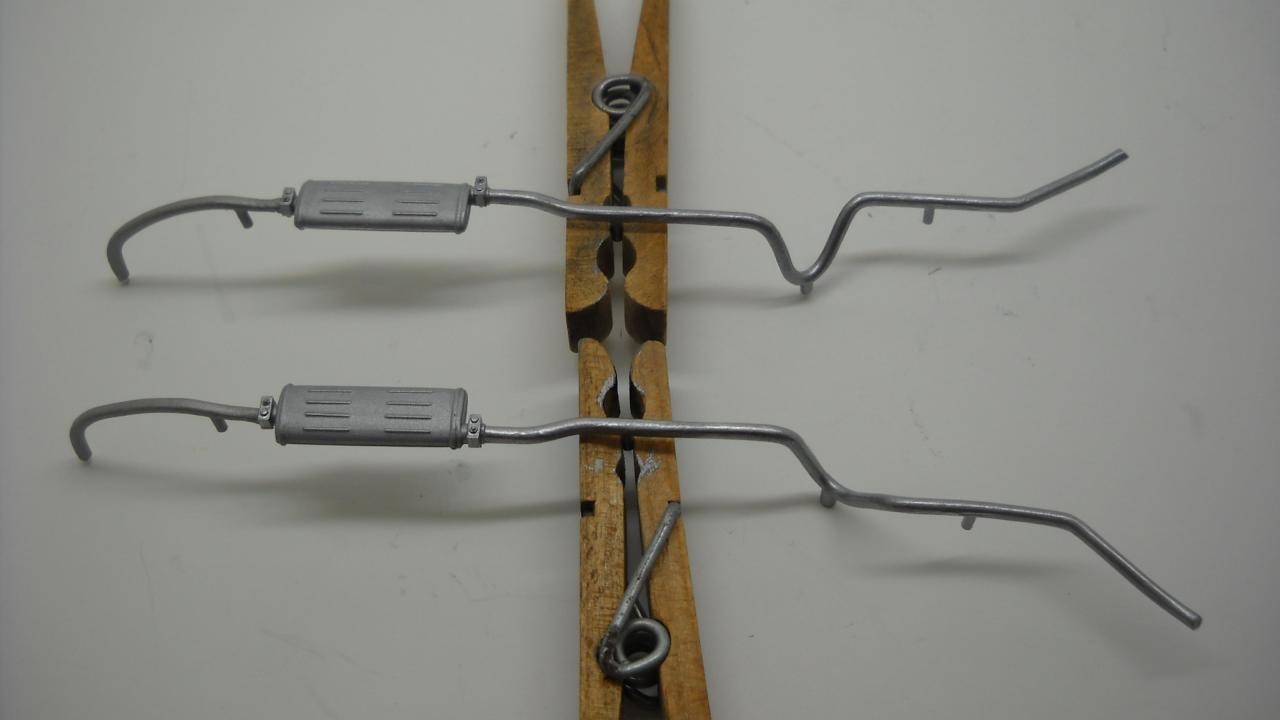
Exhaust system is assembled and painted. It went together very well; you can't even tell each pipe was three pieces! I love noticing little details that are done really well in this kit and in this case, it's the muffler clamps. I knew the front seat would probably be tricky to assemble after painting the pieces, so I went ahead and put it together. Good thing I did, too, because the back didn't fit quite right. I cut the back in two and attached each half so they lined up correctly, then filed between the seats on the front to make it look more realistic, since each half of the seat folds down separately on the 1:1. I just hope the gap isn't too big now.

-
Thank you! How's your non-proshop version coming? Is there a thread for it yet that I've missed?
-
Thanks for the info! I had a friend looking at my photos on Facebook wondering what in the world it is, so that helped him, too
-
I sort of get the basic idea that the batwing air filter is like an oil bath kind of thing, but can anybody tell me exactly what it does?
-
I use the smallest brush I have, dip it in the lid of the paint after shaking the bottle, brush some of it off on a paper towel, and do one letter at a time, very carefully. I guess this is what they call 'dry brushing' because there's hardly any paint on the brush. You want there to be barely enough on the brush to come off on the letters. It takes a few minutes, but it's worth it. I suppose you could also try a silver (in your case, black) Sharpie. I've never tried it, but I guess as long as you just barely touch the letter with the tip of the marker so that not too much ink comes out, it should work.
-
Yes! I Googled the term and eventually found a diagram of this engine where it was labeled. I had never heard of such a thing before. Thank you!
-
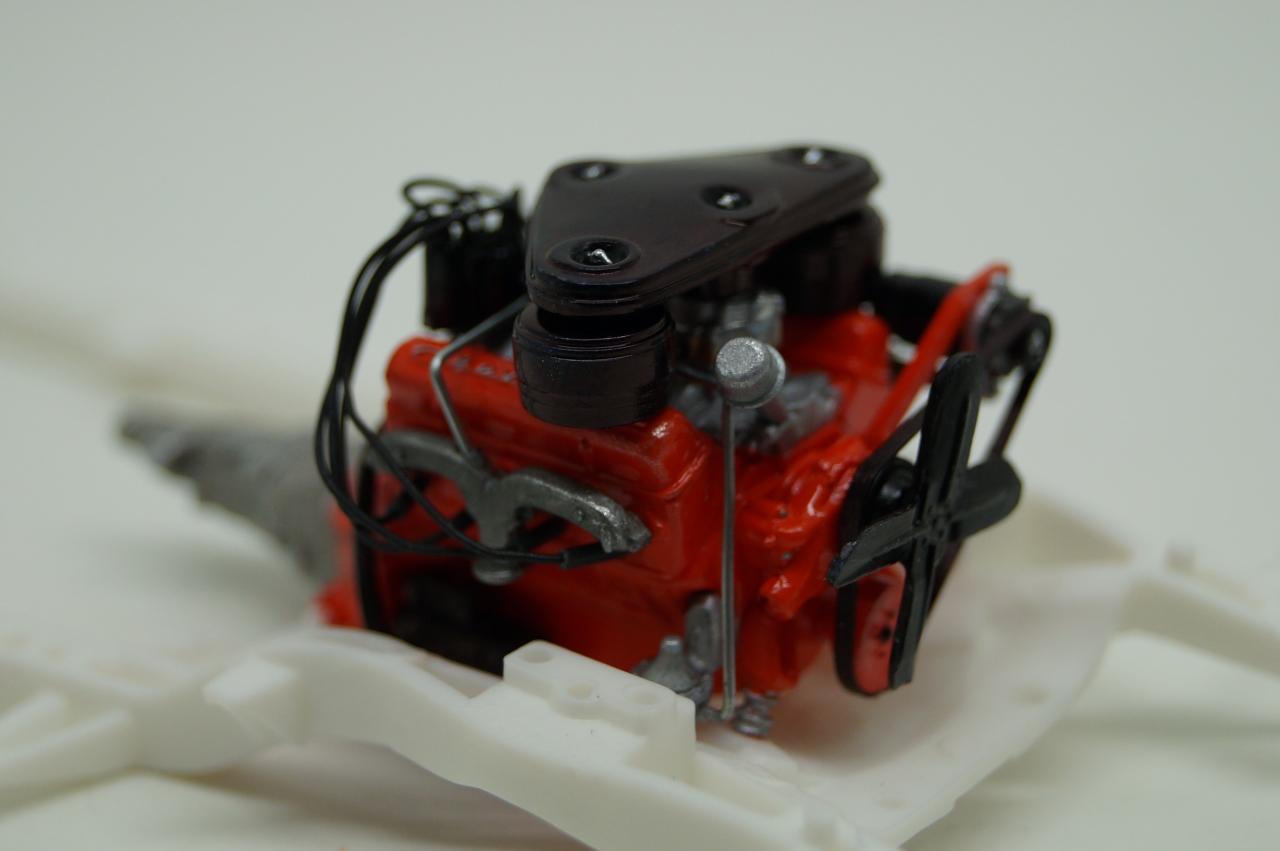
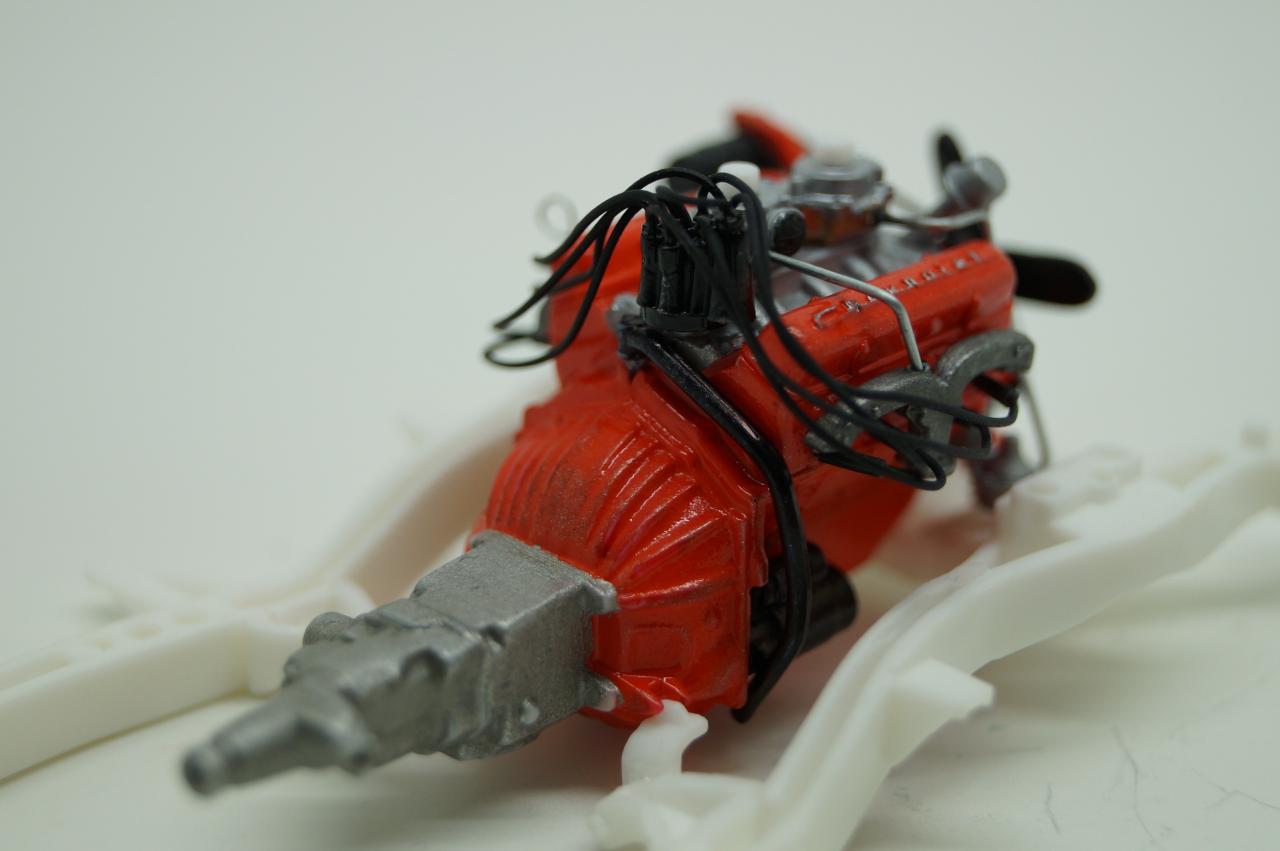
I'm sure a lot of people are probably thinking "good grief, ANOTHER '57 Chevy??" But thanks for your positive input so far Anyway, never mind about the fuel bowl, there's no room for it behind the air cleaner. I actually had to modify that fuel line a little bit to get the air cleaner on there.
-
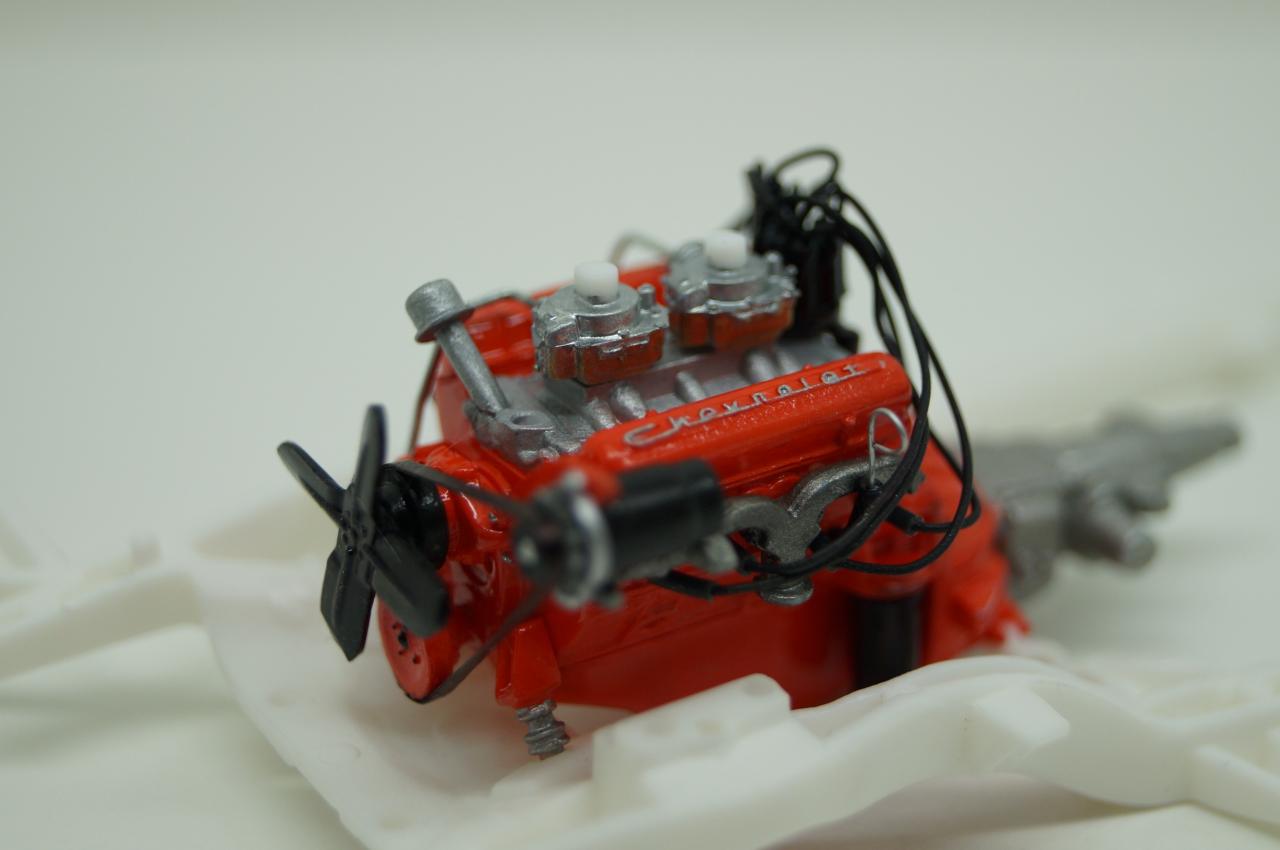
Engine is complete, except for the batwing air cleaner. I added a couple extra bits of plumbing using wire from a bread tie, the dipstick tube, also bread tie wire, and the belt is masking tape. I'd have to say this is the most detailed engine I've seen out of box. I also have to note the presence of accurate motor mounts, which I've never seen done that well. Can anybody tell me what that black hose/tube/pipe(?) coming off the back of the engine is? The instructions are pretty vague as to what the other end goes to, but as far as I can tell, it doesn't go to anything. Yes, I know there is supposed to be a fuel bowl between that carb and the fuel line, but I didn't know how to go about scratch building it and I'm pretty sure it wouldn't be noticeable once the batwing air cleaner is in place anyway. If anybody has tips on scratching a fuel bowl, though, I would do my best to put one in if possible.
-
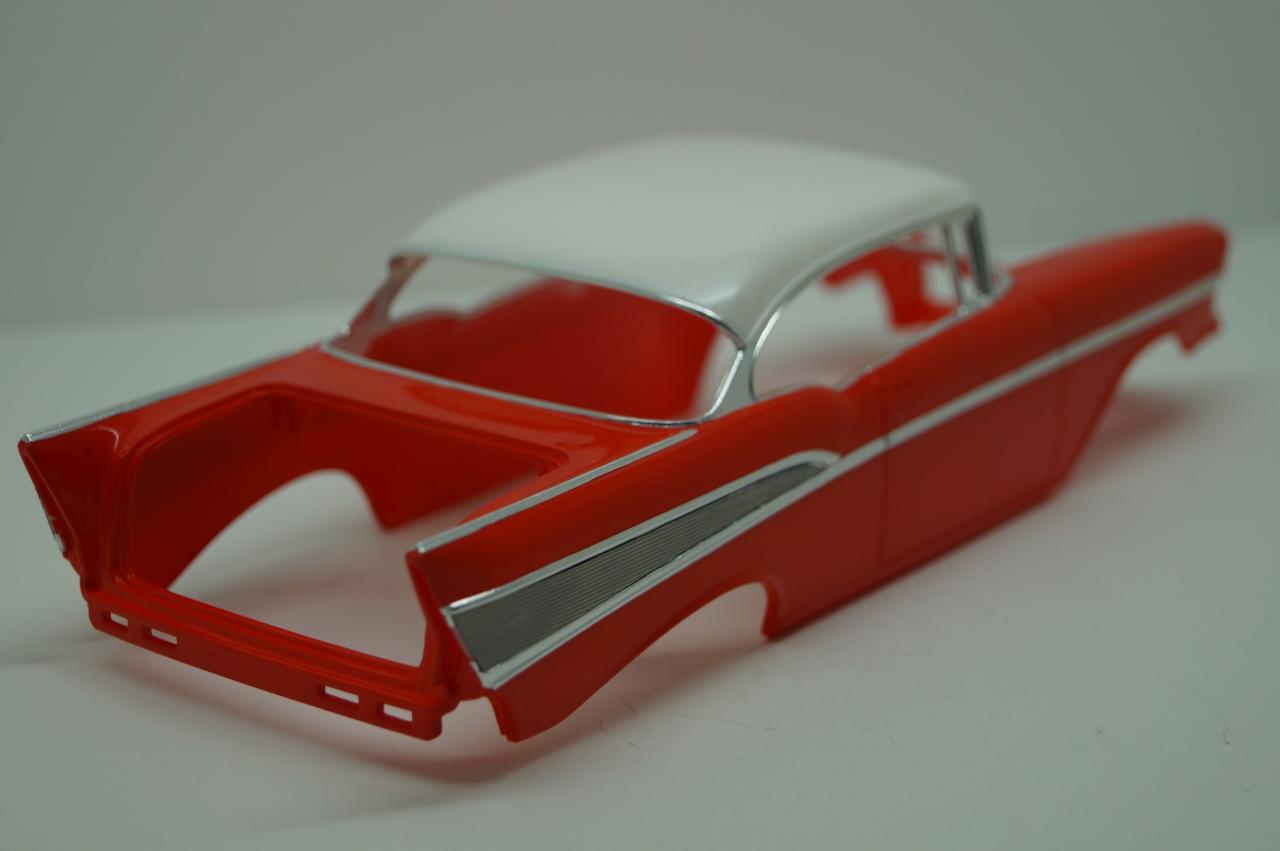
The paint is Tamiya bright red lacquer and Tamiya pearl white lacquer on the roof. Wet sanded and polished but no clear coat. It's pretty shiny, but not a perfect mirror finish, which is how I want it because I think that's how it would have looked right out of the factory.
-
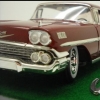
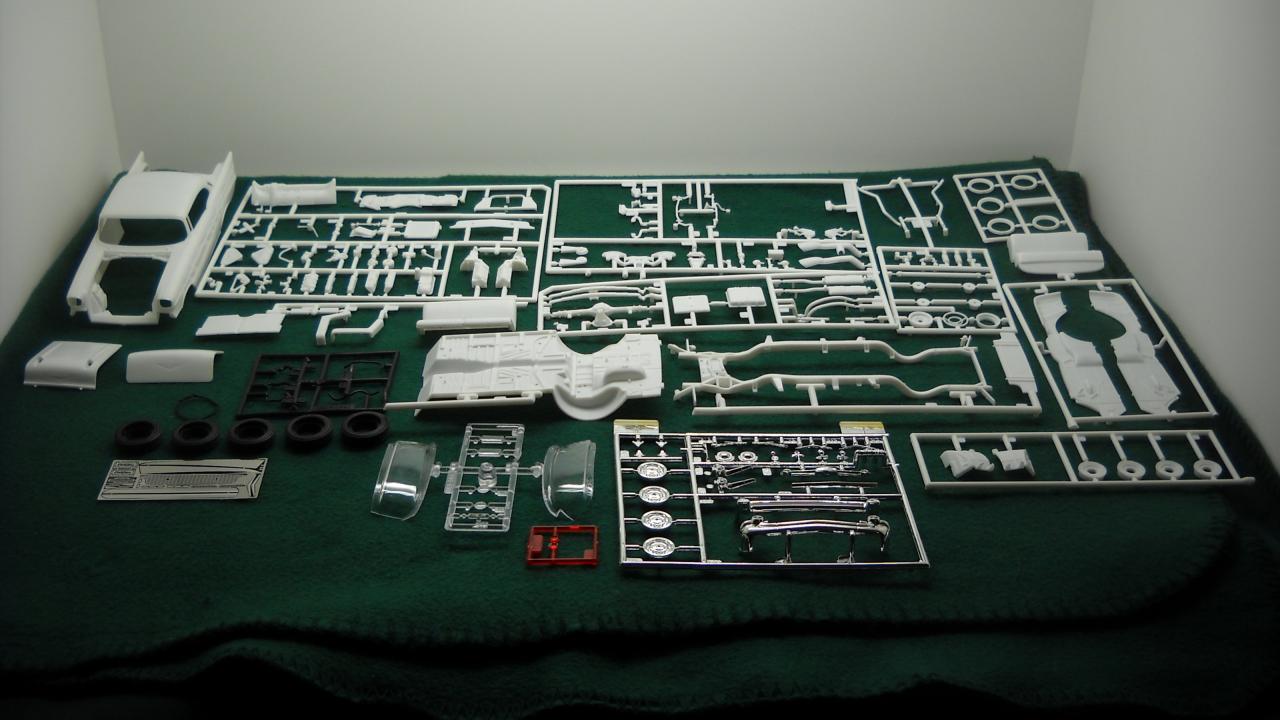
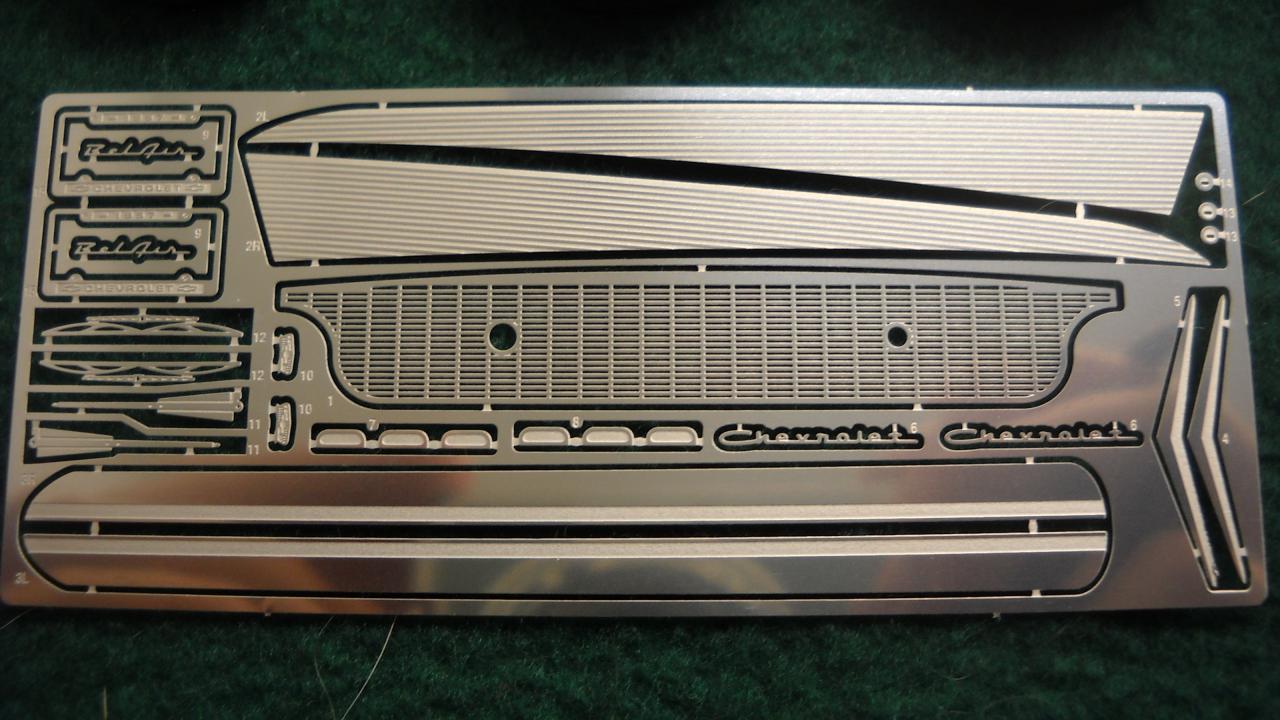
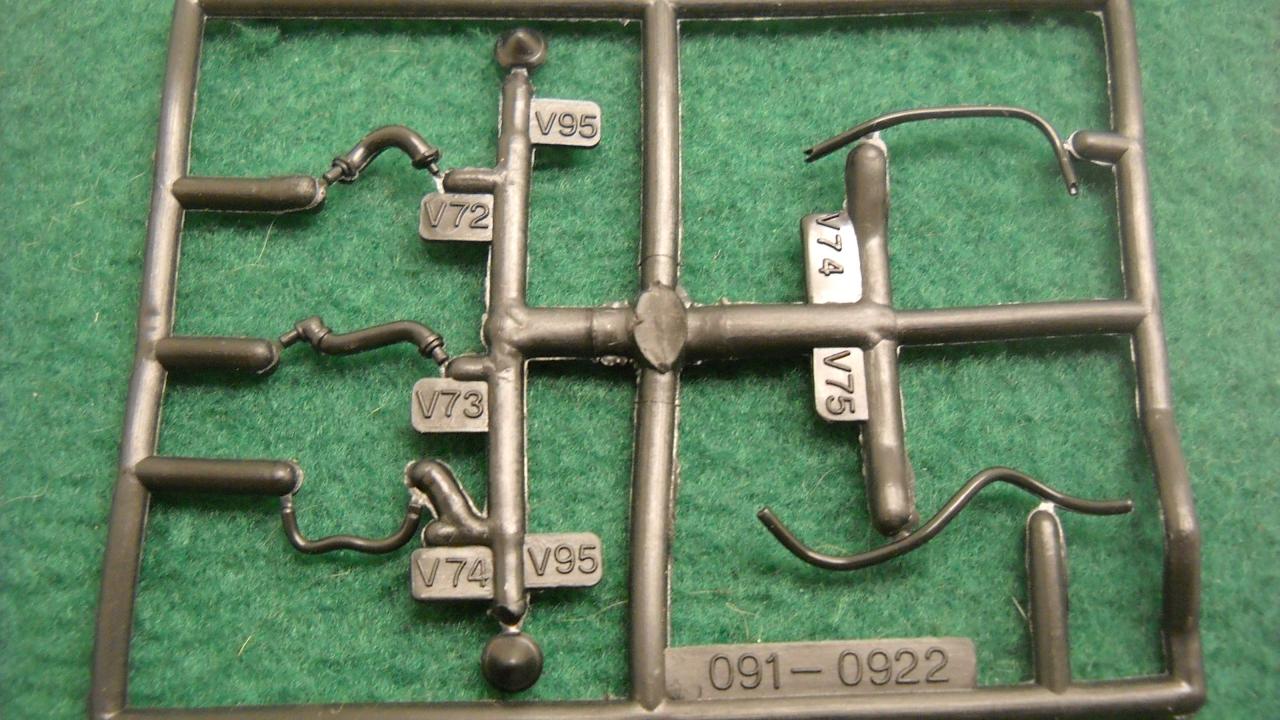
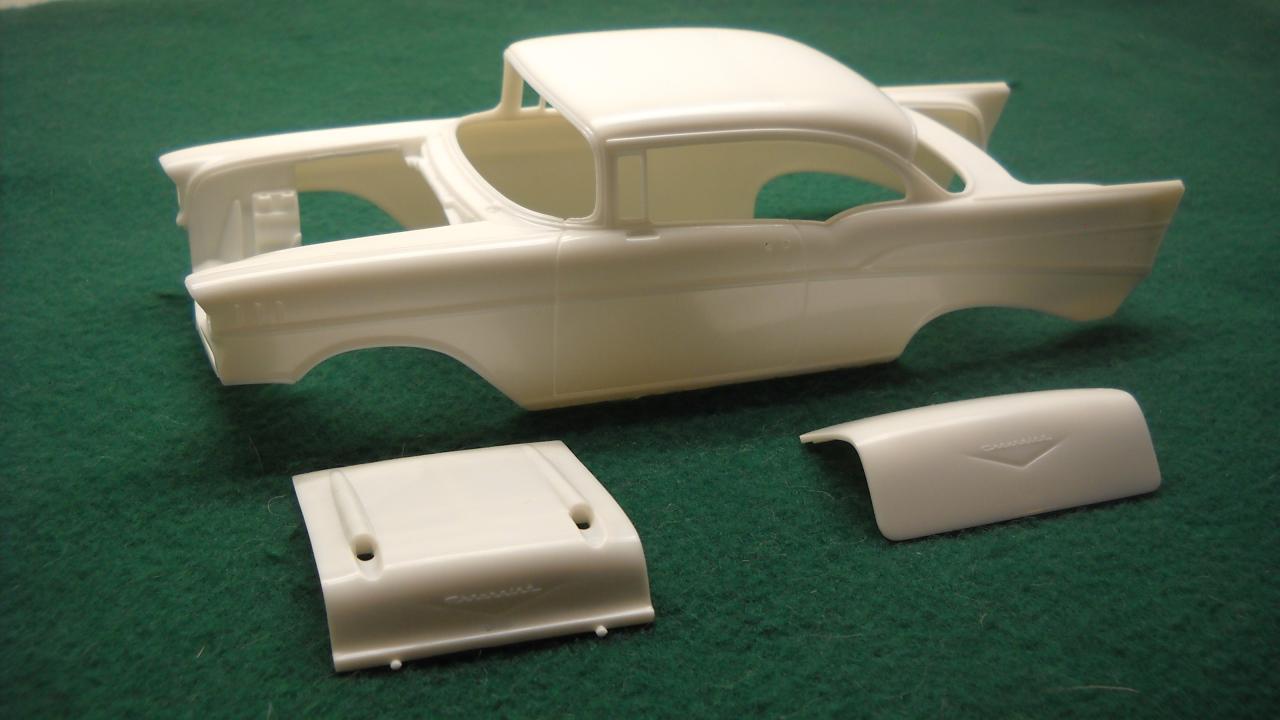
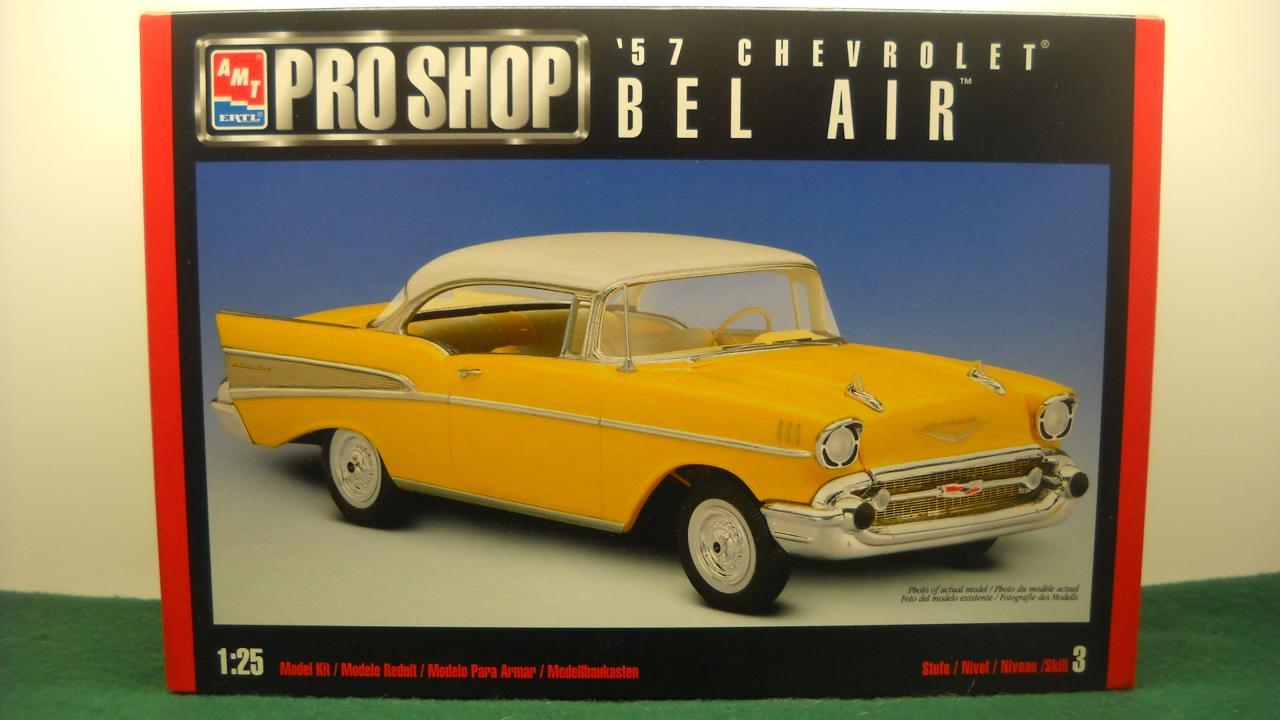
This is the Pro Shop version of the AMT '57 Chevy that was released in 1998. I know some of you will probably agree with me when I say it's such a good kit it's almost hard to believe it was made by AMT. It has over 160 parts and includes a photoetch set, ignition wire, a small sheet of BMF (which doesn't look like it would be enough to do the whole body, but it doesn't matter because I used the Bare Metal Foil brand Ultra Bright Chrome, which I found surprisingly different from the regular chrome), and a sprue of hoses, which also containes the bumper bullets, molded in soft vinyl, which I think is awesome! I think that's about it for extra goodies. I know a lot of people complain that it doesn't have any custom parts, but I really don't care since I think they looked too good out of the factory to customize. I actually started this about 3 weeks ago, but just now decided to put it up here.
-
Beautiful job, and a great color choice! That poor mechanic in the red shirt is going to have a splitting headache if he doesn't find a prop rod soon, though
-
I did try several times to use BMF on the dash, but I just couldn't get it to look right. Oh well, I'll try again on the '57 Bel Air I'm working on now.
-
That's an awesome tip! Thanks!
-
Glad you like it! The dash didn't come out quite as neat as I would have liked but actually, I do use toothpicks to paint tiny details like that. I just dip the tip in the lid of the paint jar; there's a perfect amount of paint on there after shaking it.
-
With every car I've built, the camera always brings out the flaws you can't see with the naked eye. The flash makes it even worse, which is why I recently made photo booth, which seems to help quite a bit. Nothing beats seeing the real deal in person, though!
-
Thanks! Those rear shots are my favorite. I just love the way the chrome trim wraps around the tail lights!
-
Thank you! I did my best to make the "upholstery" as close to the 1:1 as possible. And wow! this kit sure has been around a while. I'll bet the mold quality was a lot better when it first came out
-
Thanks! The doors were kind of a pain and the driver's side isn't as good as I want it to be, but I display it with the door open so I can see the interior better I would have done more with the engine bay, but after 7 months, I kind of lost my patience and just wanted to get it together.
-
Wow. That is a thing of beauty right there. Great color combo! I can't judge you too harshly for the fork trim; unfortunately it's a very common mistake. I really am honored that you think mine so good, though, because yours is gorgeous
-
Did you use the kit springs when you built yours? If you have a picture handy I'd like see how they look. Maybe the ones in my kit were just particularly badly molded. I'm not trying to defend mine anymore; I looked back at my reference pics, and yeah, they really are way too loosely coiled. If I can get it apart, I'll try to redo them using Sam's suggestion. In general, how would you rate the kit you built in terms of mold quality? I don't think there was a single piece in mine that I didn't have to sand, file, or scrape to get it to fit, or even look good. I guess the mold was just wearing out.
-
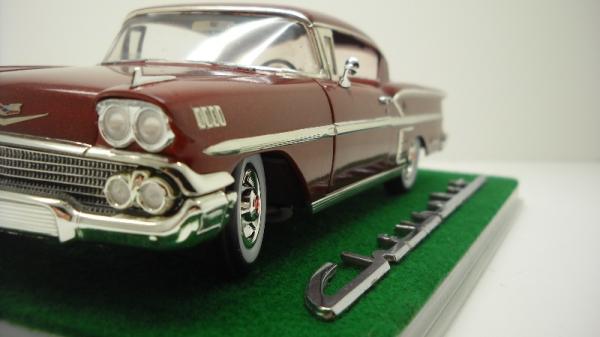
I completely agree about the springs, but I think if you saw the ones in the kit, you'd see how much of an improvement they are. As for the foiling, yes there are a couple ragged spots, but I will display no humility when I say that I honestly believe it looks better than 85% of all the '58 Impala models I've seen so far. (But then, that might just be ego and six hours of tedious X-acto work talking) Thanks for your honest evaluation
-
Thank you! I think this is my best looking engine so far. If you're looking to do a '58 Impala next, I highly recommend getting both the AMT and Revell kits and combining them
-
Thank you! And I love the Red Green Show, btw
-
Thanks! I like the outside shots best myself. I should go out and take more some time when it's sunny. It was actually quite surprised by how much brighter the paint looked in direct sunlight.