
Bluzboy66
-
Posts
358 -
Joined
-
Last visited
Content Type
Profiles
Forums
Events
Gallery
Everything posted by Bluzboy66
-
Incredible car, and cool theme. I've been a huge Dark Tower fan since day one. I agree, that car would have fit Roland to a T. Mike
-
Details I forgot to mention.....the gear shift lever is a straight pin dipped in CA, and coated with Candy Green to simulate the old acrylic gear shift balls. The carpet AND Headliner are flocked as well. All trim in the interior is Bare-Metal. The engine color is the new gold metalflake from Testors. Mike
-
There are some details on this kit that you can't see right off the bat. I used a piece of polished stainless wire for the horn ring on the steering wheel......the original steering wheel was crushed when I removed the kit from the box. I pulled an old Plymouth wheel out of my parts box and added the ring. The gear shift and turn signal levers are straight pins. Also, the cords for the CB mic and portable spotlight are fine gauge coiled electric wire. Too bad you can't really see them in the assembled car. The car also has an actual headliner and C pillar trim panels, made from thin black matte paper. There's also a dome light on the headliner. I'm just now starting to get better with fine details, but some of the stuff you guys do blows my mind. What an inspiration. Mike
-
The lenses are separate pieces. Some of the Jo-Han kits I've built have separate lenses.......the '69 Road Runner comes to mind. Whereas, the '69 SC Rambler that I just picked up has molded-in lenses........I believe. Mike
-
Thanks Bill. I plan to attend the next CPMCC meeting, and will probably join this time (really enjoyed the auction a couple of months back). I'll bring my latest finished builds. Mike
-
Guys, Here's another one I just finished up. It's the Jo-han '68 Plymouth Fury Police Car. I decided to go with an 'unmarked' theme. The color is Tamiya Gunmetal Metallic with clear coat. The magazines on the front seat are 'Rolling Stone', 'Playboy' and 'Inside Detective', all from '68. I Googled the names on the internet, snagged the images, used Adobe Illustrator to reduce them down to proper size, and then printed them out on thin photo paper. The antennas are the ends off of guitar strings.....a nickel wound .023 'D' string for the CB antenna (by using the end, you get a little bit of the winding itself which looks like the spring on a CB antenna) and a .013 'B' string for the standard front fender mounted radio antenna...... Thanks for looking! Mike
-
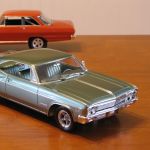
Hey Guys, Thanks for the compliments. I took some more pics. Here ya go....... This is my first time building the old AMT '63 Galaxie. Now that I'm more familiar with this classic kit, I'm going to build another one, and spend a little more time finessing the fit and finish, and maybe add a bit more detail. This particular kit had some soft detail lines in the casting. I have an older release that is much more crisp. I think I'll build that one next. What a nice looking big Ford......they really nailed it in '63. Thanks for looking! Mike
-
Hey Cruz. As of right now, yes, I'm planning to go to the NNL East. I think Mark Neary, my boy Alex and I are driving up together. Looking forward to it! See you there. Mike
-
NICE job. Very appropriate color too. I always find it challenging to pick just the right color for a 'big car'. Mike
-
Bernie, That Pontiac looks beautiful. Very nice build! The color looks like the Testors 'Colors by Boyd' "Lime Pearl", one of my all-time favorites. That, and the "Orange Pearl" from the Boyds line-up. Sweet colors. Now, after seeing your Pontiac, I have to pull that kit out of my stash to put on the 'to-build' shortlist! Mike
-
Looks sinister! The only thing that would make it better would be some Bare Metal Foil. LOVE the look of that old B-body Mopar! Mike
-
Just beautiful. NICE build. Resurrecting an old glue bomb is such a fulfilling experience. We should start a thread on that very topic. I'm currently rebuilding a '68 Pontiac Bonneville convertible. Mike
-
Man, that pup looks all-business! Mike
-
That's awesome Cruz! Looking forward to seeing it in person. Mike F.
-
Hey Folks, Just finished a few new ones. Here's my latest. It's an AMT '63 Ford Galaxie built in the 'Kustom' tradition. Wheels and tires are from Modelhaus, and color is Model Master Pontiac Engine Blue...... I'll try and post some more pics soon. Mike
-
I highly recommend it! Do yourself a favor and grab an AMT '68 RR as well. You'll need it for everything but the body, chrome and glass. The Johan kit has the perfect proportions and body detail, but the chassis and interior are very weak. I'm actually looking forward to building another one......only, this time it'll be more of a 'factory stock' build.......maybe even with a 440+6! I think the recent re-release of the '74 GTX/Road Runner comes with a 440. I guess I better start looking for a proper '69 RR Six Pack hood. Anyone know of a source, resin or otherwise?? Seems like it would be easy enough to scratchbuild..... Mike
-
Wow, can't believe it's been this long since I posted the pics of the Road Runner. Sorry for now replying to some of the more recent posts sooner. Thanks for all the kind words, but I'm immediately humbled when I see the photos of the projects you guys are working on. Y'all got some skills! I did want to reply to the question about the custom bent exhaust. The aluminum tubing and flatwound bass guitar string bending technique is so simple, you won't believe it...... I buy my aluminum tubing at my LHS, namely Overlea Hobbies here in Baltimore. "Flatwound" bass guitar strings are available at any well-stocked guitar/music store. I get mine from Guitar Center. You can also search eBay. Don't pay a lot for the strings, GO CHEAP (they can be PRICEY!), you're only going to be bending them up anyway. I keep old strings when I restring a customer's bass (I'm a guitar repairman - www.myspace.com/bluzboy66 for pics). Bass strings come in all different types, but the FLATwounds work best since they are smooth on the outside surface, and slide out of the aluminum tubing pretty easy as you work. Choose the properly sized aluminum tubing for your application, and then slide an appropriately sized bass guitar string into the tubing. Use a Sharpie to mark the bass string so that you'll know how much you're sliding into the tube, and when to stop. As you make a bend in the tubing, the bass string will keep the tubing from collapsing. As you make a bend, double check your work to make sure your exhaust is taking on the proper shape and things are lining up OK. Pull the bass string out of the tubing as you work, ESPECIALLY with tight bends......the string can get trapped in the tubing. Once you have your tubing bent into roughly the shape you need, you can fine tune it if you're very careful. The tubing wants to collapse as you try and make a tight bend, so be careful. If you guys need photos of this procedure, shoot me a line. I'll work up a little photo tutorial showing how simple it is. Oh!, and don't forget to use some metal polish to bring your new exhaust up to a nice 'stainless steel-like' shine.....if that's the look you're going for. Mike
-
Excellent idea. The laundry vent can be mounted to a piece of thin plywood (sized to fit in a partially opened window) and combined with a flexible vent hose. The whole unit will collapse down small enough to stash in a hall closet for when the neighborhood homeowner's nazi.....uh, I mean 'association' shows up to check things out. Your portable booth will have to have some sort of filtration built in so that only the fumes are vented to the outside through your window mounted vent. Me?......I've dealt with the make-shift units long enough. I think I'm going to order one of the Pace Enterprises units. Their booths look very well-built and efficient. The 'Peace Keeper Deluxe' looks like one mean motorscooter! Mike
-

My Boy's First Mid-Atlantic NNL Win!....Pics....
Bluzboy66 replied to Bluzboy66's topic in Contests and Shows
Ha! Alex said he was so surprised when you called his name! His knees were knockin' something fierce. He carried a photo of his trophy and his winning model to school Monday. He said that a few of his friends really got excited over the whole thing, so Alex suggested they get together to have a 'model building day'. How cool is that??!! Guess I'll be teaching a crash course in spray painting........heck, maybe I'll just let Alex teach it. Alex and I will do everything possible to make the next MAMA meeting. It's been a while since I was able to attend. Mike -
My Boy's First Mid-Atlantic NNL Win!....Pics....
Bluzboy66 replied to Bluzboy66's topic in Contests and Shows
Alex says thanks! And yes, he's already got a few more kits in the works. I'll have to help him post pics of them in the "On the Workbench" section. Mike -
Alex (age 10) won the People's Choice Junior trophy with his '65 Mustang Stocker. He told me that he was so excited when his name was called that he almost lost it!....... Needless to say, I'm one proud papa. BTW, the contest was INCREDIBLE......over 550 entries, and not a glue bomb in sight. There was some REAL TALENT in attendance, and the competition was fierce. Hopefully, some of these guys will post some pics. Mike
-
lol. That's my guitar shop workbench. The ultra-bright flourescent shop lights make for perfect lighting for the pics. Mike
-
Bob, I'll scan everything for you. No prob. I still have the decals, but they're not mint. I may have them reproduced, or maybe hit them with a coat of crystal clear before I drop them in water. It's funny....I've been wanting to build this kit for quite some time (it's definitely 'builder grade'), but didn't know what direction to go in. LOL! This is perfect! BTW, love your website. Mike
-
Excellent idea! Count me in on that one!.... Mike
-
VERY nice. VERY nostalgic. That's exactly what it's all about right there. NICE paint too! Mike