
ScaleDale
-
Posts
696 -
Joined
-
Last visited
Content Type
Profiles
Forums
Events
Gallery
Everything posted by ScaleDale
-
Thanks. I downloaded all of them in pdf form, but I don't know how to put them up here in permeant form. Anyone have ideas? Dale
-
Is Airbrushing Really This Much of a Pain?
ScaleDale replied to bigbluesd's topic in Model Building Questions and Answers
If the seal in the nozzle is lost, then the AB won't have the pressure it needs to properly shoot paint from the cup. Airbrushes are like traditional brushes. You can get them at low cost and pick hairs out of your paint or spend your money for better bristles and not worry about it. I wouldn't trust an AB under 75-100 USD Dale -
;0 :-) :-( :-] and so on.... Dale
-
Like Nick says, it may be routine but it's still surgery. They take it quite seriously and expect you to do you follow up-s to the T. Just do it. Not having glasses left me with residual glasses behaviors like reaching for them when they weren't there and going to find them when I didn't need them. Strange. Good luck and keep us posted. Dale
-
I've had issues like this when I used on-line images with text in tutorials I built for my photography forums. My workaround was to draw a white text box over the fuzzy text and type in a replacement with a matching font. That way the text isn't reduced in size and stays nice and sharp. Dale
-
Over the last six or eight months, I've lost track, I had cataract surgery with upgraded lenses to correct astigmatism done in both eyes. Here's the whole deal. Over several months I had a total of four office visits and two procedures to prep for two surgeries. The procedures involved office "surgeries" to scrape rough spots off the surfaces of both of my eyes. These two visits were seperate and required a driver because of the pupil dilation and numbing drops that did a bit of a number on me. It stung for a day and that was pretty much it. I had prescription eyedrops to use every few hours for several weeks and that kept me busy. The cataract surges themselves were one of those things where the worry was the worse part. They put you through what seems like a full surgery prep with monitors, IV, good drugs and the whole shebang. When you get to the actual surgery part it's over in about 10 minutes. For the laser stuff I had you look at three little lights and then they tell you it's over. Zero pain. I had the same pain killer prescription and took them for the first day but that was about it. The drop regime was like with the previous procedures. Word of warning: that stuff is expensive. Recovery involves using an eye patch at night and keeping your eye safe. And you have to lay off the pool and hot tubbing... The vision change is the most oddest thing. With each procedure my vision changed and my glasses became more "off". When I had the one eye done for the corrective lens, I had one good eye and one bad. When I finally got the other done, well, now I don't wear glasses anymore except for a pair of $25 readers for typing and stuff. Even without the corrective part, which isn't covered by insurance, cataract surgery is well worth the time and trouble. You won't believe what red looks like. BTW, I'm 66 have severe astigmatism and had worn glasses since I was around 14. Now I carry a card in my pocket to give to a cop if I ever get stopped because my license still has a corrective lenses restriction stamped on the back. Dale
-
Update your profile with your age?
ScaleDale replied to Baugher Garage's topic in The Off-Topic Lounge
Thanks. We all take that as a compliment. Dale -
Update your profile with your age?
ScaleDale replied to Baugher Garage's topic in The Off-Topic Lounge
My age? Not enough fingers for that... Many times over. Somewhere between birth and death, I think. Dale -
Need Help From Modellers.
ScaleDale replied to TBG66's topic in Model Building Questions and Answers
Raised suspension? Dale -
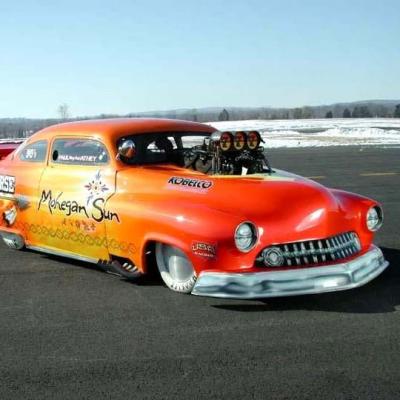
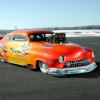
Check out Extreme Outlaw Pro Mod while you finish this build. I wonder how some of these guys can see the track... http://www.extremeoutlawpromod.us Dale
-
Here is the ProMod section of the NHRA rule book. There are references to the general section, but it's too big to upload. PM me your email if you want it. Dale 002 ProMod.pdf
-
I don't know if they have a shop or not, bunt these folks are in Oakville. Not sure where that is. They got me my 56 T-Bird. http://www.westburymotorsports.com/index.php Dale
-
Thoughts on the word, "build."
ScaleDale replied to sjordan2's topic in General Automotive Talk (Trucks and Cars)
Same term is used in the 1:1 drag race forums. Class Racer Builds: http://classracer.com/classforum/forumdisplay.php?f=58 Shut up and build something! I've got a 68 Mustang all over my garage floor... Dale -
Between the two teams, the only player not employed by the NHL was a Swedish forward employed by the Swedish Hockey League. Me? I was most impressed by the ice dancing. everyone needed their A game just to have a chance. Dale
-
The Tasca Ford Mustang and Hubert Platt/Phil Bonner Thunderbolt Fairlanes would work nice here. The T-Bolts can be found at V8 models.com (usually) Dale
-
What's the story behind your user name/avatar?
ScaleDale replied to JollySipper's topic in The Off-Topic Lounge
I use my name and something that is associated with the interest I'm exploring. In my photography forums I'm Designer Dale. Scale Dale seemed to fit in model building. Dale -
What is a good Photo Editor?
ScaleDale replied to booboo60's topic in Model Building Questions and Answers
First you need a scanner or printer/scanner capable of 600 to 1200 dpi in what they call optical resolution. That means it's not invented by software, but reproduced by the scanner itself. That will give you a sharp enough image that any loss of detail from your editing won't show when you scale it down to decal size. I haven't worked with any Corel products in ages, so I don't really know what they have to offer these days. You can't beat PhotoShop, but PhotoShop Elements comes close and won't break your budget unless your budget is "free". Download the trial and see if it agrees with you. This is how I size my decals: I scan the final assembly page from the instructions and measure the wheelbase of the actual model at the same resolution setting I used or will use for the decal scan. Then I scale the scan in PhotoShop (Elements will do this) with the ruler visible until it matches the model. That gives me something to play with that is identical to the model. After I clean up my decal image I copy/paste it into the model scan where it shows as a layer over the model. There are tricks to make the background of the decal go away so all you have is the decal image floating over the model. Then you can select the decal and scale it up or down by dragging handles without changing the size of the car. Make it the size you want and copy/paste it to a new document and save it as your decal. Do this over and over until you have a bunch of decals and put them on one page for printing. Remember you can't print white. Sounds like gobble gook, I bet. I have a background in Graphic Design with formal training. I did most of these decals: Dale -
Gassers with radiator?
ScaleDale replied to Hayabusa's topic in Model Building Questions and Answers
These folks build and race contemporary cars under "classic" gasser rules. Nostalgia Gassers Racing Association http://www.nostalgiagassers.com Dale -
What is a good Photo Editor?
ScaleDale replied to booboo60's topic in Model Building Questions and Answers
What exactly do you want to do? Create your own graphics from nothing or convert existing images to decals? The software and skill demands are different for each. Dale -
Gassers with radiator?
ScaleDale replied to Hayabusa's topic in Model Building Questions and Answers
Neil's answer is extensively correct. The short answer is Gassers are more or less street legal race cars. Dale -
Nostalgia Pro Stock Association: Check out the photo links. http://www.jeffjohnsonmotorsports.com/drag_racing.php Outlaw Nostalgia Pro Stock http://outlawprostock.com ClassRacer.com A racer forum. Scroll down to Nostalgia Stock and Super Stock http://classracer.com/classforum/forumdisplay.php?f=2 General search result page: https://www.google.com/#q=nostalgia+pro+stock+rules Nostalgia Pro Stock image results: https://www.google.com/search?q=nostalgia+pro+stock&source=lnms&tbm=isch&sa=X&ei=d-QCU4a_M4jboATKvYKYBw&ved=0CAkQ_AUoAw&biw=1676&bih=877 Pro Stock Engine search results https://www.google.com/search?q=nostalgia+pro+stock&source=lnms&tbm=isch&sa=X&ei=d-QCU4a_M4jboATKvYKYBw&ved=0CAkQ_AUoAw&biw=1676&bih=877#q=pro+stock+engine&tbm=isch Enjoy. Dale
-
Summit Racing is a good source. A lot of the parts they sell have installation diagrams included that can be downloaded from their web site. Pick a part type like electric water pump and put it in the search box. More than you ever wanted to know is right there. Also try specific Bing or Google image searches like "pro stock engines" Stay away from Yahoo or MicroSoft searches. Dale
-
How to make A arms for a Pro Stock Car?
ScaleDale replied to John Pol's topic in Model Building Questions and Answers
1.6mm styrene rod glued to a square of sheet styrene then the excess cut off. Hole drilled with pin drill reinforced with PE washer. strut and coil over is a unit from Future Attractions. I figured this out by looking at 1:1 stuff and making parts that went in the trash until I got it right. That's what scratch building is. They don't make this stuff so it's up to the individual builder to figure it out. Dale
-
Stock Eliminanor question.
ScaleDale replied to 440 Magnum's topic in Model Building Questions and Answers
Go back to Niko's last picture and look at the aluminum plates in the firewall. They are from removing the heater and/or air conditioner. You need to keep the controls in the dash but can remove almost all creature comforts except working lights. The underside of the dash on my 1:1 Mustang is nice and clean after tossing the heater and all the ductwork. EDIT: NHRA Stock Rules 2014 : 007 Stock.pdf Dale -
Stock Eliminanor question.
ScaleDale replied to 440 Magnum's topic in Model Building Questions and Answers
Thanks, Niko. Now I know how to plumb my line lock and Holley blue fuel pump when I get to that point in my 1:1 SSGT Mustang What brand water pump is that? I need the shortest one I can find to clear the oversized radiator and electric fan I have. Dale

