Russell C
-
Posts
1,930 -
Joined
-
Last visited
Content Type
Profiles
Forums
Events
Gallery
Everything posted by Russell C
-
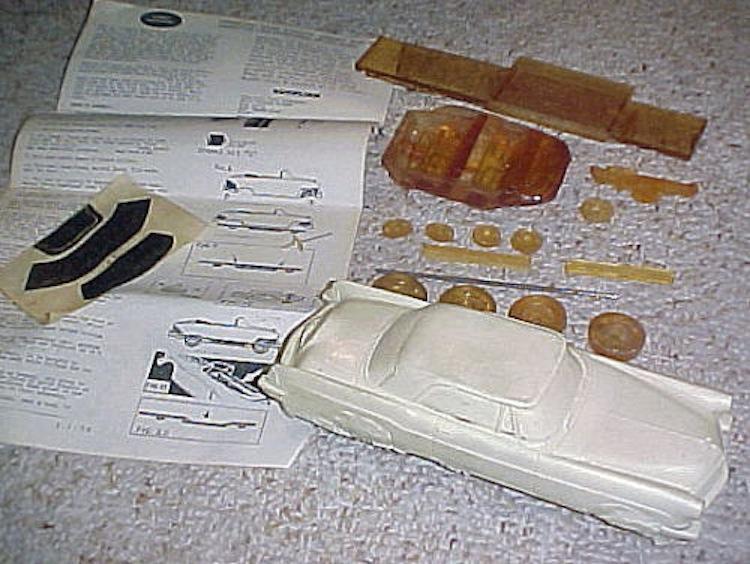
 Another resin cast I didn't know about, spotted it over the long weekend in this ebay listing. Says it was from Kustom Kolor Works back in the mid '90s.
-
What are you watching with your family today?
Russell C replied to JollySipper's topic in The Off-Topic Lounge
A classic, my recording of A Christmas Carol, the 1984 version with George C. Scott. -
Hot Rod Christmas
Russell C replied to Greg Myers's topic in General Automotive Talk (Trucks and Cars)
♬ It's beginning to look a lot like Christmas Toys in every store But the prettiest sight to see Is the Holley that will be On your own front door! ♬ (graphic artist that I am, cobbled this together earlier this evening from three images out of Google images & added shadows in my Corel program. Gift to everyone, feel free to share.)
-
Cued up this vid to start at the 1:06 spot. It looks like the end of the world is approaching.
-
Dental surgeon, it's where I got the needles to make the exhaust stacks for my 1:250 scale Mack, but I had to explain to him what I was up to with the needles.
-
Smothered 'em with love, maybe. Nevertheless, that green woody with the '39 Ford fenders & grille isn't a half bad idea, or it could be with better execution.
-
Build journal anyone?
Russell C replied to Fanof69's topic in General Automotive Talk (Trucks and Cars)
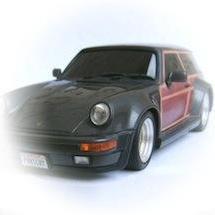
For a quite a while, I tracked just how long it took me to build my projects. I'd write down the start time for each work session, the basic work done (panel sanding, engine work, etc) and the end time. When I declared the project finished, I tallied up the time. The 911 woody wagon in my avatar, for example, took 130½ hours. This is helpful if a person feels like either insuring such things or if a non-modeler pleads with me to build an exact replica. Maybe I could bash another one out in 100 hours just as good or better. If I charge a measly $20 per hour, that makes it a model worth $2 grand. -
weird cabover that looks to be ford
Russell C replied to blazefox's topic in General Automotive Talk (Trucks and Cars)
5 additional photos of the same model now provided by Mark Harmer in his post at another other thread on a related model. -
Yes, indeed, this second one is the same one spotted by Steve Gilmore in his 2013 "Weird Cabover" thread, and I'd have to guess that somebody way back when decided to do a fairly decent clone of the Bob Nordberg model - a bit less shiny, a bit more crude, but interesting nonetheless. Thanks for snagging those photos!
-
Could you sign in to your "My ebay" and look under the Bids/Offers and its Didn't Win section and - if it was recent enough - snag the item number for the auction? Sometimes those stick around for a month or two where we can see the photos in the original listing.
-
Are you sure you aren't thinking of the one pictured in this 2013 thread post here? That one, I'm speculating, was probably a copy somebody made after seeing Nordberg's award winner in magazines way back then.
-
See the links in post #1.
-
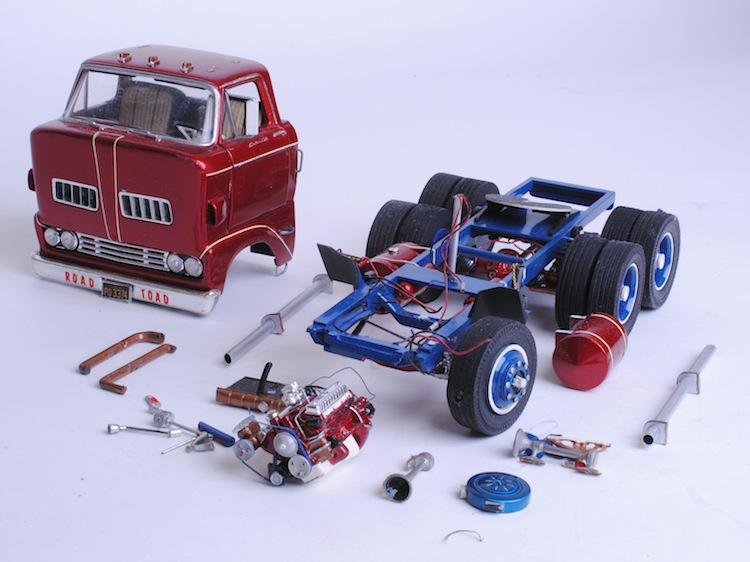
Unfortunately, all of the gallery photos I put in still have busted links from the point where MCMForums here upgraded the site. I could re-post 'em, a bit of a chore, but I'm hoping Gregg's impending site update resurrects the photo links instead. Meanwhile, the news from Mark Gustavson is that he is possibly tapping a particularly skilled restorer to put Bob Nordberg's cabover back together, and he sent this photo which shows the truck as it is now, with a better view of the front than what I had as the prior photo. Wouldn't take much to reassemble it, but one has to be mindful that it is a famous one-of-a-kind from over 50 years ago, and one doesn't just glue it back together in one evening.
-
Slight change of plans - I wiped out the kit's combined timing chain cover/water pump blob and added a mounting point for the fuel pump down at the front bottom passenger side corner, along with freeze plugs. The new timing chain cover will eventually have stretched sprue boltheads around the perimeter (since those are easy to make), but I'm leaving out the indented tri-spoke shape in it since it is harder to replicate (though it could be done with a 72nd scale 3-spoke truck steering wheel) that will be mostly buried under a much better water pump scrounged from the Revel '69 Camaro glue bomb I bought, and the harmonic balancer seen in the previous post. I've also decided to use the crossram intake and carbs from the Revell kit
-
Revell rally wheel diameters (Update 6/1/16)
Russell C replied to Russell C's topic in Model Building Questions and Answers
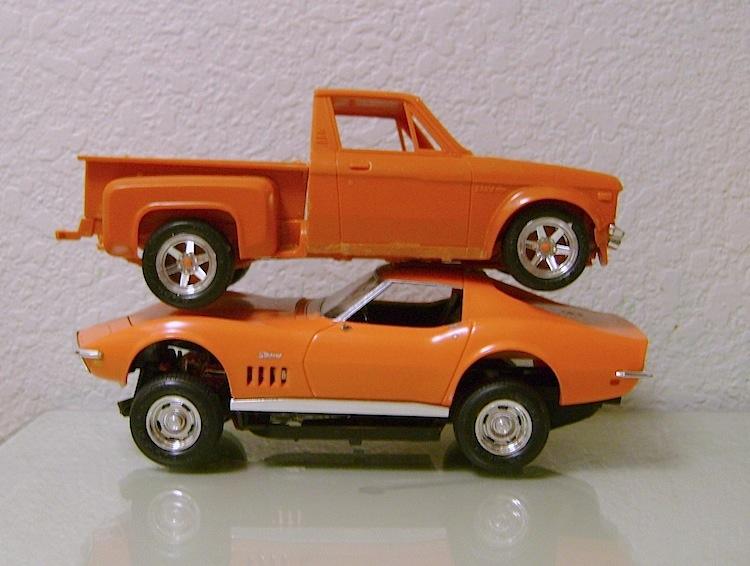
I'll have to keep an eye out for the AMT version of the wheels / separate caps. Meanwhile, in the mail today was my latest cheap ebay score of the remnants of a Revell 24th scale '32 Ford , where I can most likely use the chrome rim sections at the trim rings, and its Goodyear big & little Blue Streaks. The big & little Goodyears in the Quicksilver (shared among many other old Monogram hot rods) have always bugged me with their dome-shaped tread profile, so I was hoping -- and it turned out to be -- that the Blue Streaks where pretty much the same height for front & rear while having a proper flat tread profile. I'll try mocking it up in a week or two with the rally wheels out of the glue bomb Camaro to see how it looks. -
Revell rally wheel diameters (Update 6/1/16)
Russell C replied to Russell C's topic in Model Building Questions and Answers
Good points. For my own measurement of the glue bomb Camaro, I was going with the outermost diameter, which would be the outermost part of a trim ring. Ultimately for my 1/24 scale Quicksilver rebuild / mod project, my goal is to maintain the appearance of similar size tires, thus I need a trim ring front & rear that corresponds to the tire size openings of right around .71". I'll most likely have to borrow some other 1/24 wheel rims that look like trim rings, slice out the wheel centers and splice them onto whatever GM 5-slot wheels I can find, along with separate 'derby hat' caps. Like the wheel / cap parts out of AMT's '69 Chevelle kits or maybe one of the resin caster wheel kits. One other option is to find a good set of rally wheels out of a dirt cheap 24th scale diecast ...... -
Revell rally wheel diameters (Update 6/1/16)
Russell C replied to Russell C's topic in Model Building Questions and Answers
Bought a cheap glue bomb Revell '69 Camaro Z28 RS off ebay pretty much because the seller's photo had the wheels looking oversized, as though they were mismatched out of the Revell '77 Chevy van kit. They measure out to .688" in diameter, multiply by 24 and it would be 16.5". But they have the same metallic blue plastic under the chrome as the rest of the kit, and in 25th scale, that would measure out to 17.2". So I suppose the next question is whether the rest of the Camaro is actually 24th scale despite what it says on the box, or if they just used the tooling from the '77 Chevy van wheels? -
Via a rather pricey ebay auction from earlier today, the aforementioned R&R resin cast repop may have instead been a long out-of-production SC Miller resin cast. Using that name in a search, I turned up a January MCM forum thread I must have missed, which had just a bit more on the Miller resin casts.
-
Separated the engine block/tranny into four pieces, mostly for having an easy time creating deadly sharp color line separations between what will be an orange engine, silver bellhousing and slightly different silver tranny, but also in order to have a totally cylindrical oil filter / starter instead of those two being molded-on lumps. So, there's a parts-box starter, and the beginnings of a period-correct early '70s oil filter, along with a more detailed mounting spot for the filter. Started on a better looking distributor, and put a larger block of plastic at the front of the crossram intake for the upper radiator hose. I won't go overboard with carburetor detail since I intend to bury that area with a single oval air filter with the cowl induction foam perimeter around it. I don't know my engines well, but it sure seemed this kit's Z28 one lacked that big round thing at the lower front, I assume a harmonic balancer. And, I used my motor tool cutting wheel to gouge in the rectangular hole in the blog of a water pump at the top front, in order to make that look more realistic in shape. Oh, dear, the battery seems to have gone flat.
-
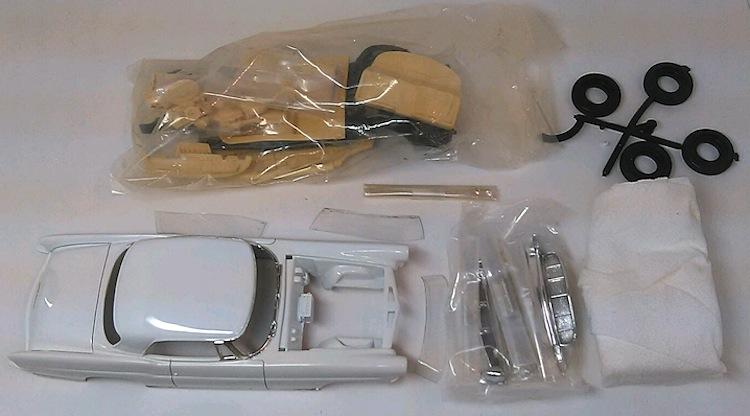
Thanks for the interest, guys. Yep, I'm lagging behind a bit on posting at least one progress pic, which I can do when I get back to my apartment early next week. At least got a question answered about the silver foil version decal reproduction over at this thread. Meanwhile, having had a lot of fun with the Y-block engine in my last silly build (photo links malfunctioning until maybe an MCM forum system update restores 'em), I thought the flip front of this Quicksilver kit would be a great excuse to present a more detailed Z28 engine. So, I've turned the kit's entire too-simplistic engine/tranny lump into separate parts of tranny / bell housing / oil pan / oil filter / starter, along with separating the distributor and creating a better outlet for the upper radiator hose. You'll see.
-
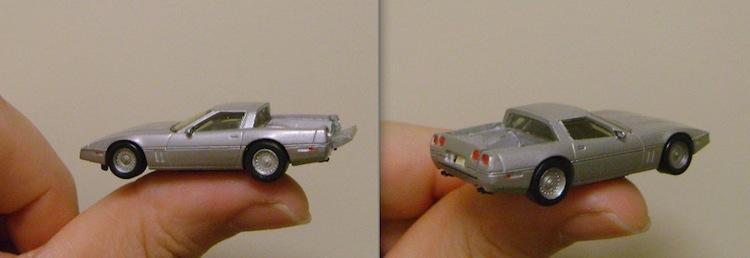
Built in the late '80s, a Monogram Mini Exacts Vette, minus its rear hatch glass, but added a working tailgate. I can't remember how I accomplished that.
-
Movin On Kenworth color.
Russell C replied to angelo7's topic in General Automotive Talk (Trucks and Cars)
And more directly, the link is here https://www.facebook.com/Movin-On-380608825314741/ -
IH Transtar Double
Russell C replied to Old Buckaroo's topic in Model Trucks: Big Rigs and Heavy Equipment
Different than usual and therefore quite eye-catching. Angle and lighting, particularly in the first pic, really makes it pop. -
Revell rally wheel diameters (Update 6/1/16)
Russell C replied to Russell C's topic in Model Building Questions and Answers
Very helpful, confirms that Revell didn't cheat and use other 25th scale tooling in this kit. -
If that's who I talked to when I pumped up my shape material & paint supplies a few weeks ago and when he allowed me to measure a wheel on one of his 1/32 scale die casts a month or three ago, I can vouch for him as well.