Russell C
-
Posts
1,930 -
Joined
-
Last visited
Content Type
Profiles
Forums
Events
Gallery
Everything posted by Russell C
-
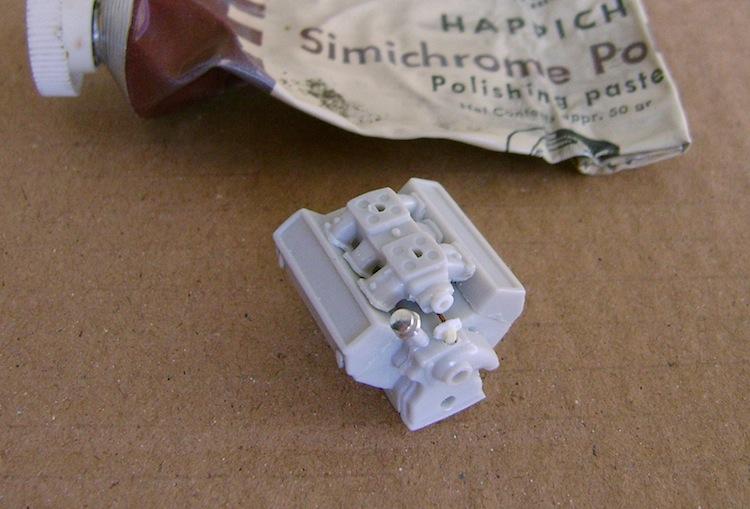
 Water line / oil filler cap. One item missing from the kit engine that's hard to miss in 1:1 photos is that 'water feature' thing (I only use highly technical lingo) at the top front which has a small two-size diameter line going to the front of the intake under the top radiator hose inlet. I made that out of a small chunk of a leftover suspension part with a flat piece at its back, and there is just a temporary copper wire there where the two-size diameter line will go later. Next, I happened to have an old chrome oil filler tube cap in my parts pile, but the chrome on top was worn off and it had a dimple in it. So, I chucked it in my motor tool and 'lathe turned' it into a better dome shape. I didn't re-chrome the top, that is no more than a circle of Bare Metal Foil mashed onto it and polished with a tiny bit of Simichrome polish I still have from that decades-old tube in the background. That stuff really shines up BMF. The oil filler cap is parked there temporarily on a wire peg. Ignore the bits sticking out from the sides of the heads, I'm filling in the locator holes for the headers so I can have a better appearance on the heads with the headers located just a teensy bit farther up.
-
Distributor. Ground off the part below the cap, glued a rod into the underside hole to have something to grip the remaining cap with. That's a #77 drill bit on the left (minus the pin vice I used, of course) and some nice reasonably soft blackened wire from my wire collection on the right. I can see why there's some demand for pre-wired distributors. Bit of a chore drilling nine holes, I got two of 'em nearly perfectly centered......
-
Ran across this one in a current ebay listing, had no clue what it is... A bit of searching here in the forum turned up Dave "Gowjobs" McGowan's 2nd set of 'most fun build' pics (after his BattleBuggy) where he called it a "Lindberg Drag Queen" kit:
-
Favorite truck builds
Russell C replied to Superpeterbilt's topic in General Automotive Talk (Trucks and Cars)
This one? From several pics down at Sourkraut's gallery page... -
Favorite truck builds
Russell C replied to Superpeterbilt's topic in General Automotive Talk (Trucks and Cars)
Nearly all of my own trucks aren't yet my favorites because they need fixing of some description. But I think my '34 Ford salt spreader needs no fixing, so I'll call it my favorite for the time being. Favorites among other folks' models changes from time to time, but I'd say I still have a particular weakness for Tim Ahlborn's reproduction of "Will Chandler's temporary truck" from the Movin' On TV series. -
Fabulous and hilarious!
-
Revell Chevy Luv Machine #H-1300 (fixed photos, 1/27/16)
Russell C replied to Russell C's topic in Truck Kit News & Reviews
Now, that I never thought to check. I knew of the Revell Courier version, but had completely spaced out their Datsun Desert Rat. In looking more closely now at the photo of the side of the Luv box showing the interior, that is definitely an incorrect dash for the Luv, which had oval-shape gauges. But what Revell has is also incorrect for both the Courier and the Datsun. Meanwhile, this Ratsun.net thread post shows a brochure cover for the full-size California Stepside conversion for such mini-pickups. -
Tony from Yorkshire / Steve Grantham. We're being invaded by Downton Abbey™ folks.
-
Great. Helpful views of the alternator bracket and the distributor / plug wiring for my project. I'd found the one pic below, but the angle on it isn't all that good.
-
Well, the more pics there are, the more probable it is that I'll spot a detail I've overlooked. Plus other builders probably could use 'em as well since it was a reasonably popular engine. I won't turn 'em down if you got 'em.
-
Oh yeh... best blunder of the bunch involved the 911 woody in my avatar pic, where it was basically 99.99% and all I wanted to do was touch up a scuff on the bottom of the engine (which really nobody would see anyway), but in trying to be too clever in mixing the settled silver paint, I made a slightly L-shaped sprue rod and chucked it in my motor tool to give the paint a good stir..... and dropped the bottle. Almost all of the paint sloshed onto my shoe and the carpet, with most of what was on the 10k rpm spinning sprue ending up as random spots on the window and wall, but several drops splatted on the model. They buffed out of the PPG Deltron clear with no real problem, but I thanked my lucky stars that one drop only hit the A-piller instead of landing on the windshield. I can still see (with magnifiers) the slightly differrent shade of touch-up black for the rubber trim there.
-
Yep, right off the bat that had me wondering since the kit has it straight up, but all the photos I see like this one show it angled. The other mystery to me is how the AMT instruction sheet says to paint the block, heads & such blue, but with only a few sorta Petty-ish blue exceptions among tons of internet photos, nearly all Y-blocks are orangy-red. AMT was aiming for a particular variant? Now, the reason why I think the AMT block isn't quite right is that the block's lower vertical side areas and vertical side areas of the heads look taller on the full size (ignore that guy's likely rattle-can gold paint). But regarding the heads, it could be AMT's exhausts are too thick, making it look like there is not enough area below 'em to stick in the spark plugs....
-
Russel's Apollo 116 Diamond Reo
Russell C replied to Old Buckaroo's topic in Model Trucks: Big Rigs and Heavy Equipment
Very nice. Being an old stick-in-the-mud, I'm not a big fan of the current hugely exaggerated front bumper craze, but in the case of this model and http://www.modelcarsmag.com/forums/uploads/gallery_12144_1240_10470.jpg this comes from, it does look quite good on it. -
First, I'm no expert on engines, but with enough observations of reference photos, I can usually get a majority of details right that I'm not overly criticized by detail purists. My NASCAR Mercedes 4-cylinder engine and my Top Fuel 4x4 7-cylinder engine, for example. Here's the starting collection of a Y-block out of the AMT '56 Ford Crown Vic, with just a bit of preliminary work on creating a separate starter, getting the tube on the front ready for a separate chrome cap, separate pulleys, and the beginnings of a lathe-turned aluminum alternator. It has a watch gear as the fins part and another pressed steel watch part that I will alter in order to kill the proverbial "floating alternator" problem. Not seen on the other side is the shaved-off oil filter, that's what the new white motor tool-turned white plastic thing is toward the back. The intake has a new bit on the front to make installing a radiator hose work better, and I think I can get away with using my long left-over set of Holley dual quad carburetors out of the Quicksilver kit (scratch that, see correction in post #35), but I will have to separate 'em and turn 'em sideways like this guy did. (I wont tell anyone they're 24th scale if you don't) After rummaging through enough reference pics, it begins to look like the AMT Crown Vic engine is not all that great of a representative of a Y-block, but oh well. Good enough for jazz in my case. I'm not using the kit tranny, and the reason for that will become obvious a bit later.
-
Jealous, particularly since I'm named as the inspirer of the model, as I'm waaaaaay behind in completing any model, much less completing one in this length of time.
-
A suggestion for making small parts a permanent feature of the model: zap glue and wire-peg the part to the model. Do this by first purchasing a micro drill set and pin vice, then you hand-drill matching holes in the part and the surface it goes to, and stuff in a short length of wire, scribing it with an Xacto blade to create a rough texture. The wire can be something as simple as a paper clip, a staple, or whatever other wire you find in scrap electrical devices. My mirrors and other such items are all on that way. I place the part onto the model (making sure it doesn't move easily), then I place a small drop of CA on the end of a wire applicator, and I touch the drop to the base of the part and it capillaries into the touching surfaces.
-
GSL-XXV anyone looking forward to attending ?
Russell C replied to randx0's topic in Contests and Shows
Ditto. (except a tight budget restricts me to just the McD's just across the street) Haven't missed attending a GSL since 1990. -
Never had any to measure. Anybody have one to measure, tire height & wheel opening?
-
Myself as well, for my GMC General restoration/fix-up, but I need proper wheels, too, since those look too shallow. My best guess is I can use the tires & wheels out of either an AMT KW conventional or the COE, but the problem is that I have yet to find an inexpensive kit or parts pile of those two on ebay... When I do find a set, I'll still have to make proper front & rea hubs, but that is something I can do from scratch with no problem.
-
Revell Chevy Luv Machine #H-1300 (fixed photos, 1/27/16)
Russell C replied to Russell C's topic in Truck Kit News & Reviews
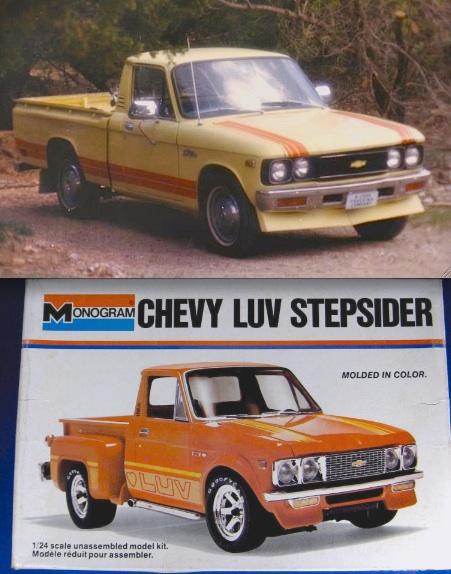
Probably. The Monograms are '73s with the thin front bumpers, as was my full size, but I swapped a '77 bumper onto it. Now I can see what bugs me about the Monogram kits, I think the headlights are too large in diameter, which in turn made the grill too narrow and too tall.
-
Revell Chevy Luv Machine #H-1300 (fixed photos, 1/27/16)
Russell C replied to Russell C's topic in Truck Kit News & Reviews
You're welcome. I keep an eye on ebay listings for Chevy Luv kits, and a current listing reminded me that I had that old Petersen's magazine with the Bergeman full size in it. Well, the Revell versions do have their problems, no doubt, and they were created at a time when stock/custom kits seemed to be out of favor, which disappointed a lot of us stock fans. As for the mid- late-'70s, I lived through it and it is an acquired taste. For me Bergeman's custom was mostly ok, could have used a more inspired tailgate, anything but plaid cloth for the interior, and the front bumperless plastic snow shovel look air dam is not what I'd prefer, that's for sure. I abandoned my own sheetmetal air dam on my full size about a year after I made it. Too hokey looking. They sure were trendy back then. -
My Shelby Collectibles 1:18 427 / Wix-Icons 1:24 427
Russell C replied to Russell C's topic in Diecast Corner
Probably an understatement, whereas my humble collection consists of that one plus a cartoonish Muscle Machines one, a red/yellow stripe Hot Wheels, some generic cheapo 1/64, and a Model Power white/blue stripe 1/87 scale. I figure I can round out the collection by acquiring maybe a 43rd scale one that jumps out at me, and likely a Wix/Icons Inc 1/24 version. Or I suppose I could get in gear and finish my long-dormant Cobra berlinetta..... -
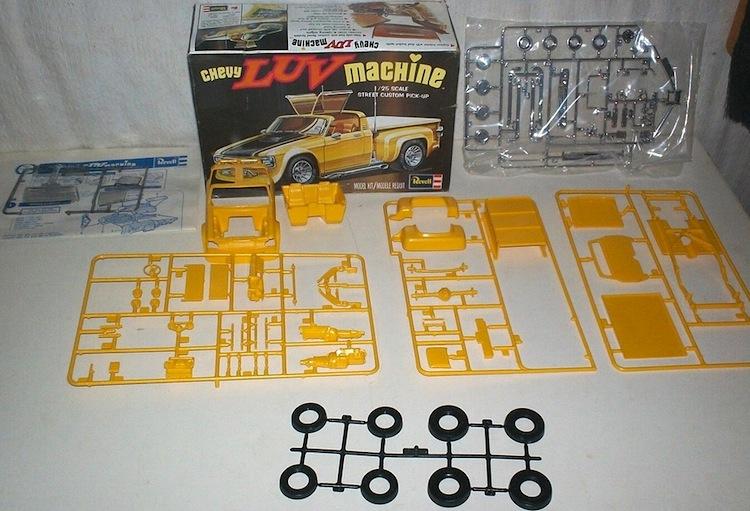
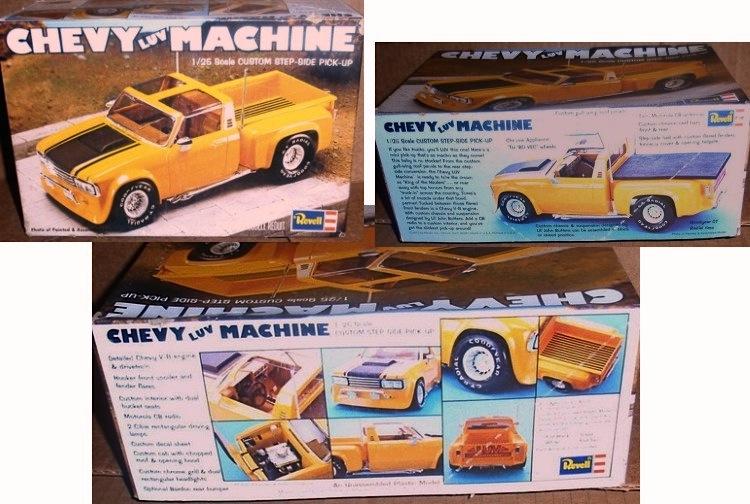
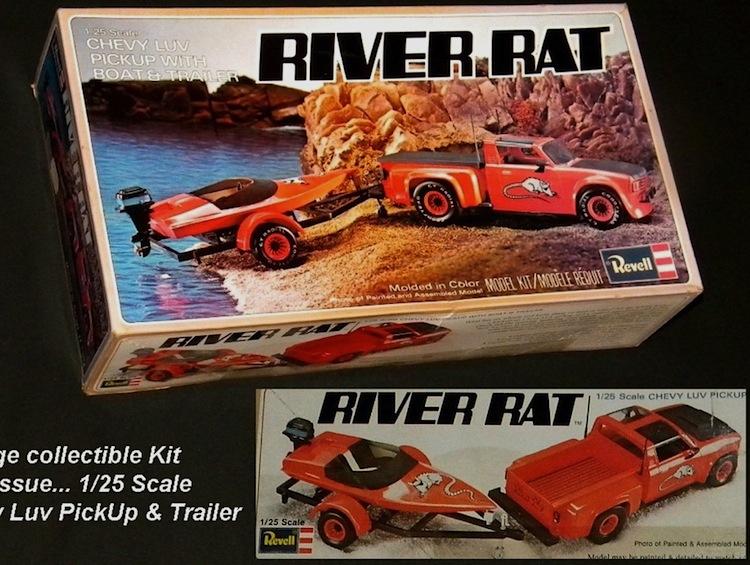
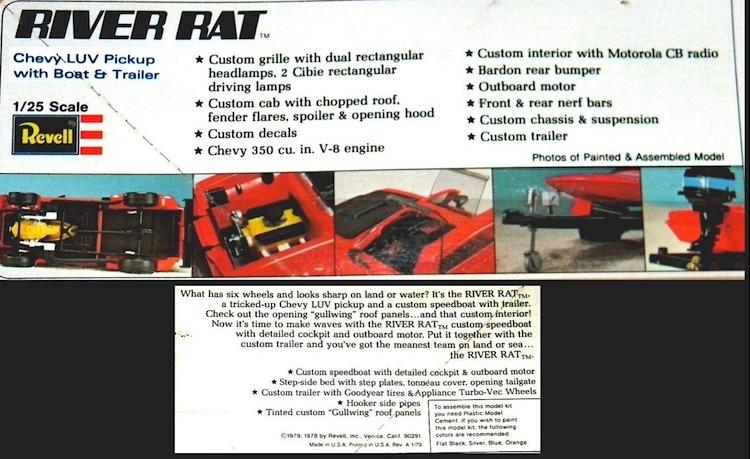
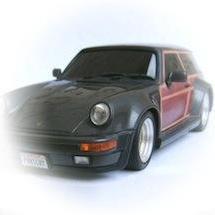
(Not to be confused with the Monogram 1/24 Luv kits seen over in this other thread here). The choptop 1/25 scale Revell kit is the one seen in Frank Rizzo's glue bomb restoration thread and in Jake Bridges' Mini Truck Team thread. From my web searches for kit boxes (with images lifted from other guys' ebay listings), my best guess is that this kit first came out with artwork illustrations on the box... Then Revell switched to actual photos of the model, which was still molded in yellow... As near as I can tell, one of the later variants was in a series called "Lightning Rods", where the other kits were a VW Bug and Chevy Monza. The best I can dredge up here is just an enlarged blurry thumbnail photo, where the kit is molded in black... And there was the River Rat version, molded in orange, with a little speed boat on a trailer. One difference in this version seems to be a rear step bumper instead of the previous nerf bar. I thought I'd bring up this whole topic because an old 1977 Petersen's Trucking Trends magazine's pgs 68-69 seems to indicate the kit was based largely on a full size custom stepside made by Vini Bergeman's Kolor Me Kustom shop in Anaheim. The most noticeable differences between the kit and the full size version (besides the tire sizes - ugh!) is the rear nerf bar and the fog lights in the front nerf bar. The full size has round taillights vs the vertical rectangular ones in the kit, which were likely incorporated into the Revell mini pickup parts pack (?): Bergeman mostly customized vans, but also rather famously muralized a Datsun pickup that ended up in the same Petersen's Trucking Trends above and in Hot Rod Pickups & Mini Pickups, and he apparently did a similar chopped roof / stepside conversion to a Dodge D50 back then (prior photo link worked, but now it is behind a subscription sign-in wall at this forum thread). Got one other reason for all of this, namely I'm an idiot and made the mistake of not only getting a yellow Luv as my first daily driver, but also liking it despite its maddening electrical gremlins, lethargic motivation (which was only good good as a source of reference for my Mercedes stock car engine buildup) and its various other shortcomings. I still think Luvs are prettier than Datsuns or Ford Couriers / Mazda B-series mini pickups. I'm probably missing varieties of info on the Revell kit versions, so please feel free to add on to the thread with better photos and/or other info.
-
Since someone else wanted to see a photo, I thought I'd pop this one in, a Shelby Collectibles 427 that I was able to snag a couple of years ago at a swap meet for just $20. Not bad overall to my otherwise untrained eye, but the model builder in me wants to fix the reflectors for the turn signals and taillights and tidy up other details. I'd prefer silver colored wheel spinners, and much better looking tires if such a thing was available. Bright sunlight makes the metallic paint look like fuzz specks are all over the surfaces in this photo, but it is really much more eye-popping in person.
-
GSL-bound, right? Lowlife, I've only barely lopped the roof off of a car for my usual "Group" category entry monstrosity. You'll be done way ahead of me, on something destined for a much higher level category.