Russell C
-
Posts
1,930 -
Joined
-
Last visited
Content Type
Profiles
Forums
Events
Gallery
Everything posted by Russell C
-
 Yep, I can visualize the original Autocar Dump having the orangy red/white of the California Hauler day cab box art scheme..... I might be able to bash that out later since it would use the graphic elements of the California Hauler sleeper box version which I could plop onto the Autocar without much difficulty. Since I already had the illustration, I gave it a shot to see what such a red pinstripe would look like........... and though it may be my subjective opinion, it just didn't work for me the same way the white stripe works on the Movin' On Kenworth or other such paint schemes where it is a dark main color with a white stripe.
 -
Holy Photos! There's maybe 14 pages of 100 photos per page on old Bonneville stuff......
-
I'd missed the original post, glad to see the update today since I'd only managed to record 4 episodes last year from Retro TV. Link here for the first episode to save others from searchin': http://www.youtube.com/watch?v=vrtrfRDdn00&list=UUv1xRsmc1tS2j4imjYD36vA
-
What NOT to do with a Jag...
Russell C replied to Ace-Garageguy's topic in General Automotive Talk (Trucks and Cars)
Never forget Willy Koenig's widebody XJS. Addict to such an appearance, I like 'em. -
Ditto x2. The knuckleheads at my apartment complex can't be bothered to water the trees during the height of the summer, and they were really looking thirsty. This ought to do it 'til the next big rain comes. Might soften up the caliche for a while, but it will turn back to concrete like it usually does.
-
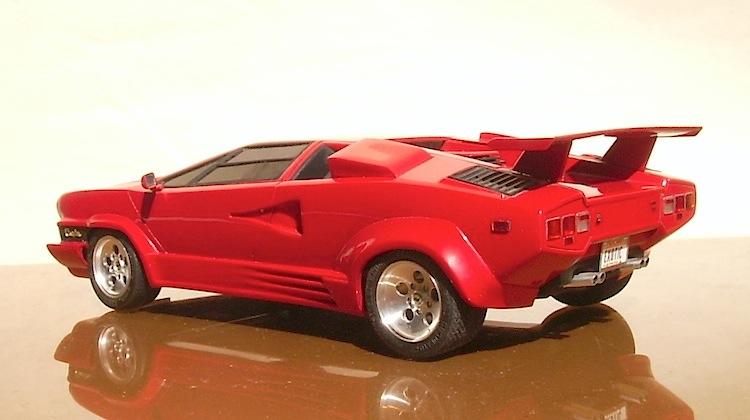
How? Well, not quite as indelicately as this, but similar with a little more sawing action on a Countach and a 300, then glue and bondo. Sorta. Why? I see things that aren't there, and instead of doing something more productive or useful to society as a whole, I make models of the images in my mind, or lately, I stop short with just photo alterations.
-
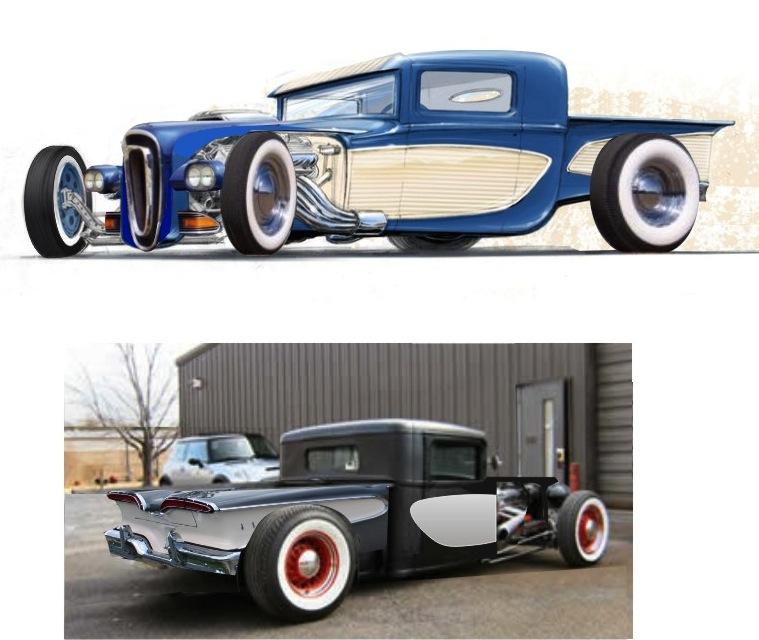
I love graphic artist Gary Campesi's rod renderings. Probably more than one modeler besides Rob Mattis here has seen those drawings and has ideas on building models from them. My problem is that I sometimes see vehicles that aren't there. While rumaging through Gary's drawings, what I saw in the pickup box of his "32 in Blue" were Edsel fins. Thinking that I might undertake a model project of Edselizing Gary's idea, I did the mildly crude photo alteration below, while borrowing someone else's 1:1 rat rod truck......... but in looking at all my various other projects on the shelf, it looks like this one is yet another that I probably will never get to.

-
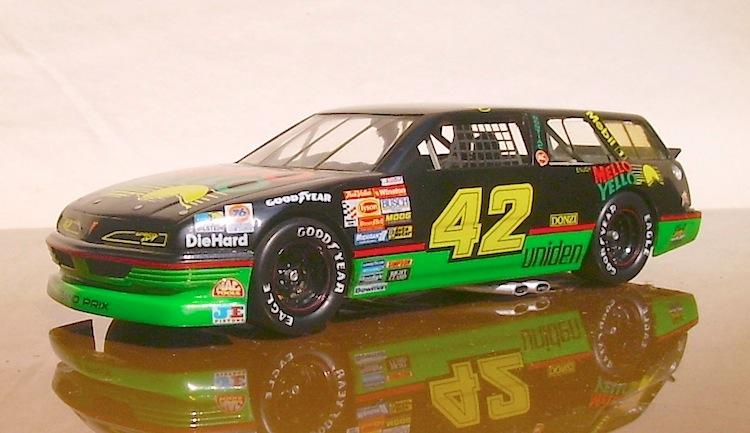
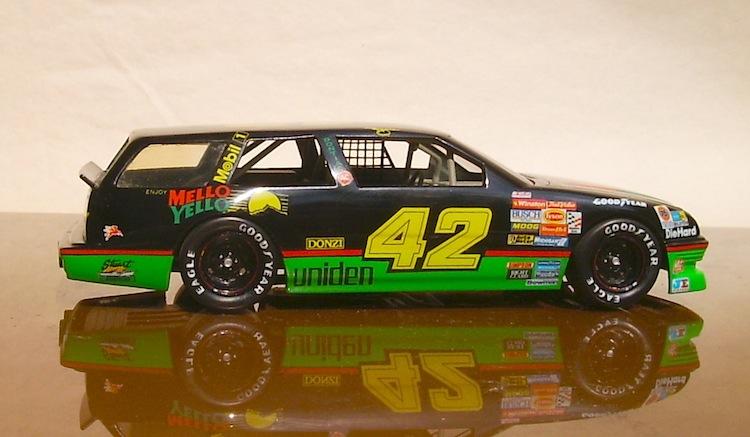
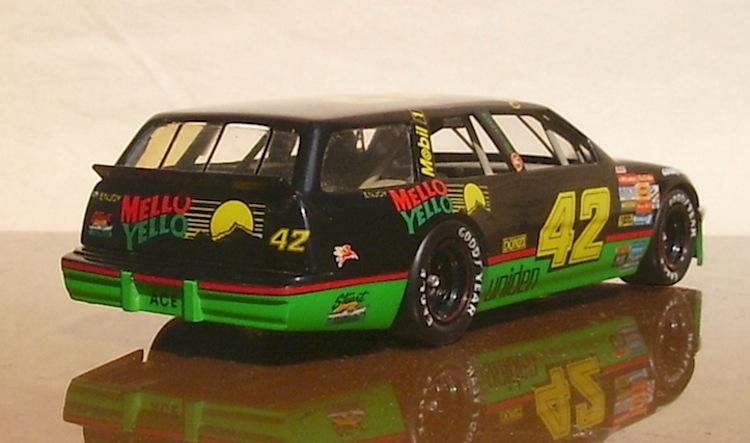
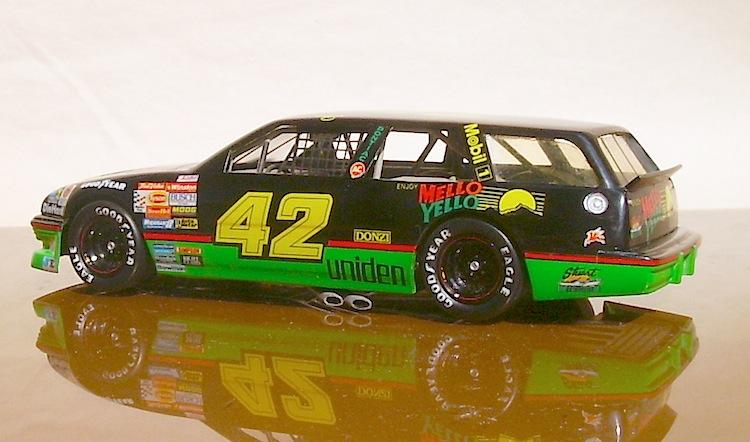
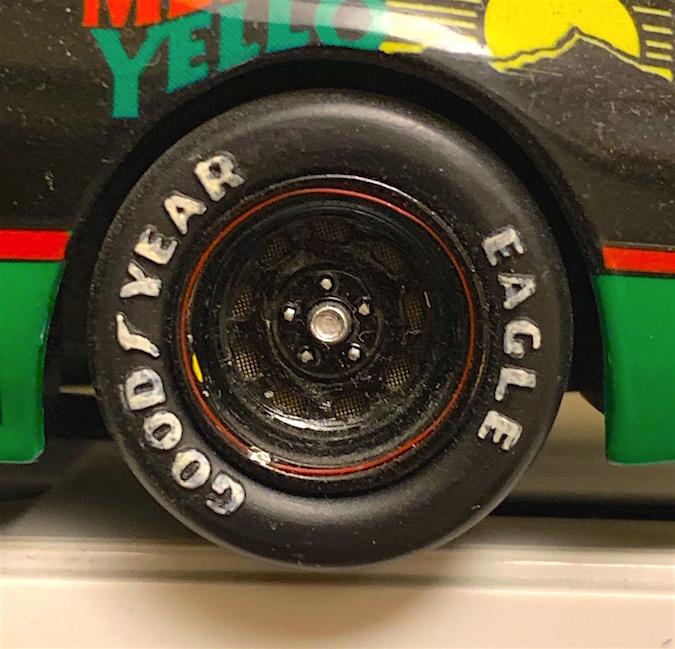
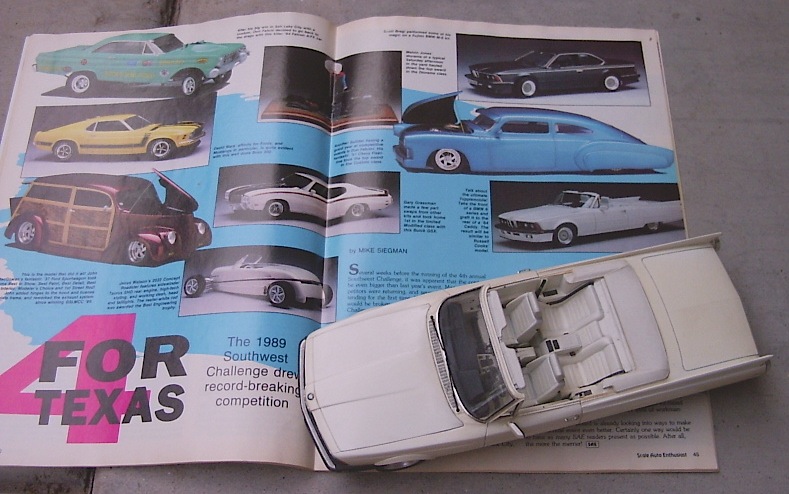
Wait...... wagon? Yet another blast from the past, finished in October 1992 just in time to take to the Dallas Southwest Challenge contest a month later. If I remember right, entrants to the contest the prior year received not one but two 1/32 scale Kyle Petty stock car kits, and since I was already working on my Porsche 911 woody wagon at the time, that wacko idea fell onto these kits as well. I just used a chunk of the roof out of one kit and added it to the other with some styrene scrap for the B and C pillars. A slave to temptation on messing with people's minds, I always have been. One of the handy simple tricks I did to achieve the red-striped Bassett wheel rims was to lathe-turn a groove into the rim and then heat-stretch some red plastic sprue into a long thin hair, gluing it in place with just a couple of capillary action Tenax glue drops. I never could have painted such a consistent line like that. Just cheap clear acetate material for the rear side windows and rear window (which have yellowed slightly with age). It's an entertaining silhouette, but I doubt if the rear spoiler would have anywhere near the same aerodynamic effect as on a coupe. I did well at the SWC that year, this wagon placed 3rd in the Miscellaneous category, while my Porsche 911 CRX Honda got 3rd in curbside and my Bonneville Checker cab got 2nd in 1/43 & smaller - Street. Plus, it was a hoot to get pictured in Scale Auto's April '93 magazine coverage of the contest.
-
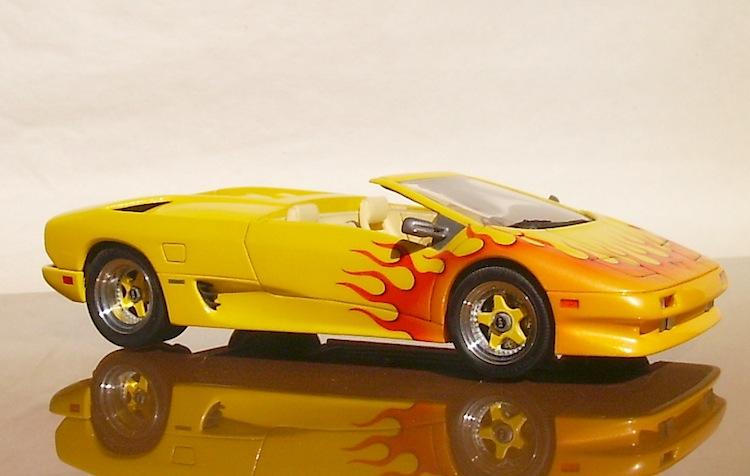
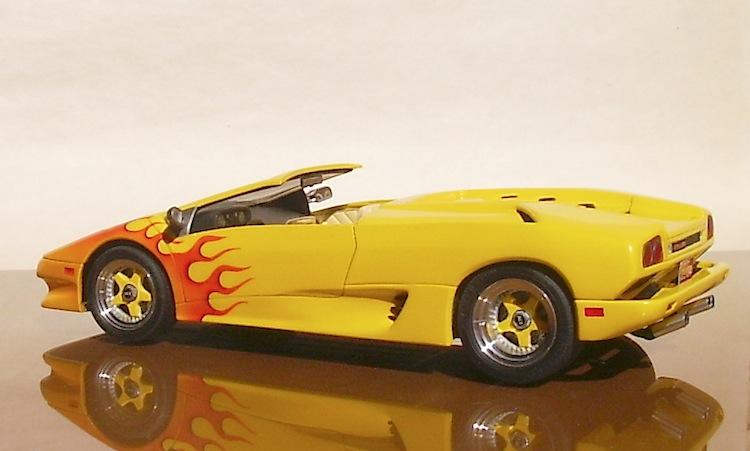
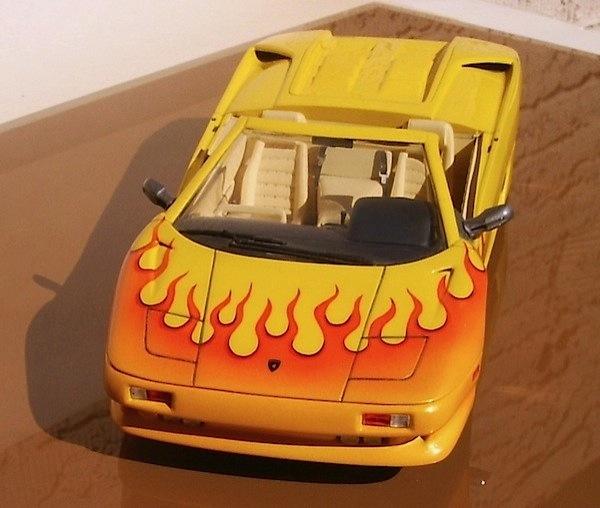
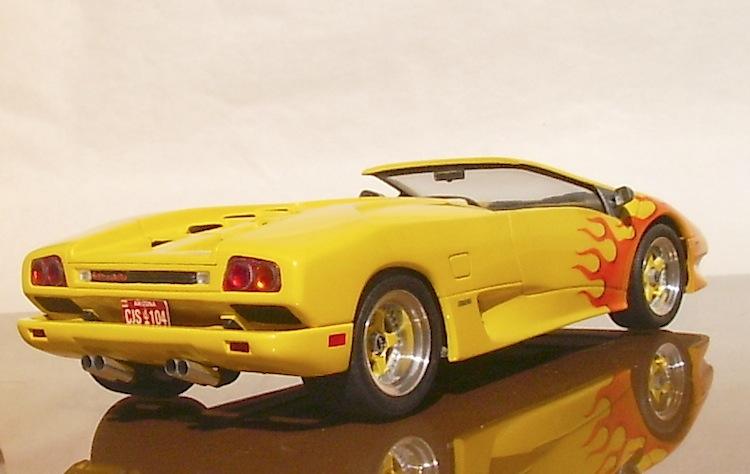
Ancient history Lamborghini Diablo Speedster Flambé
Russell C replied to Russell C's topic in Model Cars
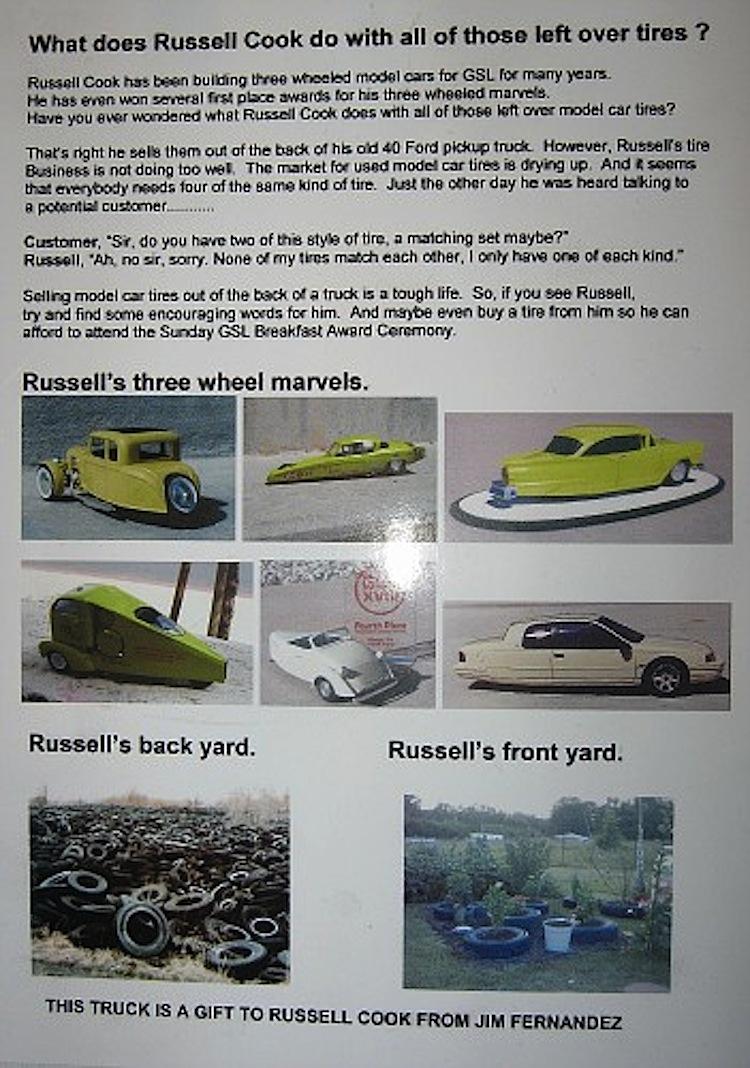
Thanks, guys. Evil Andy taunts me with my running gag yellow three-wheelers for the GSL contest "Group" category. One of these days I'll have to do a thread on the whole line-up. Hollywood Jim got most of them in that 'photo essay' of his, but there were more.
-
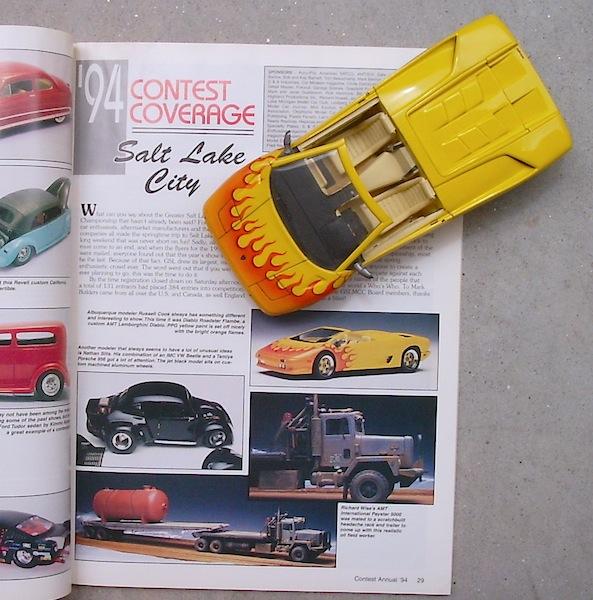
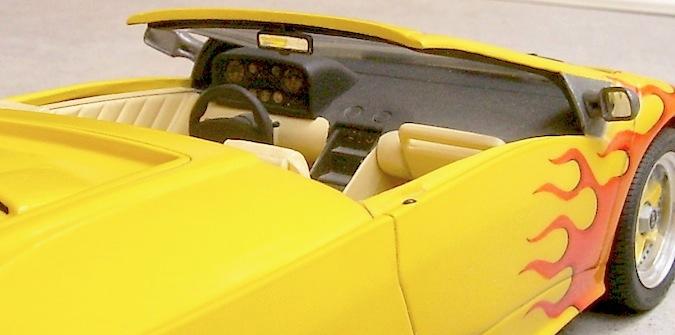
One more in the lineup of my 2 decade-old models. If I remember right, this AMT kit was a door prize which I was wondering what to do with. Since I'd had the flame image of the 1:1 prototype for a Pacer pickup rattling around in my mind at the same time as a Ferrari with sidepipes, that's what brought this about. I worked occasionally on it from '92 to March '94. It was pictured in the GSL coverage of that other magazine's '94 contest annual, and also again in that same magazine on page 42 for the Springerville AZ contest. Where'd 20 years go? Whacked the roof, but not much else custom beyond the Fujimi wheels and Pirelli P-Zero tires. My dad lathe-turned the outer rims from aluminum. I was living in NM at the time, but I figured an Arizona plate would do good on this one - hot car for a hot place. The main color is some kind of nail polish medium tone yellow, and the flames are a really nice nail polish pearl orange, airbrushed light at the front and heavier/darker at the ends, where I masked off the yellow with Bare Metal foil to eliminate paint bleed under the masks. The inner curves and flame ends are hand-painted black lines. The trick to getting a decal-flat finish was via the clear coat. What I did was lay on a ton of PPG Deltron clear, which simply built up the stairstep effect of the flames on top the yellow, but when the clear cured, I had so much of it over the flames that I could chisel that excess down to the level where it met the built-up clear between the flames. Deltron is really carveable, actually, sorta like chiseling clear wax, and it polishes really nicely. But I no longer have auto body shop contacts who could supply me with small quantities of that stuff. To get the gauges to pop out of that otherwise dark hood, I put in model aircraft ones that looked like the Lambo's gauges, which were black reverse-printed on clear sheet (similar to these). With these, it makes you look like a super modeler when all you are doing is dropping a blob of yellow for the needles on the back and blobs of white for the numbers. What everyone sees are perfect needles and numbers through completely flat "glass". As Richard Petty would say, I'd rather be lucky than good, and it turned out that my gamble on making the flames look flat against the background worked out well, as did the fading on the orange. I'm not actually all that good at airbrushing, but I get a kick out of the way that turned out to this day.
-
Great work. I had missed your build page. Rapid prototyping is the direction I plan to go in once I get out from under my current non-model car work.
-
Thanks! I'll see about doing a few more reworks. The first kit I ever made was the California Hauler with the sleeper box, but I never cared much for the brown on the box art. My dad spray painted it a forest green and put on the kit graphics. I may try to replicate that as one rework on the list. Yep, on the Kenworth's rear suspension, I'd forgotten about that.
-
Thanks, guys. I'm a slave to temptation when it comes to having fun with such topics.
-
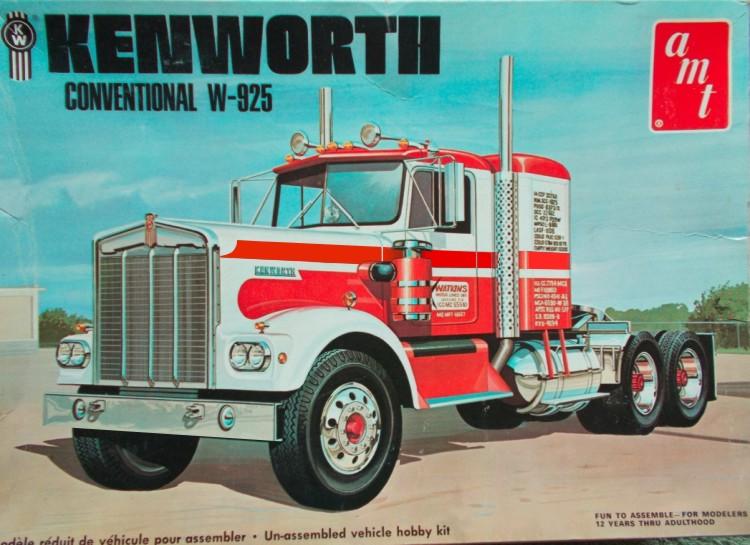
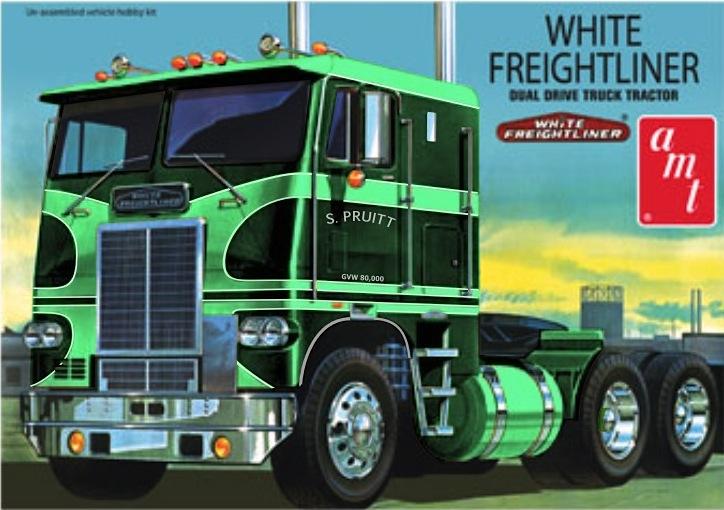
Poor kid that I was, I saved up all my pennies to get various truck kits whenever the budget allowed. But of course I drooled over the box art photos beforehand, etching 'em forever in my memory. Minor gripes about the artwork always stayed with me, and for sheer laugh's sake, I used some of my graphic arts skills to change the things that bothered me. Here's two so far: It's a subjective thing, but I would have preferred that Watkins had all red stripes. Plus, the way the black stripe was reflected oddly in the muffler heat shield always bugged me, and it seemed the rear wheels were taking on an appearance of being a tag axle hoisted up just a few inches off the ground. Never cared much for the large number near the front of the hood, either. Original box art here. Would have preferred a less harsh color combo than brown & yellow, and I always thought chrome caps on the front hubs added real punch to trucks. After tweaking the color this way, it caused me to speculate how this one would be if NBC had chosen a factory offering from Freightliner as their "Movin On'" truck……. Original Freightliner here.
-
Ancient history IH COE 4070A
Russell C replied to Russell C's topic in Model Trucks: Big Rigs and Heavy Equipment
Thanks, gents. That would probably be right, since I had used the AMT Chevy Titan cab as the basis for my CL-9000 project, which had robbed the turn signals off this IH. -
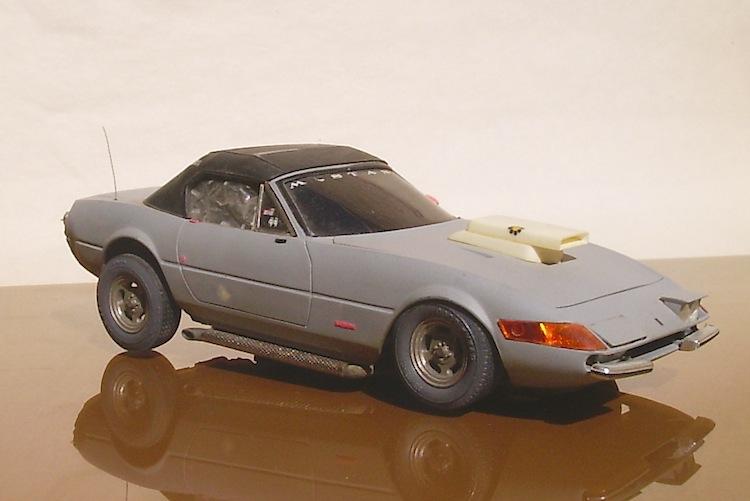
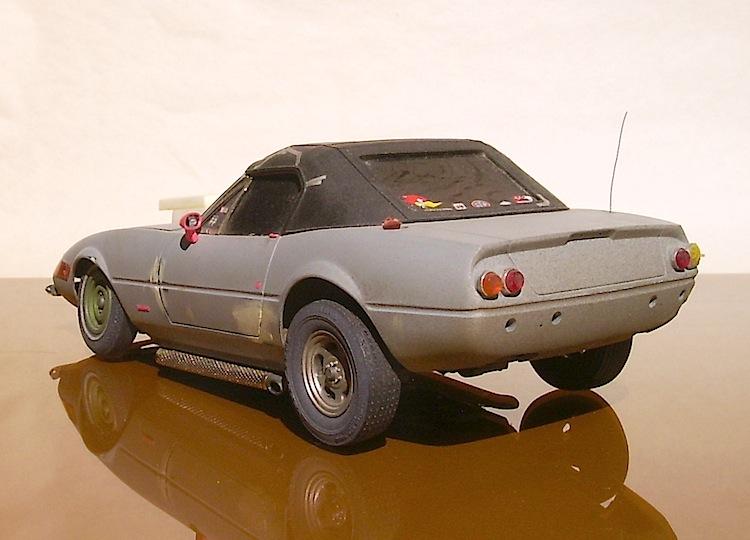
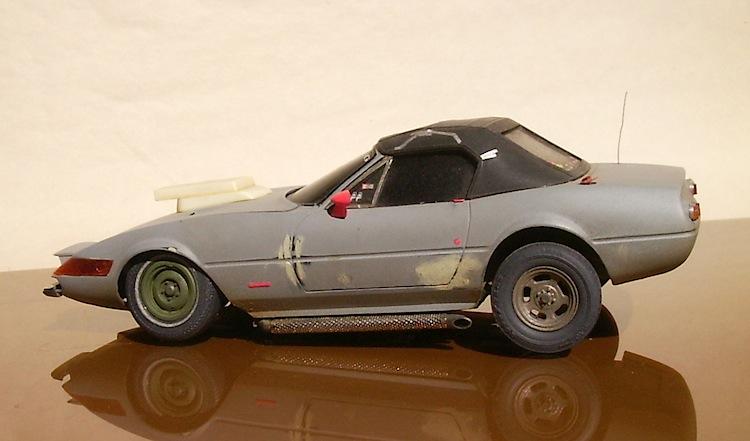
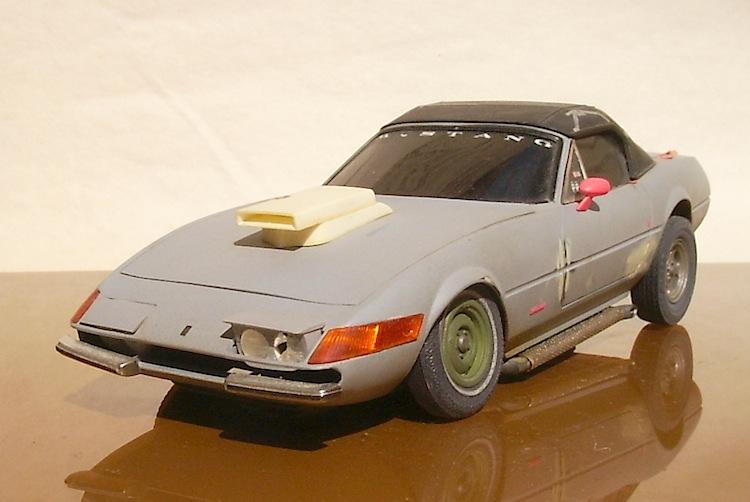
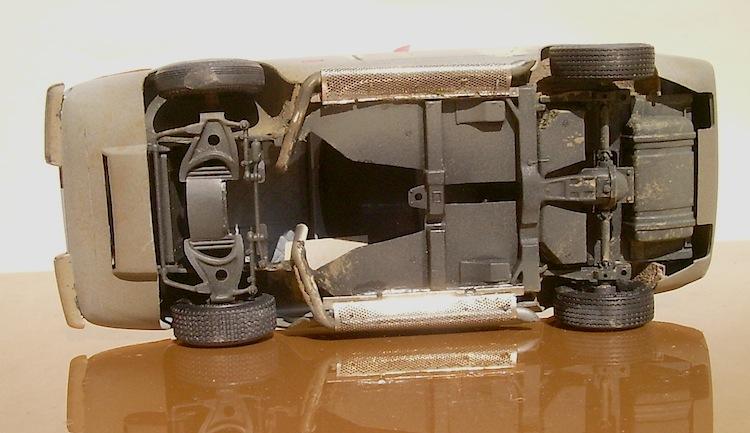
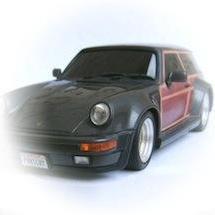
Not that it had any hopes of earning an award, I entered this in the 2013 GSL Street Machines category just to mess with people's minds. Truth is, I built it over the span of a couple of weeks back in the 1990s. The thing that prompted it was a flip remark by some guy on a cable TV car show about how you'll never see a Ferrari with side pipes. Oh, yeah? That was a straight line I couldn't resist, nor was it a project I could ignore when I saw a cheapo Monogram Miami Vice kit at a model car show swap meet and remembered I not only had a set of side pipes in my parts collection but also an old screen from my Remington electric shaver that I thought would be a useful model truck item. The then-current trend for beaters was random rattle can-painted fluorescent pink highlights. Who knows where that look originated? You know how the story for such beaters goes. You are a teenager, not too bright, with a lust for a killer car powered by lawnmowing-level wages, but you live in a neighborhood having a decent supply of cars and car parts. So, you talk that old widow out of the convertible over in the tall weeds, drag it home, get it running, use 90% of your budget on gray primer, jack it up, and borrow various parts off another even more wasted hot rod, like the side pipes, slotted mags, the unpainted fiberglass scoop with the '70s flower sticker on it. And since there should be no doubt about what your ride is, be sure to spell out the car's name across the top of the windshield. Slap on some cool stickers for additional horsepower, and keep the top together with duct tape. Too bad about the rock that busted the pop-up headlight and jammed the mechanism. The Mustang pony emblem for the front got sprayed over with gray primer, but a quick removal of it and a dunk in gasoline cleaned it off. It is around here somewhere, it's not like the regular chrome ponys……. Also too bad about losing control late one night and creaming the curb, but at least you missed the tree. Well, ok, you hit the tree with the open door as you floored it backwards, opening it up to a 90°+ angle. Nothing a bit of bondo and a spare wheel can't cure. Kinda handles weird with that bent spindle. Broken mirror? Still works since it is mostly there. Where'd the gas cap go? Oh, well, stuff a rag into the opening. Backed into a tall tree stump and busted a tail light lens? Yellow tape over that will do, but the bondo can dried out, so the dent will get fixed later. Same thing with the passenger side window, a project to fix later. No need to put the passenger side mirror back on 'til that's done. Don't you hate it when some vandal bends your antenna in half? You can never get it straight again. No need for a license plate since you aren't old enough to drive anyway. As long as nobody spots you driving around, you should be fine. Nothing to see there, this is a slammer model.
-
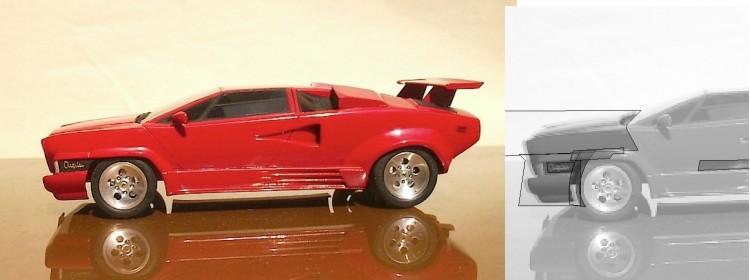
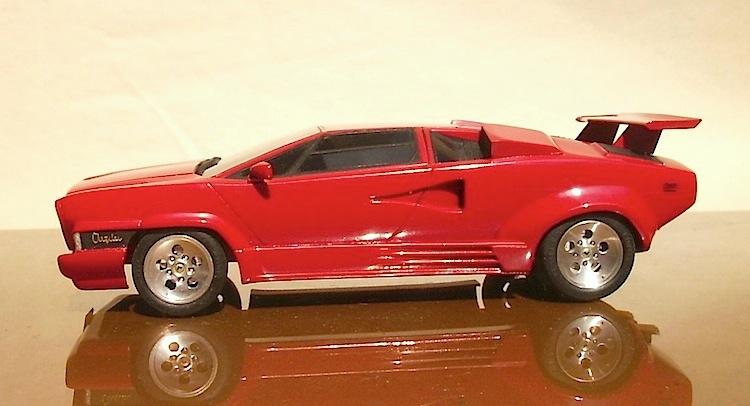
Thanks for the compliments, all. If I may criticize the model myself, I'd say it is a touch 'heavy' in the front. If I was to do it over again, or if I had the chance to play with it in a 3D computer illustration file, I'd see if it was possible to downplay that heaviness by sectioning the upper portion of the fenders and bring the overall front height down a bit... and perhaps bring the whole area ahead of the wheel arch back just a touch, while extending the Lambo's arch bulge forward just a little. I can do this sort of thing using my CorelDraw program, thusly, where you can see in the gray wireframe version where the lighter color original image was, and the cut portions of the image are that I laid on top of it (an example of 'Photoshopping' the photo to improve the model. Also removed that garish reflection on the door, since the opportunity allows for it here). Yep, I'd already forgotten that I only mentioned that one briefly in my intro post, I'll have to include it in the photo shoots for a few others I have.
-
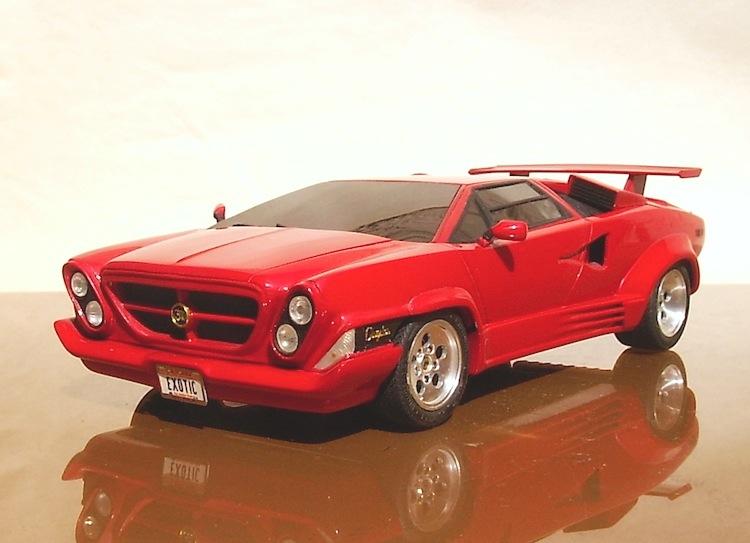
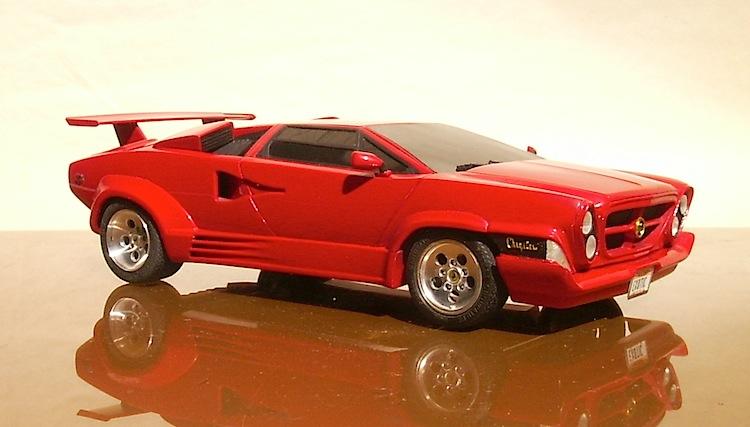
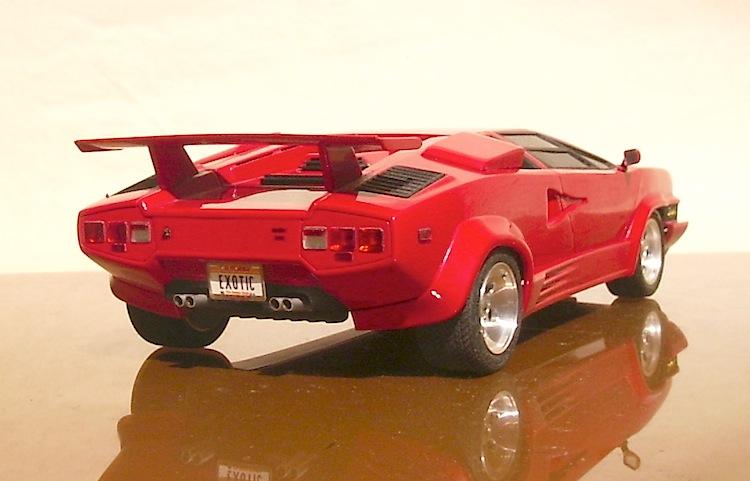
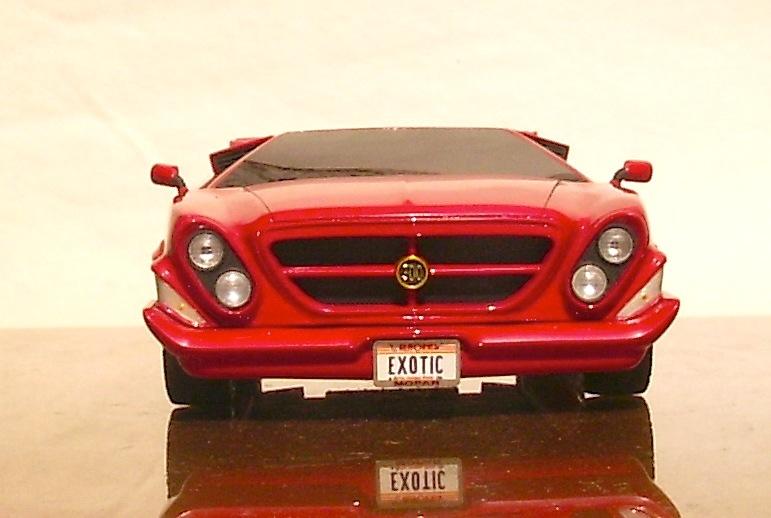
Another blast from the past, this one representing my one and only 15 minutes of cover photo fame. It was seen with other GSL XV models on the cover of the August 1994 Model Car Journal. I started with a Fujimi 1988 Lamborghini Countach and combined it with a Jo-Han '62 Chrysler 300, back over the span of October 1992 to September '93. I had a bit of a mix 'n match thing going on back then, with my BMW Cadillac and my 911/CRX. The front wheels in the Fujimi kit were fine, but the rears had truly bad sink areas between the holes, so I commissioned my dad, a master machinist, to lathe-turn a new pair of wheels out of aluminum. Sliced up the lettering decals to read "lambo 300 on the back, and placed "Mopar" license plate borders on California plate decals. I forget which Fujimi kit had those plate decals, probably one of the Porsches. My pal who worked at an auto body place gave me a small quantity of Mercedes red along with some PPG Deltron clear for the finish. Don't breath that stuff. I left the nub on the backside of the upper set of headlight lenses since they looked like projector-style bulbs, and it gave more of a menacing appearance. The turn signals have just a thin layer of orange over the bulb area, and then quite a thick layer of Elmer's glue (covered with clear) to make the Jo-Han chrome lenses look more realistic. Gold tint Bare Metal foil for the Chrysler logos. Yep, it's a slammer. Carved the words "Acme Window Tinting - Guaranteed not to Rust" into the underside of the windshield. The rear axle makes it look like the car backed into a tar pit.
-
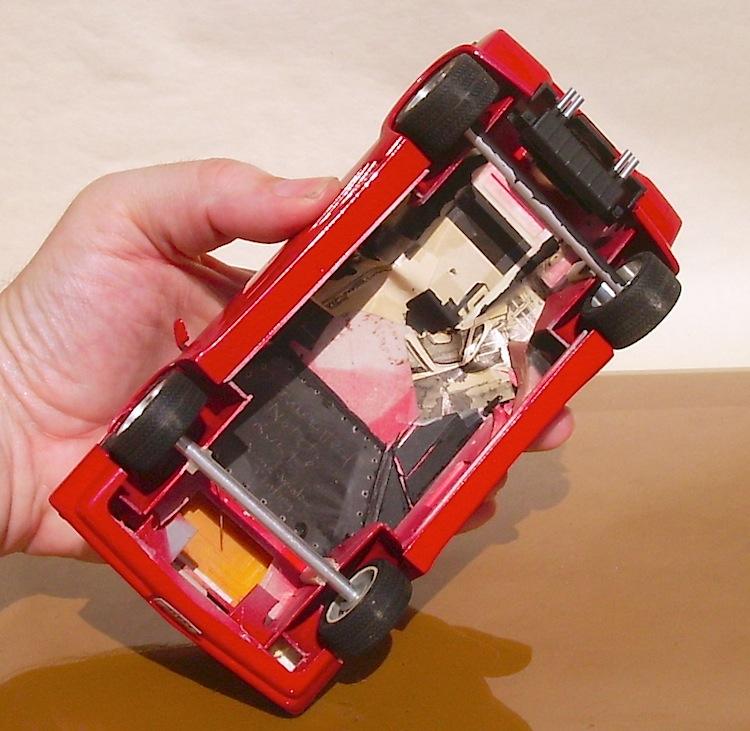
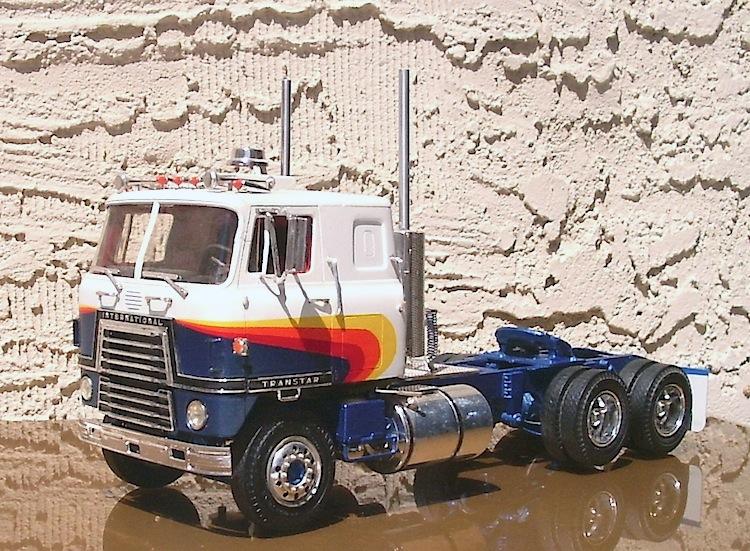
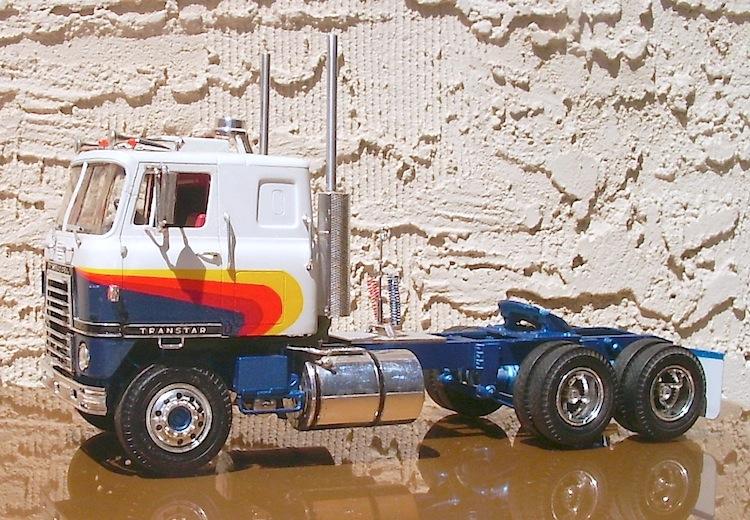
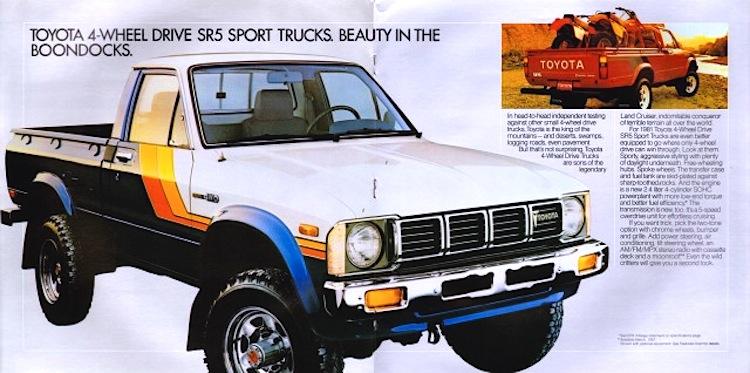
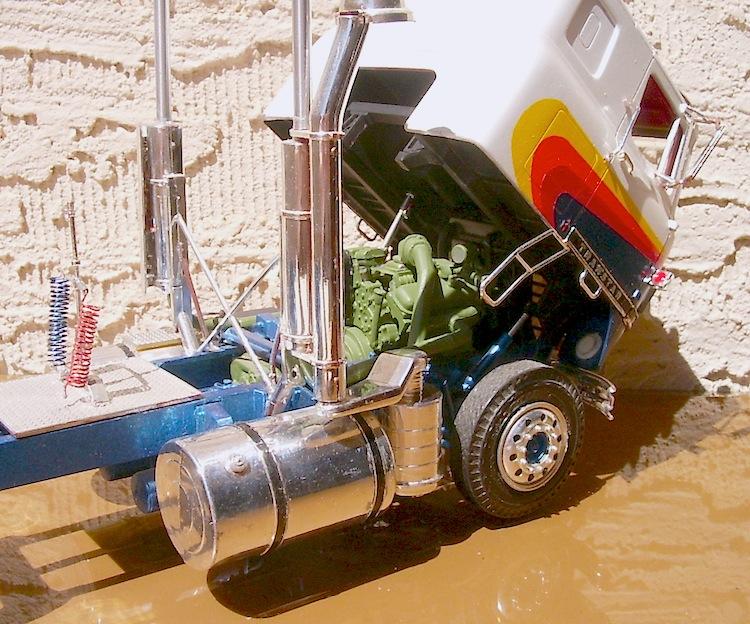
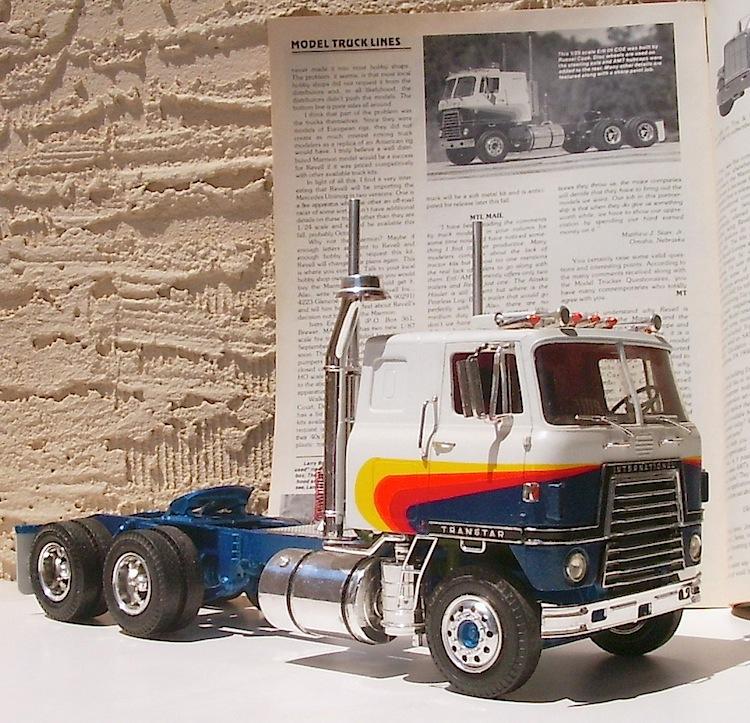
This is the original Ertl International Transtar cabover, a kit I first built rather poorly in the late '70s (even driving it around in the carpet if I remember right), which I rebuilt as you see here in June 1982, with substitutions of the steerable front axle, engine and front turn signals which went toward my Ford CL-9000. The engine, front axle & wheels likely came from an AMT Peterbilt COE I scrapped, but I can't ID those improper turn signals. The rooftop A/C is a cut-down one from the AMT Peterbilt 359. Originally I had the thing painted black with red stripes that were just the bare plastic, using the simple instruction sheet stripe templates. But in 1982 I liked the basic look of the 'team color' stripe option for Toyota 4x4 trucks, so I adapted that concept here, adding a third color in the stripes. I still like that look, that's how hopelessly stuck I am in the '80s. The New Mexico plate is a hand-lettered bit of yellow paper. I thought the rear axle caps in the Ertl kit looked quite flat, so I substituted some two-level ones from the AMT Diamond Reo kit. In the interim time between 1982 and now, the blue trailer connection hose went springing off to places unknown, so I remade the hose just a couple of days ago from copper wire wrapped around a file handle, painted with a thin acrylic blue color. Got it pictured in Scale Auto's October 1986 issue, in the Model Truck Lines column when Don Shenk was writing it. There are two of my other models in that same column, but I'll show each of those in different posts later. These days I could do better by making the fuel tanks out of aluminum tube and lathe-turned end caps, to avoid having those unsightly lines, and I'd polish the paint flat before finishing the model, along with adding basic wiring and a few other details to really crisp-up the model even more. However, it is still not half bad after all these years just the way it is.
-
No doubt it works as well. Not knowing what "gymkhana" means, I did an internet search, landing right off the bat at a Youtube video titled "Ken Block's Gymkhana Five". Aargh, all that did was reinforce further how I wish the e-brake in my 1:1 car worked, period.
-
Thanks more for the kind words, gents. Fun to be remembered that way! Don't recall if it ended up in any magazines, I didn't have access to all at that time. If I succeed in providing more instances of inspiration and humor, and less times where folks feel a need to reach for defensive weapons or for the phone to call the police on me, then I will have made some kind of headway in this life.
-
Thanks for the kind words, all. A few more of the 'ancient history' models in the series coming up soon, the Petty wagon, the Lambo Flambé & Lambo 300, maybe the SuperComp Infini-T, plus at least one more semi truck or two, all circa the early 1990s.
-
Revell range rover
Russell C replied to Jaguar man 21's topic in WIP: Model Trucks: Pickups, Vans, SUVs, Light Commercial
By coincidence, another thread here has come back up on a Southeastern Finecast metal kit for the Rover V8 which perhaps be used to cure the 'curbside' problem of the Aoshima kit: http://www.modelcarsmag.com/forums/index.php?showtopic=78922 -
New term on me. But there ain't no matching 'coal rolling' (actually oil rolling on this one) with a steam engine. Thick stuff at 55 seconds here: http://www.youtube.com/watch?v=LHI5VHBwIfI#t=56s
-
Photoshopped models
Russell C replied to Ace-Garageguy's topic in General Automotive Talk (Trucks and Cars)
Being somewhat demented, I prefer the latest funny opposite exercise trend: http://thethrottle.thechive.com/2010/12/08/photoshop-subject-mini-cars-and-one-guy-in-a-real-small-car-20-photos/