codea
-
Posts
21 -
Joined
-
Last visited
Content Type
Profiles
Forums
Events
Gallery
Everything posted by codea
-
1959 " Wild Cad" finished "Outside" pictures 8/8/20
codea replied to John Teresi's topic in Model Cars
thank god the steering wheel is on the right side of the car for once....... (Tongue firmly in cheek). Awesome as always John. That chrome finish is stunning, well the whole model is stunning but the shine on that chrome in the sunlight is amazing. Alwaya inspirational work, thanks for sharing. And thanks for sharing the journey of each model as well. It's fabulous to see how each of your creations comes together. -
1/10 scratch built Holden HX Overlander Panel Van
codea replied to prestonlal's topic in WIP: Model Cars
Okay. Nice try. “shaggin’” and “dizzy”. There is no way that you are not Australian. I cannot believe that someone who has not lived here for most of their life could do this. There are guys here in Oz that are just jaw dropping at this. Not only is it Incredibly fine work, but RC as well? Well sorry I’m just not buying it. Fess up, come on. You live on Sydney beaches don’t you? insanely good Preston just insanely good. -
Scratch Building an Aussie Ford Falcon **New update,15/1/18**
codea replied to ShawnS's topic in WIP: Model Cars
Shawn, Funny you should say that, because I too have struggled with a range of things, even though from the outside it loos like I am doing fine. I came across your work, at the 2014 stage, and was totally blown away not by the construction, but by the level of possibilities it opened up for me. My mind literally expanded as a result, and for the first time in about 20 years, I felt hope. Sounds corny to even say it, and that some people might look at that and say it's a bit extreme, but for me that was the experience, and I started to work on a similar thing. I had drive, purpose and it made the rest of my life more inspiring. I can't ever thank you enough for that hope. It came by chance and by luck, and you were just doing your thing, but it helped me to come good again, when I really didn't even know that I needed it. That said I can totally understand what you are talking about. I can see how you can look at this and be not inspired at all to work on it, and I can understand how that is for you. Even if you never pick it up again, you inspired many people, with hope, ideas and just the fact that it is possible. Even if it sits there, it is a legacy that I will be forever grateful for. To those who want to try it, give it a go. Follow Shawn's process and you will be amazed at how well something can come together. Yes there are challenges, but if it was easy everyone would be doing it. But if you just start you will be amazed at what your hands can produce, and you might just inspire others. Thanks again Shawn. -
Scratch Building an Aussie Ford Falcon **New update,15/1/18**
codea replied to ShawnS's topic in WIP: Model Cars
Shawn, I am writing, as along with a whole lot of modellers, we were all stunned at your effort. I was one who saw a whole new world of modelling open up to me, never ever thinking that I would have some genuine Australian vehicles in my collection. Like Shoey in Australia - (For those who don't know head over the ozmodelbuilders forum and check it out), this was more than just an update on scratch building this was really life changing. I started to develop a Holden Gemini, based purely on the fact that you had posted your effort. Like another contributor here who is building an RC 1:10 Holden Sandman wagon, the creation of something from flat plastic is magic to me. Like John Teresi who on this forum produces miracles, in the form of models, makes things from nothing, these are skills and gifts that most of us don't have. But I can assure you that we get so so much from all of your posts, that is immeasurable. We gain inspiration, hope and desire to model, and tongue in cheek threaten to throw it all in and take up macrame, out of sheer frustration at your skills, but truly we all hope that some of your wisdom and ideas will rub off on us. That said, I understand when you lose motivation. I've had my materials packed away now for a couple of years, due to a range of issues, and problems in my life, but I itch every time I think about it, I desperately want to get my hand on plastic again. And I will as soon as my home life allows me to. Shawn, I hope that something in your life is bringing you joy, and that somewhere there is the desire to start this again, because so many modellers here and in Australia and around the world marvel at your talent and persistence. i just hope we get to see this project reach it's conclusion because truly it would be a great loss to the Australian and the rest of the modelling community if we didn't get to see your creations completed. Hope all is good. -
1/10 scratch built Holden HX Overlander Panel Van
codea replied to prestonlal's topic in WIP: Model Cars
Can you hear that sound? That's the sound of my throwing all my tools, kits and magazines in the bin. Not in a million years am I going to get anywhere like that. You've got the BLAH_BLAH_BLAH_BLAH fanbelt turning, are you for frigging real?, are you even human? And just for an encore, you chuck in a lazy scratch built V8, and then to rub salt in the wound, figure why not and replicated it. I'm hurting here, real bad. Your talent is unreal, the subject matter brings a tear to this Aussie's heart, and you are completely smashing this one into orbit. I have no more words, I just bow at your feet and sob....... -
1/10 scratch built Holden HX Overlander Panel Van
codea replied to prestonlal's topic in WIP: Model Cars
Unfrigging believeable. I still cannot believe you are not part Aussie. Just awesome. The finish is brilliant, the dimensions and the look is simply stunning. I repeat my offer to sponsor your application for Australuan citizenship. Bloody unreal mate. -
1/10 scratch built Holden HX Overlander Panel Van
codea replied to prestonlal's topic in WIP: Model Cars
There are quite a few Australians I know that would tear up at the effort you put in to find the right General Motors Holden Colour for your creation. I suspect that if you ever need to visit our shores that you don't bother applying for a visa, just rock up to our embassy and show them your model. No true blue Aussie would ever knock you back from coming to our country. Australian modellers are really limited in "our" cars, having to heavily modify or scratch build our pride and joy. And here you are clearly showing us how it is done. You my friend are a truly modeller and thank you for sharing us, and reminding me of how iconic some of our cars were. You rock. -
1/10 scratch built Holden HX Overlander Panel Van
codea replied to prestonlal's topic in WIP: Model Cars
Fantastic work, just love seeing this come together. Well done mate -
BLAH_BLAH_BLAH_BLAH thats clever Robert. Well Done mate Apologies for the Blah blah blah that just posted automatically in my last post, not meant as a comment....
-
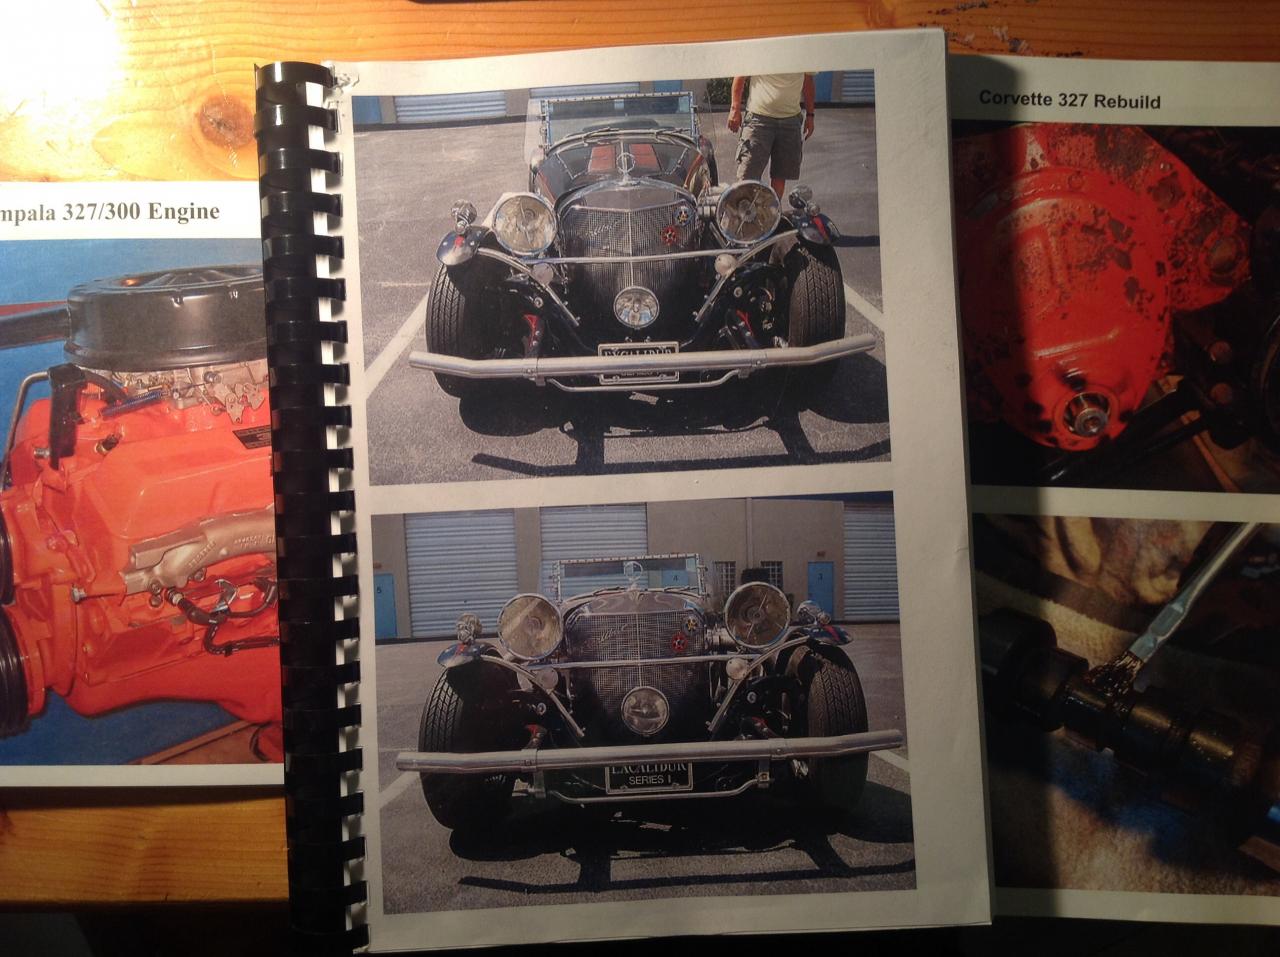
Darryl, First off thanks for the interest and the feedback. Yes I found a similar scenario when I researched and came across the link you posted. What I found most interesting is that the original one off that was built for the show was based on that Lark chassis, and then the company started to invest in designing their own chassis as you correctly point out. The kit is such a mish mash of parts and components that I was spending so much time trying to determine the history of the car, even to the point that I contacted what remains of Excalibur automobiles to see if they would send some information. I never heard back so I plowed on. I stumbled across an Excalibur on Flickr that I decided had the best series of photos of a single vehicle. And so my project was born. I aim to produce a later version of the first series of Excaliburs that has been driven enough that a full restoration has been undertaken. The story I am to show with the model is that the small block Chevy remains, but some of the bolt on components have changed. I have a picture of the original supercharger and am contemplating scratch building one, but I will wait and see. At this stage, life got in the way and I have not had much time to get back to this kit, and am still trying to scratch build an intake manifold. Once that is done then the block can be finalized, and mounted to the chassis so I can then run the running gear, gearbox, shaft, etc. Your point about the Corvette suspension is noted, and I think the reference car I am using as a basis has corvette components just a case of reviewing my references again. Thanks so much for the interest and I hope to do the model justice in the long run.
-
1/10 scratch built Holden HX Overlander Panel Van
codea replied to prestonlal's topic in WIP: Model Cars
Sometimes you can pick up a Resin body such as those at www.scaleautomobilia.com.au. Not in any way flogging the company, but I think they are the only ones who carry them at all. I also know of a few very talented Aussie modelers who scratch and cast their Falcons and Holdens. Sadly not a big enough interest for mainstream production but that comes with the territory. There is an Aussie car modelling website - Australian Automotive Model Builders that you can check out if you haven't already for some of the scratch building and heavy modifying of American cars into Aussie Muscle. -
1/10 scratch built Holden HX Overlander Panel Van
codea replied to prestonlal's topic in WIP: Model Cars
I had to double check the location to make sure that you weren't posing from Australia. Makes an Aussie so proud to see a holden being scratch built. I have dabbled in scratch building and my brother is nagging me for a 1/12 HX panel van sandman. I am pouring over your photo's to see how you did it. I suspect that you might be an expat, and if not, well you bloody well should apply for citizenship. You'd be a shoe in with skills like that. Have you finished it? -
Bugger mate. Sorry to hear that. Worst thing that you can take from a modeller is the ability to model, especially when he can't do much else. Hope the pain can be managed with amber medicine and I hope you make a speedy recovery.
-
John, I've bookmerked this page and poured over the pictures and your text, and watched with amazement the clean nature of this build. I am sorry that I have not commented before now, but I am not sure what I coould ahve said that wasn't simply admiring your work. I have this kit and have got back into modelling after a long break, and hope I can turn out something about 15% as good as yours. Please keep posting pictures of your work as I am a big big fan. Congratulations and thanks again for sharing. Kind Regards from Down Under.
-
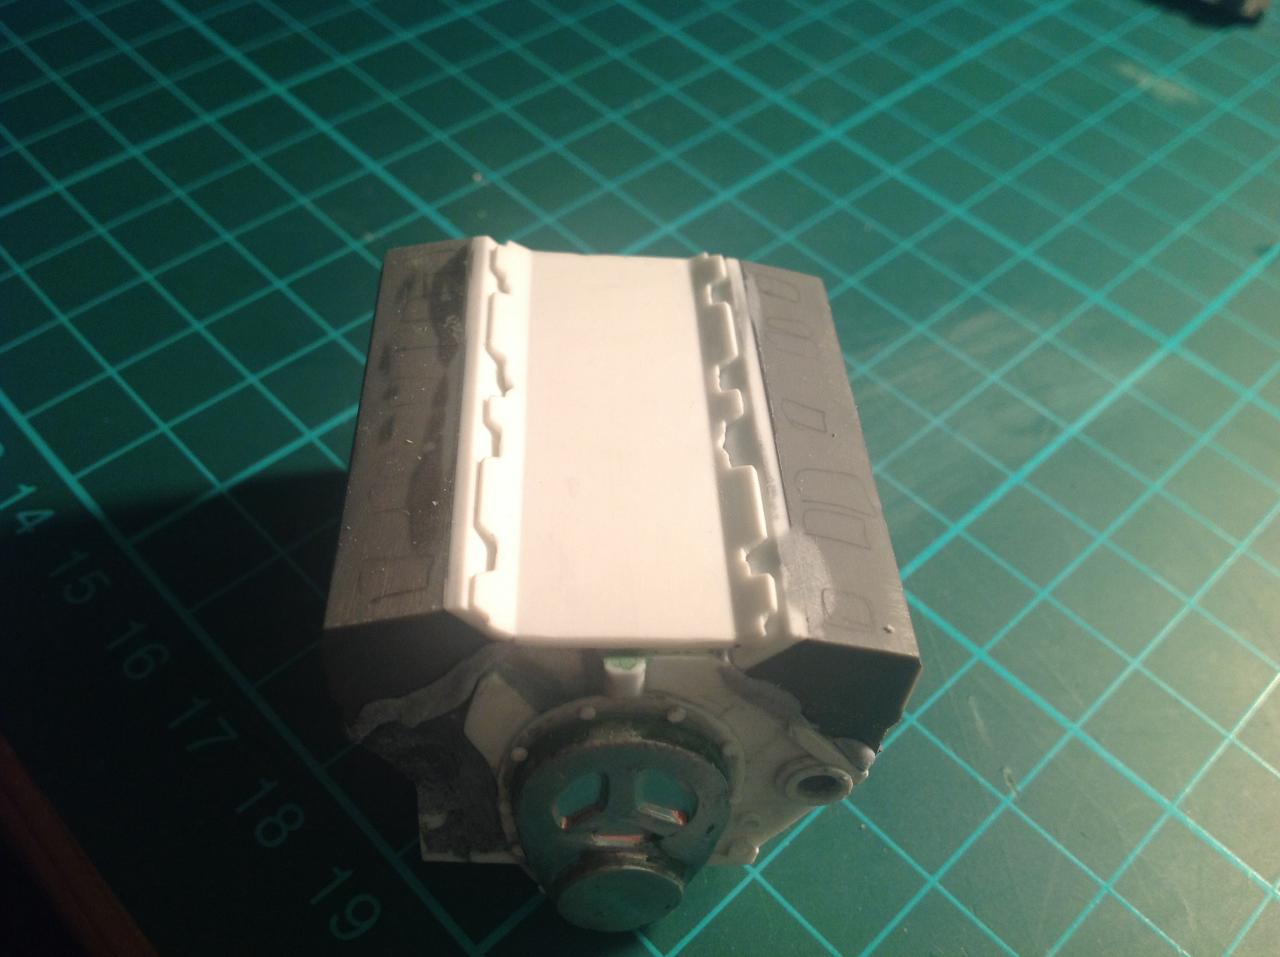
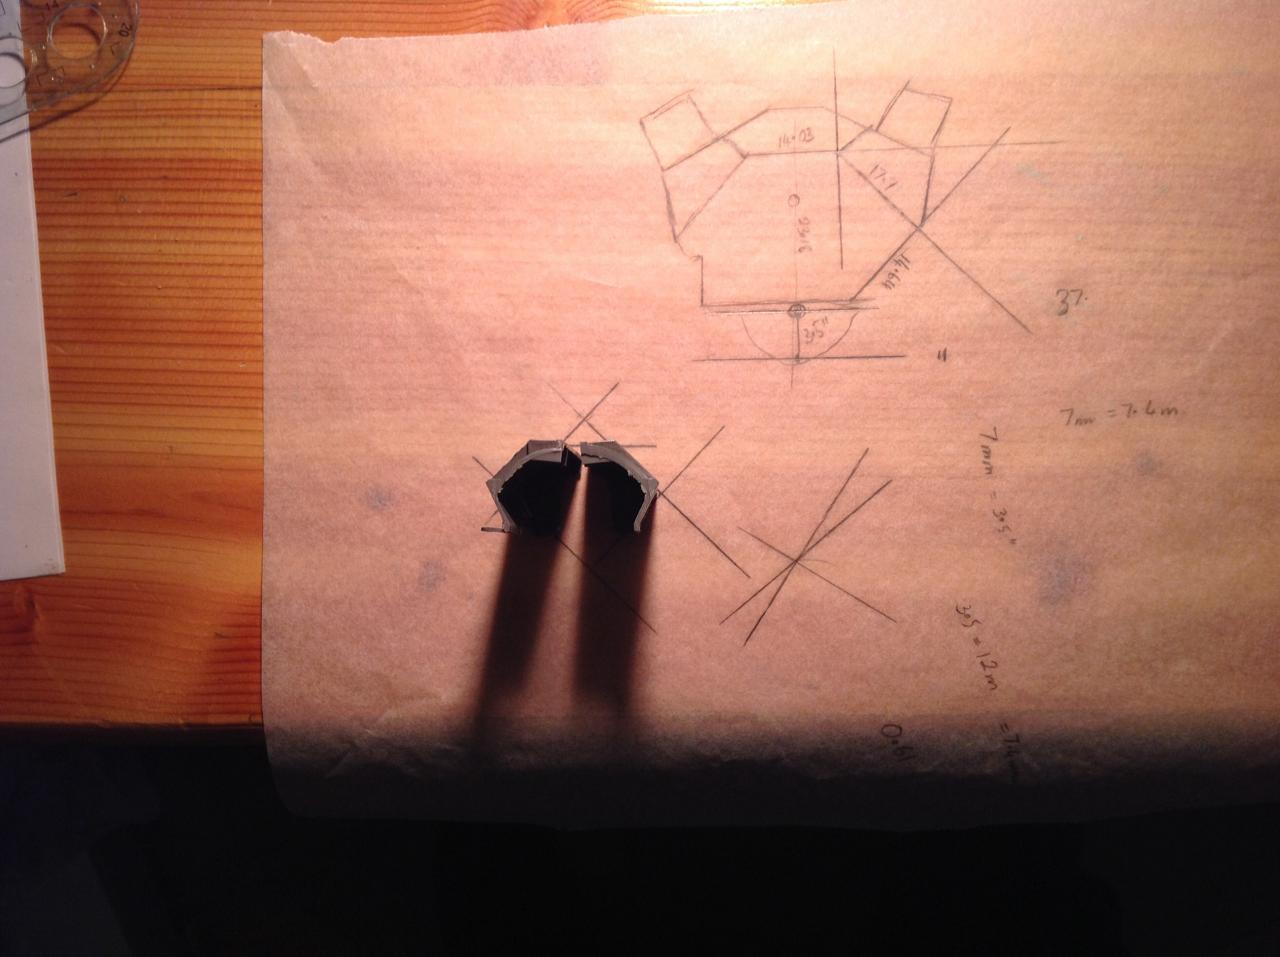
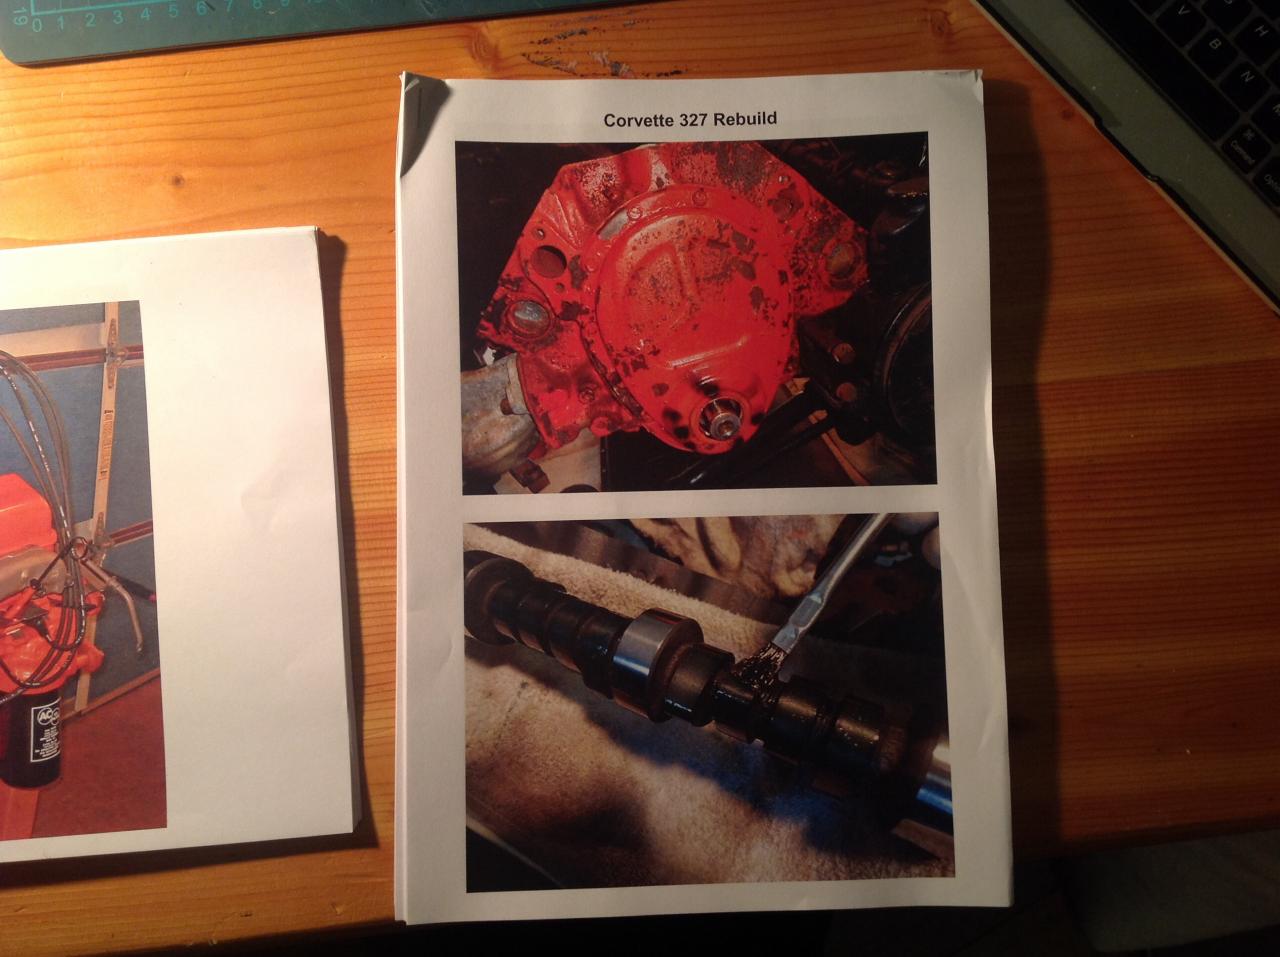
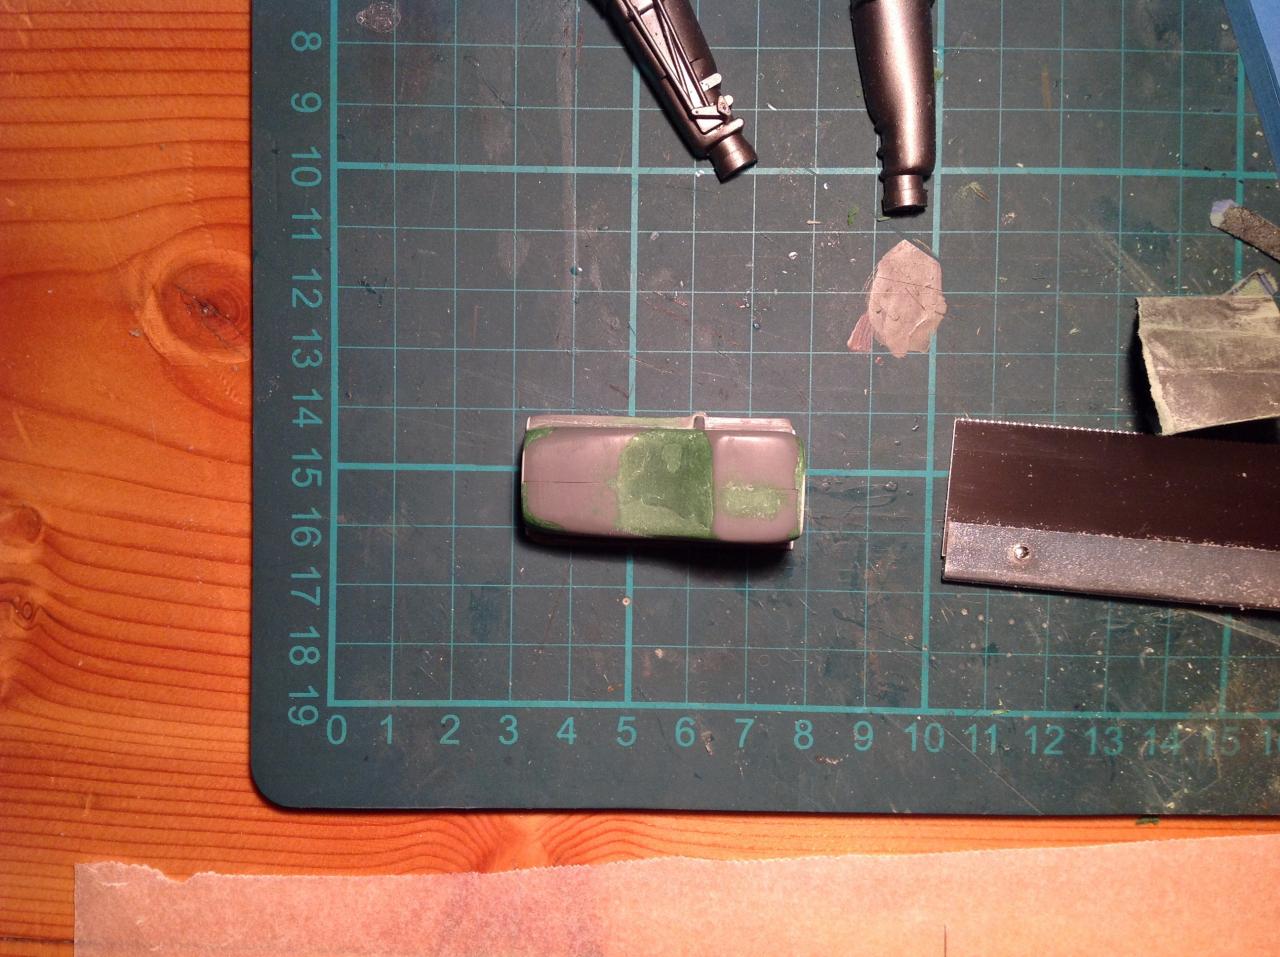
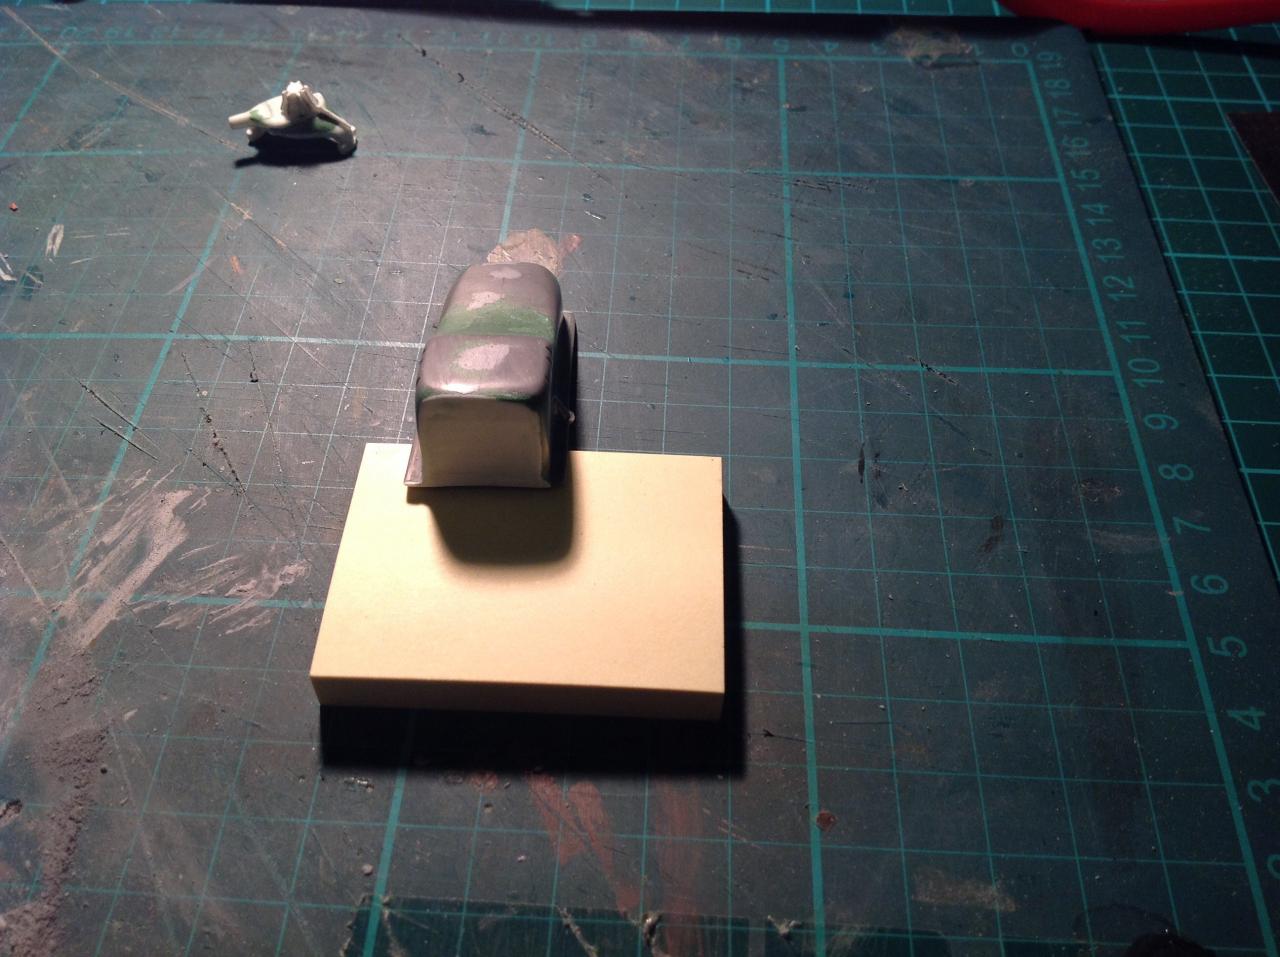
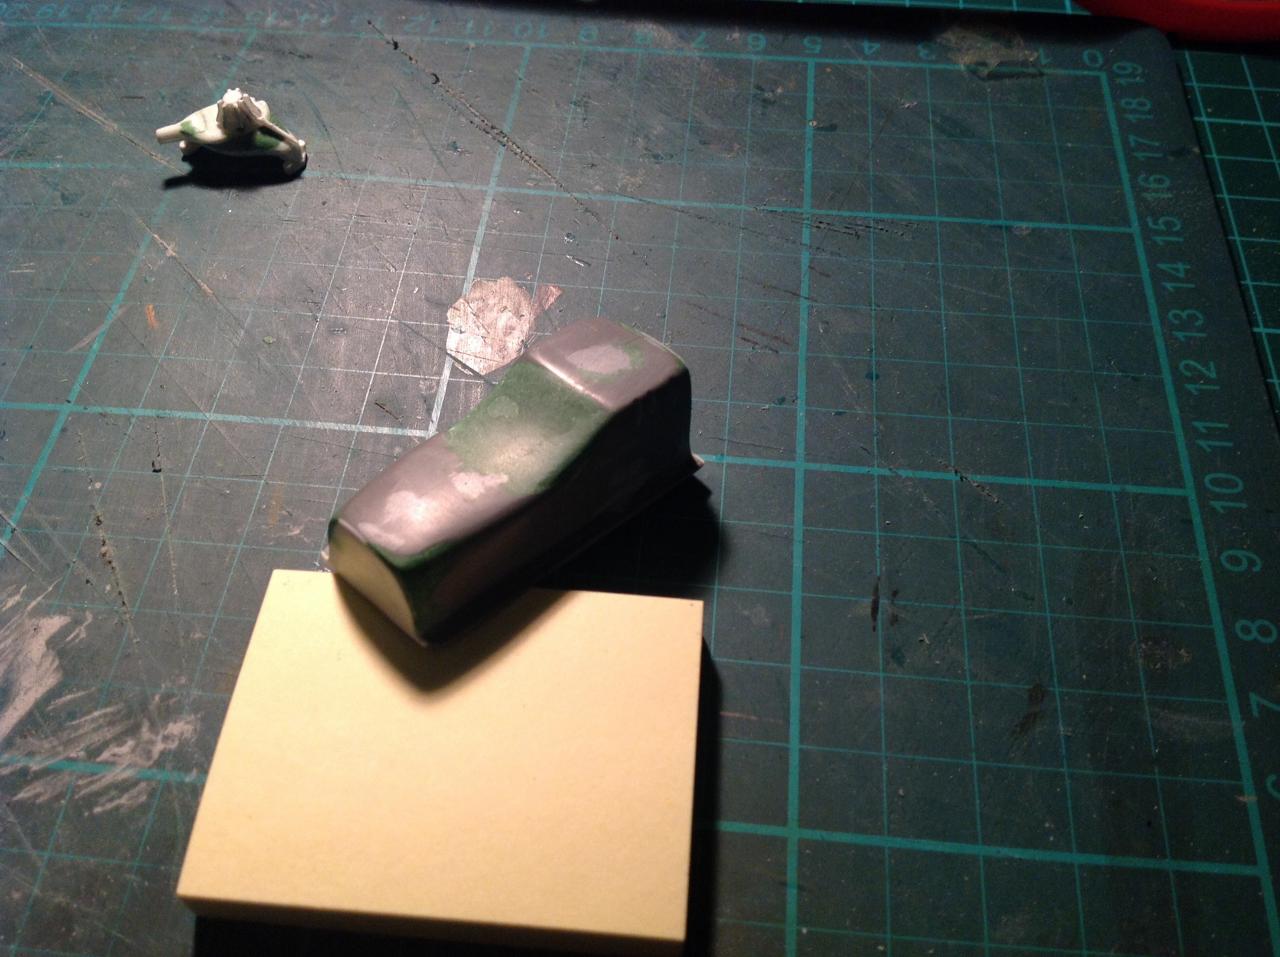
More progress on the frame. Keeping the flipping thing even is a challenge, but I've blocked out the remainder of the front of the chassis, and thinned out and removed a heap of material that was just plain wrong. While I was waiting for the fourth lot of putty to dry, I started on the intake manifold. I am basing it on the Edelbrock manifold as below I thought I would share how I am going to make this part as the kit part is just sh$t So I measured out and cut a section of styrene, scored both sides to give me the flanges, and filled the gaps with stretched sprue. Then using the image I measured out the flange pattern and created a template in post notes and attached to the side of the piece and ground and filed the shape, then repeated for the other side. It doesn't look to bad on the engine block. From here I will build up the detail and add it to the bottom piece of the manifold.

-
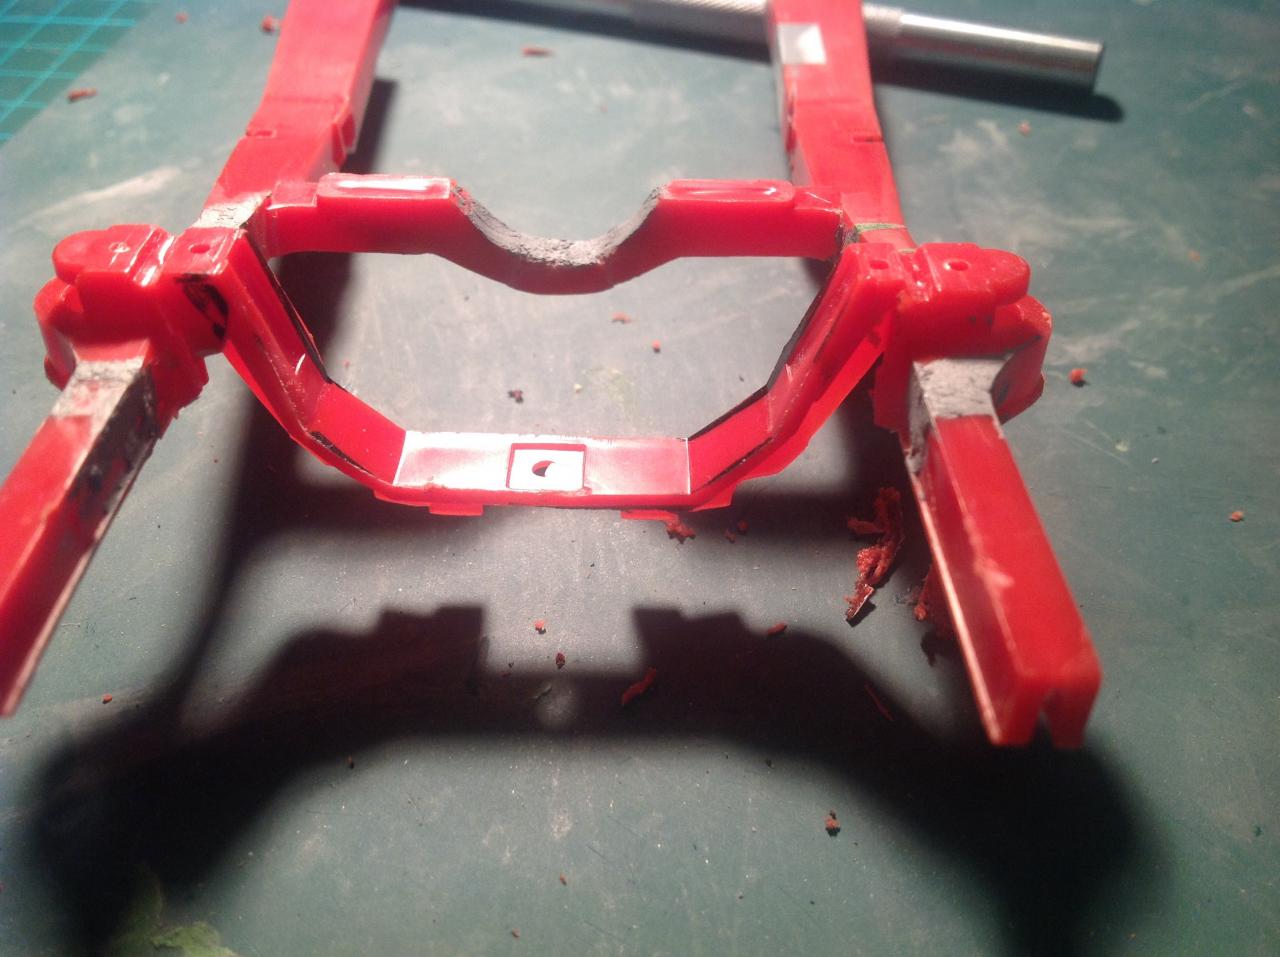
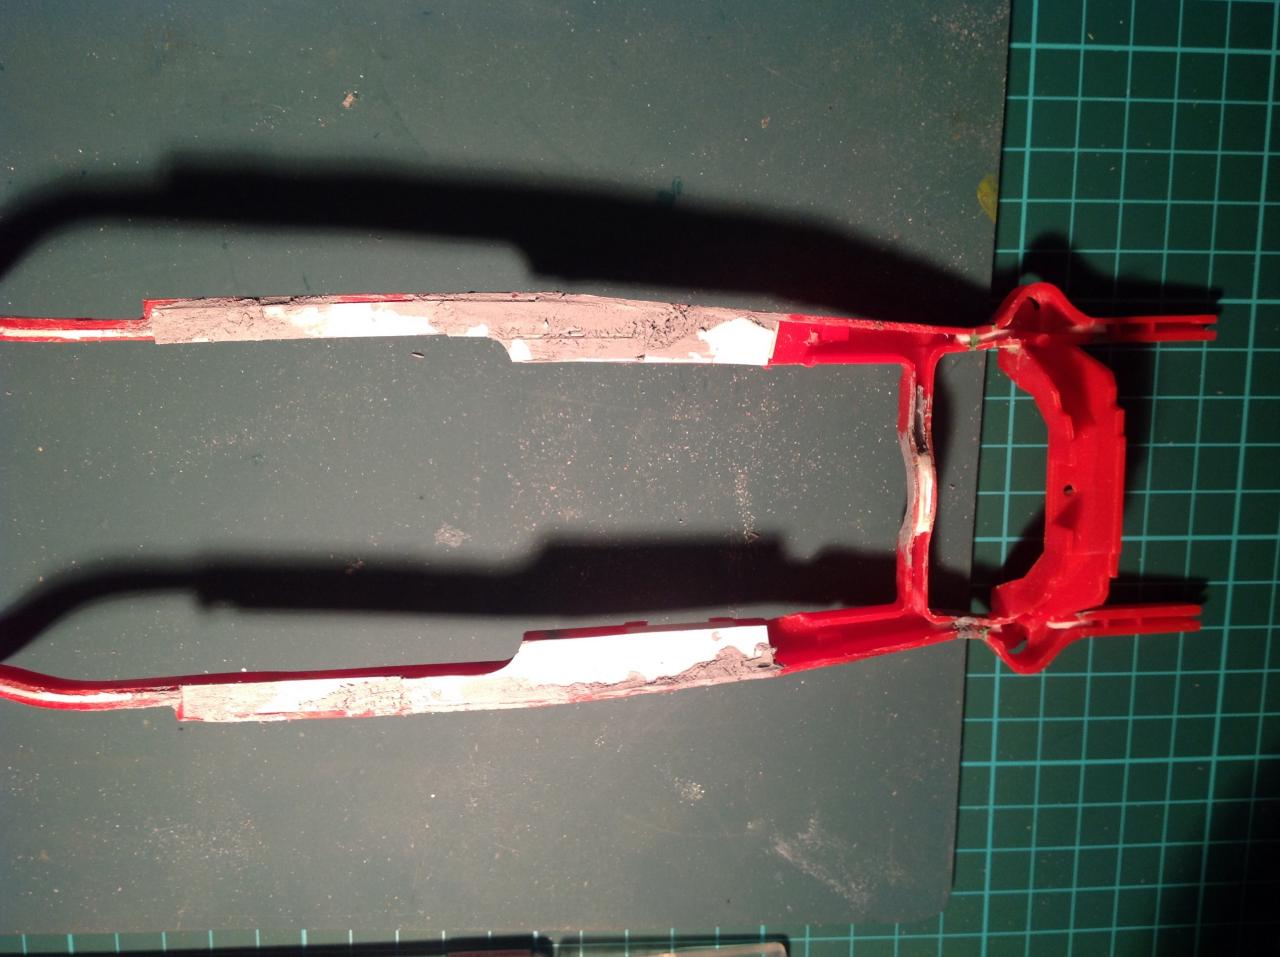
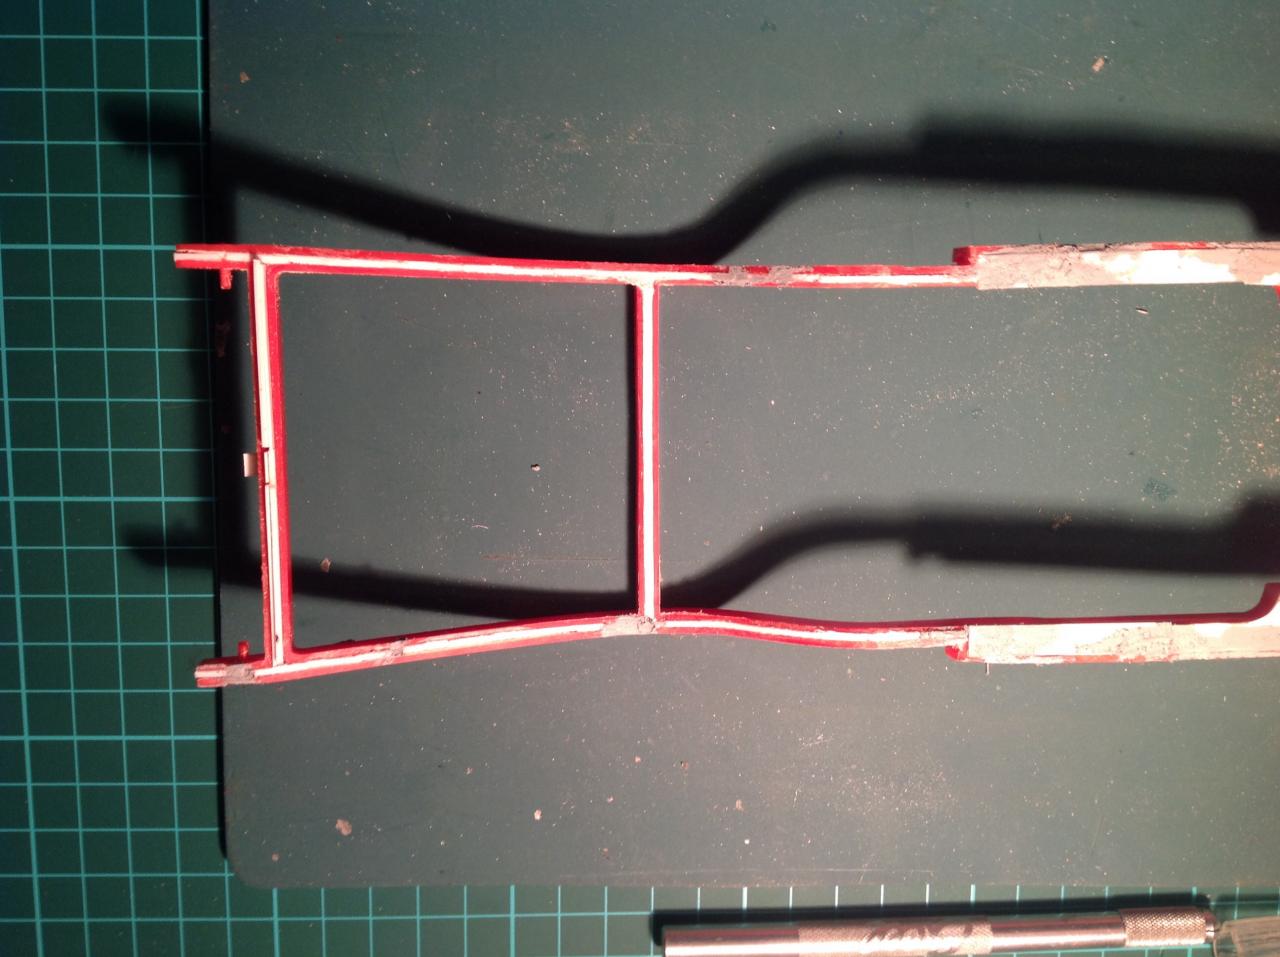
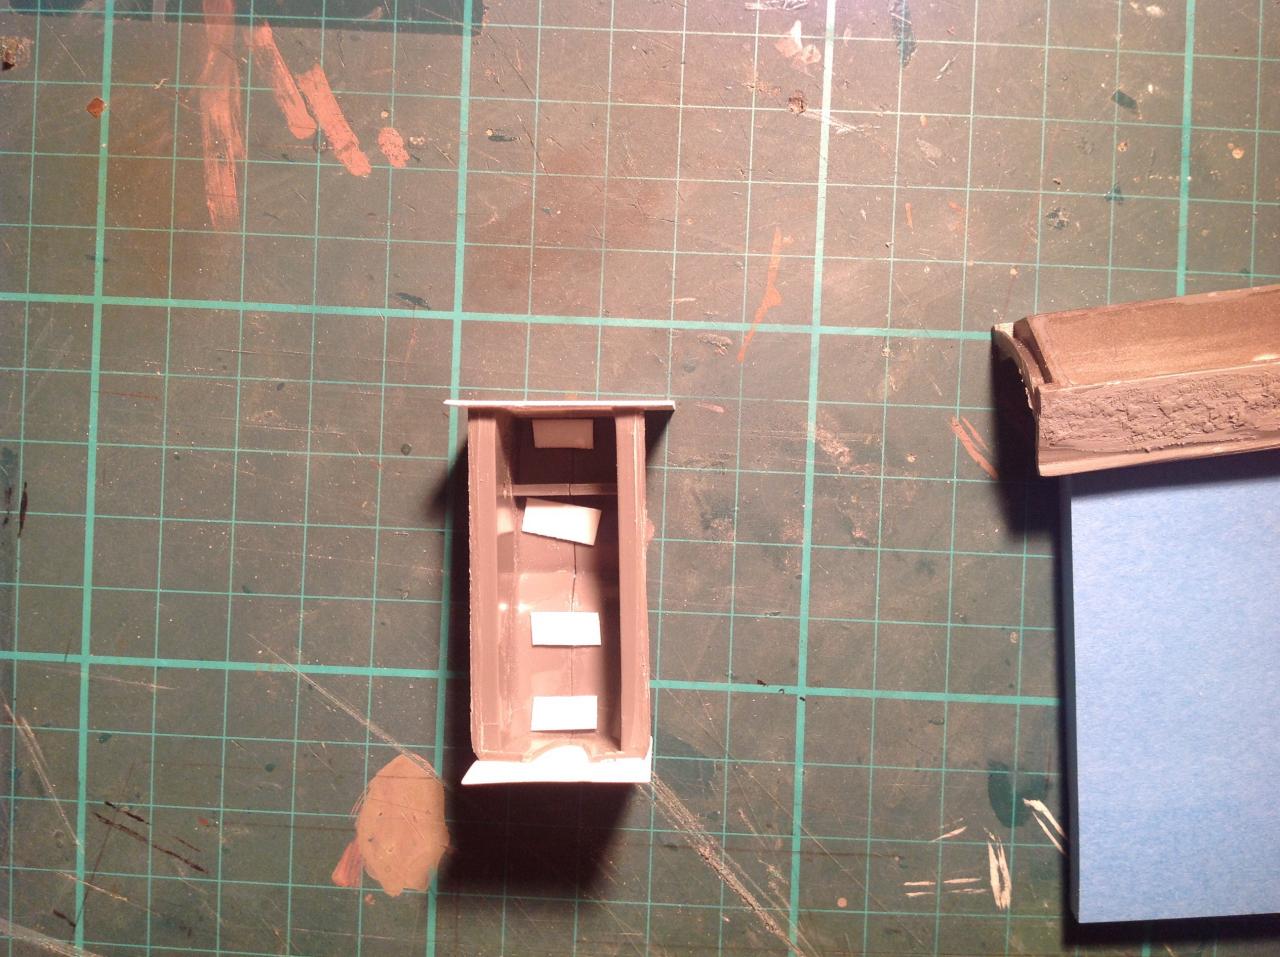
Just a quick update on the frame. I've worked out the front part of the frame was both too wide and not angled enough up to the side rails, so first thing was to grind off the front of the frame, and cut it back to scale width. Now to fill it in and blank it off like the rest of the frame. Here is some progress shots of the chassis that I have blanked off so far. It's taken a bit of time as the side rails had to be reduced in height and to achieve balance across both rails took time and care. Also the curves at the back of the chassis were the wrong arc, so they too had to be carefully ground back and a steady hand and eye to make sure I kept them even as well.
-
So boxing in the frame has taken some effort, with some grinding of the sides of the frames down mid chassis to closer match my references, plus filling in all the location points that are for the fenders etc, that are not attached to the frame above, but below, and bolted on, not incorporated into the chassis. Some parts of the frame required some framing first, and other thinner sections were filled in with sheet styrene, and the first of the putty was applied. The frame once boxed in will still need some modifications and some further cross bracing etc. Areas to be ground down to get to a more accurate profile And some of the boxing in work
-
I have watched this thread with interest. I've previously attempted to create from scratch a 1/25 gemini and I came to the floor pan and that's where it got me, so I am looking forward to seeing what you do in the hope of being inspired to pick it up again. Thanks for sharing the approach you are taking with this topic. I'm a huge fan of toranas, especially the mount panorama killers, and they always turn heads in the street. Congratulations on your efforts so far, it looks brilliant!
-
That is amazing work in this scale. Well done, and thanks for sharing the techniques with us.
-
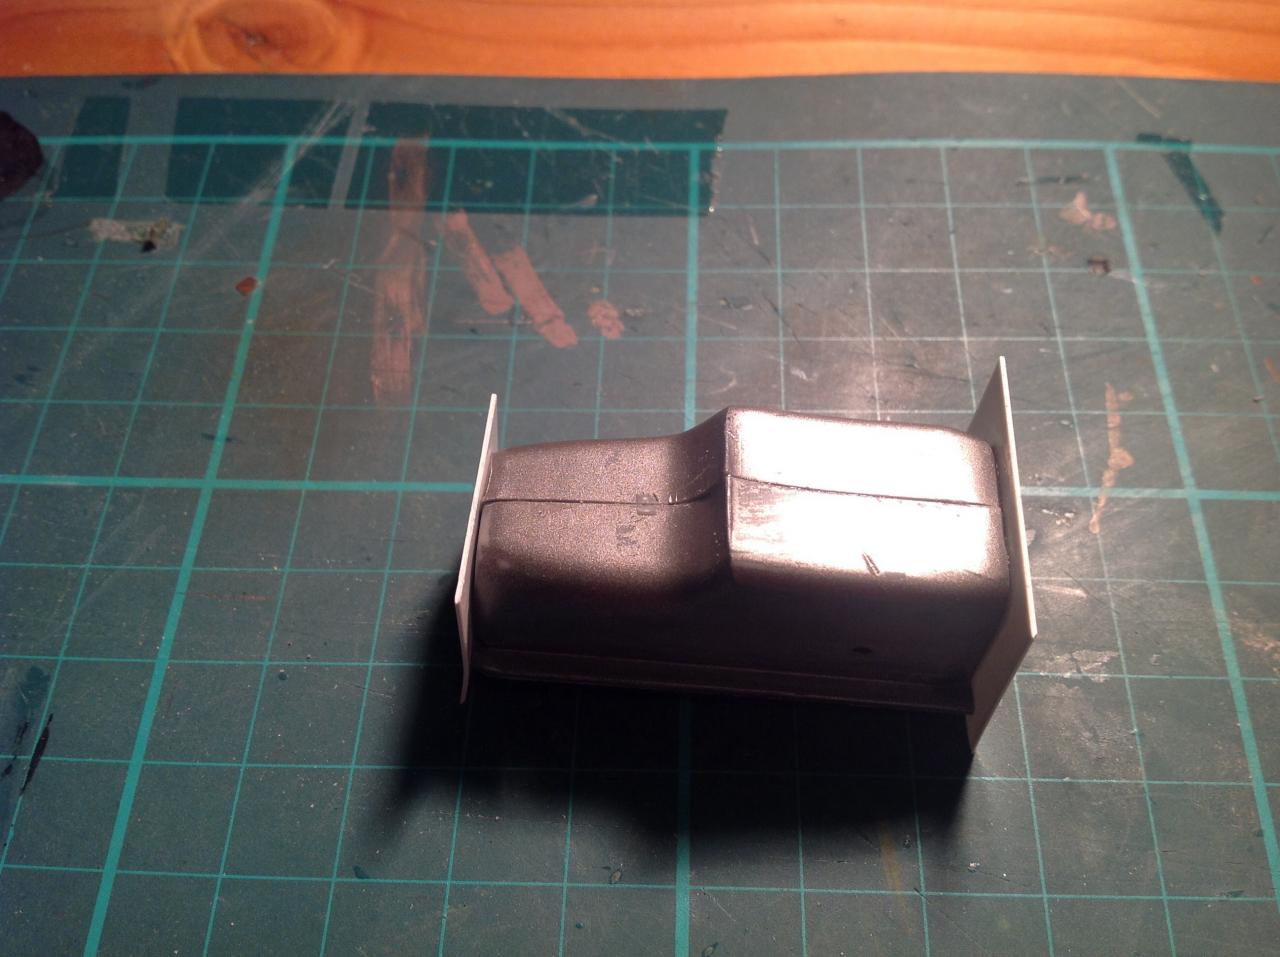
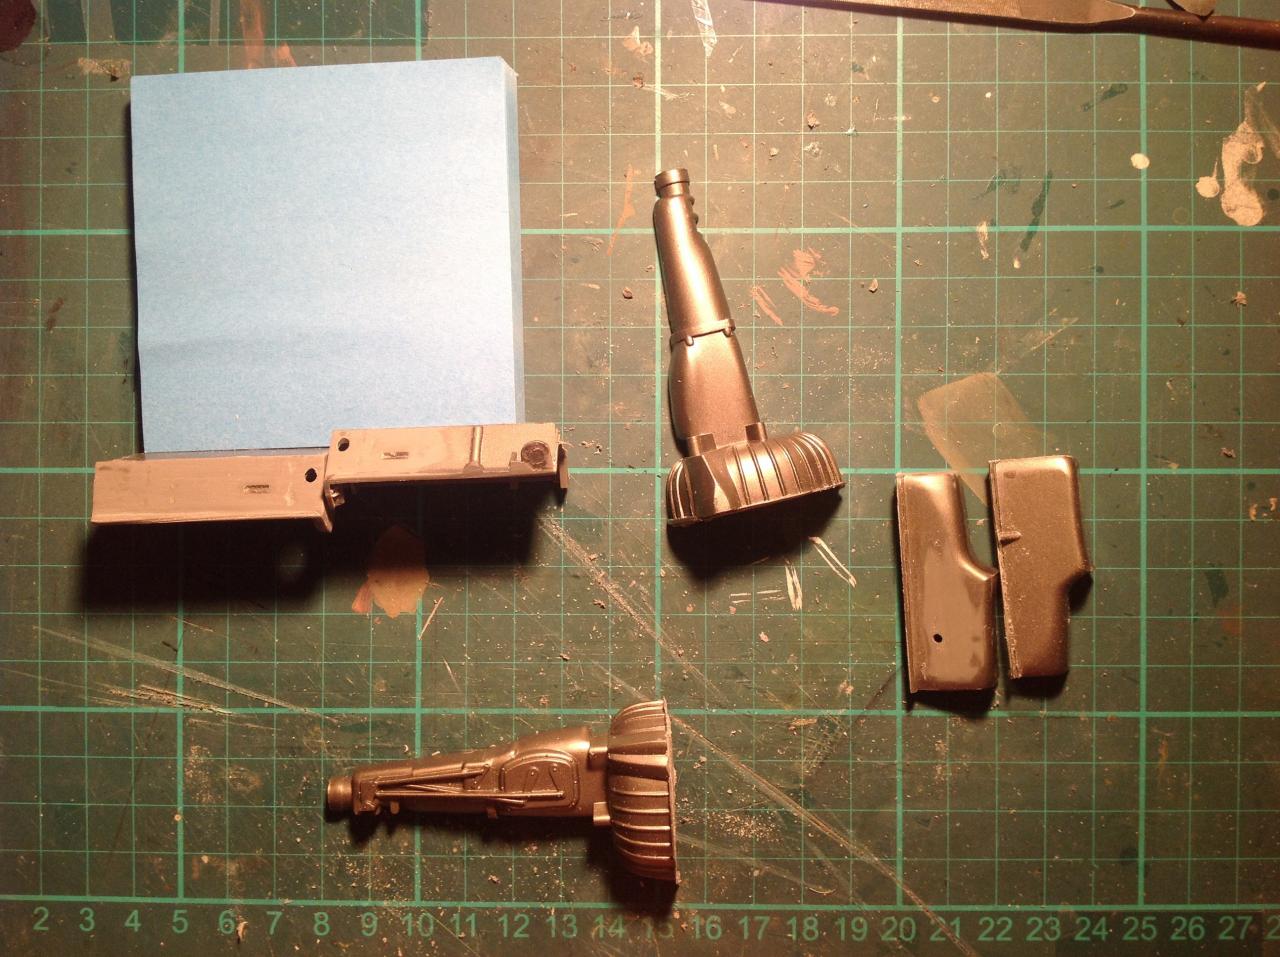
Thanks guys for the encouragement, and yep microwheel, that's exactly what I am trying to do here. I did re enter the hobby with an ambitious start of scratch building an entire car. I learned very quickly that I need to consolidate some techniques, and chose a bigger scale and a "basic" kit to give me some elements to build on rather than completely from scratch. That said, I have almost completely rebuilt the engine block so far. I started with the view that the angle of the vee in the block was not even correct. As you can see I had to further cut the block up into the upper and lower portions of each side, as changing the angle at the top to be steeper, left the bottom too wide to be in scale, and so I cut the lower portions off to re angle those, to get the corrected shape and angle, and still have the bottom of the block the right size so I didn't invent an oversized oil pan Once I established that I worked out length and width of the block. This has been an education for me, that despite liking model cars, I'm not very mechanically minded, and so I first realised that the left and right banks of the block are slightly offset to allow for piston movement, etc, was a mini revelation. Imagine my surprise when the kit engine didn't represent that offset So then I spent a bit of time filling in the gaps, setting the right angle etc, and this is the result so far. The grey is the kit parts, the rest is my work. And then I worked out that the front of the block, was not flat, but had a distinctive timing cover, and other aspects that I have attempted to recreate. To create the timing cover, I created the oval shape out of sheet styrene, then a circle and some inner arms to create the "peace" like symbol at the top of the cover. I then added a couple of circles of plastic for the shaft housing and covered the whole thing in a foil, that you get at the top of "Milo" tins in Australia.It is thicker than aluminium foil, and when burnished down gently into the shape I've created it gave me the look of pressed metal, something that I couldn't recreate just with plastic, and I think the effect looks quite good. I added some punched out hex bolt heads and added it to the front of the block, along with some details on the block include welsh plug holes - called something different in the states. Note in the following that the left hand side of the block as you look at it has been hacked back to create the depth that I am building back up to represent that side of the block. As you can see between the two photo's I've added the fuel pump housing to the block on the left giving it that distinctive outline. Some more images of the block so far, showing that not one dimension was close to correct on the block. But that is what I am aiming to learn how to do. In hindsight, I could have started with sheet styrene and created the block from scratch, but this has been very enjoyable to challenge myself so far. Next I turned my attention to the water pump. As mentioned in an earlier post, my reference pictures suggest the excalibur I am basing this build on has a new higher performance water pump, and I am trying to suggest a car with attempts to remain as true to the original as practical. Not being mechanically minded, I was told by someone who is a mechanic that water pumps do wear out, and it would be realistic to assume that the pump had to be replaced at least once, if the car was driven regularly. So with that in mind I researched and came up with a style of pump that I think could have been put onto the car in this imagined scenario. And here is my attempt at it. It's not finished but you can see the main structure in place. And one of a comparison between my effort and that of the kit part. Next up is to develop a bell housing, and gear box. However I have stopped the engine for the moment, to start on the chassis. I have no measurements of the chassis, and have relied heavily on the reference pics I have that include a number of the underside of the car. In those images the front of the chassis has amore pronounced curve, so I cut and repositioned, glued reinforced and have started to fill in the gaps. Further work on the chassis includes reducing the overall height of some aspects of the mid chassis, and filling the whole chassis in to suggest a boxed structure, plus some new straight cross members, to support the gear box etc. That's all ahead.
-
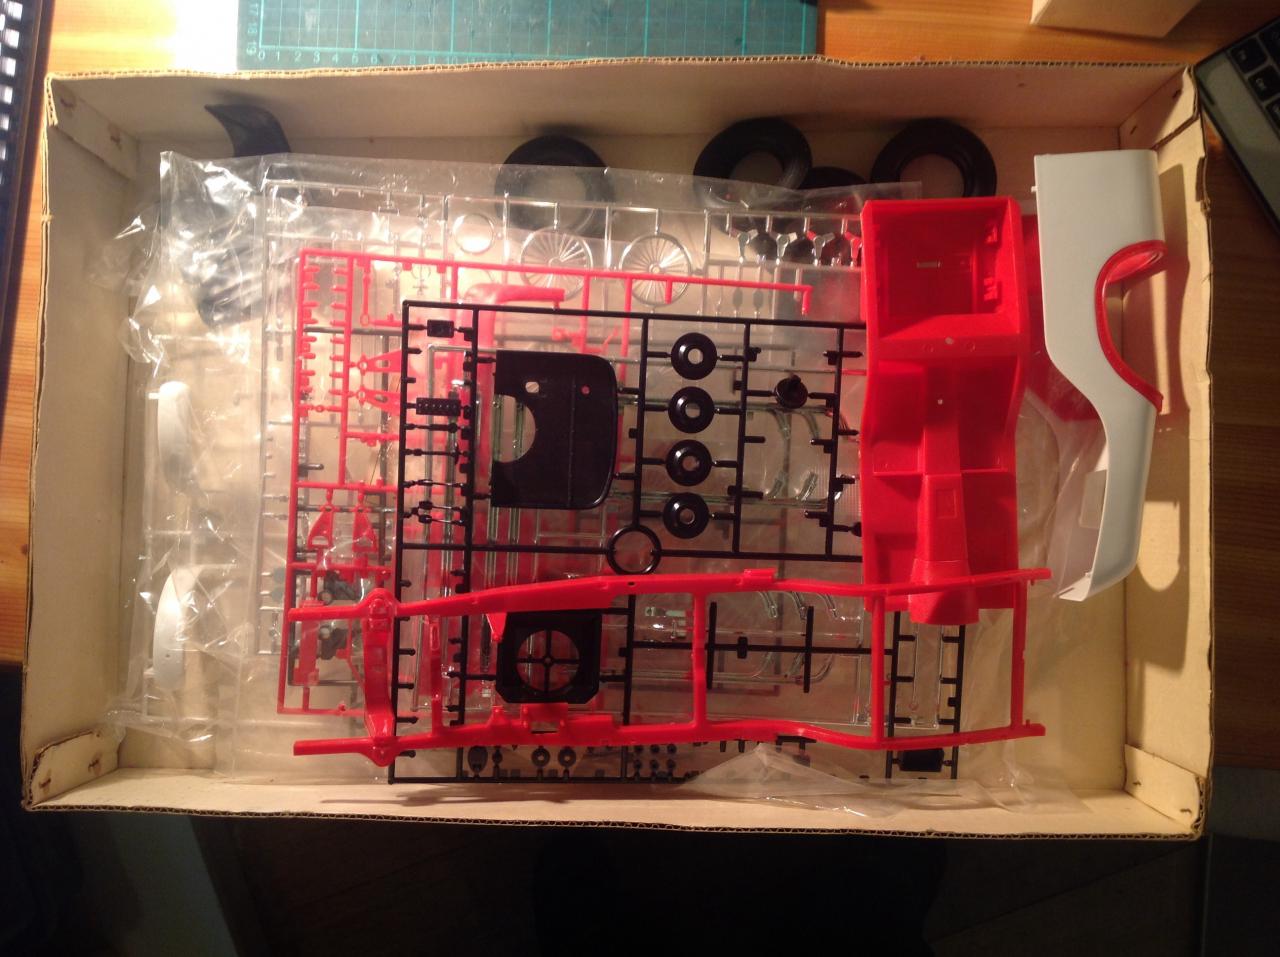
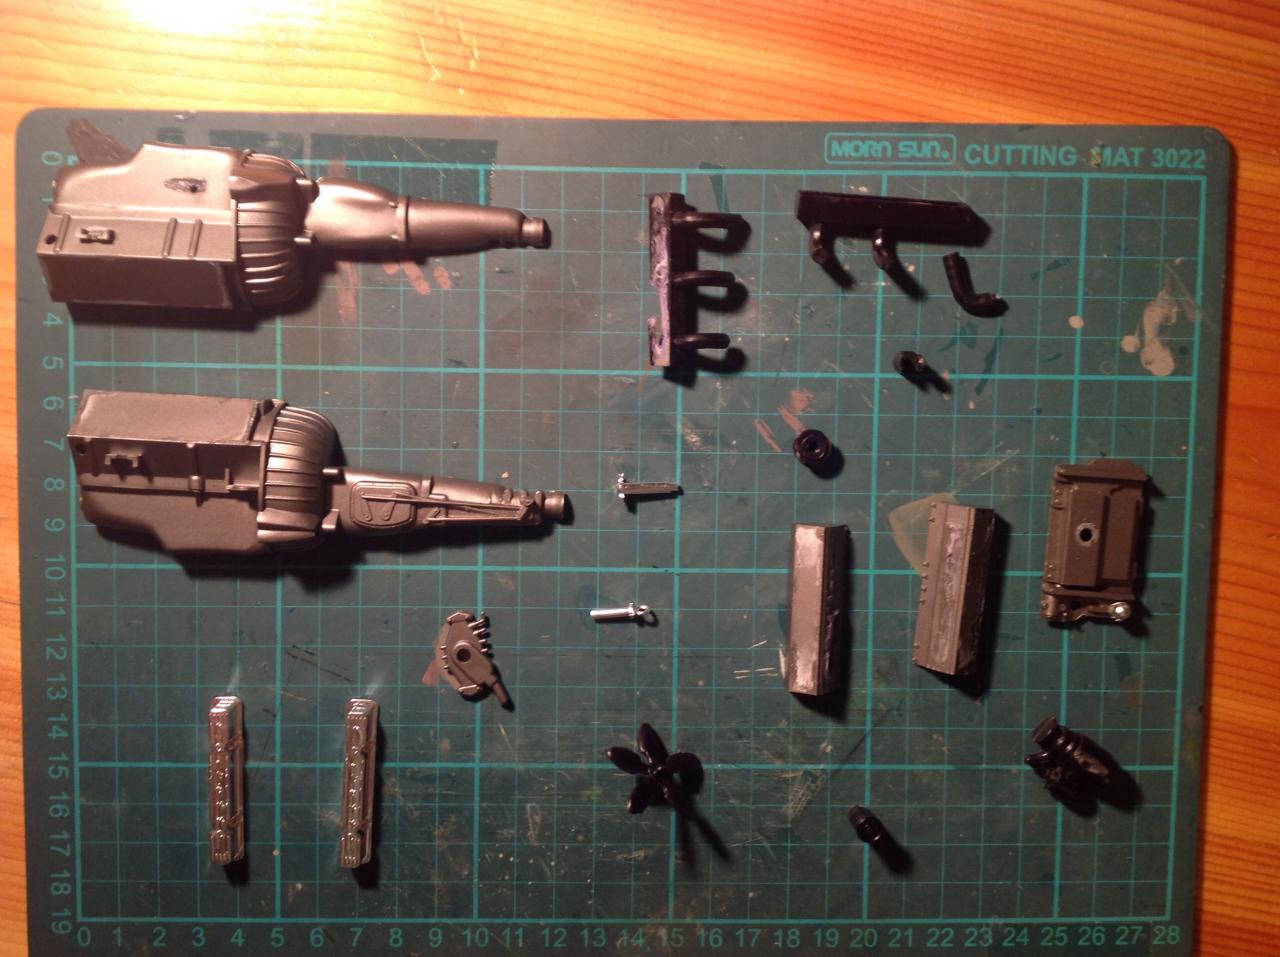
I picked up this kit for $40 dollars Australian. It had been "started" but not much had been done. I decided that I wanted a kit to practice my scratch building skills on, because I had been attempting to scratch bulid an Australian TD Gemini, and reached the limit of my skills and so figured I'd try to fix a kit up, and also in a larger scale so I could get used to making things in a bigger scale before aiming again at completing the 1/25 scale project. So the bandai kit is very basic. I refuse to say bad, because I think you get what you pay for most of the time, and I was prepared in advance. And it was what I was looking for anyway. The kit is simple, with a number of engine parts, a couple of body parts, and a lot of intenal mechanics for a battery powered motor, and moveable steering. Here is the engine gearbox etc. broken down from the attempted assembly. So of course after fiddling with the parts etc, I started to research. I won't bore you with the details, except to say that it took a few weeks to gather enough material together to start. I found an excalibur on a flickr account and was able to get a very good selection of reference photos. I learned that the excalibur series 1 was based around the Chevy 327/350 engine, a homemade frame strengthened from the original Dart frame to accommodate the 327/350 Chevy small block, and some had super chargers etc. And I found heaps of material on the Chevy small block engine First thing was to cut the engine/gearbox/oil pan up completely to get it in a position that I could start to re engineer it to look something like a chevy small block. Then starting with the oil pan I glued it back together reinforcing the inner seam I added end pieces to fill in the gaps created by cutting the one piece moldings up And then using a scratch builders best friend, copious amounts of filling and sanding to create something that vaguely looks like a late 60s oil pan. This is a good example of the challenge I face, as I'd like the model represent a story, but I obviously can't make it like it came out of the factory as a lot of cars in the production line were custom made, some with super chargers, some with bigger engines and oil pans, fuel pumps etc, so I have to balance out all the possible variations as much as possible. And I don't have the super references of just one car to do that. So for example with the oil pan, I am working on the approach that the model will represent some one doing the best they can to restore an excalibur back to as close as factory spec as possible, hence the aim of changing the oil pan back to a "traditional" late 60's shape. I will aim as I develop parts to replicate them as best I can. In a future post you will see that for the fuel pump, instead of using the useless blob in the kit, i scratch built one. But based on the fact the water pumps don;t often last 50 years, I have found an Edelbrock water pump suitable for the 350 Chevy small block that is in a more traditional style with the strengthening vanes around the pulley housing as opposed to the excalibur in my reference photo's that has a modern flat, sleek looking water pump, which seems a little out of place for me. Anyway I hope it makes sense as I go along, and I'd appreciate all and any comments at any time.