DoctorLarry
-
Posts
1,145 -
Joined
-
Last visited
10 Followers


Recent Profile Visitors
9,914 profile views


DoctorLarry's Achievements
MCM Ohana (6/6)
-
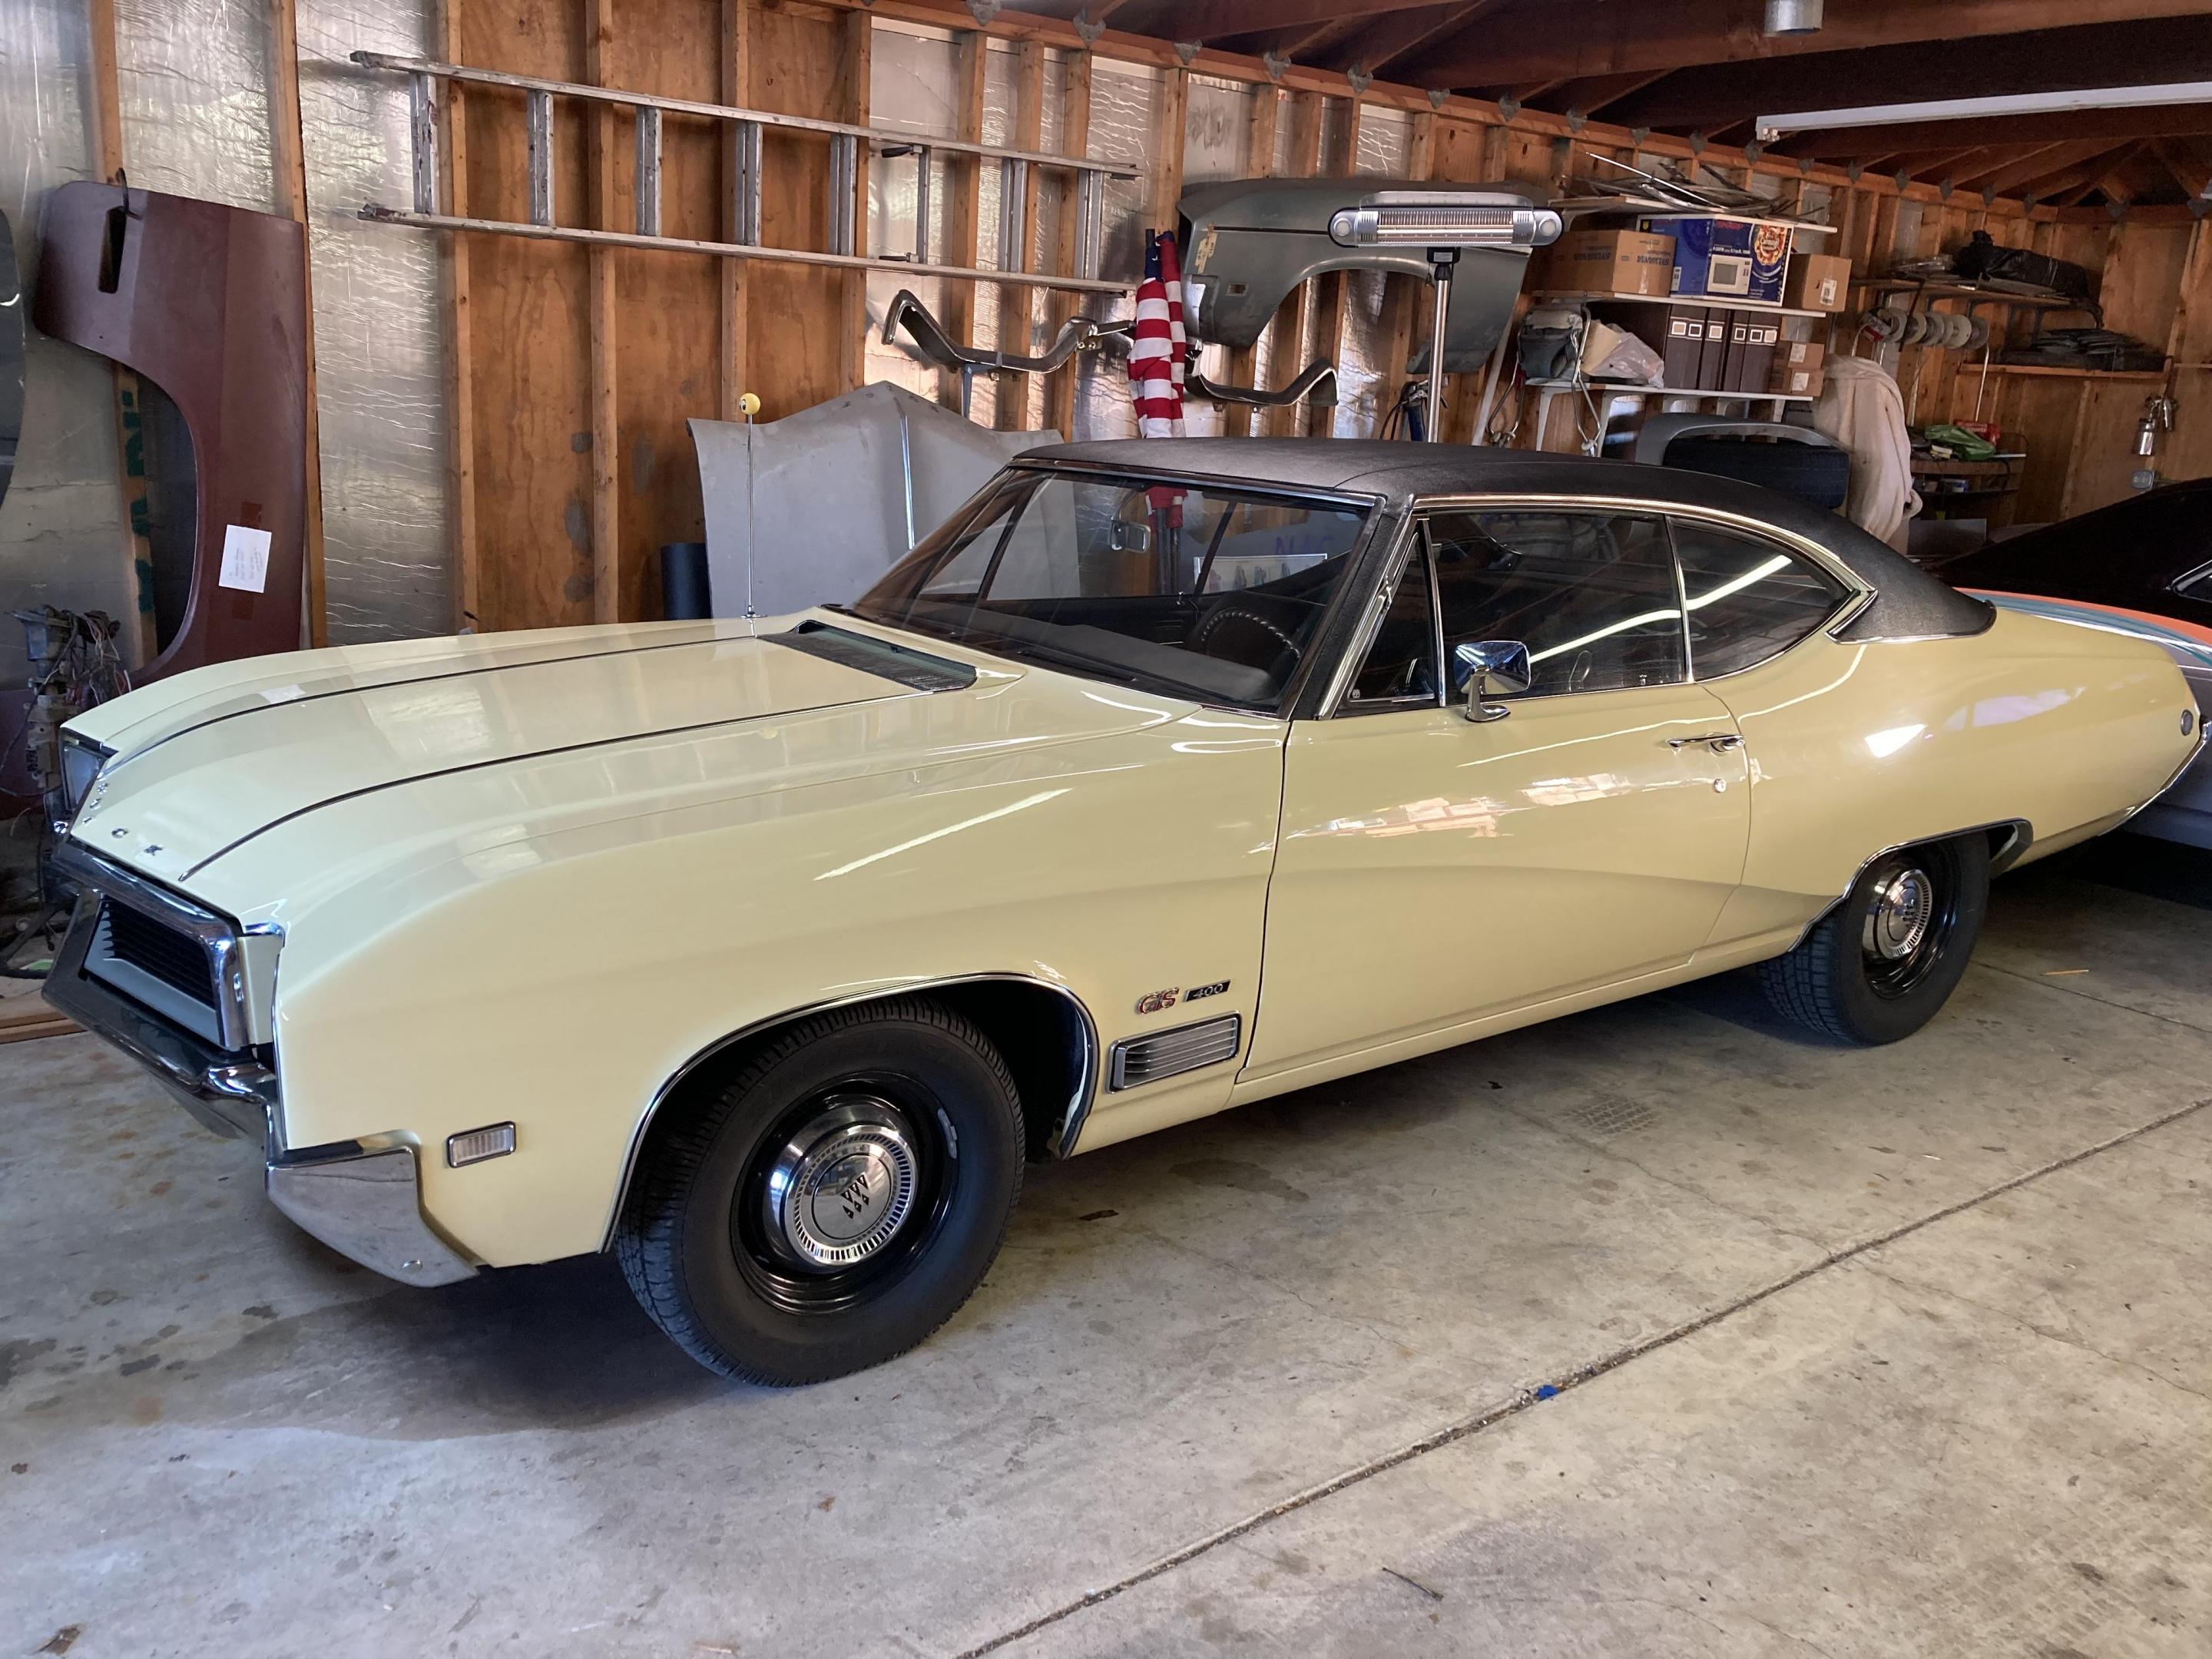
I have a liking for the 73-77 GM Collonade cars. They hit after the energy crisis flared up and so they represented a shift from the traditional muscle car era. Power was down, choked by emission controls, gas was expensive and insurance companies figured out how to charge for performance. Nevertheless, suspensions were better, interiors were better, radial tires became standard and you could always modify them. The 1973 Pontiac Grand Am was one of the prettiest of the Collonades. It also had big engines, you could get a 4 speed (even on a sedan!) and the interiors were pretty posh. I have had two real ones and they handle great. Sean Tobin took a 73 and moved it to the next level. LS power, trick suspension, manual trans and understated interior all added up to a killer restomod that is show car beautiful. I'm doing a tribute to that. My own resin body and interior tub, modified late model GTO seats and console, 66 GTO chassis shortened 3 mm, correct BMW grey paint, resin Pontiac themed LS engine, resin Tremec trans, resin wheels and brakes. I think it will be not a perfect clone but a tribute car.

-
Looks good so far. What's your body color?
-
Beautiful job, Tim.
-
Thanks, Gerald. That was my take on Tim's 1-1 car.
-
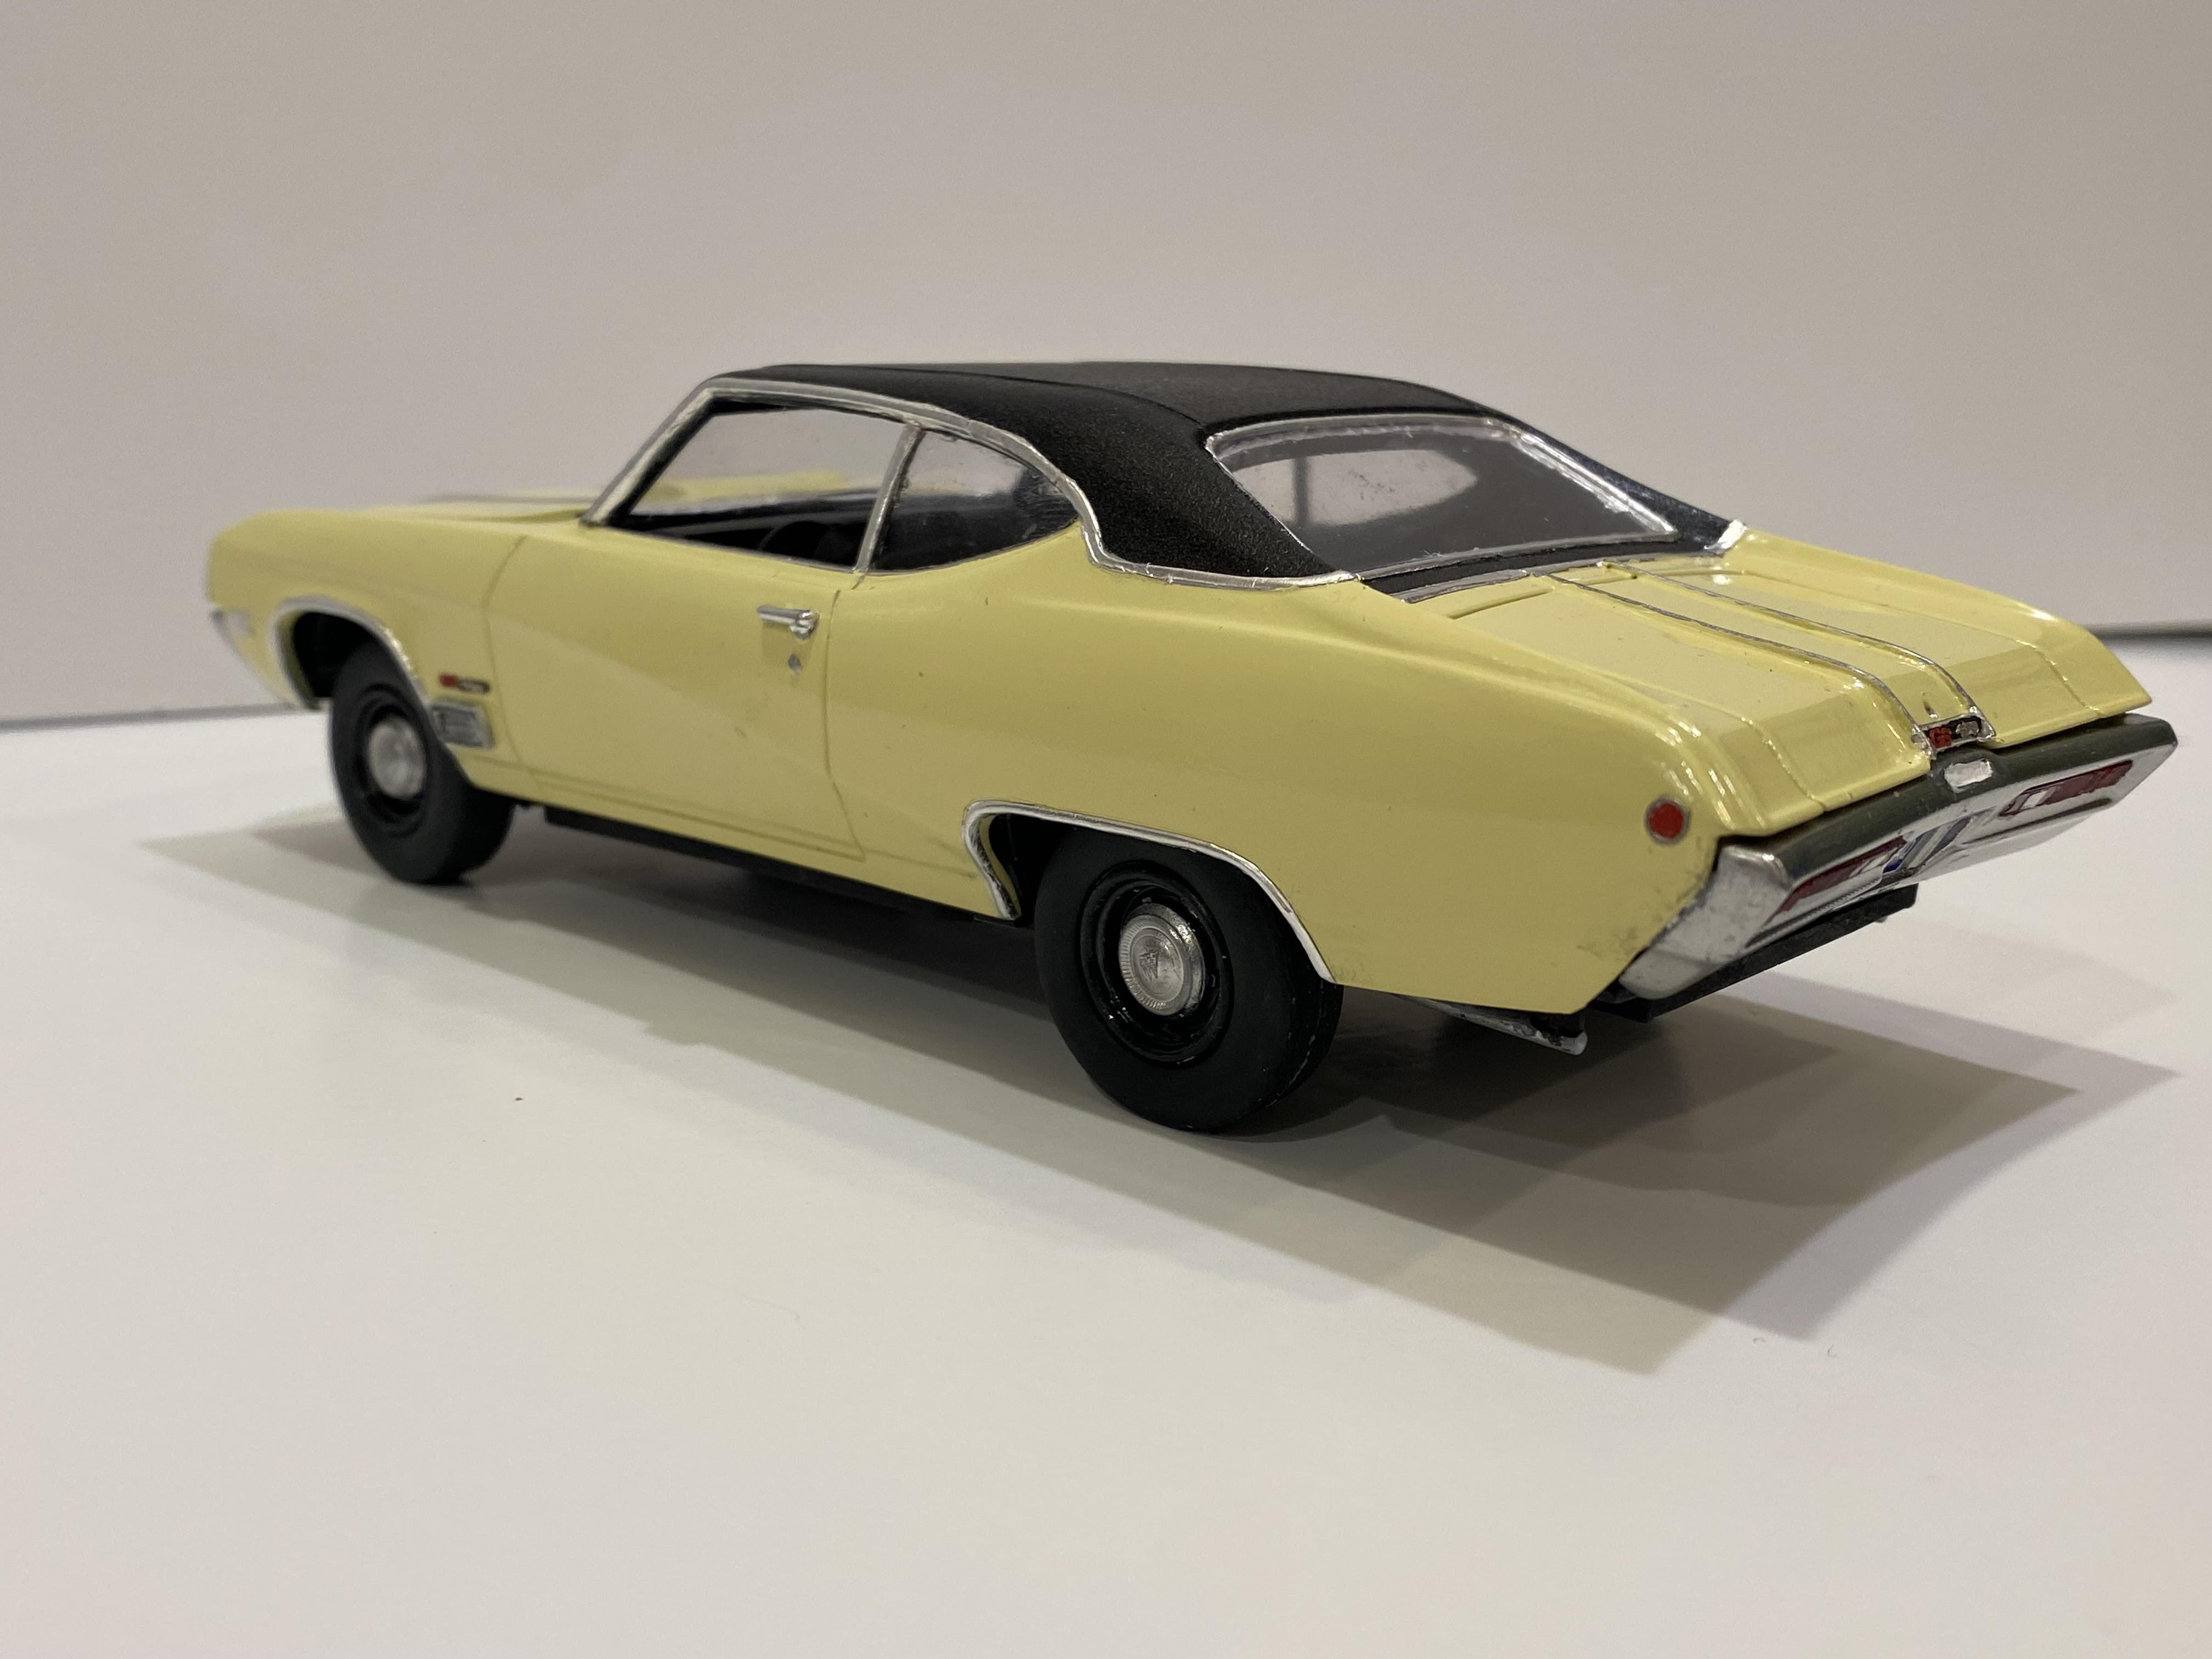
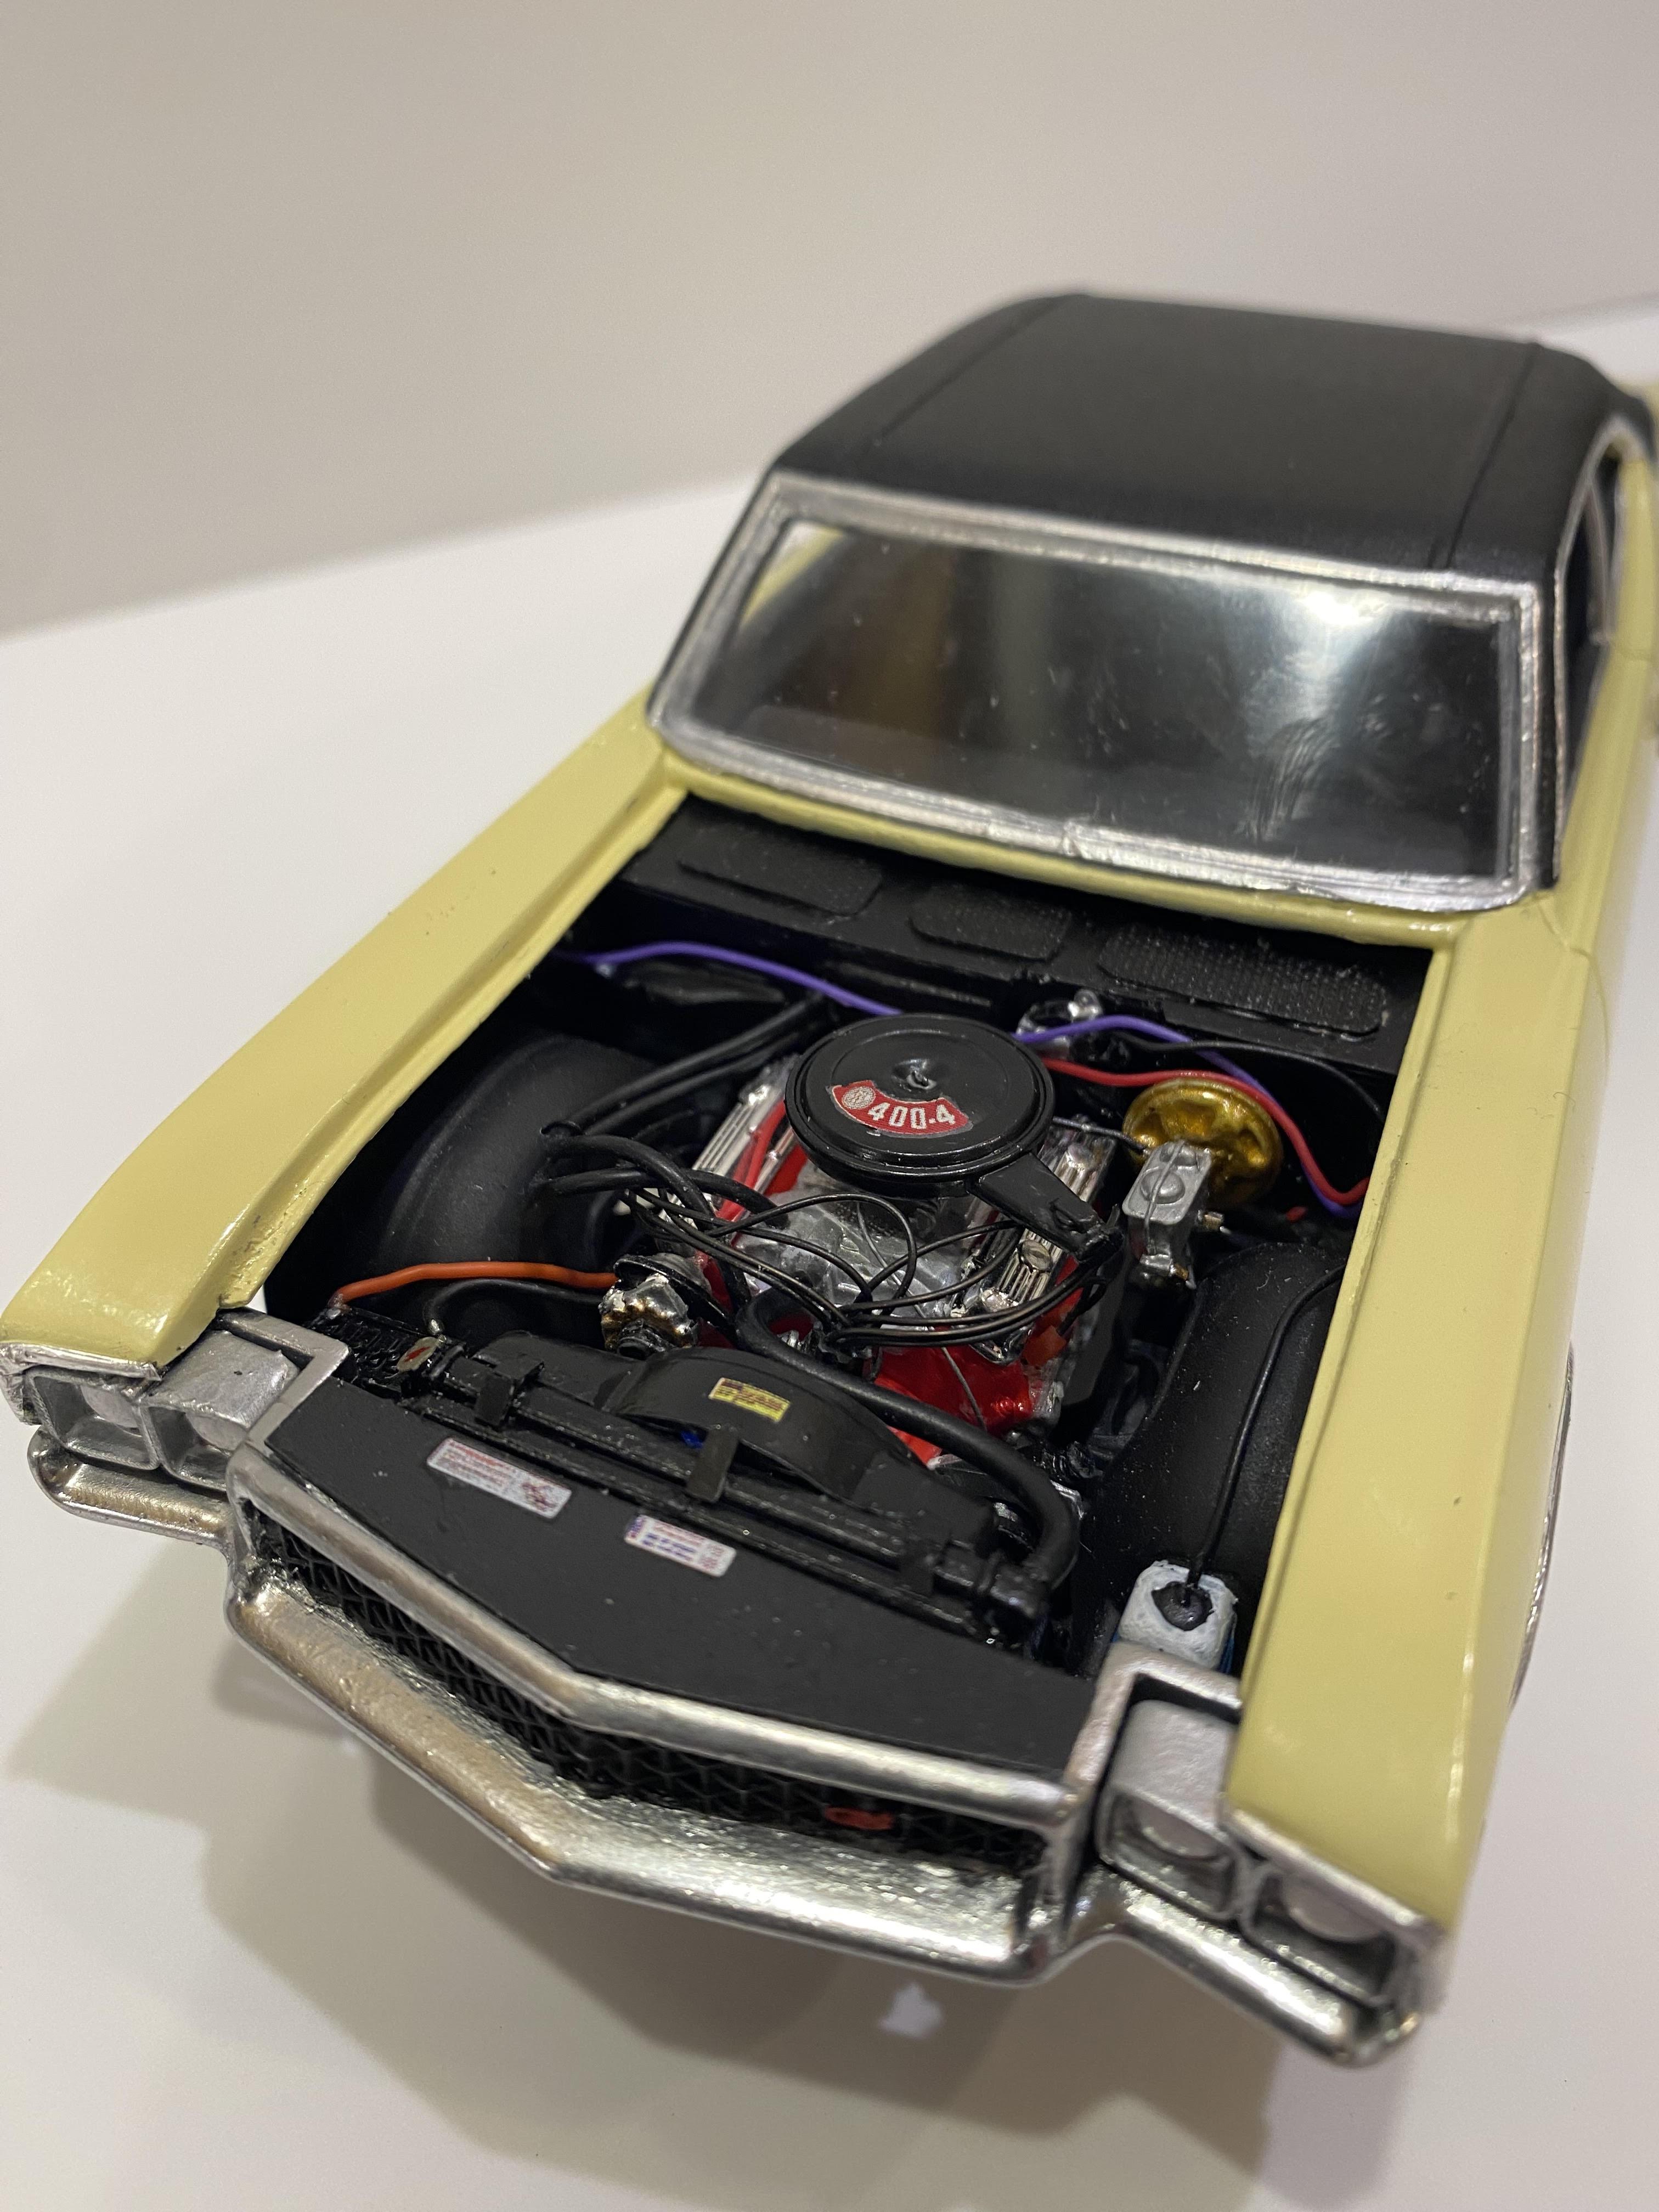
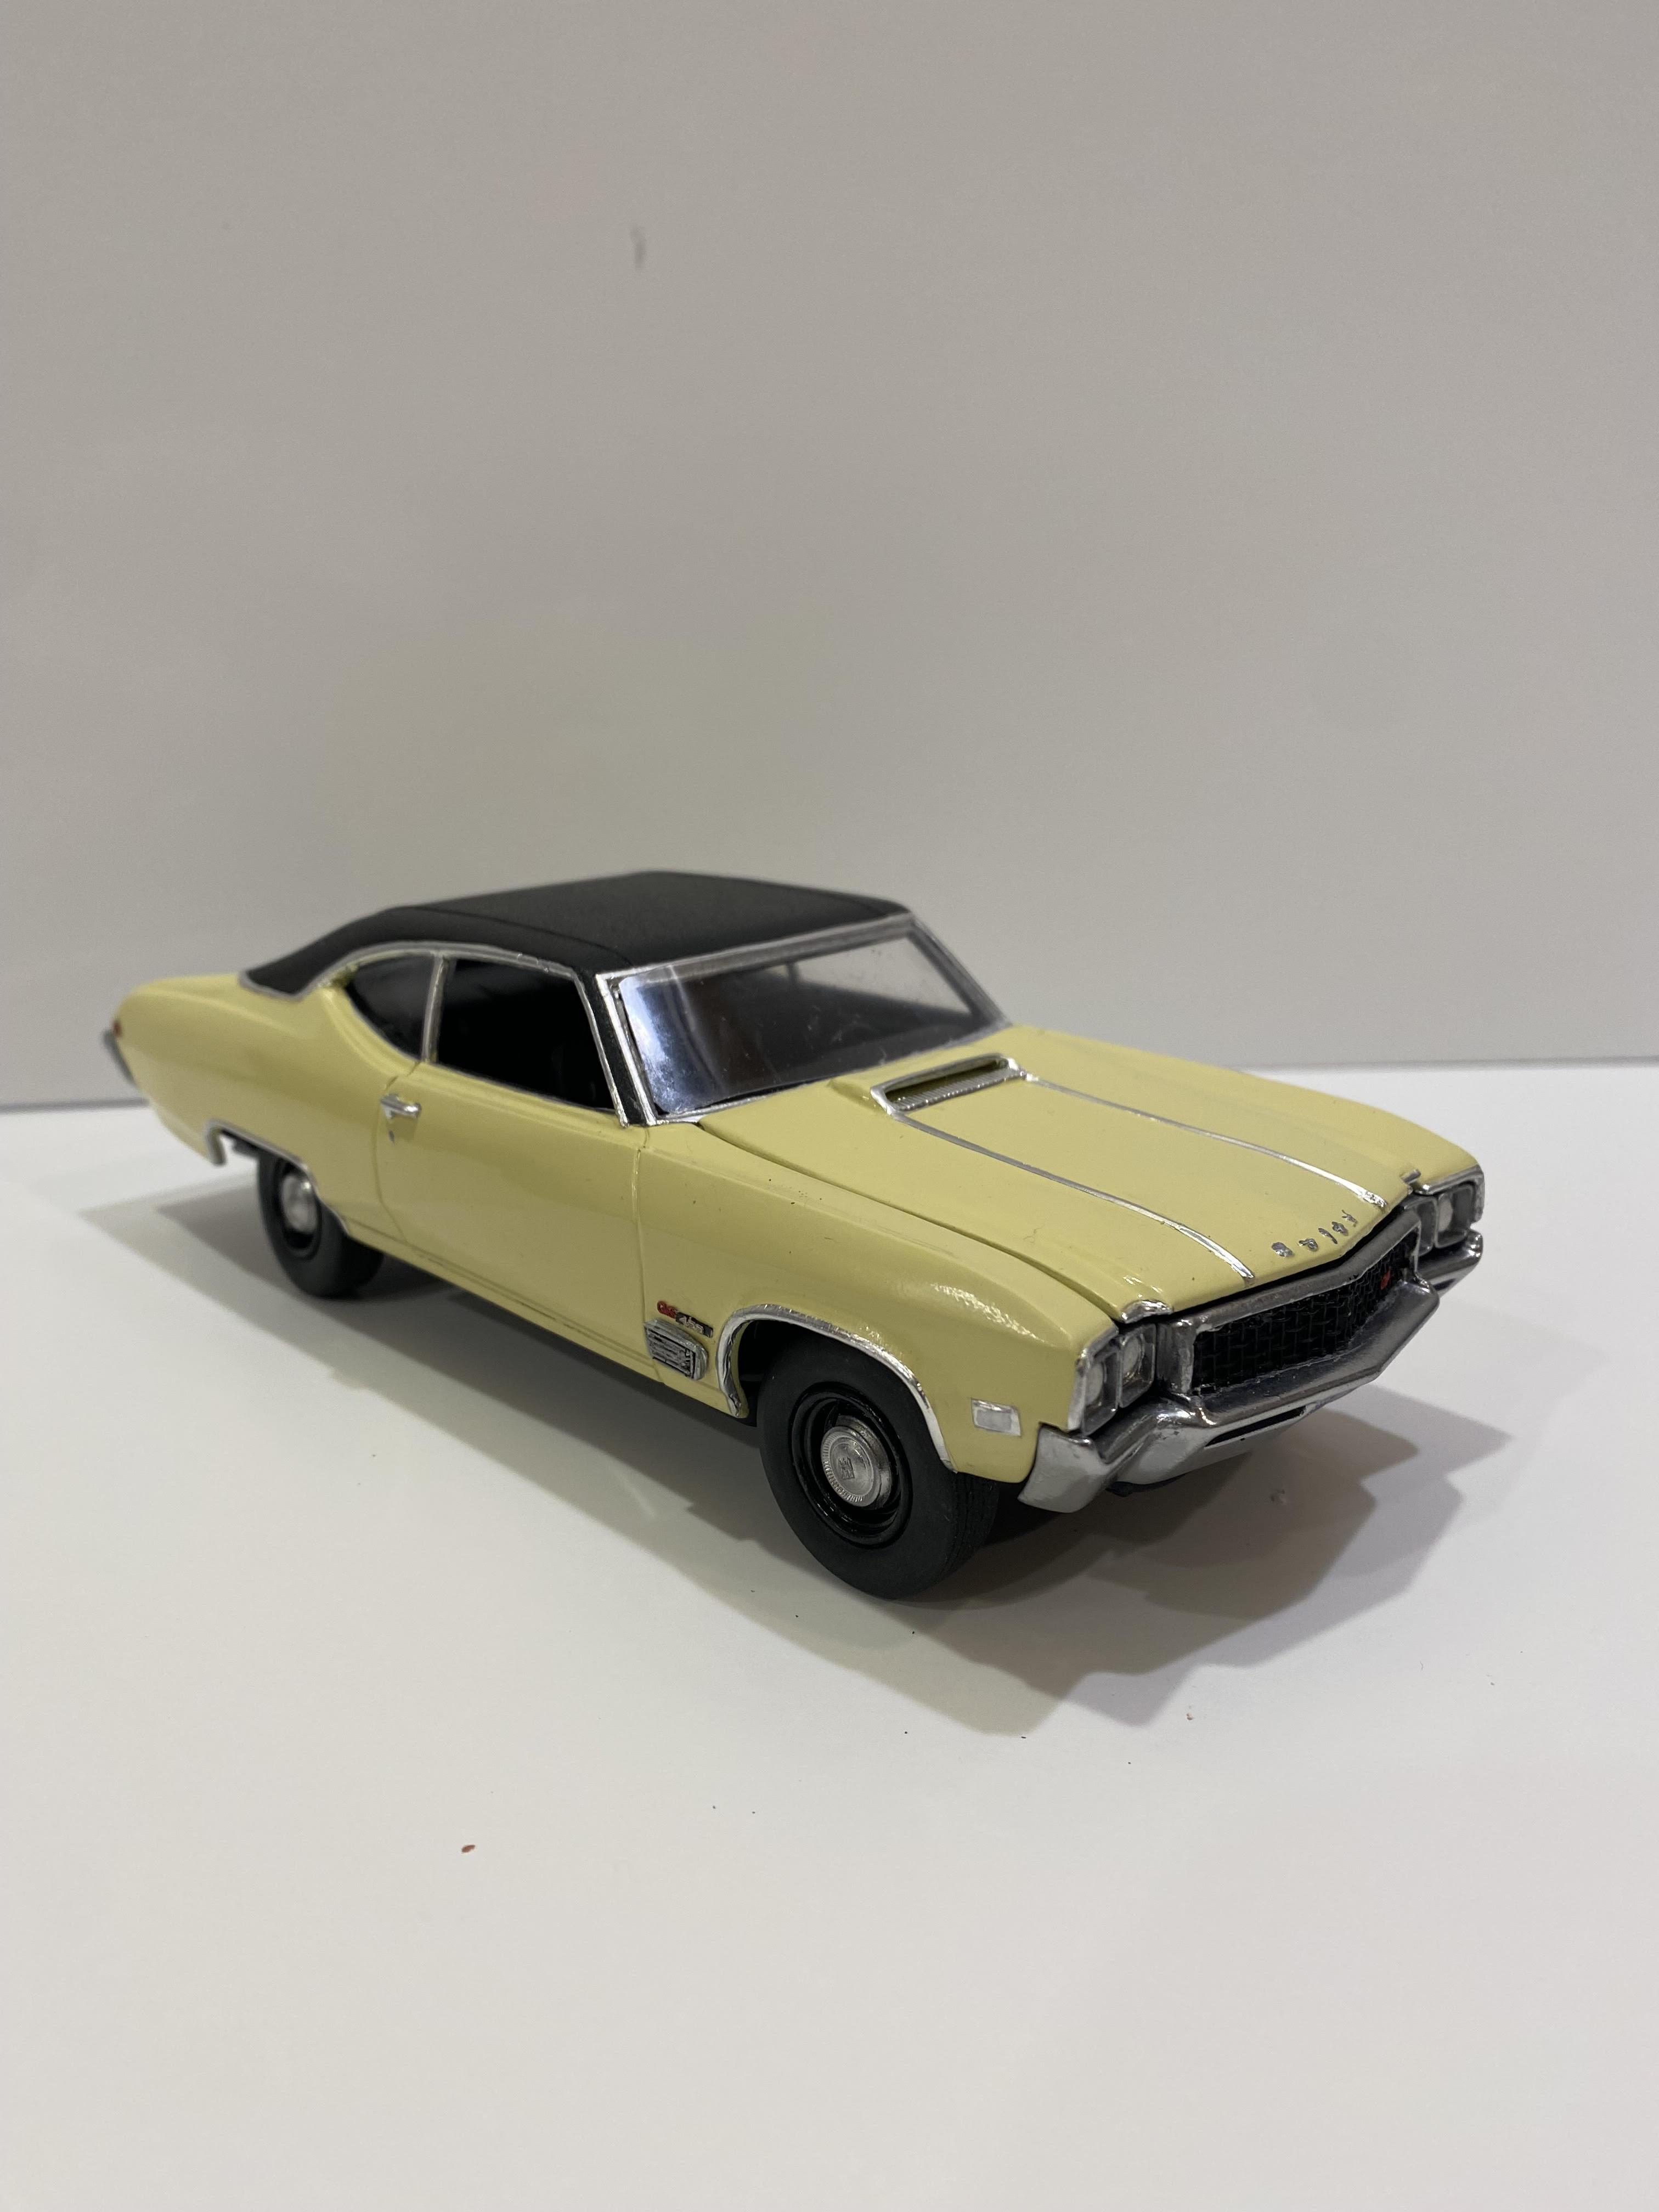
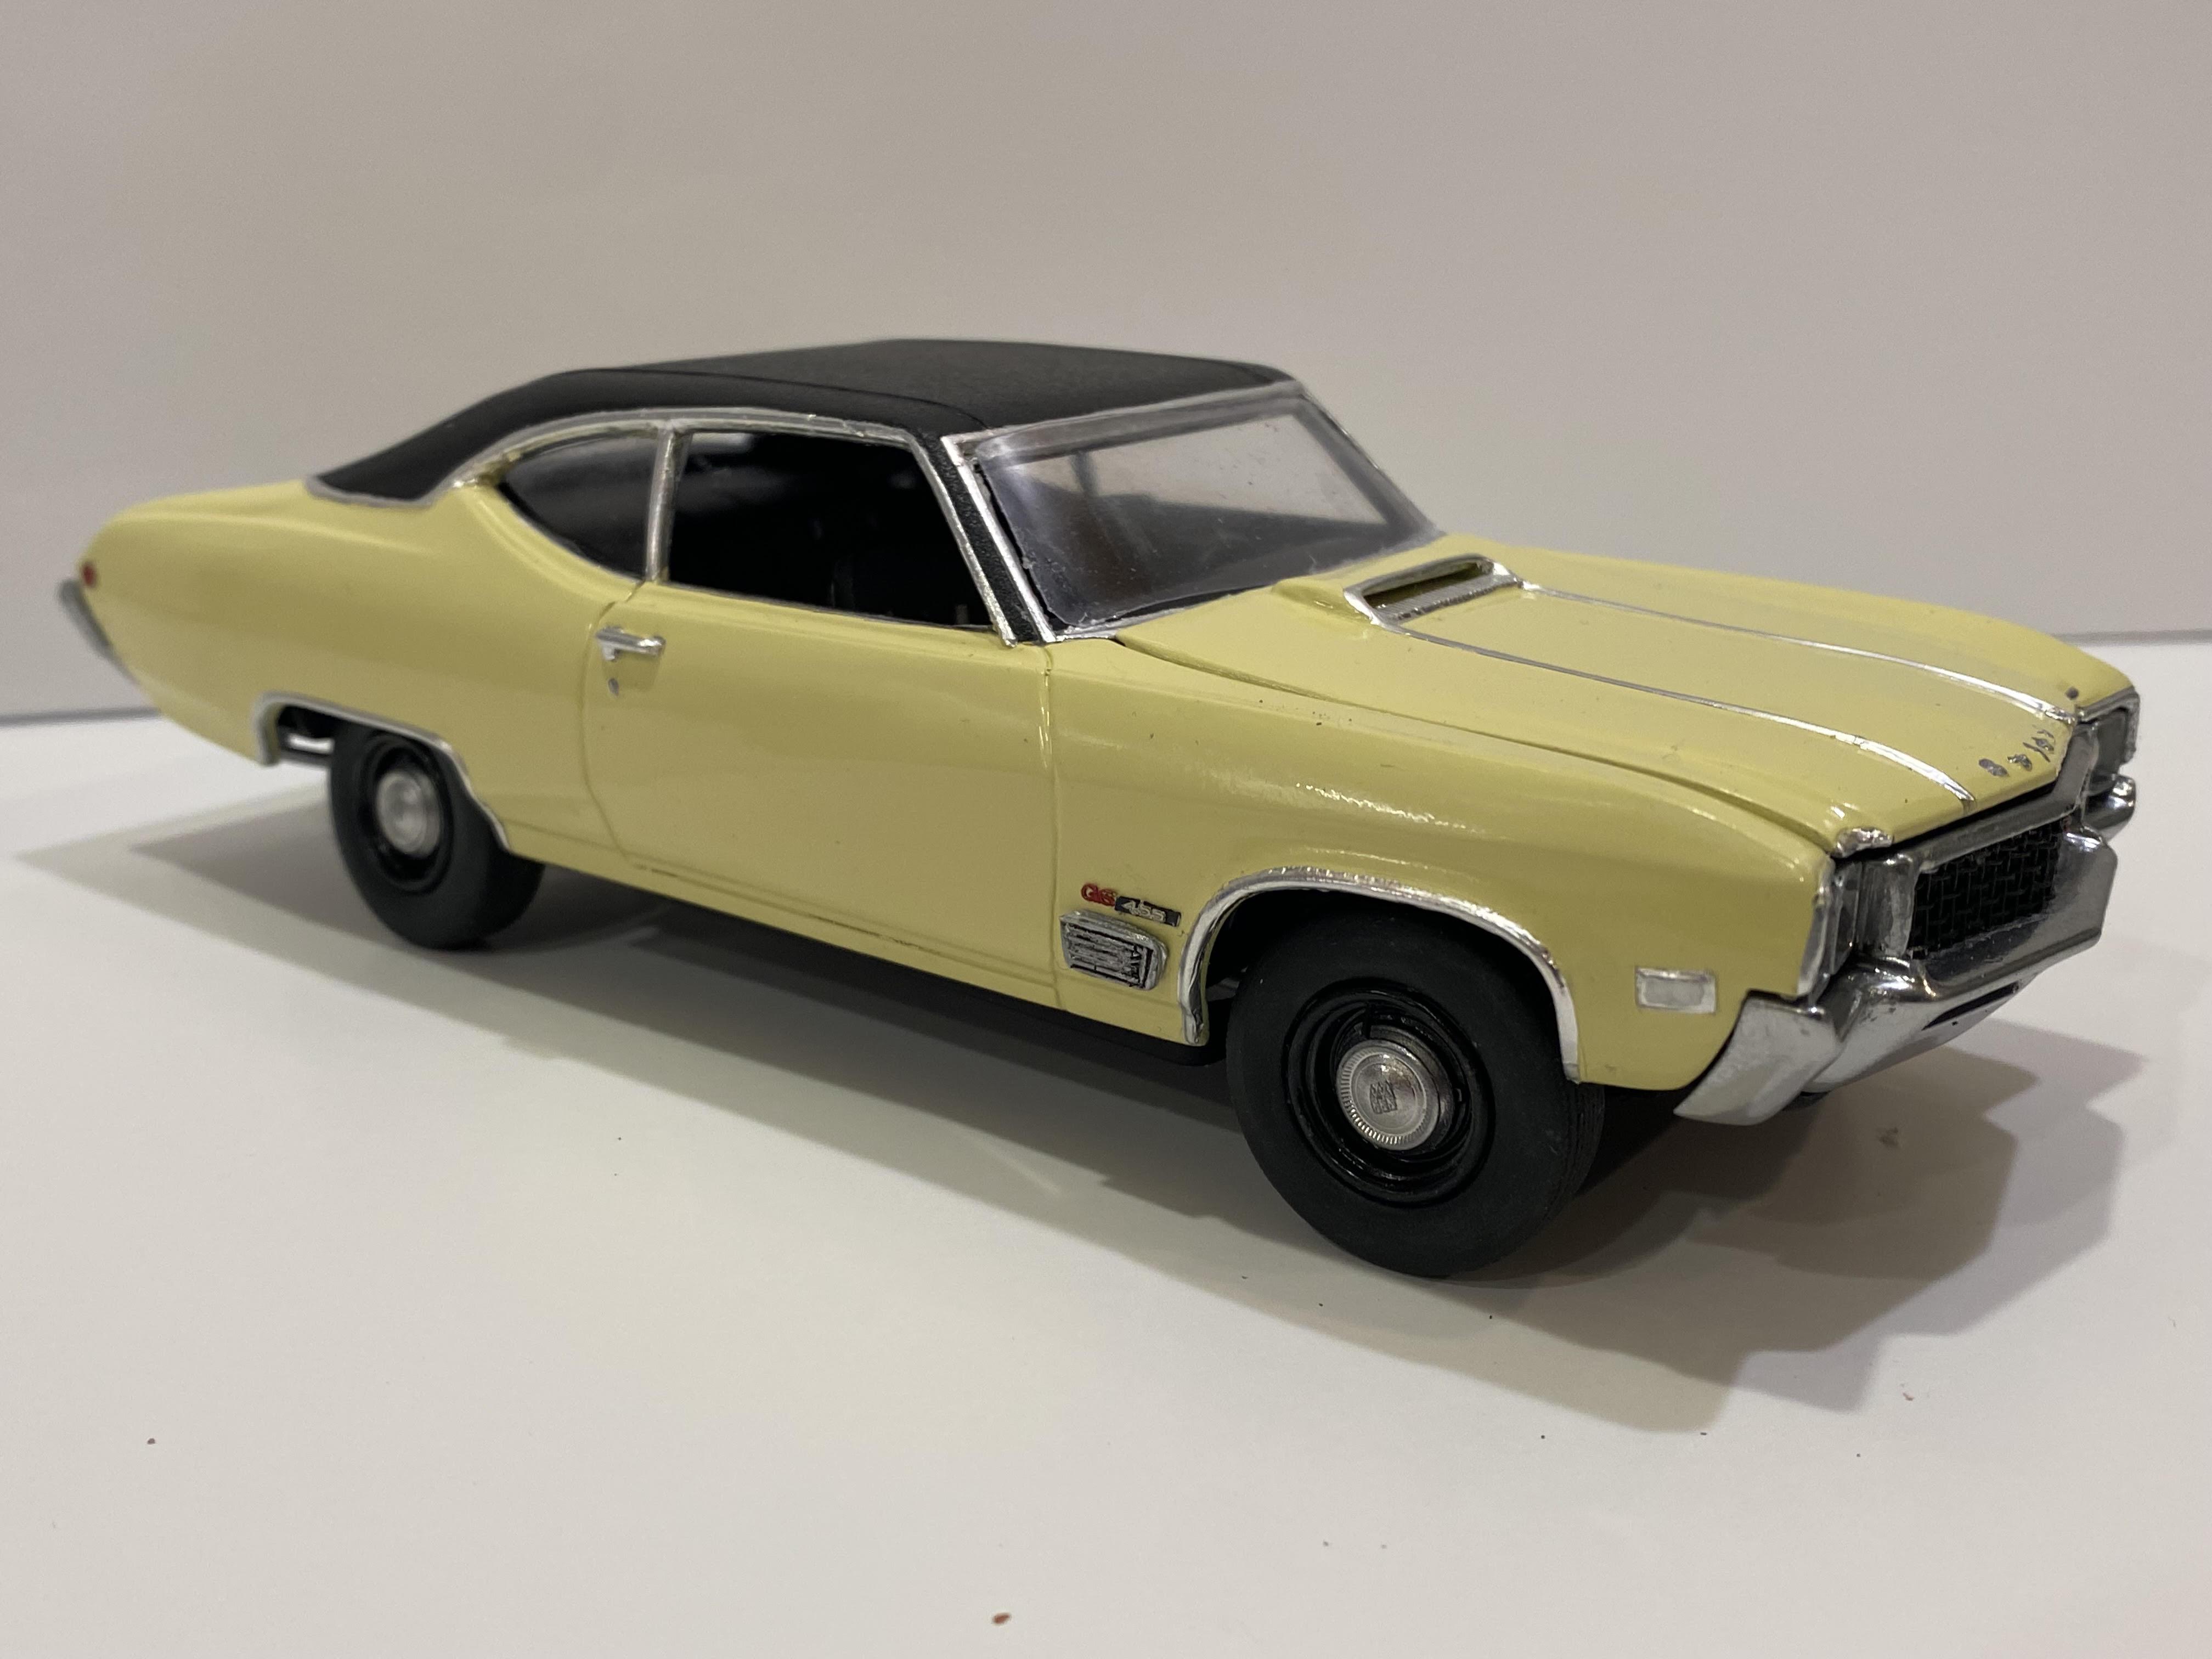
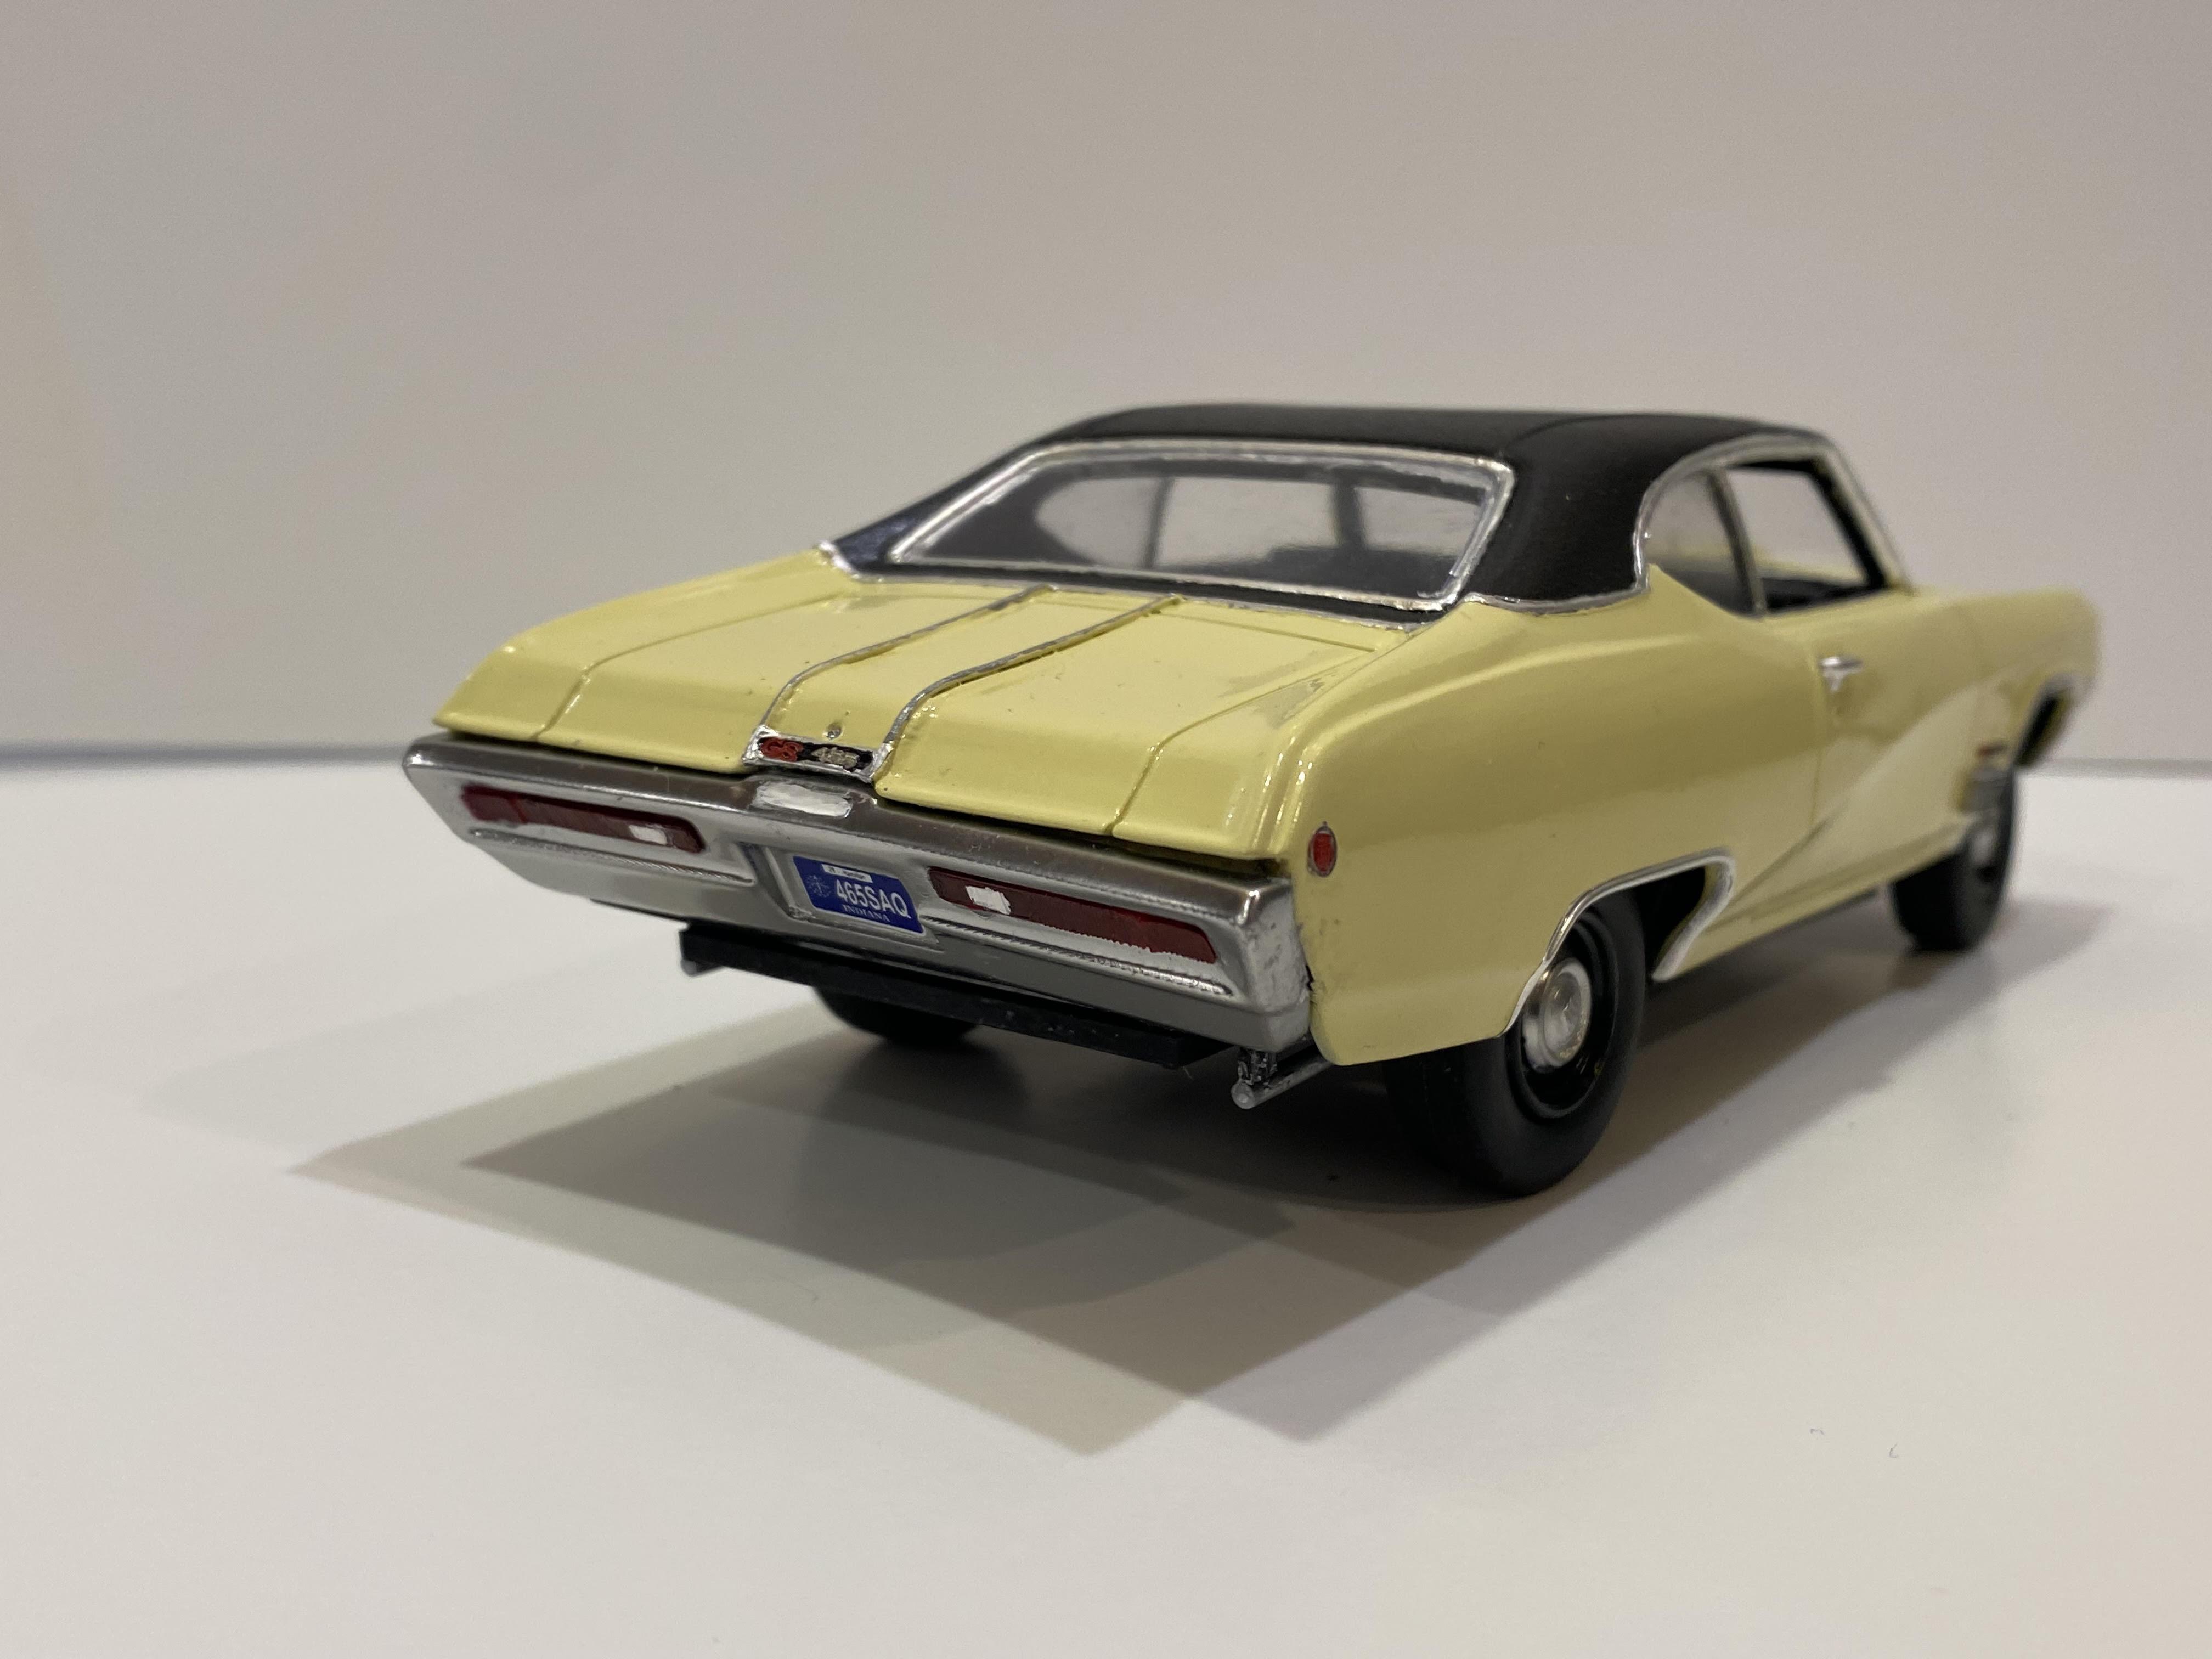
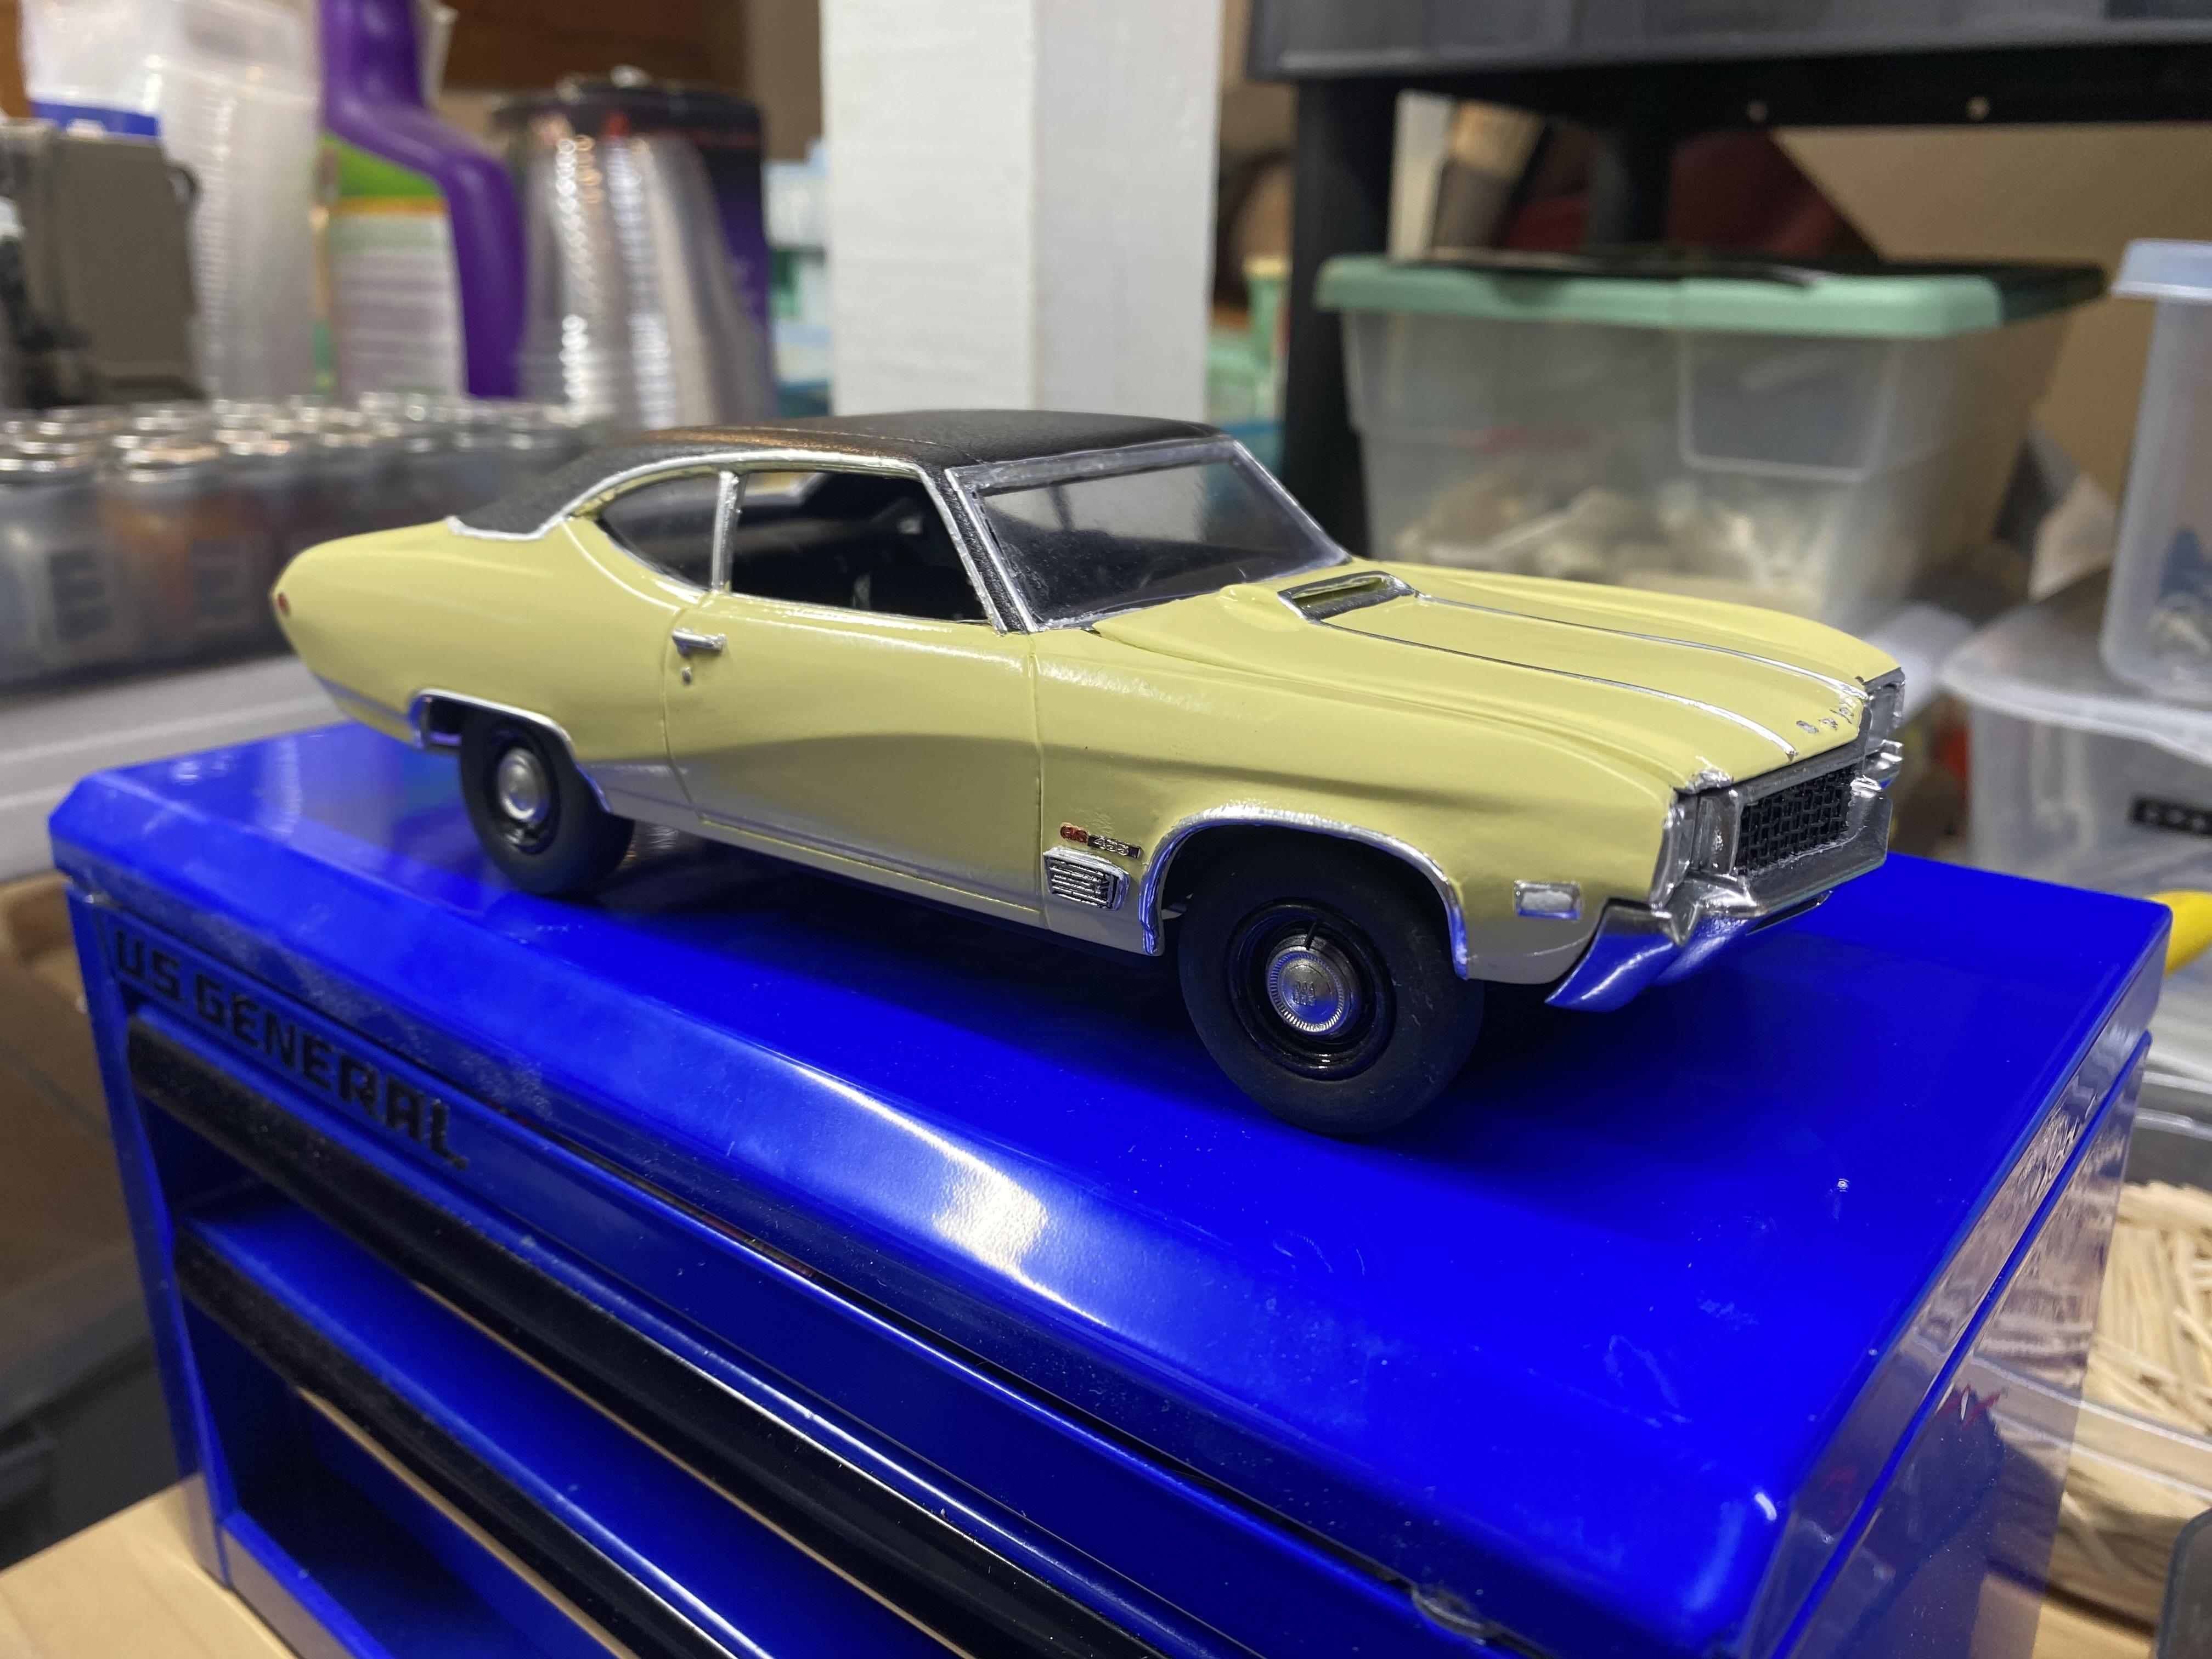
Finally finished this one up. Resin 69 Skylark kit from EBAY. Modified to be a 68 with scratch built hood and fender gills and trim. Scratch built resin custom interior. Monogram GSX 455 engine. Resin hubcaps and steelies from Missing Link resins. Fireball Motor Works tires and brake calipers. Model Car Garage photo etch emblems. Revell 68 Chevelle chassis, frame, radiator, exhaust and shroud. Embossing powder carpet, cellophane windows. Revell chrome paint with clear. Bare metal foil (a really bad job by me). PPG Omni acrylic enamel paint over Dupli-Color filler primer and Mr. Surfacer fine primer in Cameo Cream. Ray's Kits engine compartment decals and selective Molotow chrome paint. Rust Oleum texture black on the vinyl top.
- 13 replies
-
- 19
-

-
68 Buick Skylark GS 400 with a nod to Yellowsportwagon
DoctorLarry replied to DoctorLarry's topic in WIP: Model Cars
I just noticed the vinyl top is all wrong on the roof pillar. I guess my 69 to 68 conversion is a little off since I used the vinyl top molded on the 3D print of the 69. -
68 Buick Skylark GS 400 with a nod to Yellowsportwagon
DoctorLarry replied to DoctorLarry's topic in WIP: Model Cars
Very slow progress on this one. Painted the body. I have repainted the chrome three times now. It fingerprints very easily it seems. Never got the hood to fit right in the corners. Worst BMF job ever. It fought me all the way and it still looks bad. Engine turned out good. I still need to put the radiator hoses and air cleaner in. Finish the radiator shroud. Add the mirrors last. Chassis turned out fine. I have to get the body sitting right on the frame and attach the back bumper without screwing up the finish.
-
Very nice! I love colors that are different than the norm.
-
Show us your Engines - Post Dedicated to the Engine
DoctorLarry replied to TheCat's topic in Model Cars
I'd say that was a lot of talent-a beautiful job! -
Show us your Engines - Post Dedicated to the Engine
DoctorLarry replied to TheCat's topic in Model Cars
Very nice! -
Very cool!
-
Clearing over Revell Chrome Spray
DoctorLarry replied to DoctorLarry's topic in Model Building Questions and Answers
Ordered some today. -
Clearing over Revell Chrome Spray
DoctorLarry replied to DoctorLarry's topic in Model Building Questions and Answers
I may try thinning it and see what happens. -
Clearing over Revell Chrome Spray
DoctorLarry replied to DoctorLarry's topic in Model Building Questions and Answers
That would make sense because Future is an Acrylic product. I may try spraying it and see what happens. Thanks for the tip. -
Clearing over Revell Chrome Spray
DoctorLarry posted a topic in Model Building Questions and Answers
Has anybody used a clear coat over Revell chrome spray? It says acrylic on the can and I have noticed it will rub off if handled. Any suggestions? Thanks!