

CabDriver
-
Posts
5,117 -
Joined
-
Last visited
Content Type
Profiles
Forums
Events
Gallery
Posts posted by CabDriver
-
-
15 minutes ago, krassandbernie said:
Apparently, it doesn't really interest anyone on this forum that I have been offering an improved casting of the Revell Model A coupe body to date though.
I don’t think I saw that before - can we see? ?
-
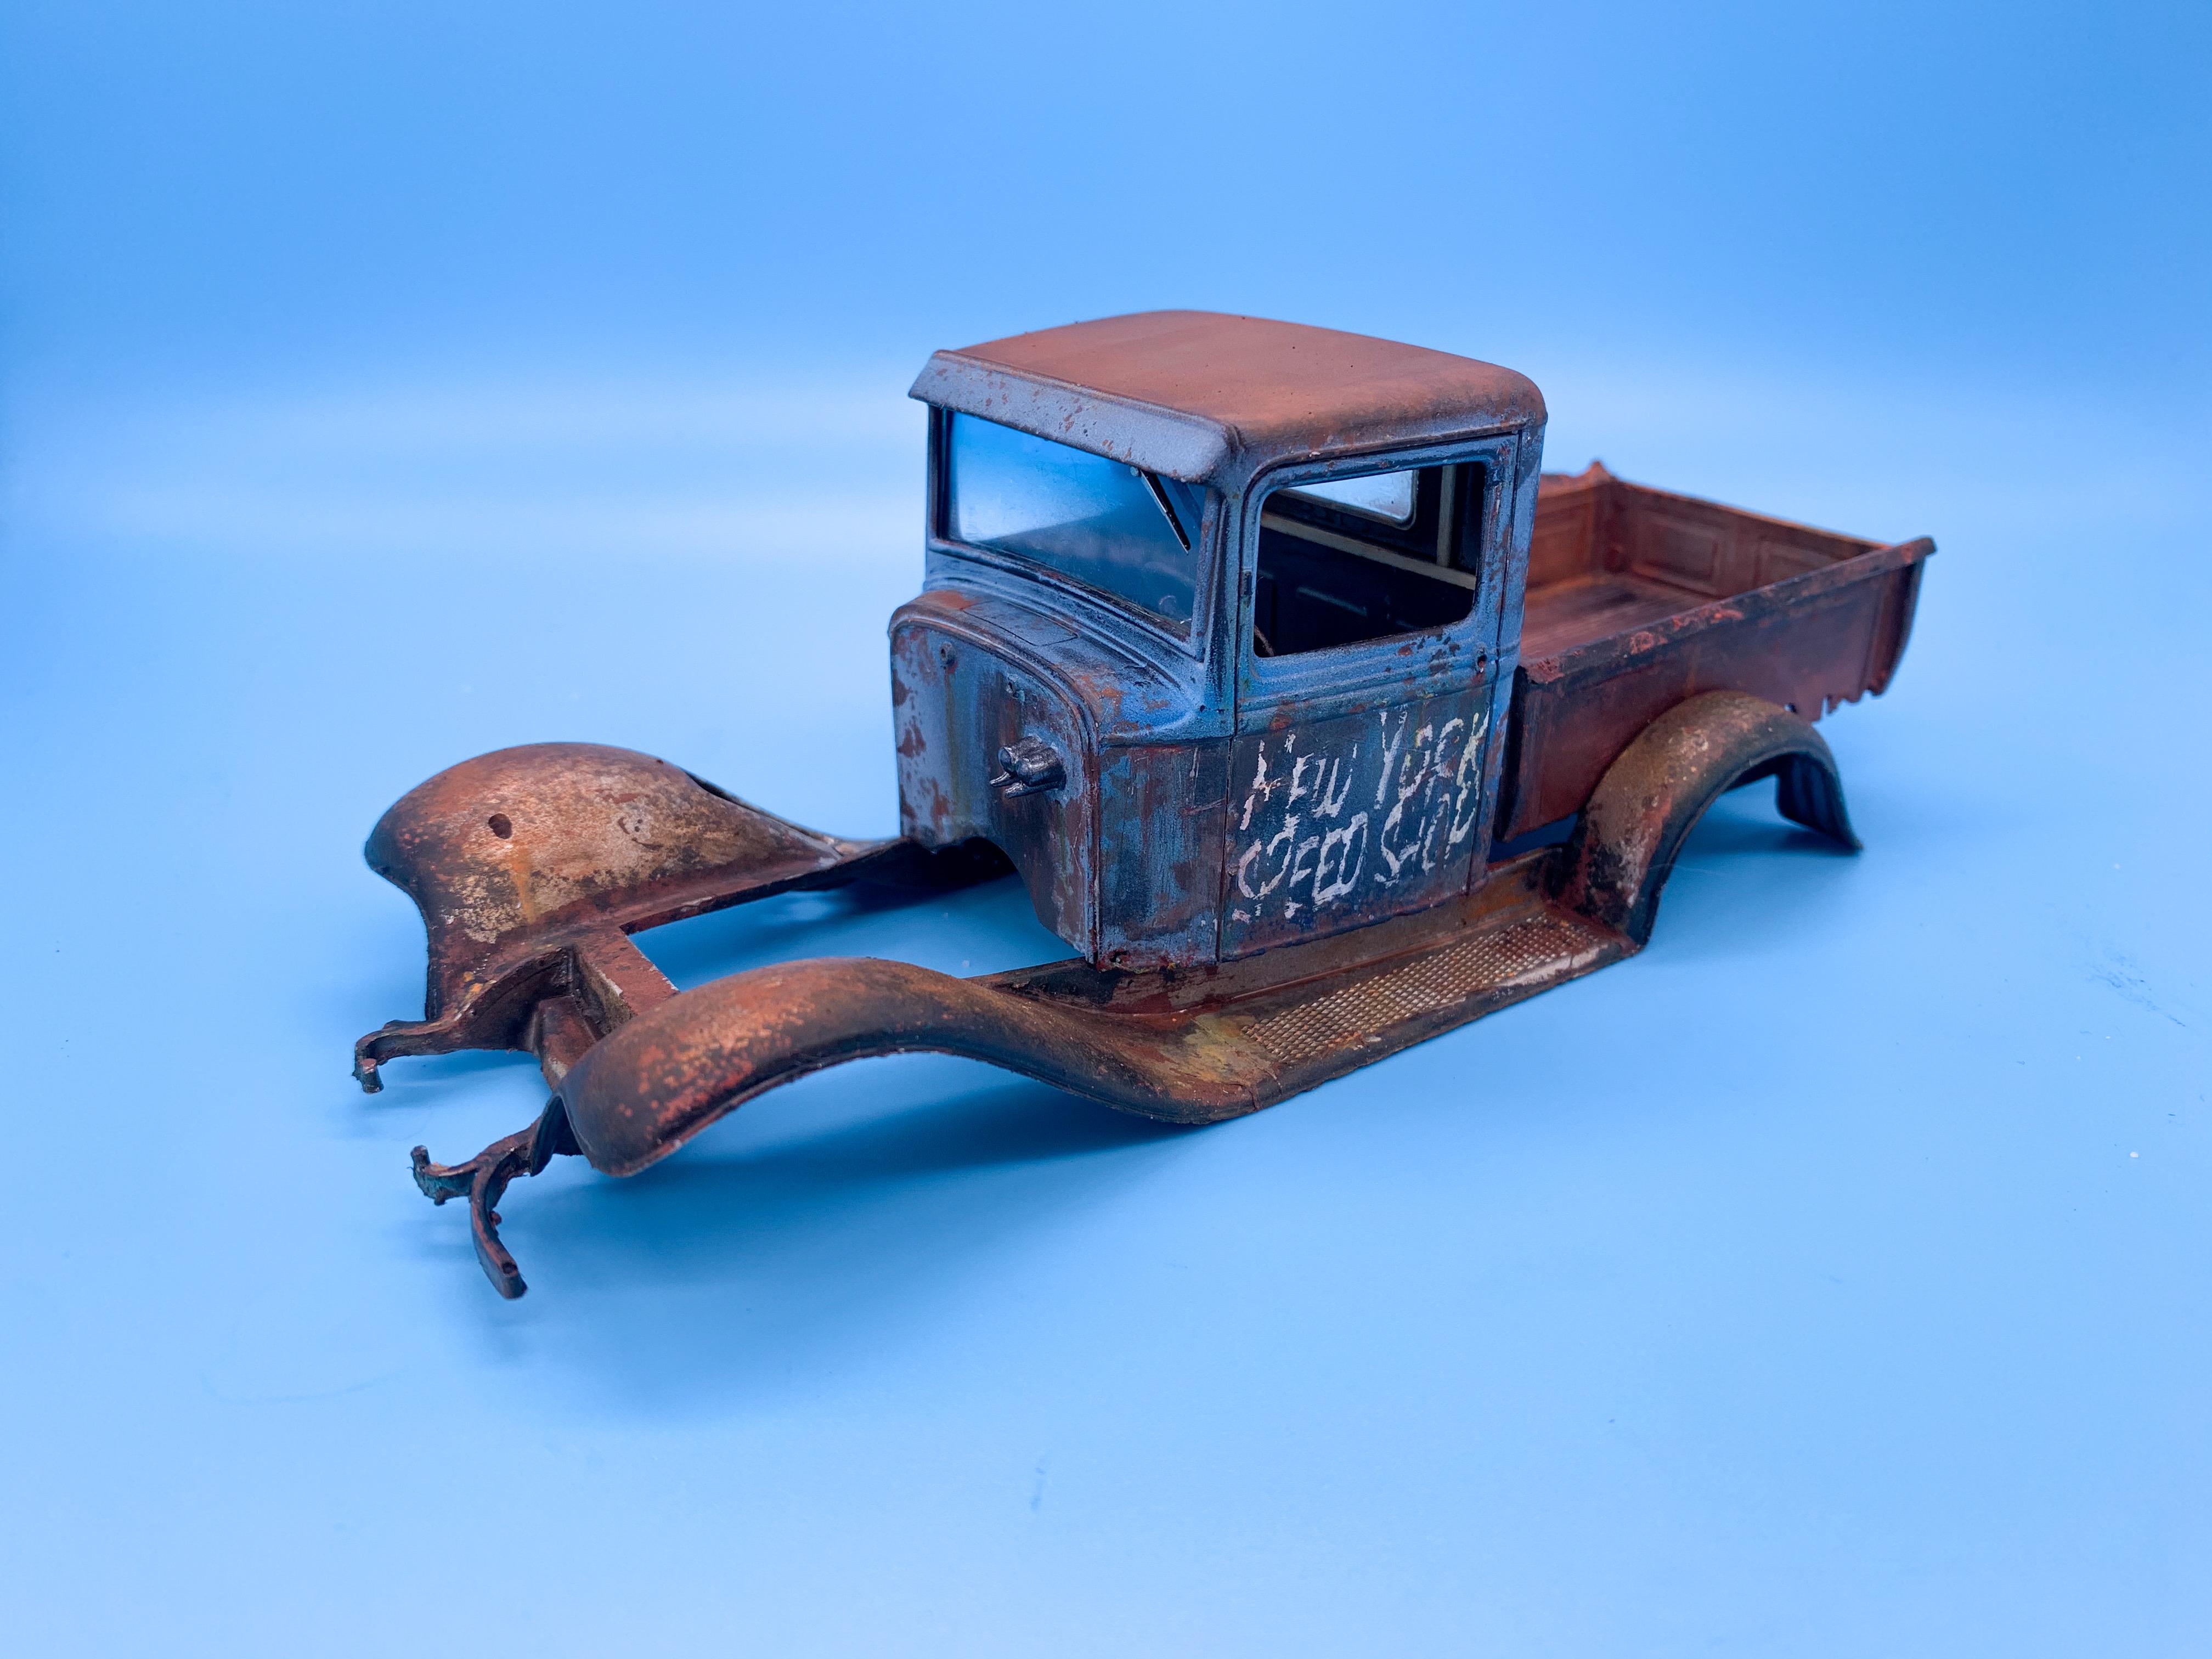
A little more aging and weathering - have been prepping and priming a bunch of parts that I hadn’t handled yet, so haven’t had much interesting progress...
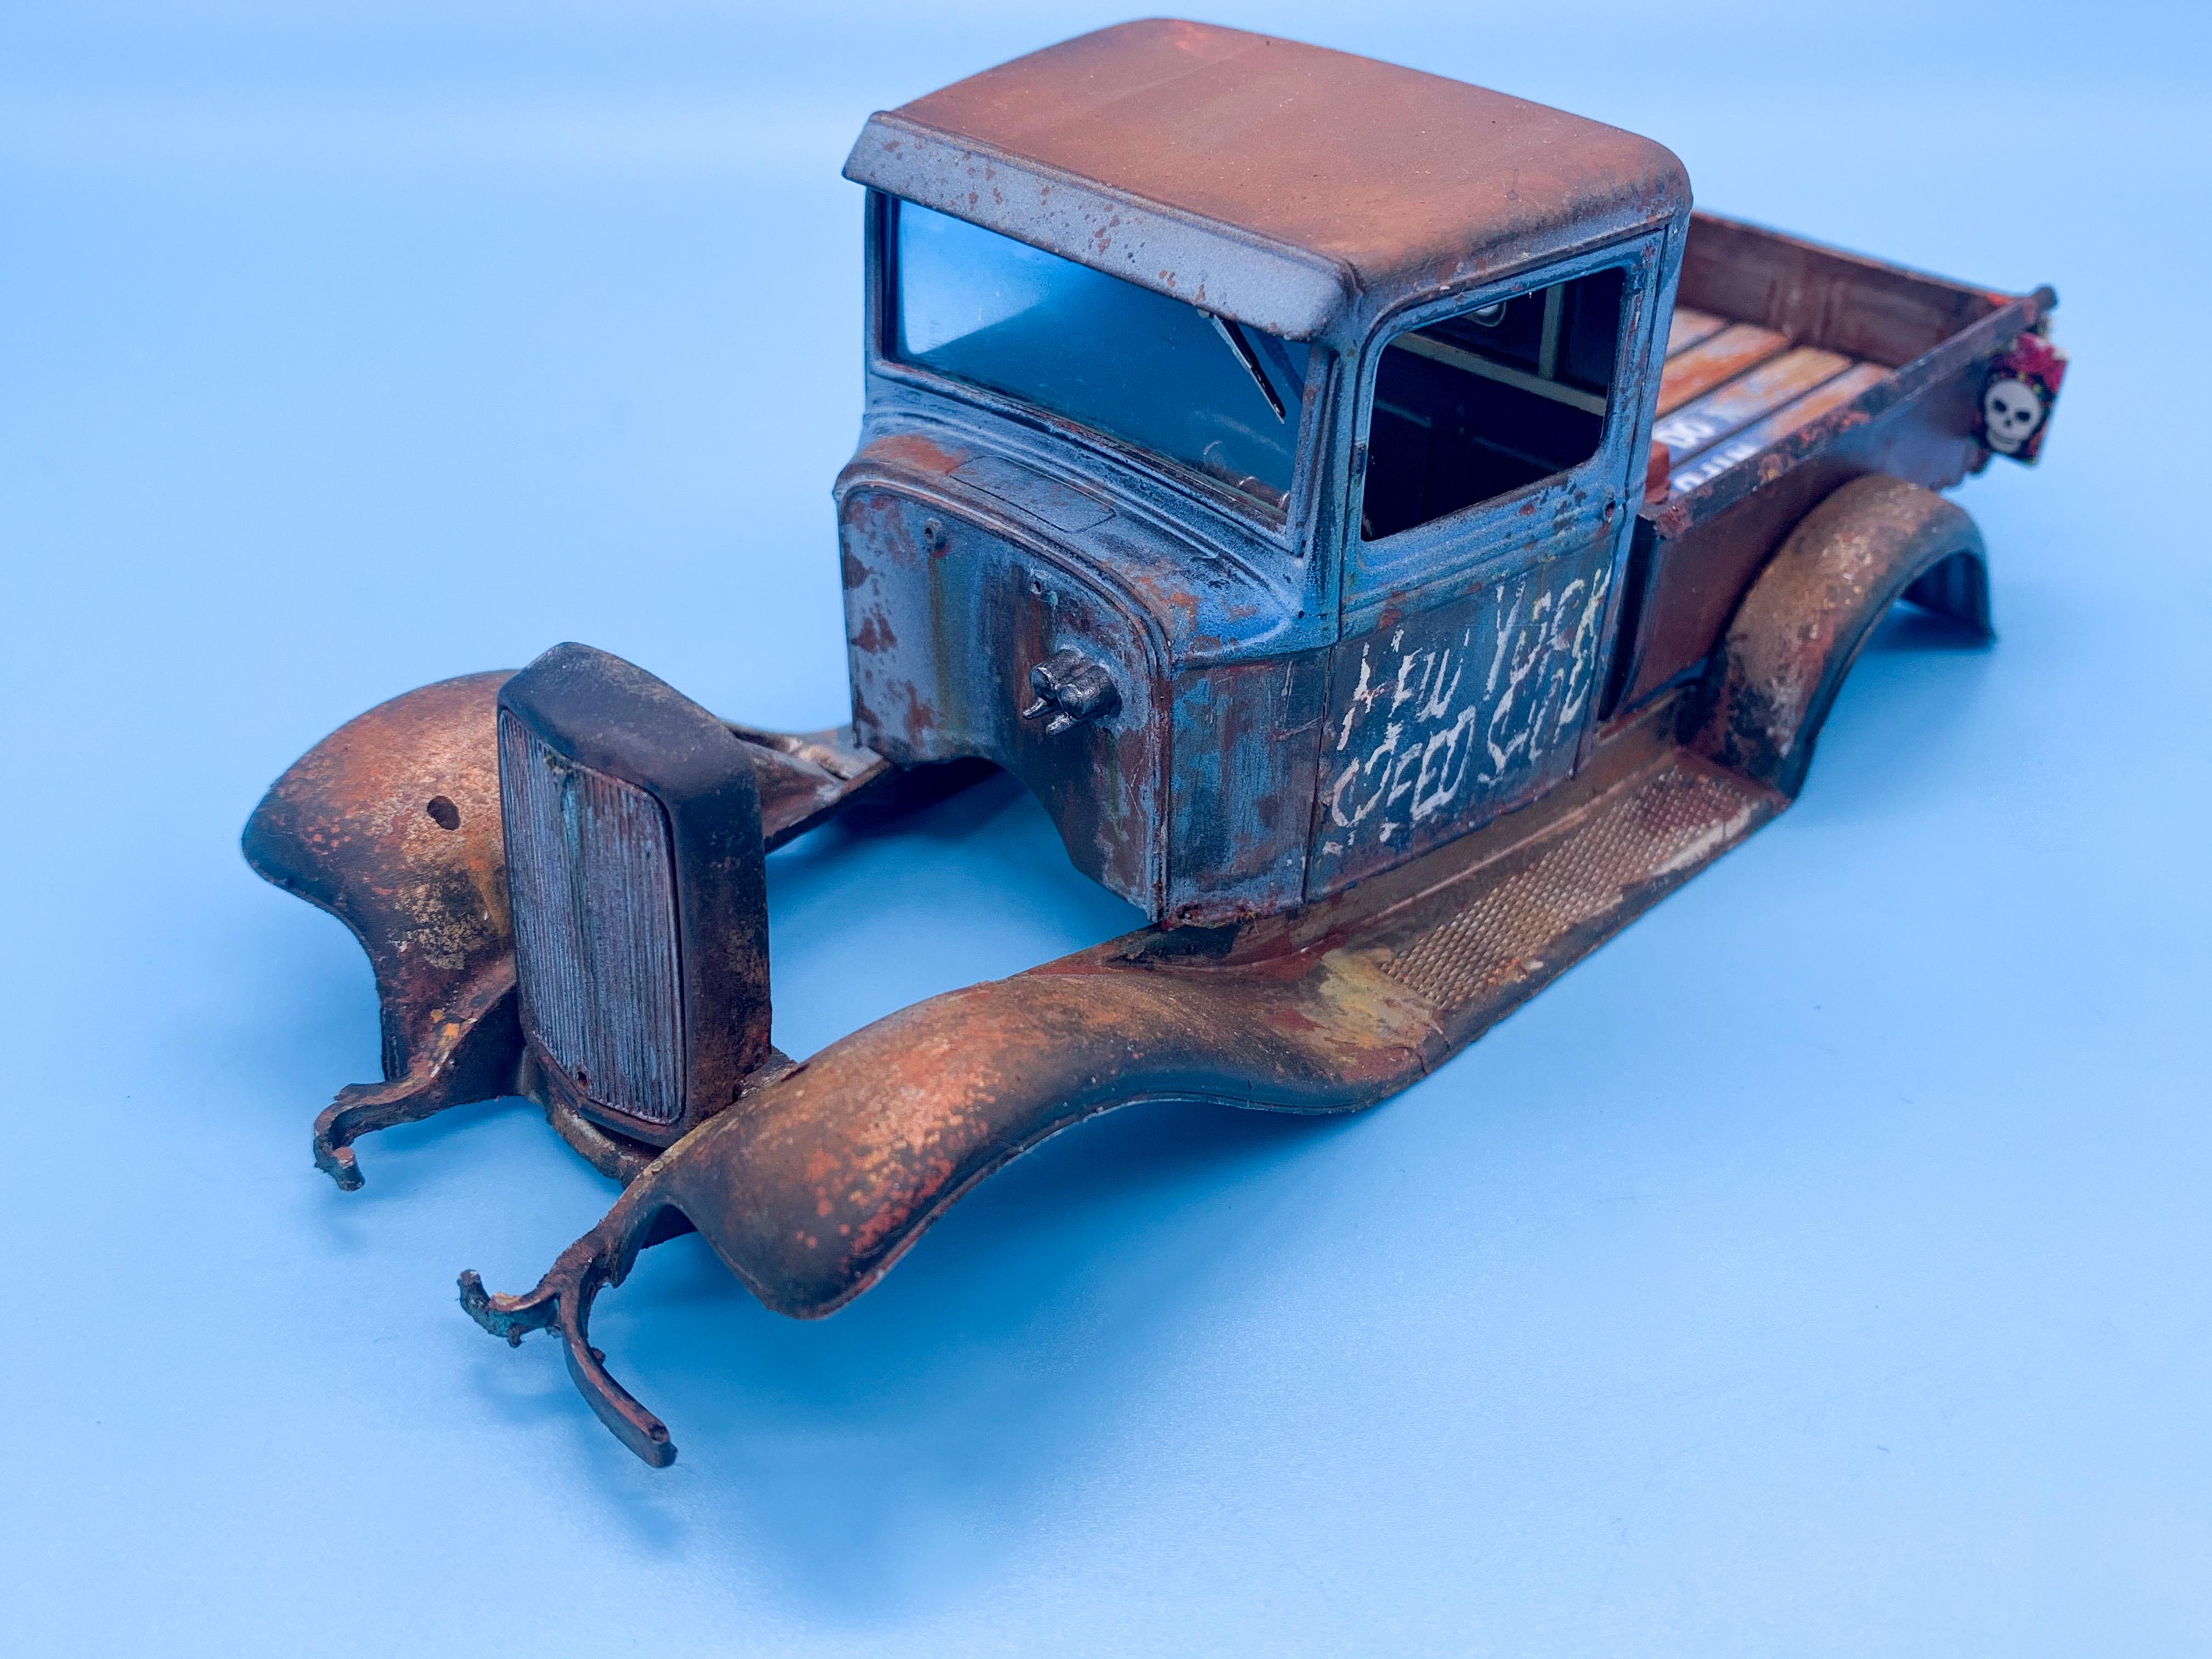
Grill shell and insert:

Gave the insert some subtle weathering over a bright silver base, and the shell itself is same tricks I’ve done on some of the other parts
Starting to look like a truck!
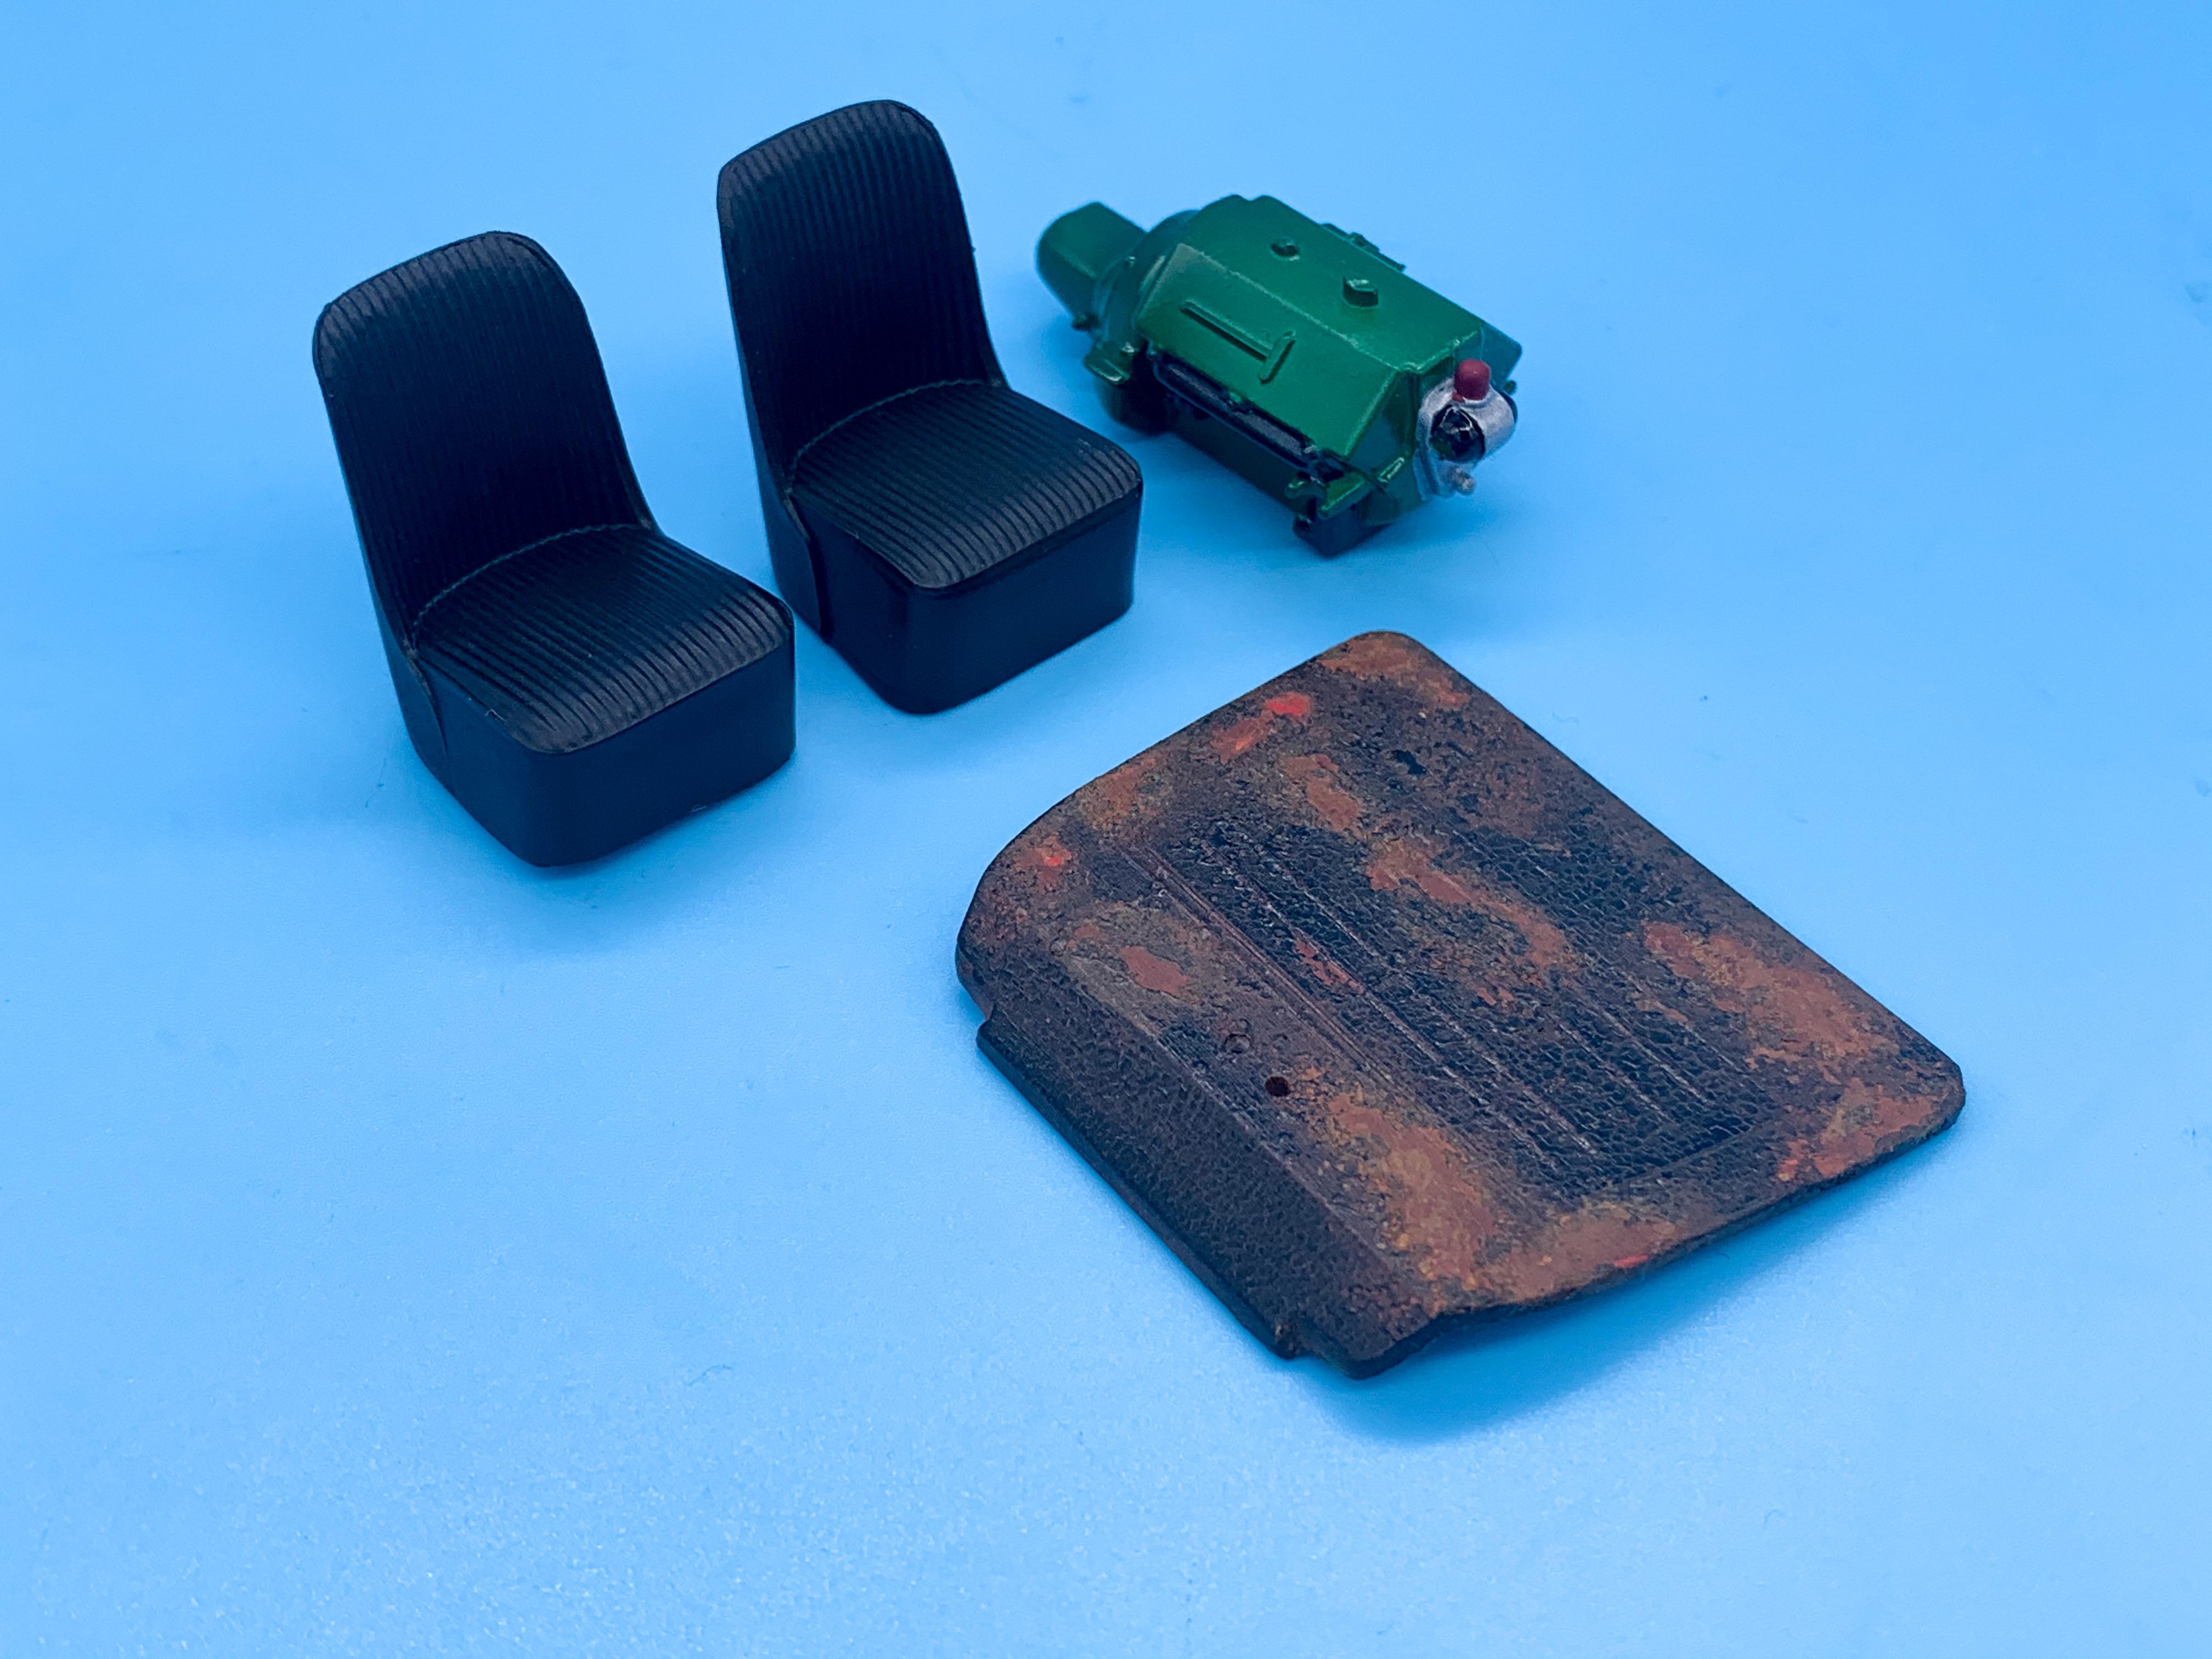
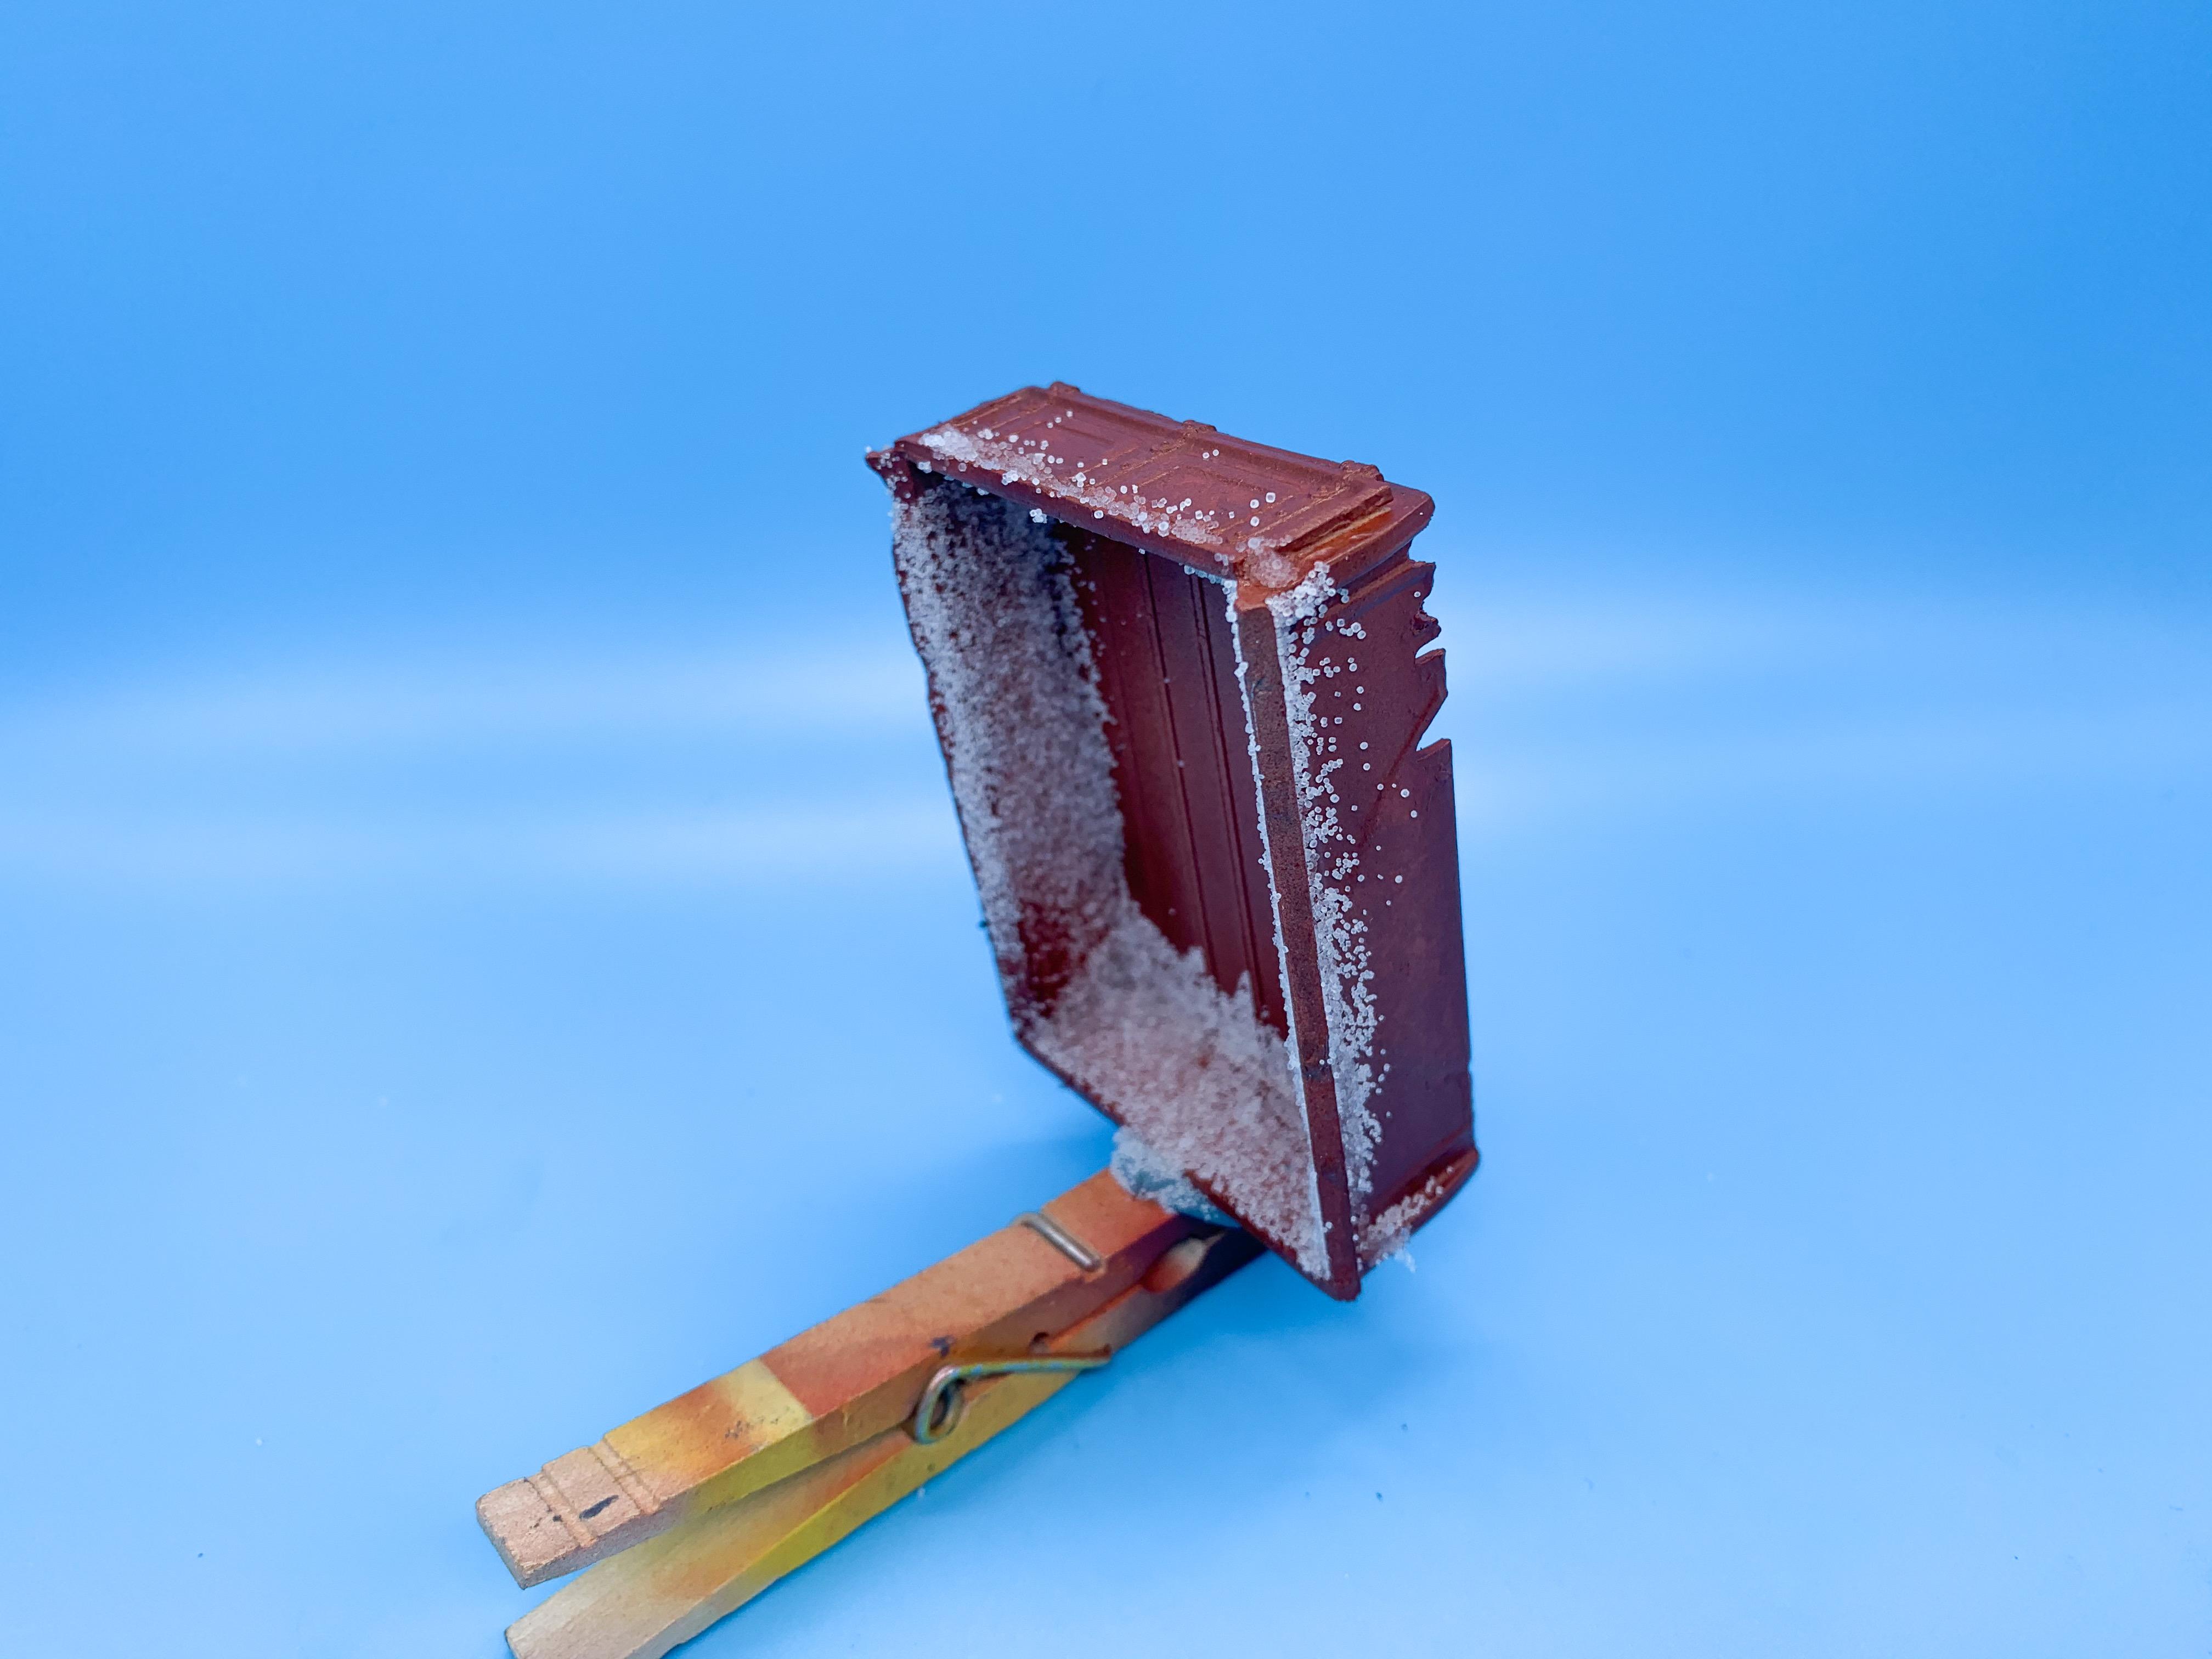
I’d been thinking of a way to achieve a cracked, almost blistered look to a paintjob and did some experimenting this week. I was trying to get a real fine cracked look, like when paint is ABOUT to fall off but isn’t quite there yet. I shot the underside of the floor on the truck with the usual brown base, added salt and then added a very thin coat of an enamel matt clear. Knowing that enamels and lacquers don’t play nice together I then shot a bunch of light mist coats of black over the whole thing, and got a real fine cracking of the top coat that I could then weather over:
Really pleased with the extra texture this added - will definitely be developing that trick for future projects.
And, seeing as this thing won’t be a complete pile I’ve been slowly detail painting some of the moulded-in bits on the engine, along with some nice clean seats - because I don’t like sitting in dirty old seats, even when I’ve had dirty old cars ?
More soon! -
5 hours ago, Dave Van said:
Just look at the back of the box........complete parts layout.
Pfft, next you’ll be saying to read the assembly instructions ?
-
8 hours ago, Greg Myers said:
It's supposed to return Q1 2021. There's even boxart floating around
Ohh where? Or is that it, above?
-
3 hours ago, Fat Brian said:
At least some of them are curbside, I made that mistake on the 2012 kit.
Oh, that’s interesting to know - I almost picked up a couple to steal motors and suspension parts from!
-
One of my two local stores is pretty well stocked, except for the Revell 29 that I was actually after yesterday, but the other store has had half-empty shelves for a while.
They had one of the AMT 34 truck a couple of weeks back, which I brought home - and behind it on the shelf were 3 of the same kit but in the Lindberg box. They’ve since gone too - so it seems like they could use some more hot-rod-type kits in their range if those spots keep getting cleared fairly quickly.
Neither of the stores by me seems to be able to keep those 29s in particular on the shelves for very long...that said, I DO keep buying them when I see one, so...
-
On 10/30/2020 at 10:54 AM, Tom Geiger said:
The way city contracts go, those planks probably cost a grand apiece! ?
HAHA! That’s VERY possible ?
19 hours ago, AmericanMuscleFan said:Maybe salt is not good for our health but this build is good for the soul... and as if that wasn't enough, herbs are now part of the recipe... Colonel Jim's secret recipe... good at licking my computer screen!!! ?
It’s Styrene Rustin’ Good! ??
10 hours ago, stitchdup said:Enjoying watching this come together and a thought occured to me, patina by kfc (11 herbs and spices)
I’d better worsh up! ??
5 hours ago, Mattilacken said:Incredible..... just incredible!
Thank you sir!
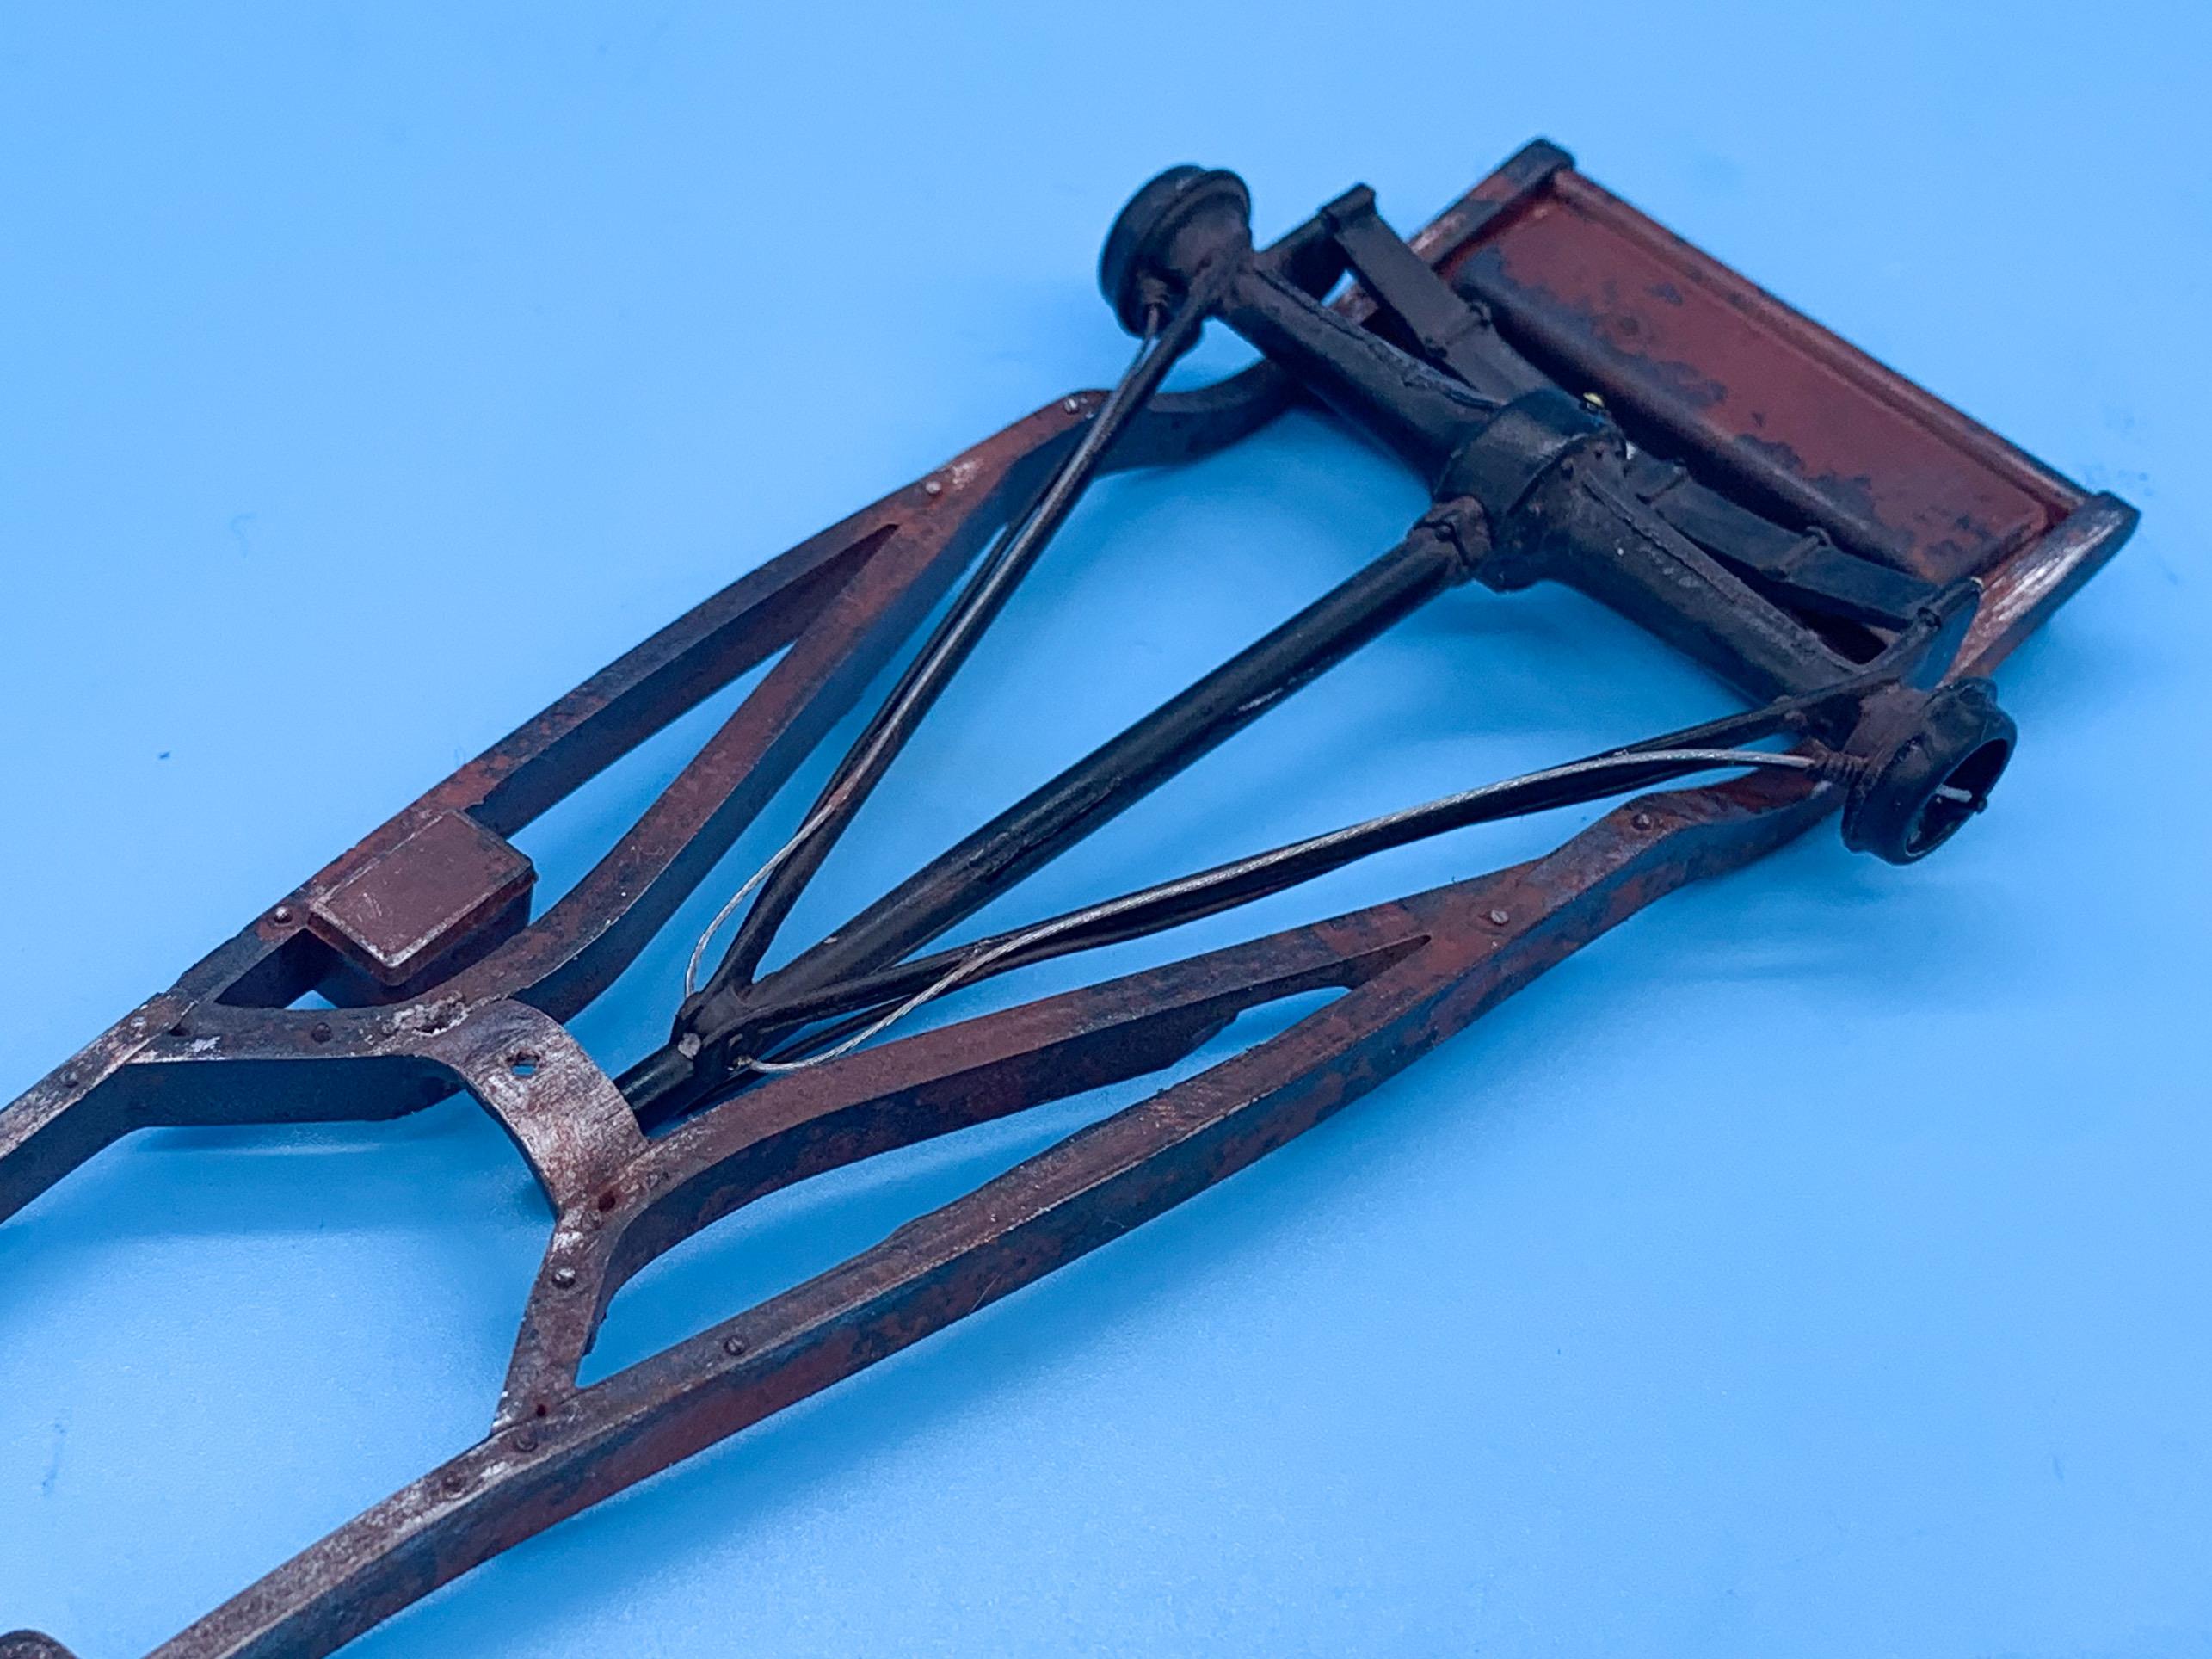
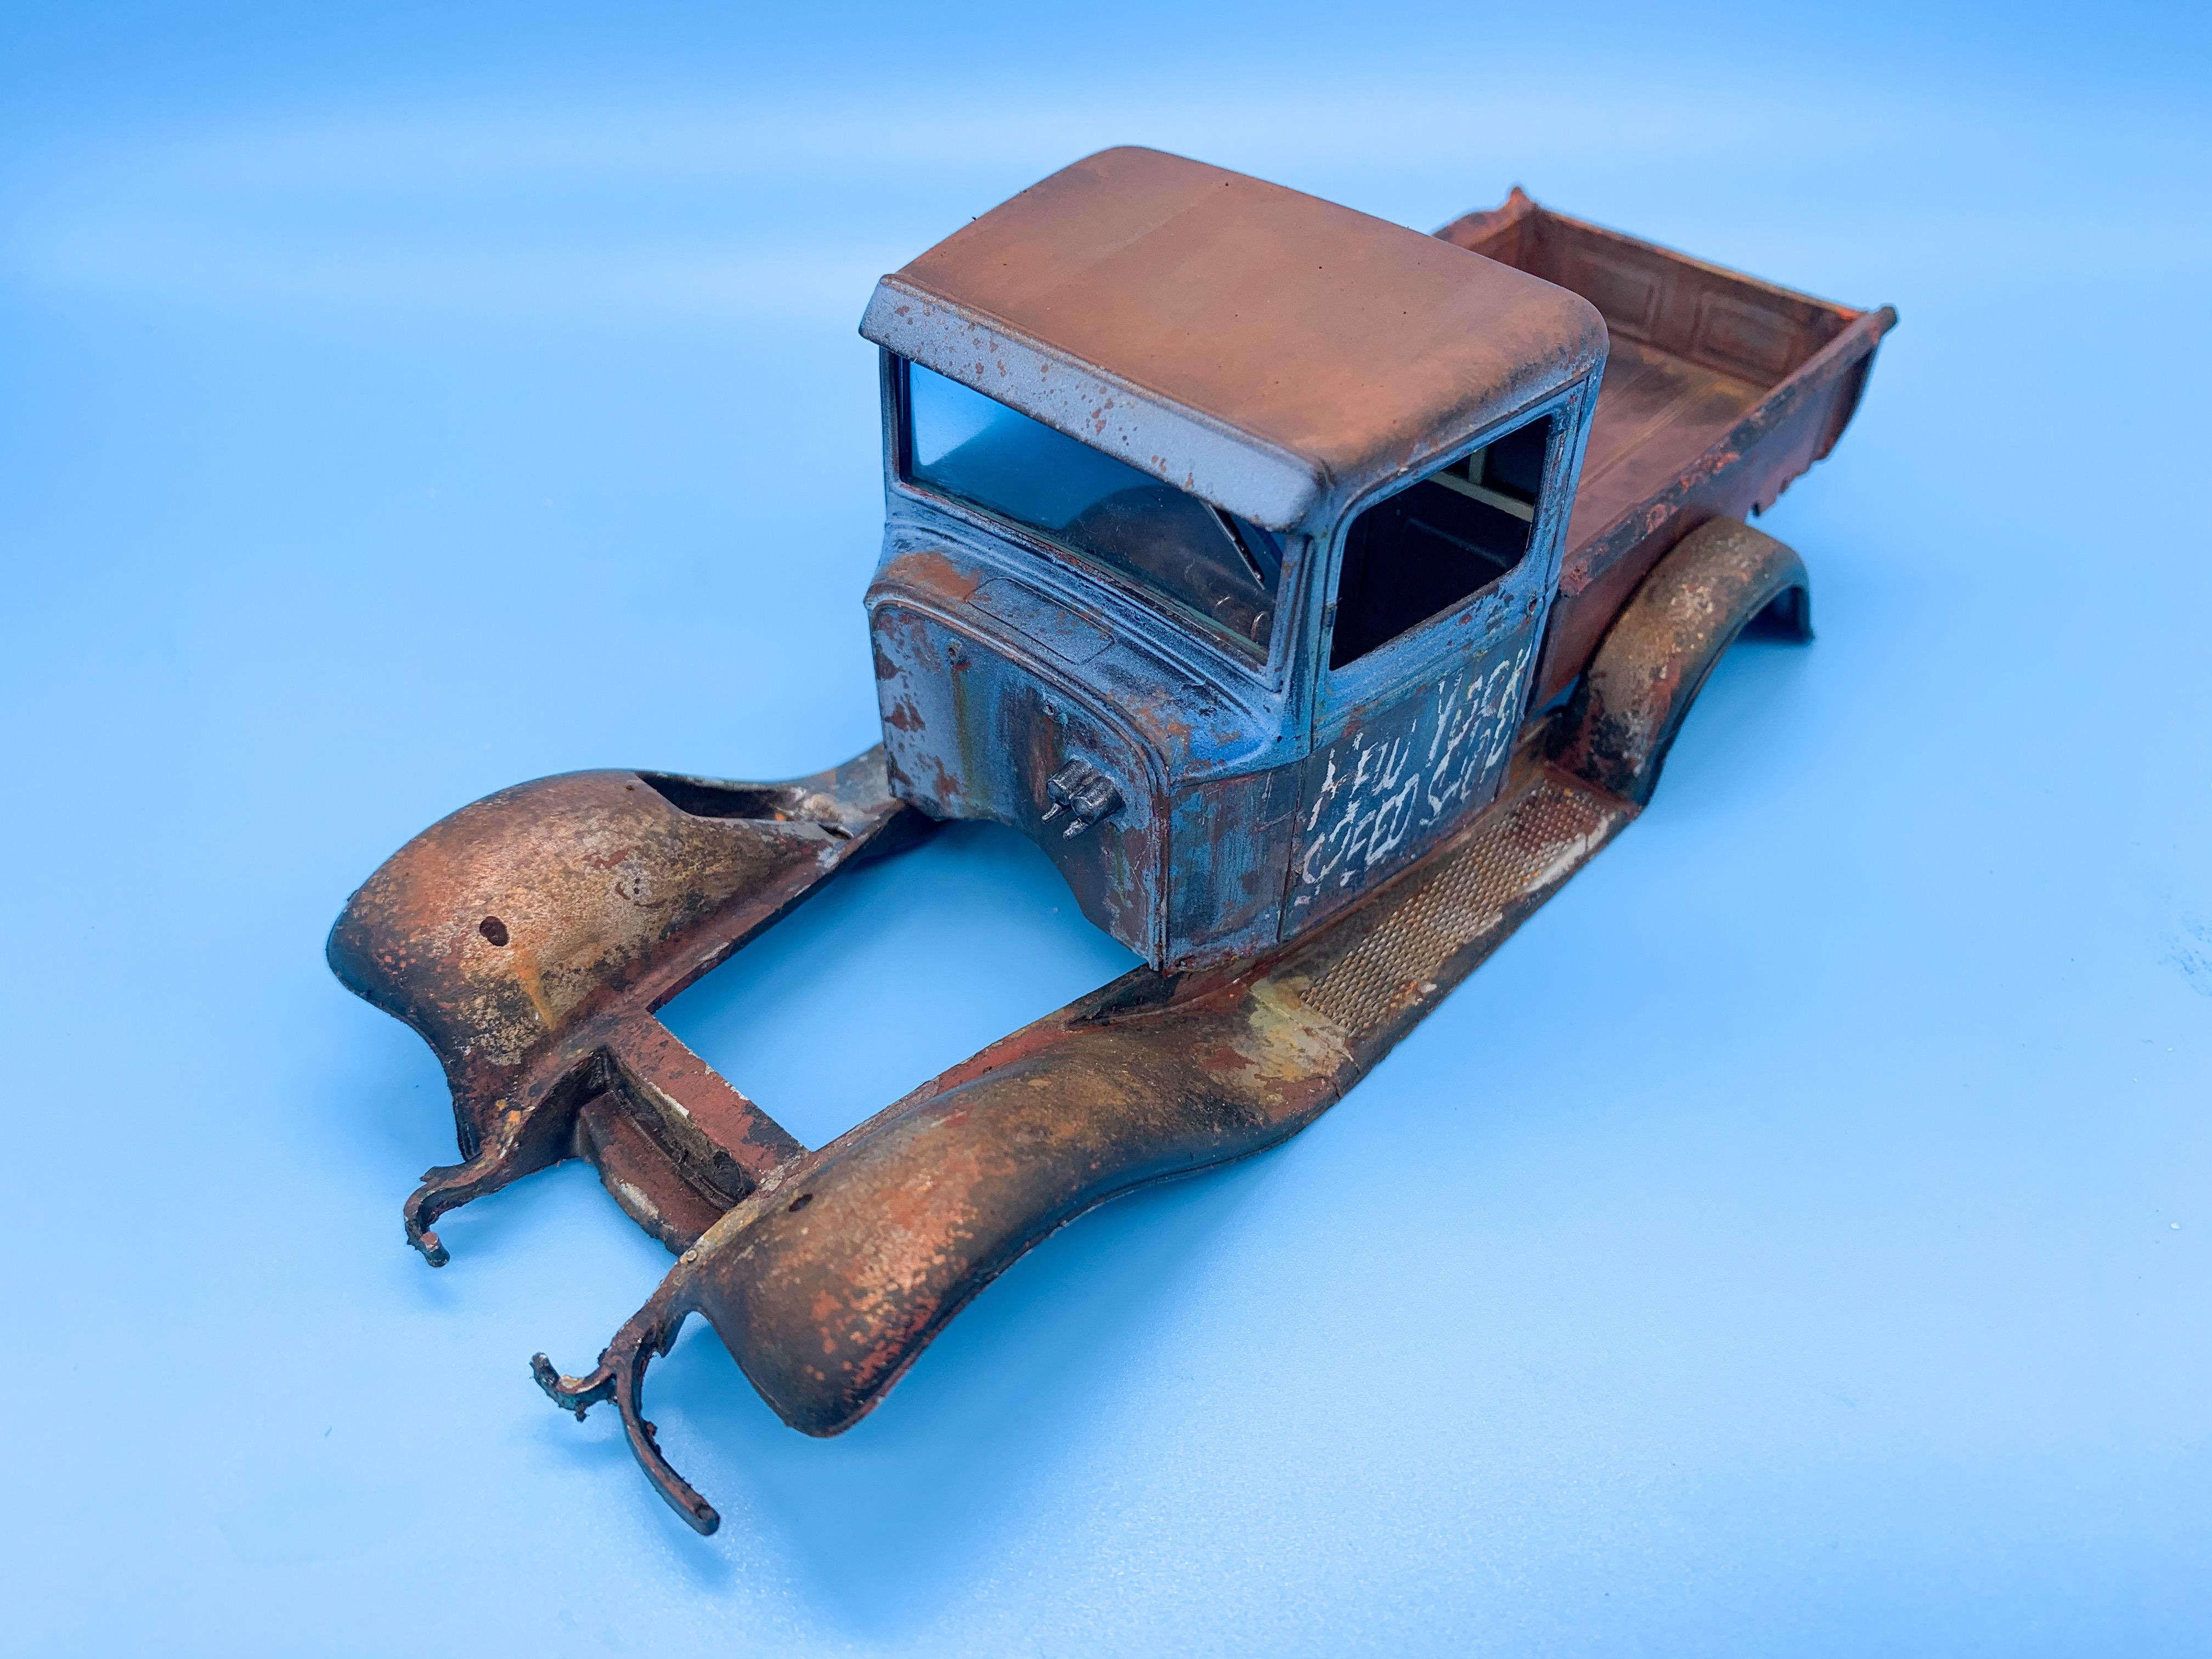
A little progress so far this weekend - getting to some of the mechanical bits now so I can get the frame together. The built-up kit I’m using as a basis for this build had a rear axle, so I cleaned that up, added some rural looking welds where it had been repaired at some point and got it in a semigloss black as a starting point for some weathering:
I reasoned that, being as this is meant to be a working hot-rod-shop-truck it’s cool to have those patina’d body panels and some running repairs but mechanically it needs to be pretty sound...weathered, but not looking like it would break down all the time. Who’s gonna trust a rod shop with a broken down truck? ?. So, no rust on these parts but maybe a little dust and dirt from being out on the mean streets of Brooklyn...
Used some brown and grey pastels to add some weathering and added a little leak from the drain plug that will need some attention next time this thing is on a ramp. Hey, it’s an old car - they like leaving some little drips everywhere, right?Next up, added cables for the parking brake and some rubber brake lines, plus some nice new shiny bolts where they’ve had to drill the old ones out to do some maintainance:
Looks in-keeping with the rest of the frame I think:
Got some detail painting to do on the engine, but in the meantime I’ll probably tackle the front axle...more soon! -
5 hours ago, RSchnell said:
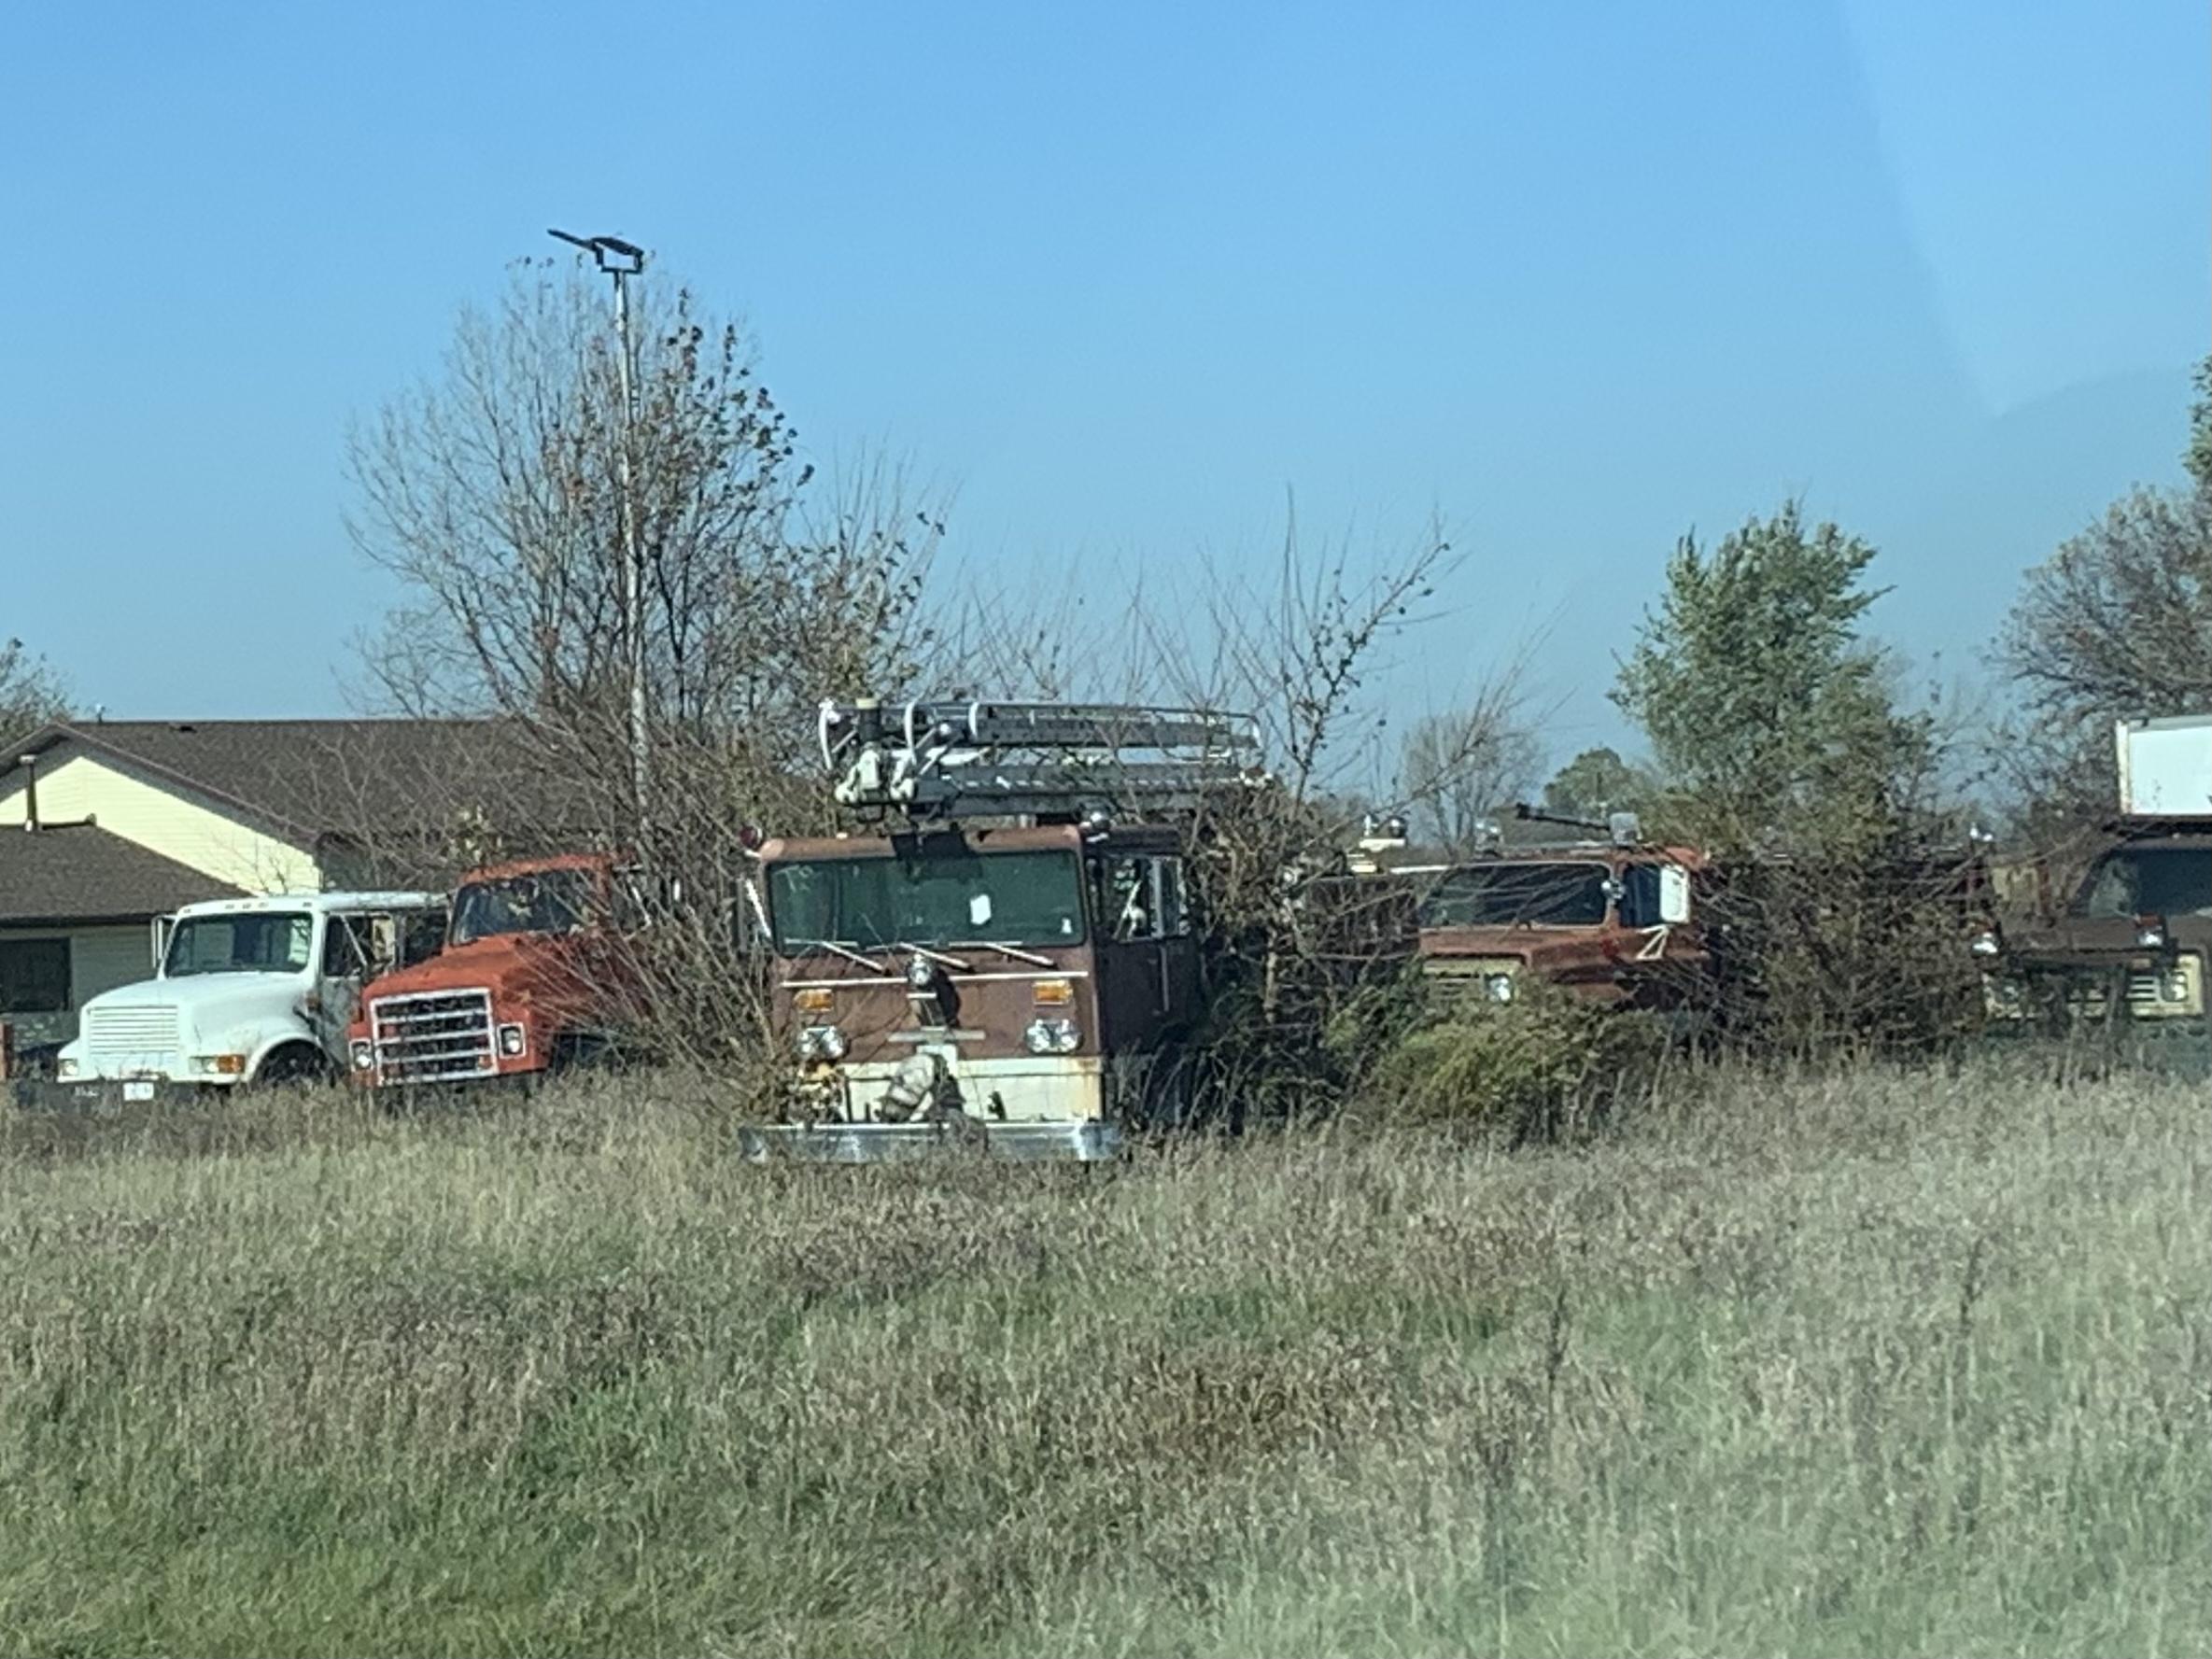
Looks like an old American LaFrance "Pioneer". An interesting collection of equipment in the background!
Interesting, thank you! There’s some pretty cool old junk around here!
-
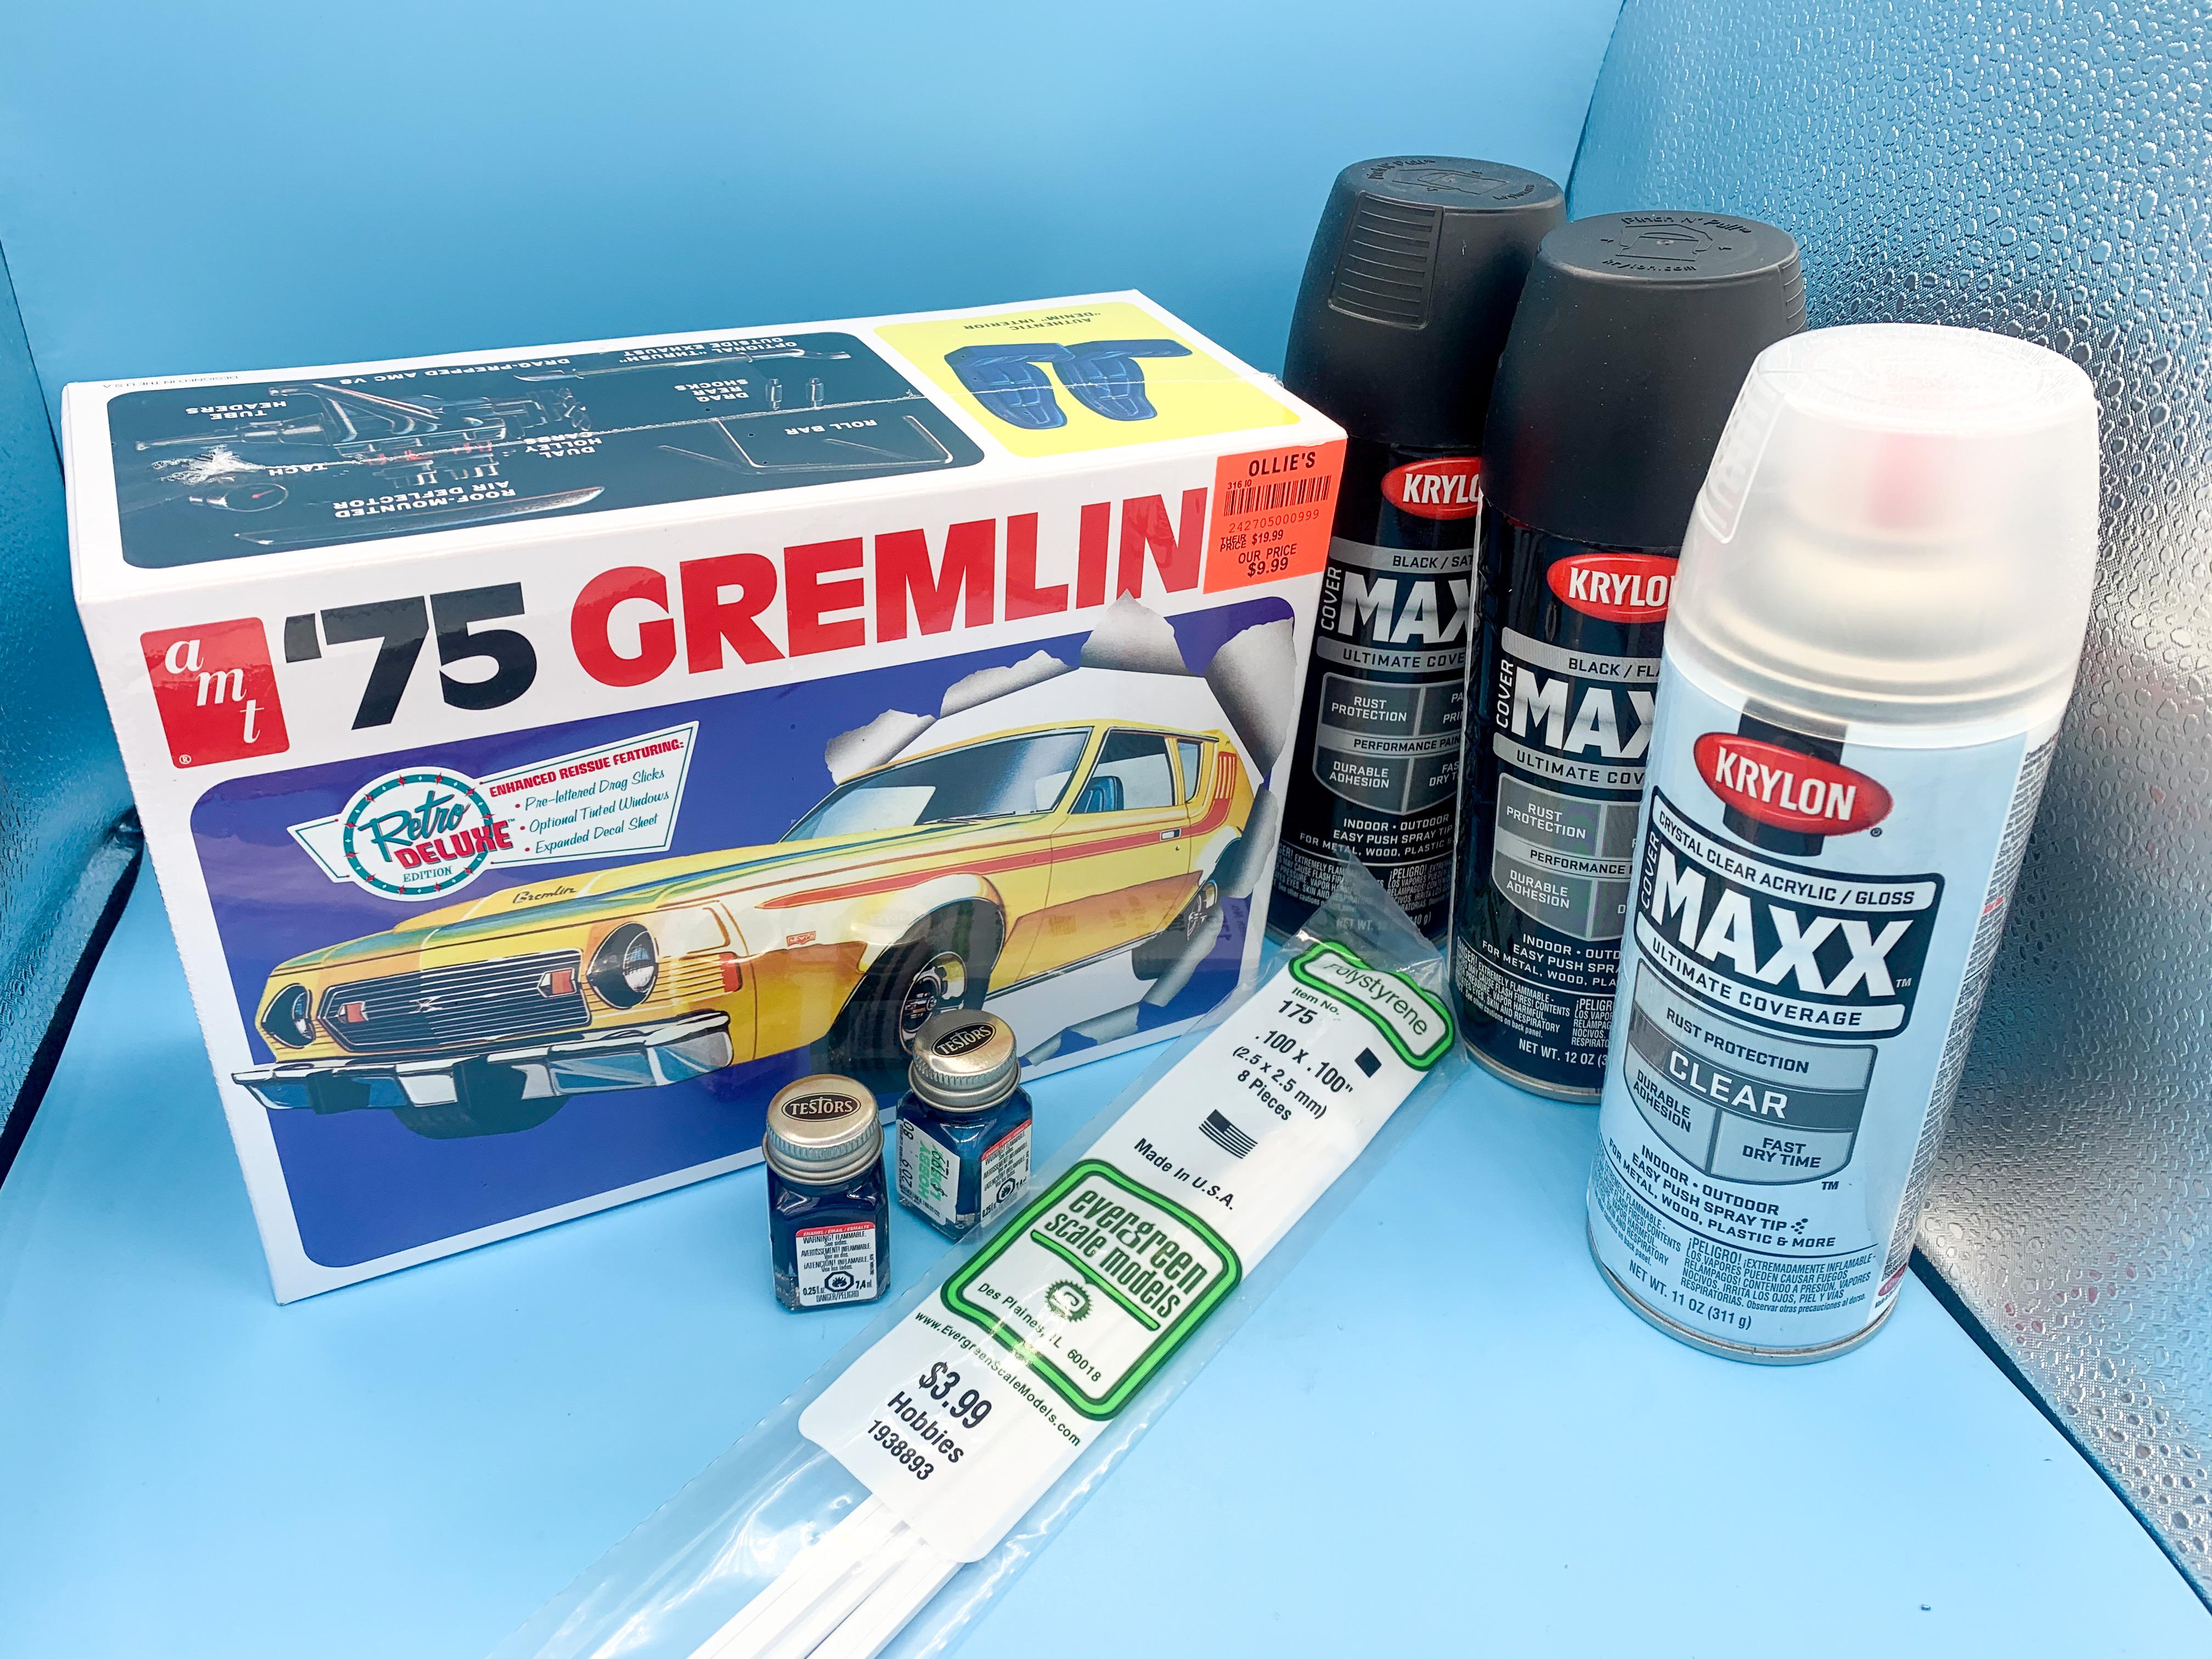
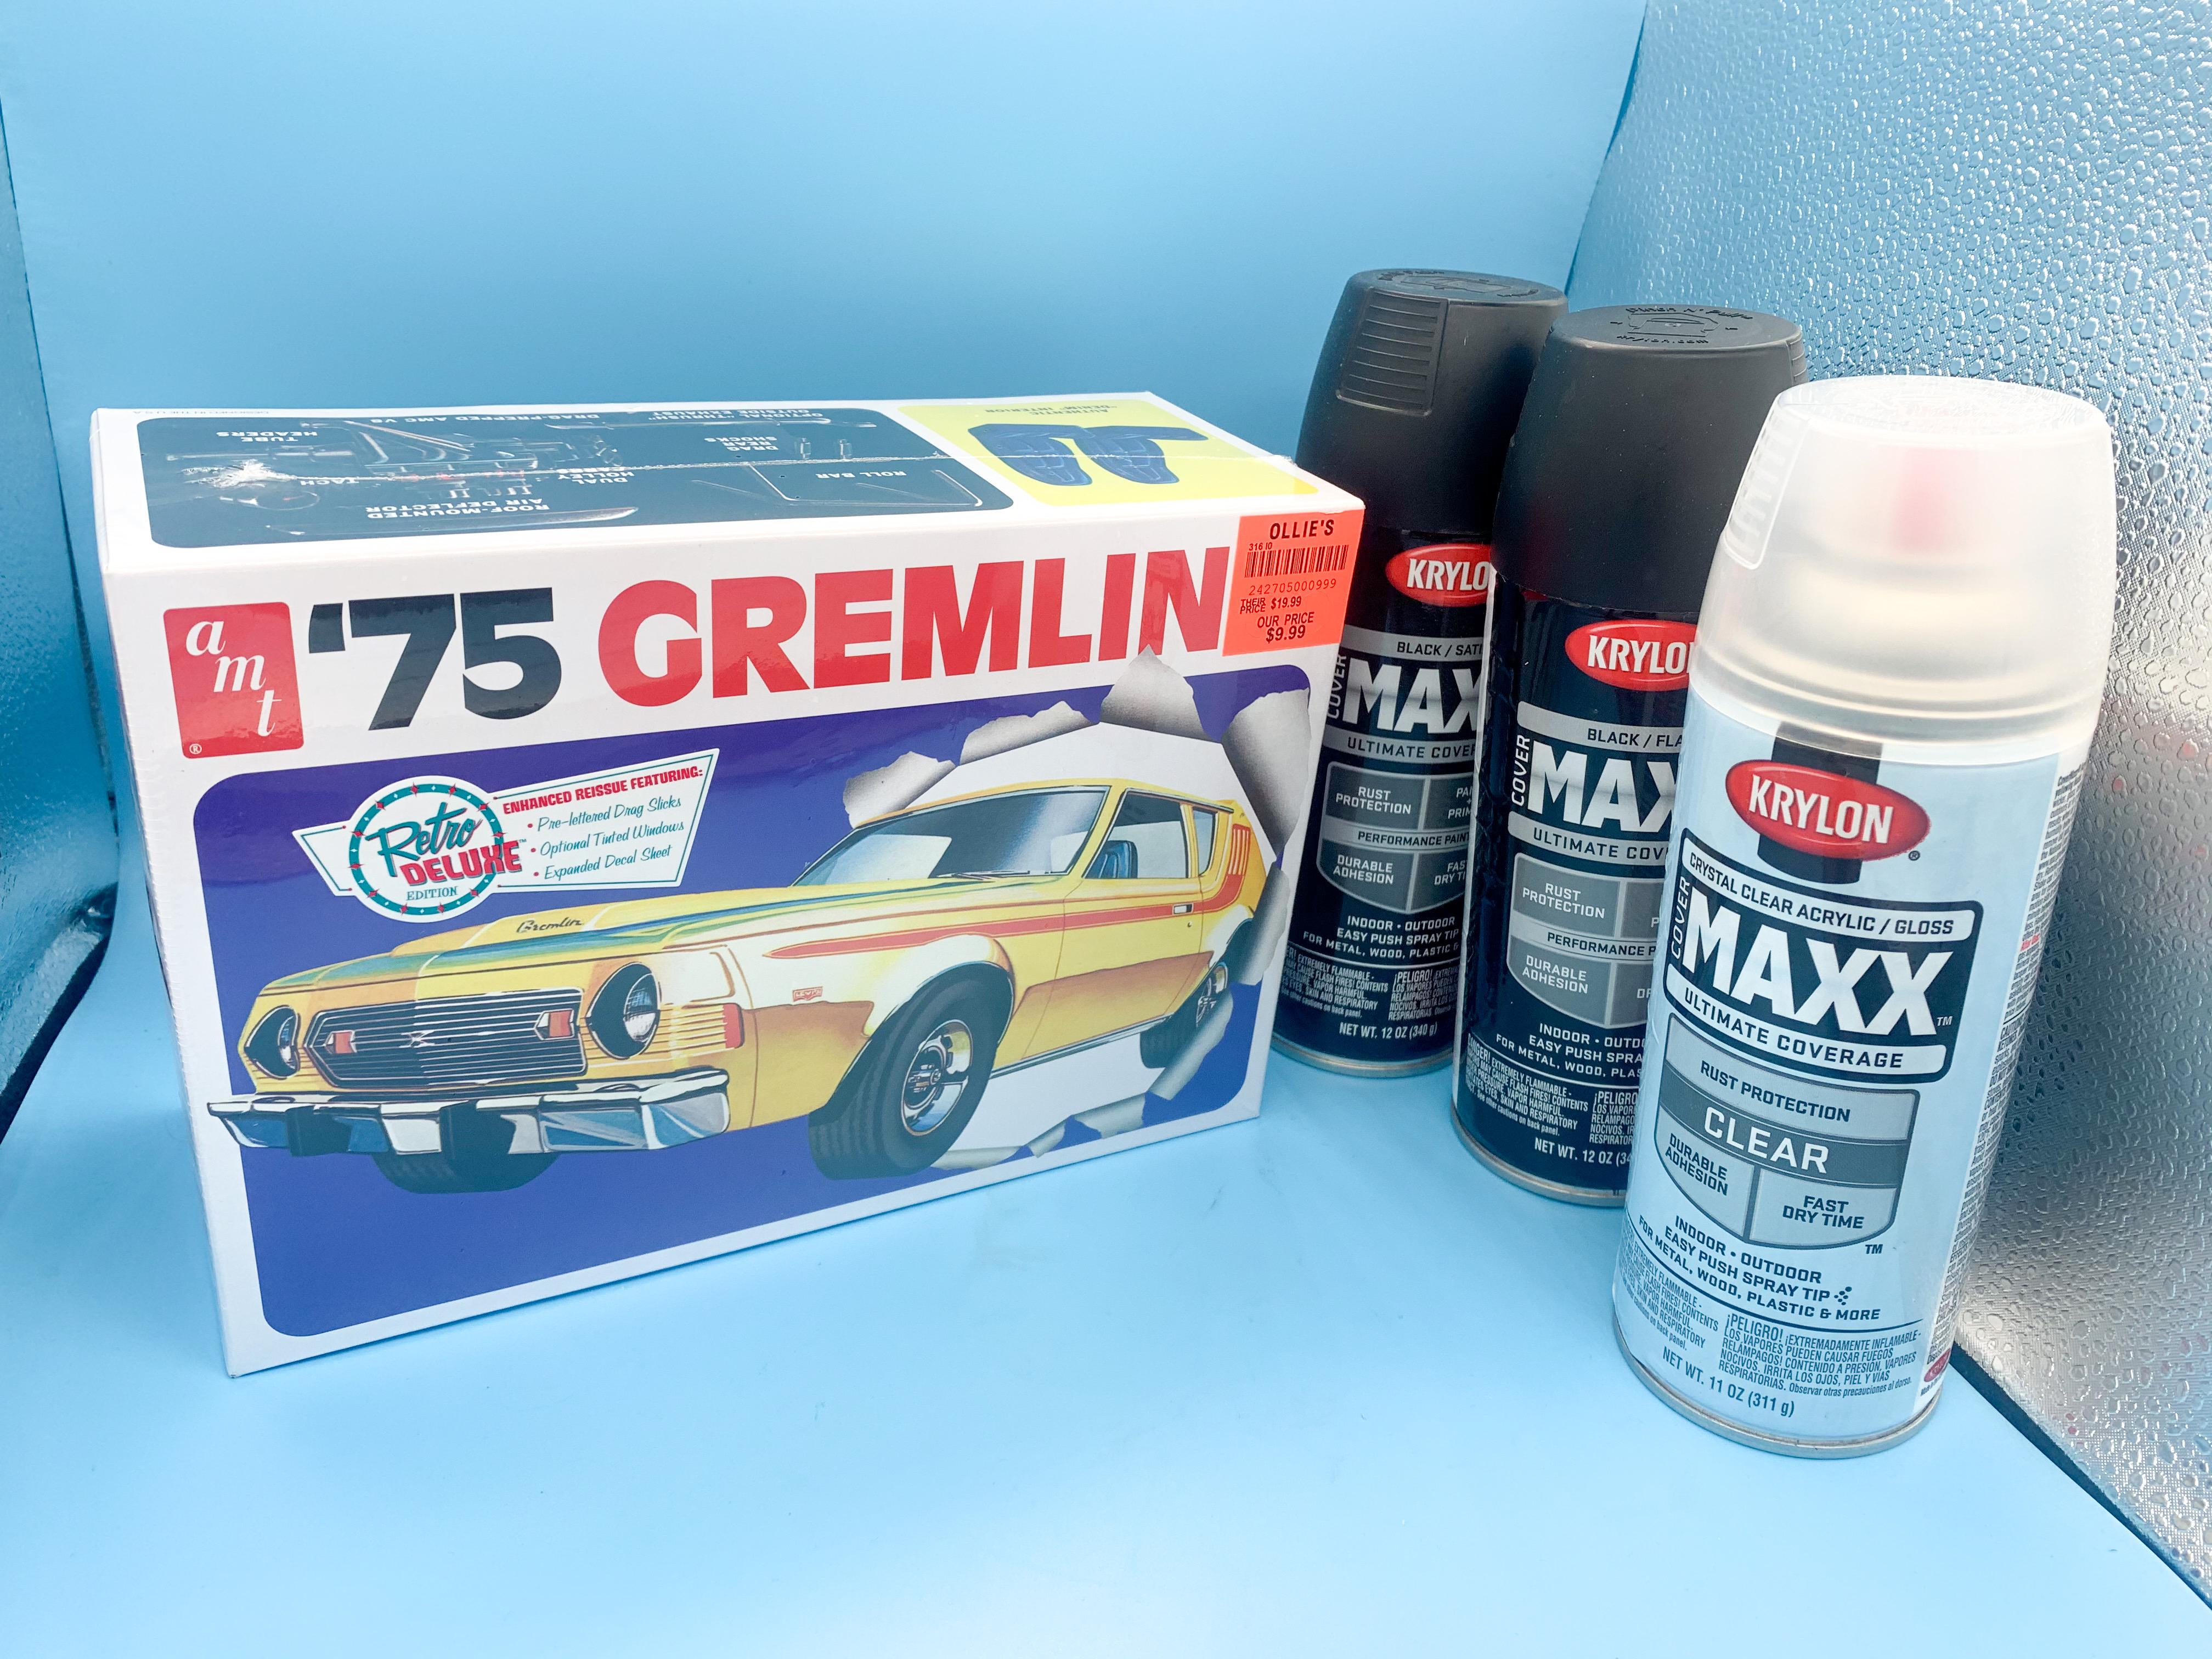
AMT Gremlin, because I’ve always wanted to build one and they’re $10 at Ollie’s right now (actually, $8.50 if you’re a loyalty member and you use your coupon), some $2 paint from Ollie’s too and a couple of bits from Hobby Lobby. I love Saturday shopping day!

-
Not ON the road, but next to it - I wanna stop and get a better look at this thing next time I’m passing...not really a truck guy but I’d be interested to know what that firetruck is if anyone knows?
-
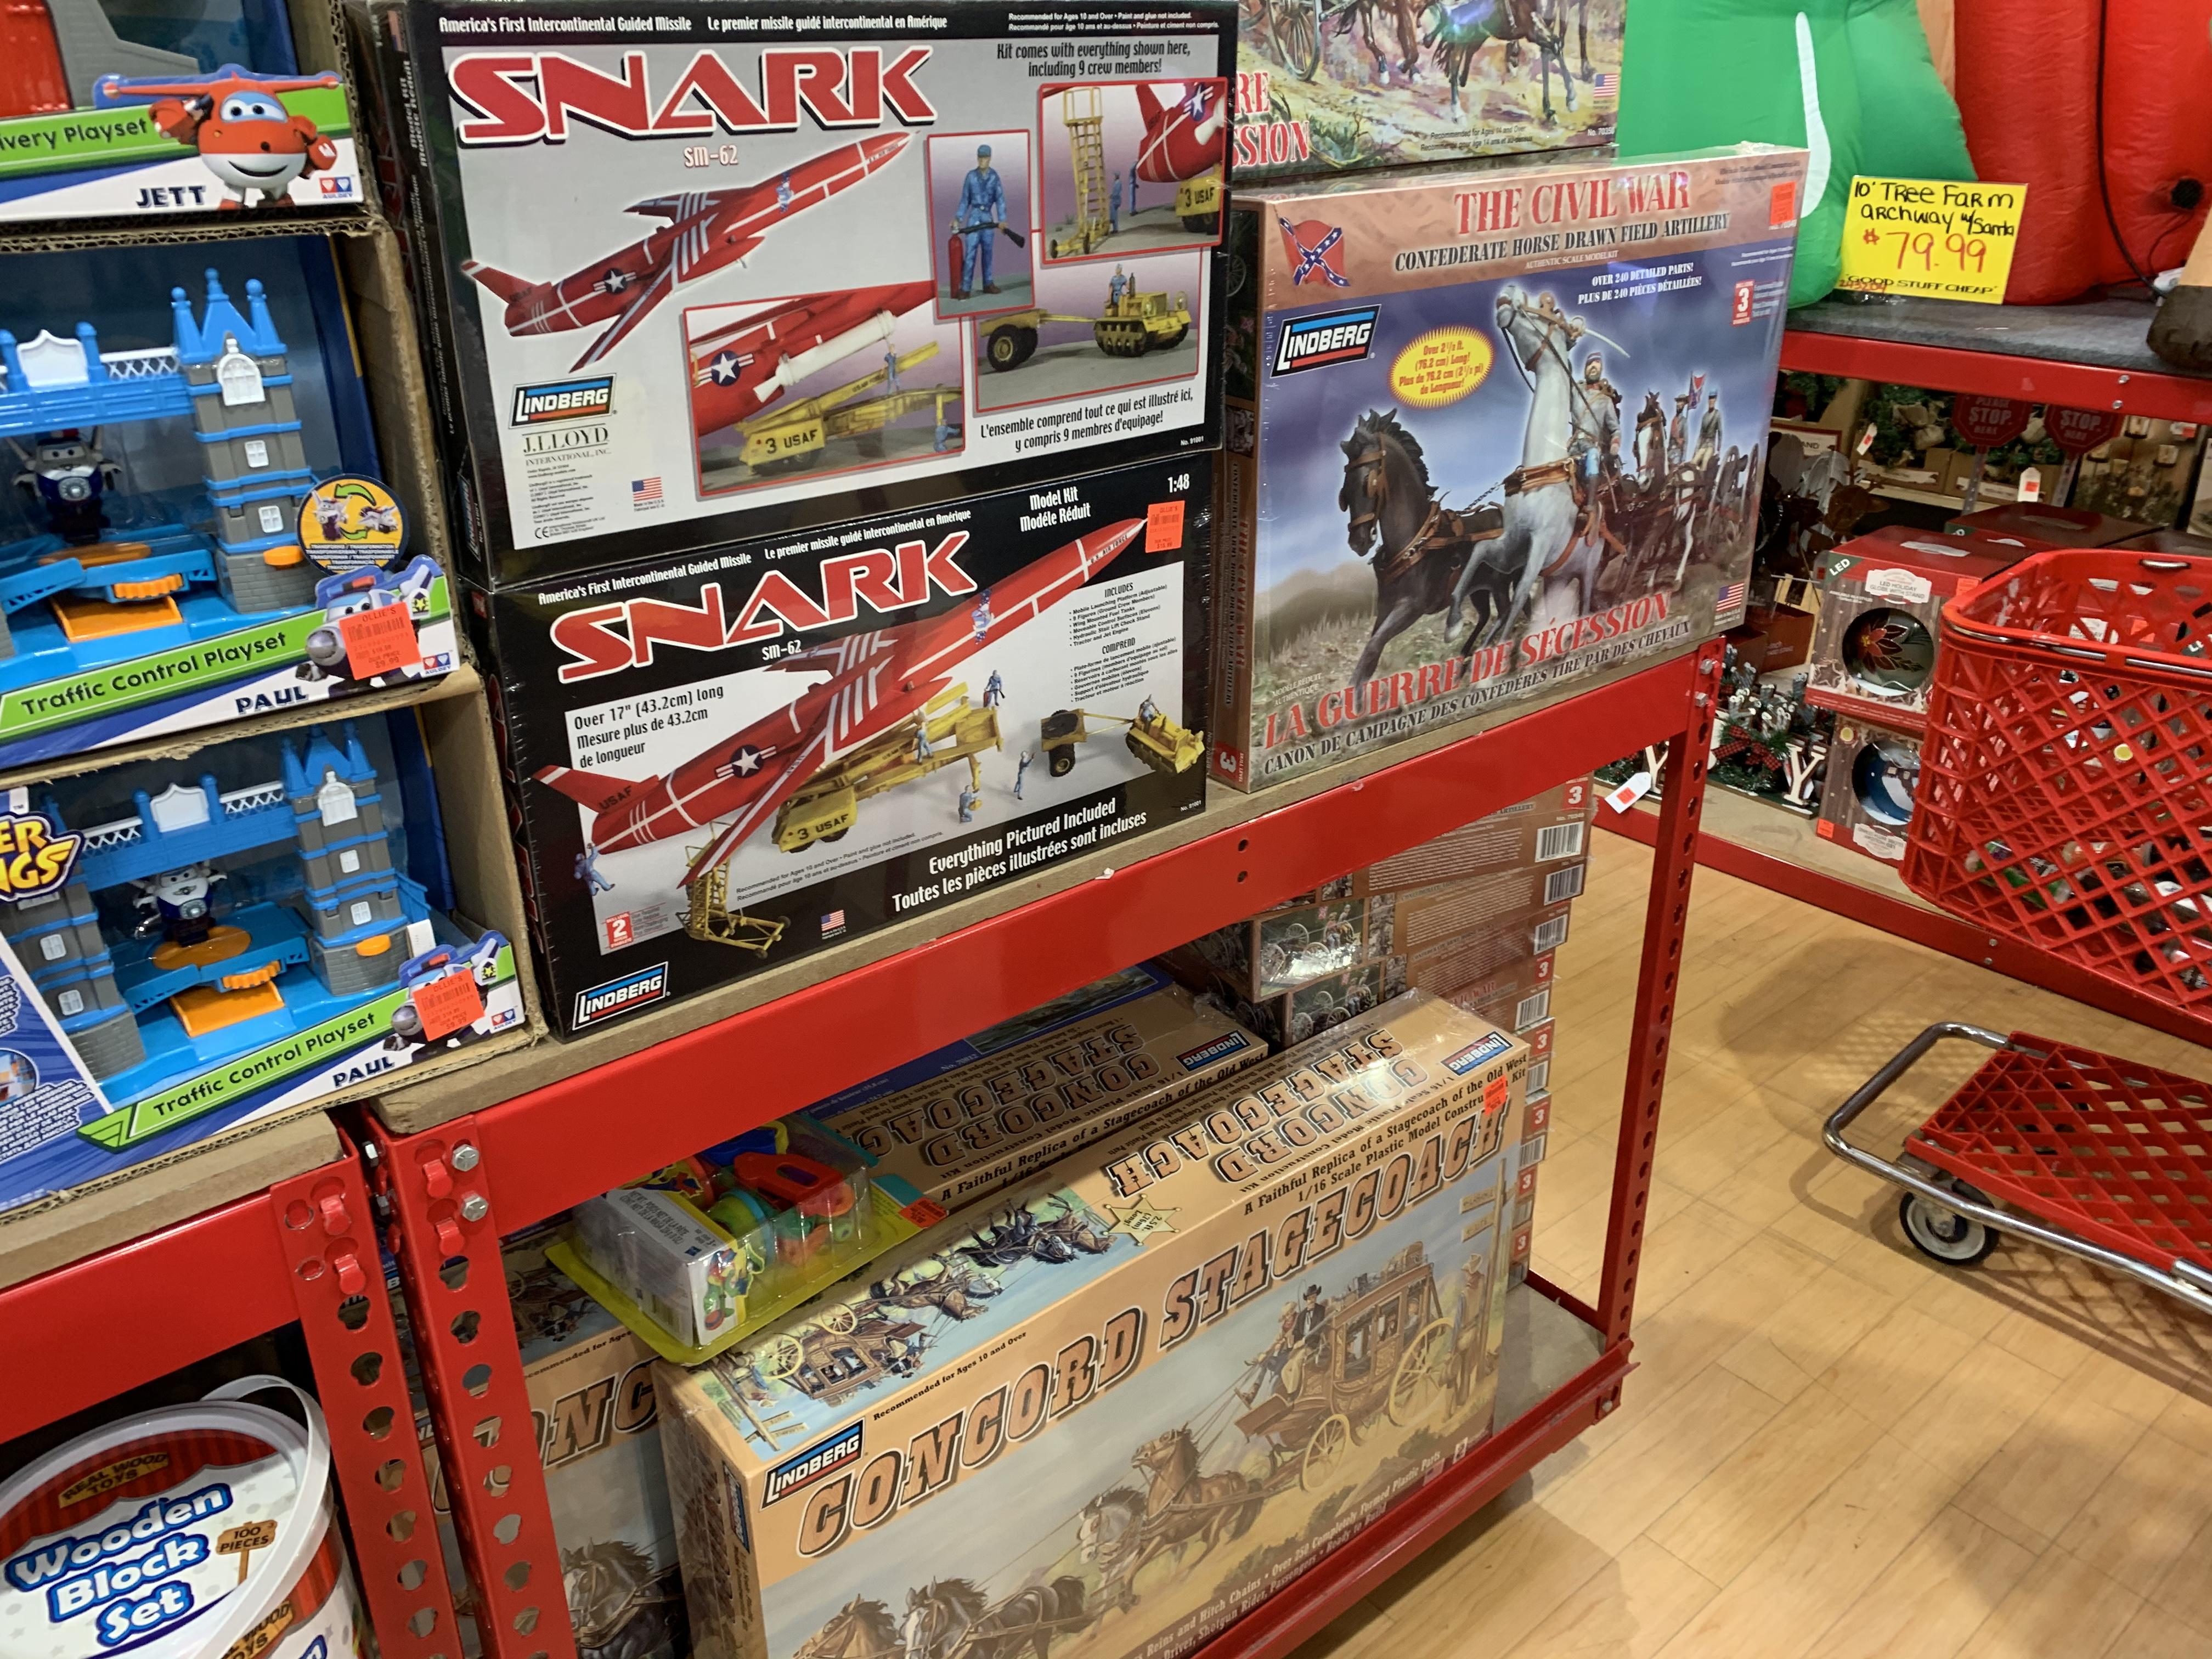
Pretty good stock at my local store!
Picked up the Gremmy I wanted, and some of the more useful paint colors they had
Seemed like they had about everything everyone has mentioned so far in the thread, and probably 5-10 of each, so no shortage or hunting to be done this time around. Got lucky, finally!
-
2 hours ago, Robberbaron said:
Yup, stopped at the Merrillville, IN store and got one of the Gremlins
Heading to that one today to try and pick up a Gremmy too! Fingers crossed they have one still
-
I absolutely love this build - looks amazing! And it’s cool to still get to see your projects come together now that the other mag is gone...I always enjoyed your SA articles Tim!
Ill be continuing to follow along!
-
22 hours ago, Skip said:
I have never used it but have read more than once where some painters use an acrylic such as Future over the bare styrene or primer to provide a barrier to shoot a "Hot Lacquer" without burning / crazing the styrene.
I like Future over my Createx when I’m going to be masking and adding more layers too. It’s super thin so it doesn’t build up a bunch of depth and obscure details, but it’s tough enough to mask over and I’ve never had ANY tape I’ve used pull it up. But if tape WERE to pull up something, I’d rather it was clear than something nice that I’d painted...
-
Weathered and detailed a toolbox for a simple evening project...
...then realised I can’t just have an empty toolbox and now I gotta make/modify/weather a bunch of tools. So much for a simple little project ??
-
On 10/27/2020 at 10:28 PM, stitchdup said:
Very fine work, the bed floor is a fun detail to have
Thank you sir!
On 10/27/2020 at 10:29 PM, Steve H said:Jim, once again you are crushing it!... actually, I guess you’re rusting it. Anyway, your WIP’s are educational, entertaining, and all round fun. I have learned a ton watching these. Definitely going to try out the salt on my next weathered build. One question, do they look at you funny at the local grocery store when you keep coming back to buy more salt?????
seriously though, amazing work.
Cheers, Steve
Haha! Thanks buddy! Funny you say that - I had to run to the Dollar Tree to get more salt because my wife was sick of wondering where the salt was. Got some of my own, and some other model-related junk whilst I was there...and some weird bootleg stickers ?
Should have enough salt for a few more weeks of weathering now anyway...won’t be needing those polishing clothes for this one though, I don’t think...On 10/28/2020 at 8:07 AM, espo said:Great looking frame, I like how you show where it bottomed out on the transmission support.
Thanks buddy! I’ll detail the frame up some more when I start adding parts to it, but it’s a start anyway...
12 hours ago, Jonathan said:Man, oh man! This is the coolest thing I've seen in a while!
Thank you! ❤️
12 hours ago, Paul Payne said:This is a really good tutorial- love the way this truck is looking! How about a patch panel or two? Maybe an old license plate?
Ohh, that’s a cool idea! I should try and think of where to utilise that somehow on this (or stash the idea away for the next one...)
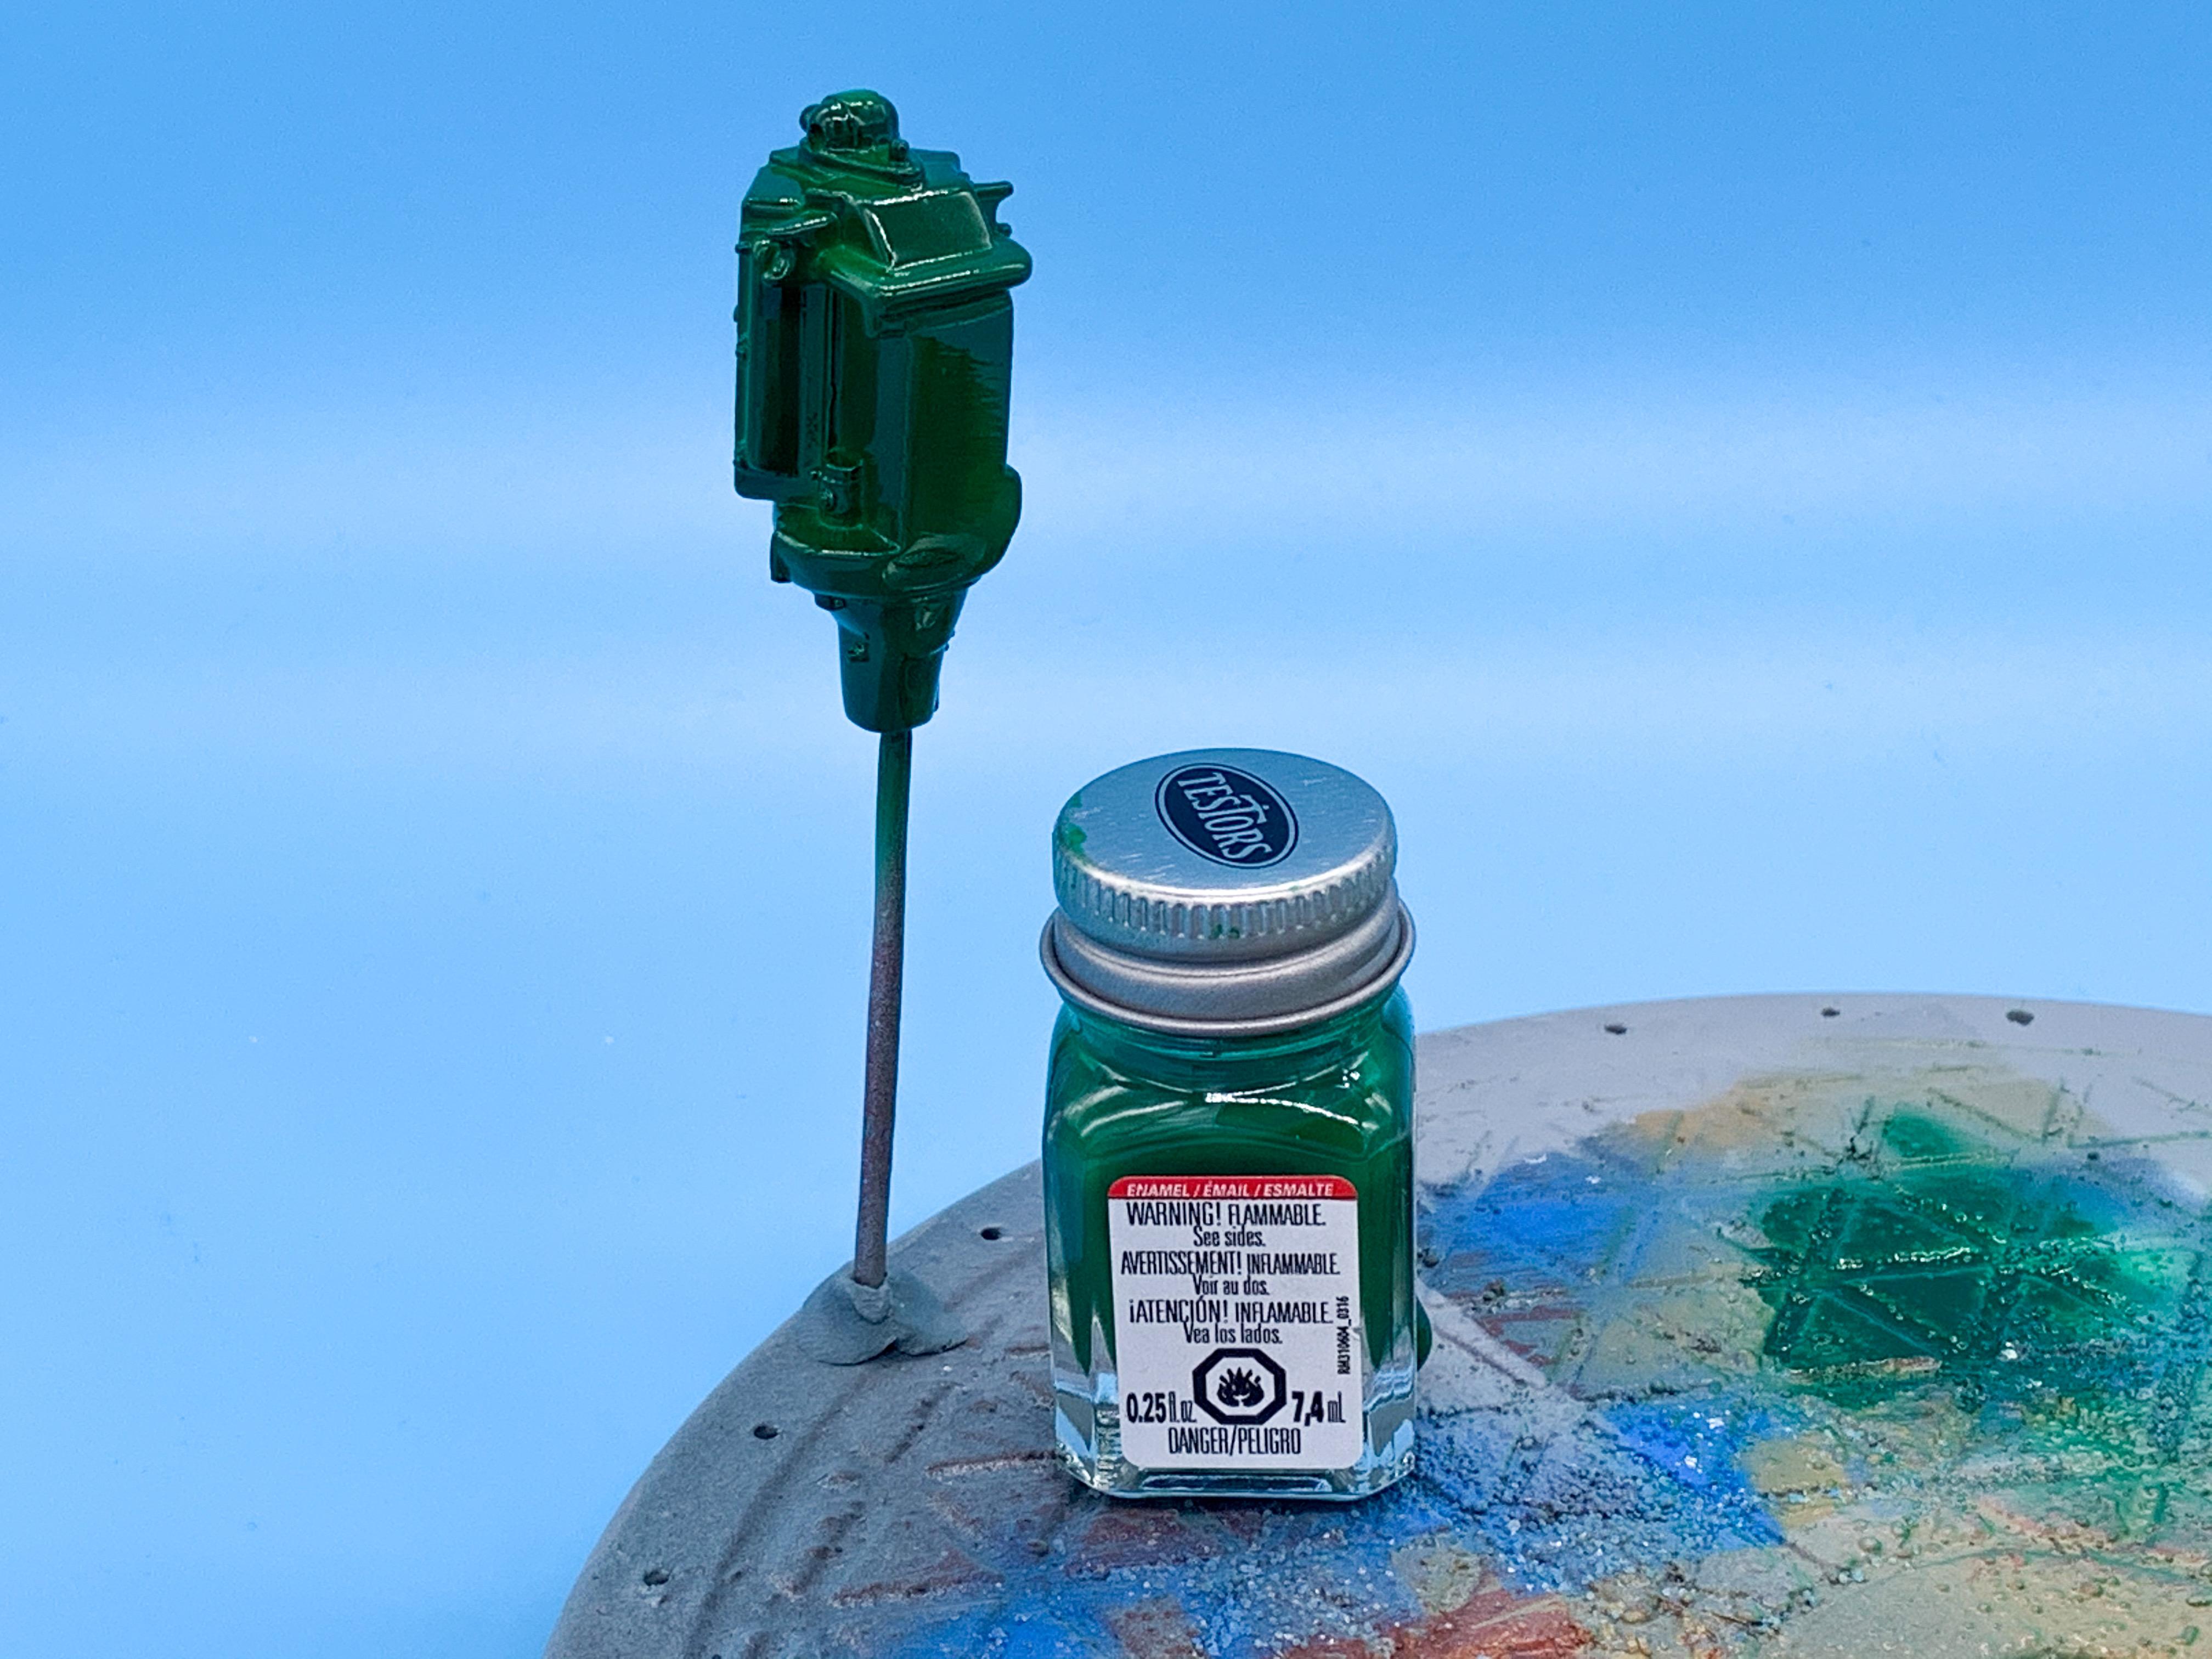
Having a busy week but trying to keep rolling on this one...shot the engine parts with a loose approximation of an early Ford green, mixed with Testors enamels:
I figure if ONE PART on this old hot-rod shop truck should look like it didn’t sit in a field for the last 40 years it should be the engine, so this will be slightly better looking than some of the other parts...more on that once the paint has dried and I’ve found some good Flathead reference pics...
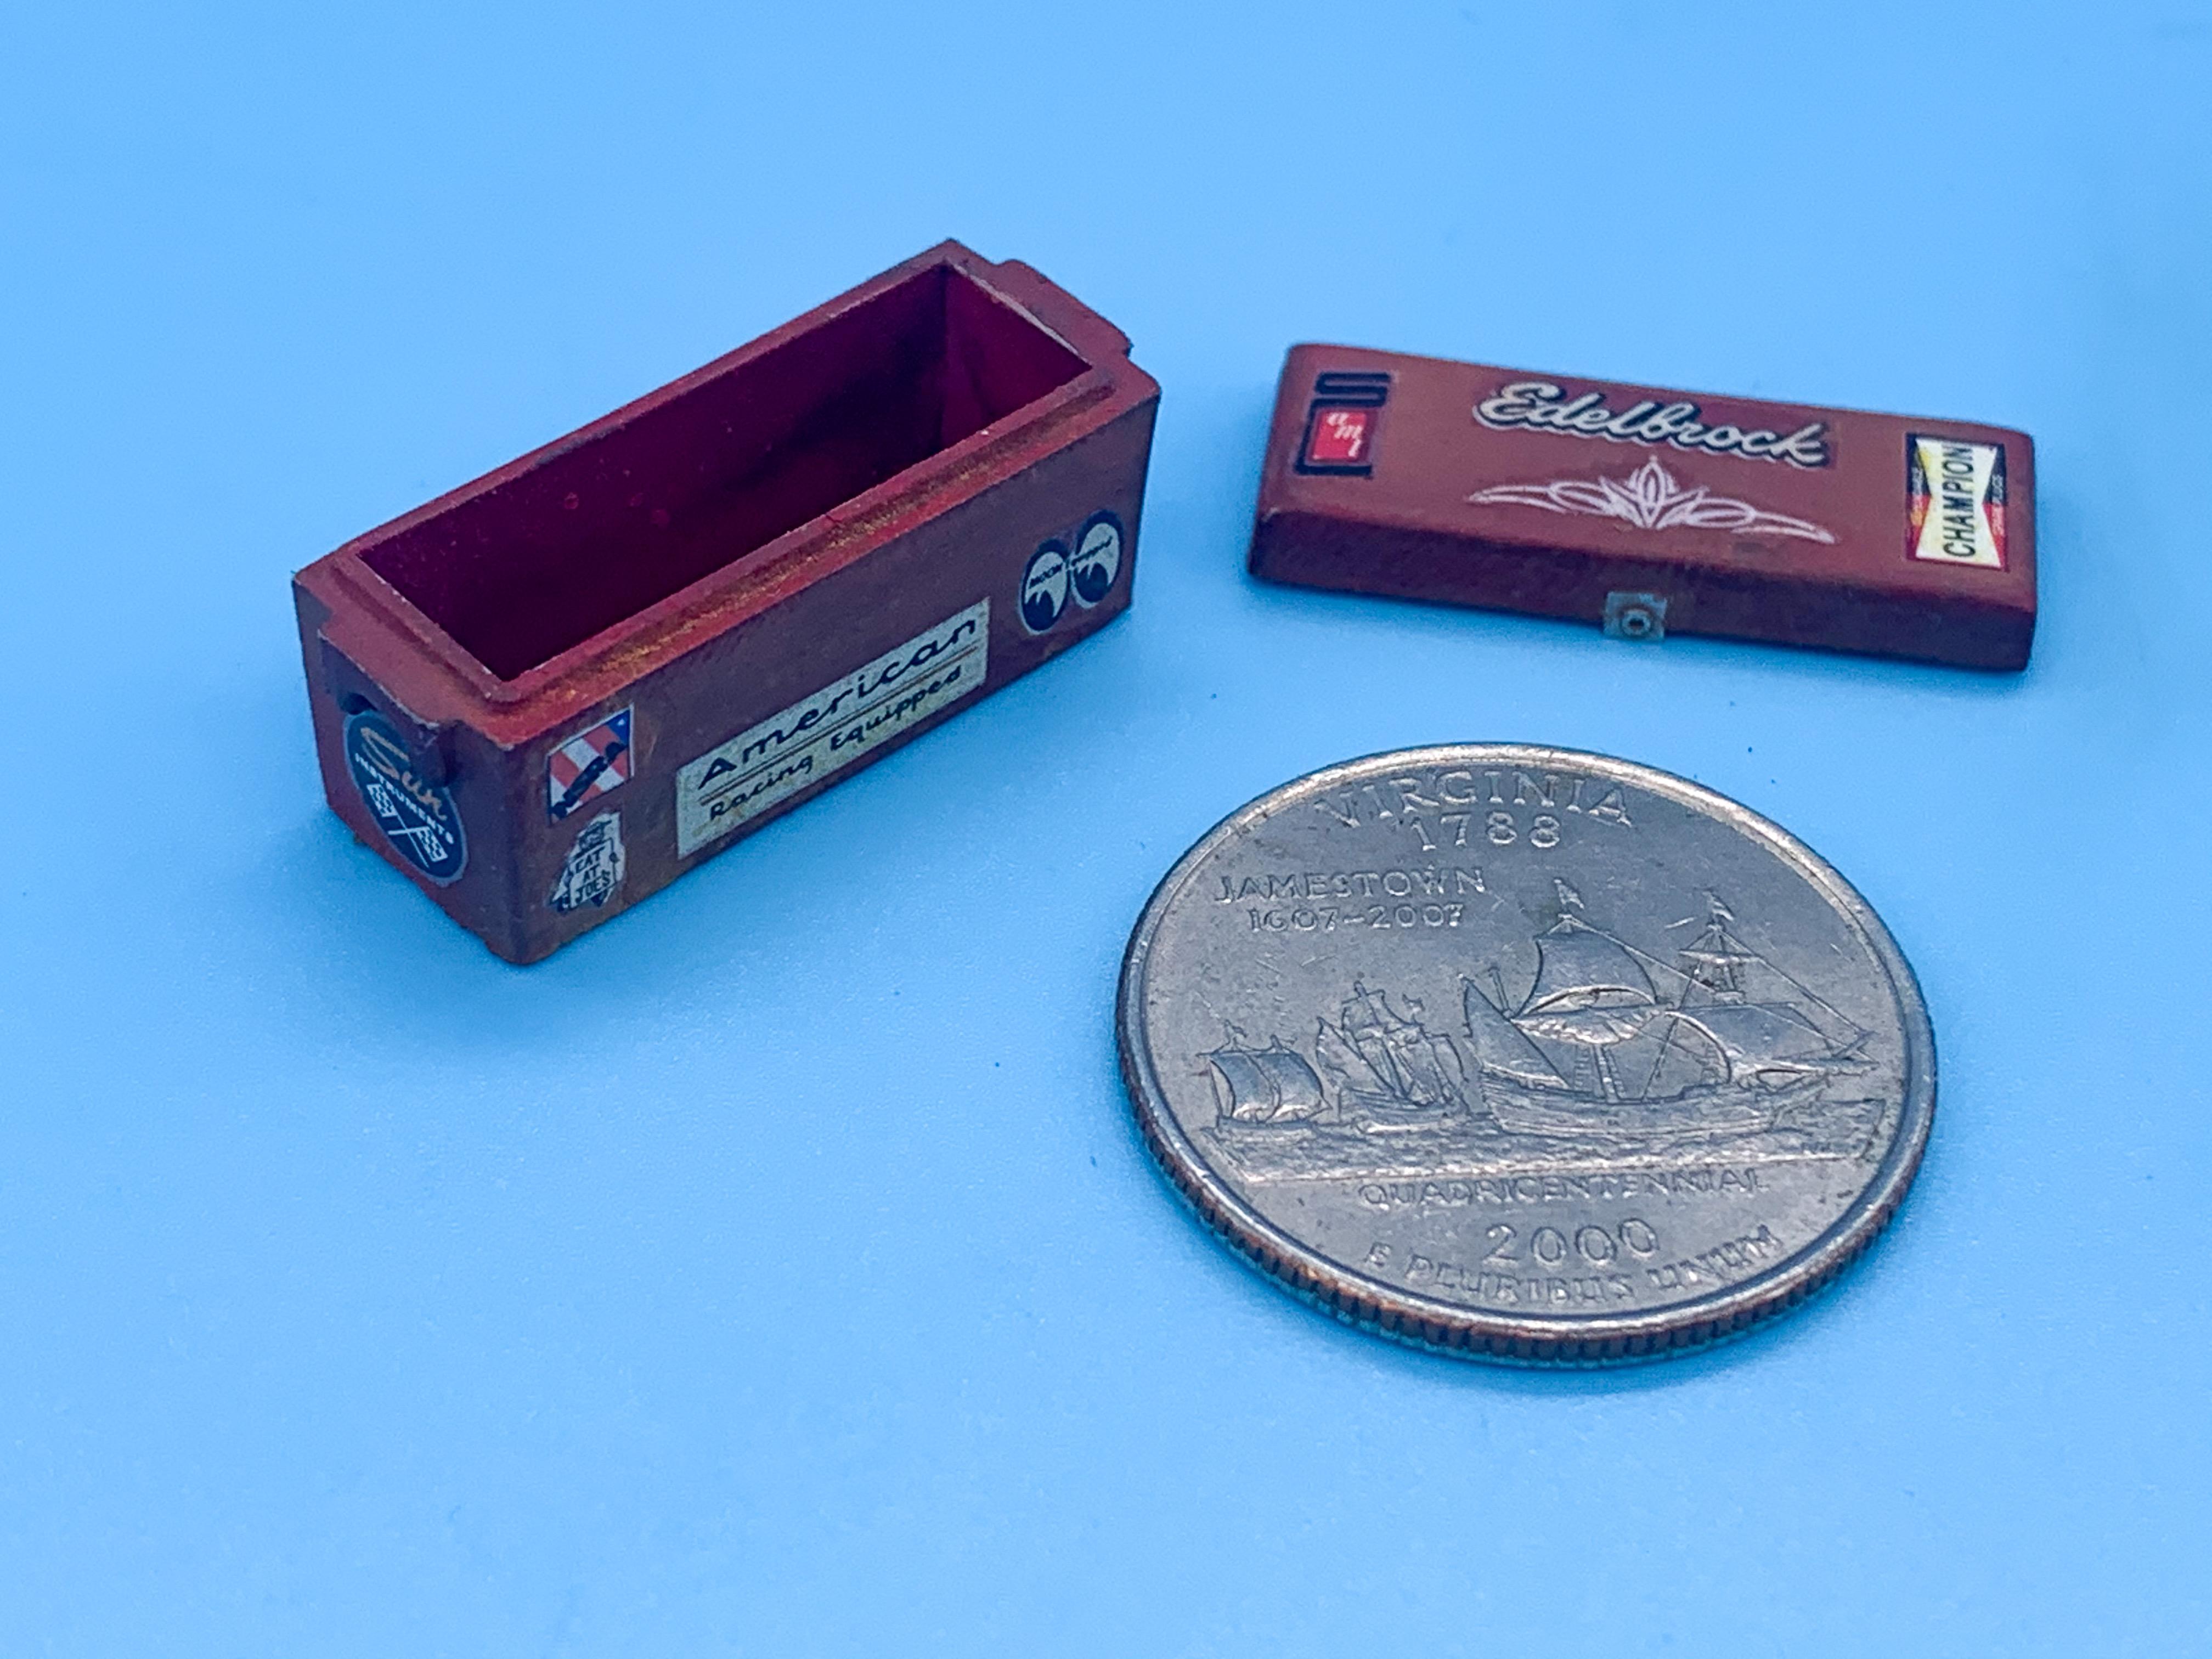
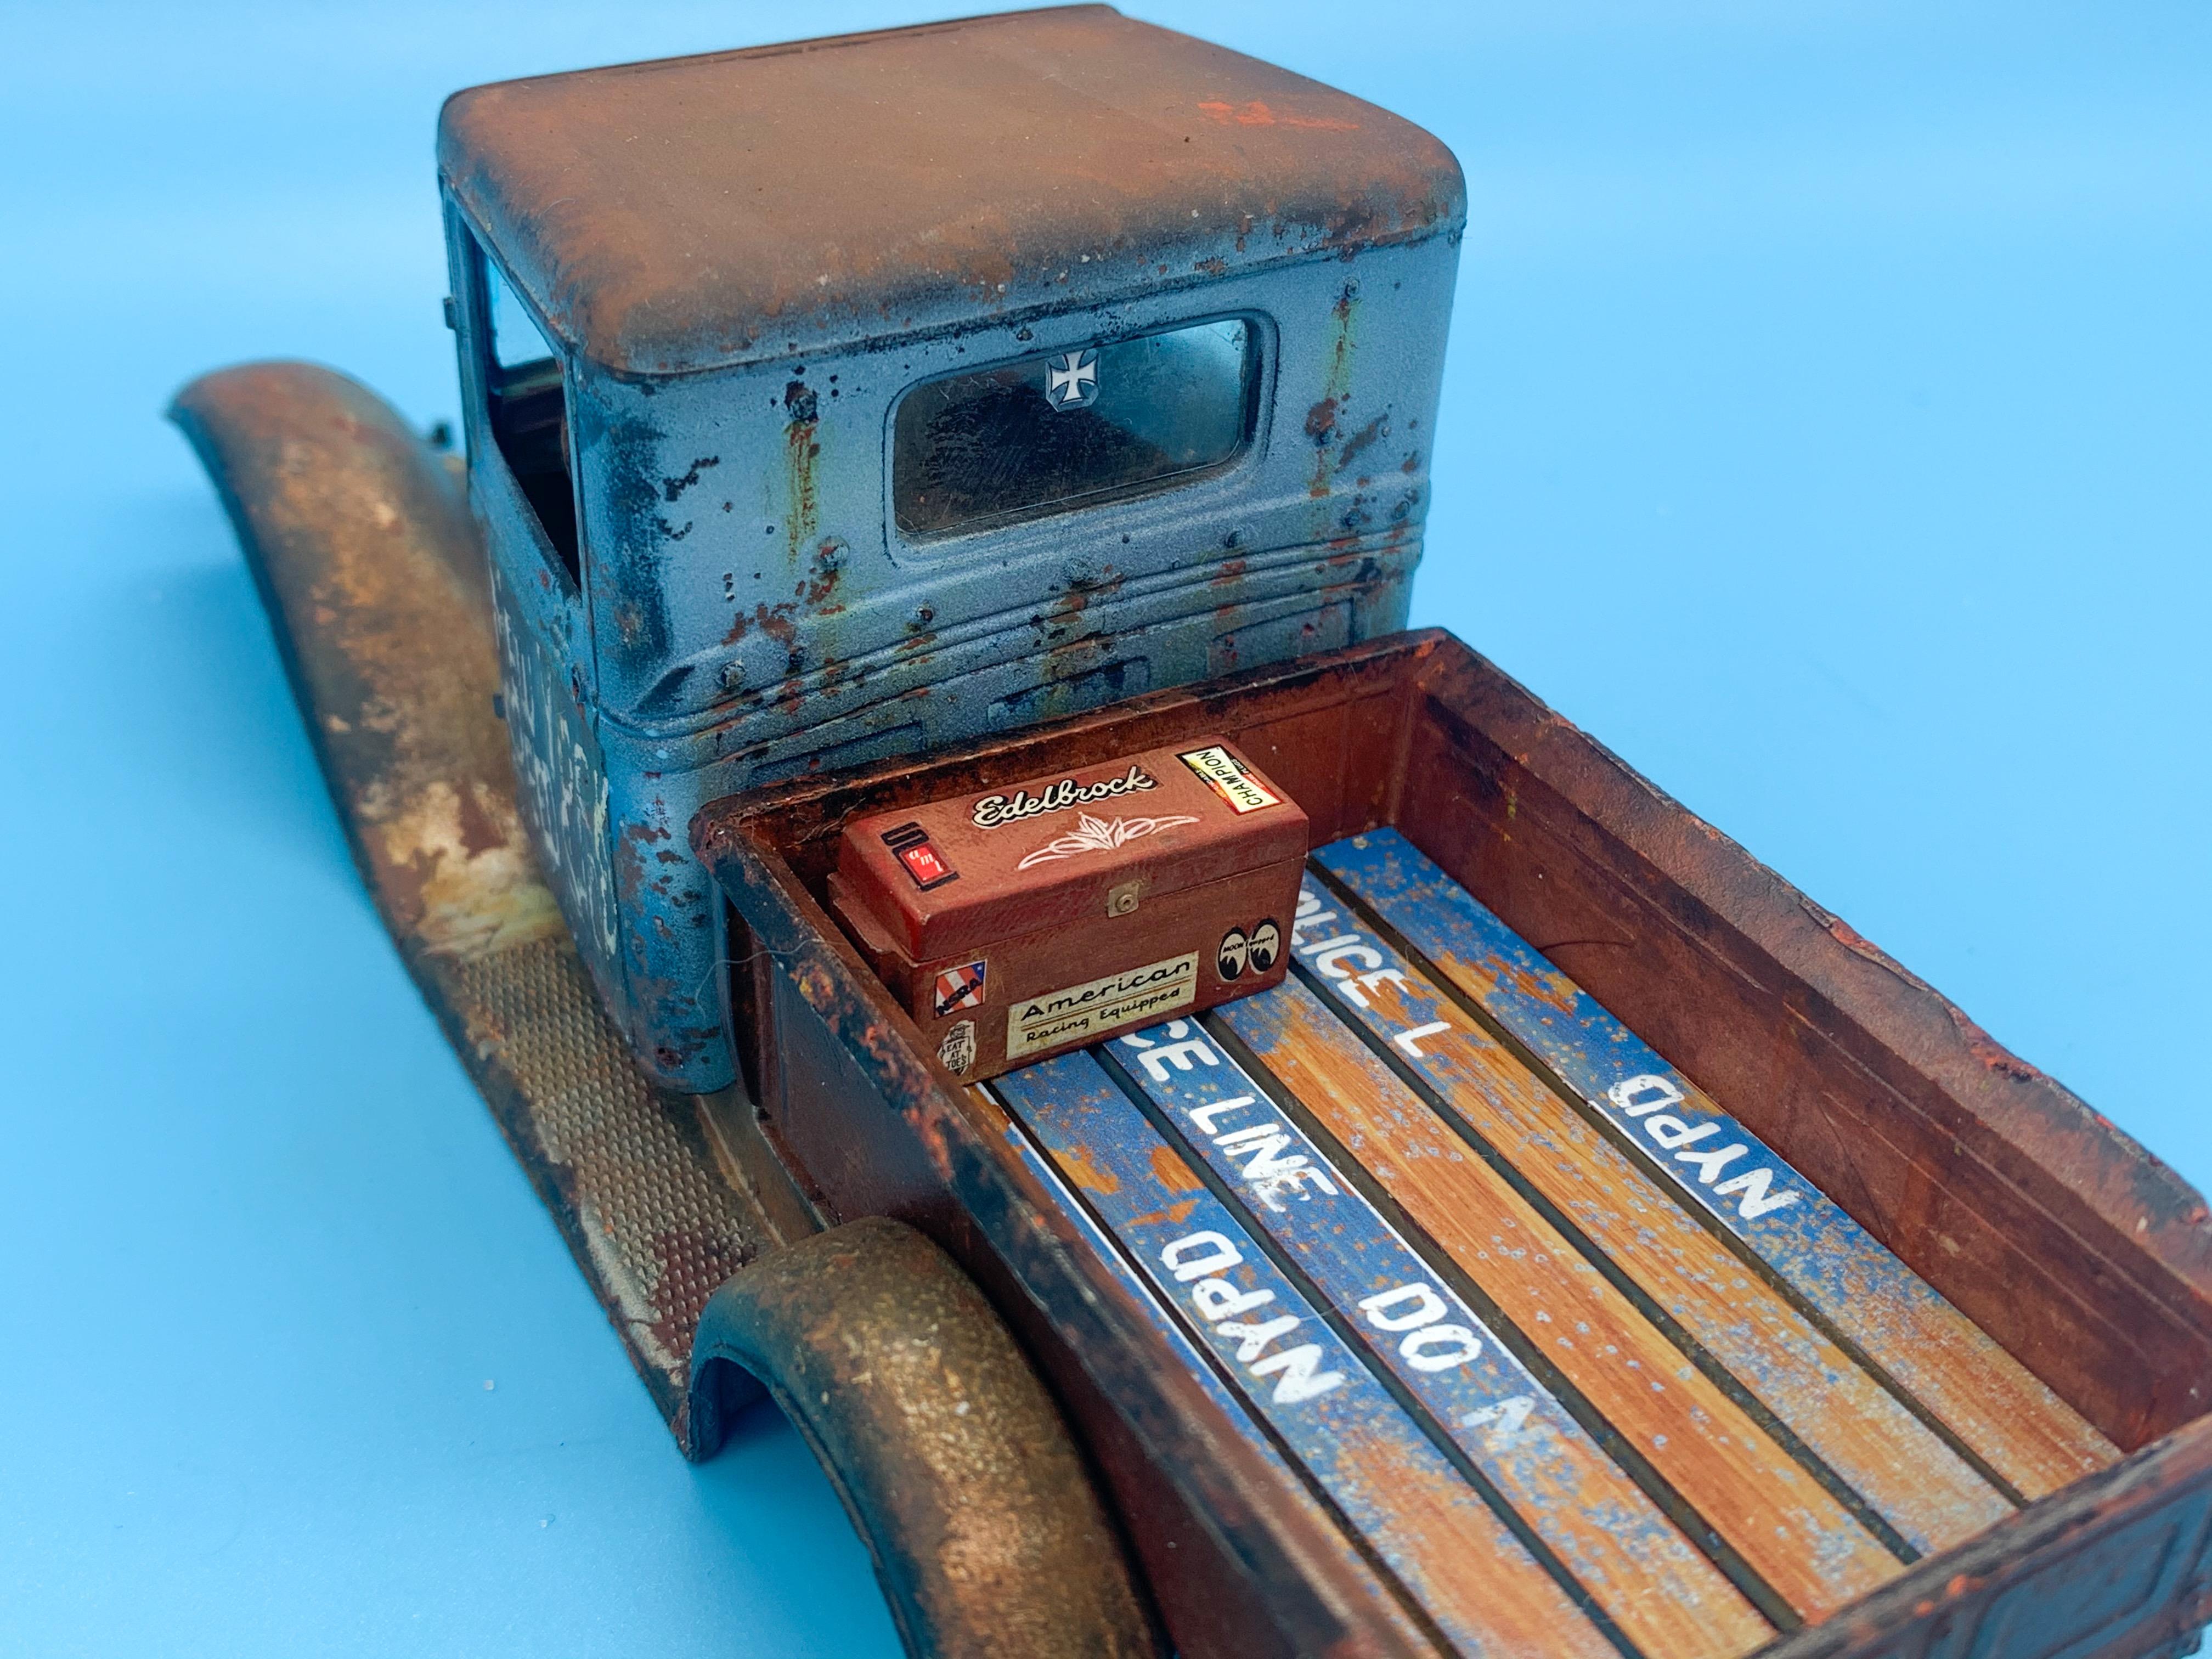
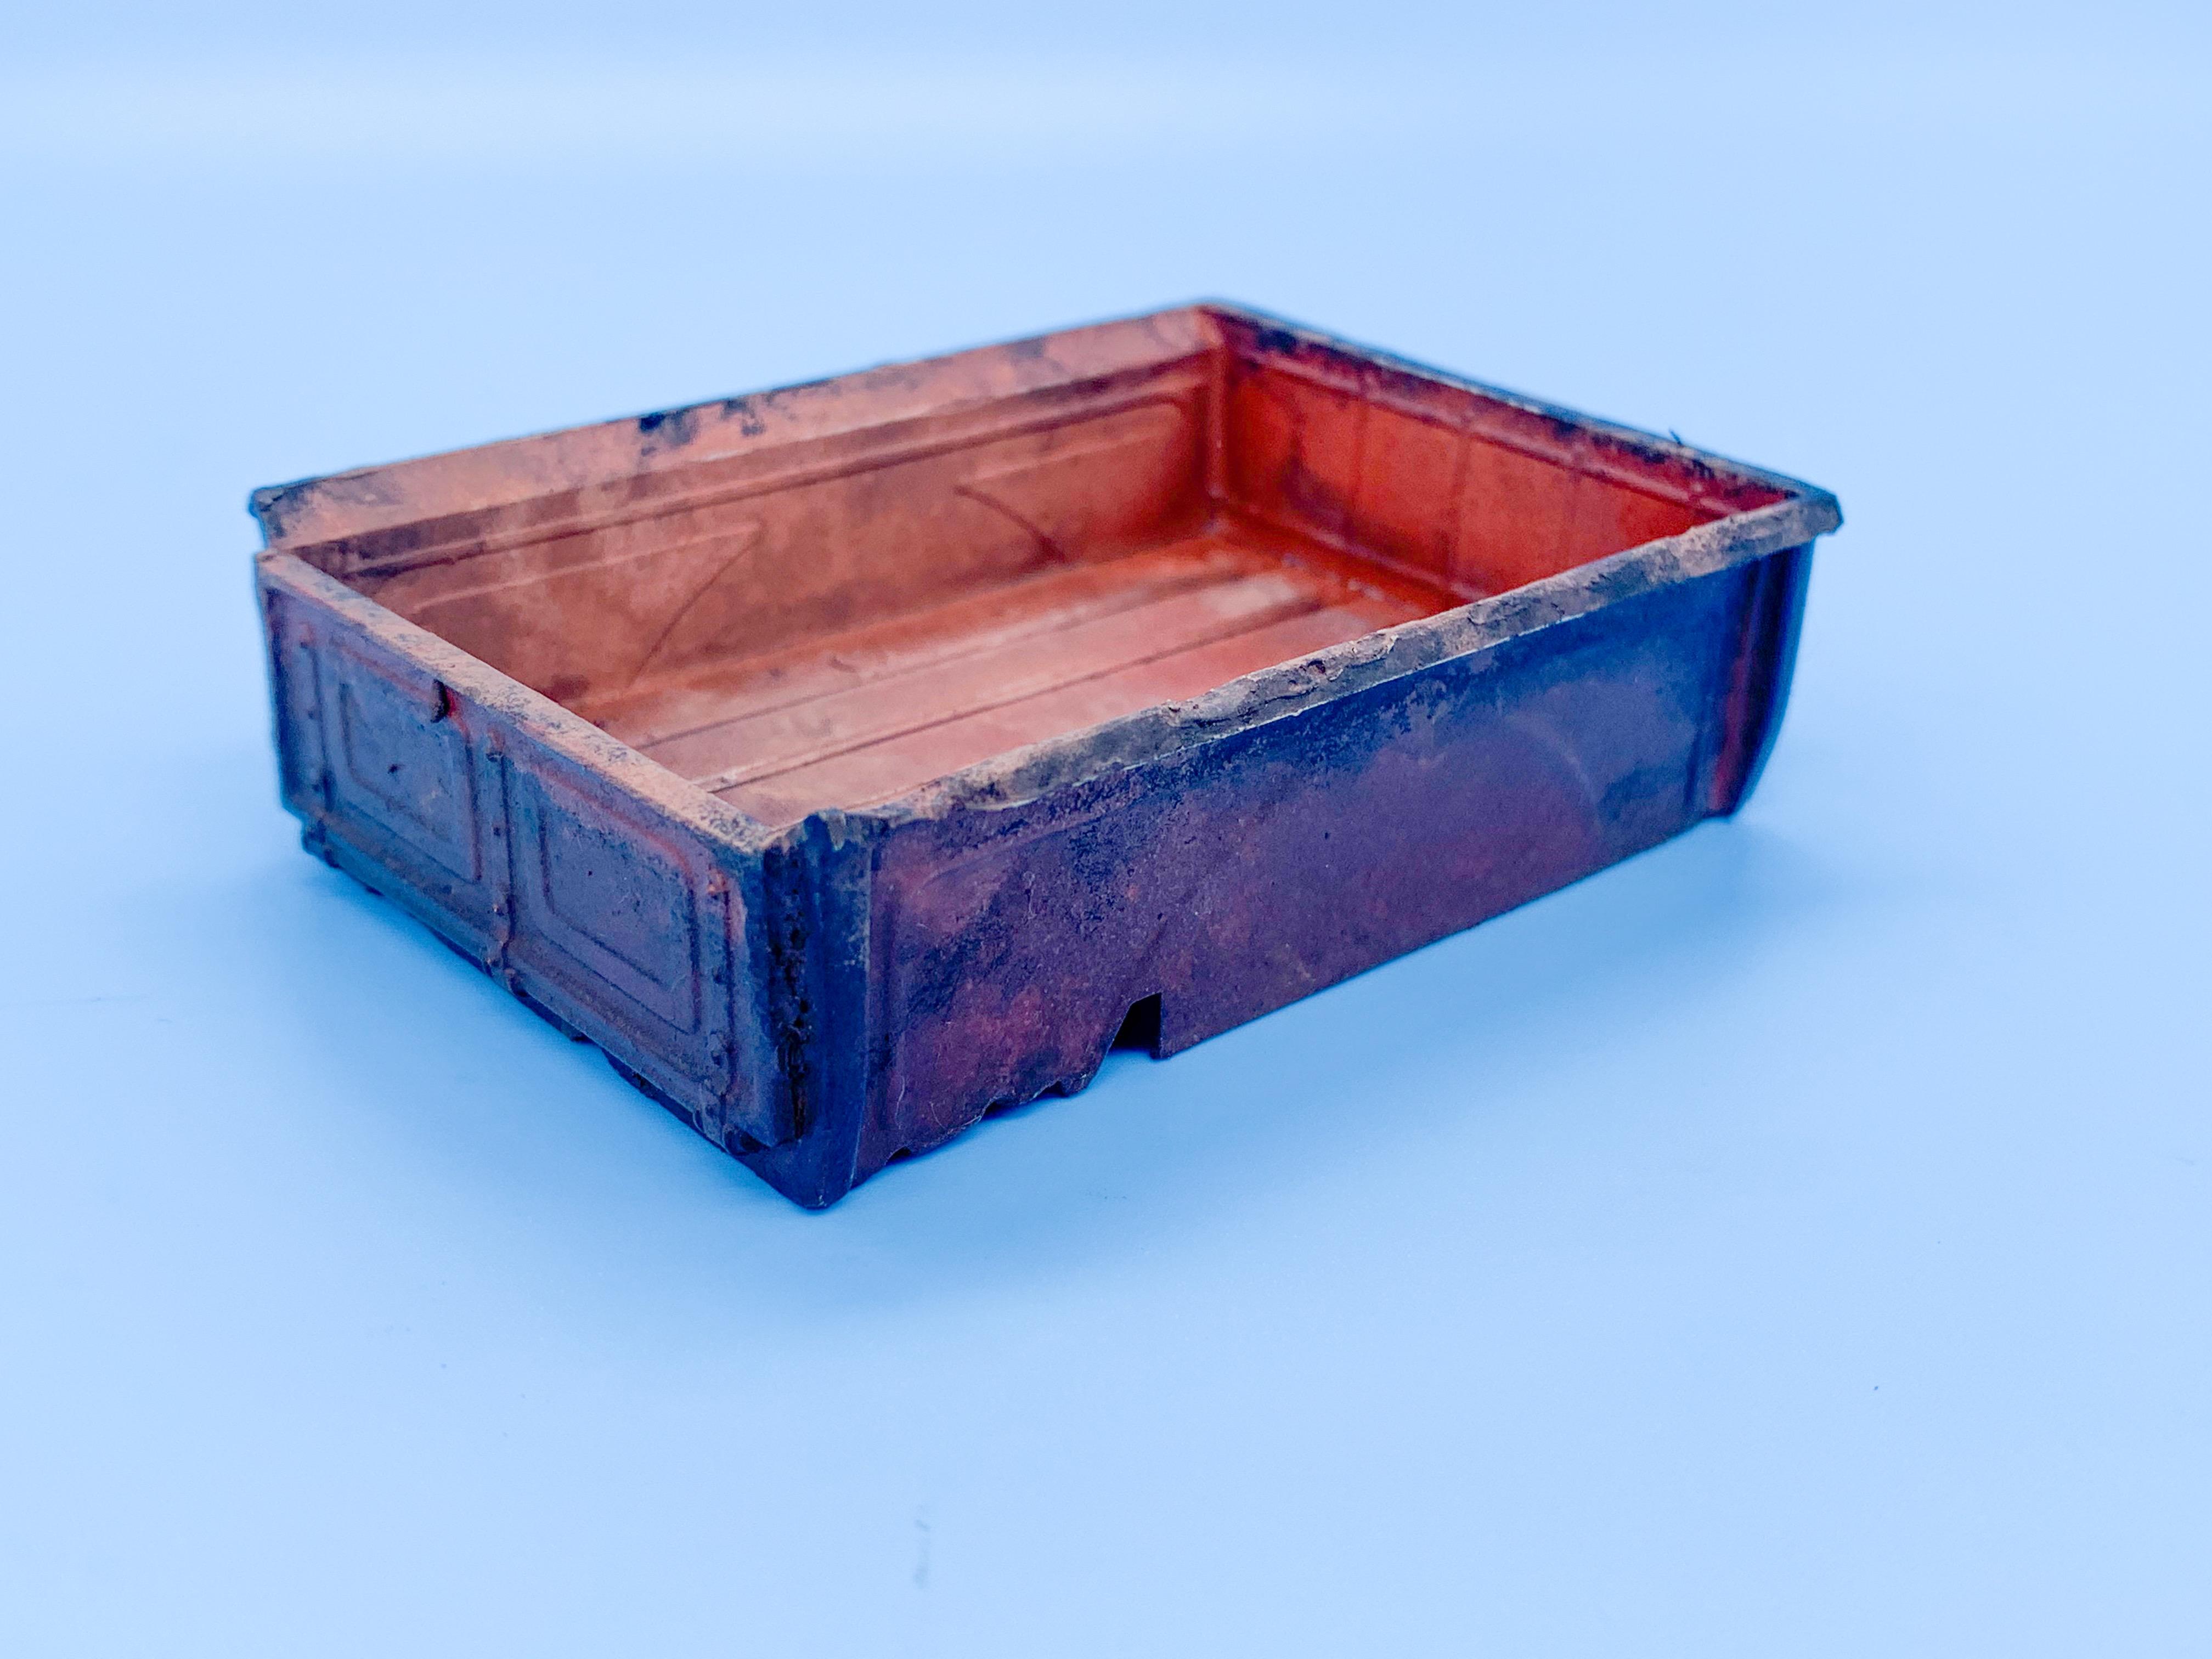
Back to the world of dirt and grime, worked on a toolbox for the bed the last couple of nights - used a mix of salt and some Italian herbs for the rust pattern on this one, for some variety...
Same tricks as before on the box - shot it with some thinned red this time, then added some decals and made a little metal latch from some photoetched bits:
Of course, this seemingly simple mini-project means I need to fill it with a bunch of tools and junk now ??
Some of the decals I used looked too new, so to get that weathered yellowing sticker look I brushed them with some yellow watercolor paint...looks cool in the bed anyway!
And yes, I put an out-of-scale fingerprint in the pastels I’d just laid down when I was photographing this - guess I’ll be giving that some more attention tomorrow. Good thing this is fun!
More soon!!
-
On 10/26/2020 at 11:44 AM, espo said:
The most original idea for bed wood ever.
Haha! I wonder if it’s been done before? Would be cool if it has!
I’d have a bunch of those planks as shelves if my wife wasn’t around to keep me out of trouble ??On 10/26/2020 at 12:48 PM, thatz4u said:"The most original idea for bed wood ever."
just don't drive anywhere near NYC.......?
That’s good advice generally, I’d say. Take the subway, it’s usually faster ?
23 hours ago, Dennis Lacy said:You are absolutely killing it with this model! The bed wood idea is freakin' awesome!!! I can't believe it's actually painted strips of styrene.
What is the darker color you made the grain lines with?
Thanks bud!!! That means a lot coming from you!
Funny thing with the styrene planks - when I was thinking which glue to use my brain tricked me into thinking I shouldn’t use anything that could potentially soak through the porous wood and ruin the paint on the top surface. Eventually I remembered it was plastic ?.
Just used some Createx transparent brown for the grain - I probably should’ve gone for a lighter color to make them realistic compared to the actual wood they likely use for those boards, but I’m happy with the effect...might use this trick on a woody build before too long!4 hours ago, landman said:Absolutely! Watching and learning here.
Thanks for watching! ❤️
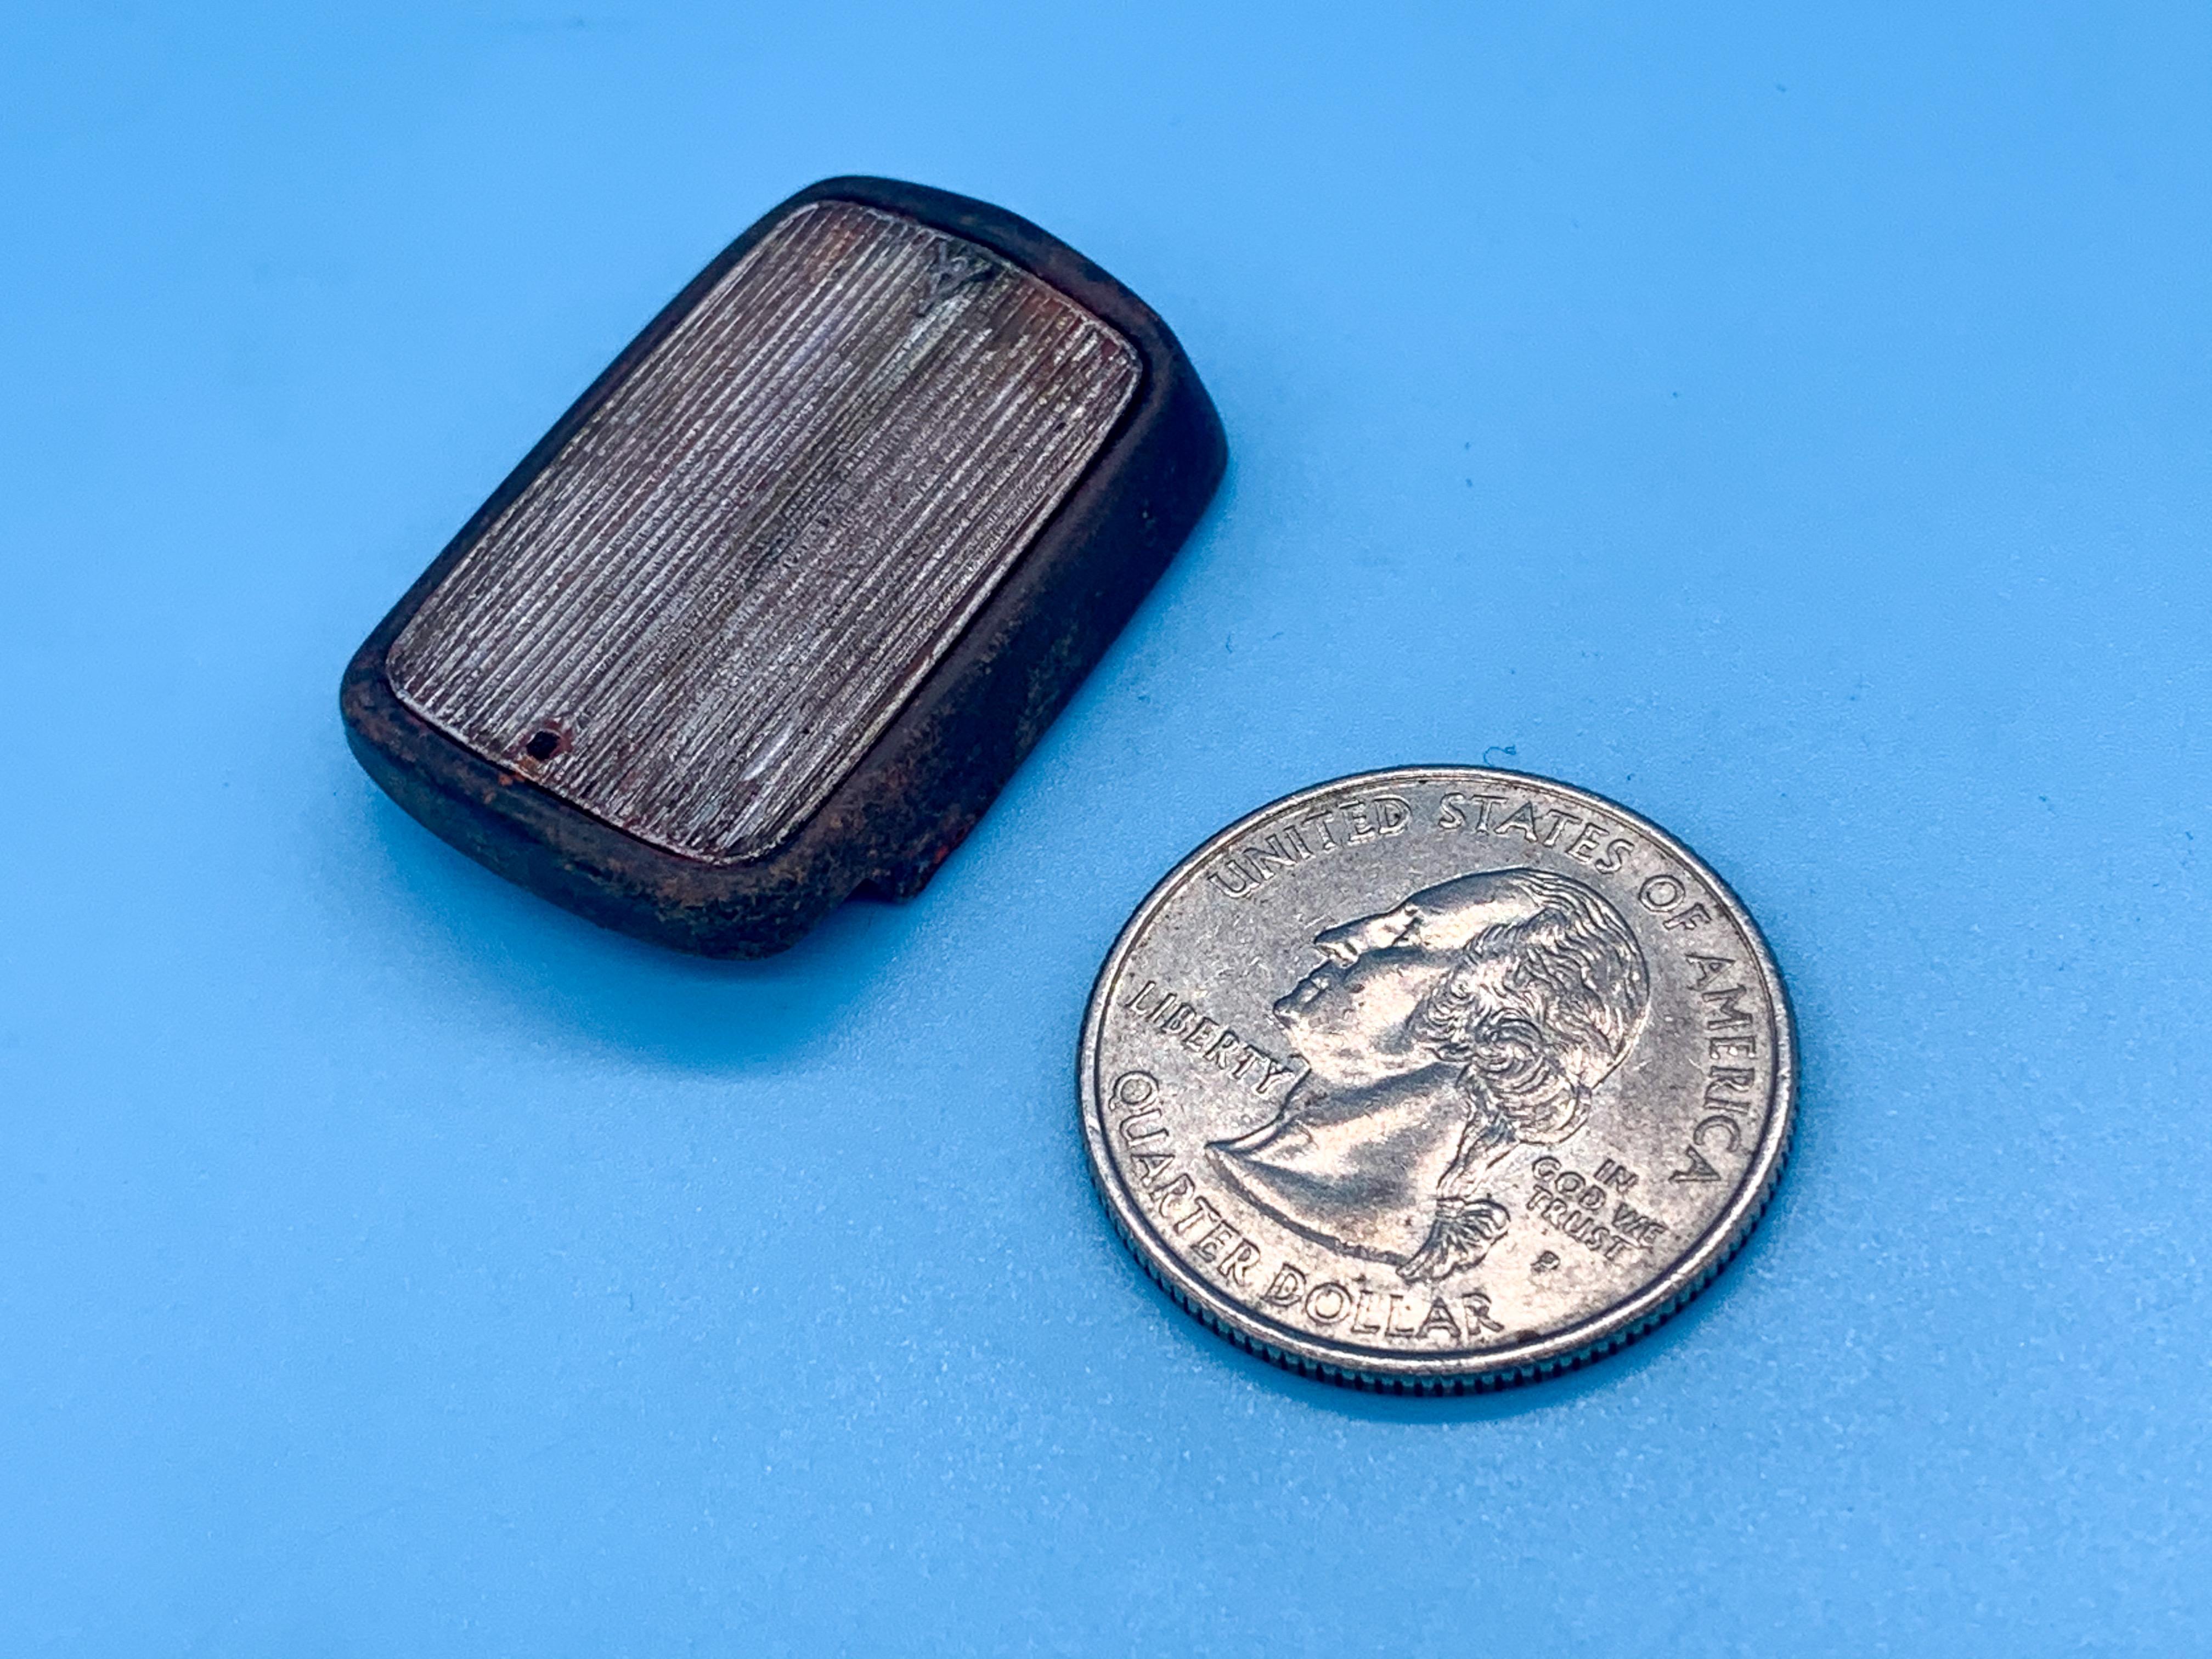
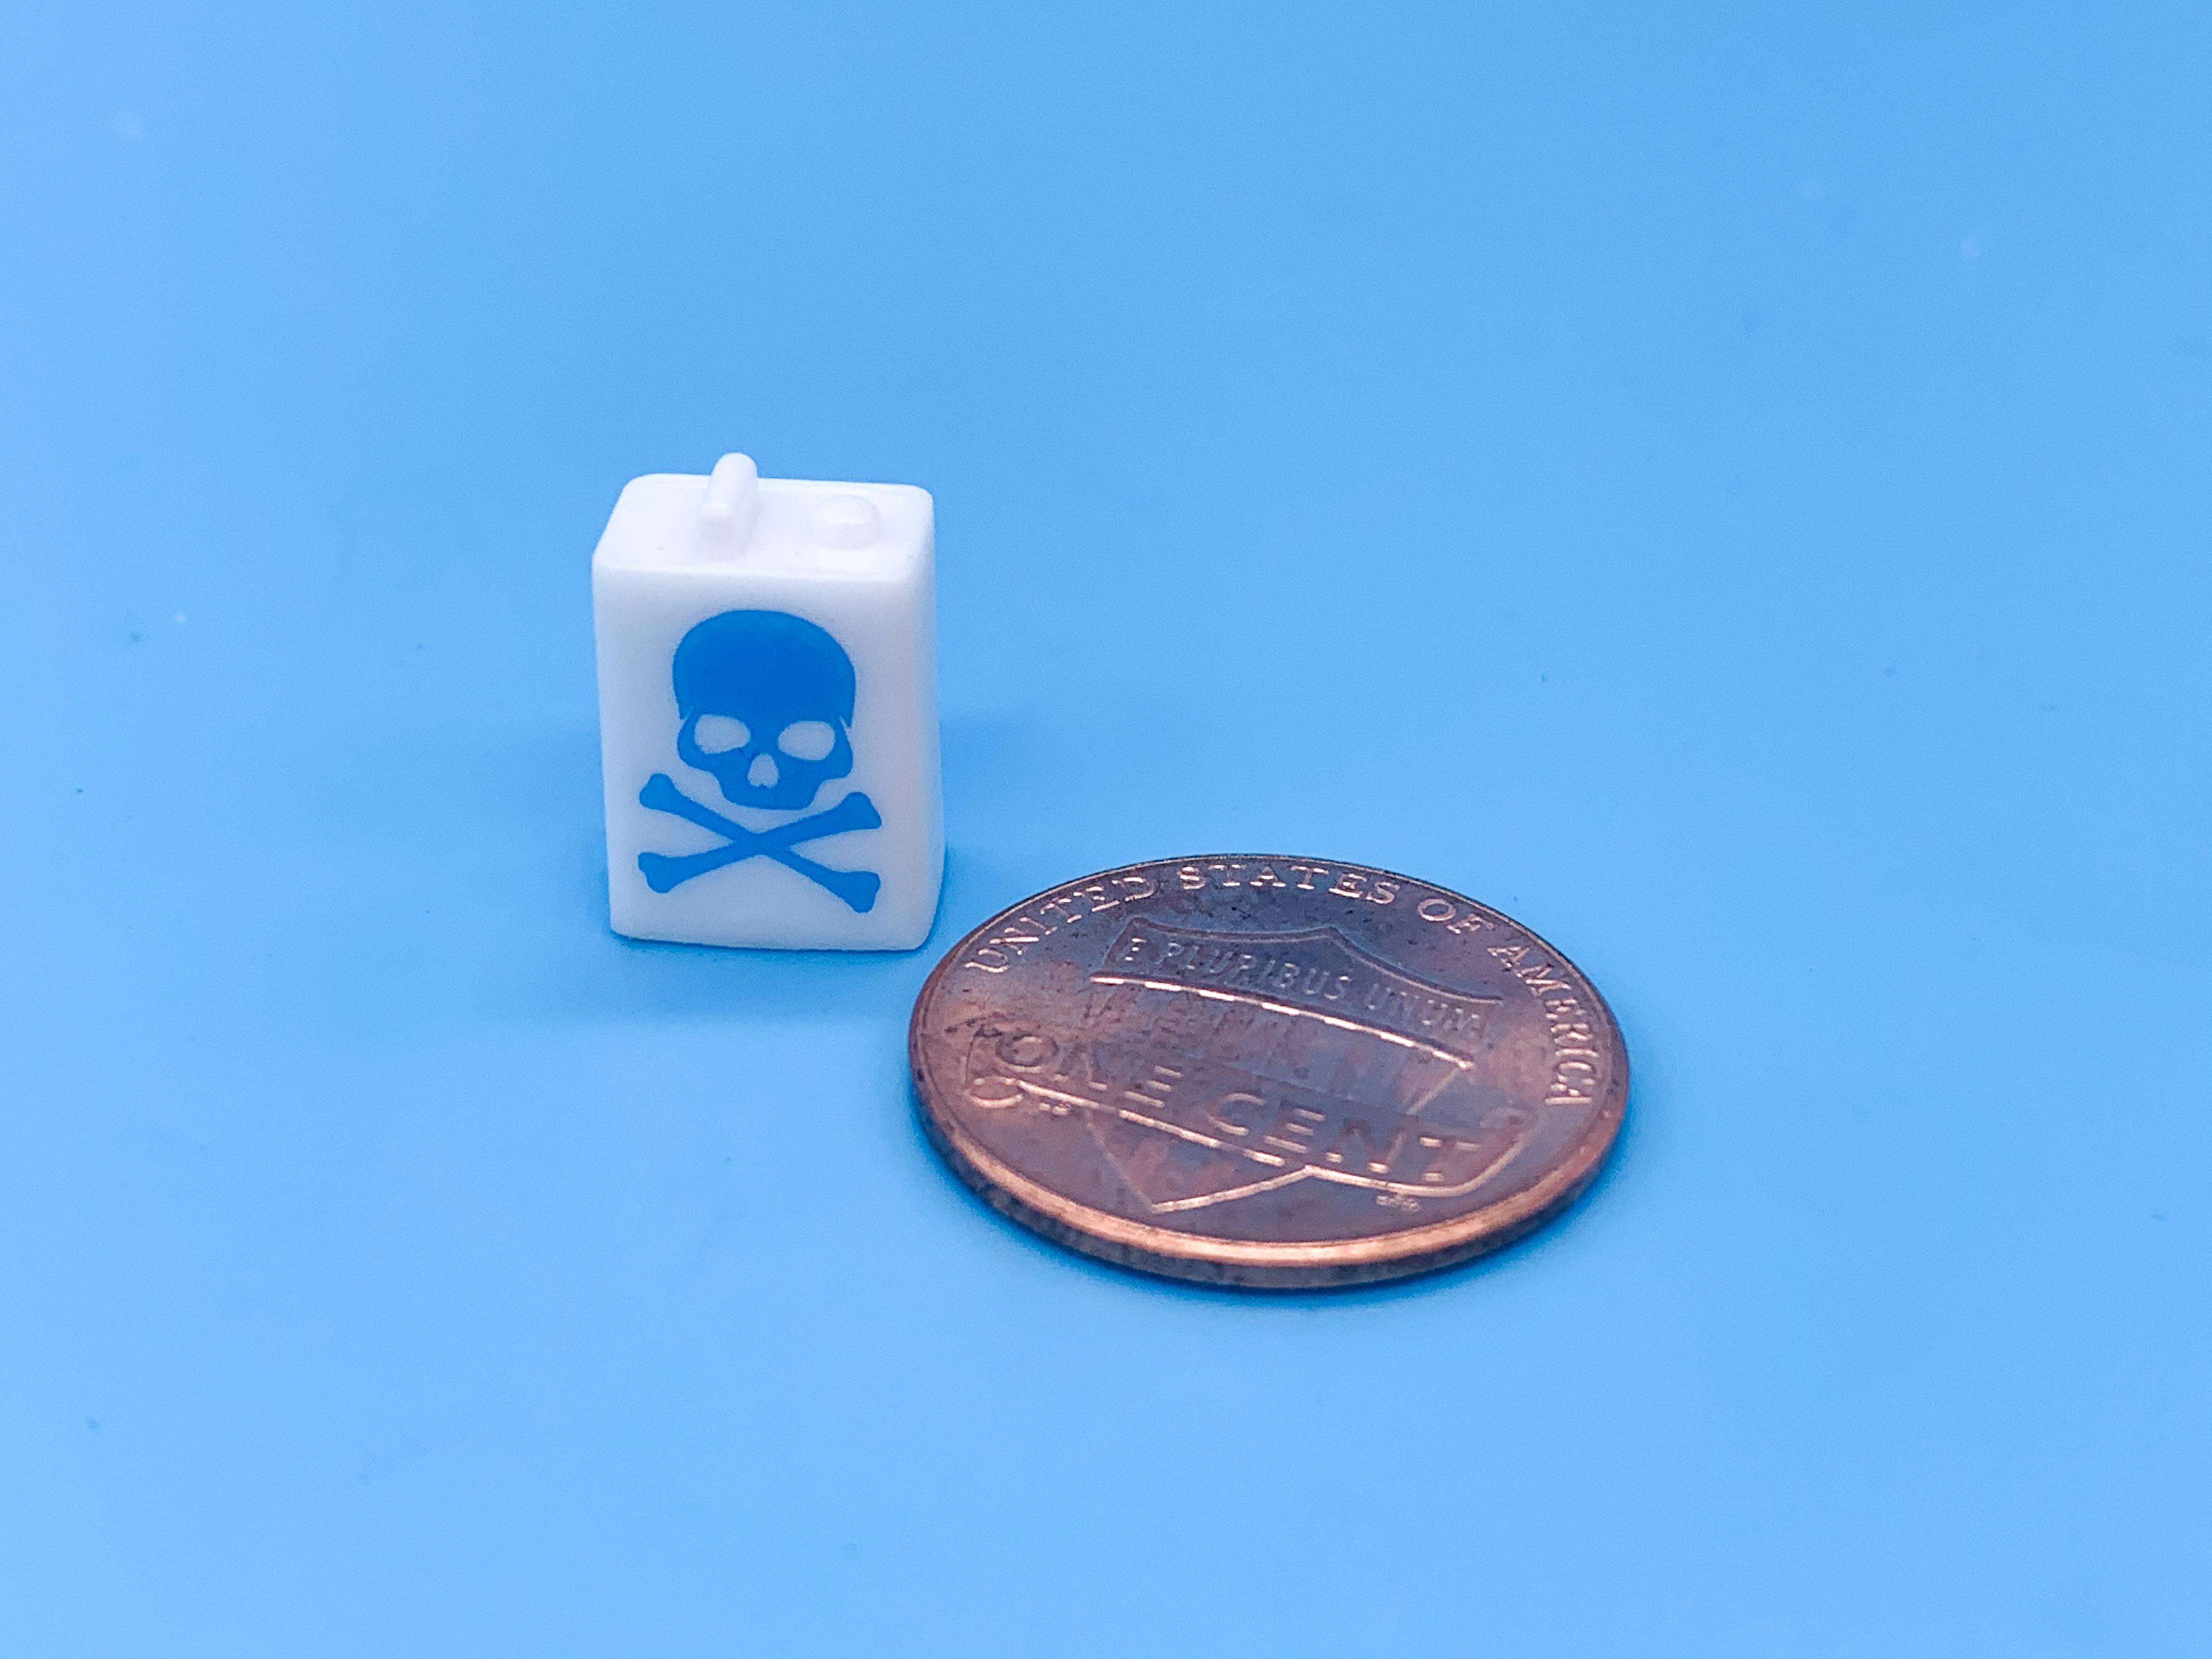
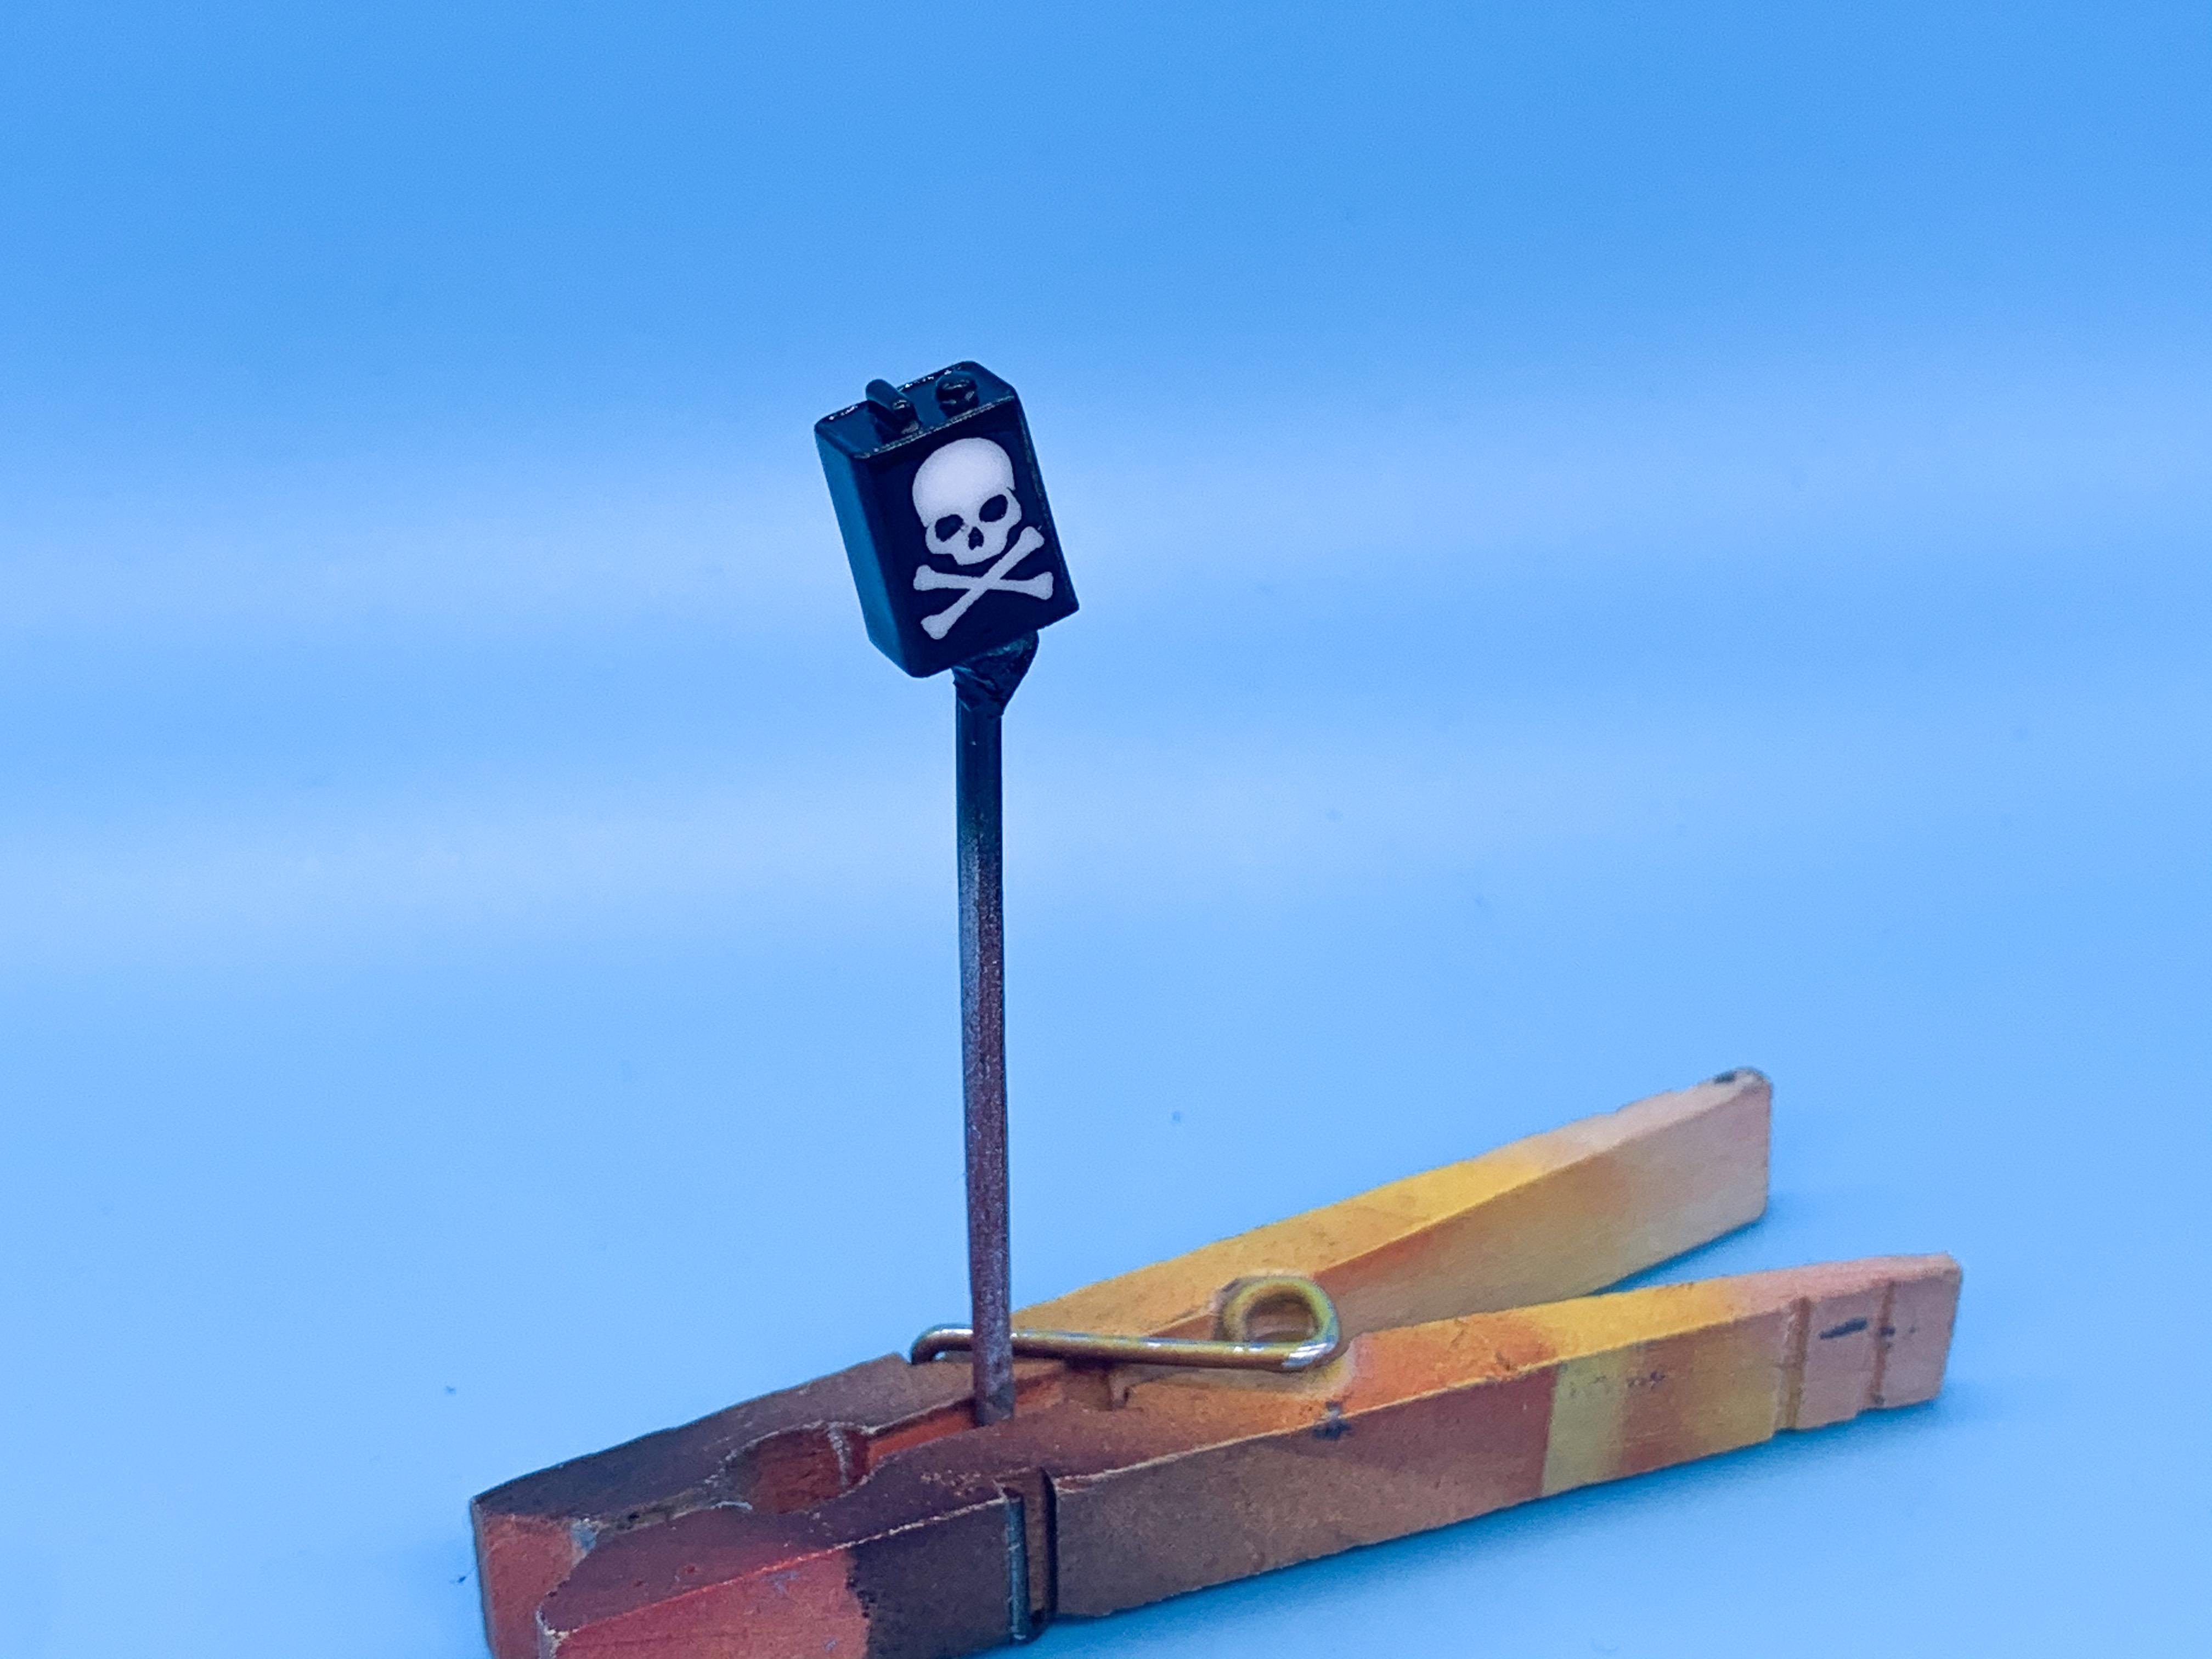
Had a busy couple of days, but got a little done. Wanted to do some kind of skull design on the little gas can that comes in the kit so I cut a little airbrush mask...
...and just shot some black Createx sealer right over the plastic:
Just a fun little accessory to throw in the bed - once I’ve clear coated it I’ll add a little metal cap...have something not-ruined in the back there for a little contrast:
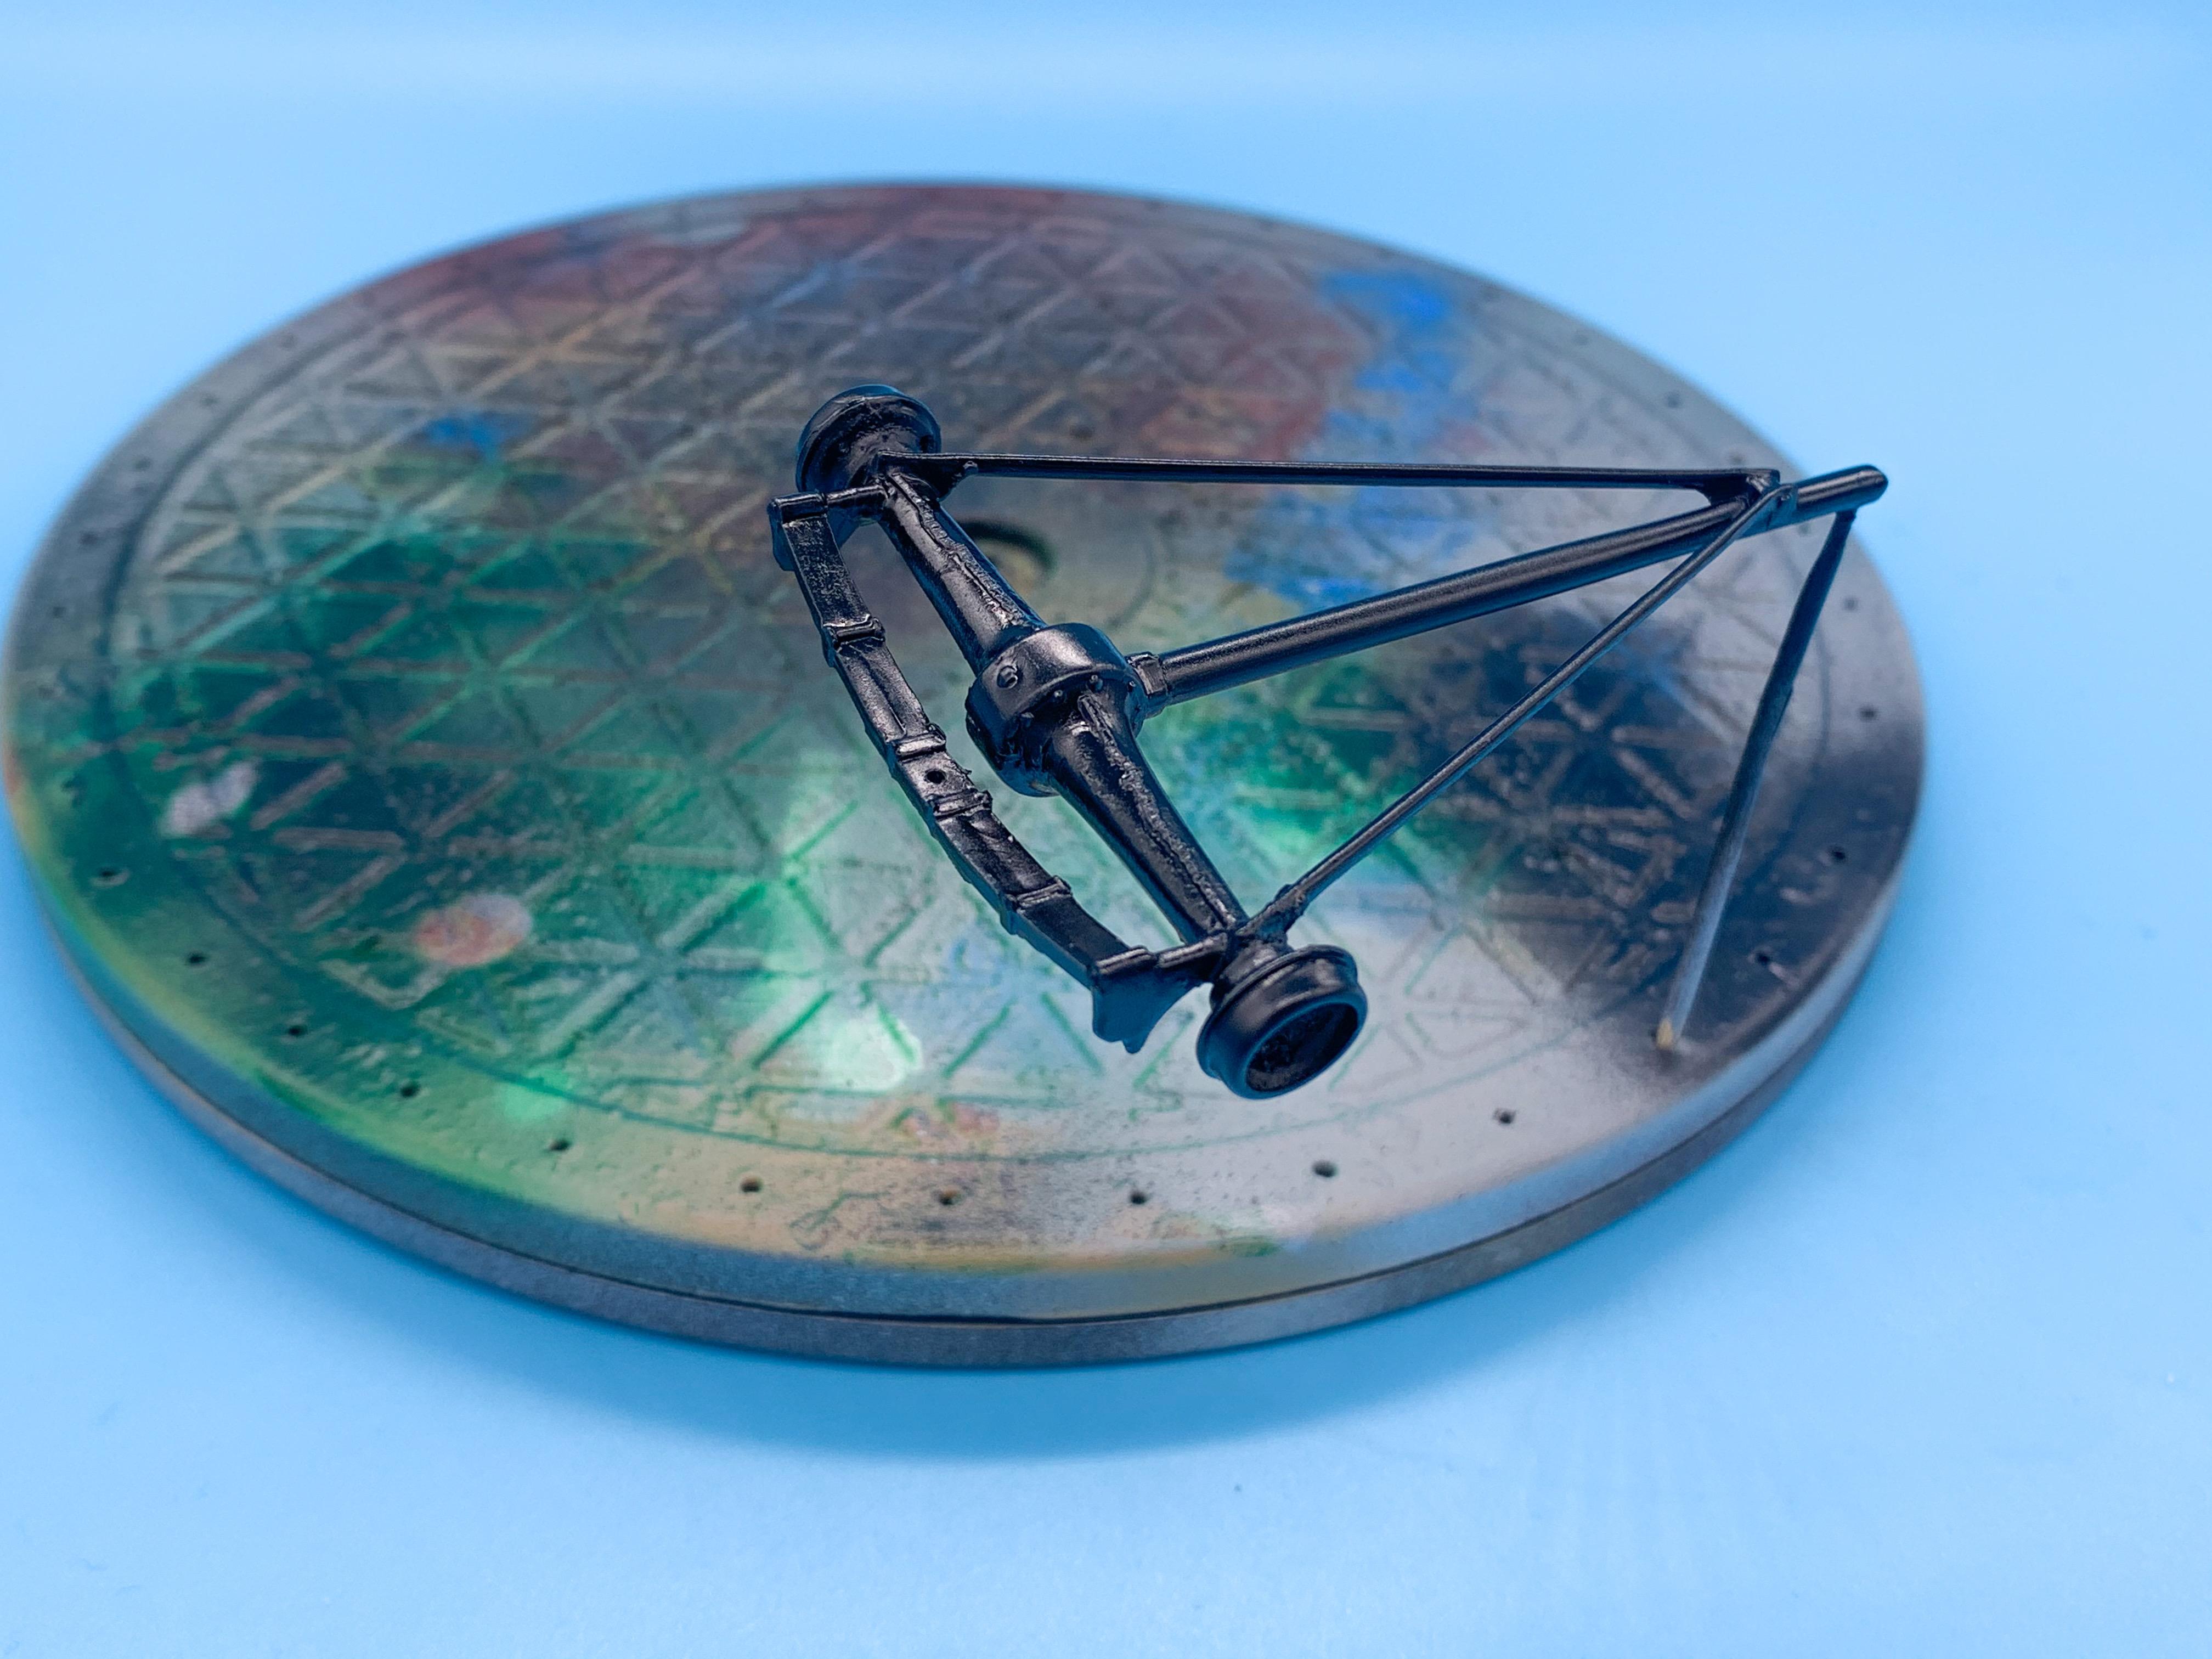
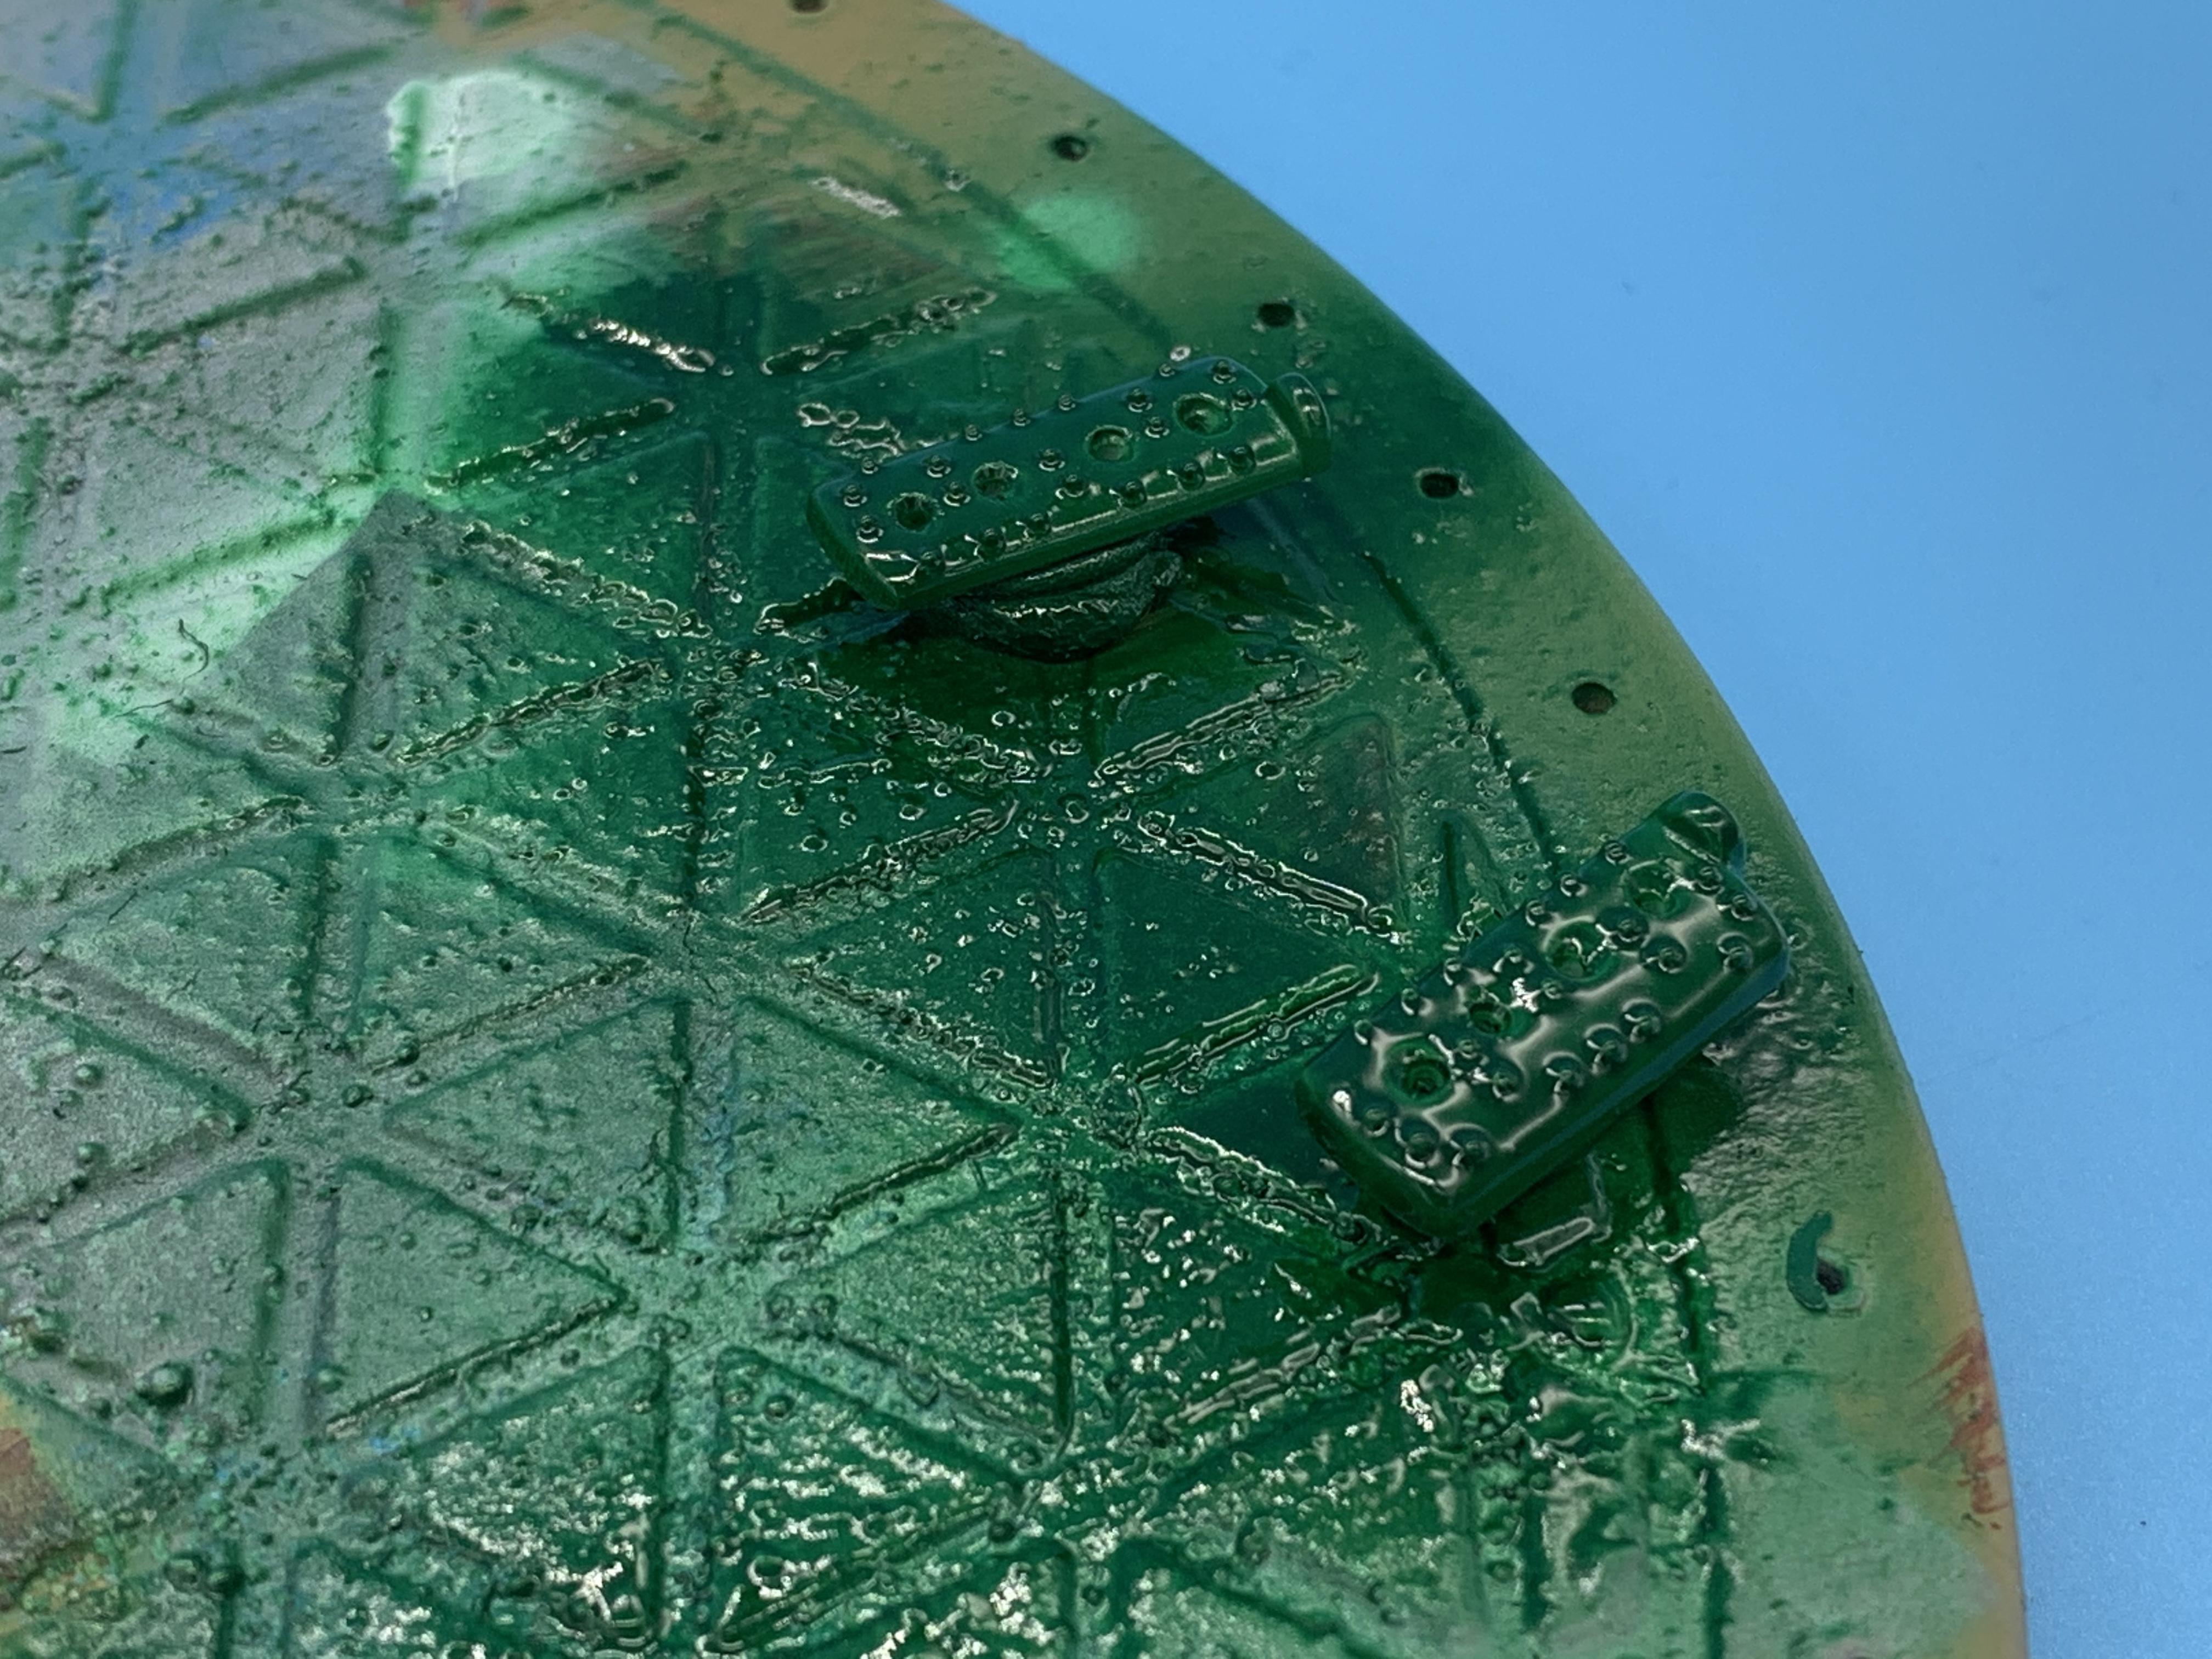
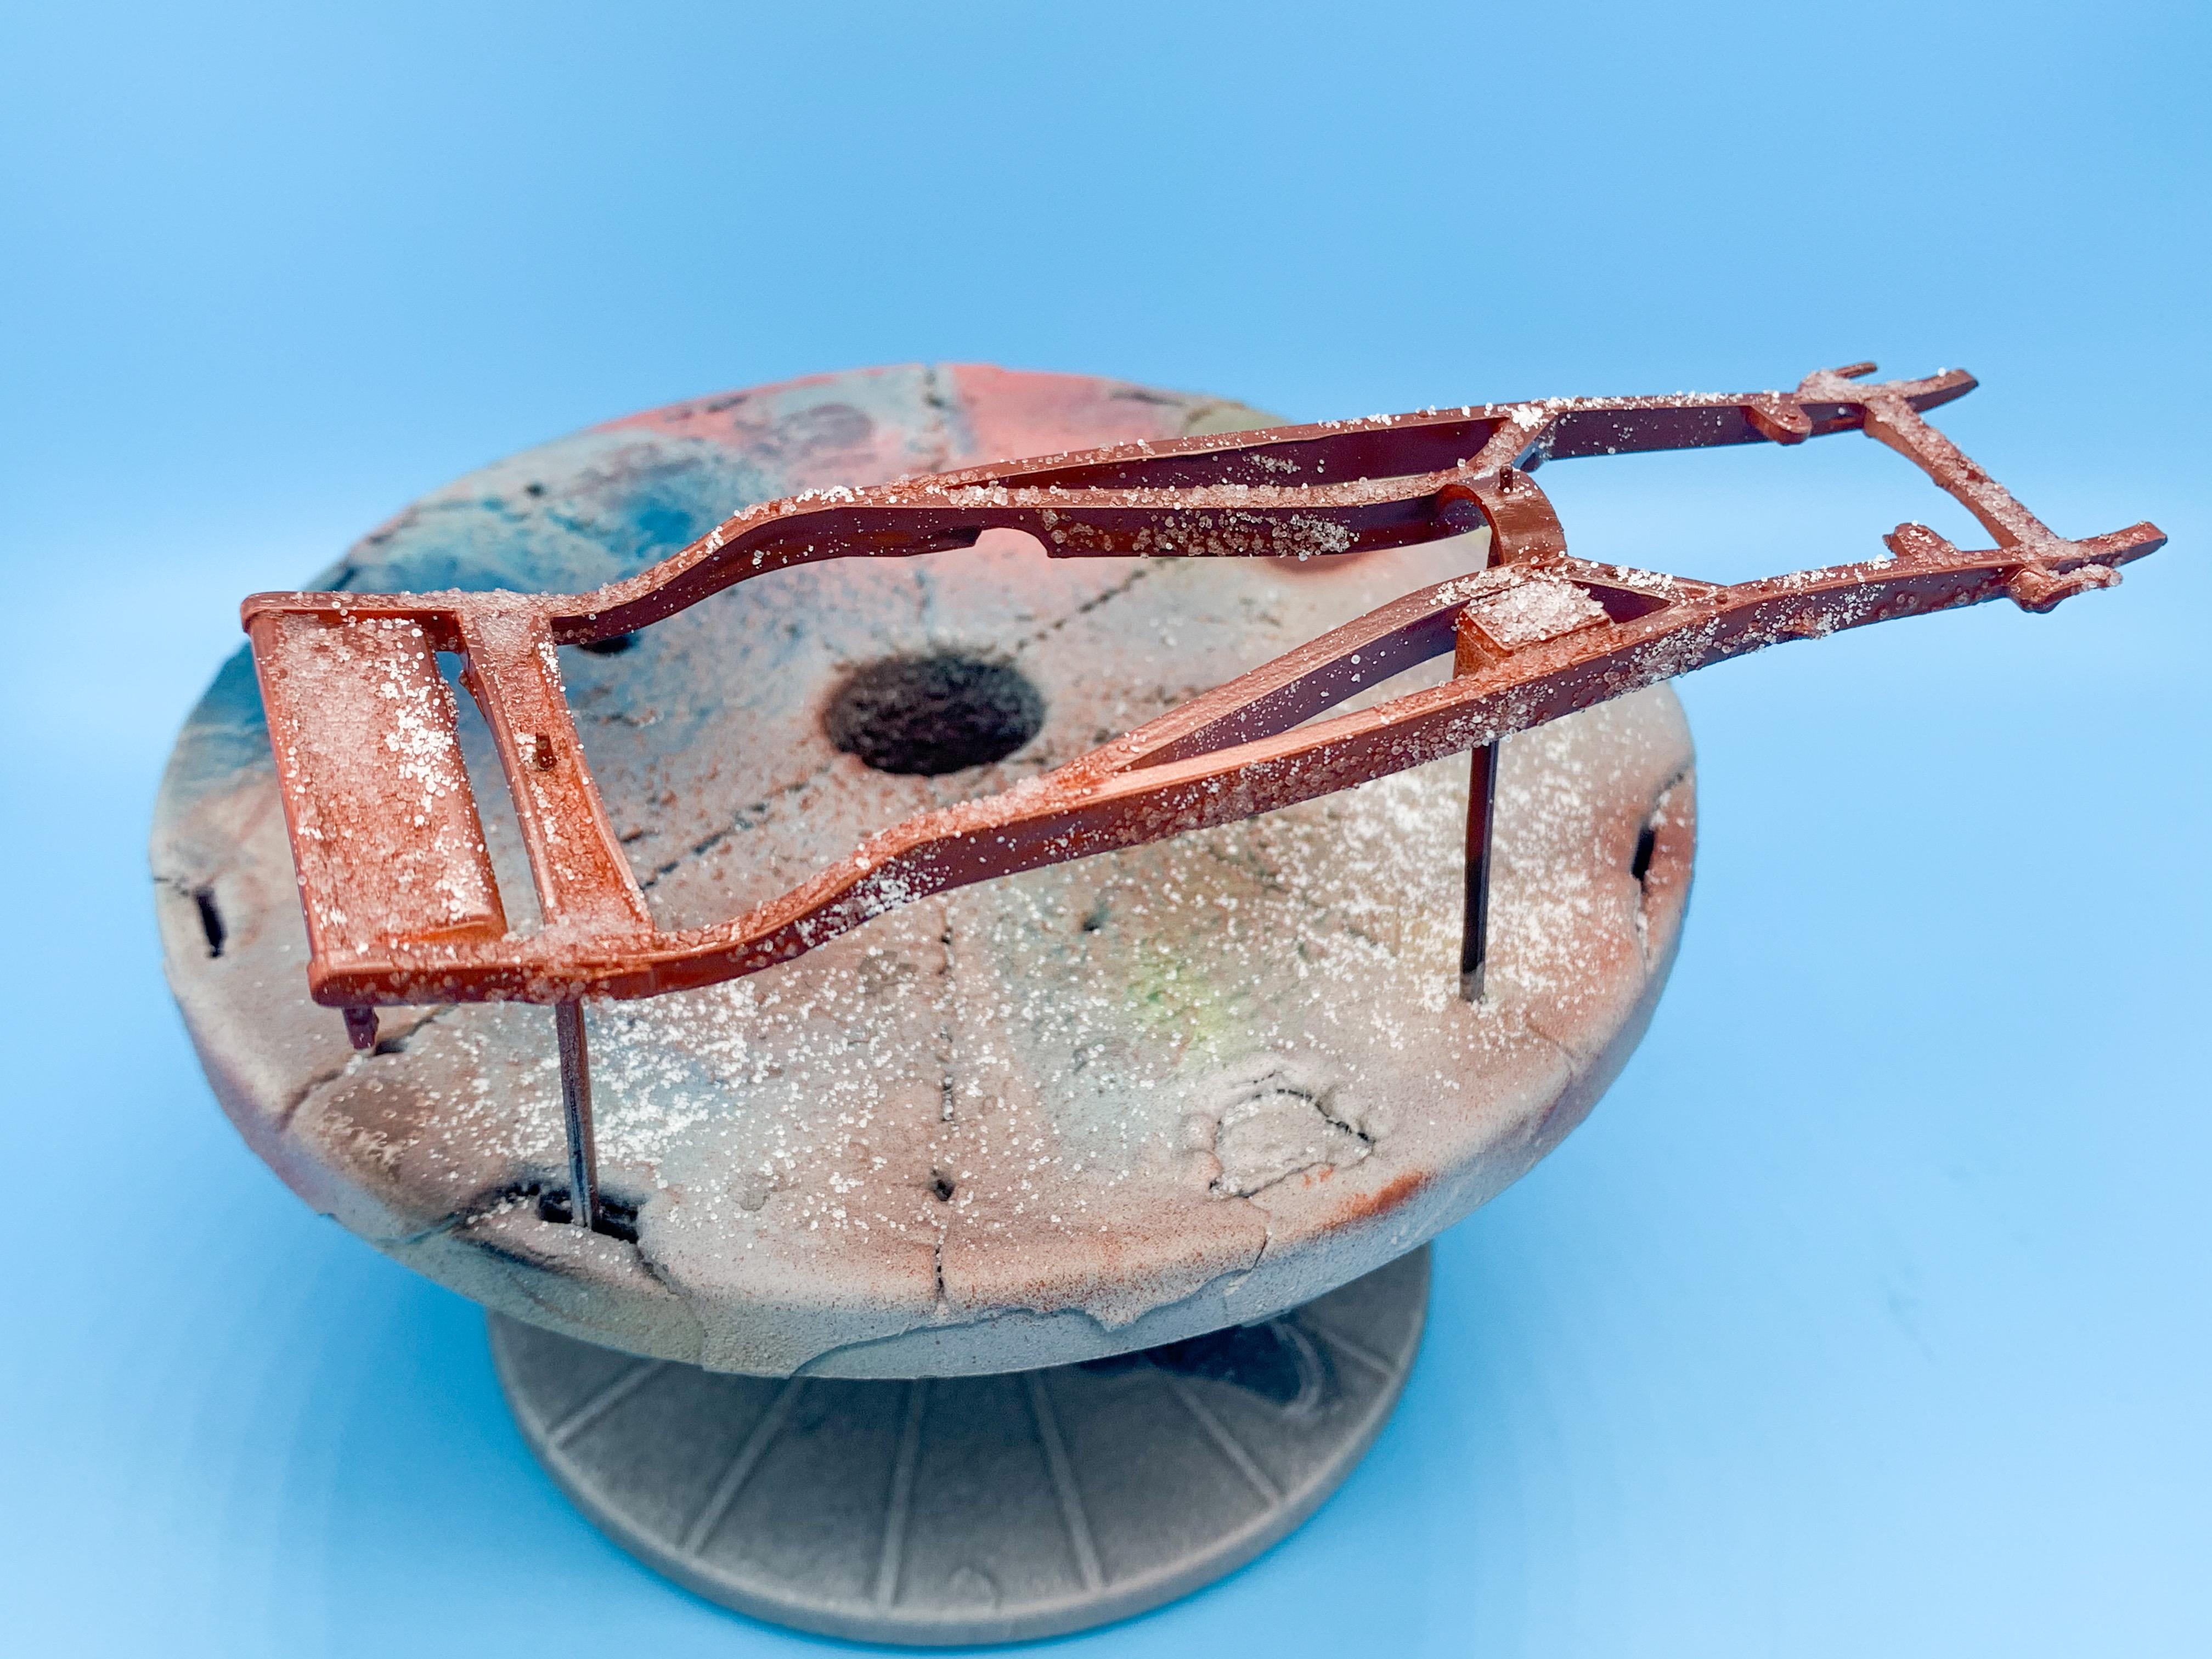
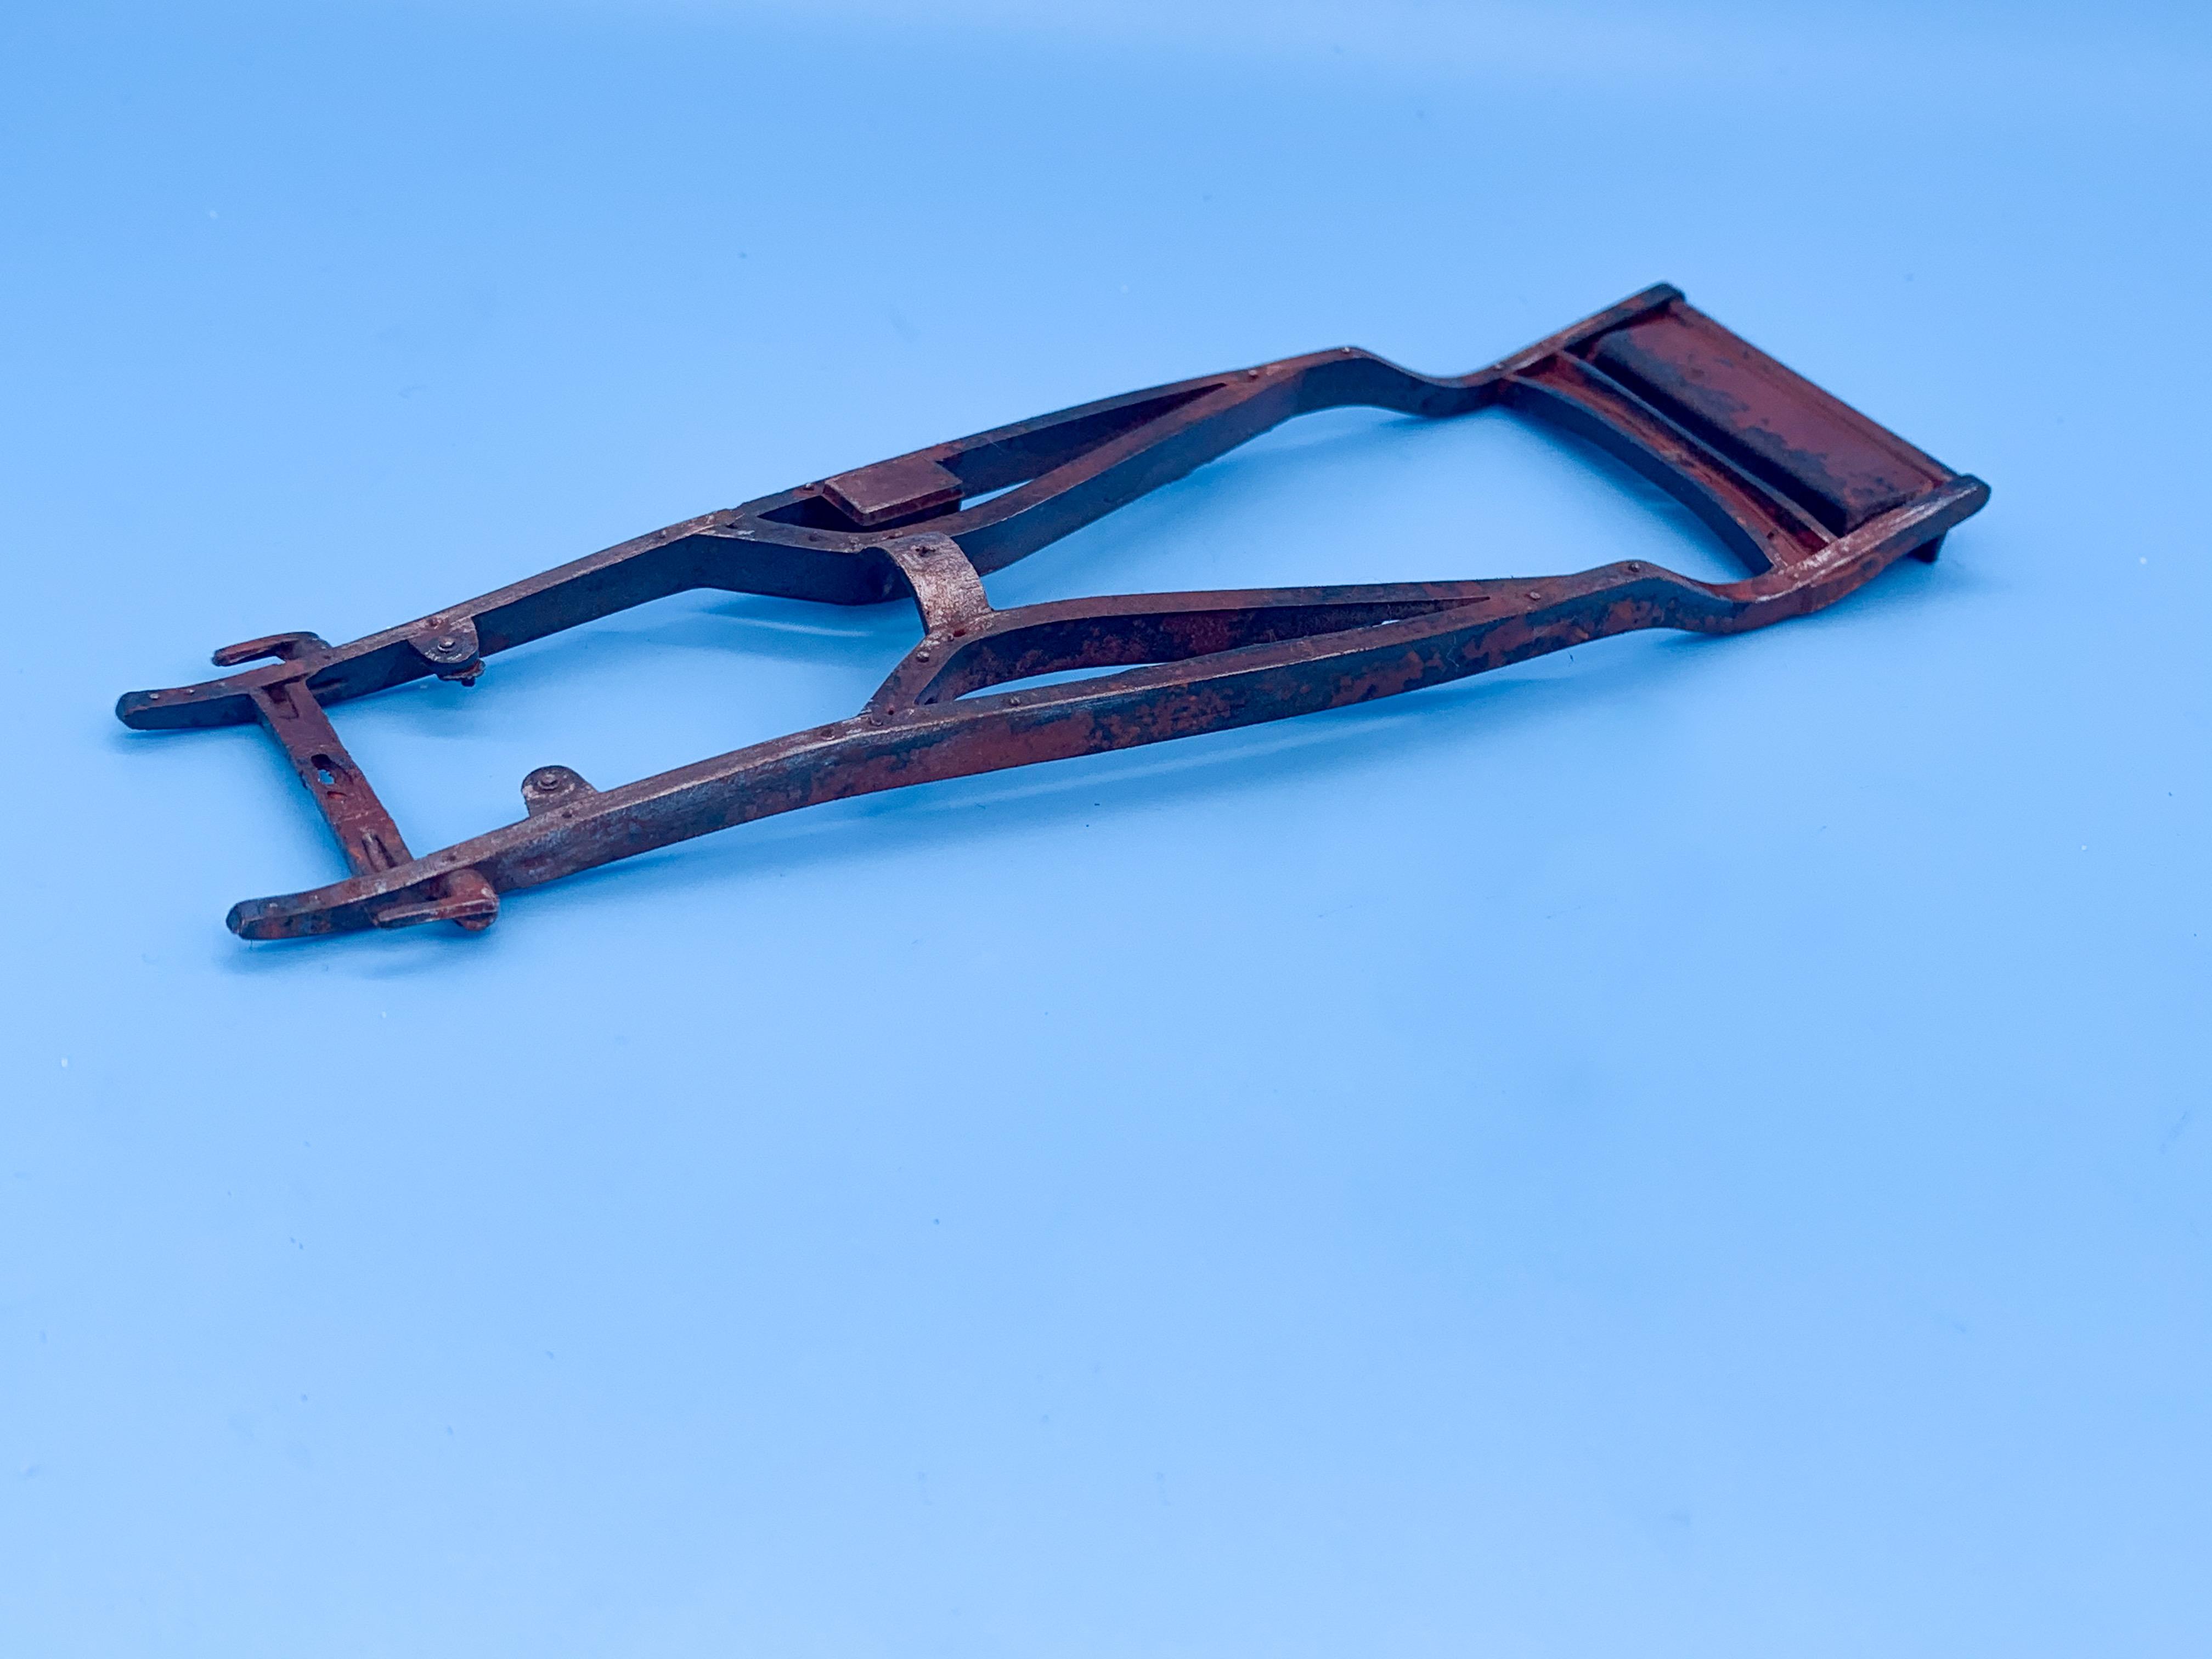
Next big part to weather was the frame, so here goes again with the Createx brown first...
...then another unhealthy amount of salt:
And some airbrushing, pastel-ing, Rub ‘n’ Buff-ing and watercoloring later:
I reasoned there would be at least a couple of spots where the metal is showing through, or in the case of the trans mount in the center there they maybe ground the paint down to bare metal to do some maintainence welding and never quite bothered to repaint it.
Just a little update - more soon, soon as I’ve done more!
-
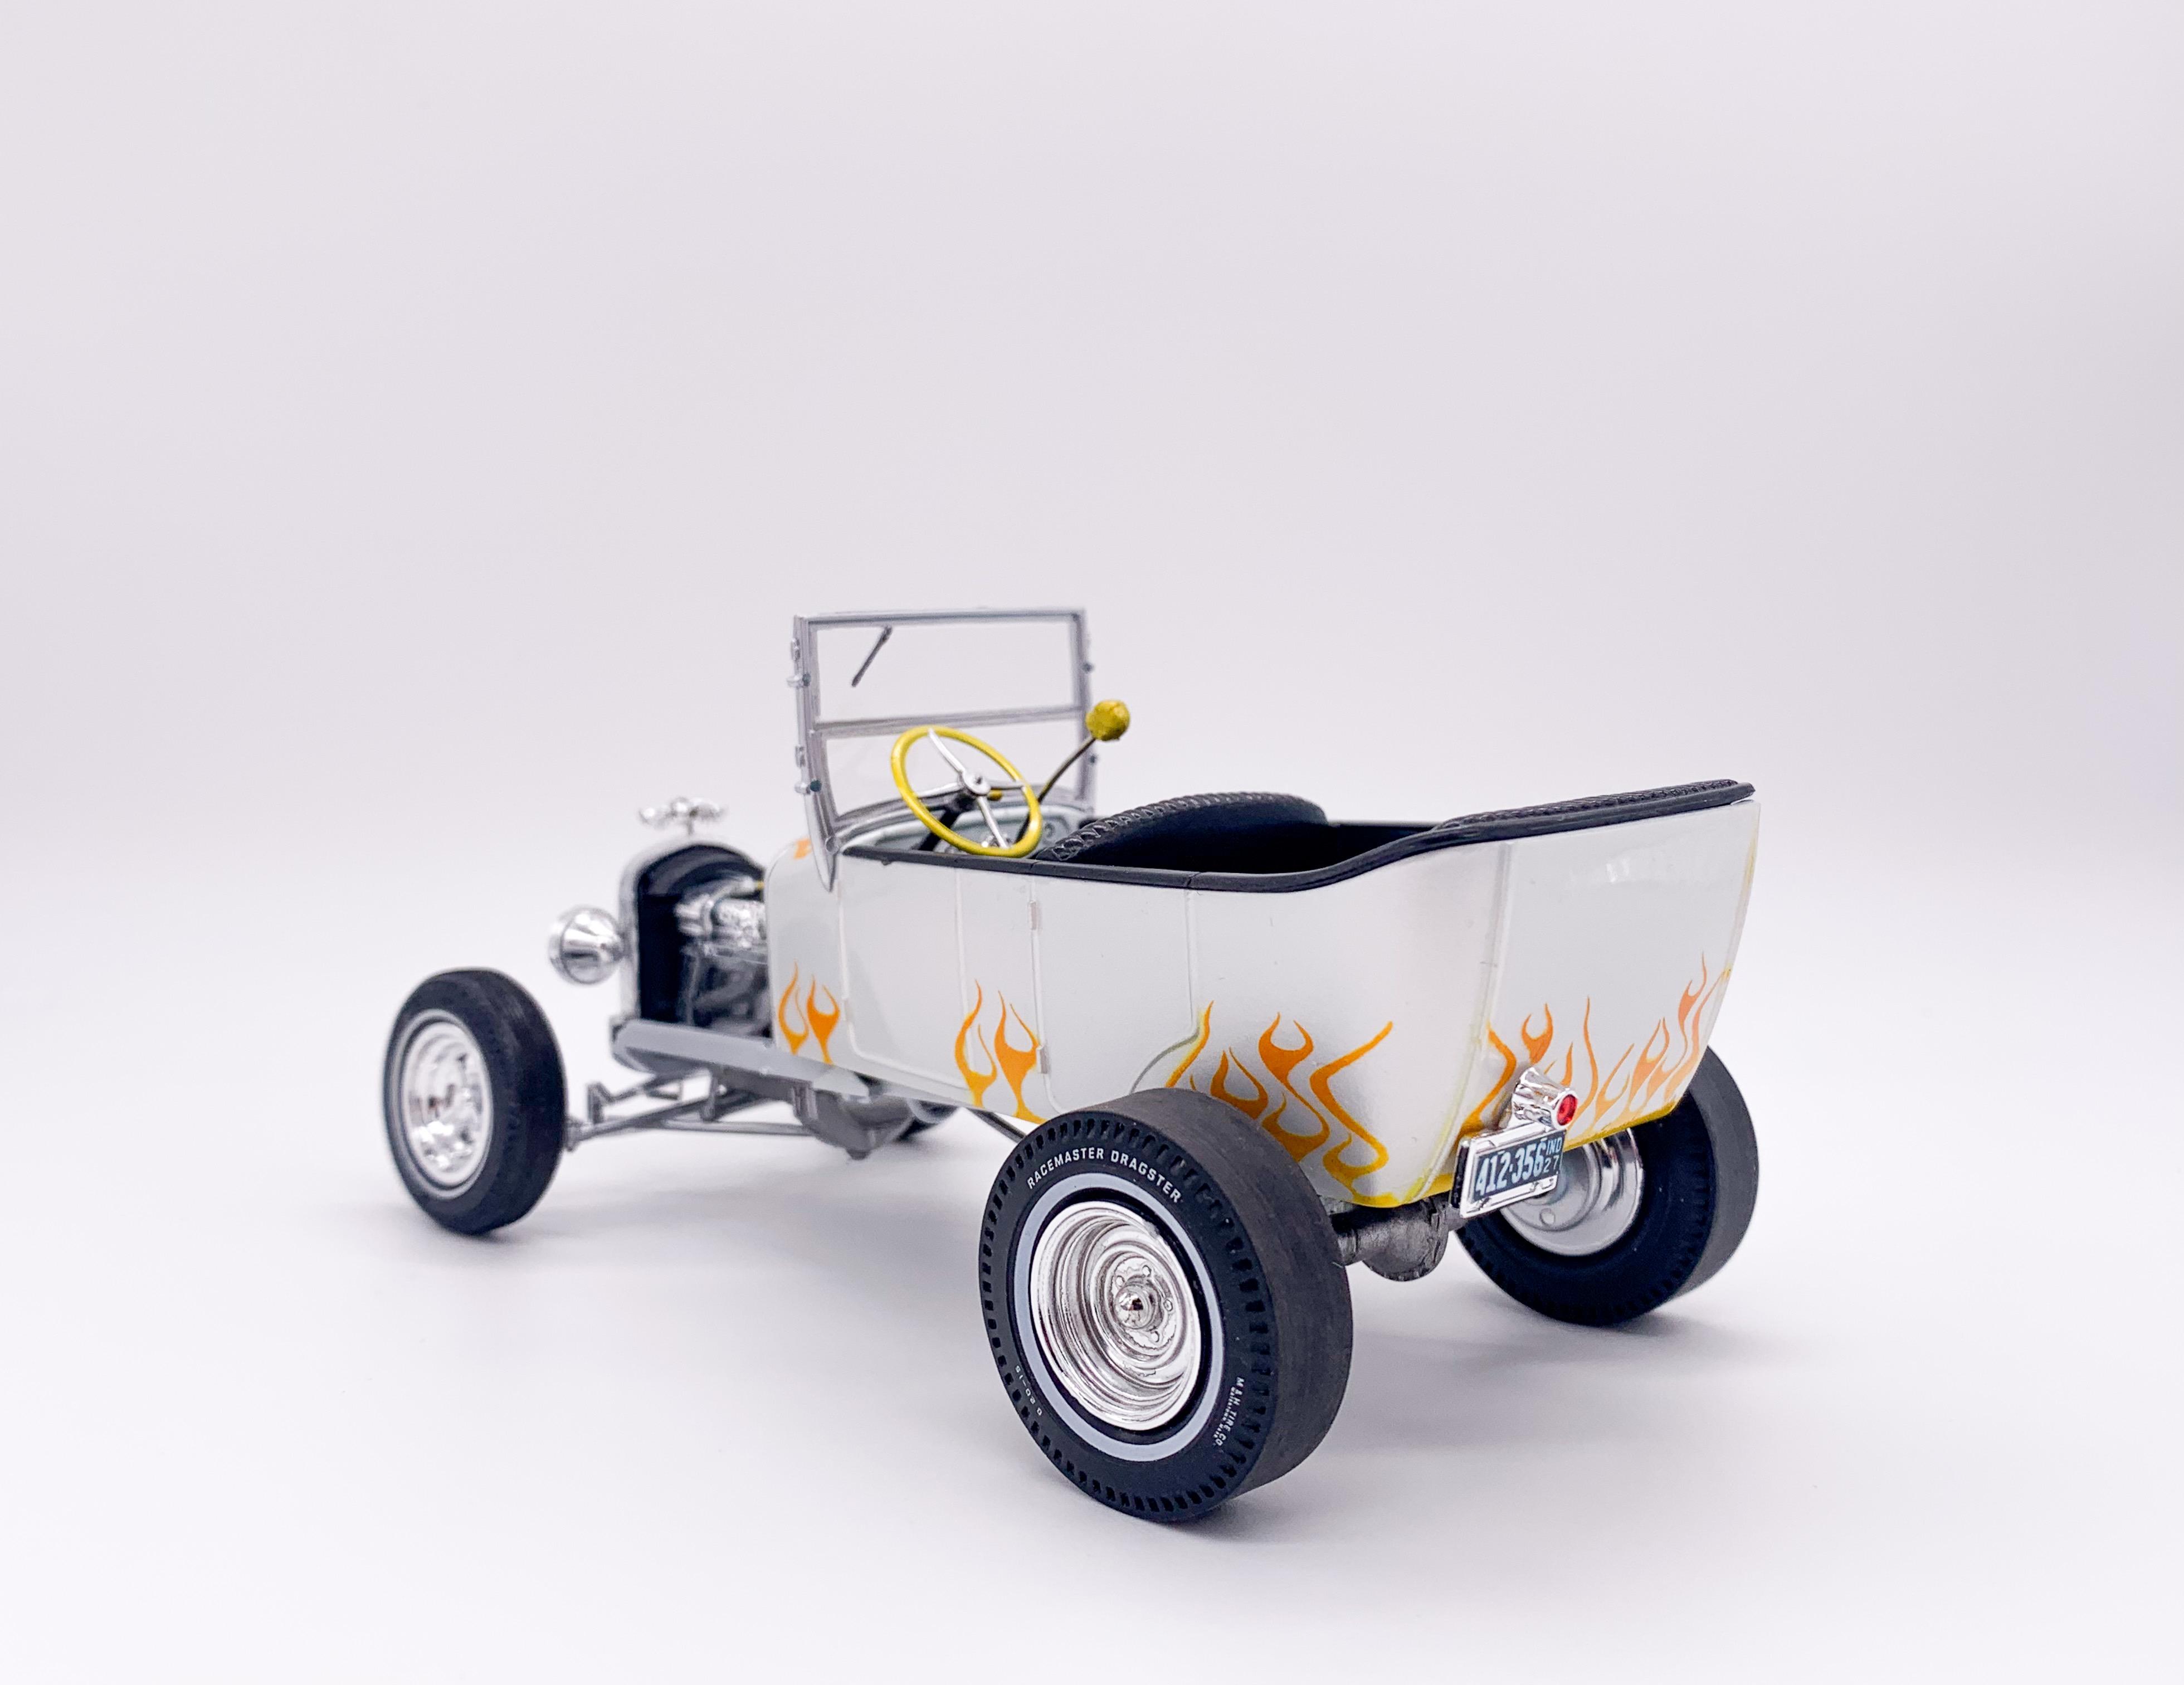
Oh man, I love the second version too! Great stance!
-
I’d bet if it looks good now, it’ll stay looking good most likely without needing to clear coat. A good automotive wax might help project it from eventually fading and deteriorating but if it looks good now and you’re happy I’d be inclined to leave it alone
There’s plenty of debate over whether to clear over decals - I don’t think they’ll suffer usually if you DON’T clear over them, but also I guess it can’t hurt if you decide you want to!
-
I haven’t had luck with their primers/sealers - no matter what I tried I couldn’t get them to adhere to styrene well enough that I could safely mask over it. If you’re not going to do any masking, you might get away with using them, but even that $1 Color Place primer you can get at Walmart works better than their stuff does on the plastic we like.
I use their sealers for other stuff, but ALWAYS over a ‘real’ primer base.
For projects like that Impala I posted above there was a TONNE of masking, and I had about 0% confidence in their water-based based Auto Borne products for that job - I don’t see how a water-based paint can bite into styrene as well as regular primer can, and in my experience it just doesn’t work.
The Createx reducer however works great for me and isn’t expensive - I’ve used Rx 91% type alcohol too, like some others above, but their own brand stuff works great and a little goes a long way so I don’t mess with anything else very often.
For a clearcoat, I haven’t found much that DOESN’T work over Createx paint - I like gloss enamel cut with lacquer thinner right now, but there’s plenty of options in the flavor of your choice out there.
As always, opinions vary and mine’s only worth as much as you paid for it, but these have been my experiences with the stuff...
-
Jaw dropping work! I’ll start clearing a space on my shelf! ??❤️
-
My three favorites right now:
-
Yep! Love all their paints! Very forgiving to use, great price, great colors, and they mix easy as pie. Hard to go wrong with them! You can’t polish them like lacquers or enamels, so you’ll need a top coat, so bear that in mind but I love them!
All painted with Createx or Wicked Colors paints (mostly Createx):
-
6 hours ago, AmericanMuscleFan said:
Looks gooooooood! No... marvellous! You are an expert in this field my friend!!! I just called the doctor few minutes ago for my tetanus shot... ?
Oh man, I’m learning all this stuff as I go - but it’s fun!
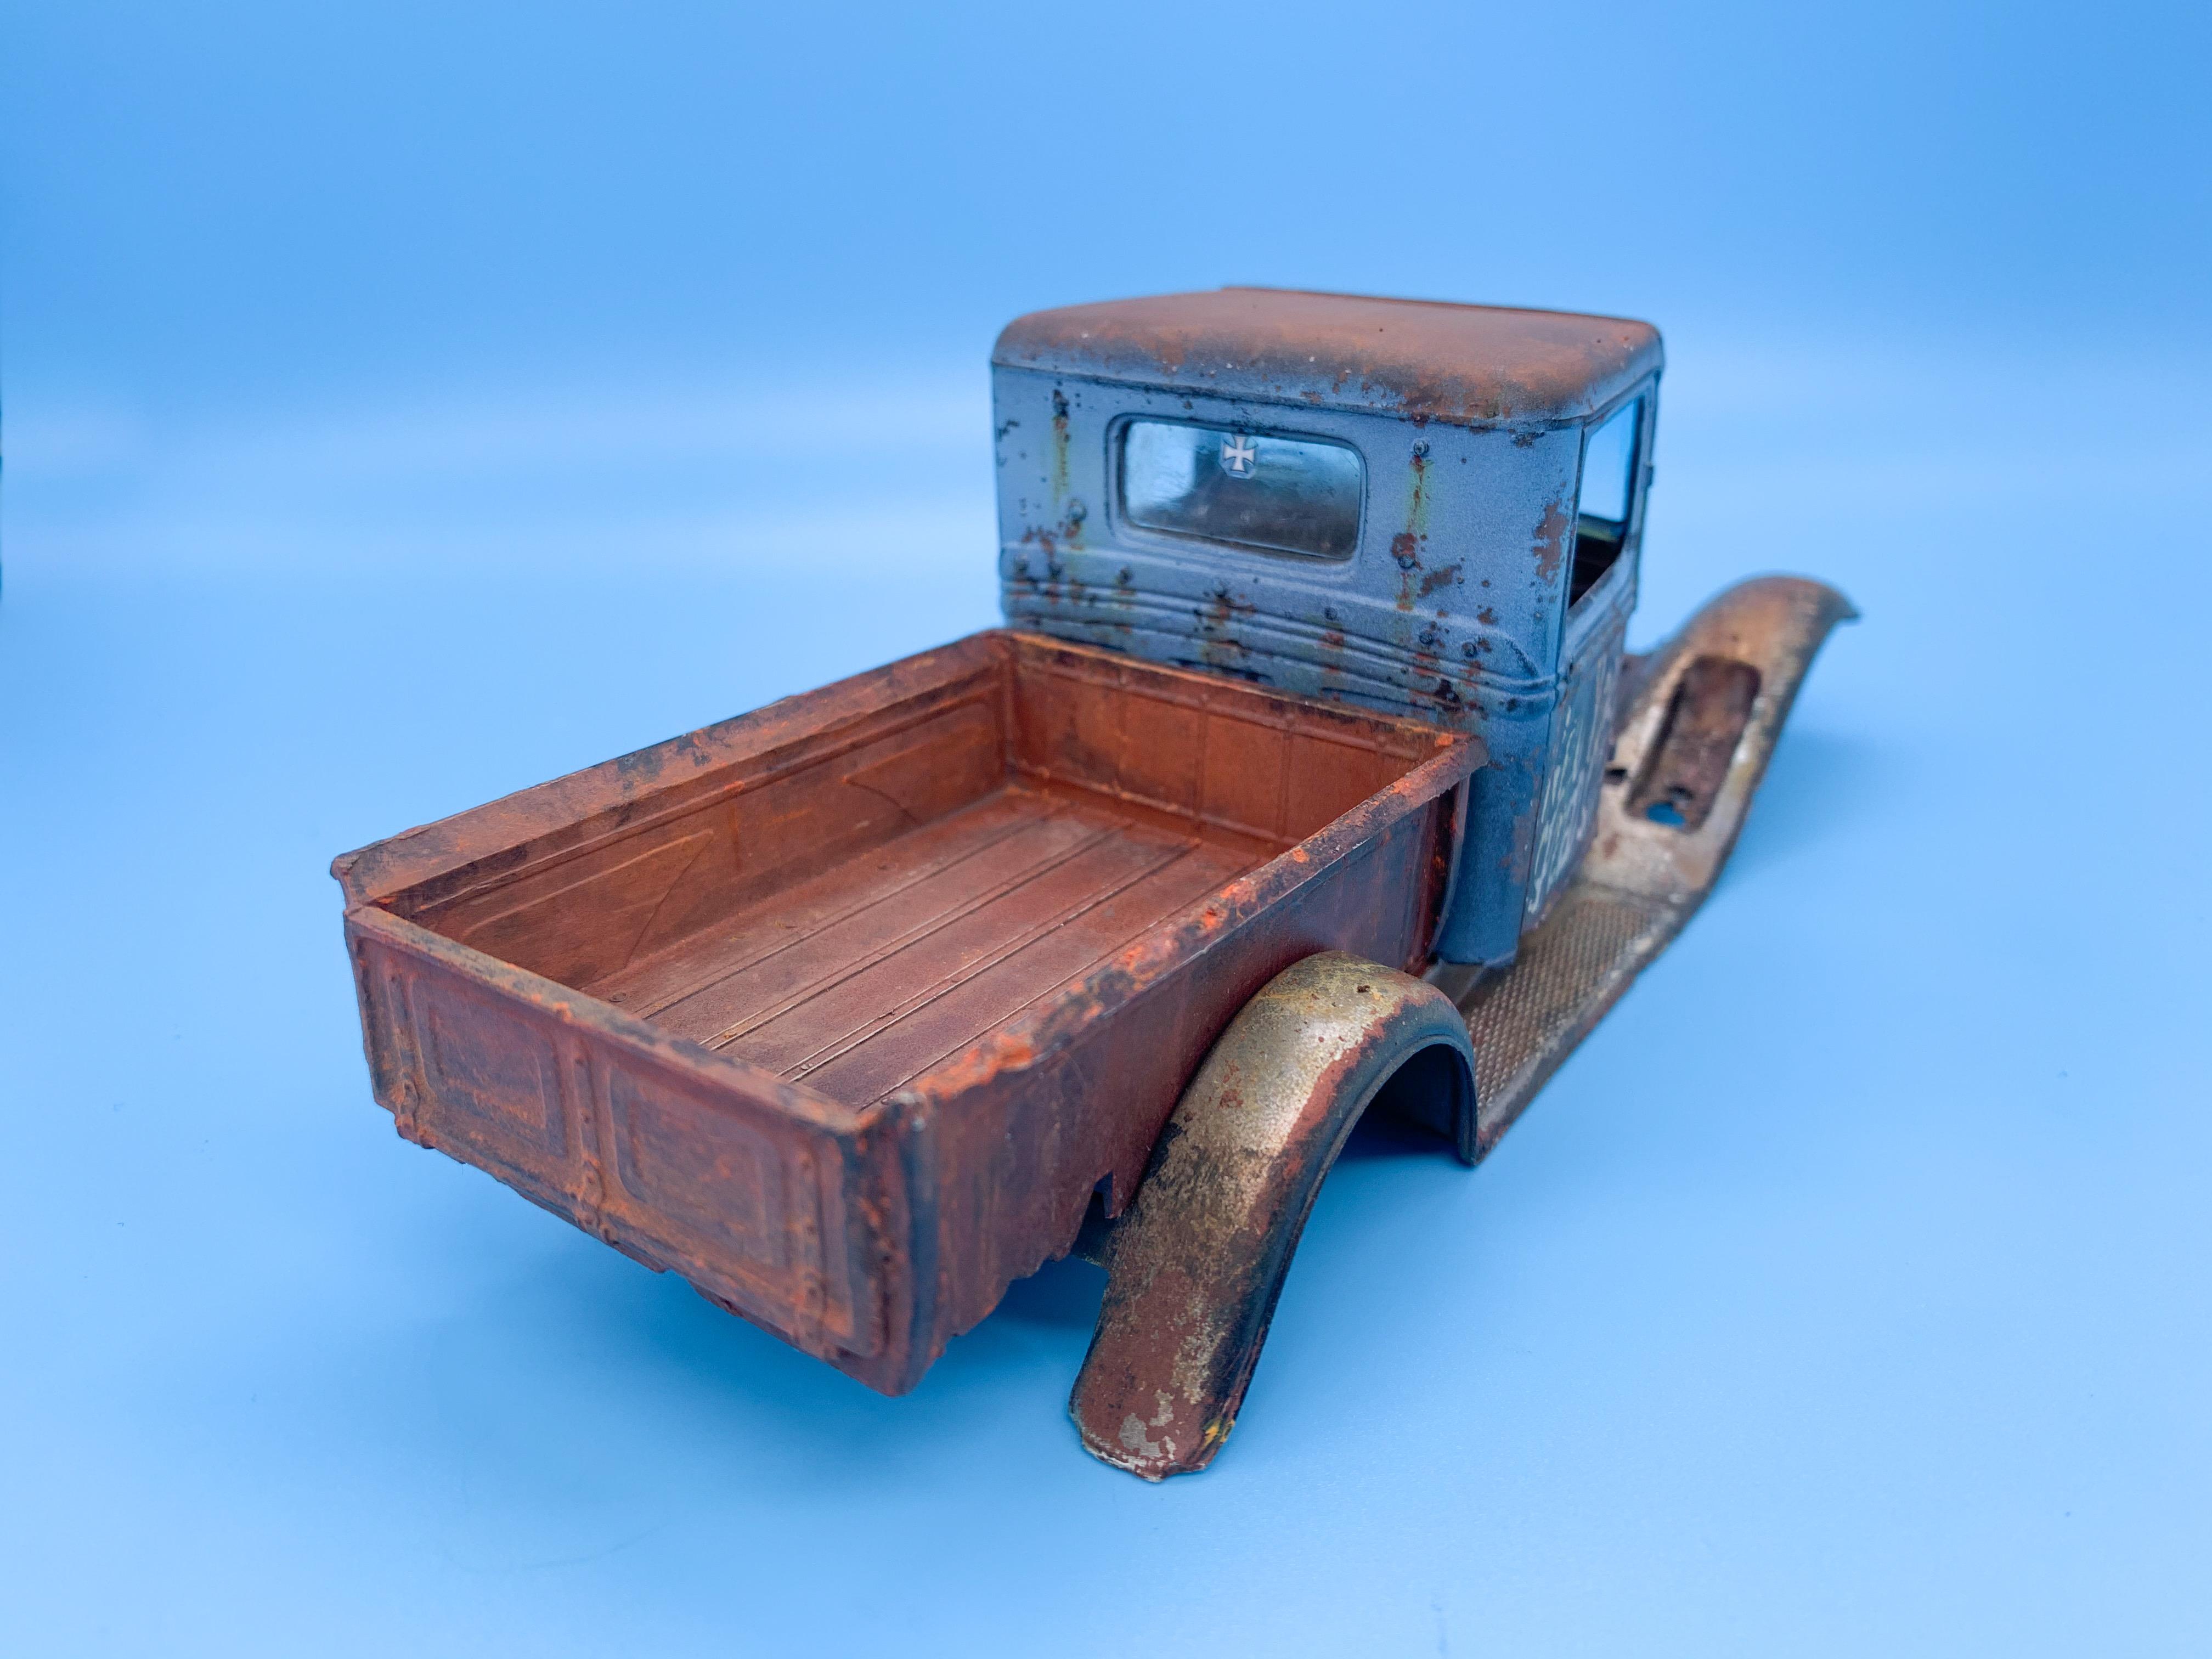
This weekend’s project - the bed! In continuing the pieced-together-from-5-different-trucks theme of this build, I’m giving it a slightly different look to the other parts I’ve weathered...same technique tho...base coat of brown, then some salt:
Then some black, and remove salt:
And then a bunch of weathering with watercolor pencils and pastels and we’re getting close to what I had in mind...
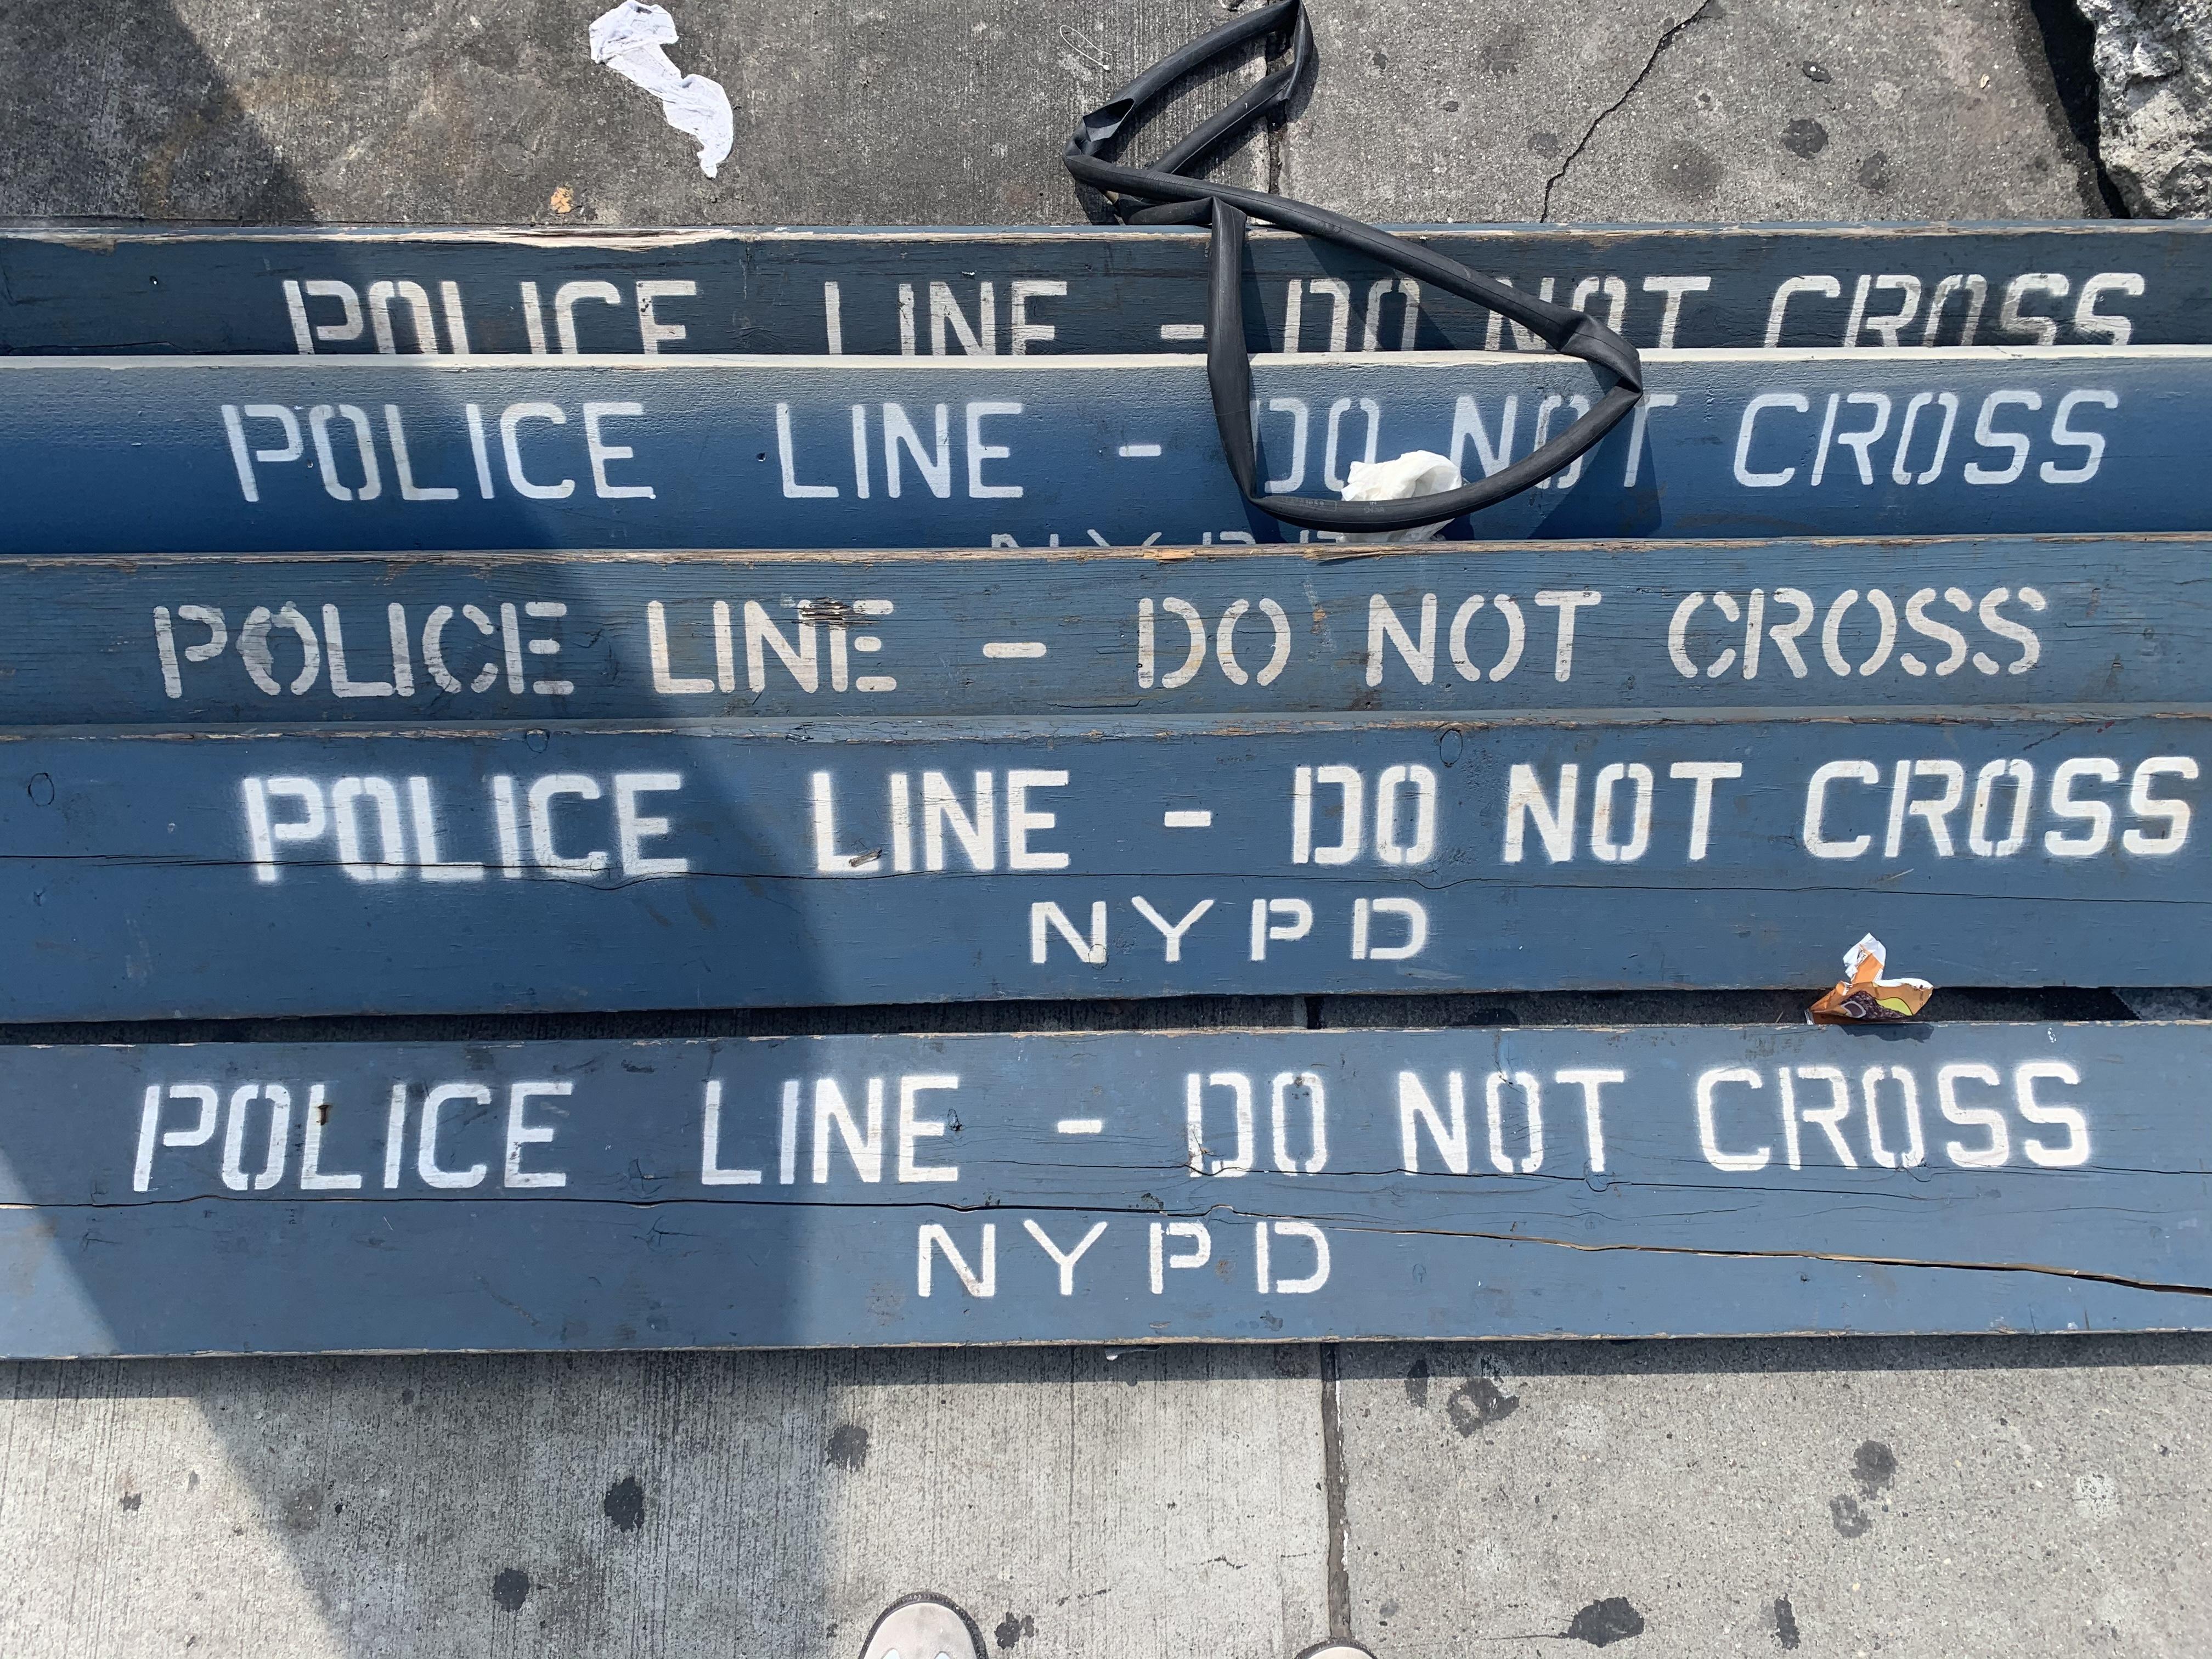
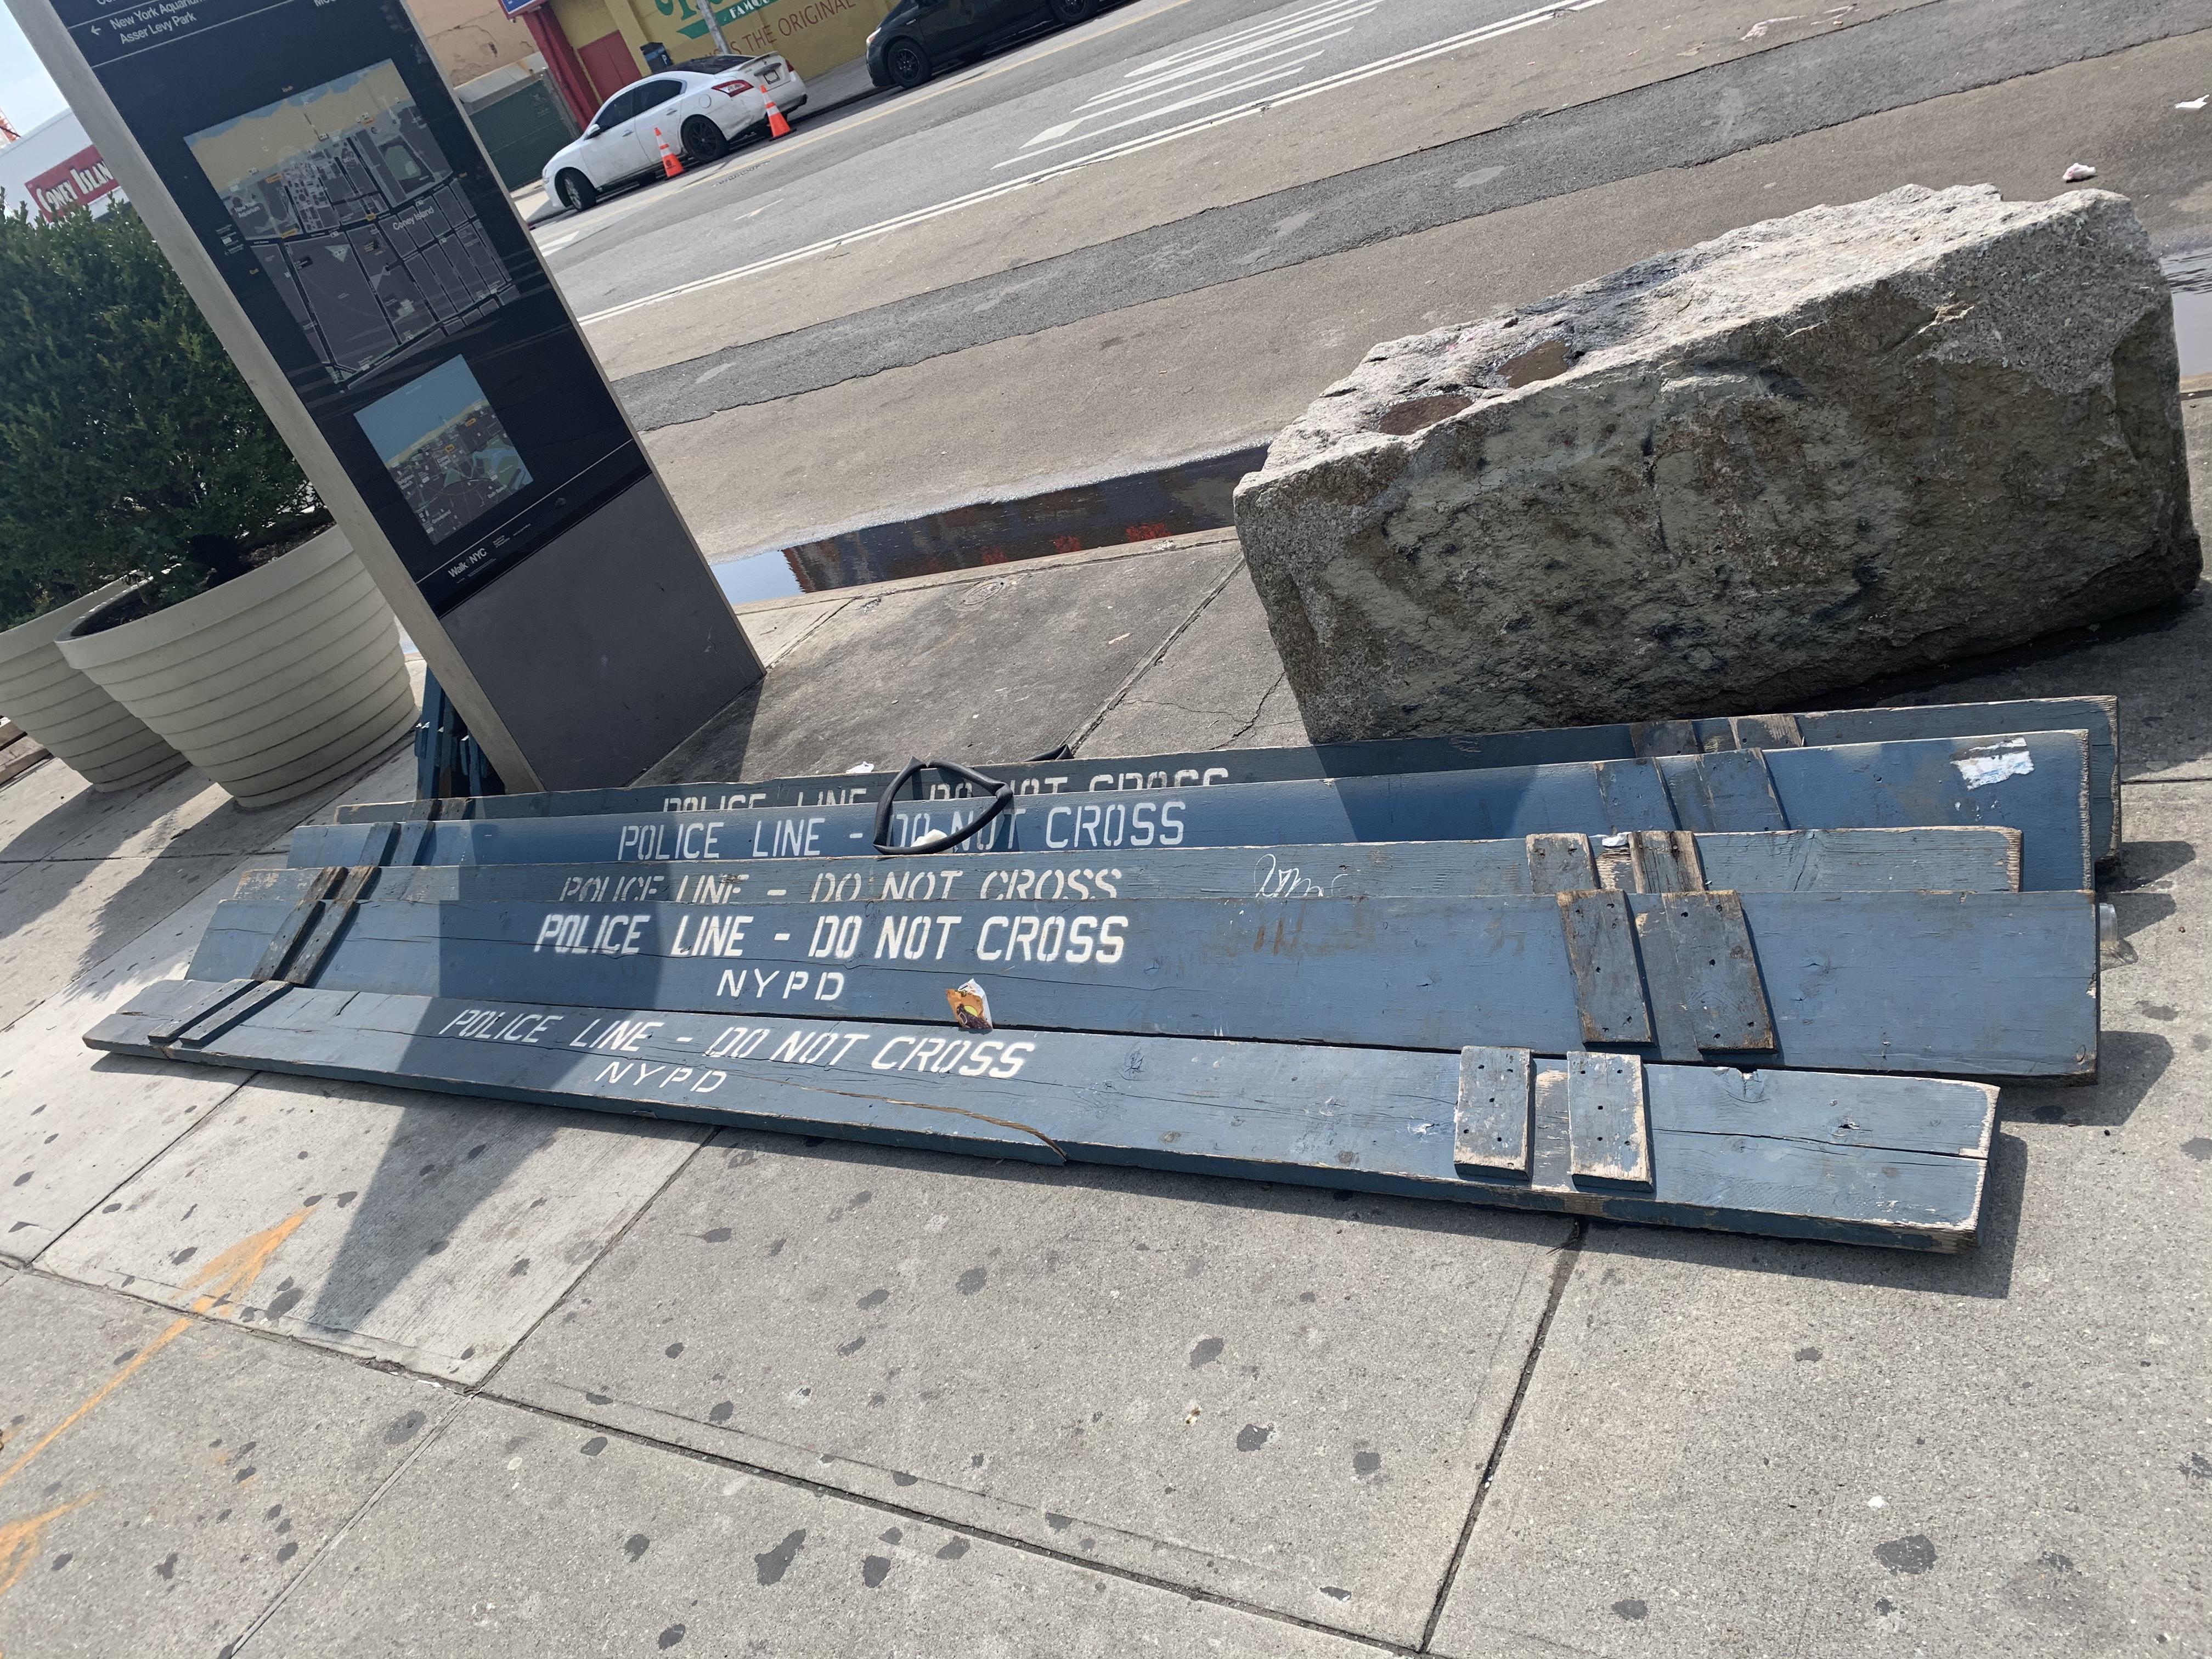
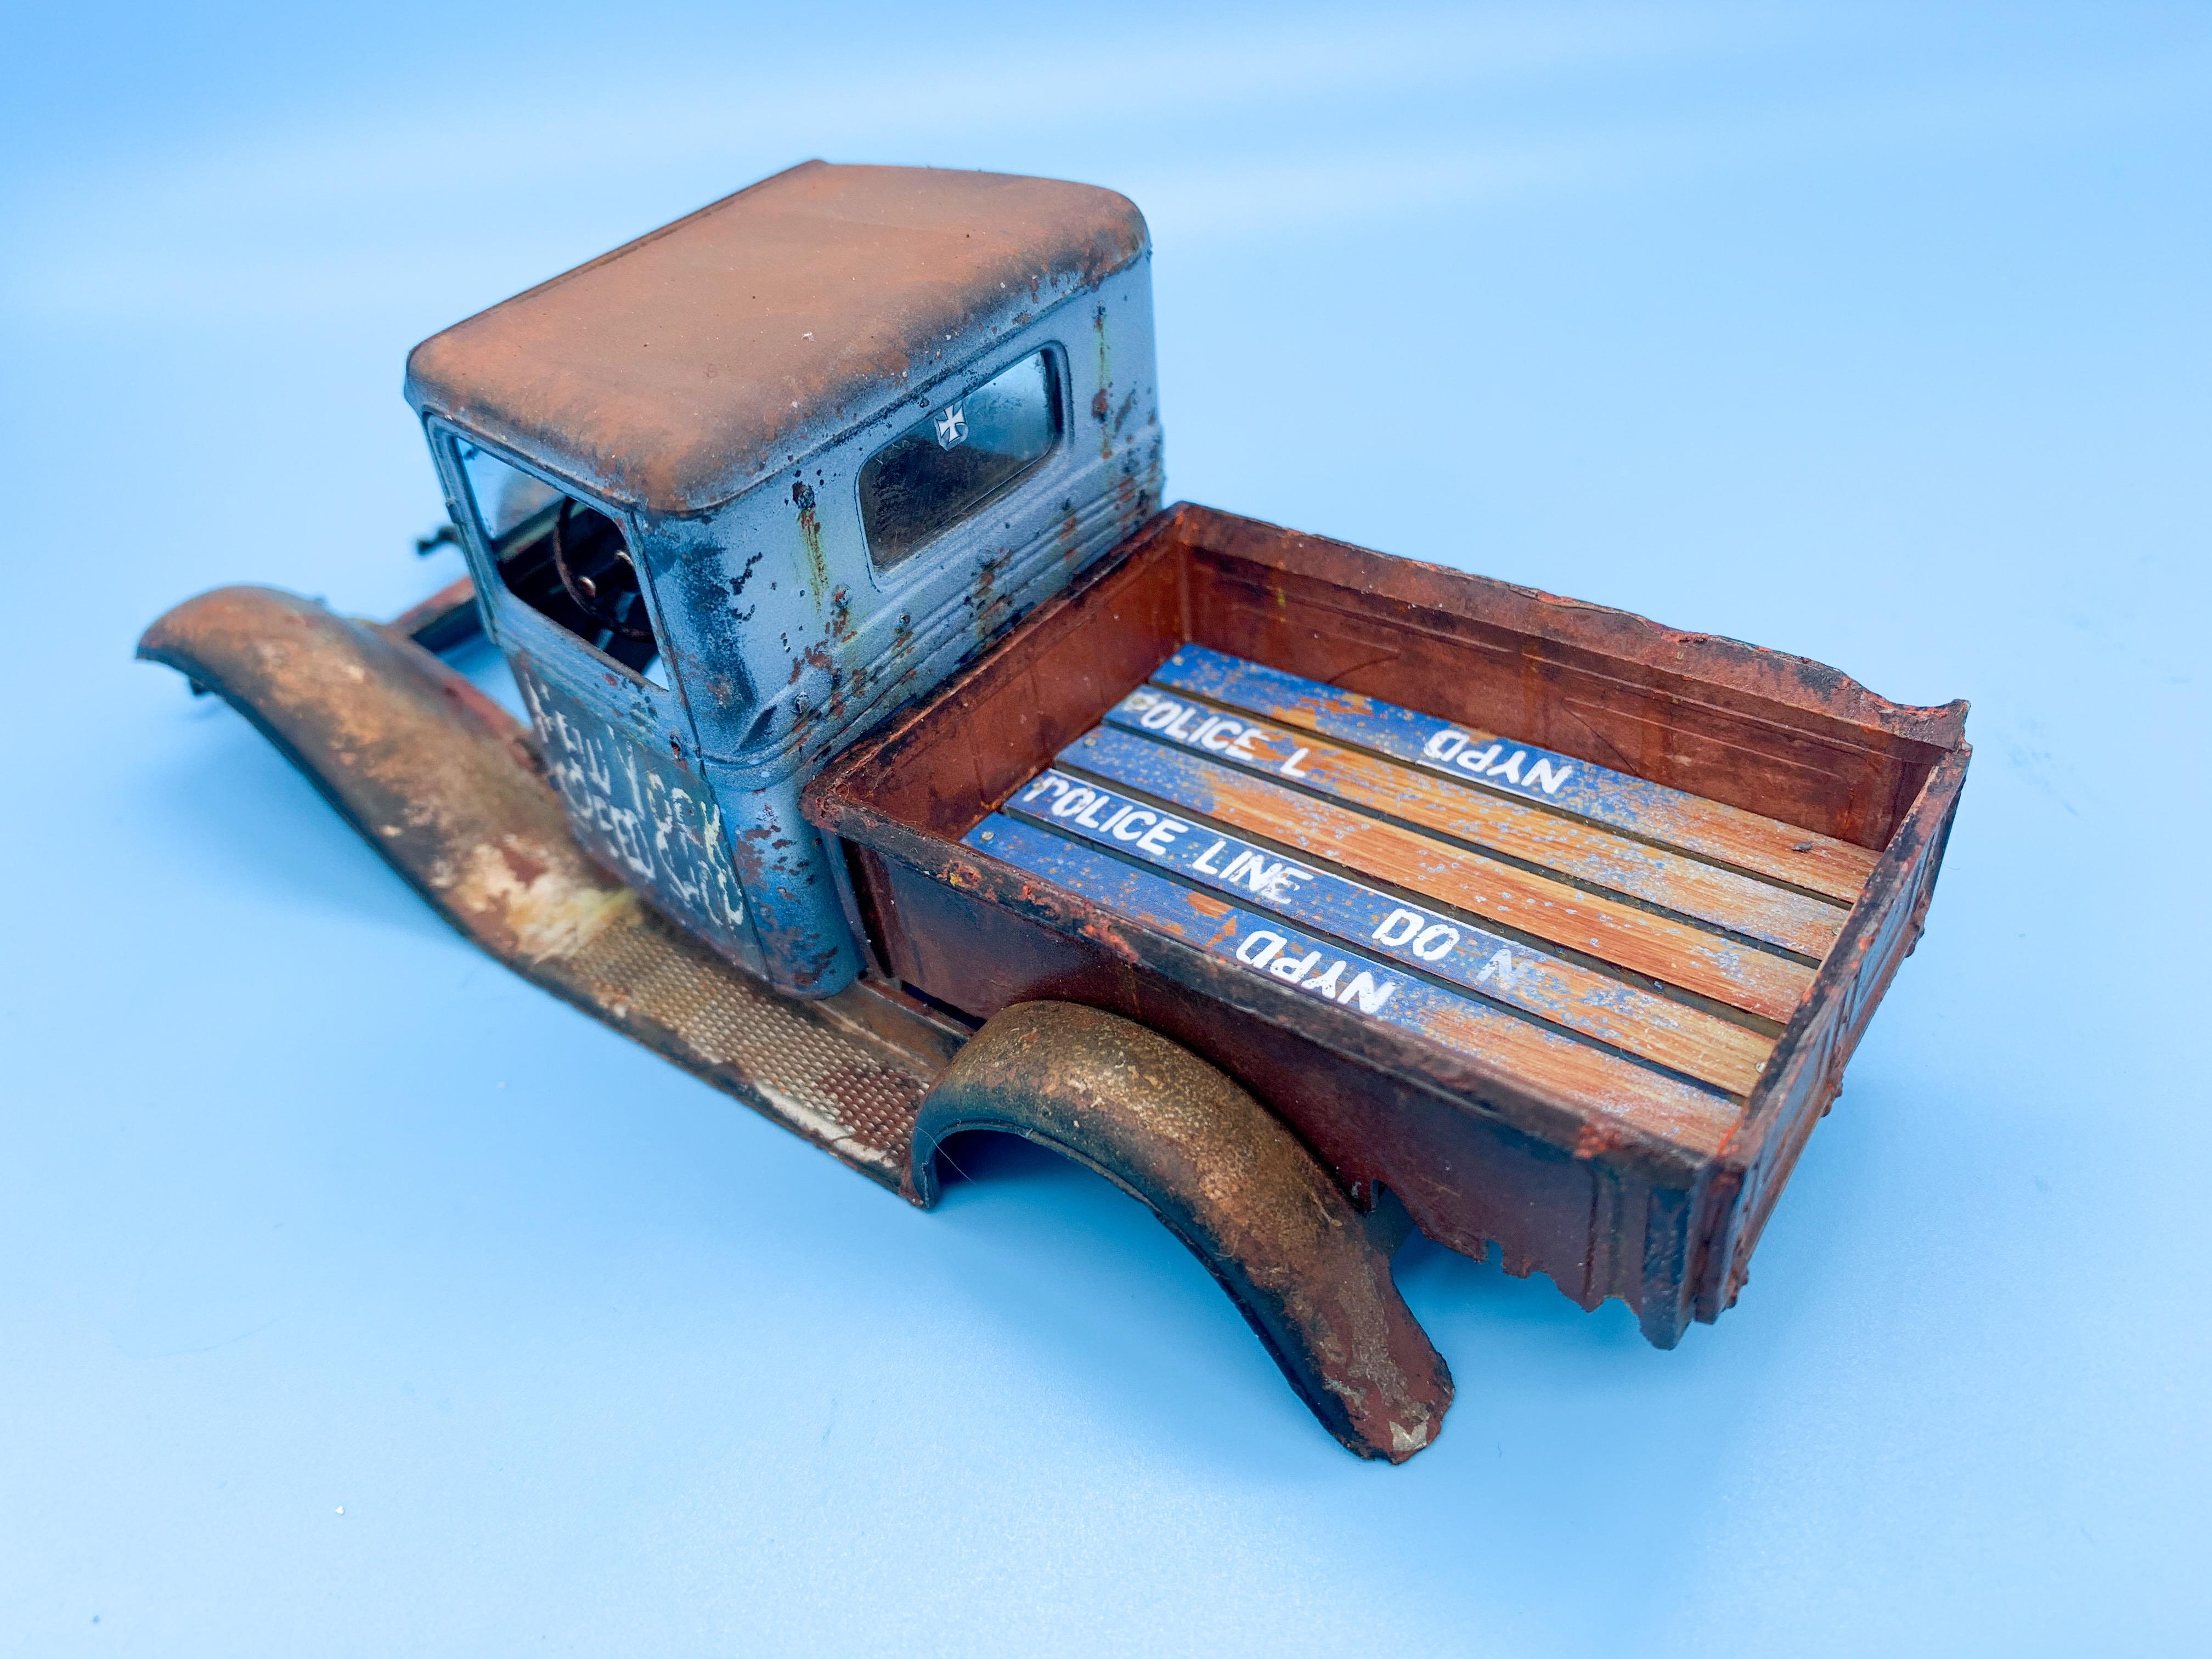
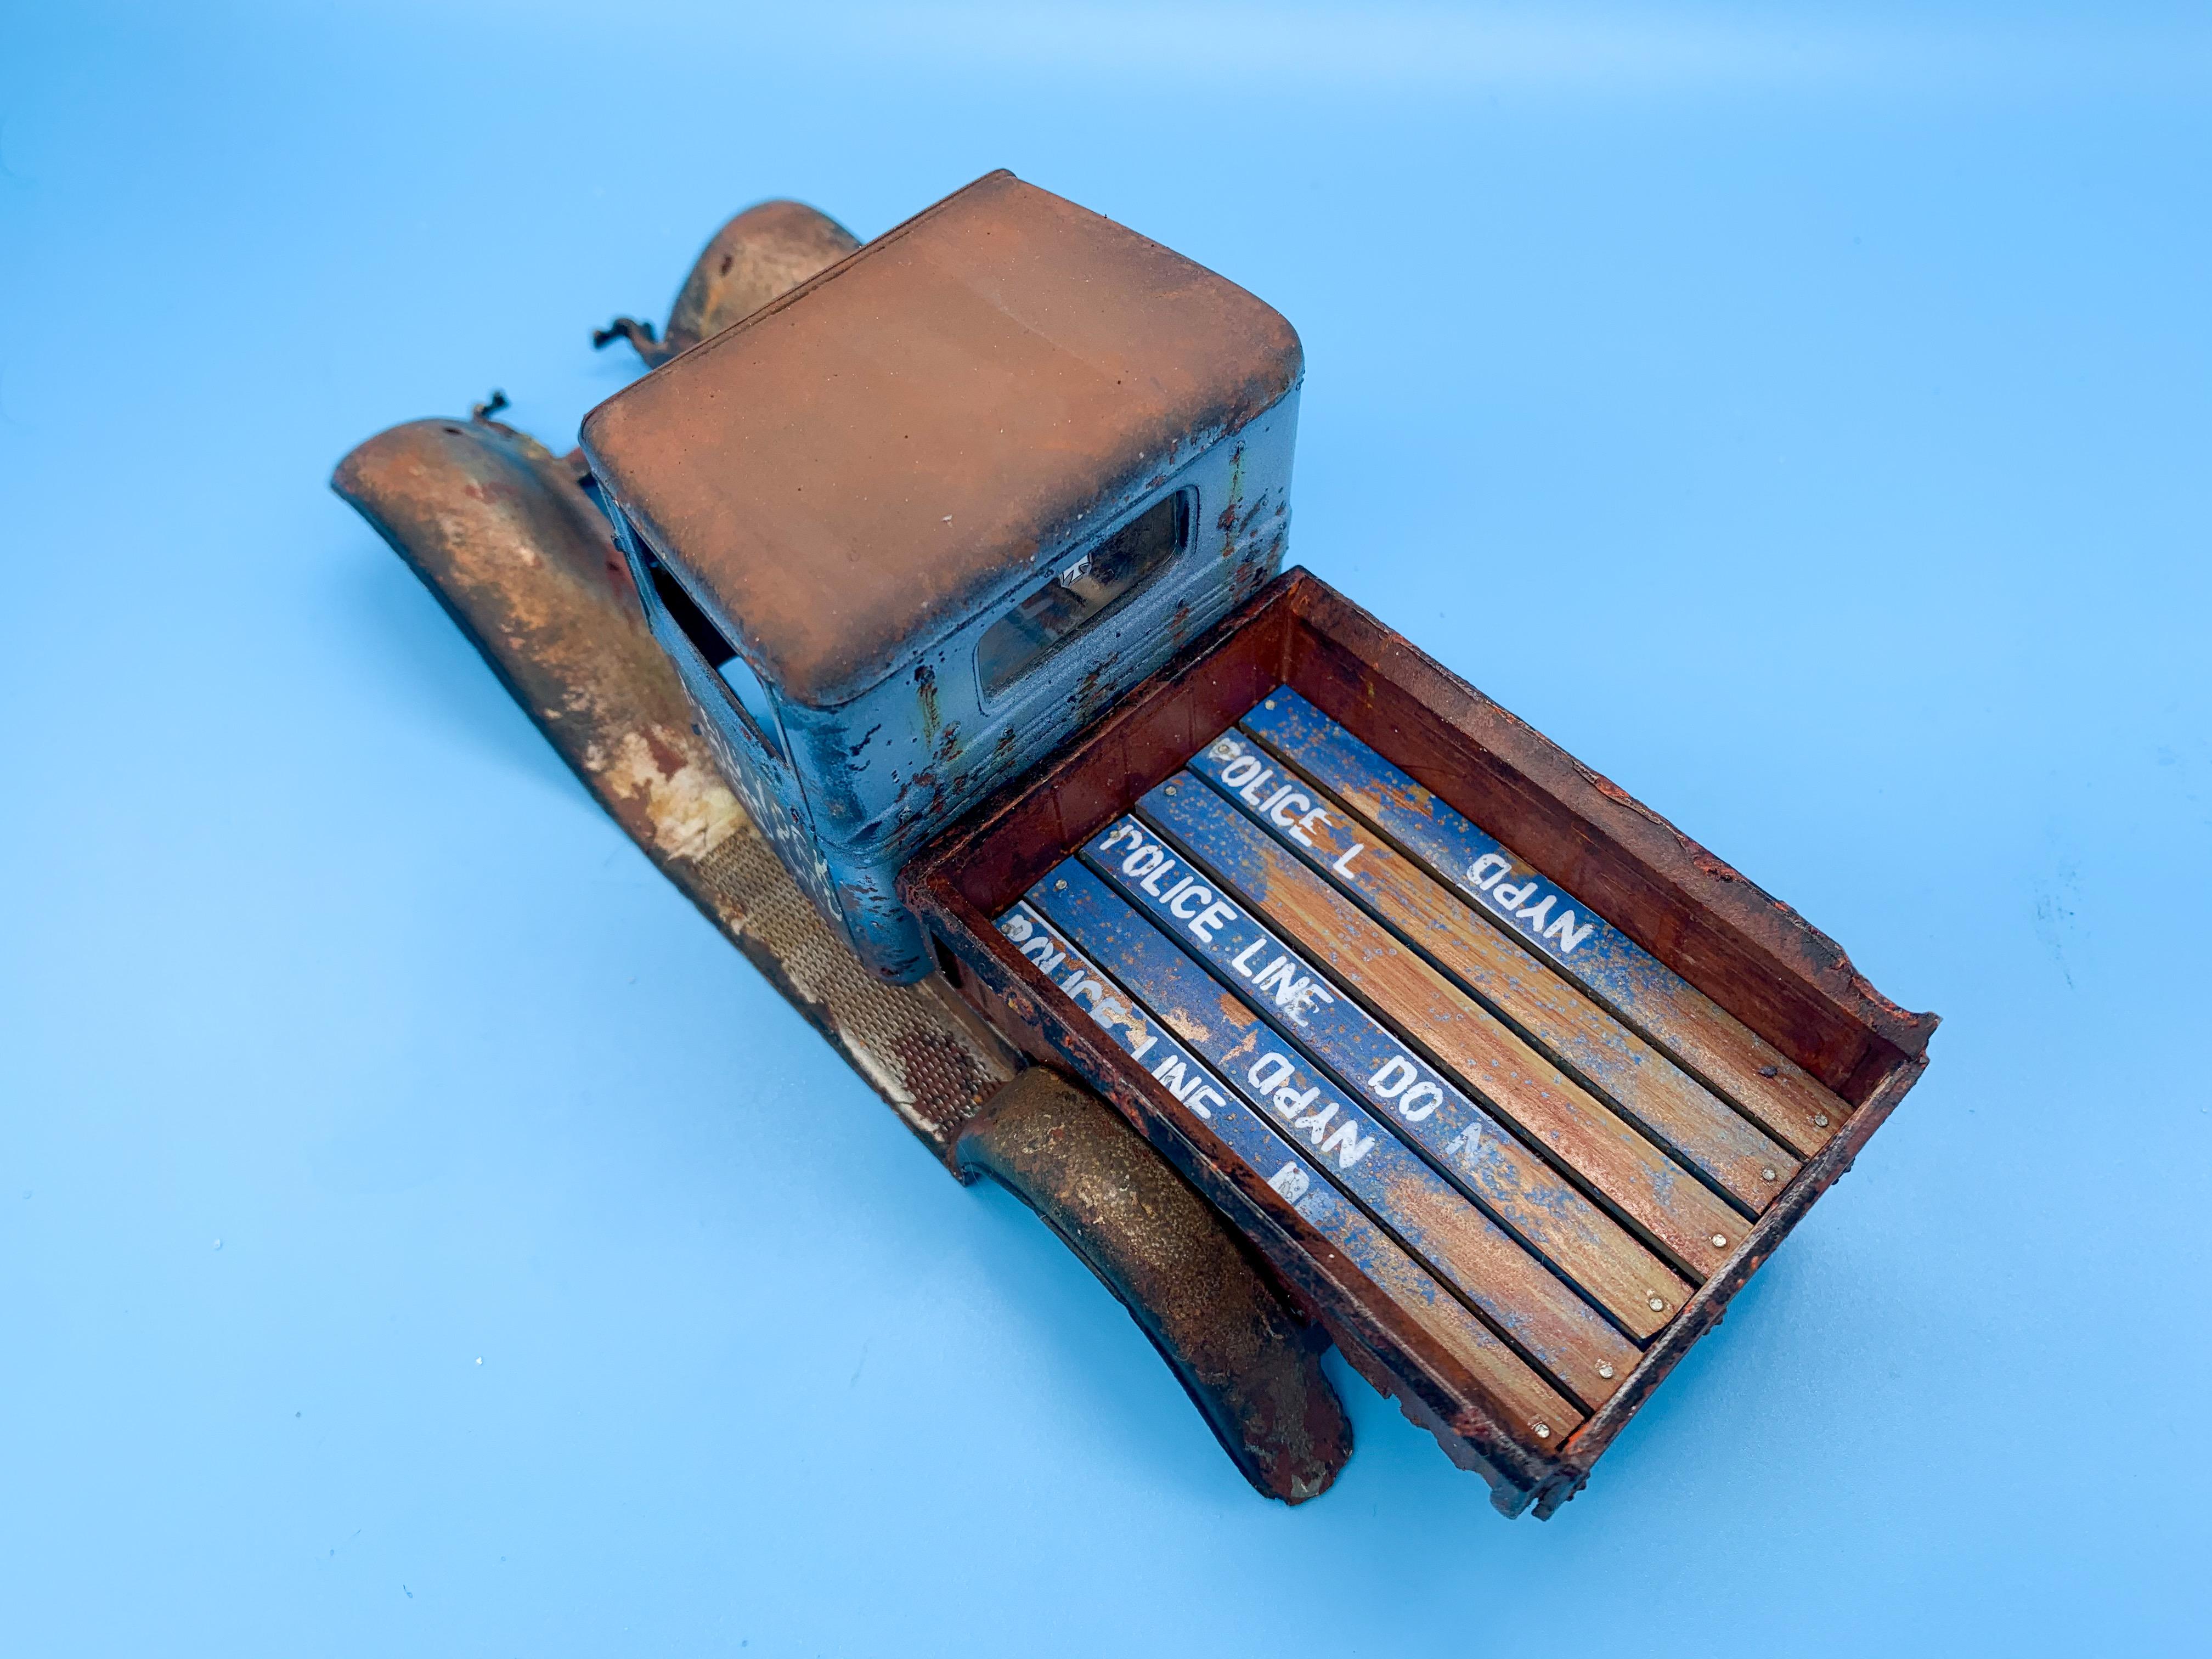
I figured the bed would almost certainly be pretty rotten after 86 years, but a resourceful New York speed shop would no doubt have noticed the almost limitless amount of free wood laying around the city...
What better to replace the bed than free material that’s laying around forgotten on about every block in the city?
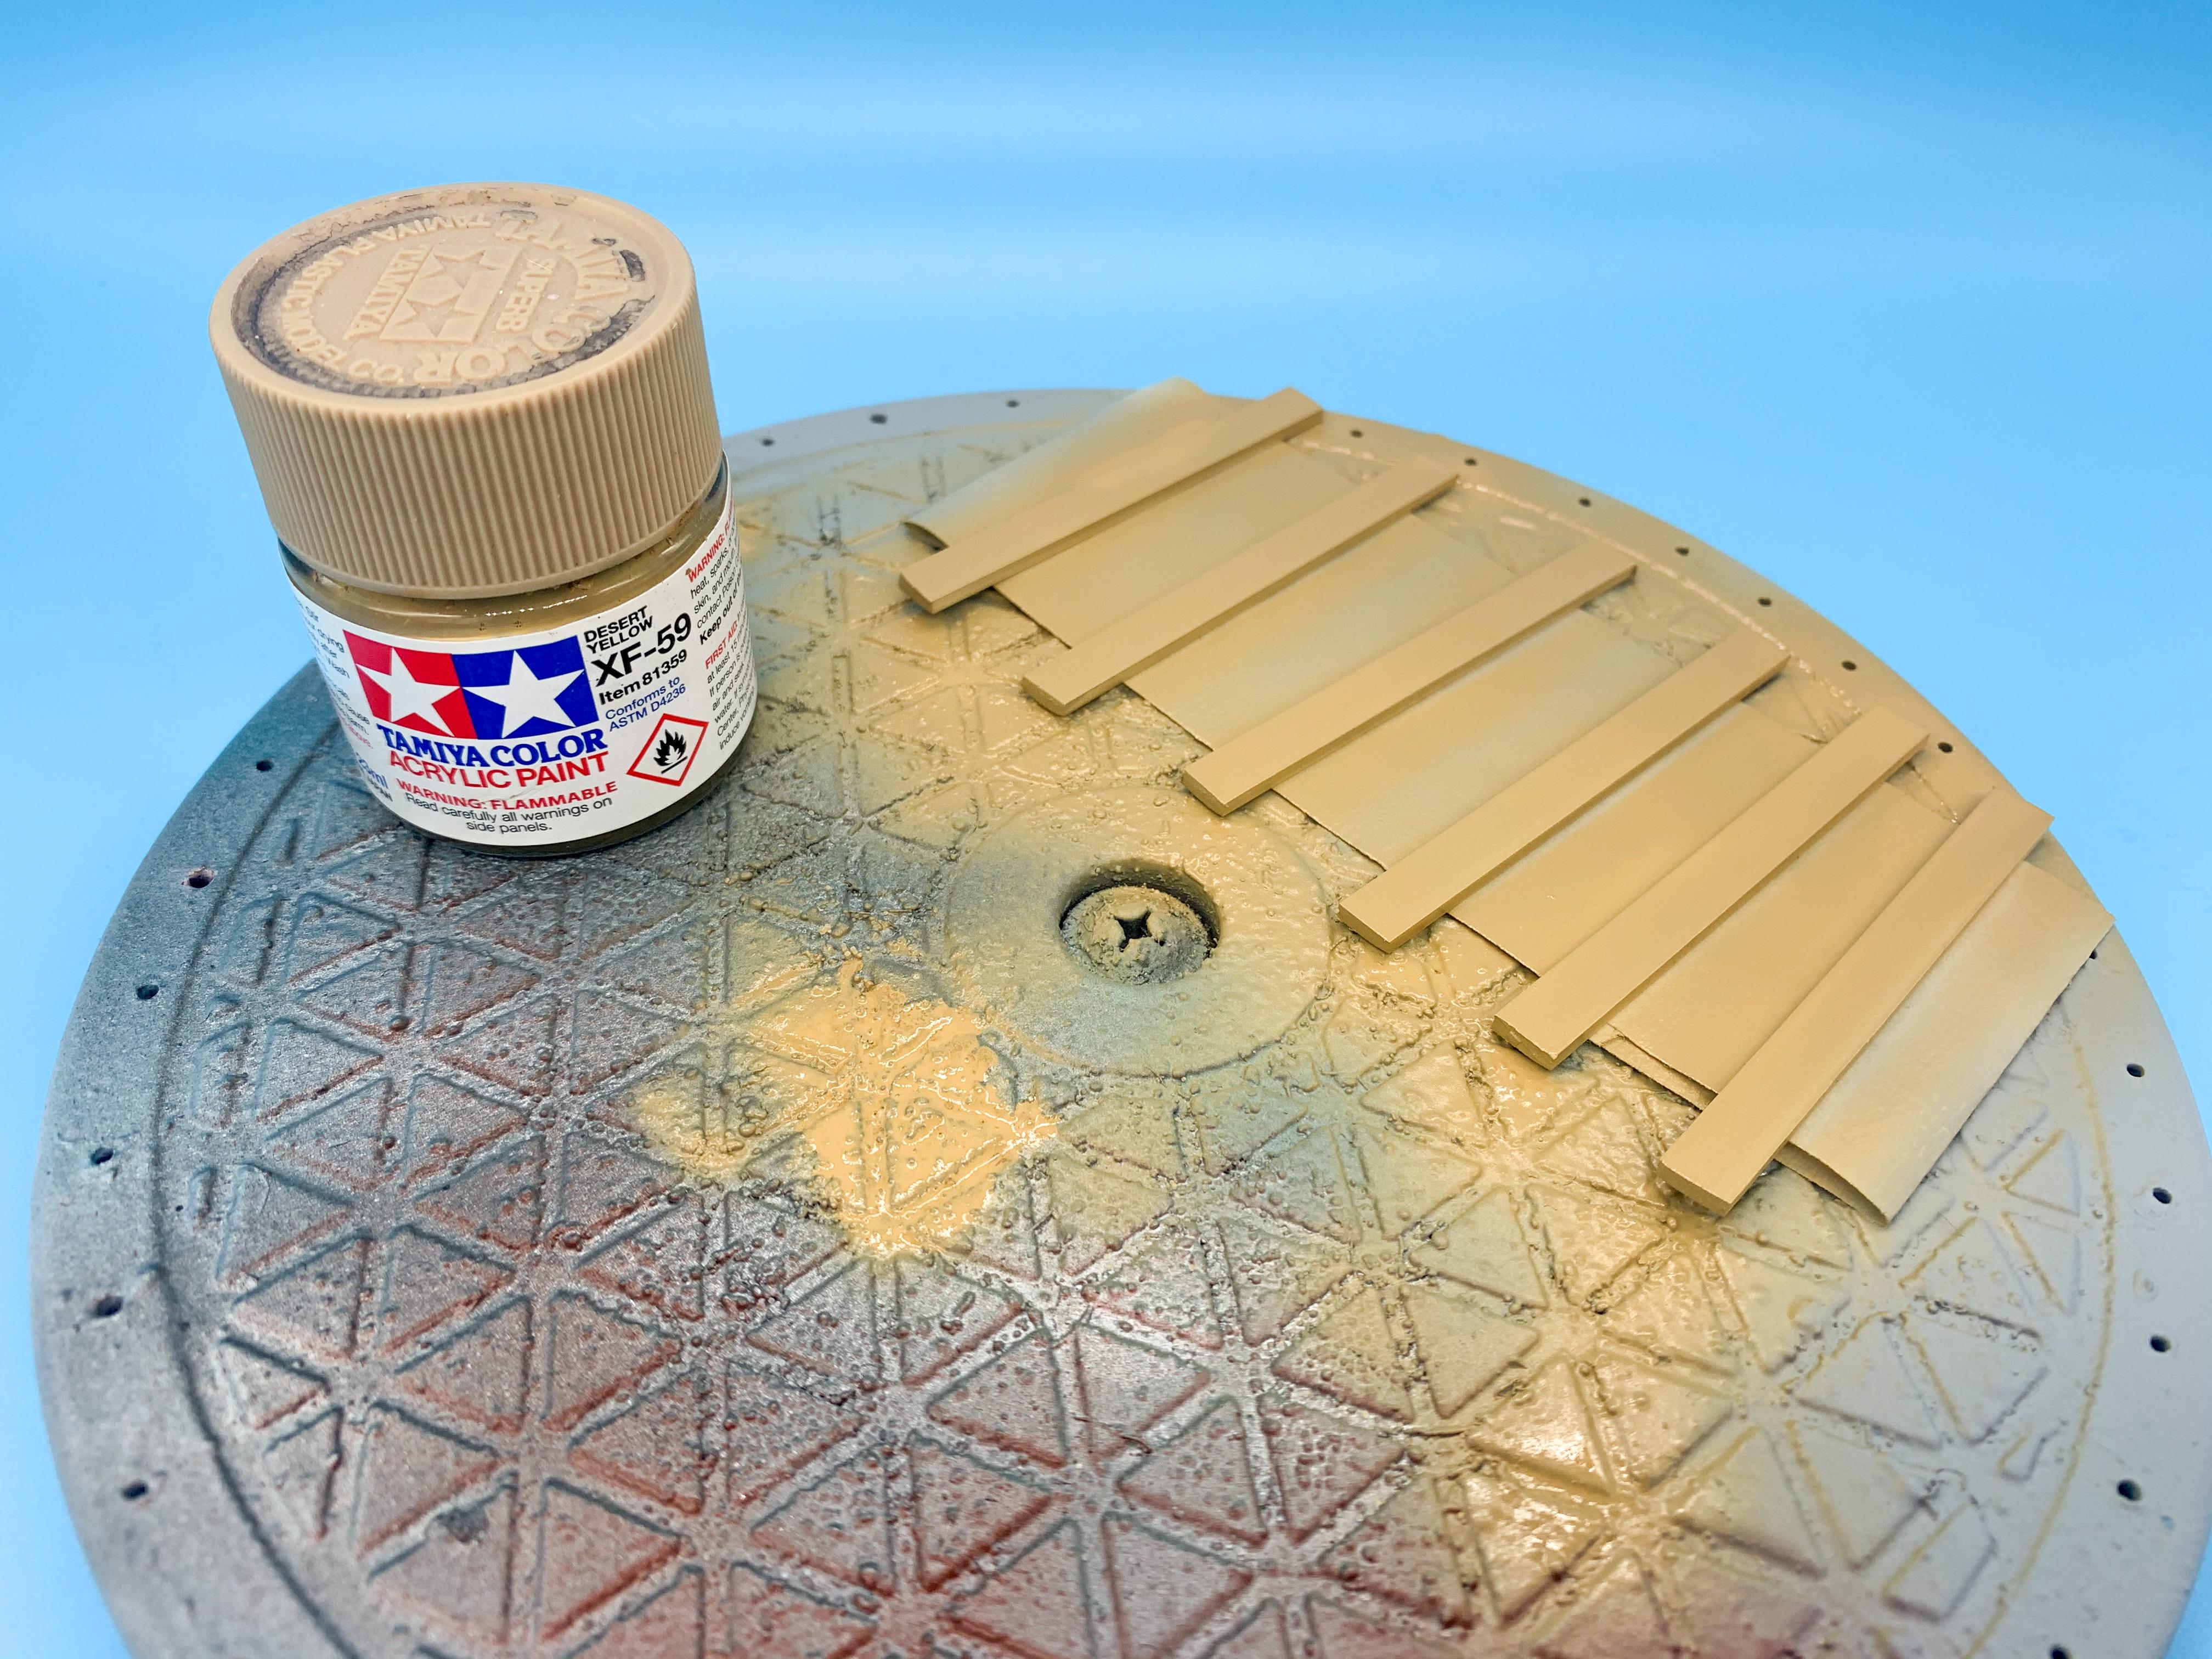
Cut some strips of styrene, and painted with Tamiya acrylic:
Then added some grain:
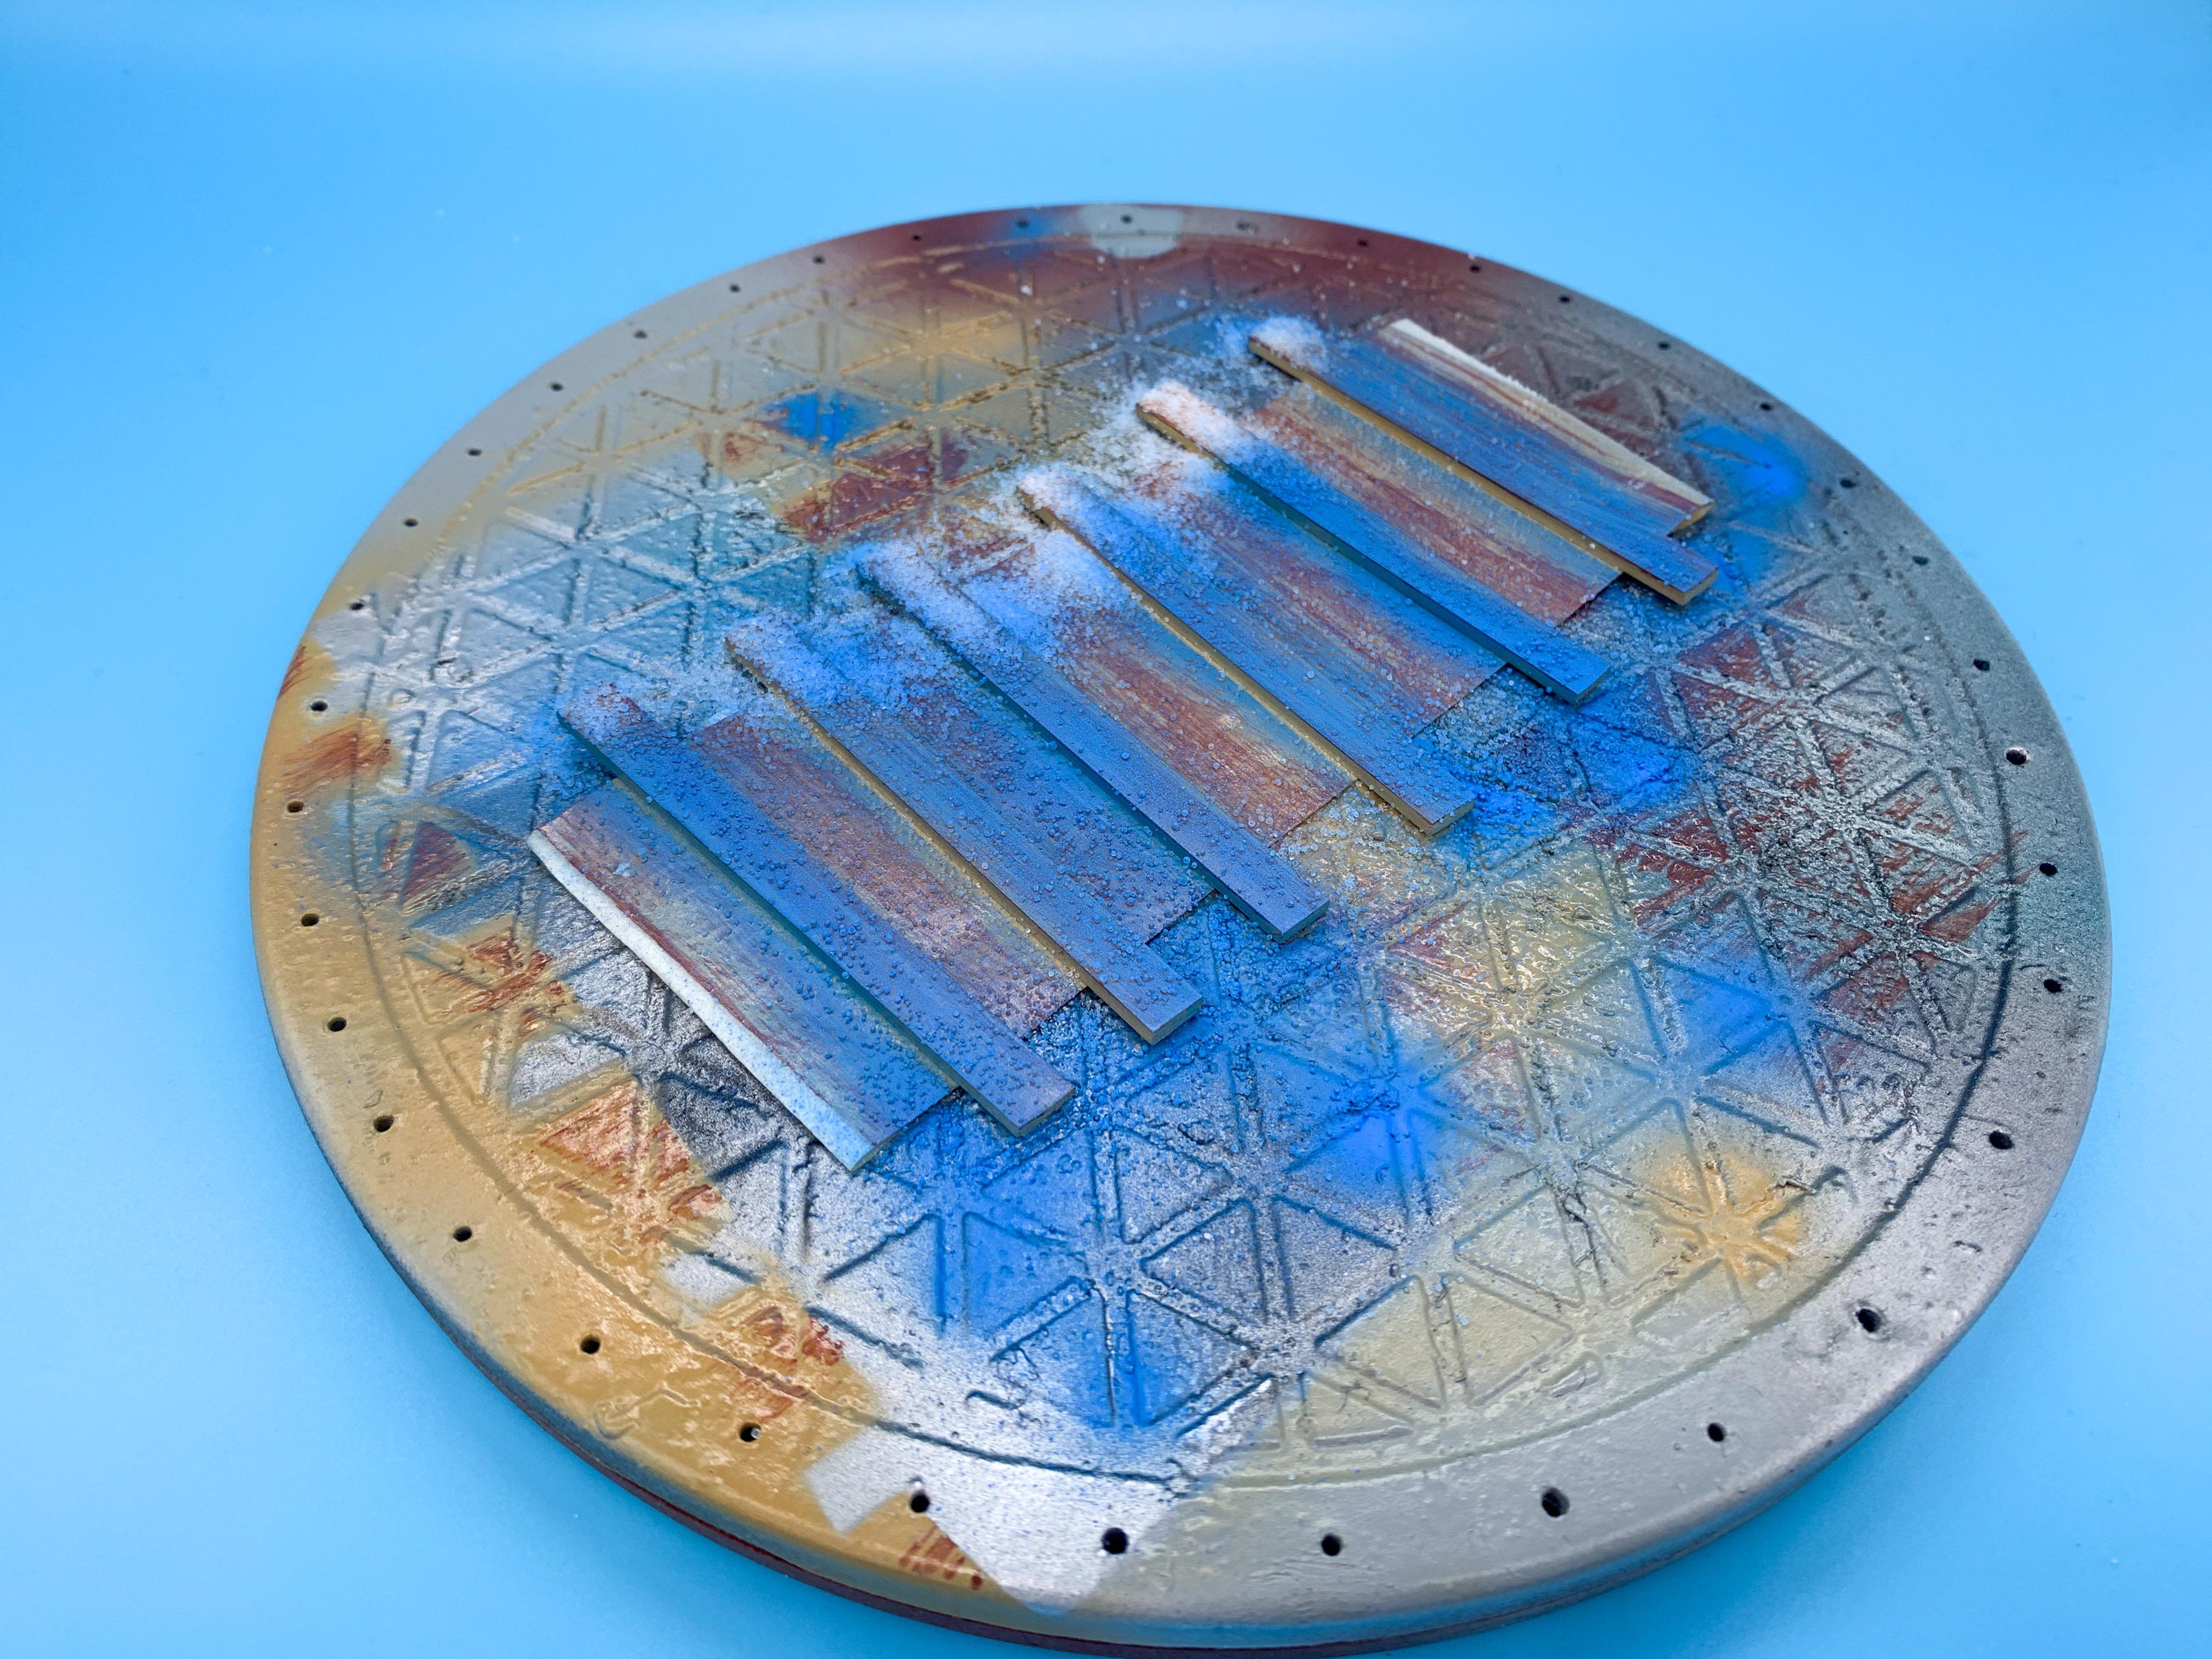
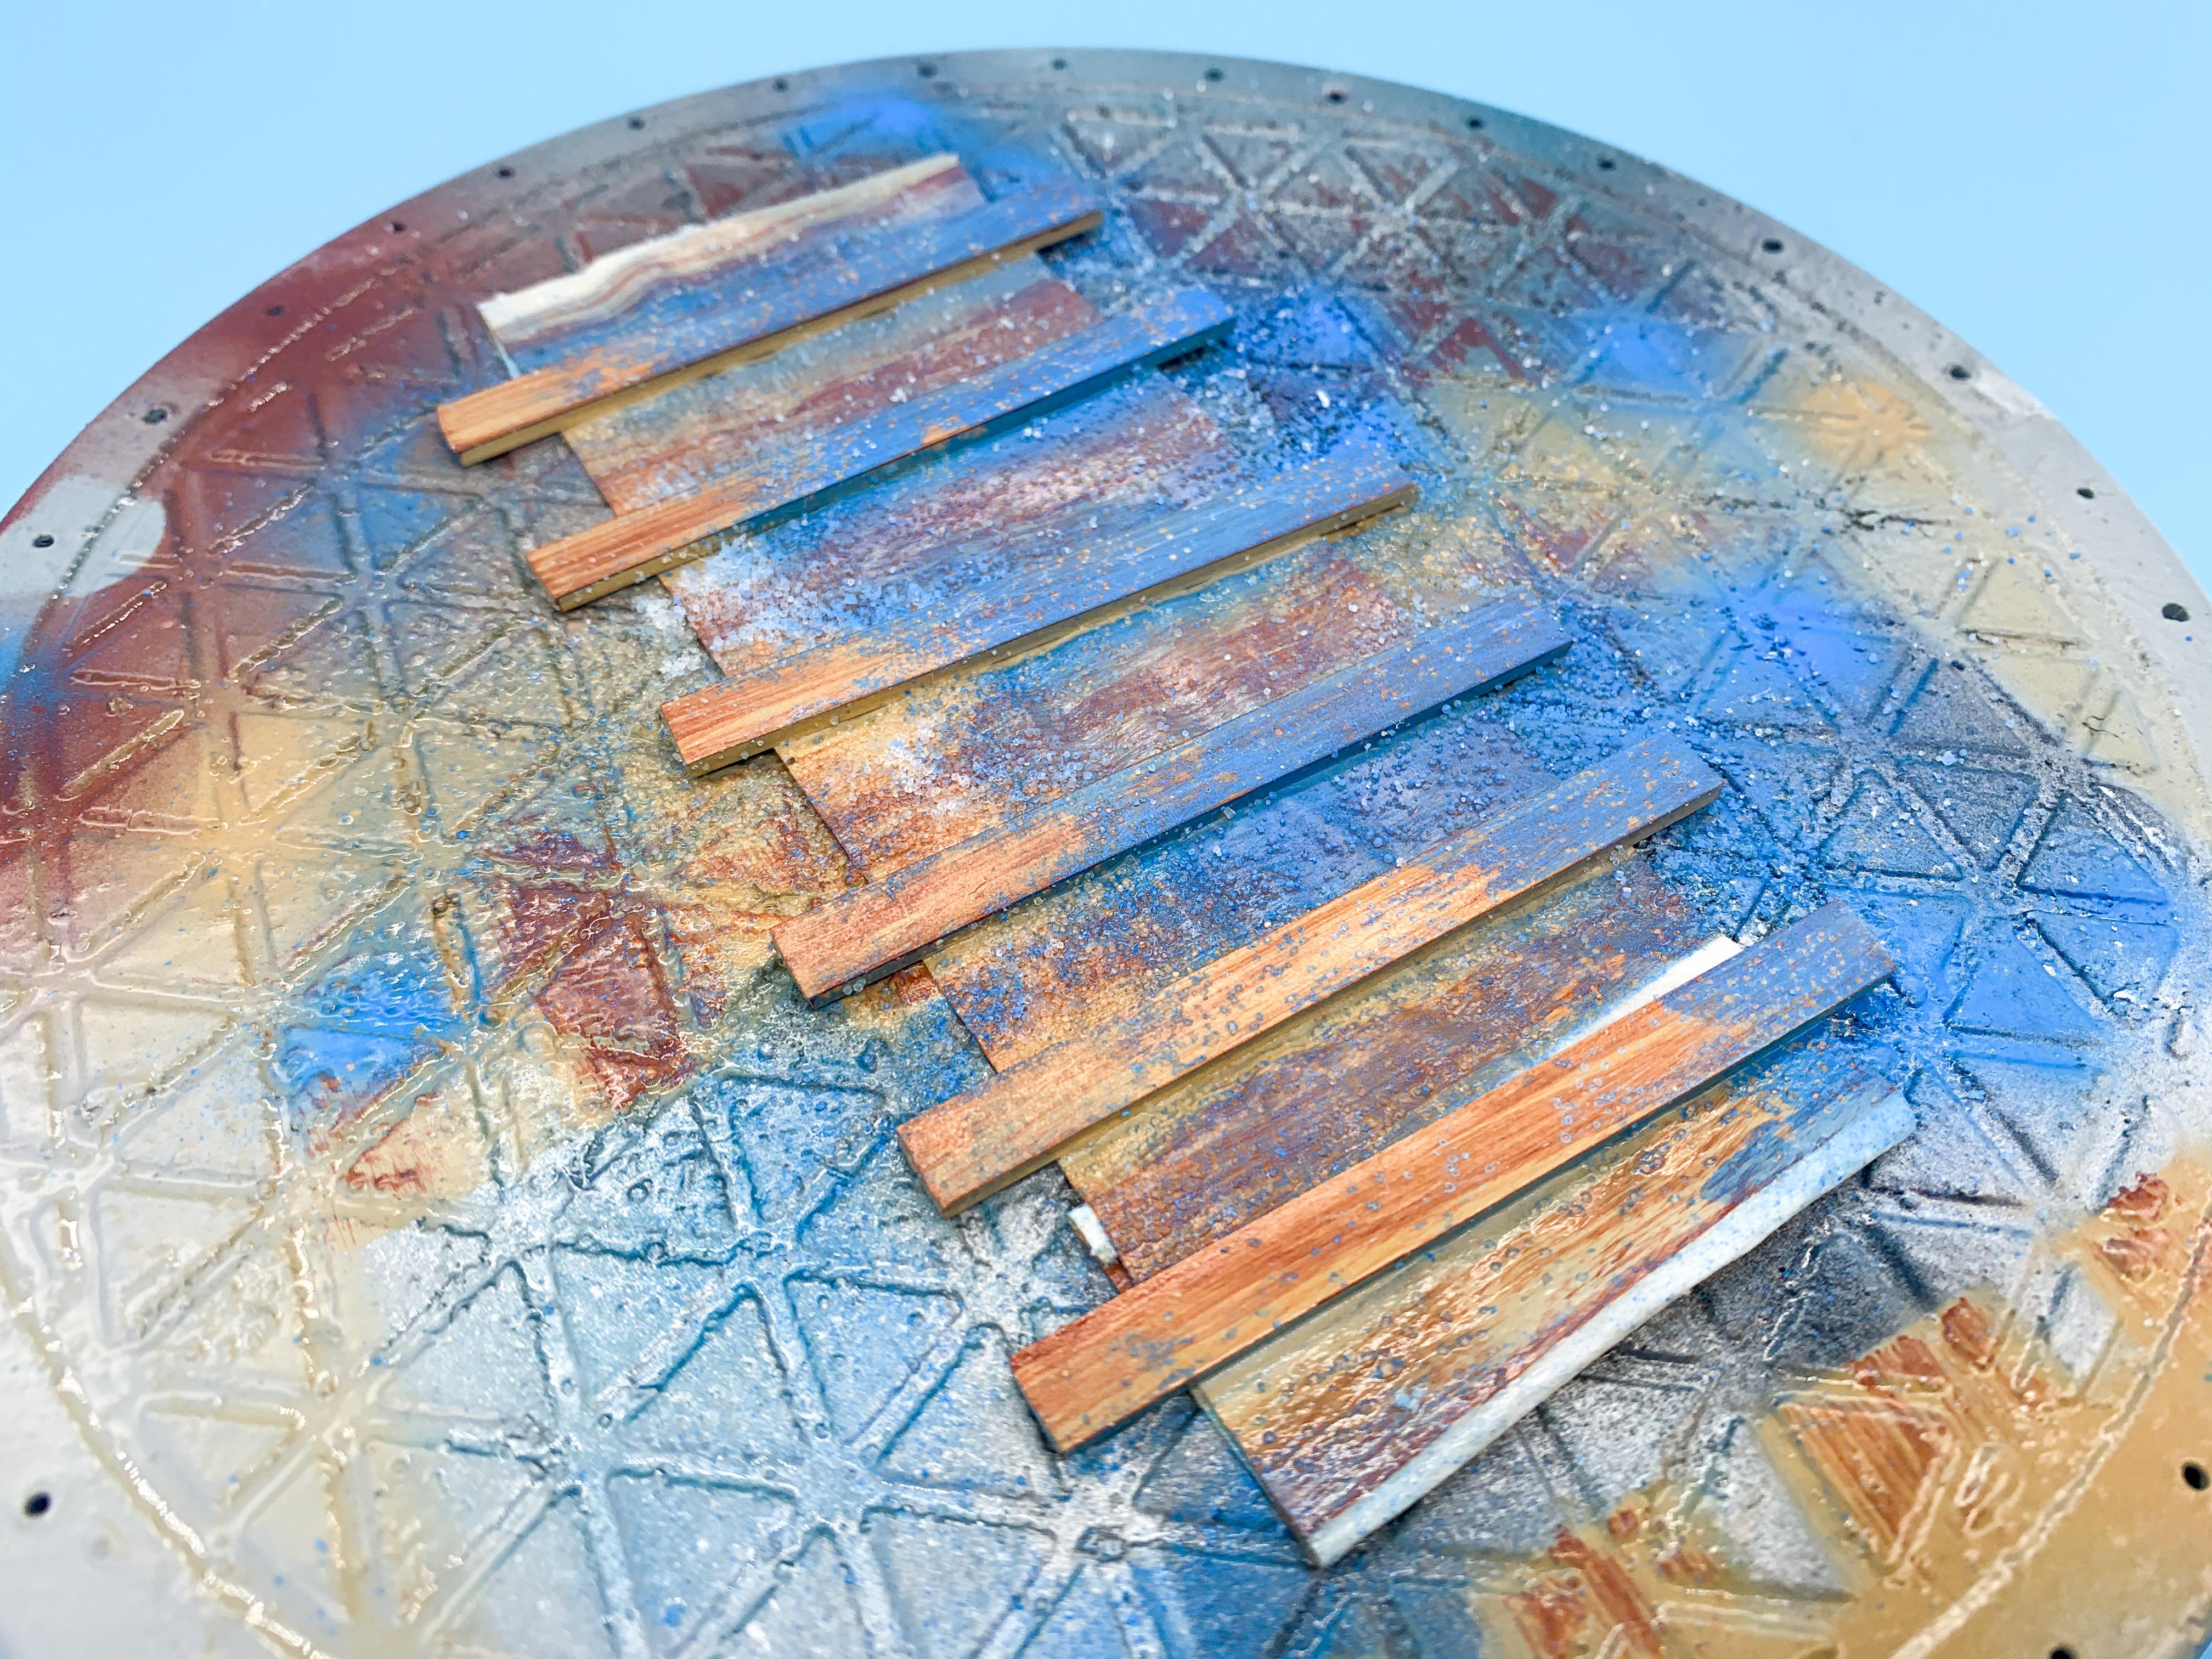
Then some salt, and some blue:
Removed the salt and buffed back through the blue in a few spots to make it look like the paint was worn away from endless parts getting dragged across it:
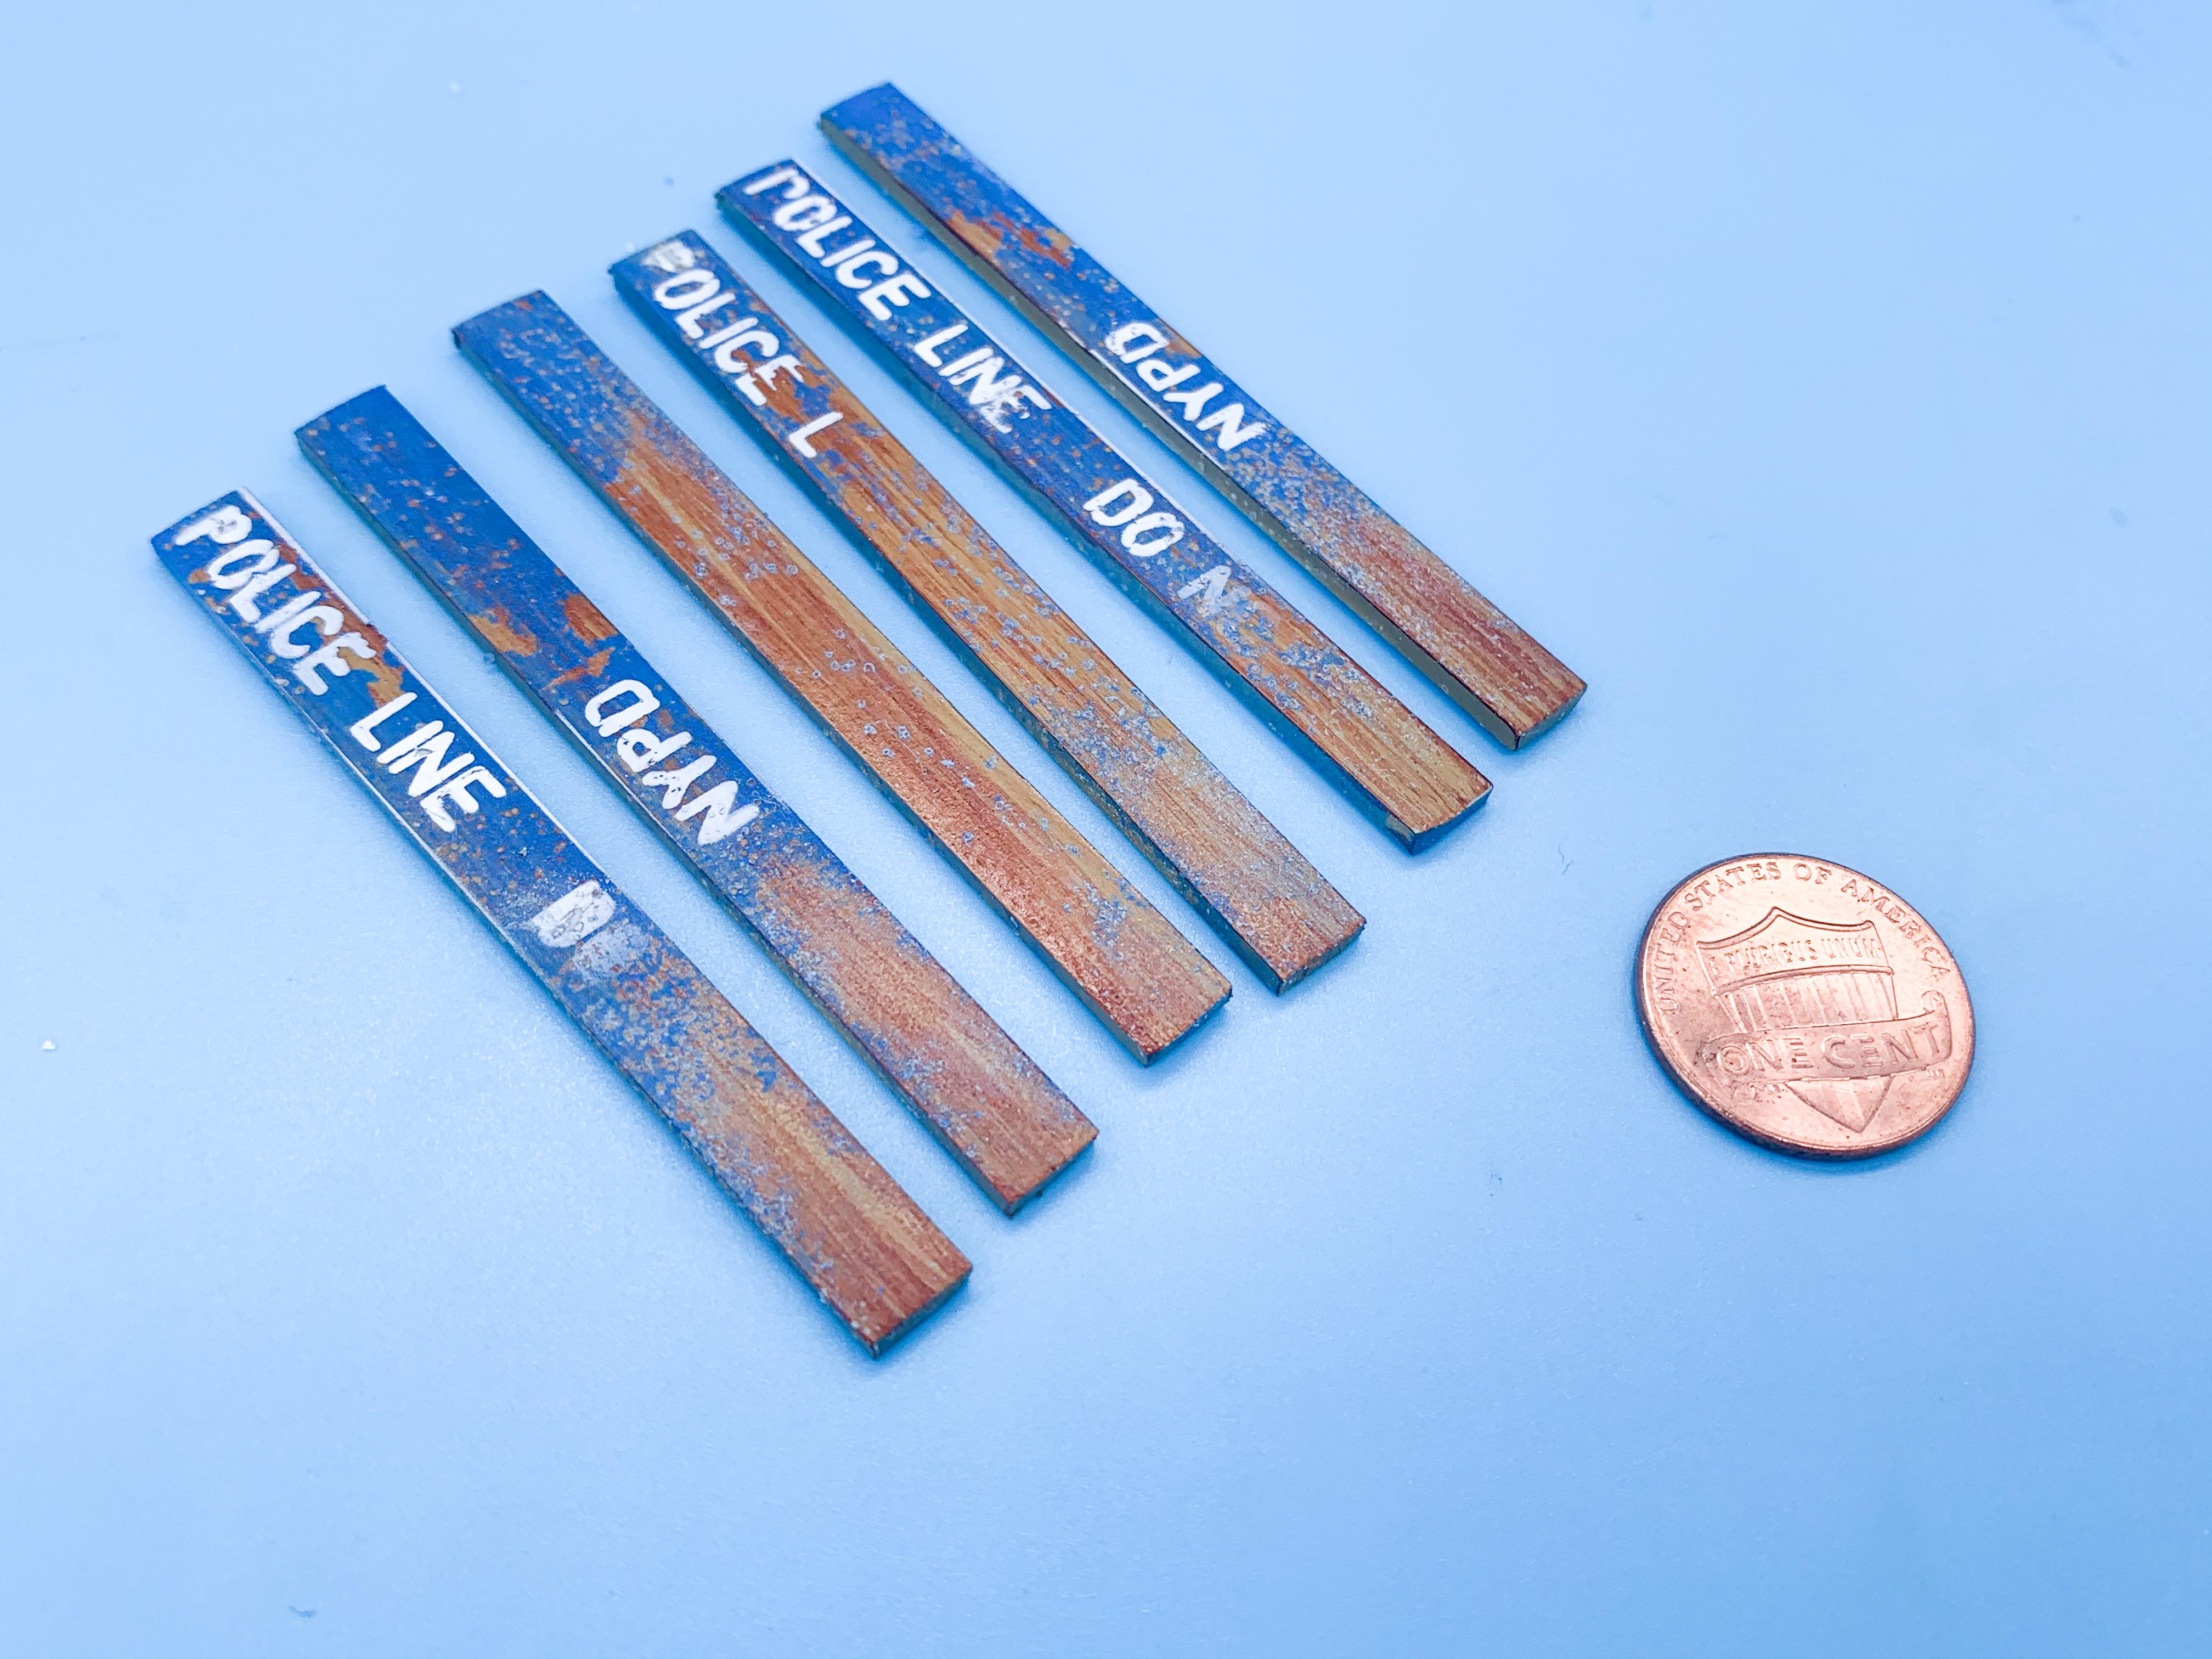
And some tricky masking and airbrushing later we’ve got some serviceable NYPD standard issue barriers ready for installation:
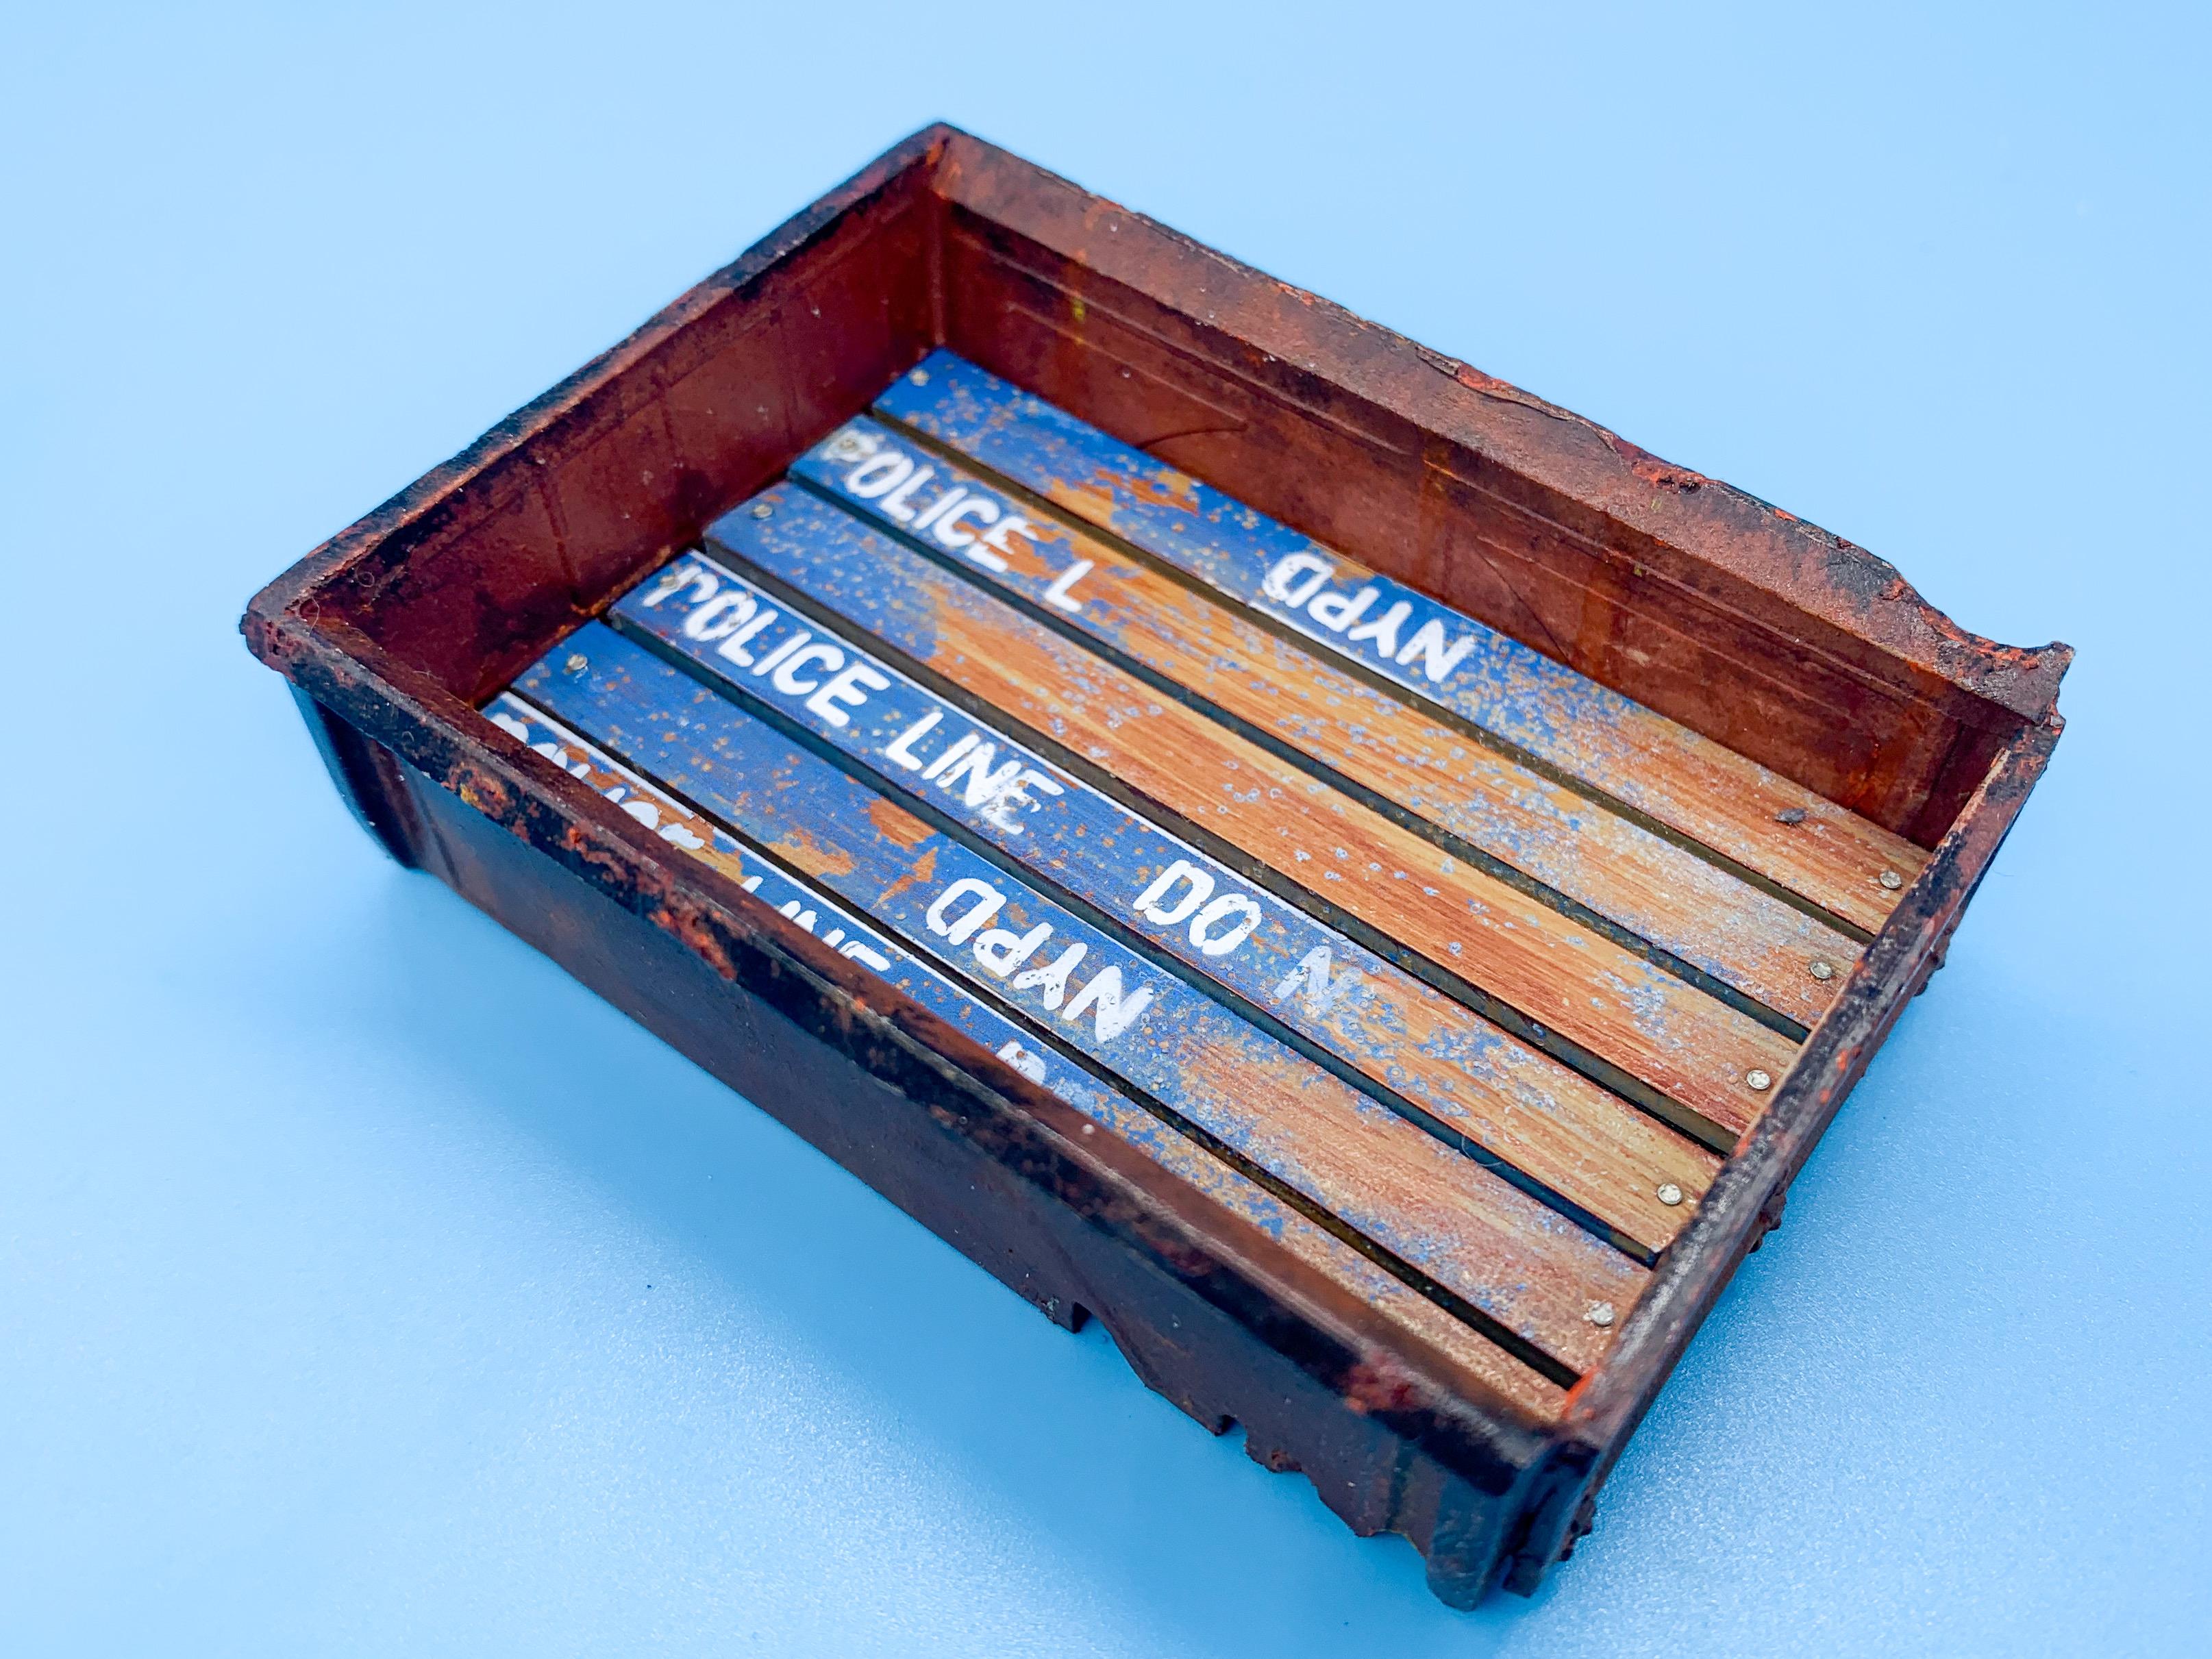
Added some photoetch screws to ‘secure’ them and got them attached to the bed:
Fun little detail I think!!! Looks cool with the other parts too:
More to do on the bed still, but that’s this weekend’s progress so far...more when I’ve done more!


What Did You Accomplish Today? (Model Car Work)
in General Automotive Talk (Trucks and Cars)
Posted
Been messing for a few days with a trick to get a realistic aged, cracked paint finish - think I got it to work today!
Took a few experiments but I’m pleased with that super-fine crackle type pattern ?.