John Clutch
-
Posts
364 -
Joined
-
Last visited
Content Type
Profiles
Forums
Events
Gallery
Everything posted by John Clutch
-
 The MPC 1/16 General Lee, some styrene rods and a nice spruce cutter. Actually, I got this stuff yesterday lol
 -
MPC 1/16 General Lee Firewall Issues
John Clutch replied to John Clutch's topic in Model Building Questions and Answers
LOL ok. I found it. This firewall belongs to the MPC 1/16 Richard Petty Charger. The odd thing is it was on a tree with the pushbar, front and rear valances for a 1969 Charger. The chassis doesnt sit right in the body either. It has the "right" rollcage system and not the NASCAR one. I spent all night looking for info and then within 5 minutes today, I find the issue lol
-
MPC 1/16 General Lee Firewall Issues
John Clutch replied to John Clutch's topic in Model Building Questions and Answers
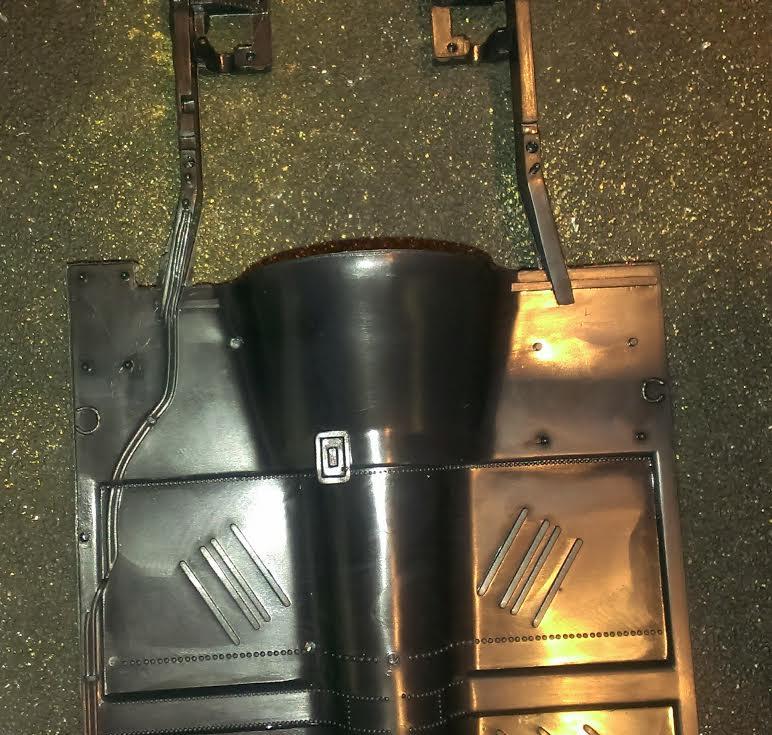
Here are the photos of the components. The firewall needs to be trimmed down .075 on each side to fit inside the body properly. Ive searched for the build and I dont see any with this firewall. All have what I called "Firewall A" If you notice the chassis section, where the firewall sits, on the driver side the floorpan protrudes into the engine bay a bit, and has 4 locating tabs in that area that nothing on the instructions say to use. BUT......I didnt see any completed reissue MPC 1/16 General Lee kits either. (My kit has a 2010 copyright on it) Could this be why? And I read on another forum that people didnt like this kit, but didnt go into specifics about it. Here are some photos of other 1/16 General Lee found off the internet. The tree that my firewall was on was different.
-
I just purchased this kit, and it seems it has the wrong firewall. I CAN NOT POST PICS AT THE MOMENT, I WILL DO SO TOMORROW AT WORK, but hopefully by my description, someone might be able to help...... The instructions are showing two different firewalls. "Firewall A" is the same on steps numbered 1,2,3 and 6 through the end of the steps. This firewall is flat from driver side to passenger side fenders, with notches on the top to receive the hood hinges. " Firewall B" in steps 4 and 5 (THIS IS THE FIREWALL I HAVE) has no notches for the hood hinges and has a block section that protrudes into the driver's compartment on the driver side floor. This firewall does fit the contour of the transmission tunnel and is notched for the framerails, but the frame rail notches are very wide. This firewall doesn't allow the interior door panel to fit and the width of it makes the fenders pop up. When trying to fit the body/firewall/floor together, there is about a 1/4" gap on both sides of the floor were the rocker panels meet. When I fit the chassis/body w/o firewall, the hood fits snug and follows the contour of the fenders/cowl well. The firewall came on a tree with the items specific to the General Lee, including the push bar, lower front and rear valance and truck bulkhead. I can make it work if I have to, that's not an issue, but if this is a common issue with the kit, and there is replacement parts, I would rather go that route. Thanks Clutch
-
Removing Glue From Models?
John Clutch replied to John Clutch's topic in Model Building Questions and Answers
Gentlemen, thank you for your responses. I was aware that some glues actually melt/weld the plastic components, but being new to this after 30 years, I thought maybe some new technology has come to light since then. But then again, why fix something that isn't broken, right? I like that freezer trick and hope so day I get a chance to try that. -
Removing Glue From Models?
John Clutch replied to John Clutch's topic in Model Building Questions and Answers
Big, I'm not actually having an issue at the moment. I'm quite new to modeling and I thought I would ask this. I did search a few pages on the forum, but considering there are soooo much information, I thought I would start a thread. And then after starting the thread, I noticed the pinned post about how to search on this forum, which I didn't yet. I'm off today and I'm doing a bit of running around. But I guess my question was a general one to cover all types of adhesives. -
I don't imagine there is a chemical that removes dry glue from a model kit without damaging the plastics, but if there is, I would love to know about it. Thanks Clutch
-
Consensus on Plum Crazy
John Clutch replied to Sean W's topic in Model Building Questions and Answers
Color matching is all in the eye of the beholder. We all see color differently. Plus you might be using the exact paint code, but if the preparation isn't exactly the same (and who is to say what the exact preparation is) than the color will be different. Not to mention the lighting you're looking at the paint under. -
Warming paint cans.
John Clutch replied to aurfalien's topic in Model Building Questions and Answers
The purpose of warming up the spray can is to increase the pressure inside. The higher the pressure, the more duration you get out of it, allowing you to use more of the paint that would normally be left after the pressure drops to atmospheric pressure. Warming the can also helps to thin out the paint as well, so if you start a paint job with a warm can, you'll need to finish the paint job with a warm can, otherwise you can see the difference between the panels you paint. You DO NOT raise the temperature to the point that you can't hold it. It's dangerous to have the bottom of the can bulging out for obvious reasons, but the not so obvious reason is that the hotter the can, the bigger the temperature difference is as it cools. You start spraying the body when the can is hot, the paint is very thin, and as the can cools at a rapid rate, so does the paint, resulting in the paint being thicker...... Be constant. Warm water is all you need. Spray the paint until you can feel the warmth of the can disappear. Then put the can back in the warm water. And remember to shake the can to mix the paint and also dry the can, so your not spraying water that's dripping off the can. Guys that run nitrous warm the bottle for similar reason. The solenoids are rated at 1800 psi bottle pressure. When you see them purging nitrous on the starting line, that's so they lower the bottle pressure to 1800psi. Too high of a pressure might over power the track, too little pressure and the car is a pooch. -
STEVE SCOTT ,A.KA . [ UNCERTAIN T ]
John Clutch replied to bpletcher55's topic in General Automotive Talk (Trucks and Cars)
I do appreciate cartoon style customs, they are always good eye candy, but that bucket is no Cadzilla. -
is it only a matter of scale?
John Clutch replied to detailstymied's topic in General Automotive Talk (Trucks and Cars)
Forget about getting 100% accurate kits on any car, because most real cars are not 100% accurate to begin with. Try fitting any body panel, new or used on your car, and you'll have adjustments that need to be made. And cars on the assembly line are built at incredible rates, and the companies main goal is to pump out as many cars with the least amount of work. So if mid year, they find out that component A costs too much to make/install, they change to component B to get the job done. There is no press release on the subject, they just make the change. I collect coins as well, and the biggest gripe is about the quality of business strike coins.......well guess what !!!! The US mint doesnt care or has ever been in the business of being concerned about about the quality of business strike coinage, unless the US government wouldnt accept them for one reason or another........ Now model car manufacturers are in the business of duplicating to scale models that best they can, but just like anything else, time cost money. And it will never be in their interest to make a 100% accurate carb for a Ford Hi-Po 289. There is no profit gain in doing so, so why bother. They are plenty of talented model builders that are more than happy to accept the challenge of building one. -
How I would love to do all that I want, but time and money is a very limiting factor in my life lol
-
1/16 Scale Peterbilt 359 Large Car
John Clutch replied to Kenny B's topic in WIP: Model Trucks: Big Rigs and Heavy Equipment
Very VERY nice recovery after the clearcoat issue. I know how hard it is to spent countless hours and money on stuff, only to have a unforeseen issue burn it to the ground. I applaud your dedication, no matter how much it hurt to redo it. Great job. And I see we both have similar taste on modifications, Im sure a rig build will be in my future at some point, and this thread has inspired that. -
I also have plans to go after two rc land speed records. But that adventure will require alot more planning than willing to give at this point. And most of the planning is being able to accept the fact that there is a 90% chance of losing the entire car on a single pass, because its a very fine line between going fast and complete destruction. lol
-
Thats not even a home run on those rims, its a grand slam. You nailed it.
-
Lookin good !
-
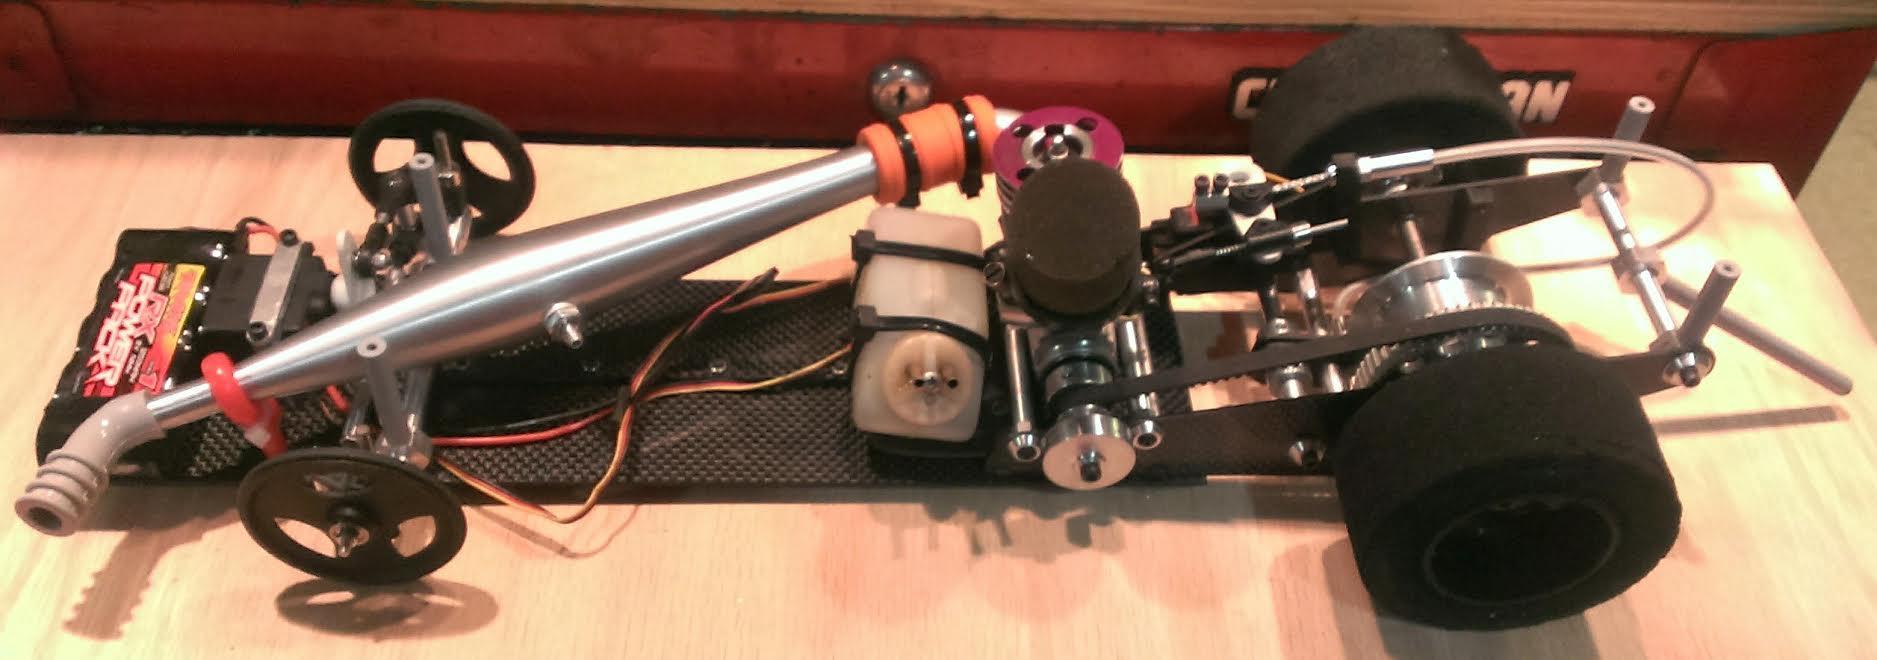
Yes, its very time consuming. I always build my own cars, and they are different from most others. Sometimes they are a complete failure, sometimes they set national records. I have a world record for a combination (0.12ci motor, 11" wheelbase doorslammer) that hasnt been challenged since 2006. The class has allowed bigger engines (with weight penalities) and most if not all are trying a bigger motor combination, but performance is not much better than what I can do with a .12 motor. Ive been away from the hobby for a few years (physically but never mentally) because life gets in the way.
-
I always start every project from a mathematical point, to give me a starting point to work from. Centrifugal forces have alot of different influences that are hard to put down an exact mathematical formula to. Material, dimensions and conditions effect it, so you can only start from a "guesstimation" lol. At this point, the math is somewhat close, but Im off the paper and into the physical until I can come up with a combination. Once the car starts doing what I think it should be doing, then Ill evaluate the numbers again.
-
Moment Of Inertia The less mass a rotating system has, the less work is required to move it from a stand still. Very important concept to take advantage of at all cost, whether 1:1 or scaled. And in drag racing, the less torque that is required to move an object, the more the motor can be tuned for horsepower. At the weights these cars run at, having too much torque is wasted energy. You only need so much and anything more than that doesnt help contribute to performance. You can have two 500c.i. motors. One is in a drag car, the other is in a monster truck. The truck requires alot more torque so the tune will have to be bias to that, where a drag car is lighter and requires less of it. Rotating Inertia Since the entire drivetrain system is moving before the clutch engages, it helps accelerate the car off the line a bit. The weight of the clutch bell, rear axle and wheels is all that needs to be put in motion. Granted, the engine still needs to pull all of the drivetrain down the track, but I think I can use that weight to my advantage, as soon as I figure out exactly what the bare minimum is to get the job done. I built an incredibly light drivetrain initially, and it proved not to work because the clutch simply did not put out enough force. So once I figure out exact what the system wants, it should fly.
-
All my notification settings are right, just not getting them. Clutch
-
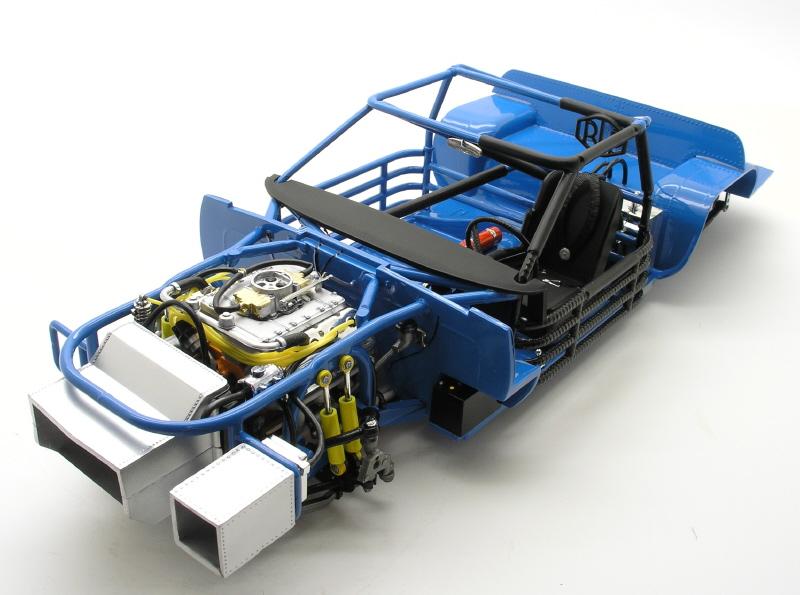
Here is my latest creation. I build everything except the engine, exhaust and electronics. Its a rear axle clutch system. First one designed for rc cars. I saw the concept on modified mopeds, except the clutch is on a jackshaft, and thought I would try the system. It works but there is ALOT of fine tuning to be made. Getting the right clutch weights and spring rate is my challenge at the moment. EDIT: Im not sure why my image disappeared, so here it is again.
-
Russ, Thank you! Yes this is my first lol but not my first at fabrication. Metal fabricator by trade, never built a turnkey drag car but I have done a good amount of work on them, been building and drag racing nitro and electric remote control cars since the late 90s and Im constantly creating. Speed is my ultimate challenge, and rc does that for me. But it lacks in visual creativity and I hope to fill that void in my life with modeling. Clutch
-
Very very nice color. It has just enough pop to it. Rock solid muscle car color.
-
I like the three contrasts between the gold, white wall tire and chrome rim. I would carry the white and chrome into the interior with a gold steering wheel and carpet
-
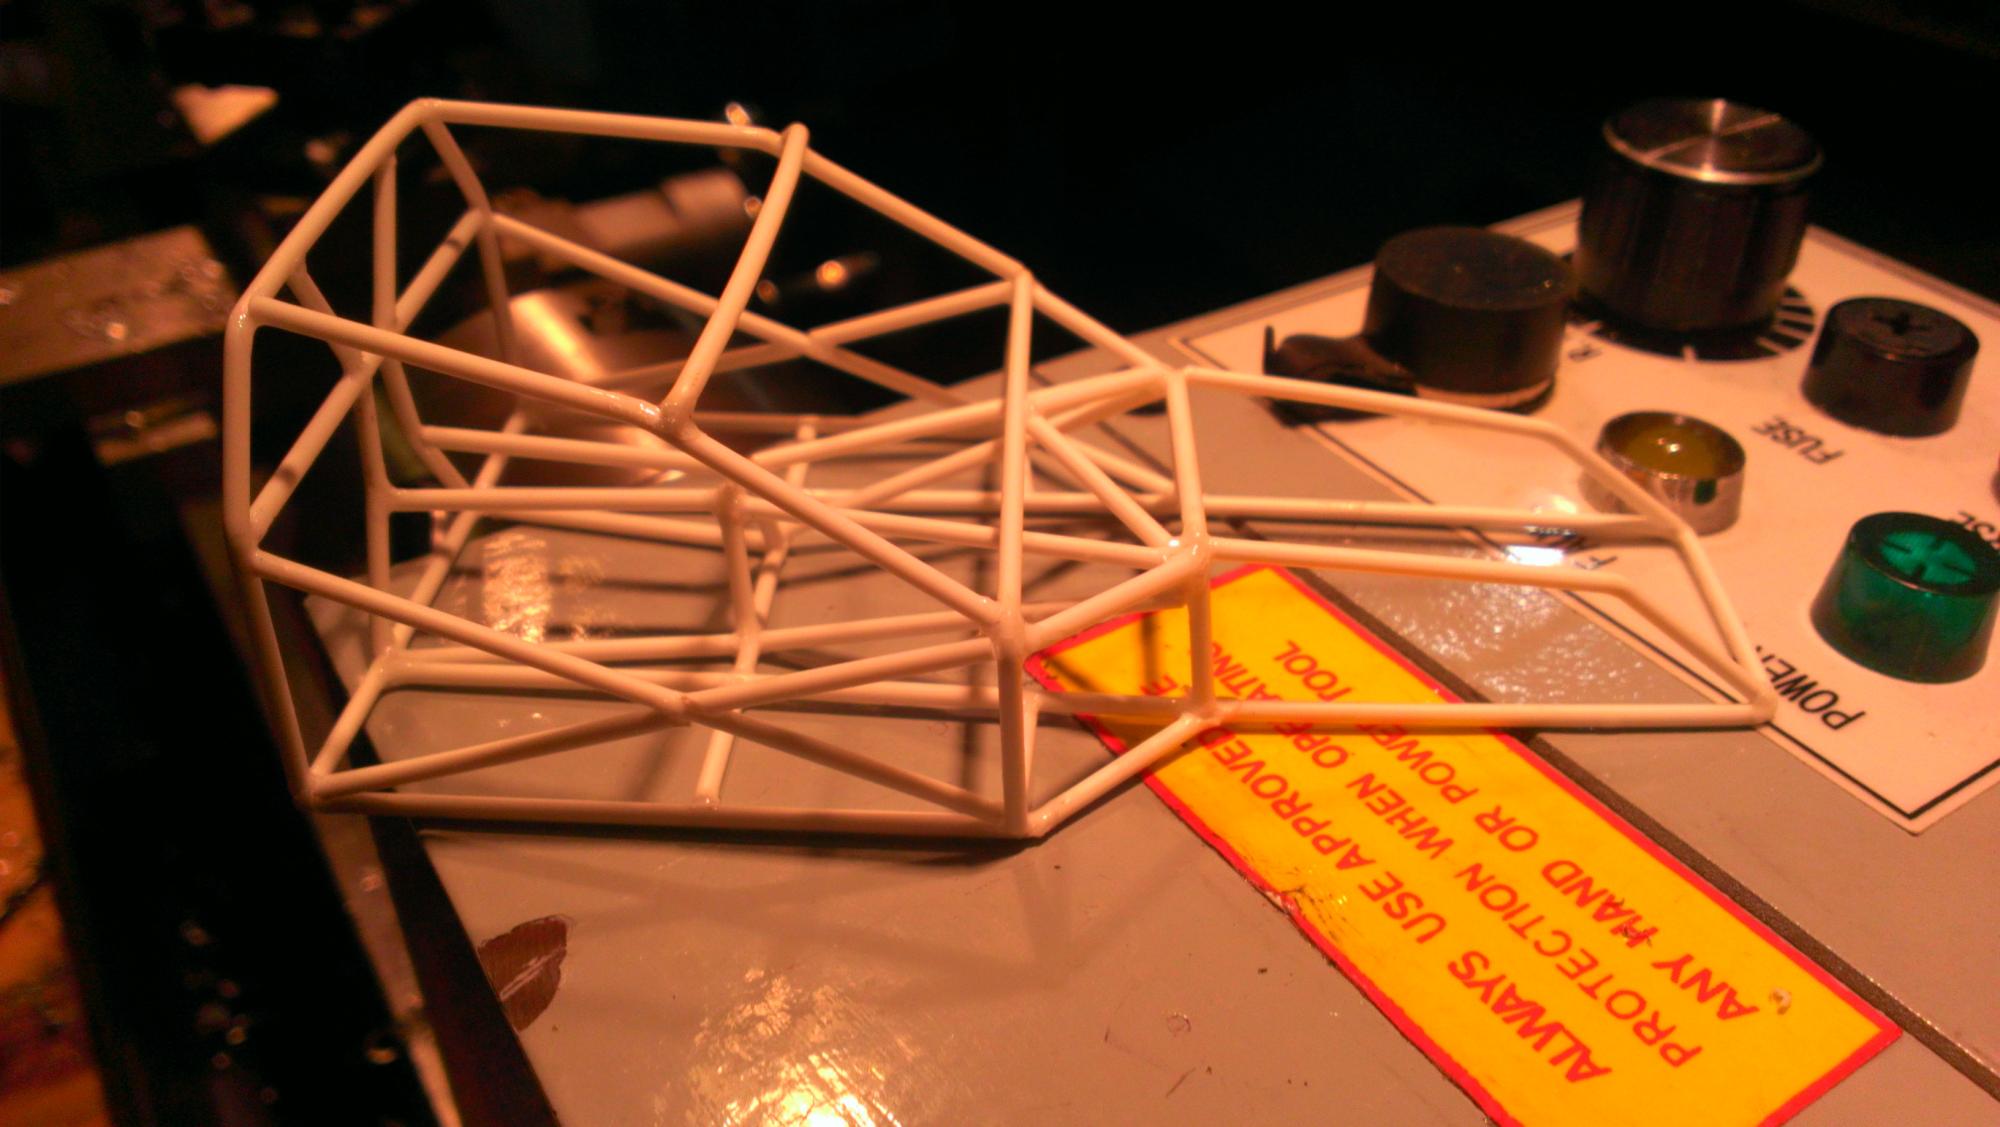
I had to take a pic for it to post. It won't allow me to pull up pics from memory. I didn't spend anytime fitting this to the vette body, other than the main hoop. I just winged the rest. I just wanted to get a feel for the material. I'm.not planning on using it.