randman
-
Posts
65 -
Joined
-
Last visited
Content Type
Profiles
Forums
Events
Gallery
Everything posted by randman
-
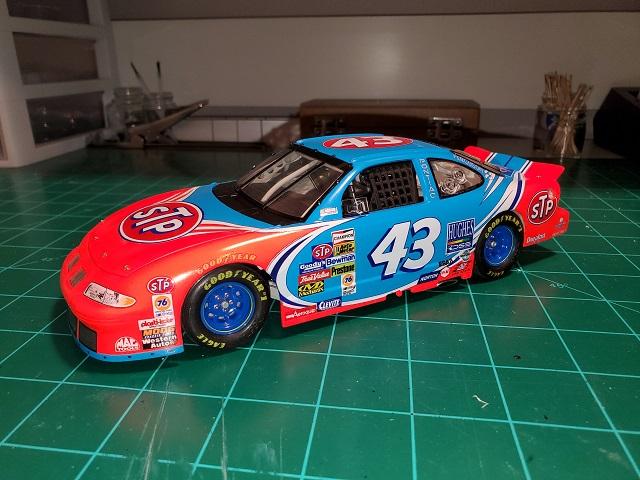
1997 Petty Pontiac. I think this was driven by Bobby Hamilton at the time, but there weren't any driver name decals included. For colors, Tamiya TS-23 Light Blue and Mr. Color 171 Fluorescent Red. I added the Earnhardt bar, but that was about it for mods. These kit decals were by far the worst that I have dealt with from the 20+ year old kits. Some worked, but if they didn't, they shattered into a thousand pieces. I tried piece together what I could and then found a second set online (which seemed to be a bit better) to finish up. More pictures in the gallery: https://onedrive.live.com/?authkey=!ALIwdfB3N4bk438&id=151834E7F1DA907C!2247&cid=151834E7F1DA907C

-
I bought it online from Michigan Toy Soldier Co. It was the only place I could find that sells it in the U.S. I did not seal it. It is supposed to be more resilient than some of the others. It is just misted on through an airbrush over a gloss black coat. There are some YouTube videos that go into more detail about it.
-
Yes, I bought them from Jim Rogers (the JR of Salvinos JR). You can email him and see if he has any still available. With all the work associated with the new kit releases he may not have time to do any 3D printing for a while though. His email is jim@salvino.us
-
Thanks. It's just black thread with a small drop of superglue.
-
Correct. Salvinos JR has the old Monogram molds.
-
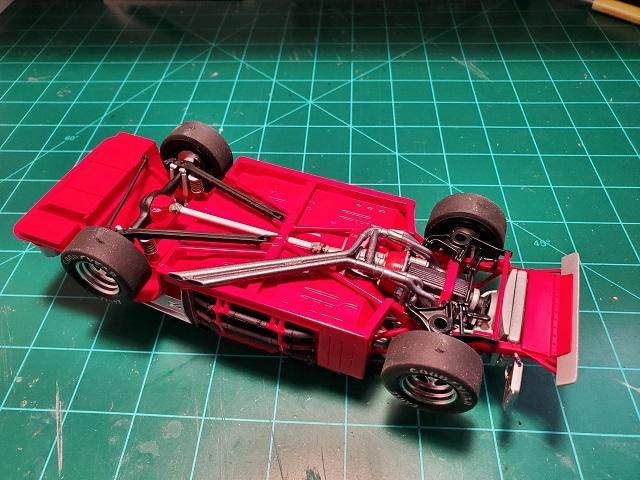
This is the Salvinos JR Tim Richmond Lemans kit. I used MCW 2056 Red for the color. The headers and wheels are from Jim Rogers. I painted the wheels with Green Stuff World Chrome Metal (over a black base). I modified the window openings by essentially shifting them down about 1 mm. There are in progress photos in the link that show what I did. I also trimmed about 1mm off the rear bumper. I added the fuel overflow tube and used heat shrink for the roll bar padding. More pictures available here: https://onedrive.live.com/?authkey=!AEICFNbTo9TjLbo&id=151834E7F1DA907C!2214&cid=151834E7F1DA907C
-
It looks great. These are good kits, I just wish there were more available.
-
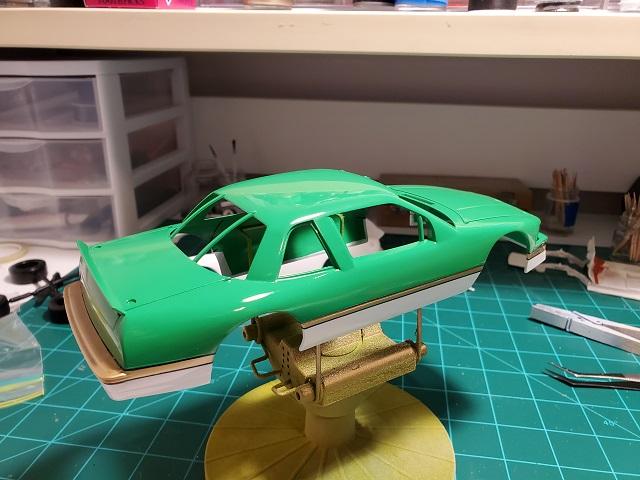
I built one of these when they first came out and 30 years later, here's attempt #2. I was about to try the kit decals and then I saw that Powerslide has some in the Coming Soon section so I guess I'll wait until those are available. I did paint the gold stripe and created decals for the black outline. I also added the roll bar padding. Tamiya TS-35 Park Green, TS-26 Pure White, and TS-21 Gold for the colors.
-
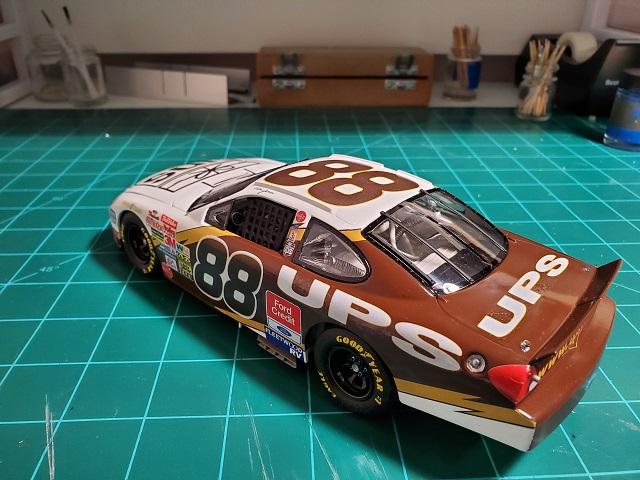
Dale Jarrett UPS Taurus
randman posted a topic in Stock Cars (NASCAR, Super Stock, Late Model, etc.)
This is the Revell Dale Jarrett UPS Taurus. For colors I used Krylon Short Cuts SCS-053 Gloss White and SCS-035 Espresso. The brown was a bit off from the kit decals, but fairly close. The chassis is SEM 61113 Chassis Gray. I added a thin strip of plastic at the top of the hood to reduce the gap between it and the cowl. I also added the jack posts since I broke off the ones molded on the body. I also added some plastic strips inside the front and back of the body so it would sit better on the chassis. Everything else is stock. The kit decals seemed to work fairly well. There was a bit of silvering and the hood decal didn't want to conform on its own so Solvaset to the rescue. Tire decals were Powerslide. More pictures in the gallery: https://onedrive.live.com/?authkey=!AAwh6ccGPggaPVg&id=151834E7F1DA907C!2200&cid=151834E7F1DA907C
-
This Revell Monogram kit represents the Rusty Wallace Ford Taurus Miller Lite Elvis car from the 1998 Bristol night race. Tamiya TS-15 Blue and TS-26 Pure White. The chassis is SEM 61113 Chassis Gray. I modified the exhaust and air cleaner to represent that of the later Taurus kits. I also tucked in the wheels slightly. Other than that, it is box stock. I purchased the decals from Mikes. I don't recall the maker (Sunset maybe). These were good quality decals, but a bit inaccurate based on the one photo and grainy youtube video I could find. To more closely match the blue and make it more accurate, I ended up recreating the hood and front end music notes decals and used a mixture of Slixx and older kit decals I had laying around. This body started its life as a John Deere model about 15 years ago, but after messing up that paint job, I dumped it into the junk box. I realized I could strip the paint and resurrect it, so here it is. More pictures in the gallery: https://onedrive.live.com/?authkey=!AOGZv91Yt_MXmSU&id=151834E7F1DA907C!2183&cid=151834E7F1DA907C
- 1 reply
-
- 1
-

-
Dale Jarrett’s 2002 Ford Taurus
randman replied to iSewen's topic in Stock Cars (NASCAR, Super Stock, Late Model, etc.)
Nice work. This looks great. I just started working on this one. Were there any issues with the kit decals? -
This is the Monogram Ken Schrader AC-Delco SuperTruck. Tamiya TS-26 (Pure White), TS-49 (Bright Red), TS-44 (Brilliant Blue) and SEM Chassis Gray (61113) for the chassis. The kit comes with decals for the Red, but I opted to paint it instead. I created decals for the black striping to separate the colors, as well as the grill details. This is box stock. I hollowed out the wheel backs to show the “brake rotor”, but that was it. Once again, the decals were tough. I should have known better since I’ve worked with these truck kit decals before. I didn’t clean out enough of the glue for the hood decal so it was pretty much yellow underneath. I removed it and ended up printing out my own and it worked out pretty well. More pictures in the gallery: Ken Schrader AC-Delco SuperTruck
-
Mark Martin Folgers Thunderbird
randman replied to randman's topic in Stock Cars (NASCAR, Super Stock, Late Model, etc.)
It's been a while so I don't recall exactly, but my guess is that I sprayed in directly on the bare plastic. I have usually had no issues with using the Krylon directly on the plastic. If I do use primer, I have been using Tamiya white or gray primer. -
This looks fantastic. I haven't built one of these yet. What shortcomings or issues did you experience with the build?
-
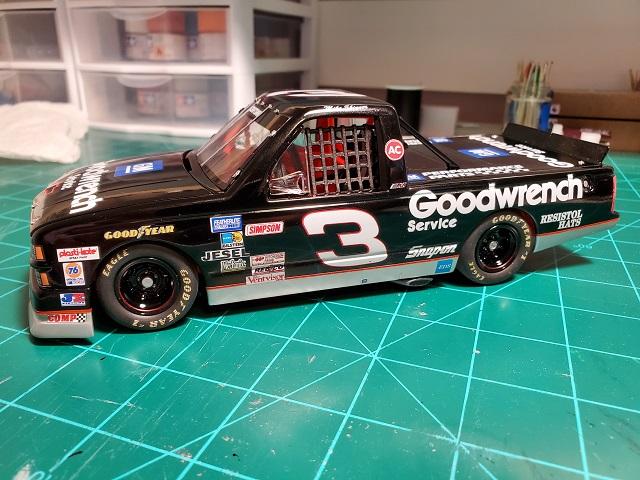
Tamiya TS-14 Gloss Black and TS-30 Silver Leaf for the body. MCW 2128 Red for the chassis and interior. This one is strictly box stock. The decals are 25 years old and an absolute nightmare. I tried the silver decals and knew those weren't going to fit the front bumper curves so I ended up painting the silver and creating the red stripes from clear decal film and the leftover MCW paint. The decals silvered like crazy but I was able to salvage them. More pictures in the gallery: Mike Skinner Goodwrench Chevy SuperTruck
-
1984 Cale Yarborough Monte Carlo SS
randman replied to randman's topic in Stock Cars (NASCAR, Super Stock, Late Model, etc.)
I created a decal for the grill. -
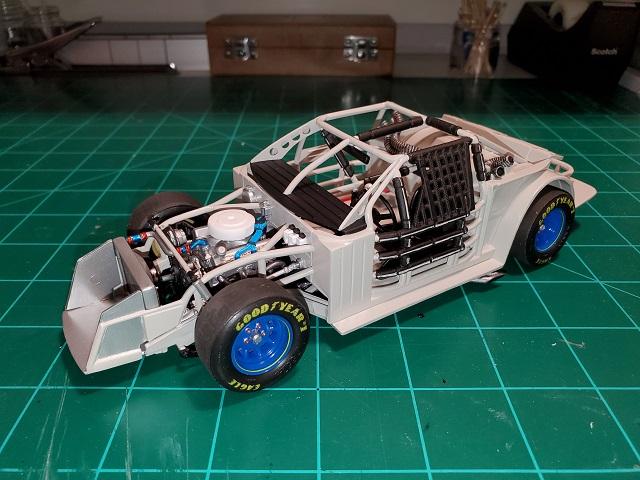
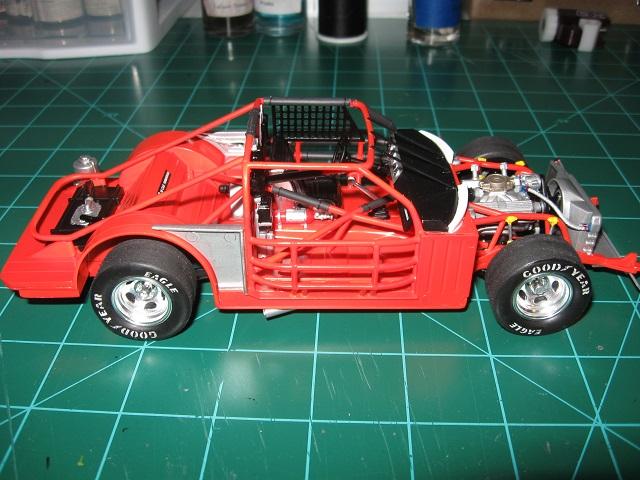
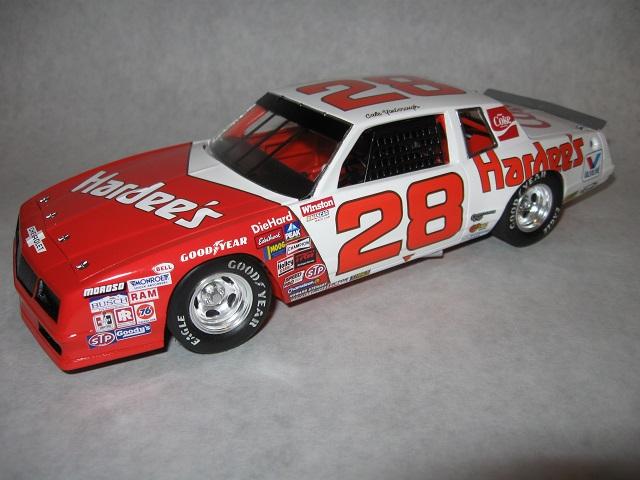
This is the Salvinos JR Cale Yarborough Monte Carlo SS. The colors are Tamiya TS-26 (Pure White) and MCW 2012 (Red/Orange). This was my first time using MCW paints and I went a little too heavy on the body so it turned out a bit more red. I swapped the wheels with 5 hole wheels from a T-Bird kit, built a new exhaust, and added the camera antenna on the trunk. This is my first attempt at adding roll bar padding. I used 1/16th heat shrink and black thread for the straps. I added the front air dam (or whatever it’s called) by tracing the piece that is included in the Pontiac Grand Prix kits. I wasn’t too happy with the kit windshield fit, so I built my own and added the bars that connect to the dash. Other than that, it is stock, including ride height. More pictures in the gallery: Cale Yarborough Hardees Monte Carlo
-
Spray booth recommendations??
randman replied to 2zwudz's topic in Model Building Questions and Answers
I have this same version (not sure if the exact same model, but they all appear to be the same). I get my filters from MicroMark. They have a 5 pack for around $23. This is usually the best price I have found. -
Gen 6 Chevy SS
randman replied to randman's topic in WIP: Stock Cars (NASCAR, Super Stock, Late Model, etc.)
Finished project located here: http://www.modelcarsmag.com/forums/topic/158787-2017-chase-elliott-darlington-throwback/ -
Chase Elliott's 2017 throwback to his father Bill's ride. This is the Revell Gen 6 kit with minor modifications (spoiler, fuel line, ride height, tucked wheels, splitter) The colors I used were Krylon SCS-070 Bonnet Blue and SCS-073 Forever Blue for the back. The chassis is Tamiya AS-20 Insignia White. The Decals are from MPR. I decided to use the kit decals for the headlights, taillights and grill. I added a few minor decals touches of my own. More pictures in the gallery: Chase Elliott 2017 Darlington Throwback
-
It's called "Build a better Buick" by Drew Hierwarter from the June 2007 issue.
-
PM sent
-
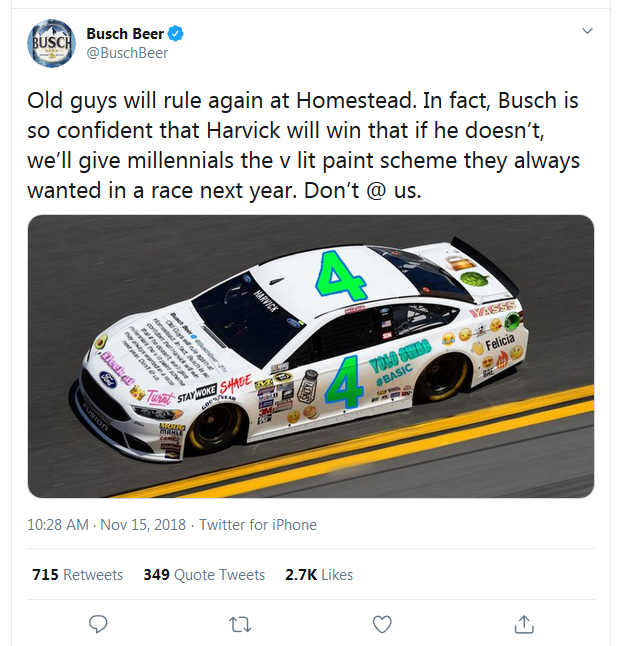
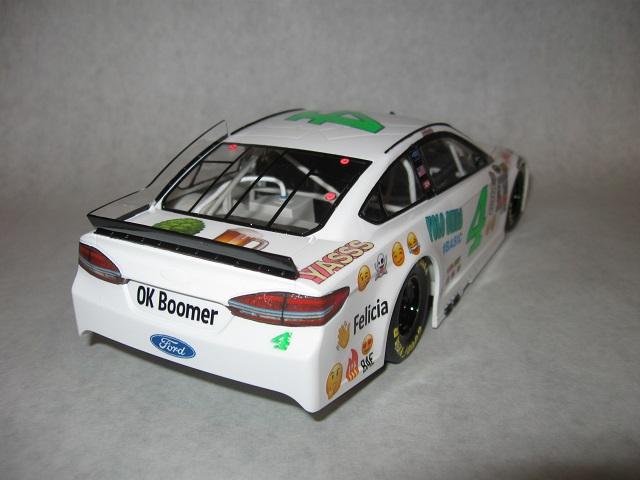
Based on the Busch Beer tweet before the 2018 finale, this is my interpretation of the Millennial V-Lit scheme. Decals are ink jet printed (Numbers then painted fluorescent green). The kit is one of the Danica fusions. I lowered the ride height, tucked the wheels in, added a fuel line and added the front splitter. Everything else is box stock. More pictures in the gallery: Busch Beer Millennial V-Lit
-
Mark Martin Folgers Thunderbird
randman replied to randman's topic in Stock Cars (NASCAR, Super Stock, Late Model, etc.)
With the hood in place, I applied the decal and let it overlap on the fender. Once dry I carefully cut along the hood edges with a sharp x-acto blade. I think I taped the hood in place along the cowling so it wouldn't move. -
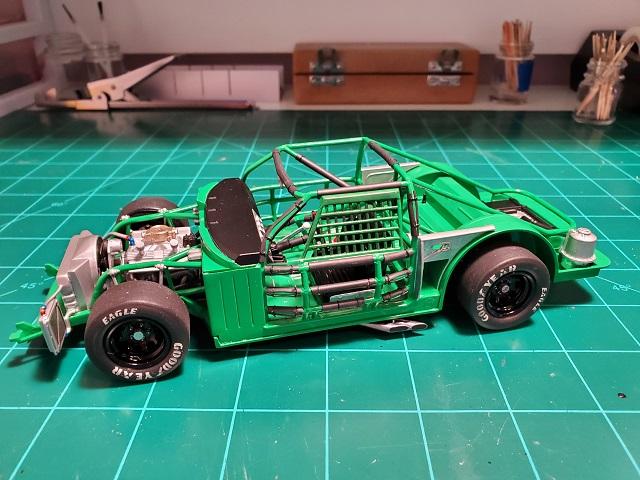
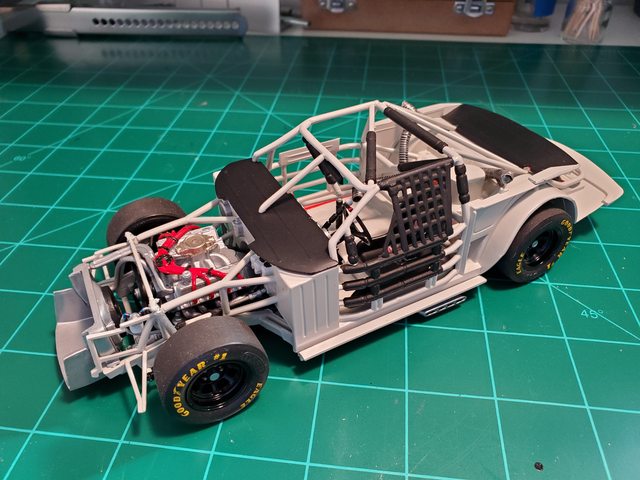
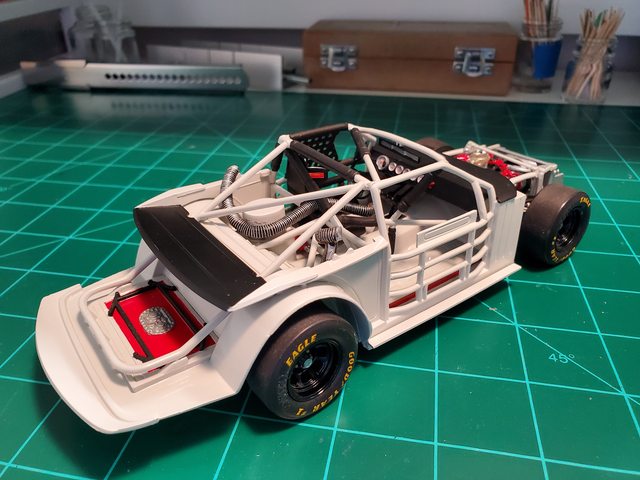
The chassis is complete, but I still have the body to complete. I added fuel lines and some missing bars to the cage. The ride height is modified and the wheels are brought it. After having it complete, I ended up dropping it on its wheels and had to redo the rear suspension. That minor catastrophe aside, it turned out ok. I have more pictures available in the gallery: Gen 6 Chevy SS