Jiml0001
-
Posts
120 -
Joined
-
Last visited
Content Type
Profiles
Forums
Events
Gallery
Everything posted by Jiml0001
-
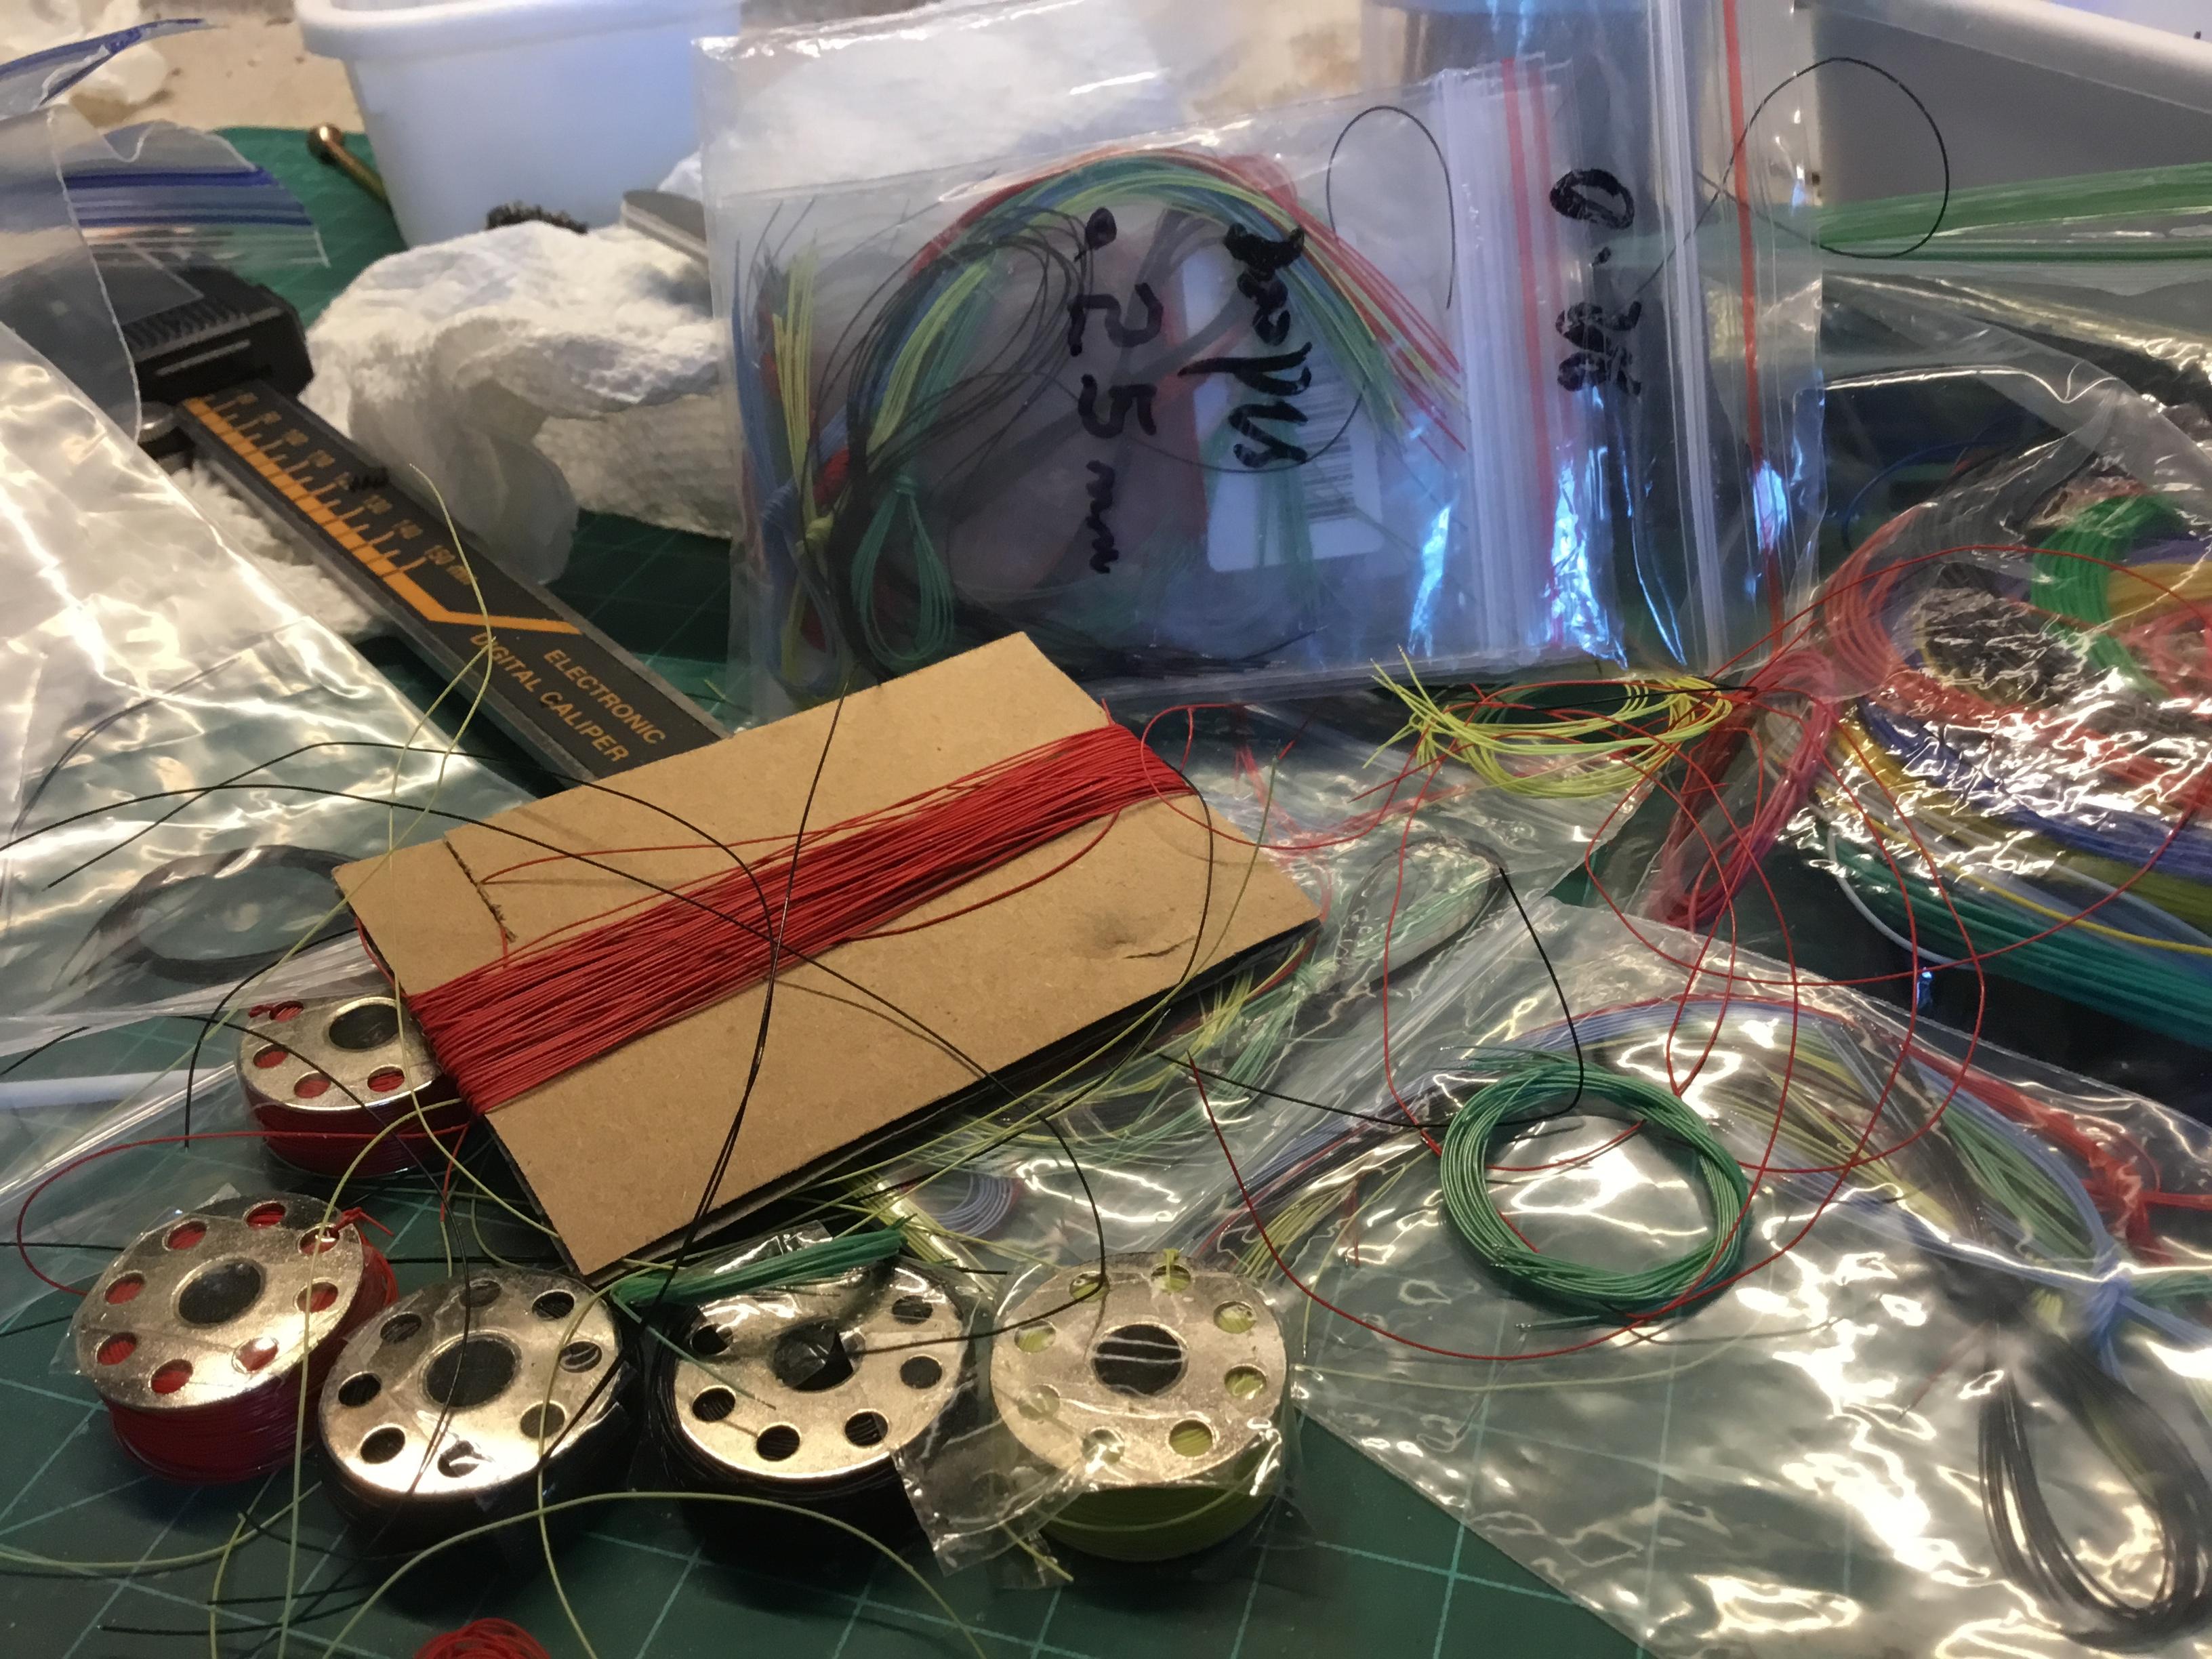
wanted to try to print a distributor on my 3D printer. I was looking to have the wires separated and not just all bundled up coming out of a tube. Came up with a simple drawing and I think it came out pretty good. All the wires have holes and the holes extend all the way through the bottom so I can glue from the bottom and keep the top holes pristine. I know when you look at it it might not seem like a big deal, but this distributor is 0.123 inches wide. That is about 3 1/2 inches in 1/24 scale. When you see the size of it I think it looks good. The wire I am using is .25 mm which is a quarter inch in 1/24 scale. Now I can have a realistic distributor on stock engines which is the correct size. A old style stock distributor cap is usually 3 1/2 to 4 inches around so this is to scale.

-
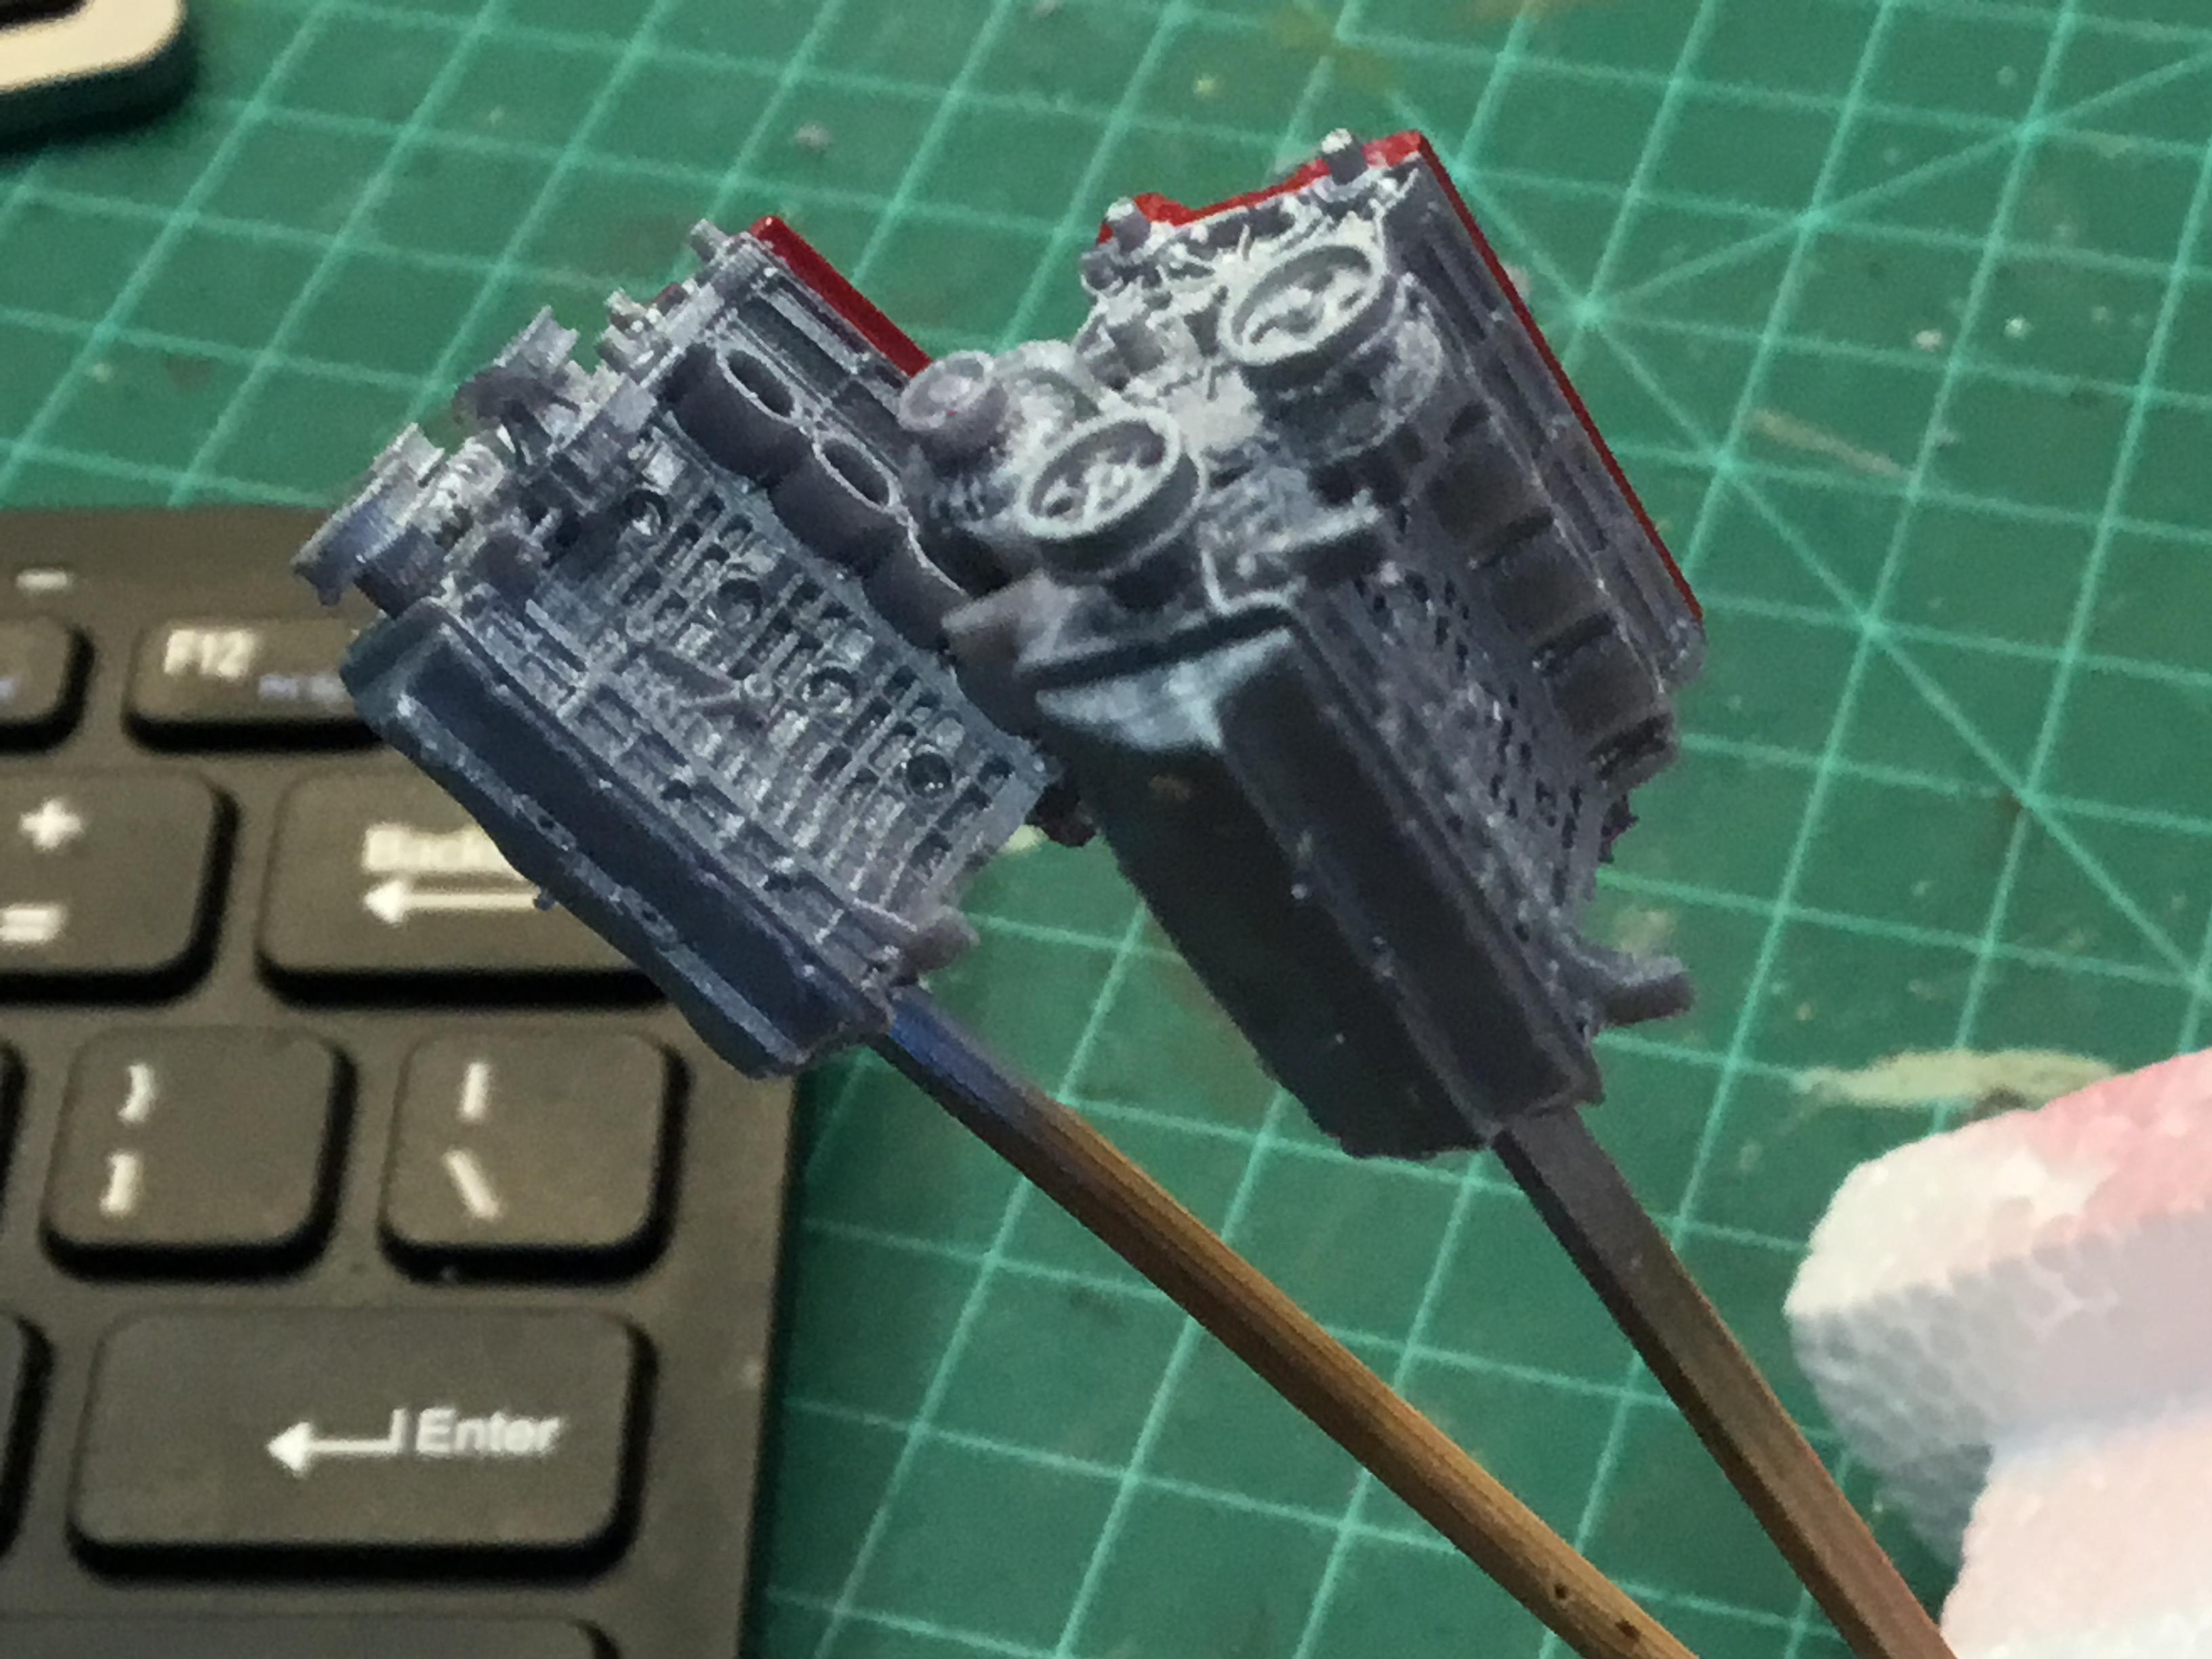
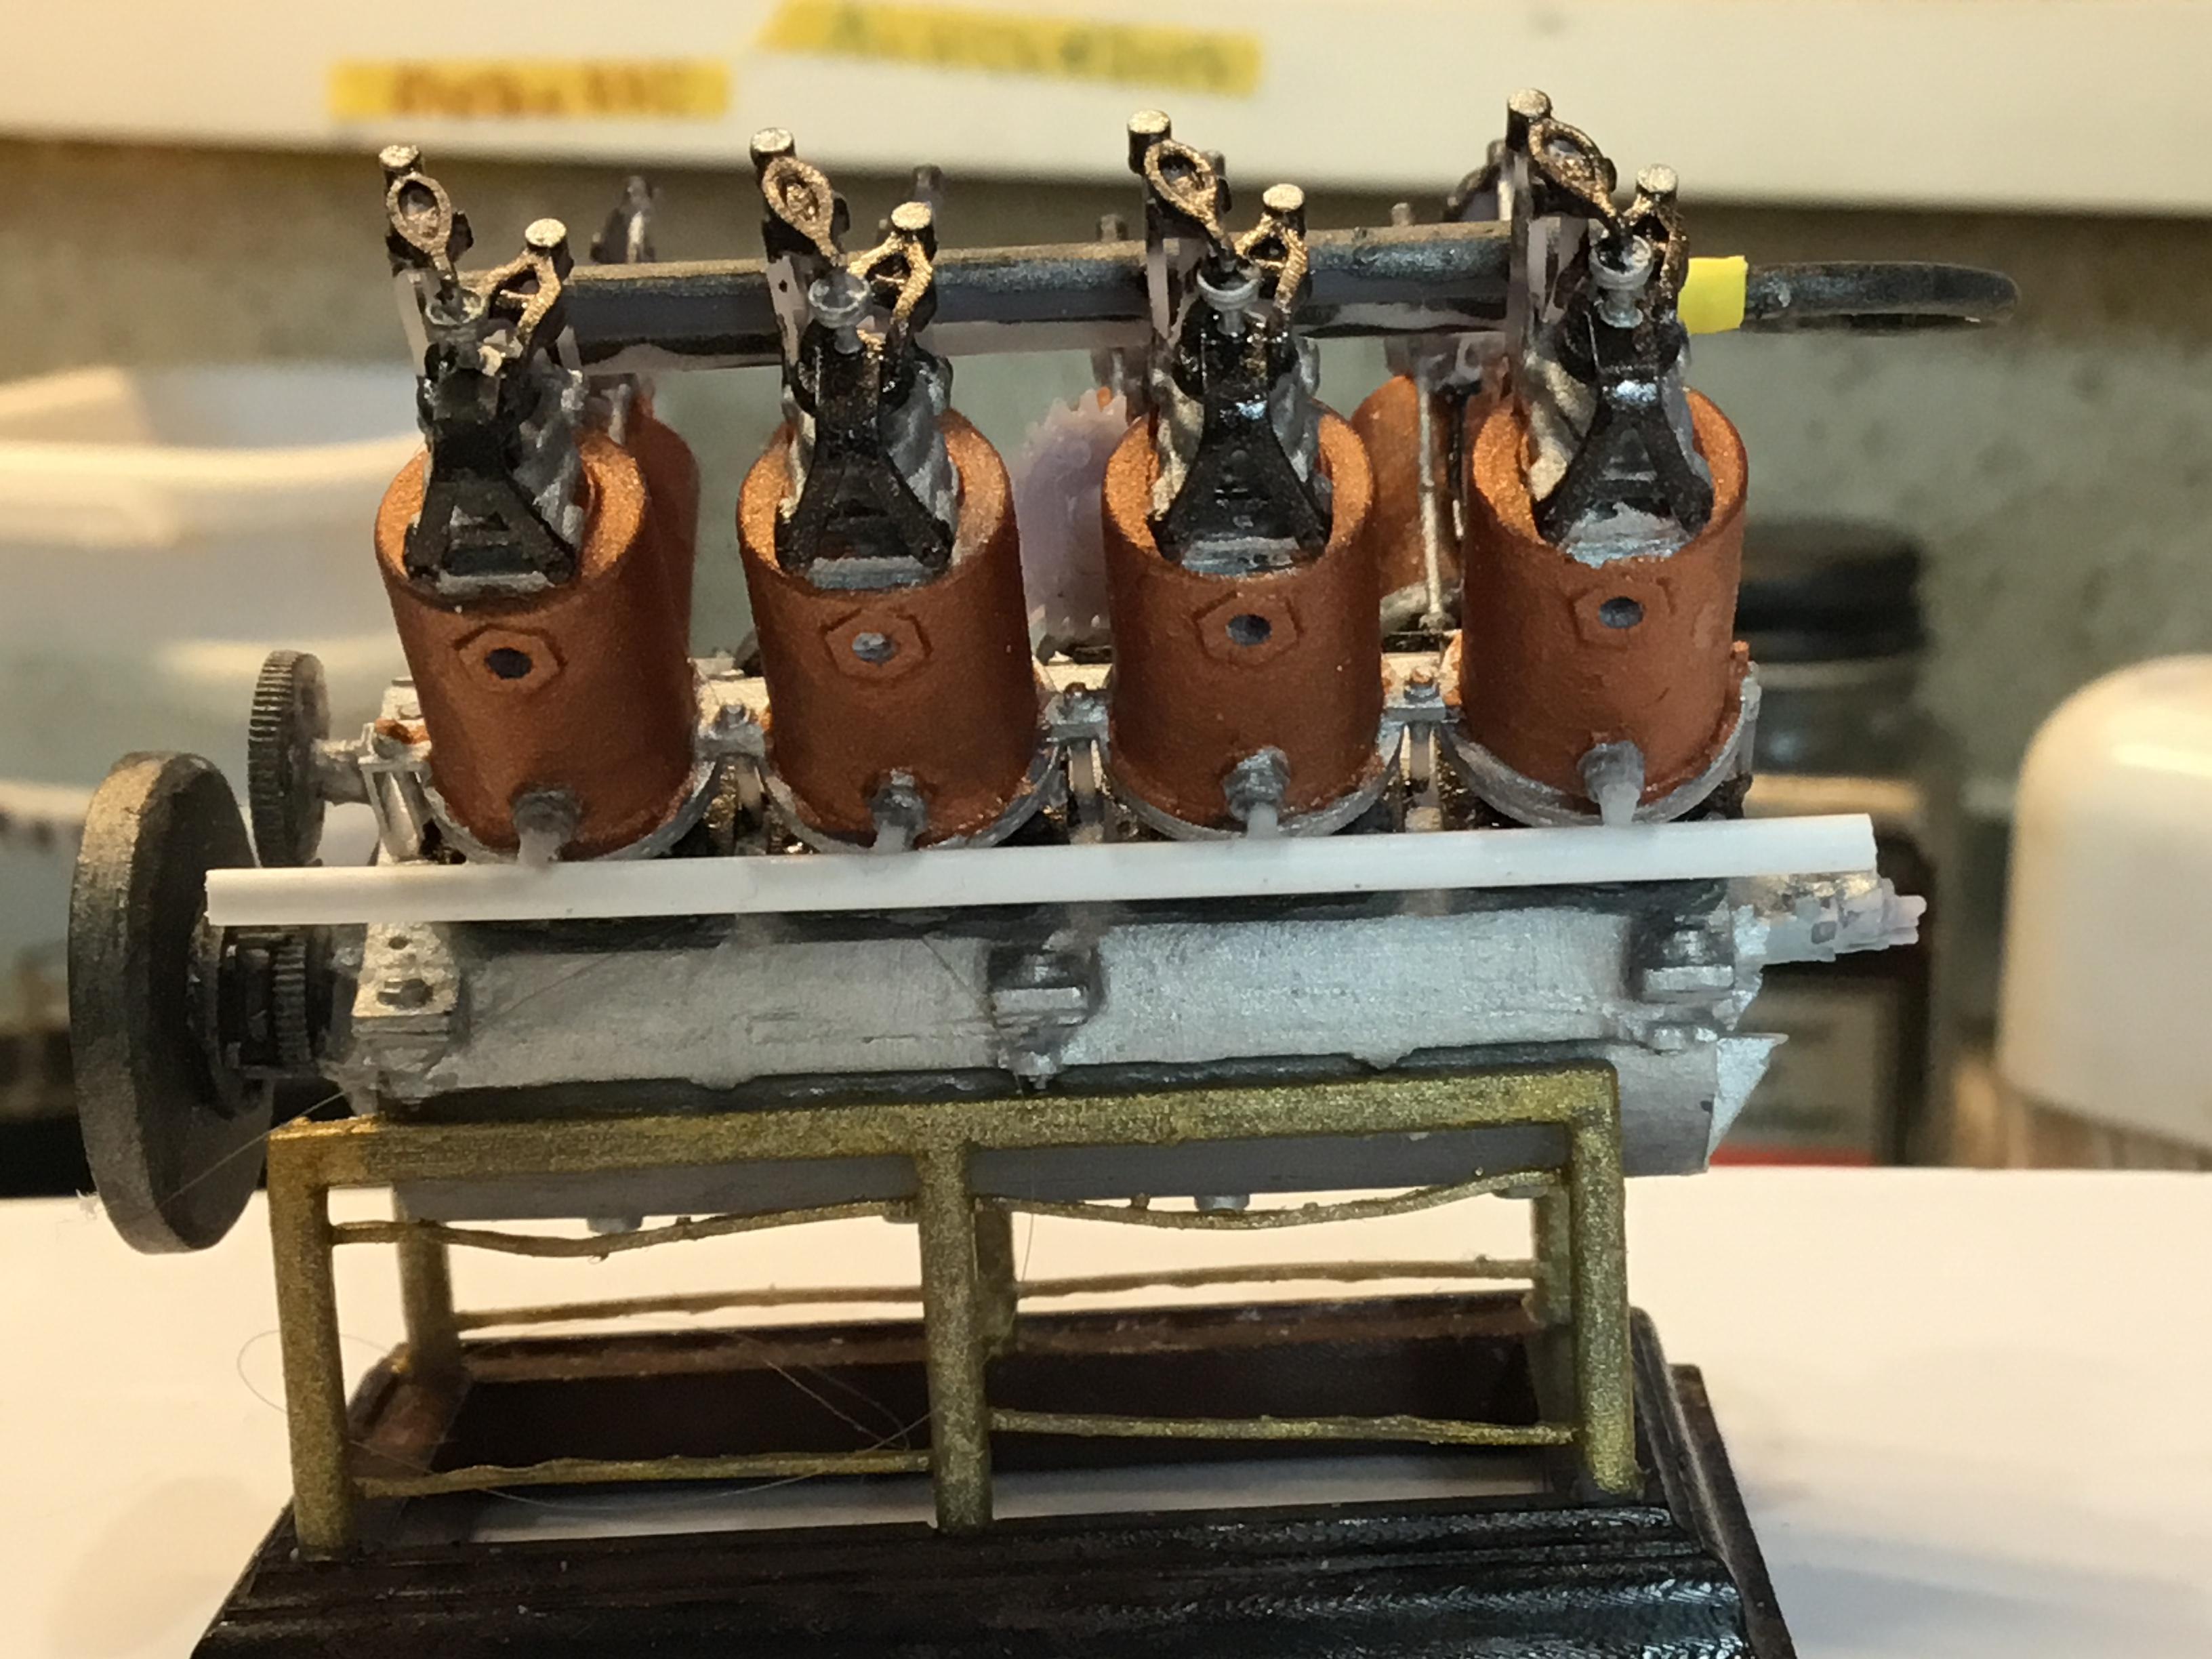
Well, I made a big mistake. I wanted to use a flathead in my tanker and all was going well until I realized I had miscalculated the correct size to print and all the engine work I had so painstakingly done was too small (anyone need a pile of flathead stuff at about 1/32)? Oh well, back to the drawing board and i next realized that when printed to correct size, it was just too big to fit without hacking big holes in the body for all the protuberances. Once again, back to the drawing board. How about a Caterham Duratec? I have a nice drawing of that so i started there (carefully measured). Here are the blocks for tis one: I printed it with the alternator attached since the mounting brackets were just too small to attach afterwards. The alternator is so detailed you can see the windings on the inside rotor through the vent holes. On nice thing about 3D printing is if you are going to print one, you might as well print a dozen. In resin printing the time is the same for one or many. Here i printed two. Of course you can end up with dozens of parts you cant use: So the Duratec fits much better in the frame and I can finally start moving forward again I also found a nice drawing of an old style flat steering wheel so I printed that:
-
Basic “Detail Up” Resin Parts or STLs
Jiml0001 replied to AaronM's topic in Car Aftermarket / Resin / 3D Printed
I'm building a bellytanker completely from 3d printed parts. I have drawings for AN fittings, nuts and bots, batteries, pedal sets, distributor, disc brakes, etc. What are you needing? -
On the wire front, here is where I found the small scale wire I use 10 meters for $5.00. He also has some wire at $19.95 for 100 meters. Outstanding value I think https://www.ebay.com/itm/152192202513?
-
So my final design, Ford Flatheads and custom belly tanker body:
-
Here are a few things I made including batteries, steering wheels, and a real sweet pedal set that I actually drew myself.
-
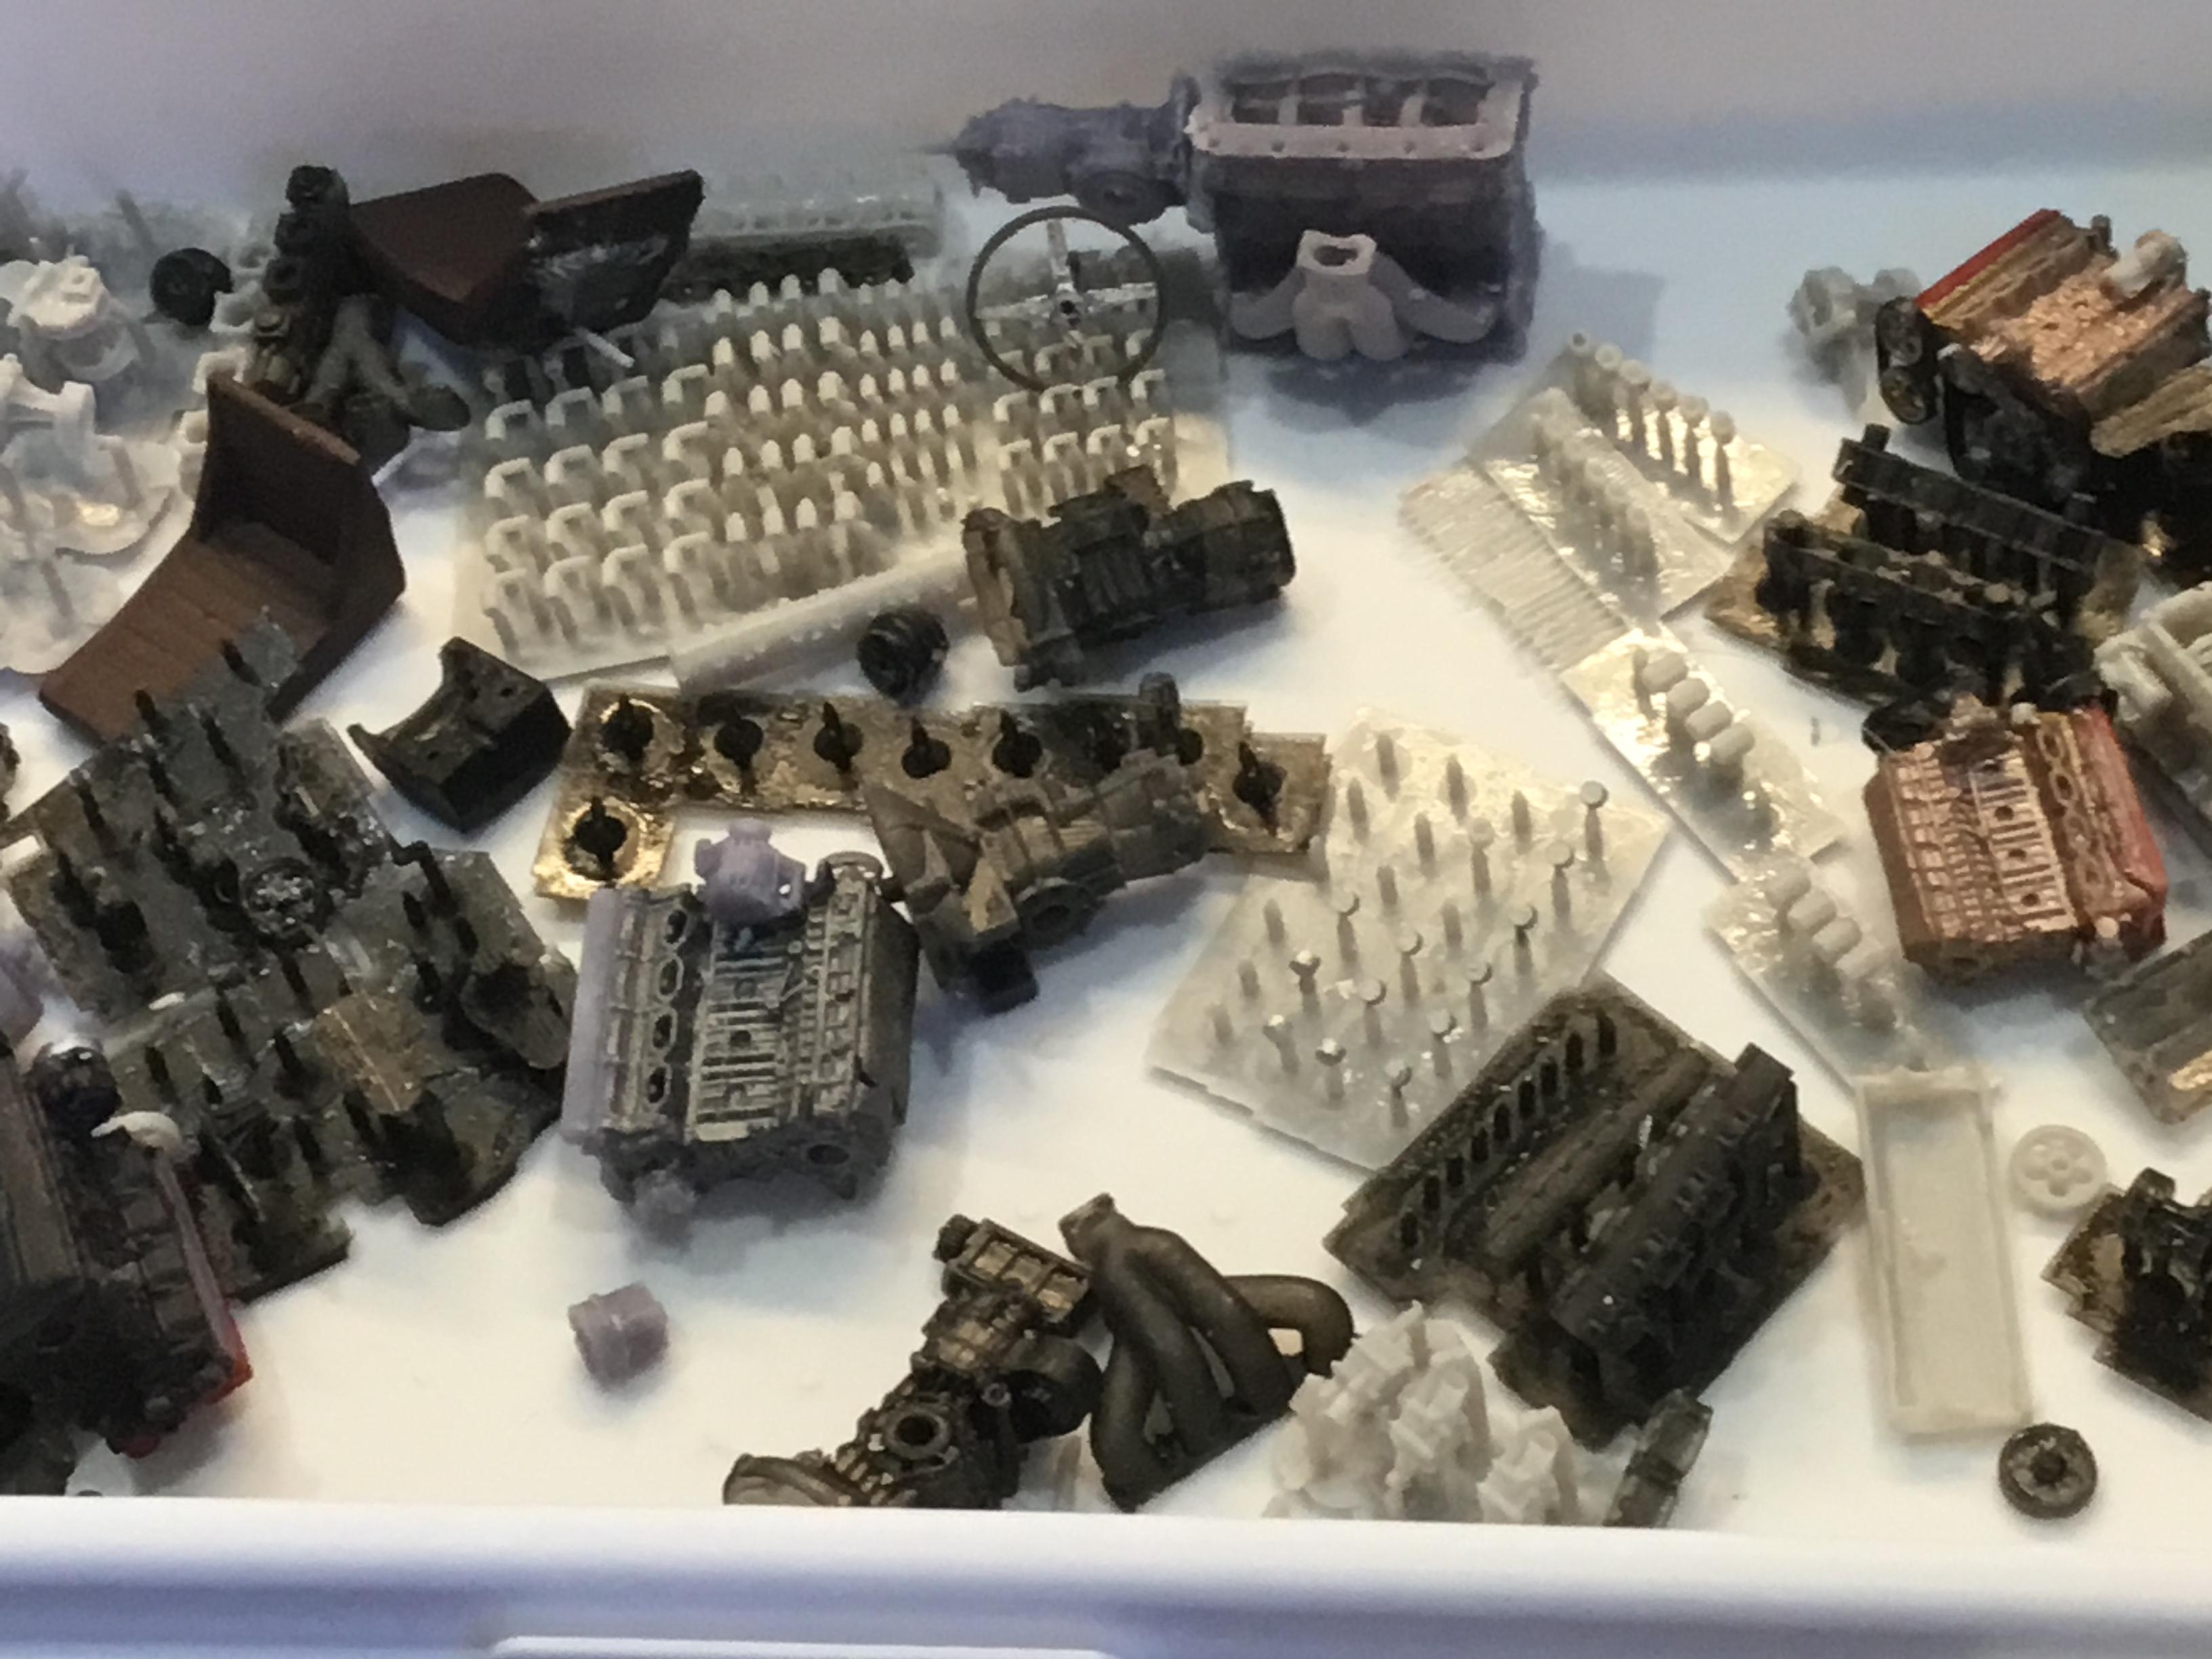
So you can see that this has been a lot of 3D printing, here is a picture of my final design in the middle surrounded by some of the designs that didn't make it: I have had so much fun with this project. I can't say enough about the capacity of the printer. I can print all the nuts and bolts, rivets, spark plugs, real scale distributors with proper bots, just about everything. Yesterday I was making scale seat belt buckles. It is a blast and if anyone else wants any help, advice or drawings, while I am a beginner I will share what I have.
-
To the person that hadn't heard of a bely tanker. After World War II that air force had tons of drop away fuel tanks used on most fighters to give them the range they needed. When these tanks were empty, hey were jettisoned. After the wr they were sold off and most of them went for around $200. They ranged from 12 feet to 15 feet in length and roughly three feet in diameter. Hot rod guys grabbed them up and built "bell tankers" out of them. Speed week at Bonneville still has a lot of them and many speed records are held by belly tankers to this ay. Google "belly tanker" and you can see some. These were pure do-it-yourself cars and everyone had their own idea of how to build one. That is what appealed to me, make something of my own design. I went for an interior framework with more modern independent suspension but that was the beauty, anything goes.
-
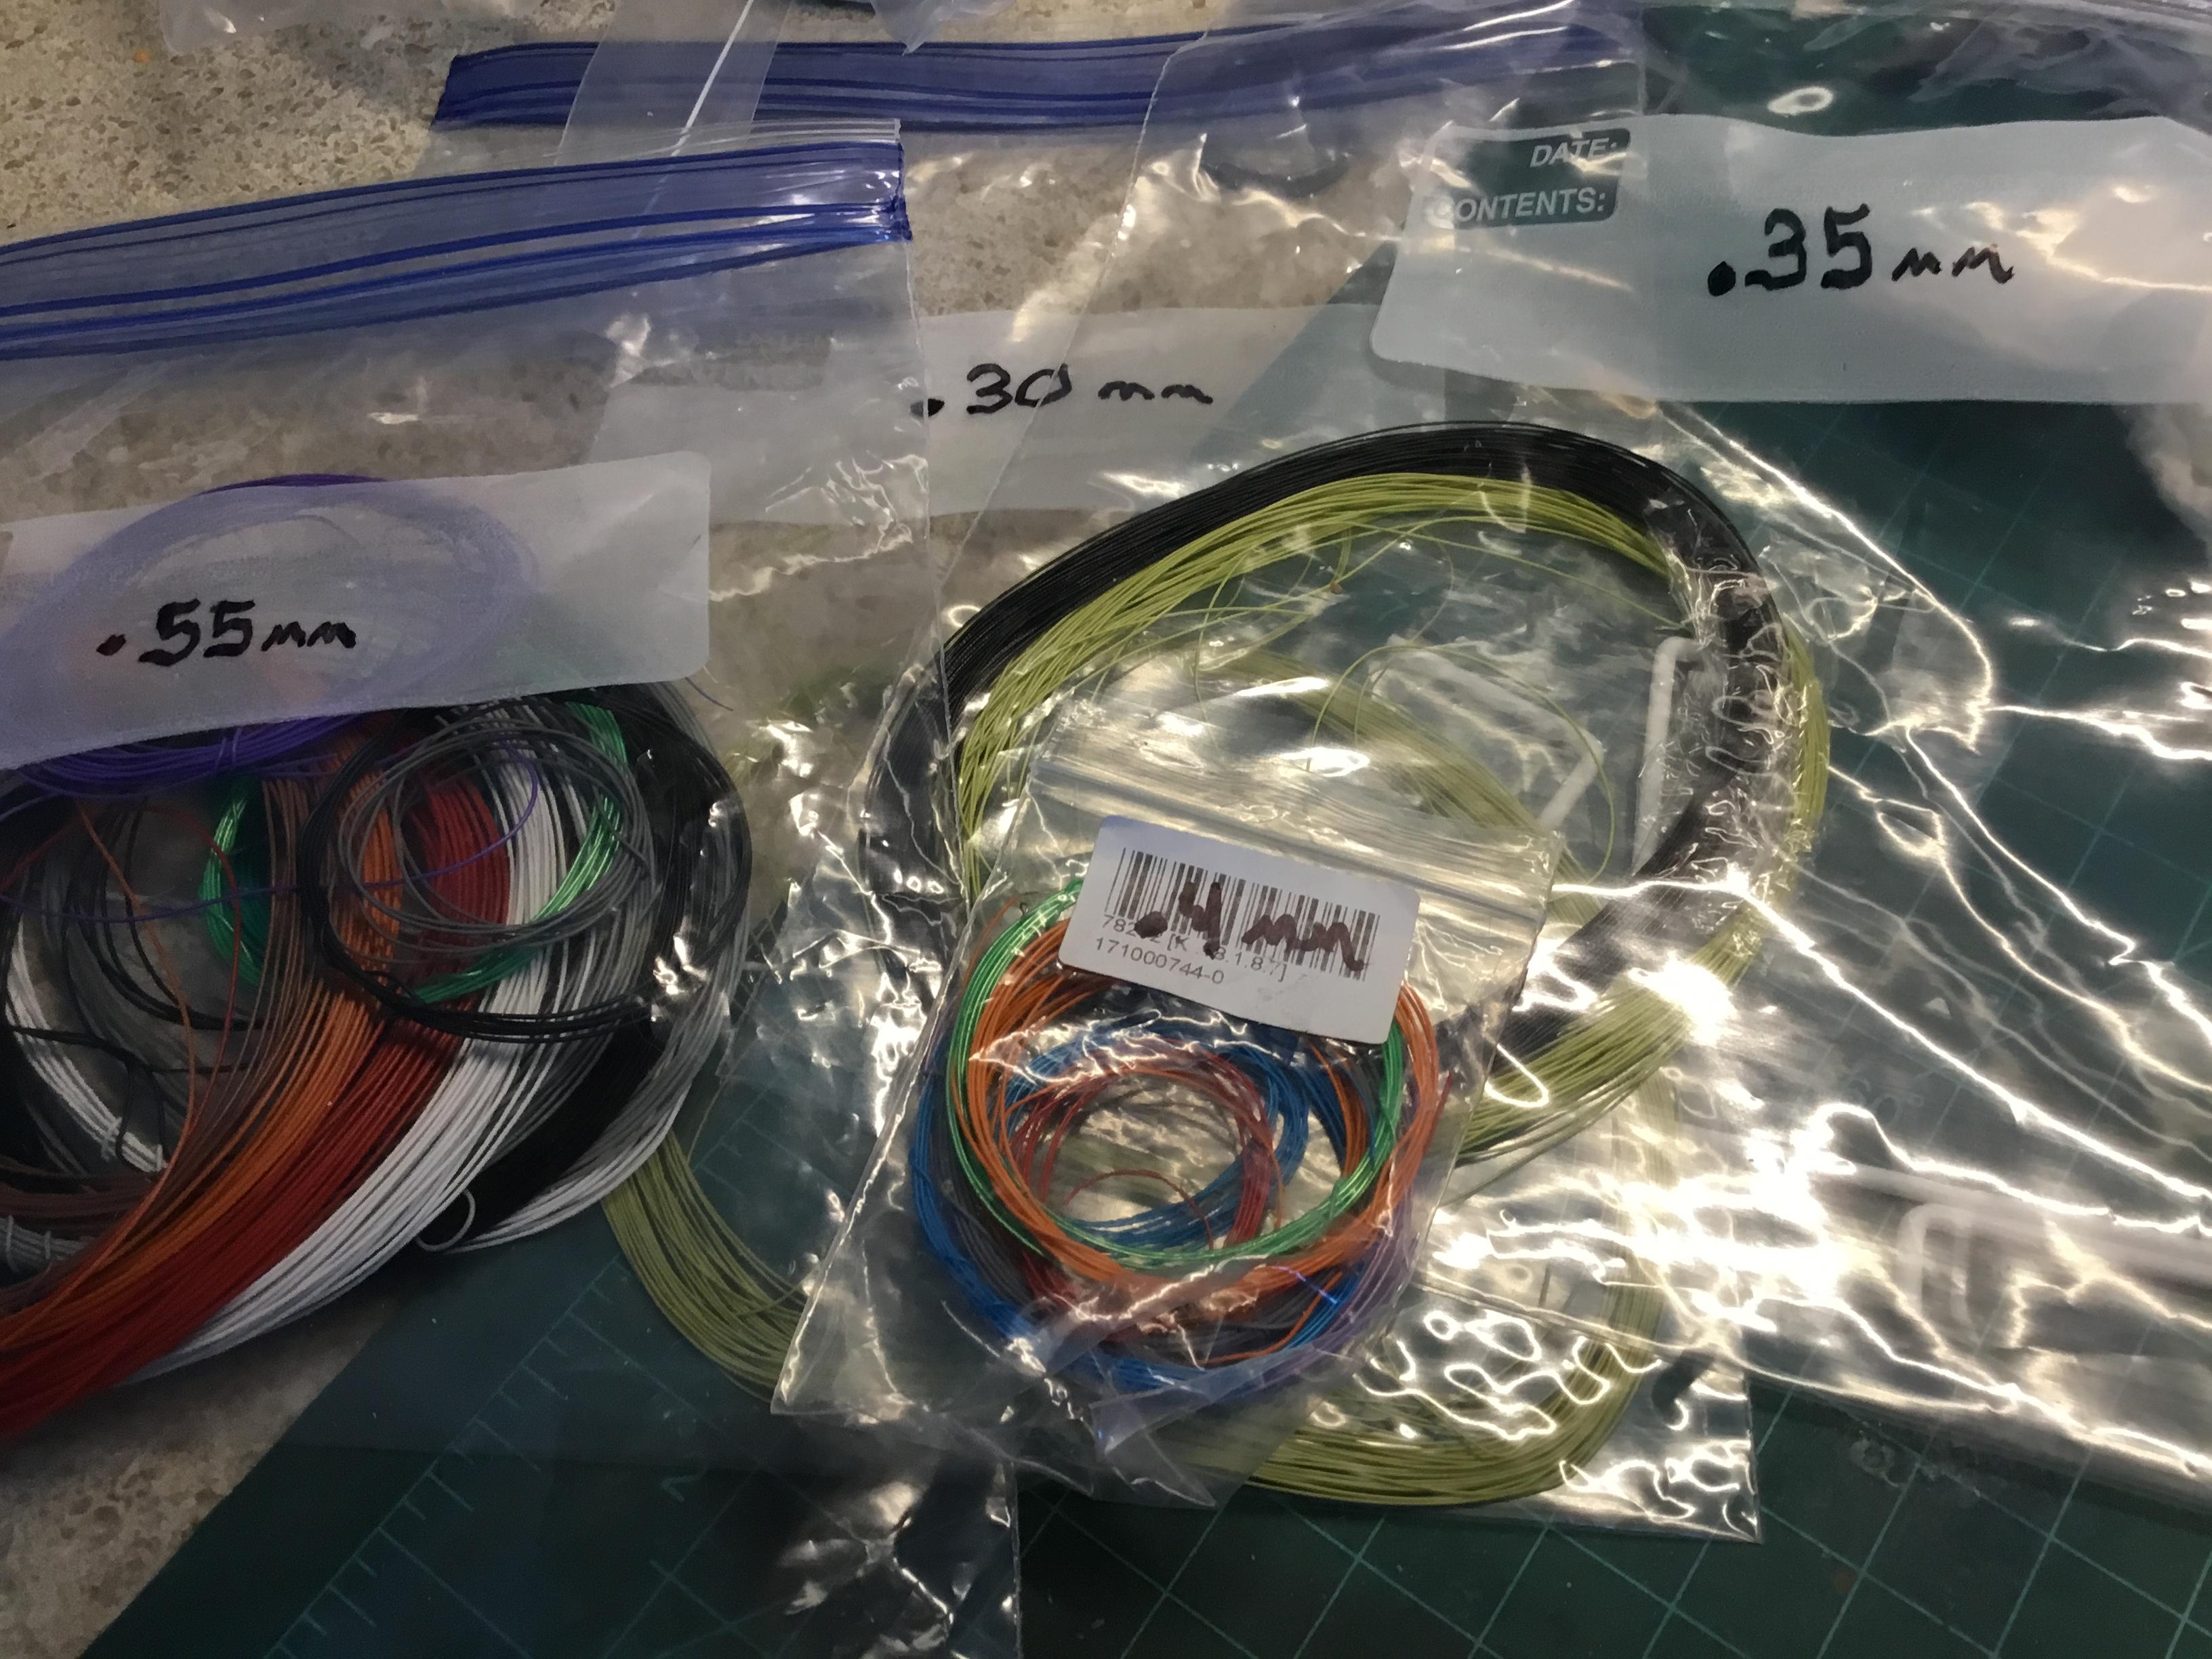
On spark plug wire, I had an obsession with getting the proper diameter wires for everything. After searching high and low I gathered different sized wire for different uses. I found you can't go just by the size AWG gauge size of the wire. That is the diameter of the actual inner wire, not the size of the wire with insulation on it. Some insulation is quite thick, some quite thin. Most aftermarket distributors use a wire that is .65 mm in diameter. I use millimeters since one millimeter in scale equals one inch in 1:1. So wire that is .65 mm in diameter is .65 inch in 1:1 scale, almost 3/4 of an inch. Way too big for scale spark plugs. I found that most stock plug wires, especially in older cars, is 1/4 inch in diameter or .25 mm in scale. High performance wires in real life are around 3/8 of an inch in diameter or about .35 mm to .4 mm in scale. So I was finally able to find wire that was .25 inches in diameter. If I remember correctly, it is 36 AWG size with with a teflon insulation that is very thin. I found several sources with lots of different color: I also have found plenty of other sizes including .3 mm, .4 mm, .5 mm and up: So that was a part of my wire odyssey, The plug wire in the picture I sent previously was .25 mm or a quarter inch in scale. I will be honest though and say that the .25 mm wire is certainly tiny and I have to admit, actually looks too small to the eye on some engines.
-
This morning has been all about spark plugs and boots. My hands just aren't that steady any more. As a reference, the red plug wire is one quarter of a millimeter in real life or one quarter of an inch in 1:1.
-
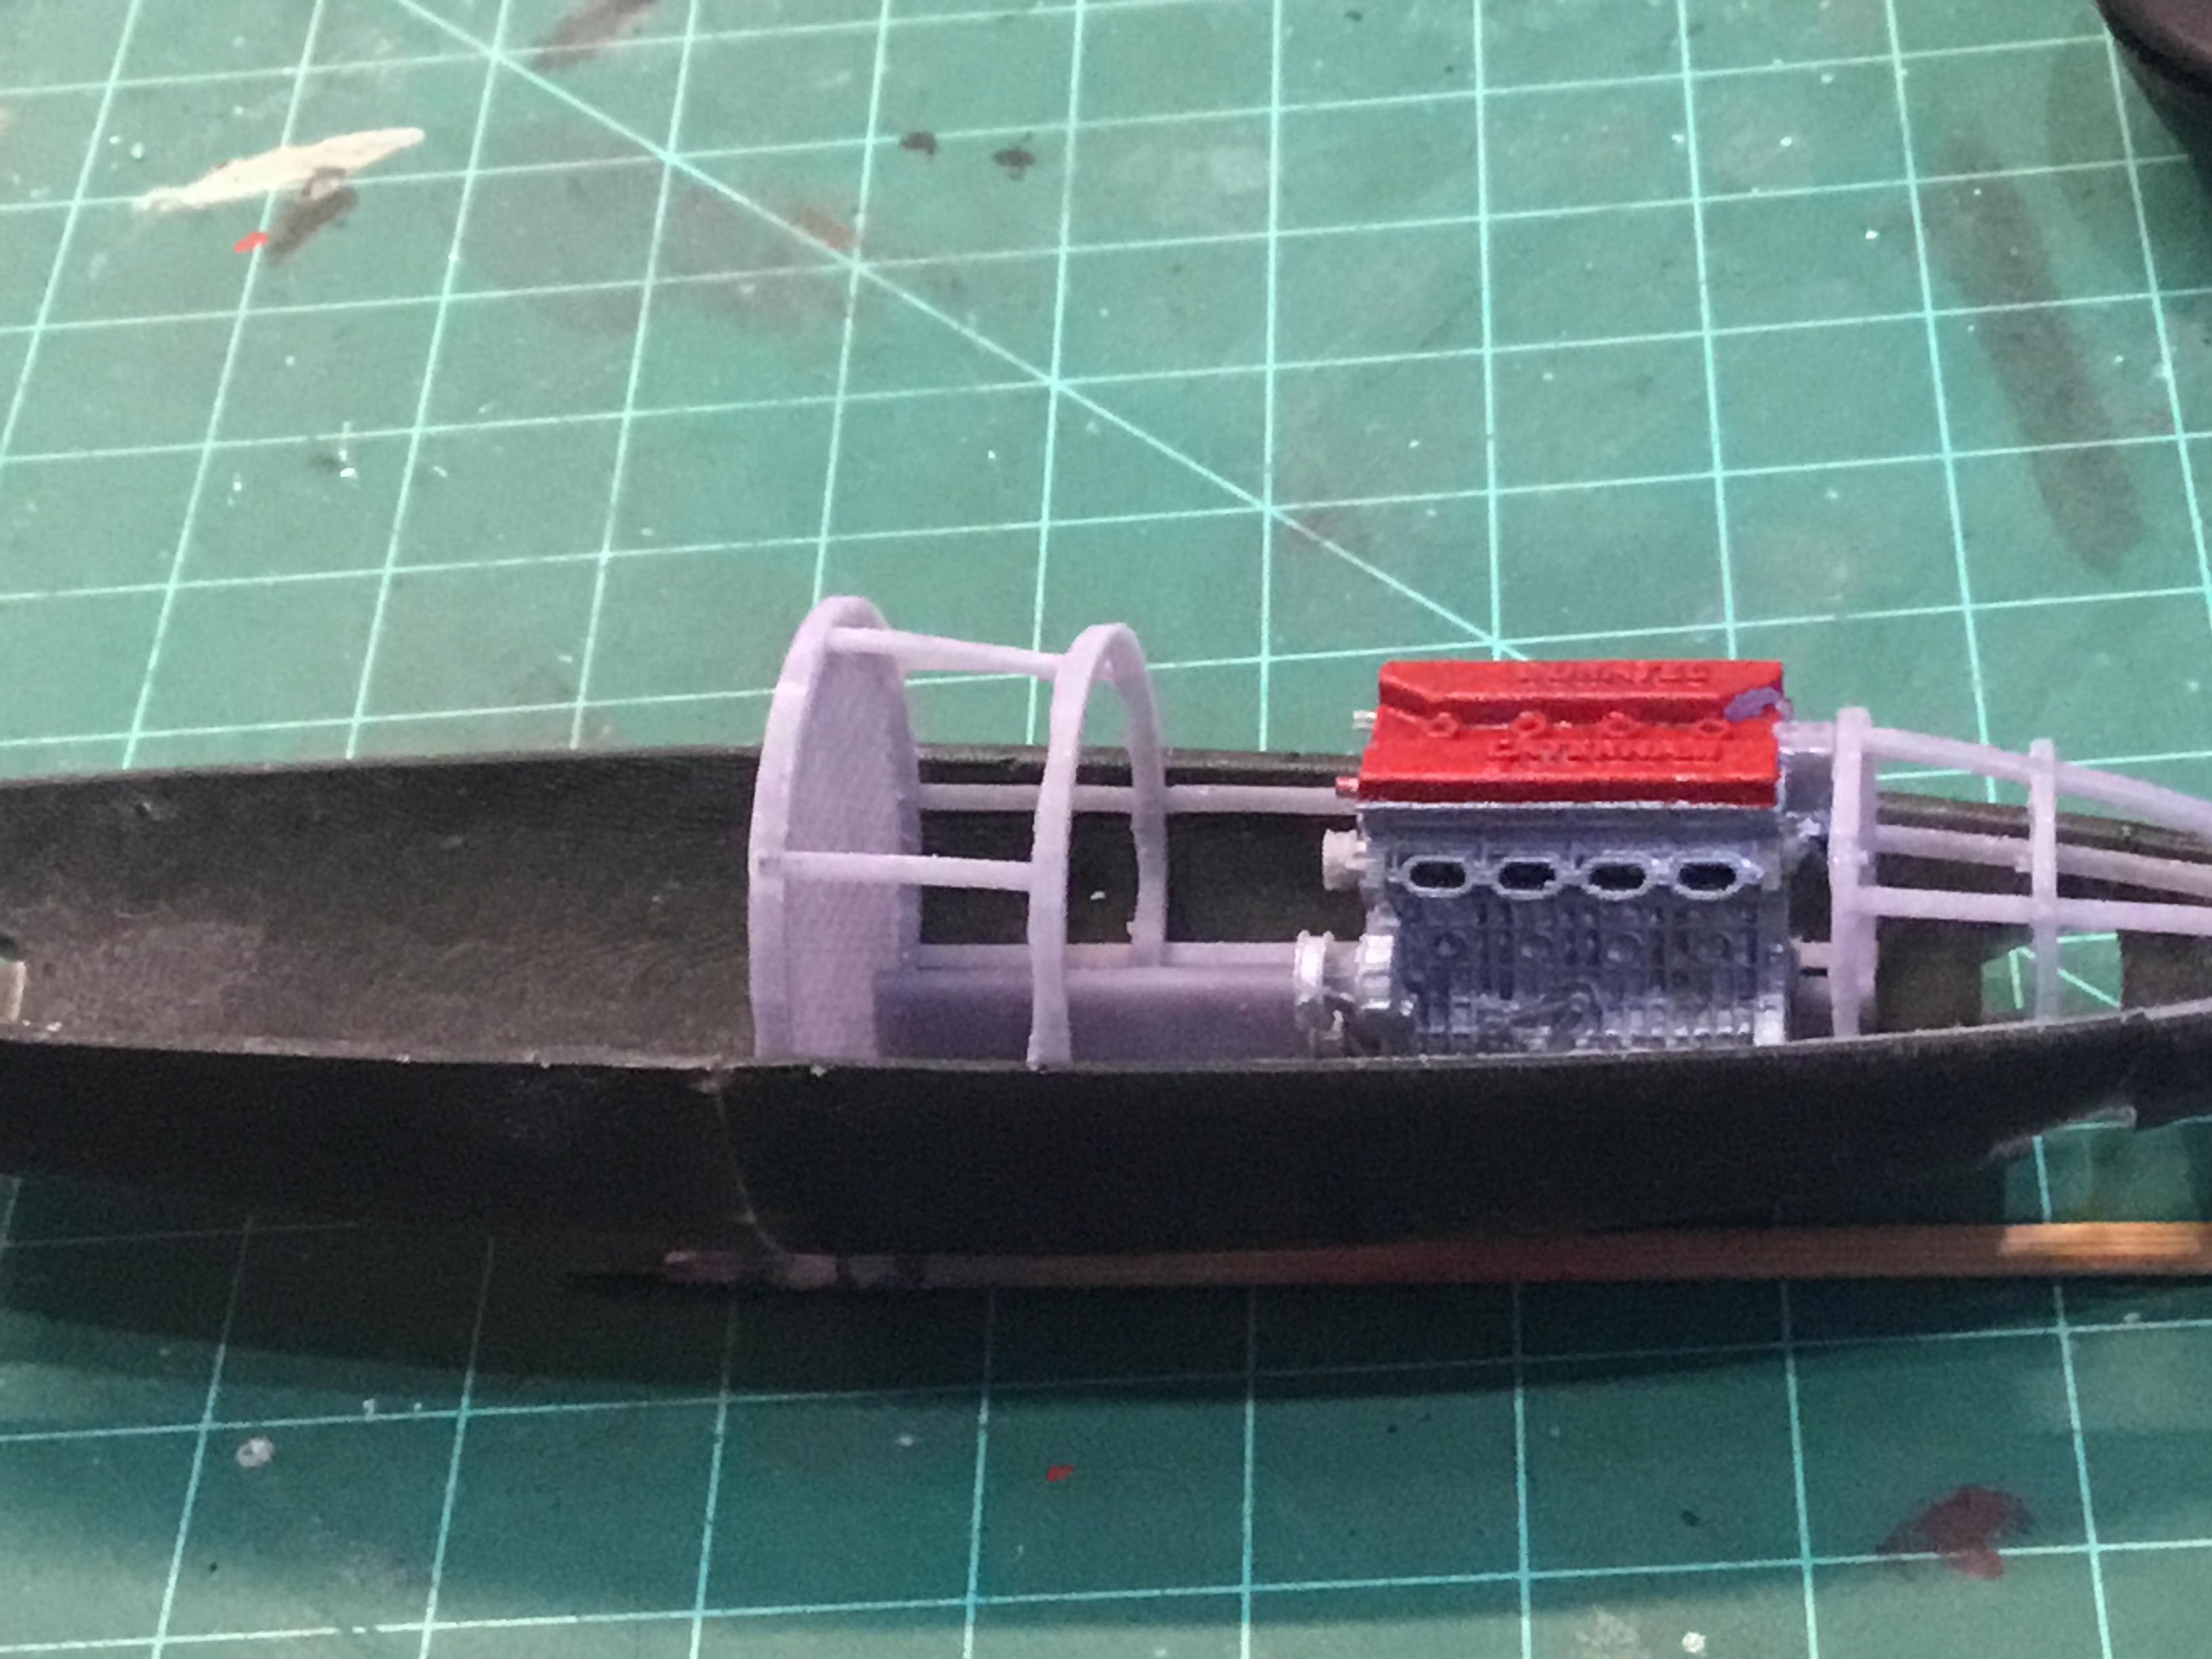
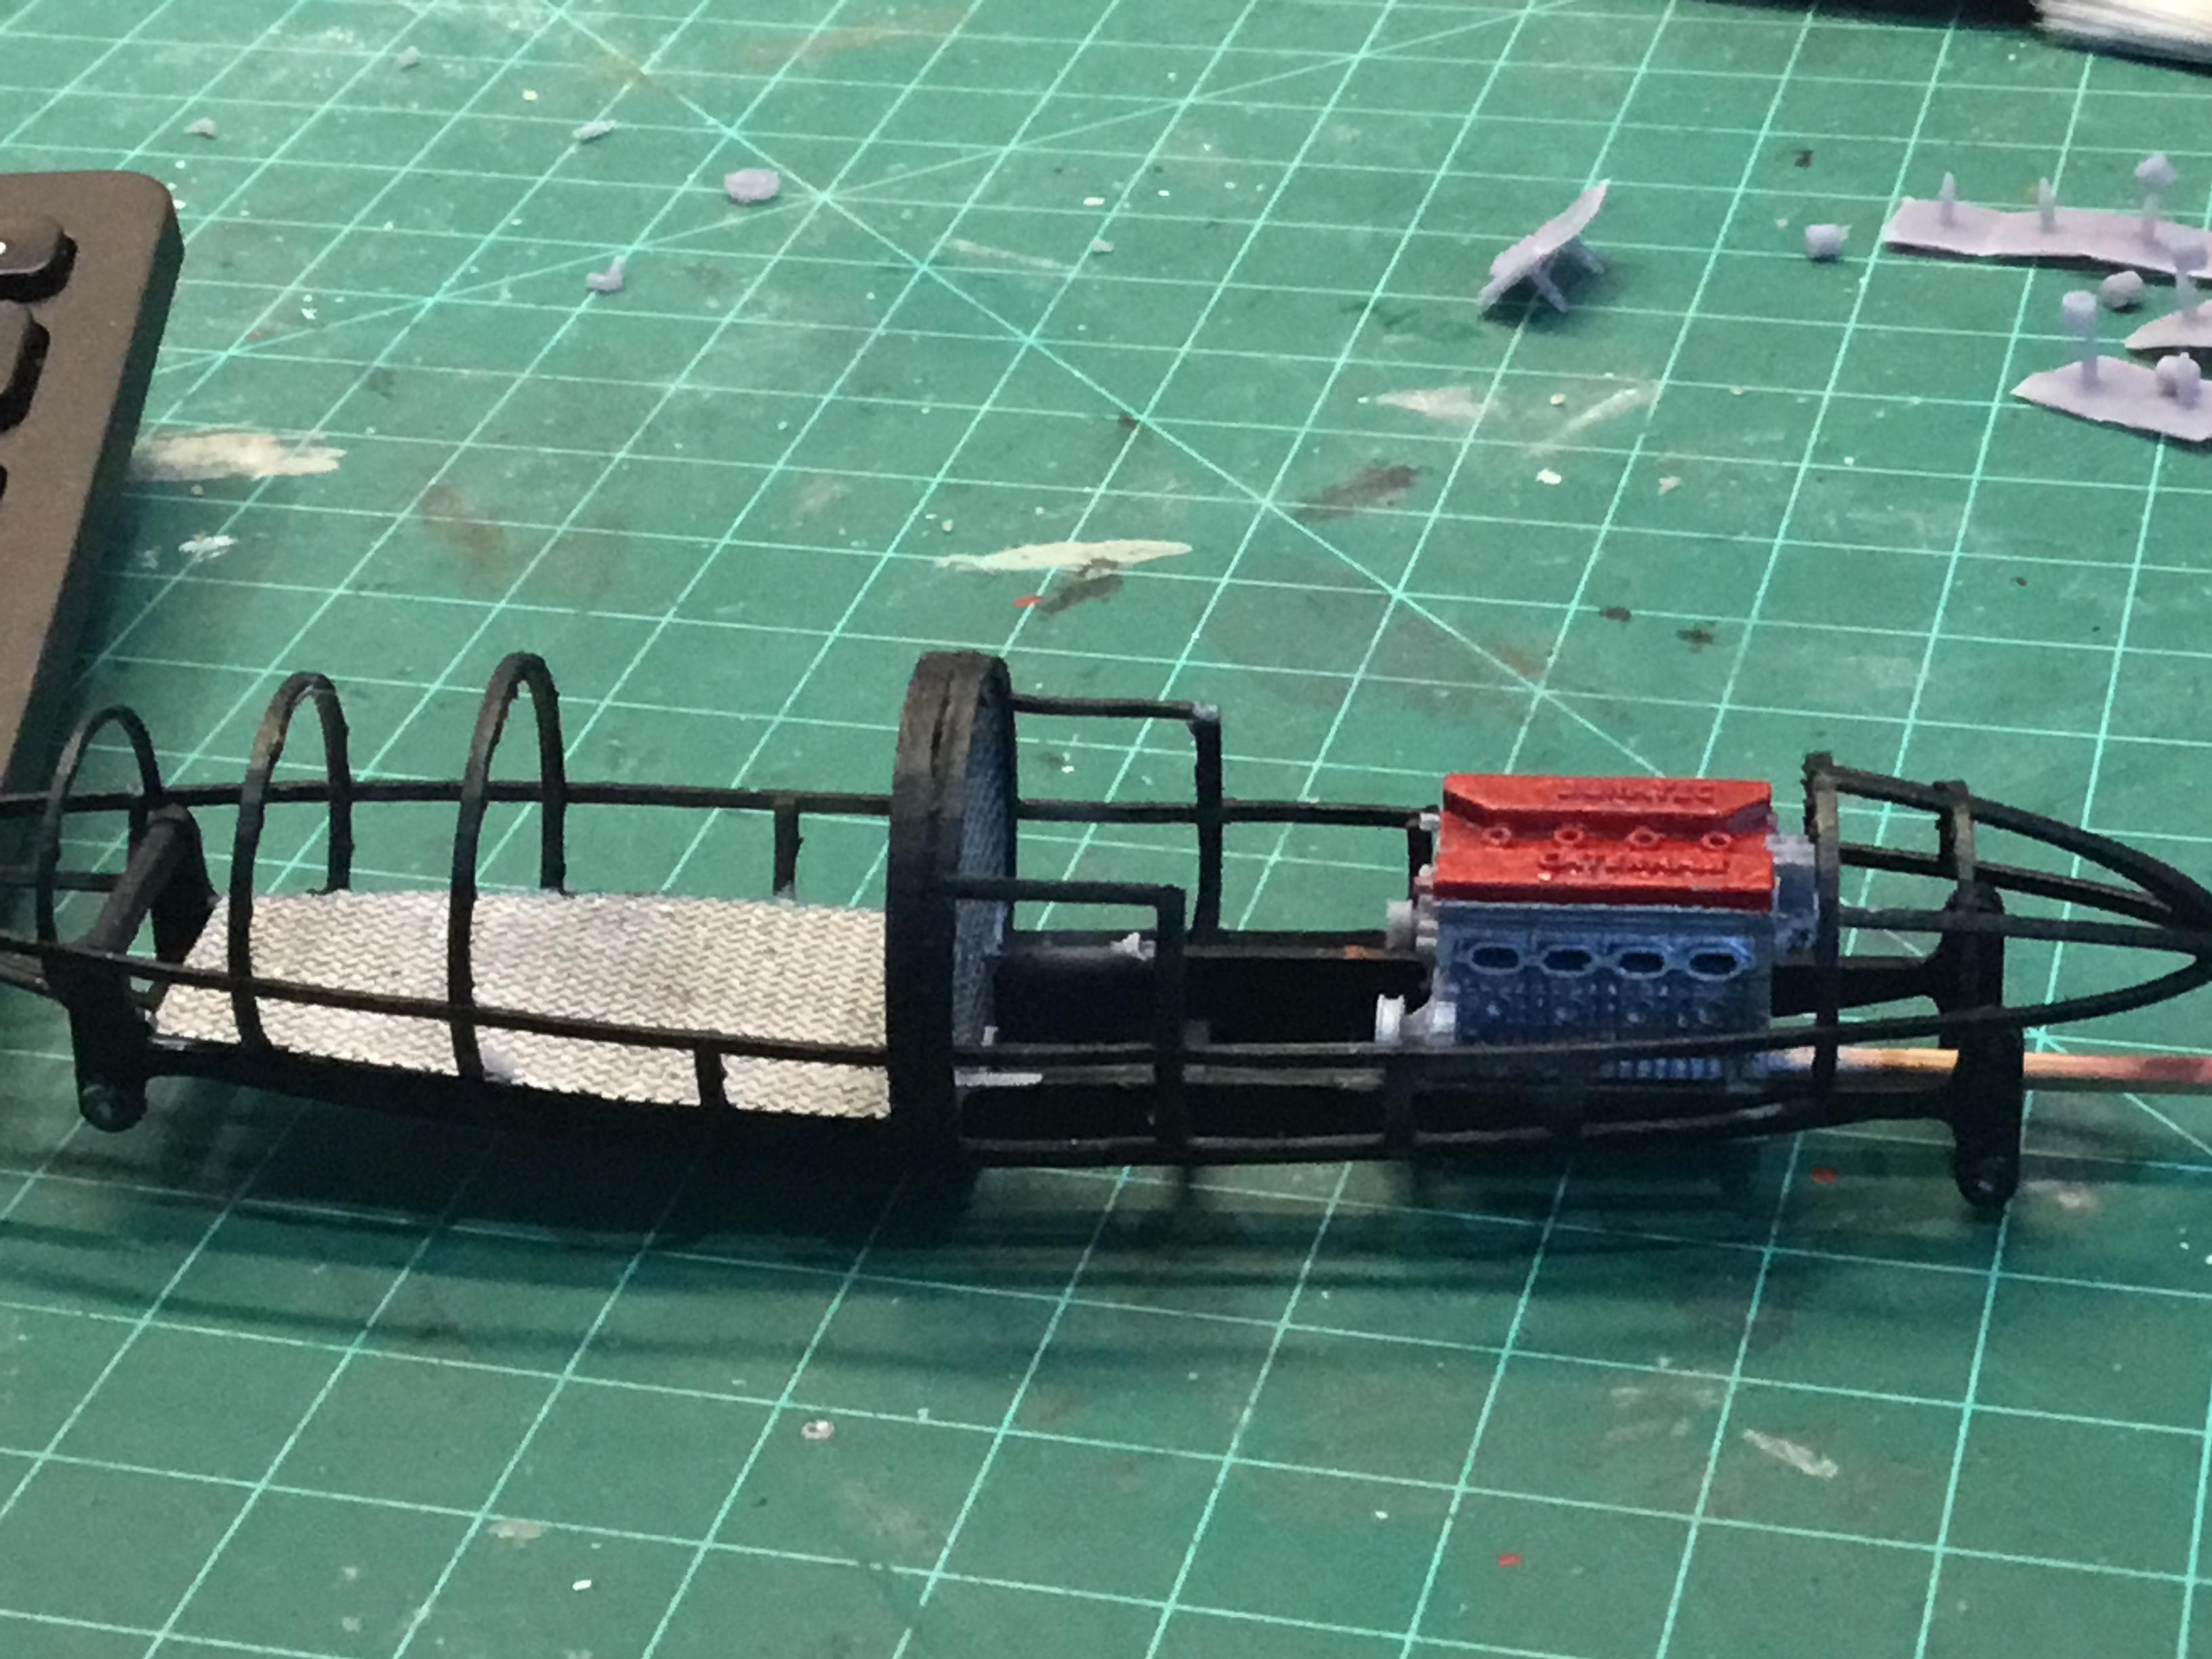
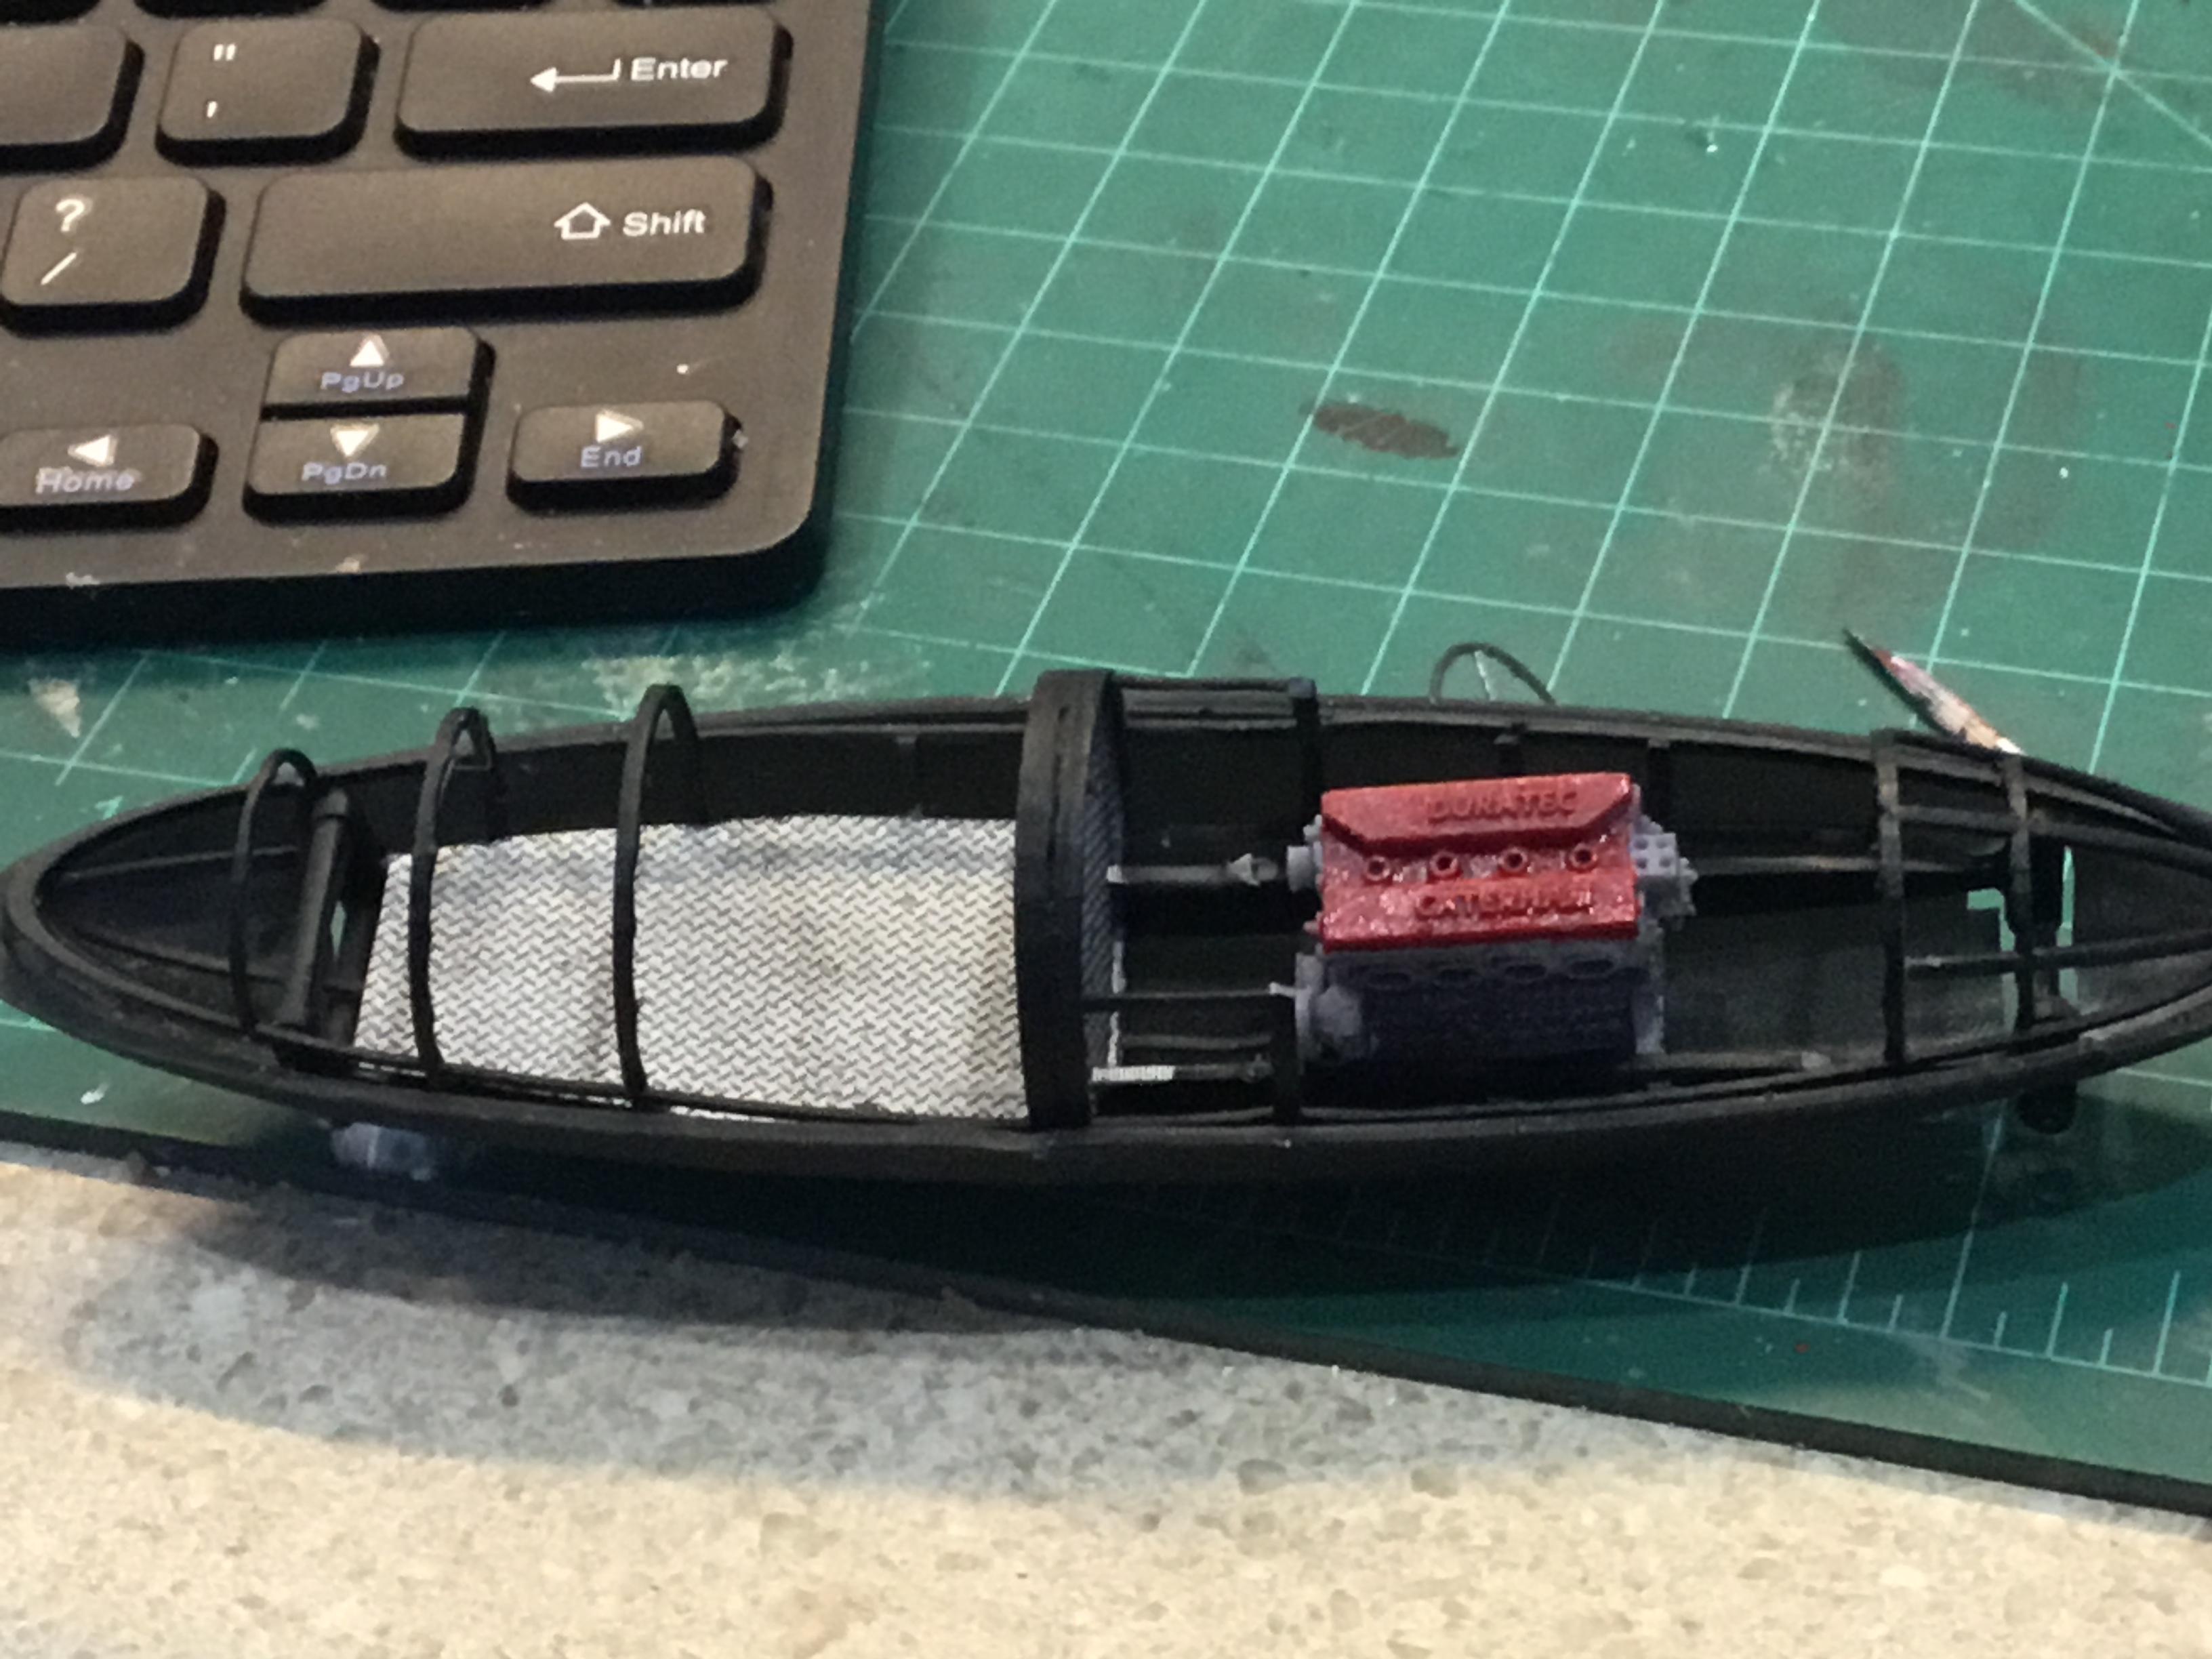
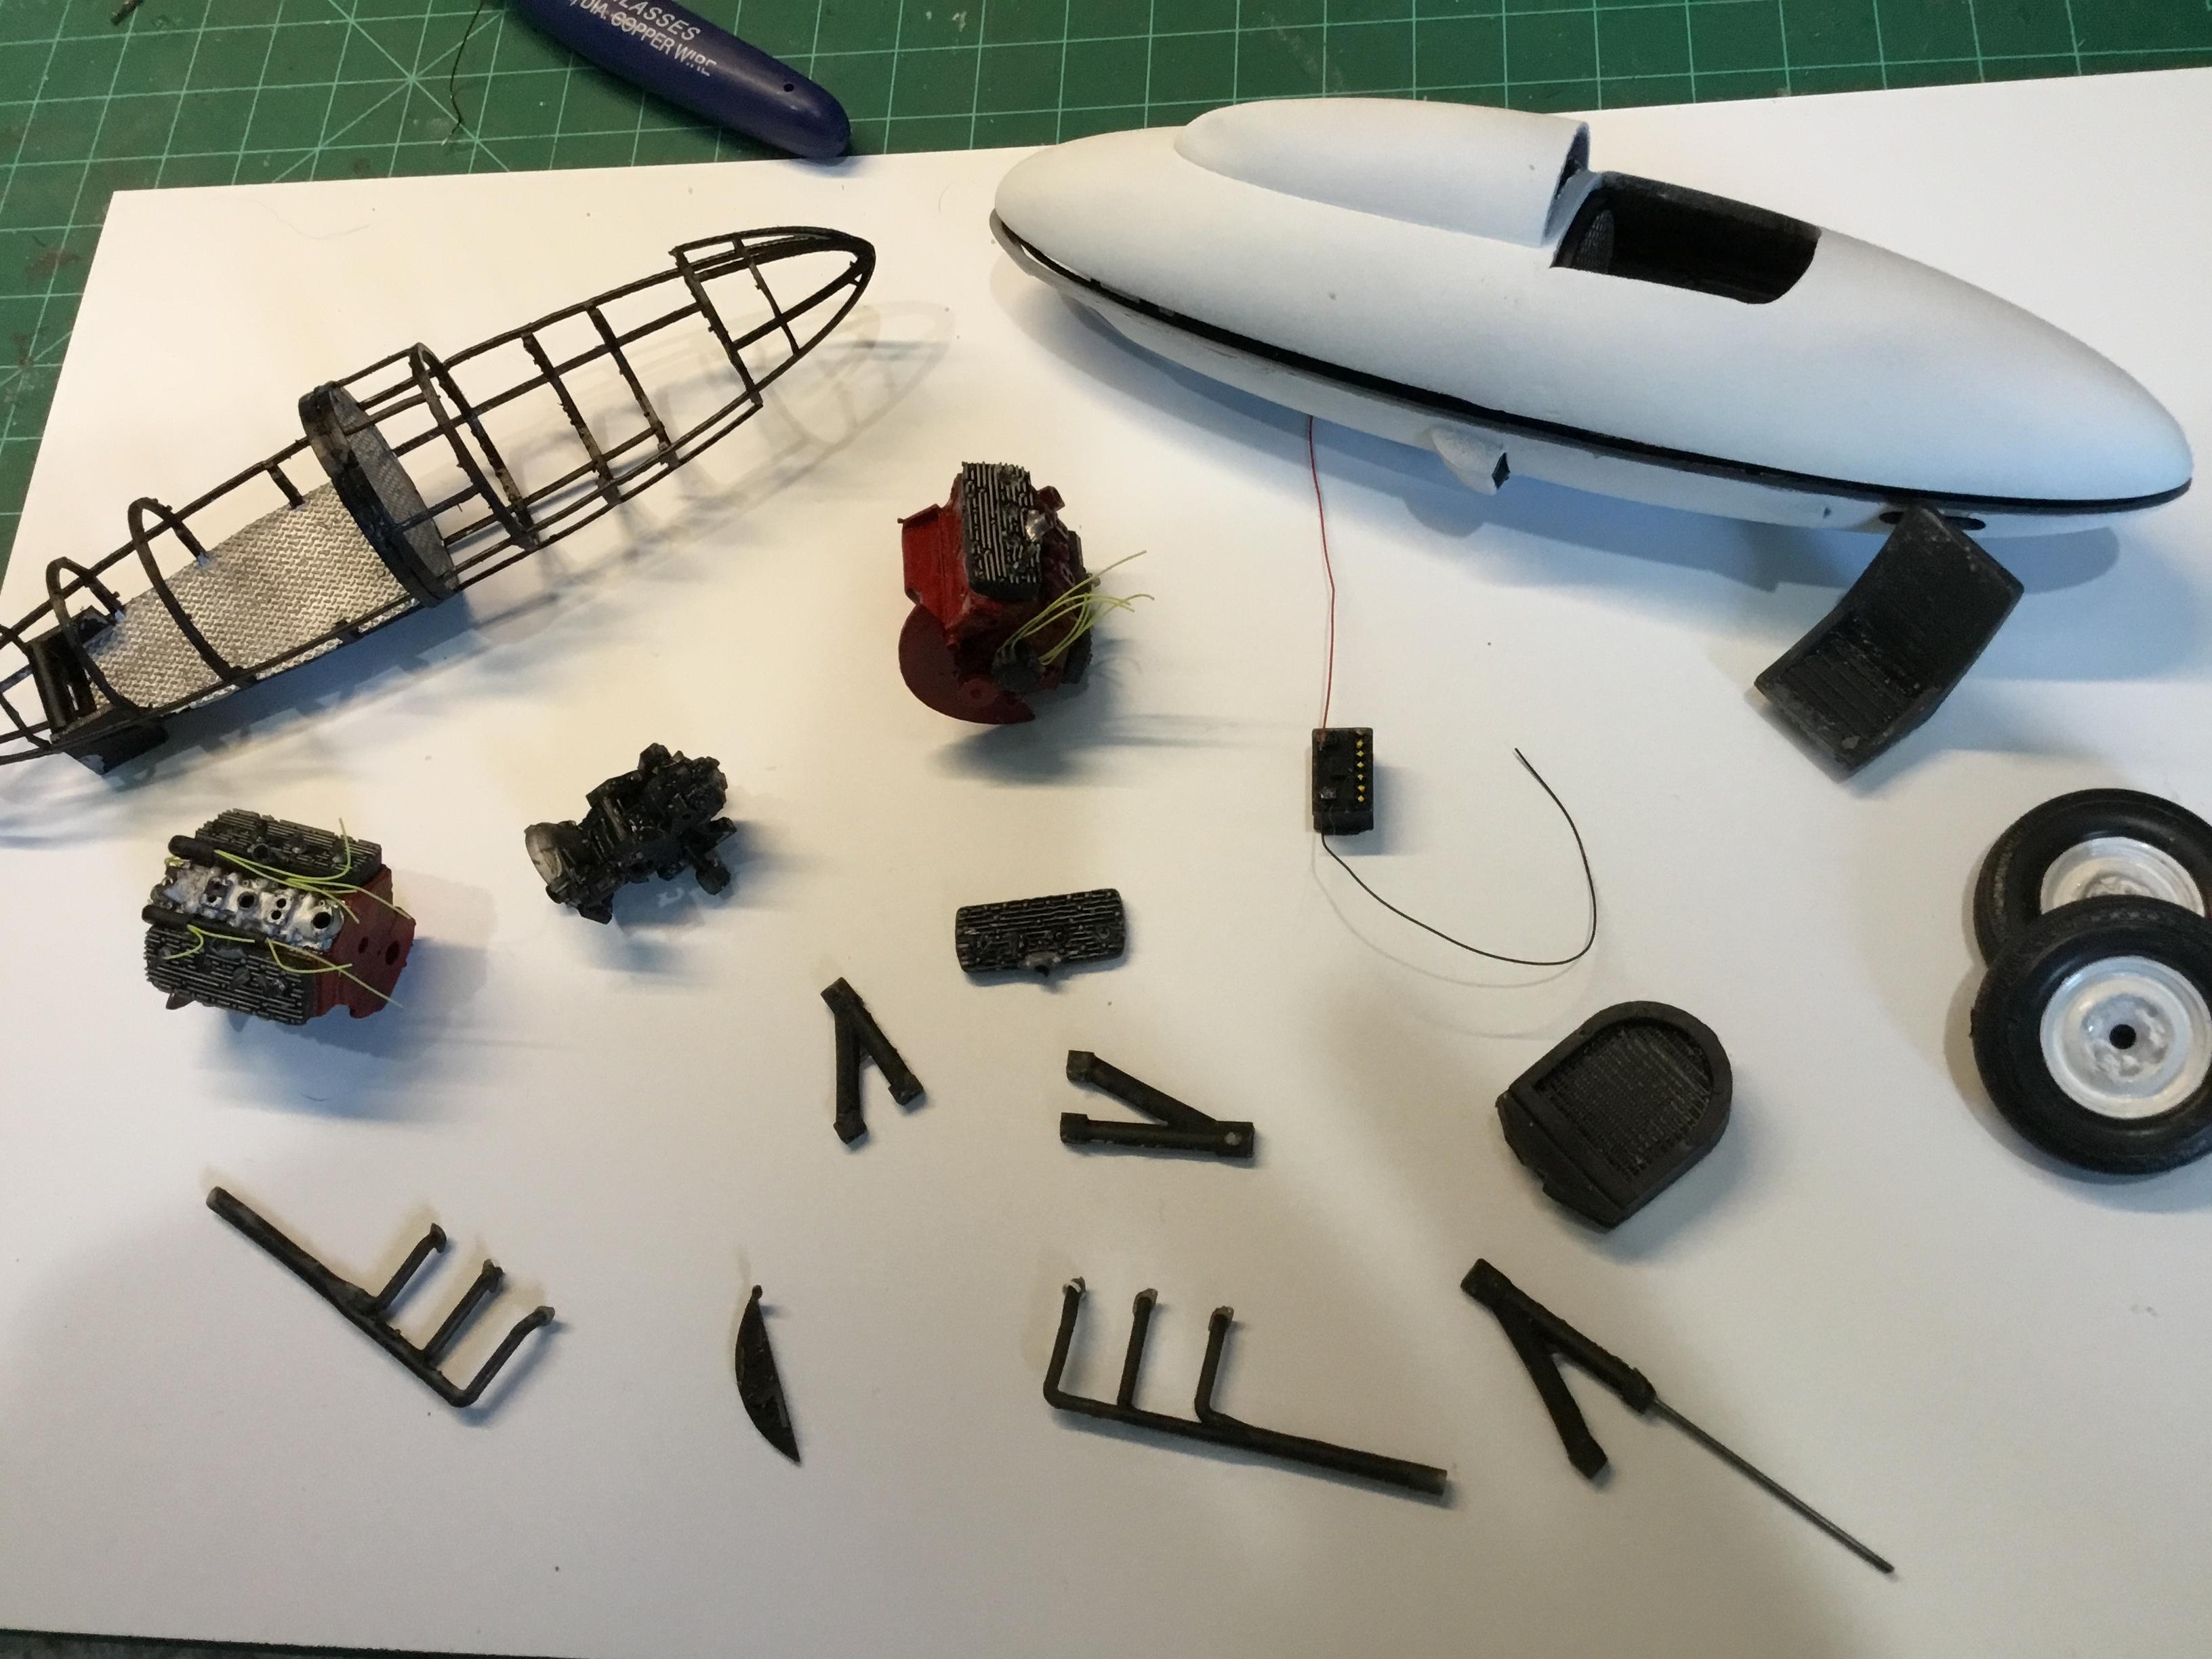
When I promised myself that my bellytanker would be completely designed and printed from scratch, I didn't really think about how many parts it takes to make a complete car. It has been a labor of love and a lot of fun, but boy there is a lot of design and tinkering to get all the parts needed. The frame and body were really fun until you realize how much stuff you have to think abut. Exhausts, suspension, engine, everything has a knock on effect. Get one part to be right and six more need to be tweaked to fit around it. Here are just a tiny handful of parts so far A quick mock up of the engine and transmission. You can see the diamond plate floorboard. I am going with a wishbone suspension. The plan is to build one with a body and one without. Right now I am trying to get the two engines ready to install
-
I am using Phrozon Sonic Mini, which seems to be perfect for what I need, inexpensive. I don't know how good these pictures show it, but these radiators printed with every fin and tube, you can see through it and these are in 1/24 scale
-
Yeah MeatMan, I agree. See my bellytanker I'm building in the Land Speed Racer section. That is going to be completely self designed and printed except for the wires
-
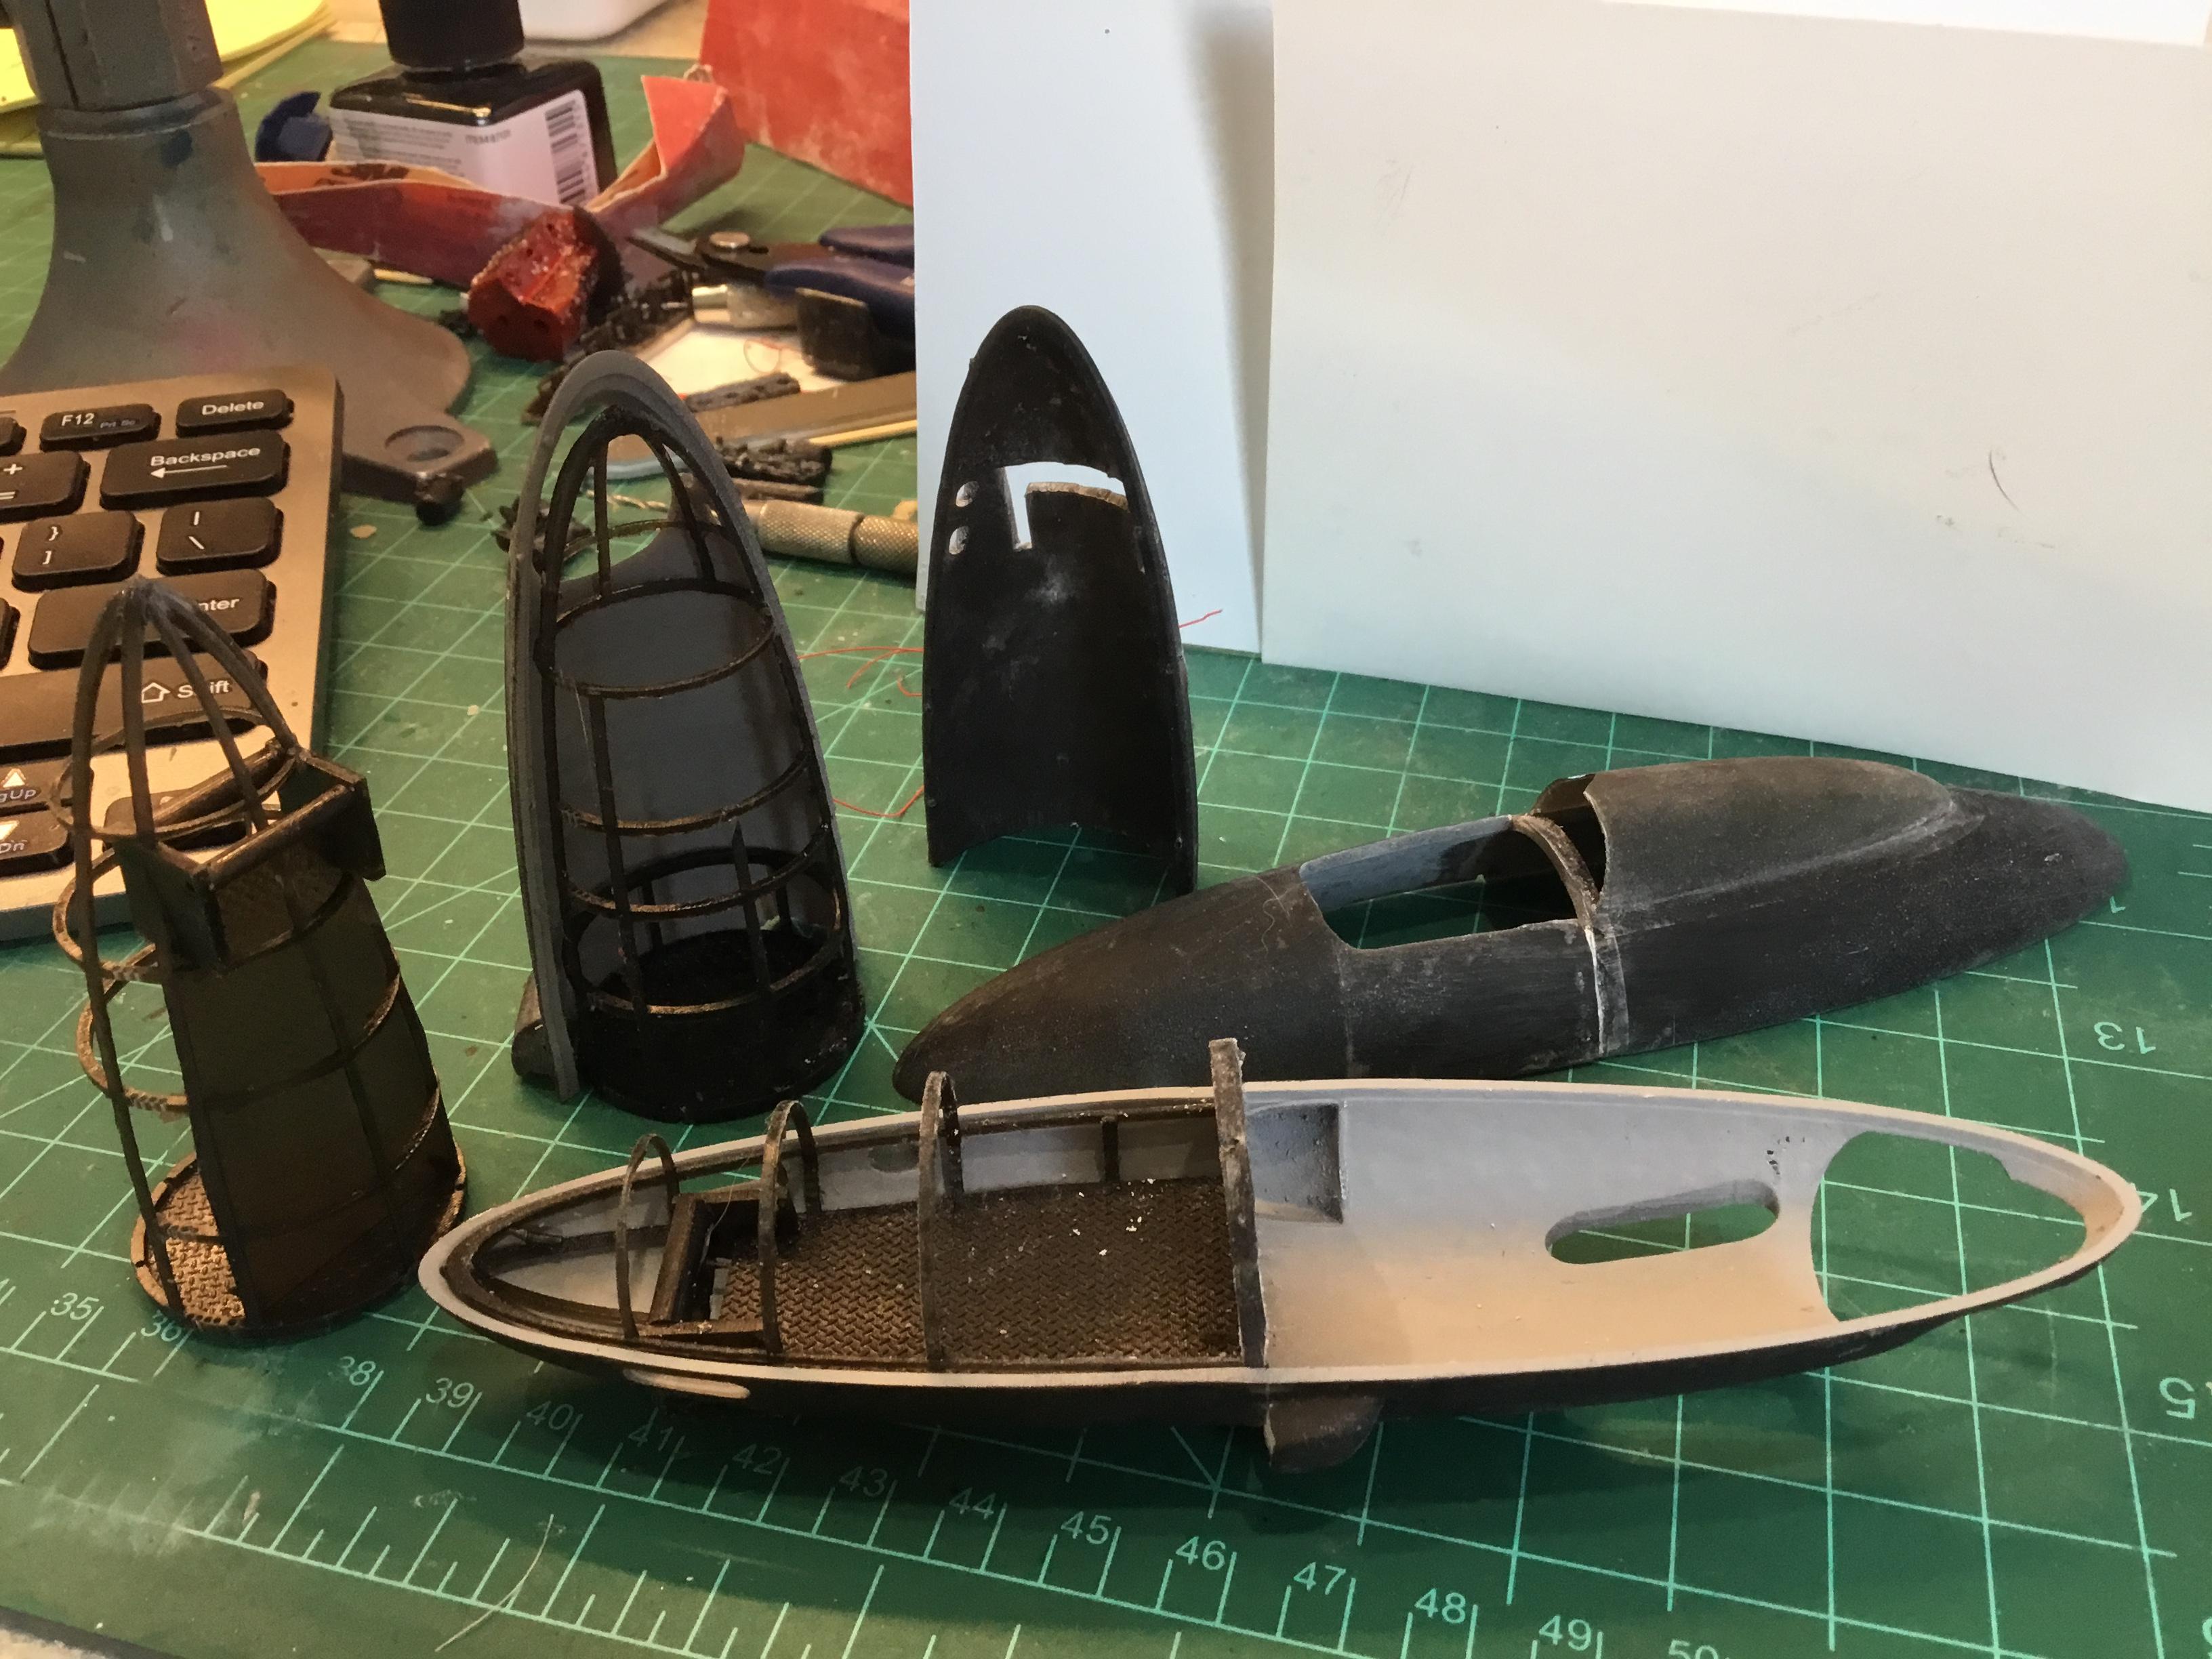
I know I have skipped a lot of design work but the goal was to have a body and frame that would fit everything and then go back and start building the different elements that will go into it. So here is the overall breakdown showing the body top and bottom and the frame. Since my printer is not large enough to print the whole body at once, I cut it into two parts- front and back The front is on the left and you can see the structure that hangs down in the front. This is the hard points for the front suspension and hangs down through the front of the body. The suspension A Frames attach there. In the back, the suspension will attach to the frame of the transaxle . So the drawings from the first pic get sent to the printer and the actual parts are printed. This picture shows some of the parts for the body and frame as well as some body parts glued up. This resin sands like a dream and is easy to work with My biggest issue is that after the part "cures" by getting bathed in light it will become fairly brittle so you have to be extra careful sanding and finishing. I thought I would start with the engine. I decided on a flathead V8 to kind of keep with the old style. One of the greatest thing about 3D printing is the ability to scale drawings up and down. Most drawings are made to be bigger than 1/24 or 1/25 but all you have to do is bring up the drawing and scale it down on screen to whatever size you want. Once one part is the correct size, all the rest of the drawing will be automatically scaled to fit. Another thing I have always done when detail building is to work in the metric system. As luck would have it, one millimeter in real size equals one scale inch. If you want a 1/2 inch bolt, simply use 1/2 millimeter. The one millimeter = 1 inch rule is neither 1/24 or 1/25 scale. It is actually 1/24.6 scale so it fits pretty nicely.
-
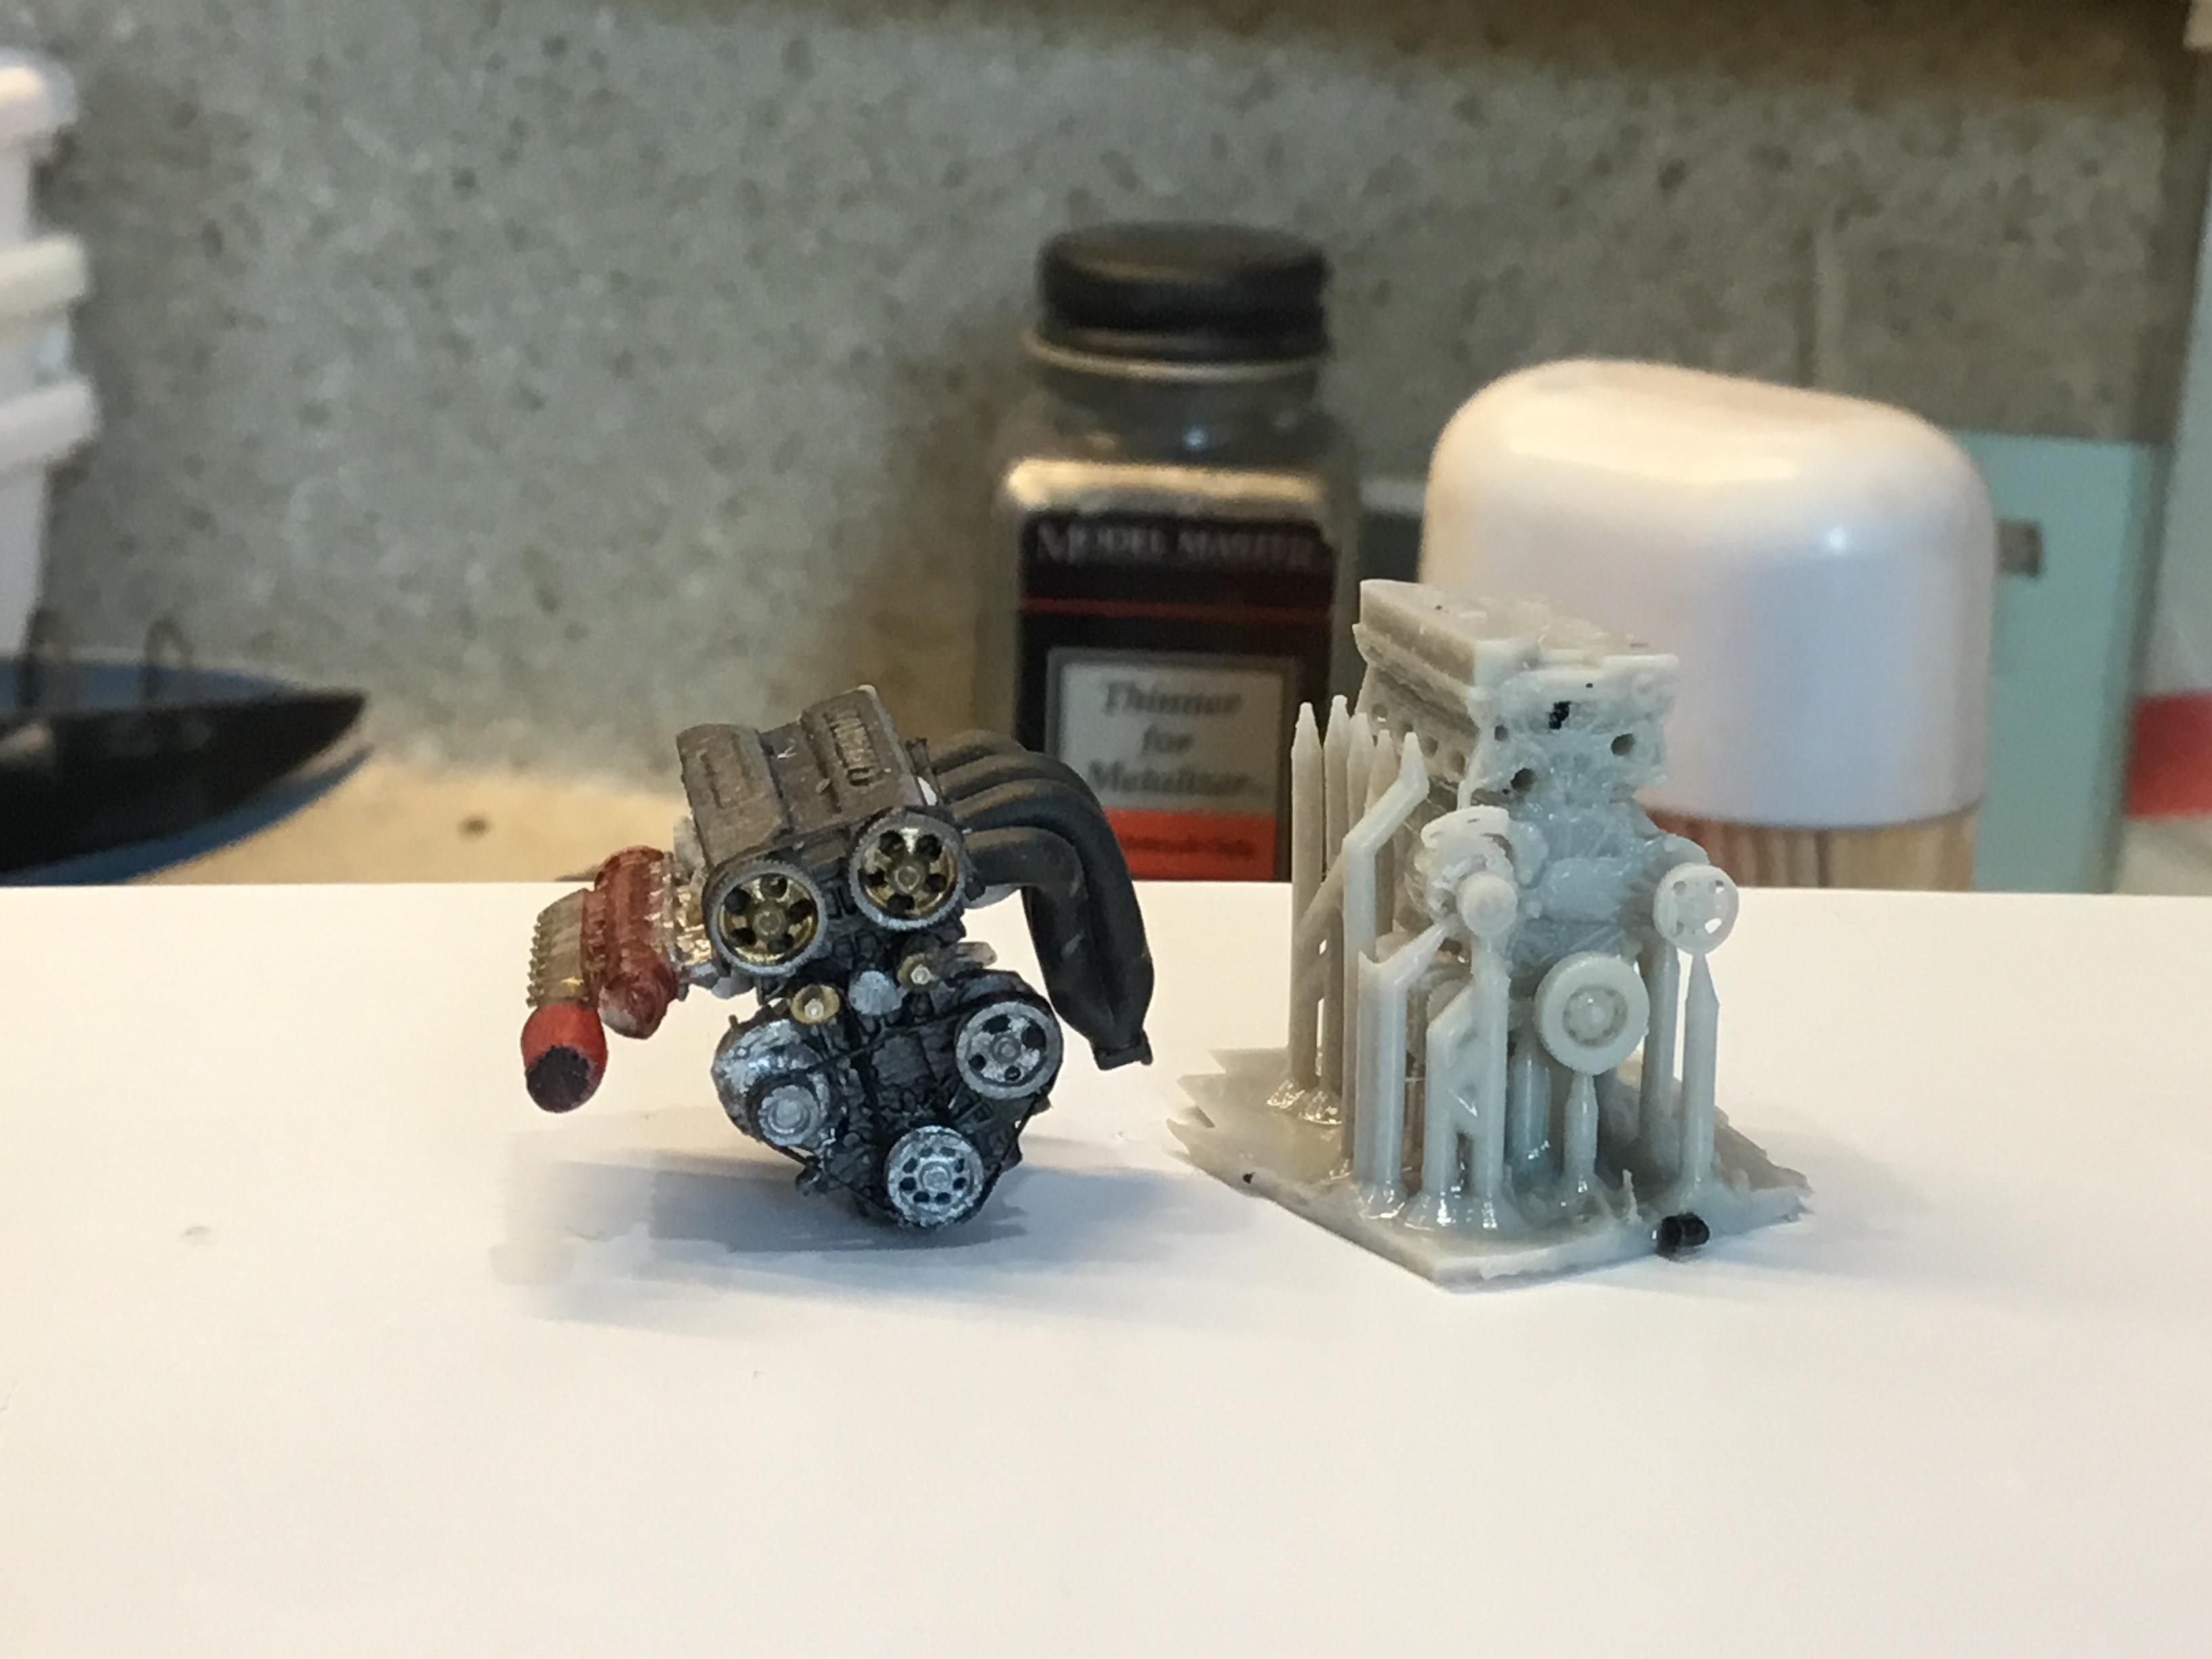
My wife bought me the greatest birthday gift, a 3D resin printer. I have never had more fun modeling. I have been digging up print files all over the web, all of them free. I have been tying to print extra detail items, wheels, and especially engines. The first engine I tried was a Curtis airplane engine It was my first printed engine That was fun so then I jumped in and tried a Toyota 4 cylinder. This engine is complete with pistons, valve train, everything: My next challenge was to build an engine for an Aril Atom style track car. decided on a Caterham 4 cylinder. These pics show the engine as well as the raw print right out of the printer. I did it in 1/24 so it was pretty small.
-
Can't be a true belly tanker without a flathead
-
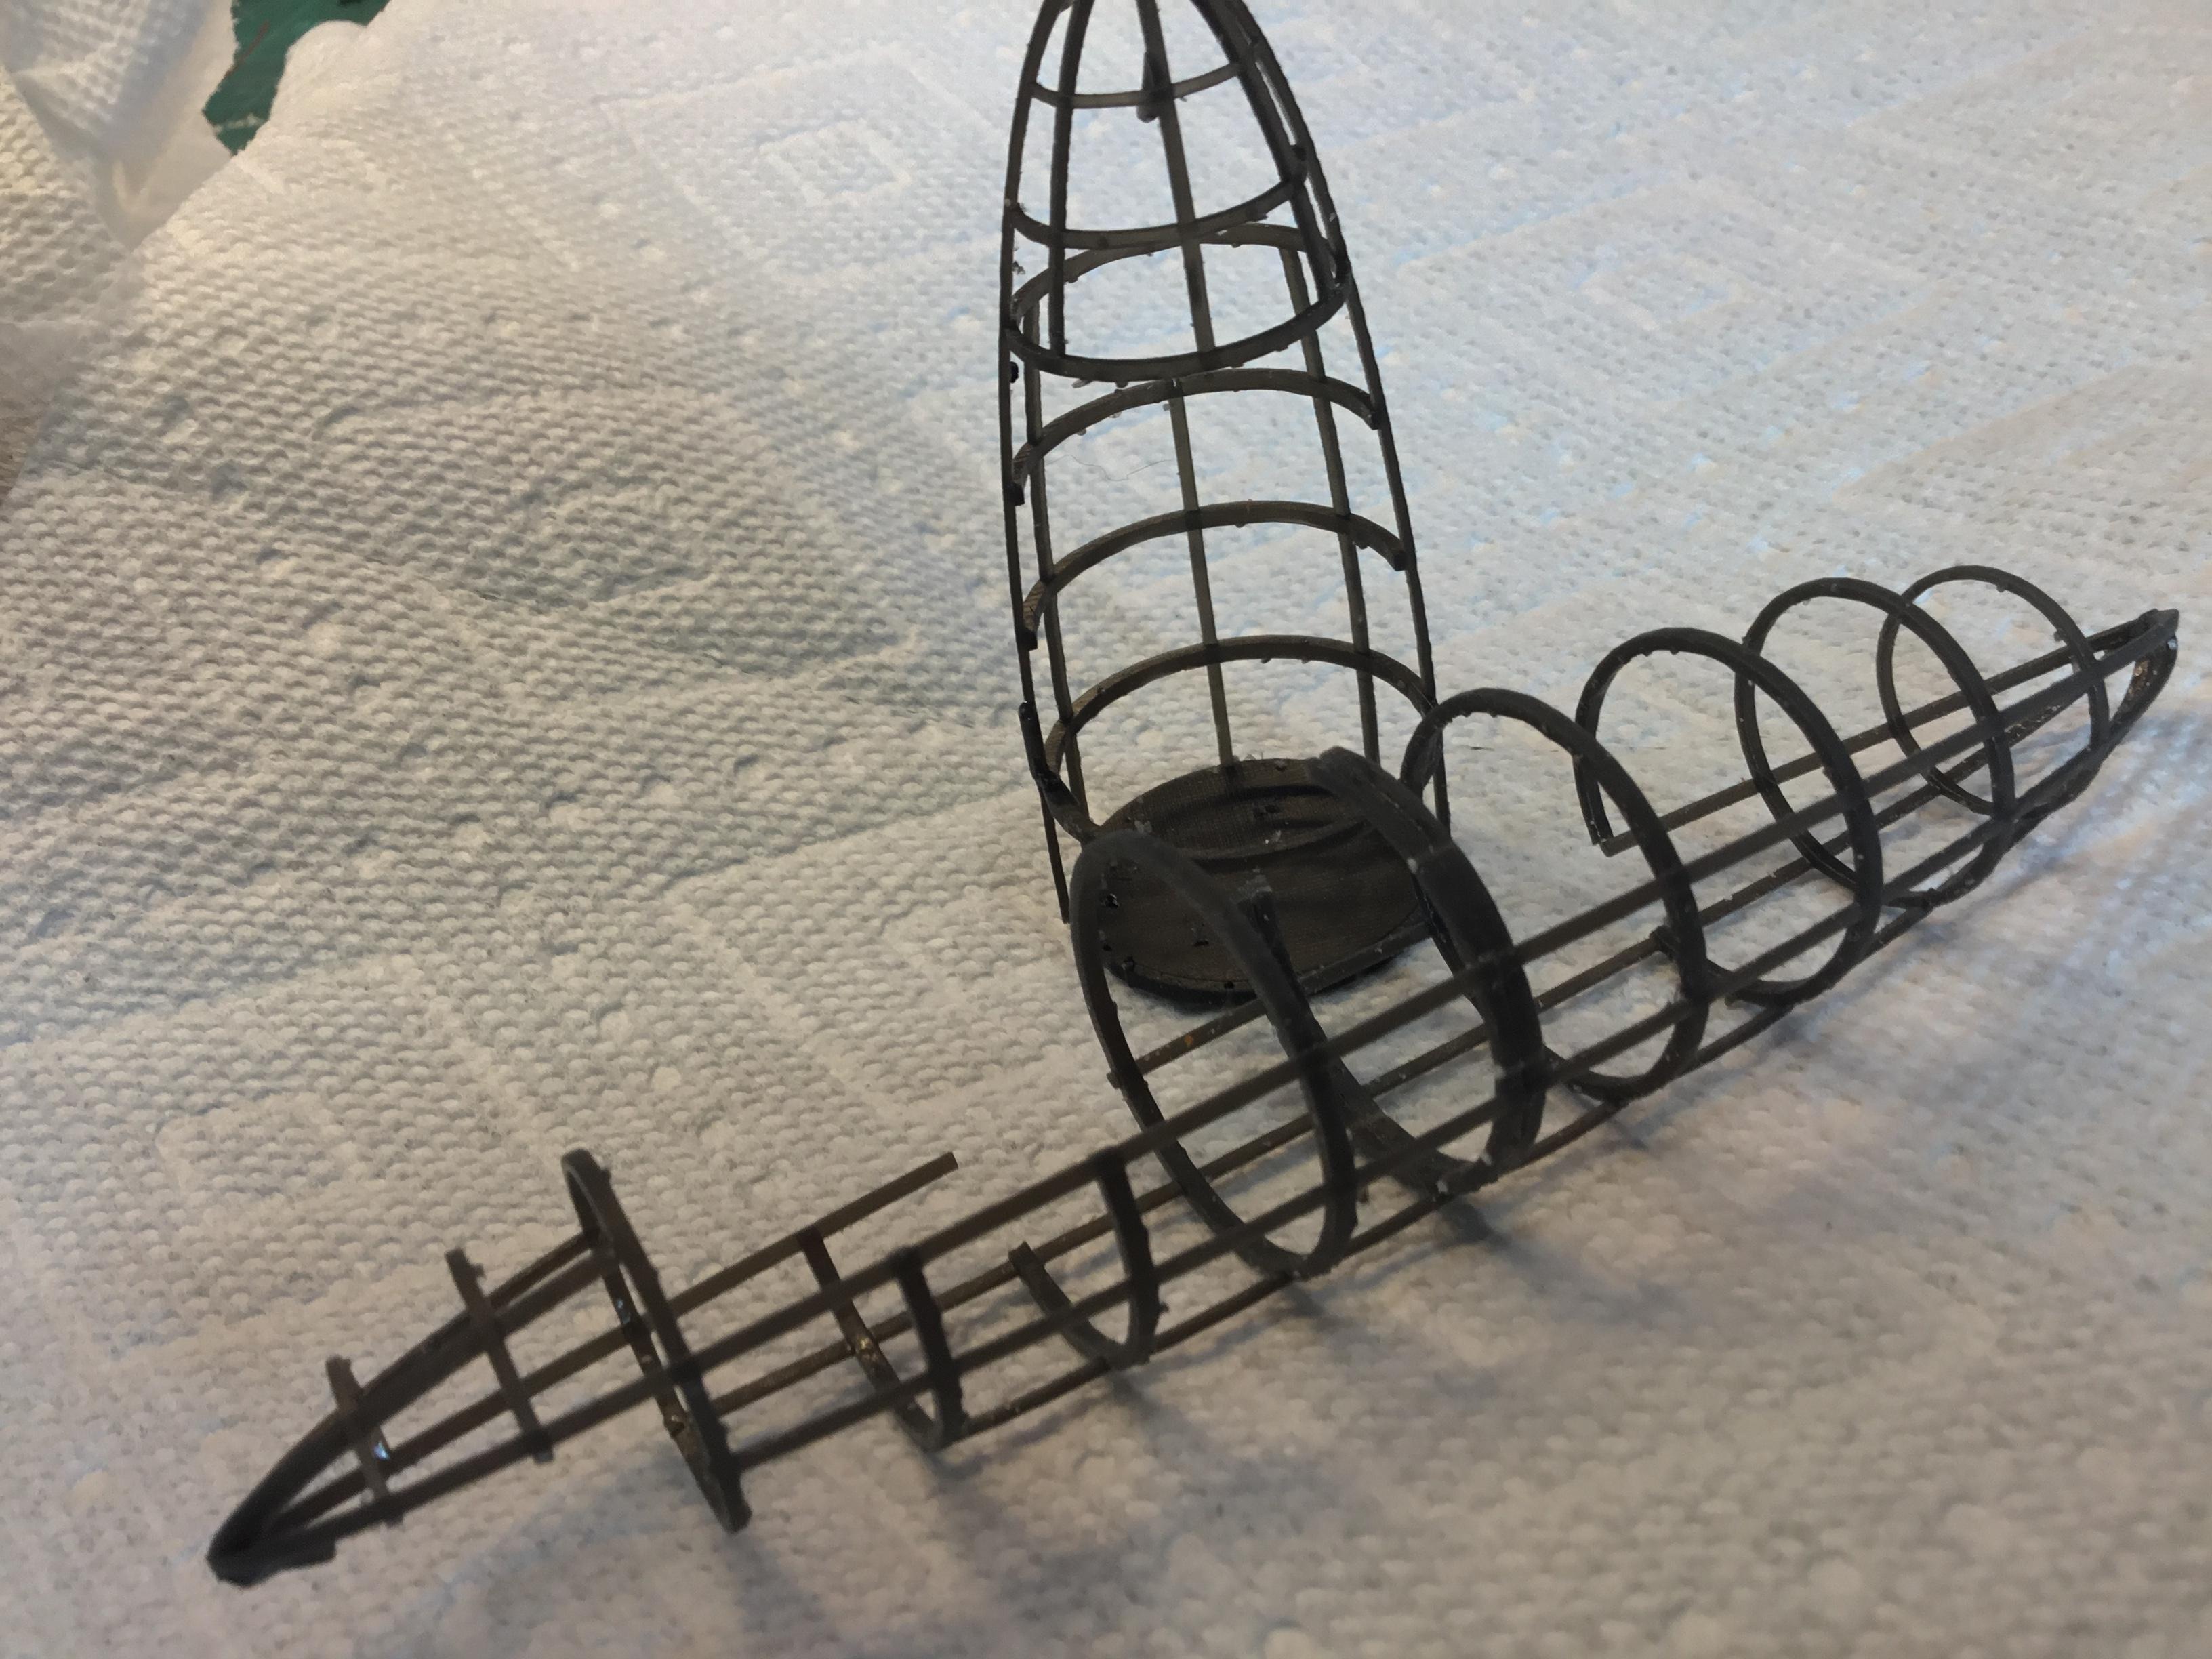
So from the drawings the printer goes to work. I printed out several versions and tried to glue up a complete side, sand and paint it to see how well this resin finishes and assembles. It works great, sands smoothly and quickly. Takes paint well. ` I wanted a frame that would be aircraft oriented. Again, using the shell drawings I created an inner frame Using this frame I mocked up engine and driver areas, put in suspension attachment points and came up with a mockup frame
-
While I was working on the shell, I added a scoop to the top rear to feed the engine
-
I have been a modeler for over 60 years and I have to say I have never had so much fun than since I got a 3D resin printer last Christmas. I had always been curious as to how 3D printing would enhance modeling, but it is far and away beyond what I thought it could do. I am not a CAD expert and have never dealt with making my own drawings but by using drawings available for free on the internet and some fairly simple free software, I have been having a ball. You can't imagine the scale of the detail this printer will produce. So I have used it to make some add on details for my builds including carbs and distributors etc., but I want to produce a complete car from scratch. Other than wire, I want to print every part. I started to play with some Arial Atom type track cars, but I saw a picture of an old belly tanker Bonneville car and it got me going. This will be like a car designed and constructed in somebodies garage, just like me. Not looking to create a replica of an existing car, just my take on the subject. Hopefully it will be a fun project. To get started I searched the web for a drawing of a drop tank and thanks to the military modeling guys, who are well into 3D printing, I found a drawing of an F86 drop tank: The shape was close and I used a free program called MeshMixer to edit it, making the tank 36 inches around and 13 feet long, just like a lot of guys used in the day. I also made it into a hollow shell and cut it into four parts since my printer is too small to print the whole thing at once: So I am off on my belly tanker project