Jiml0001
-
Posts
120 -
Joined
-
Last visited
Content Type
Profiles
Forums
Events
Gallery
Everything posted by Jiml0001
-
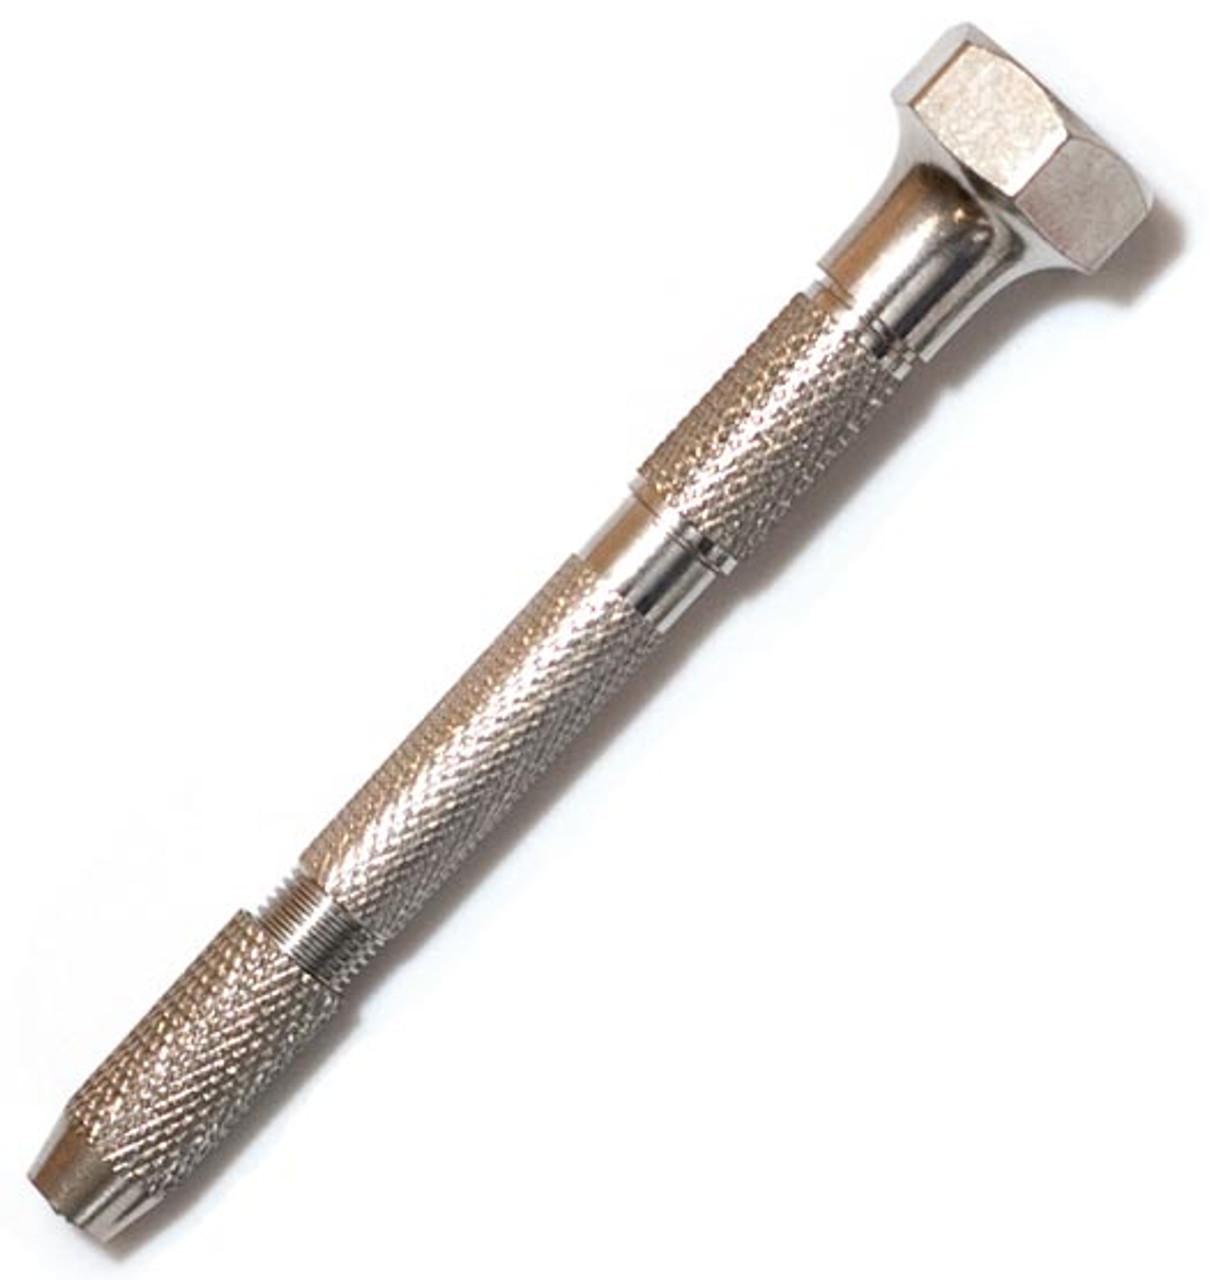
Buying a pin vise HELP
Jiml0001 replied to WizPorsche944's topic in Model Building Questions and Answers
I have been using CML Supply for drill bits for a while (cmlsupply.com). I use a lot of very small numbered bits in the 75 to 80 wire size. These are under a half mm and come in packets of six. I use twist drill bits and have much better luck with these over the cheap off shore stuff. The circuit board bits that a lot of people use are tungsten and are easily snapped in a hand vise. They work best in a press. The pin vise I love and have used for years looks like this: I have tried others but keep coming back to this one. CML Supply sells this one for $4.29.
-
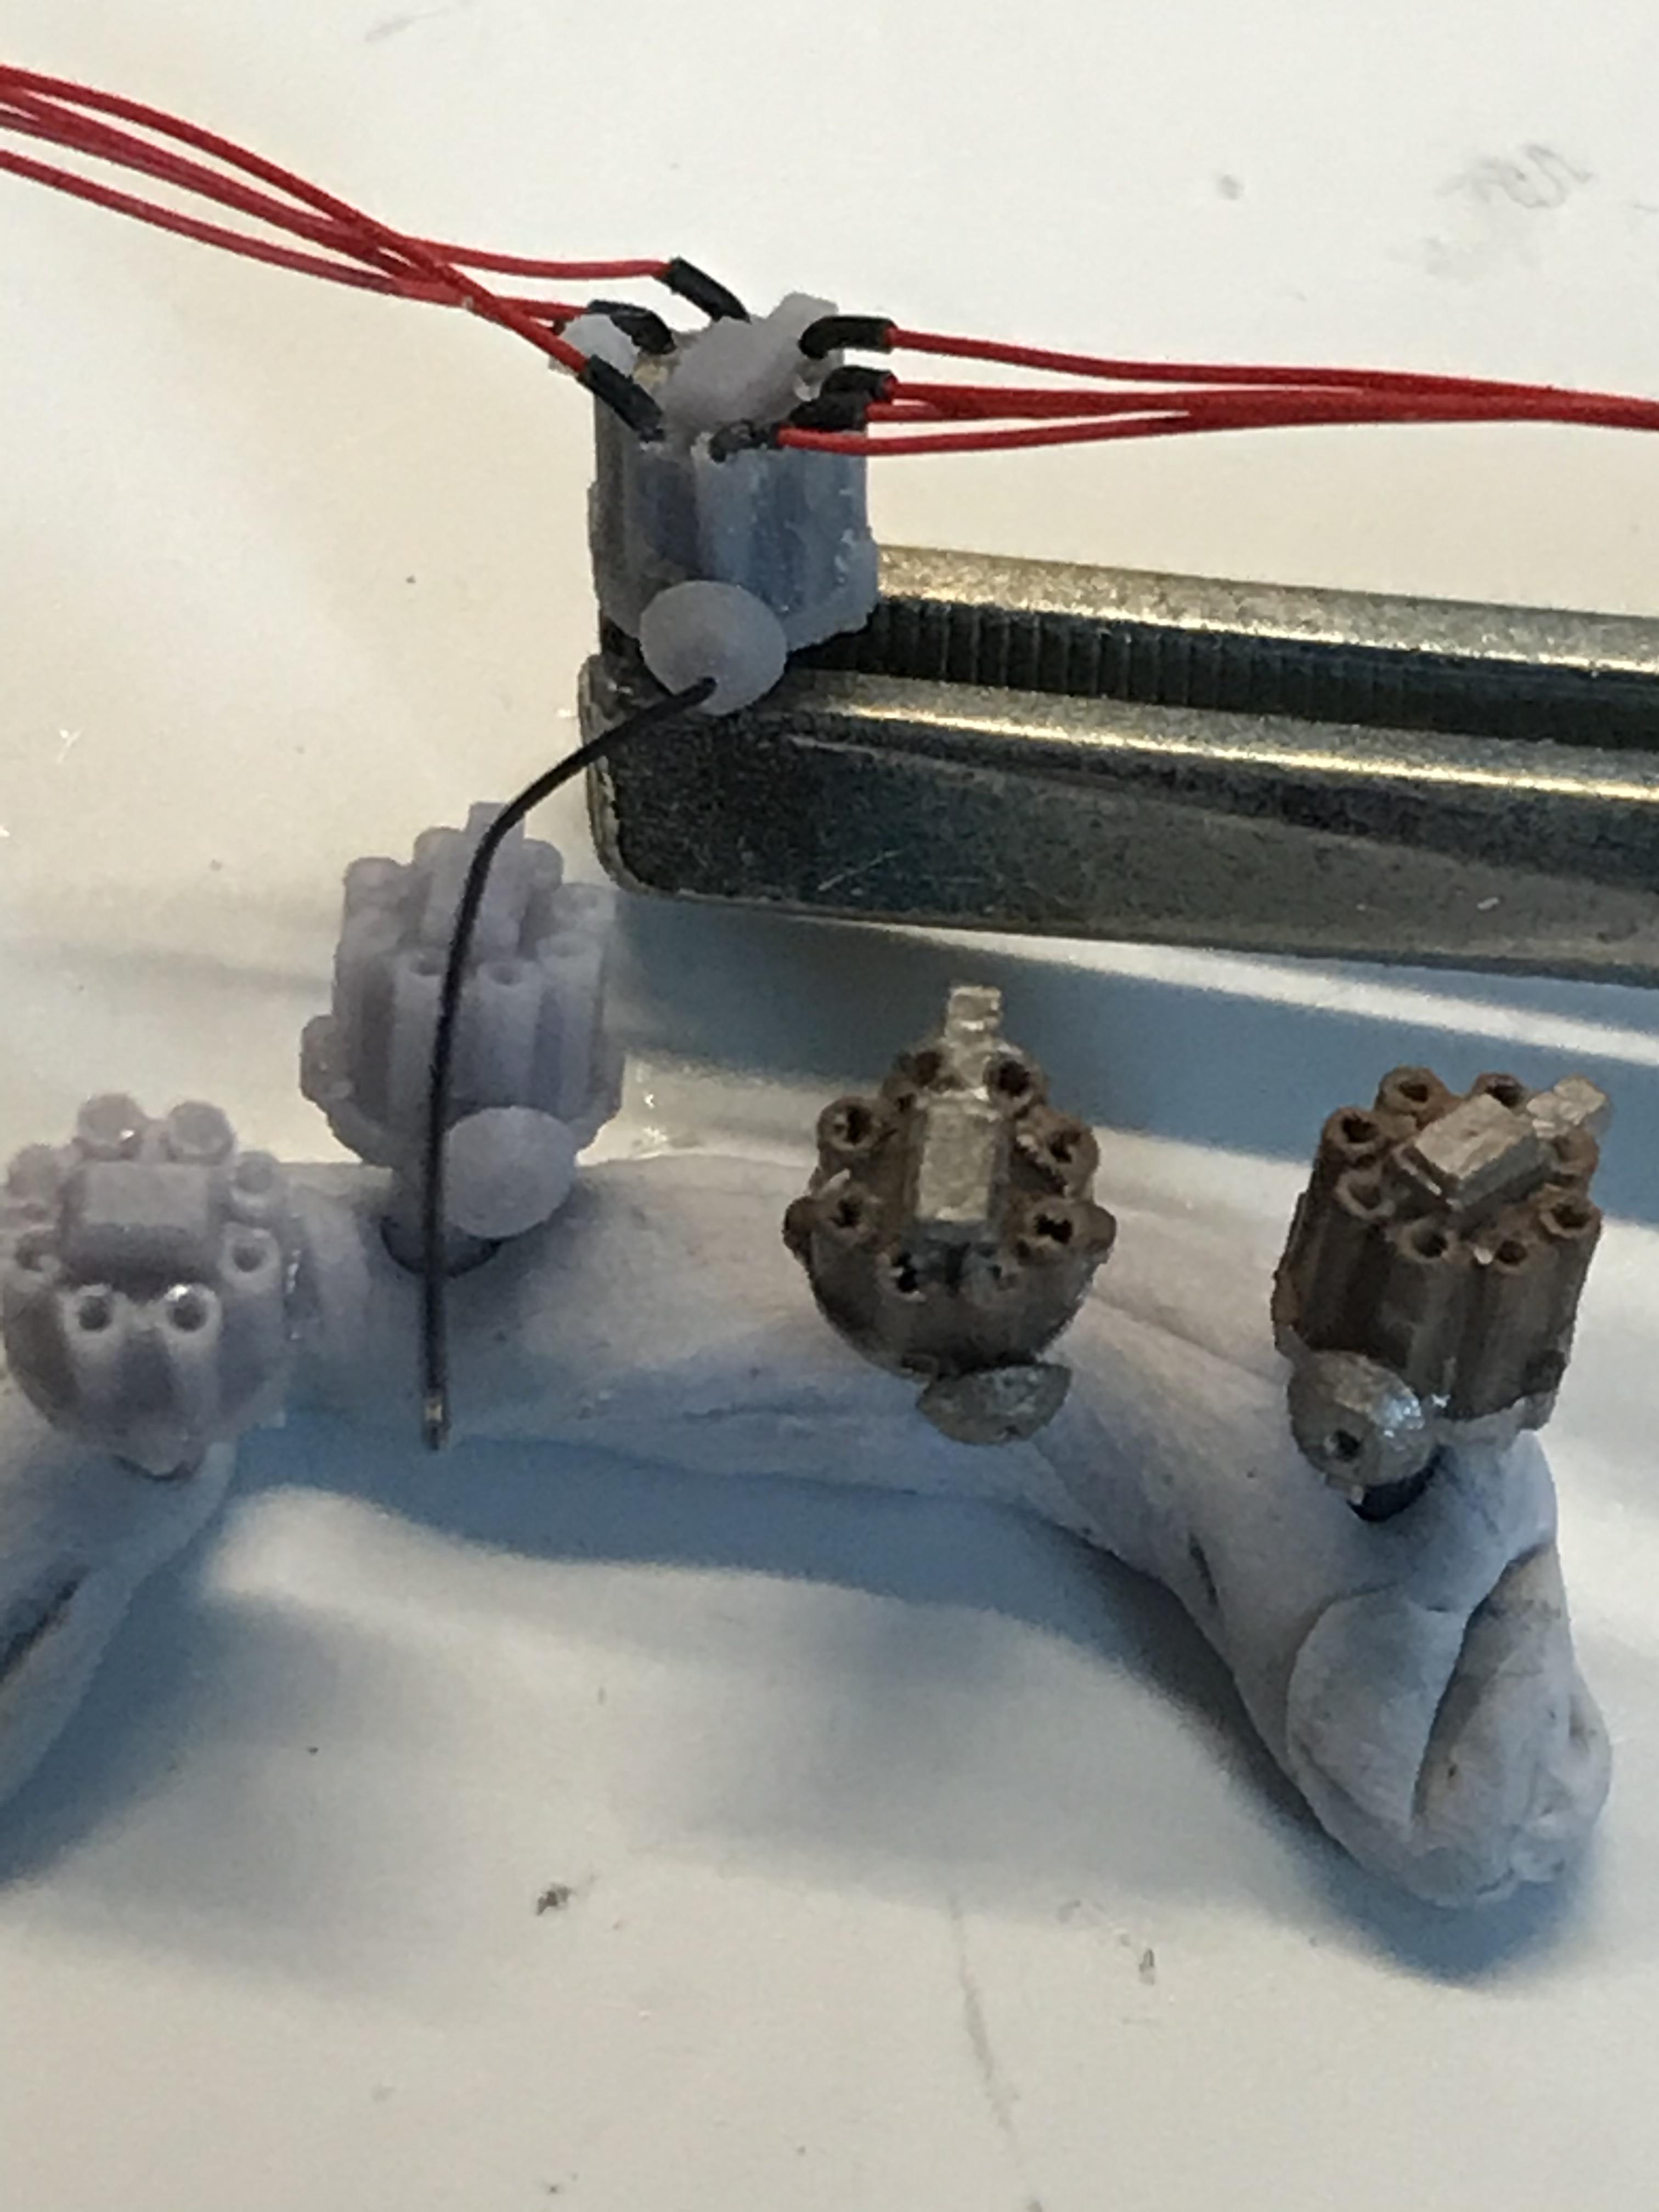
Pre-wired Top Fuel Duel Distributors
Jiml0001 replied to Katsusauce's topic in Model Building Questions and Answers
Here is one I made using my 3D printer
-
If the 3D part is sticky then it wasn’t completely cured. Put the part in strong sunlight for a couple of hours. Turn it over and do it again. The resin should harden up. If you have one of those lights that are used to harden fingernail polish then use that. A few minutes under the light should harden it up. Fully cured resin should be hard and dry like styrene. I haven’t had any paint issues on parts I cure in UV light. I mostly use Tamiya and Vallejo paint and it comes out fine.
-
On the first dvd every issue is already in its own separate pdf file. You don’t have to do anything to it. The problem comes when you try to open one of the pdf files. They are all password protected and I haven’t found any way to bypass that password the second dvd that has the issues through 2019 also has every Issue in a separate pdf file. These files are not password protected. You can copy them anywhere and open them with any app. I copied them from my pc to an iCloud Drive. Now I can use my iPad to look at them anywhere.
-
I am using the same printer as you are and I almost never use the small support size. Just too fragile. I almost always use the medium size. I use the small only for things like individual bolts, spark plugs, etc. make sure your Z axis is adjusted. I finally figured out that when adjusting the print platform you need to not only put downward pressure on the platform itself but also put some upward pressure on the lifting bracket when you tighten the screws. The piece of paper you use between the build platform and the screen should be hard to pull out without ripping when the adjustment screws are tight.
-
Fantastic idea! They look great. Thanks.
-
What do you use for spark plug wiring?
Jiml0001 replied to customline's topic in Model Building Questions and Answers
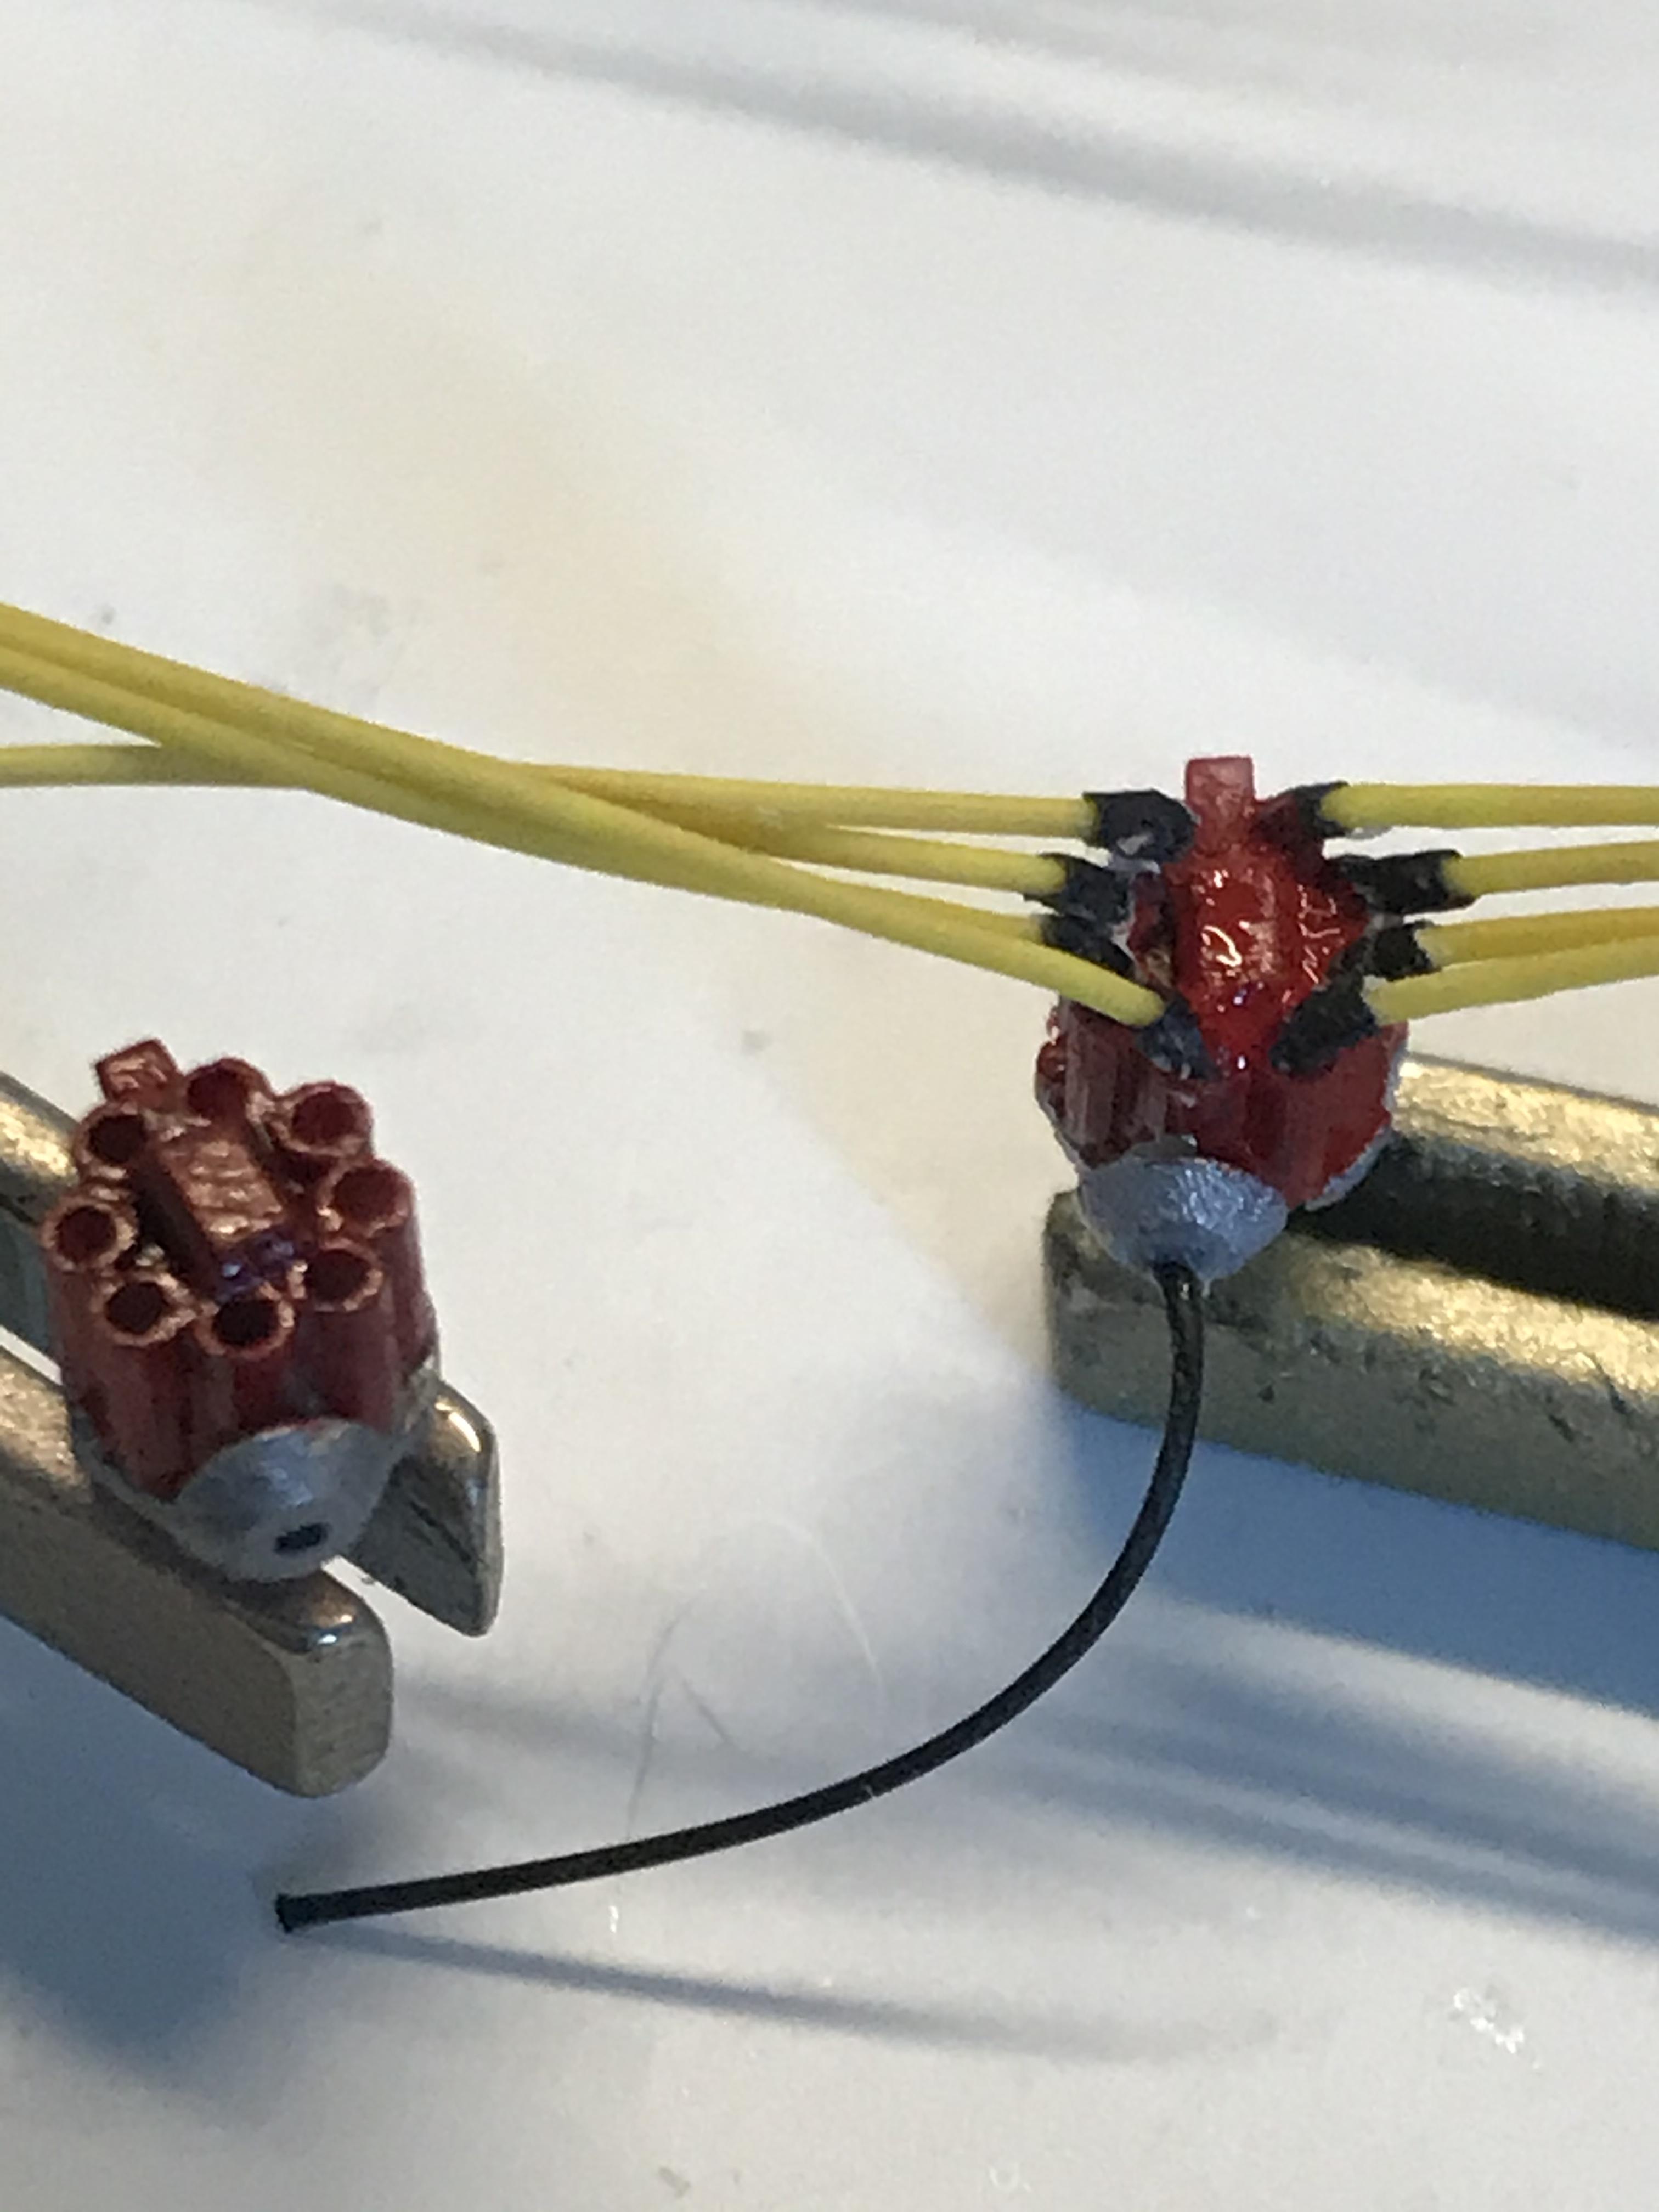
There is a material that I have had great fun with. I found some heat shrink tubing that was less than one millimeter in diameter and I found that if you stretch it as you heat it you can make unbelievably small tubing. That is what I use for plug boots. Heat shrink tubing shrinks at about 150 degrees so a hair dryer is usually enough. Using open flame will melt it. Also styrene softens at about 250 degrees so you can shrink the tubing around styrene with no worry. Radiator and heater hoses come to mind. 1/32" ID Black Heat Shrink Tube 2:1 ratio wrap (6x9" = 4 ft) inch/feet/to 0.8mm if you are looking at heat shrink tubing make sure it does not say “adhesive”
-
3D printers - is it worth it?
Jiml0001 replied to customline's topic in Model Building Questions and Answers
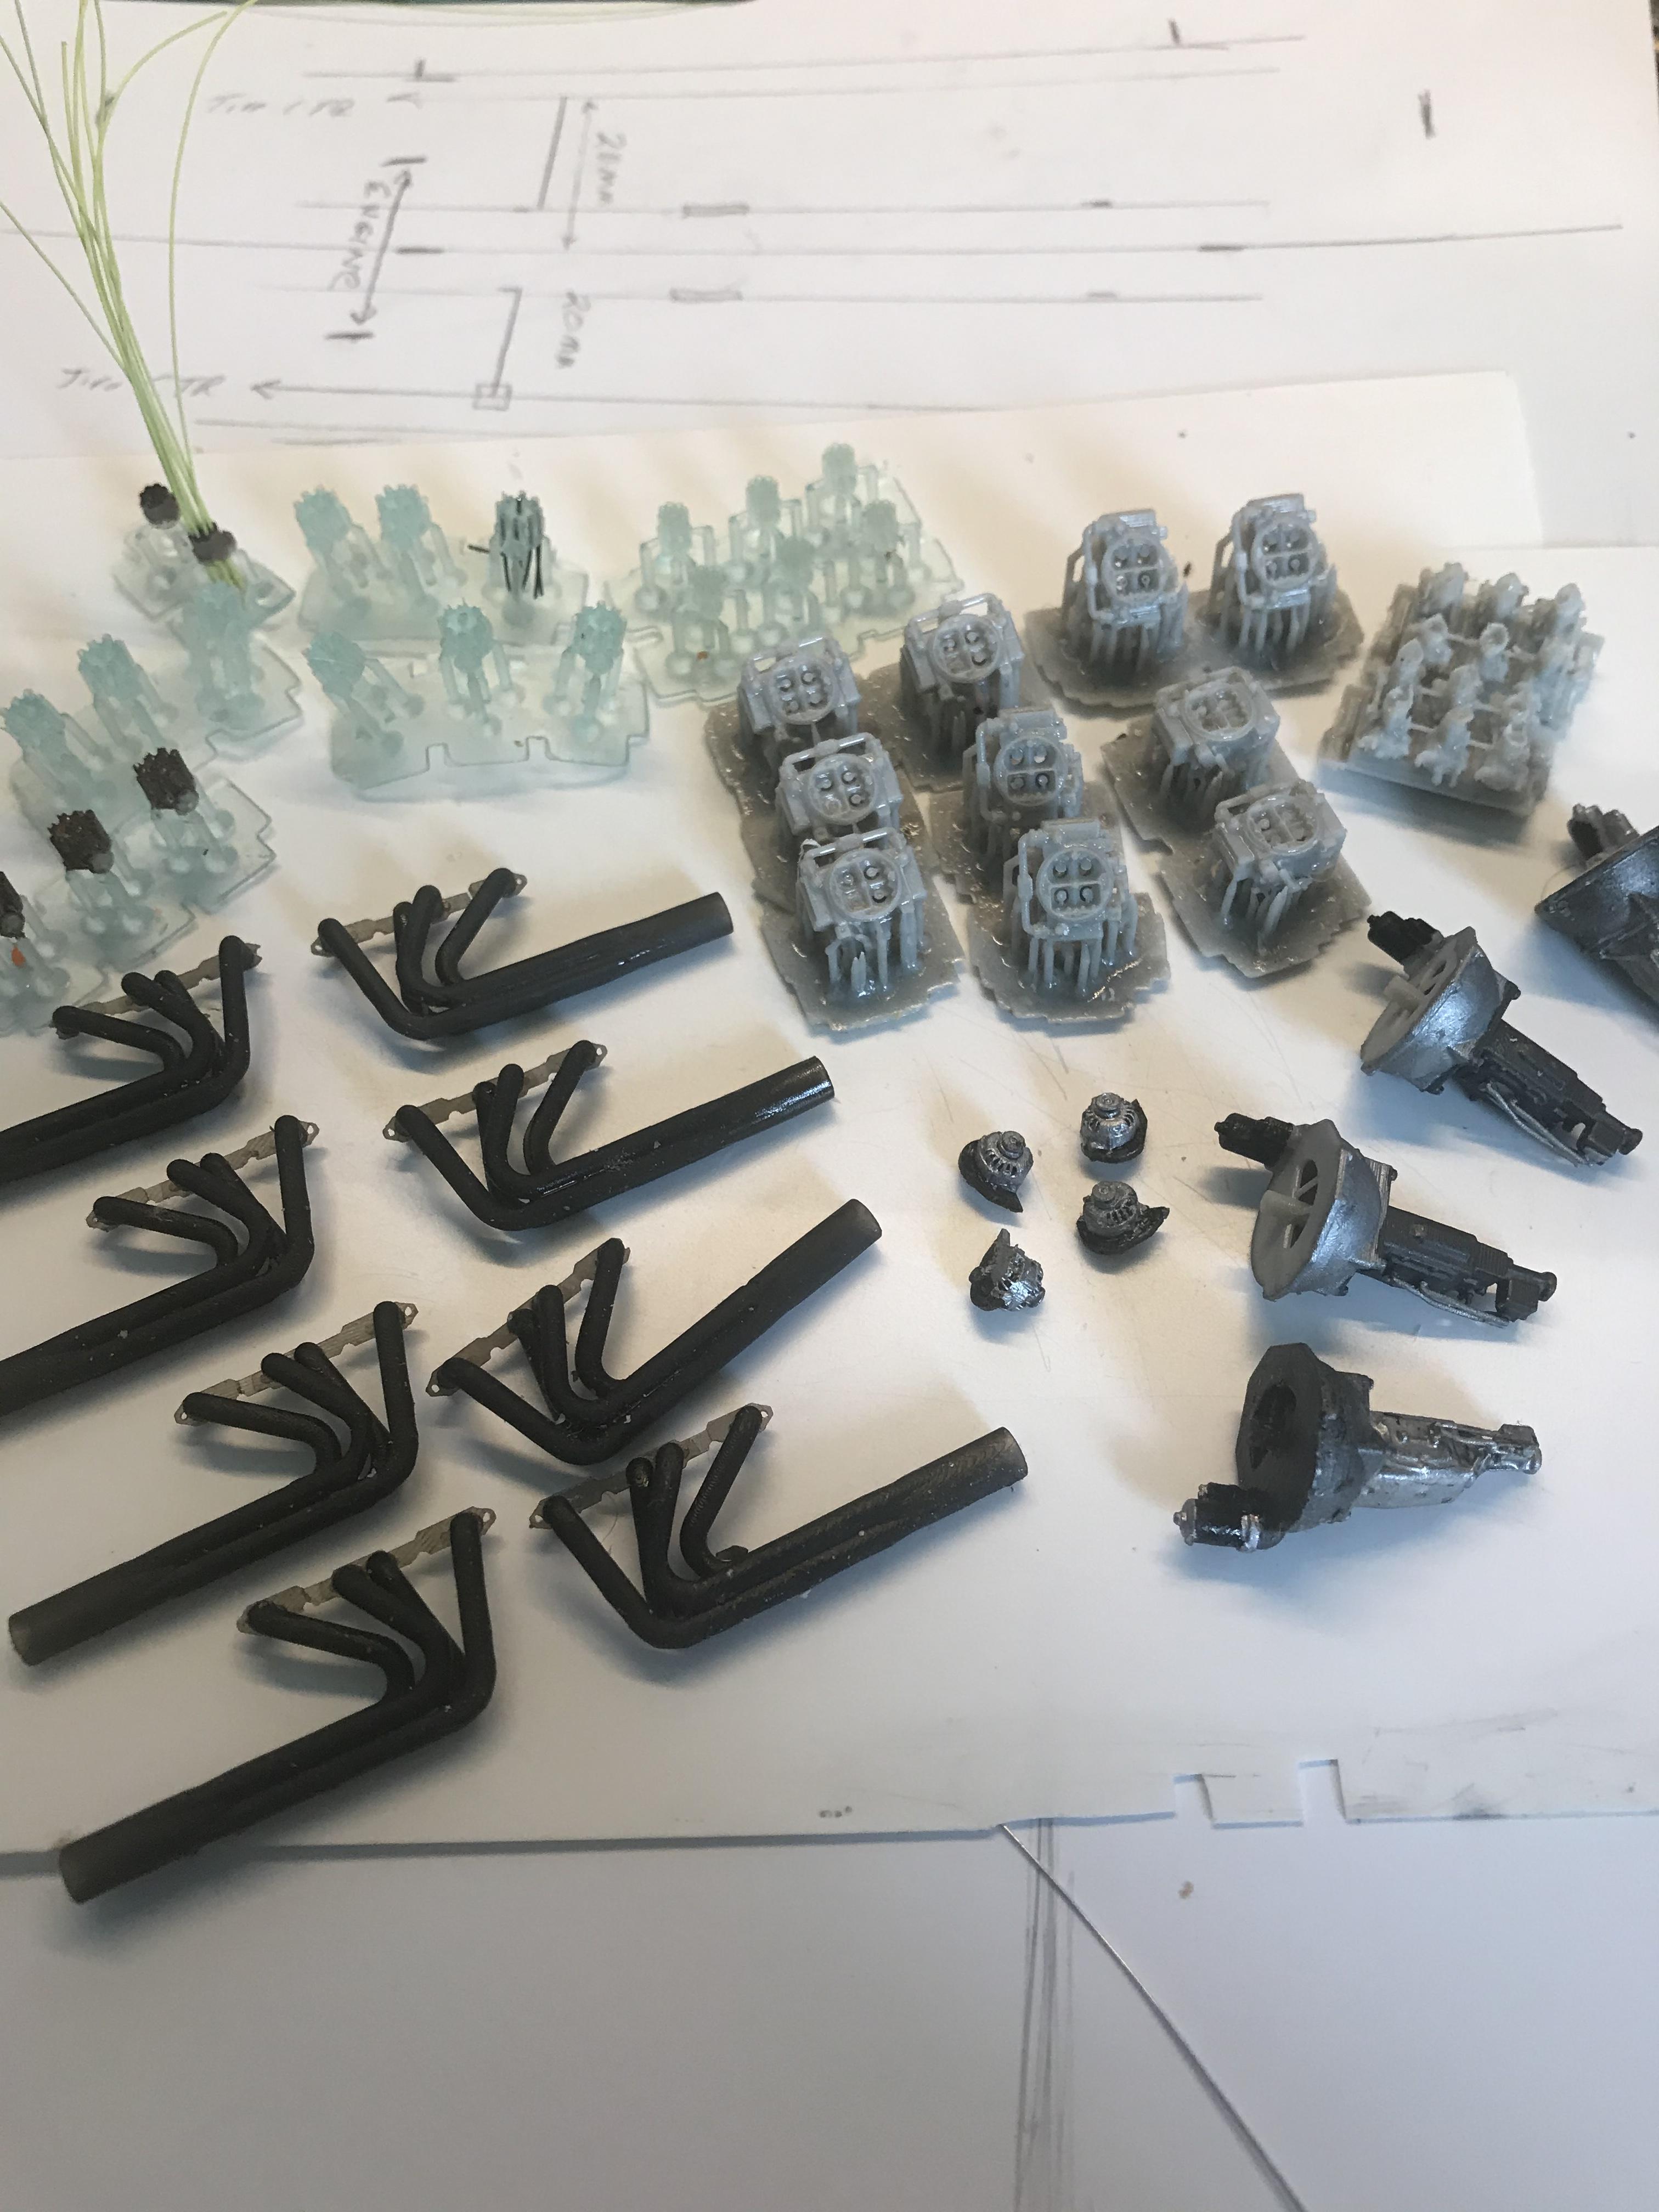
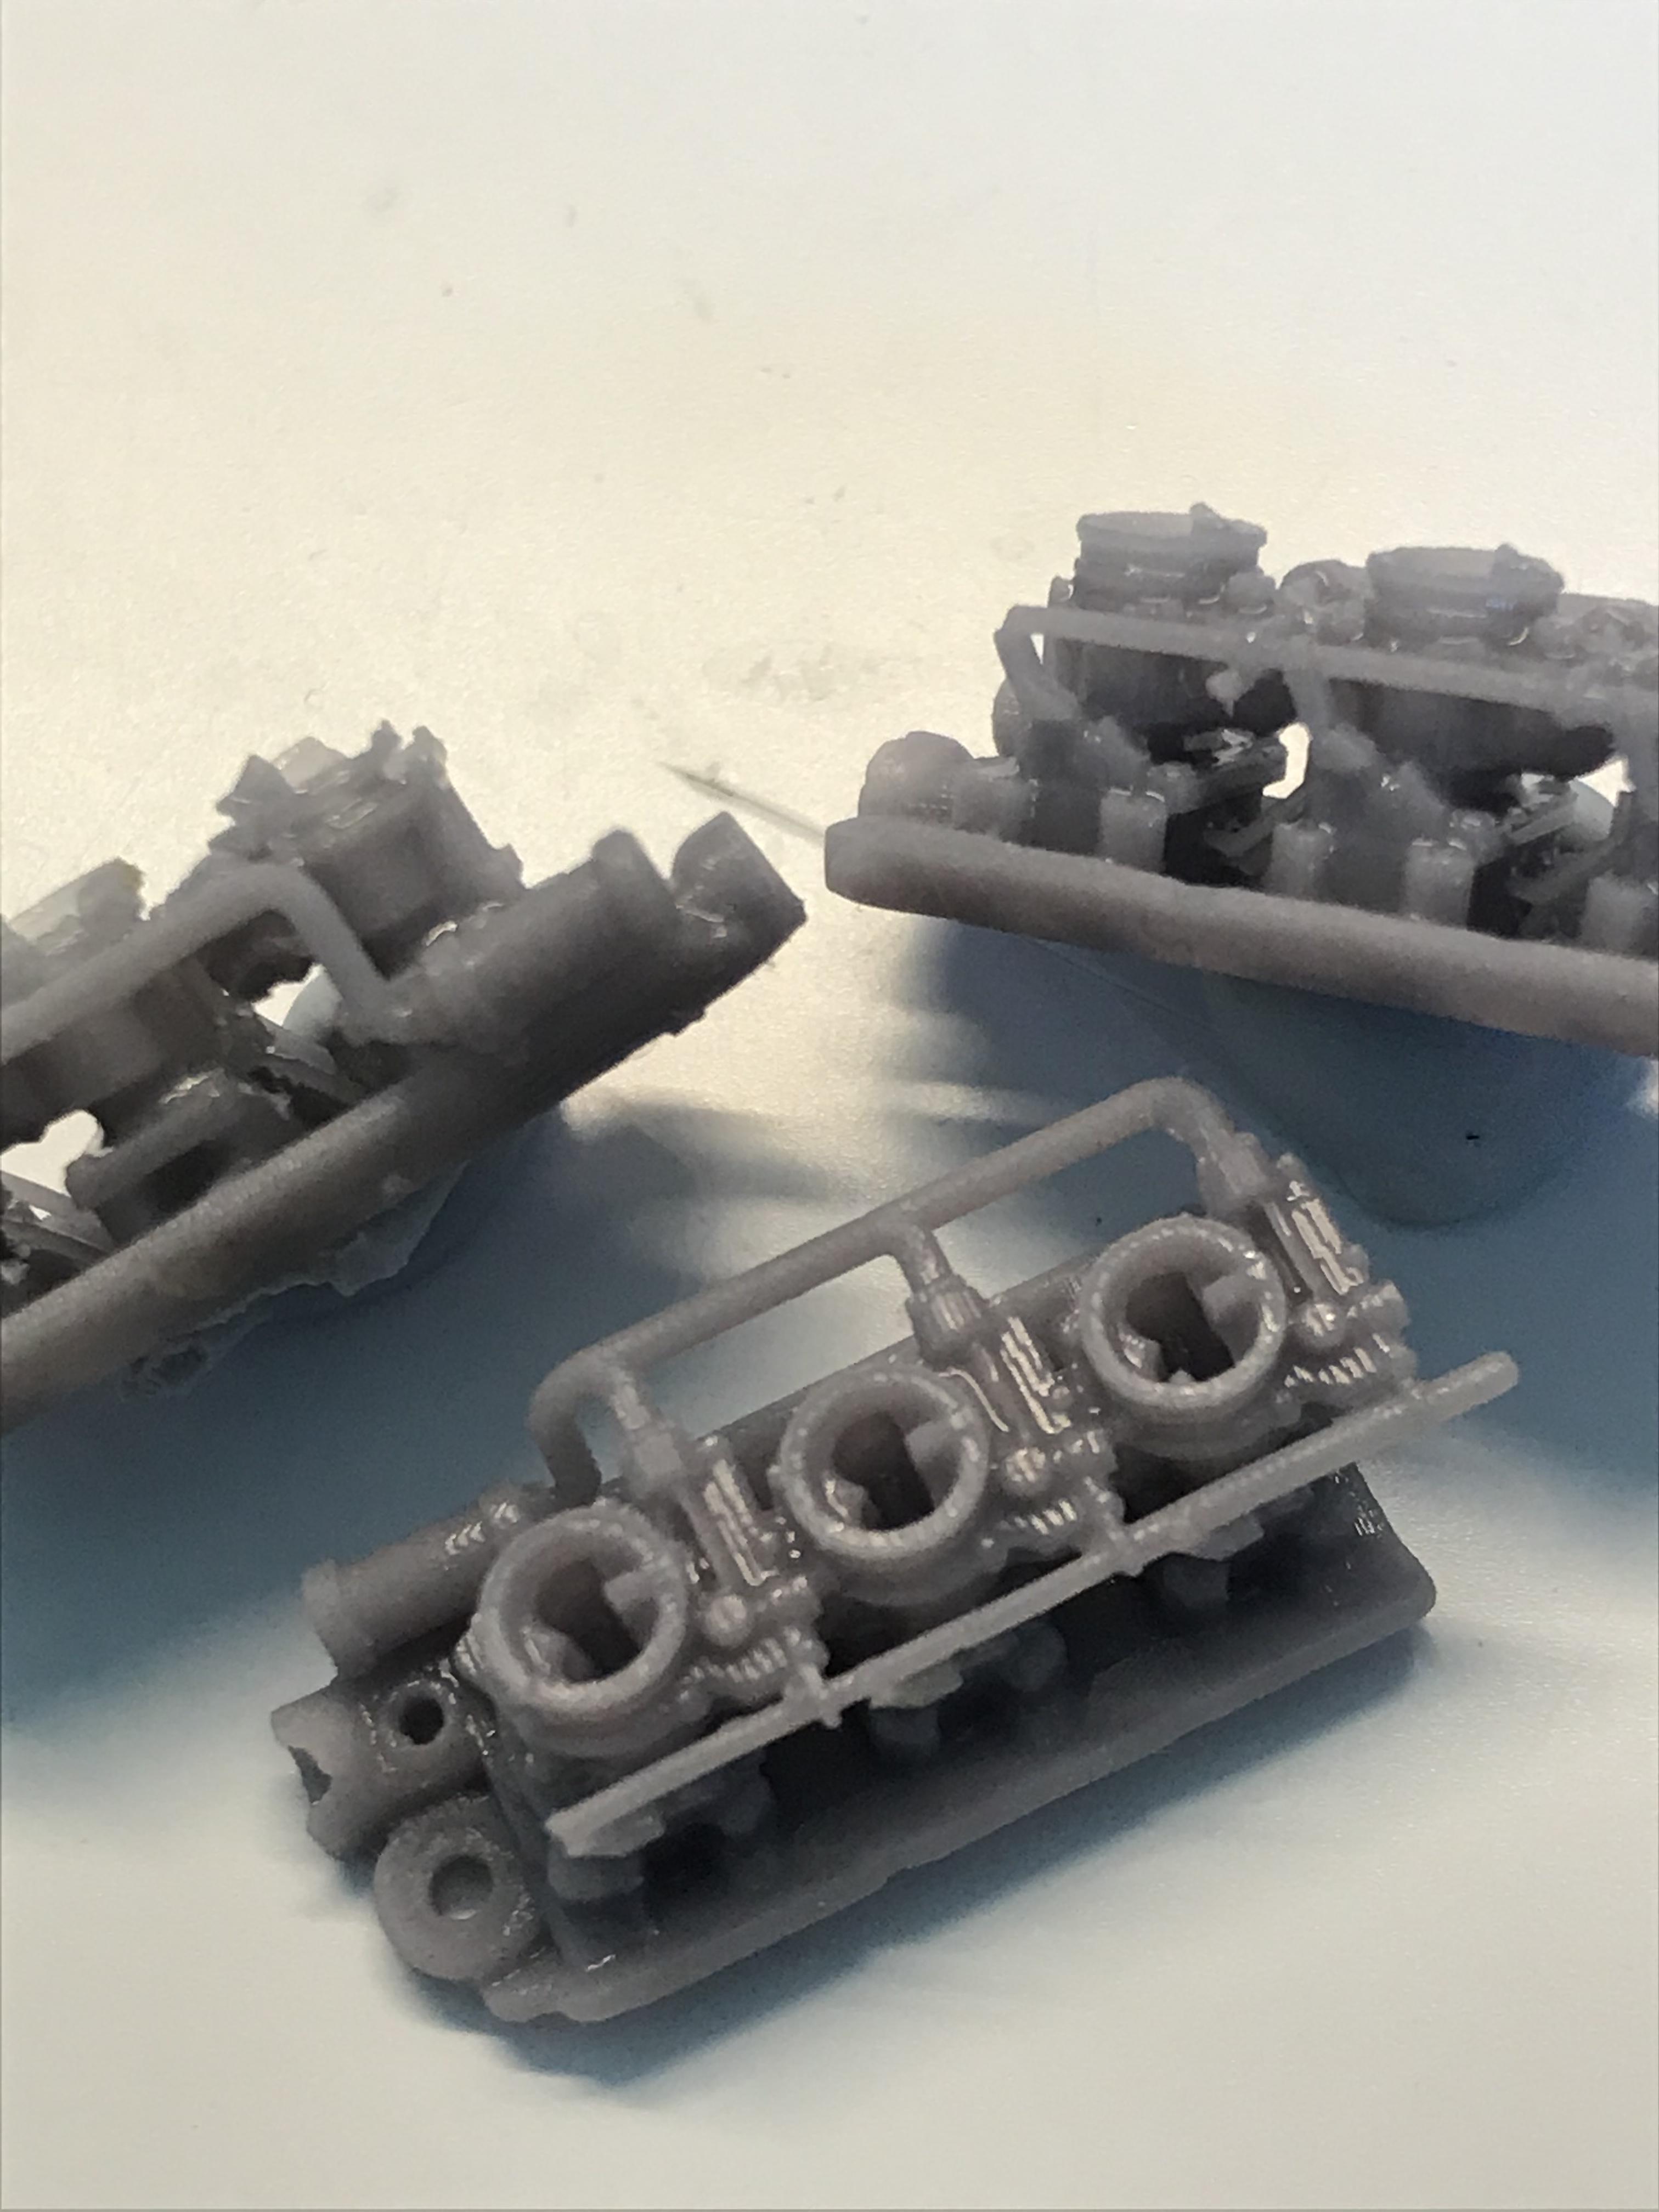
Water based resin is available from just about every resin manufacturer. I like the Eligoo brand and I think they call it water washable. Two great things about it. There is virtually no smell and you rinse your prints with water instead of alcohol. Big savings there. At first I was rinsing them in the sink and that was great but we are on a septic tank and I was concerned about putting uncurled resin in it. I find just agitating the prints in plain water works great. I leave the used rinse water in the sun and the resin sediment drops to the bottom and hardens and I can throw away the leftover sediment. I bought a cleaner but the sediment would drop to the bottom of the tank and harden around the agitator so I was constantly taking it apart to clean out the gunk to free the agitator. It was more trouble than it was worth. I haven’t done much with bodies but I have printed a tbucket body and frame that came out great. I really love trying to get details like perfectly scaled distributors or alternators where you can see inside the open vents. I have printed radiators where you can see through every fin and tube. I have a lot of fun seeing just how detailed I can make something. Carbs with linkages and eight cylinder distributors that measure out to three and a half scale inches are a lot of fun. -
3D printers - is it worth it?
Jiml0001 replied to customline's topic in Model Building Questions and Answers
Too bad. I have been resin printing for almost two years and never had so much fun. The printer I use is a Phrozon mini and I think those go for around $125.00 right now. I use water based resin so no special needs there. To cure the stuff I make I use an ultraviolet curing lamp that manicurists use and that was $15,00 on Amazon. To wash parts I use Tupperware containers and put the parts in them with water and shake them a couple of minutes. As far as software goes I use a program called Chitubox that came with the printer to slice and prepare files to be printed. I am not a CAD drawing guy but there are so many files out there for free or at most a couple of bucks. I do use a free software called Meshmixer that lets you make changes to existing files and even make new stuff. That software does have a learning curve but it is pretty easy to learn. So my investment to get started was less than $200.00 and I have had a ball. As far as detail is concerned I printed a front axle leaf spring where even the spring shackles were separate. Tiny nuts, bolts, spark plugs come out amazing.
-
What do you use for spark plug wiring?
Jiml0001 replied to customline's topic in Model Building Questions and Answers
Detail Master sells two sizes of ignition wire. They have .012 inch and .016 inch. A two foot piece is $4.99. The ad I showed you above has wire in .011 , .012, .014, .020, .023, and .027 inch. There is wire even smaller than Detail Master and they offer Black, white, green ,red ,gray, blue, yellow, purple and orange. This stuff is 3 cents PER FOOT! Detail Master gets $4.99 for two feet and the offer above gets $4.68 for 168 feet. Take one 50 meter roll for $4.68, cut it into two foot pieces and sell each piece for $4.99. Your profit from your $4.68 investment will be $400.00 That’s where detail companies get their wire I mean we are talking three cents a foot! I’d be more than willing to sell two foot pieces for $4.99 all day I’d even have a promotion, buy one get ten for free! Also if buying 50 meters for $4.68 is too much, they have 5 meter pieces for $1.25 (That is 16 feet of wire for $1.25) -
What do you use for spark plug wiring?
Jiml0001 replied to customline's topic in Model Building Questions and Answers
The holes in the detail master looms I have are .5 mm. The smallest wires in either hdmi or Cat5 cables are .62 mm. The two wire sizes I describe above both fit the looms. The .28 mm wire is a scale 1/4 inch in 1/24. The .38 mm wire is a scale 3/8 inch in 1/24. I have searched a lot and never found wrapping wire smaller than .6 mm. I have bought hundreds of feet of it and never found any wrapping wire that is right. If anyone can use .6 mm or .65 mm wire in any color let me know and I will send you a bunch -
What do you use for spark plug wiring?
Jiml0001 replied to customline's topic in Model Building Questions and Answers
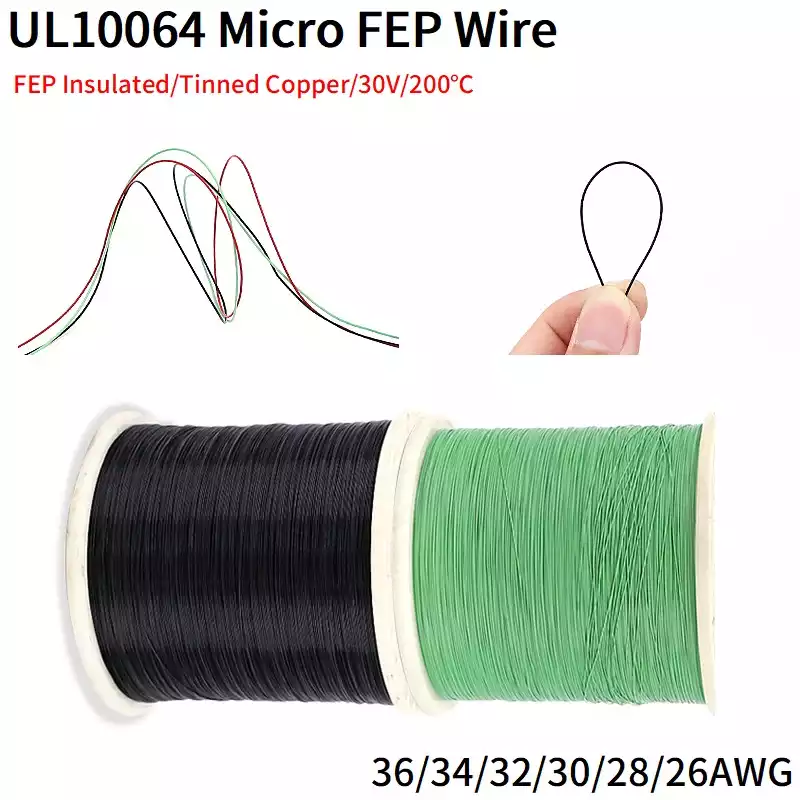
I have been on a quest to find correctly sized wire for 1/24 1/25 uses. I always look for metric sizes since one millimeter equals one inch in 1/24 scale. So I have searched for 1/4 mm for regular ignition cables and 3/8 mm for hi voltage wires. I find you can’t look for a particular AWG rating since AWG measures the size of the copper wire inside and not the outside diameter of the wire with insulation and the type of insulation makes a huge difference. Another thing is that a lot of tiny wires use Teflon insulation that is not opaque or does paint stick to it. The best source I have found is on AliExpress. This wire comes in correct sizes and a variety of colors. The 36 AWG has an outside diameter of .28 mm and the 32 AWG has a .38 mm outside diameter. It has plastic insulation that comes in many colors and other sizes. There is a size chart on the site. 50 meter rolls ( over 150 feet ) are less than five dollars. Search for this on AliExpress
-
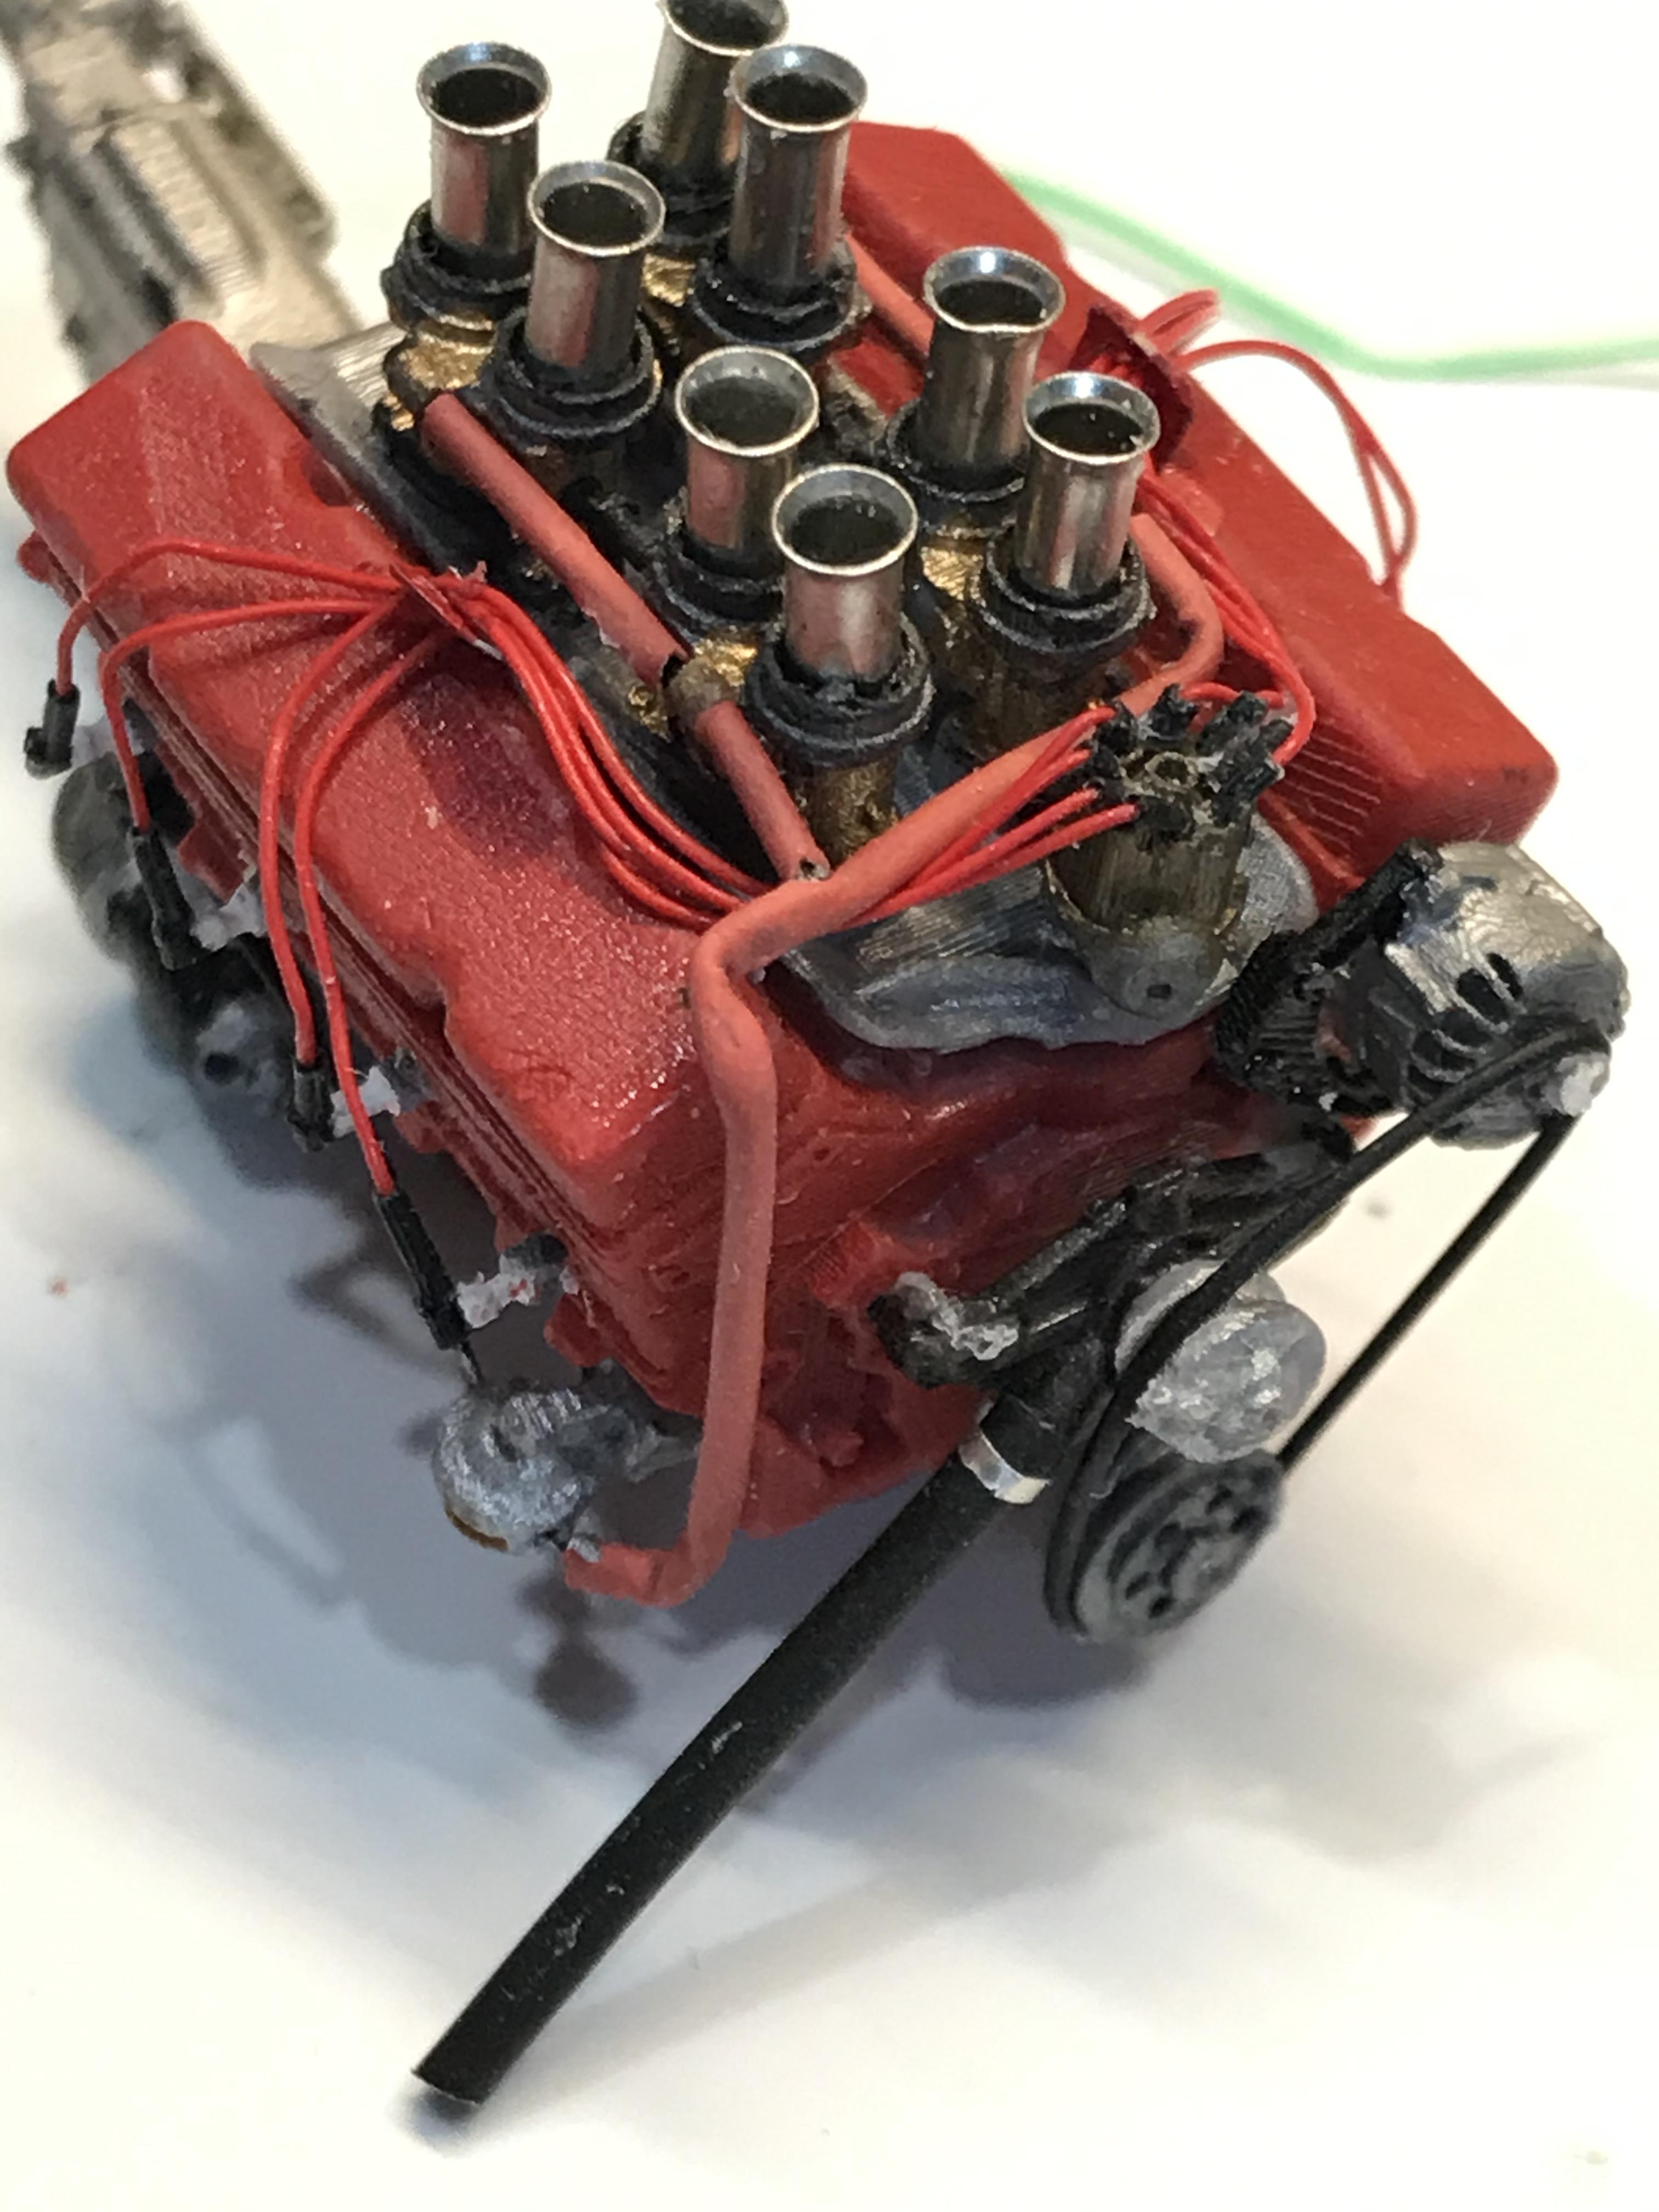
Hilborn Injection for SOHC Ford
Jiml0001 replied to TransAmMike's topic in Model Building Questions and Answers
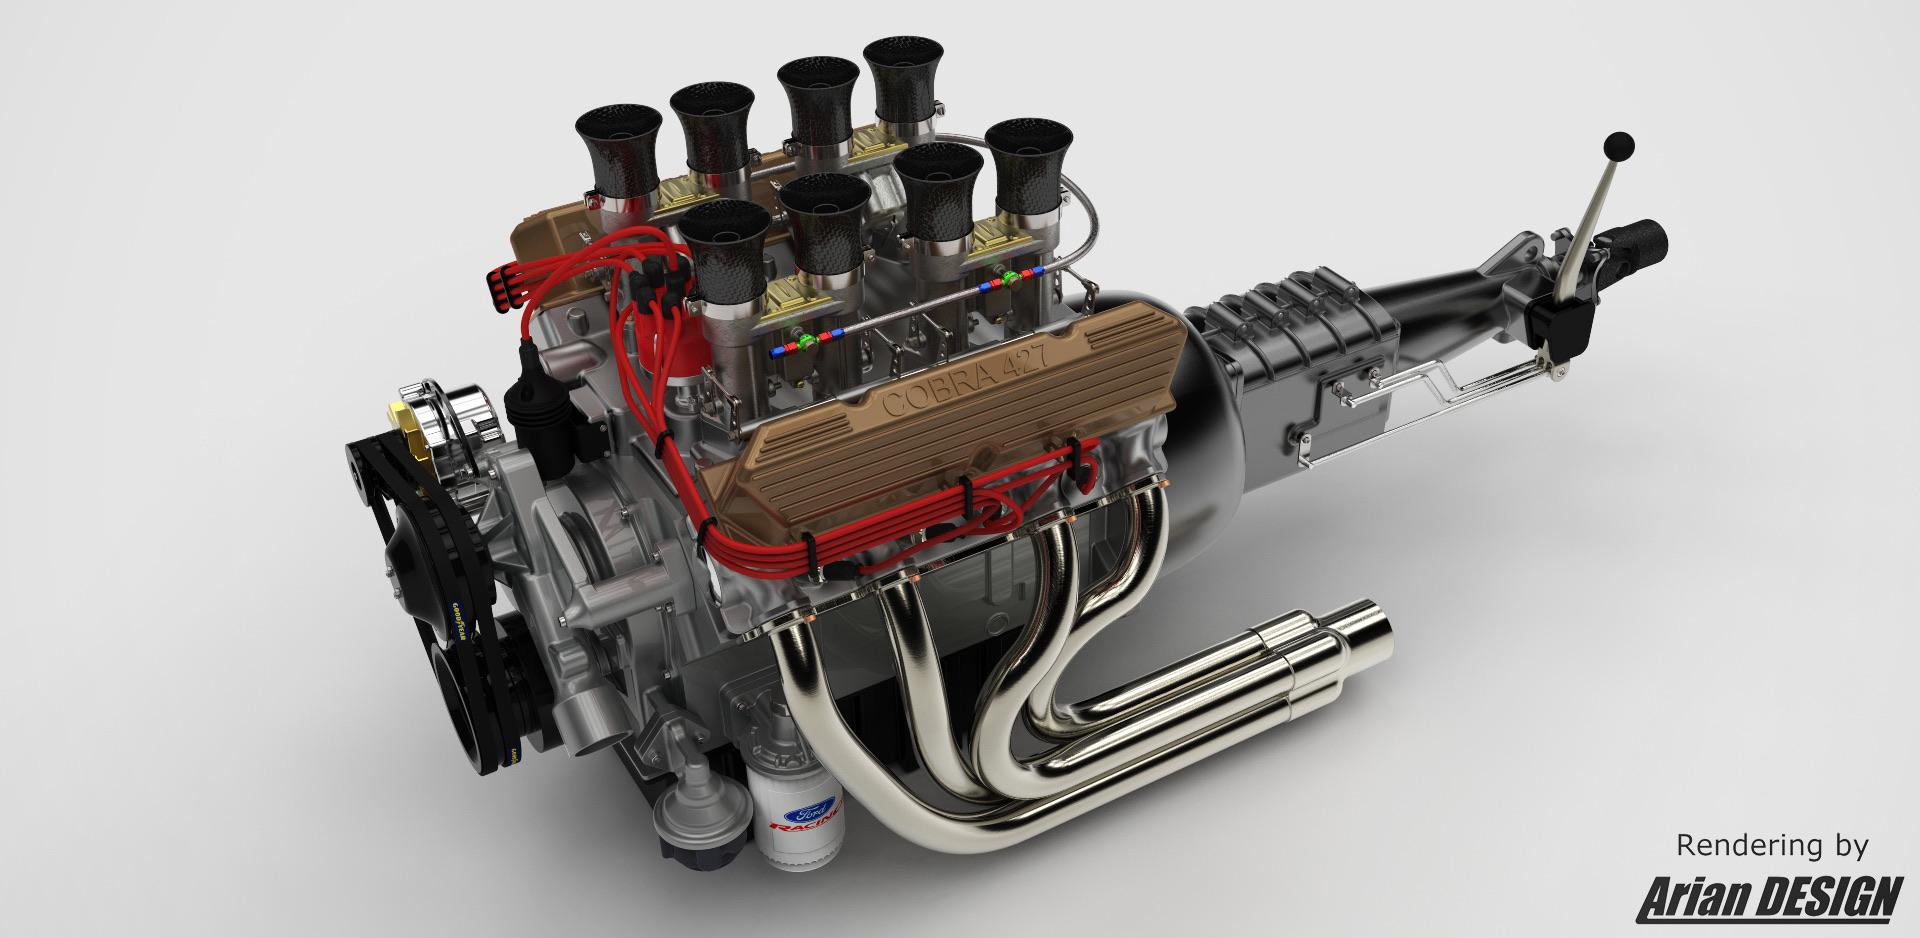
I’m not sure exactly which engine that one came from. I do however have a 427 Cobra drawing and have been working on the intake from that one. I will have to send a picture of that one when I get home. Here is a picture of the entire engine it came from
-
Hilborn Injection for SOHC Ford
Jiml0001 replied to TransAmMike's topic in Model Building Questions and Answers
Here is an intake I use. Be glad to send one to anyone who wants one
-
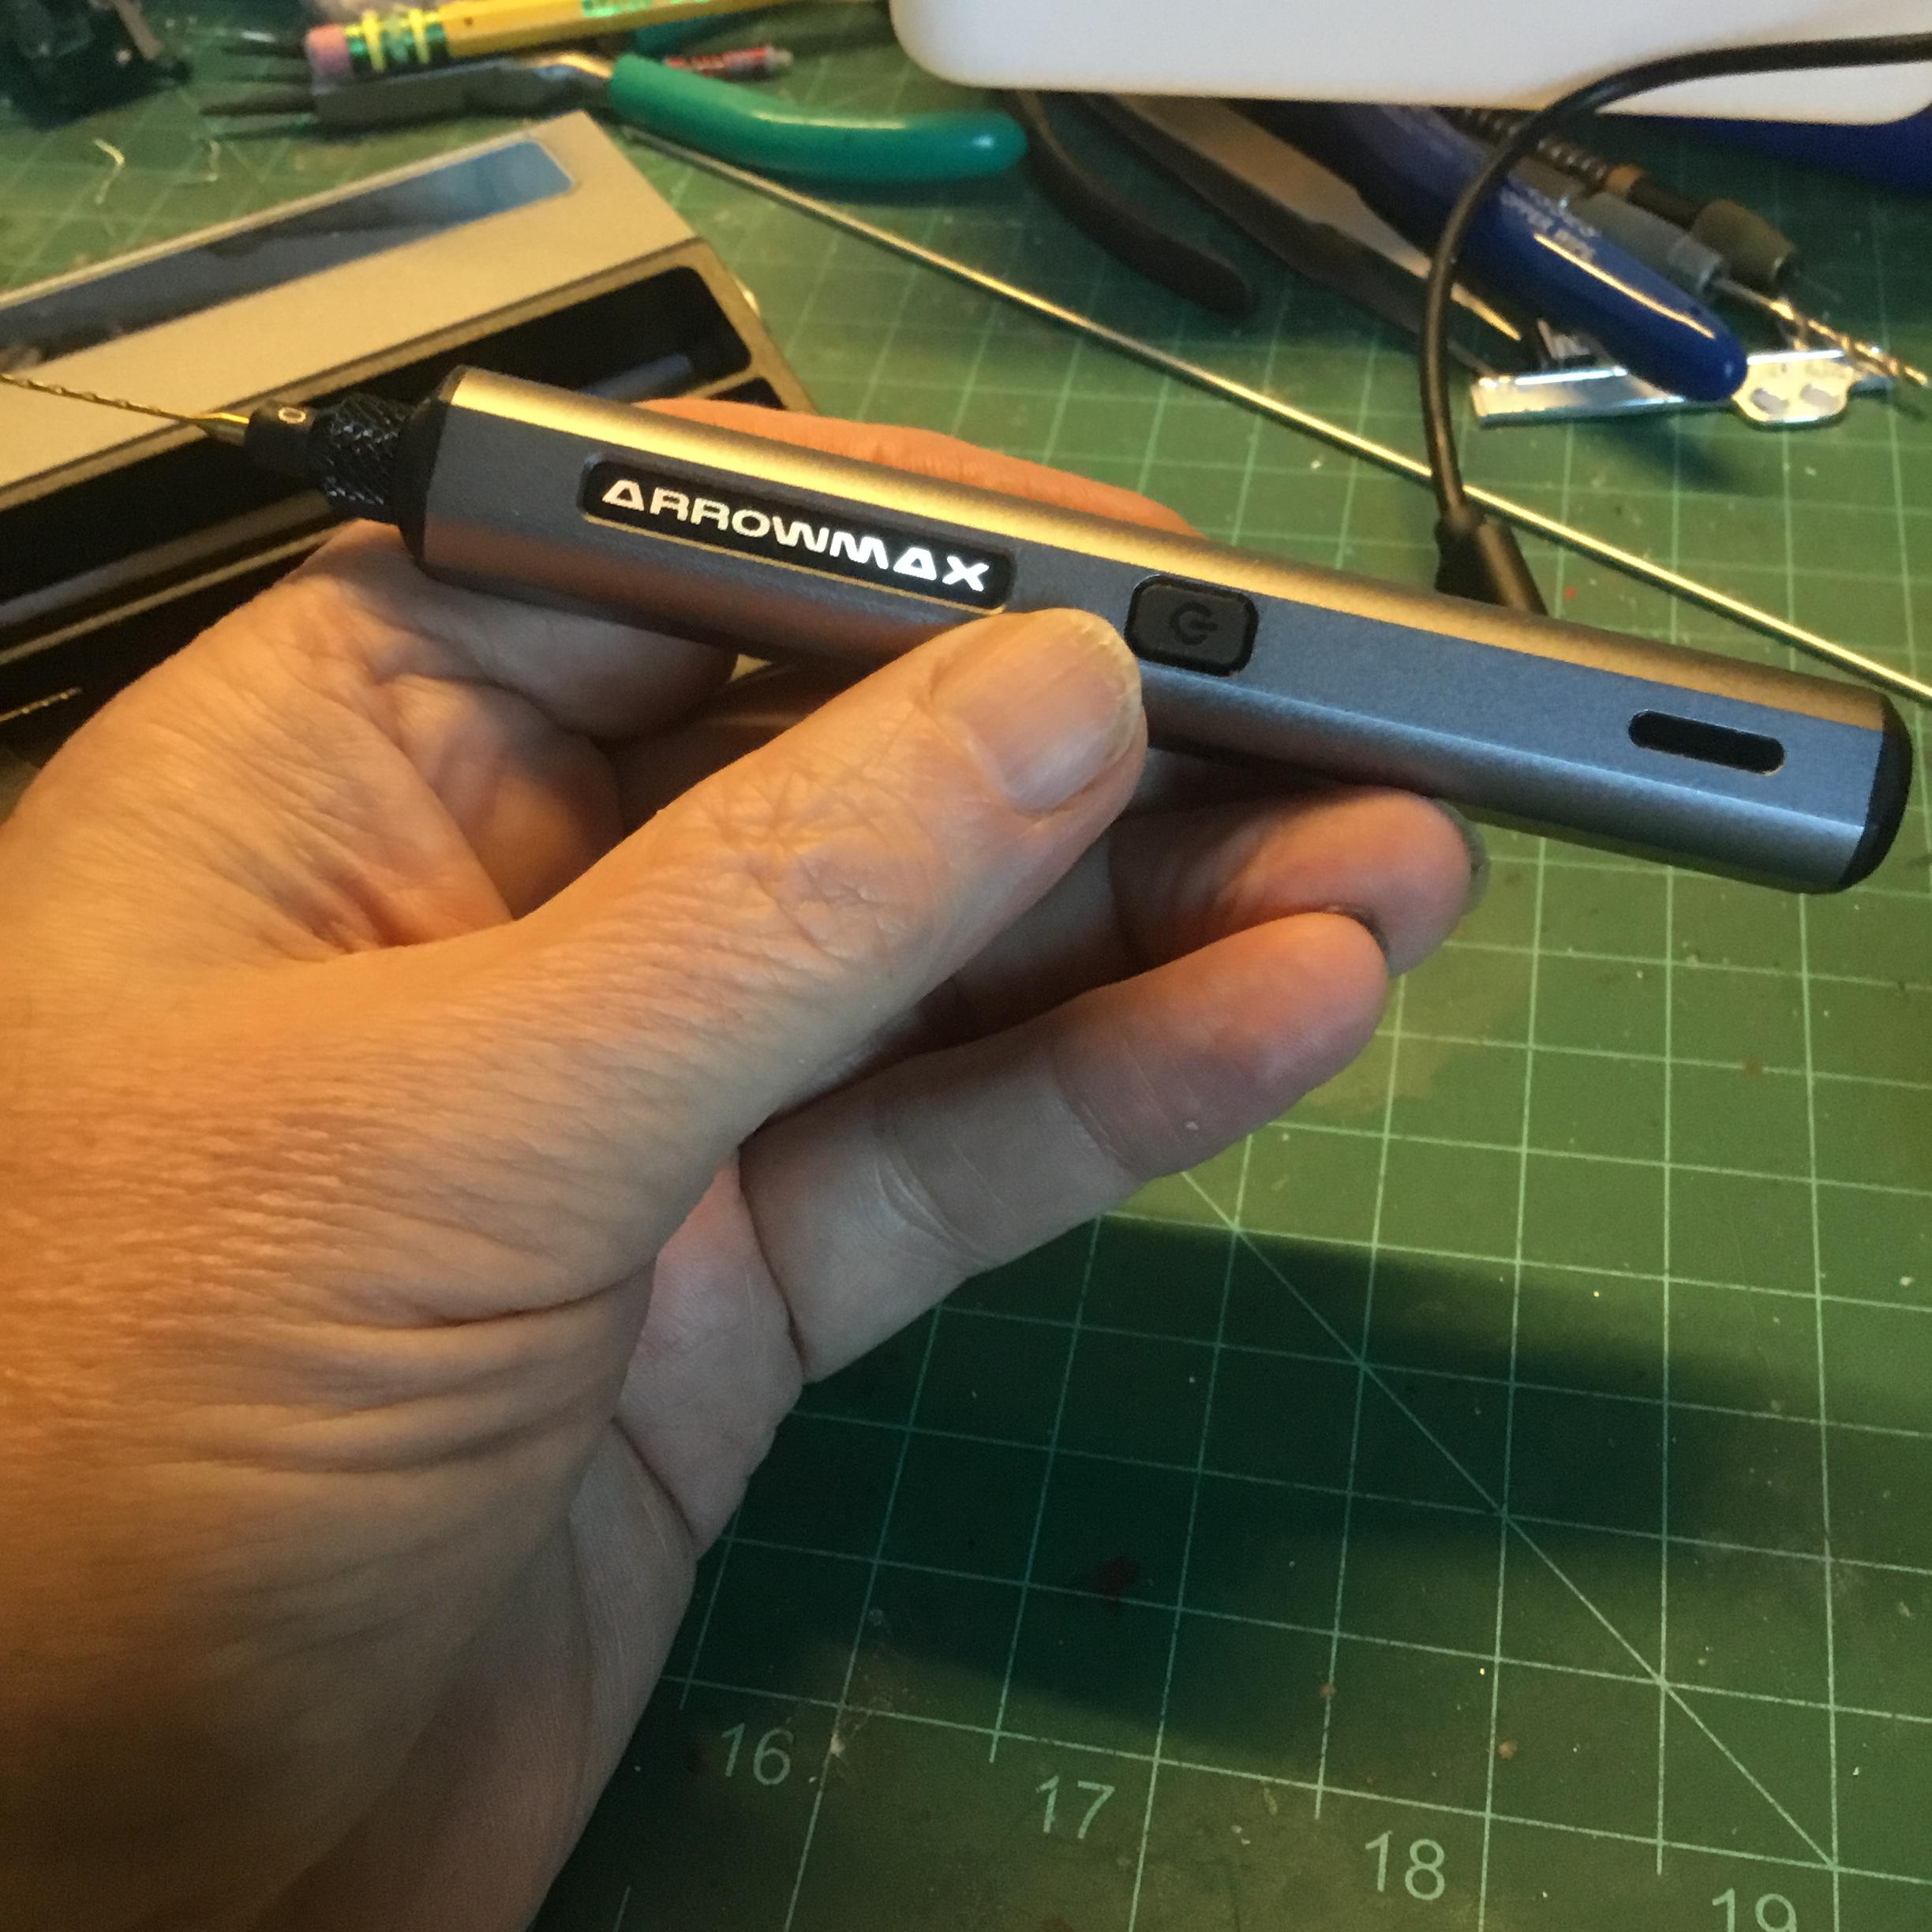
Looking for cordless hobby drills
Jiml0001 replied to JerseeJerry55's topic in Model Building Questions and Answers
I just posted two topics in the Tips and Tricks forum about a drill I have been using. It runs at 550 rpm and is very small. I also posted about some drill bits I picked up. Take a look over there. -
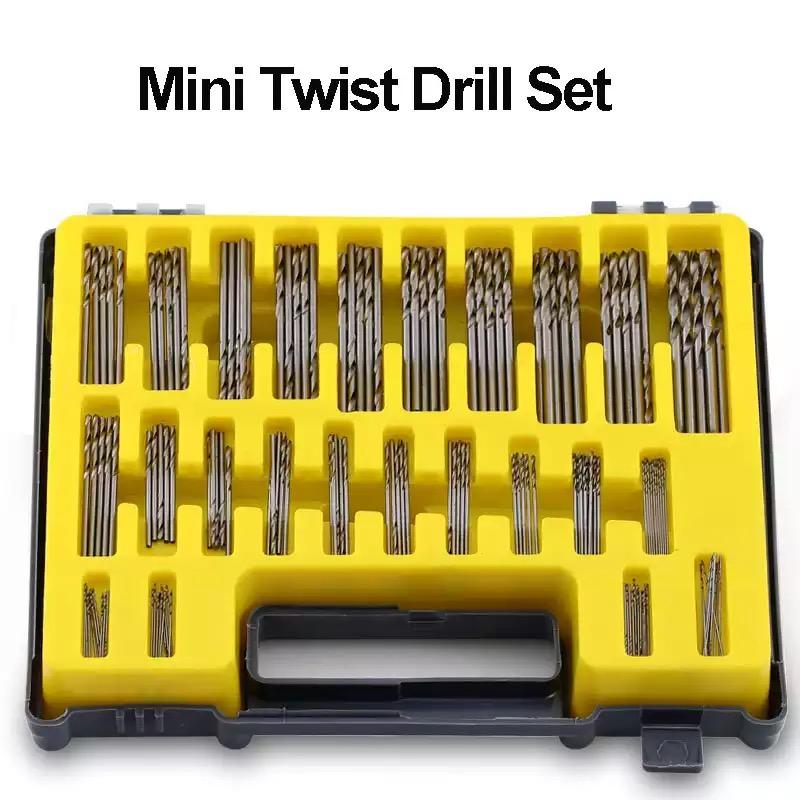
About a year ago I got an assortment of drill bits from Amazon. I’m sure they are are not the hardest out there but since all I drill is plastic and occasional brass and aluminum I have been very happy with their performance. The assortment was $16.00 and has 150 bits. They start at .4 mm and go up to 3.2 mm in one tenth increments. I didn’t count them but there is about ten each for the smallest ones and less as they get bigger. I also get individual sized bits in tubes of ten for less than $3.00. https://www.amazon.com/Awakingdemi-150-piece-Twist-Precision-0-4-3-2mm/dp/B01NBLGT0F
-
Yes it is battery operated. It uses a USB C charging connector that is not included in the cheapest model but I already had that from another device charger.
-
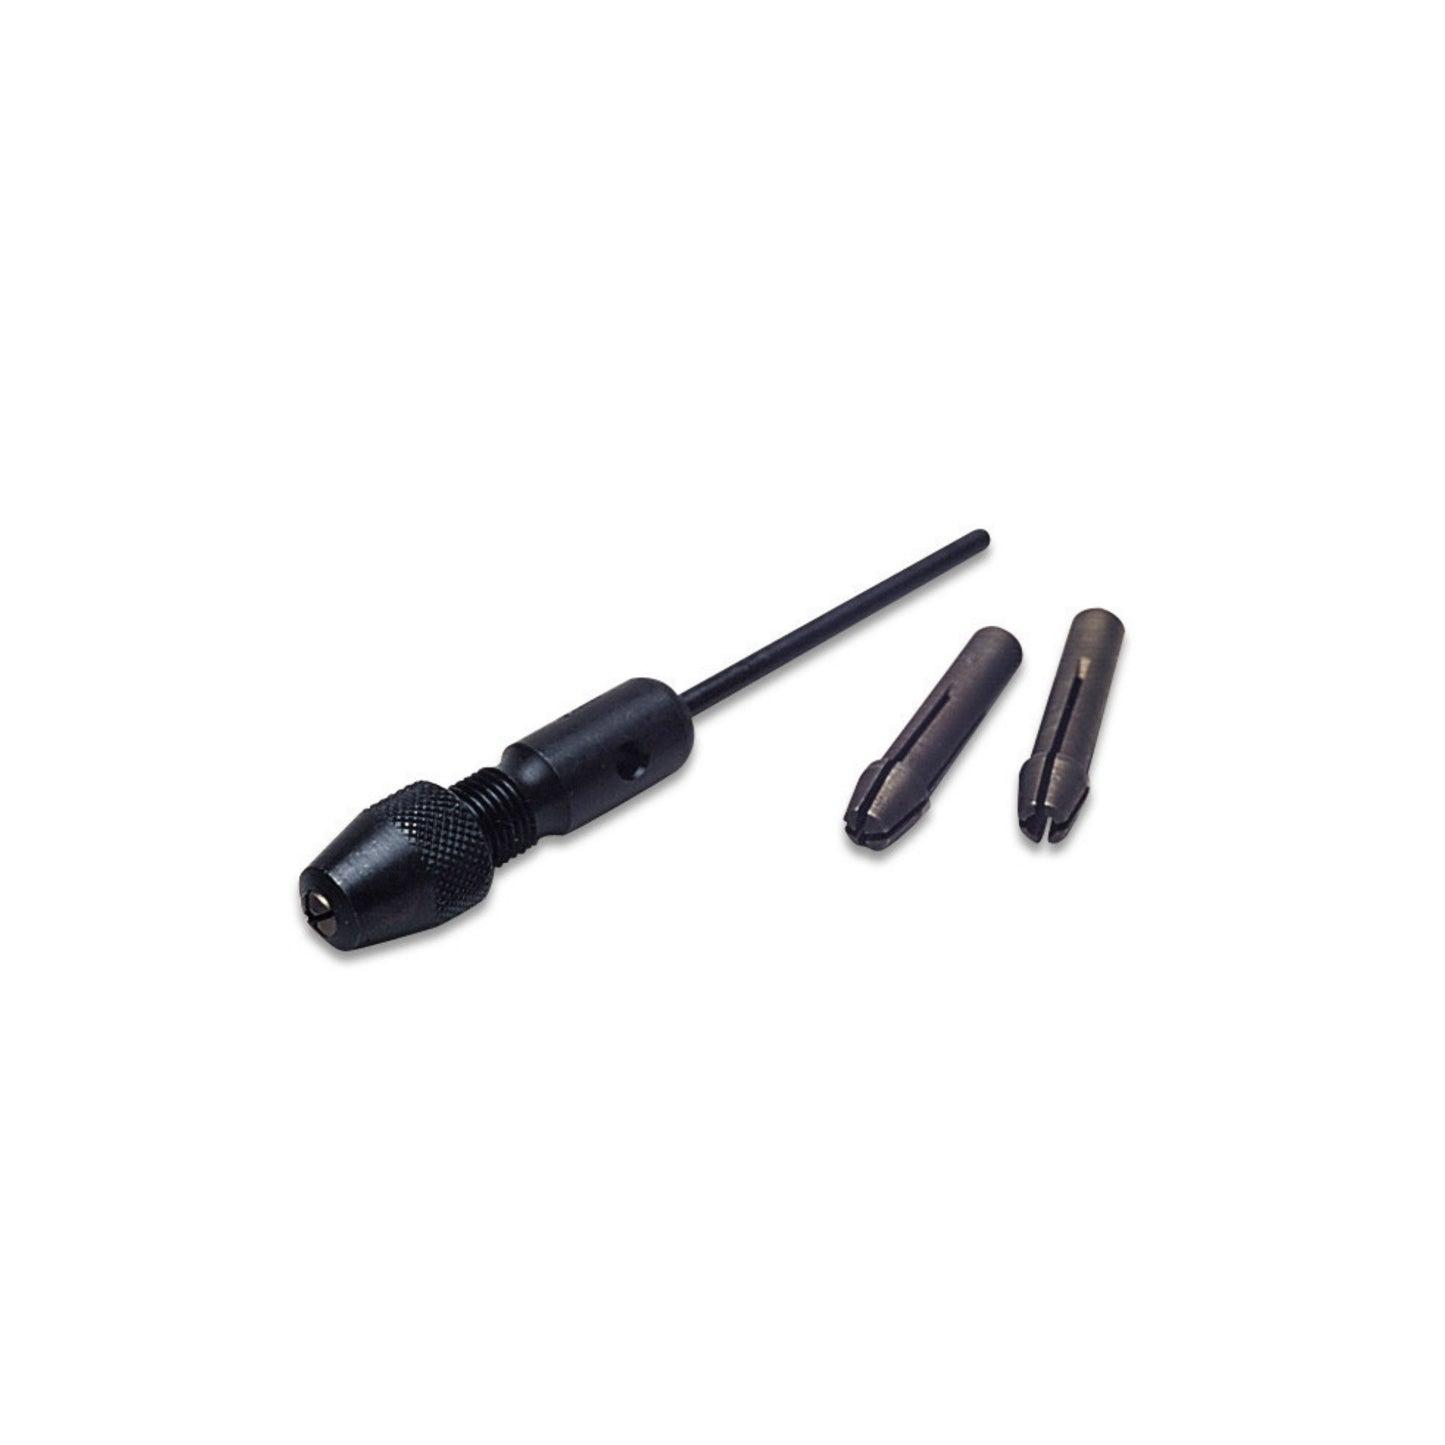
This drill only accepts 3/32 inch shanks. To use any drill bit I use a chuck adapter. These are less than five dollars and let’s me use any bit. If you look for one make sure it will go down to zero inches. Some don’t go down that small. Also be sure to get the 3/32 shank adapter.
-
Ordered this from AliExpress. I didn’t expect much for $30.00 but this is a great tool. It has two speeds with a built in light. It is so tiny, feels more like using a pen. The slow speed is 550 rpm and it drills styrene perfectly without melting the plastic. Seems to have plenty of torque There is a more powerful version but I didn’t want to invest too much if it was junk. Wish I had ordered the more powerful one.
-
I have that exact 3d print file. The 1:1 block is 747 millimeters long. If I print it at 1/24 scale it is 29.88 mm long. If I print it at 1/25 scale it is 31.12 mm long. That is a difference of 1.24 mm (.04 inches) in length between the two scales. If you set one of each on a table an inch apart my old eyes could never pick out the difference. I have been 3D printing different engines and I always go on line to get the 1:1 size of any block I am printing so my block will be the correct size. When I compare to the blocks from any kit I have never seen a kit block that was very close to correct. Being off by 2 to 3 millimeters is what I have found.
-
Testers Modelmaster Metalizer Paints
Jiml0001 replied to bauercrew's topic in Tips, Tricks, and Tutorials
I also replaced my almost used up testers metalizers for Vallejo. Bought four sets and so far am very impressed. They go on much like the metalizers and look great. I will say some colors look pretty close to others but there is some subtle surface effect differences that stand out -
Printer is Phrozon mini 4k
-
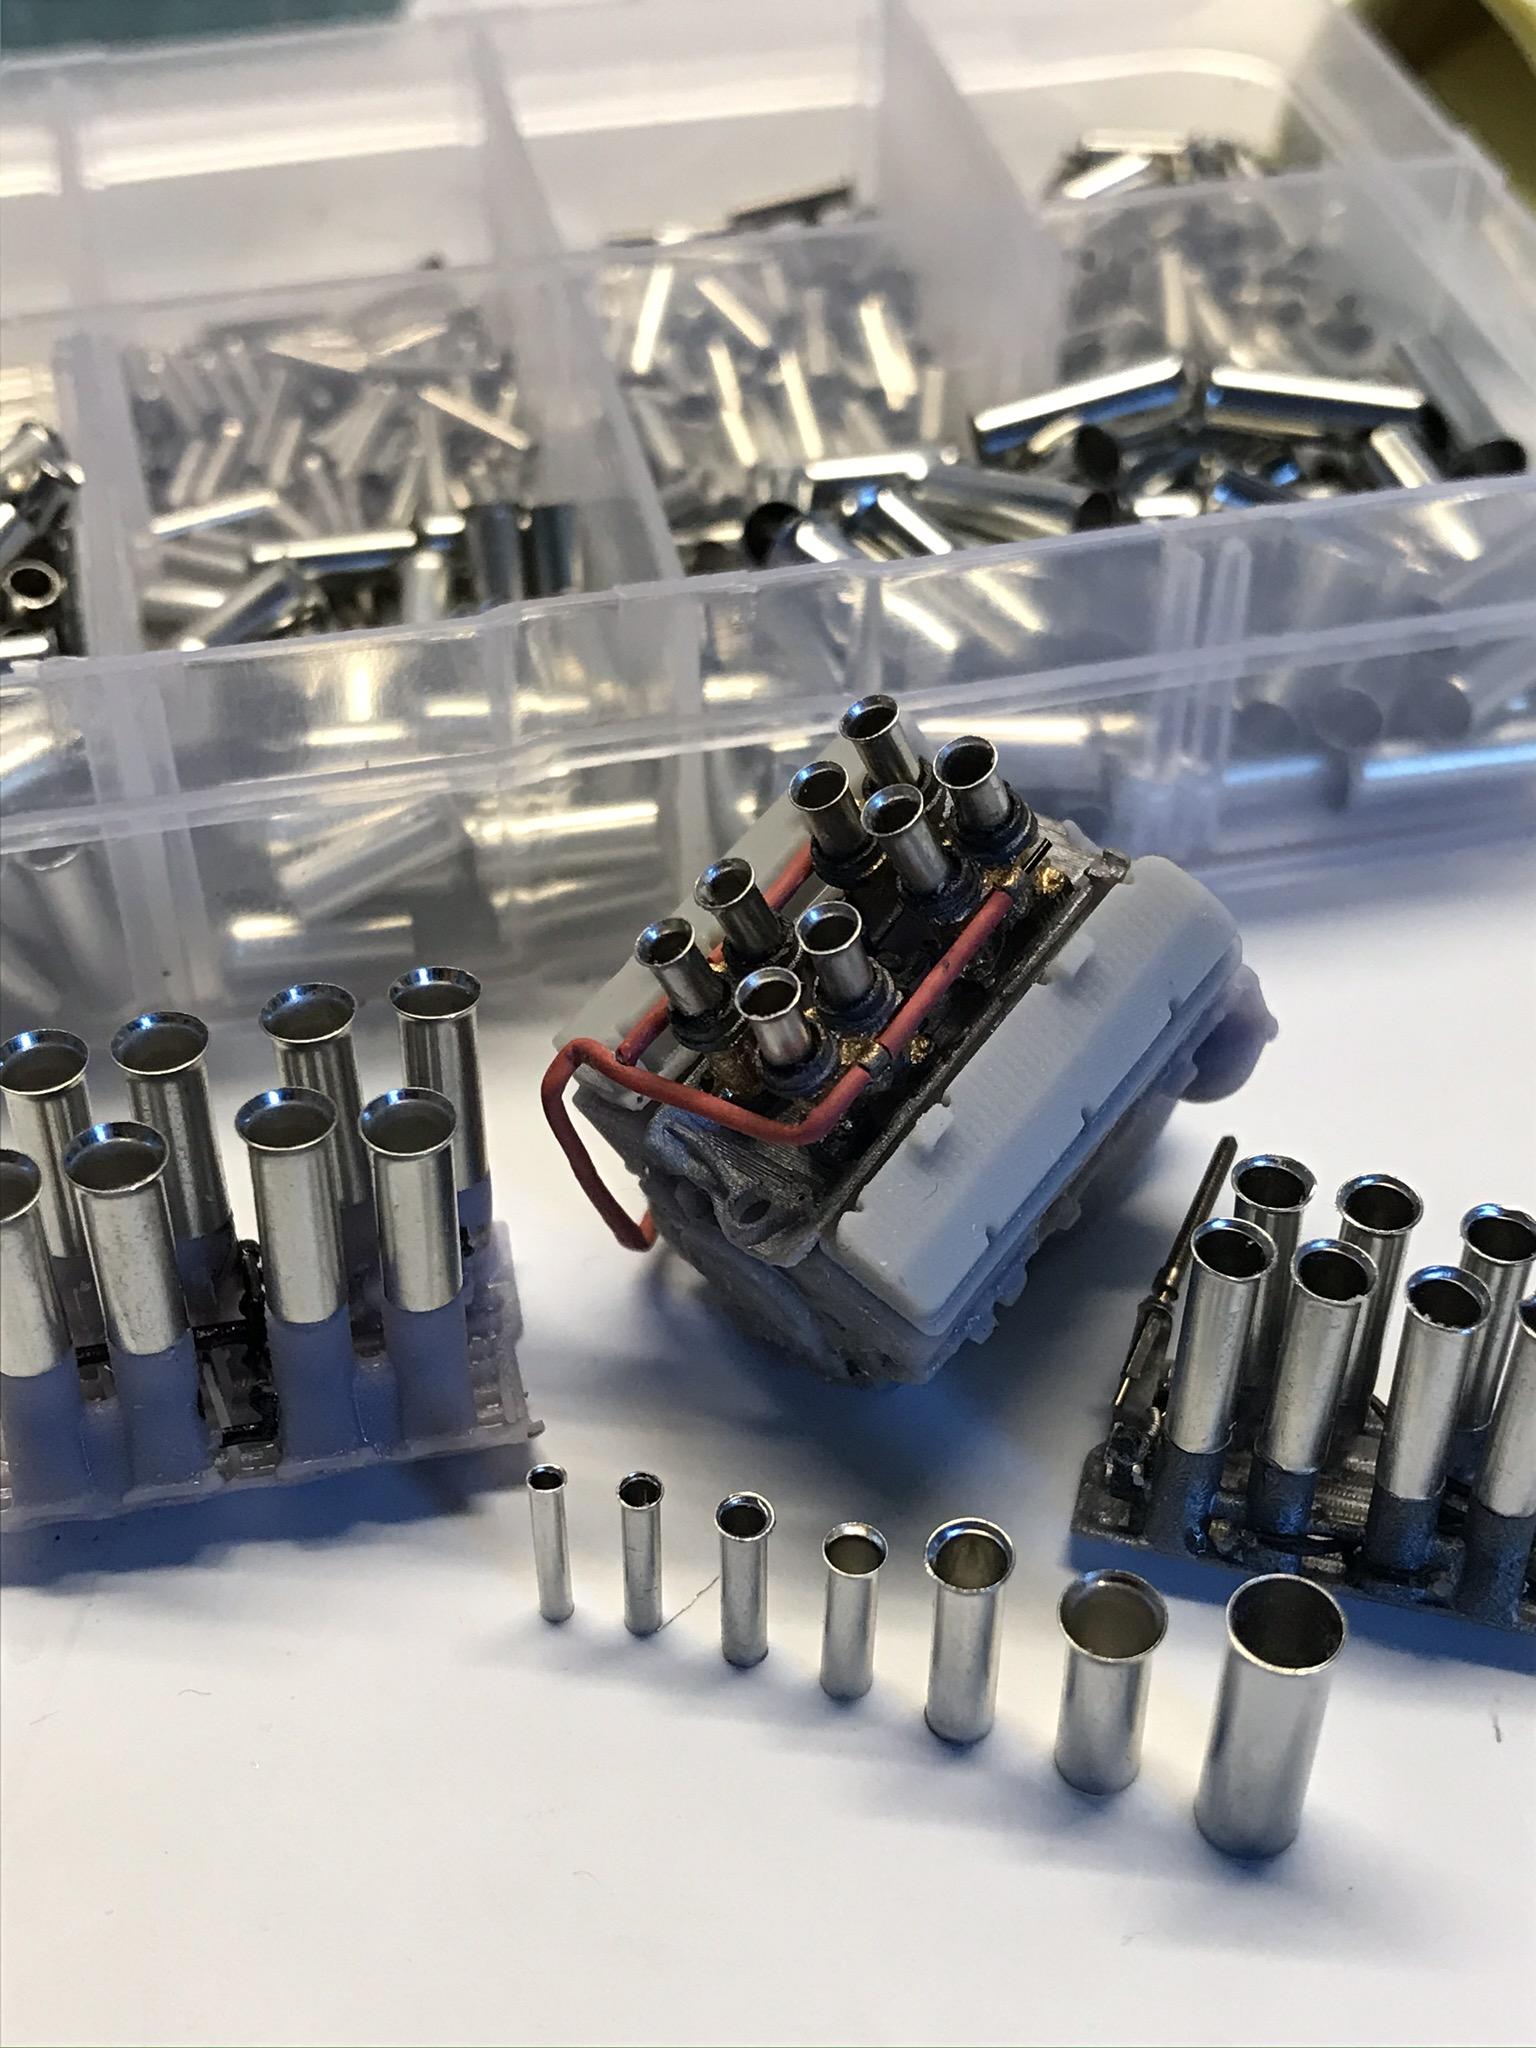
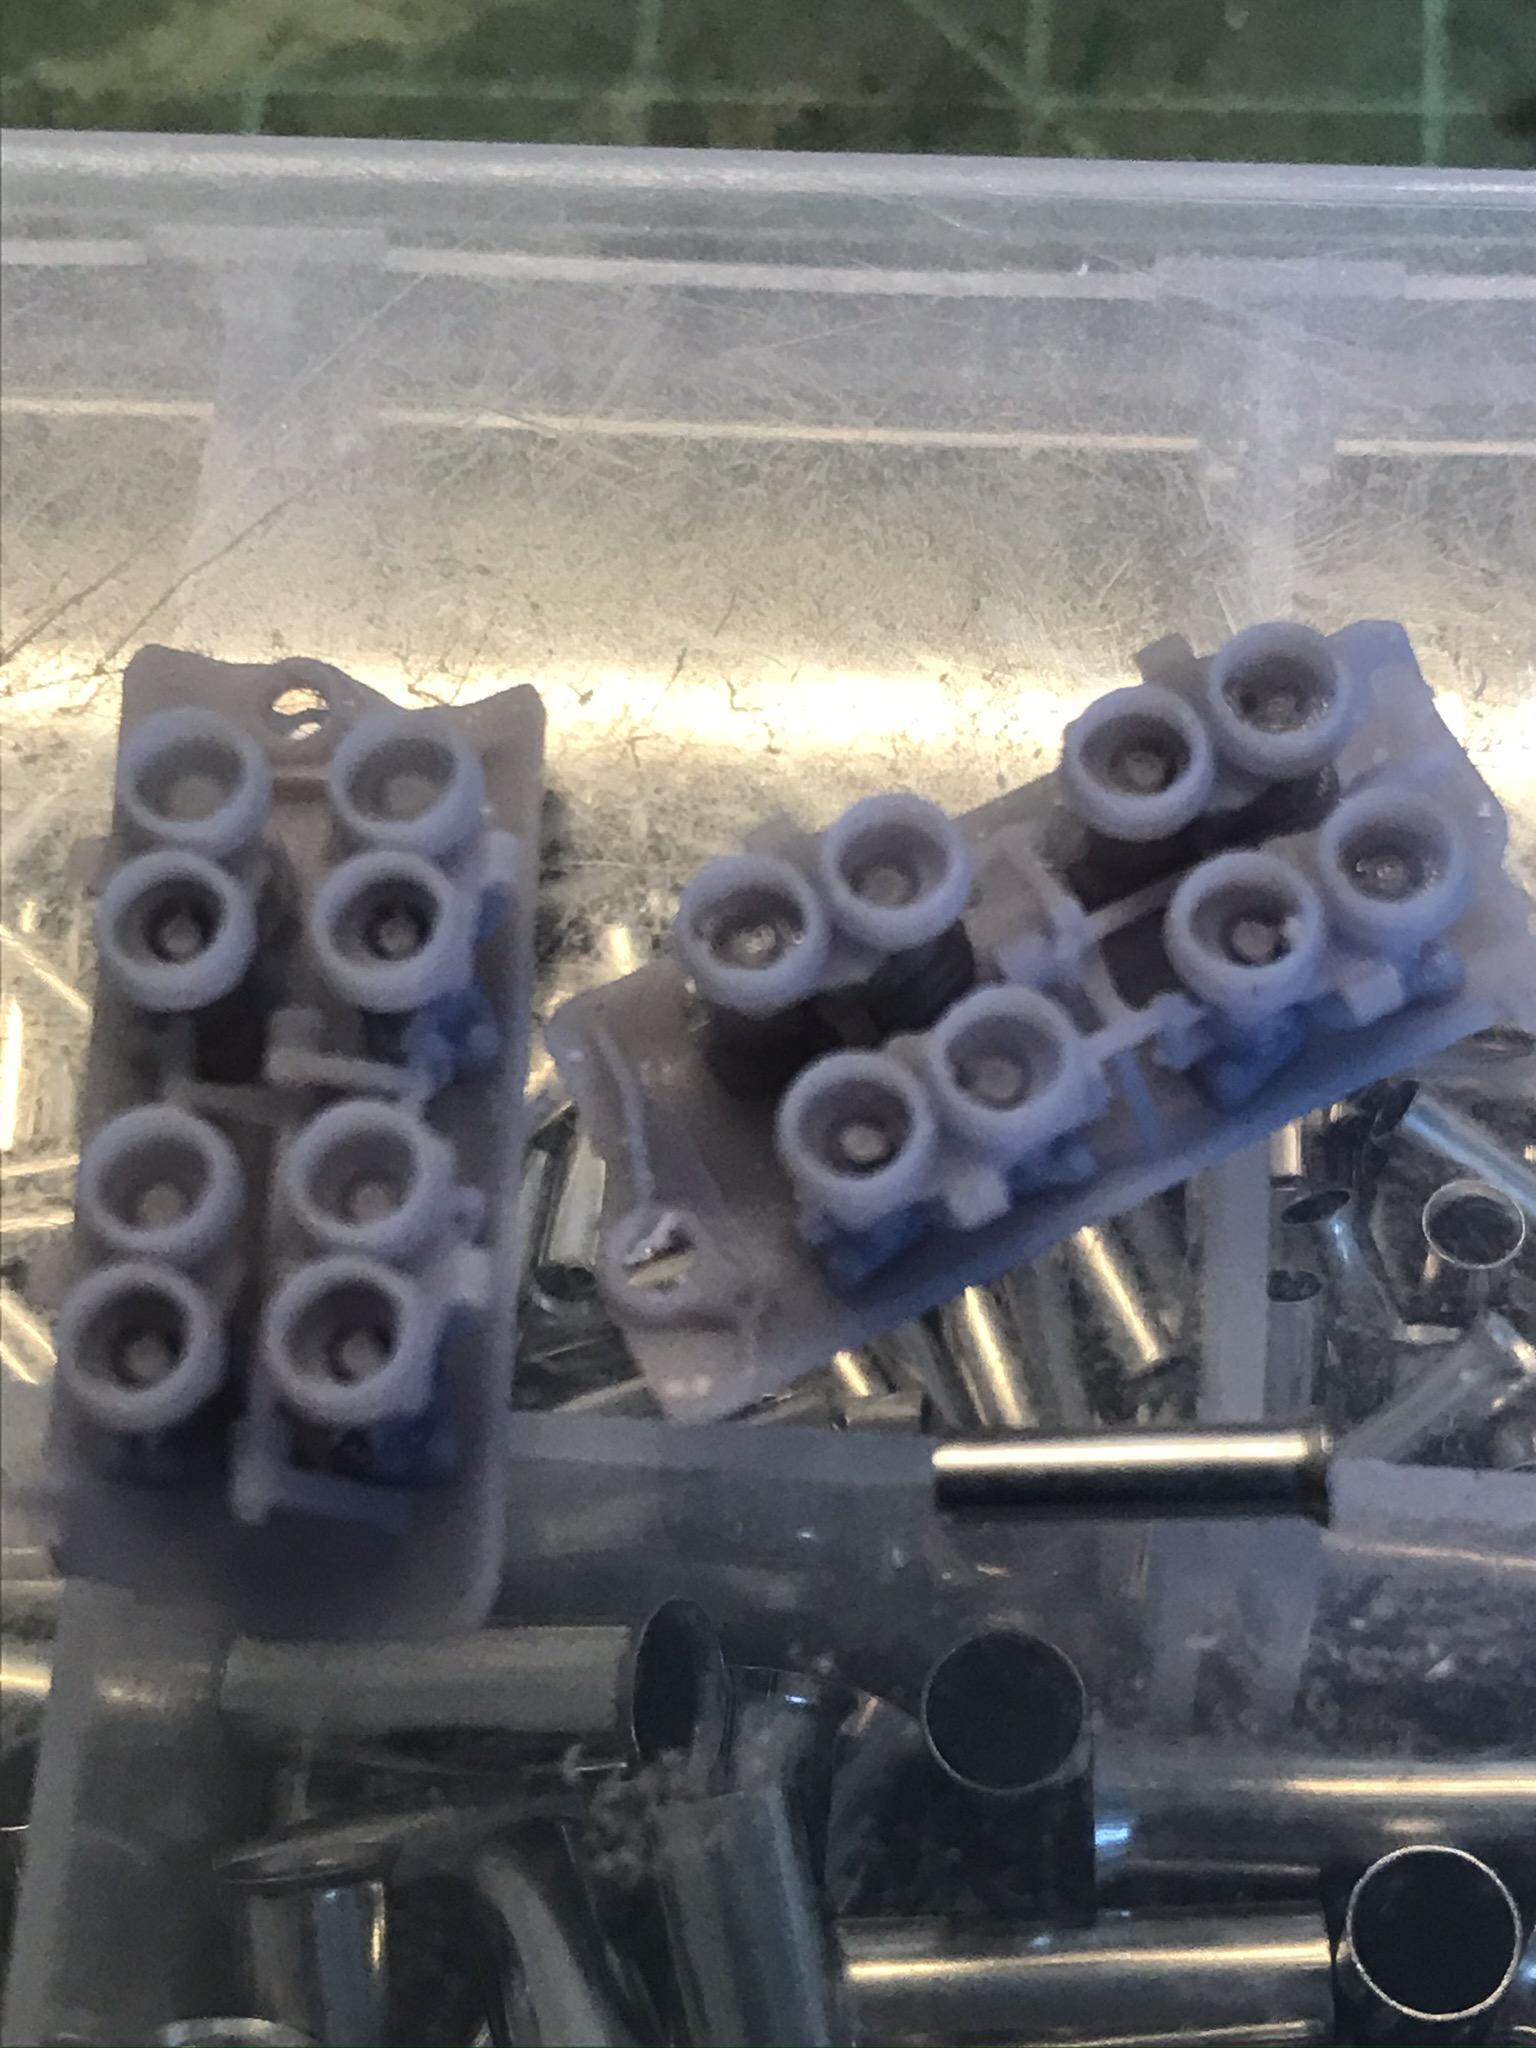
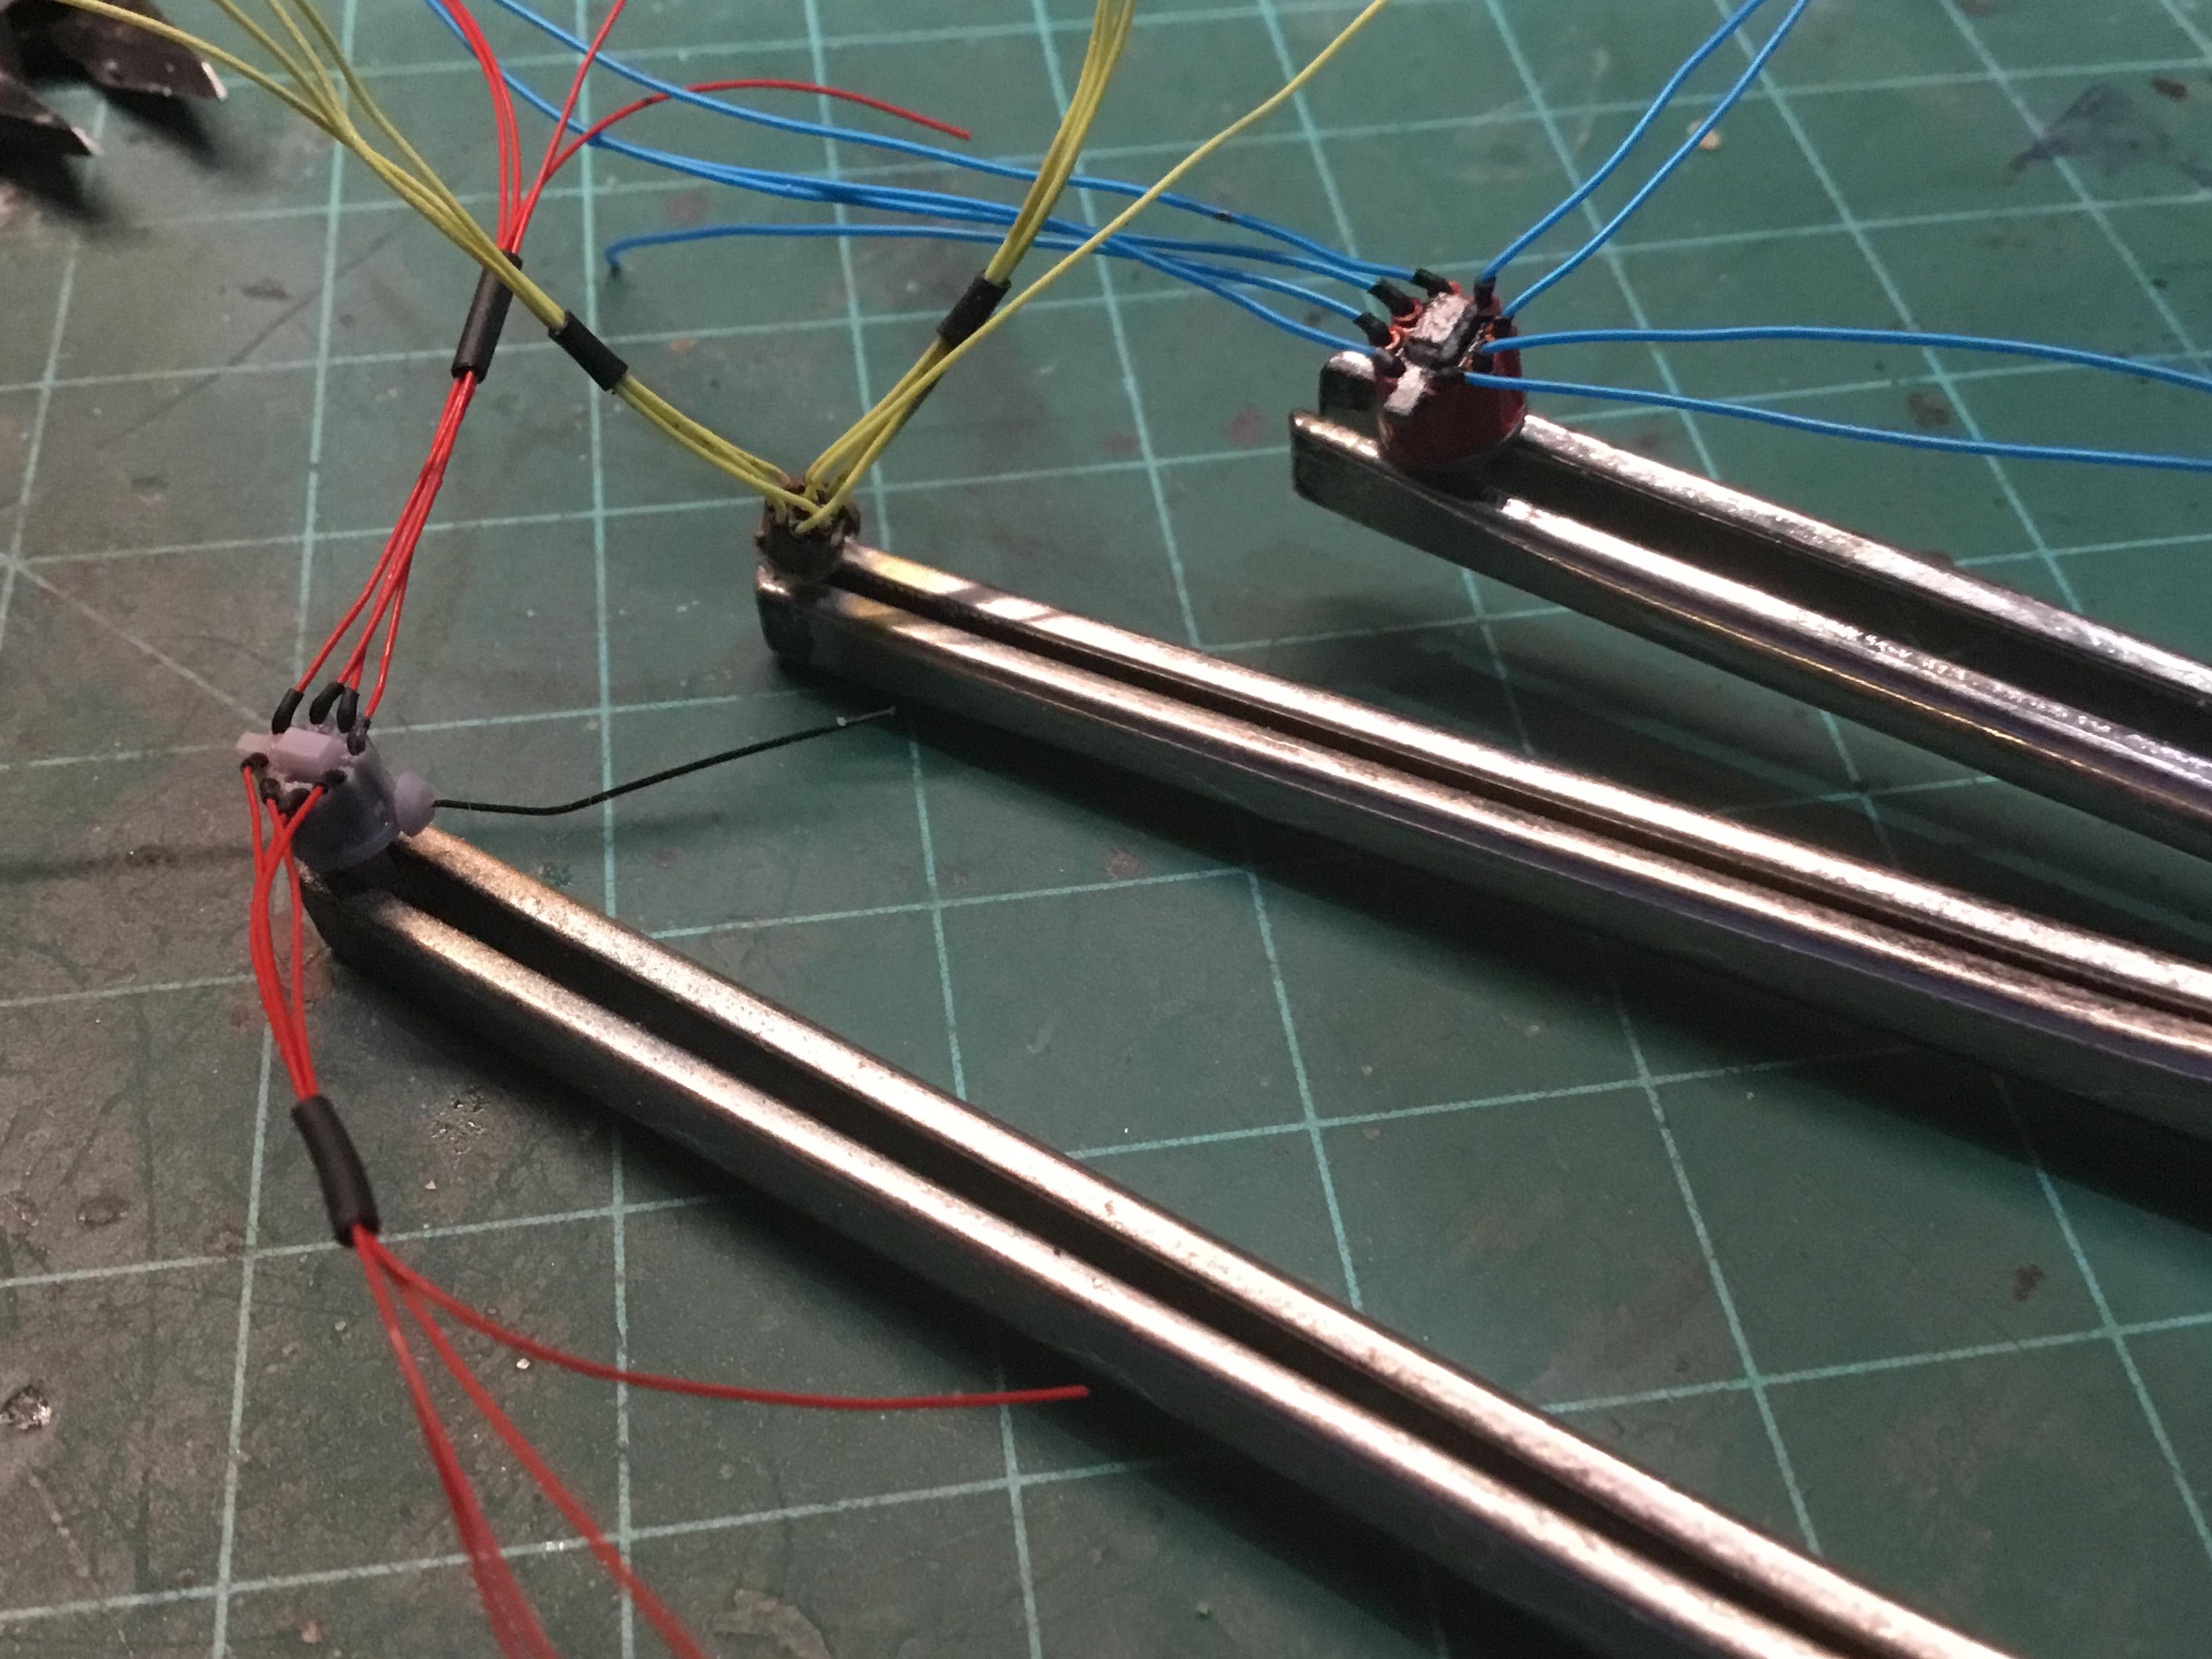
My first fully 3D printed engine. Includes distributor with boots. Spark plugs with 90 degree boots. Carb linkage. Everything I printed except the velocity stacks which are boot ferrules.
-
Also I make 3D printed distributors I drew that have vacuum advances
-
I have been able to find good wire for plug cables. You got look at outside diameter, not AWG size. There is wire available that is .25 mm in diameter. In 1/24 scale that is a quarter inch. I use that for standard ignition. I also found wire that is .4 mm in diameter. That is 3/8 inch in 1:1 scale. I use that for HEI systems. Both of those sizes are available in many colors and cost about $5.00 plus shipping for ten meters (<> 30 feet). Just stay away from Teflon insulated wire. Teflon insulation is not opaque nor can you paint it.