Jiml0001
-
Posts
120 -
Joined
-
Last visited
Content Type
Profiles
Forums
Events
Gallery
Everything posted by Jiml0001
-
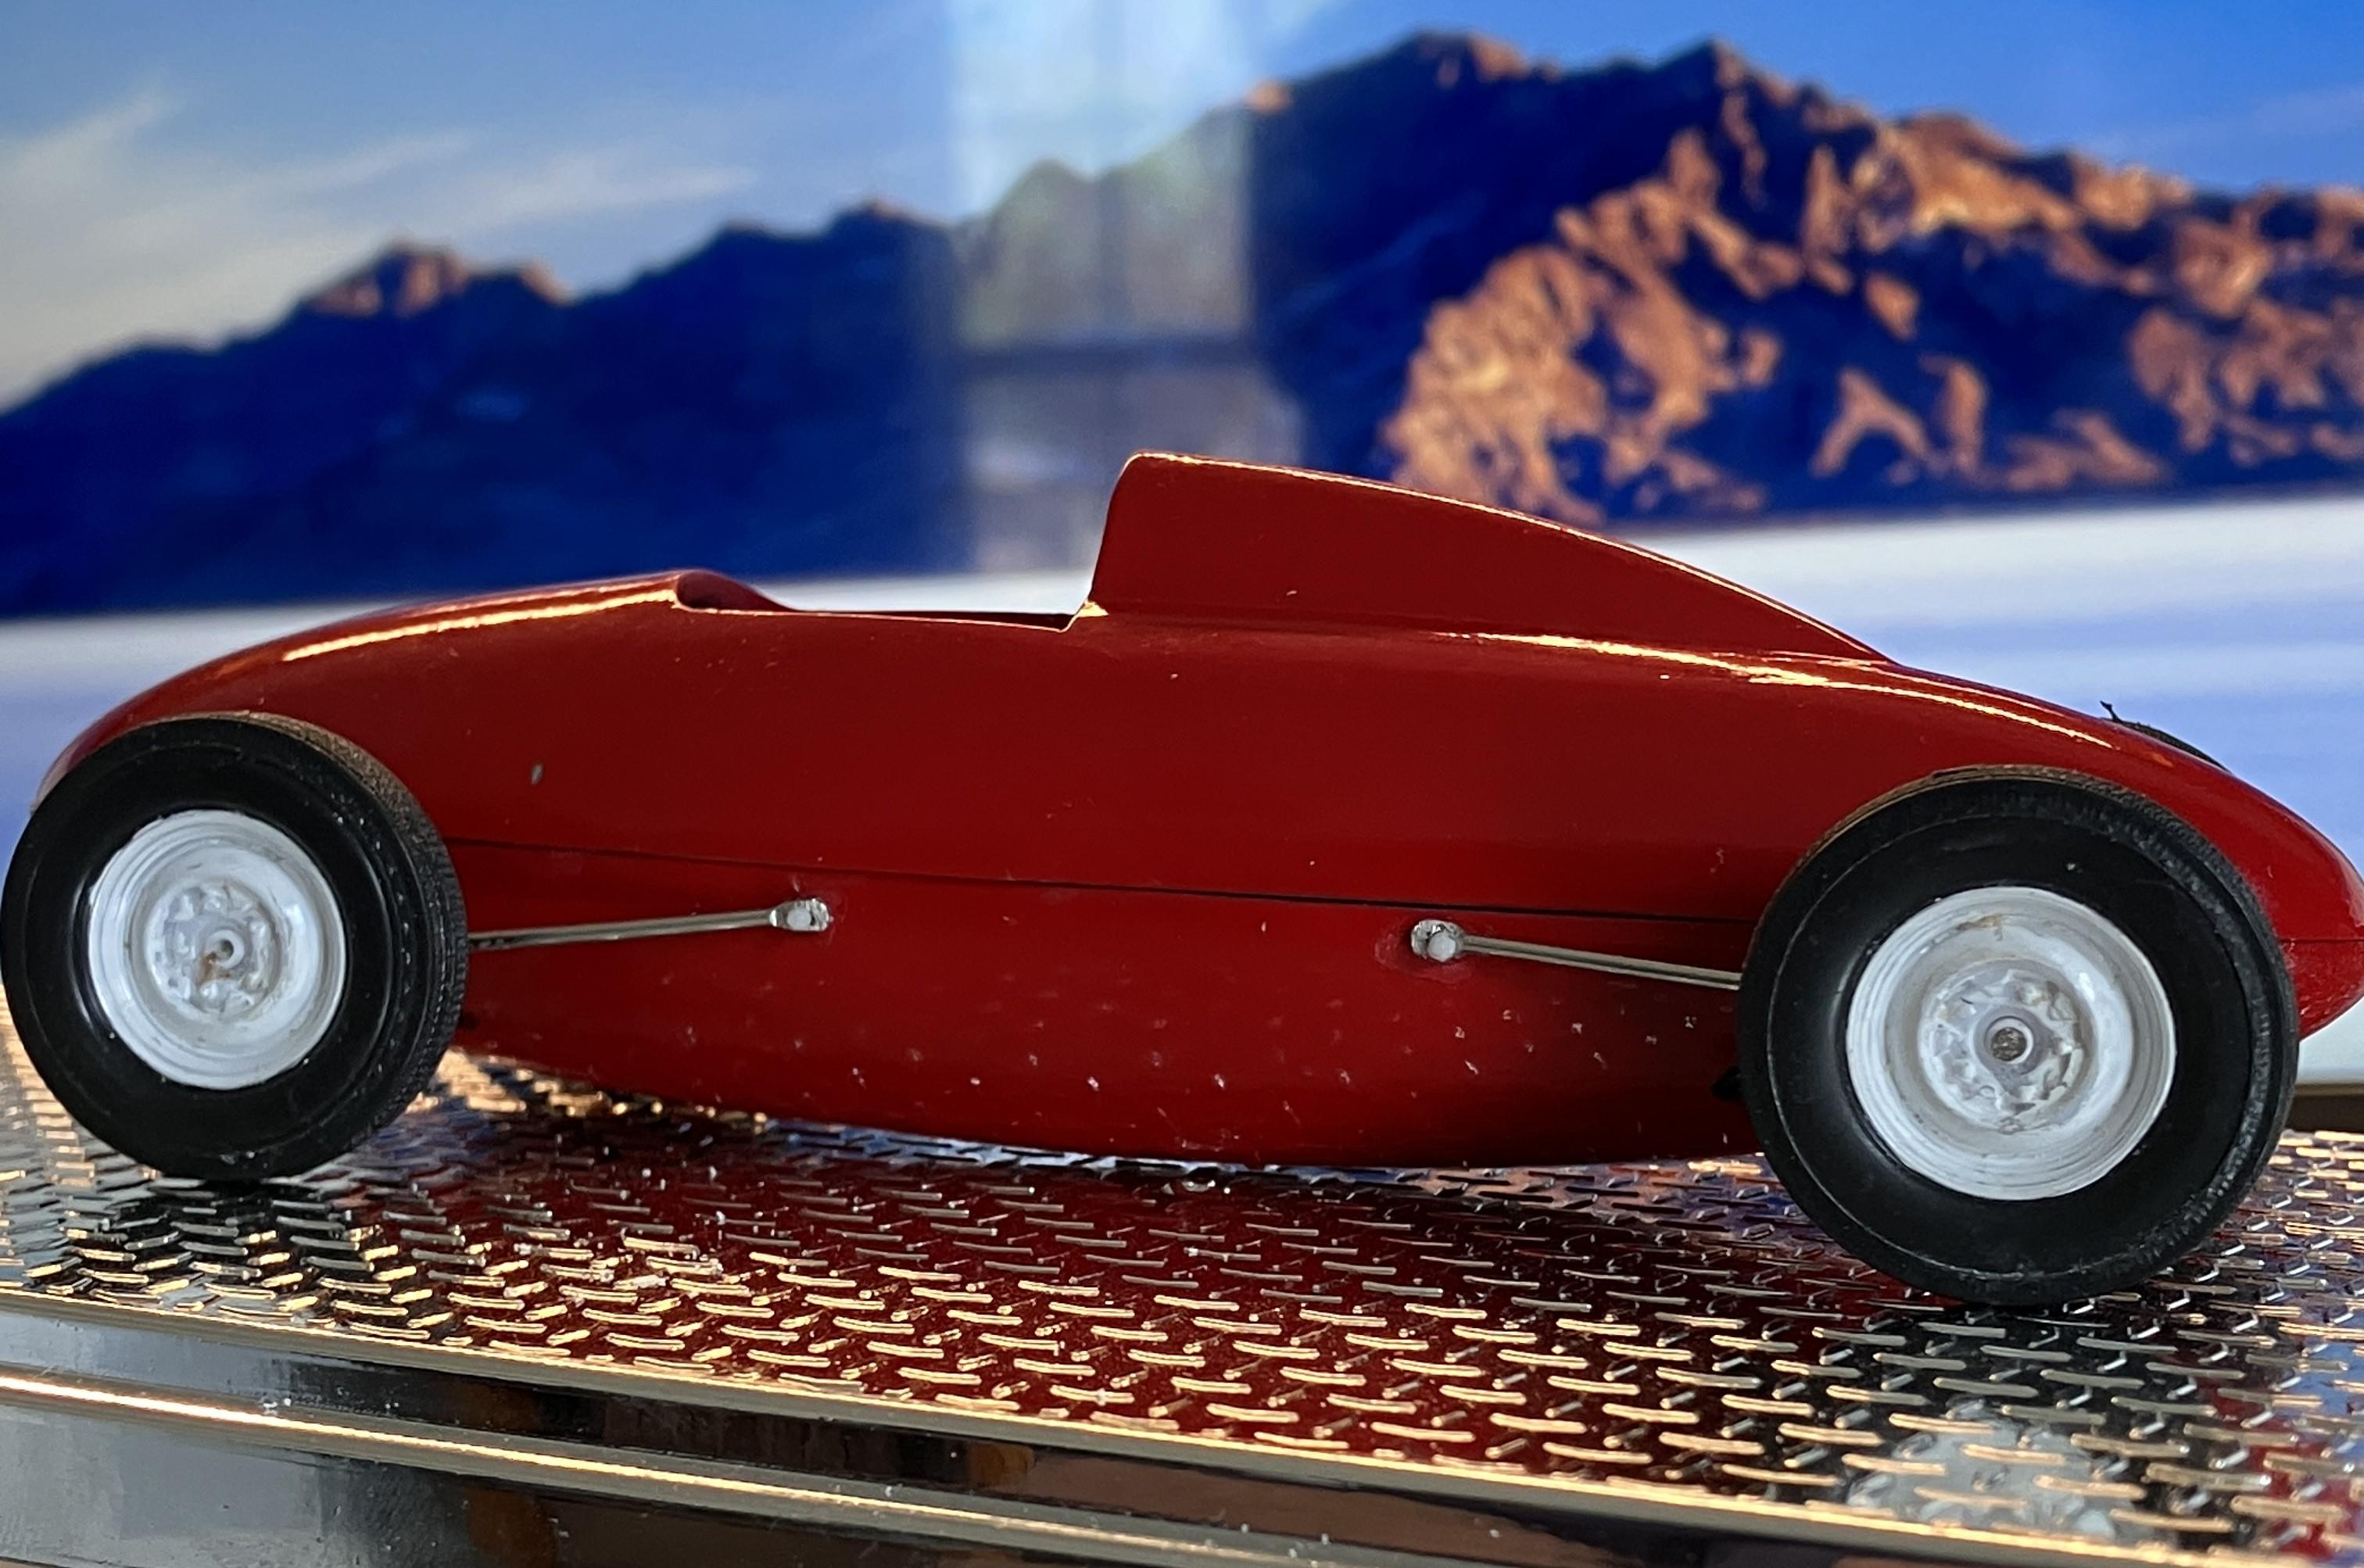
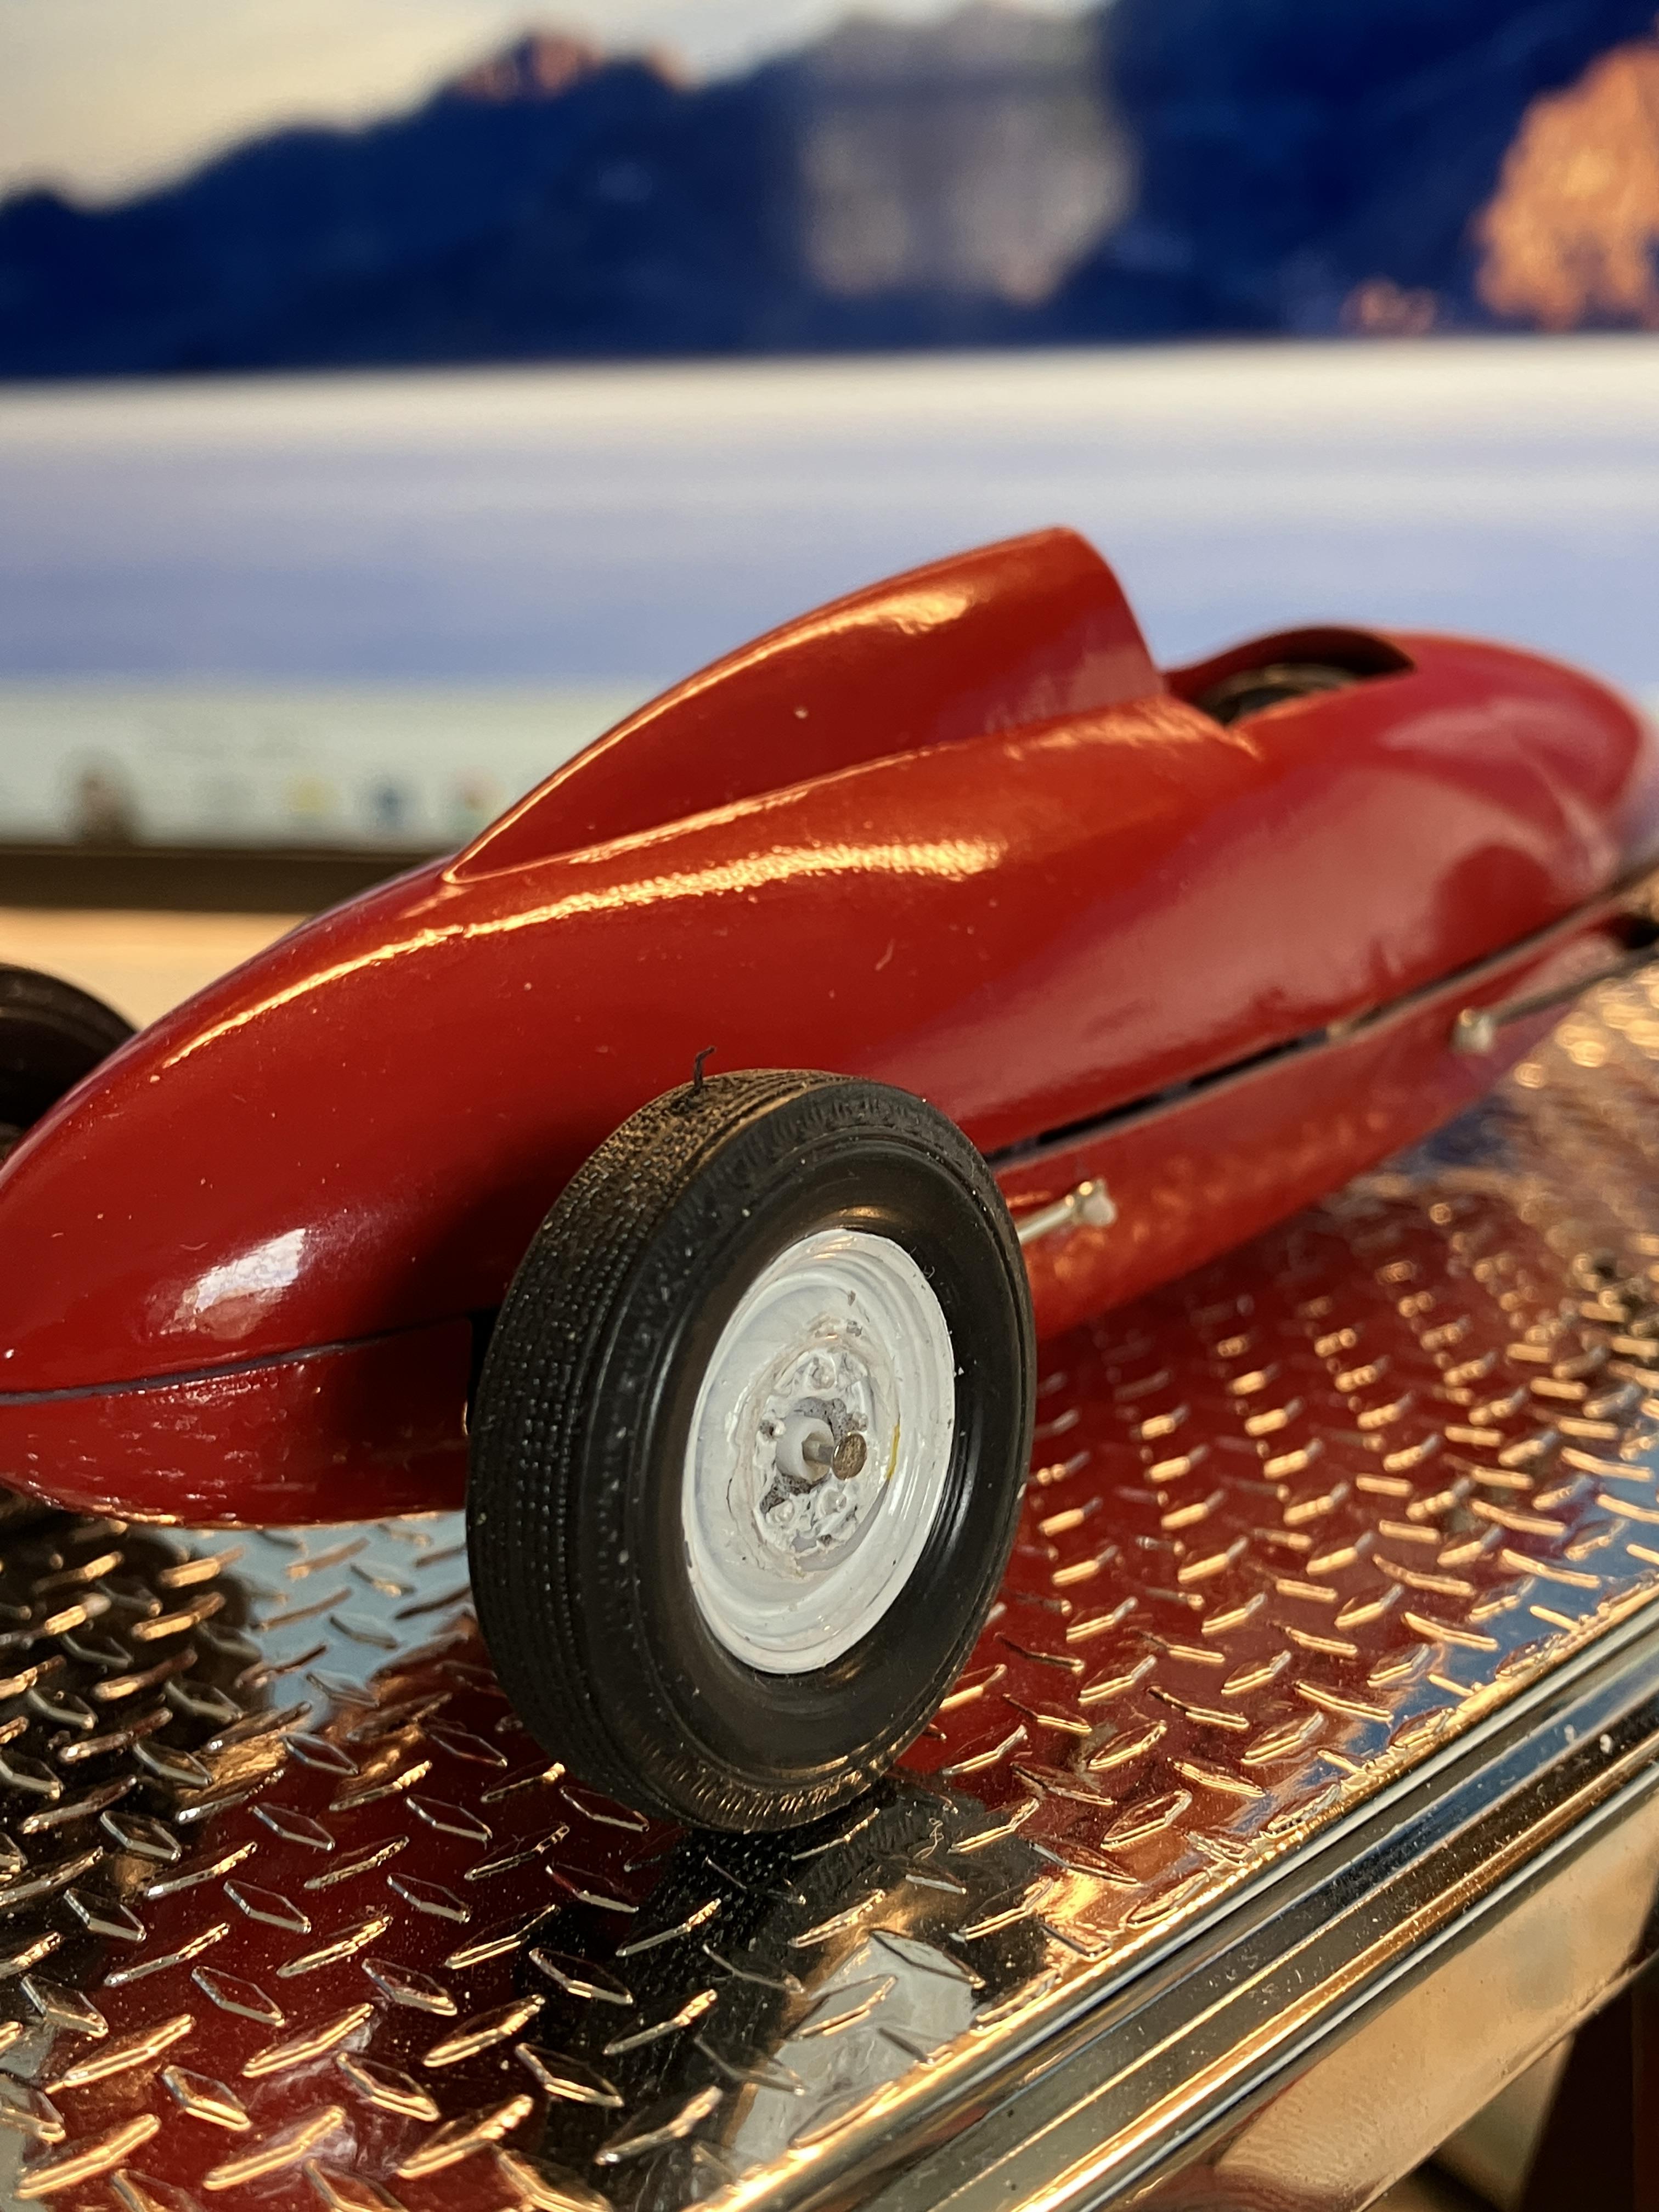
Here is my take on a belly tanker. It was not based on any real car, it is just my fantasy. The idea was to build this completely using 3D resin printing. I will admit in the end I did cheat on the wheels/tires, they were parts box finds. The frame was just my idea to keep an airplane style frame, again just my fantasy. Hope you enjoy:

-
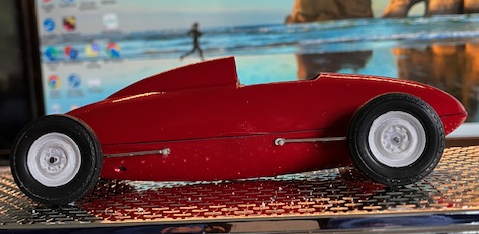
Getting close. Body paint came out pretty good and I am moving toward finish. Here is where we stand right now:
-
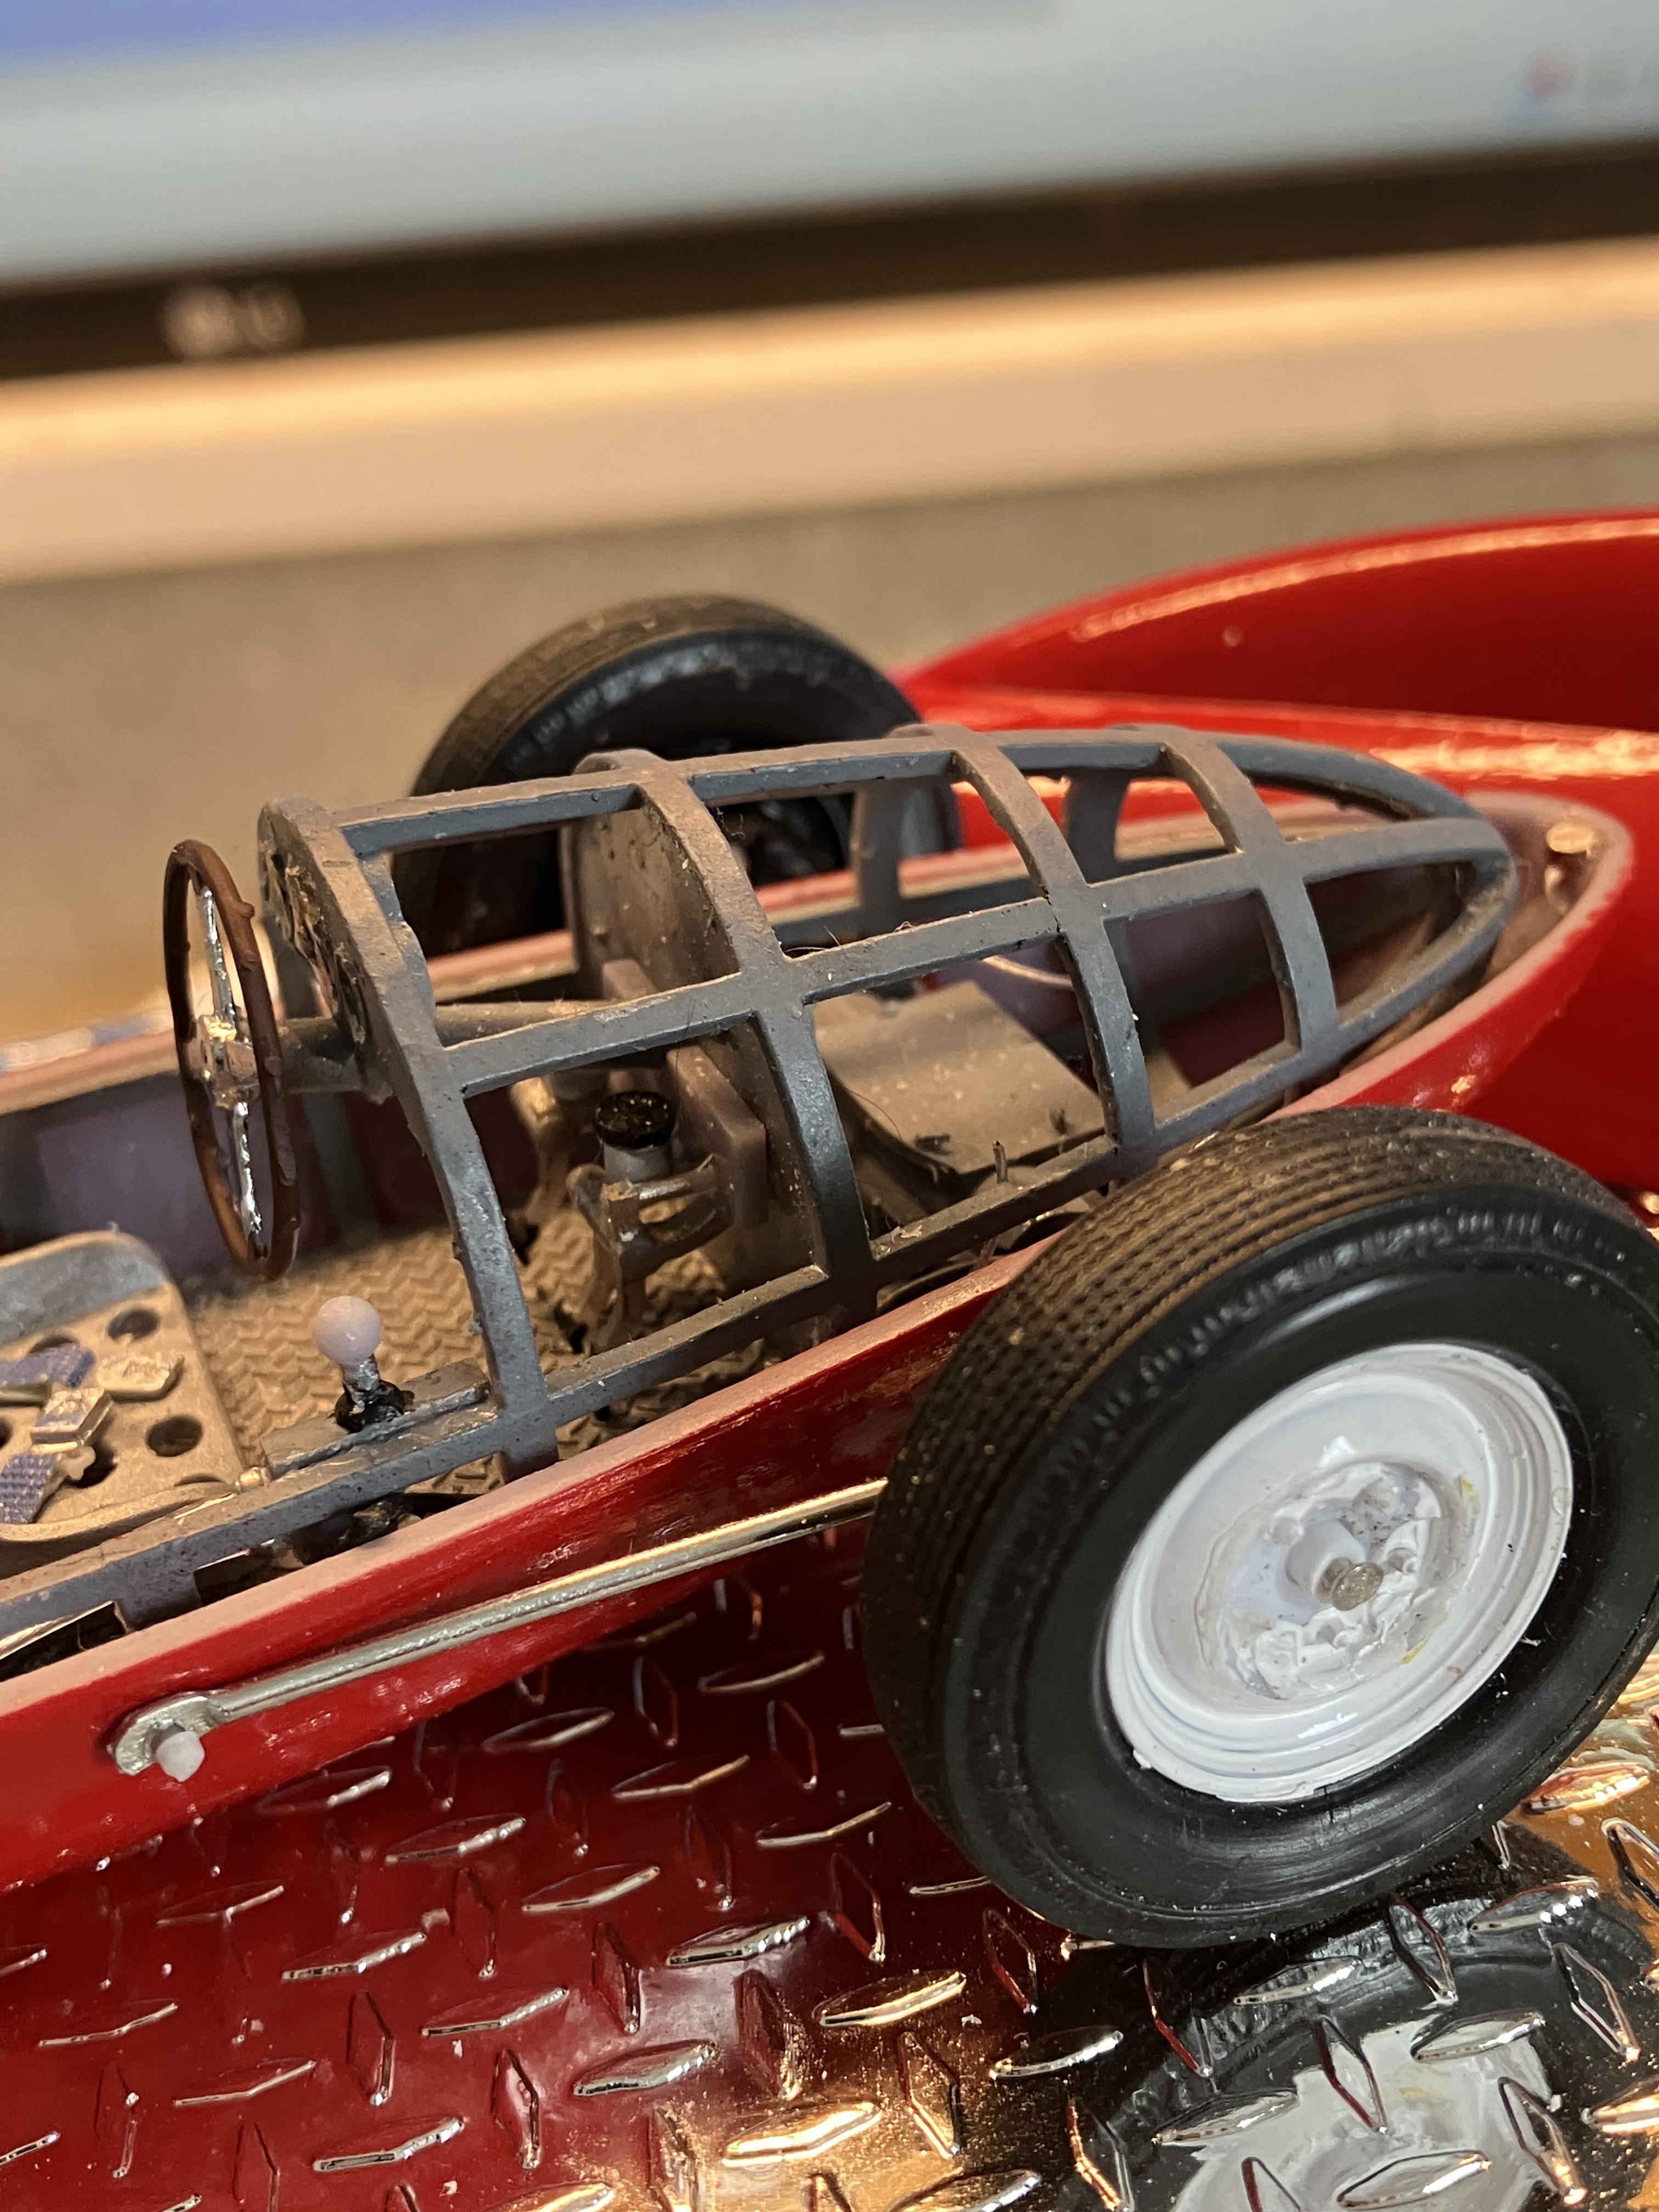
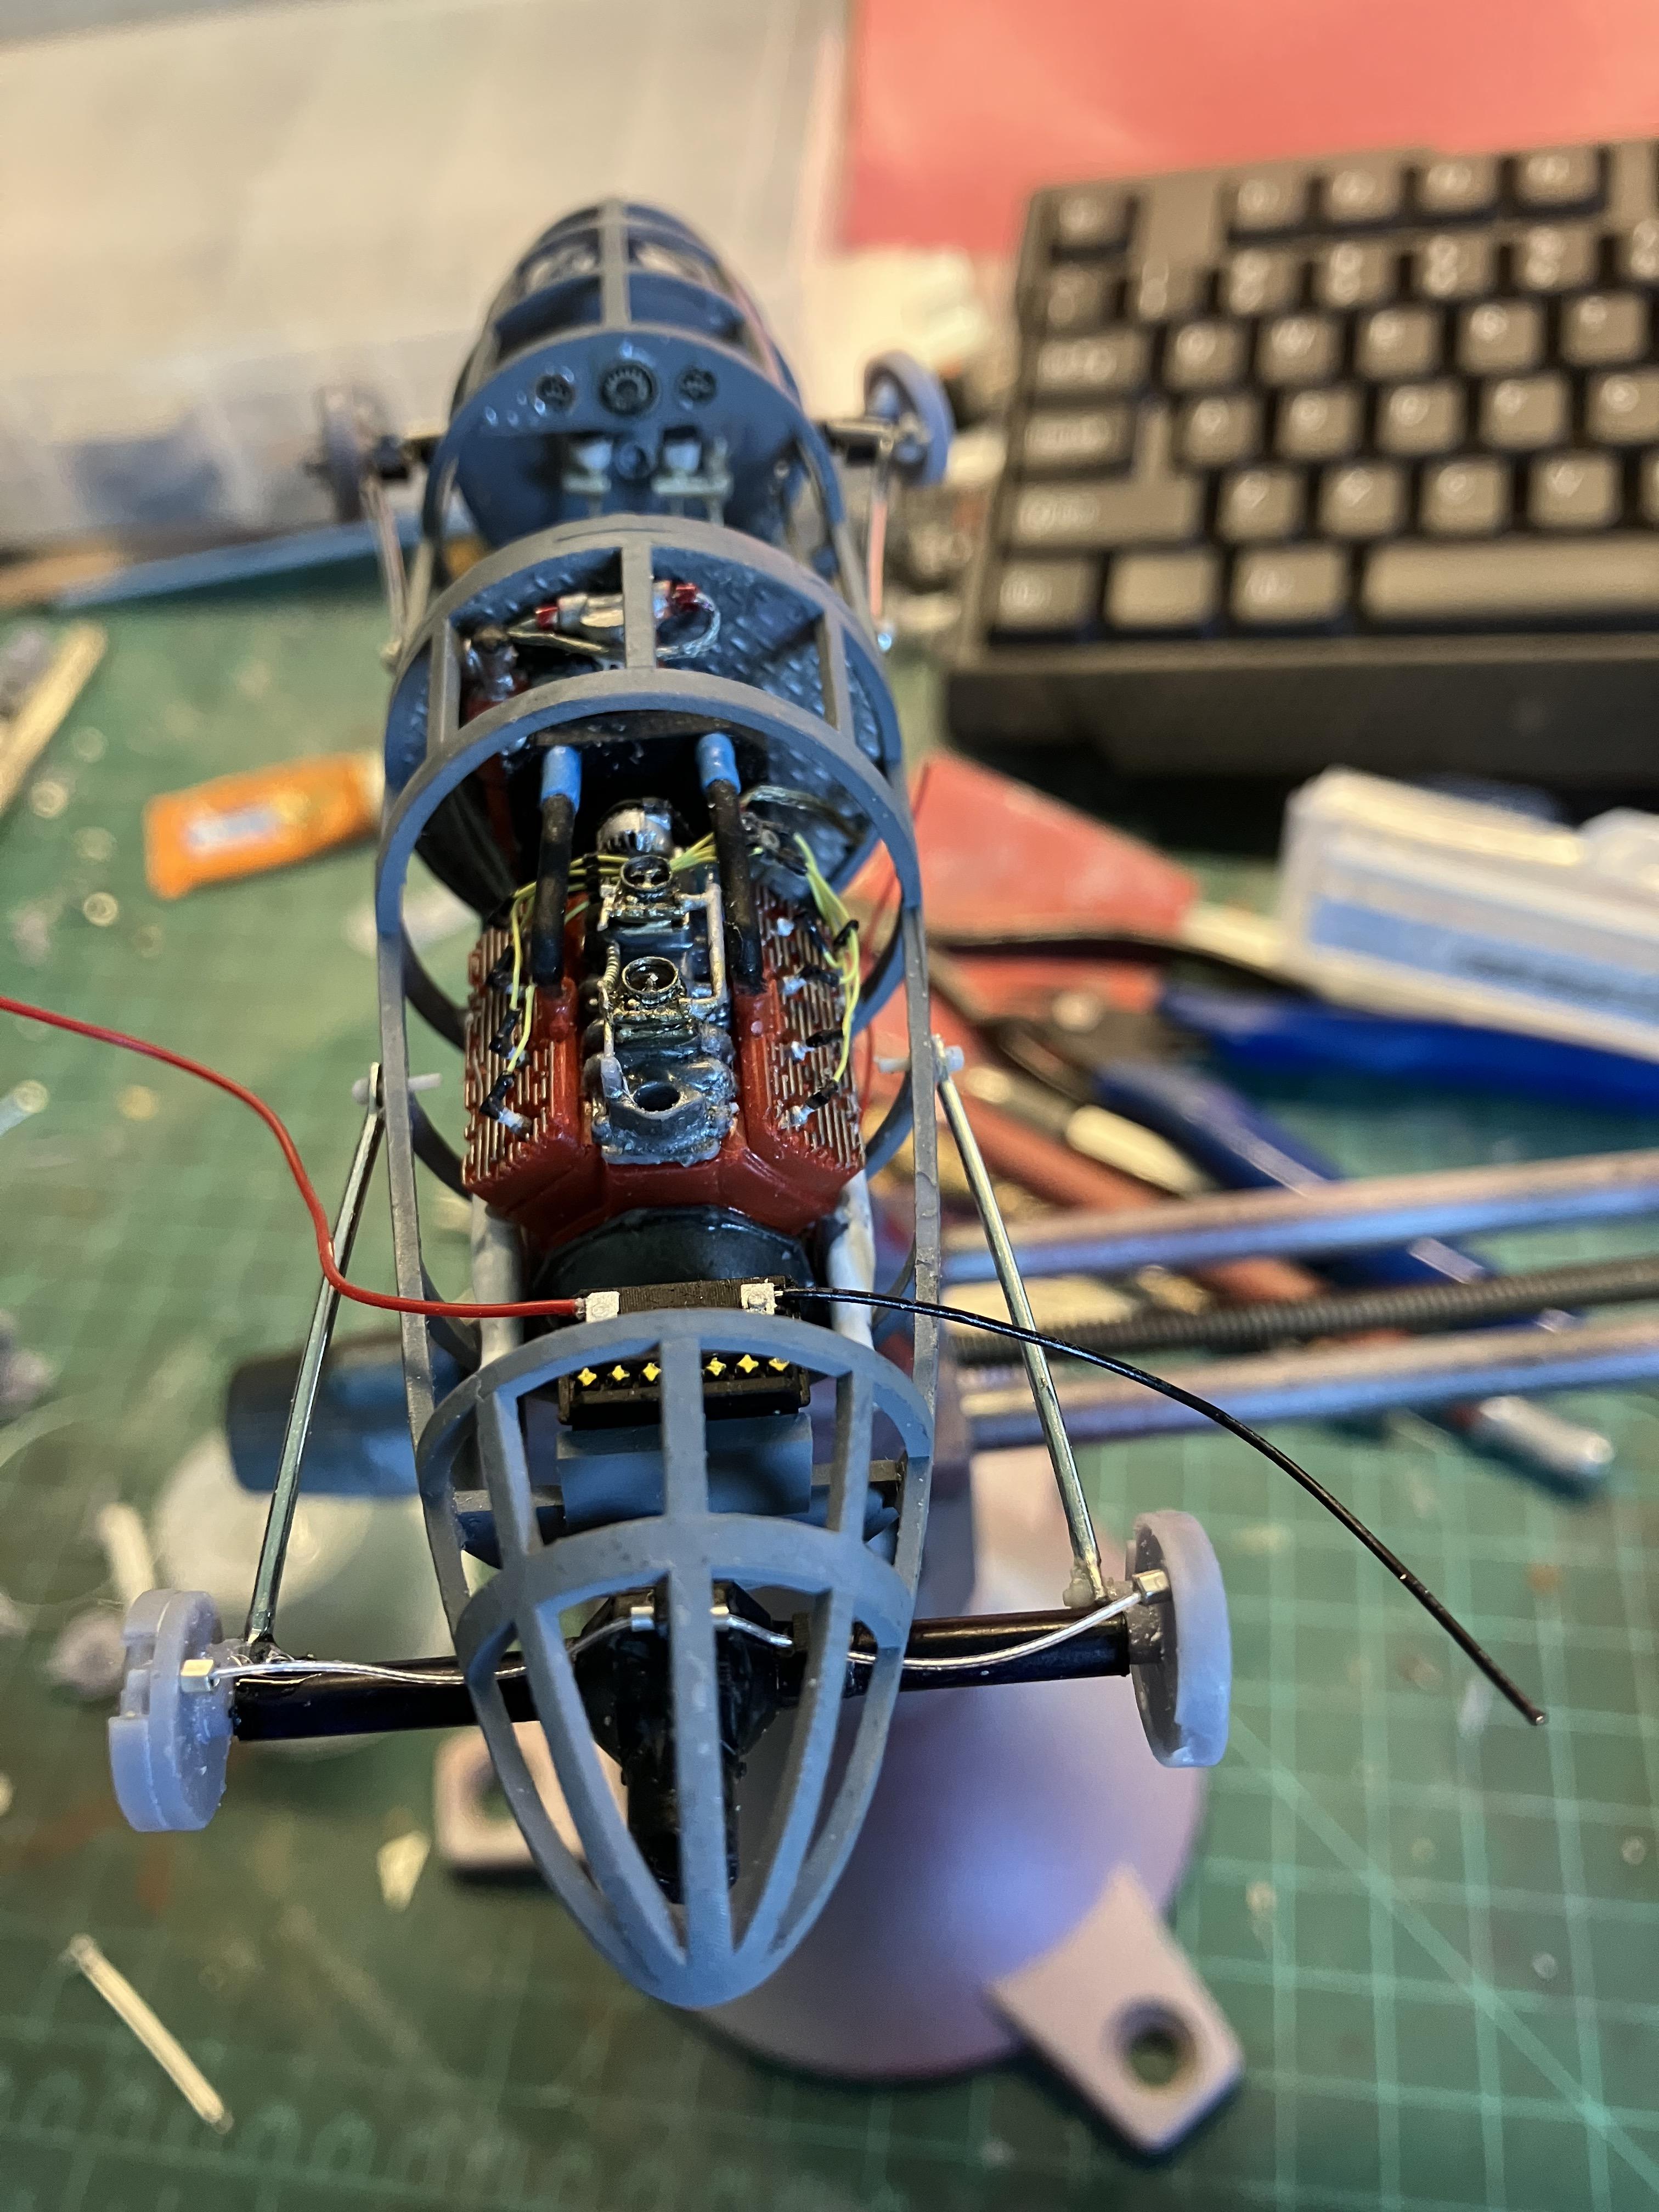
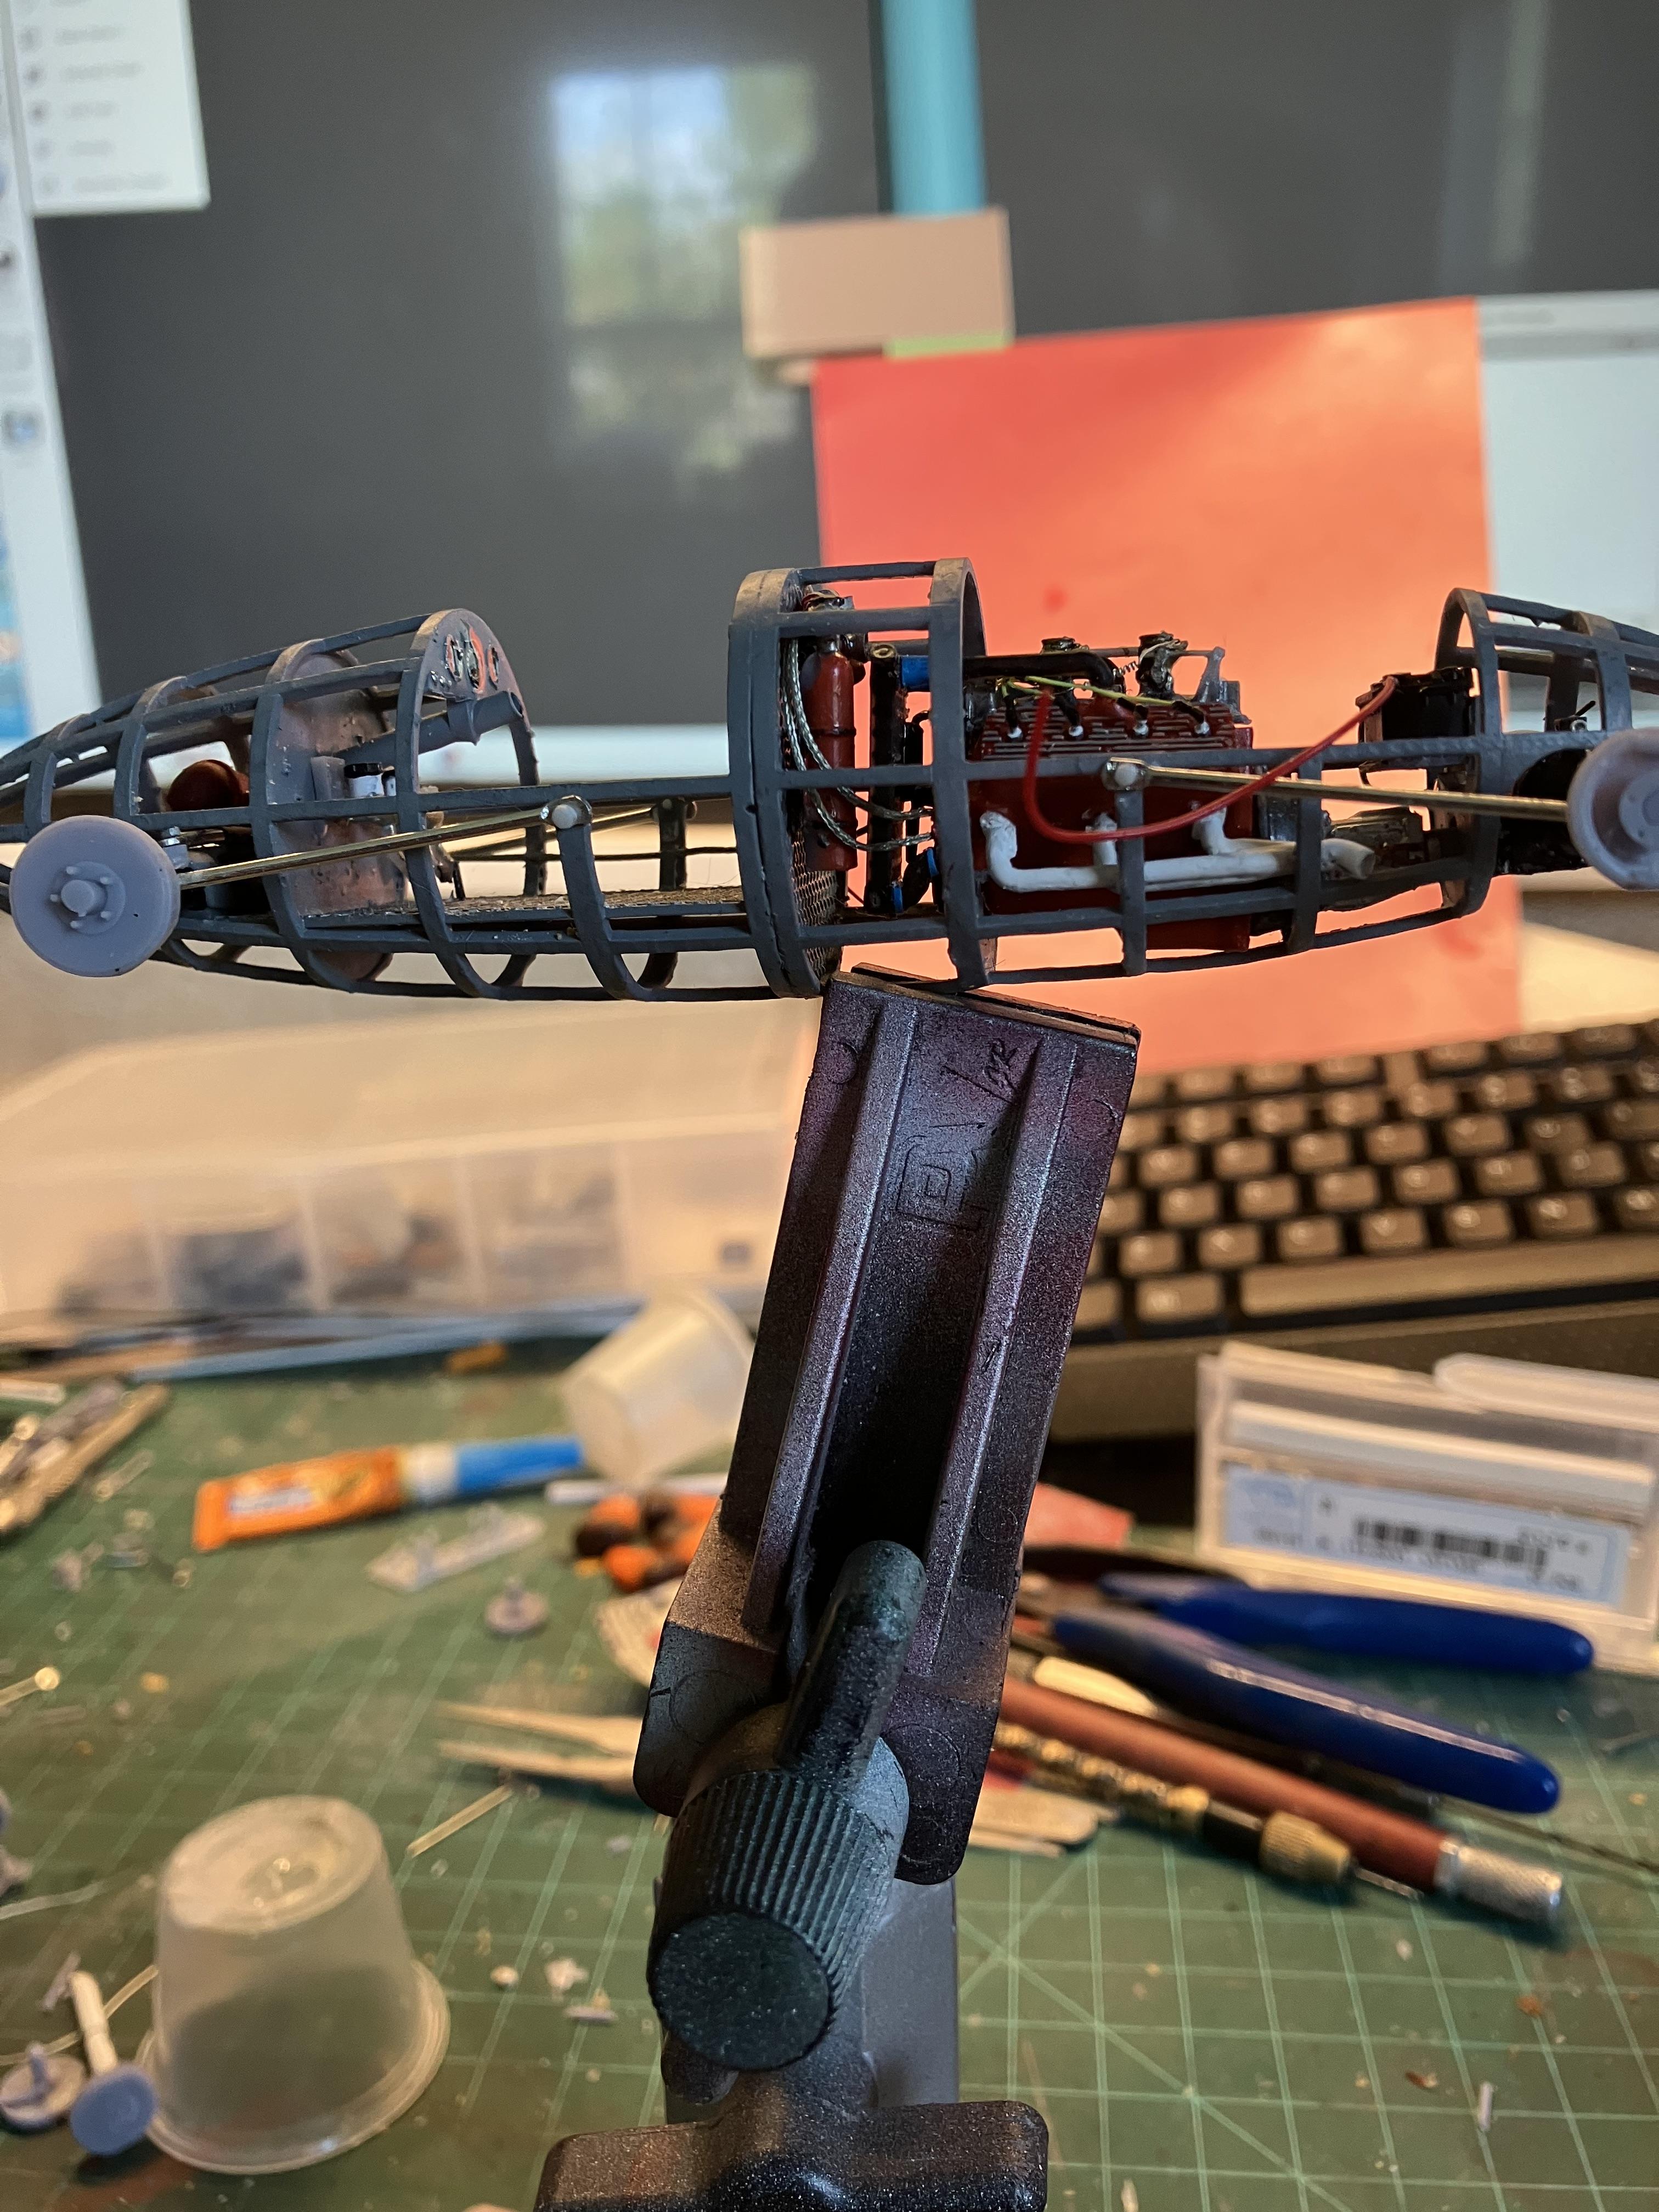
So here are a few pictures of where the frame stands right now. It is finally feeling like I can see the light at the end of the tunnel. Pretty soon will be the body but that feels like it will be fun.
-
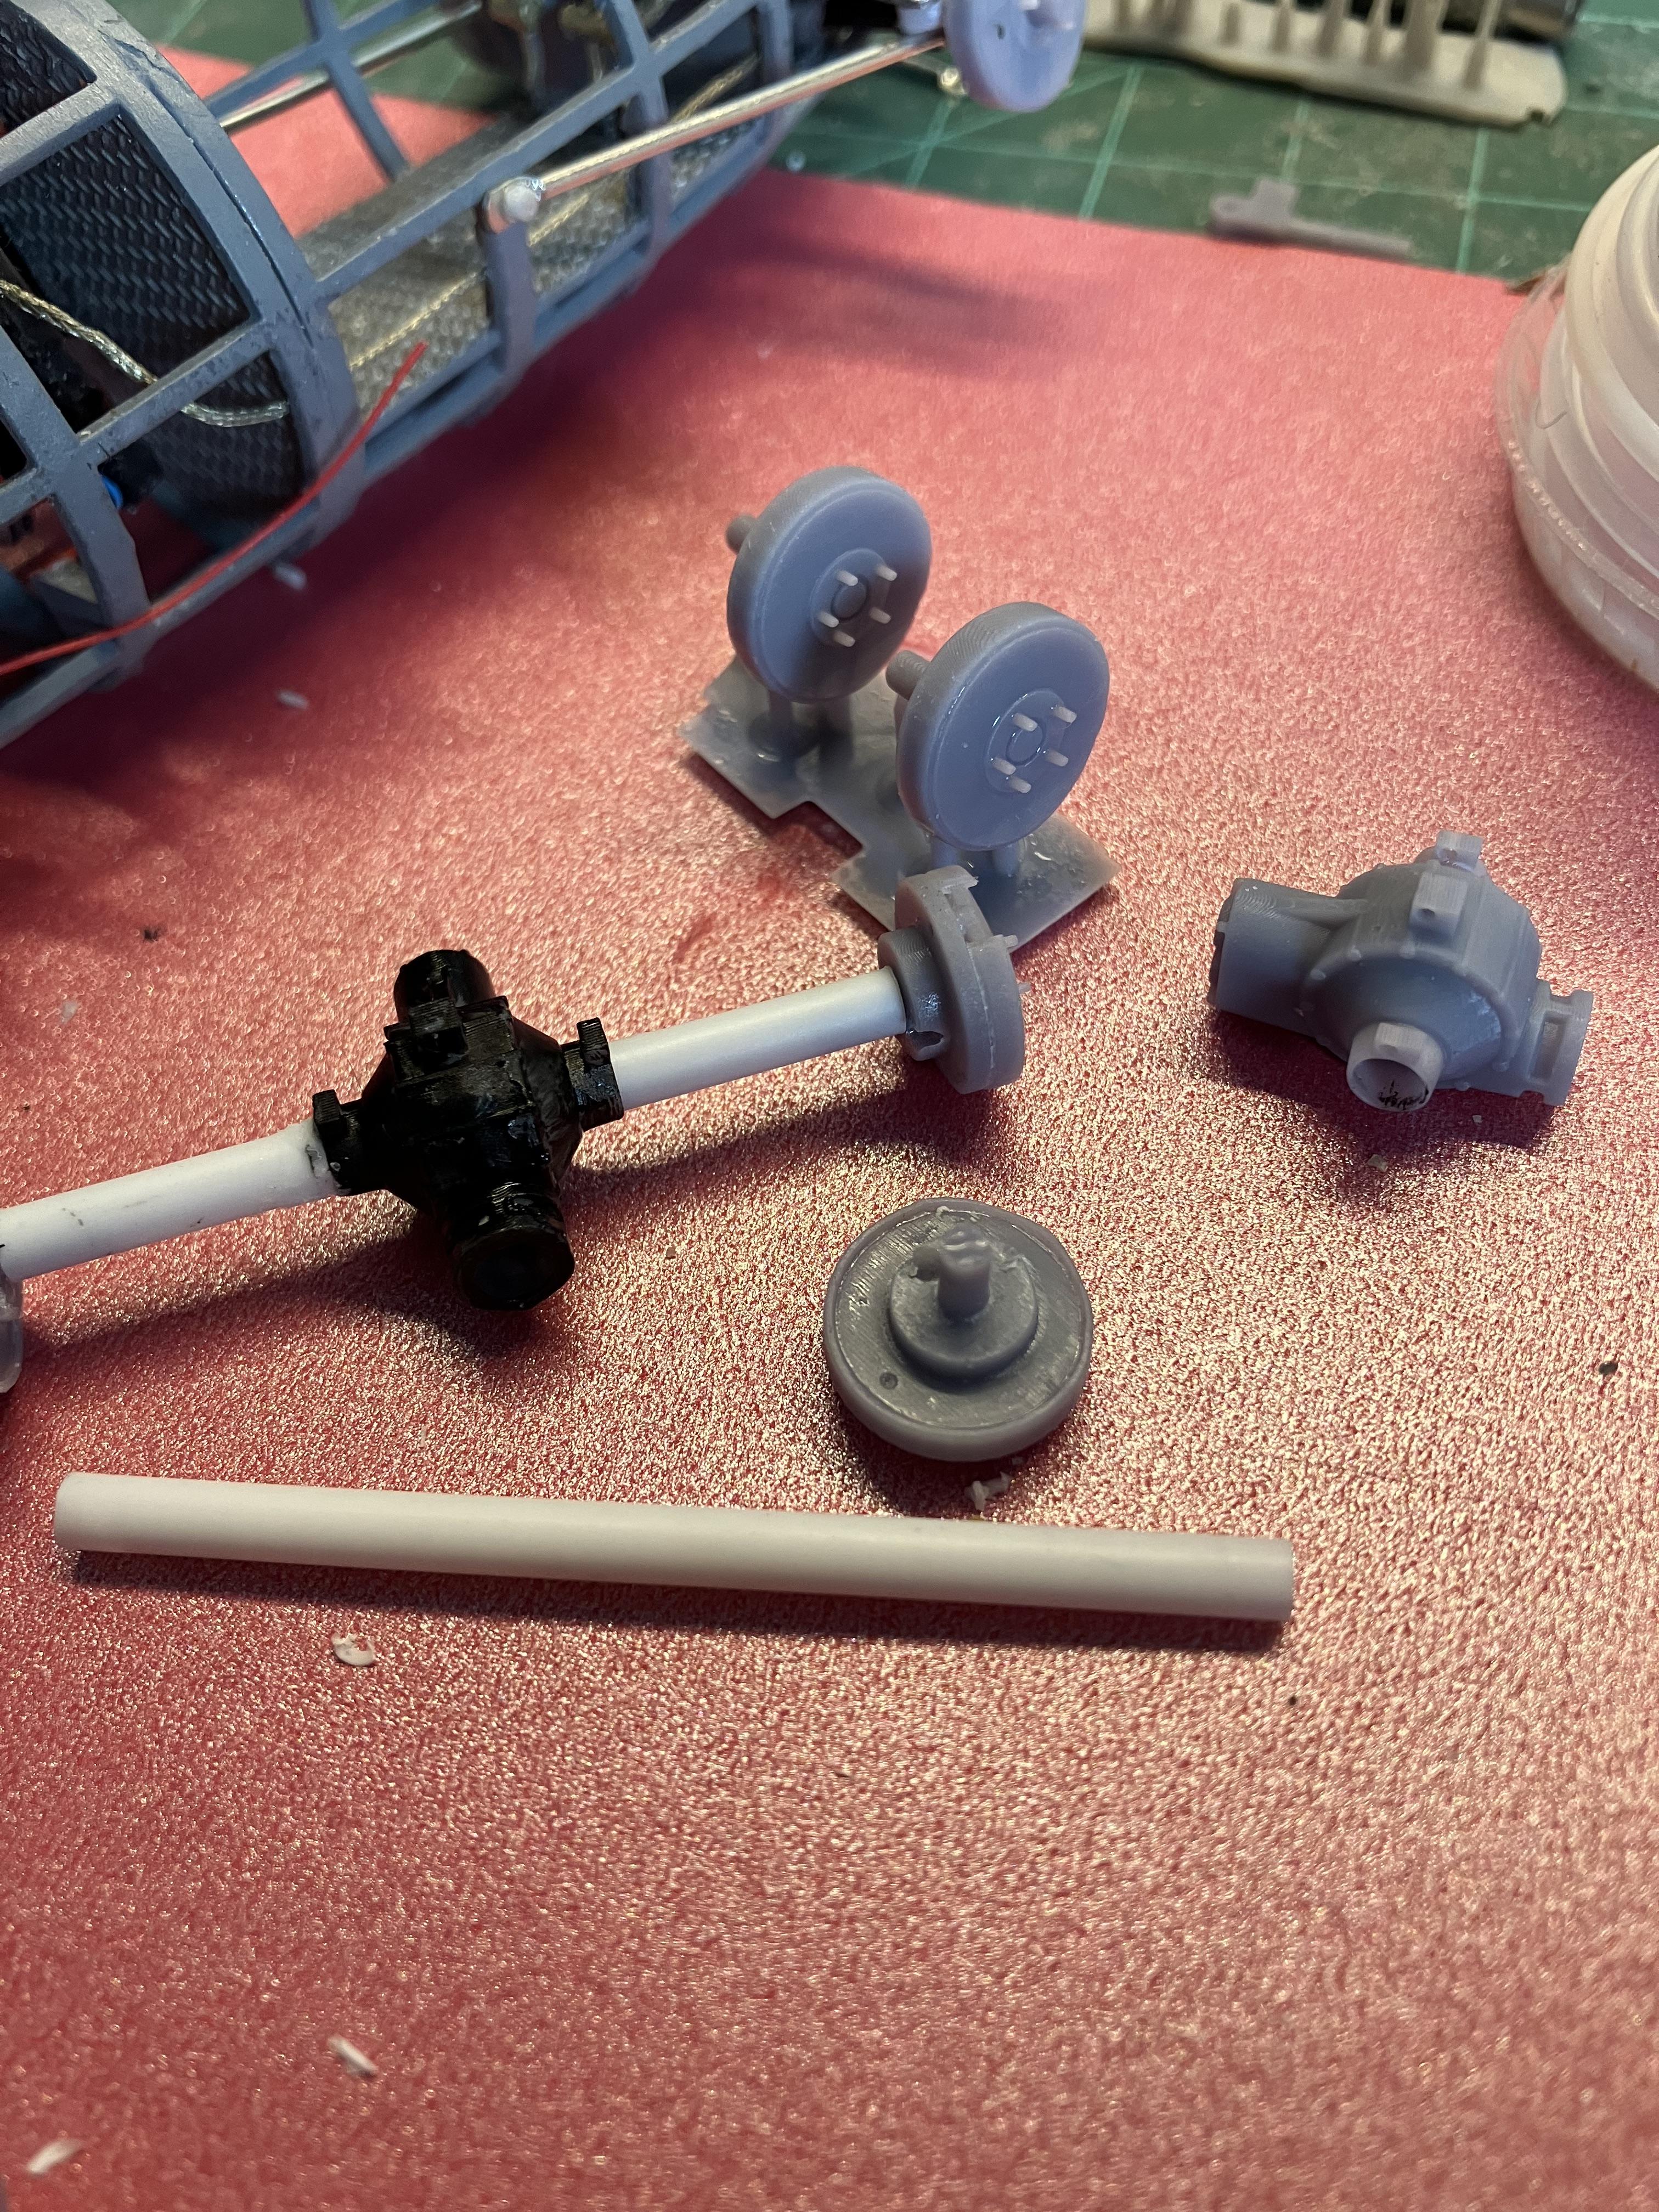
In the rear I printed a differential and used styrene rod for axle housing. I added rear hubs and again used jewelry findings for links I also added a few bits and pieces like battery, pedals, fuel tank, etc.
-
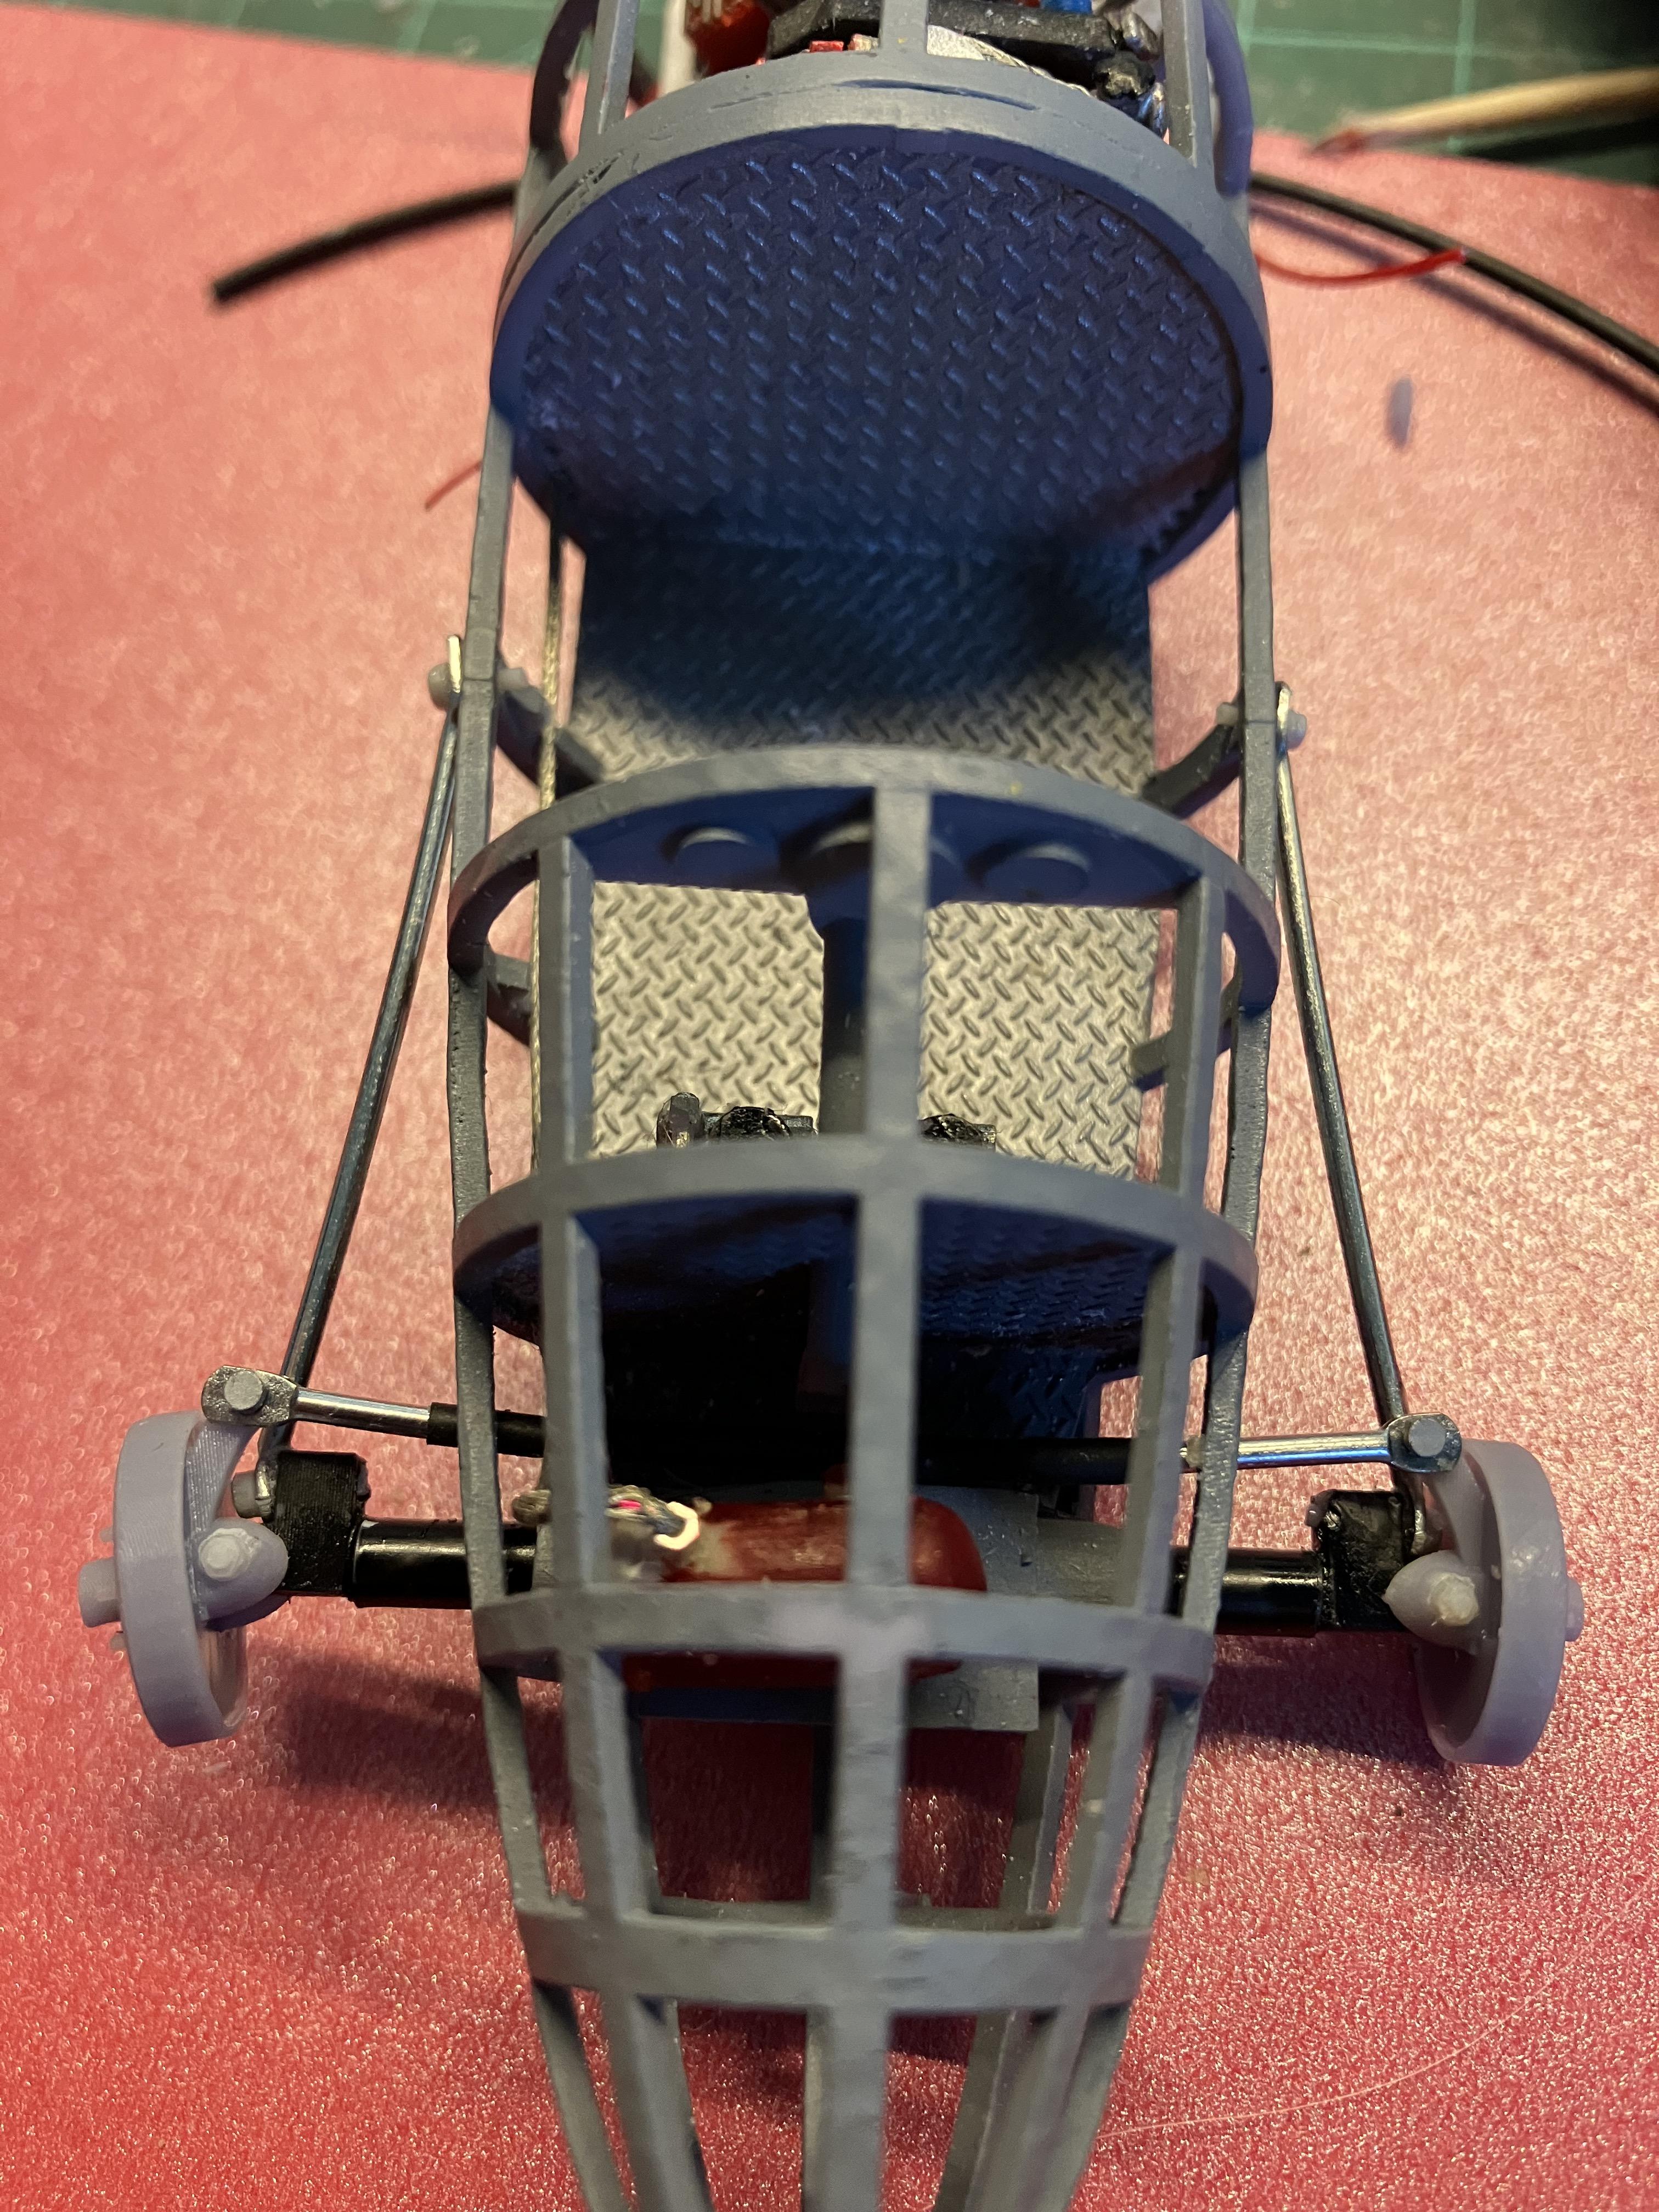
Finally back at the belly tanker. I am trying to not get burned out on it so I set it aside when It stops being fun. When I started out I didn't really think about the shear number of parts that would have to be fabricated. So now I am back to tackle the suspension. I went through many iterations before coming up with a final plan. For the front I started by using a piece of styrene tubing that fits in the bracket that was part of the frame. Next I built front axle ends to support steering and links: I( used jewelry items for the links. held on with bolts I print. It is nice to be able to print fasteners any size and amount Last I put on the front hubs and a tie rod made from jewelry findings I know, there is still a lot of painting needed. .
-
look for Tichy Train Group nuts and bolts. A crazy amount of sizes to pick from and every nut/bolt/washer combination there is. I got a bunch of different sizes and some were almost too small to see. Good product at a good price
-
Unconventional Materials - From the jewelry area
Jiml0001 replied to Jiml0001's topic in Tips, Tricks, and Tutorials
The small coaxial can be hard to find sometimes Right now you can find it on AliExpress 20 meters (65 feet) is $11.82 with $4.00 shipping That works out to less than 2 cents per inch and you get 780 inches of braided cable At my age a lifetime supply
-
Unconventional Materials - From the jewelry area
Jiml0001 replied to Jiml0001's topic in Tips, Tricks, and Tutorials
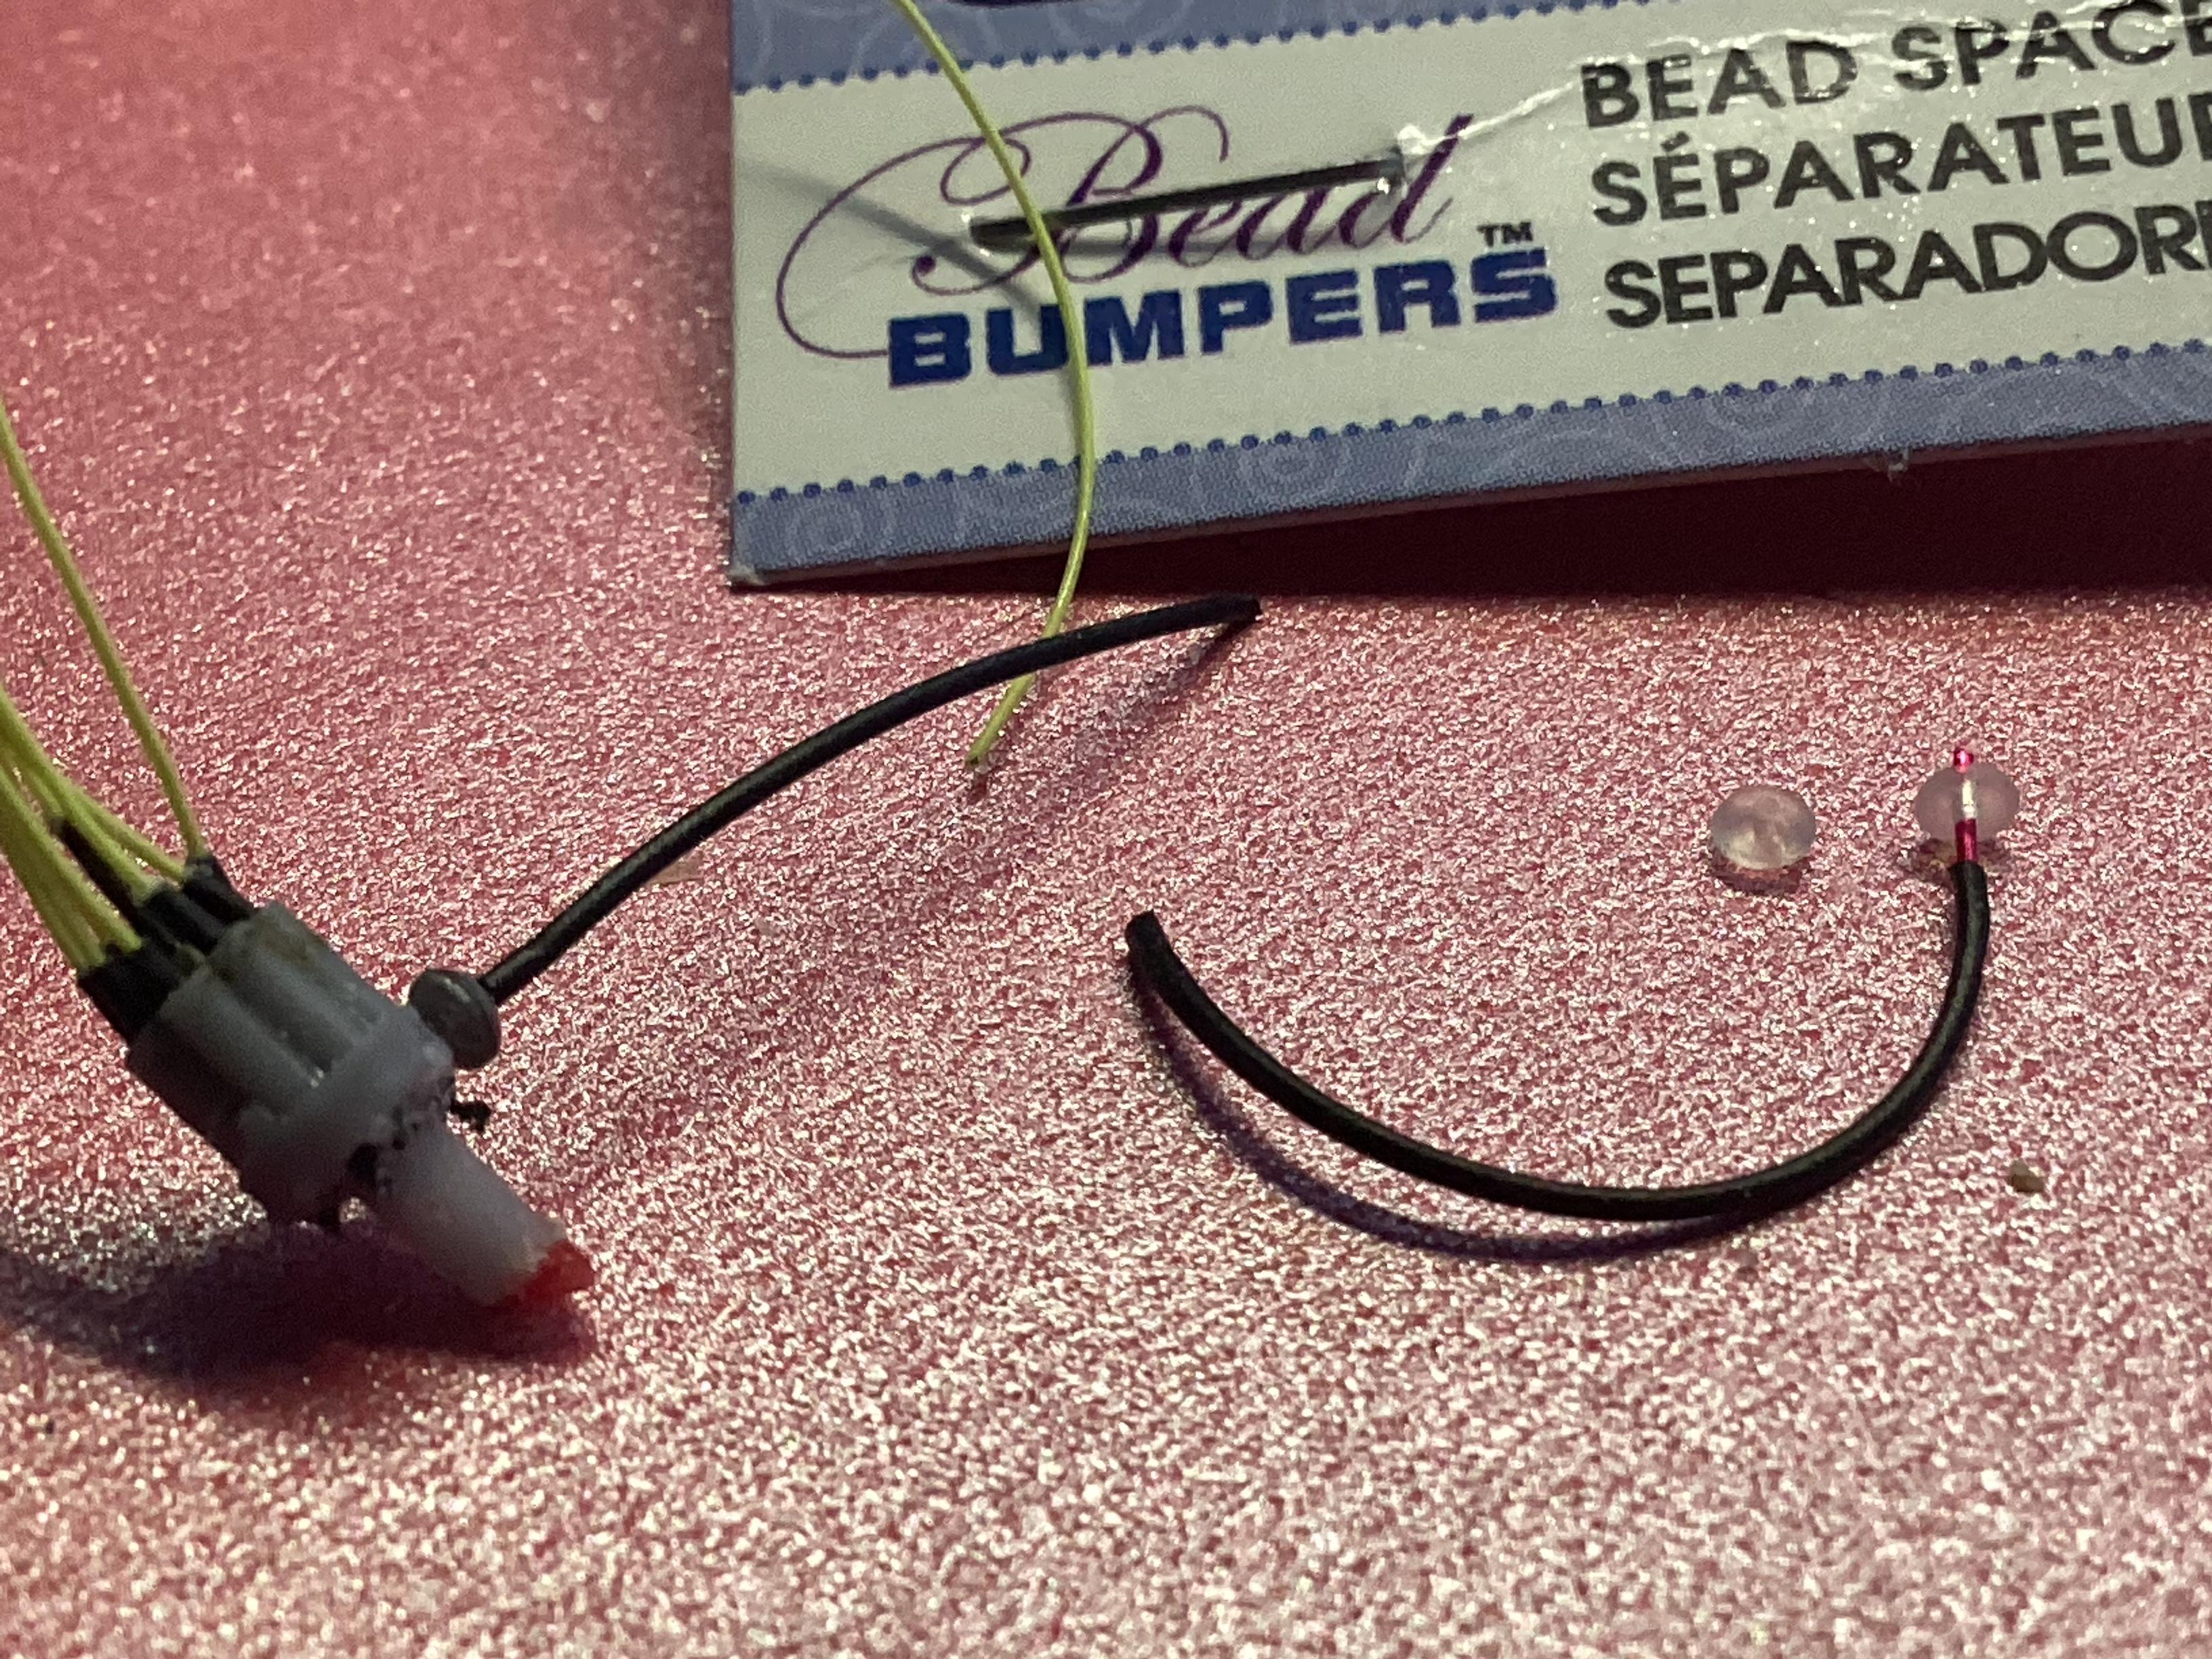
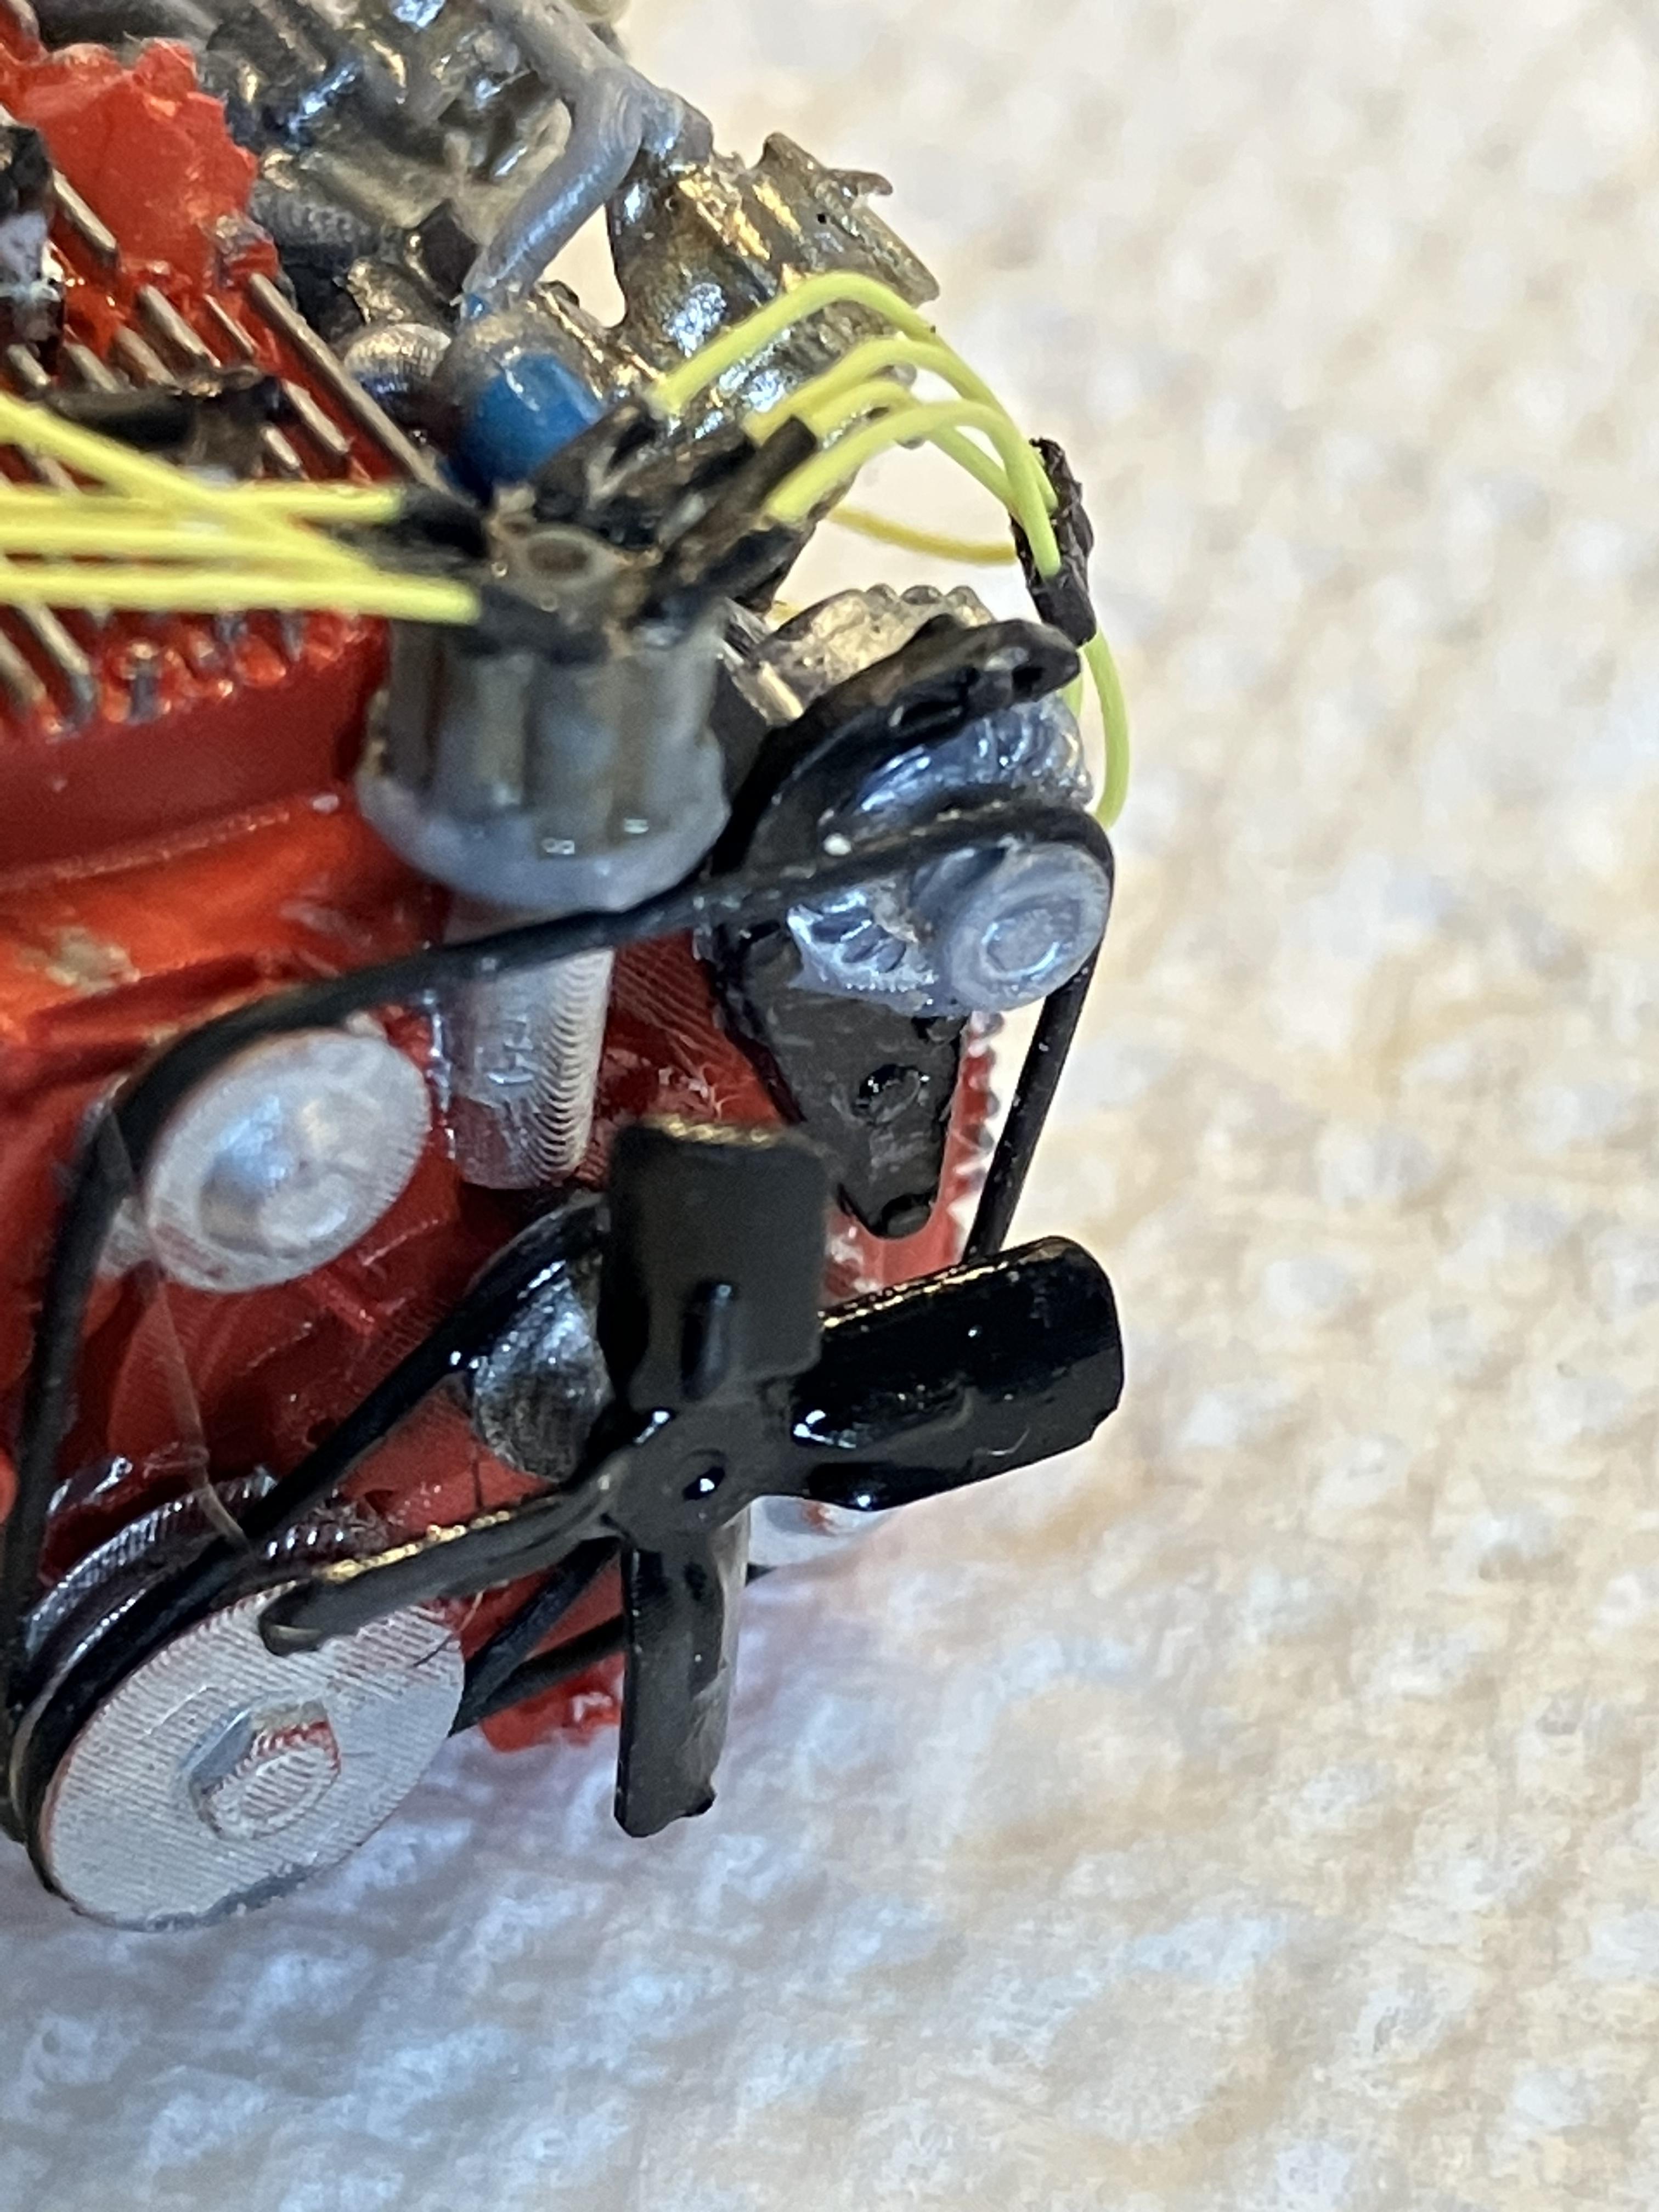
These are glass beads, usually referred to as “seed beads”. another jewelry item I use are bead spacers. These are little bumpers that are strung between beads to space them out. They are little conical pieces and make great vacuum advances. This pic shows 2mm size but other sizes are available. Little piece of wire, some tubing, silver paint and you have a good looking, but tiny vacuum advance uniit
-
Unconventional Materials - From the jewelry area
Jiml0001 replied to Jiml0001's topic in Tips, Tricks, and Tutorials
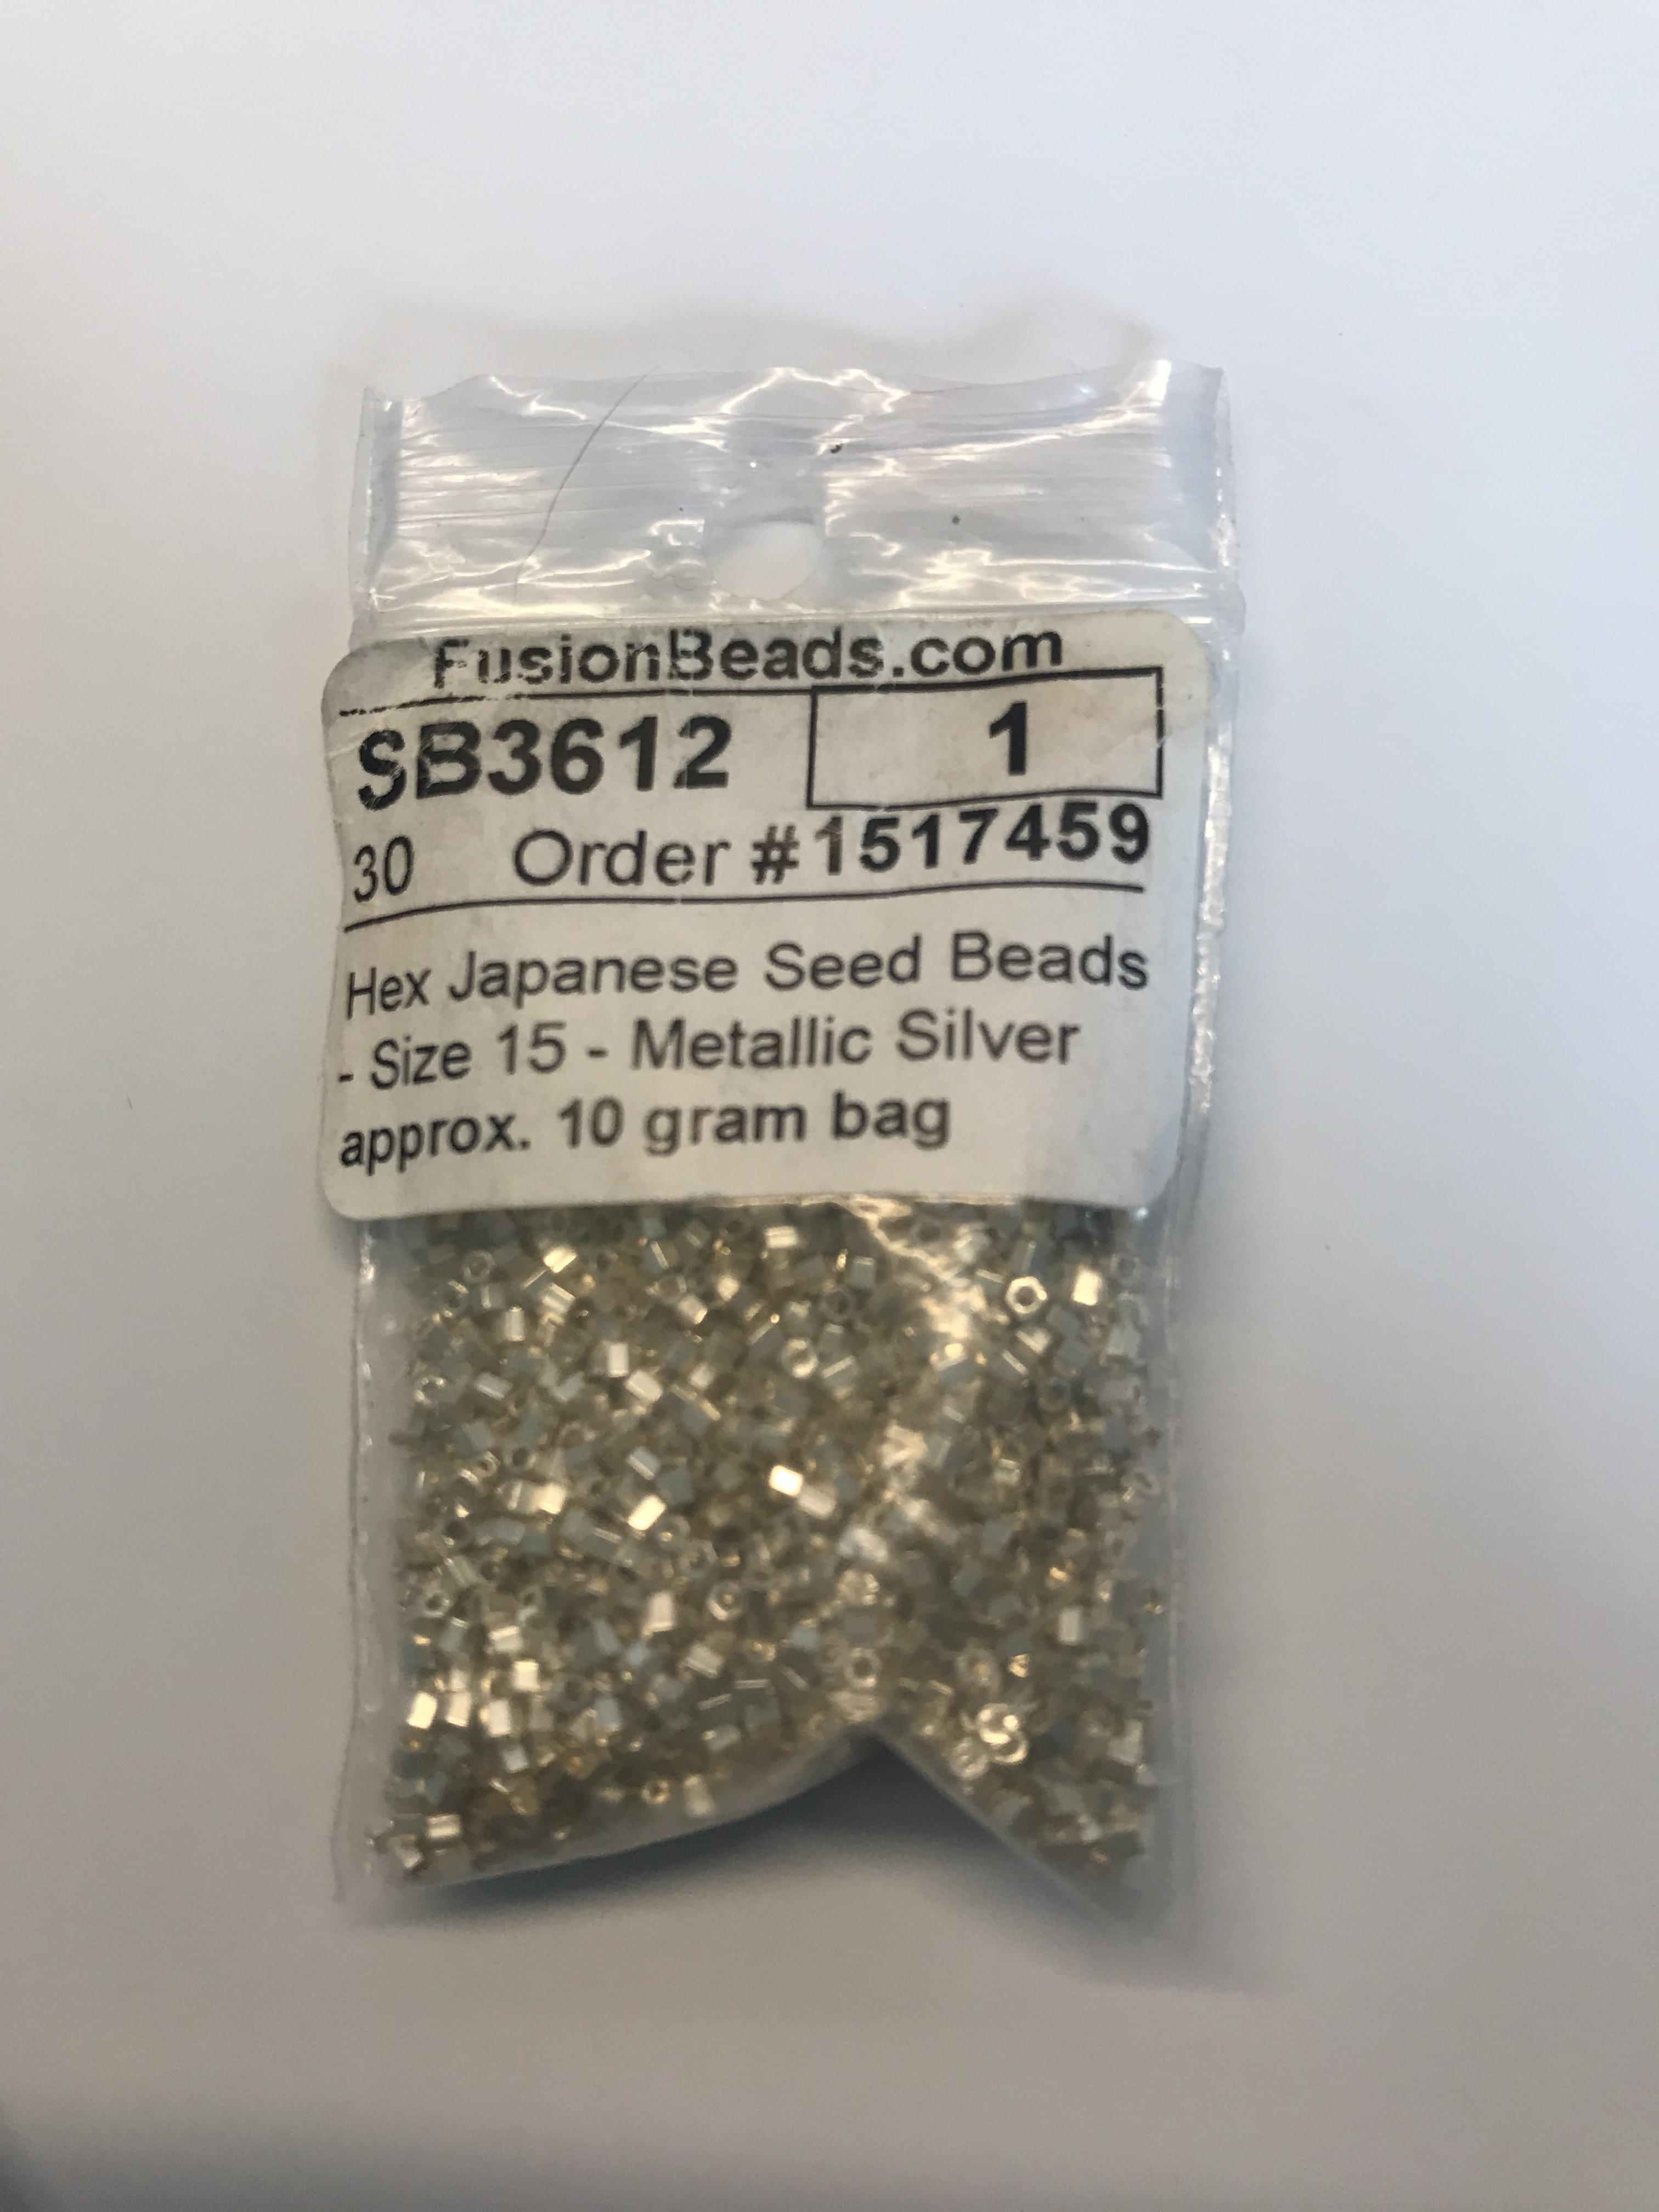
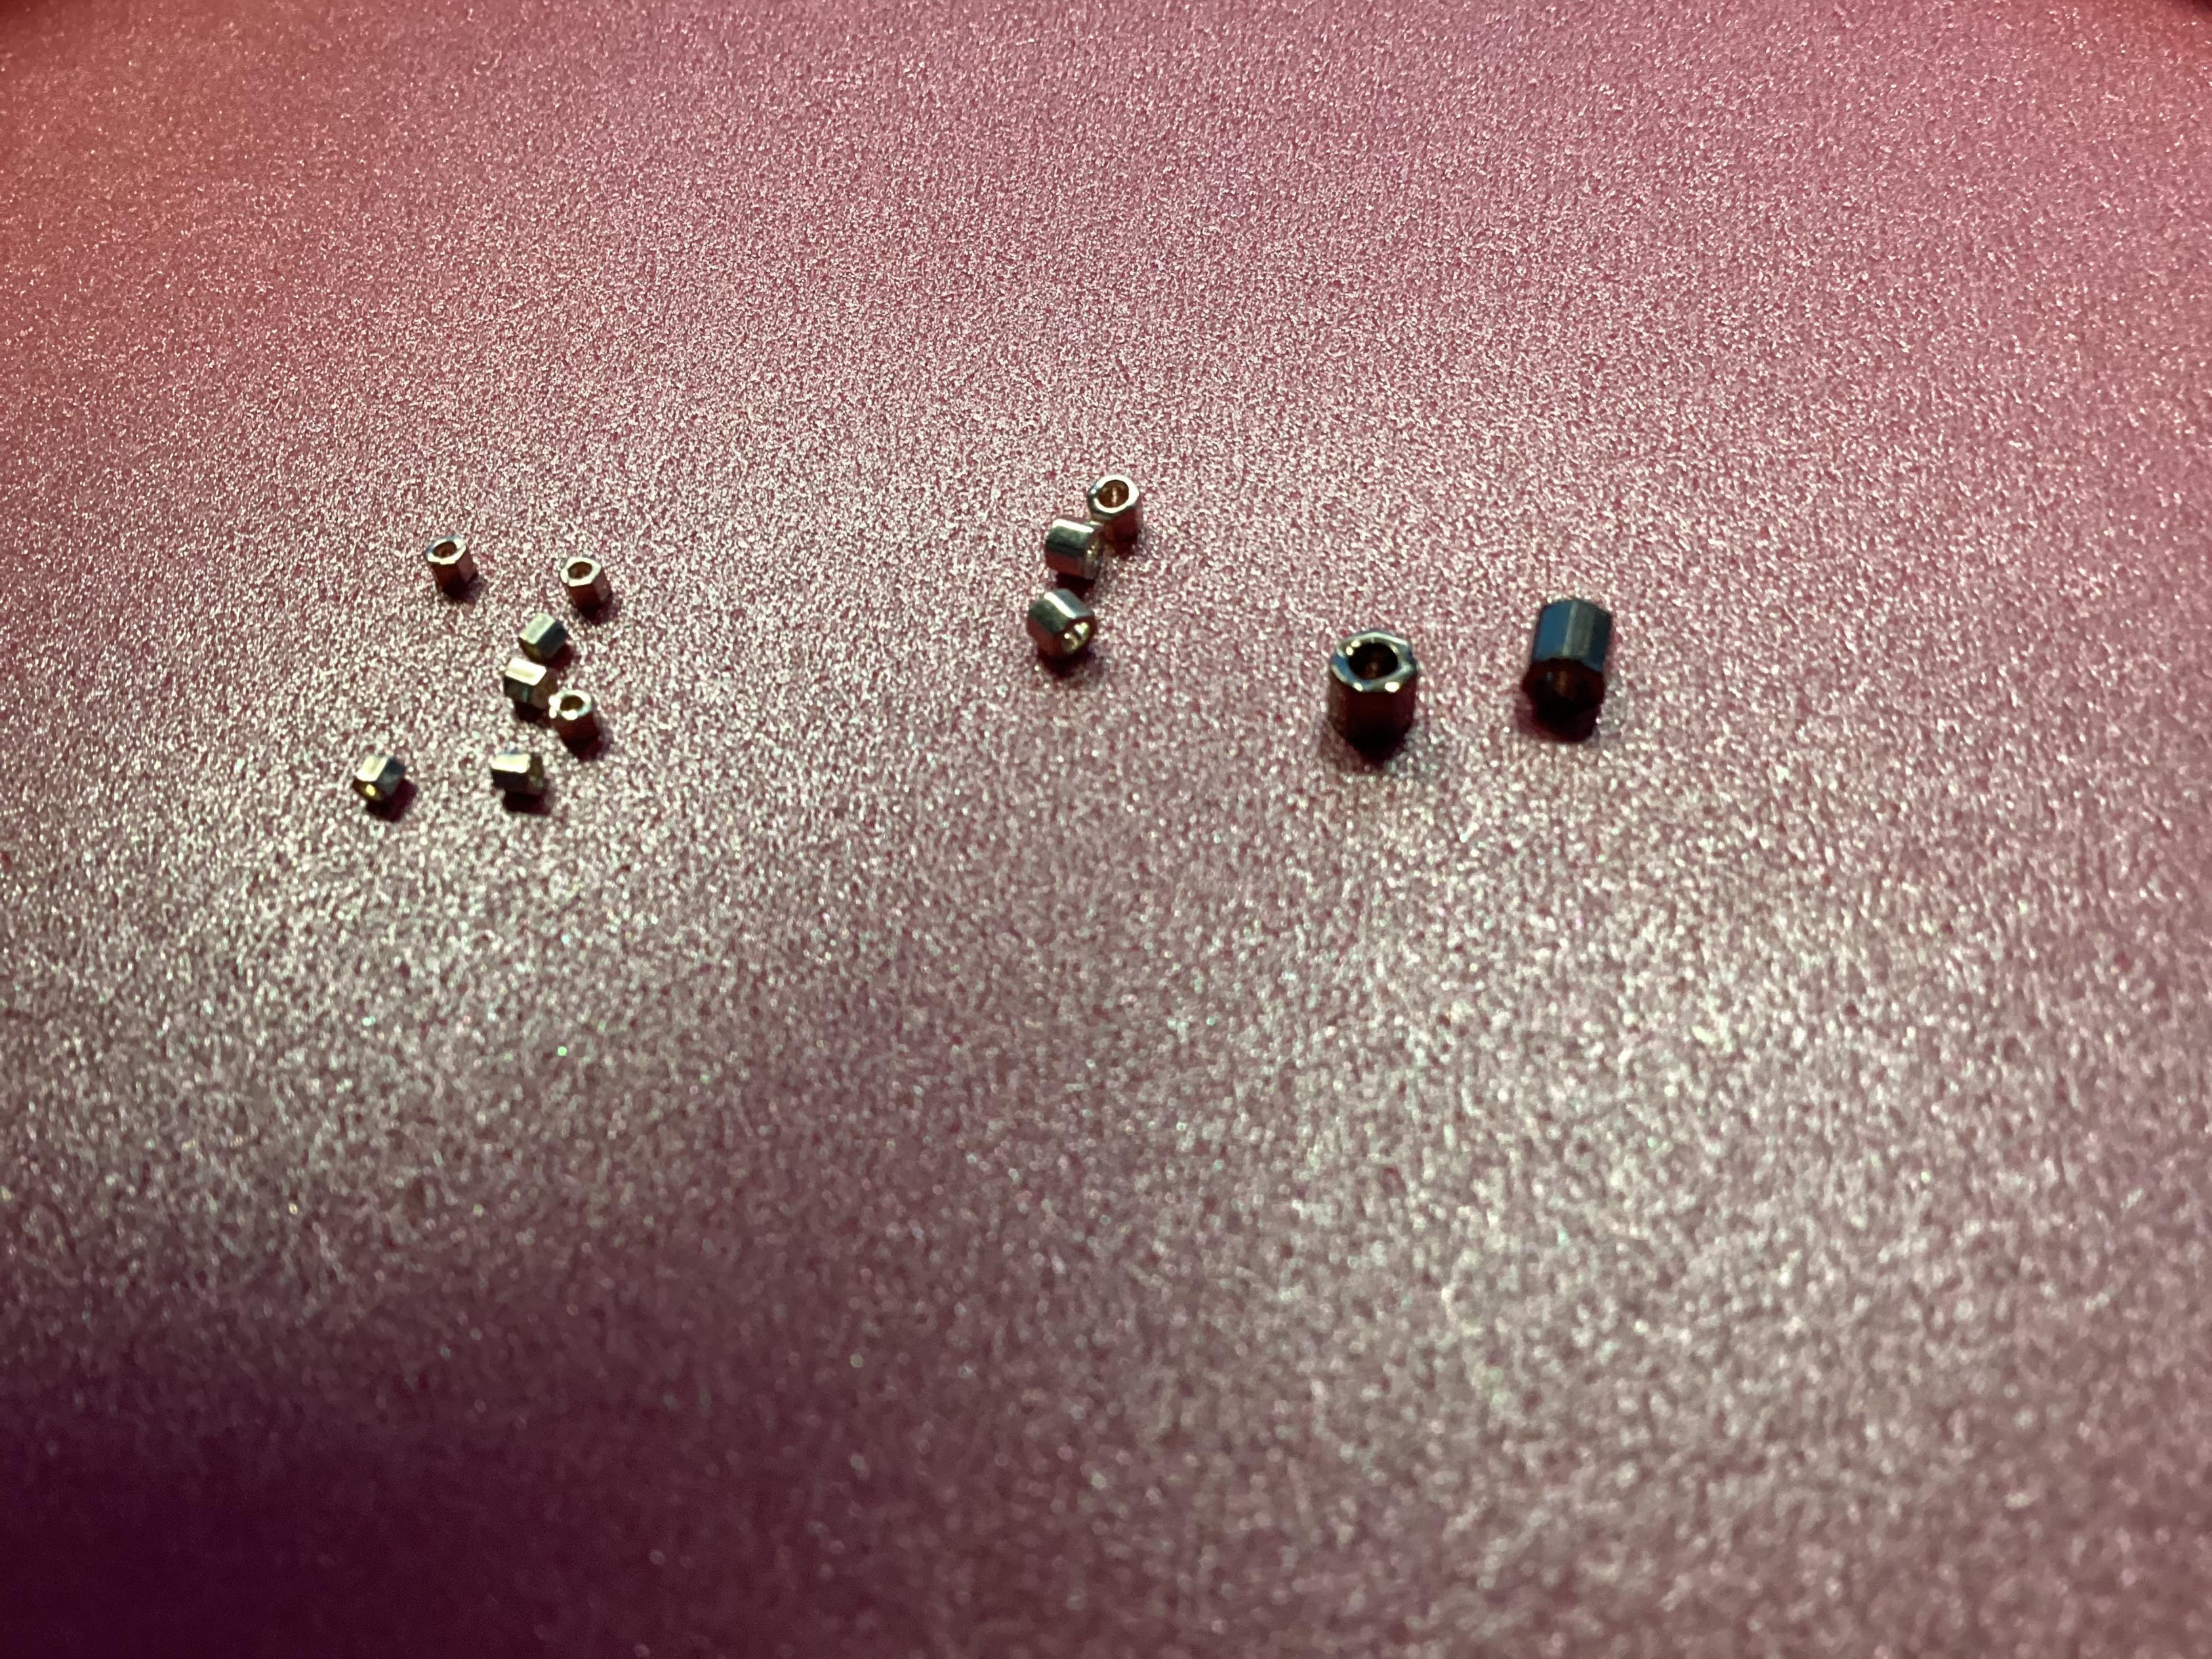
The 15/0 size hex beads are 0.056 inches.
-
Unconventional Materials - From the jewelry area
Jiml0001 replied to Jiml0001's topic in Tips, Tricks, and Tutorials
The smallest hex beads are size 15/0. Google "15/0 Hex Beads" and you will see plenty of hits. I see some on Etsy for $4.55 for 10 grams. That's pretty much a lifetime supply. I got the chrome ones and clear blue and clear red paint on them look great for AN Fittings. I also found some .81 mm coaxial cable. If you remove the outer insulation and pull out the center core, you are left with a braid of less than a half mm (3/8 inch in 1:1). This will fit into these small hex beads and you can make all the braided lines you want. a 65 foot piece of .81 mm coaxial cable is $15.00. 65 feet of braid will make a lot of models
-
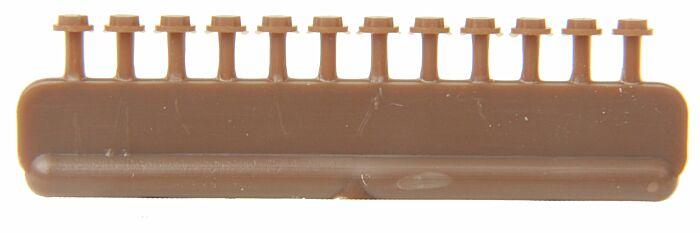
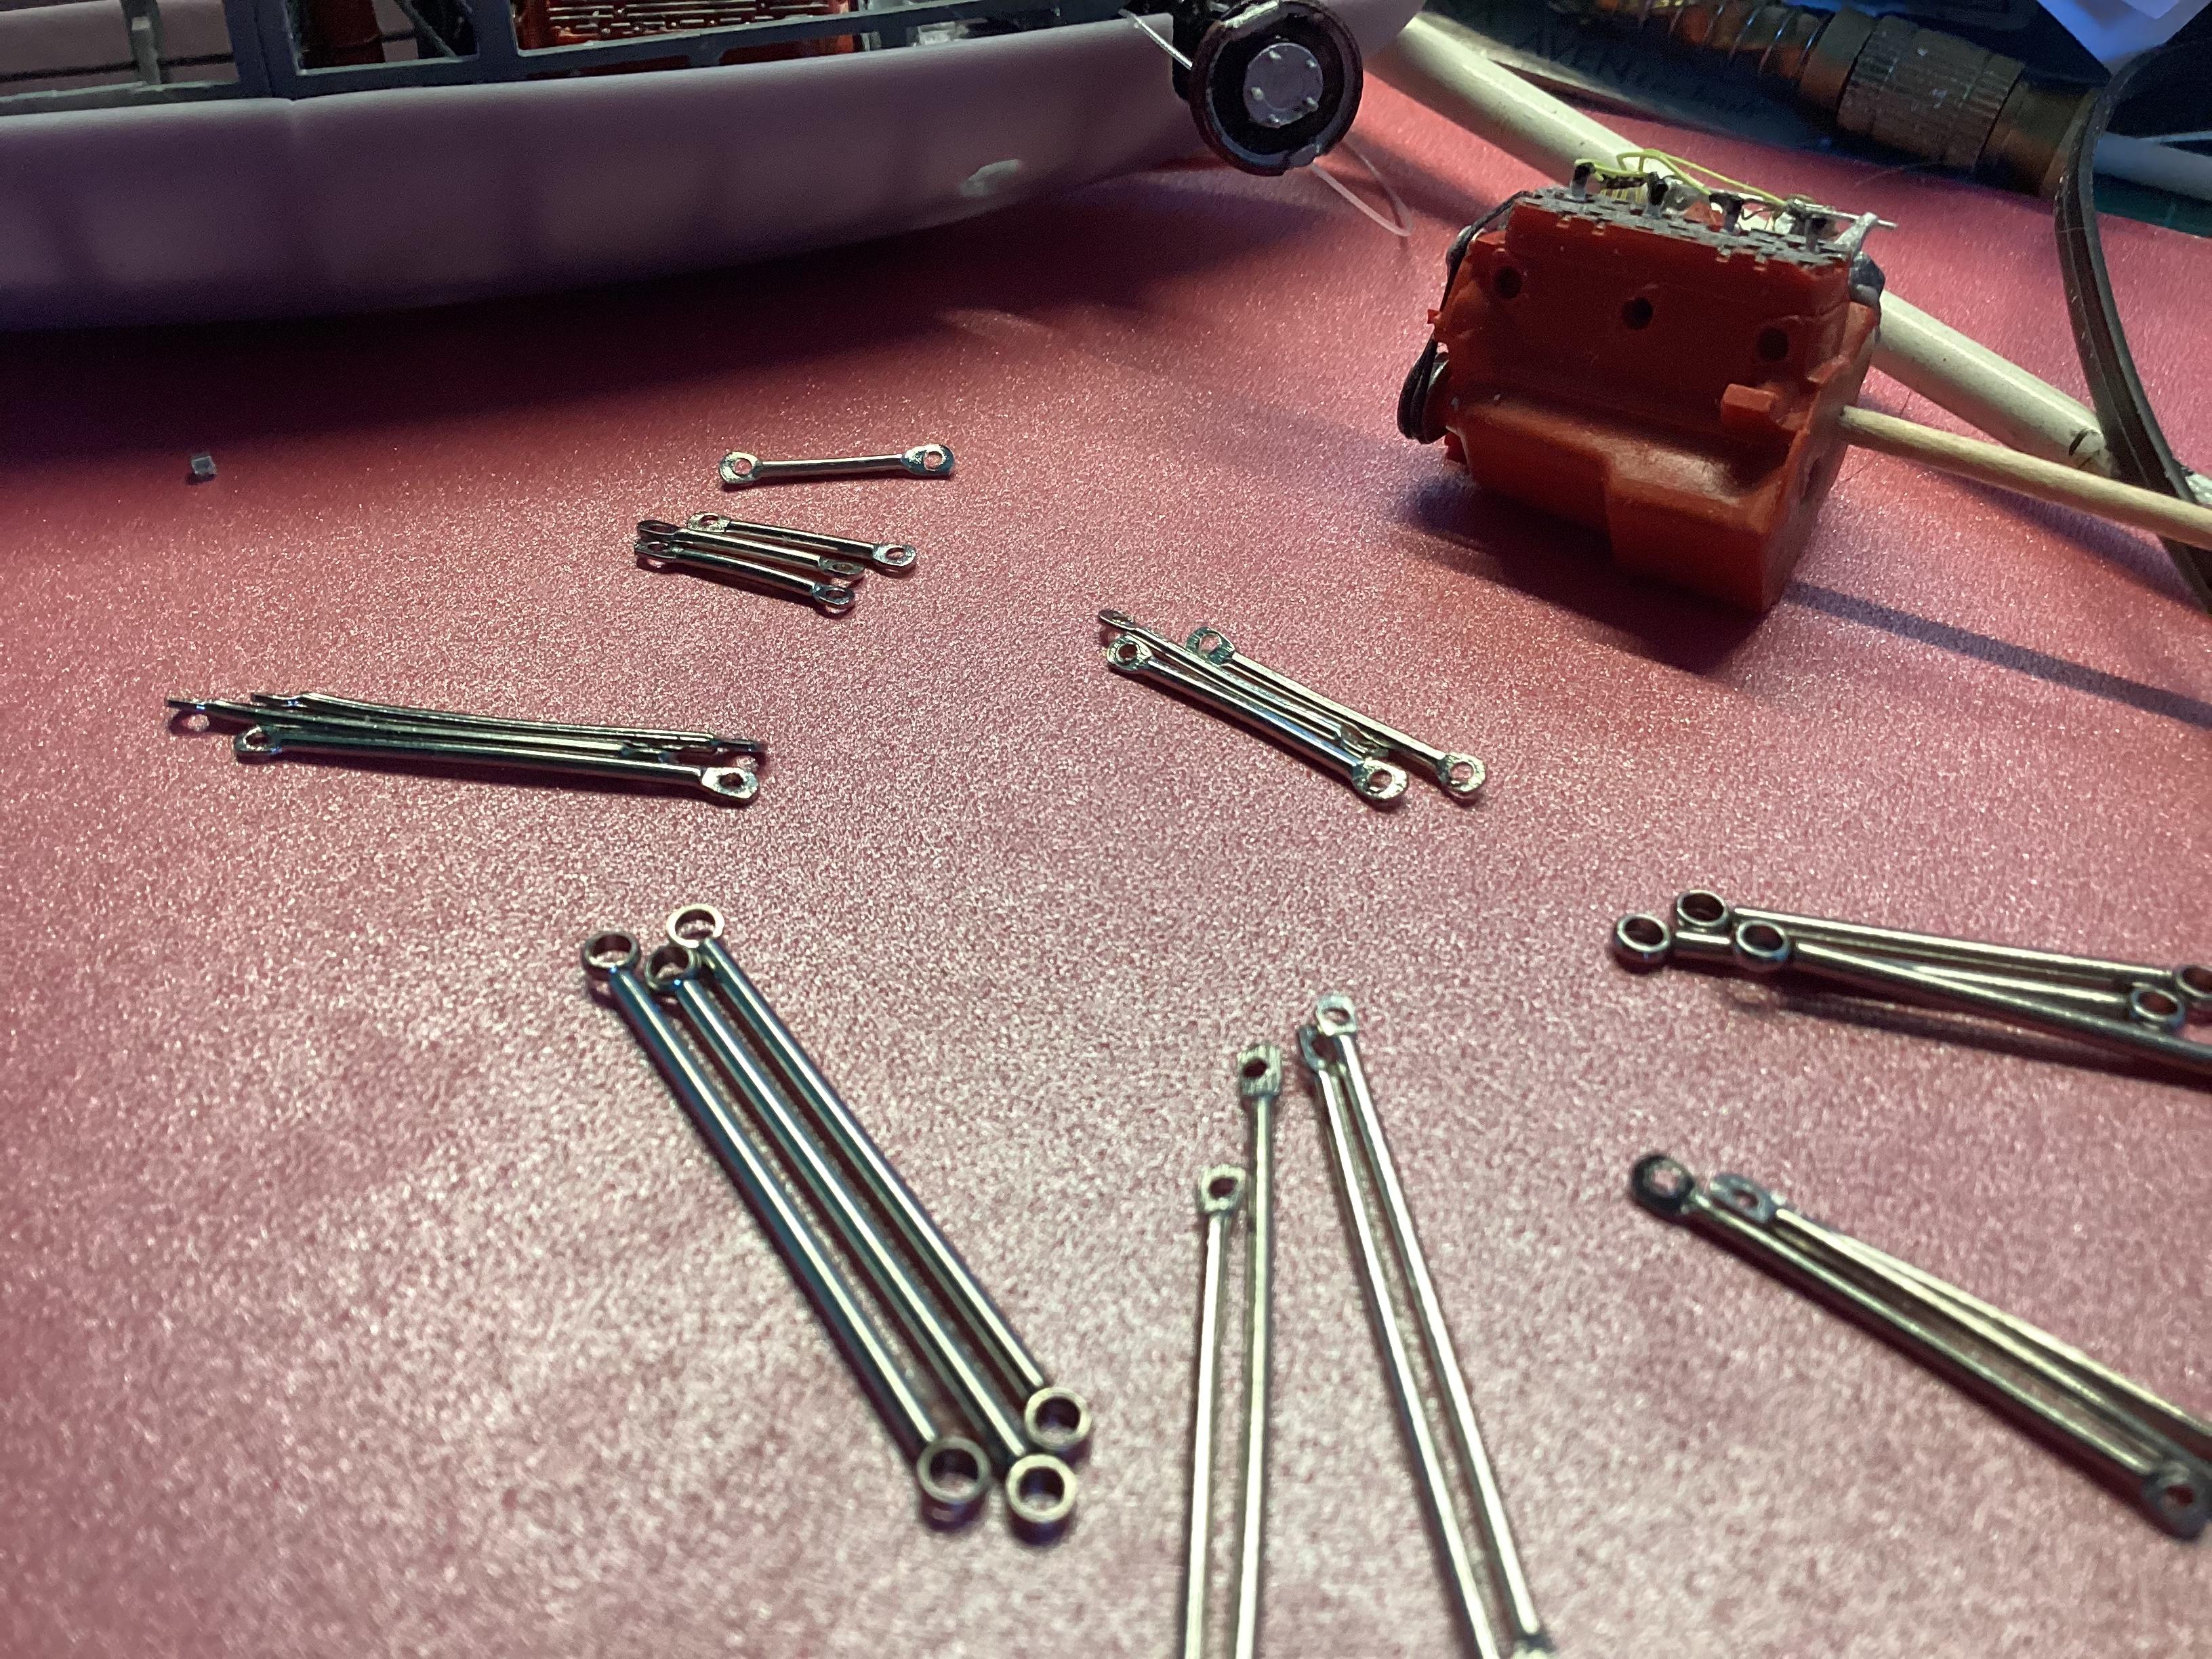
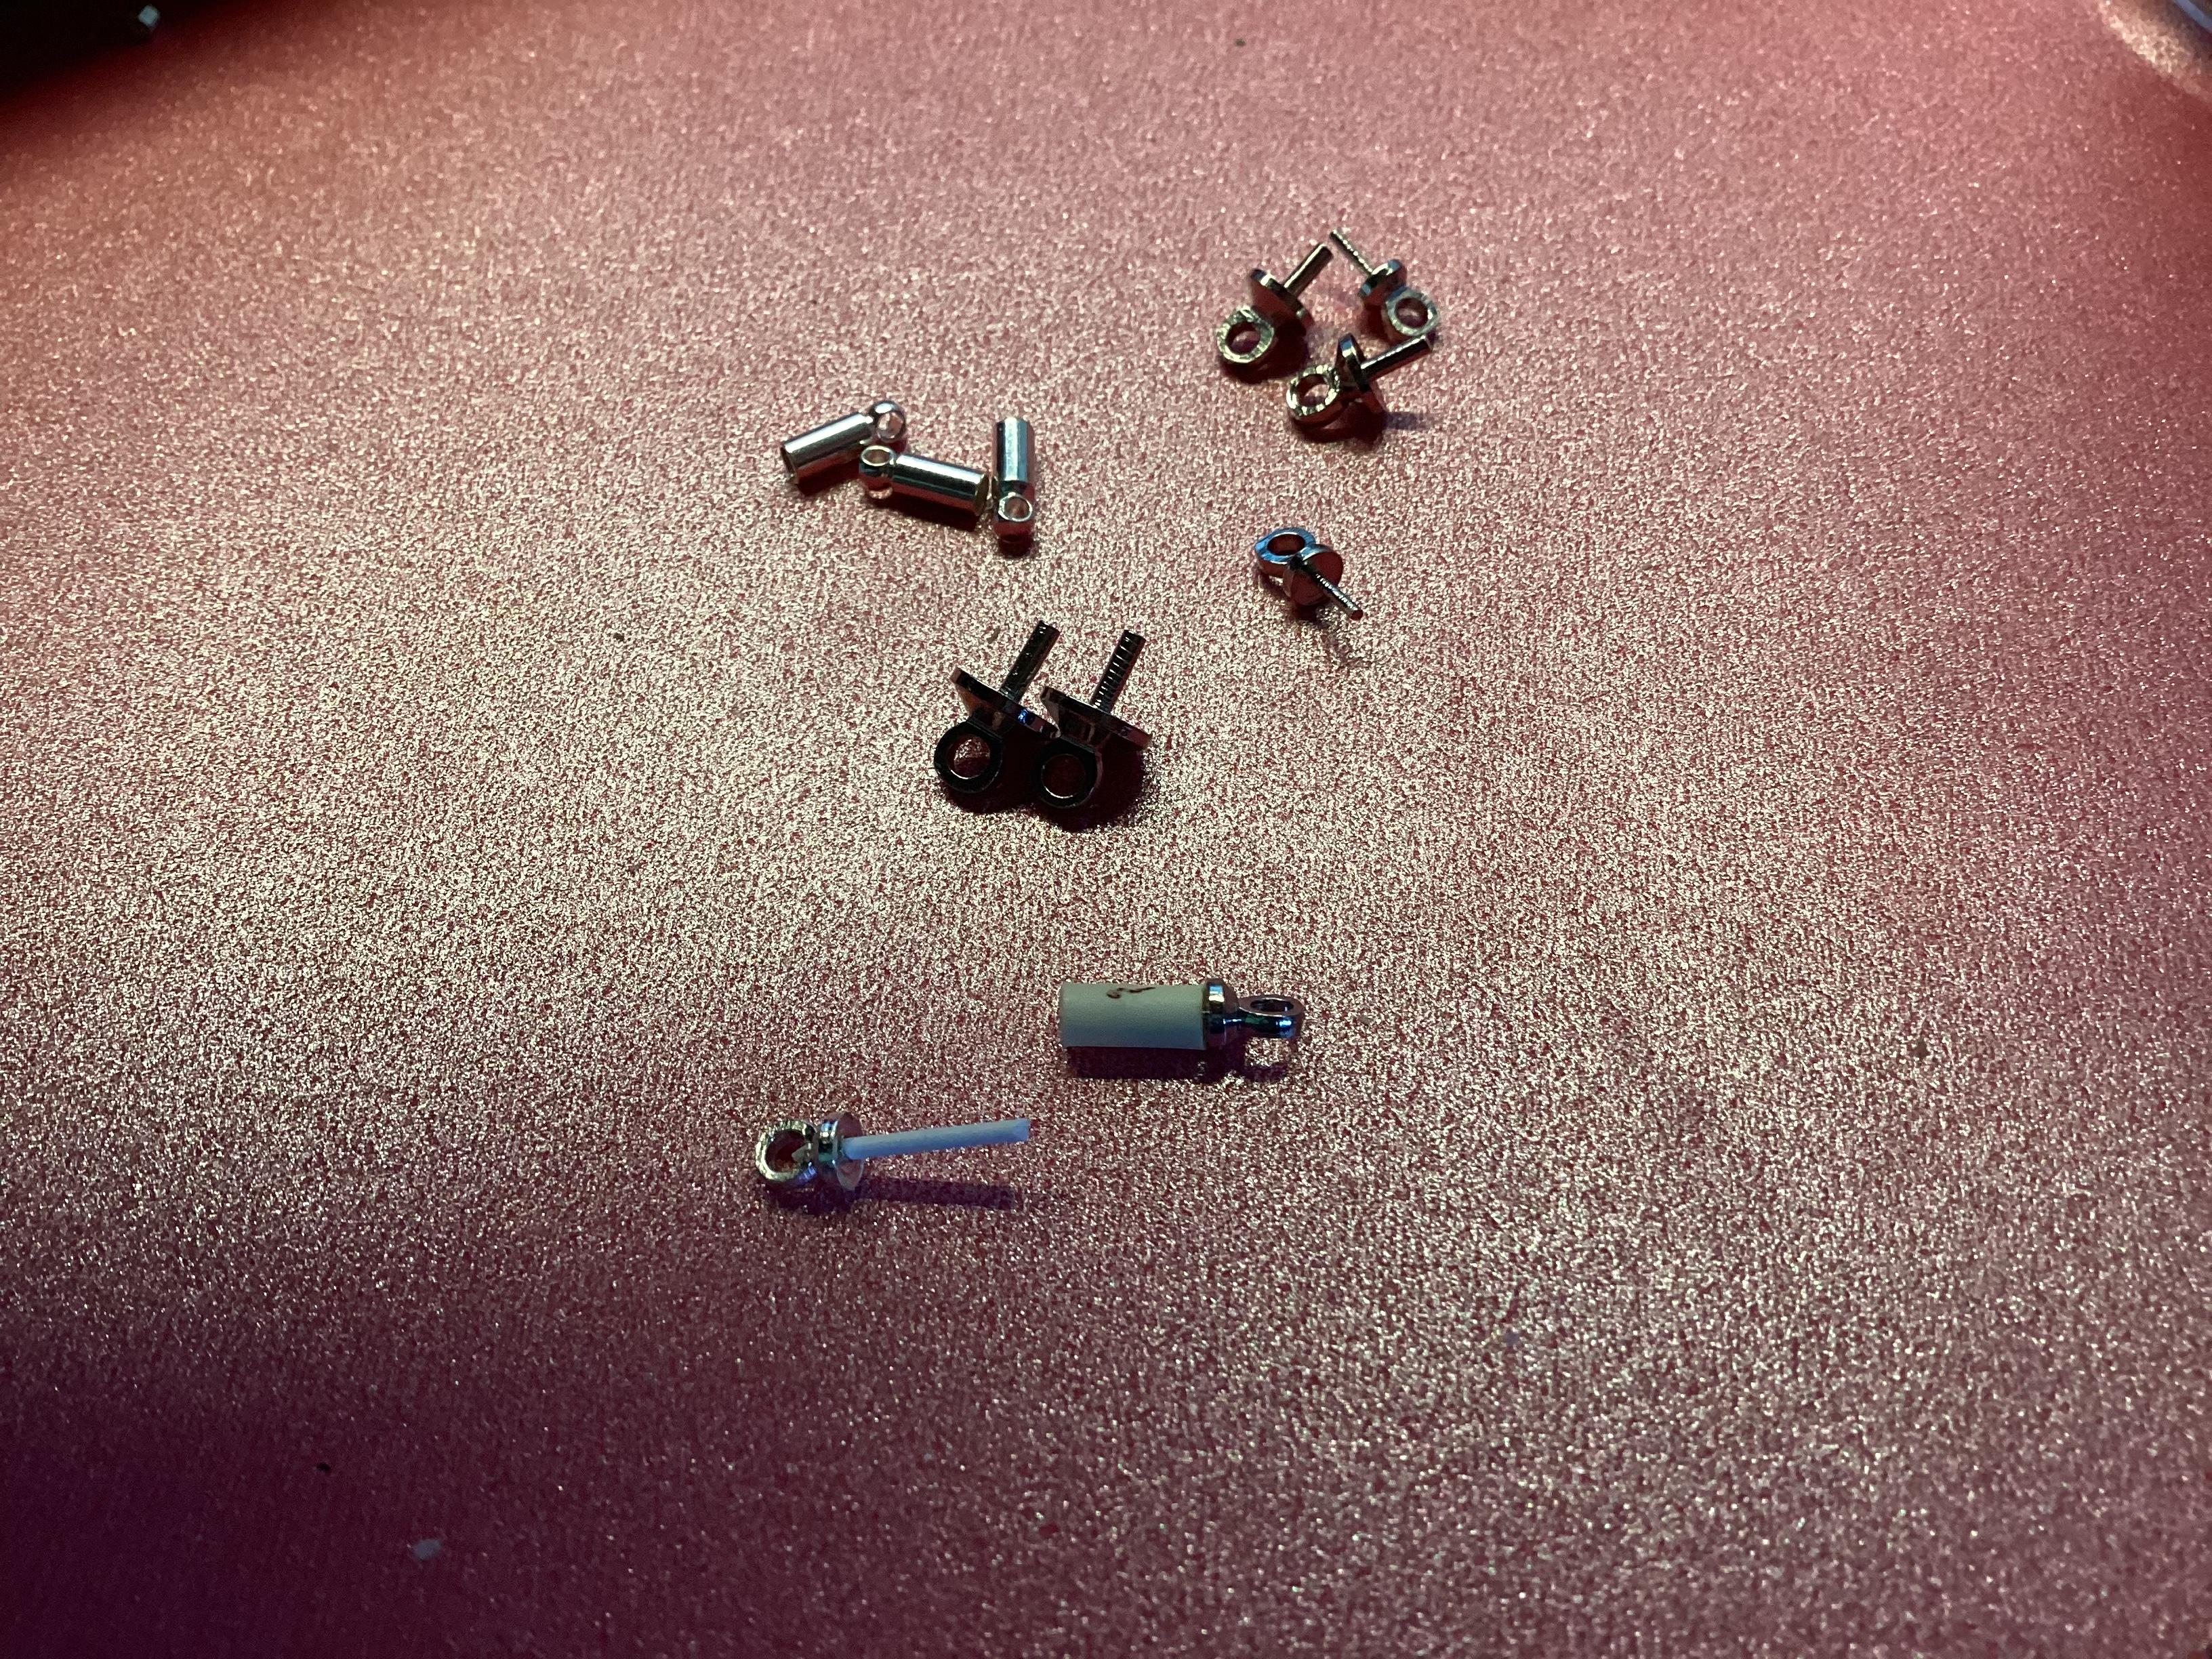
Looking through the bits and pieces available to jewelry makers (sometimes called “jewelry findings”) I came across some fun stuff. These bits and pieces are very inexpensive, generally $2 to $3 for a bag. In the pictures below the sizes range from less than a mm (less than an inch in 1:1) to thirty inches (in 1:1) for the longest link shown. There are cord ends that make excellent shock absorber ends. These show some of the stuff i bought but there are all kinds of shapes and sizes of jewelry parts to pick from for your project. Show us the unconventional materials you have found
-
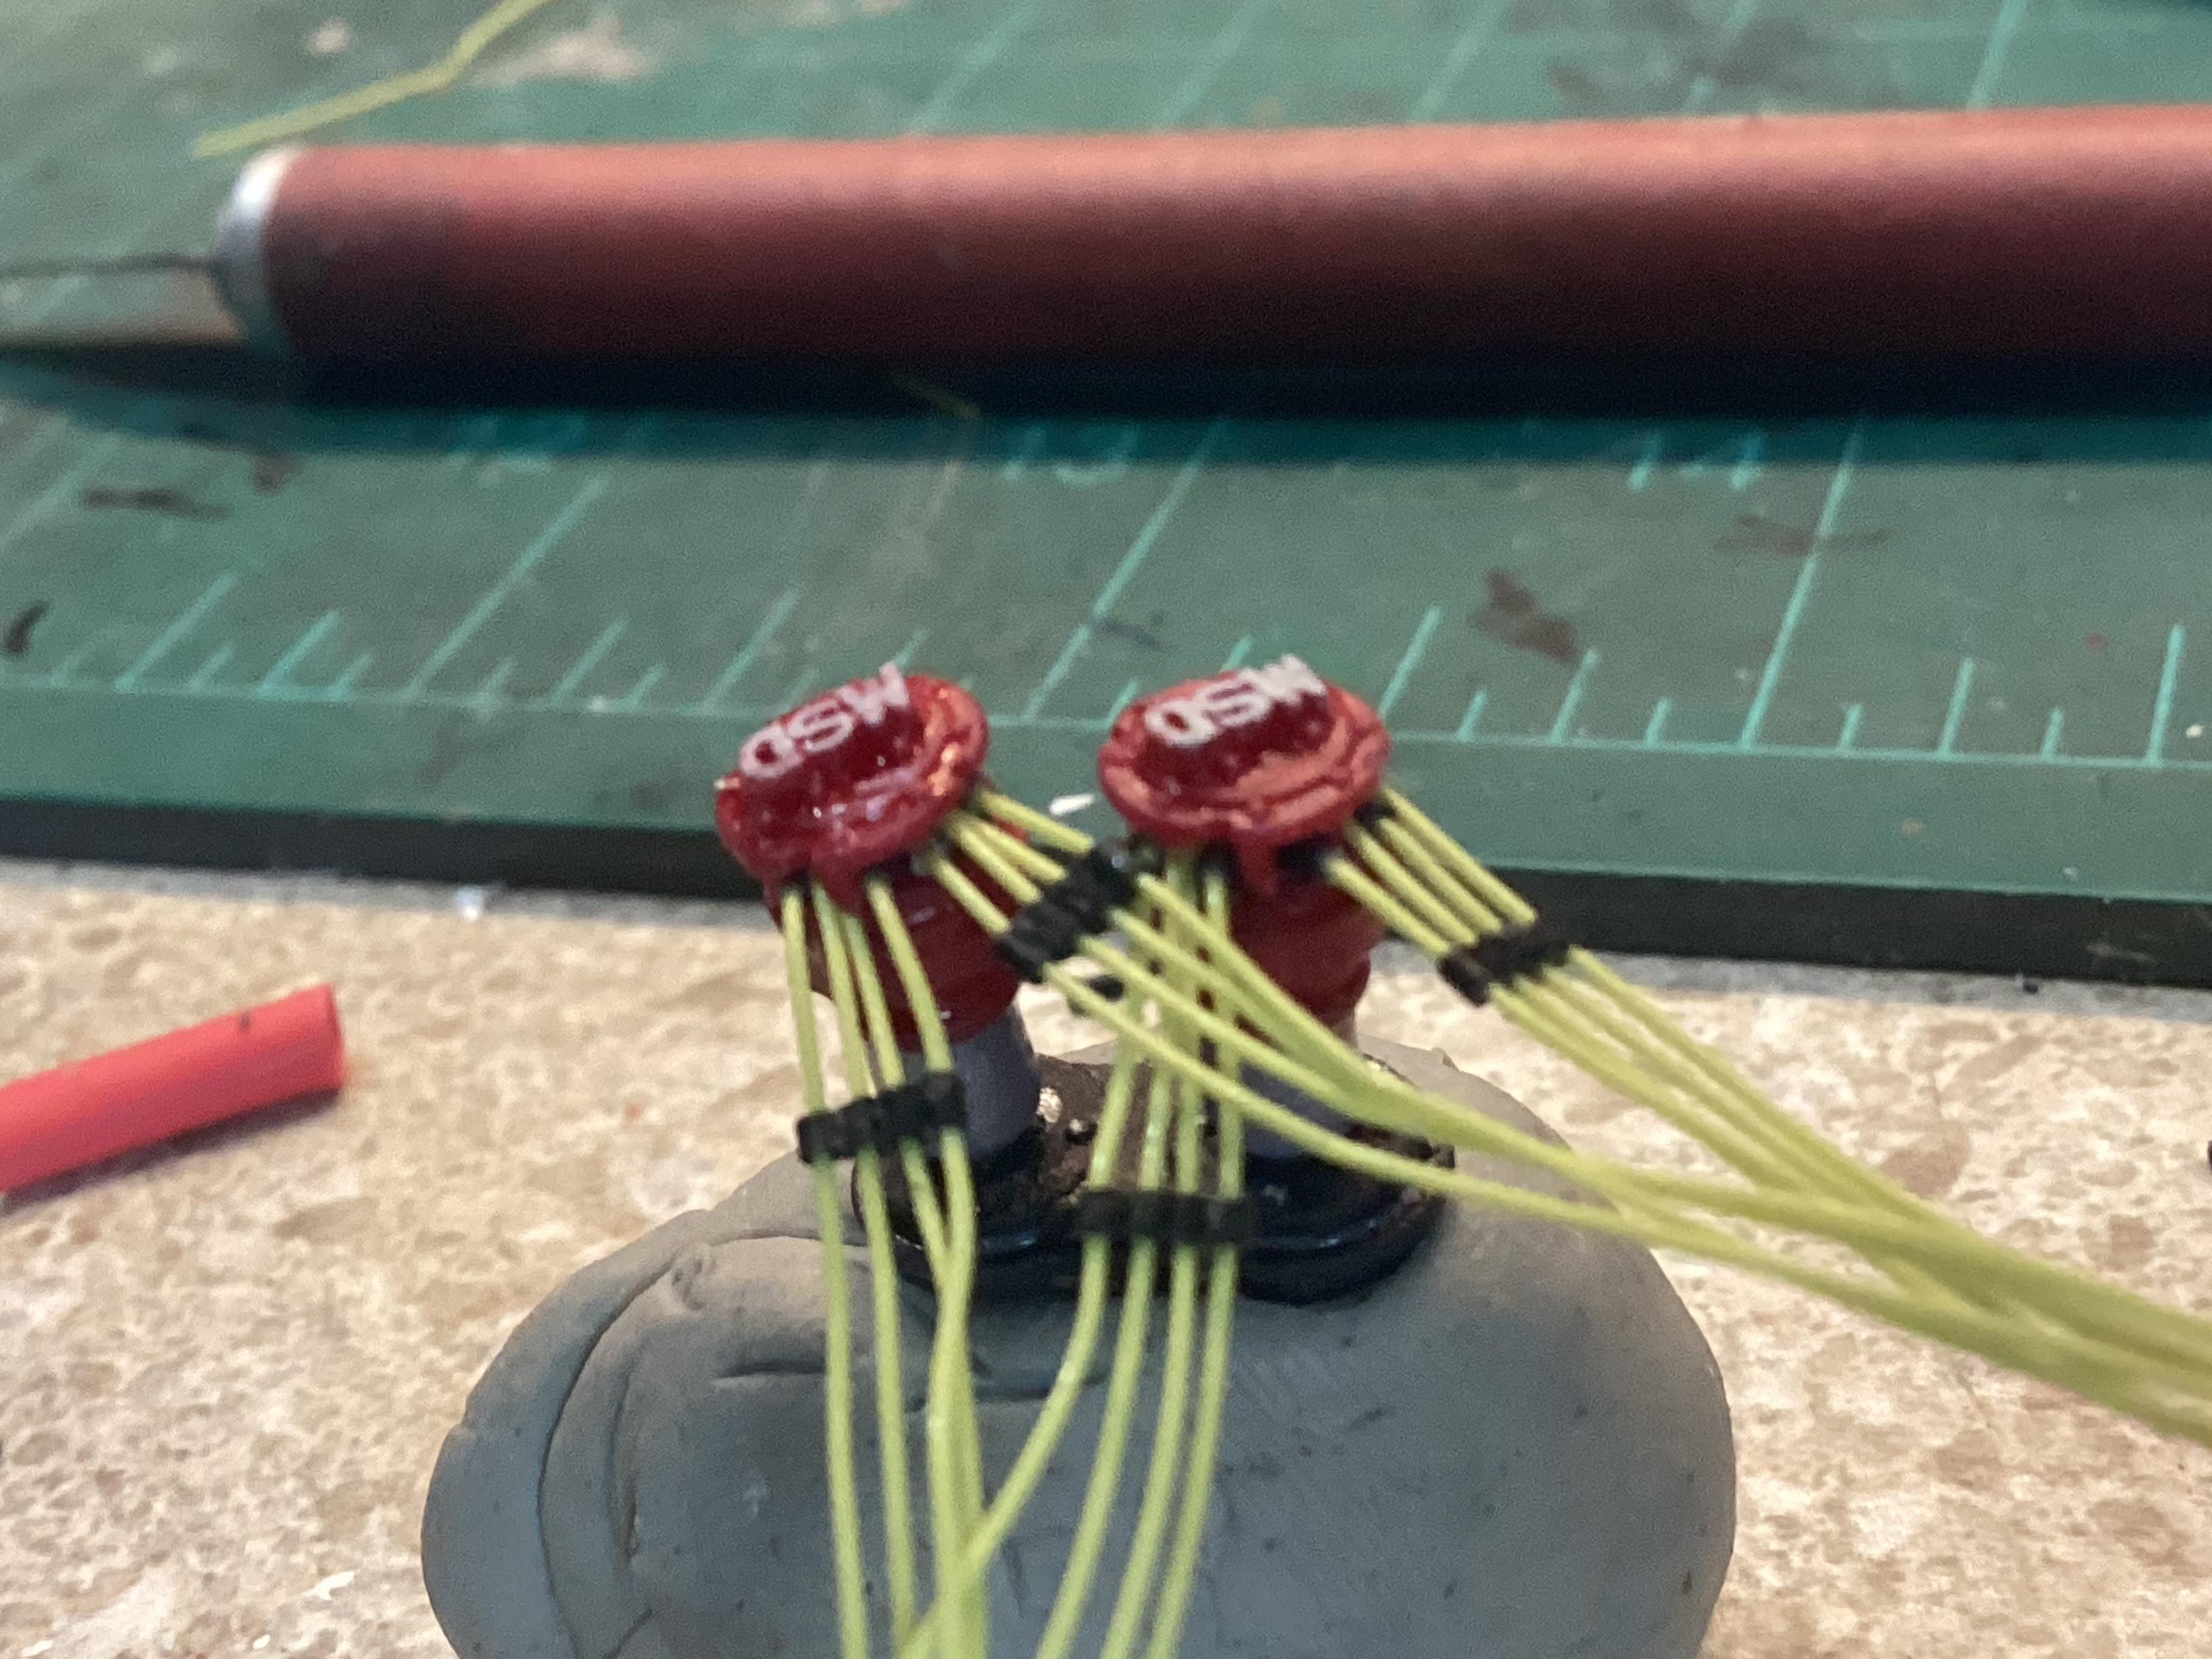
1/24 / 1/25 MSD distributors
Jiml0001 replied to Monty's topic in Car Aftermarket / Resin / 3D Printed
here are some MSD distributors I printed. I can print them with or without vacuum advances. Also this picture shows a dual distributor mount. If anyone wants some let me know. Just reimburse for postage
-
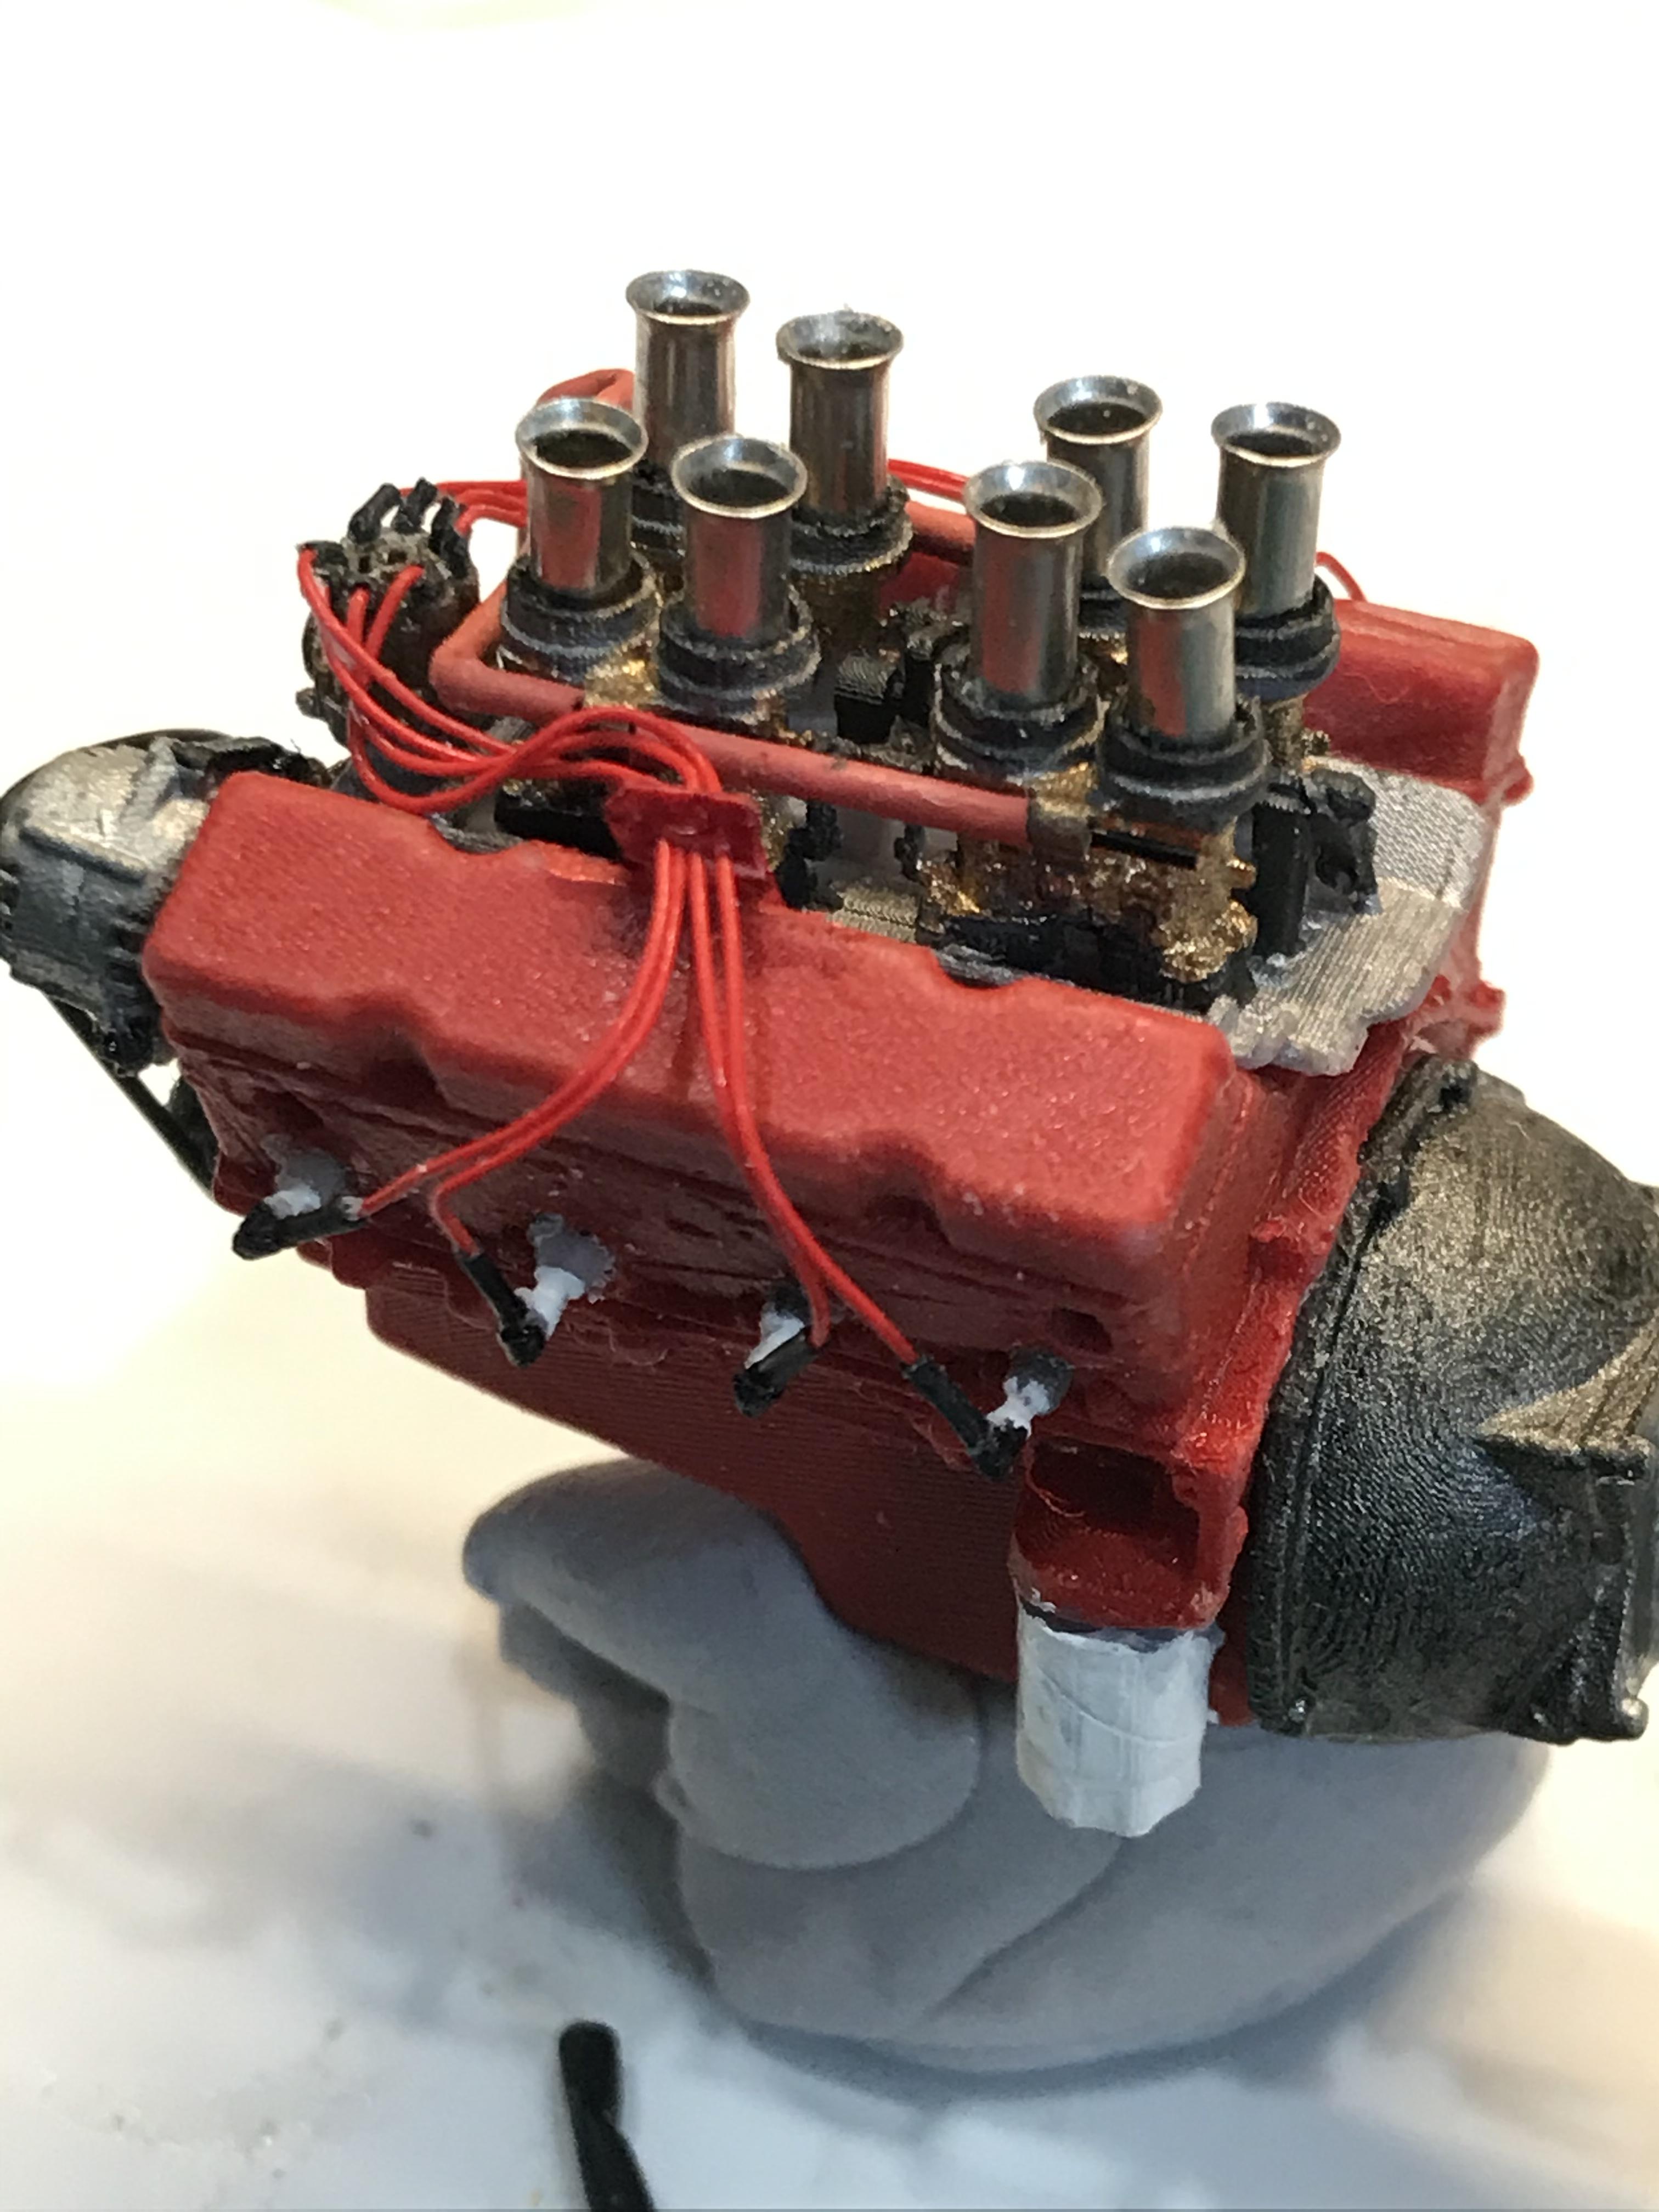
Electrical shrink tubbing as header collectors.
Jiml0001 replied to GLMFAA1's topic in Tips, Tricks, and Tutorials
I use heat shrink a lot. Couple of things. Most heat shrink tubing shrinks at under 200 degrees. Styrene melts at about 350 degrees. I use a heat gun but a good hot hair dryer will work. Open flame tends to melt and deform the tubing and the styrene instead of getting an even shrink. Heat shrink can be stretched when it is warm and you can make tubing as small as you want. I use it for any type of hose and even make plug boots from it On these engines fuel lines, radiator hose coupling, plug boots and even the fan belt are all stretched heat shrink tubing
-
Speed is also a big problem. Styrene melts at a pretty low temperature and if a drill bit is too fast, it will melt rather than cut. If you see melted plastic on the tip of your drill bit, slow it down
-
3D printed wire wheels for Revell XKE
Jiml0001 replied to jacko's topic in Model Building Questions and Answers
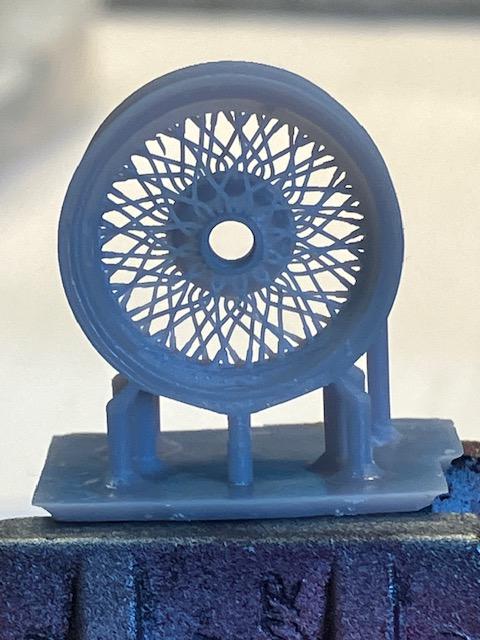
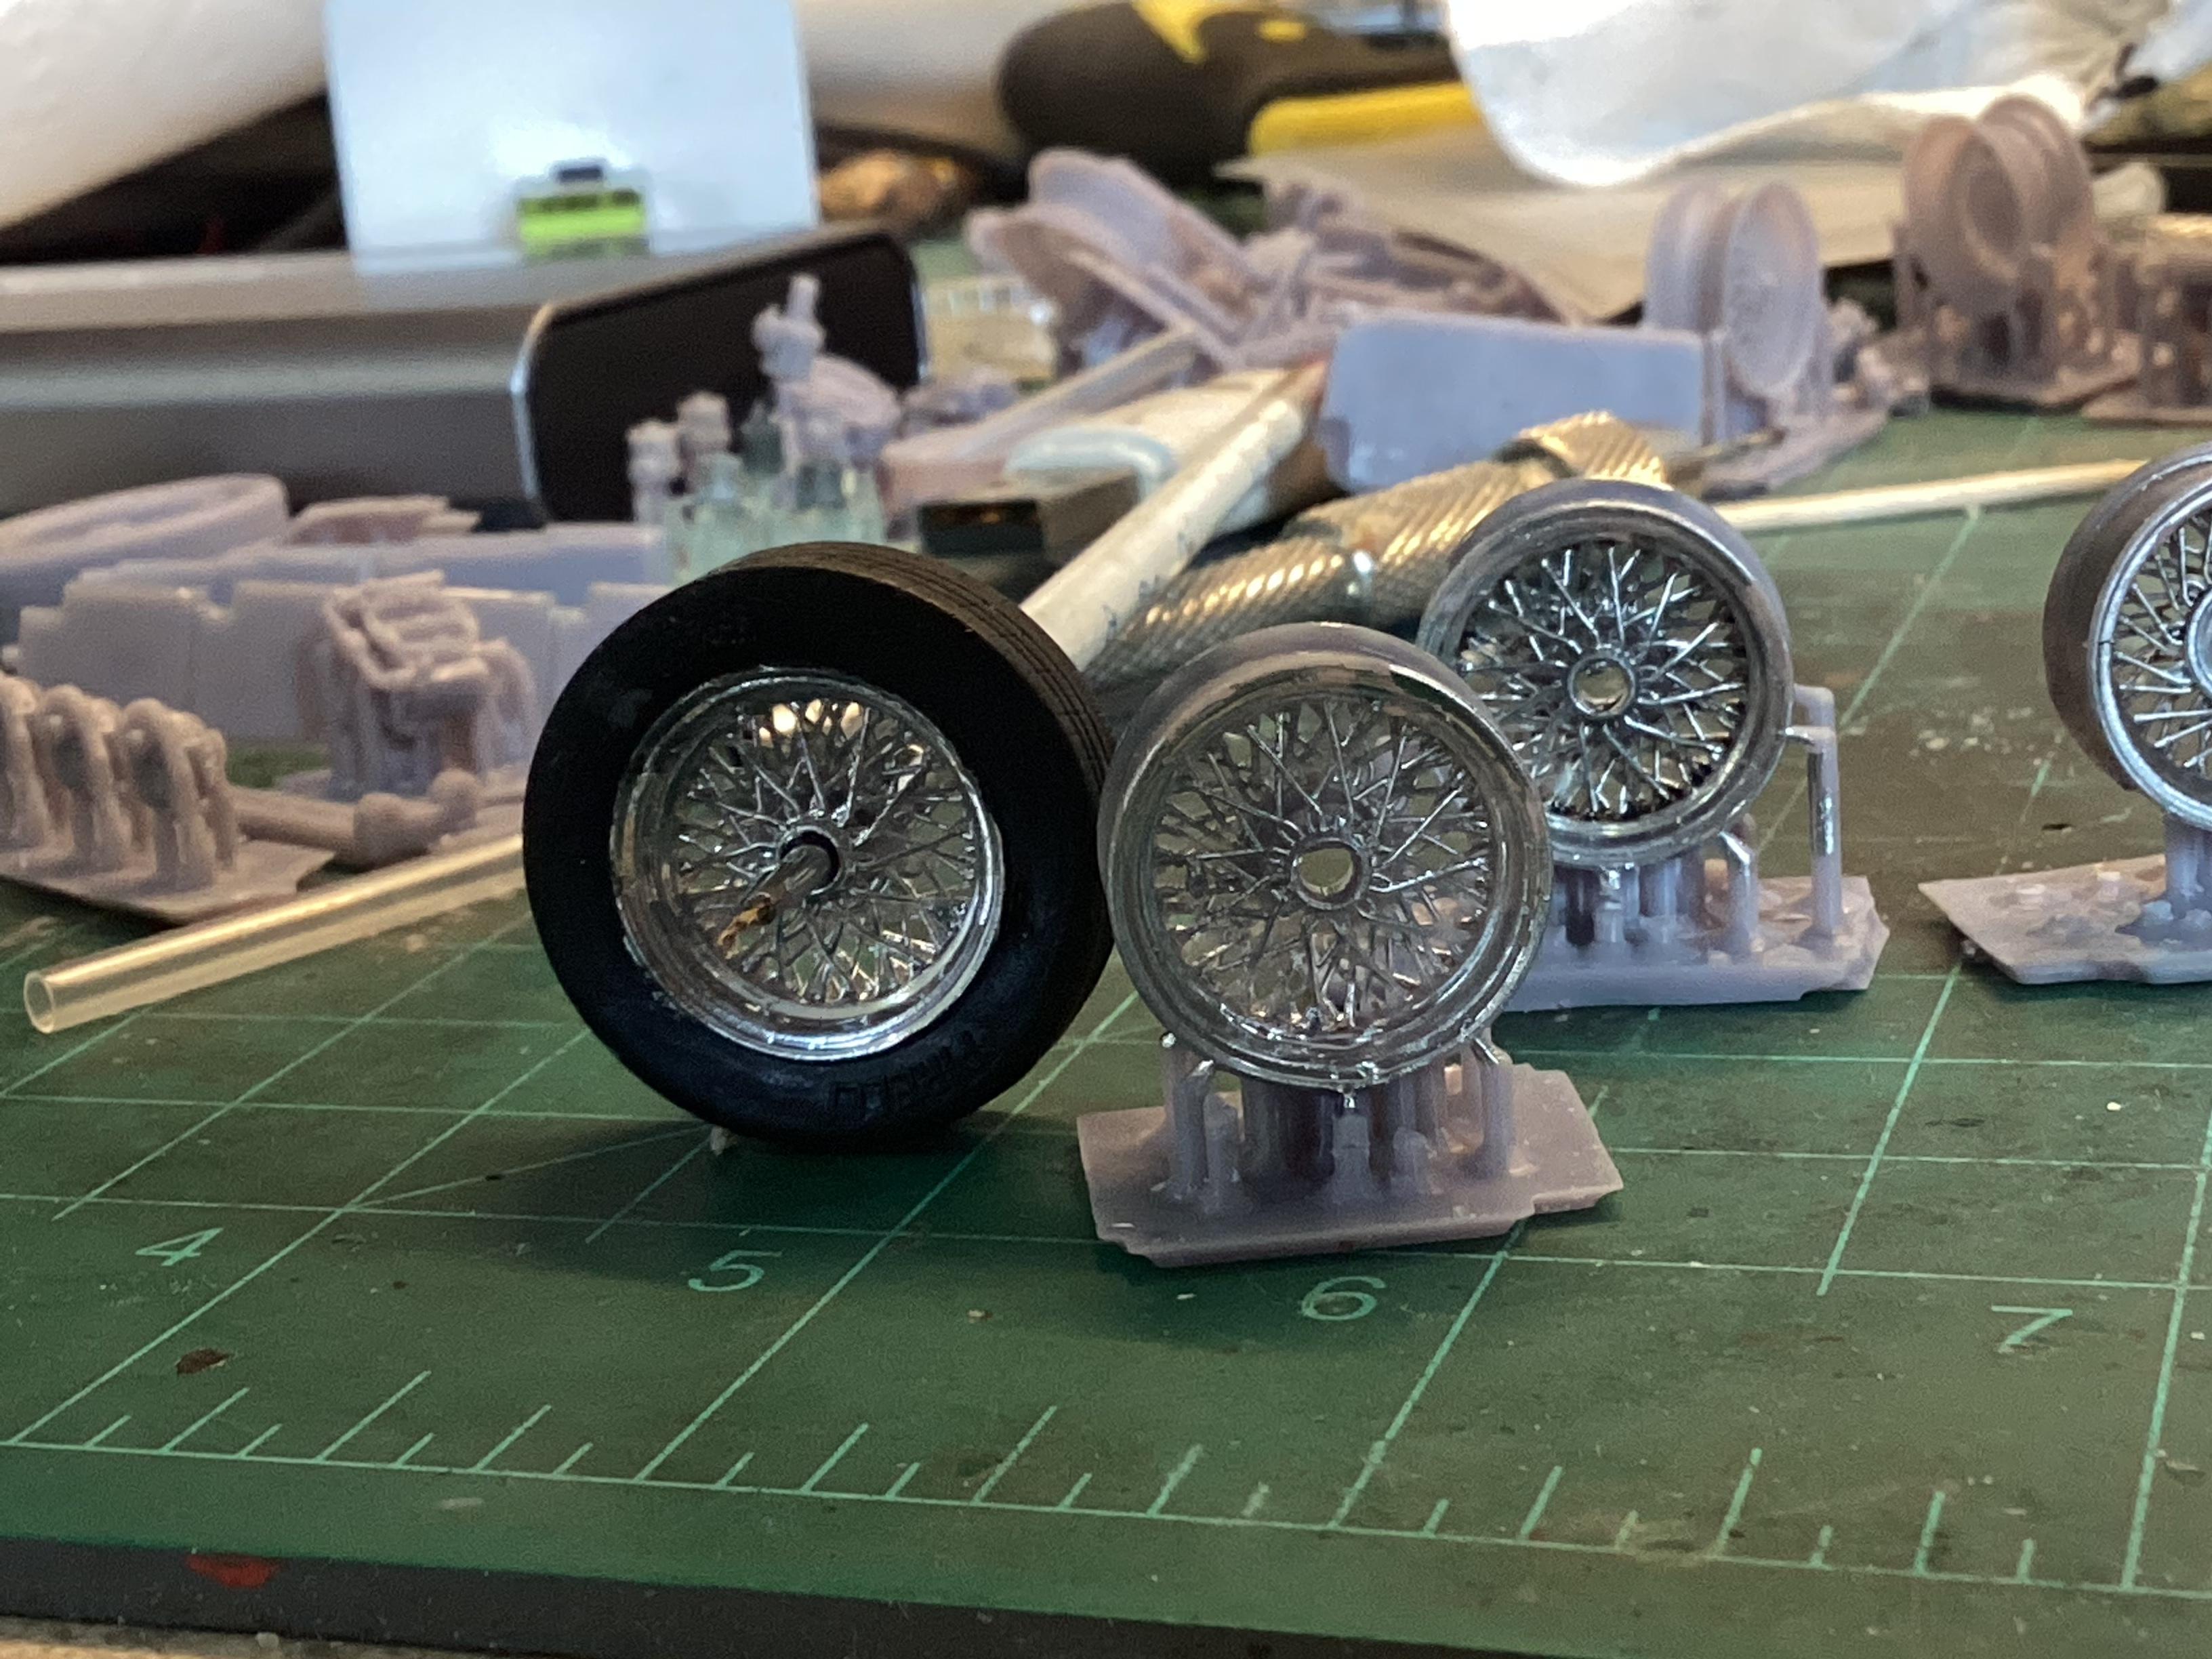
Just a followup on the comment by Bugatti Fan. These wheels are not resin cast, they are 3D printed. The individual spokes are less than a third of a millimeter thick. When I print them I have to be so gentle because before they are cured, just rinsing them off in water can break spokes. I haven't seen any deformity issues with them yet, but I have seen 3D printed front tube axles sag after several months on the shelf so I wouldn't be surprised if these wheels sag after time. These spokes are much thinner than any other wheel I have seen.
-
3D printed wire wheels for Revell XKE
Jiml0001 replied to jacko's topic in Model Building Questions and Answers
I have these 72 spoke Borani style wheels. These I painted these with Molotov chrome paint. Can print with or without tires. A tip: plan to have some kind of support for your model. Resin wheels are delicate and will eventually start to distort with the weight of the model
-
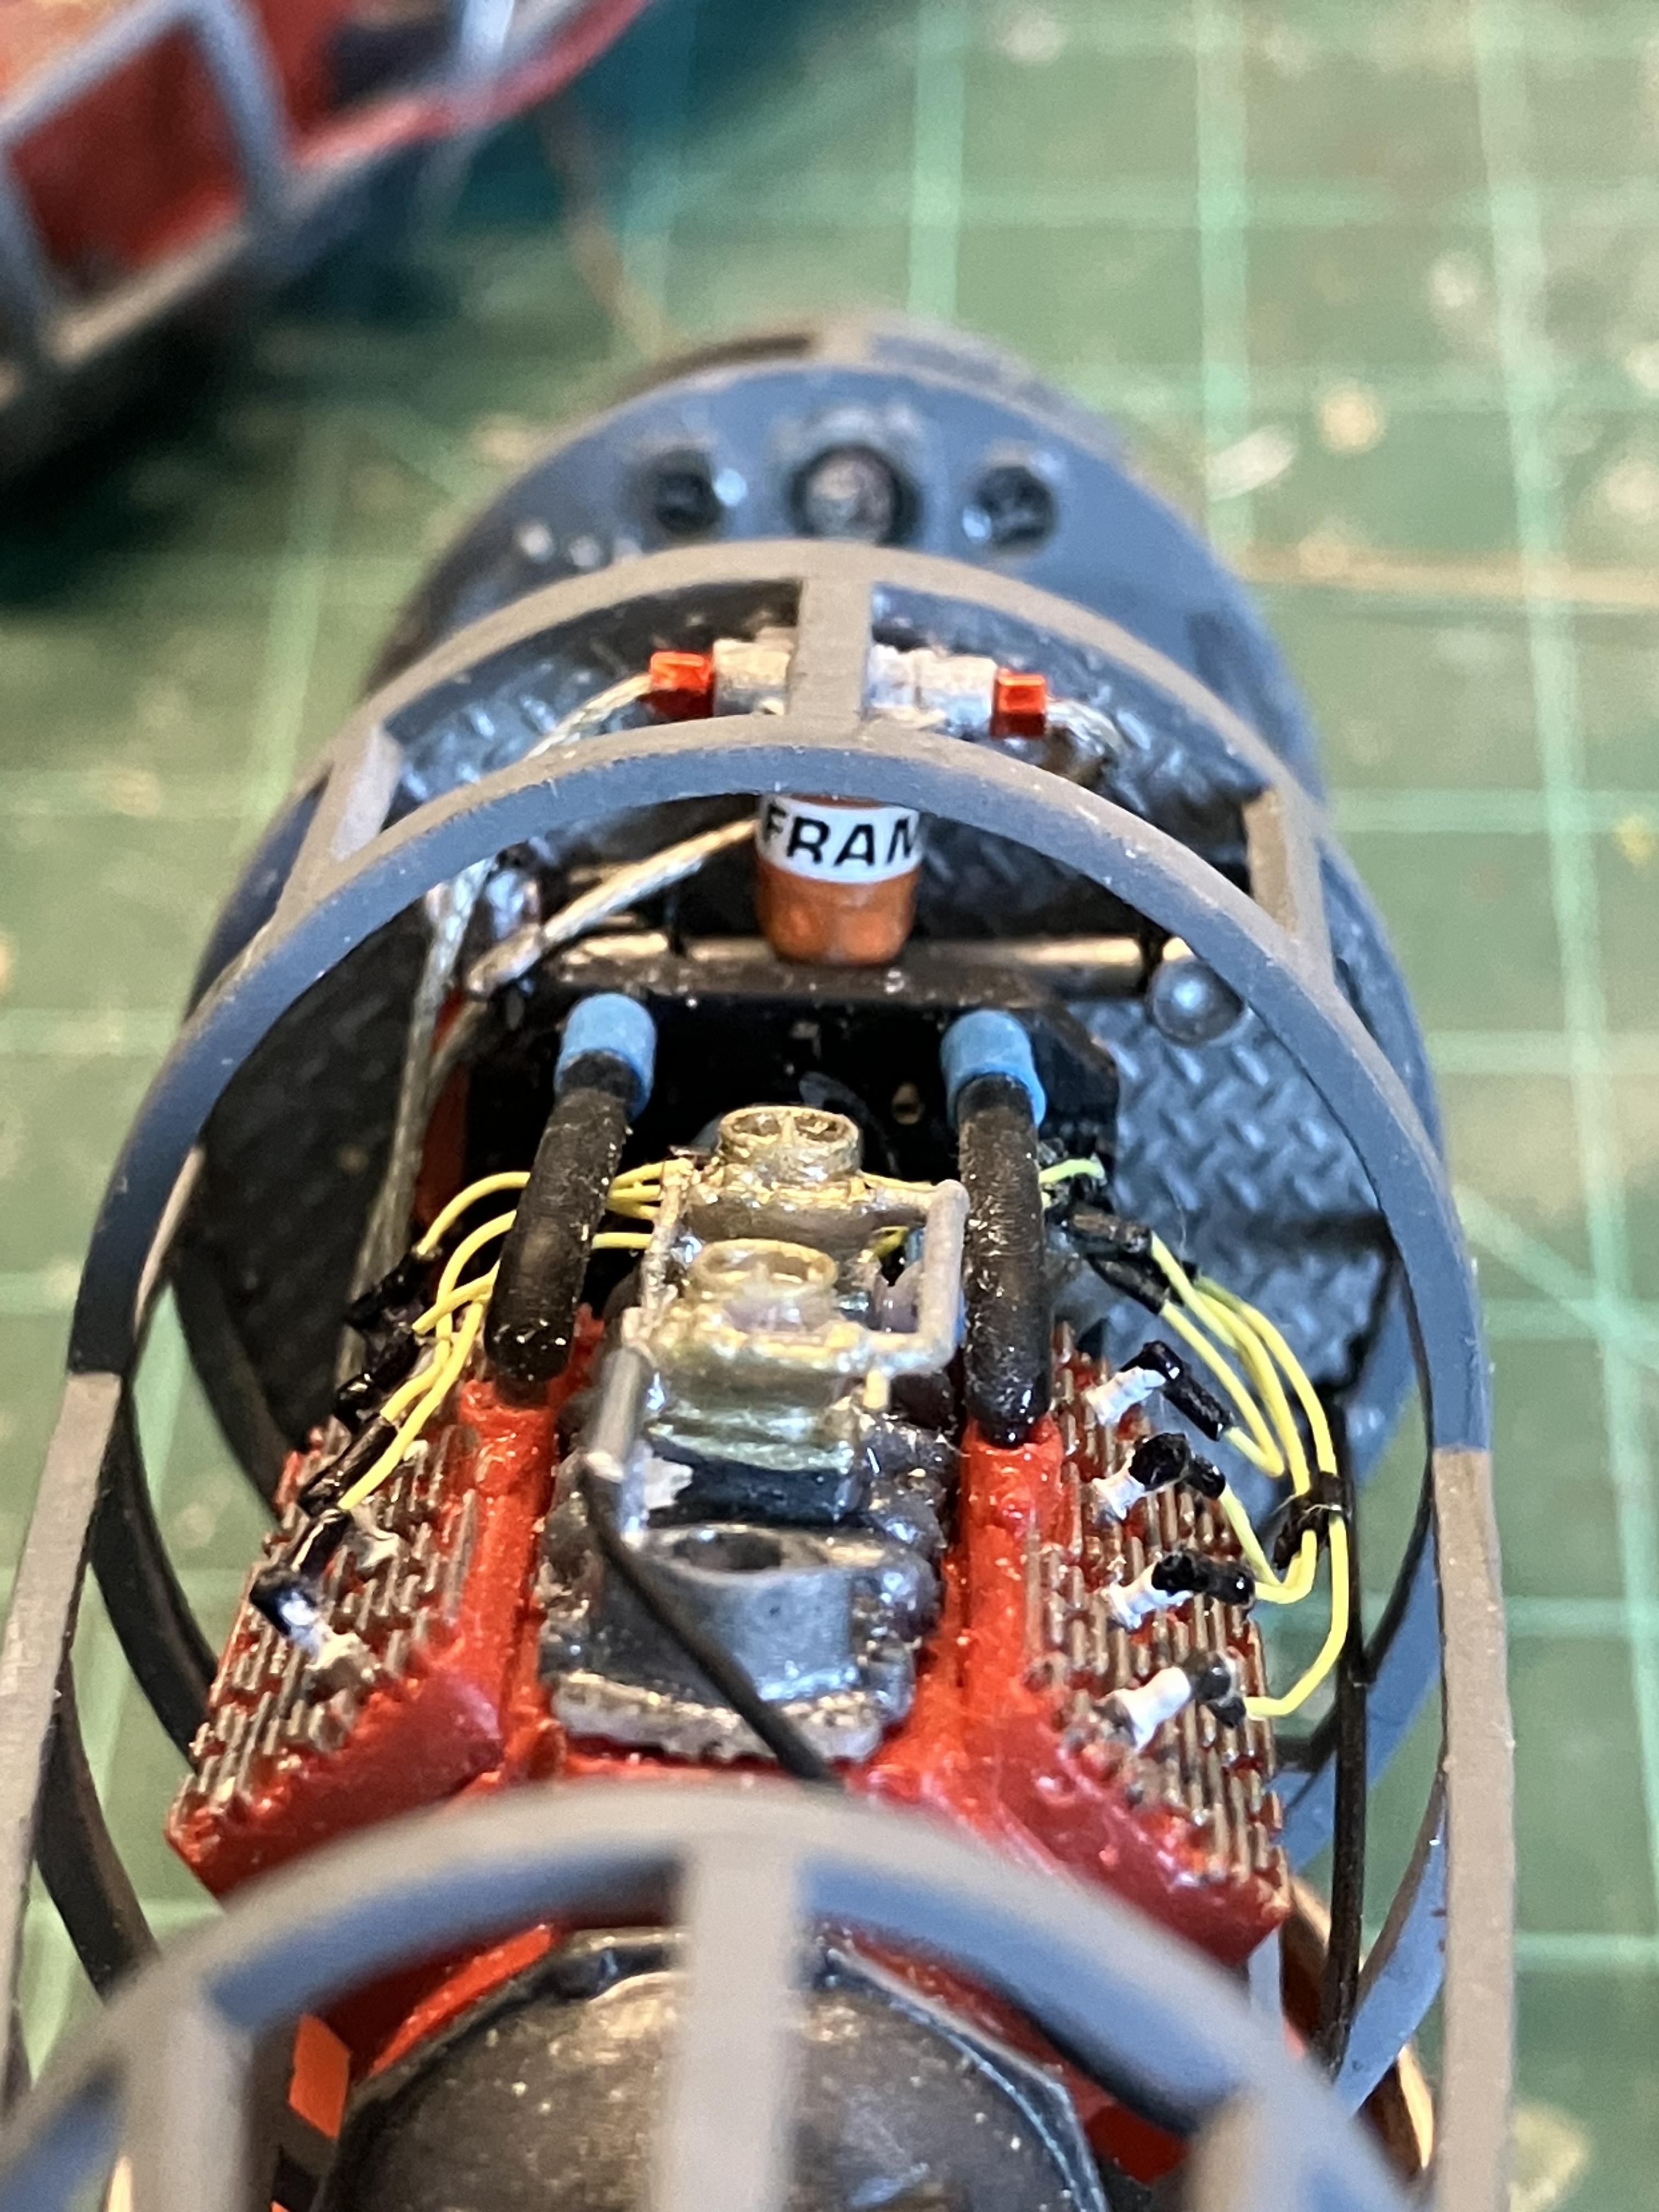
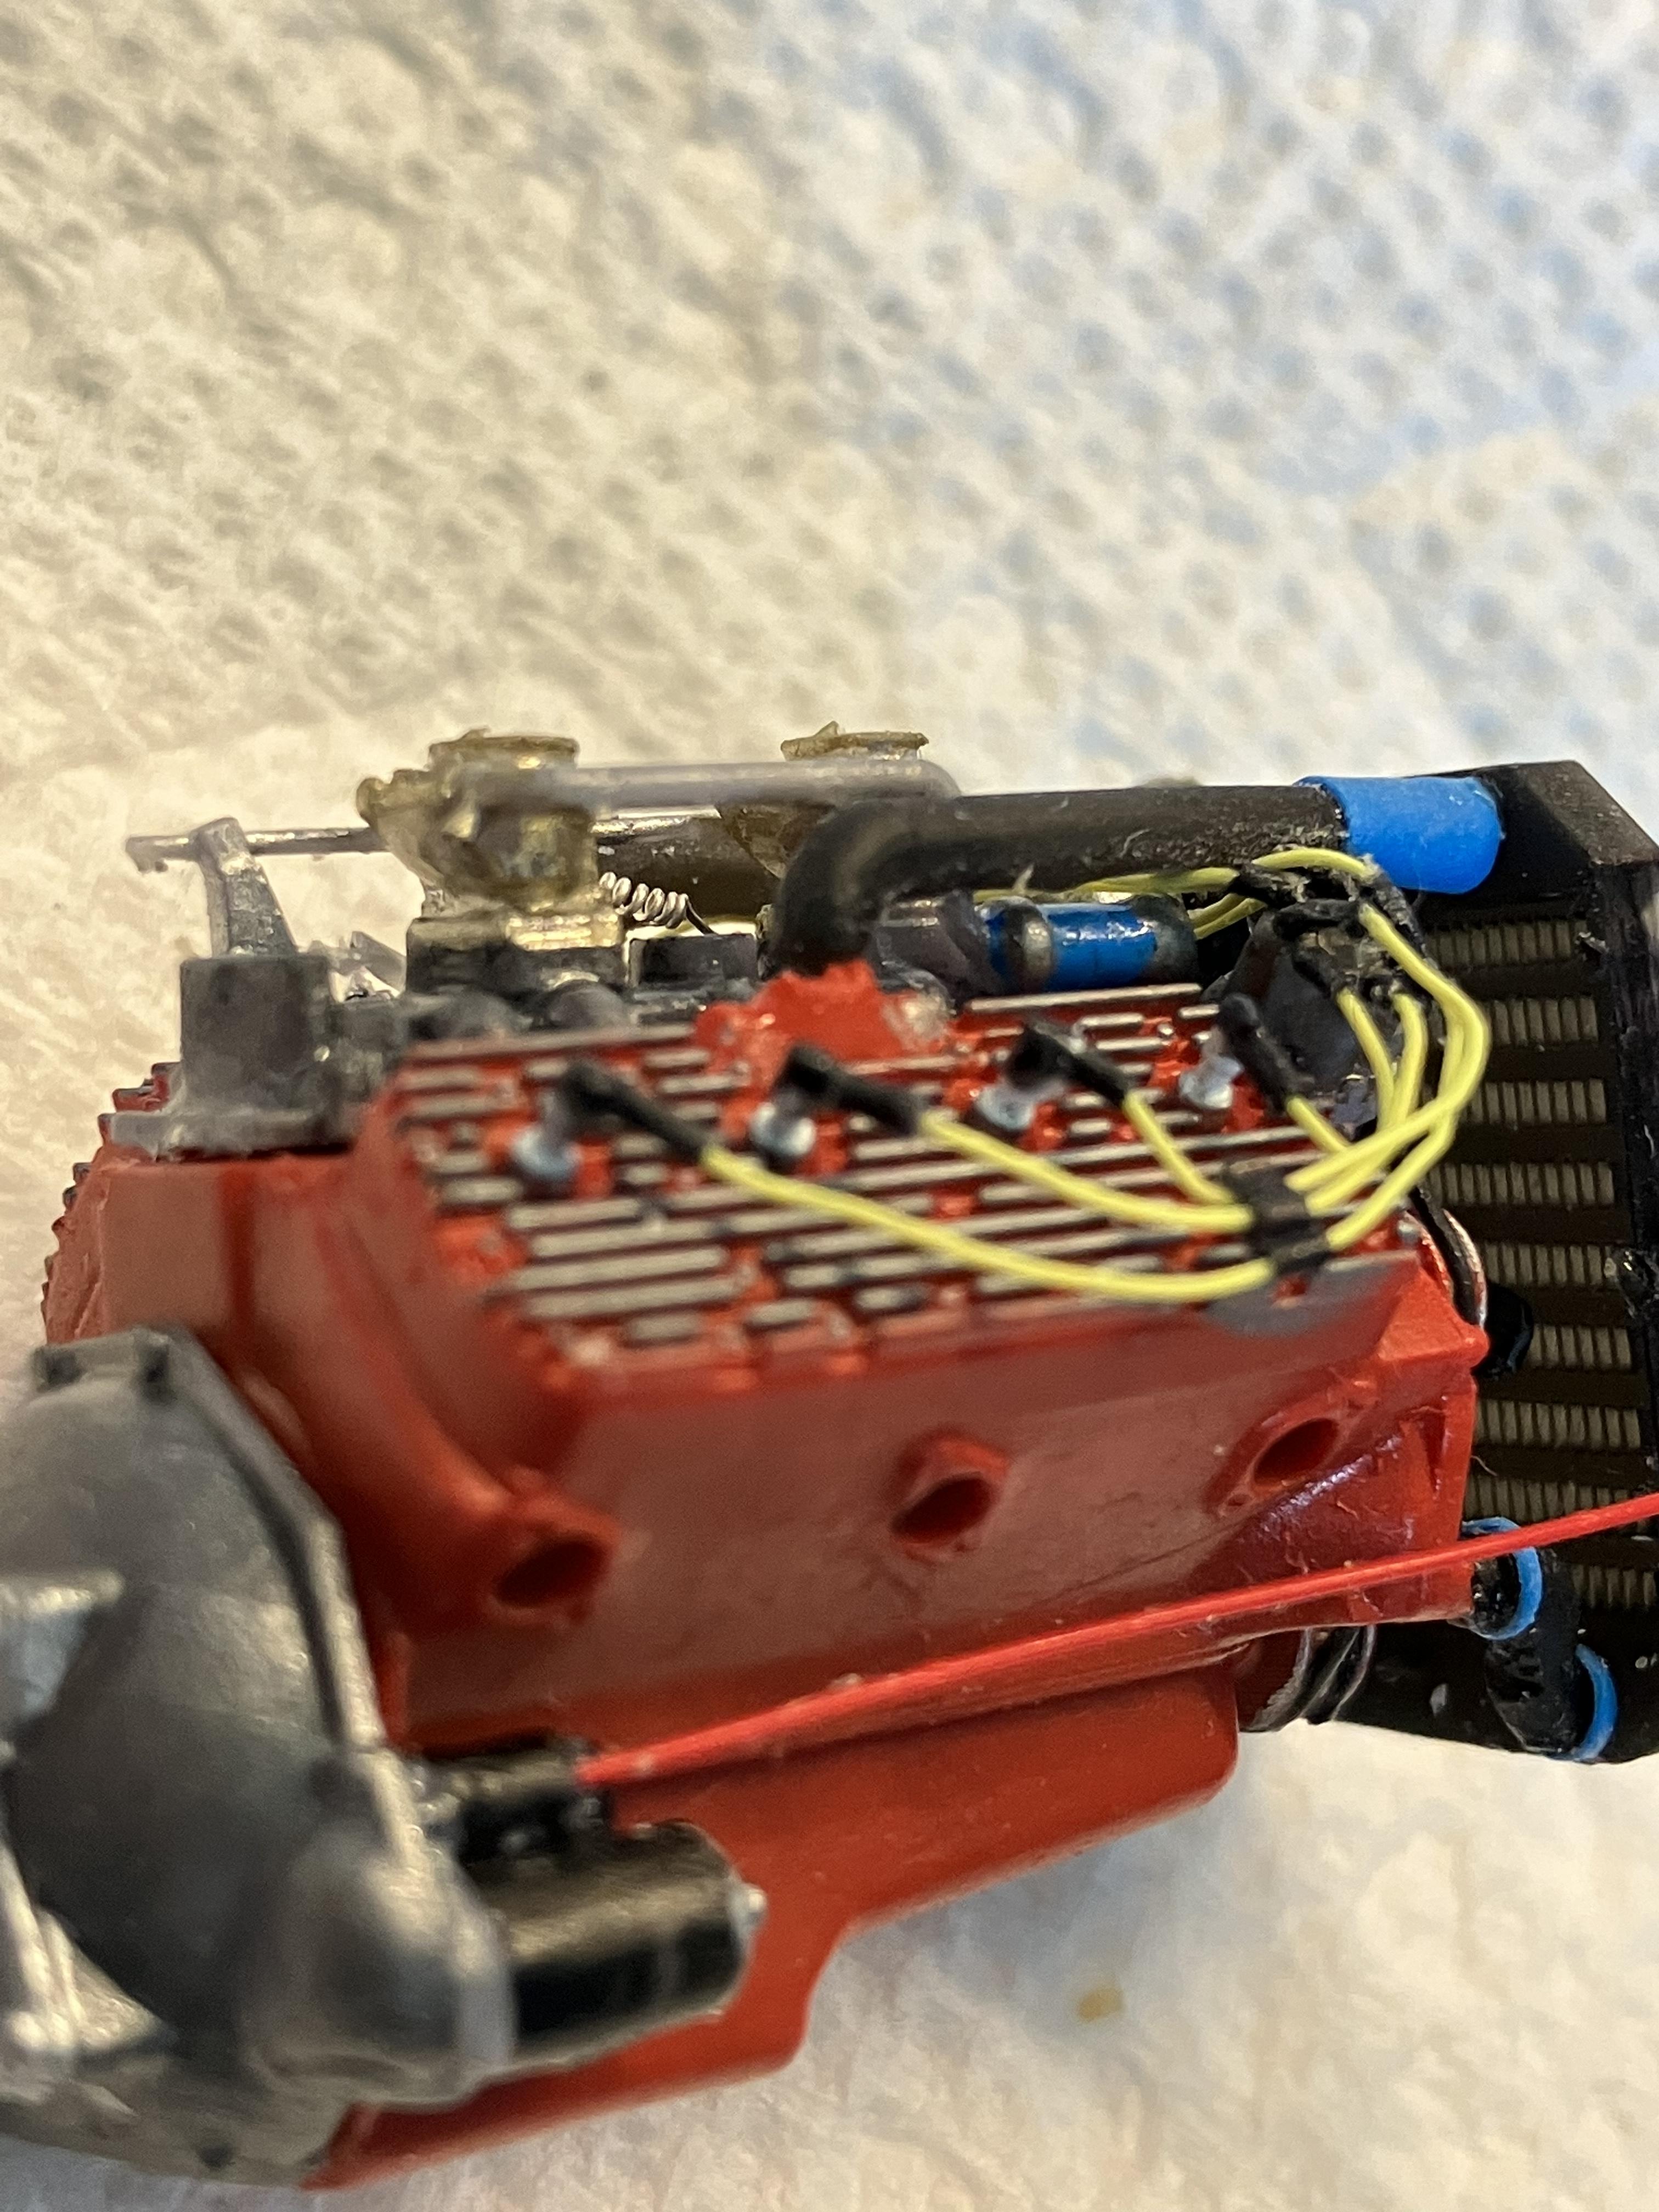
printed a pedal set and battery that I designed printed a remote oil filter and dressed it up with braided line and fittings. Mounted it to the firewall
-
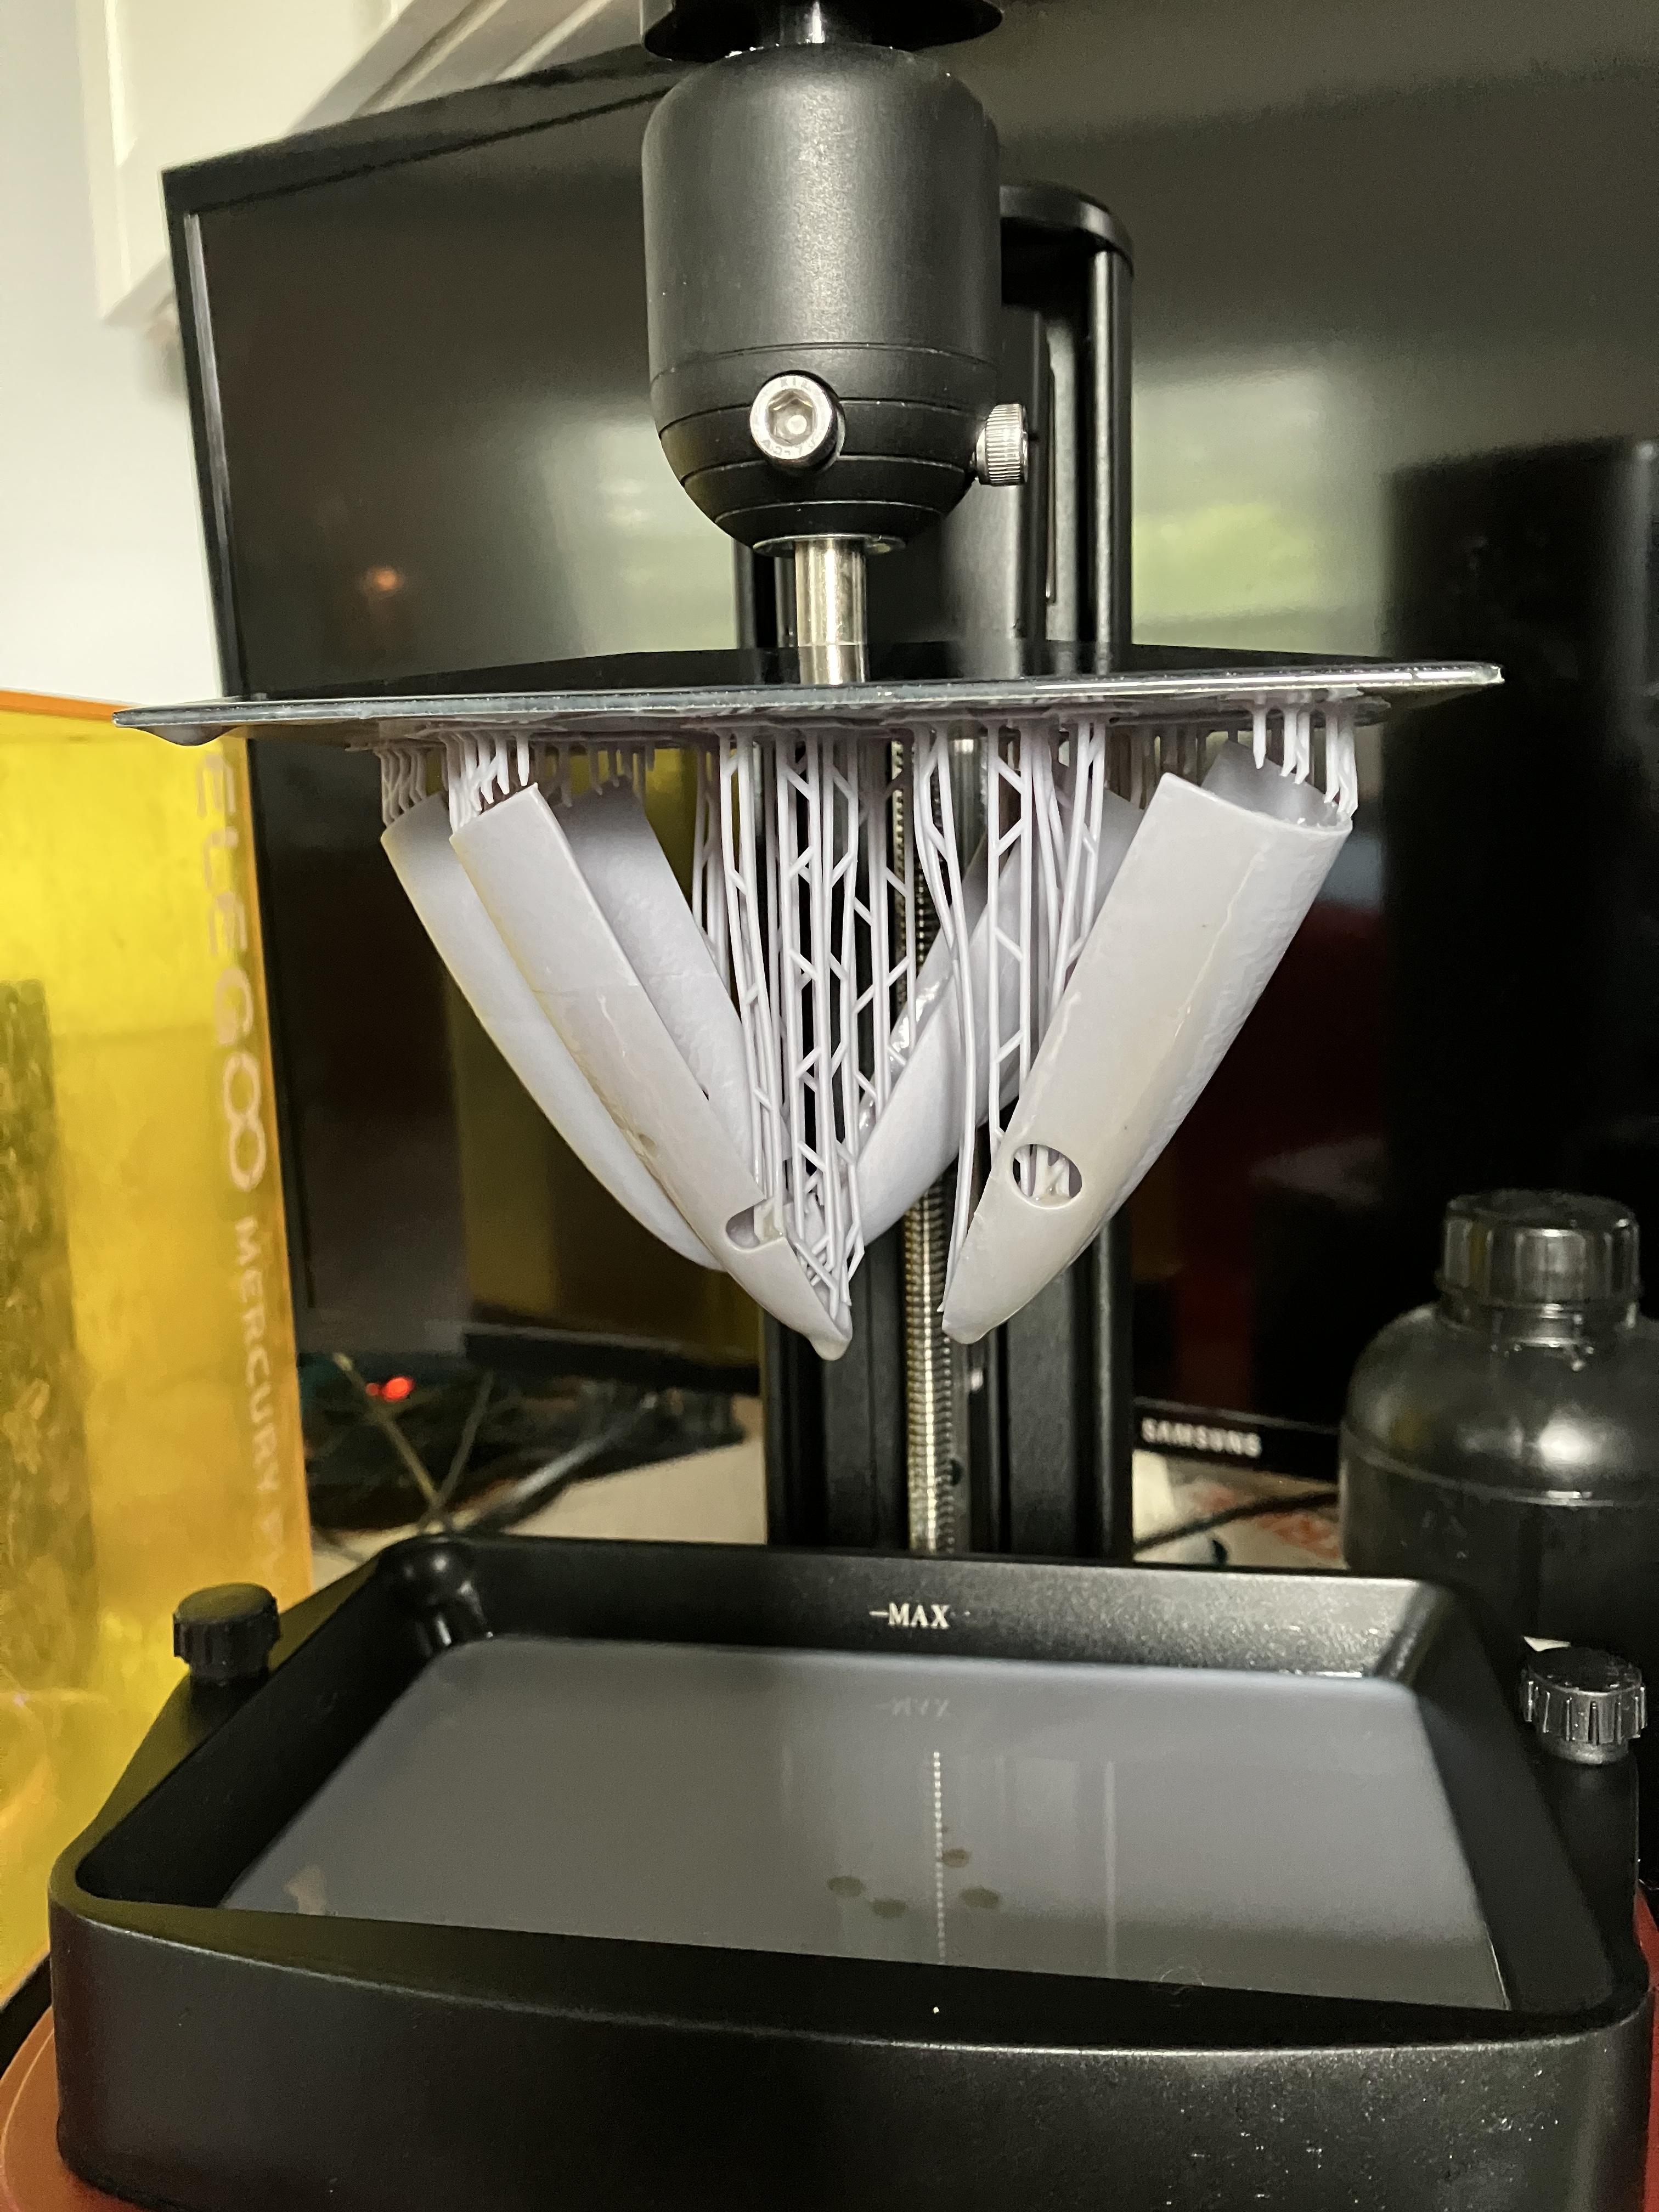
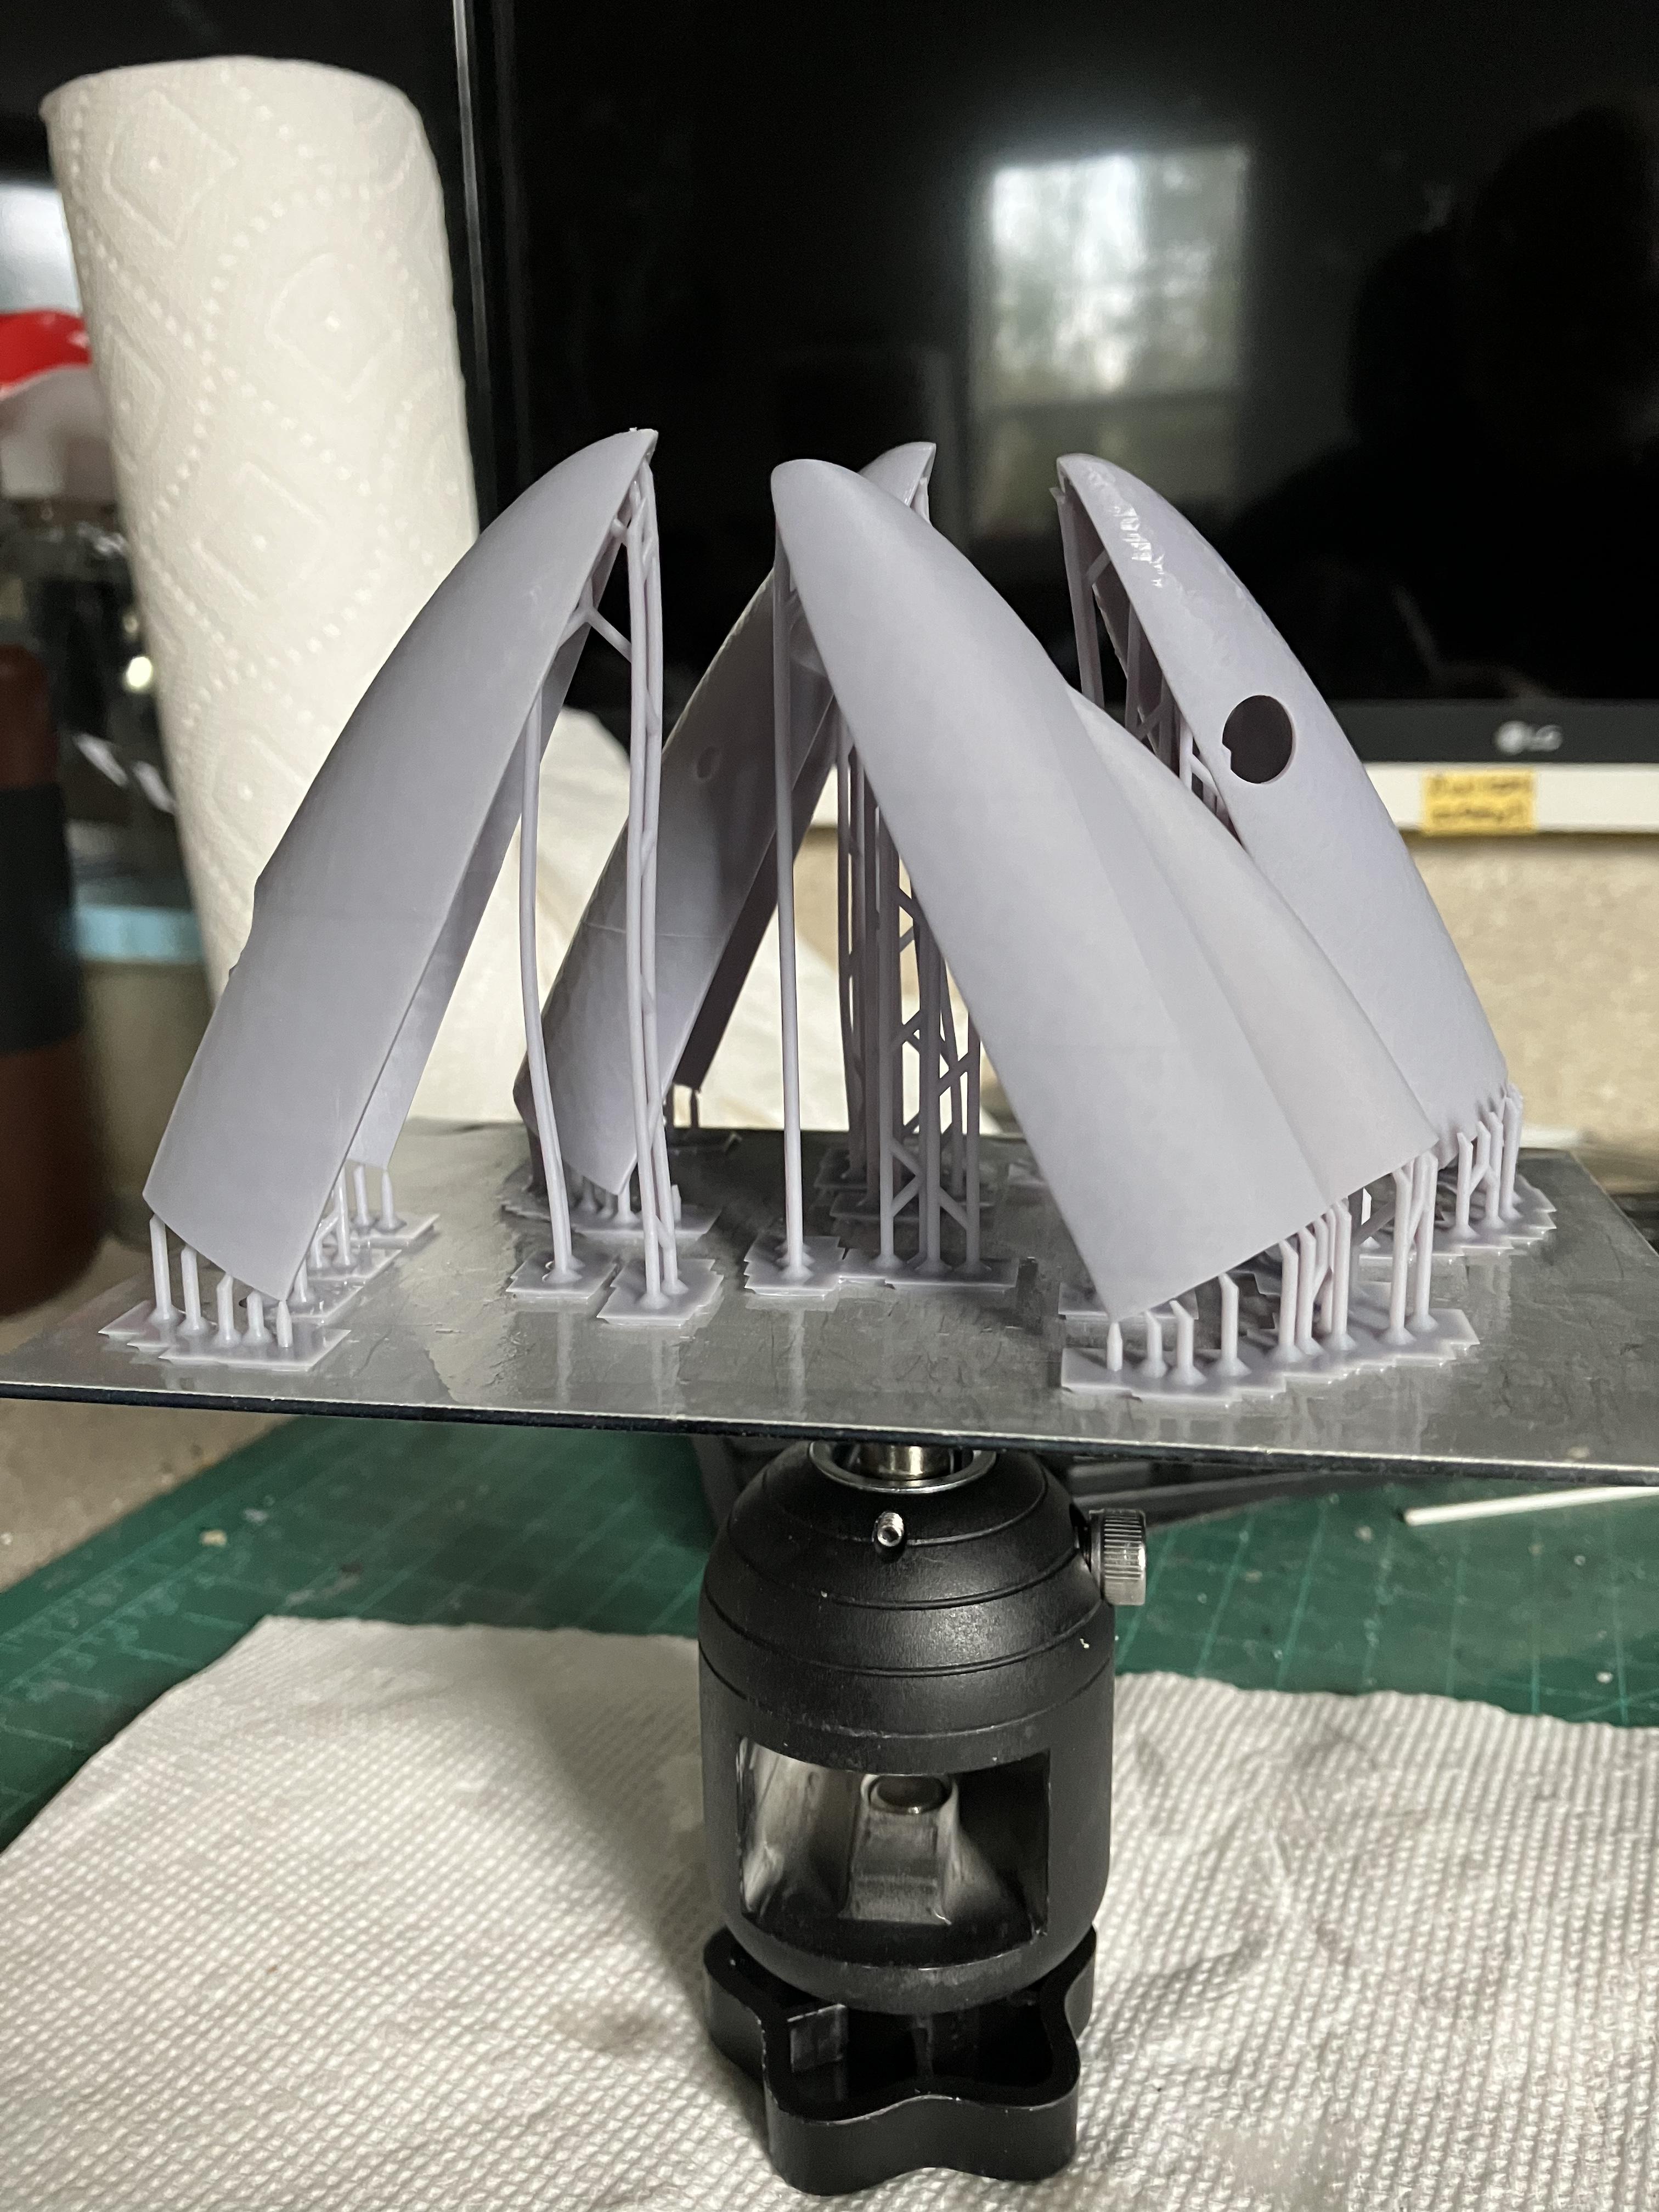
For those unfamiliar with 3D printing each print builds layer by layer from bottom to top. The plate that the print adheres to moves up and down layer by layer as each layer is exposed to the light source. So the print actually builds in the printer upside down one of the most important setups for printing has to do with the position of each part as it prints. It’s important not to have edges parallel to the build plate. That is why I tilt each part so they come out clean right out of the printer the resin is fairly soft. It needs to be cured in a UV light source. Then the parts can be trimmed and glued together
-
About printers. As far as I can see there is no real difference in the performance and detail accuracy between any of the brands. My first was a Phrozon Mini and my new one is an Elegoo Pro. Both are in the $200 - $250 range The Elegoo does have a larger capacity but not by much. There is one thing different though that might be significant. My model bench is in my bedroom and when a print job might take a couple of hours I like to run them at night. My first printer, The Phrozon, was very, very quiet. There is clicking and whirring as the head moves up and down, but not a huge deal. My new printer,, by Elegoo, has a cooling fan that runs constantly, any time the power is on. For that reason, I wish I had replaced my Phrozon with another like it. I have no complaints about the Phrozon. It gave out after a huge number of print jobs so for $199 (at the time I bought mine) I consider it a bargain. There is one thing I would pass on. Originally the resin used in these gave off a powerful odor and required ventilation. Also, the prints needed to be cleaned in isopropyl alcohol after they came off the printer. You needed to buy that stuff by the gallon. A real negative part to printing. Now they have water washable resin that cleans up with water and there is virtually no odor. I print at my bench in the bedroom without issue. Just don't rinse your prints in the sink. The residue you rinse off can harden in the drain pipe. Once a print comes off and is rinsed, it needs to be cured using UV light. I went to Amazon and bought a UV light designed for curing fingernail polish. It cost me $12.00 and works great. Just some of my thoughts about getting started.
-
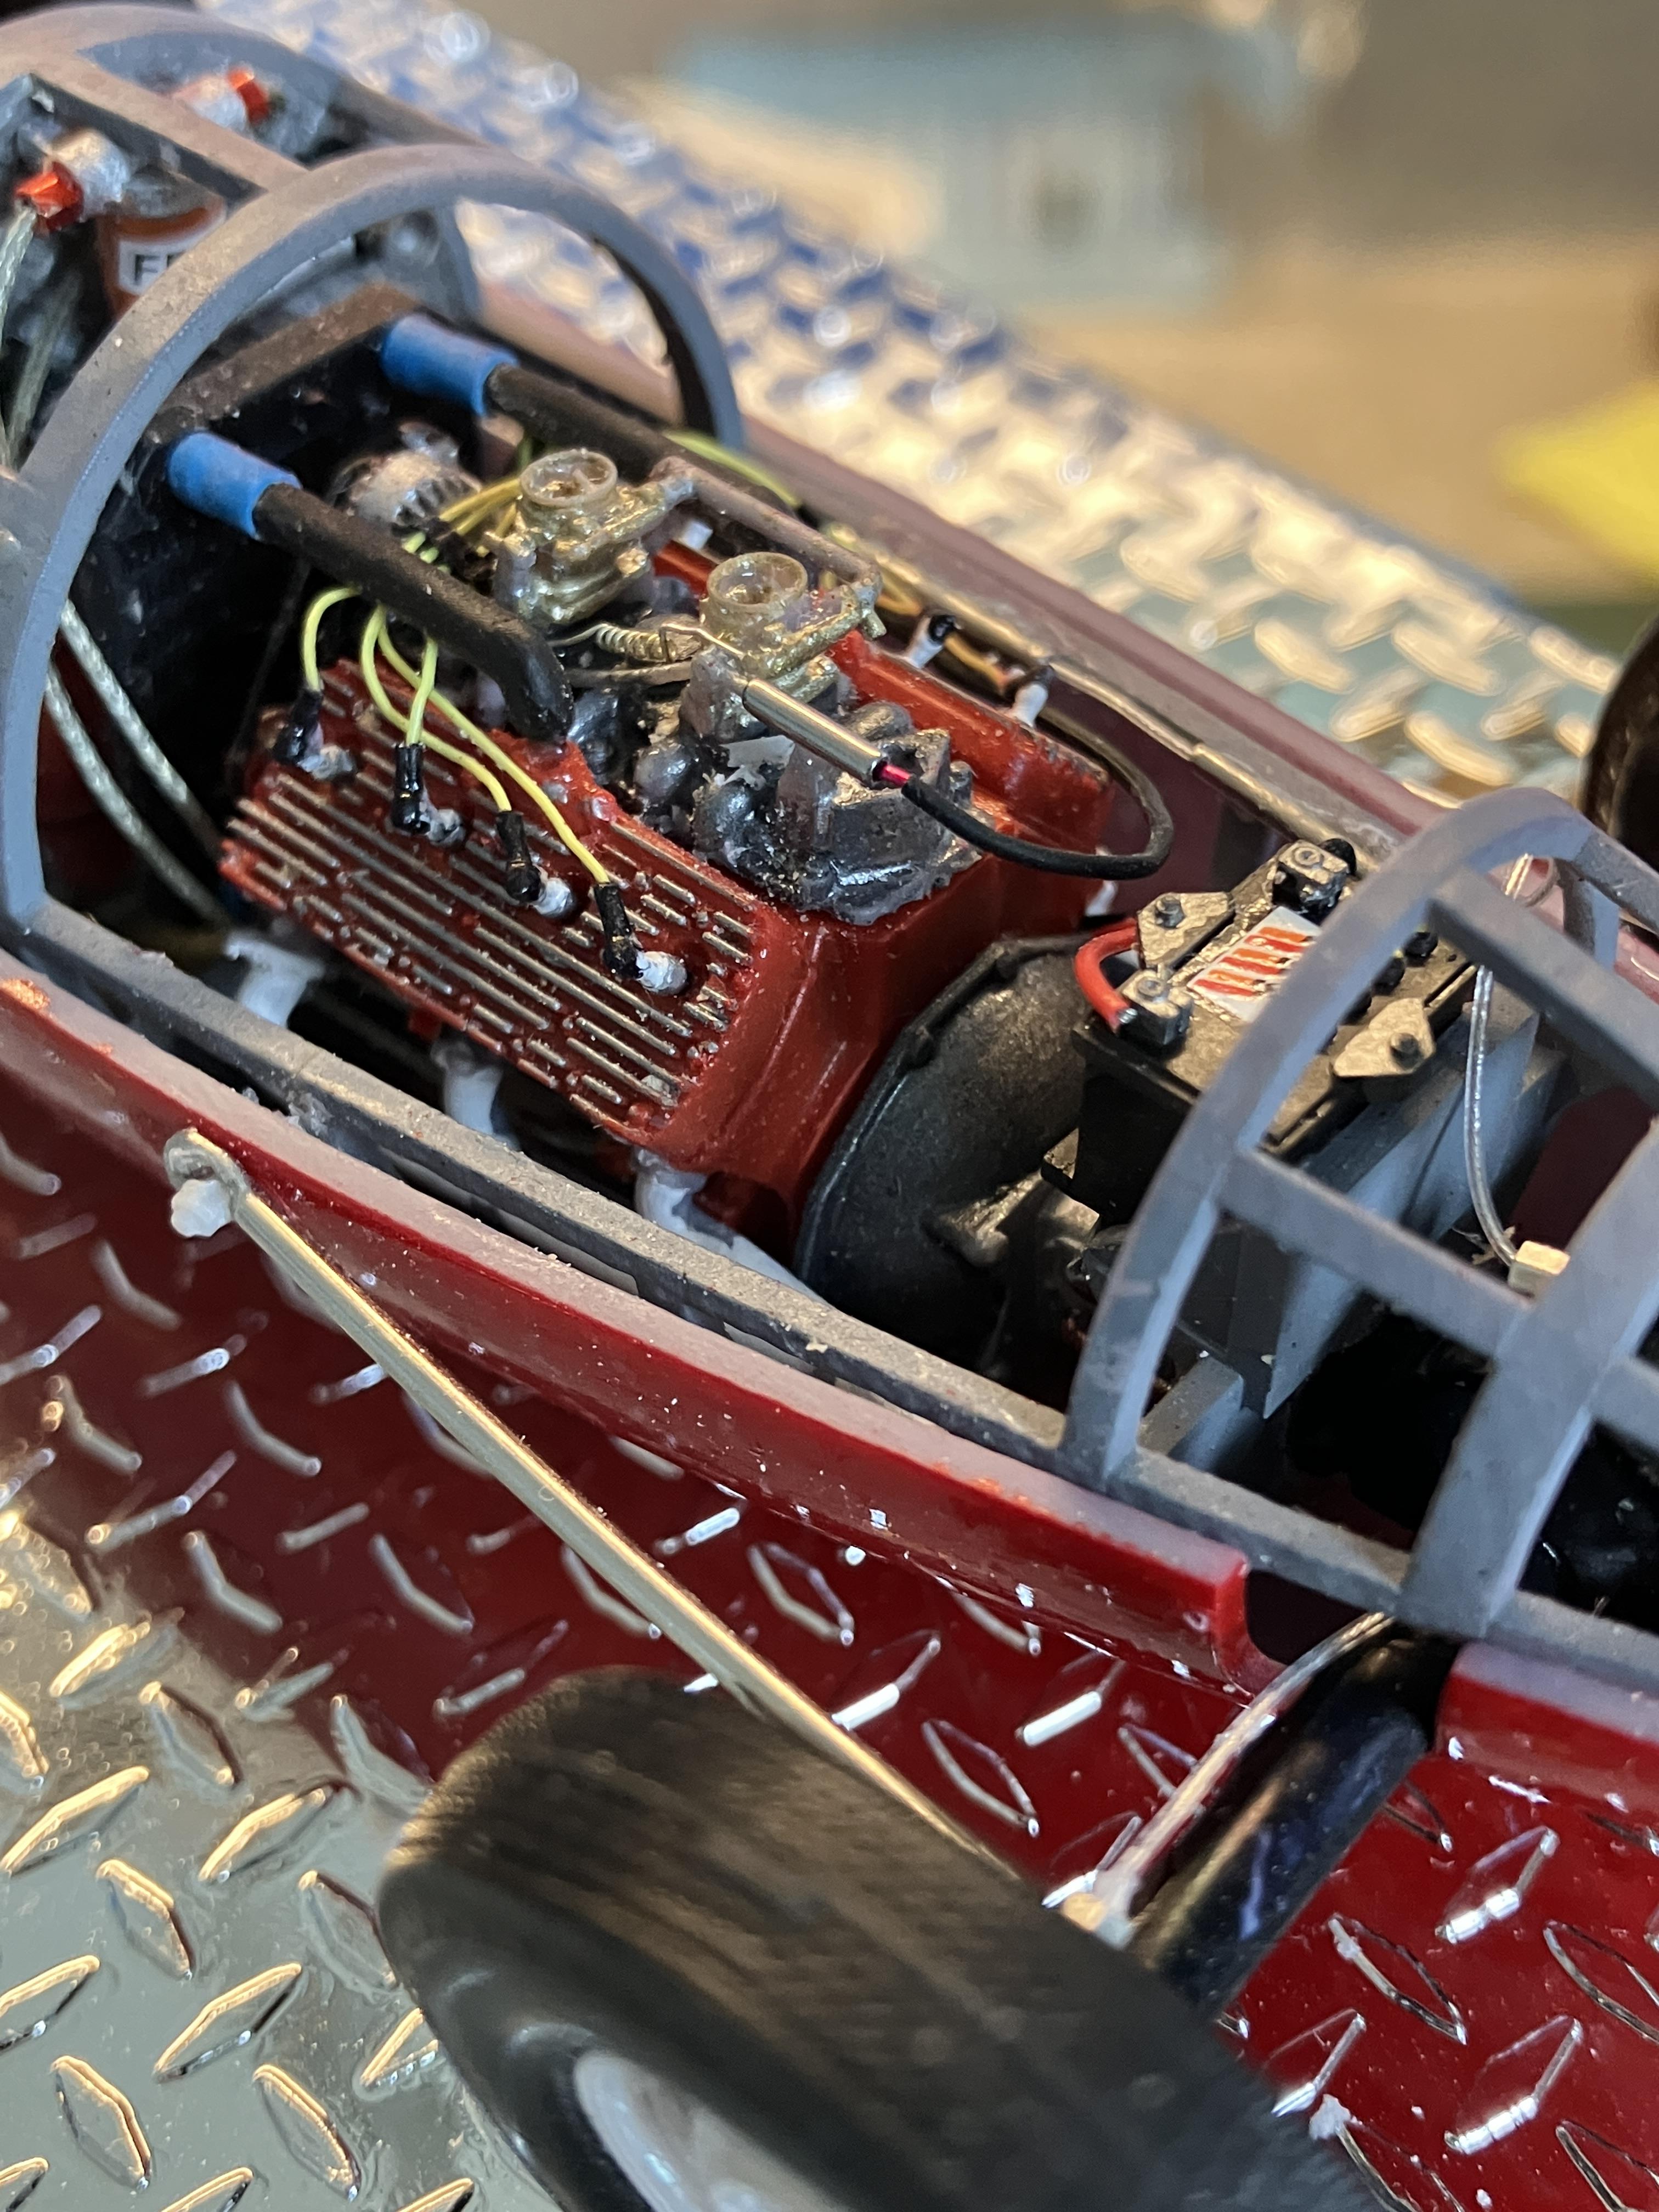
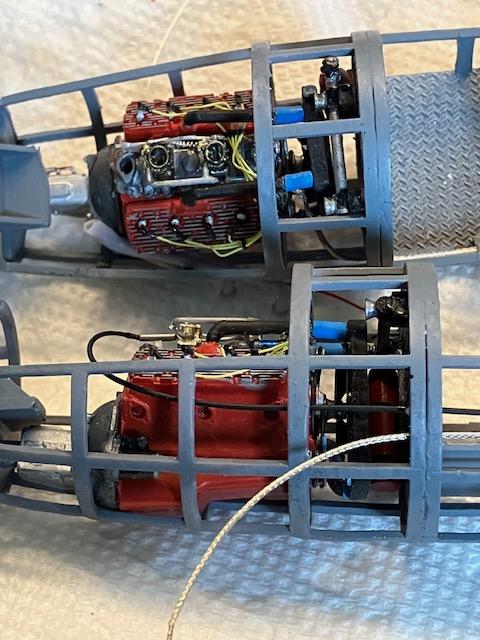
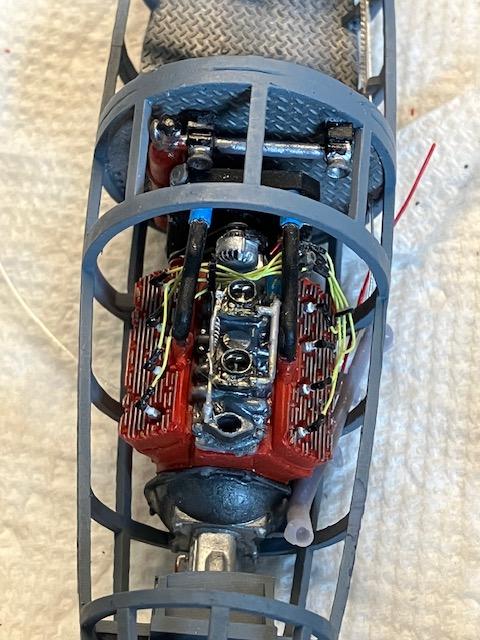
The frame I designed probably is nothing like any other belly tanker. It was just my imagination wanting to have a frame that looked like an old airplane frame. I like how the finished frame looks. I installed the engine and transmission and everything fit just right. The red tank on the front bulkhead is a fire extinguisher and nozzles. All the control cables. gas and brake lines are threaded through the frame as you can see above. Now I think I will move to the front and do the cockpit, gas tank etc. If anyone would ever like to attempt this project or could use some of the parts to make their own design, send me an email and I will send you all the print files.
-
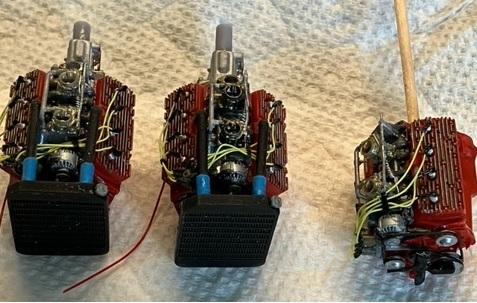
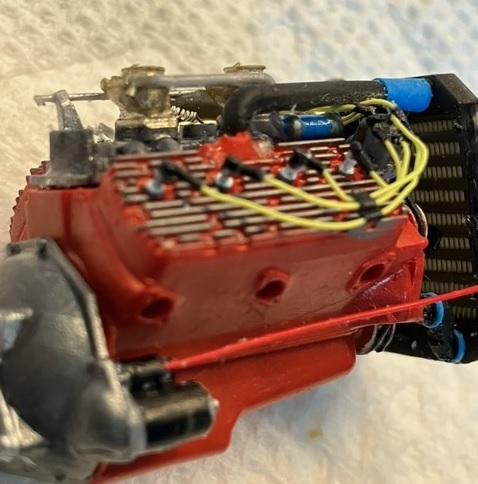
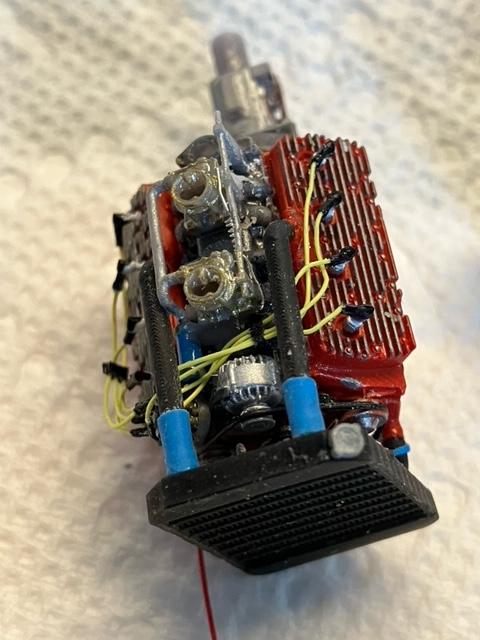
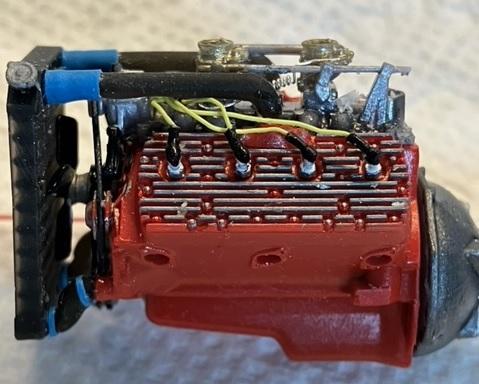
Well, it has been awhile. The belly tanker got the best of me, too many parts, scaling problems, print issues. If I know one thing about modeling, when a project stops being fun then get away from it and come back later. So now after learning more about my printer and getting proper scaling figured out, I am back on the Tanker. Come to find out, a Ford flathead does fit perfectly. I built up three examples.
-
3D sizing question... Chitubox slicer
Jiml0001 replied to V8tiger's topic in Model Building Questions and Answers
If you want 3D print scaling to be super simple use the formula that one inch in real life equals one millimeter in scale. I use this for both 1/24 and 1/25 scale. So a 17 inch rim is 17 millimeters on the printer. Chitubox let’s you scale by measurement as well as percentage so just scale your 17 inch rim to 17 millimeters. I’m sure there are people screaming out there but we can do the math all day and the differences are tiny. And before you scream too much about fidelity spend some time with your dial calipers measuring kit parts against actual manufacturers specs like I did and you won’t find many kit parts that are correct. I looked at engine block measurements, distributors, carb flanges, oil filters and many other items and found kits were all over the place for accuracy. so I use the one millimeter equals one inch rule and not only does it make scaling consistent and easy but the results have all the parts in correct proportion to each other -
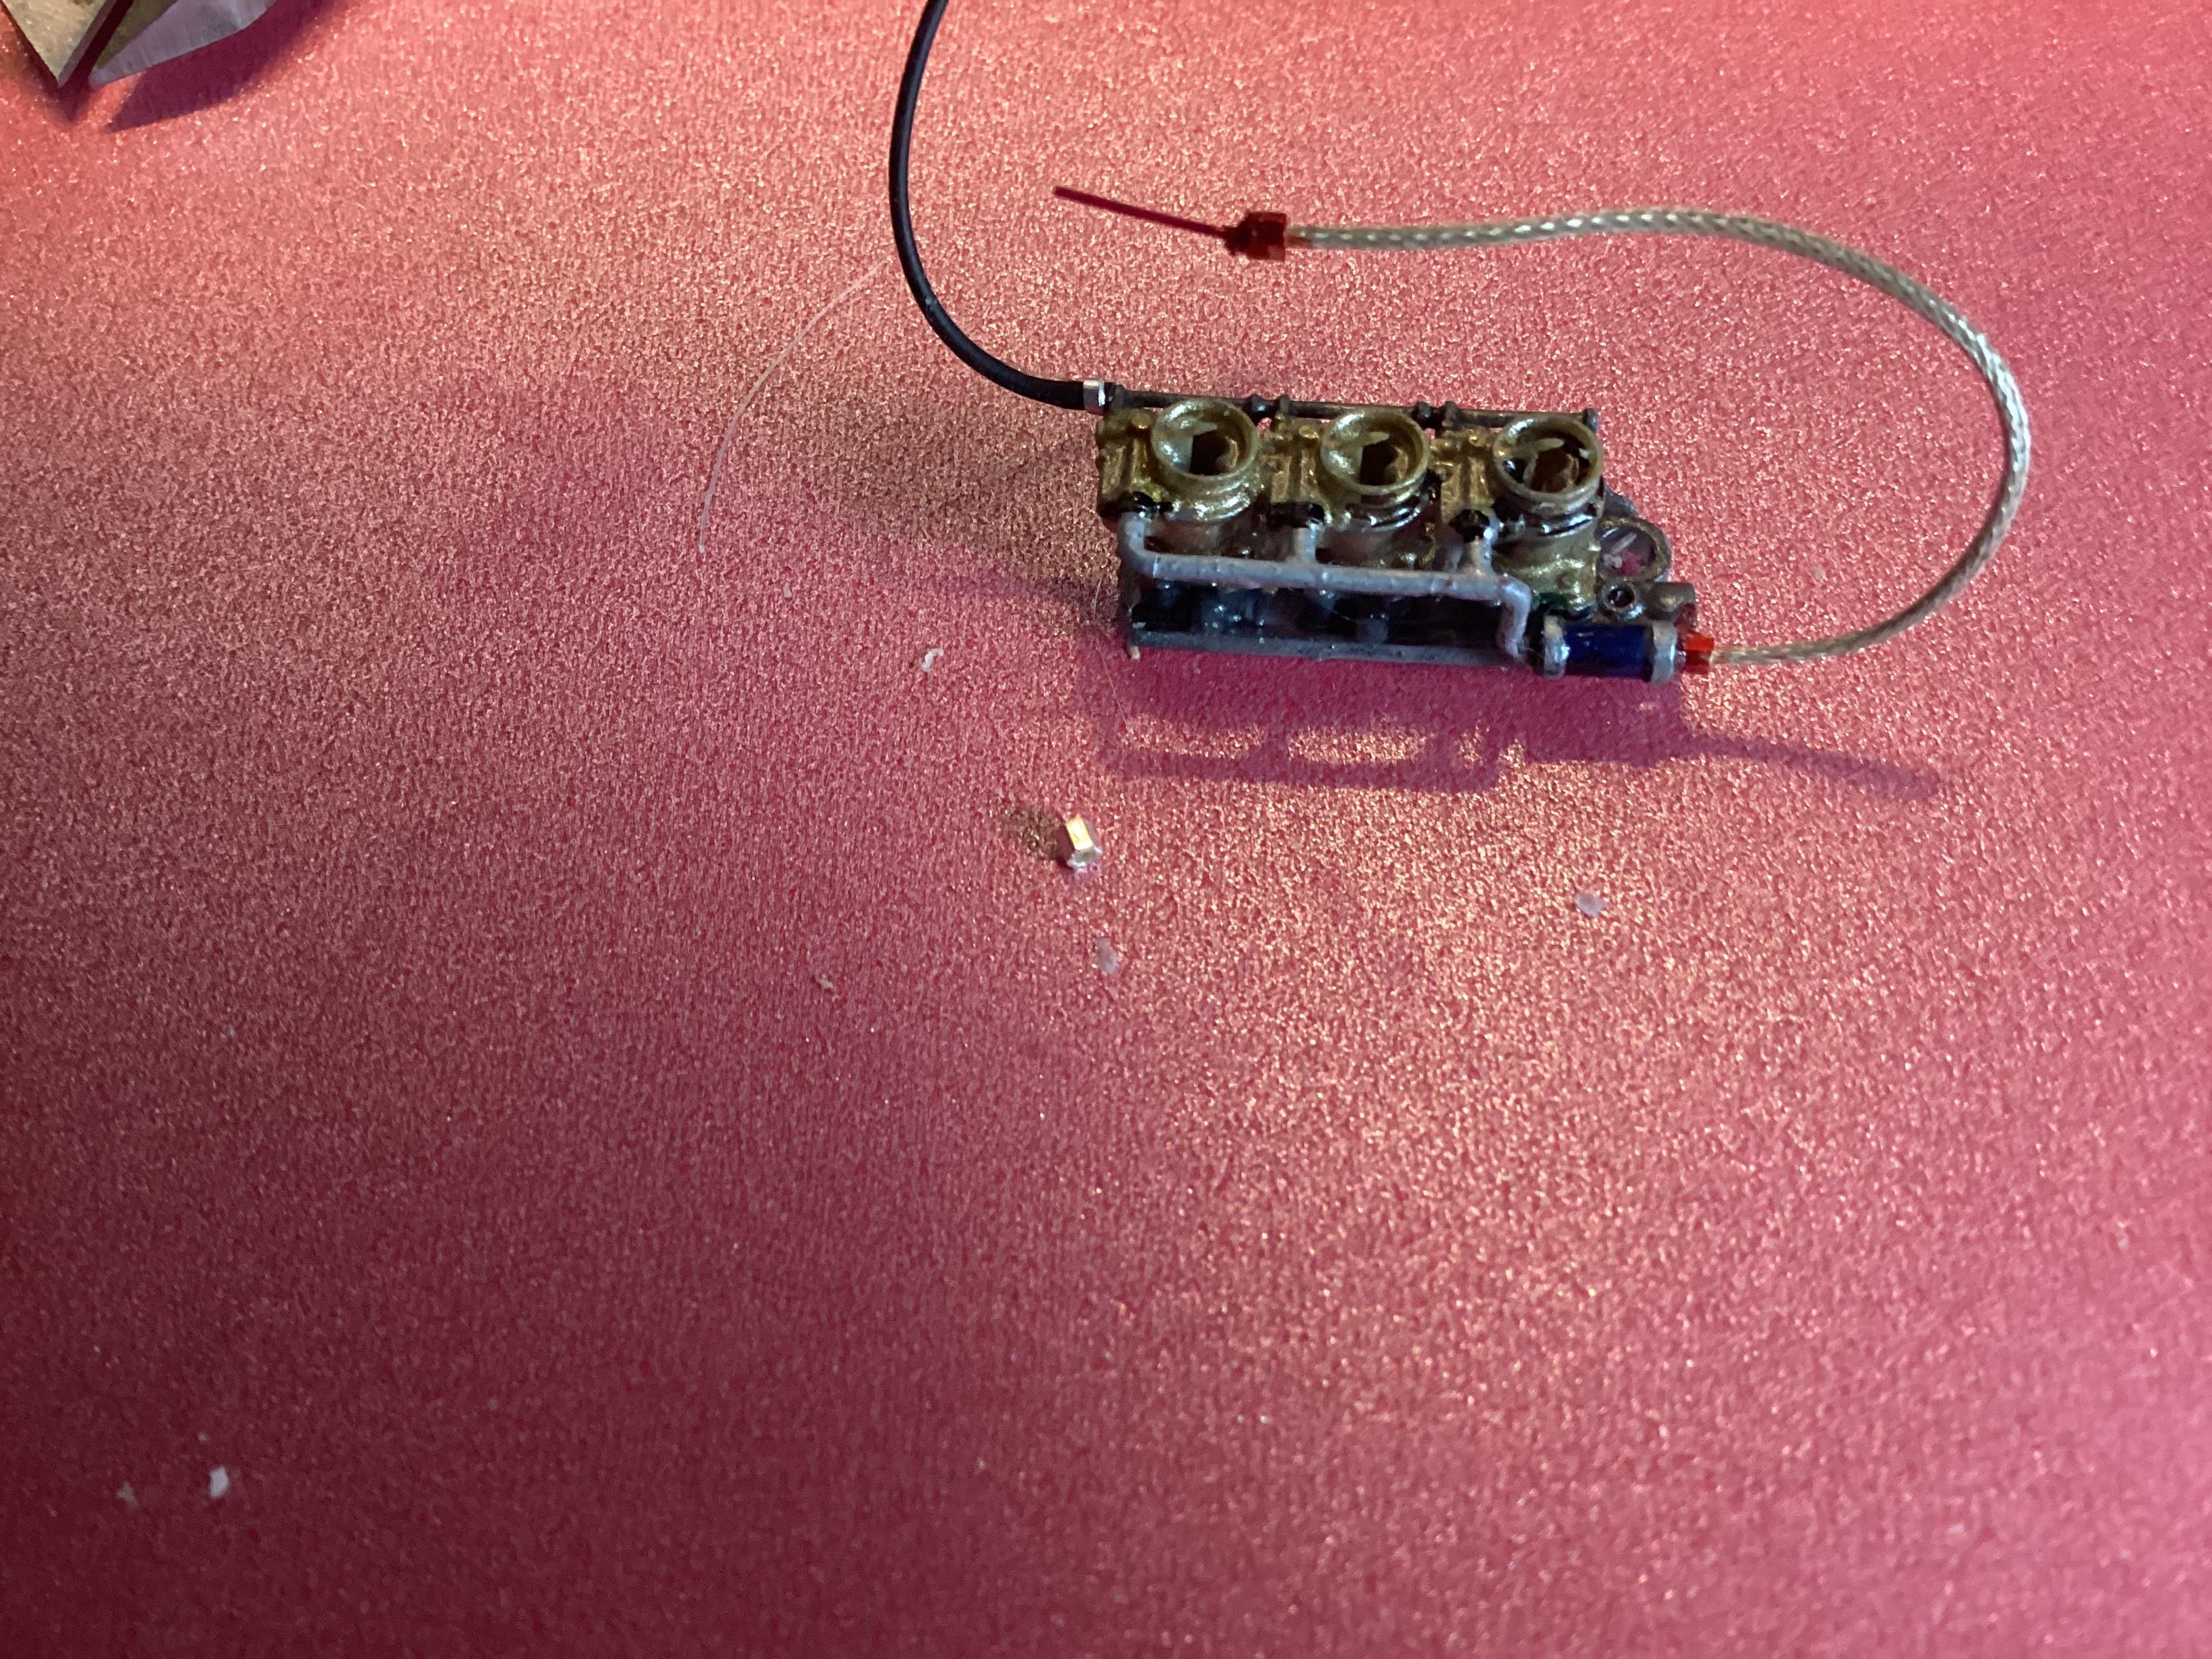
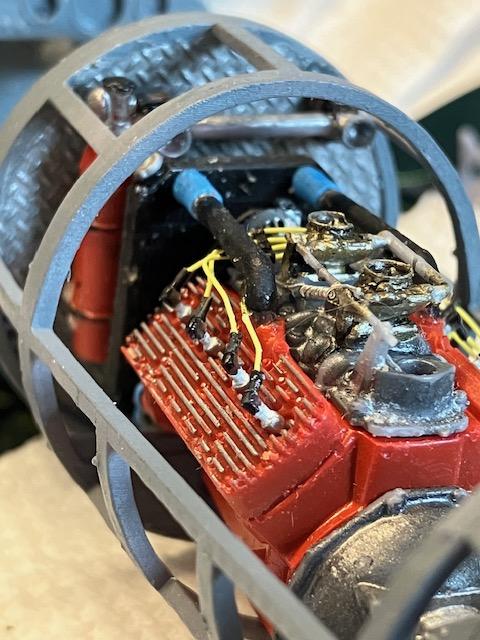
A while ago I became obsessed with finding plug wire in scale. In the end I found that the wire gauge (AWG) was not as important as the Outside Diameter (OD) of the wire overall. There are many thicknesses of insulation and while the AWG my be the same the thicker insulations make the diameter vary greatly. The best source for affordable in scale wire is on EBay and comes from China. The listing on EBay is "UL10064 Ultra-Fine Electronic Wire 0.38MM". In this listing they have different AWGs available and many colors to chose from. Their 36 AWG wire is .28 mm in diameter which is almost exactly 1/4 inch in 1:1 scale. I use this for standard plug wires. Their 34AWG has a diameter of .32mm. There is also a 32AWG that is .38 mm in diameter and is almost exactly to 3/8 inch in 1:1. I use that size for HEI ignition wires. The available colors are good. Probably the best thing is the price. 10 meters (32 feet) of the 36WG is $4.79. Thats a lot of engines for under 5 dollars. Here are pics of just a small amount of my stash of wire as well as a distributor I am building for a Ford flathead. The distributor shown is 3 inches in diameter in 1:1 scale which is the right scale for an old style distributor. So in 1:1 scale this ignition has 3 inch diameter cap that is 3 1/2 inches tall. The wires are 1/4 inch in diameter in scale so for me this is as close to the real thing as I could get.
-
Another resin 3D printer question
Jiml0001 replied to V8tiger's topic in Model Building Questions and Answers
I started with a Phrozon Mini and after countless runs, it finally gave out. The screen failed. Now I have an Elegoo Pro and it works great. There is one slight issue. My work area is in my bedroom and I like to kick off long jobs to run at night. The Phrozon was nearly silent while the Elegoo has a very loud cooling fan. Just something to think about. Given the choice now I would get another Phrozon just for that reason. Both of these printers worked great. I couldn't guess how many print jobs I ran on the Phrozon before having trouble so I am not unhappy about its longevity. I have been using Elegoo water washable resin in ceramic grey and have had great results. The water washable resin has no smell and cleans up with water instead of IPA. Works perfect for me. -
Buying a pin vise HELP
Jiml0001 replied to WizPorsche944's topic in Model Building Questions and Answers
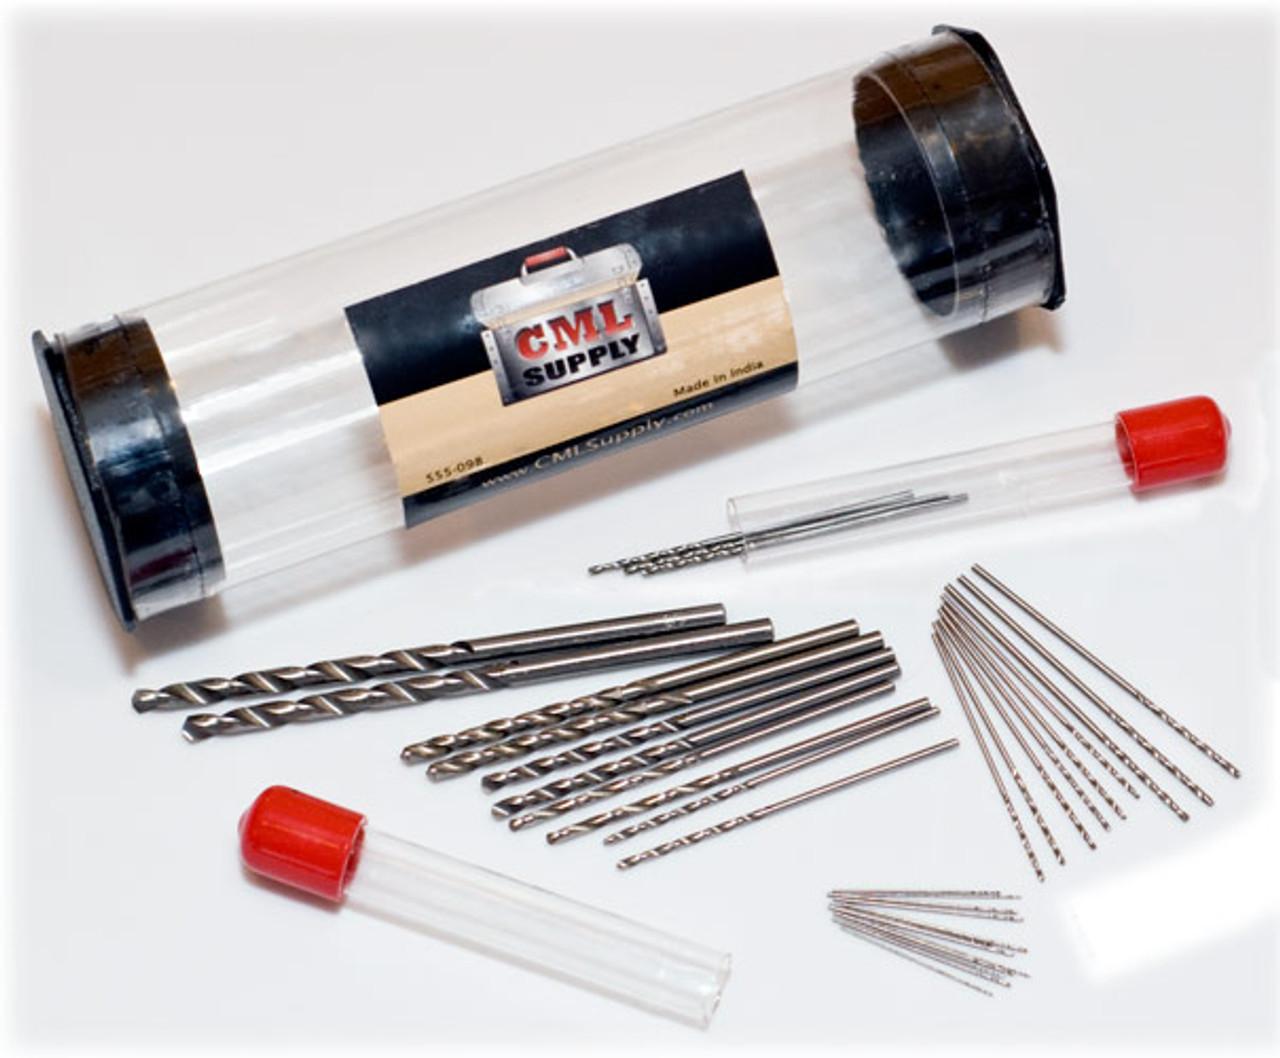
Also at CML Supply they sell a combo bit set for $10.99. This is a real great bargain there is also a set that includes the pin vise for $14.99. Another great deal