Blackkat13
-
Posts
69 -
Joined
-
Last visited
Blackkat13's Achievements
MCM Regular (3/6)
-
Survivor Resto--Original First-Issue Monkeemobile New Pics 4/8
Blackkat13 replied to Snake45's topic in WIP: Model Cars
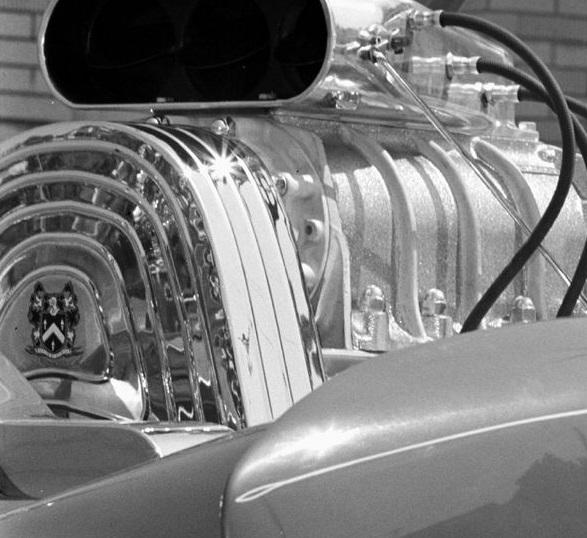
I was thinking of making the b&w one as decals and use them on the side. I might also make one up for the blower since there was one located on there. Sorry, I am building the kit at the moment, and studying everything I can on car 1&2 original photos. I even noticed the pinstriping on the fenders and the loops on the front and back fenders. I just don't know how to make that one up in decal form.
-
Survivor Resto--Original First-Issue Monkeemobile New Pics 4/8
Blackkat13 replied to Snake45's topic in WIP: Model Cars
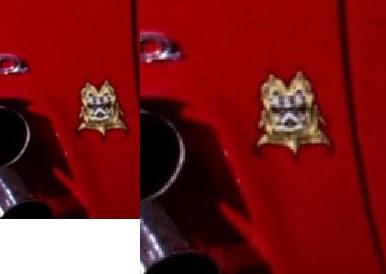
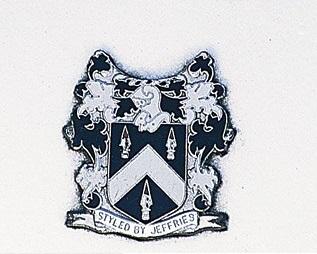
Hey Snake, which Dean Jeffries crest is on the side? Do you have a better photo of the crest? Is it any of these versions?
-
Movie truck"Big trouble in little China"
Blackkat13 replied to ranma's topic in General Automotive Talk (Trucks and Cars)
I just checked the site, to bad the guy hasn't been on since 2015. It's still a cool project to build. -
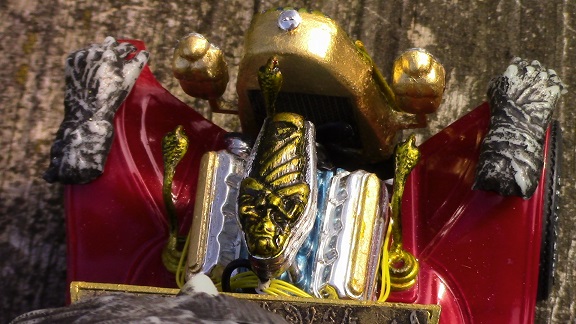
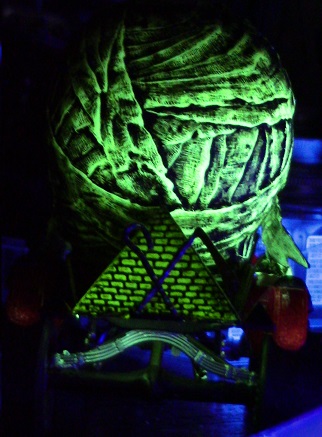
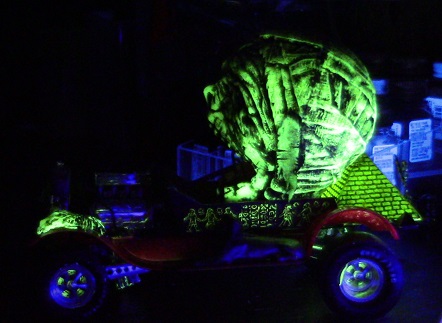
Finally finished up my Mummy Machine I've had since I was a kid, and never finished it. I wanted to have the car 50/50, look nice during the day, and night. The Mummy head, hands, pyramid, King Tut, brake drums, hieroglyphs, & panel lines, all glow. When a black light hits the car the body glows an eerie red, and the panel lines show out. Good paints, glues, and just keep at it, and this is what it turned out like.
-
I took them after I finished building it around 4am. I have plans on taking new ones later this week if the weather stays nice. I think in natural light it will look better.
-
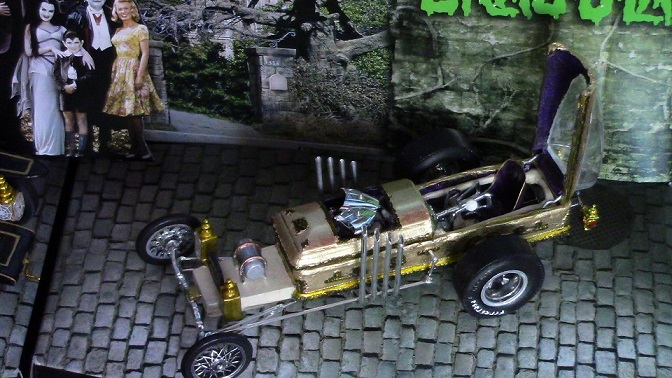
After 2/3 months of building my Drag-u-La it is finally finished. I even took it to the local hobby shops contest with the Koach. Neither one of the kits won, and I guess the judges didn't like them. Drag-u-La was built from the standard model kit. I molded a old busted Revell dragster frame to the kit. I went with the body idea after seeing how the frame was pretty basic for the real car. I found out after I molded/glued it to the frame from age the plastic was very brittle in a few places and would break. I had to wrap the frame pieces with jb waterweld to make it more solid. I cut the body, hinged the door, and added pins along the body to hold it down the hood, and not allow the door to wiggle when closed. I used real fabric on the inside of the coffin, gold leafed the body, and light bar. When I leafed the body I didn't leaf the emblems on the body and wanted them to stand out. I did a black wash to show out their artwork, trim around the bottom, handles, and painted them with clear yellow. I painted up the everything the right colors frame, dash, motor, interior like the orginal photos from MunsterKoachs website. I made a custom differential cover out of weld so it would look like the purple/webbed one in between the seat. Drilled out the carbs added little hoses, fuel filter, gas line runs to gas tank. I added a piece of small hose to each side of the gas tank, instead of using the decals for that. I added brake lines, gas & brake pedals, battery, battery cables, built a coffin radiator cover with cross, hoses, added a small wire to the parachute, wired the hand brake, fogged up the headlights, & made custom candles for the lights, etc. For fun I heated up my clay carving tool curved end to give the pipes a curved tip and the black is from the fire, not paint. I also glued in plastic pieces so the bottom looked more like the real car that was hanging at old Planet Hollywood. The pieces are located where the seat is located to hold seat/battery and gas and brake pedals. Only decals I used was the Drag-u-la for the windshield, and the tombstone marble ones. The kit didn't come with the Ford logo for in front of the tombstone. Before I forget this kit when the sunlight hits it, it really does shine.
-
I take it your sale is the one using the seat photo from this thread?
-
I still might need another set, for another camaro build. I did happen to get a set of seats with a old junkyard seat lot. The ones I got were from 73 camaro kit from mpc. I think your set has better detail then what I have. https://public.fotki.com/Blackkat132000/camaro_parts/img-4571.html
-
I'm trying to get one that will look pretty close to these ones in the photo.
-
Thanks guys for the tips, and how to use this. If I have old paint on a kit, or junkyard kit, I'll use this. I went ahead and used standard paint thinner on the munster koaches interior to remove the old paint. It took fresh primer to coat the black interior, and 2 coats of red to get it looking right.
-
All I got in the mail today was a new bottle of Tamiya cement (orange cap) today. I spilled almost all of my other bottle last week, so happy to get this one. The sad thing is my Ryders and Hobby Lobby out here only carries the green cap version.
-
I never heard of this method before. This is something my dad heard of but has never tried. On my latest build the paint messed up on the cars interior, and I have to remove the paint. My dad suggested using brake fluid since it won't melt the plastic. Has anyone ever tried this on a model build? Tips/Tricks? Does it wash off? Leave a oil residue?
-
Hello and welcome. I highly suggest checking out MunsterKoach.com for anything Munster related to these cars. I'm using the site for reference photos of the original cars and the detailing. As far as colors go with your best guess, to whatever matches up to the car. Always check out different stores like Ryders, Hobby Lobby, and Michaels for different colors each store carries different colors. On my Drag-u-la I'm using Grape by Testers for the motor block. Haven't started Koach yet, but looking up and studying the palette on it. Build at your own speed, no hurries, slow and steady is always good. You don't want to rush and mess up your paint. I use Testors paint on my builds, even some water based acrylics for small stuff. This site has a lot of knowledge on it and everyone is very helpful.
-
Hiya, from north of Flint. Nice to see another Michigander on here.
-
Quick question How big, are the detail master tachometers? I seen that detail master has tachometers for kits. I am wondering what do they look like all together on a dash or even in the dash. I want to buy a few but want to know more about them in general. I'm having a hard time finding dash photo's with the part on them. Are they as hard to put together as a distributor from the company?