Chris Smith
-
Posts
815 -
Joined
-
Last visited
Content Type
Profiles
Forums
Events
Gallery
Everything posted by Chris Smith
-
I’m sure it looks even better outside in sun light.. Your trip sounds cool ? Next time I over they hill, there needs to be a lunch involved ?
-
So….. This is what you have been up to! Your doing a great job on this my friend.
-

1960 Ferrari 256F1
Chris Smith replied to Chris Smith's topic in WIP: Other Racing: Road Racing, Land Speed Racers
I took this photo on Saturday, before I came down with a illness. I just don’t want anyone think that I’m a slacker ?
-
1960 Ferrari 256F1
Chris Smith replied to Chris Smith's topic in WIP: Other Racing: Road Racing, Land Speed Racers
Thank you for the complement, I appreciate it ? -
1960 Ferrari 256F1
Chris Smith replied to Chris Smith's topic in WIP: Other Racing: Road Racing, Land Speed Racers
Thank you very much! -
1960 Ferrari 256F1
Chris Smith replied to Chris Smith's topic in WIP: Other Racing: Road Racing, Land Speed Racers
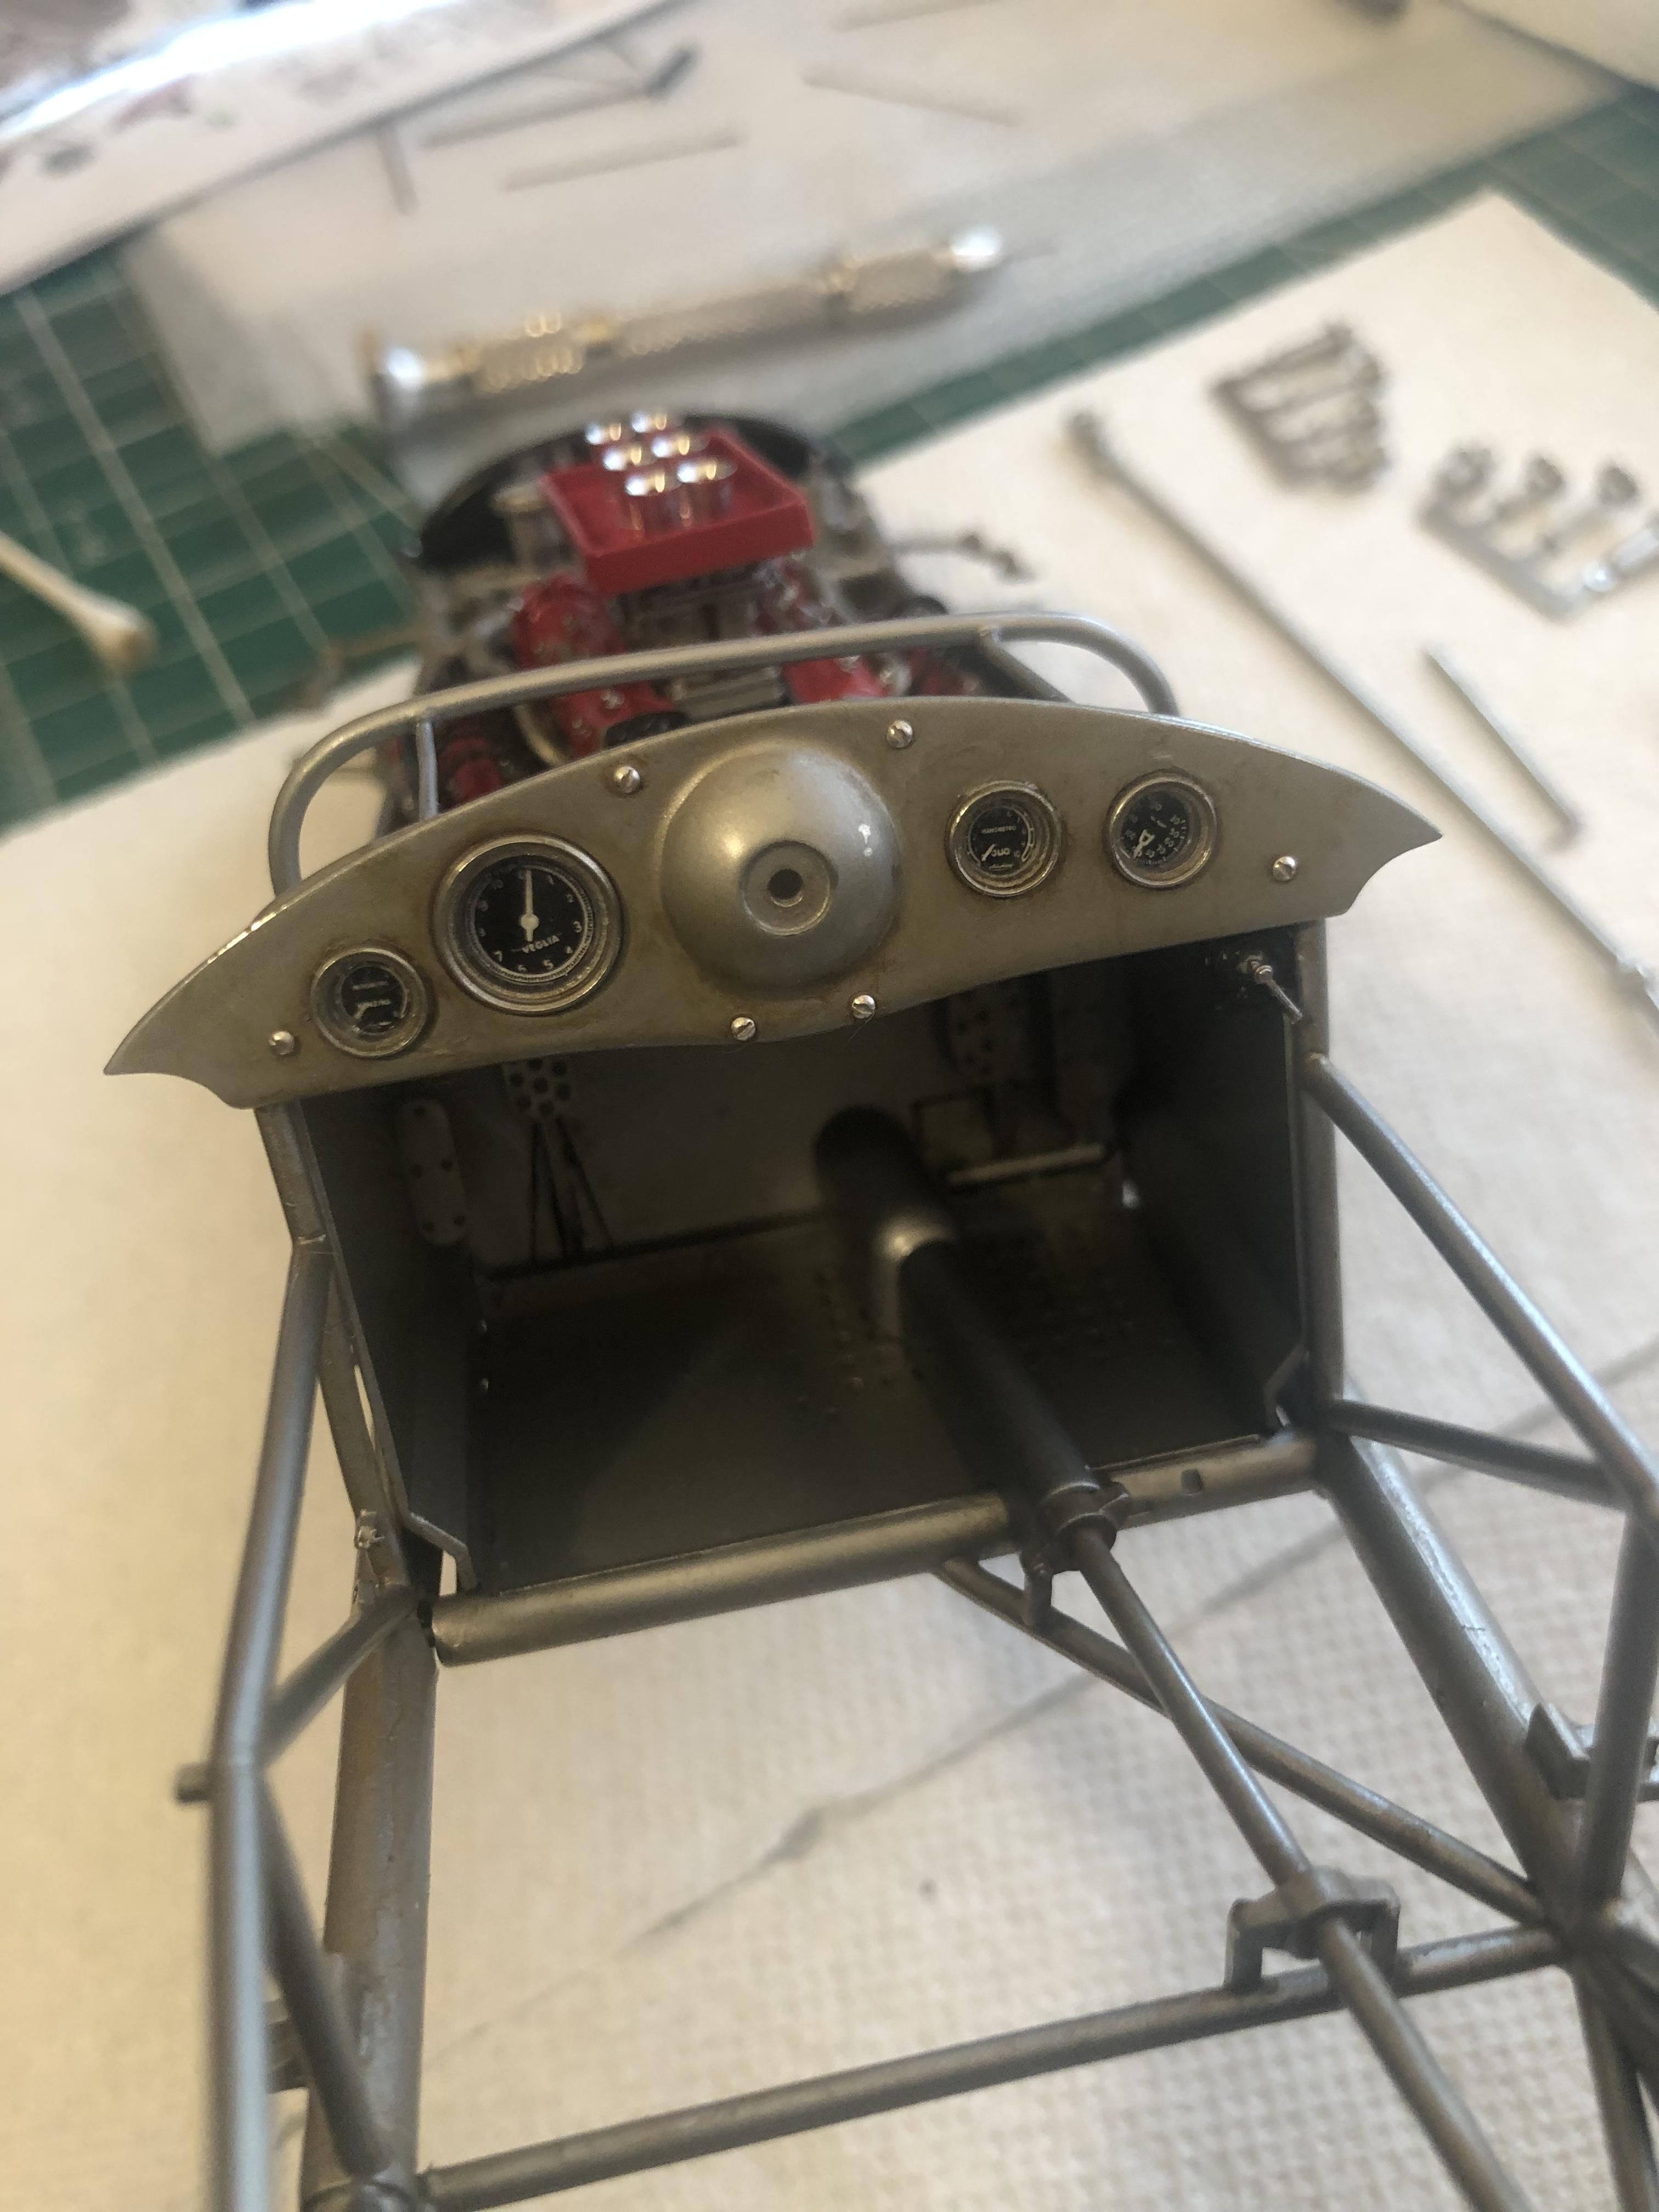
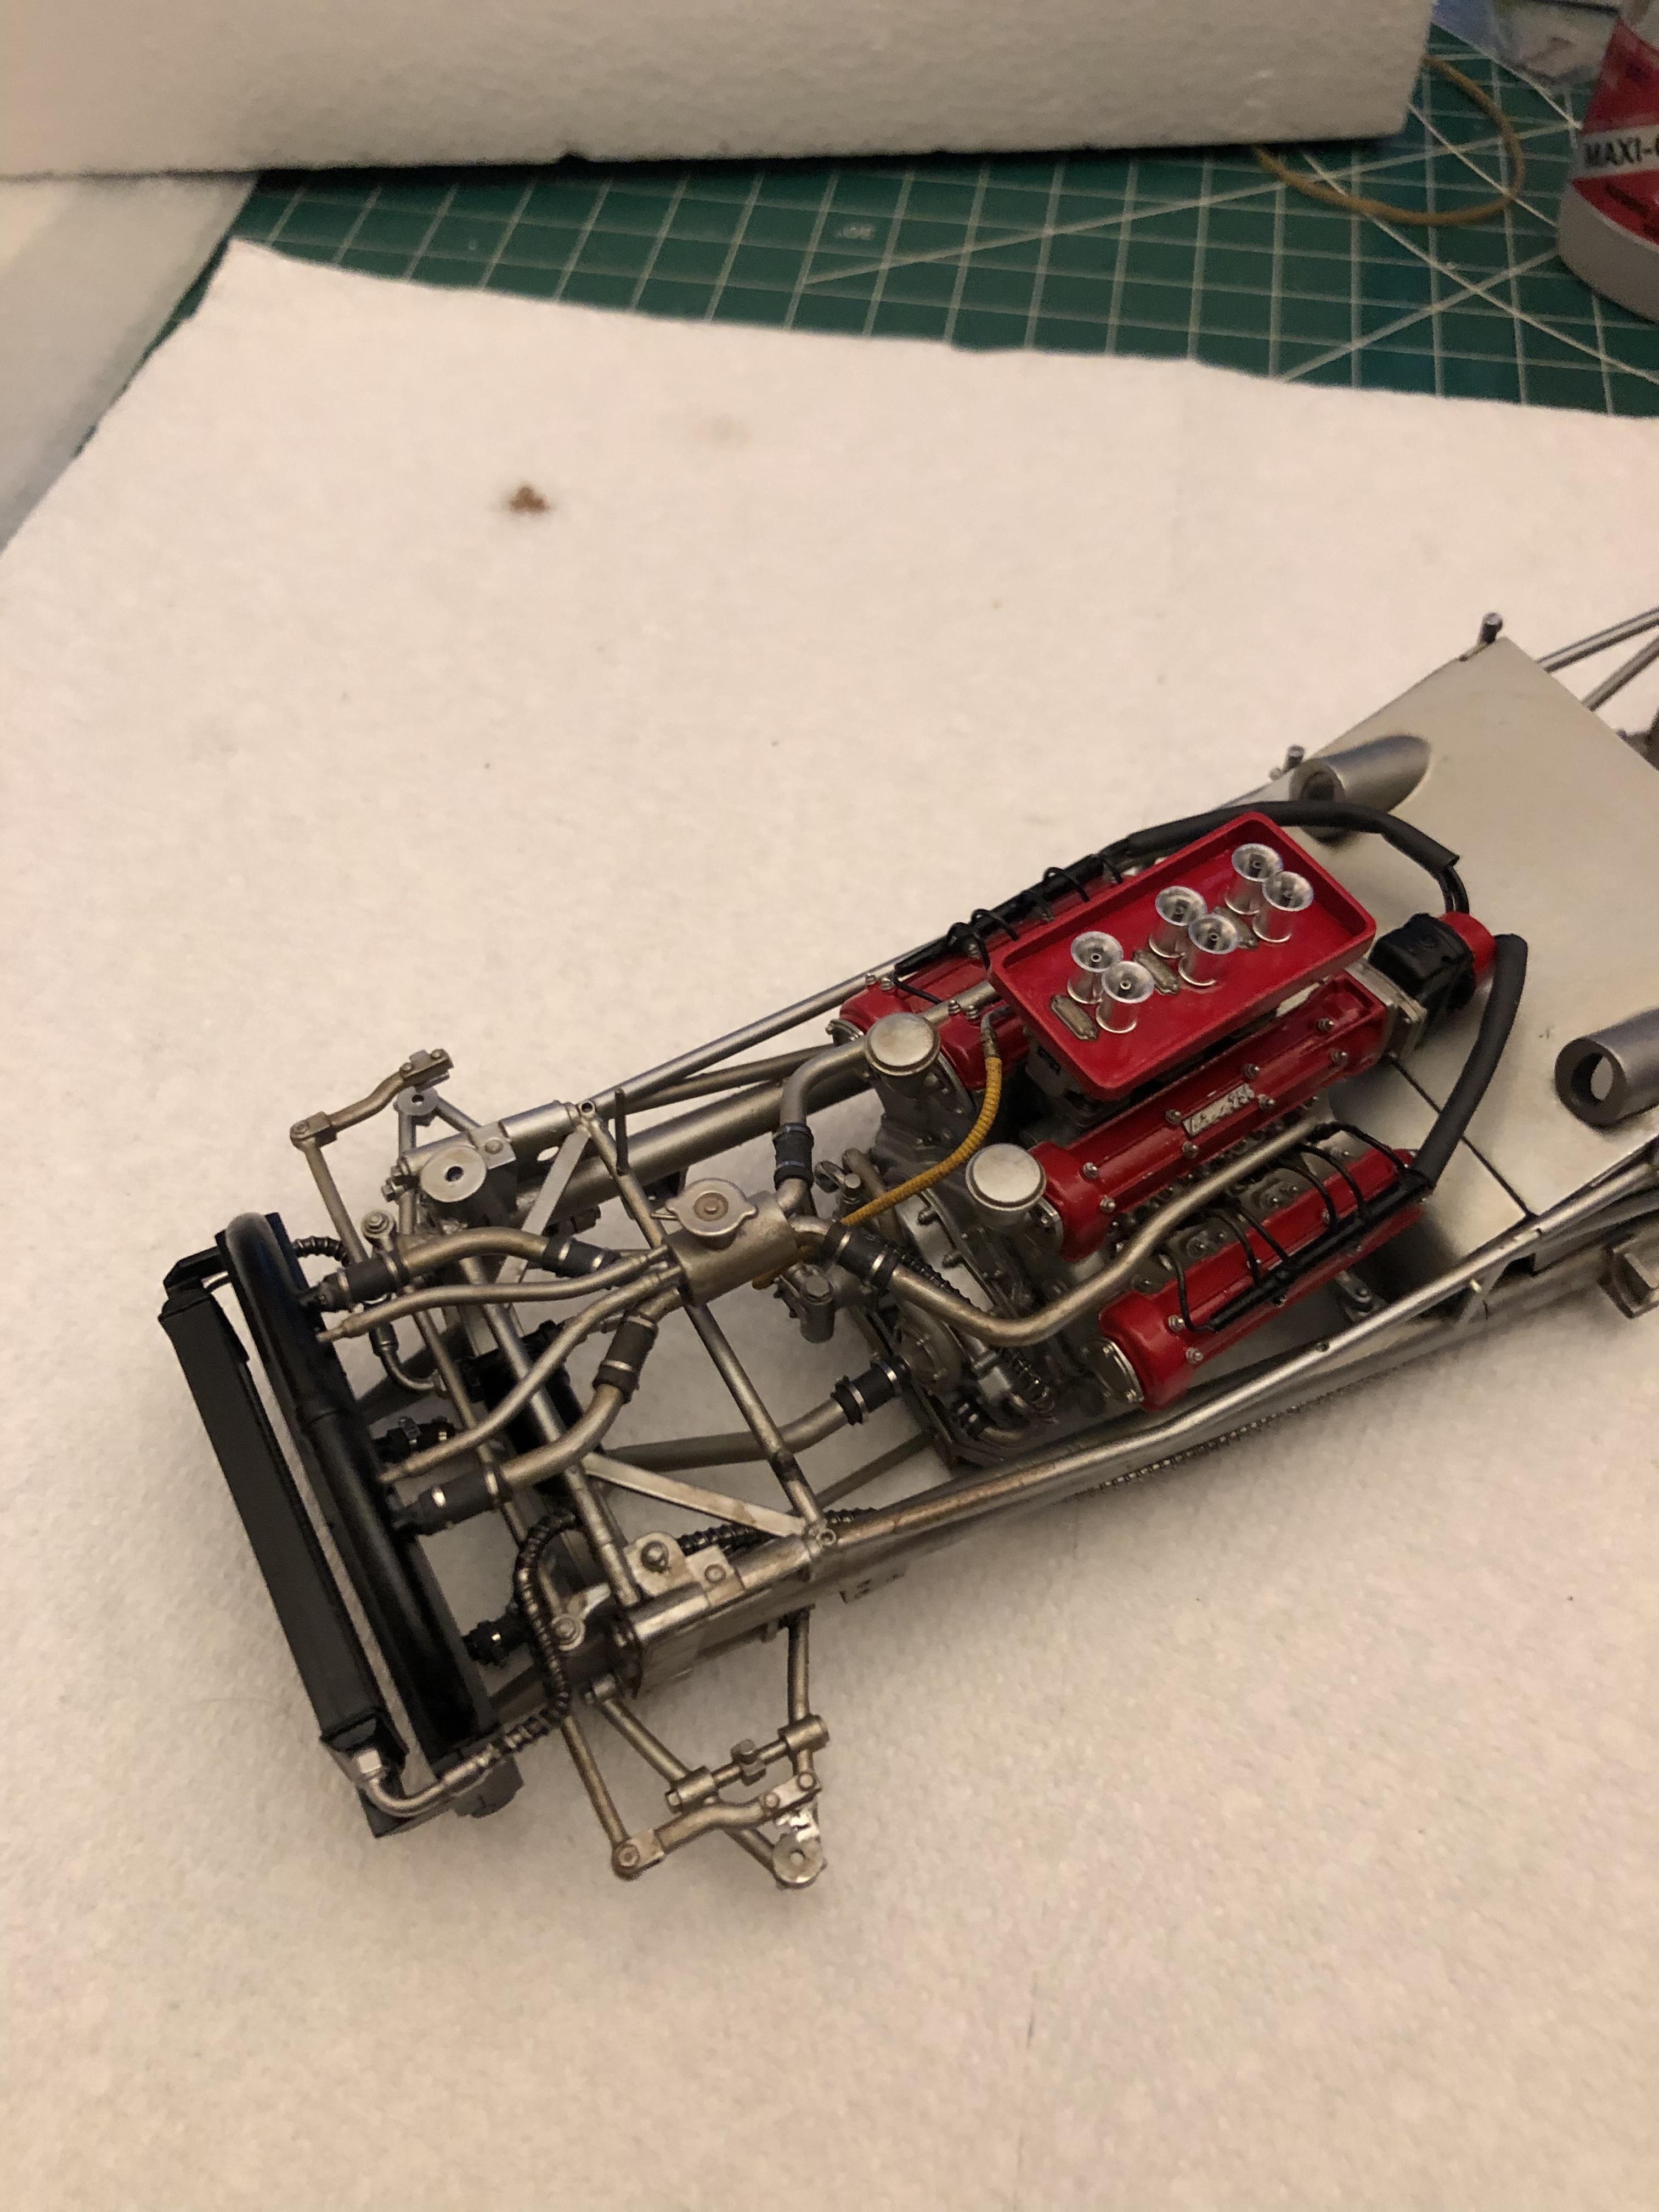
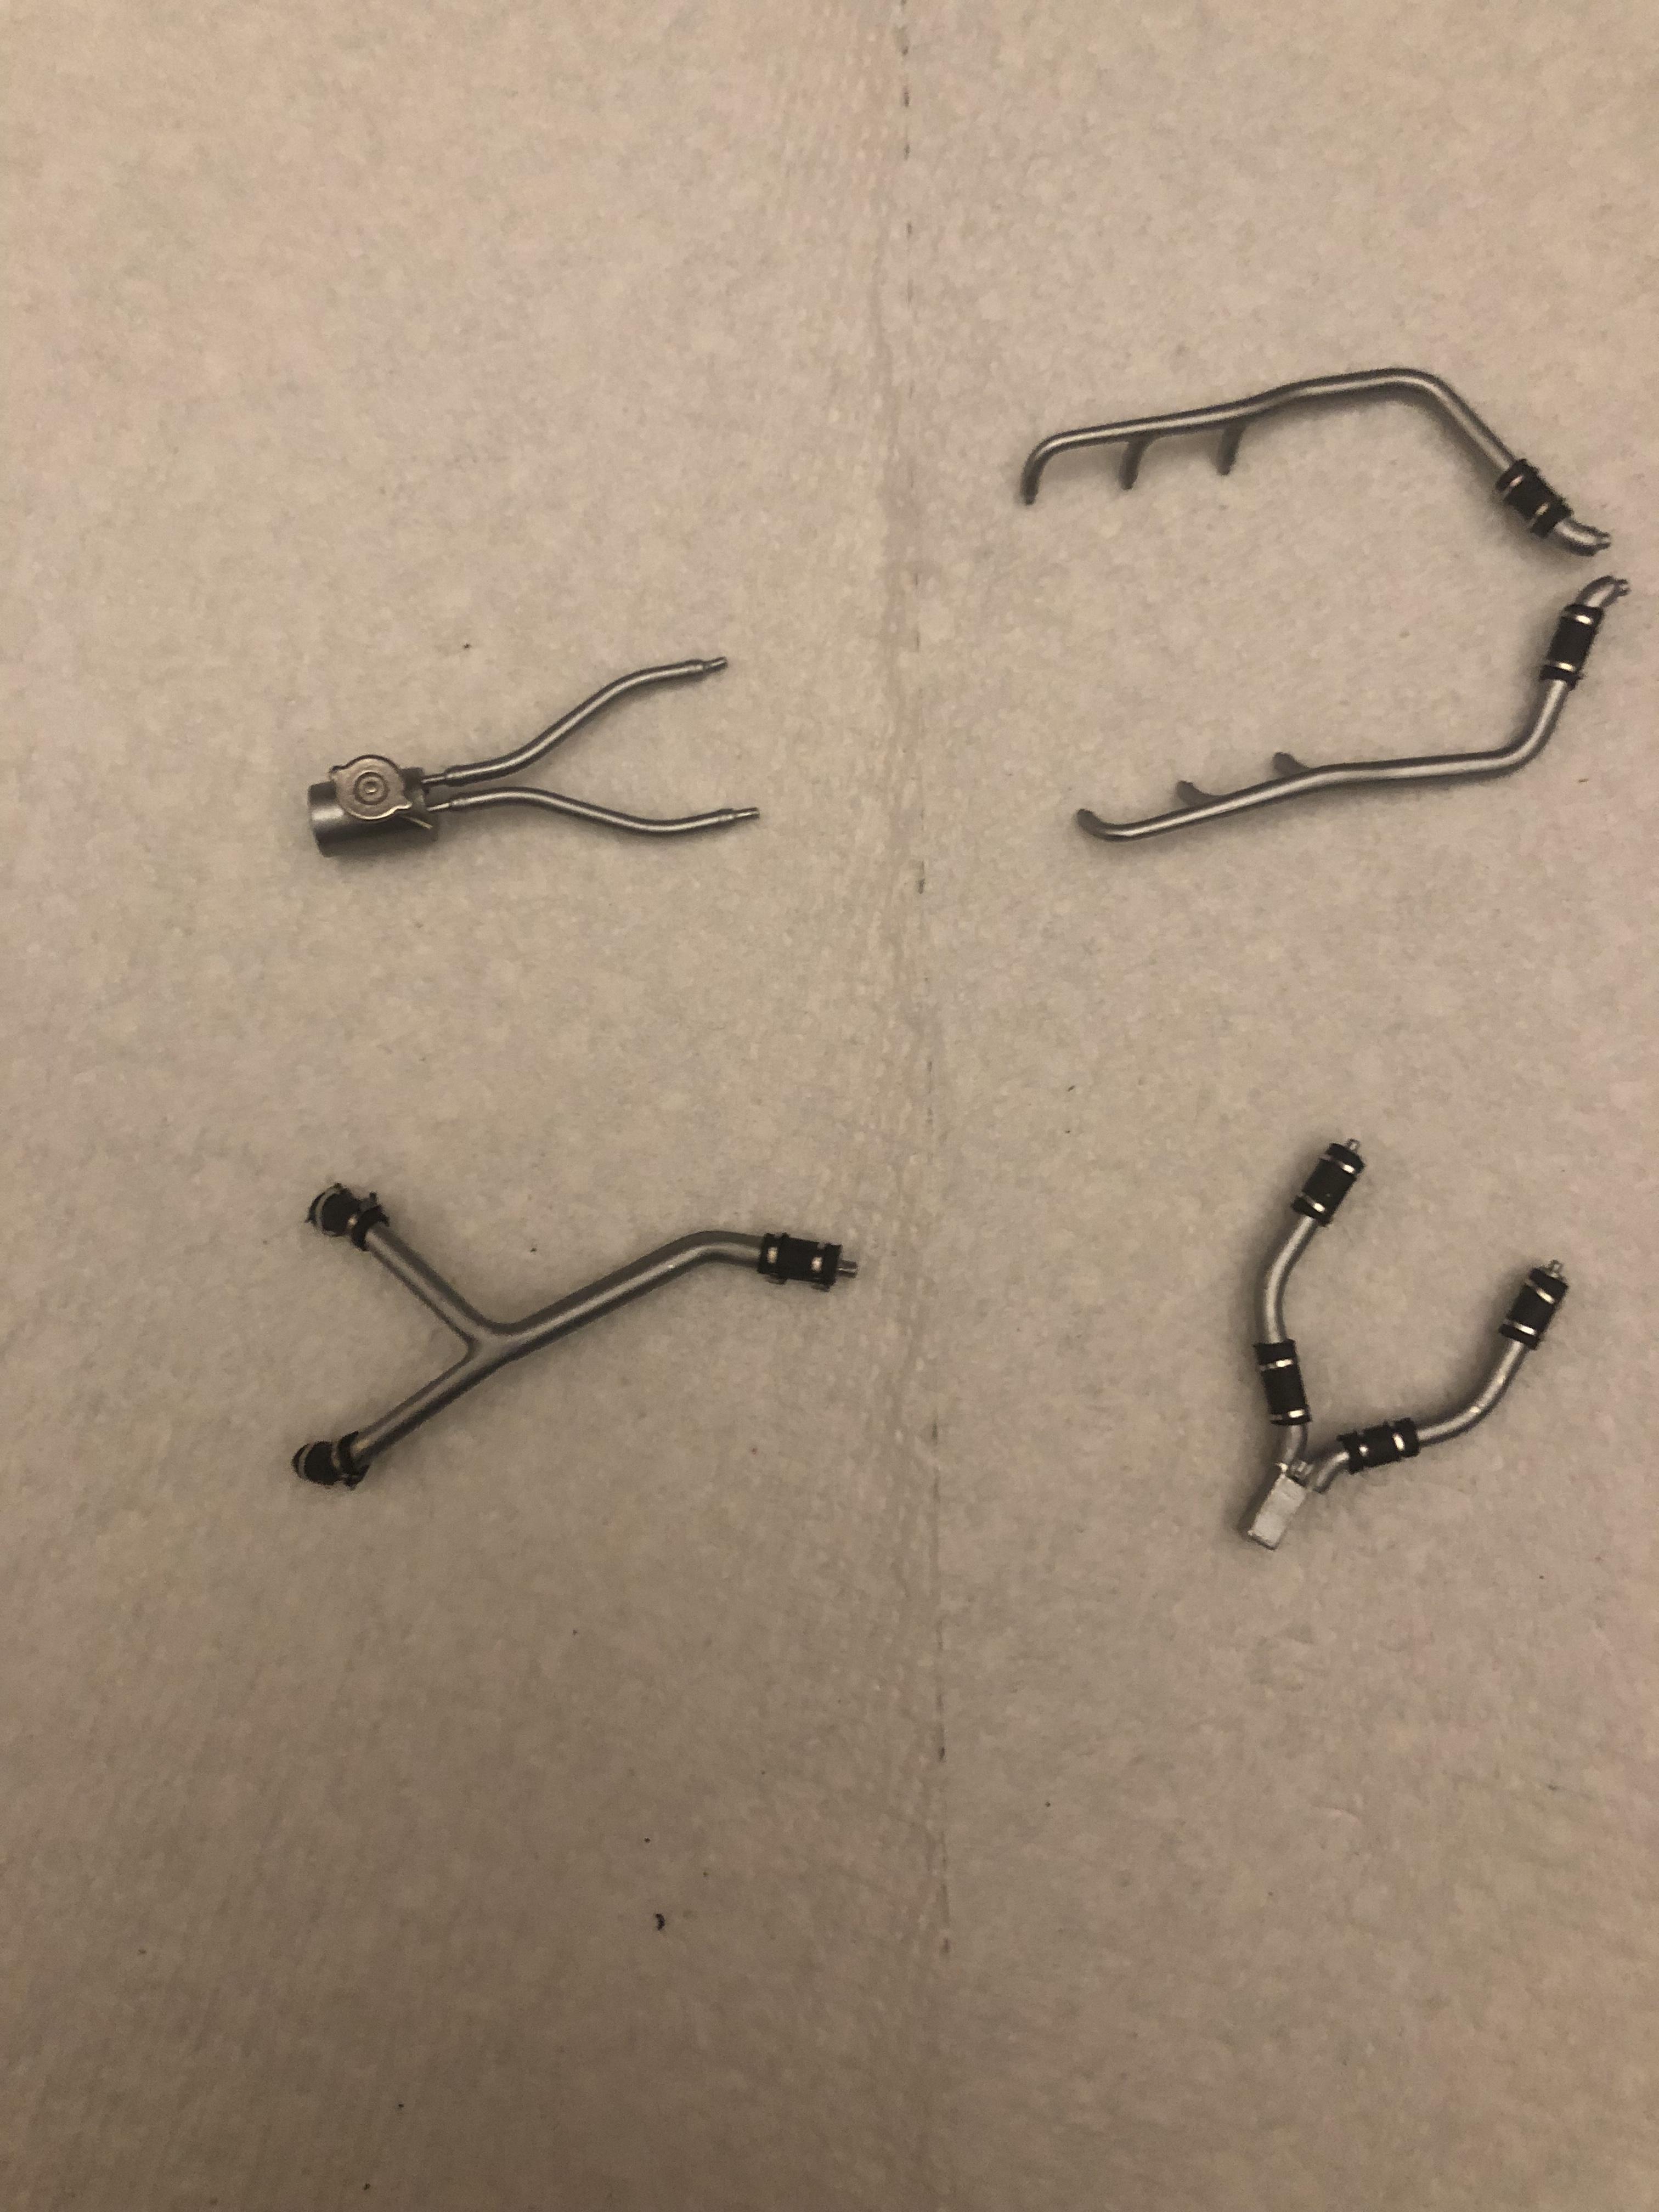
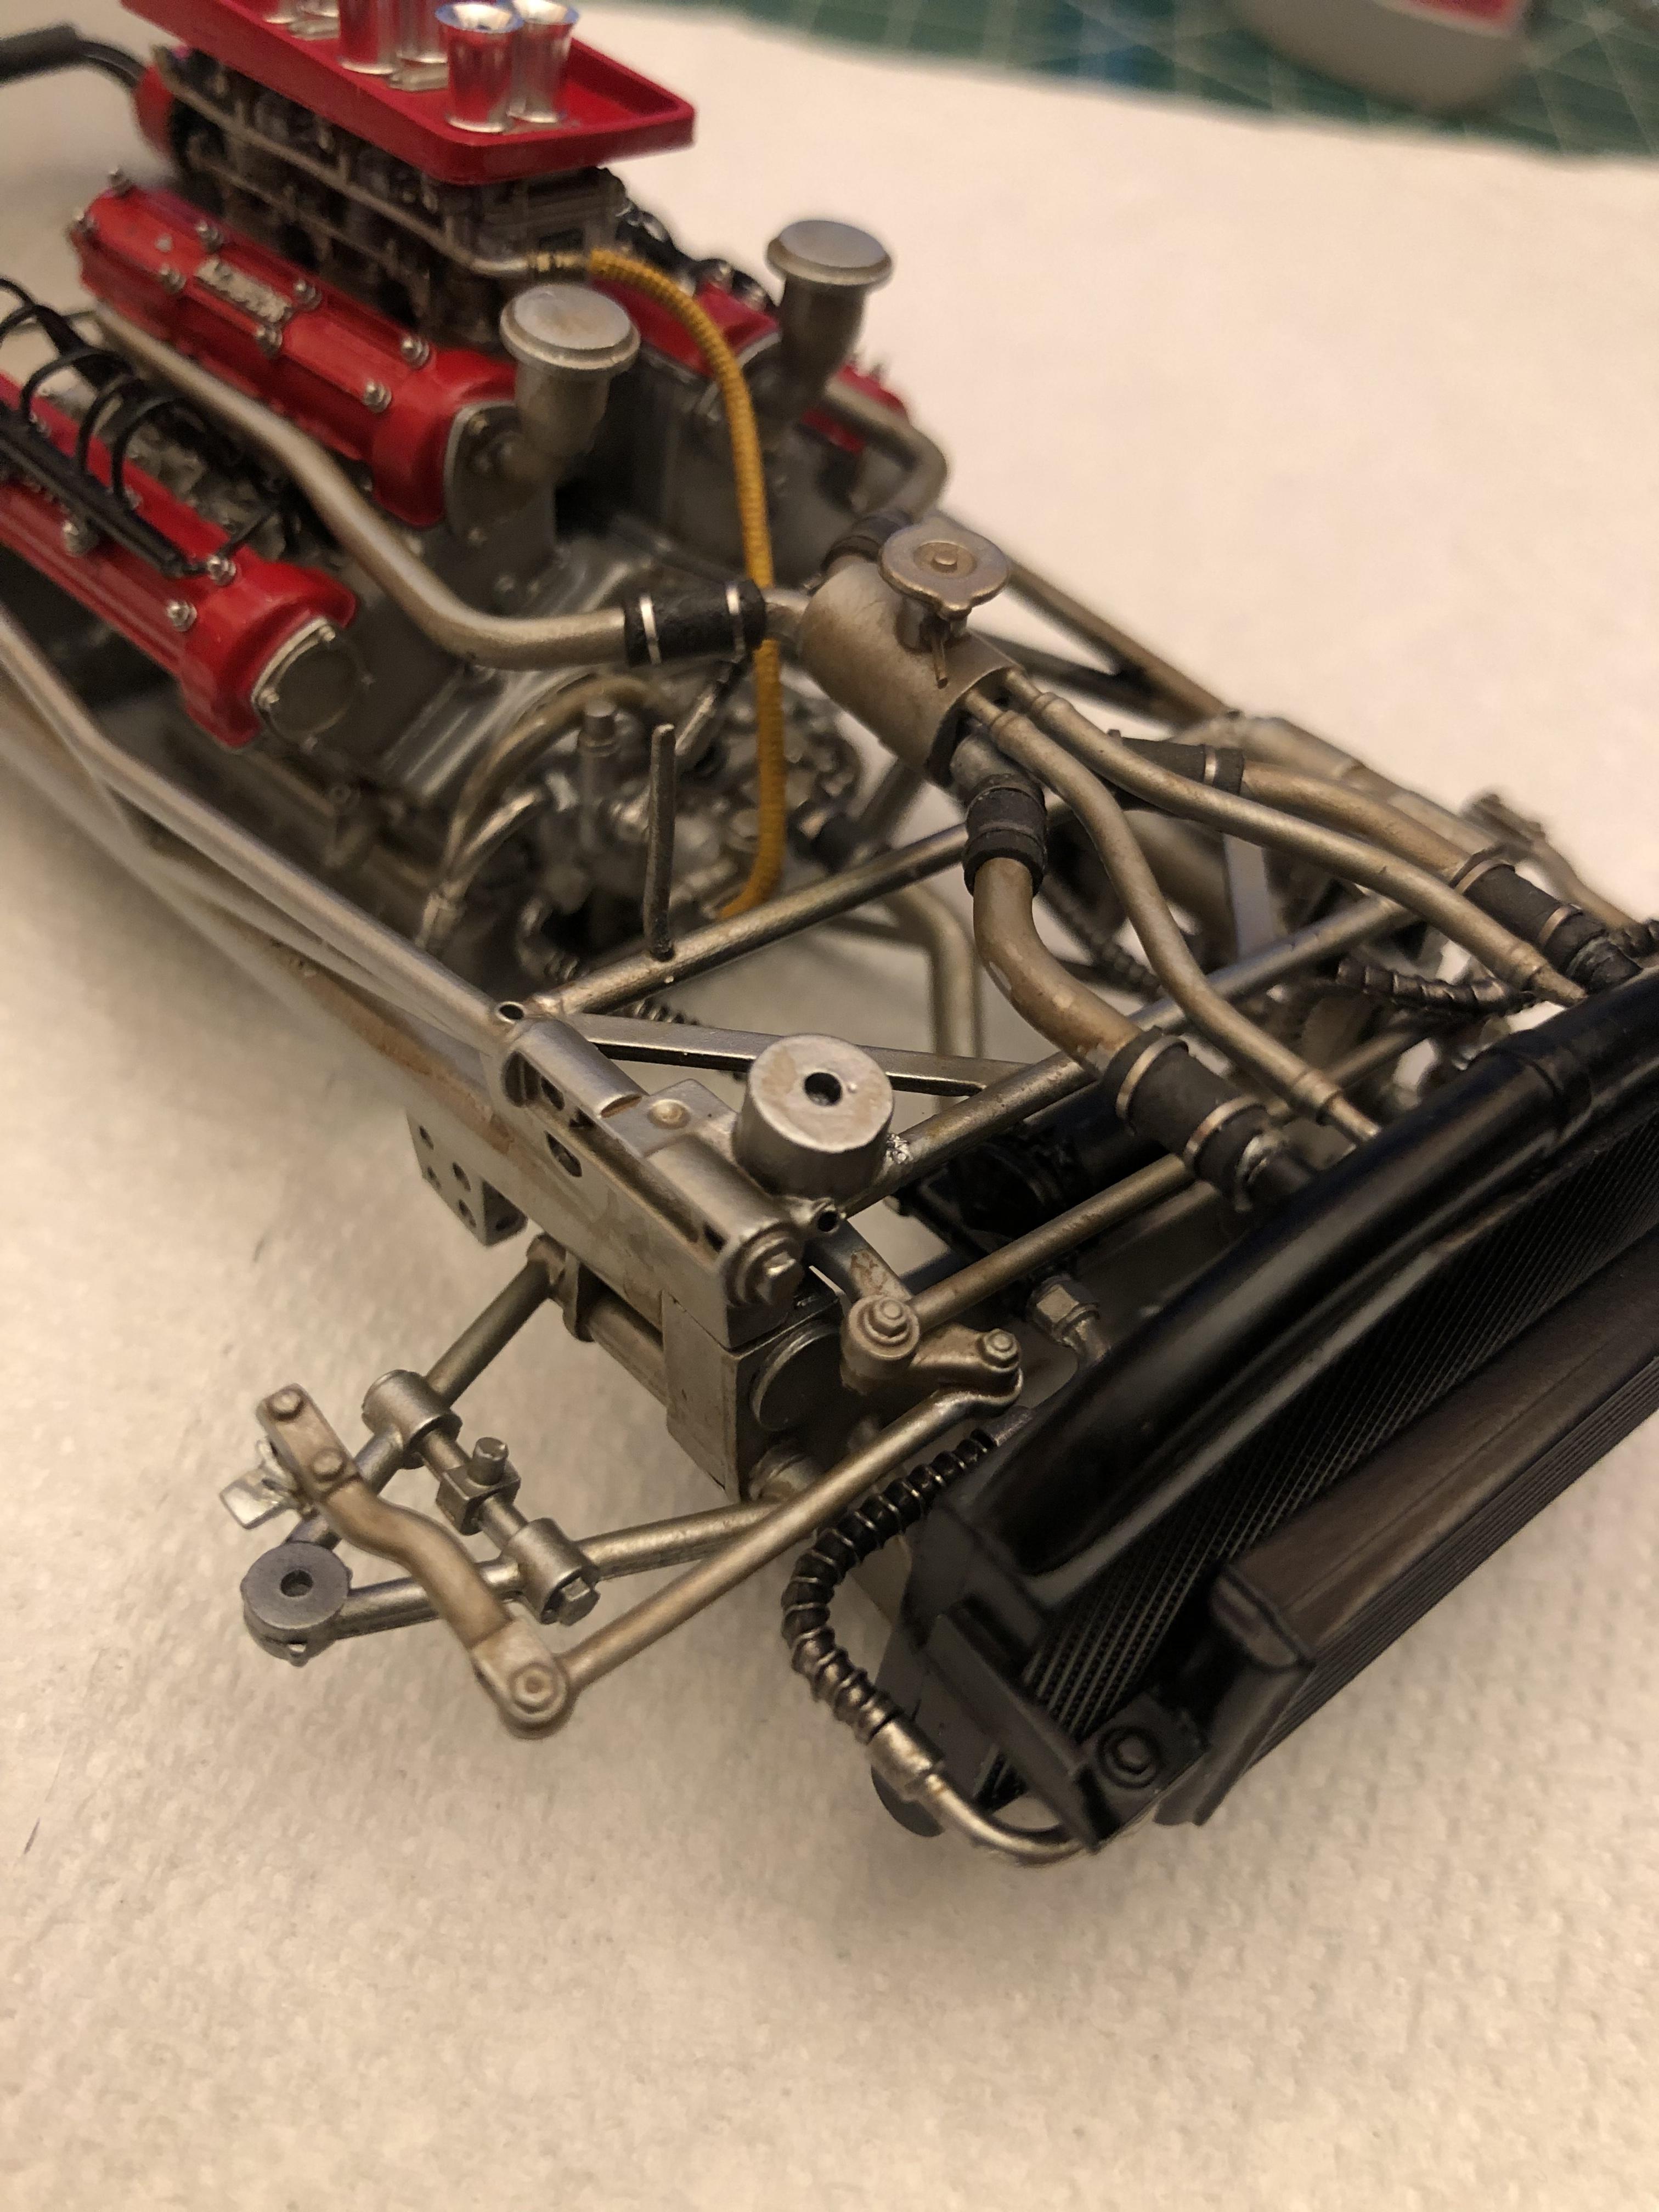
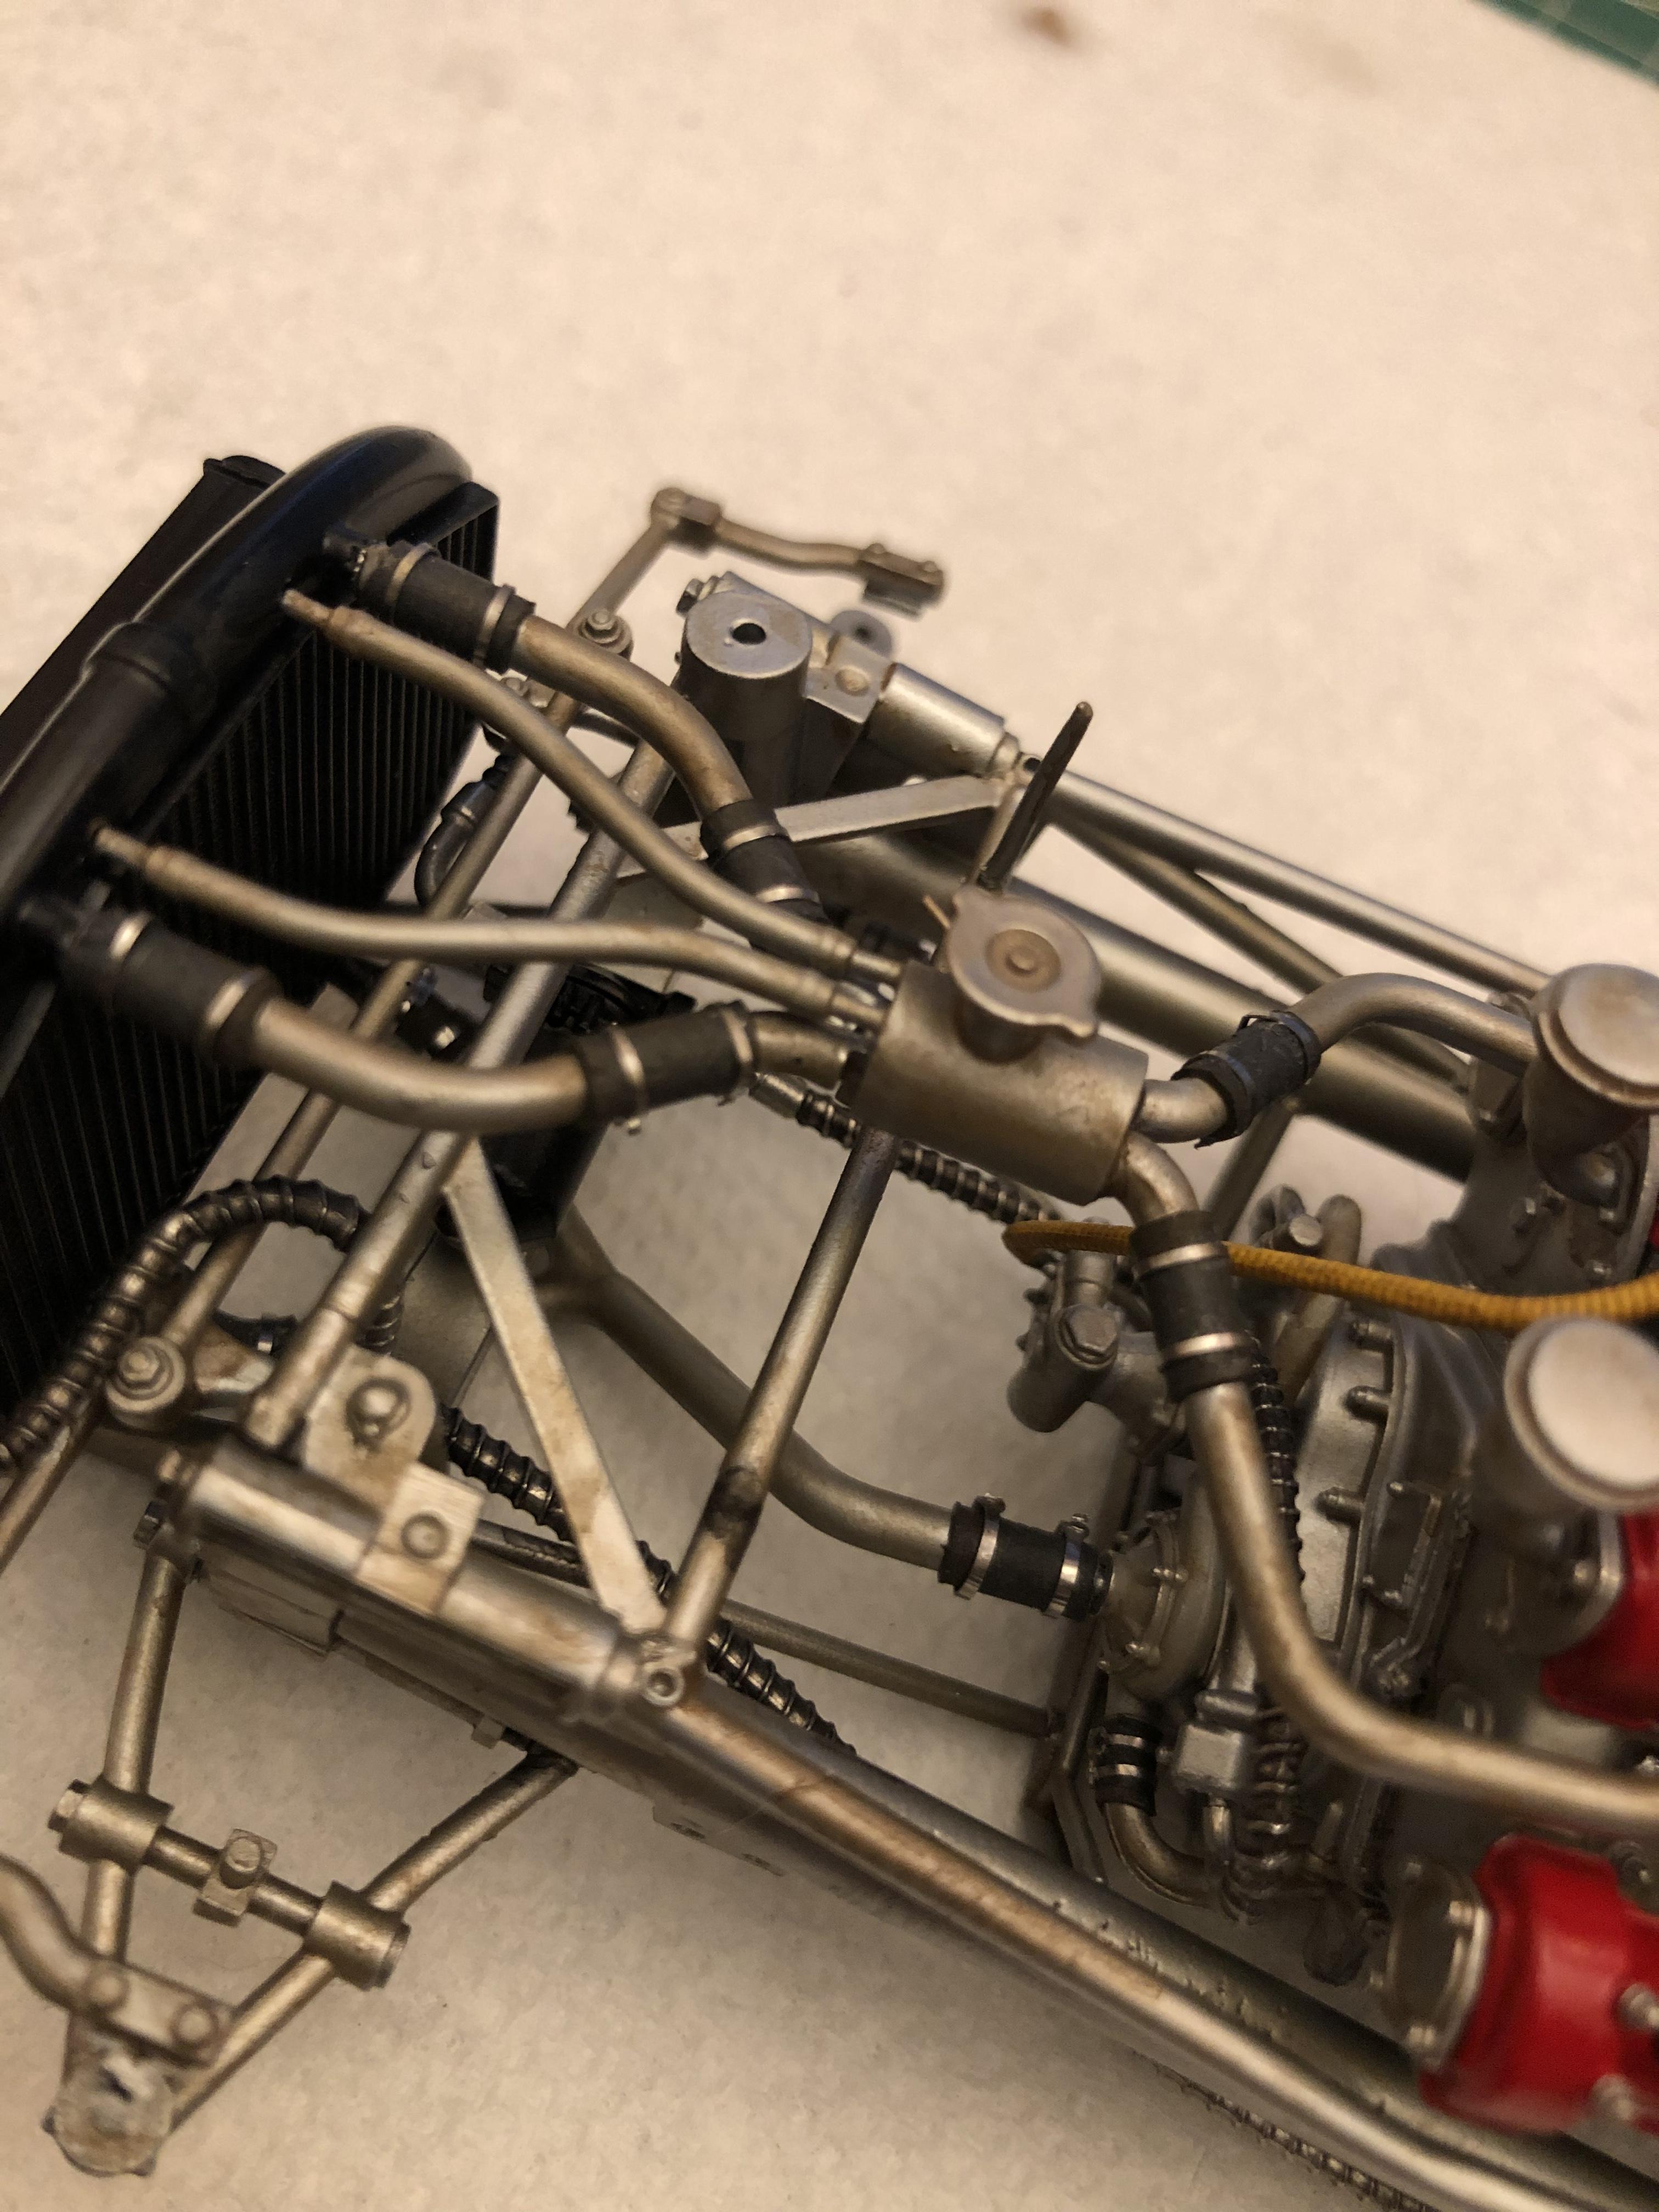
More stuff for all of you looky loo’s ? I spent the last week prepping a few parts. I think I got all the plumbing done. Enjoy!
-
1960 Ferrari 256F1
Chris Smith replied to Chris Smith's topic in WIP: Other Racing: Road Racing, Land Speed Racers
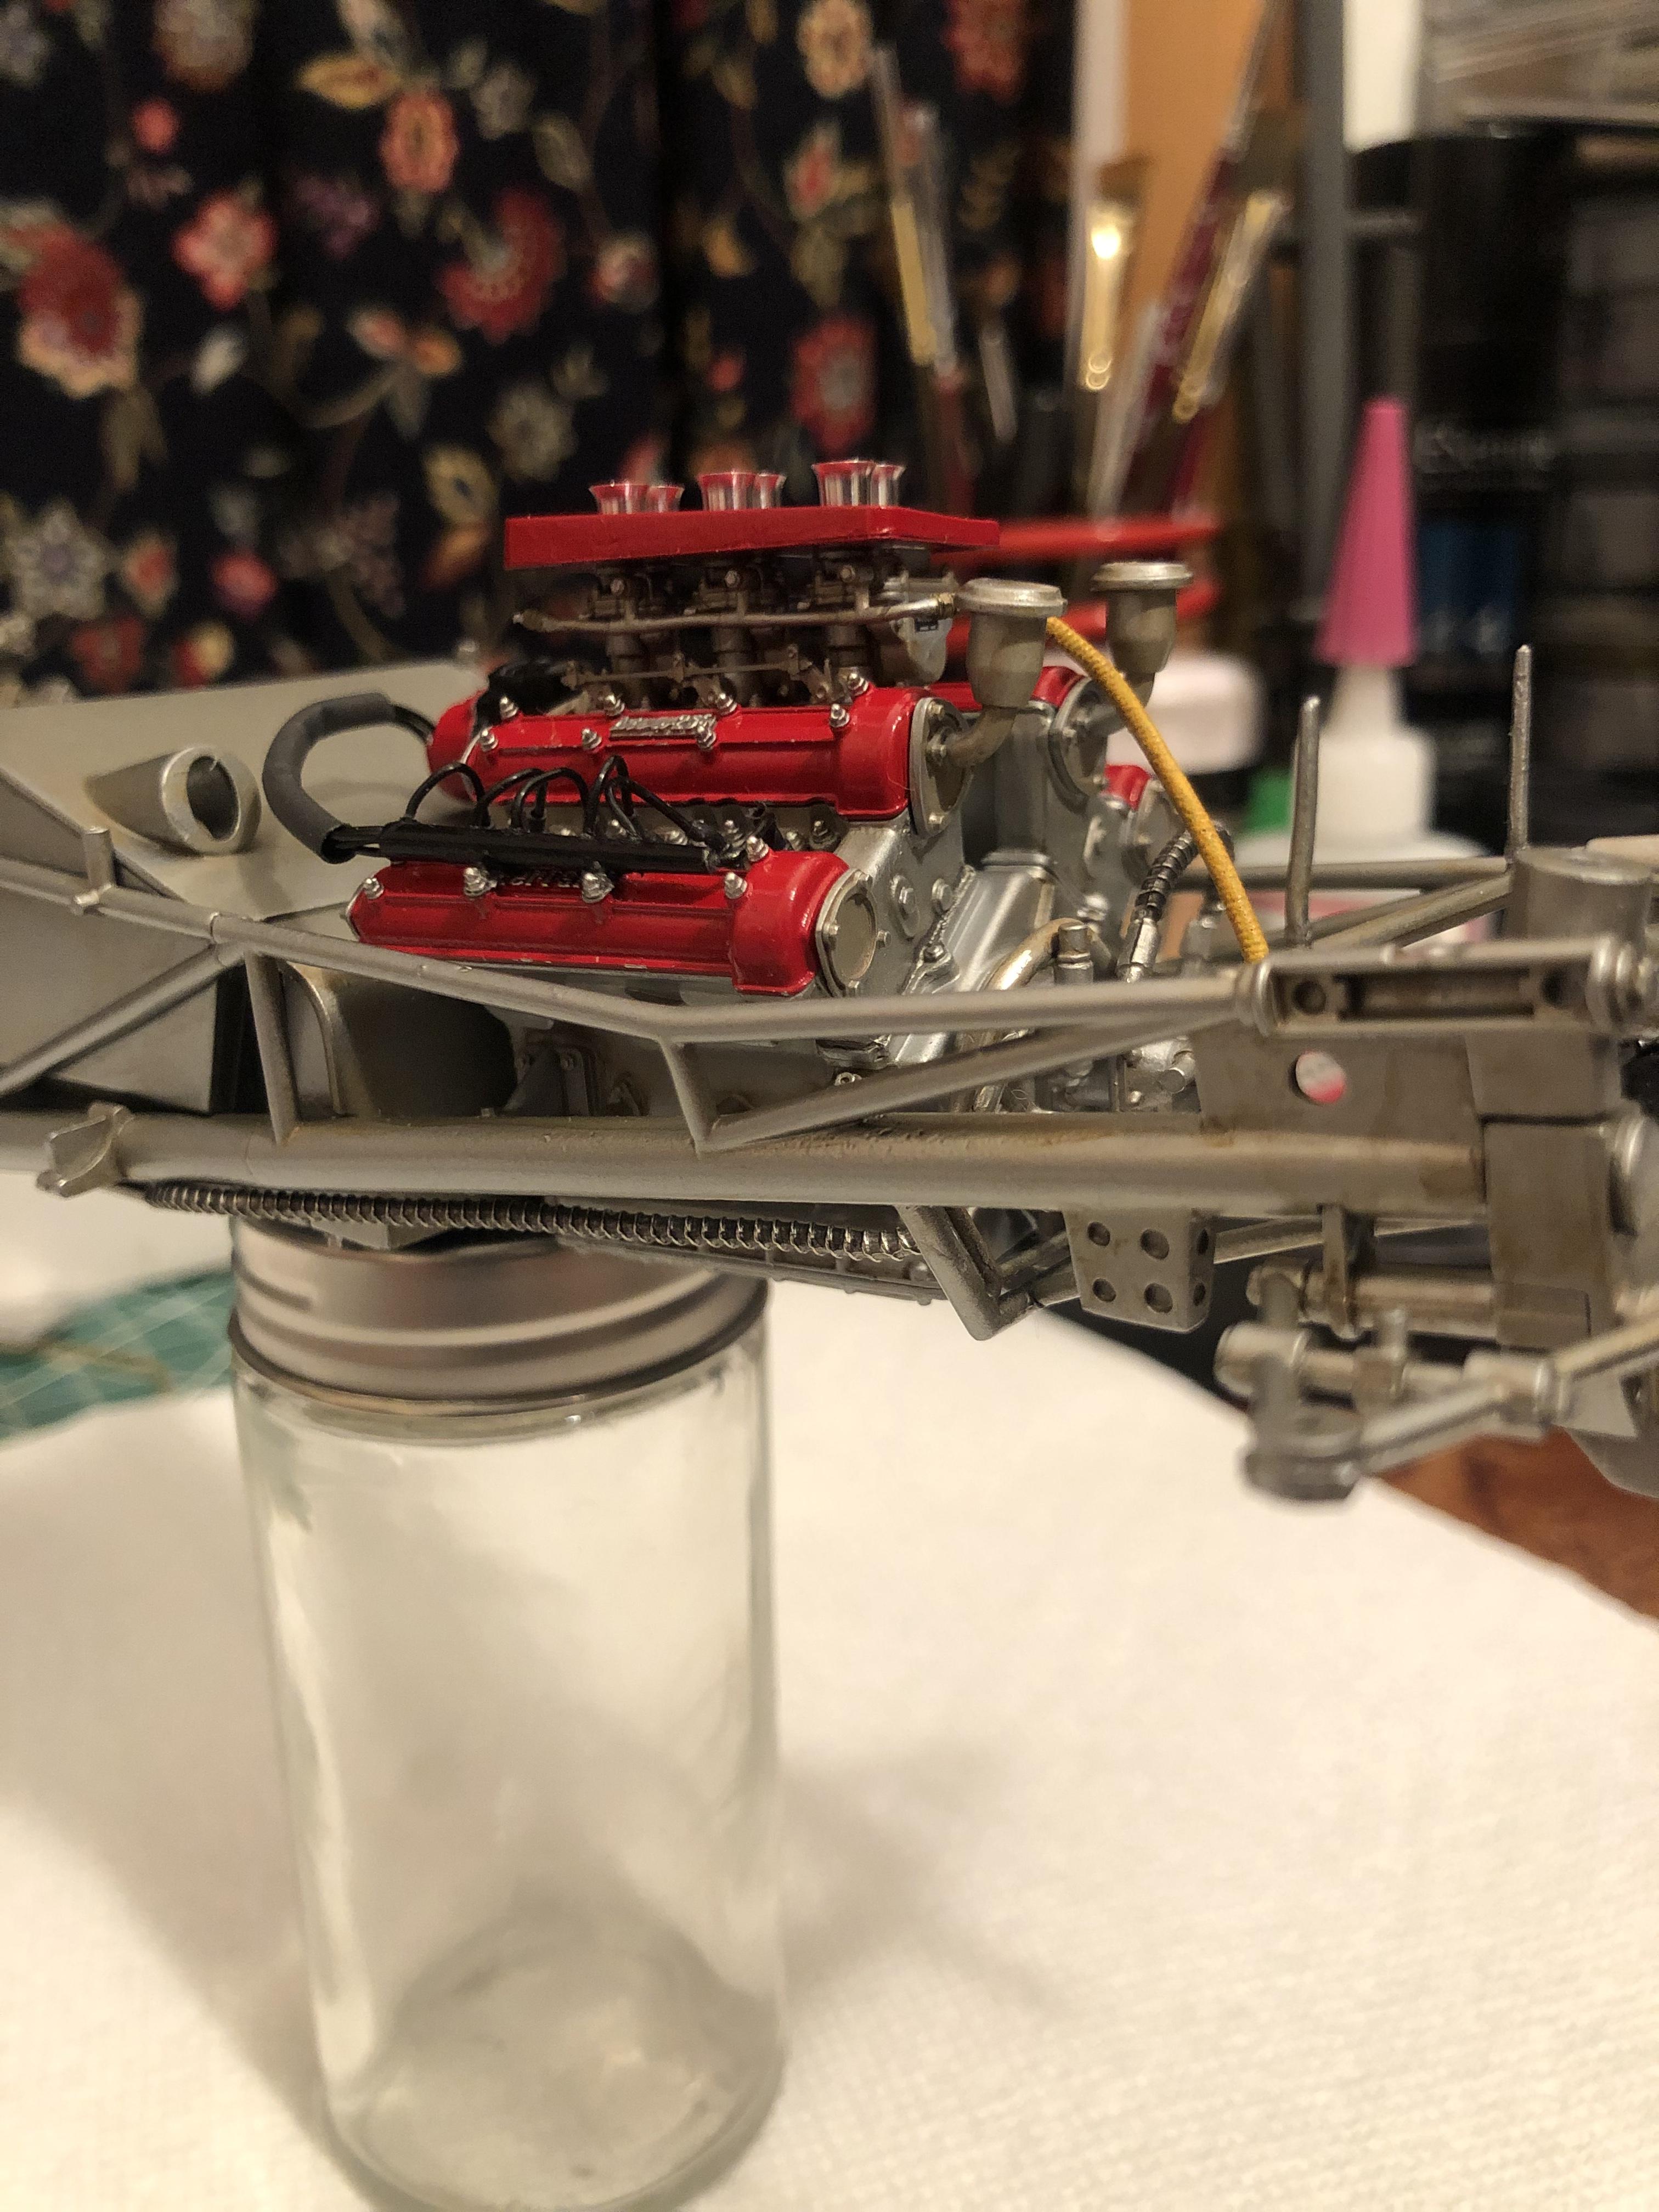
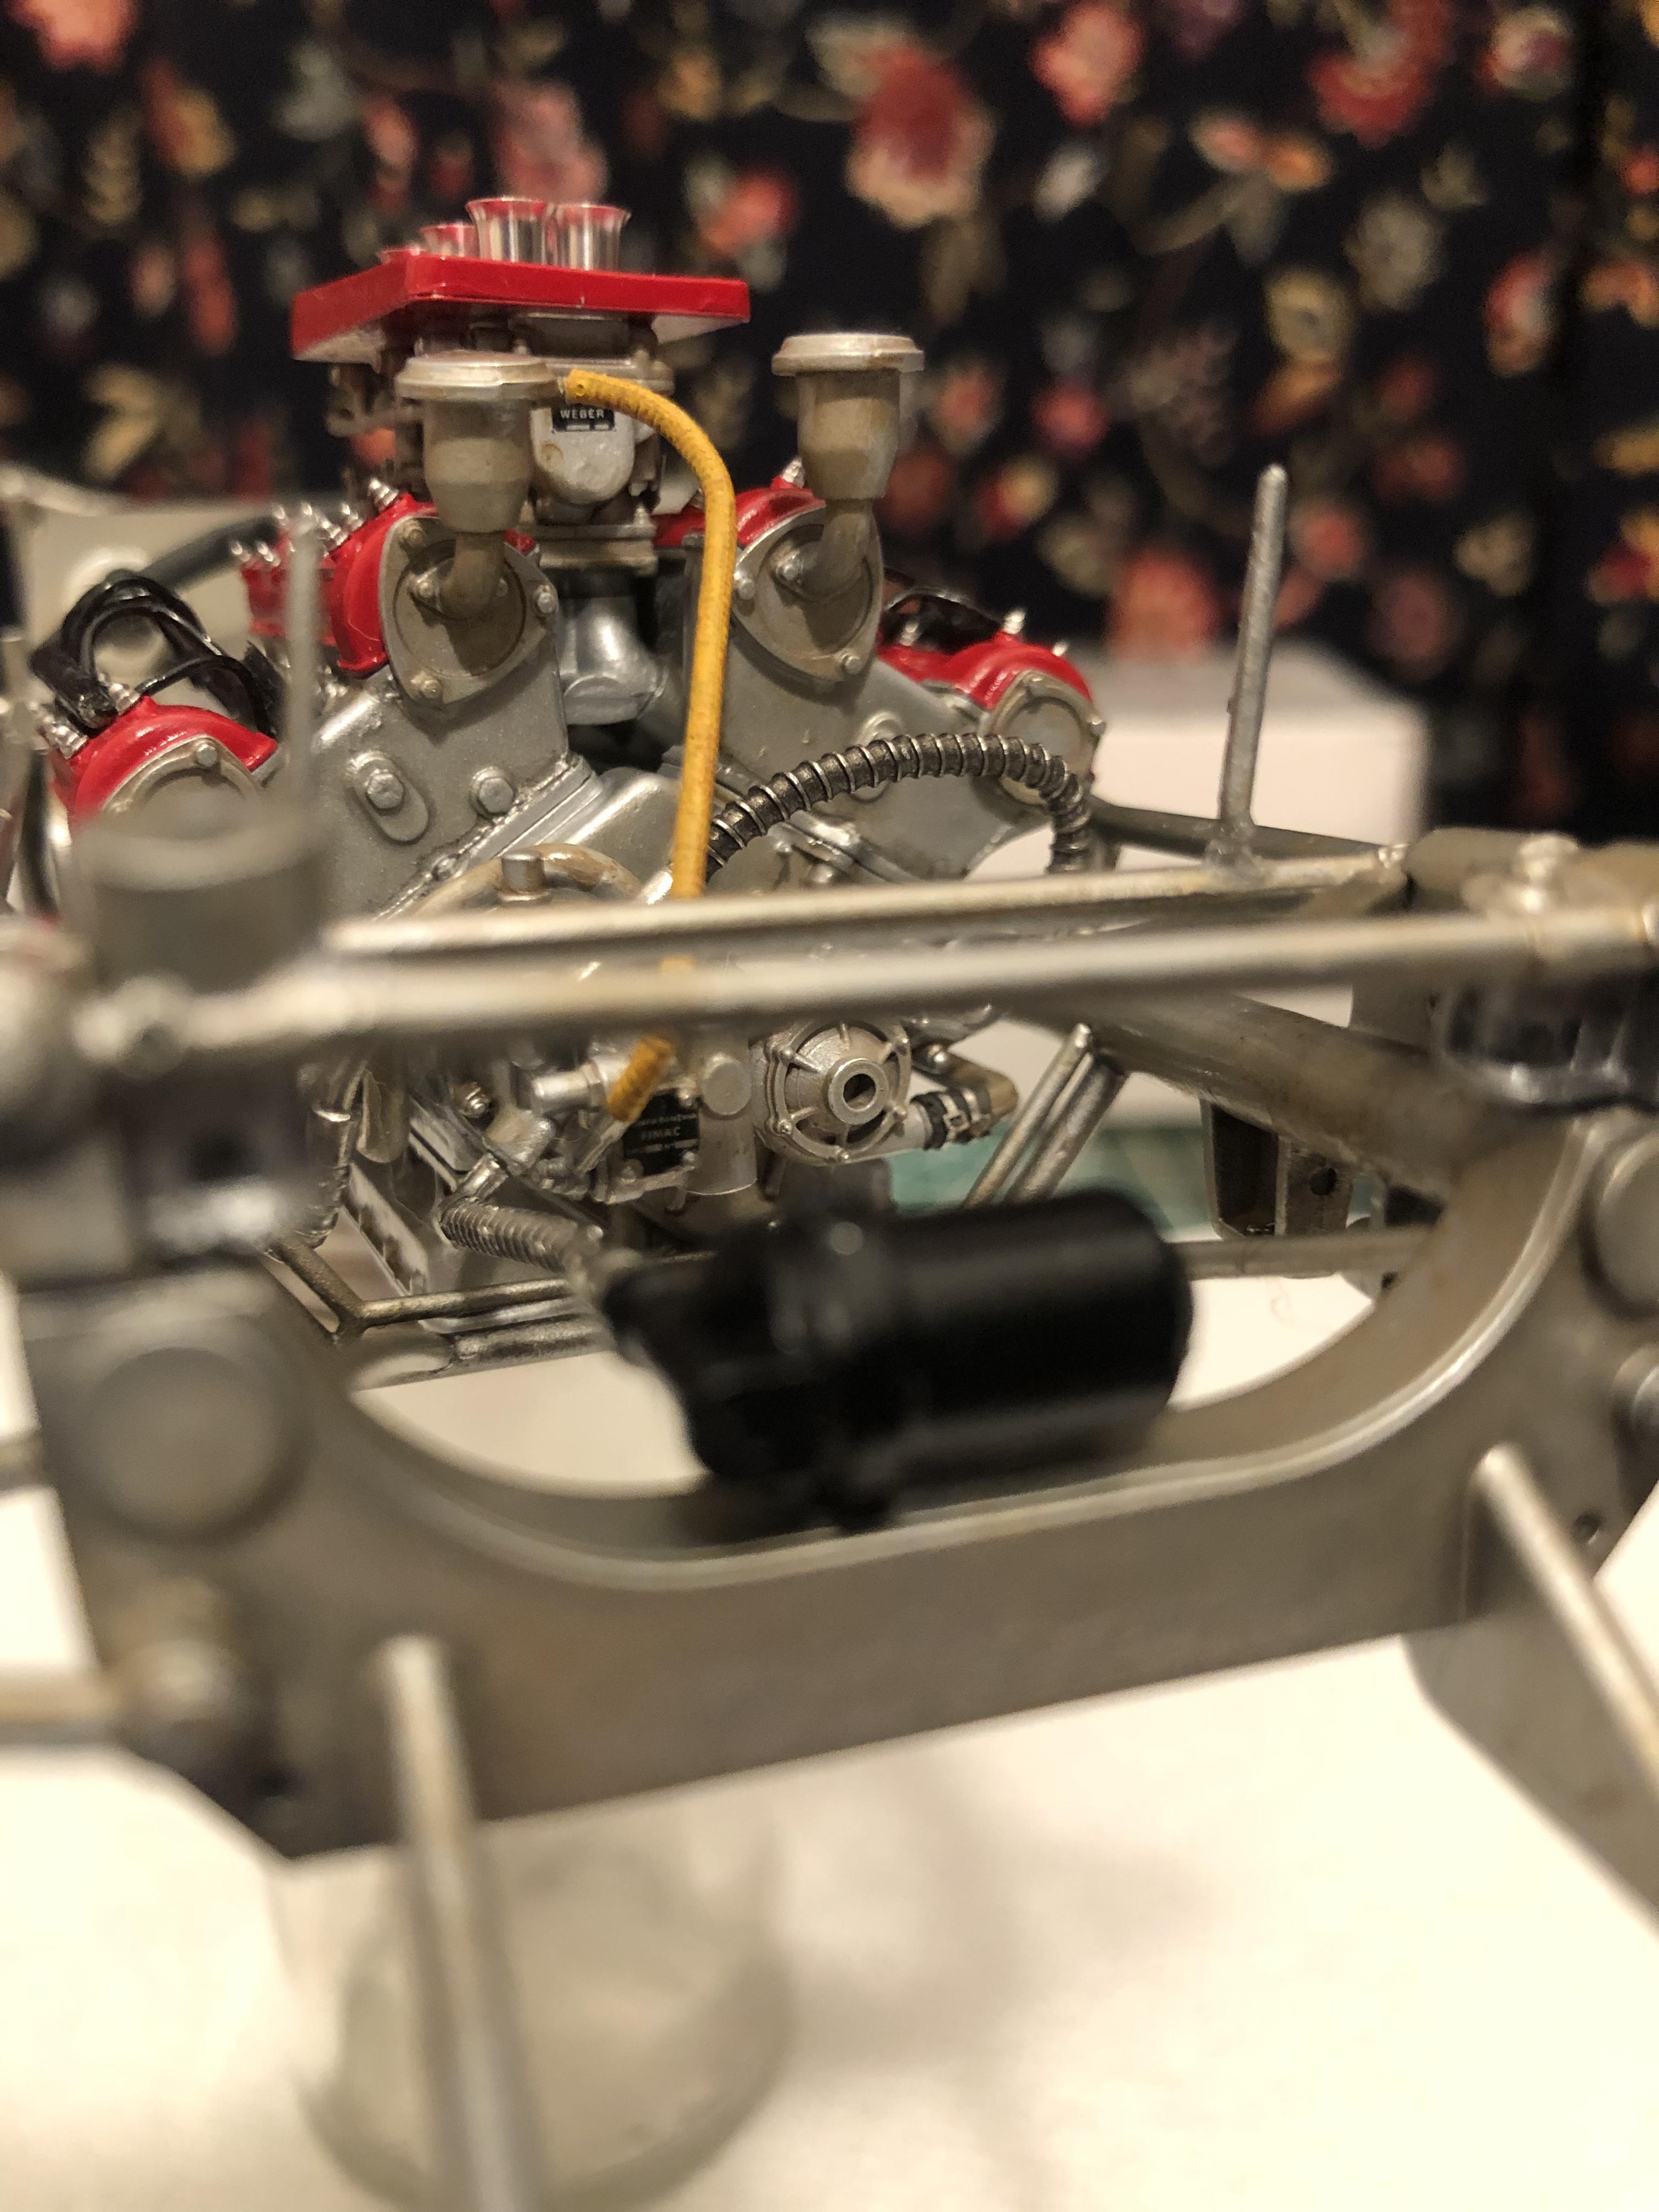
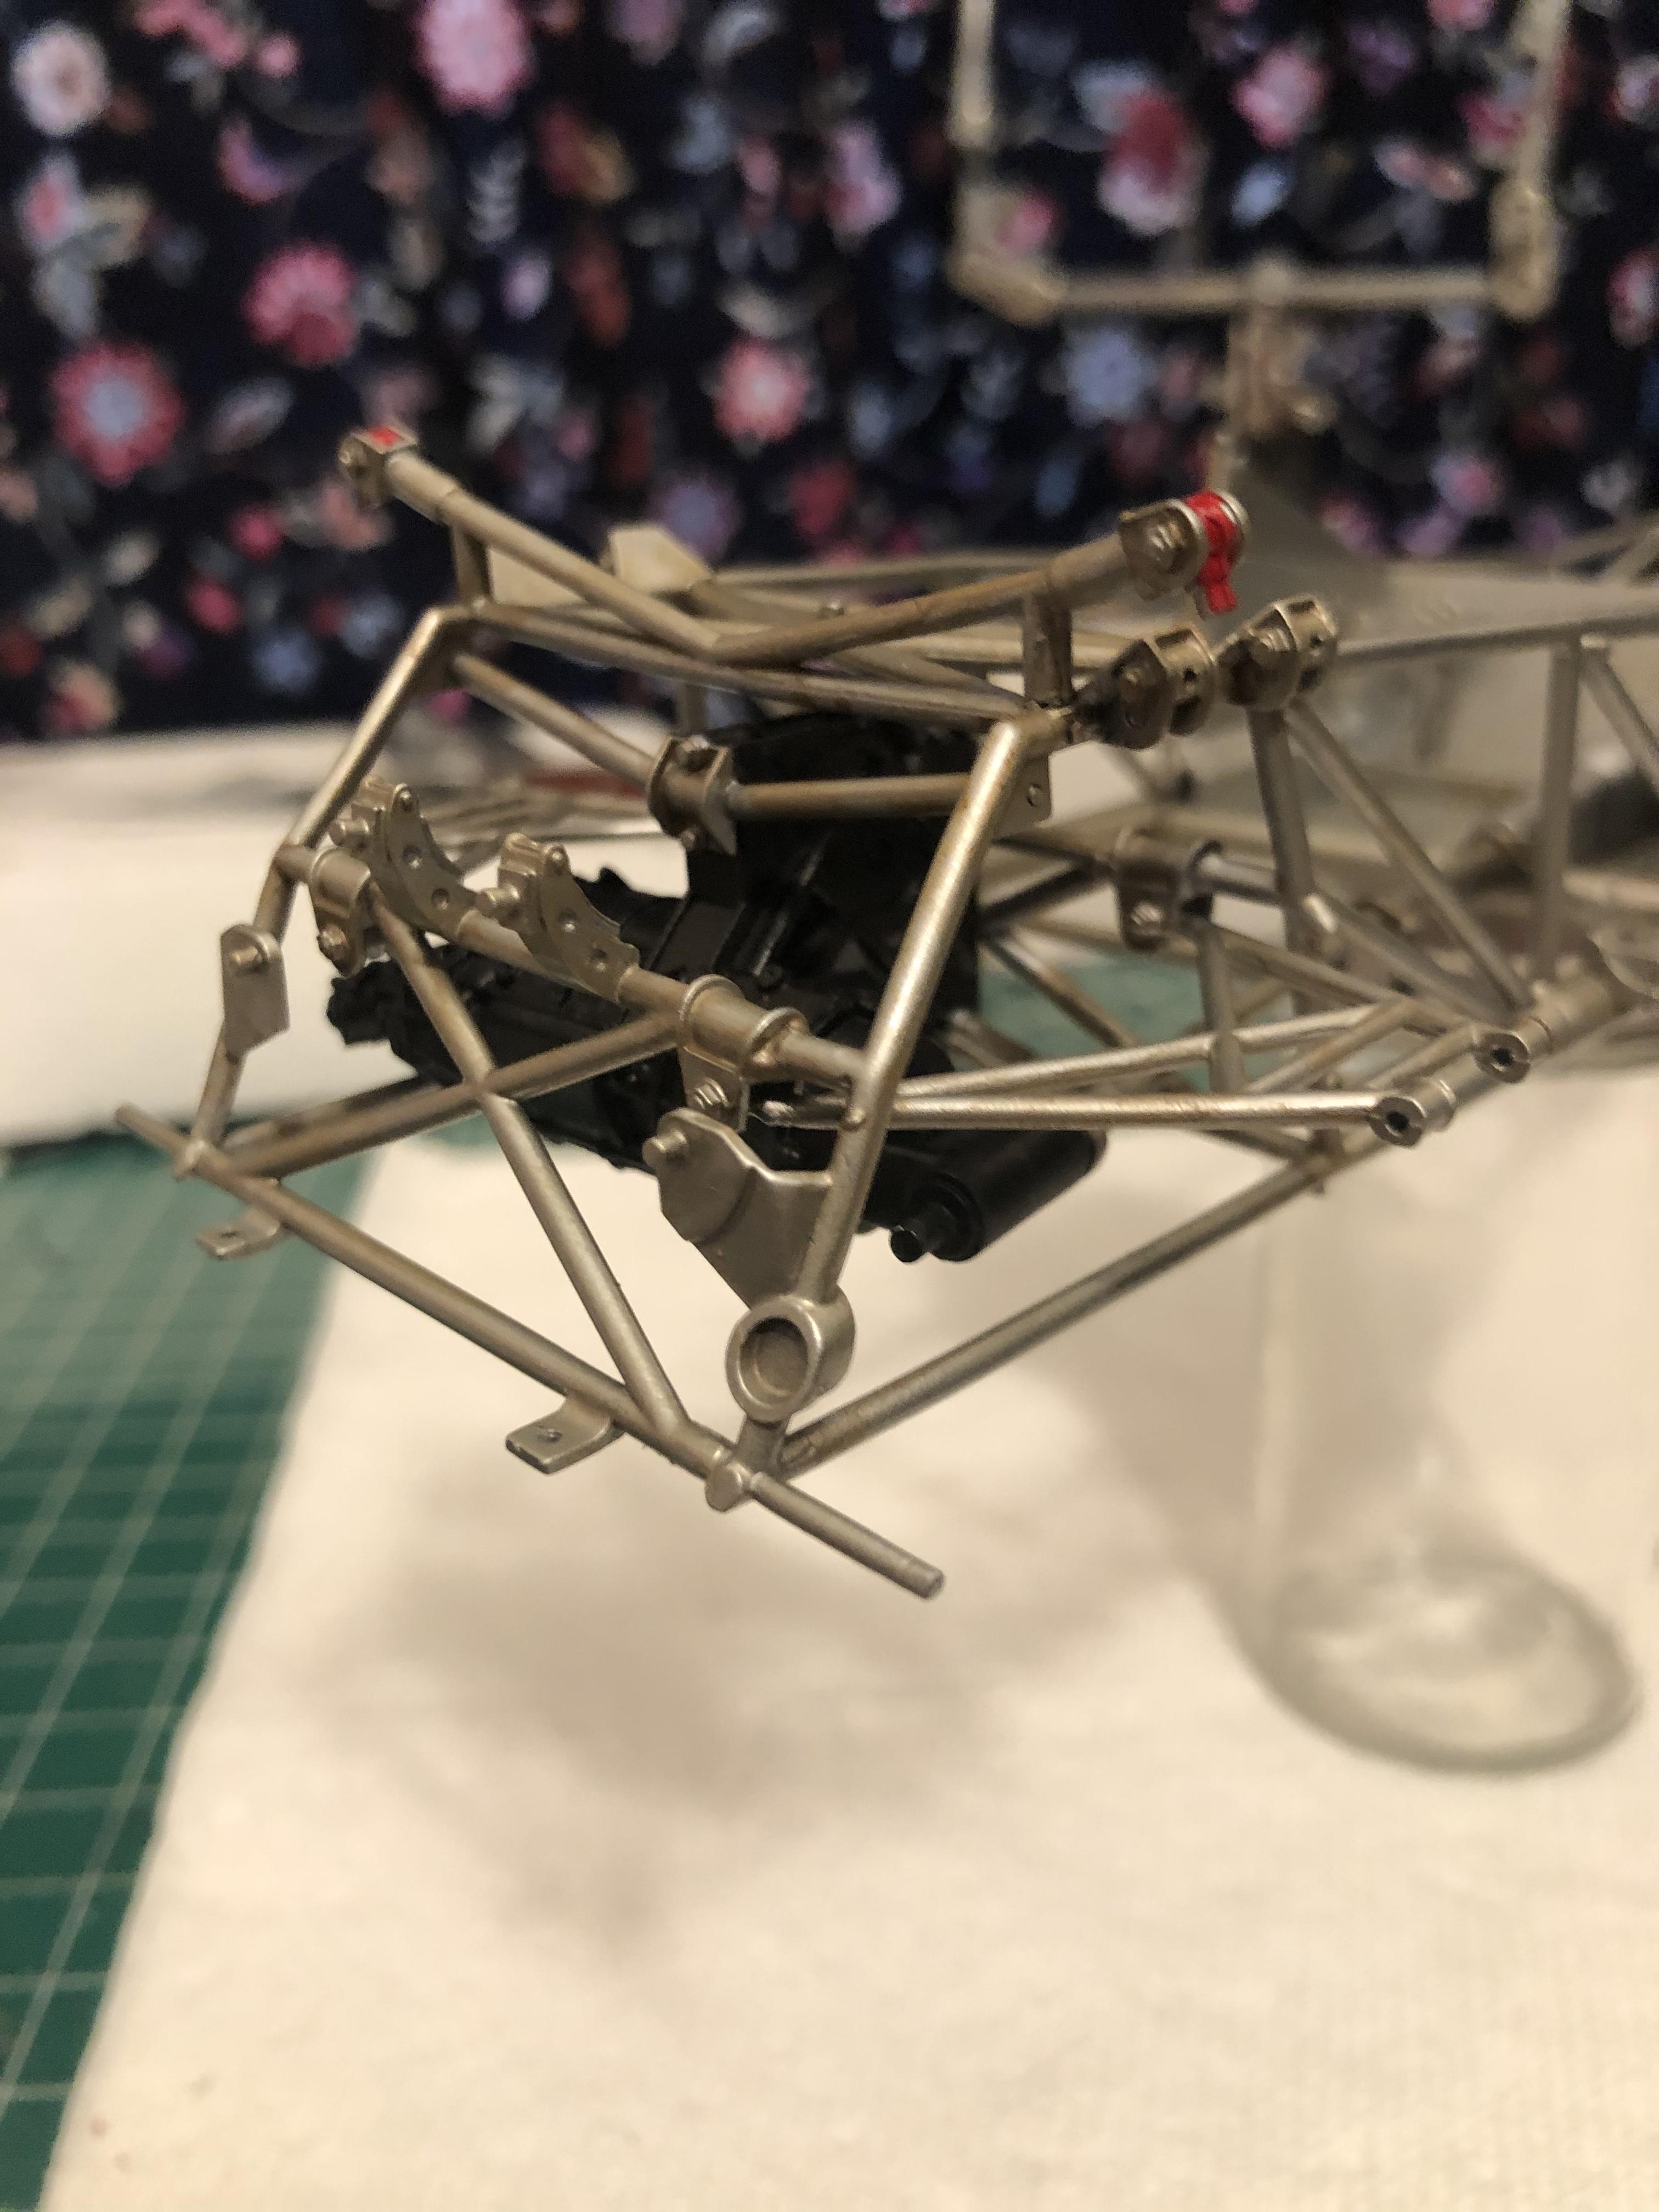
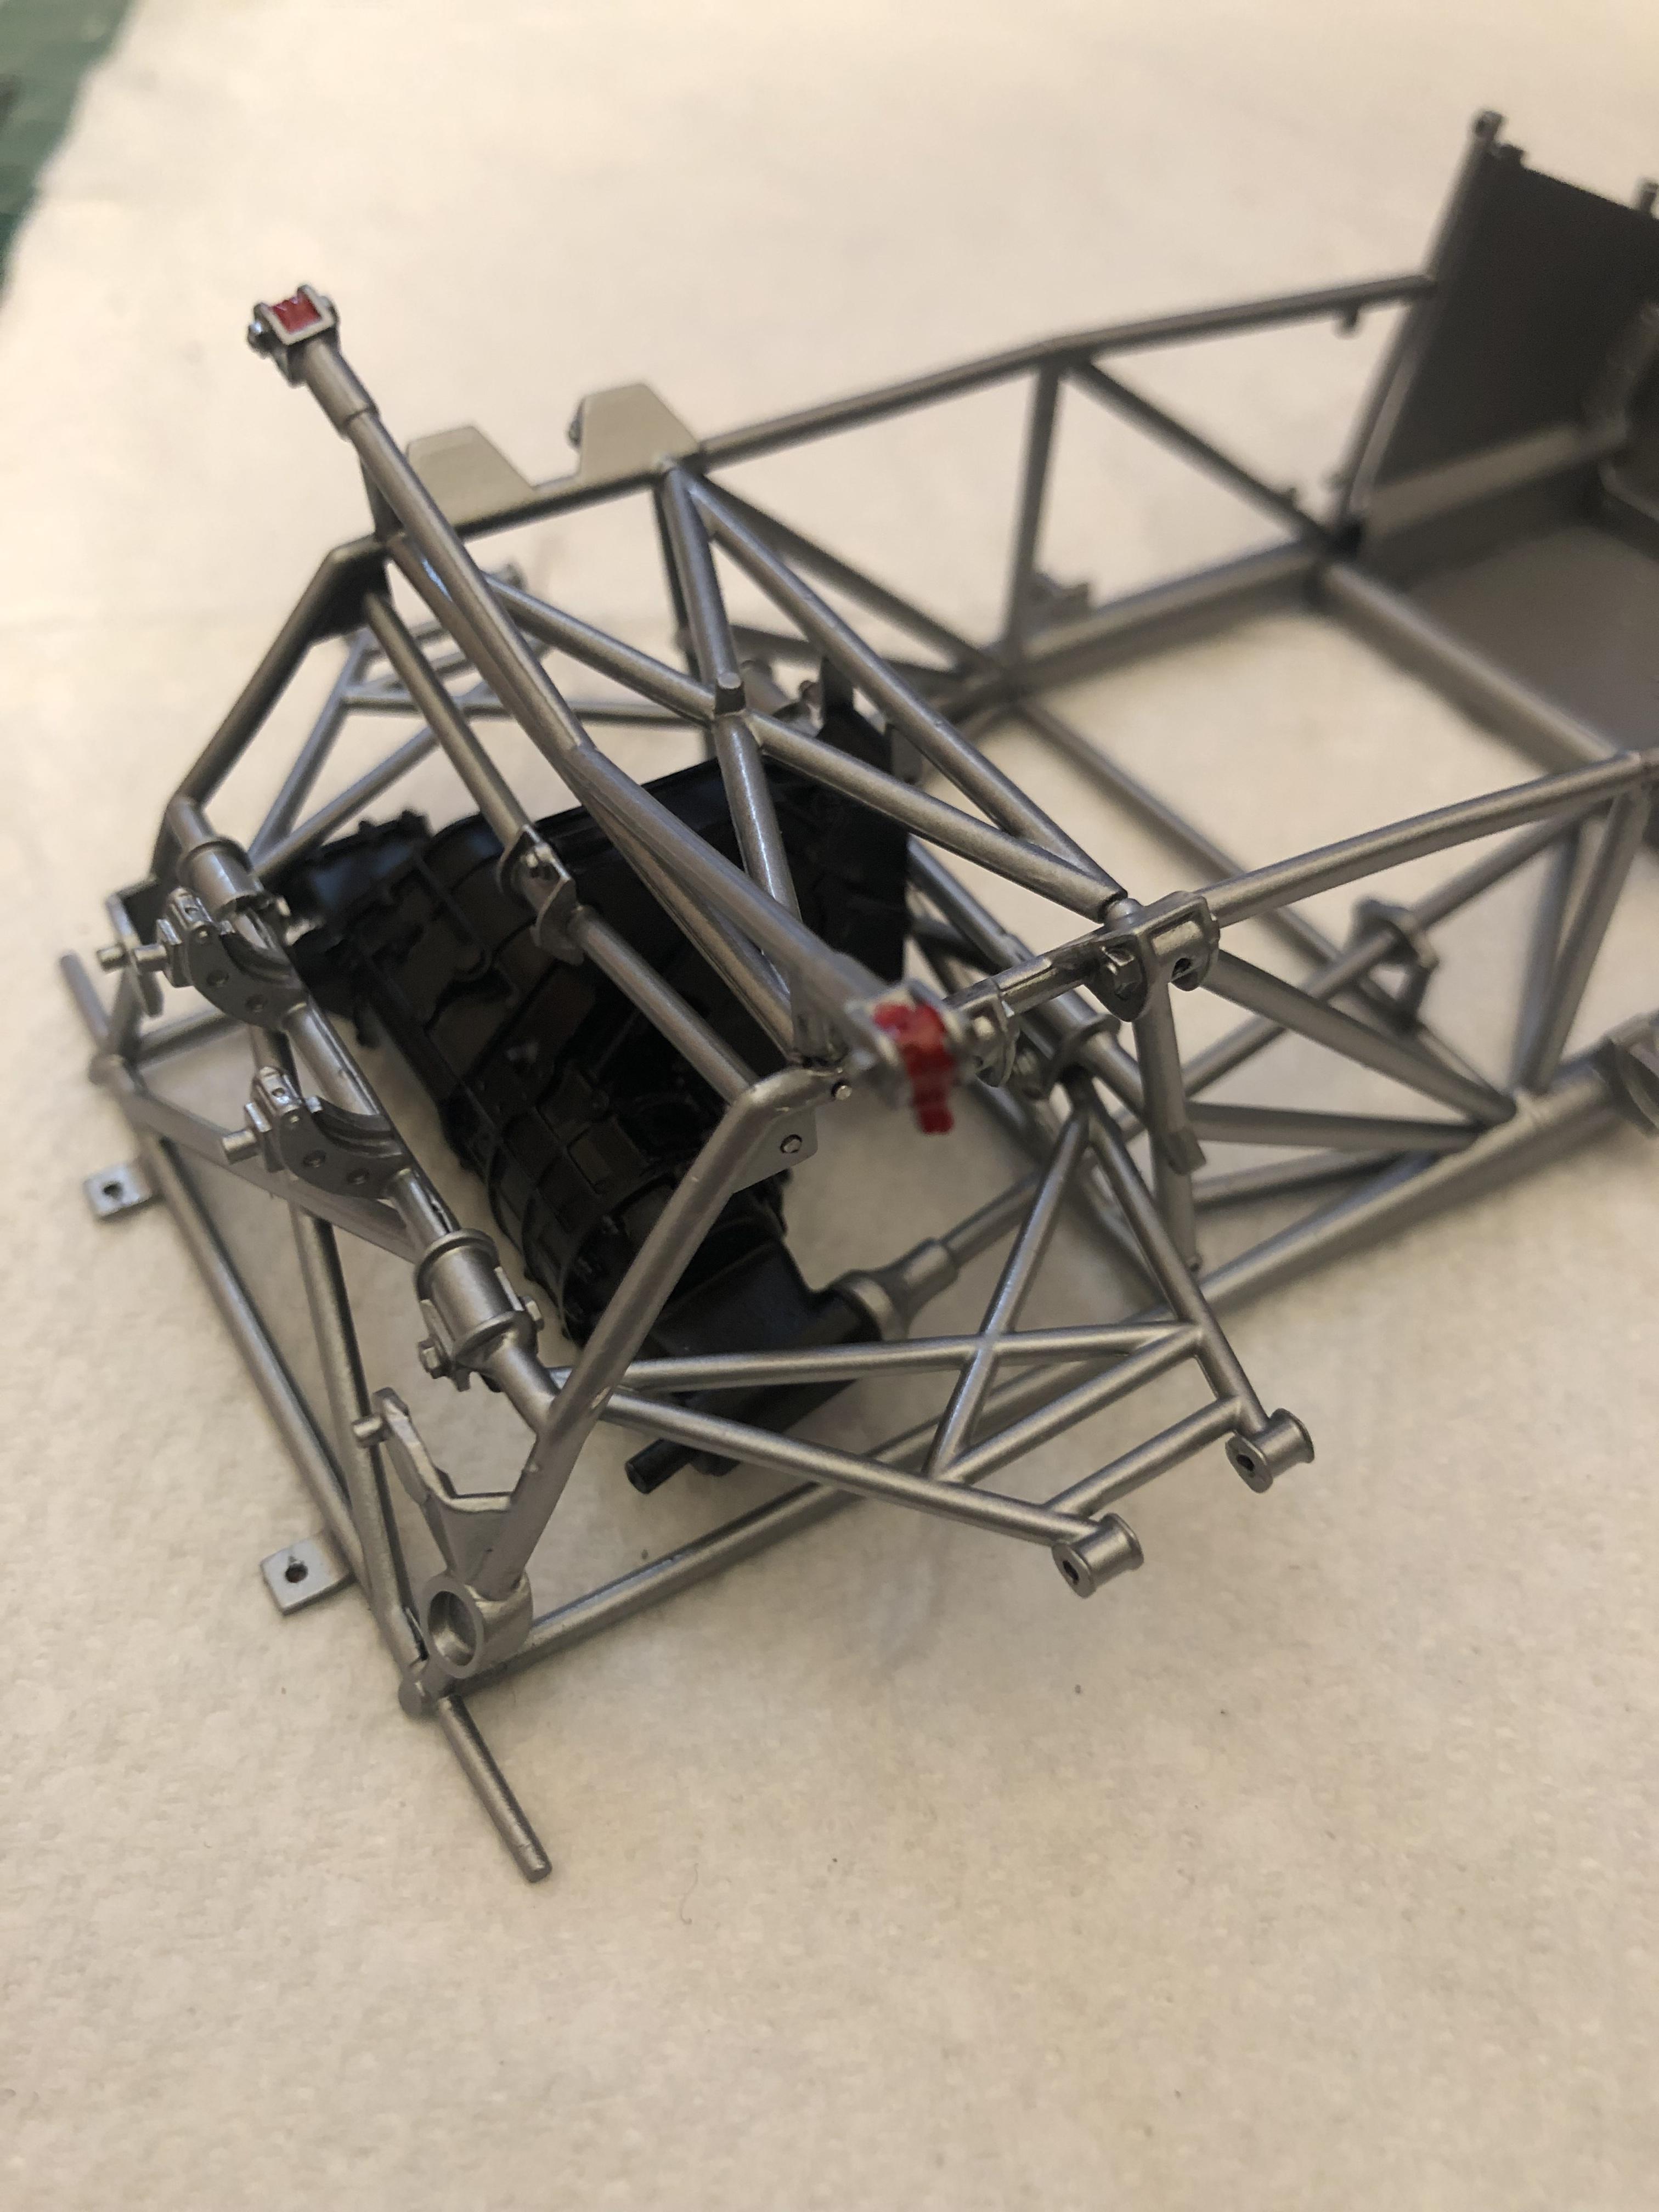
I would like to thank all the people checking in! It does give me a smile and a little motivation. As you can see by the photos I got the engine nestled in between the frame rails and a couple more lines plumbed
-
1960 Ferrari 256F1
Chris Smith replied to Chris Smith's topic in WIP: Other Racing: Road Racing, Land Speed Racers
Thank you! -
Another Porsche 935 build
Chris Smith replied to Timonator's topic in WIP: Other Racing: Road Racing, Land Speed Racers
? -
Another Porsche 935 build
Chris Smith replied to Timonator's topic in WIP: Other Racing: Road Racing, Land Speed Racers
I just checked out your photos log on this build…. Well done sir! Some cool looking stuff. Did you purchase the scale Motorsports up grade kit? -
1960 Ferrari 256F1
Chris Smith replied to Chris Smith's topic in WIP: Other Racing: Road Racing, Land Speed Racers
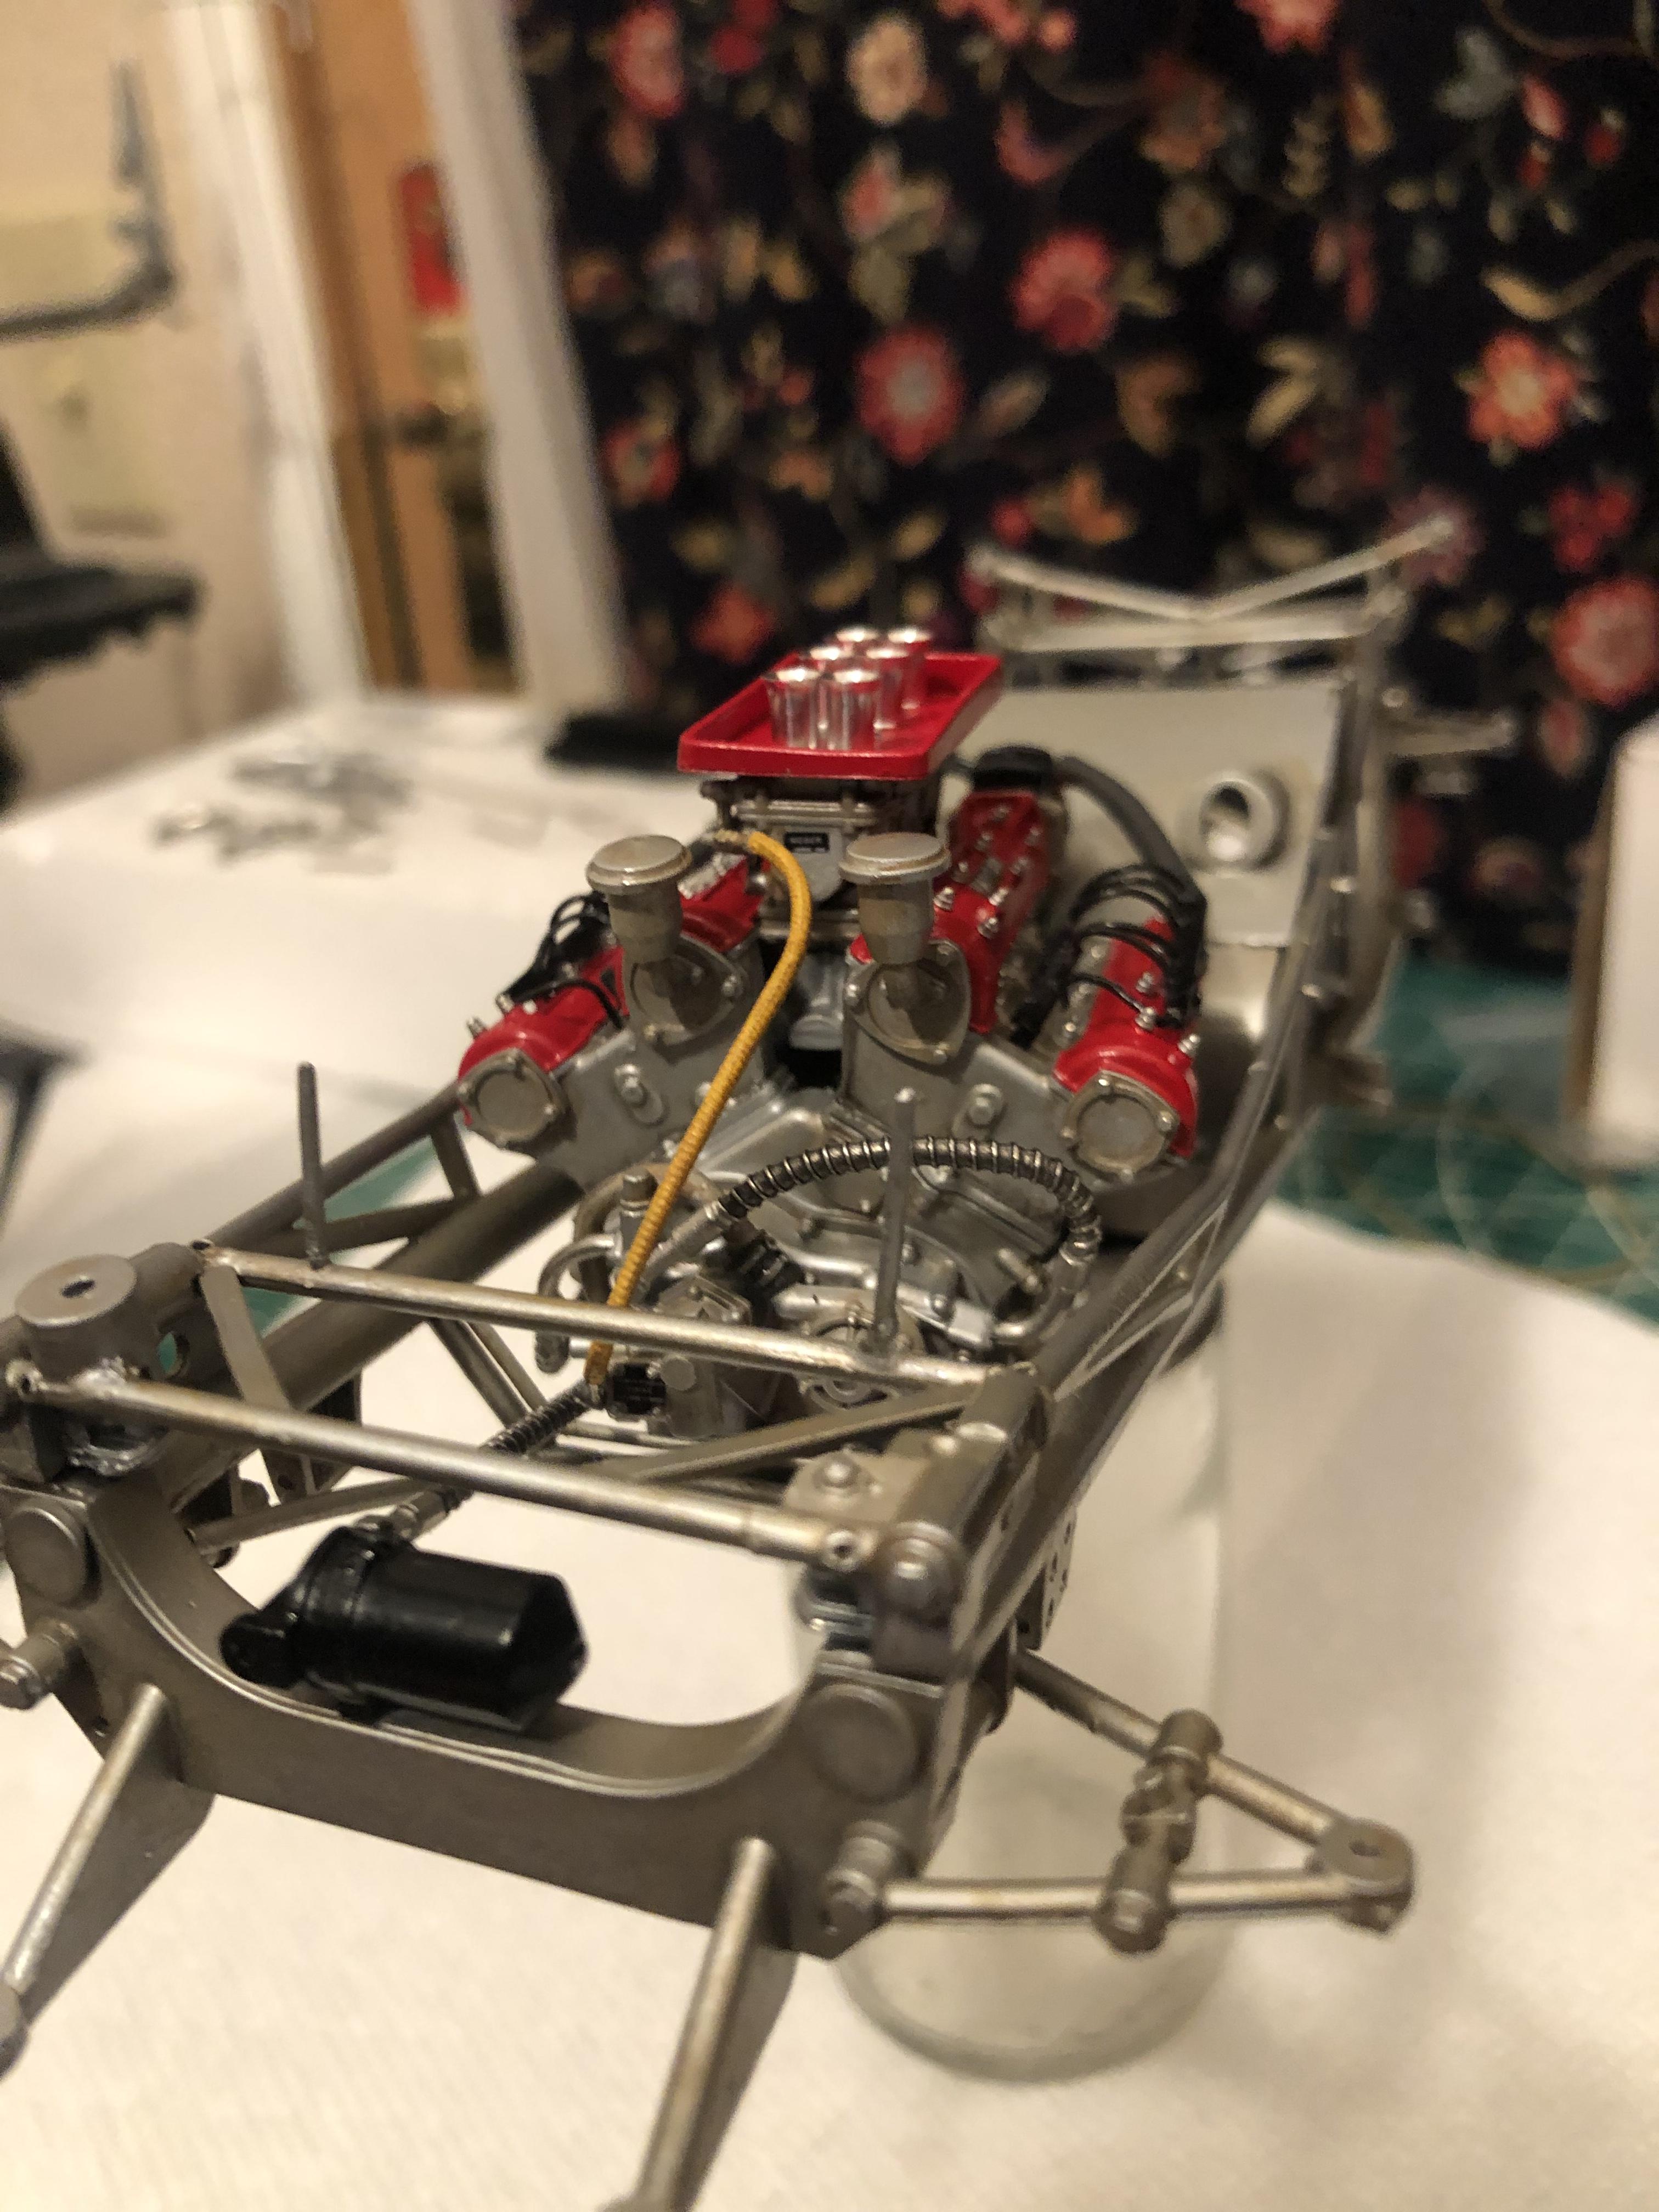
Yes it is? and the engine sits at a severe angle -
1960 Ferrari 256F1
Chris Smith replied to Chris Smith's topic in WIP: Other Racing: Road Racing, Land Speed Racers
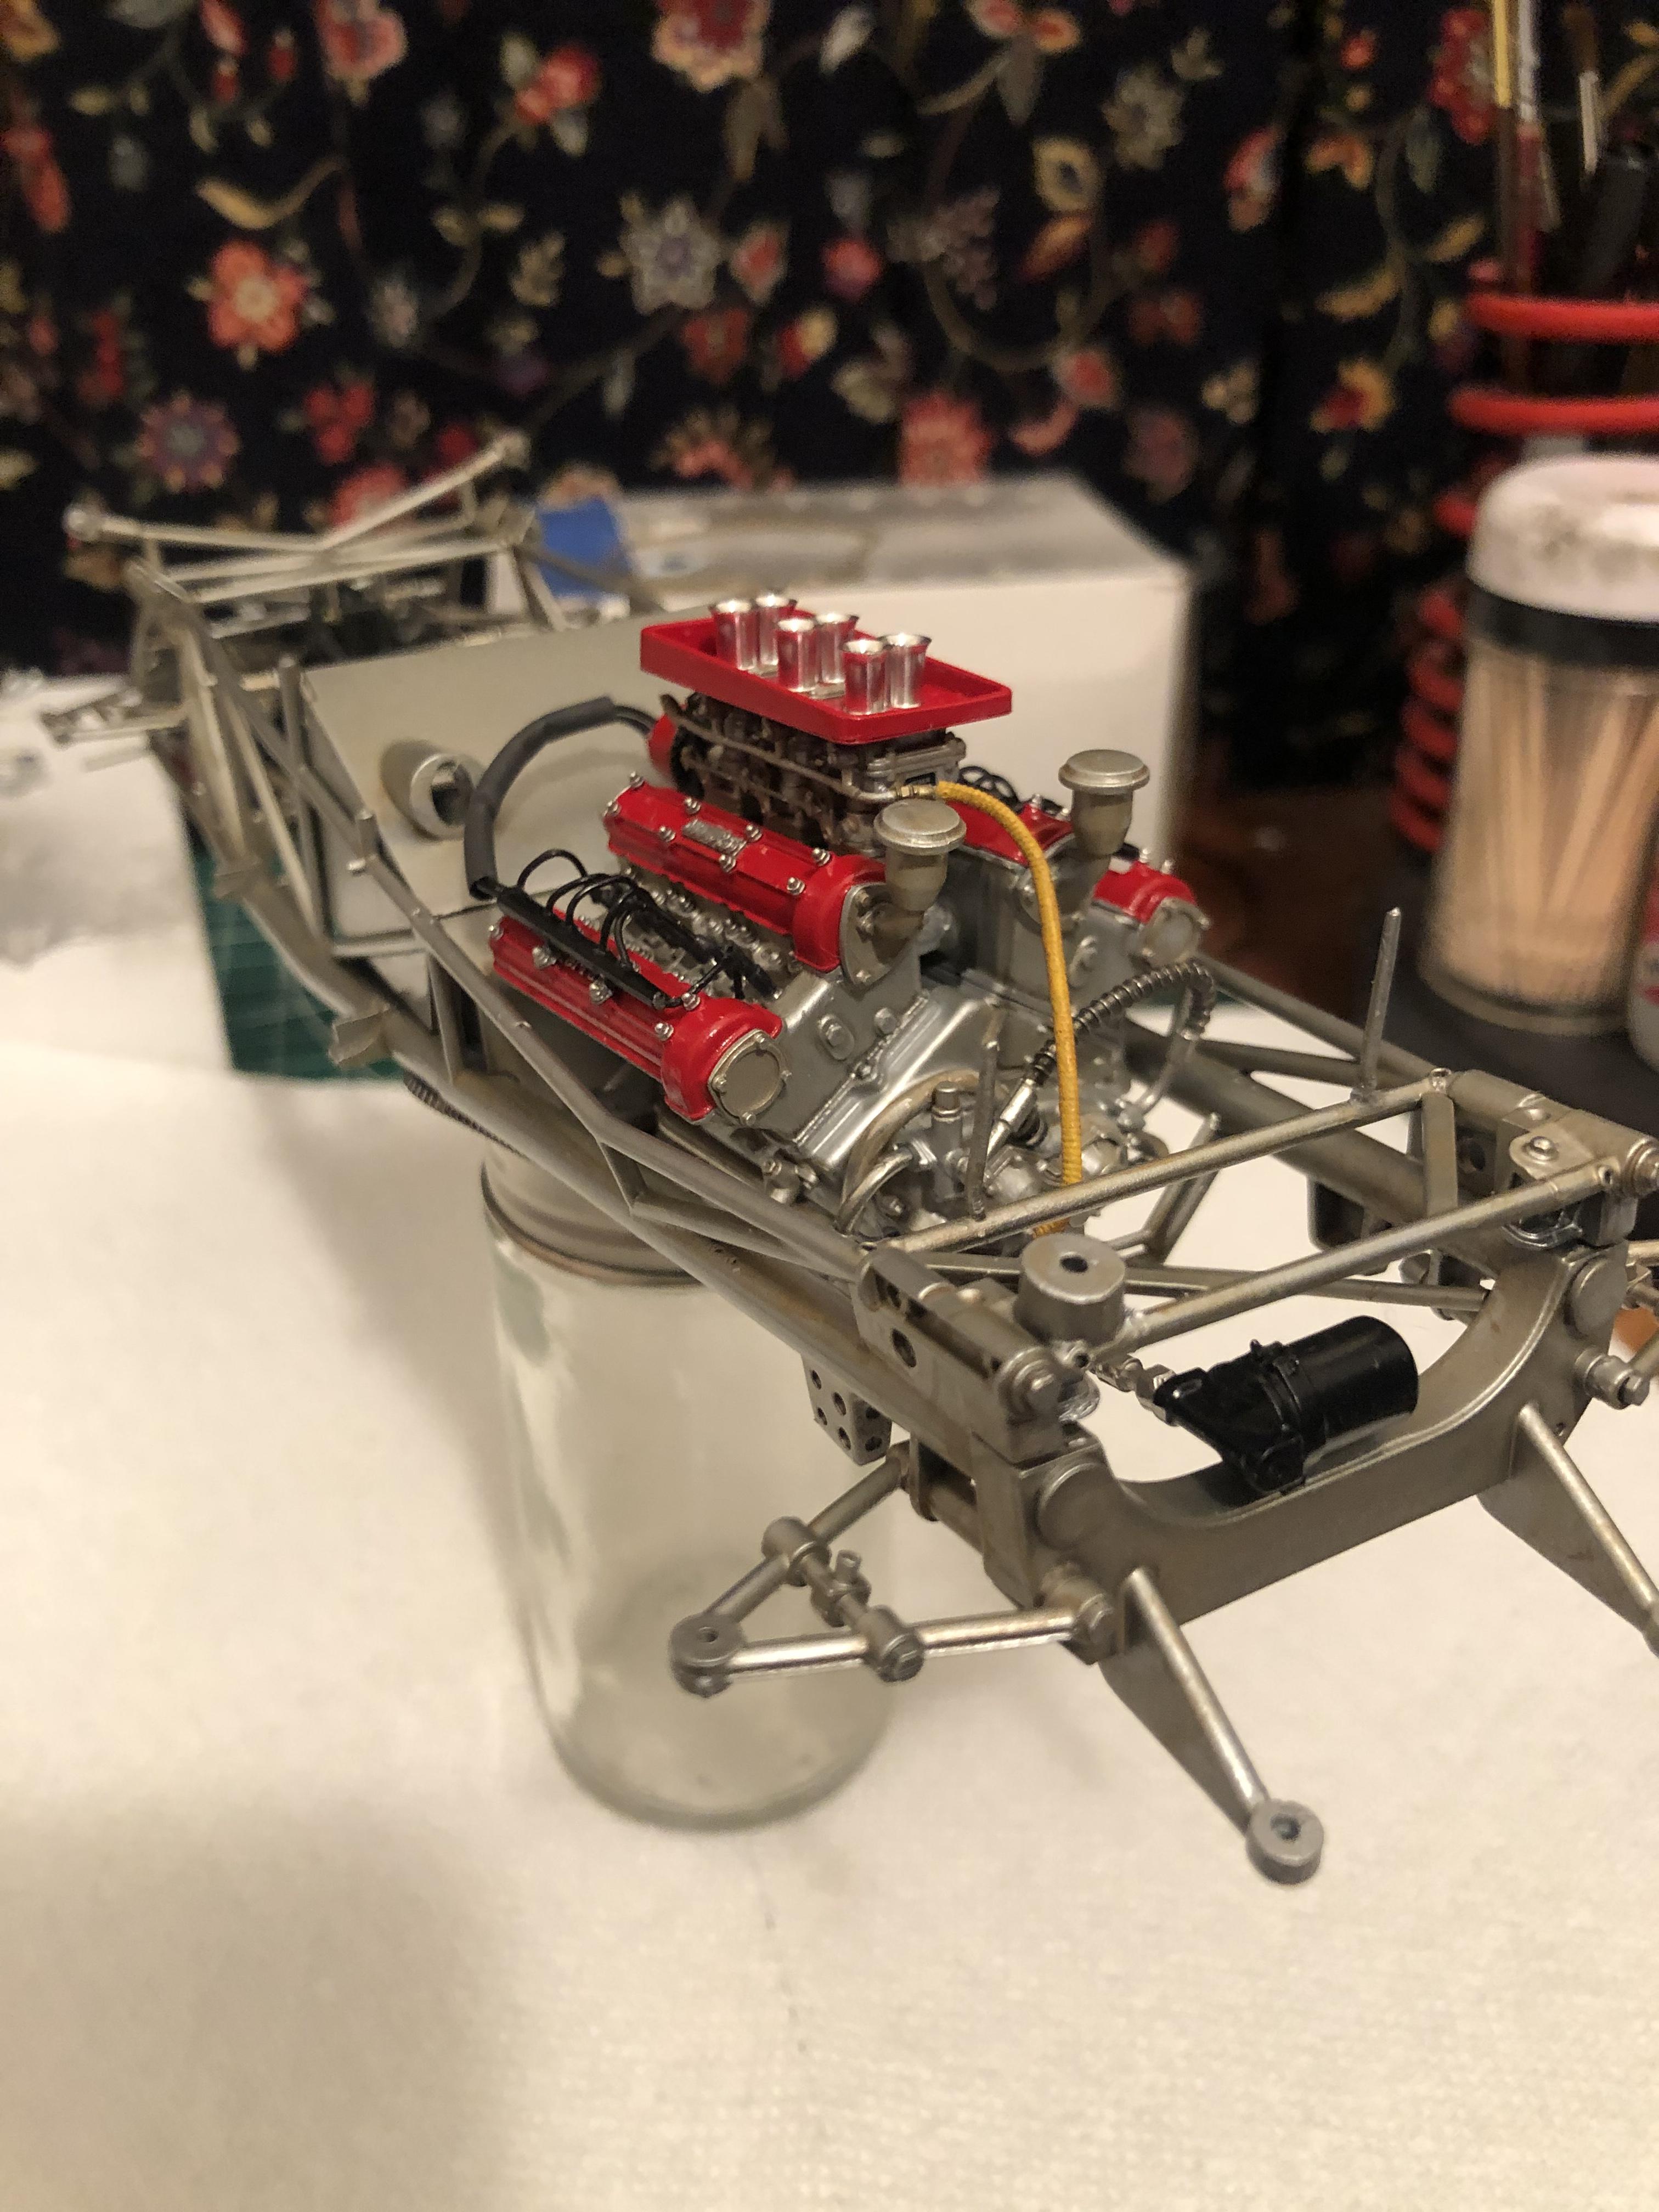
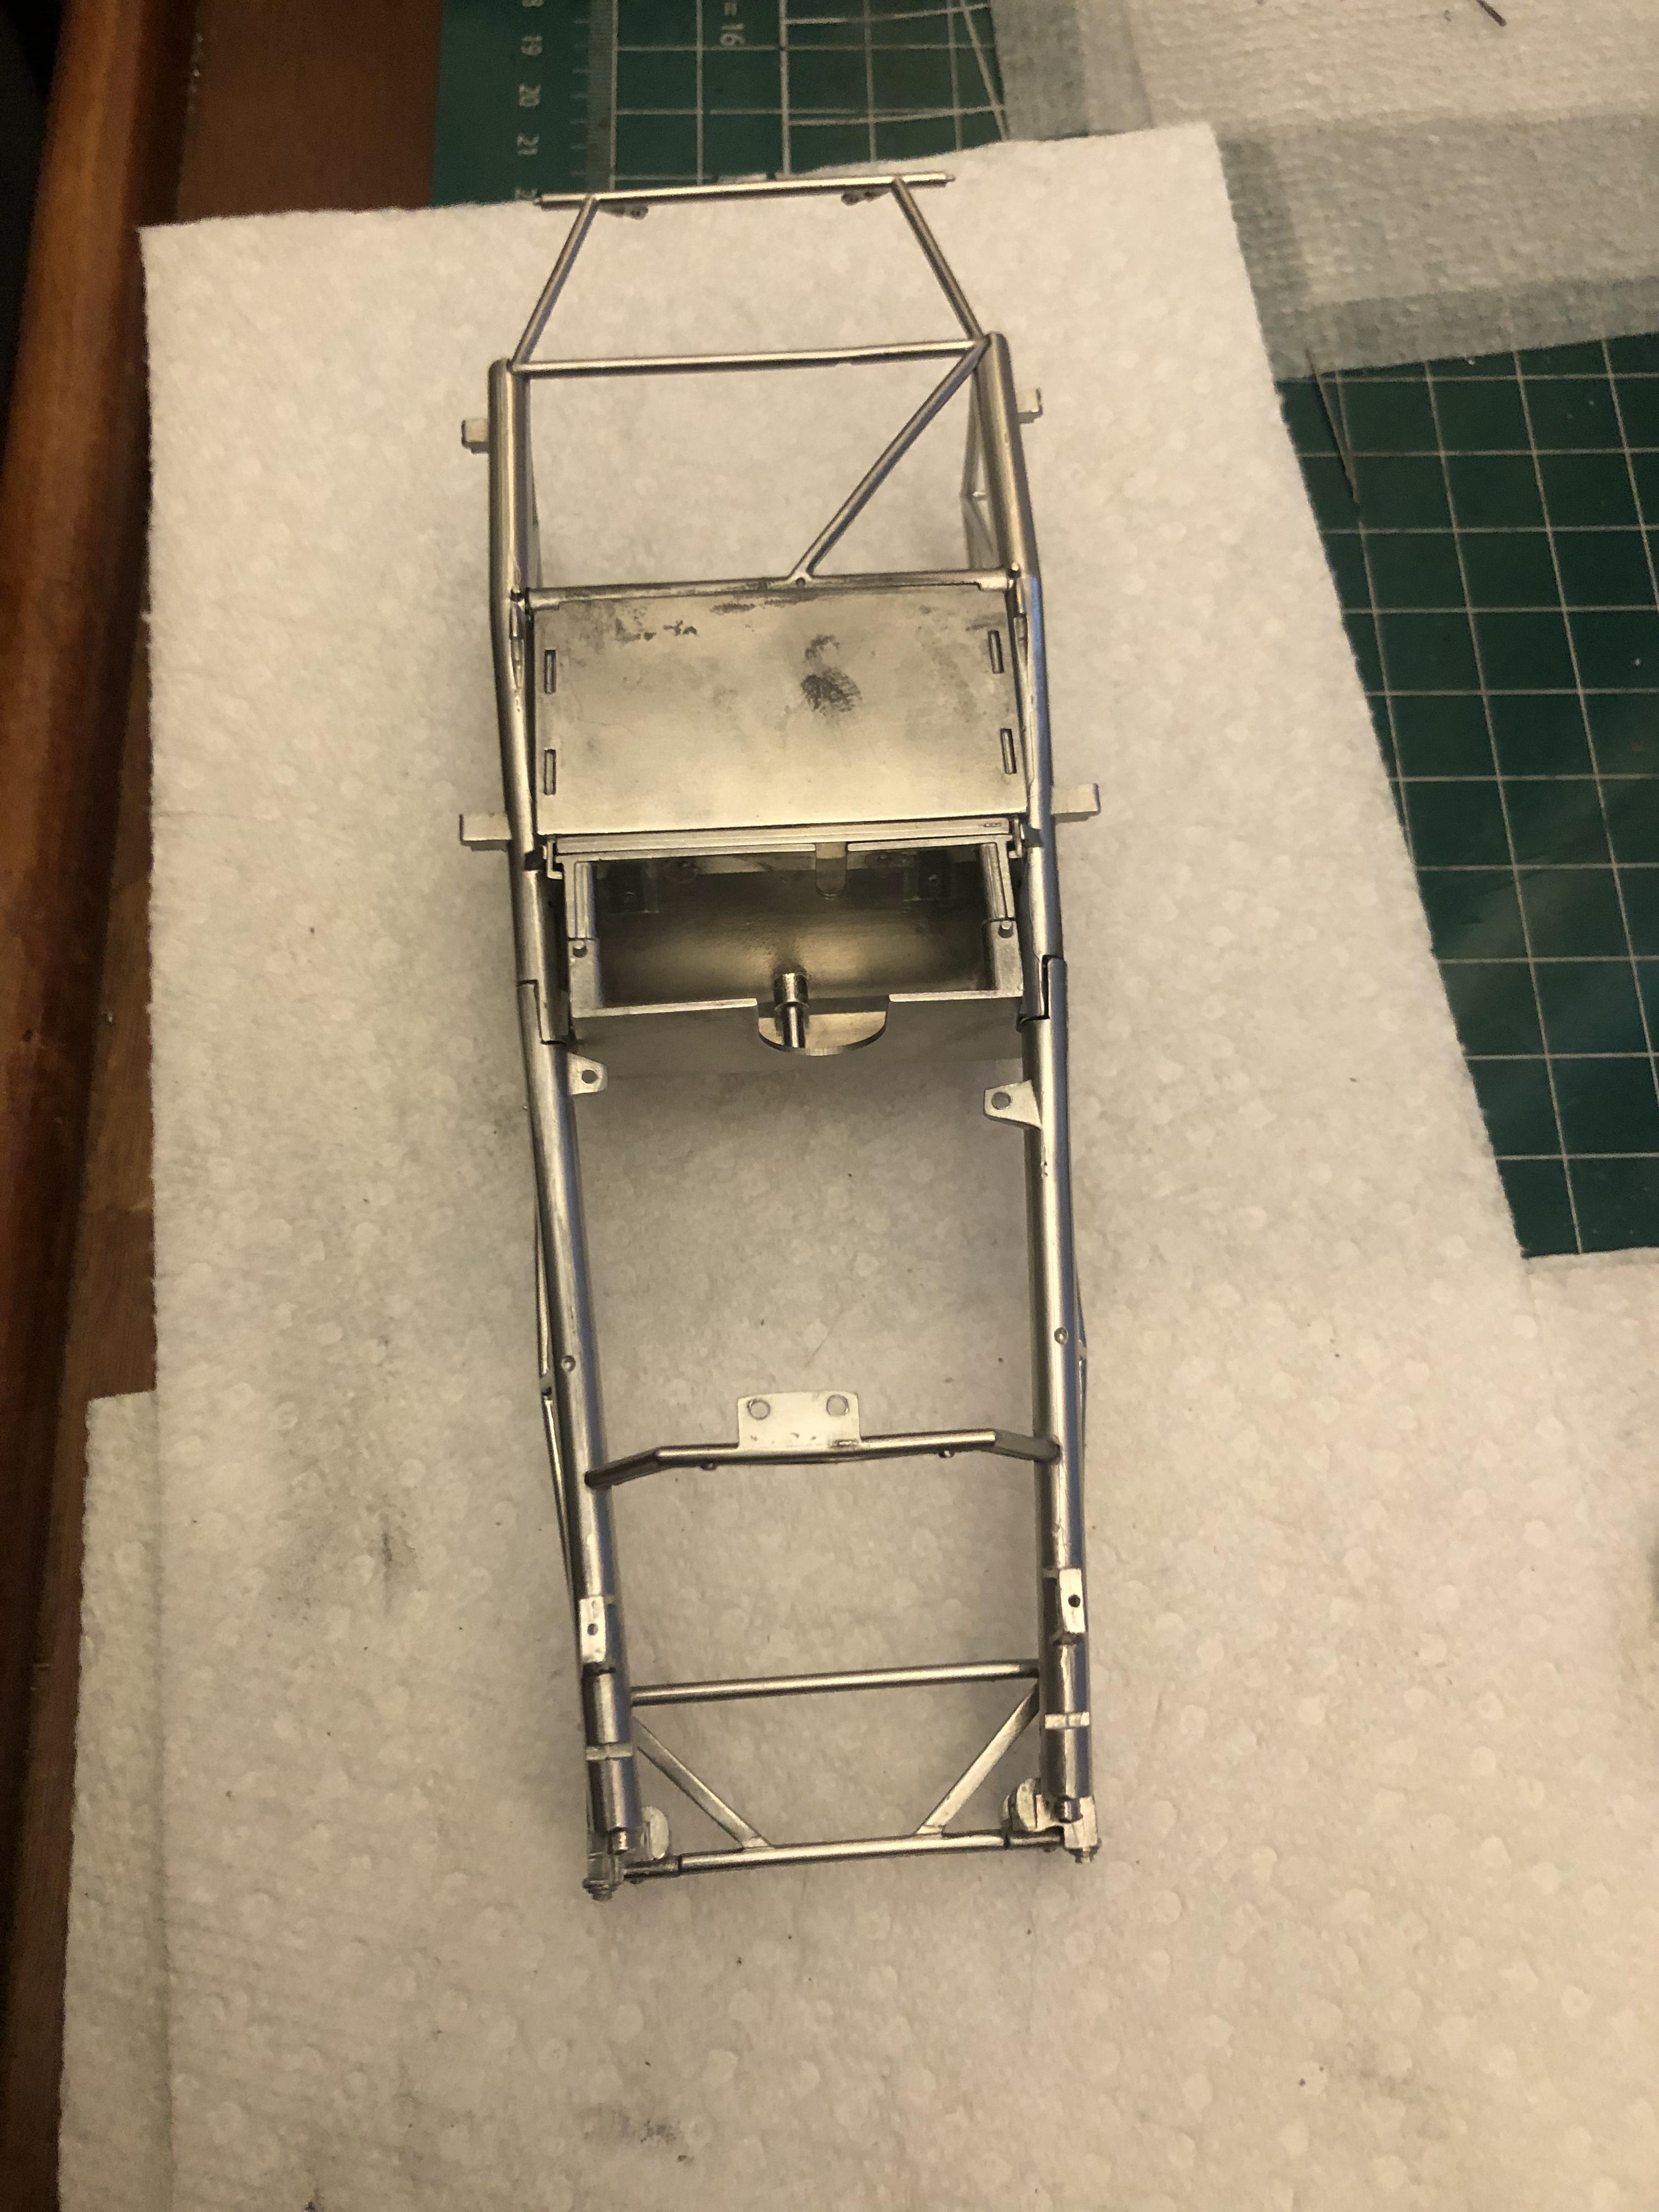
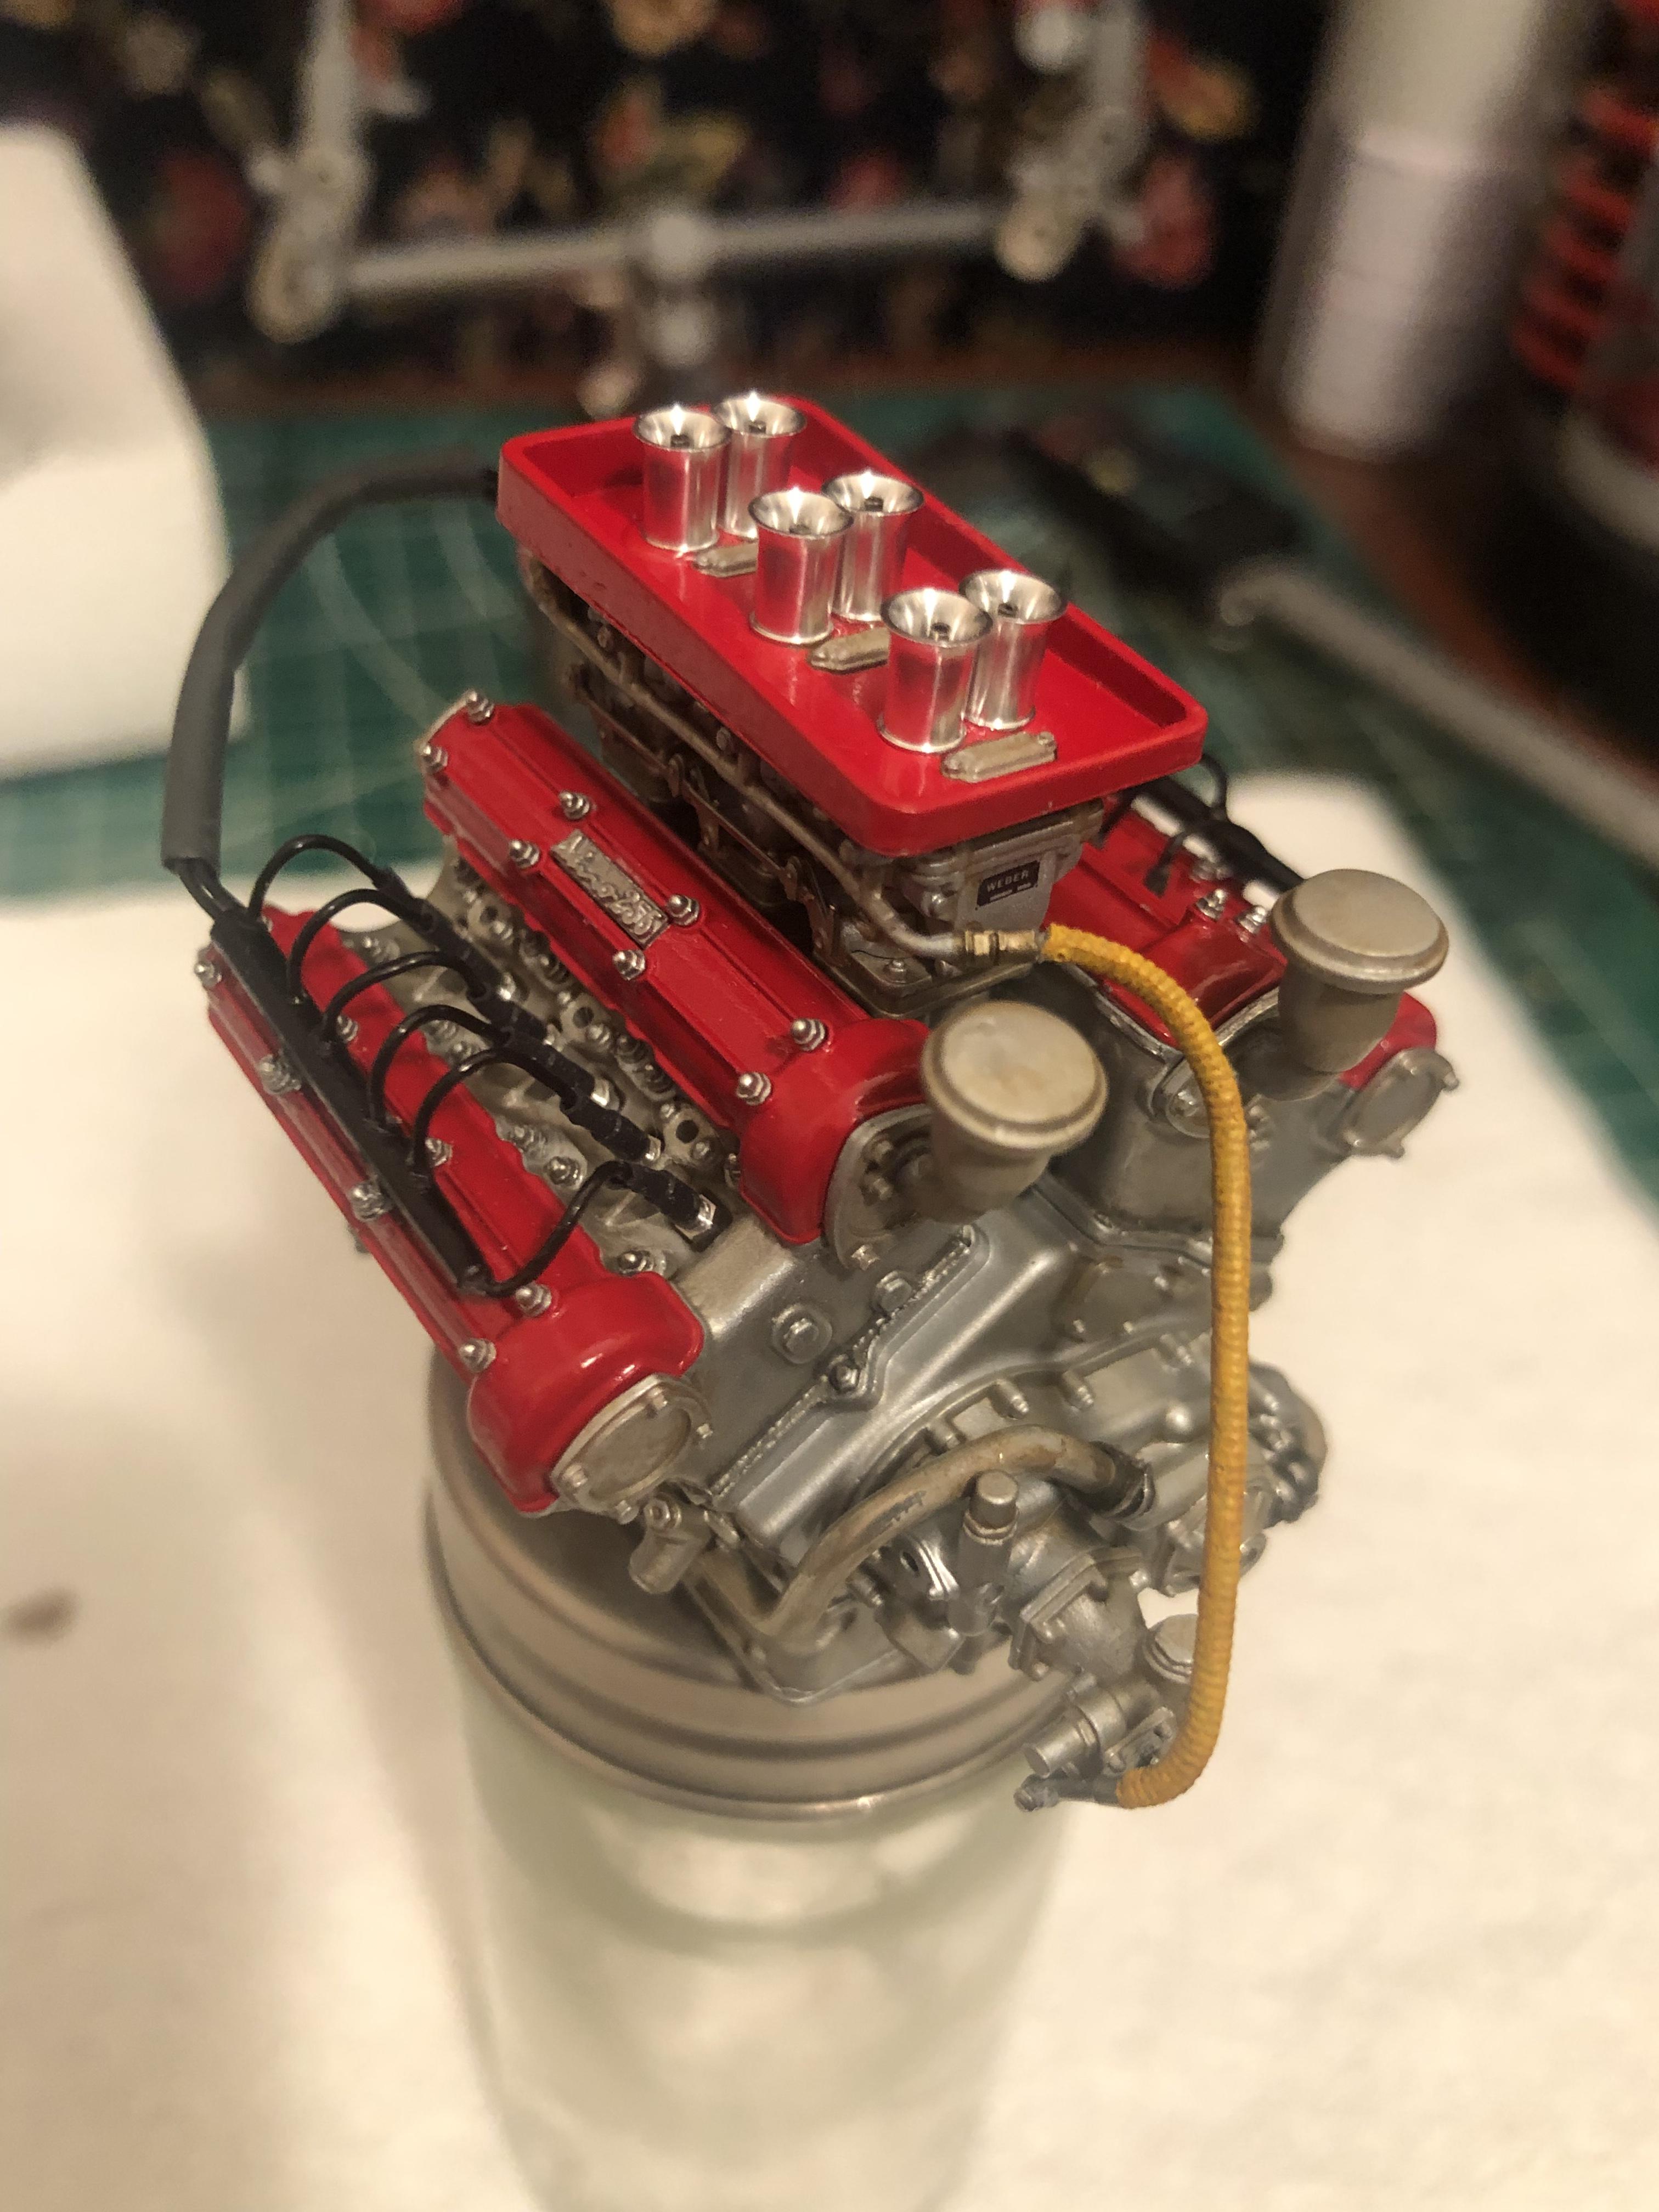
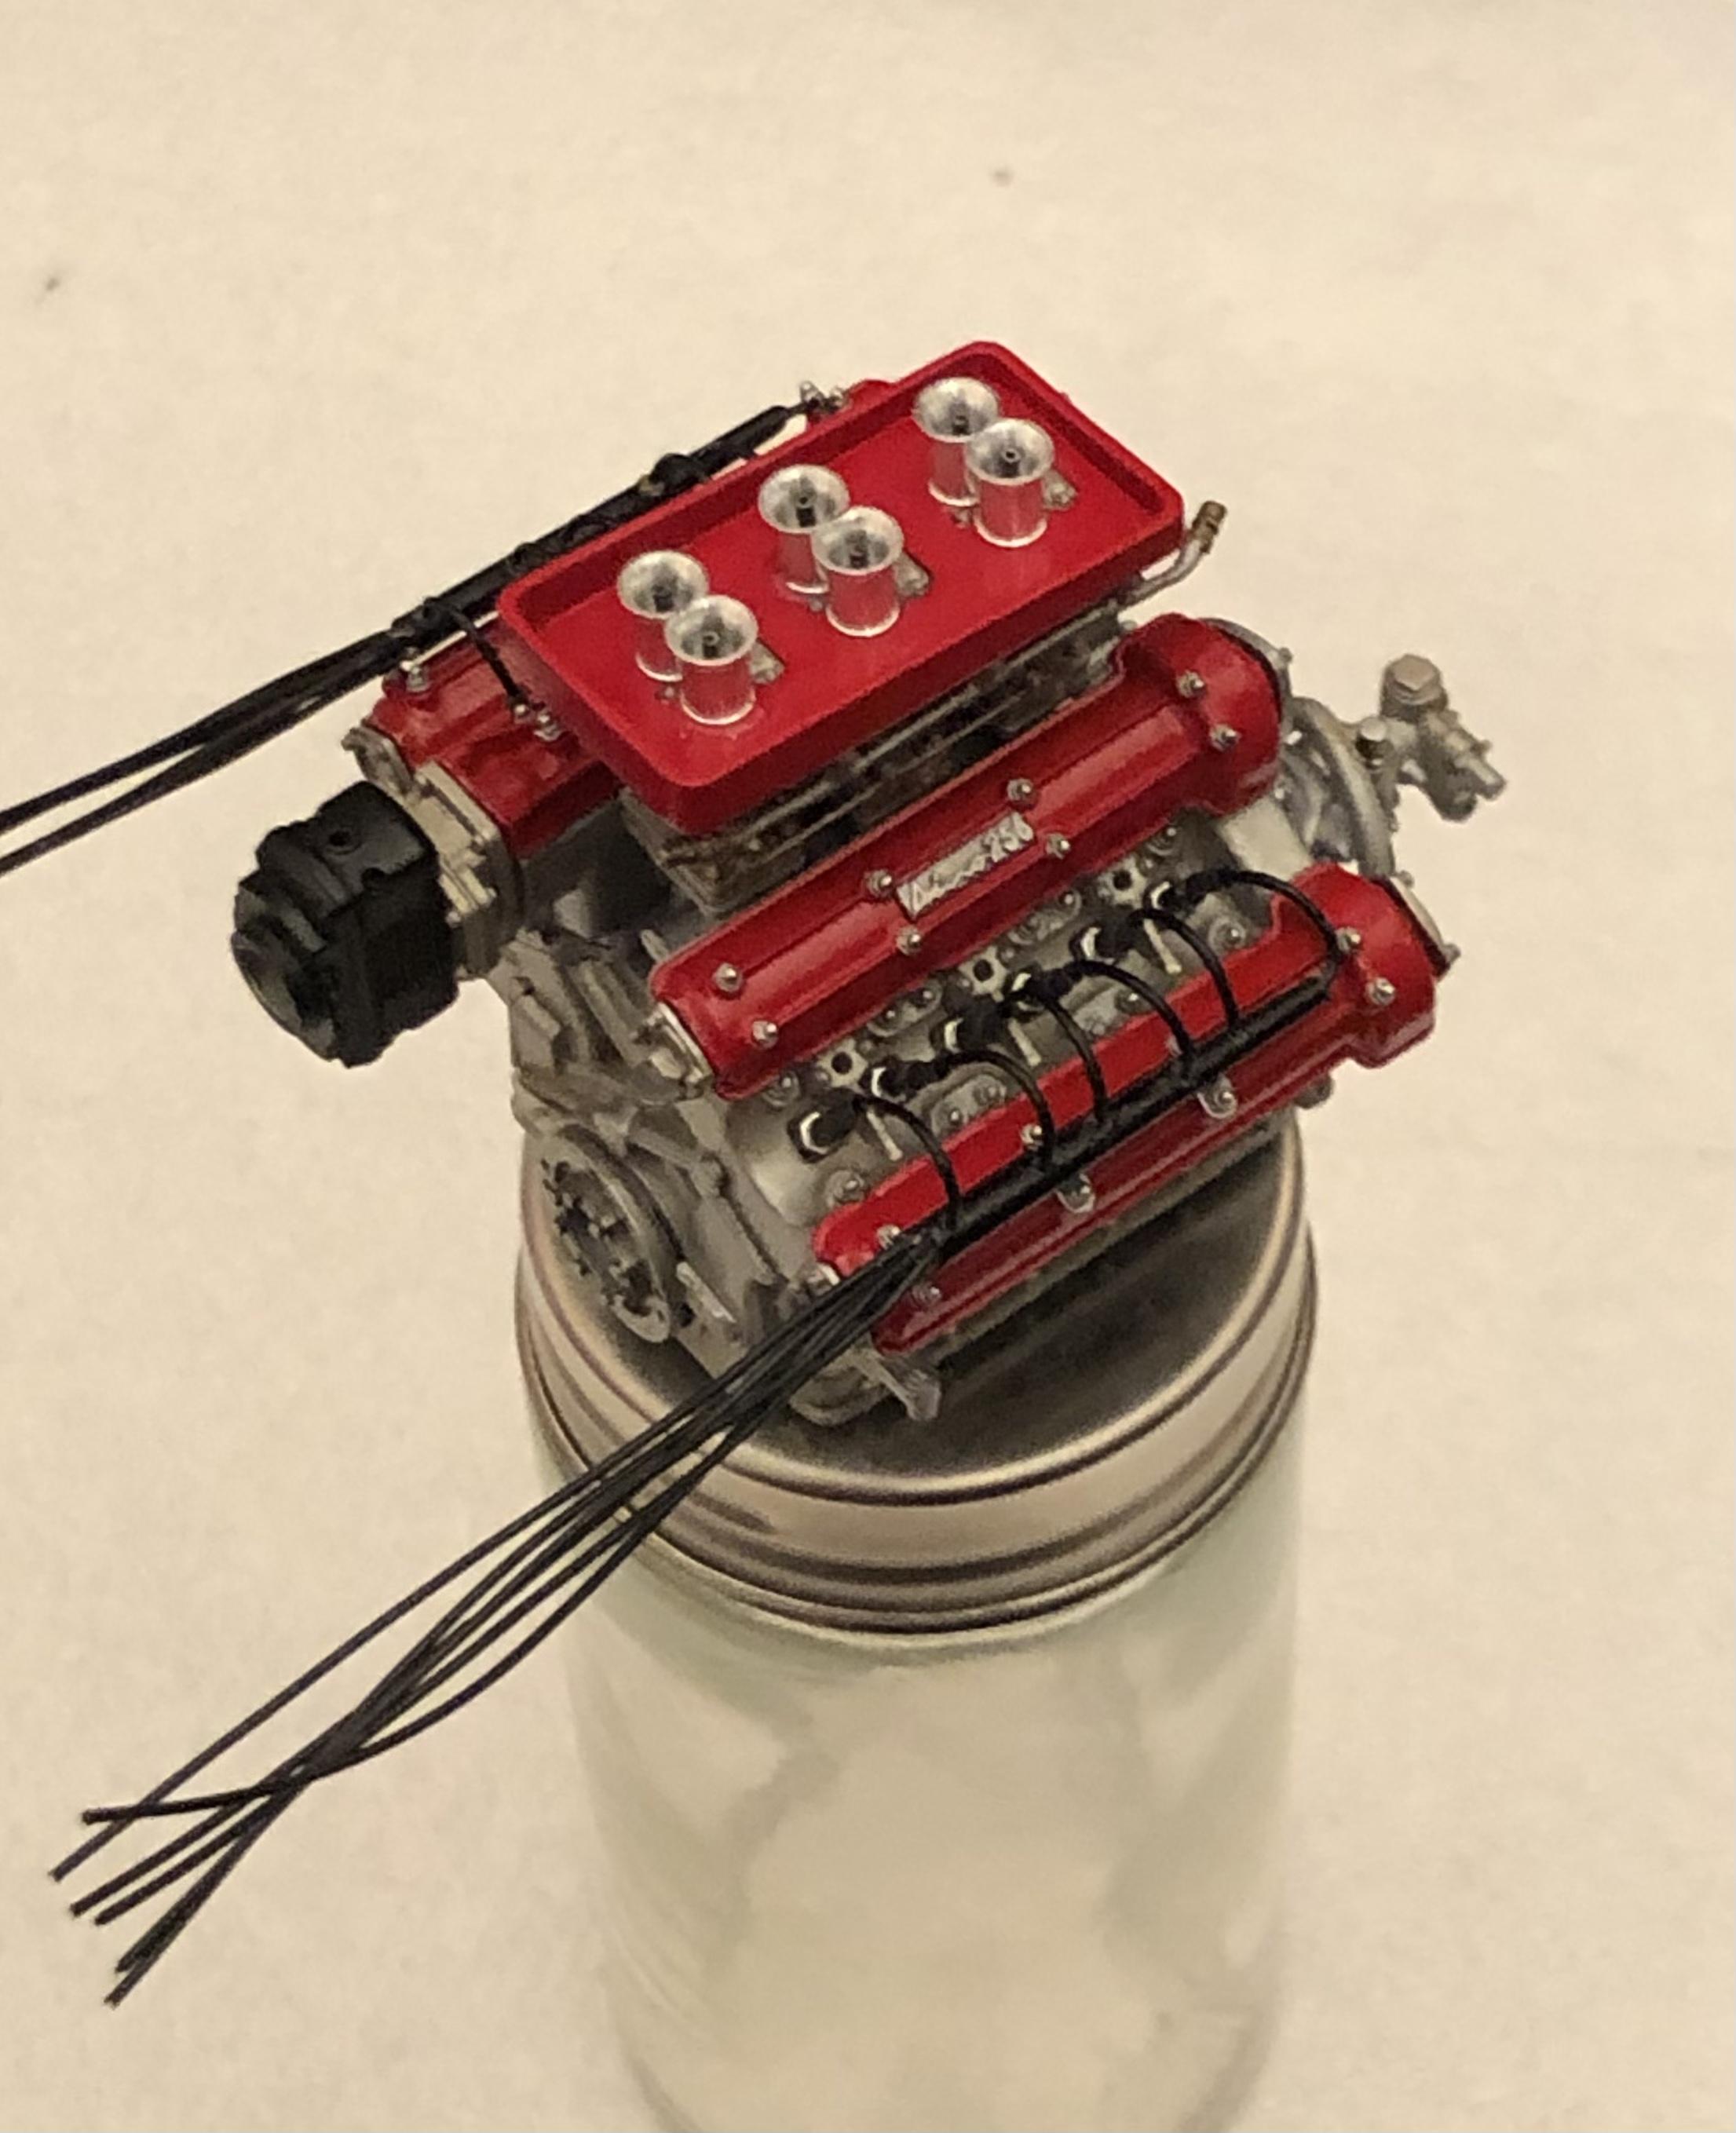
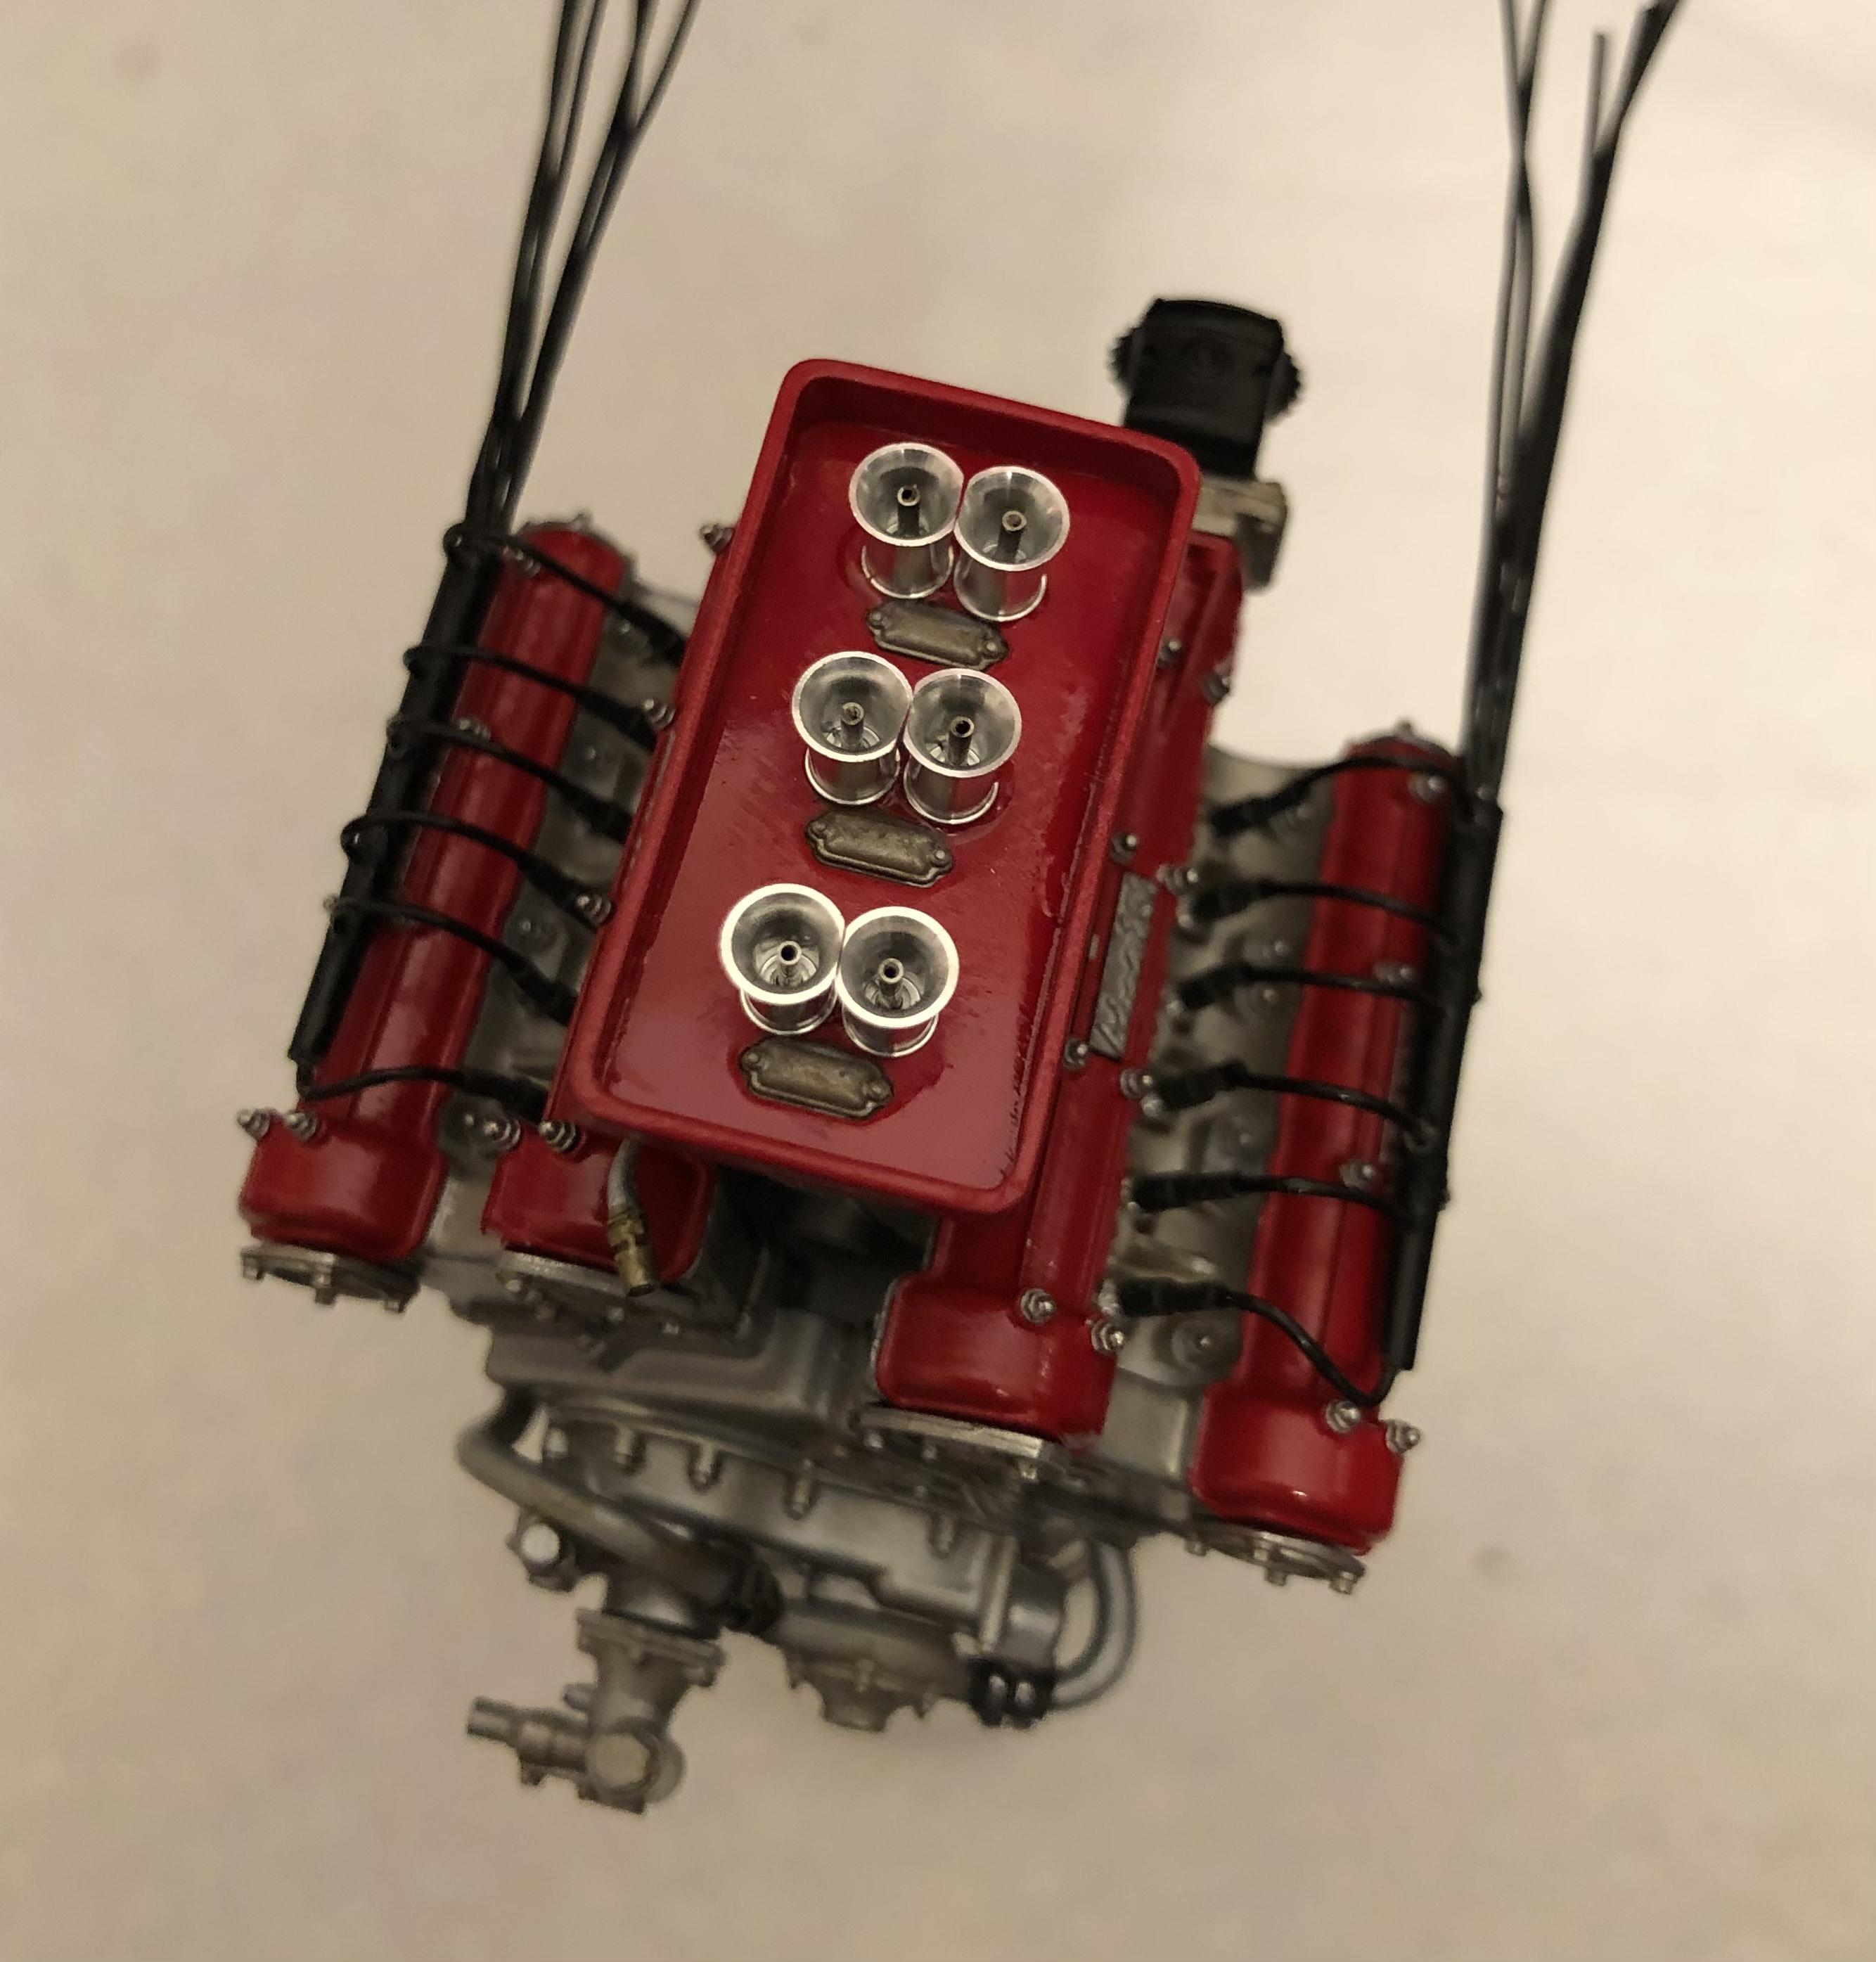
This set of photos is after I put a brown wash over it. I am trying to create some depth and make it look like it has been driven a lot
-
1960 Ferrari 256F1
Chris Smith replied to Chris Smith's topic in WIP: Other Racing: Road Racing, Land Speed Racers
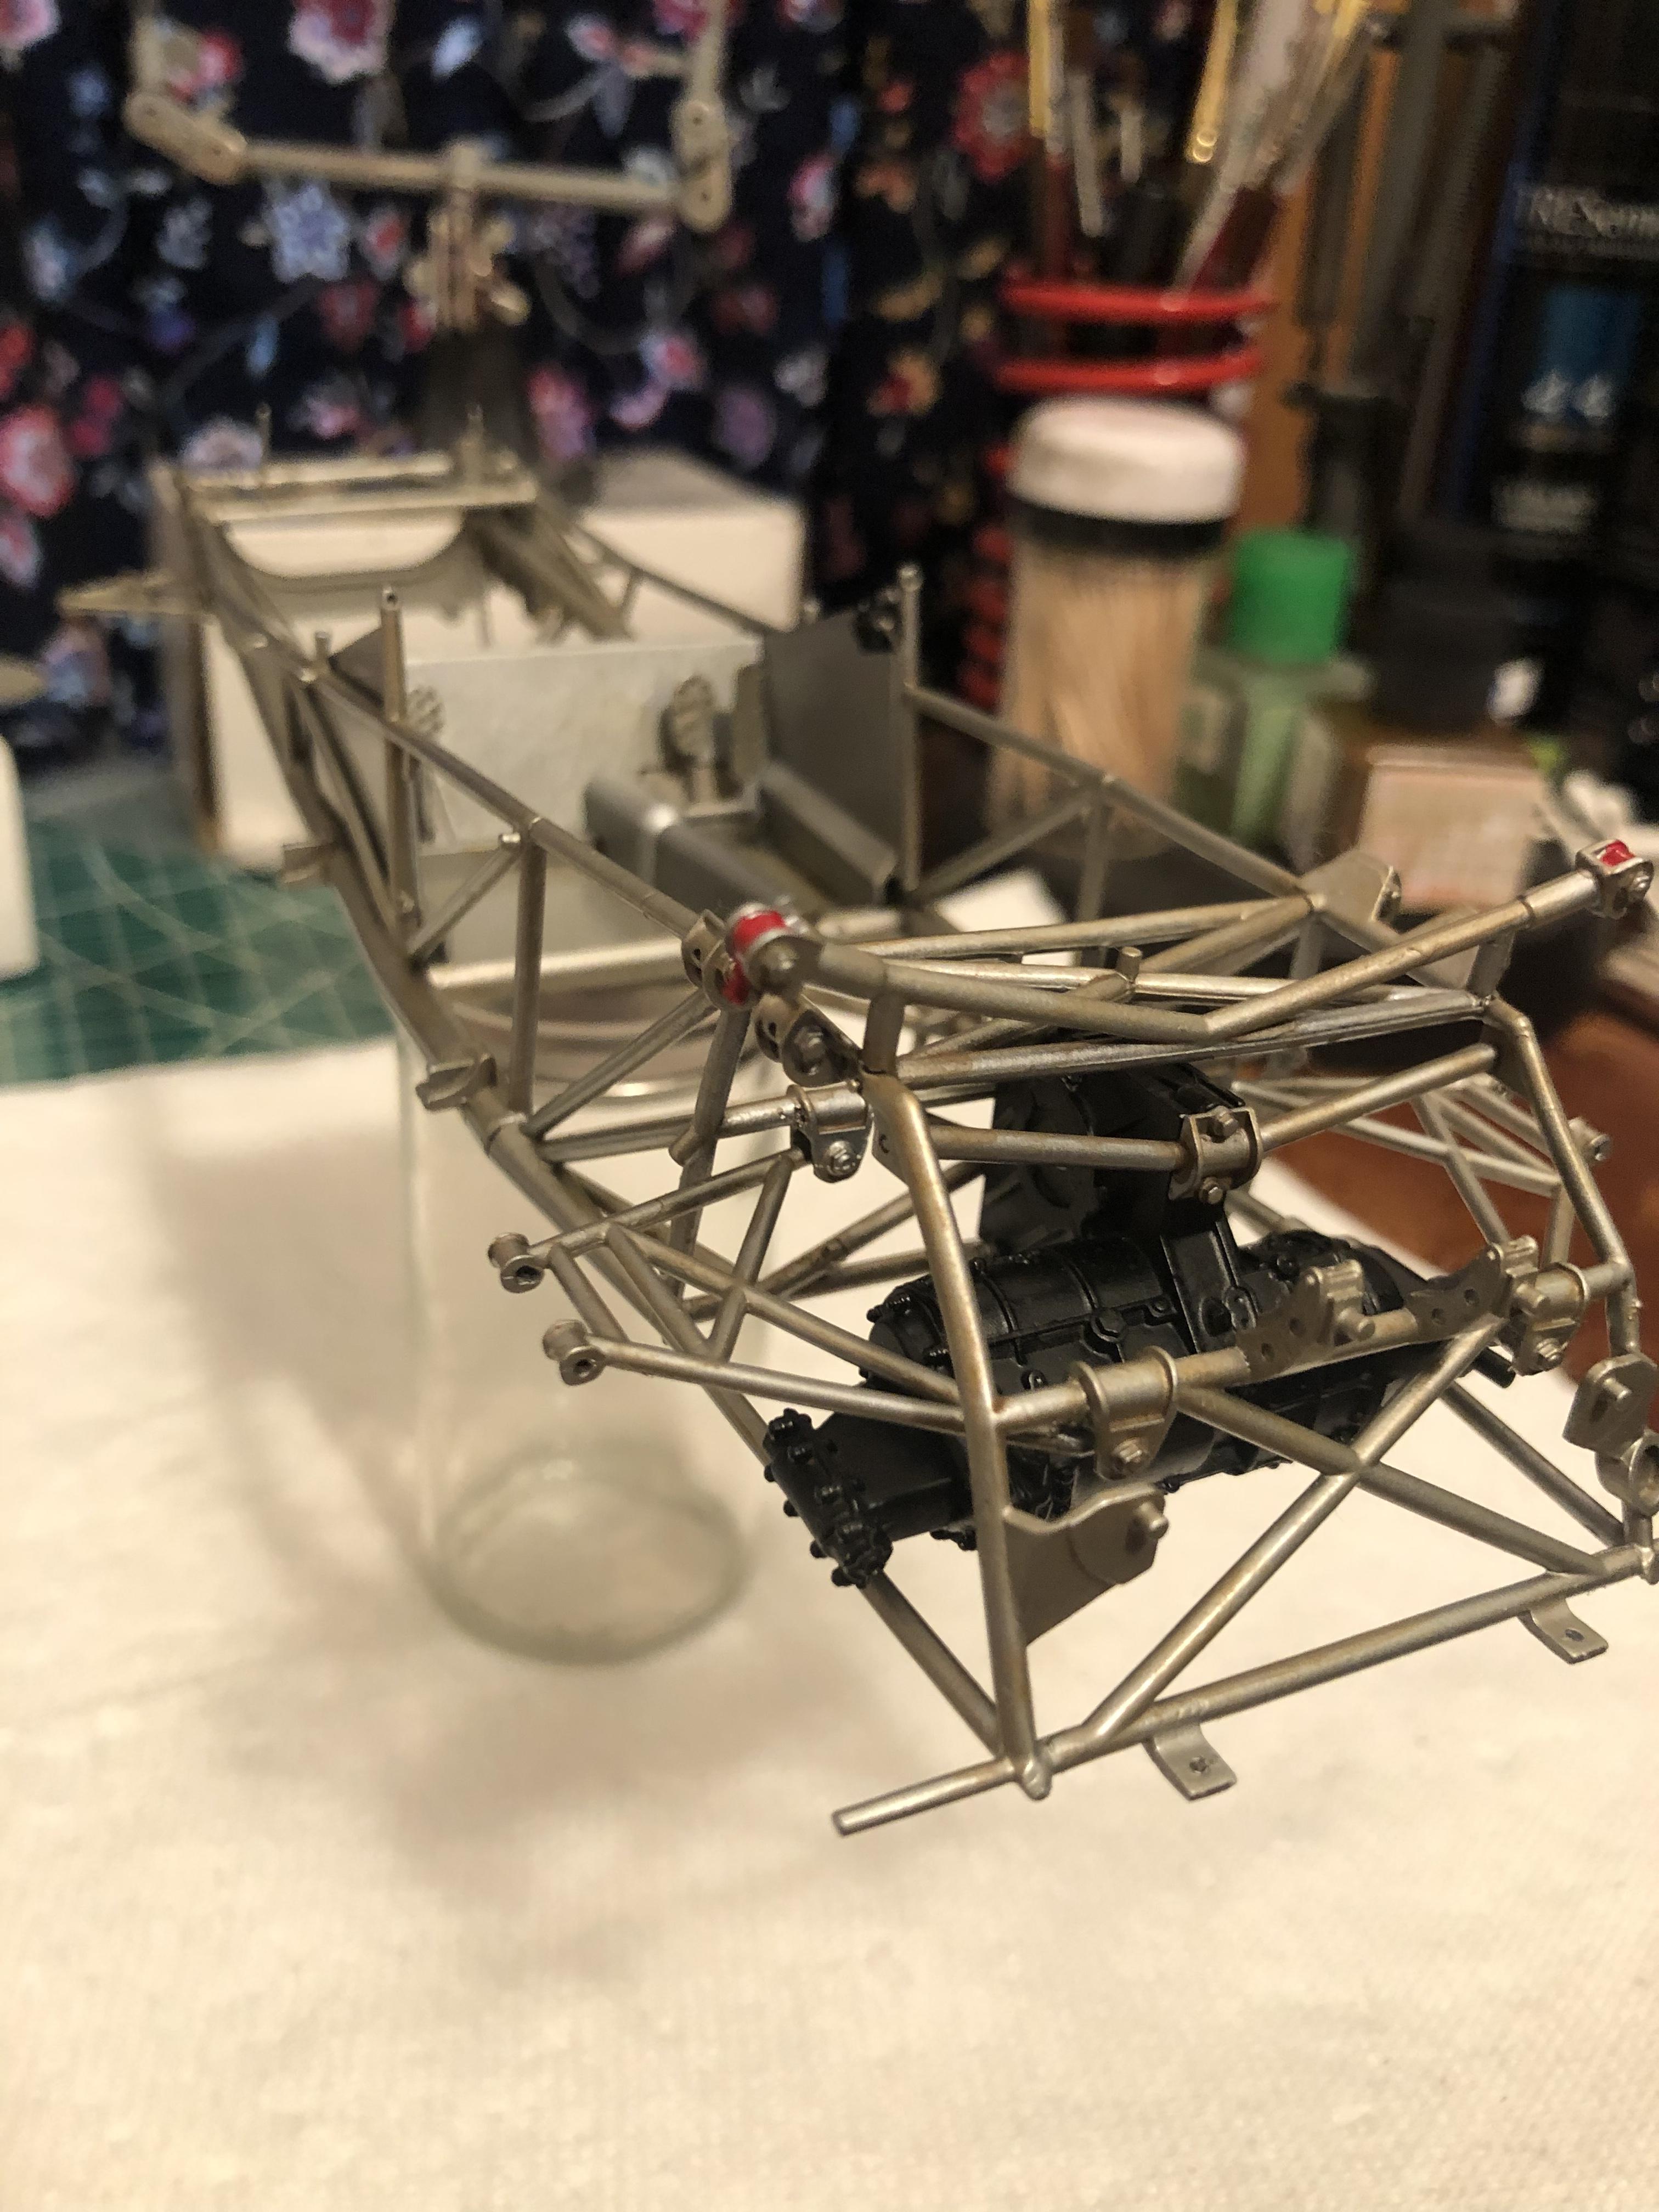
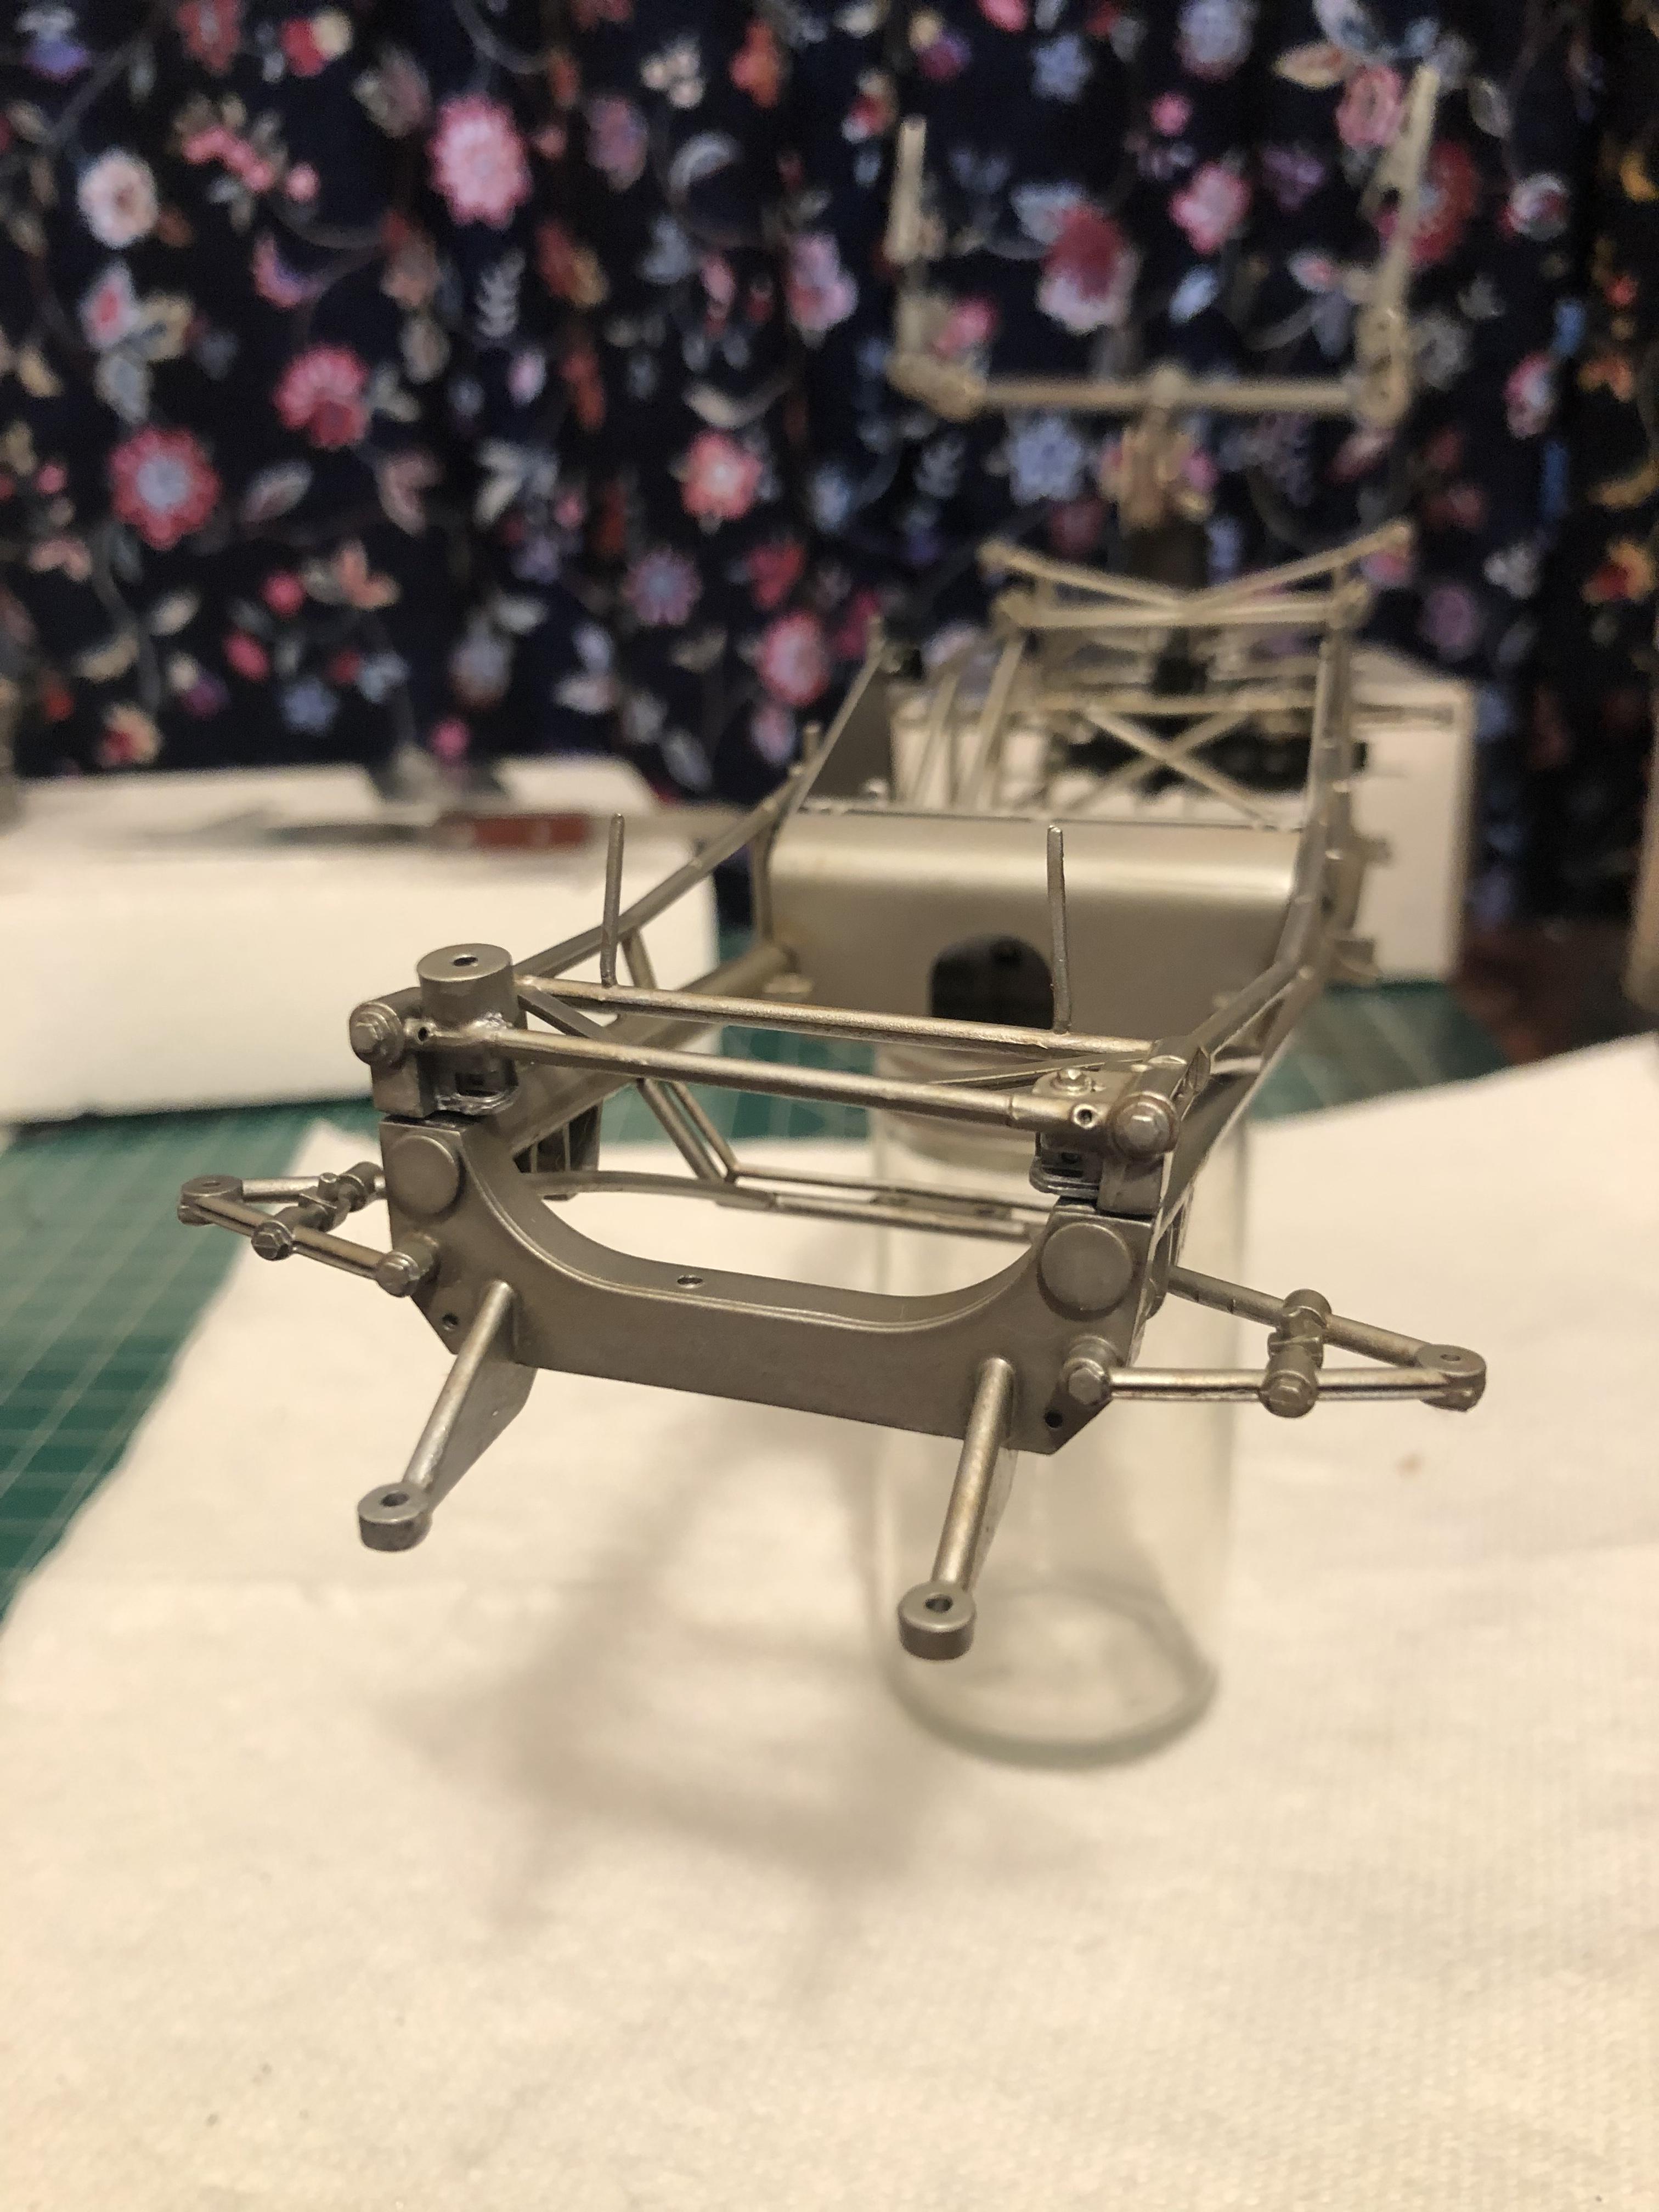
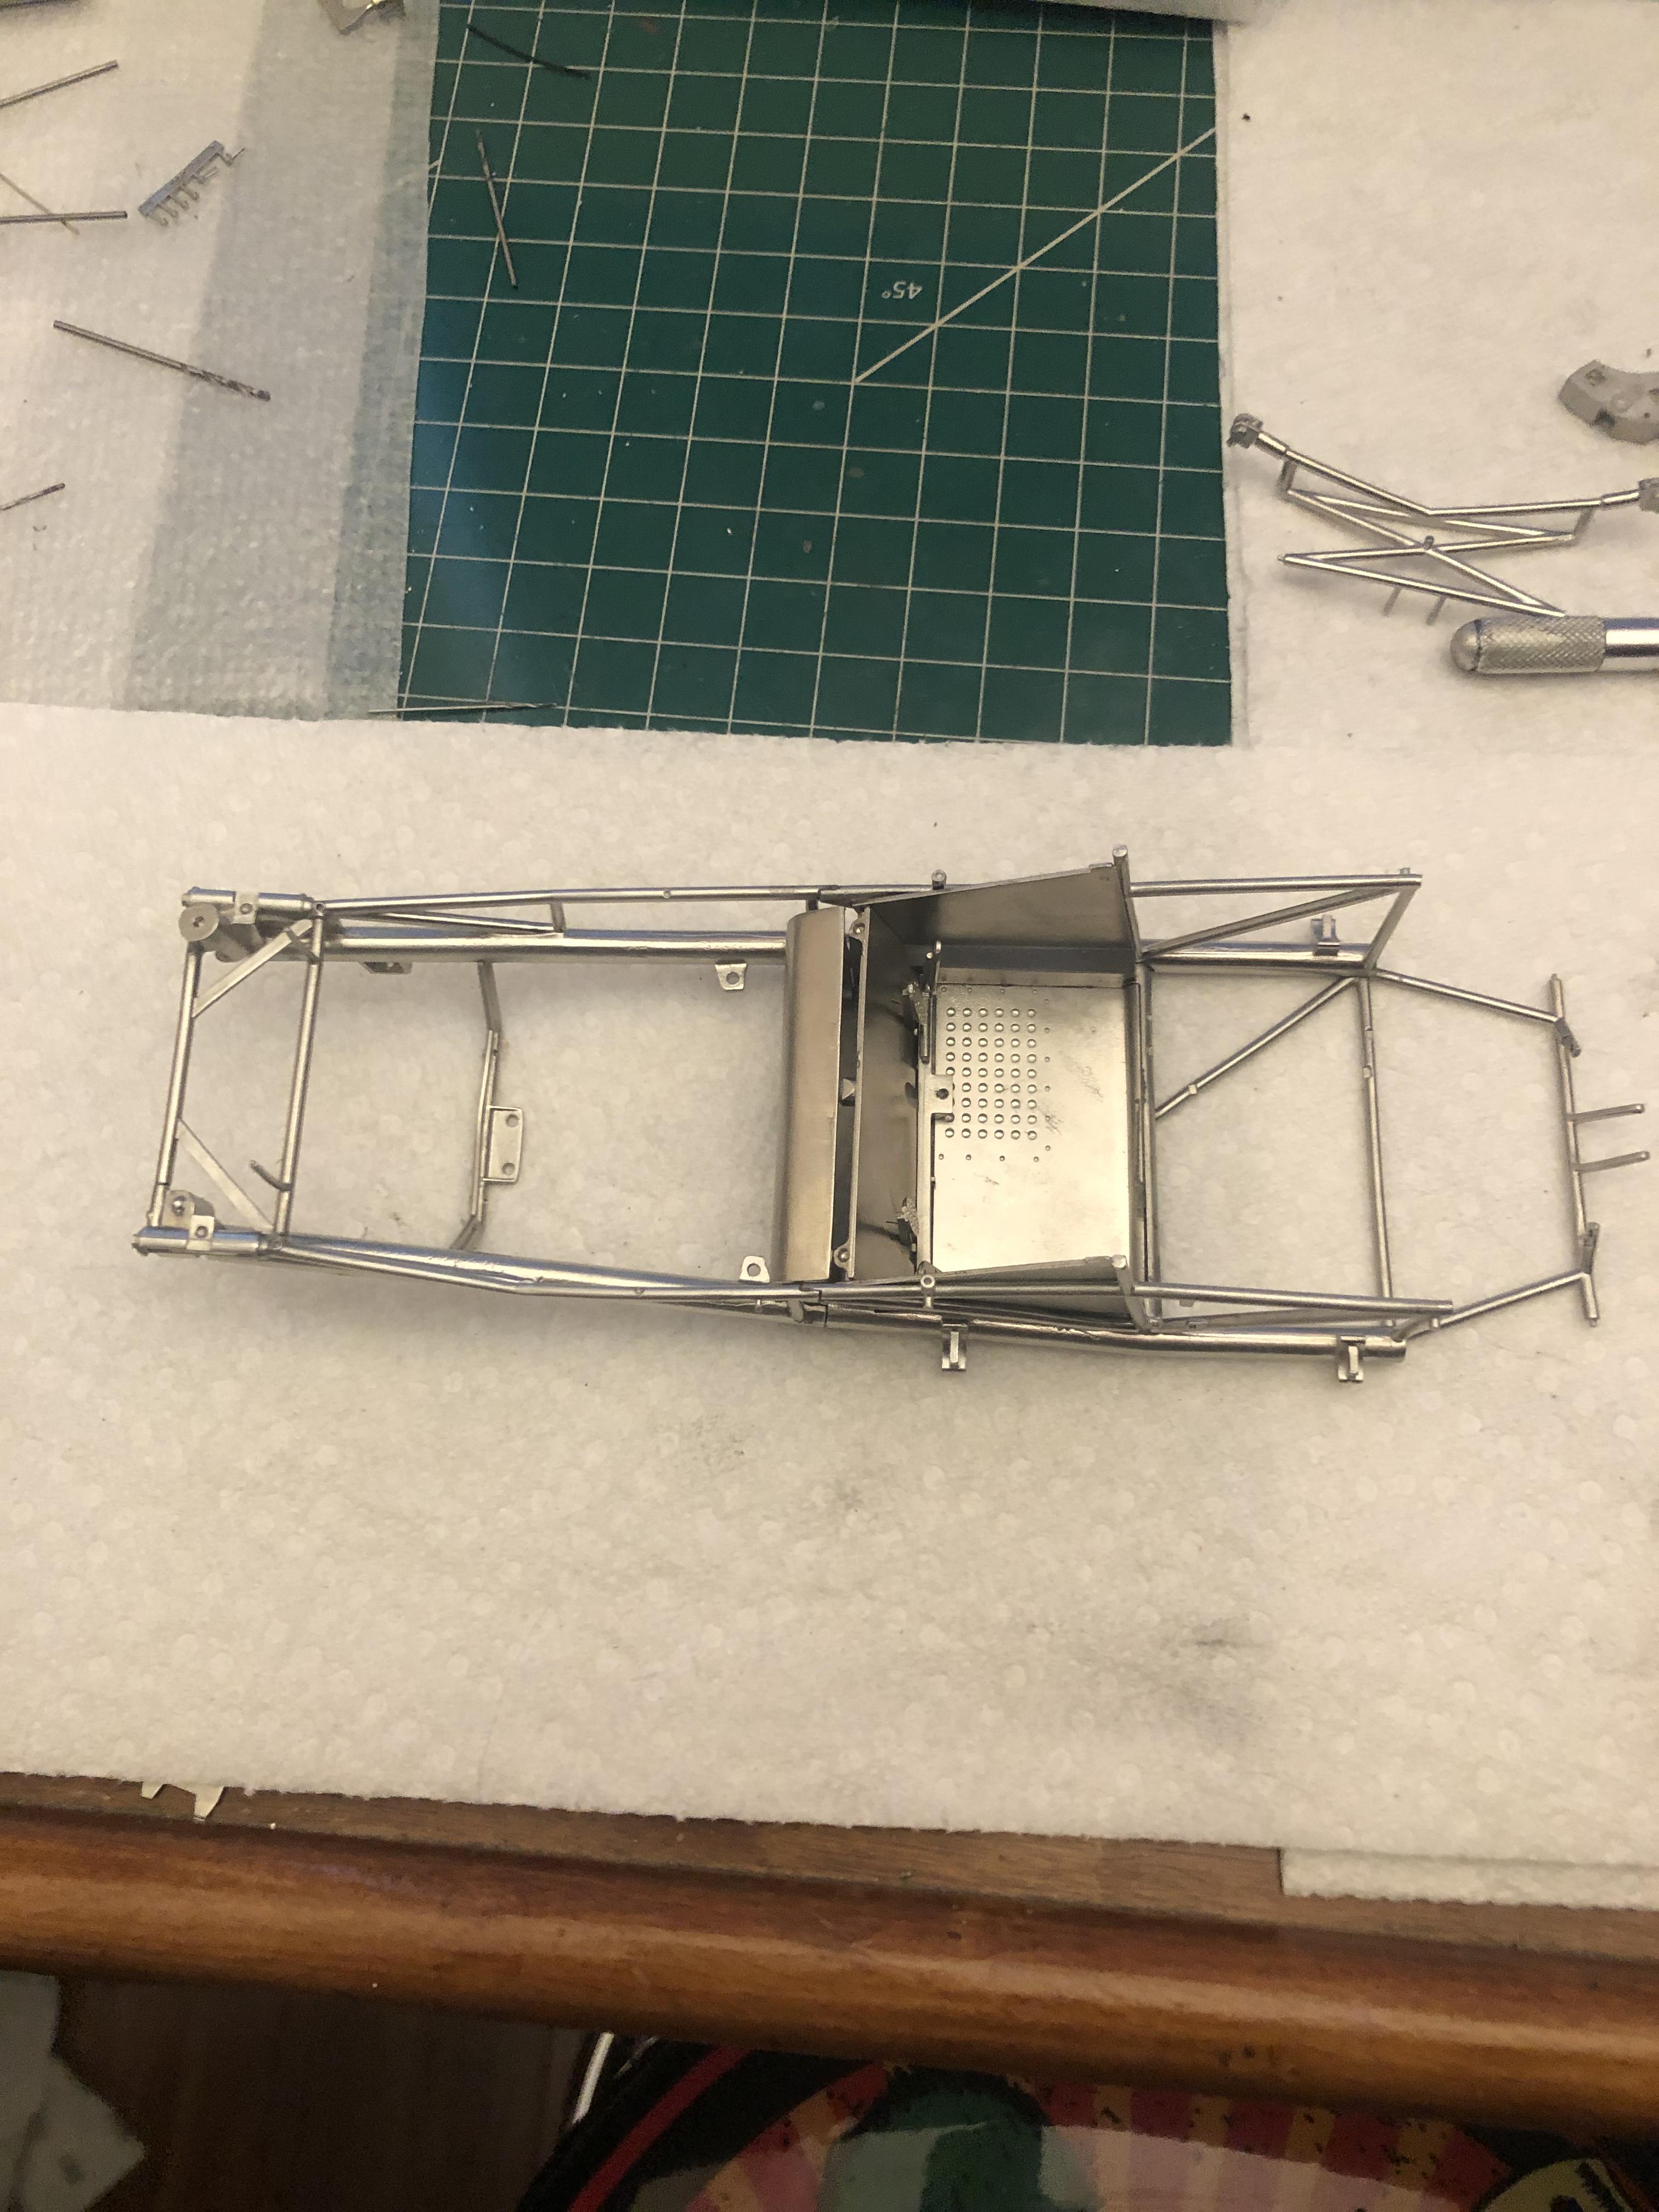
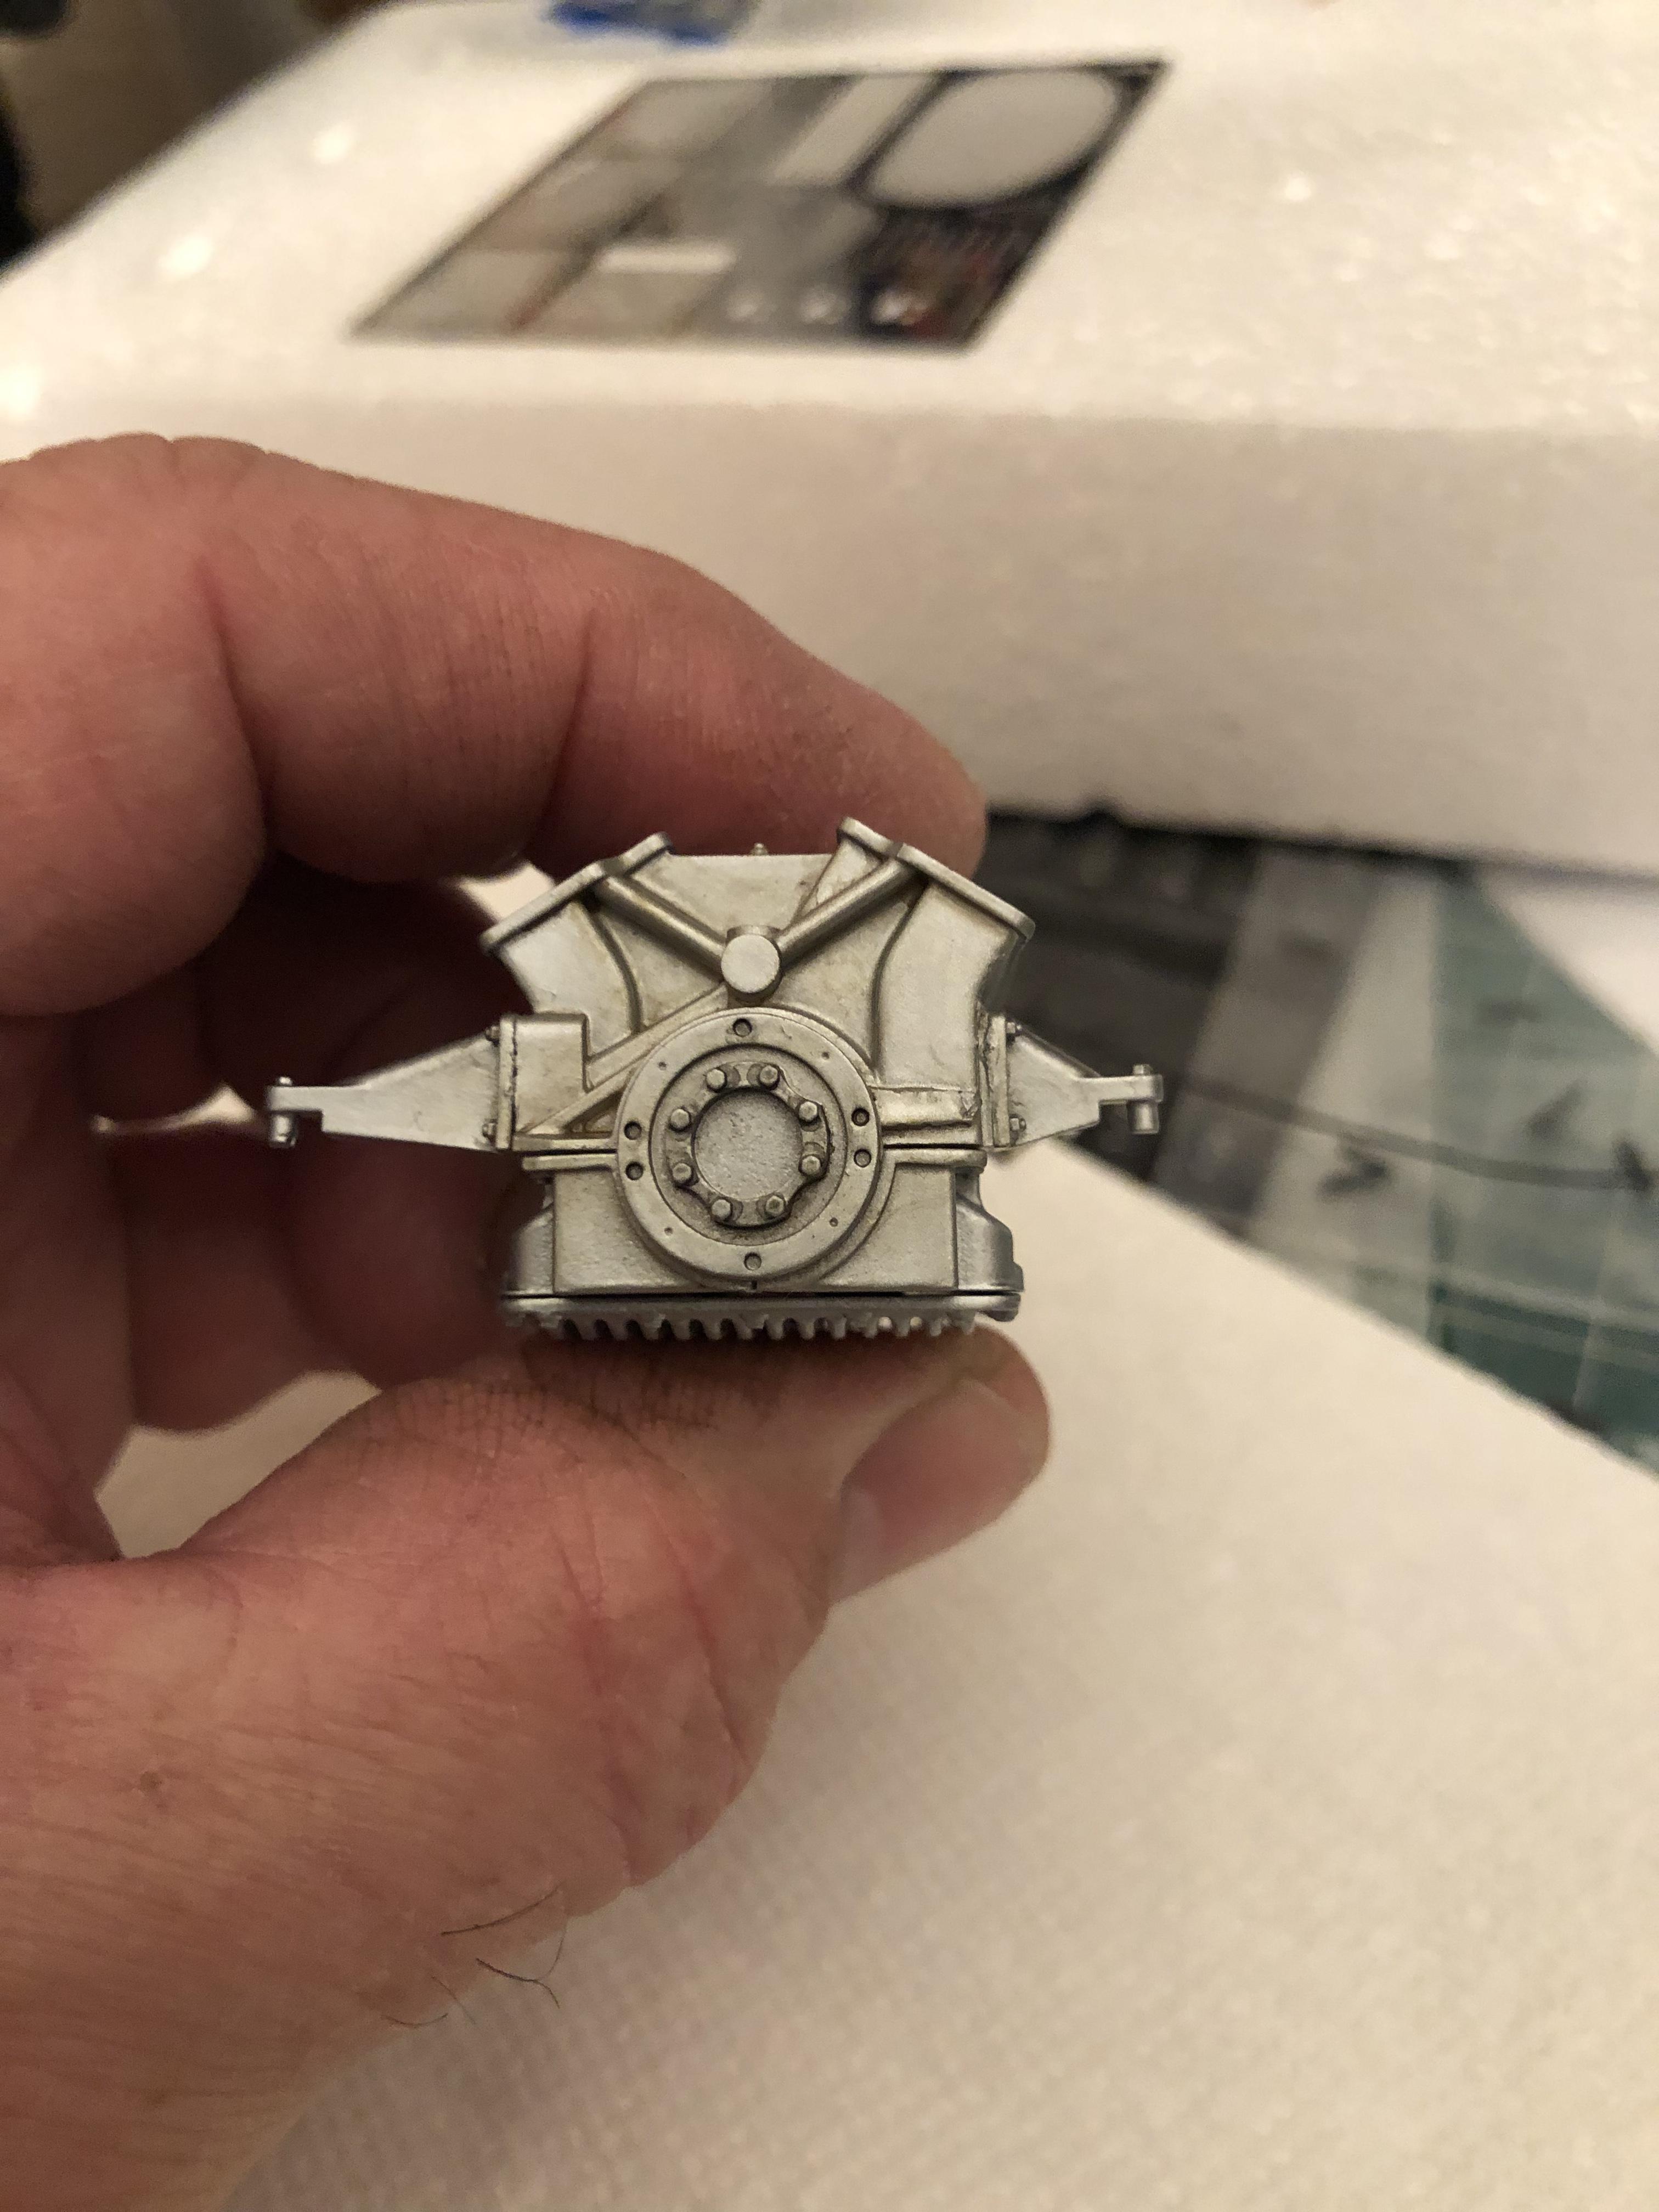
I finally finished the frame and painted it with alclad aluminum. I also built and painted the gear box/trans axle it’s done in semi gloss black
-
1960 Ferrari 256F1
Chris Smith replied to Chris Smith's topic in WIP: Other Racing: Road Racing, Land Speed Racers
I’m using medium gell CA and 5 min epoxy -
1960 Ferrari 256F1
Chris Smith replied to Chris Smith's topic in WIP: Other Racing: Road Racing, Land Speed Racers
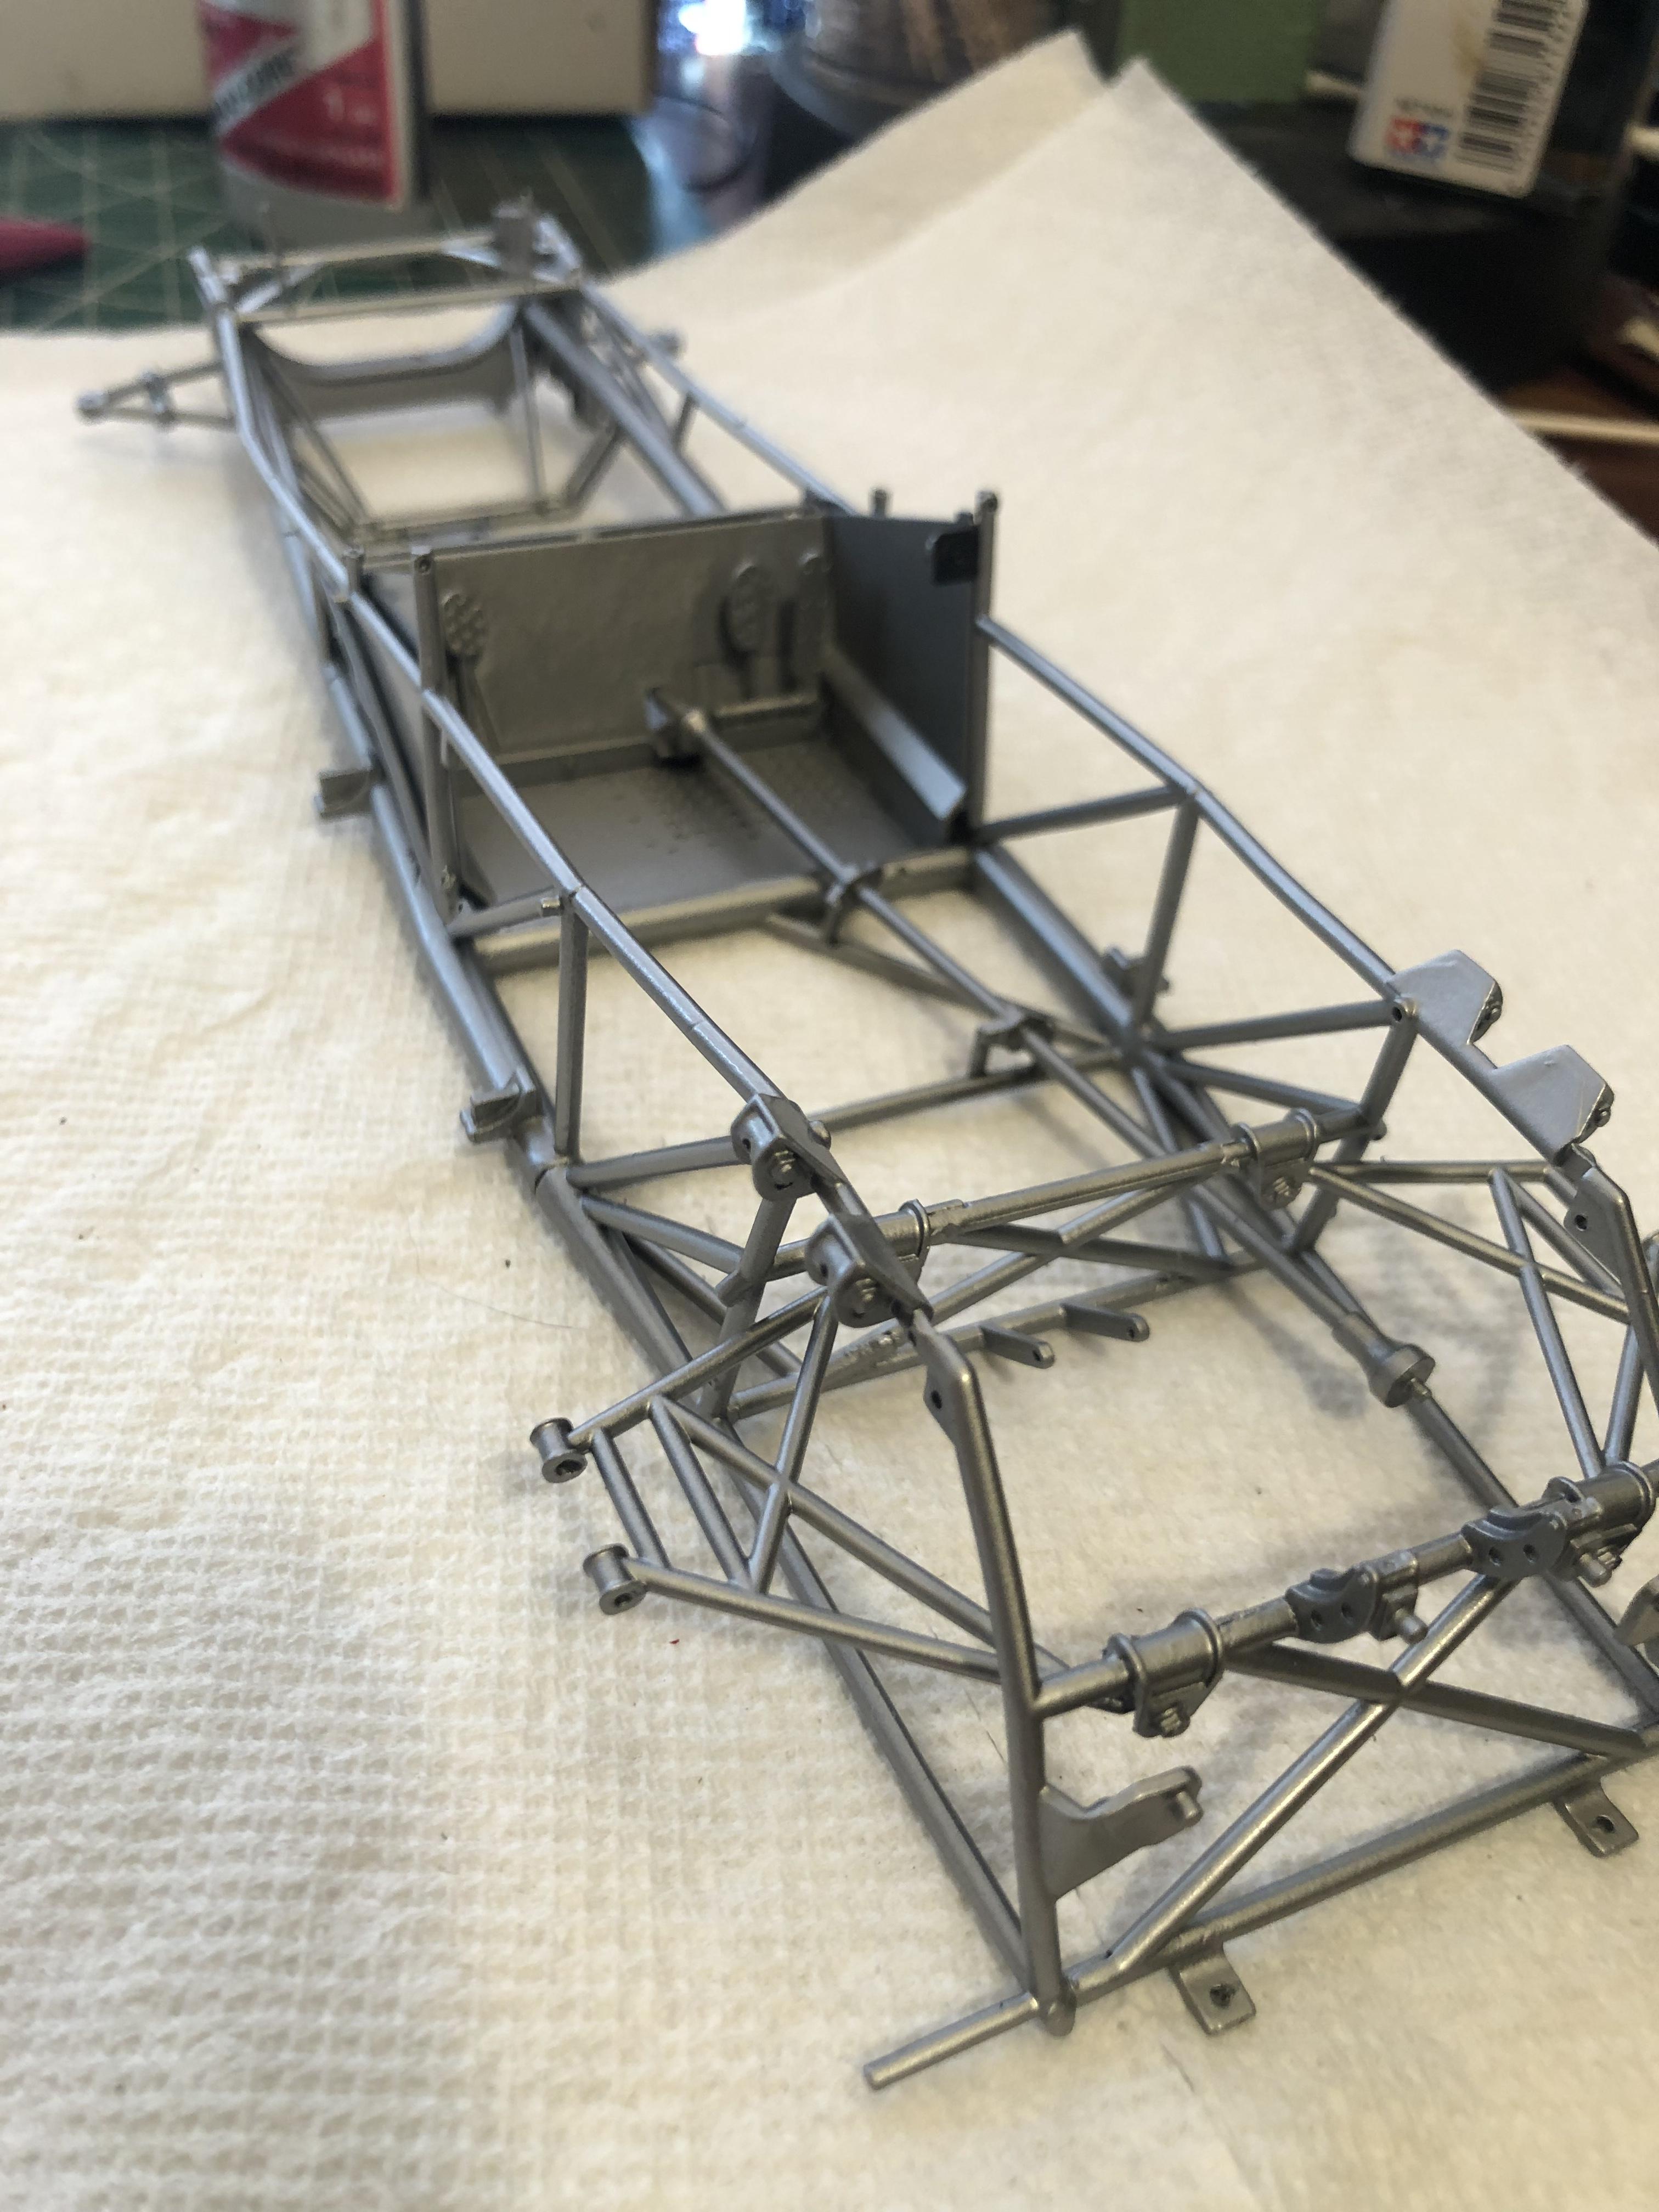
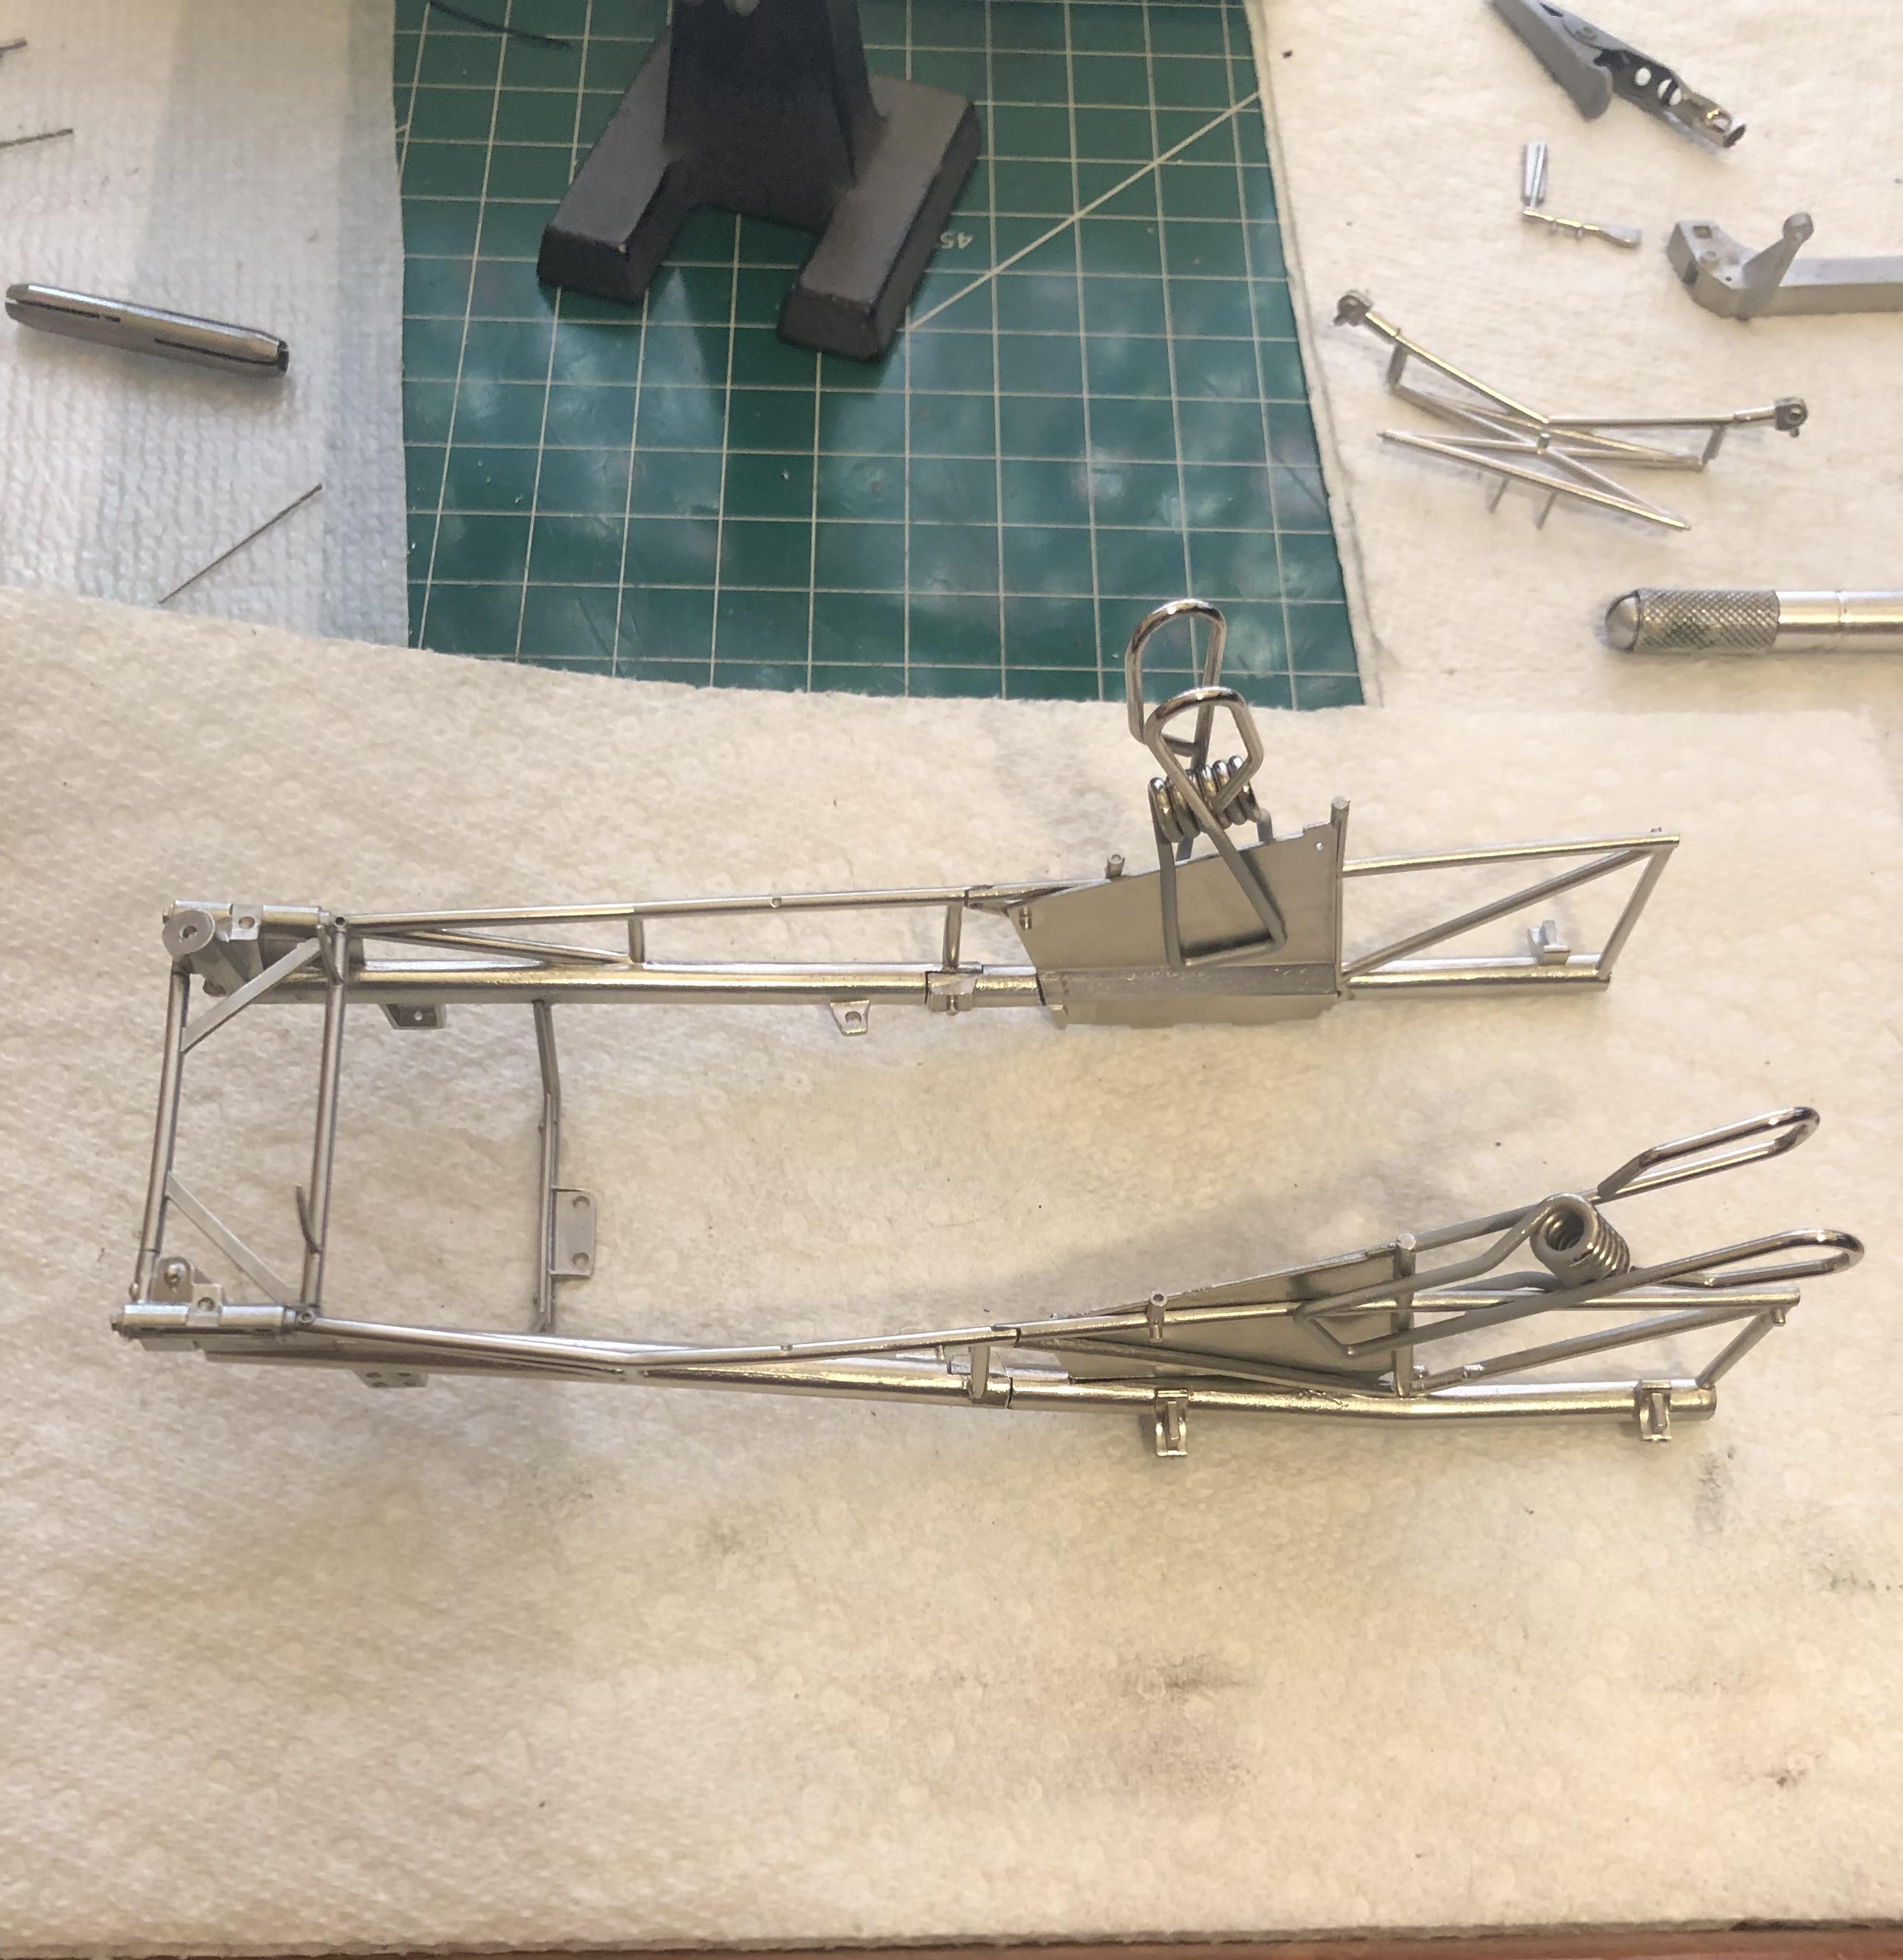
Started assembling the tubular frame. I put all the parts in the tumbler for some cleaning and polishing after a few evenings of drilling and dry fitting. My plan is to get most of it put together, then paint it alclad aluminum.
-
1960 Ferrari 256F1
Chris Smith replied to Chris Smith's topic in WIP: Other Racing: Road Racing, Land Speed Racers
Thanks Tim! I’m hoping the hinges get here soon too? -
1960 Ferrari 256F1
Chris Smith replied to Chris Smith's topic in WIP: Other Racing: Road Racing, Land Speed Racers
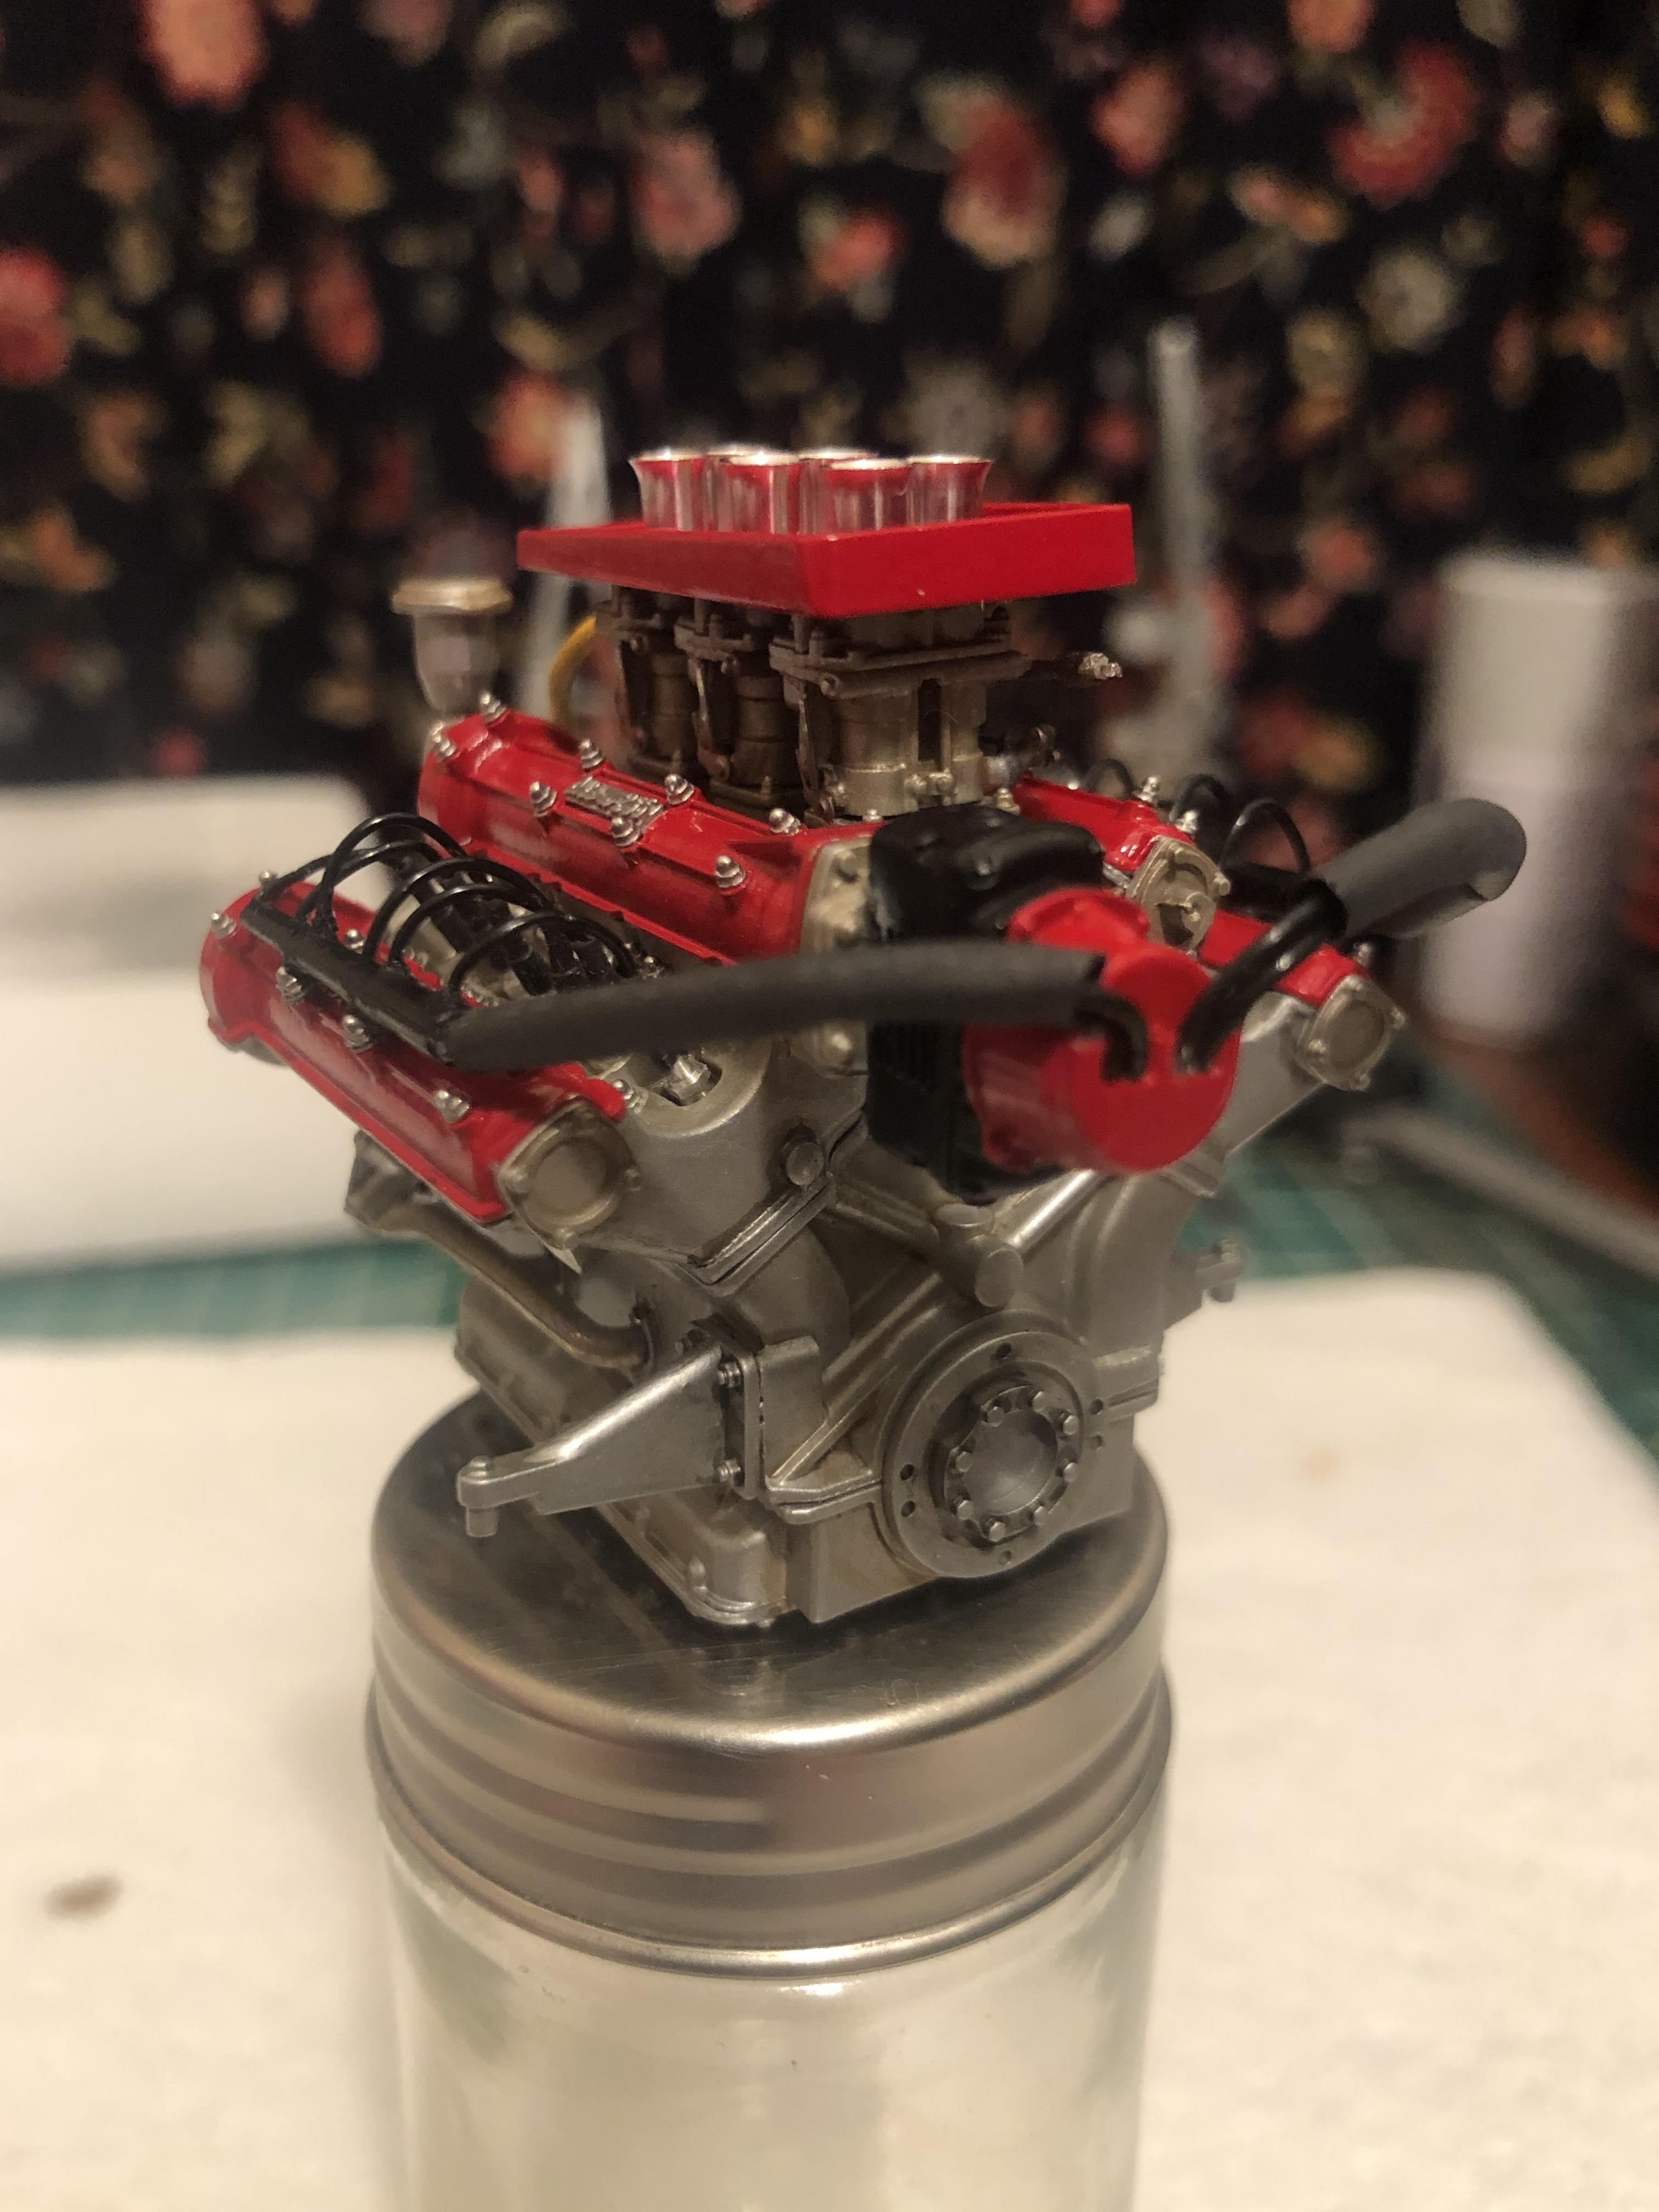
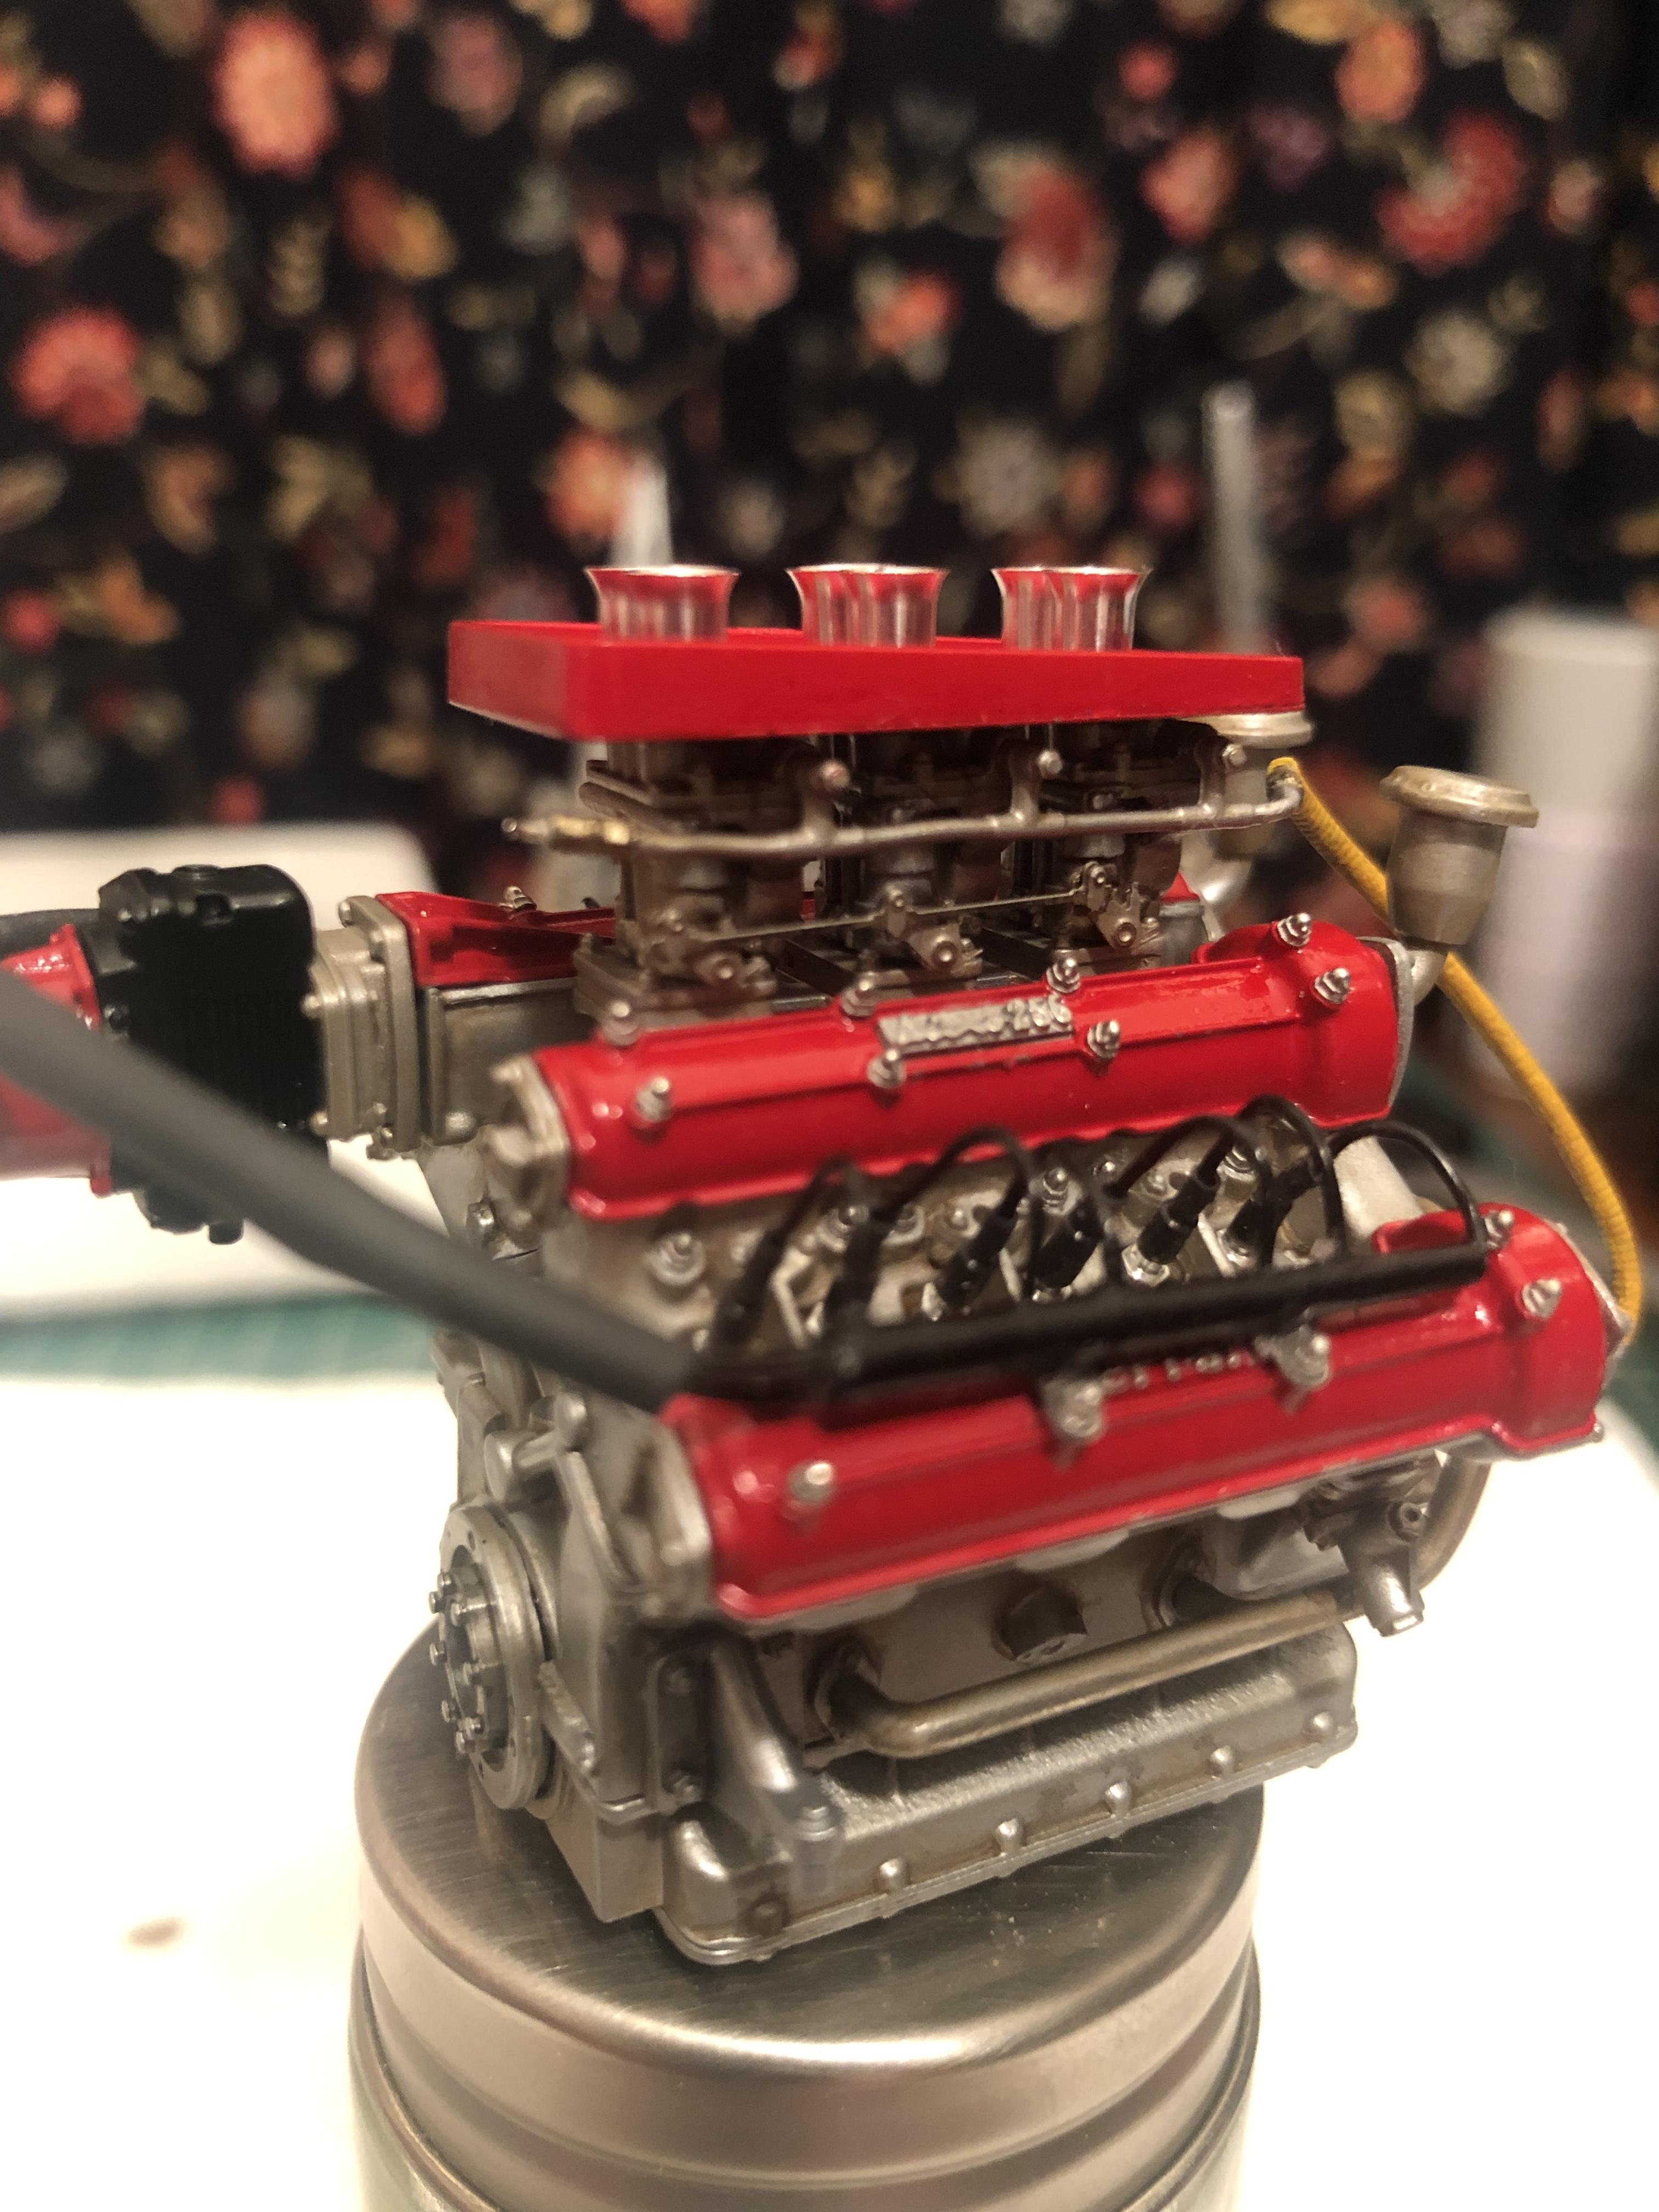
I’m on a roll? I did paint the fuel line with a Tamiya flat yellow and a few small drops of hull red, then a light wash of brown panel liner
-
1960 Ferrari 256F1
Chris Smith replied to Chris Smith's topic in WIP: Other Racing: Road Racing, Land Speed Racers
-
1960 Ferrari 256F1
Chris Smith replied to Chris Smith's topic in WIP: Other Racing: Road Racing, Land Speed Racers
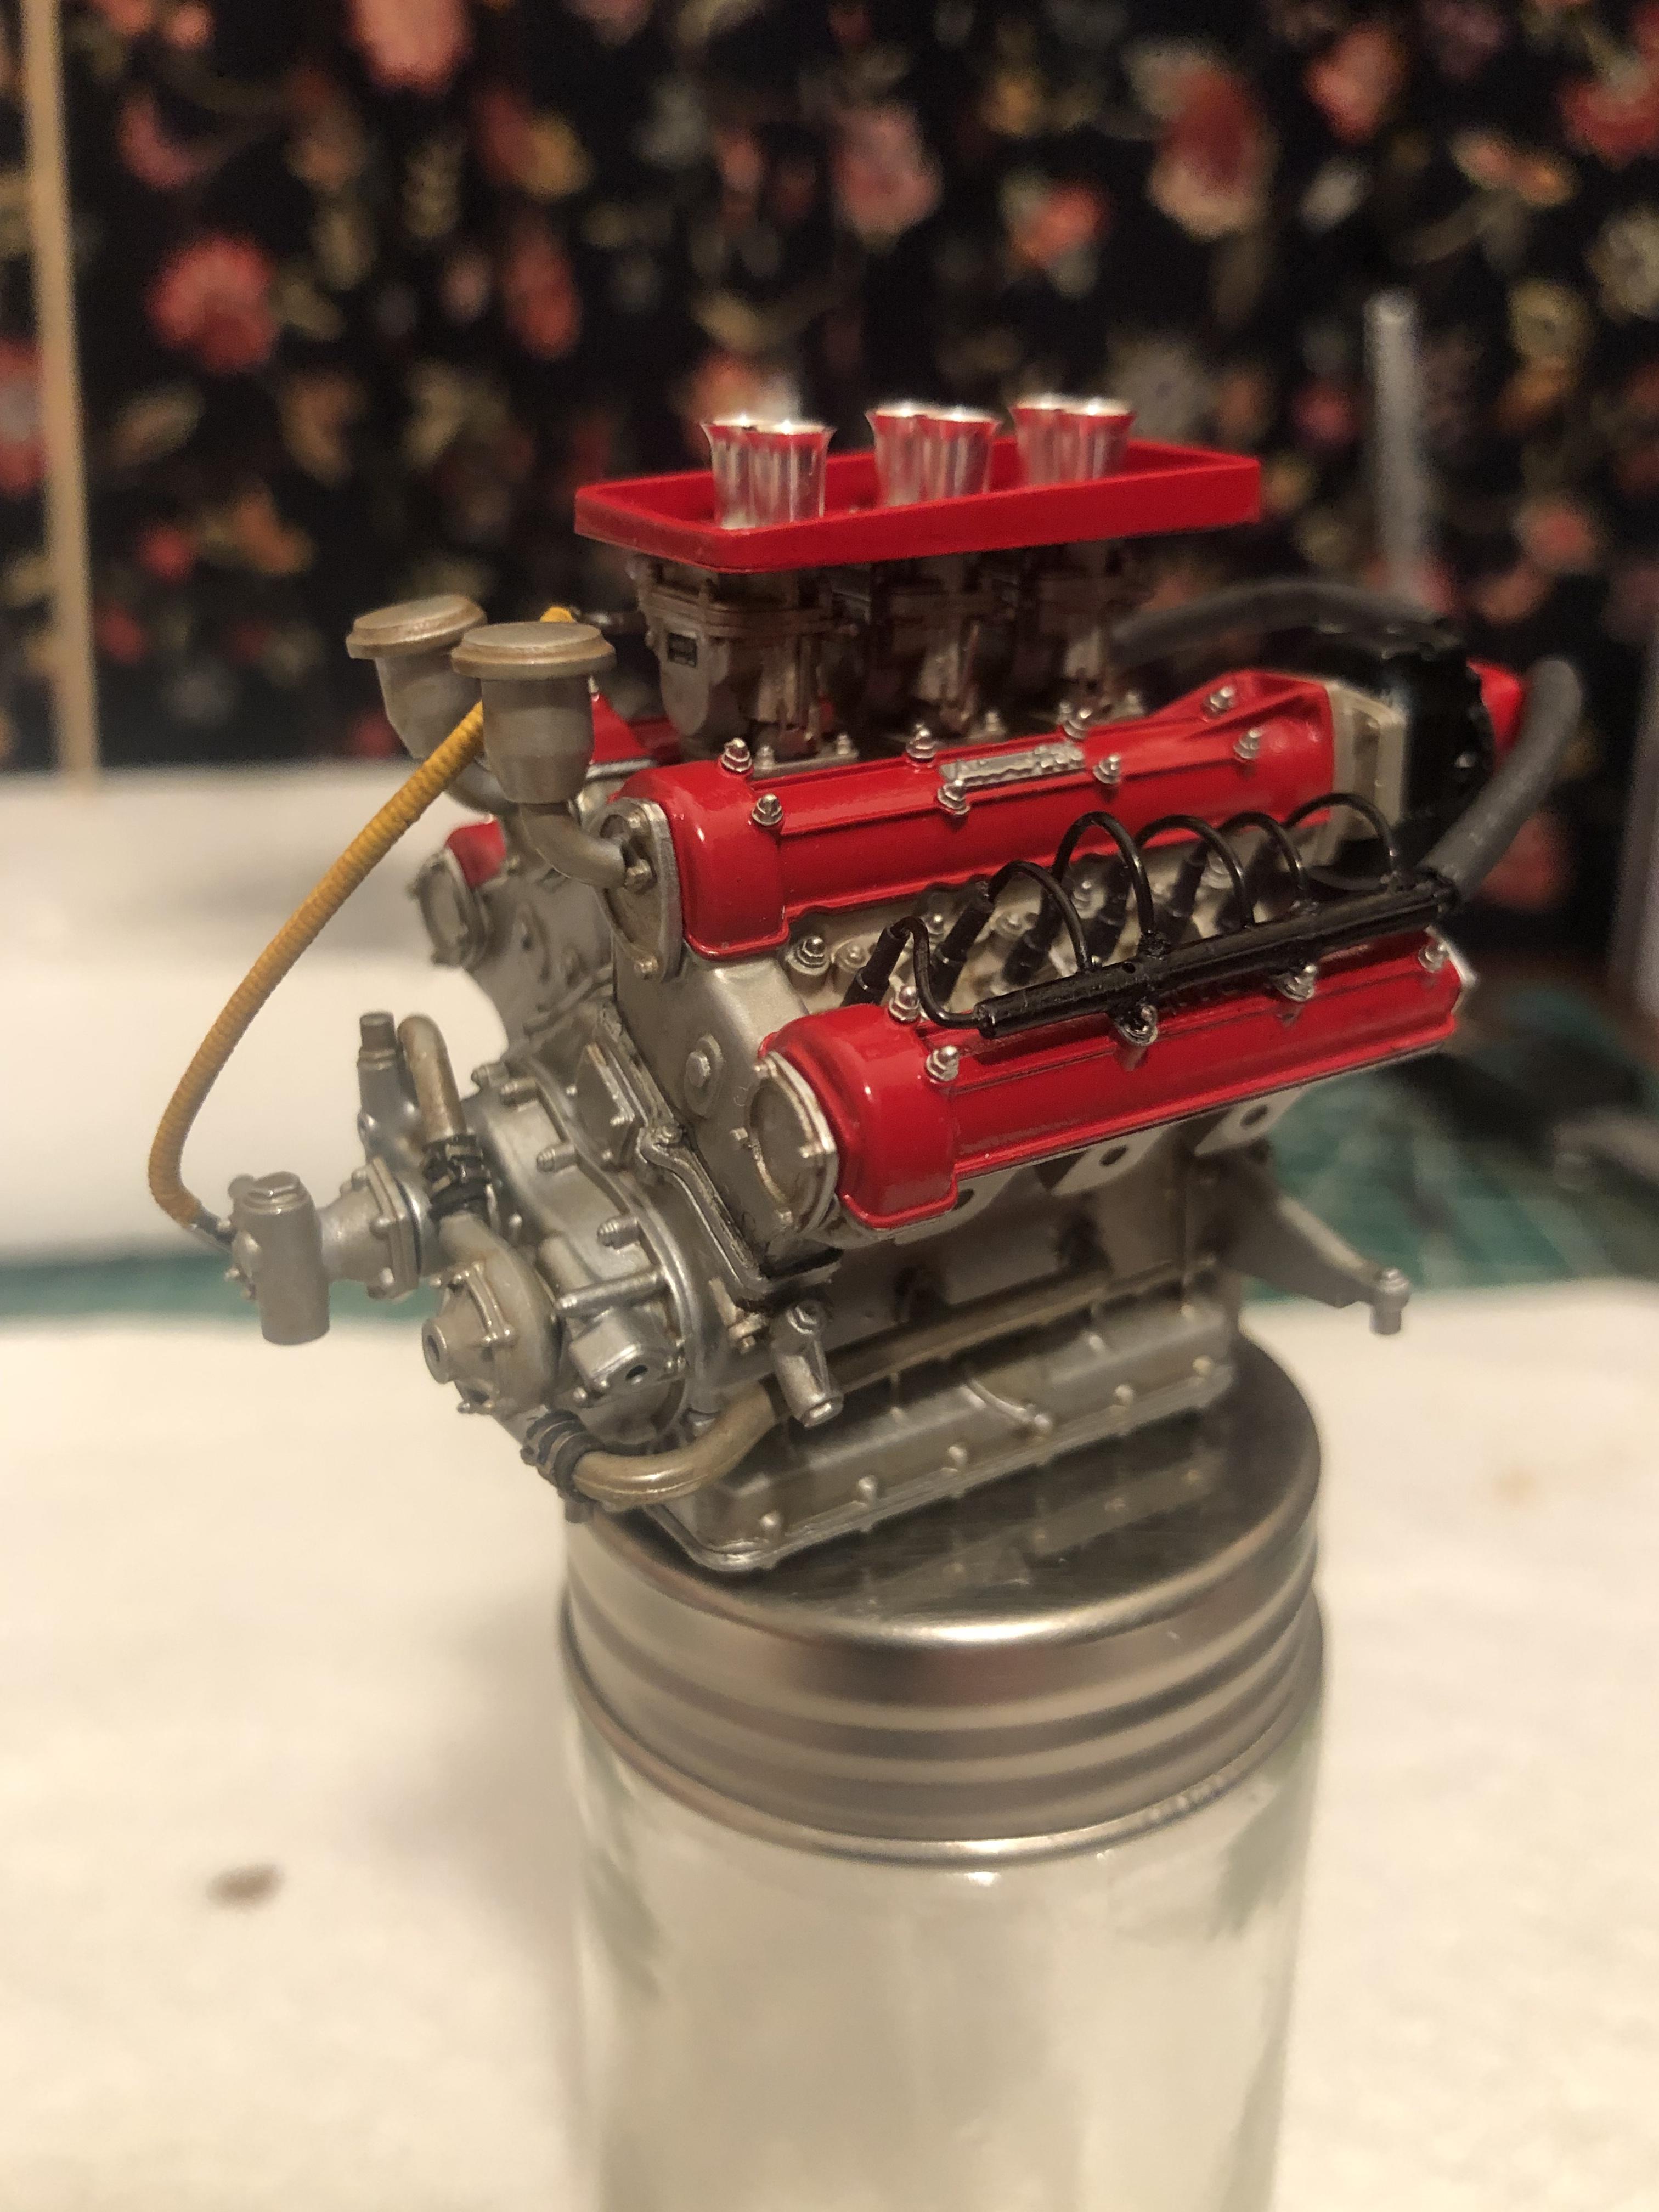
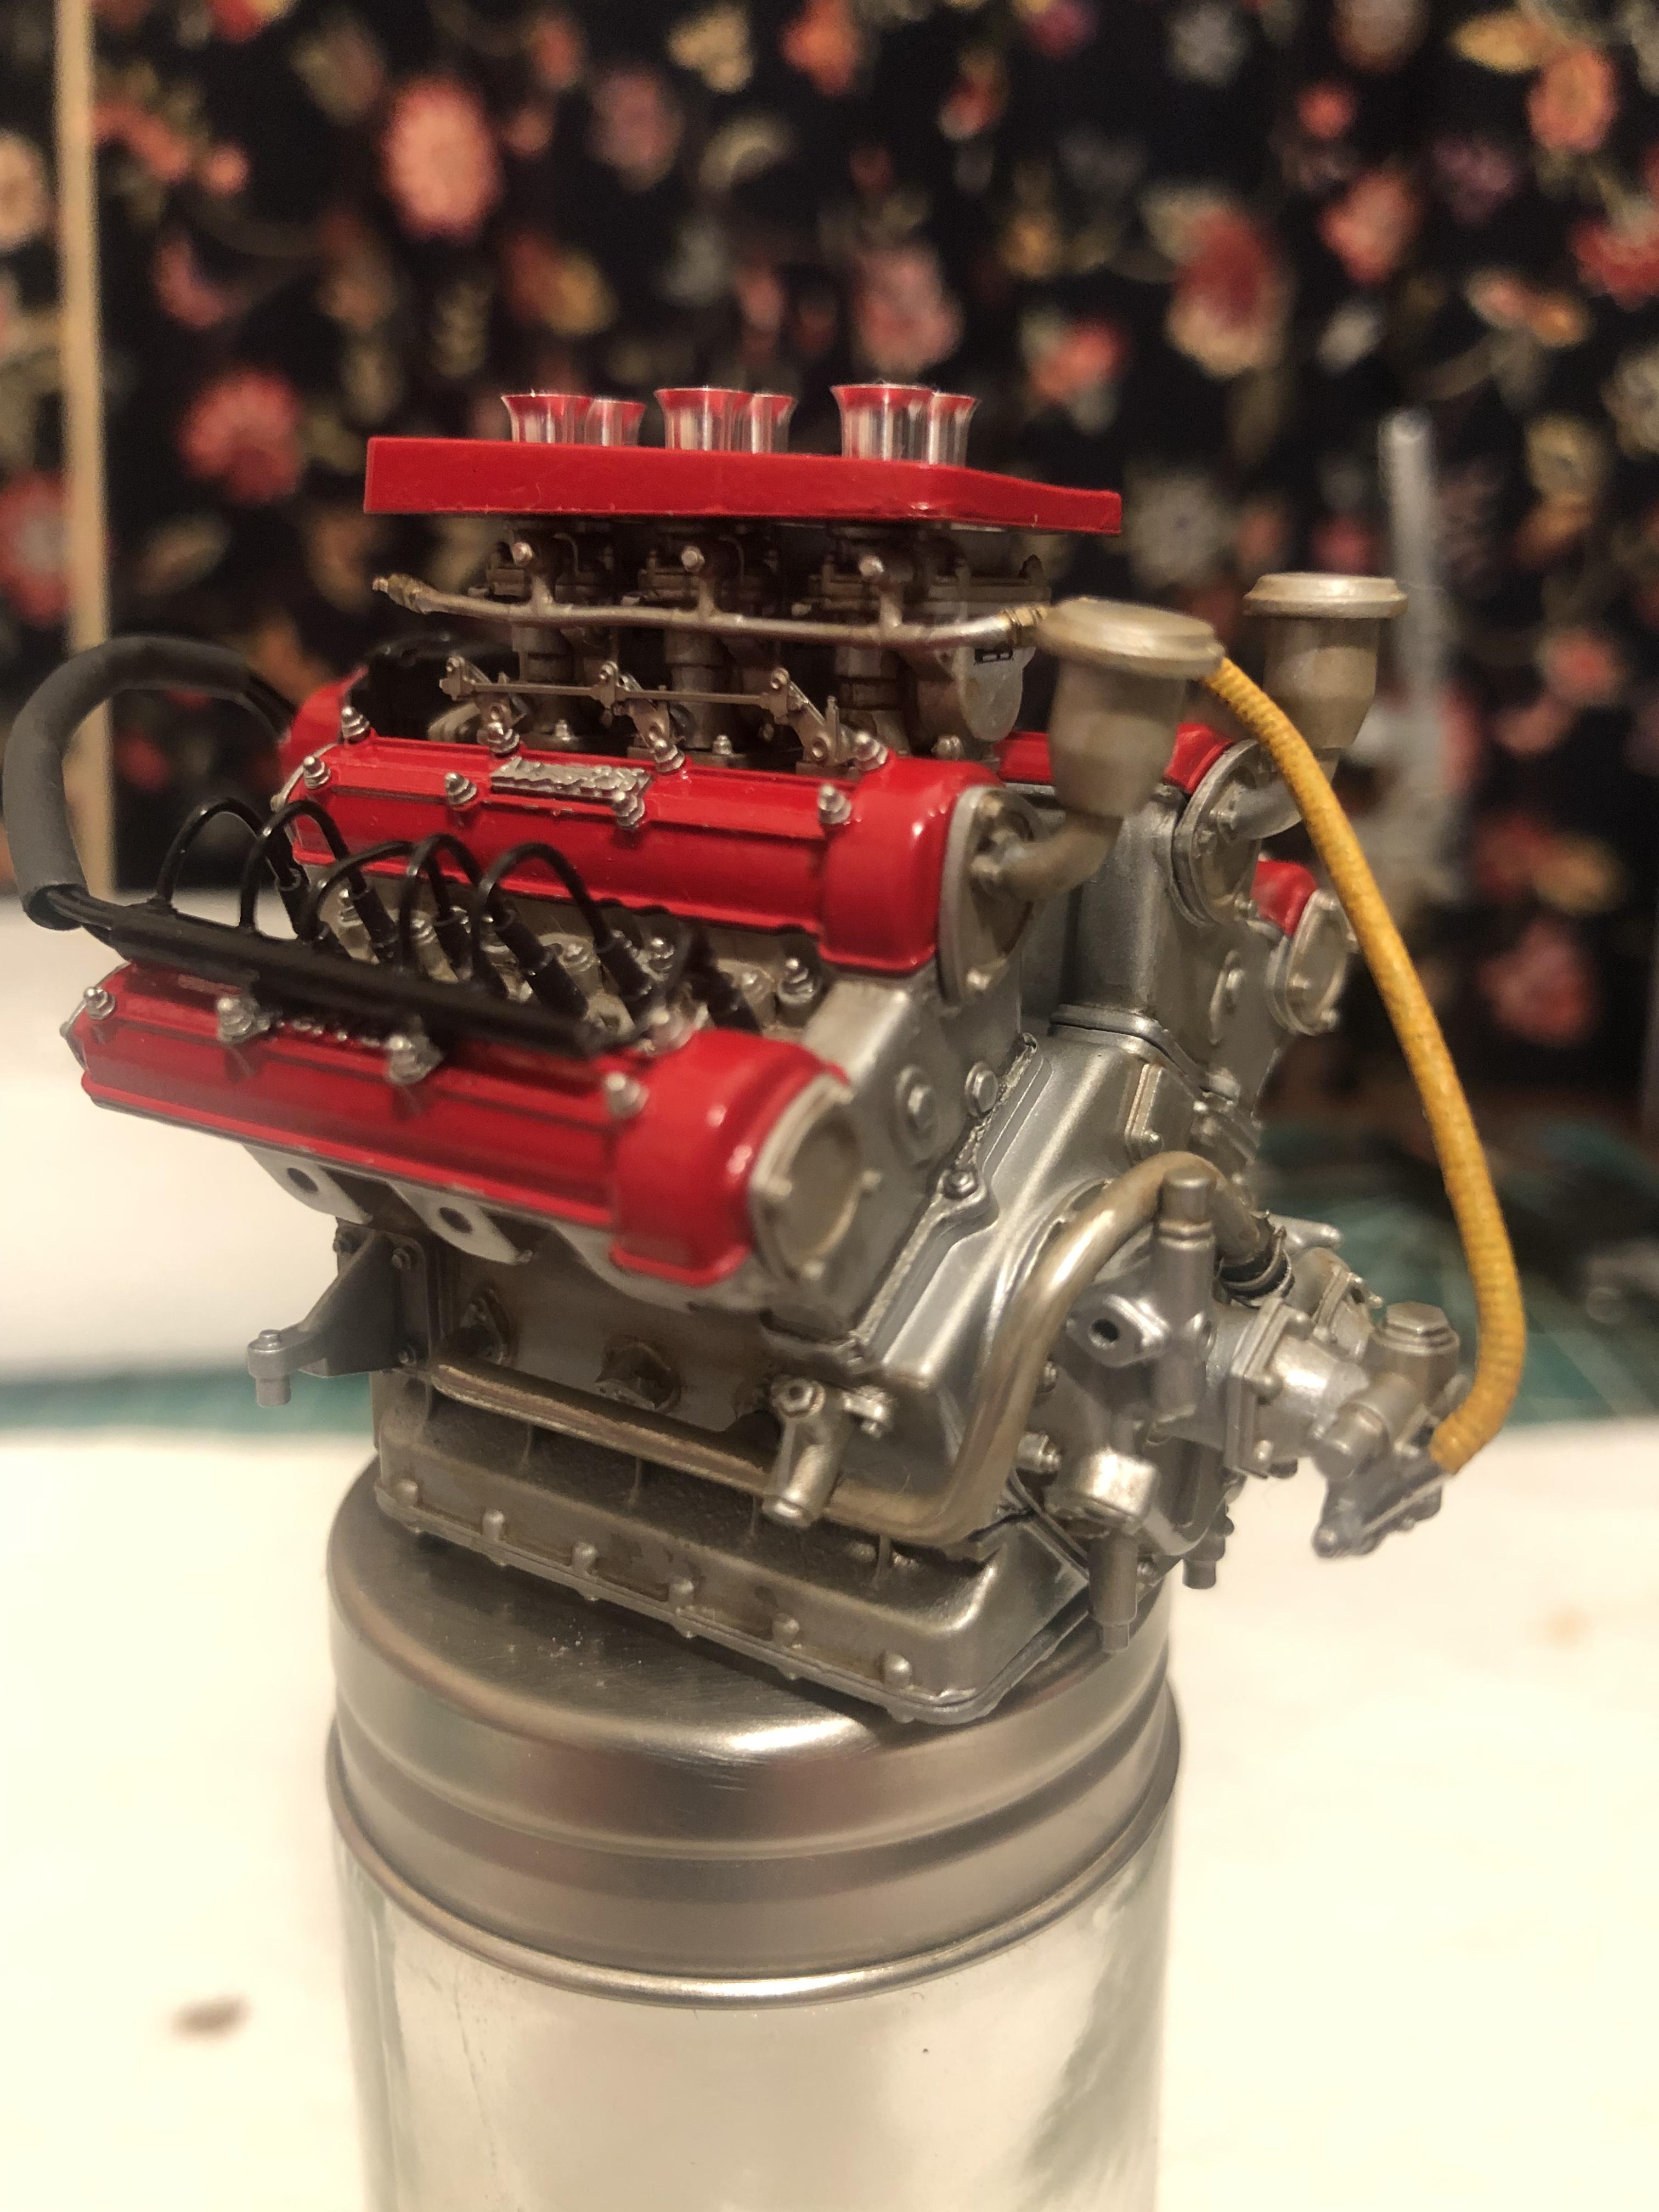
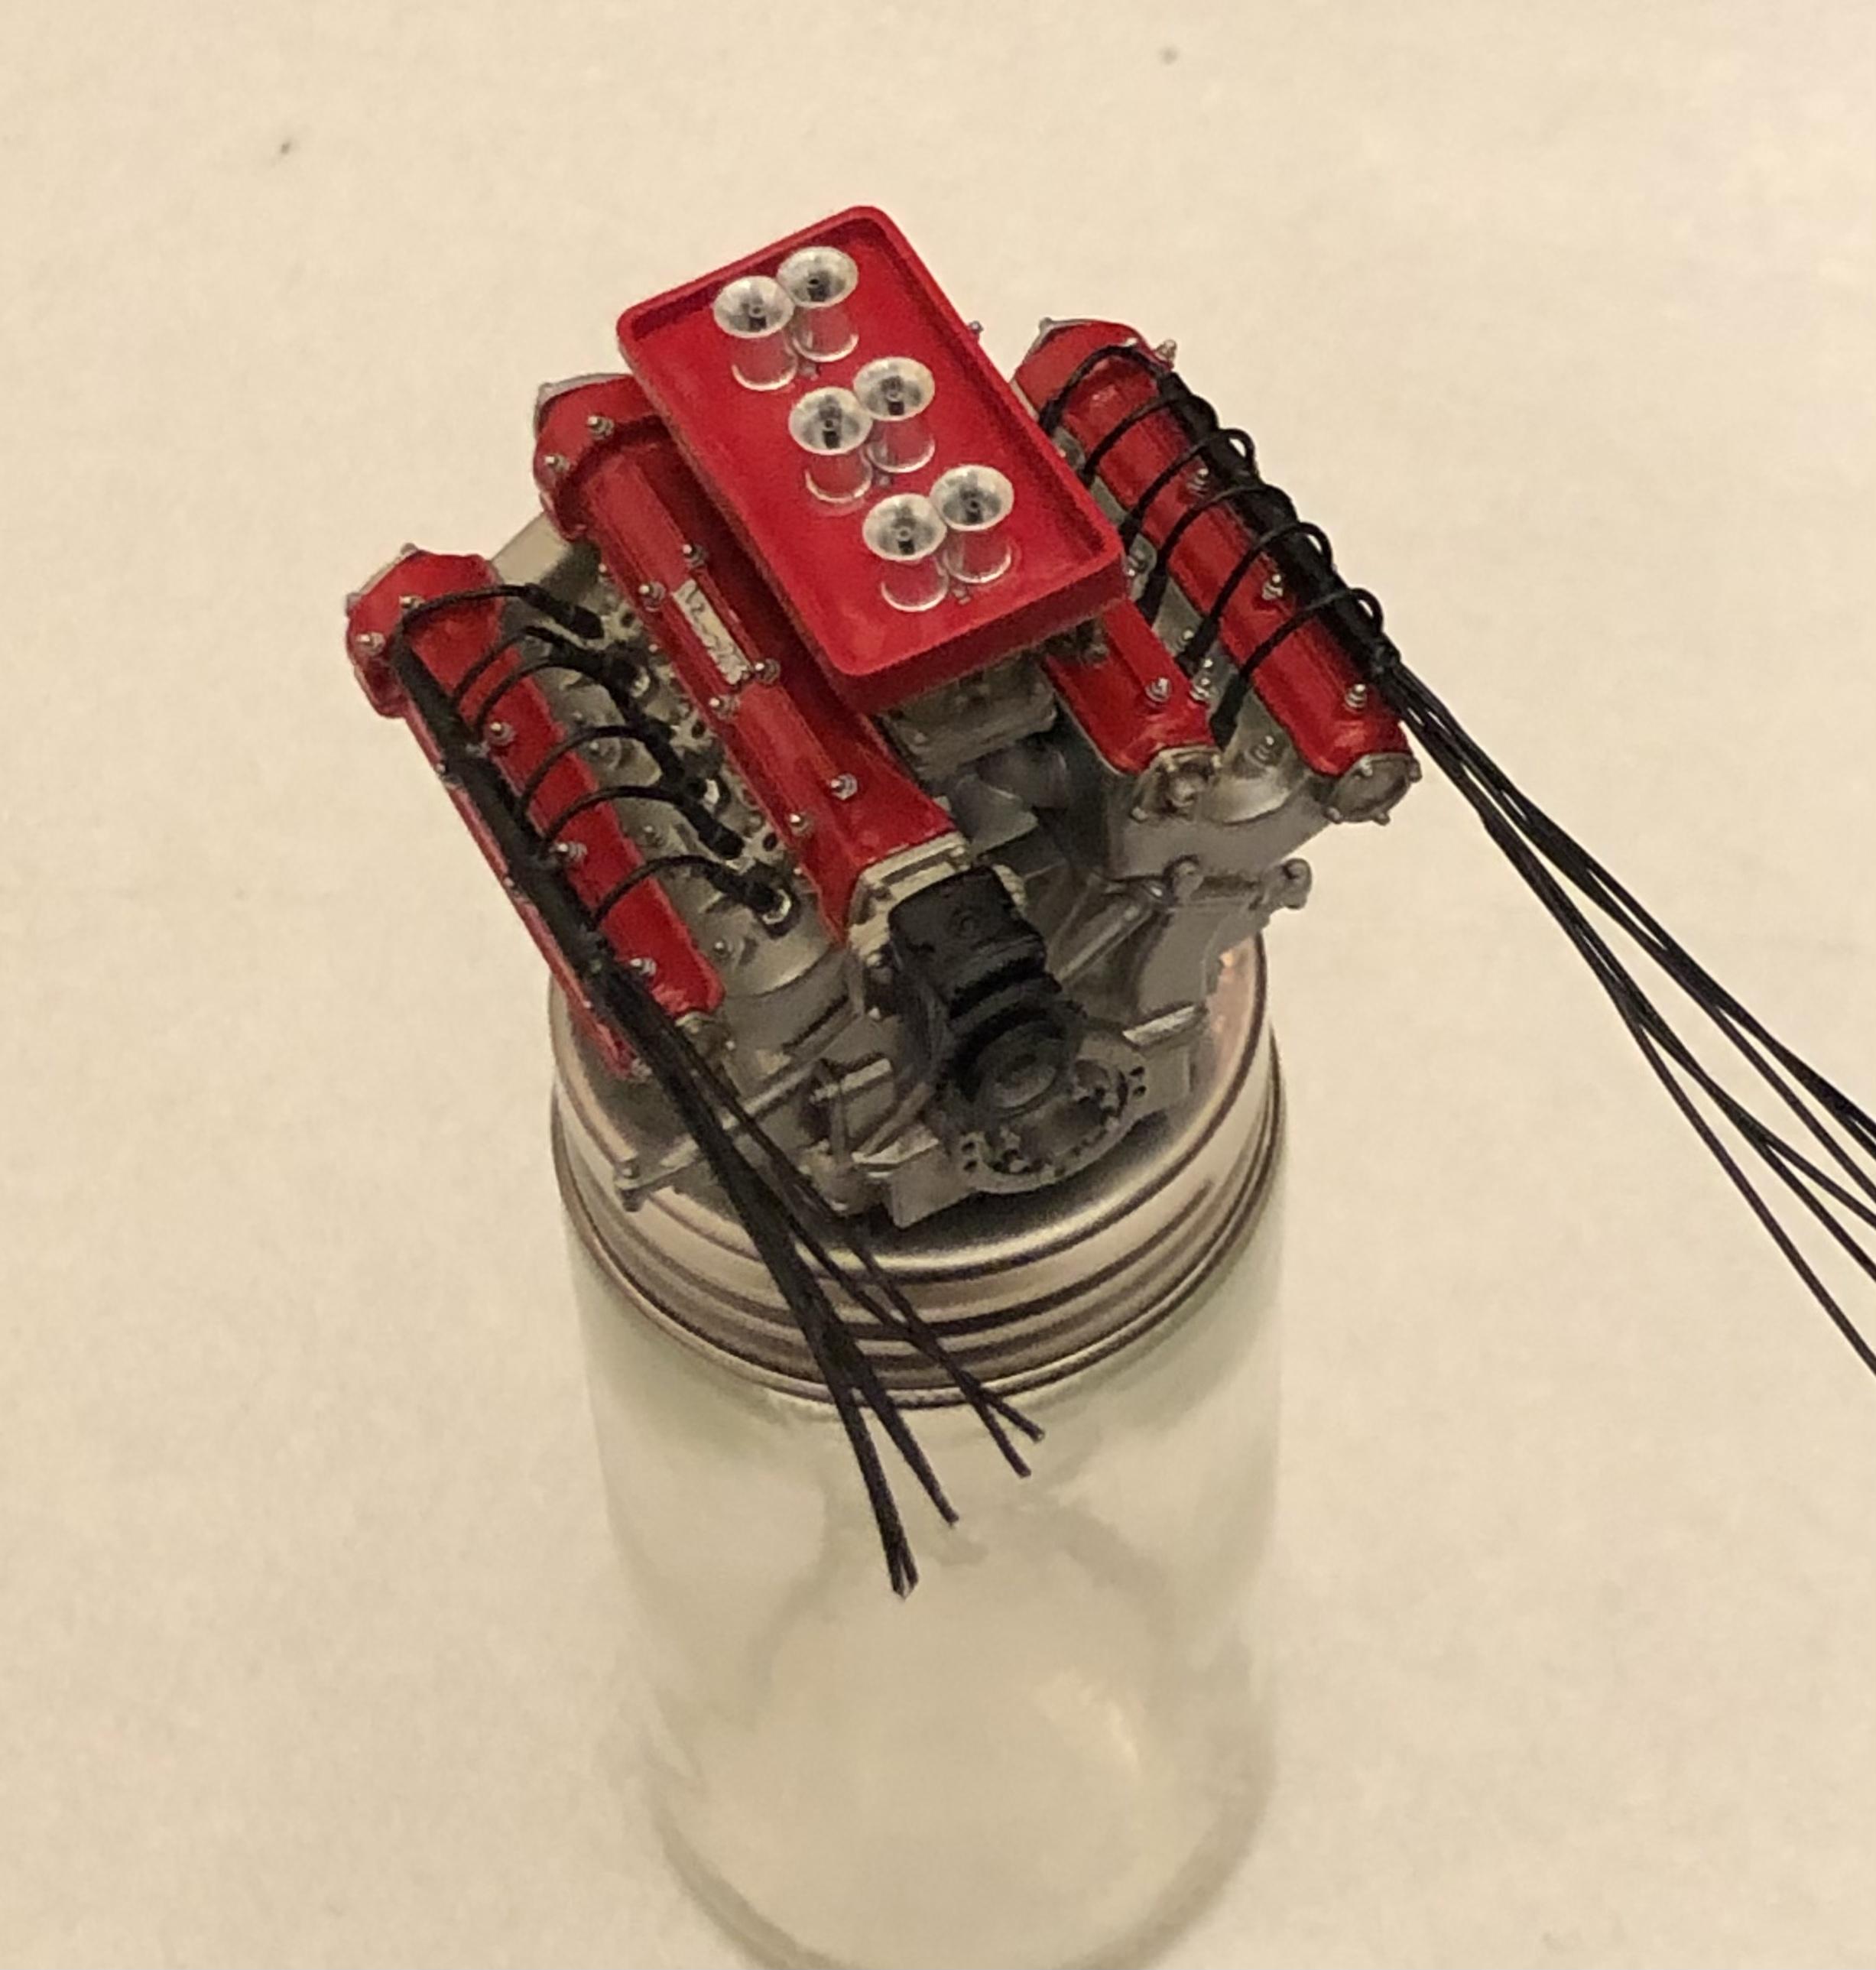
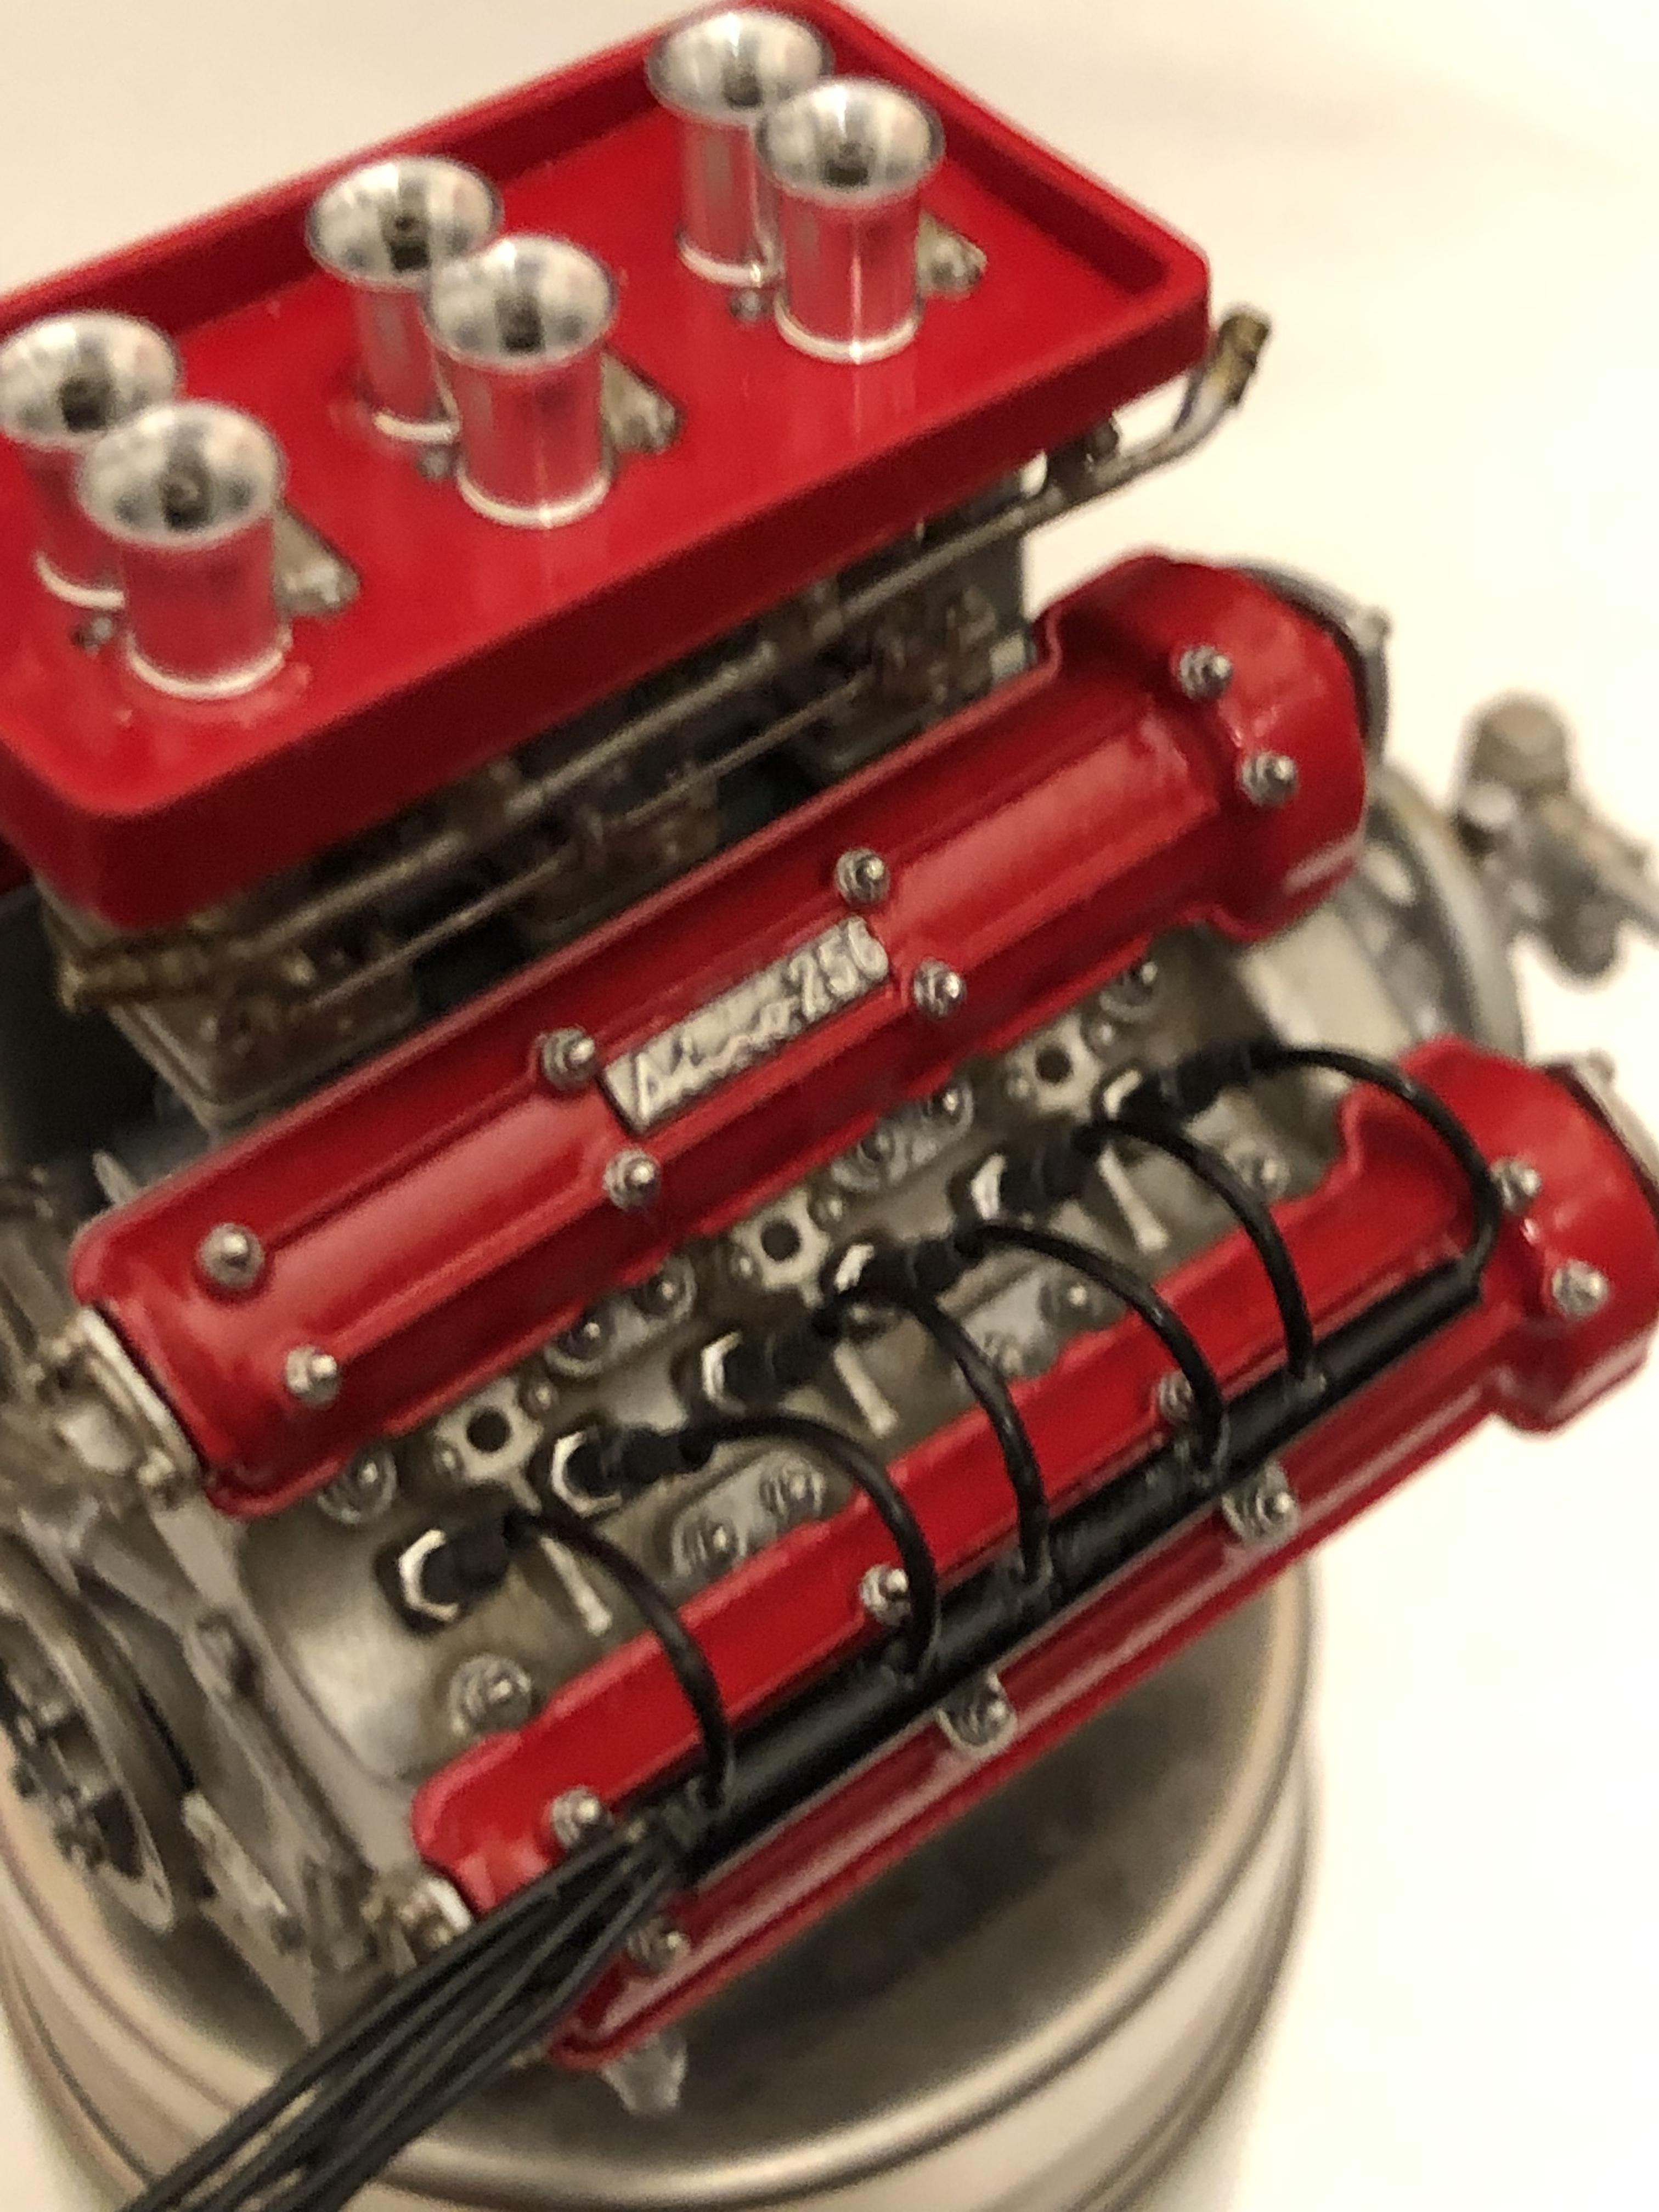
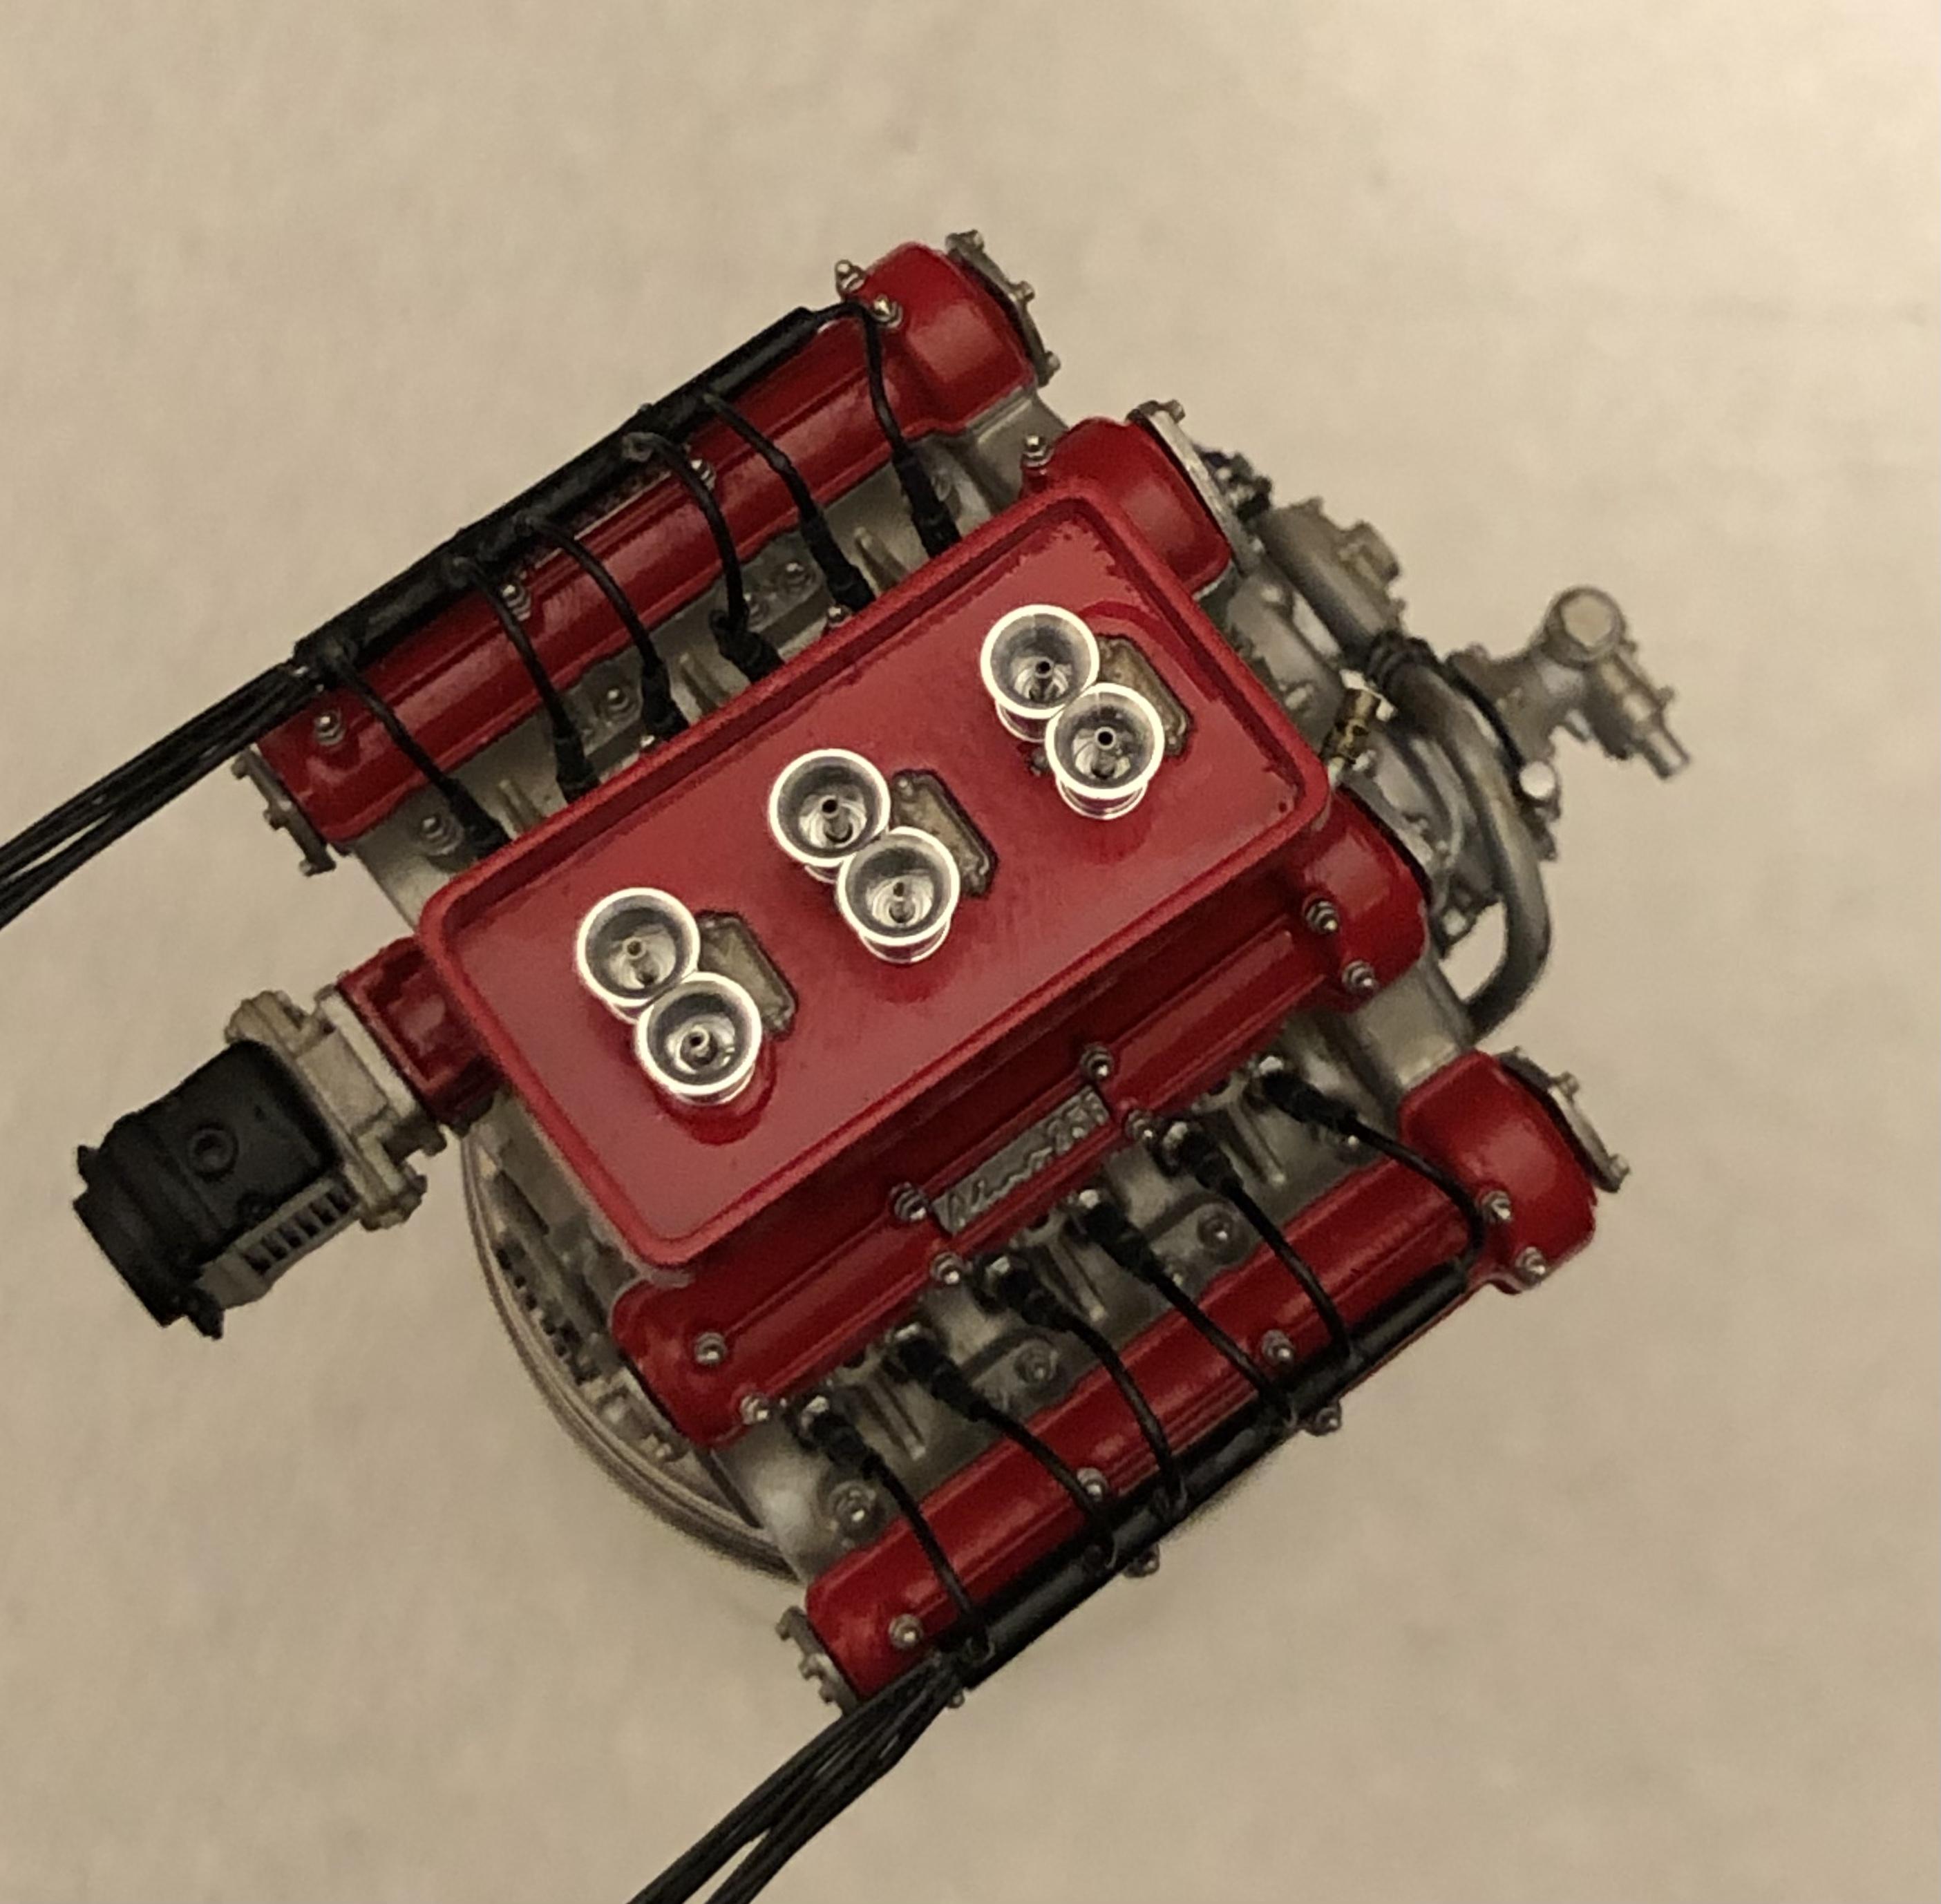
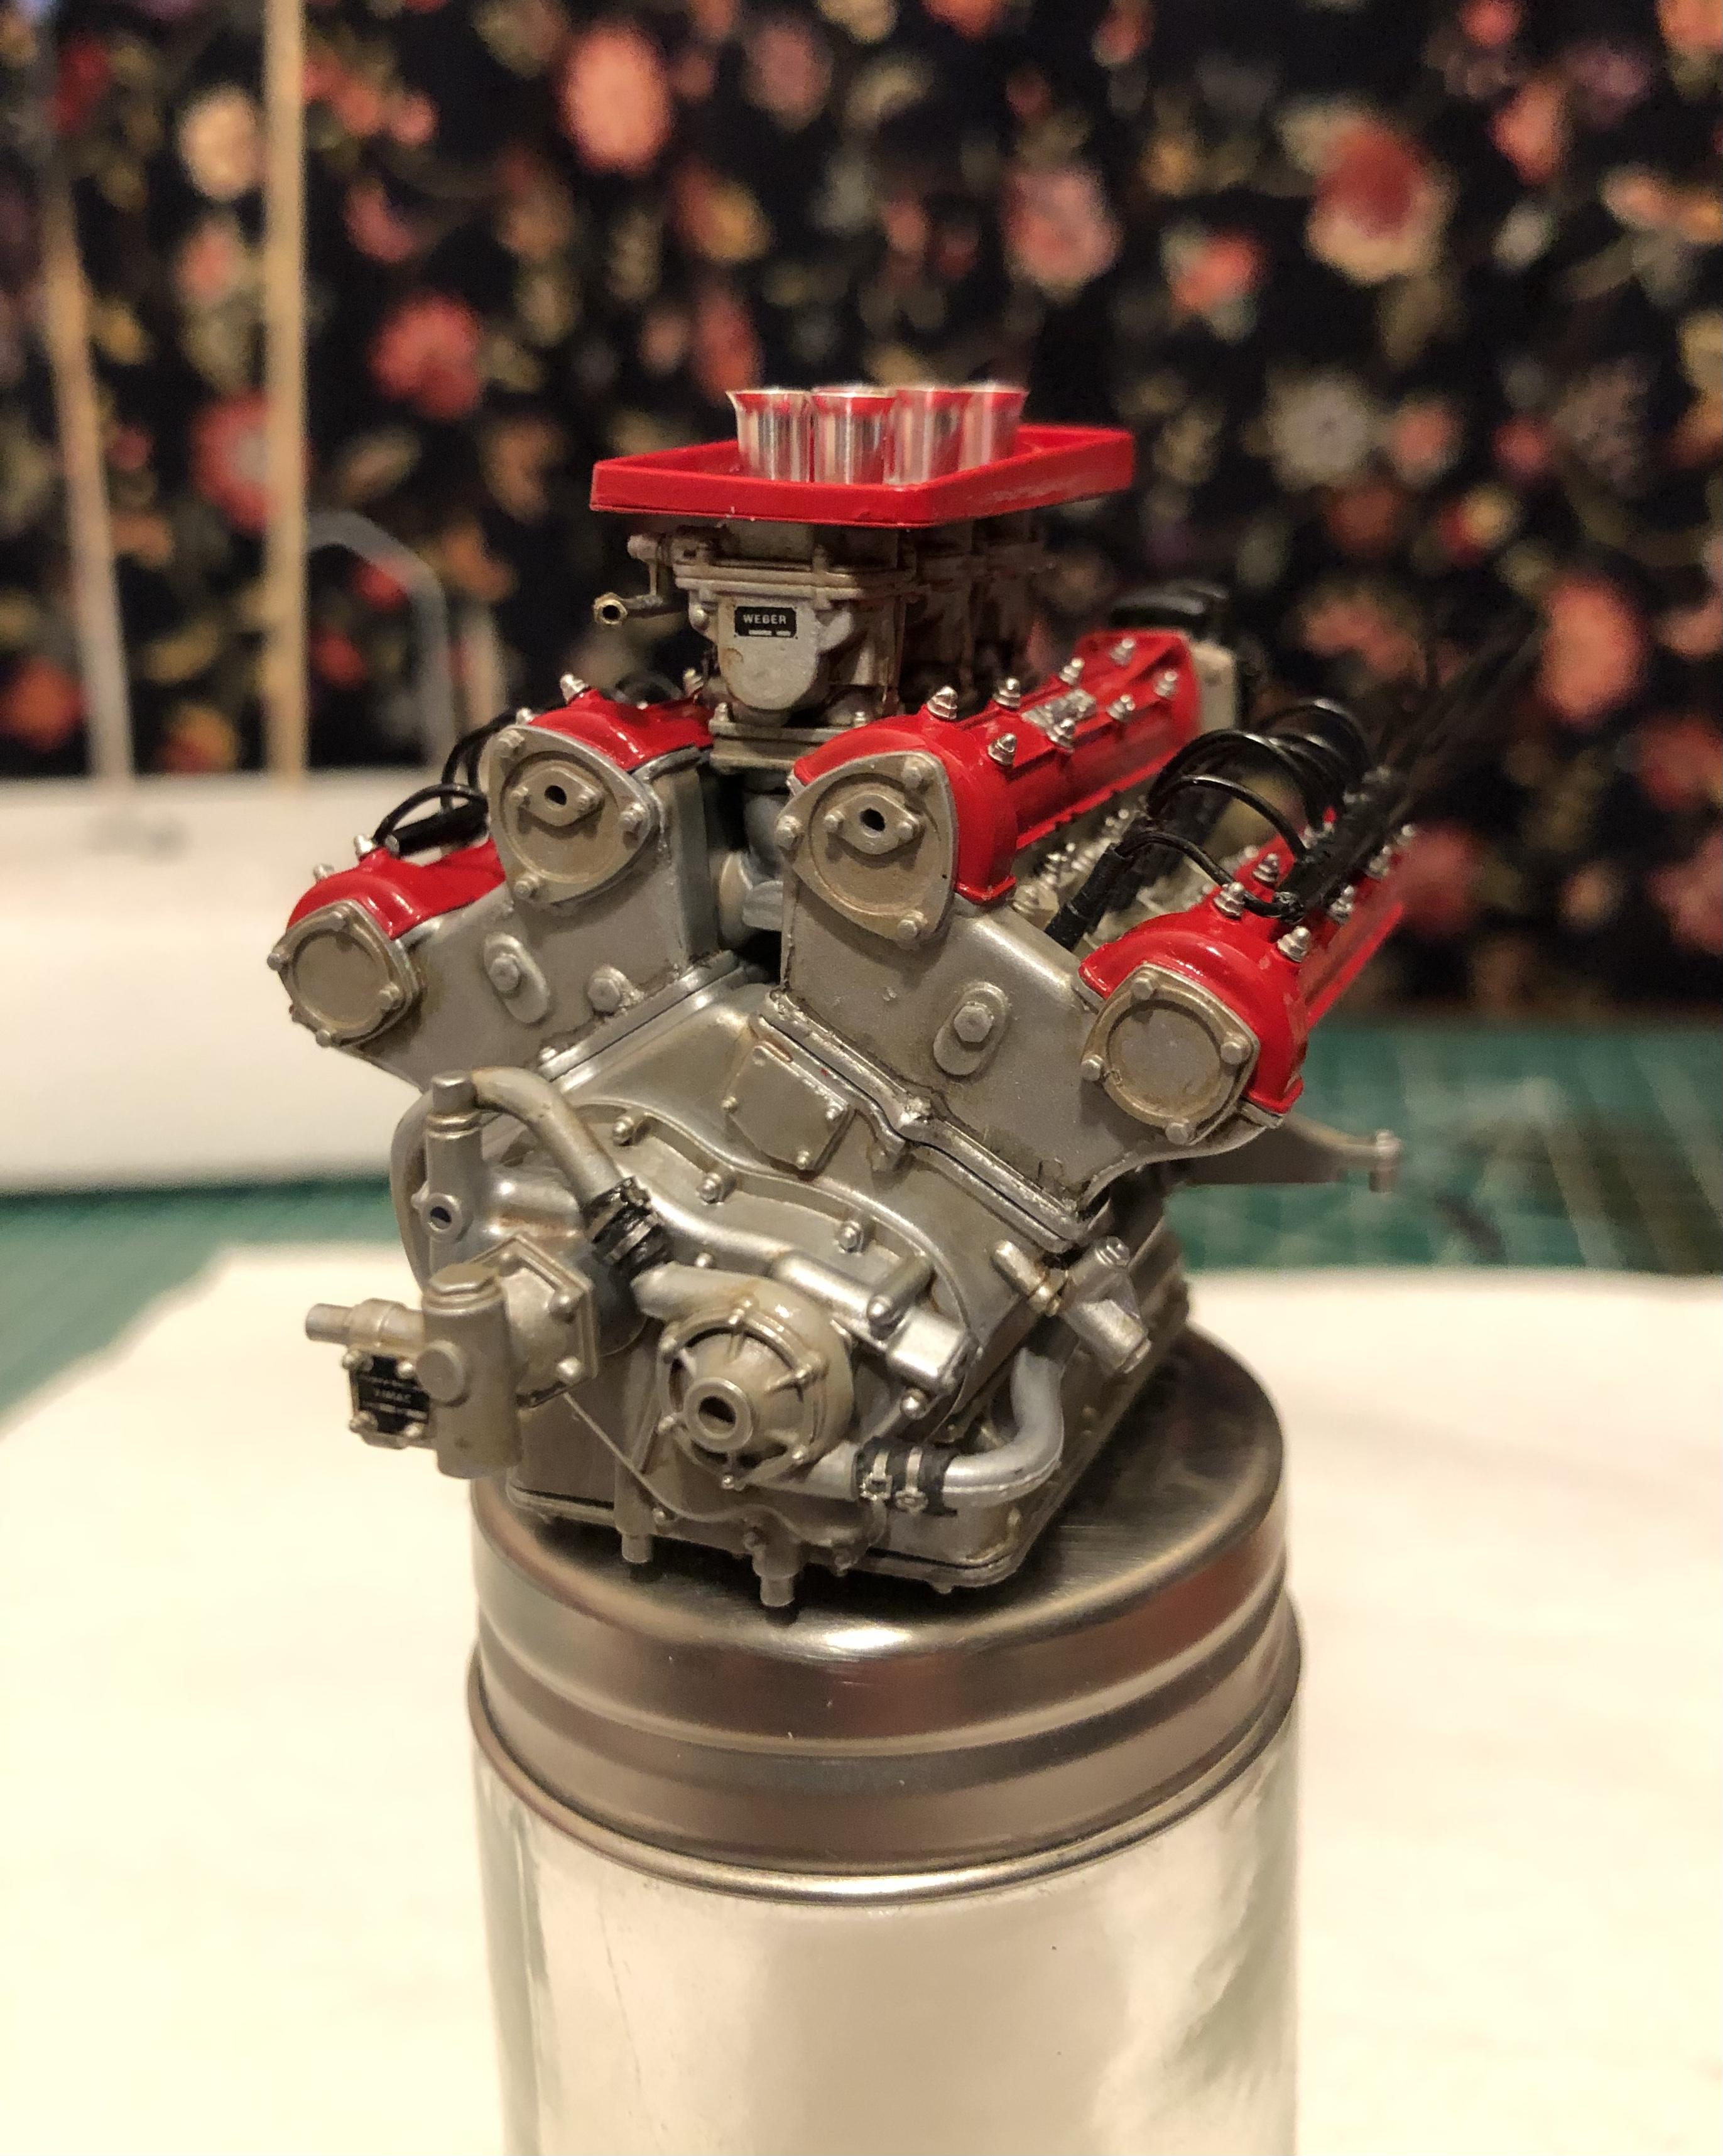
I’ll try? I am using Alclad aluminum over Tamiya grey primer the other paints are Tamiya red and semi gloss black I have been using Tamiya brown panel liner for a quick wash to give it depth. Okay, here is what I have completed so far. I still need to finish wiring the ignition, then I can move onto the frame -
1960 Ferrari 256F1
Chris Smith replied to Chris Smith's topic in WIP: Other Racing: Road Racing, Land Speed Racers
Thank you -
1960 Ferrari 256F1
Chris Smith replied to Chris Smith's topic in WIP: Other Racing: Road Racing, Land Speed Racers
I am almost done with the 935, I broke one of the door hinges, so I am waiting on the replacement to arrive. I kind of just jumped in with two feet and never looked back. I do suggest a good set of metric drill bits .04mm-2.0mm a magnetic tumbler, makes cleaning and polishing the white metal easy, a good set of files. I will say a lot of patience and you have to think and prep multiple steps in advance and always dry fit multiple times to absolutely make sure it is correct before painting. There are a couple groups on Facebook that have super talented people who build Hiro kits, check them out? thanks for checking in -
1960 Ferrari 256F1
Chris Smith replied to Chris Smith's topic in WIP: Other Racing: Road Racing, Land Speed Racers
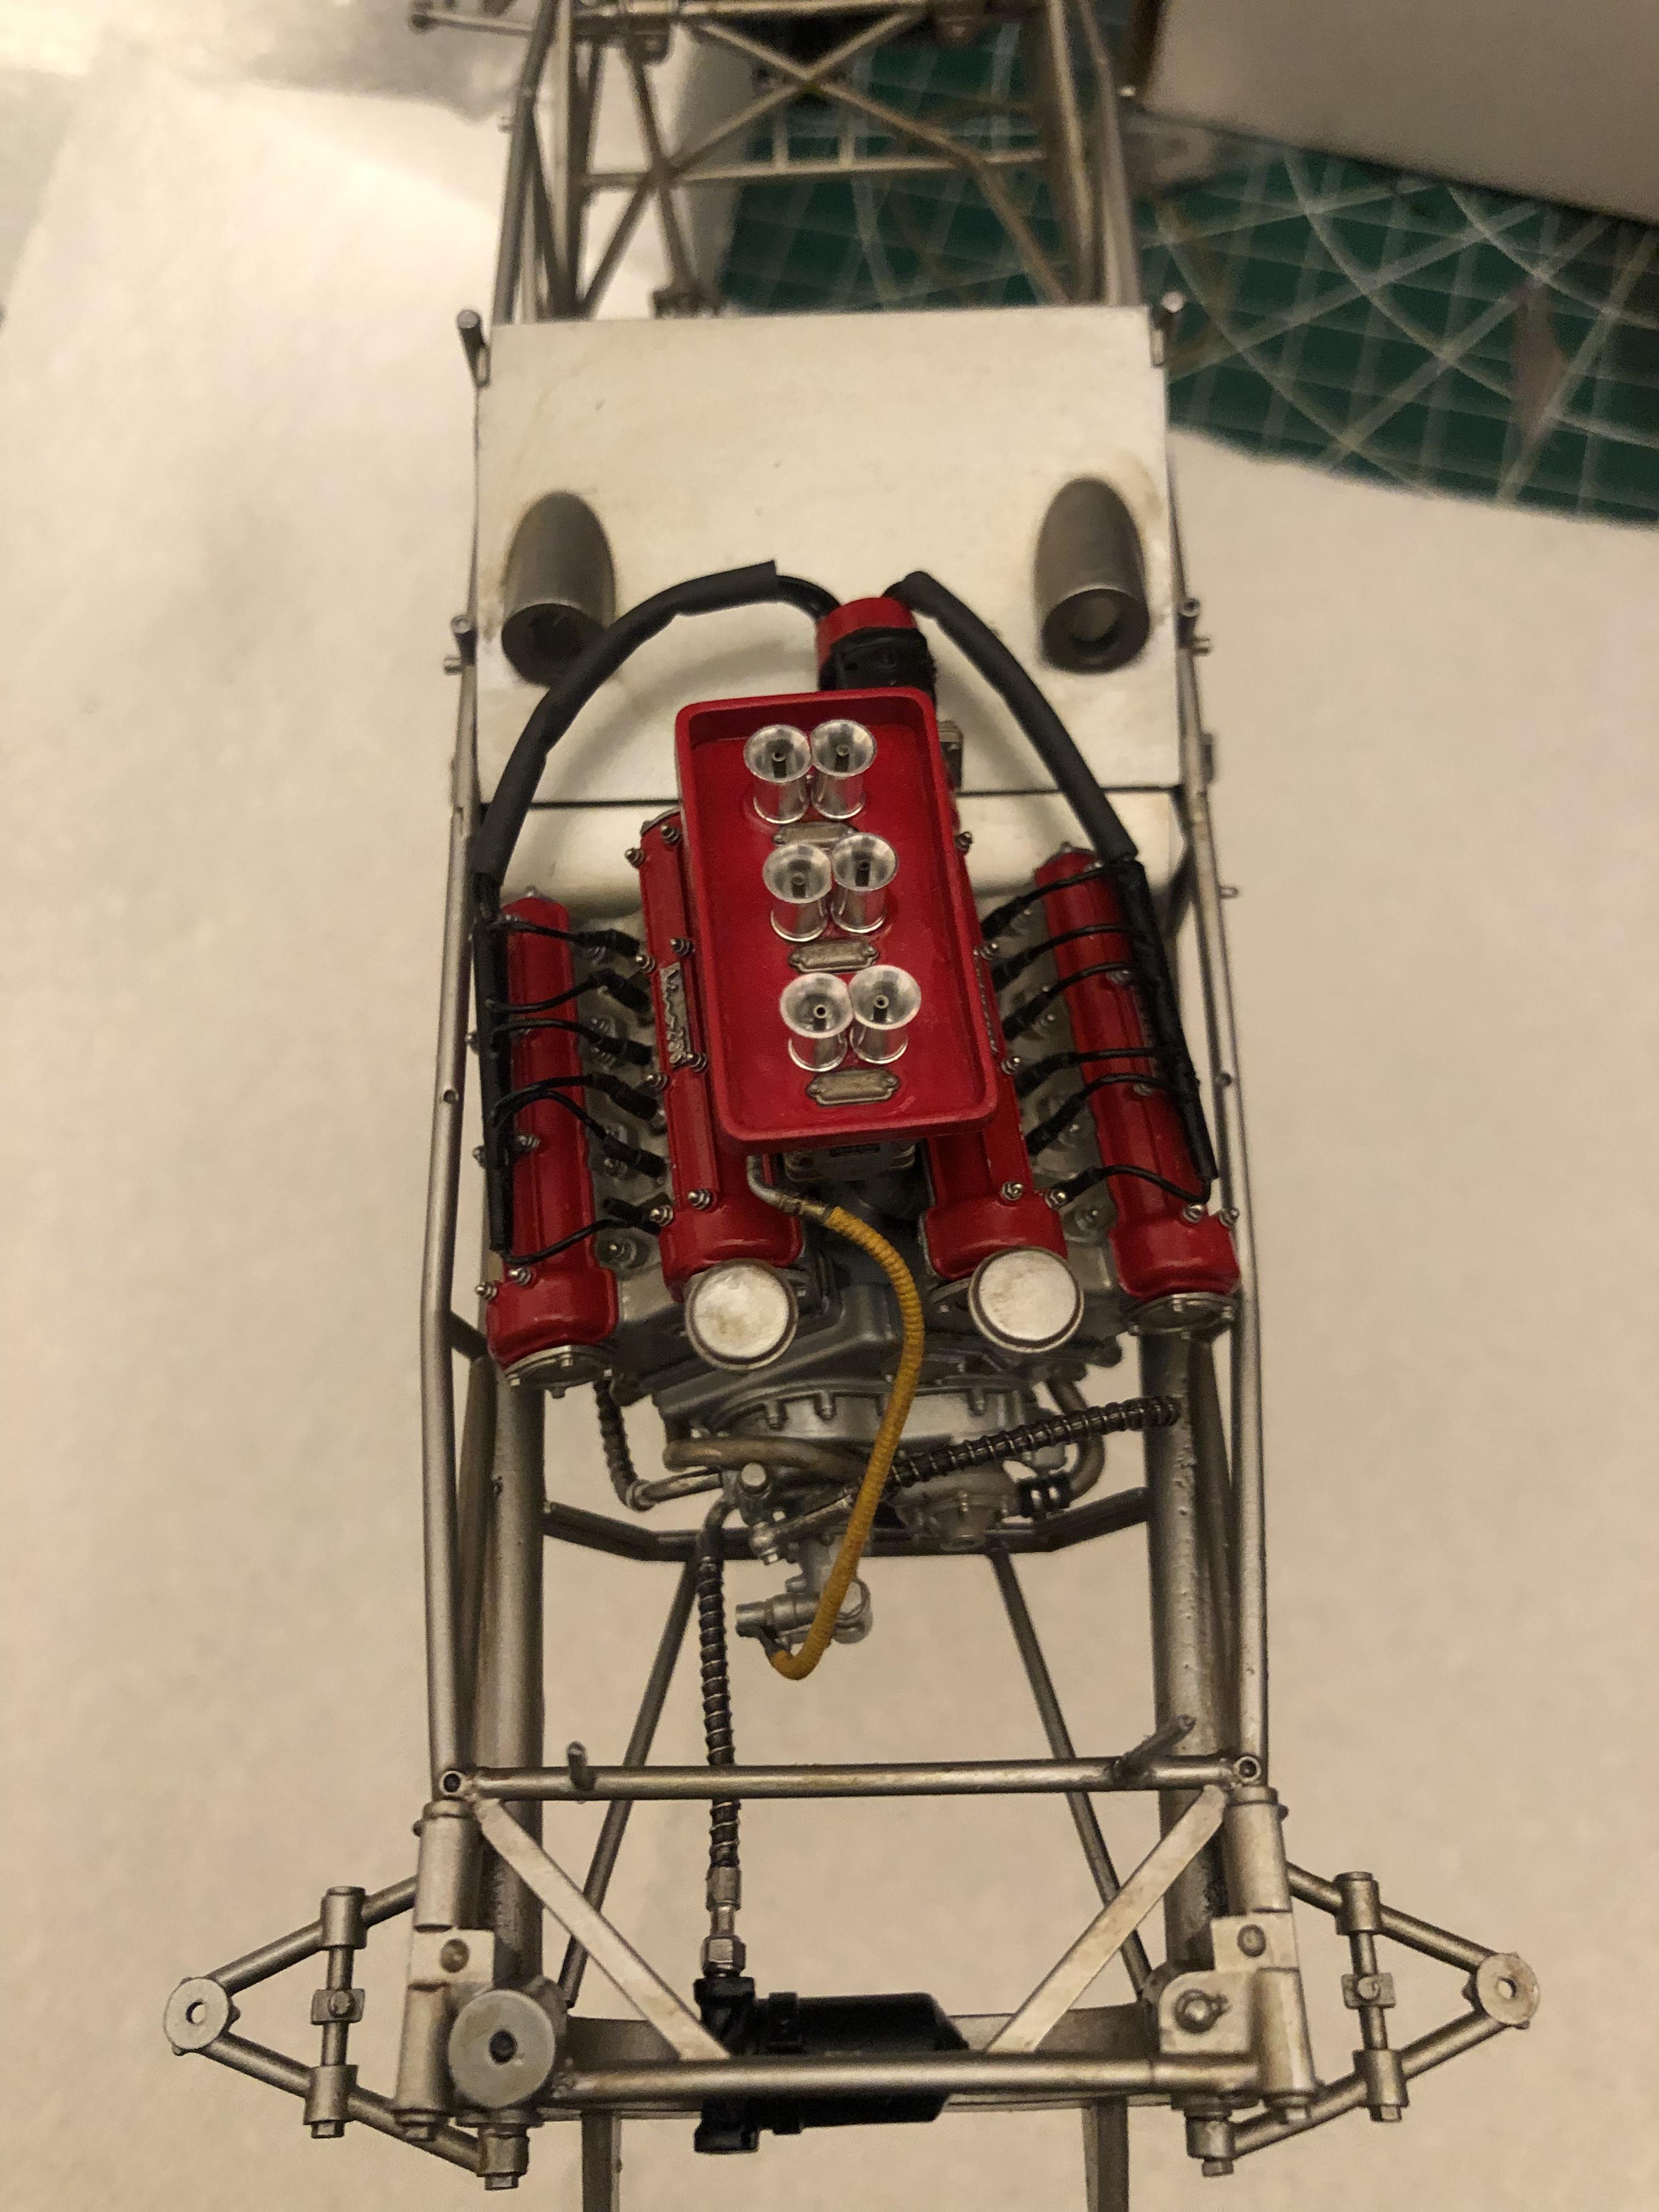
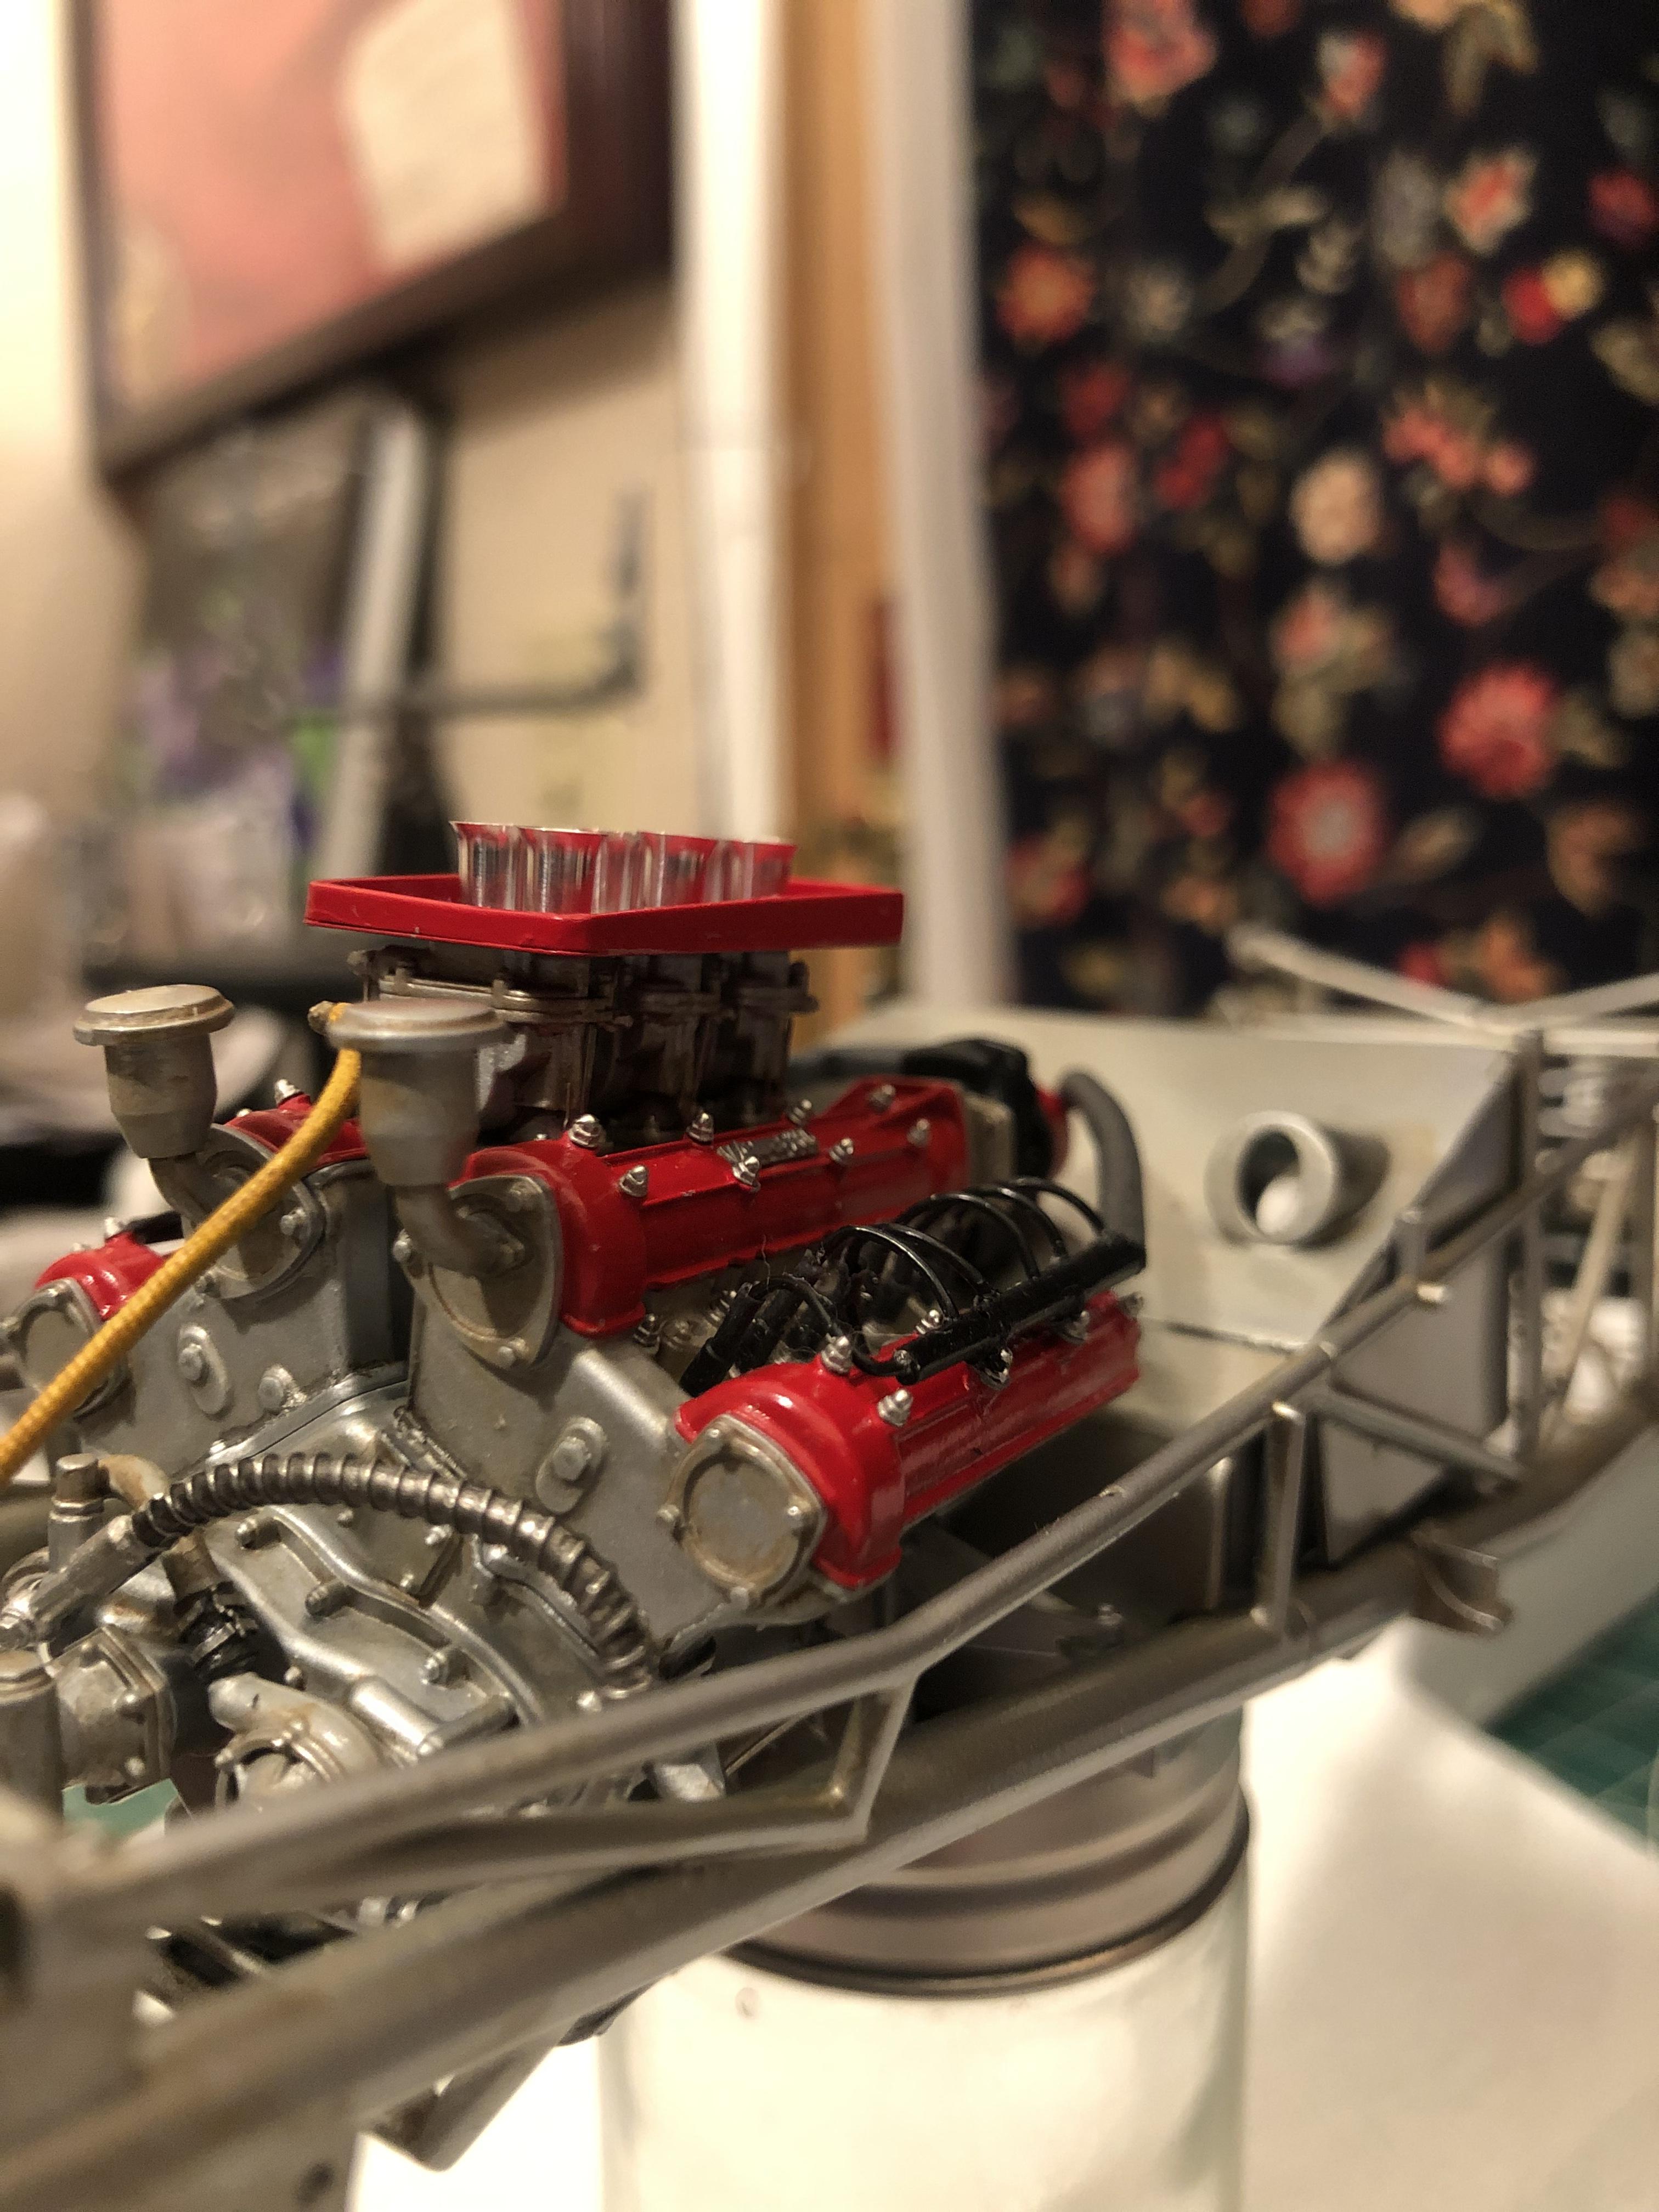
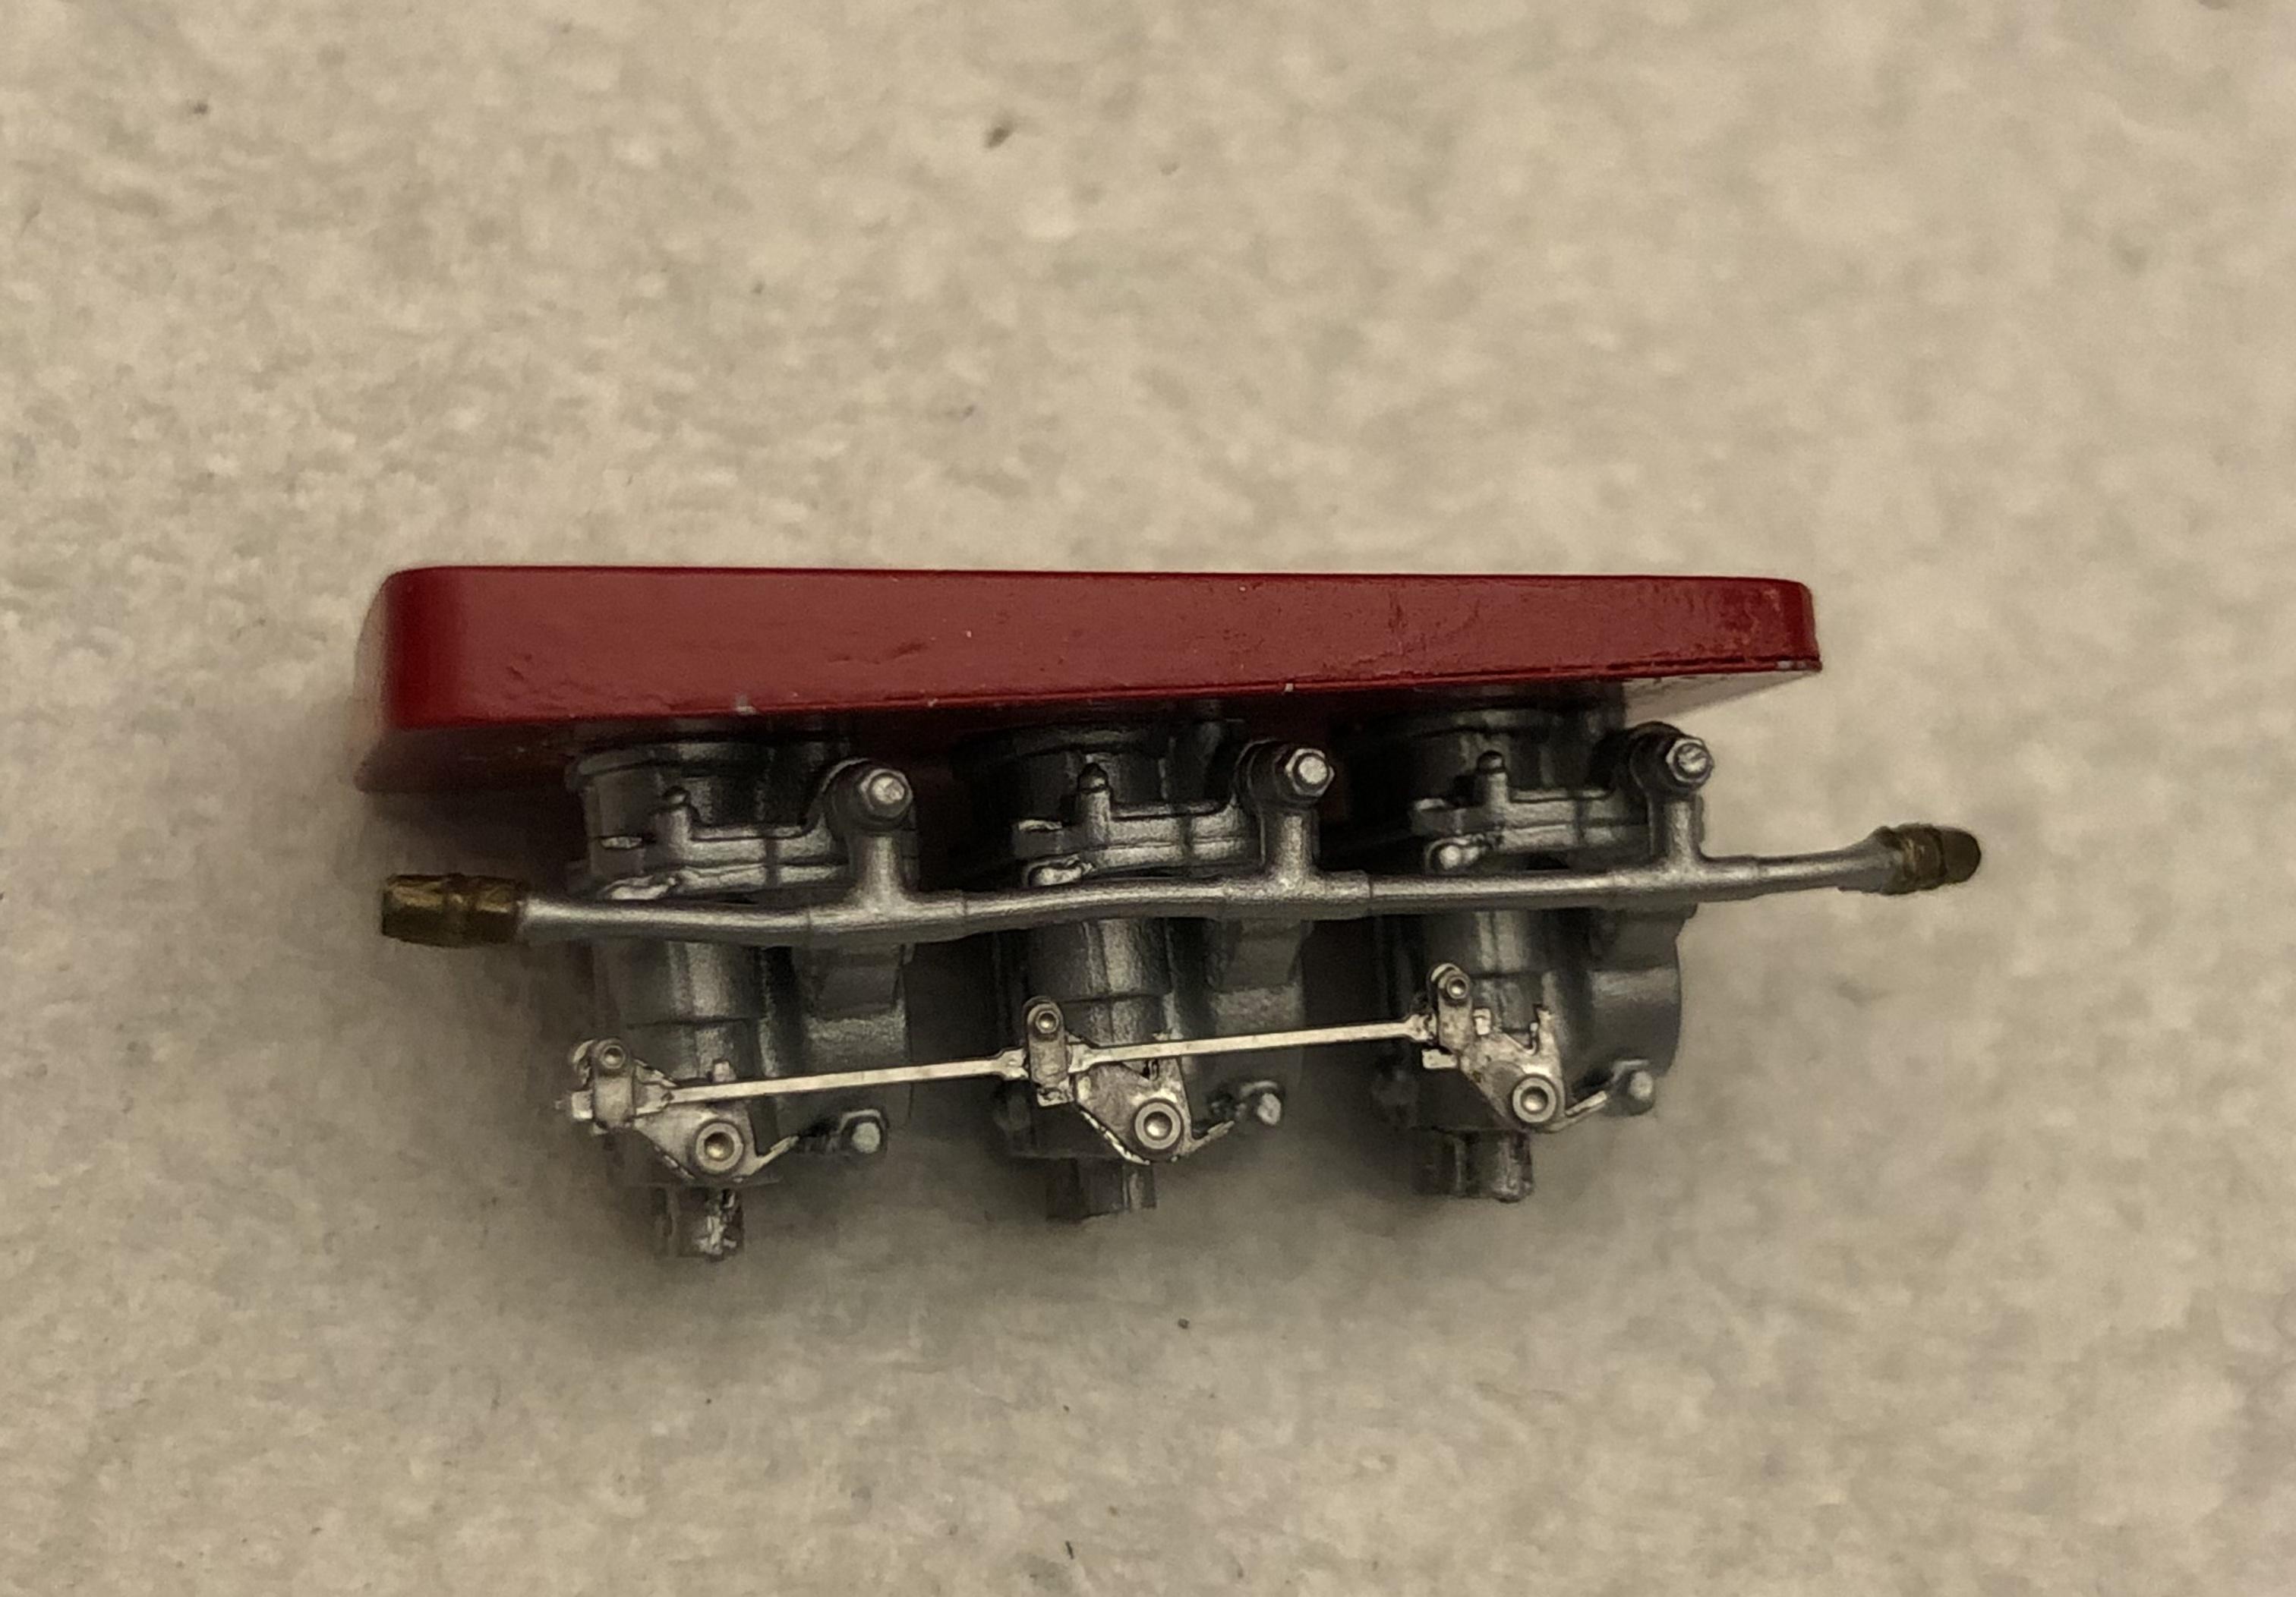
Webber carbs and linkage
-
1960 Ferrari 256F1
Chris Smith replied to Chris Smith's topic in WIP: Other Racing: Road Racing, Land Speed Racers
Thank you! I use Tamiya brown panel liner and a cotton bud -
1960 Ferrari 256F1
Chris Smith replied to Chris Smith's topic in WIP: Other Racing: Road Racing, Land Speed Racers
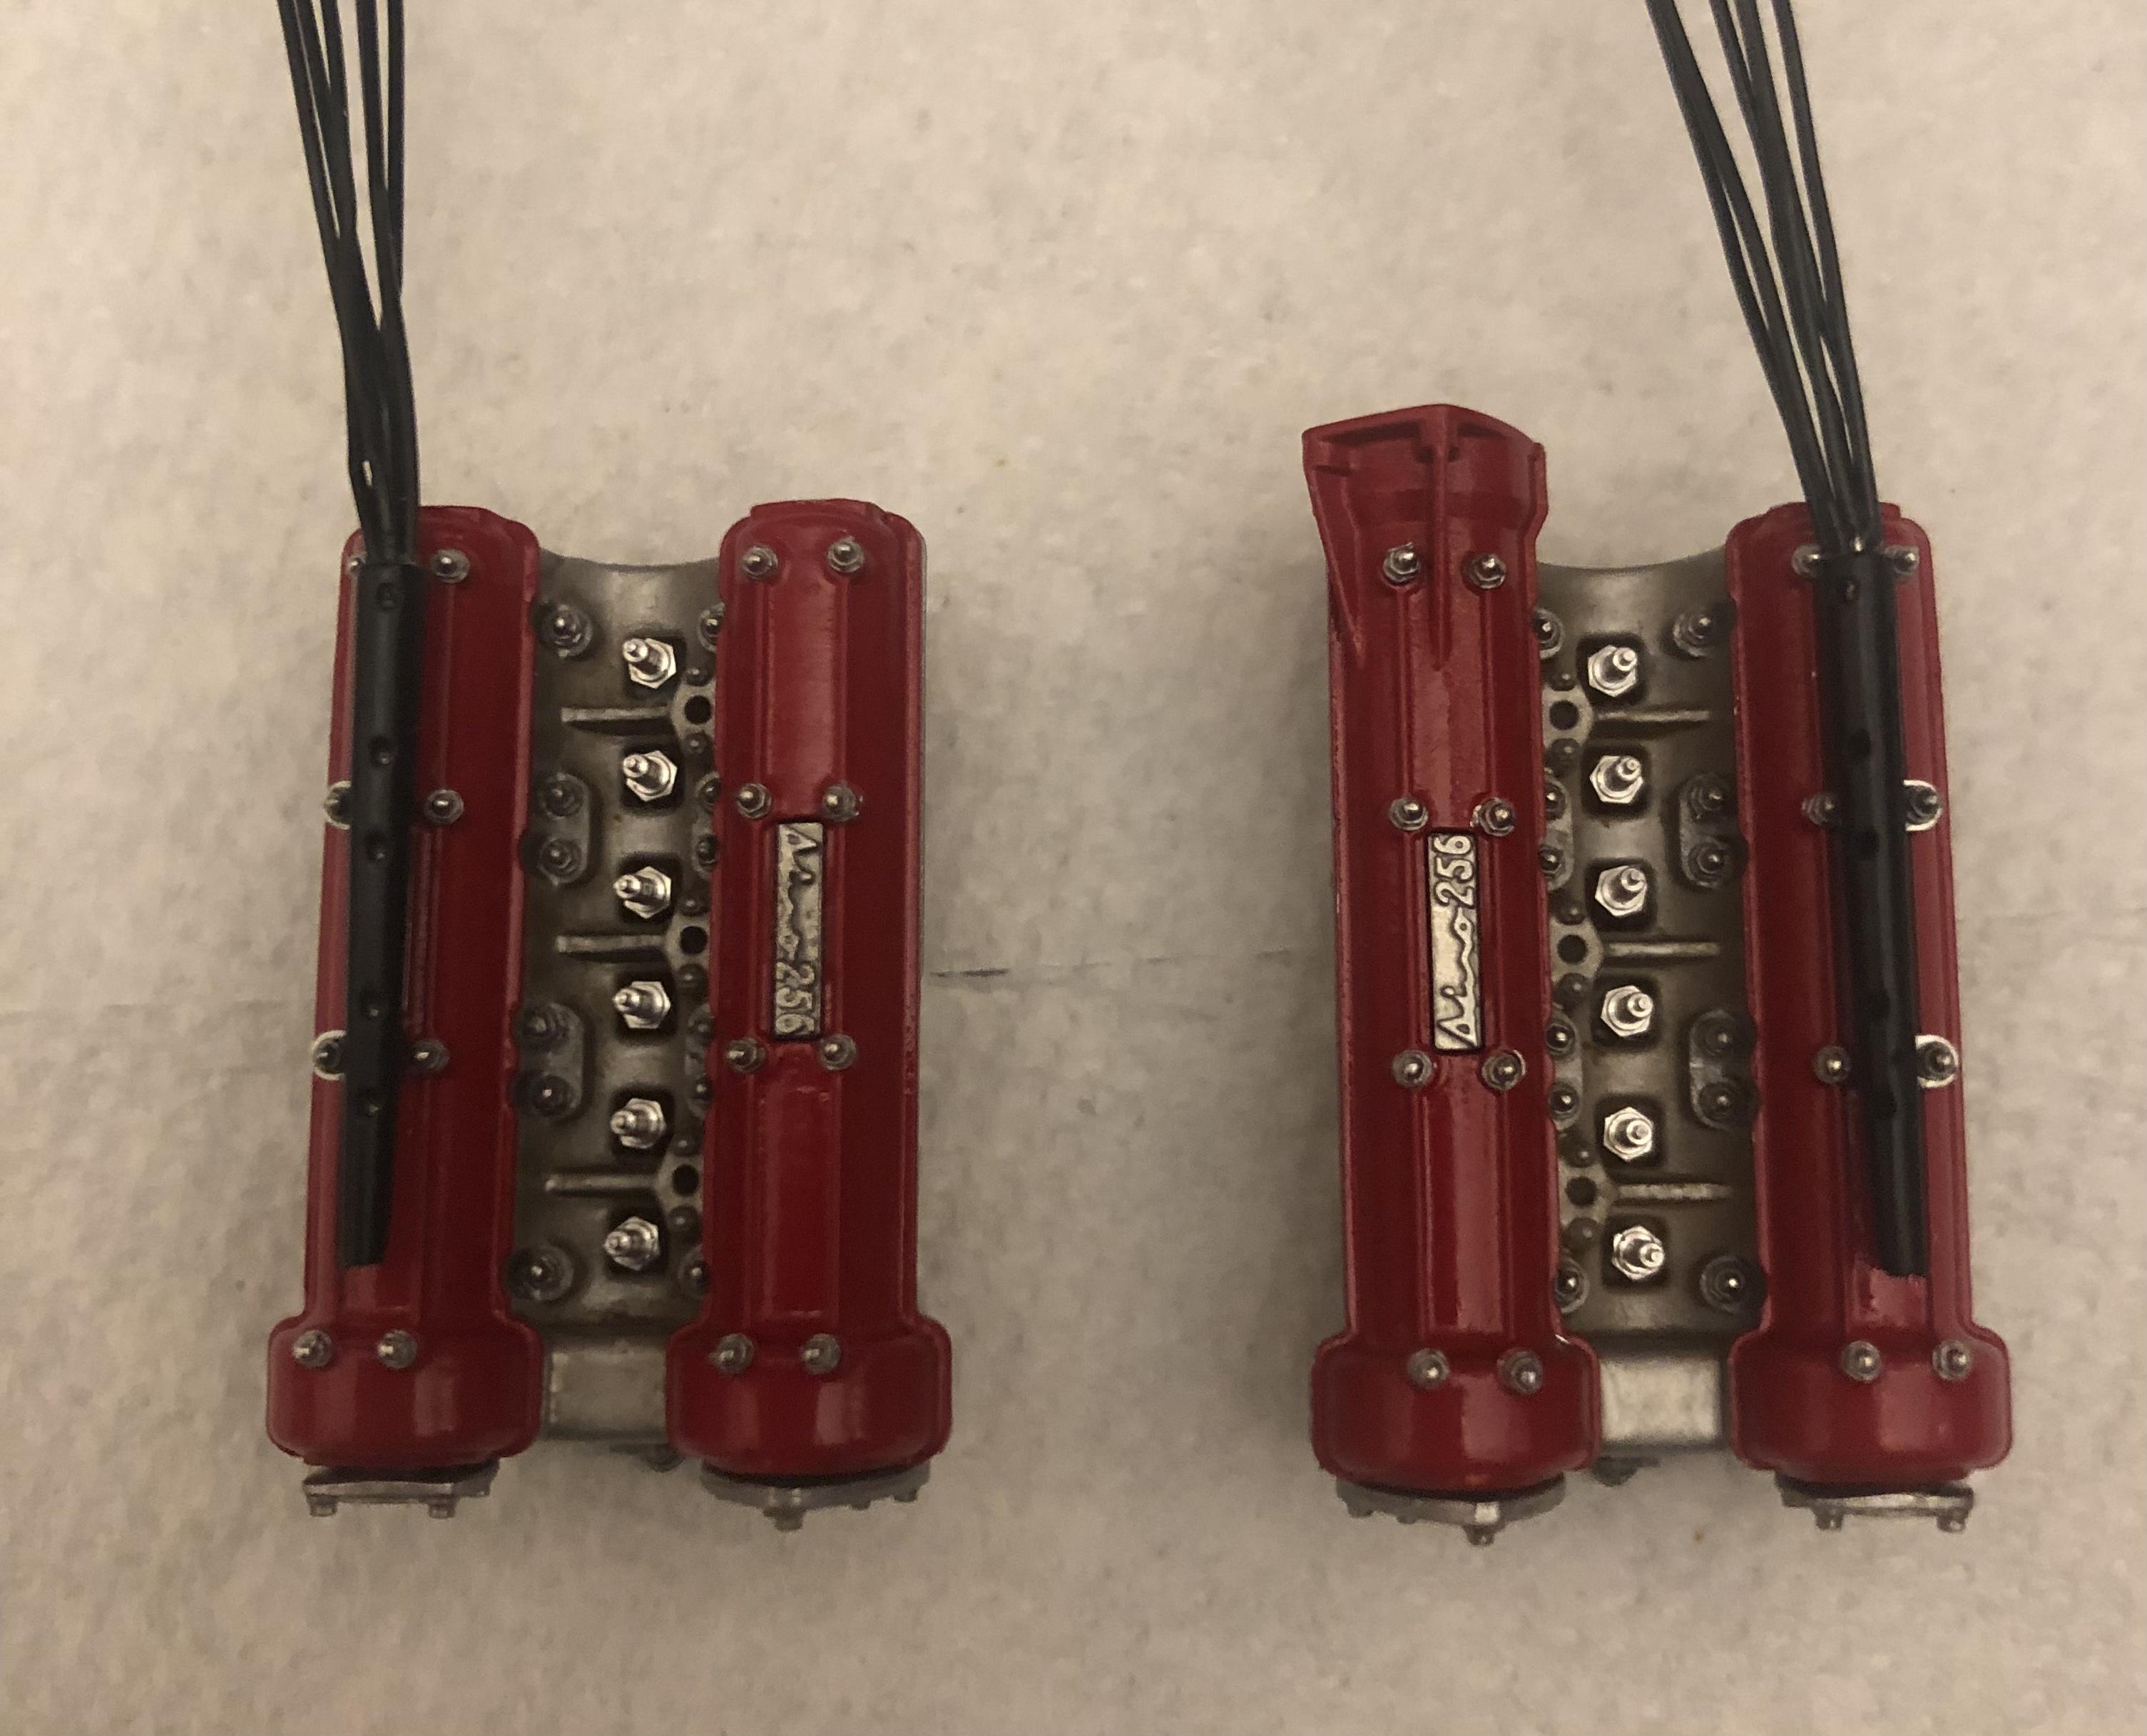
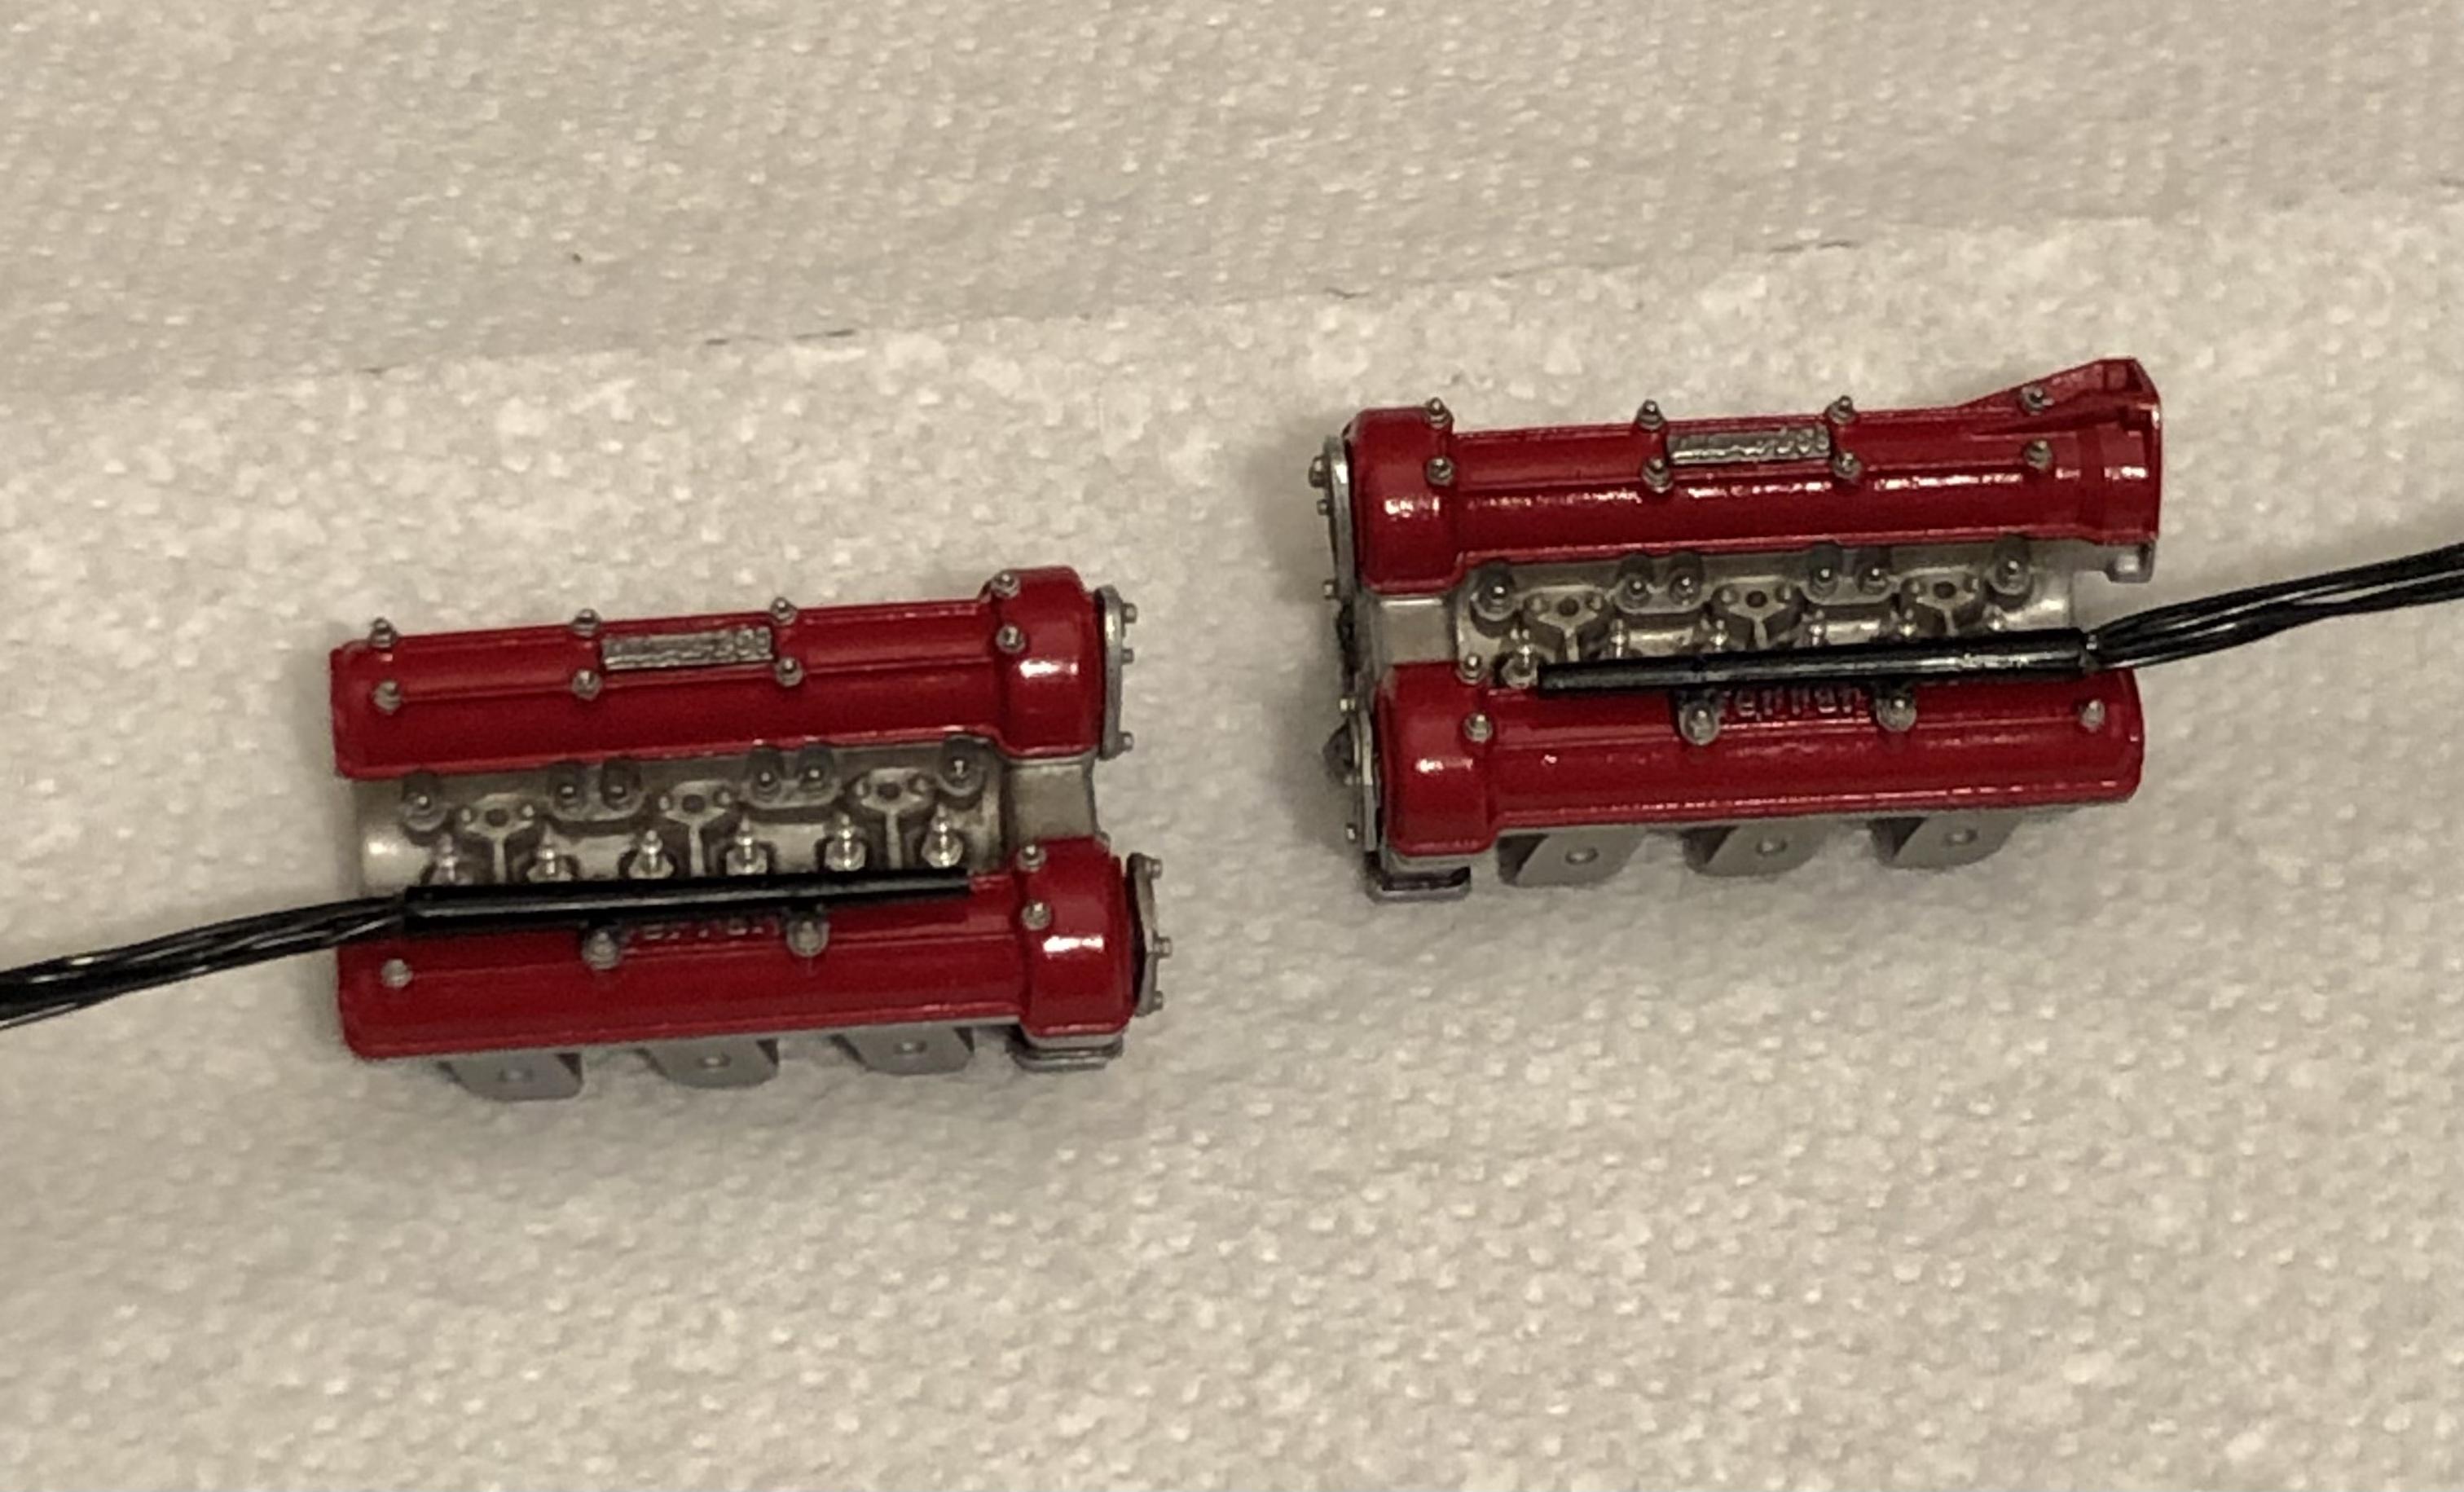
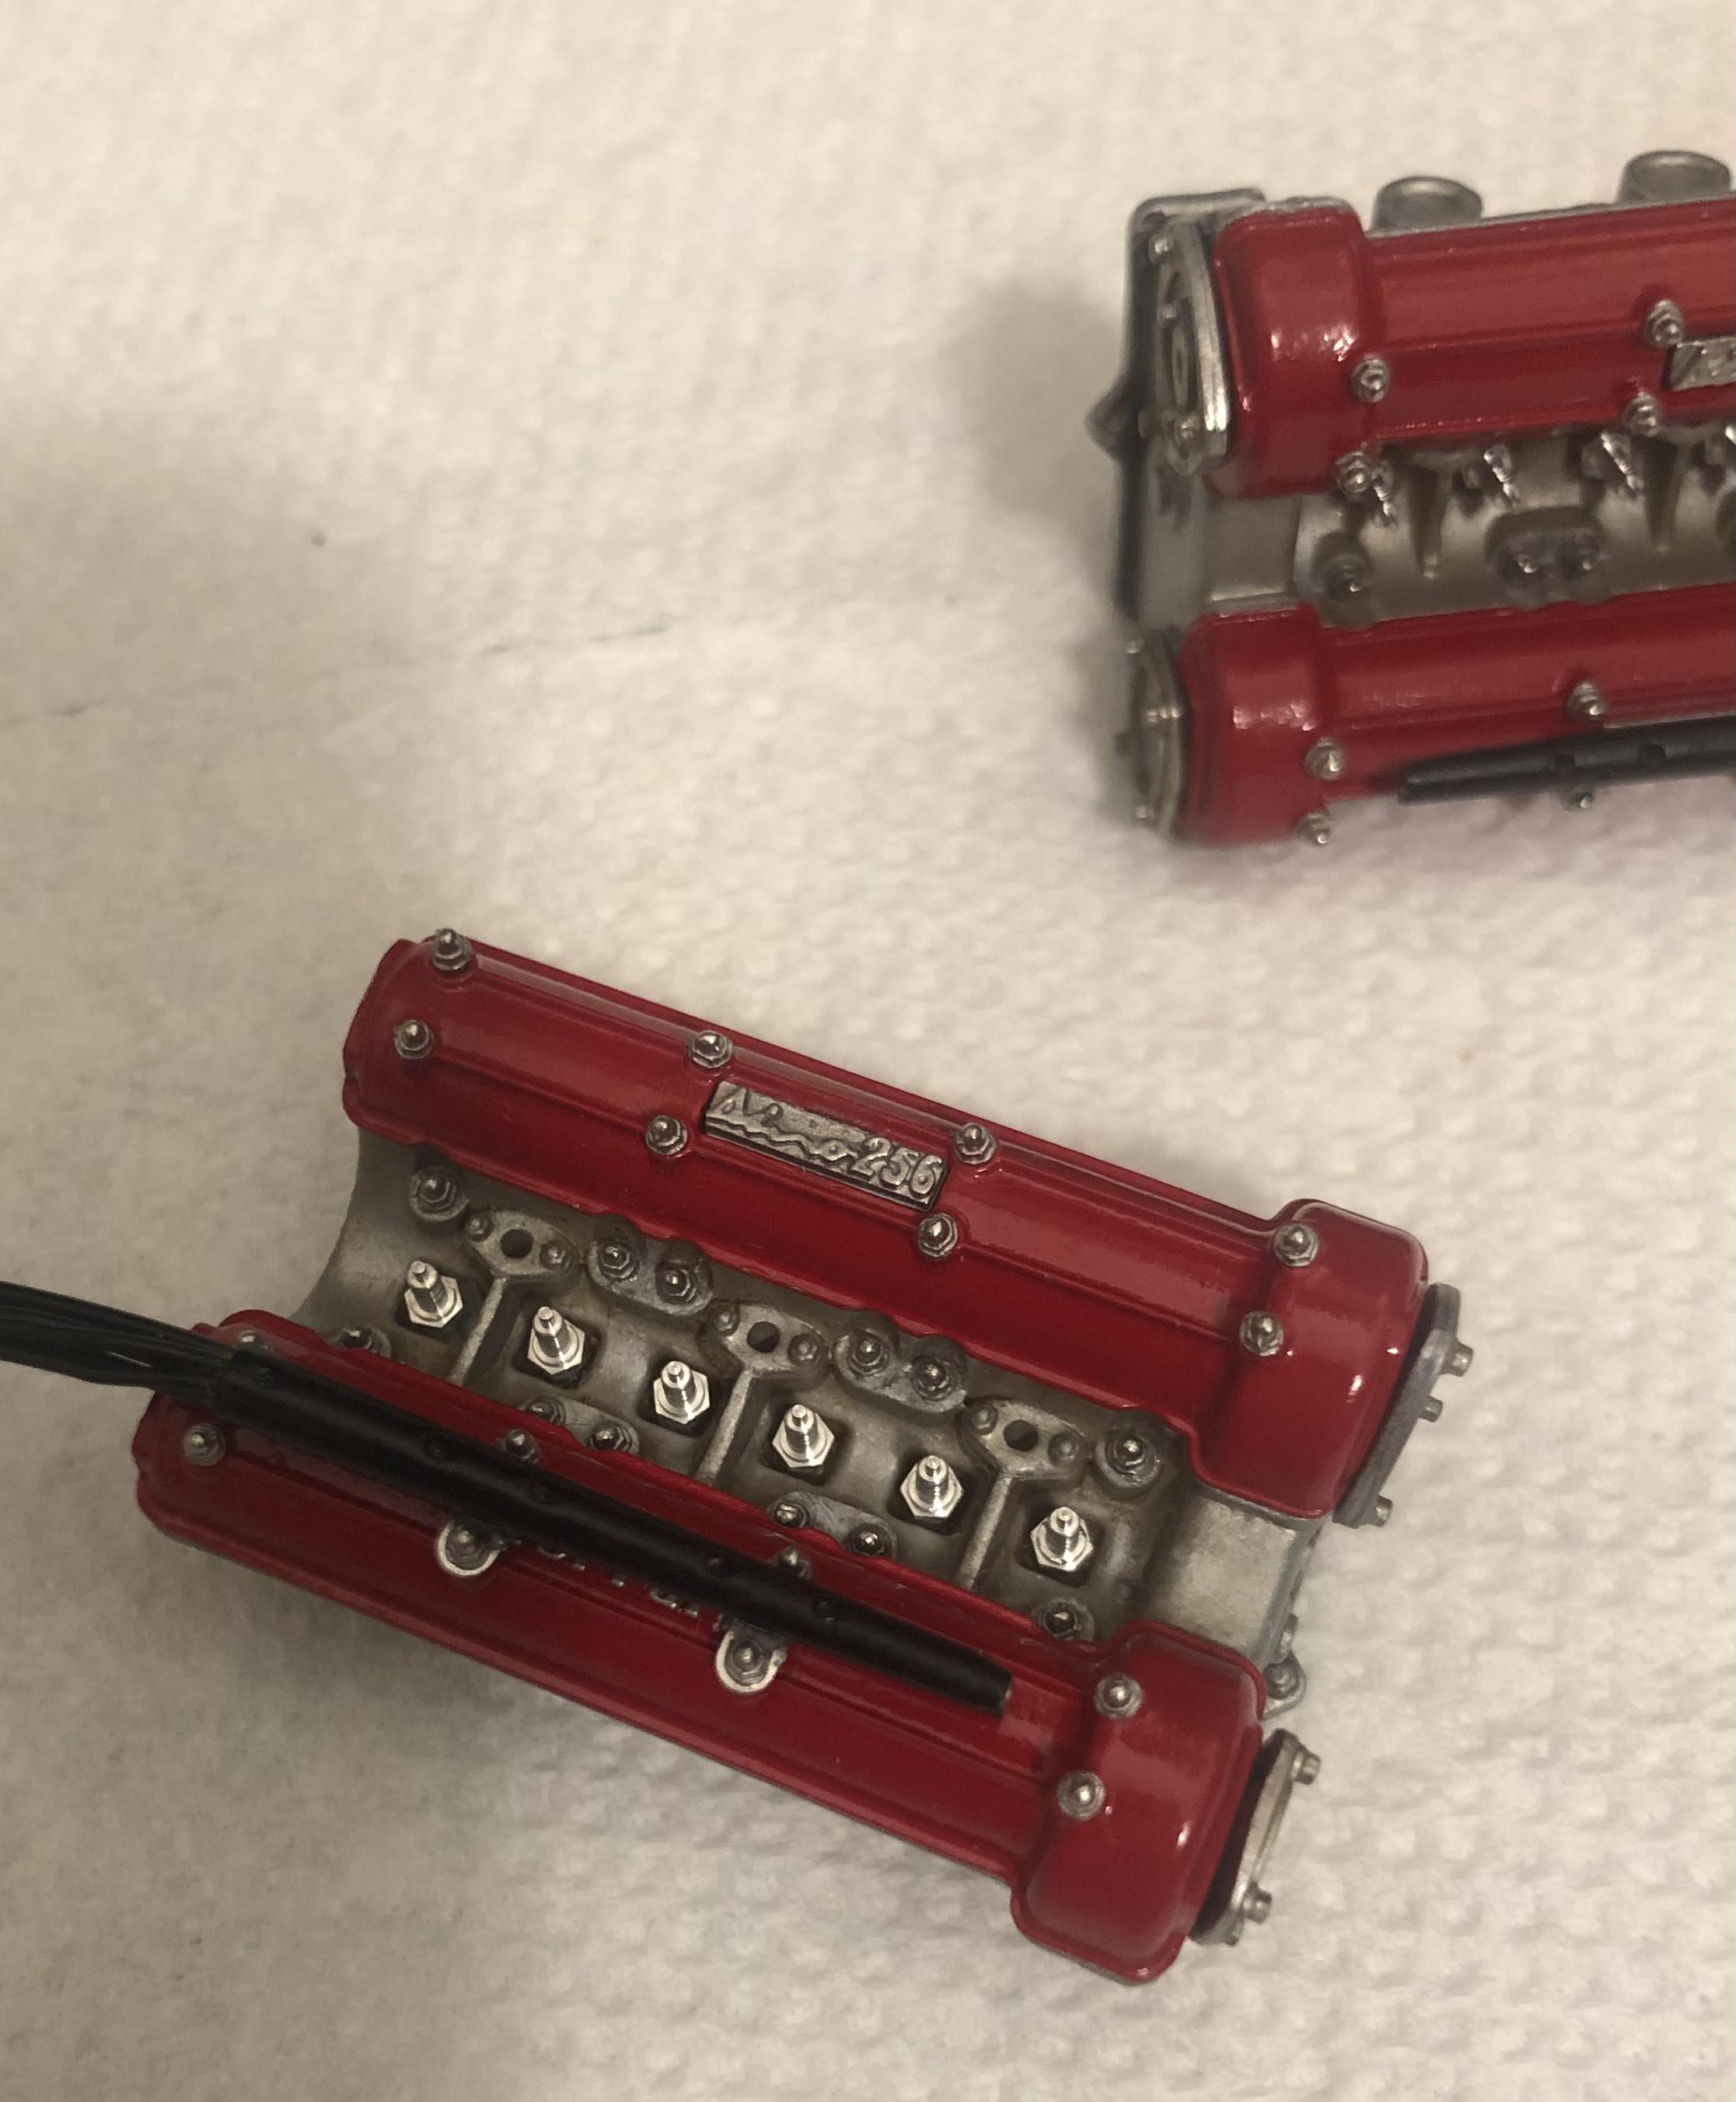
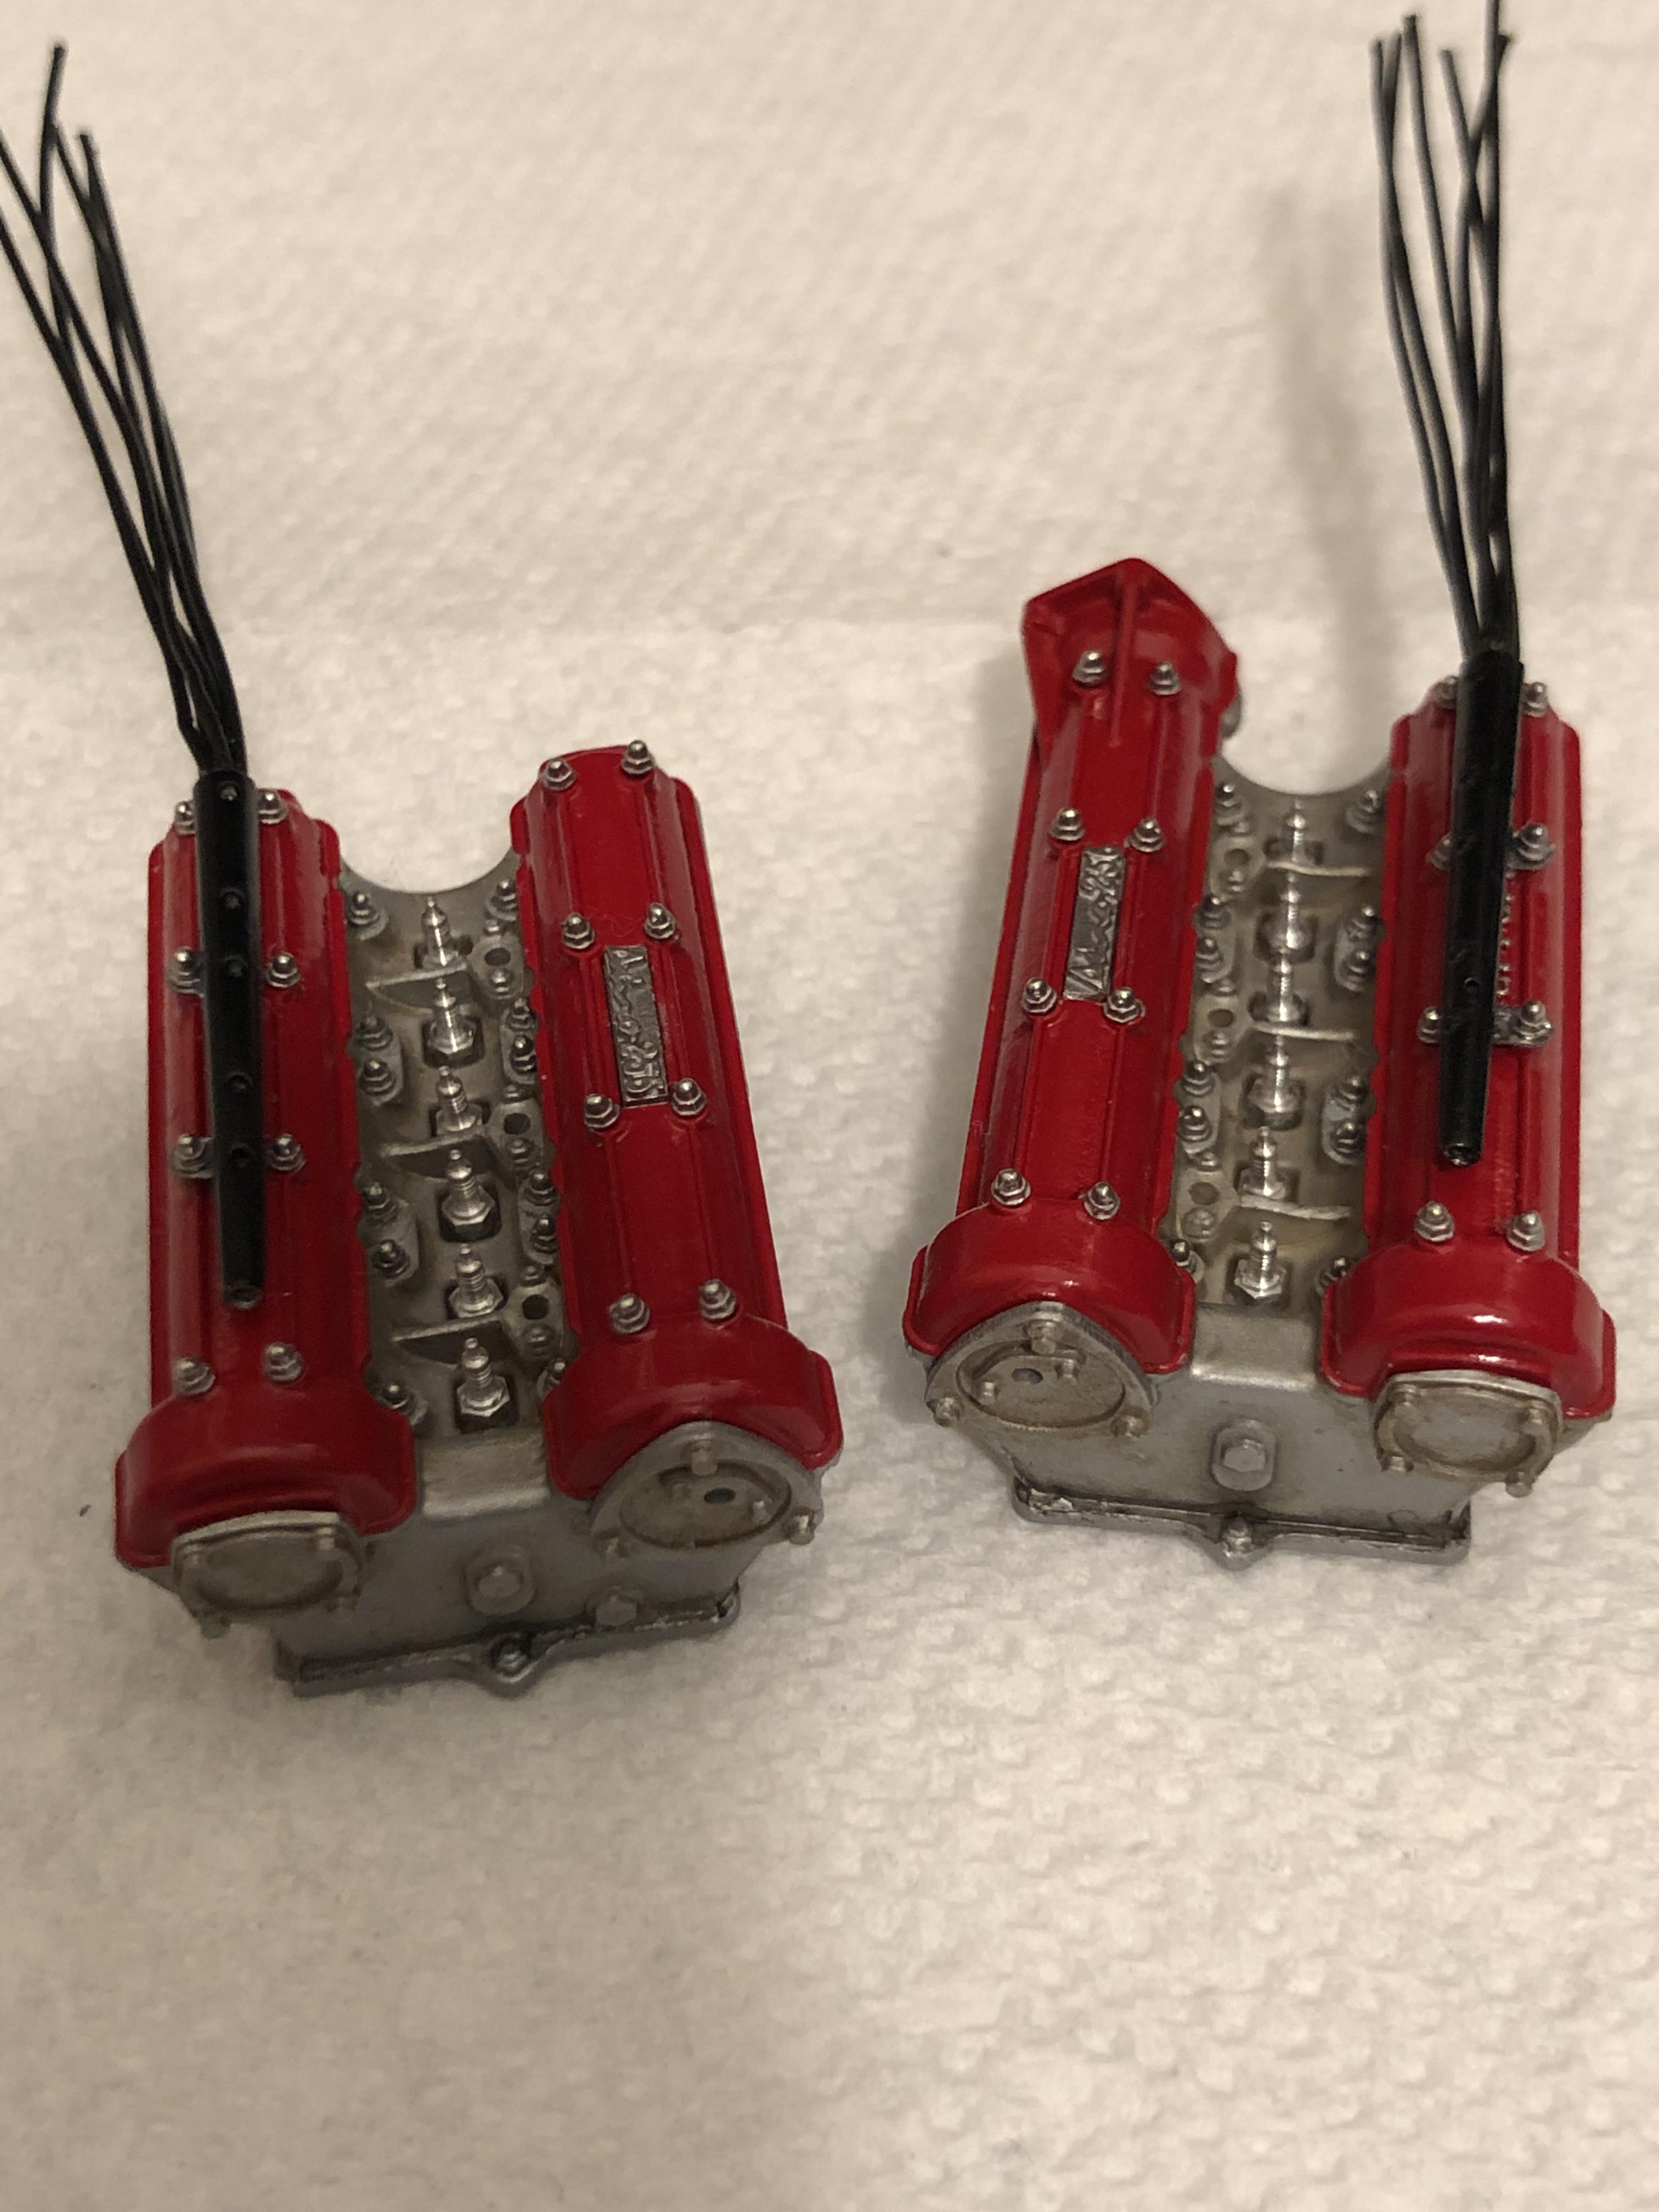
Working on the cylinder heads. Getting there…
-
1960 Ferrari 256F1
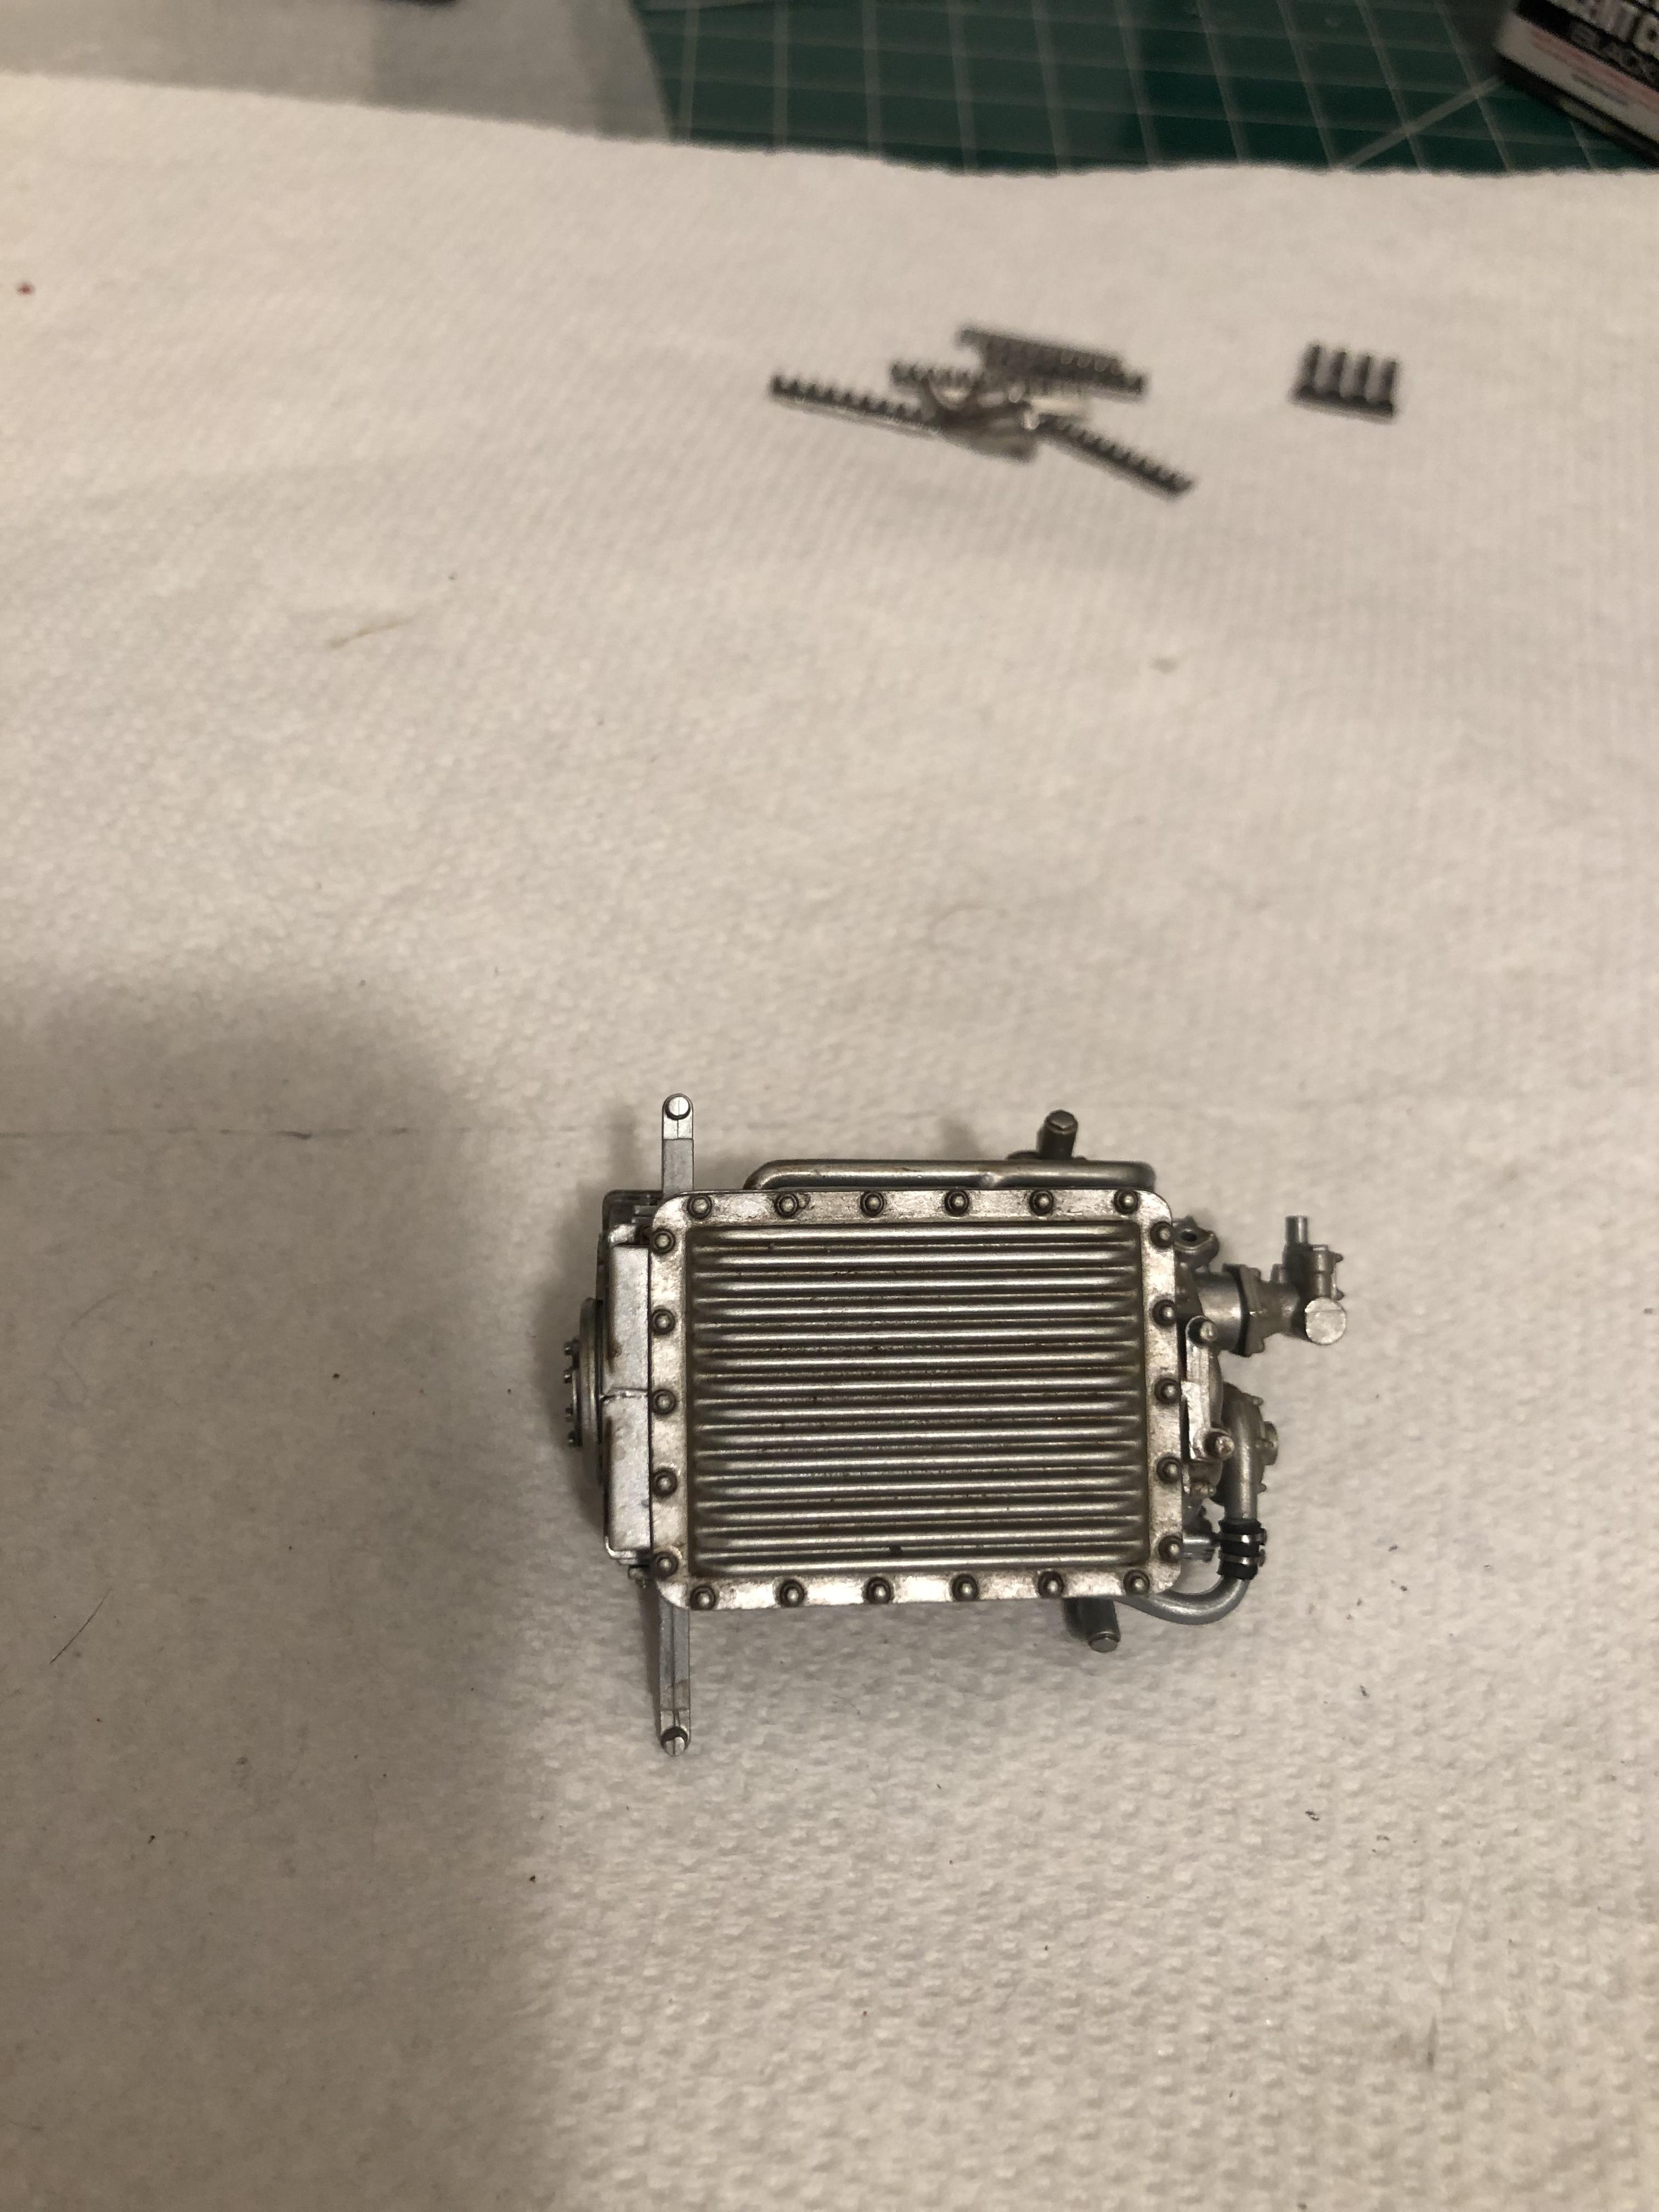
Chris Smith replied to Chris Smith's topic in WIP: Other Racing: Road Racing, Land Speed Racers
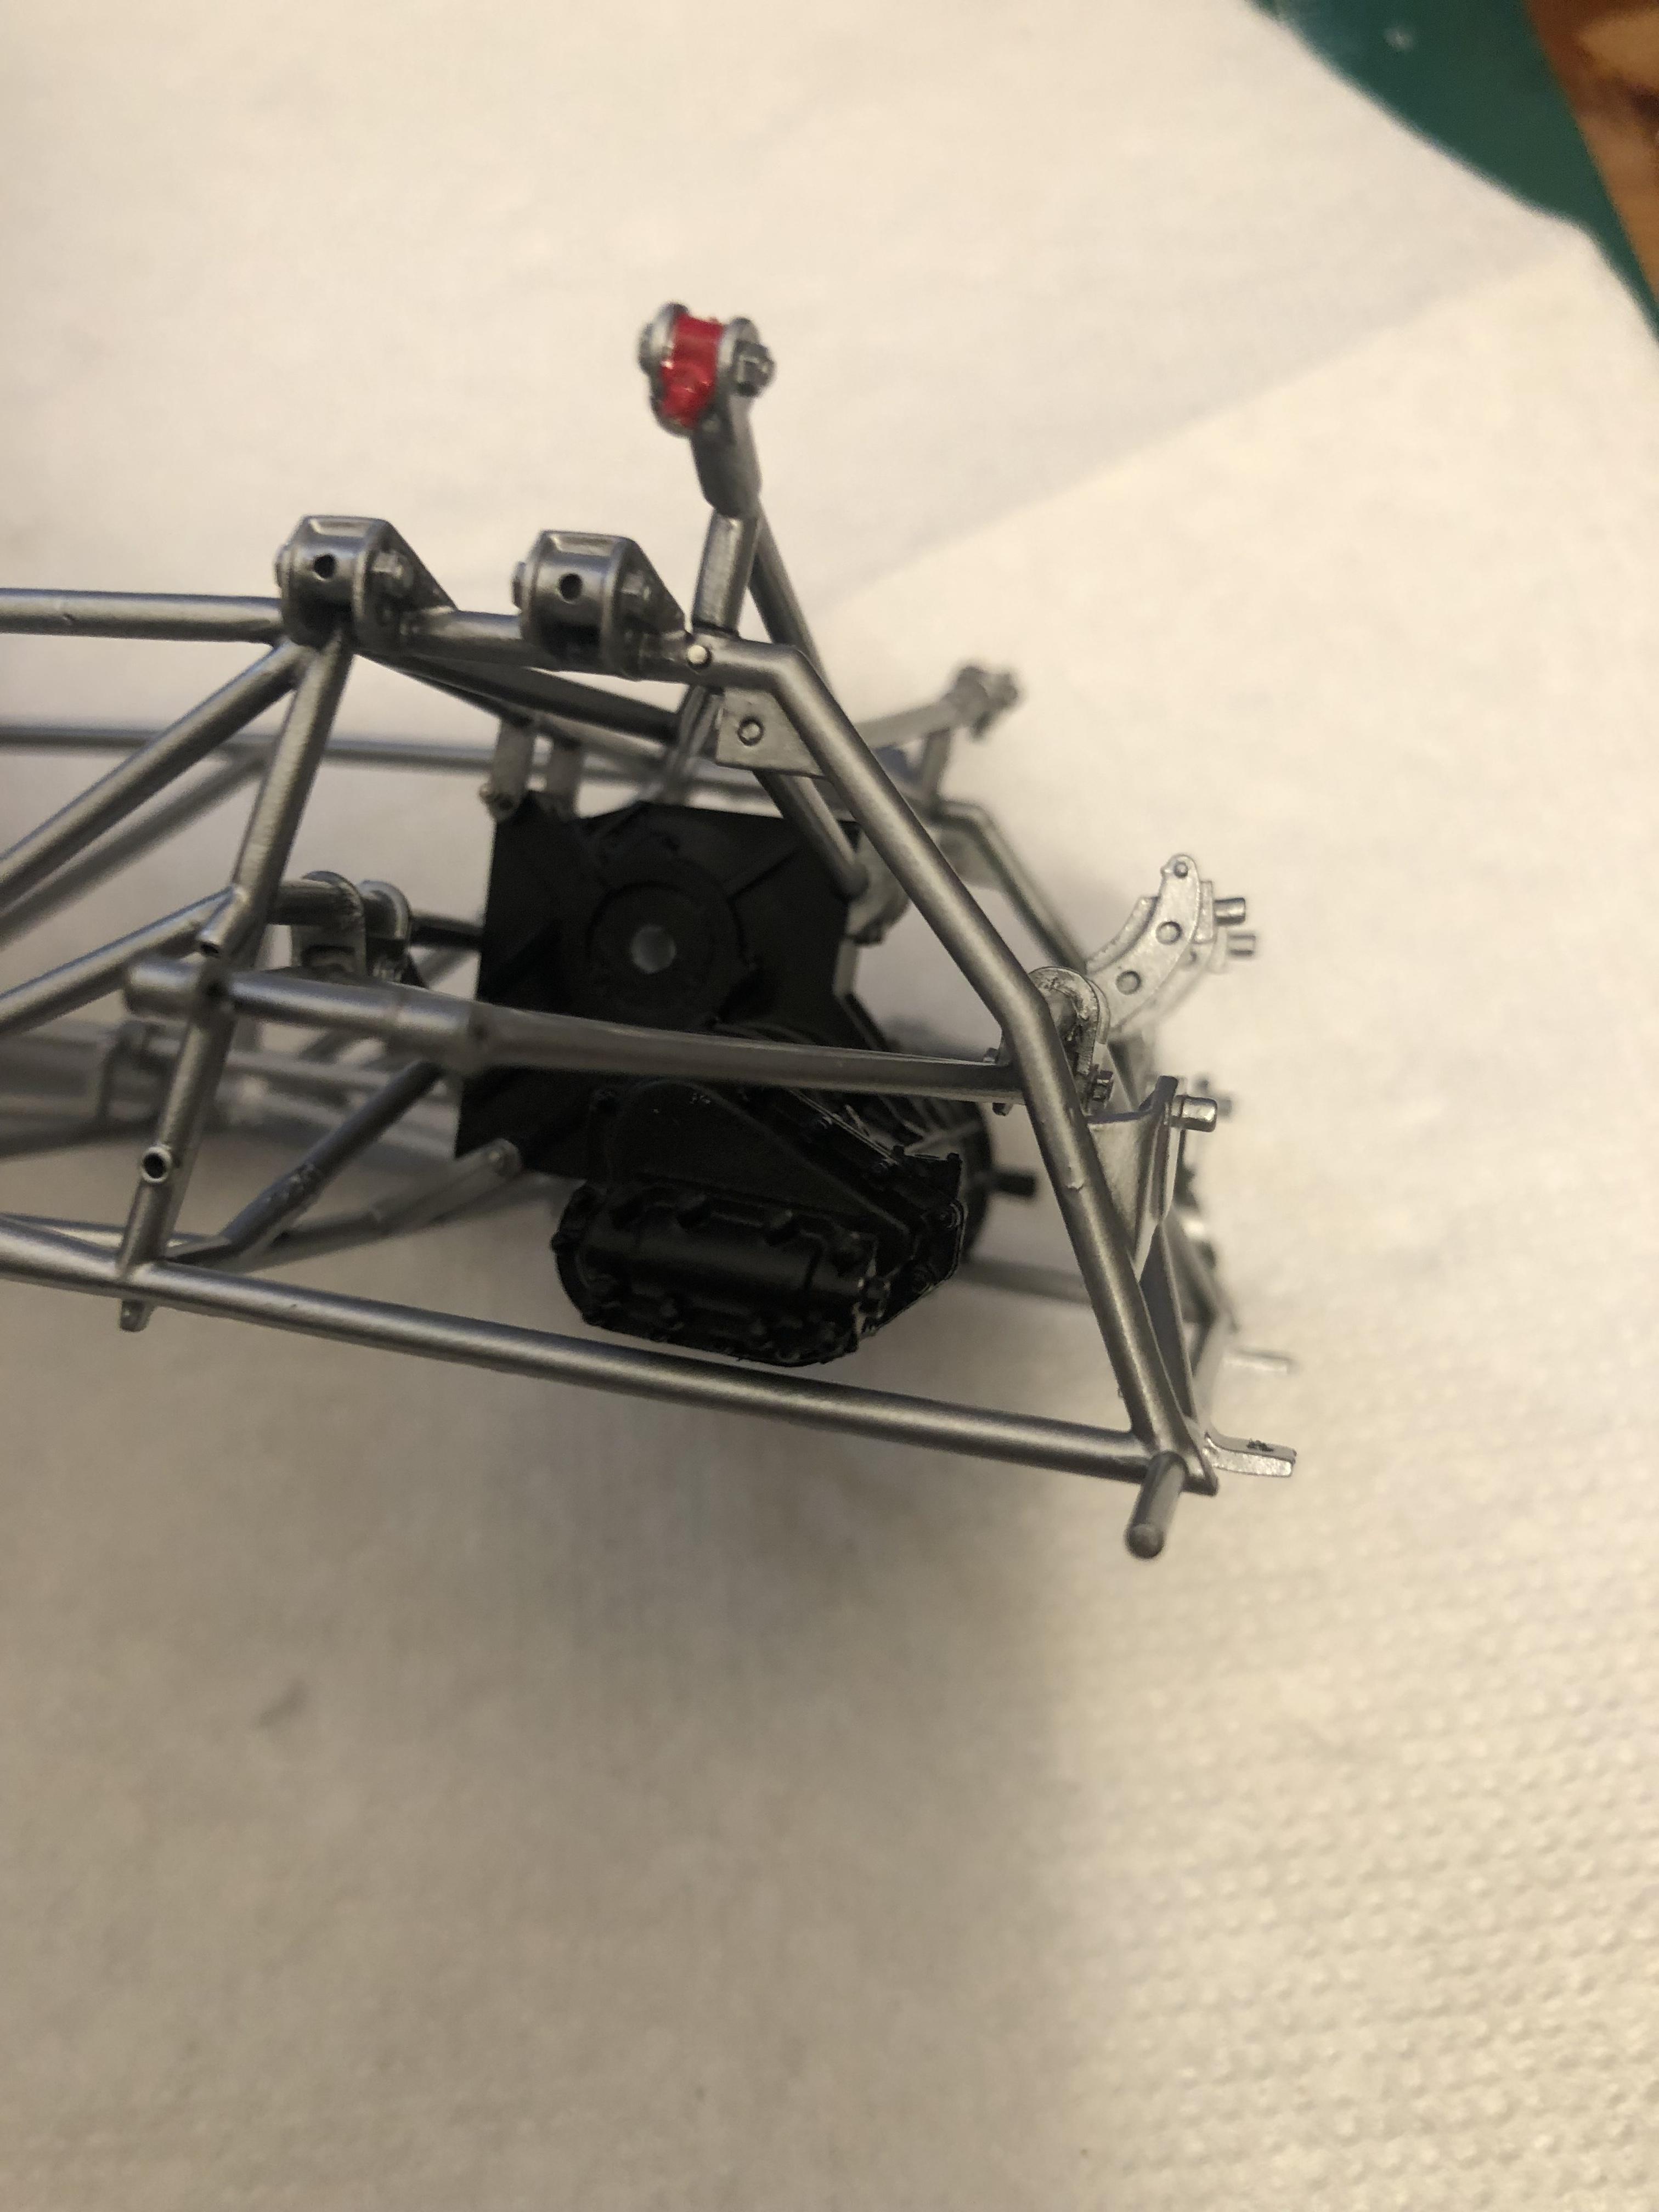
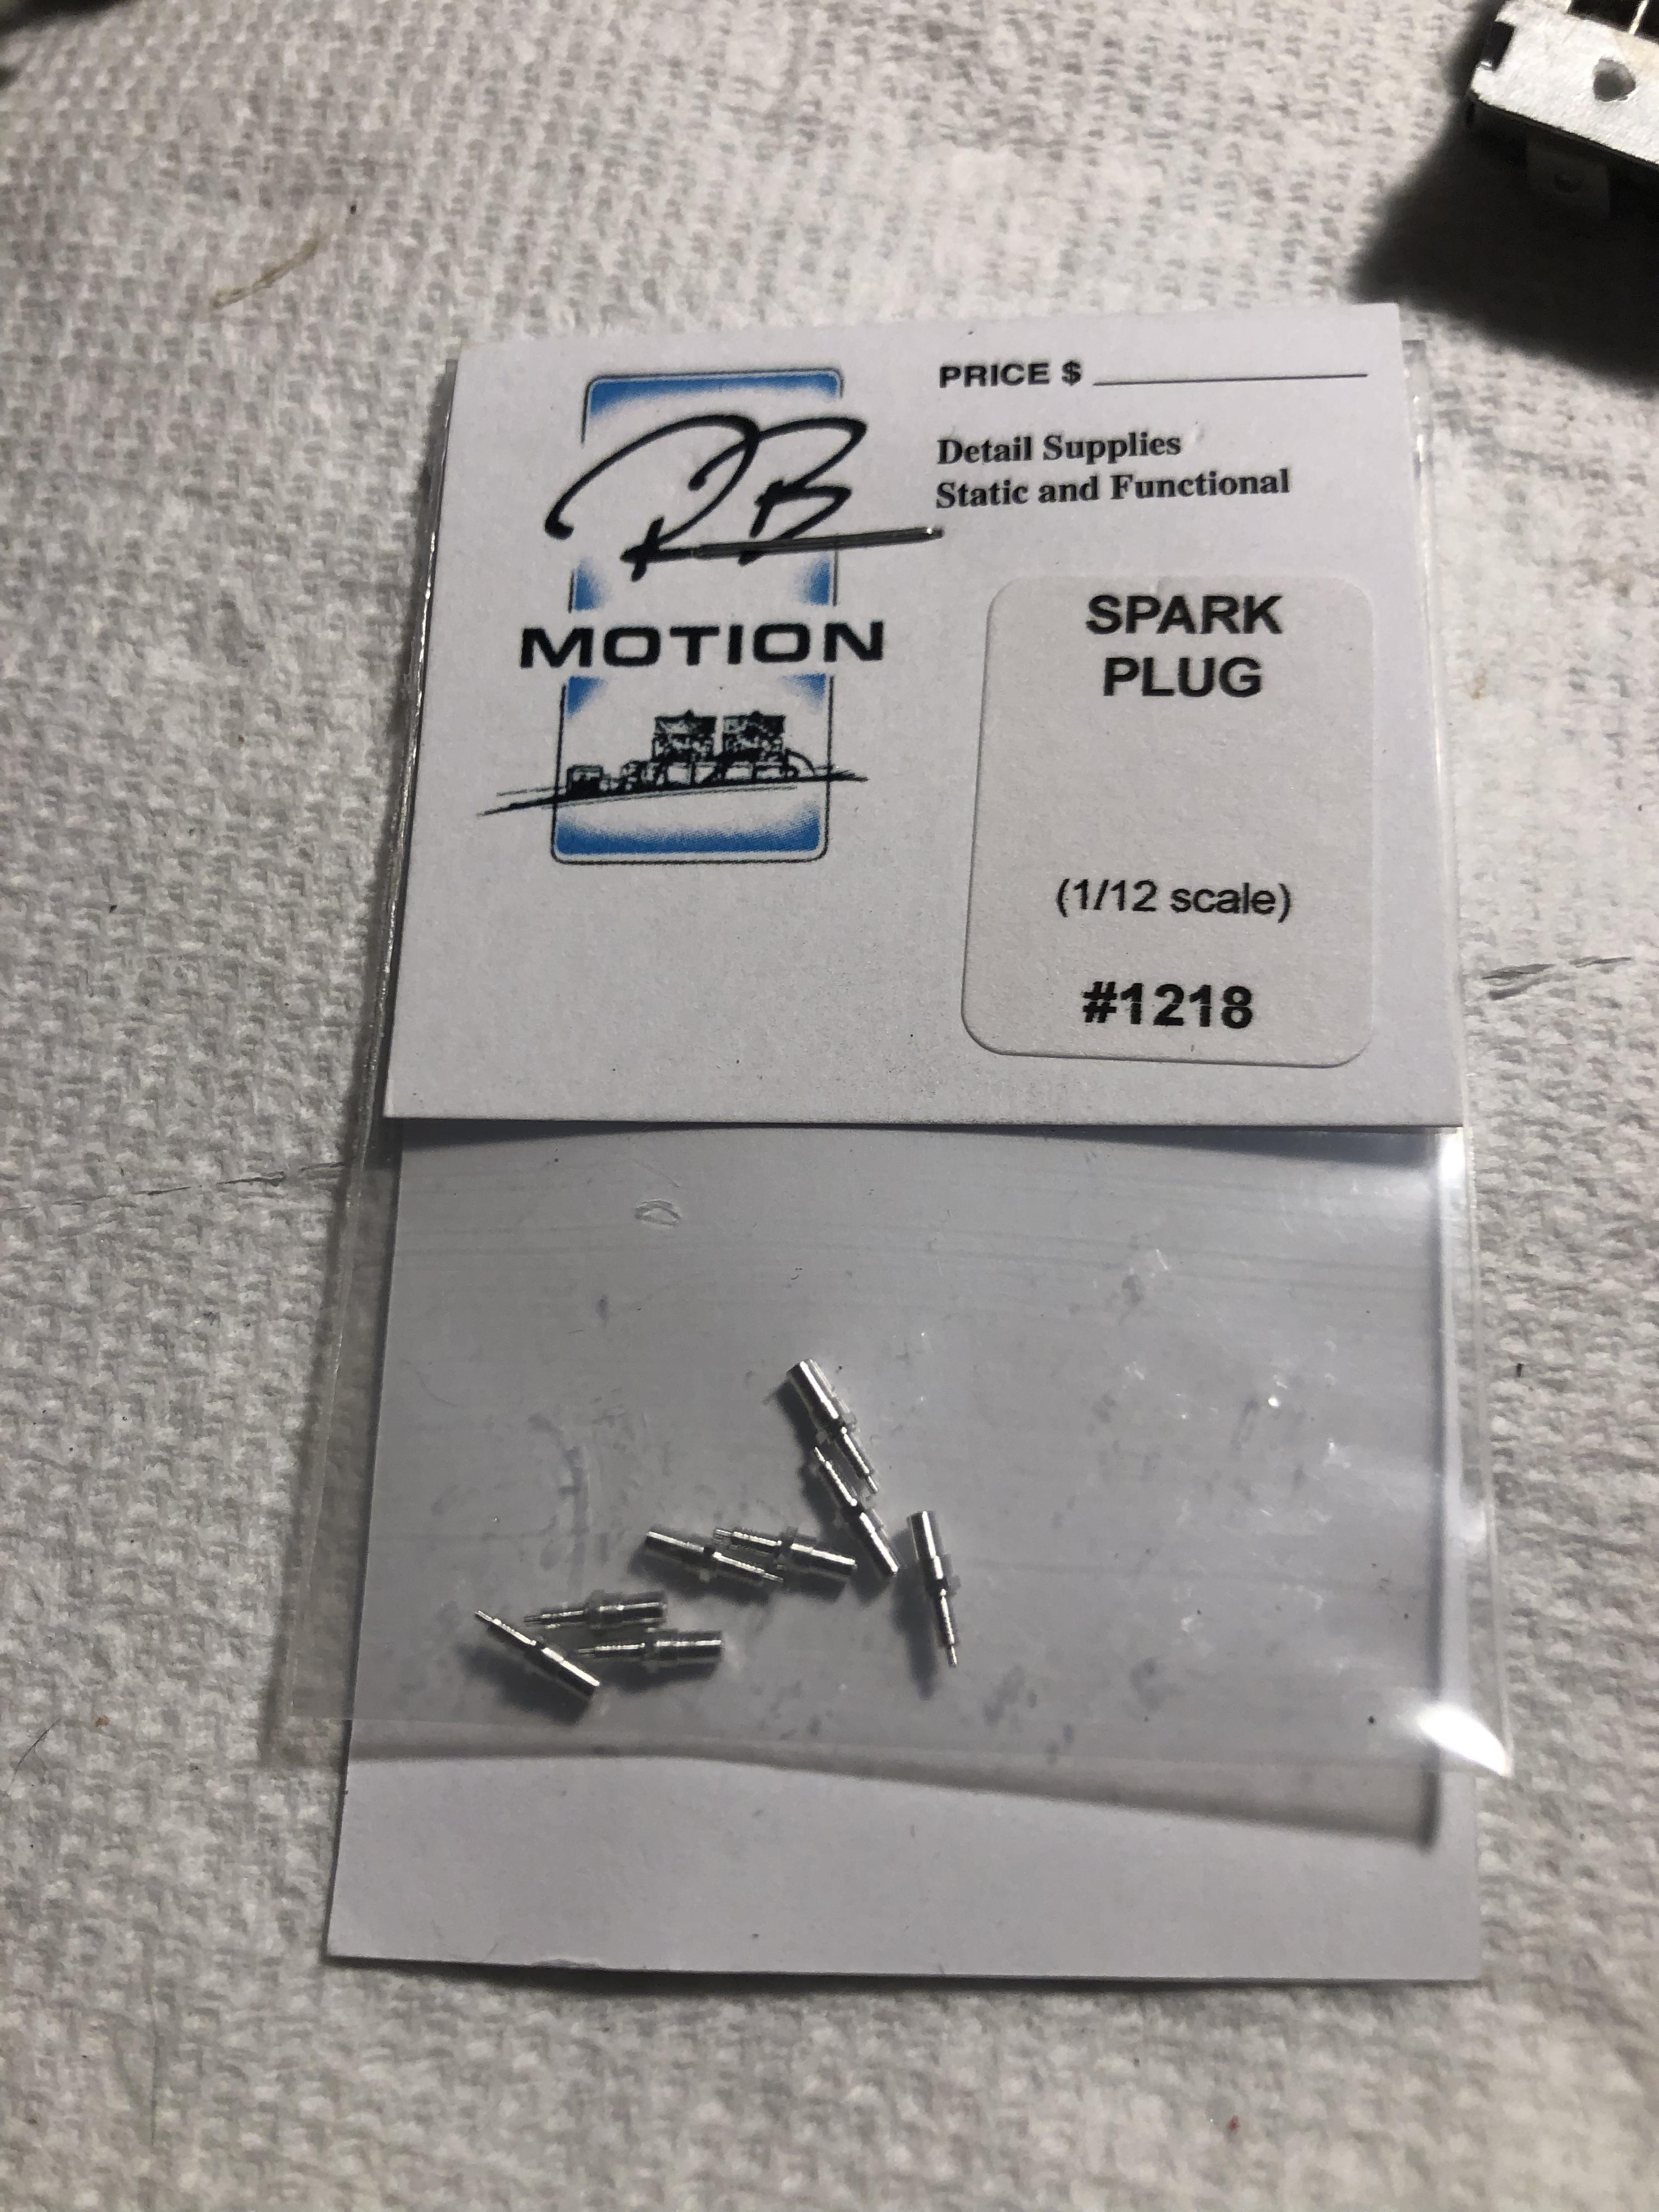
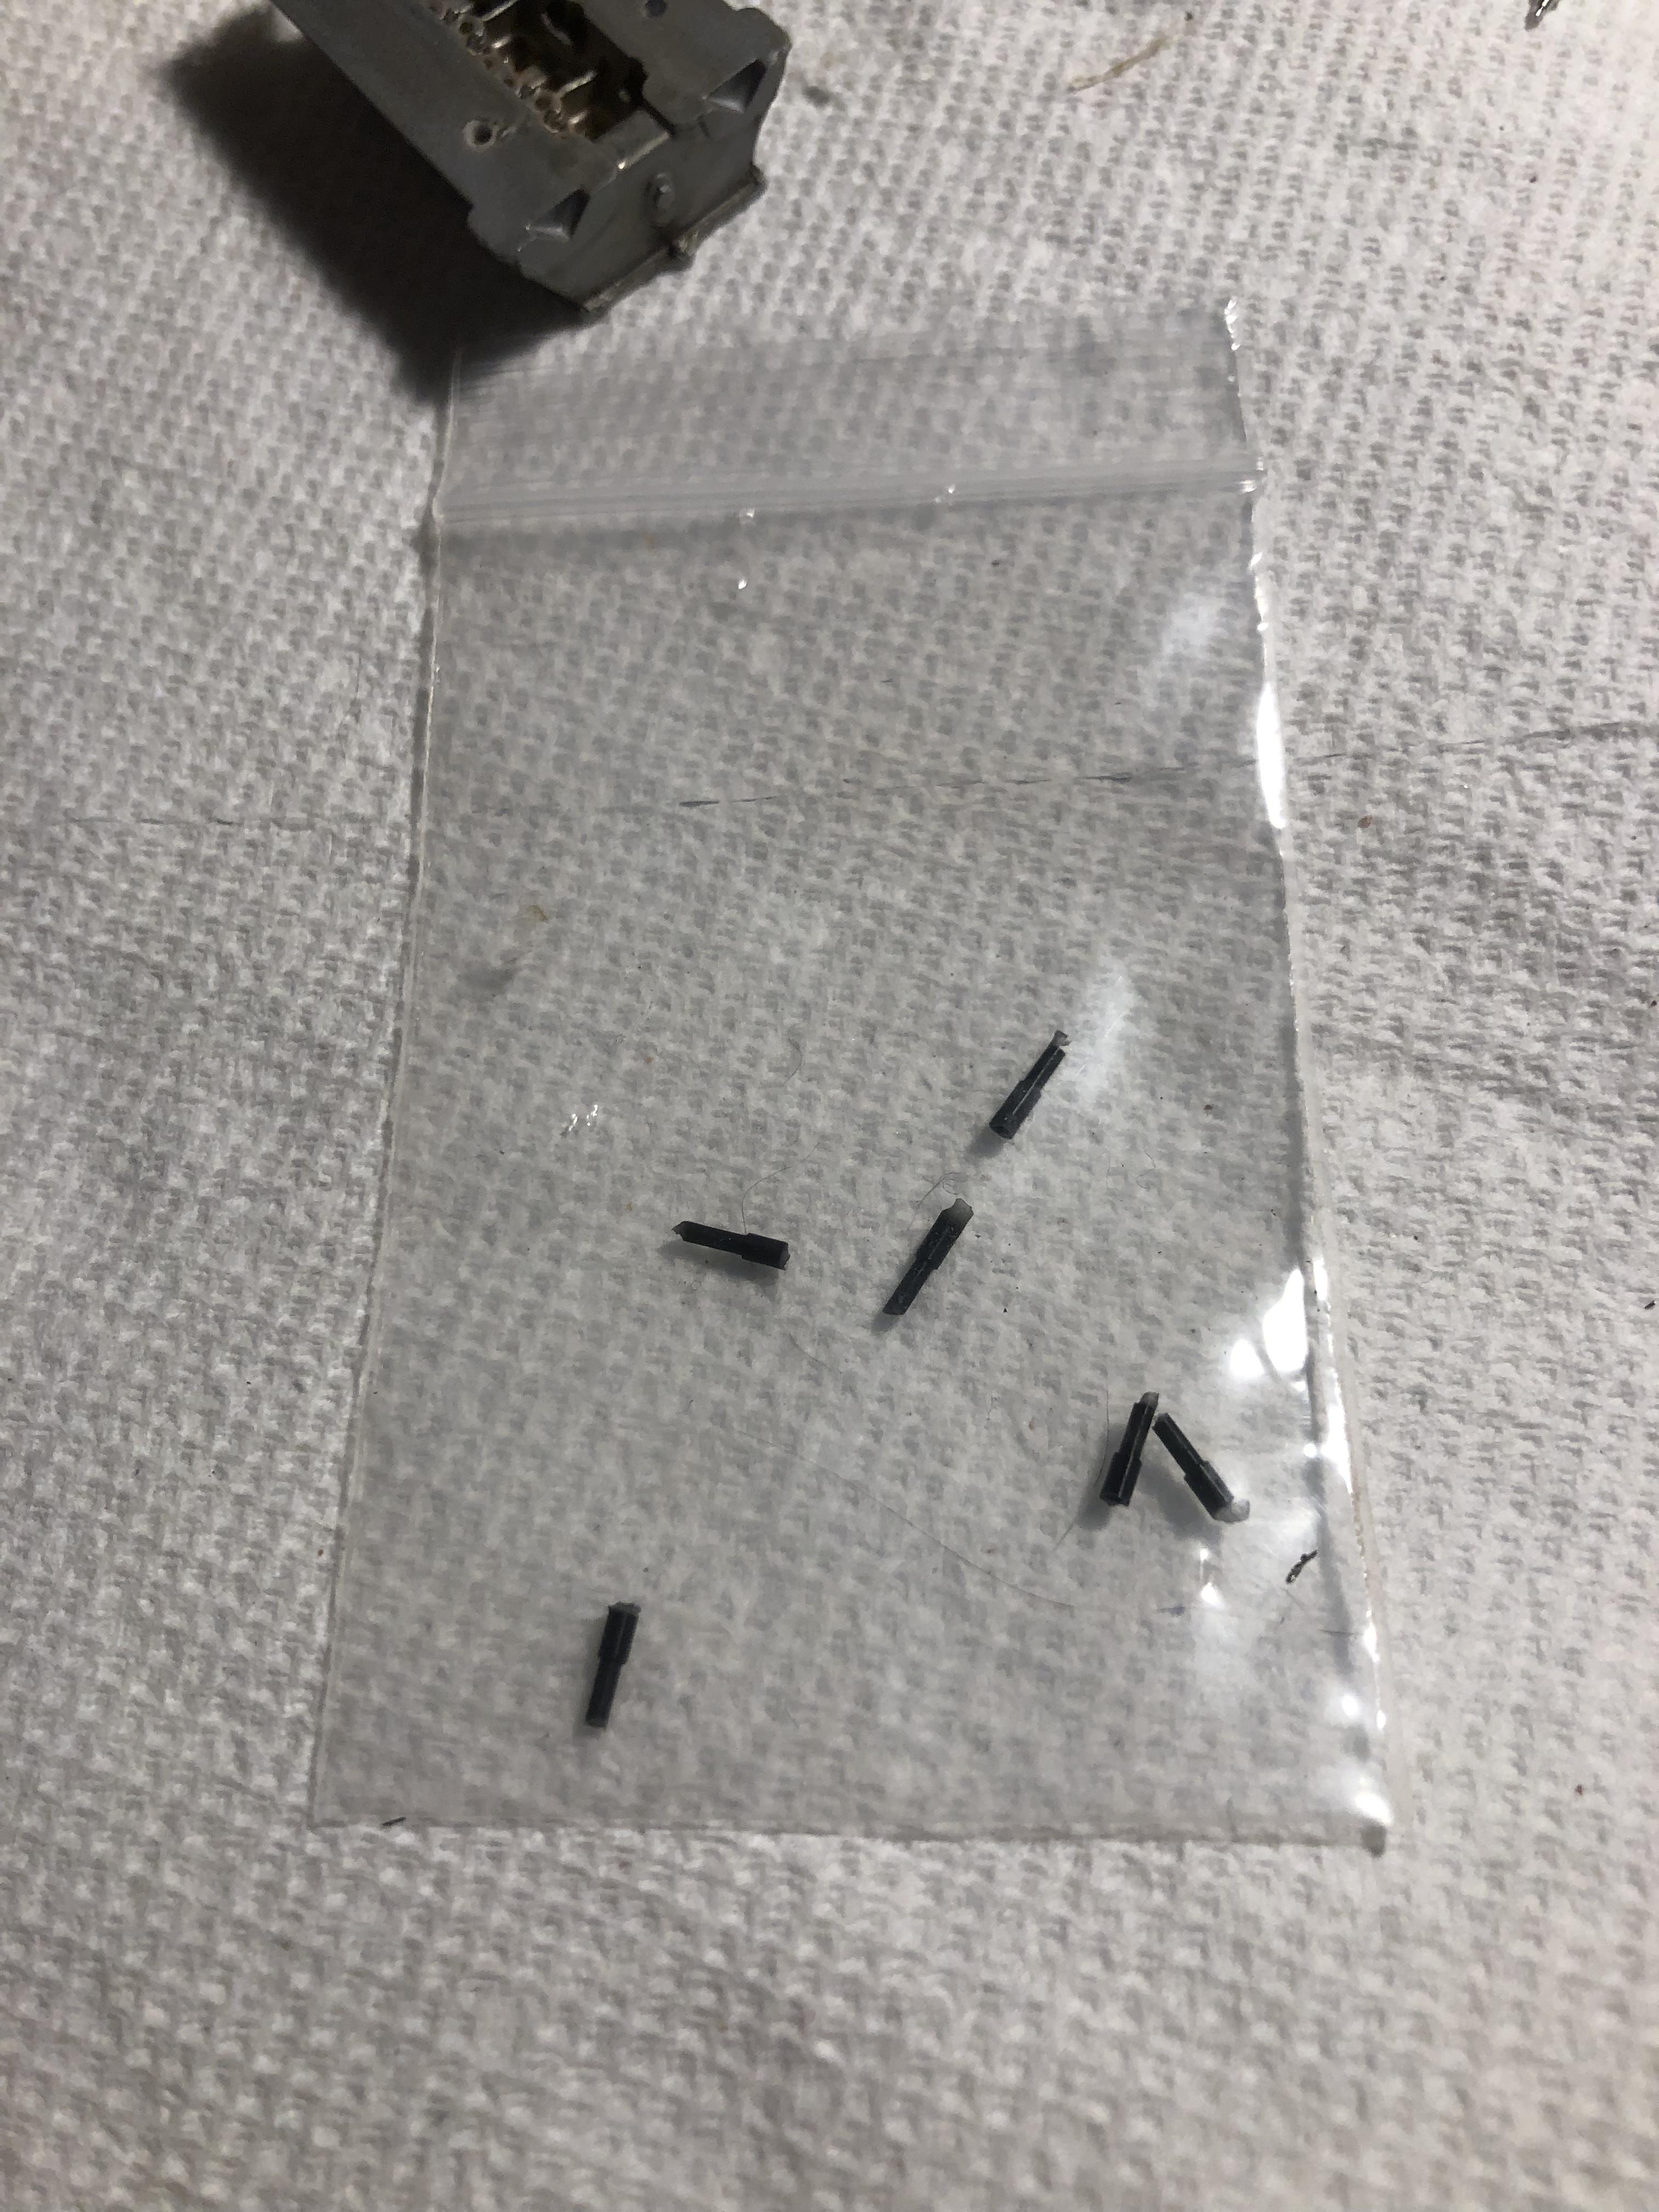
Last night I did a little weathering to add some depth to the engine, I’m happy with it. I will be using RB motions spark plugs and boots instead of the kit plugs. I like the look ?