

Dave G.
-
Posts
1,381 -
Joined
-
Last visited
Content Type
Profiles
Forums
Events
Gallery
Posts posted by Dave G.
-
-
Tamiya plastic is pretty good but for some kits, to the naked eye everything looks good for paint. You put down the first coat of paint and some swirl or other inconsistency in the plastic transfers through paint and will show right up. Subsequent coats just magnify it all the more. One simple primer coat would have sealed that off. Or else shown it so work could be done. My answer is I prime all bare plastic that will show.
I also prime early on in a new build, simply because I don't like the look of bare plastic. A coat of primer also brings out the details of the parts, takes the glow of plastic away.
-
On 5/26/2024 at 12:40 PM, TarheelRick said:

Oh, I want this one, she is a beaut.
Amazon Prime has it for $30 with free shipping. The 63 Galaxy is just about my favorite Ford of the 1960's decade.
I saw a Nascar short track race when I was about 15, so 1965. There was a 63 Ford there with 406 engine mopping up and lapping the field. Been hooked on the 63 ever since. Not only did he mop up but the car was so sure sounding and handling, it sounded like it had power to spare actually. But we also had some nice Galaxys around town with chrome wheels and stuff. My favorite color on them at that time was the burgundy.
We had a hot 63 white Fairlane in town too.
-
1 hour ago, Paul Payne said:
Guys, thanks for the info. When I try to spray, there is only a light dribble of paint. If I try the hole method, I will shake the can thoroughly. Can anything be used to probe the exit and actuate the valve?
In my experience if the tube is clogged, it stays clogged. If it's the nozzle you can soak it in lacquer thinner and that generally will clear it. Or change the nozzle to one from a working can of the same brand paint.
That said, even a full can of paint has head room at the top, they aren't 100% filled with liquid. So if you set a can down for a few minutes the paint will settle and you can poke your hole near the top of the can. You won't get soaked in paint. Once the gas escapes, flip the can to drain and poke a vent hole near the bottom, which is now facing up, to drain more quickly. I've seen videos where people use a small number drill rather than poke a hole .
-
3 hours ago, NOBLNG said:
That doesn’t work if there is no pressure.
Hmmm, I should have read the OP closer.
-
I decant partial cans of Mr Surfacer and also certain colors so as not to empty the entire can. So I just put the nozzle over the edge of an empty jar. Cover with a paper towel and spray what I need into the jar. I don't fully depress the nozzle though, that will make a mess. Wear rubber gloves as invariable some small amounts of over spray escapes. It's a bit slow but I do get just what I need. Expect to possibly need a little added thinner for airbrushing and depending on the airbrush tip size.
-
 1
1
-
-
TS 49 and TS 8 look to be close contenders to start with.. One perhaps slightly darker, the other maybe a bit lighter. But not by a lot. I haven't tried Budweiser red though. It seems to be named in three classifications but I suspect it's all the same red in the end.
I did something similar with Coca Cola red, starting with Createx primary red. Just with an airbrush I was free to mix in some 4030, which is clear and allowed more shading from the base color below because of reduced opacity of the red..
-
1
-
-
I worked on a bunch of old Ford trucks back in the day, though not 53 specifically and not always pickups but larger commercial trucks. And to the best I recall, the body parts were all primed in Red oxide.
-
1
-
 1
1
-
-
Hah, my own 55 Chevy (first 1/1 car) ended up in primer. The next, a 58 Chevy was already metallic blue.
-
I love it, Bill !! One of my all time favorite kits to build, especially back in the day. The 49 coupe and the 39/40 Tudor Sedan right up near the top of my list in terms of favorites and most quantity built over the years. Anyway, lovin yours !
-
What Ace said was my exact thought.
Also there are custom extra thick radiators used for this cut down shell idea, small in square inch foot print but thick for extra rows of tubes, sold by some of the aftermarket kit car companies in 1/1. If not mistaken, they're about 4-5" thick. Use your imagination on how to fabricate that appearance, maybe ?
-
I have the red. Made for mixing colors, toning etc. without the bias of similar red, blue ,yellow. It's like in art work blending colors from primary colors vs say hunter green, hot rod red or something.
-
Old school is cool !
-
I just read about the 1957 Poly yesterday, the one used in the Dodge Cutom Royal. It was said to be 325cu, single Carter Carb, dual exhaust. My dad had one of those. Apparently there was a dual quad version as well. I didn't know that before, I thought the hemi was the only dual quad combo. My dads was single quad for sure. He owned this around 1959- 62ish as well as I recall.
-
4 hours ago, bluestringer said:
I think the tops can be removed to reveal a larger opening. I've never tried, but have read about others doing it.
Yes, the dropper top pulls out. But the opening isn't large enough for the standard Badger mixer end.
-
There are several not too expensive vortex or strap on shakers for nail polishes, salons or hobby paints at Amazon, in the $20-$25 range. One guy on youtube used both at one time or another. He put a stainless steel or glass bead in the Vallejo bottles.
Another guy ground down the diameter of a Badger battery operated mixer, to use with Valljo paints.
-
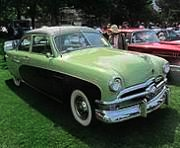
Common scheme, with whatever colors ( photo says 49 but that's a 50). Anyway:
-
1
-
-
4 minutes ago, Bill Anderson said:
Hi,
Thank you all for the insight. I bit the bullet and took the body parts to the garage and sprayed the white plastic model. As it "dried" pretty fast, I hung out in the garage and managed to get a few light coats on it. The paint covered nicely (Tamiya never disappoints) and I just brought the pieces into the house, with the body still on the metal parts holder (worthy tool from Micromart).
On close examination, the paint job looks pretty good. But to my taste, its "blah". I asked myself, who would paint an old car pearl white? So I do recall a guy in high school (Lane Tech '62) that had a 51 Ford and it was light beige with a single wide blue racing stripe. That looked pretty good back then.
But most cars have two stripes, so I'm thinking I could do that in a dark blue (interior is shades of blue). The thing is, I've got the tape and the paint, but putting down stripes looks pretty difficult. Would I be biting off more than I can chew?
Of course if I screwed it up, I could just spray the whole thing a dark blue and forgetaboutit........
Your thoughts???
You gotta bite and chew sometime lol ! Just practice a bit.
-
1
-
-
Anything clear that I'm gluing on a model and I reach for Testors clear parts glue. Ya it's the white stuff that dries clear, but for me, it's held great.
-
2
-
-
11 hours ago, robdebie said:
Interesting question for sure! But I don't think I know of another area in everyday life than paint that uses such vague terminology. Like eteski's example: "paints which are not enamels" - sigh..
'Enamel' itself is another vague description - why not use the technically correct name 'alkyd paint' since alkyd plus oils are the carrier?
Many modelers in my club call enamels 'oil paints', because they are derived from crude oil. With that reasoning acylics are oil paints too. Another sigh..
One I haven't cracked yet are 'acrylic enamels'..
Rob
There are alkyd arts paints but those are not your traditional oils . Alkyd oils are closer to enamel alkyds and faster drying and fully curing. In alkyd paints the binder is synthetic oil resin. Faster drying than traditional oil paint, oil paint can keep changing and hardening for decade, if not centuries.. Oil paints generally have the pigments carried in linseed oil or another natural vegetation based drying oil, like safflower oil. Windsor Newton and Lukus oil paints use linseed oil in their oil paints but offer also a water cleanup oil line of paints, where one molecule of the linseed oil was changed and made an emulsifier to fit the bill. So with those, oil mixes with water for soap and water cleanup. Now some VanGoh brand oil paints use safflower oil for the carrier. And as a medium to help paint flow, an artist can mix in walnut oil or stand oil. So this is all different from petro or synthetic based alkyds. As you progress from alkyds, to linseed oil, to safflower oil to walnut, then stand oil, the speed of touch dry is changed from fastest to slowest.
Oh and one more complication ! Odorless Turpenoid, is truly odorless as in no odor. But it's not turpentine lol ! It's actually a highly refined odorless mineral spirits. I use this to clean my oil painting brushes. It should clean alkyds as well, it's petro based.
Oil paint solvents can be toxic but the paint is not in general. Certain colors can have metals in them that may be toxic, the highest toxicity of those being cadmium. IE Cad Red or Cad yellow etc. Thus they came out with cad hue paints, these give the same punch to the color without the toxicity.
As others mentioned not being chemists, neither am I ! I just do oil paintings and a lot of studying.
By the way, the term " acrylic" is another whole ball of wax lol! This was meant to be short, so I'm not getting into the acrylic topic. But just to get back to the topic Lacquer, we have acrylic lacquers ( which incidentally, I'm not the greatest fan of. As much as I like cellulose lacquers, I think I dislike acrylic lacquer, unless it's special like Tamiya LP is).
-
The 91% IPA needs to be cut with water anywhere from 60-40 ratio to 70-30 ( even better) water to alcohol ratio. It will work fine for washes in most craft paints, in terms of not attacking the chrome, flow, dry time etc.. But it would be more durable with some medium based acrylic thinner in the mix, Like Liquitex Airbrush medium for instance. The Liquitex mediums maintain the resin molecules, where too much thinning with water and alcohol, breaks the molecular connection or so called binder. You discover that, like perhaps, a year down the road when it all starts flaking off if using a non binding medium like water lol ! Acrylics ( water borne) shouldn't be thinned more than about 35-40% with a non supportive solution, so make up the difference with the medium. This gives a wash with some adhesion, thin enough to drain off the high points and easy to wipe grill bars clean of any left over film, while still partly wet.
Artist paints will stick even better. I conducted a test with artist acrylics from Liquitex. I painted it on to aluminum foil, let dry. Then crumpled the foil. Expecting the paint, in acrylic fashion, to flake off when I opened up the ball of foil, it did not do that, but rather stuck quite well. FWIW, model chrome is plate aluminum.
I've also used water clean up oils.
All that said, everybody has their wash formula and like it. So ramble mode off. Have a great Sunday !
-
22 minutes ago, bobss396 said:
I swap engines and do away with the axle thru the oil pan. Aluminum tubing is easy to cut vs a steel axle.
True, but I have auto mechanic metal/wire cutters. Side cutters, snip snip, done through steel that size.
The 53 pickup flathead has no holes through the oil pan though.
-
1
-
-
6 hours ago, bobss396 said:
For the axle through the oil pan thing, I just cut 2 stubs of 1/16" aluminum tubing and CA them into the chassis or straight axle. I patch the oil pan holes too.
I suppose the existing metal axle could be snipped off just the same way. Funny, never though of that ! I built two of these back in the 1960's and have one mostly done now, ALL stock. But it's a great kit to hot rod too.
-
The other issue with the swap, not mentioned thus far, is that AMT chose to use a steel axle rod through the backing plates to connect the wheels with. Typical early AMT. I had to do a little filing on even the kit flathead to fully clear that metal axle on a recent 53 build.
FE Fords, I believe, you might have to make into a rear sump oil pan ( which in 1/1 was done on some drag cars). Just flip the pan around backwards. Nobody knows it doesn't have the extended oil pickup tube from the front pump, lol !
-
1
-
1
-
 1
1
-
-
Besides pre mixing the retarder and paint in a specific ratio, I've found wetting the brush with retarder, then picking up the paint onto the brush to work quite well. It's an acquired skill that you learn very quickly if you pay attention. Same as I'd do in oil painting for more flow with linseed or stand oil on the brush, or even mineral spirits, then pick up the oil based paint . Great for long runs of tree trunks or limbs, the paint flows right off the brush. Well, retarder and Tamiya acrylic work similarly, the paint flows right off the brush and levels.
But most paints can take up to 30% of some additives or thinners and not break the structure of the paint. It's kind of a generic percentage. Whether or not there is any gain between say 10% and 30%, or loss for that matter, is another topic lol. You'll generally be safe in that range, and the paint may even be able to take more. There comes a point where you lose film and opacity though.
-
1
-

To prime, or not to prime, that is the question
in Model Building Questions and Answers
Posted
Ahhh, Pactra, my favorite enamel back in the day !