

Dave G.
-
Posts
1,659 -
Joined
-
Last visited
Content Type
Profiles
Forums
Events
Gallery
Posts posted by Dave G.
-
-
When I was an apartment dweller I just put a fan ion the window, shrouded each side with cardboard and shot near the fan. Everything went outside basically. In that time frame I was shooting Pactra and Testors enamels for cars and ships and Floquil paint for model trains.
-
I'll have to try the Anita, it's one I haven't shot. Ceramcoat is fine with my thinner blend I mentioned above.
I shot DecoArt with Windex today. Not thrilled with how that layed down but it dried decent. Just a bit of texture that some 3500 will take out easy. I force dried it between coats with hot air. Actually I was thinking as it is it would be good for mohair or fabric interior. For a body it would need the fuzzies scuffed off is all. The color and evenness is fine.
-
18 minutes ago, Miatatom said:
Where is Folk Art sold?
Micheals stores, seen it in Walmart too.
-
2 hours ago, hedotwo said:
I've used different brands of craft acrylics and for me I prefer Folk Art. Not sure why but the price difference isn't very much and it's always mixed and laid down good. And I've always used plain 'ol washer fluid about 50/50 but usually just play it by ear until the consistency is like thin milk.
I use a bunch of different brands of craft paints and I feel the quality of FolkArt is a cut above many others as well.. DecoArt is good too but but you just have to do a thinner with no ipa in it.
-
10 hours ago, TransAmMike said:
Though I've gotten hooked on Createx pearl colors (also an acrylic) I do like and have gotten some nice paint jobs with Anita's also. I don't specifically measure the paint to thinner ratio. The rule of thumb is mix to consistancy of 2% milk but I just add enough to get a good spray out. Windex, Auto Windshield washer fluid, Alcohol all work pretty much the same.
I agree with the consistency. But with the thinner what you say may be the case with Anita paints but if you use multi brands you will absolutely see differences in behavior between the brands and thinner you use. And some acrylic paints are ammonia based, others are not. As I mentioned before don't mix ipa alcohol with DecoArt.
-
39 minutes ago, Zippi said:
I've airbrushed Testors in the little bottle with lacquer thinner 50/50 before and had good results.
Ya that works, Testors enamels are pretty consistent on viscosity. I usually go a little short of 50/50 personally, slightly less thinner, so maybe 55/45 paint to thinner.
Craft paints though are inconsistent on viscosity. Probably among the thinnest is Craft Smart and the thickest Colortek ( spelling could be wrong, too lazy to go look lol).
-
5 hours ago, Miatatom said:
What ratio of thinner blend to paint do you use?
Well Tom, I don't really go by ratio but if I know a certain paint well and have used it long enough a formulated ratio then may come to light. I mix till when I wipe mixed paint up the side of the mixing cup it returns to the pool of paint below in 1-4 seconds. And adjust from there according to how it sprays.
Ratio is tough with multi brands of craft paint, not to mention even between colors as viscosity in the bottle varies greatly before you even begin to thin.
-
On 10/30/2021 at 7:18 AM, Zippi said:
I use craft acrylic paints on all my bodies. Since I use Rust-Oleum Flat Gray primer I like the Anits's brand since it is made by Rust-Oleum. I also use the Delta Ceramcoat paint. I just finished this 34 pickup and it was airbrushed with FolkArt acrylic paint since the Anita's brand didn't have the color I wanted.

Nice color combo, great job !
-
On 10/30/2021 at 9:28 AM, Zippi said:
50/50 with Windex.
Windex can get the job done and sprays pretty well. I liken it to hardware store paint thinner in enamel though, which can crater . That's a phenomenon much like fish eyes where you get these round circles where paint separates from the surface. I notice this especially with Apple barrel paint and in that case still much prefer my own blend of thinner I make up, which doesn't do that.
But ( always a but right !) my blend is dog dung in DecoArt lol.
60% bottled or filtered or distilled water.
40% 91 IPA
For every 3 oz of this blend put 4-6 drops of Liquitex retarder
For every 3oz of that blend put in a trace amount of Dawn dish washing liquid ( I mean a trace amount, not even a drop from the bottle, I use the pointy end of a wooden barbecue skewer and just get a film on the end and mix that in), this breaks surface tension in the paint mix.
This blend Works in most acrylic paints but DecoArt doesn't like the alcohol. And many craft paints come closer to spraying like solvent paints with this blend.
-
6 hours ago, dartman said:
Quite frequently I use nail polish for painting my kits.My wife bought me some cool colors but
they are gel polish. Has anyone used the gel's yet and if so how do you thin them? I was thinking
just extra thinner or is there some other trick to it?
Pretty sure you just thin as usual. But then do a test spray and adjust if need be. I haven't used them but seen referenced those who have. As thin as my memory banks are now ( think swiss cheeze) I do recall that much lol. Course they're meant to be kicked with a UV light which is quick and also toughens the surface.
-
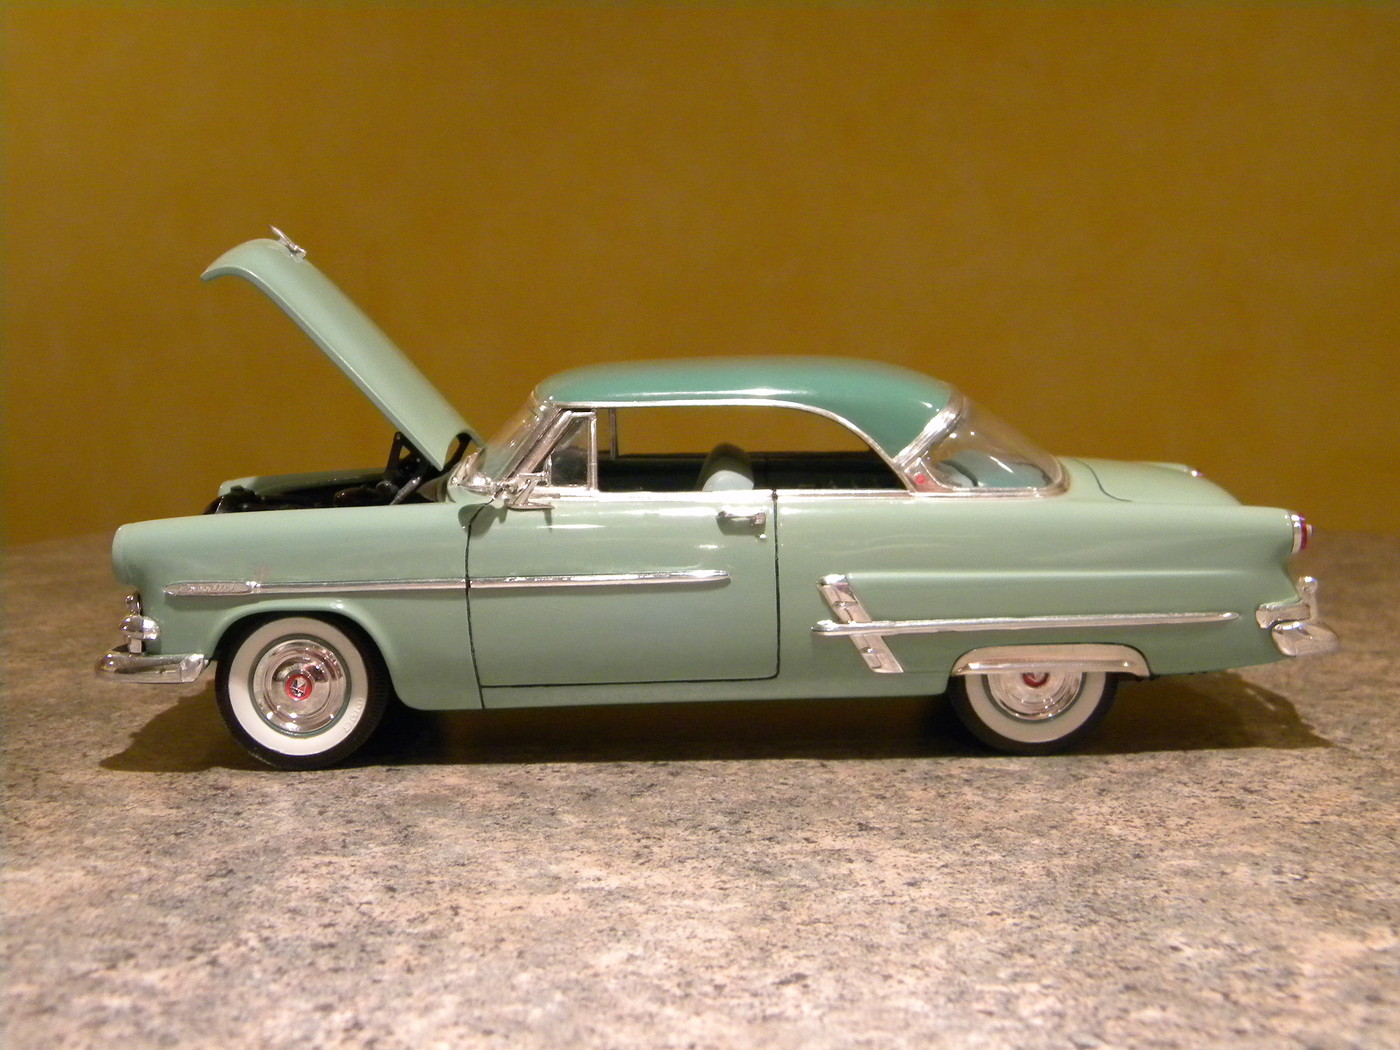
This is the actual original chevy tone or shade of blue ( supposedly). But I recall rebuilding those engines and it seemed a bit darker than that in my memory banks, course that was what, 50+ years ago sheesh lol.
-
18 hours ago, Sledsel said:
I need to jump in here rather than starting a new topic. I have recently painted a body and wish to clear it after the decals are on. The body was primed then painted with Rustoleum Gloss protective enamel (not 2X). I wish to clear it but it is 2 tone blue and white. Unfortunately the blue was the key because the enamel was the only one that matched my prefered color.
#1 Will 2x clear go over the paint already applied?
#2 Does the 2x yellow?
#3 What can I cover enamel with that will not yellow? Future shine? Tamyia?
Thanks in advance
As to question 3, Future/Pledge and Tamiya acrylic have not yellowed for me as yet and I've been testing them for about 4 years. I also use Liquitex varnishes that have not yellowed and are UV stable besides. We've had my now deceased wife's ceramics out in the weather 24/7 for years and has not deteriorated or yellowed. I use that in my modeling as well. All these should go right over enamel as long as the enamel is well cured so you don't get opposing shrink rates as the paints snuggle in.
I think that Rustoleum protective enamel has a bit slower cure time than 2x. I haven't used it in years but that was the case years ago, maybe it's changed now though. And I would think the 2x clear would go over it but I can't answer if it yellows or not.
-
20 hours ago, jchrisf said:
I got a Pace but I'd get this one instead if I had it to do all over again
Hah,I just watched the same video yesterday and now you post it.
-
Plenty of people use them including ones you see often in the painting how to videos at youtube. Often you can notice in those videos that the painter has one of those booths in use, including the now aging but still almost infamous Dr. Cranky videos.
-
50 minutes ago, Rick L said:
Really!!!
Just keep experimenting on your model. If you don’t like the paint job, soak it in lacquer thinner for a couple of days and your problem will disappear.
If you keep soaking in LT for two or three days eventually you will run into a plastic where more than the paint goes away lol !
-
3 hours ago, StevenGuthmiller said:
If you don't have "disposable income", and you apparently are going to use straight Testors enamel, I don't know why you went through all of these contortions.
You should have just used Testors enamel spray bombs!
Would have saved you a boat load of time, money and aggravation!
Here, let's see if this sinks in.
Mix Testors flat enamel, (you can mix any color you want) about 50/50 with lacquer thinner. (should be the consistency of milk)
Prime the body with one of Testors lacquer primers, (gray or white) (spray can)
Spray on the color in several light coats. (air brush)
Finish by clear coating with one of Testors clear lacquers. (spray can)
There!
It doesn't get any simpler than that, and you're using all Testors products.
Steve
Nice Ford !! But it does get simpler than that, use gloss and skip the clear coat.
-
Well I used X-1 black on those 1/16 Model A fenders and they turned out fine with no clear coat. I did a 39 Ford sedan in a build off with another member, part of the criteria he set was the color coat had to be craft paint. I cleared that with X-22, minor sanding for polishing the rest was polishing compound, it polished up real nice to my eye so it became a keeper finish for me after that. I'm pretty sure you will like the results on yours.
-
7 hours ago, old gearhead said:
The dehydrator arrived today. It has temp control and a timer. I put the Ferrari in for 3 hours @ 113F, and then for another hour @ 122F (these are default temp settings). It seems to have hardened up to the point that I'm game for buffing. Funny, I don't know if you're familiar with MFH kits, but often (most times) they're resin bodies w/metal hoods and decklids. The X-22 over paint seems to have dried much harder on the metal parts than on the resin body, even before I tried the dehydrator. I'm wondering if the resin retains moisture, or has a chemical reaction, and affects drying(?). Seems unlikely; I build a lot of resin and most paints behave normally on all types. And, the Ferrari body is covered with applications of lacquer-based primers and color coat. You'd think that would seal the deal. Who knows? I'm probably over-thinking this whole thing, now. Getting crazy in my old age. I'm just going to proceed to buff, polish and wax. I'll post the results.
Have a good evening!
Like Pete or similarly at least, I run dehydration between 105 and 110. 122 is getting up there, might be fine with enamel and the metal parts. It's not the heat alone that dries or cures the paint but the added air movement, especially with acrylics.
-
5 hours ago, old gearhead said:
let's see how the X-22 buffs out after I harden it up in the dehydrator
I don't know if the dehydrator you're getting has temp control but I set mine around 108f with straight Tamiya acrylics.. Just FWIW. It may not matter so much but over 105 up to 108 is what I do with acrylics and 108-110 for enamels.. You may even want to go with 105f with your multi combo paints on there, it will still dry.
-
5 hours ago, old gearhead said:
Thanks, Dave. I've been thinking about getting a dehydrator in as that I still spray a lot of enamel. What the heck, I doubt it'll hurt to try a dehydrator on the X-22 cleared Ferrari, although it is starting to harden up on its own. And, yeah, I considered just going with toothpaste for the initial buffing, however I've got some orange peal and a few rough spots that need to be smoothed out and so am planning on a pass with 4000 through 12,000 grits, and then a final polish with Tamiya compounds followed by Novus 2 and then a carnauba wax job. Might pass on the Novus 2, though; the Tamiya compounds do a pretty good job.
Interesting that you use lacquer thinner to thin an acrylic (X-22). I use lacquer to thin enamel, but have never tried it with acrylics. In your experience, how well does the DNA work with the Tamiya acrylics compared to Tamiya X20A? Is there an advantage to using lacquer and DNA as an acrylic thinner?
Thanks again, and best regards.
PB.
I believe you will find that the X-20A has some retarder in it. Lacquer thinner dries faster, the colors on color coats are still very vivid ( very clear color no haze if that makes sense). LT won't work in all acrylics but it is suggested by Tamiya for their acrylics ( at their web site), they claim a harder finish. As to DNA, the paint flows like crazy when mixed 1/1 or more thinner. I like it especially in X-1 black as it gives a very natural factory looking black finish that just needs a light buffing to clear the color up a bit ( just offers some extra user control to get that finish we expect to see on a classic car for instance). With DNA it dries super smooth, the smoothest of all the thinners in X-1 black that I've tried. The buffing is just to pull up the gloss slightly. I'd still prefer Model Master Classic black that was made for this job but well, it's not around anymore so we move on right ? Make a way.
-
15 hours ago, ManiacModeler said:
Ouch, wish someone would do some of the obscure stuff man, it's a drag when you wanna build something and ain't got the stuff you want.
You talk about obscure I'm only desiring a 34-38 Buick sedan kit someplace near stock. And a stock 1956 Buick hardtop kit. Nobody comes close the either one, ever.
-
39 minutes ago, old gearhead said:
Dave, I went ahead and cleared (four applications) with the Tamiya X-22 and it went on fine. The last (wet) coat was applied three days ago and the X-22 still feels "soft," i.e. I would not be comfortable buffing it out in this state. Do you suppose it'll harden up over time? Would a dehydrator help? Or, would a dehydrator even have an effect on an acrylic clear coat? Then again, the finish would be acceptable as is, but that's not he way I roll; I want it smooth and shiny...
Funny, I use Tamiya acrylics on most of my (non-metallic finish) aircraft builds and the colors (albeit mostly XFs, but not all) seem to dry hard as a rock Then again, I only gloss clear the aircraft for decal application (so, no buffing) and then go back over with Microlux clear flat (the flattest flat I've been able to find thus far) to seal everything up.
Aarrgh! I've been building for centuries! Still no easy answers!
Thanks in advance1
PB.
I don't have a straight answer on air dry times because I always do a 30 minute blast in the dehydrator to jump start the dry, which to me if anything increases gloss ( at least on color coats anyway). Also I tend to use either lacquer thinner or DNA to thin with Tamiya acrylics with to include X-22. I can generally polish by the third day. It should eventually harden though but I haven't experienced your situation personally. I do very little sanding for polishing, go to Colgate toothpaste, then Formula 1 Scratch out. I'm happy with the finish for the era cars I build is best I can say.
Maybe be glad its taking it's time with that combo of paints and decals under it, perhaps less chance of something wrinkling on you.
-
46 minutes ago, Kit Basher said:
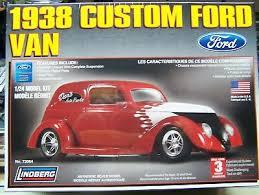
I was thinking about the OP, but if it applies to you as well, it's all good. After looking at the Lindberg kit, the grille is very different from the one Claude shows above. Also, now I think about it, isn't the Lindberg kit 1/24?
OK.
And yes 1/24.
-
1 hour ago, Kit Basher said:
Is this Lindberg '38 any help?
Are you addressing the OP or my post above ?


Question regarding Grex TG3 airbrush
in Model Building Questions and Answers
Posted
Have you tried just changing your gripping position and trigger finger ? I've seen where various types of hand and finger pain has been avoided in using a conventional airbrush by changing how it is gripped and using the thumb on the trigger button. I believe I've seen Will Patterson do that in his videos.