capricorn71
-
Posts
44 -
Joined
-
Last visited
Content Type
Profiles
Forums
Events
Gallery
Everything posted by capricorn71
-
Chronicle Part 6: in late 2020 a dream took a great step to become true. The parts have been printed at a professionell printing service:

-
Chronicle part 5: Many hours later the CAD Model has been finished:
-
Chronicle part 4: After a more than 20 year break I started to work on this project again. Meanwhile I hade the chance to use 3D CAD. This is the early stage of the CAD model:
-
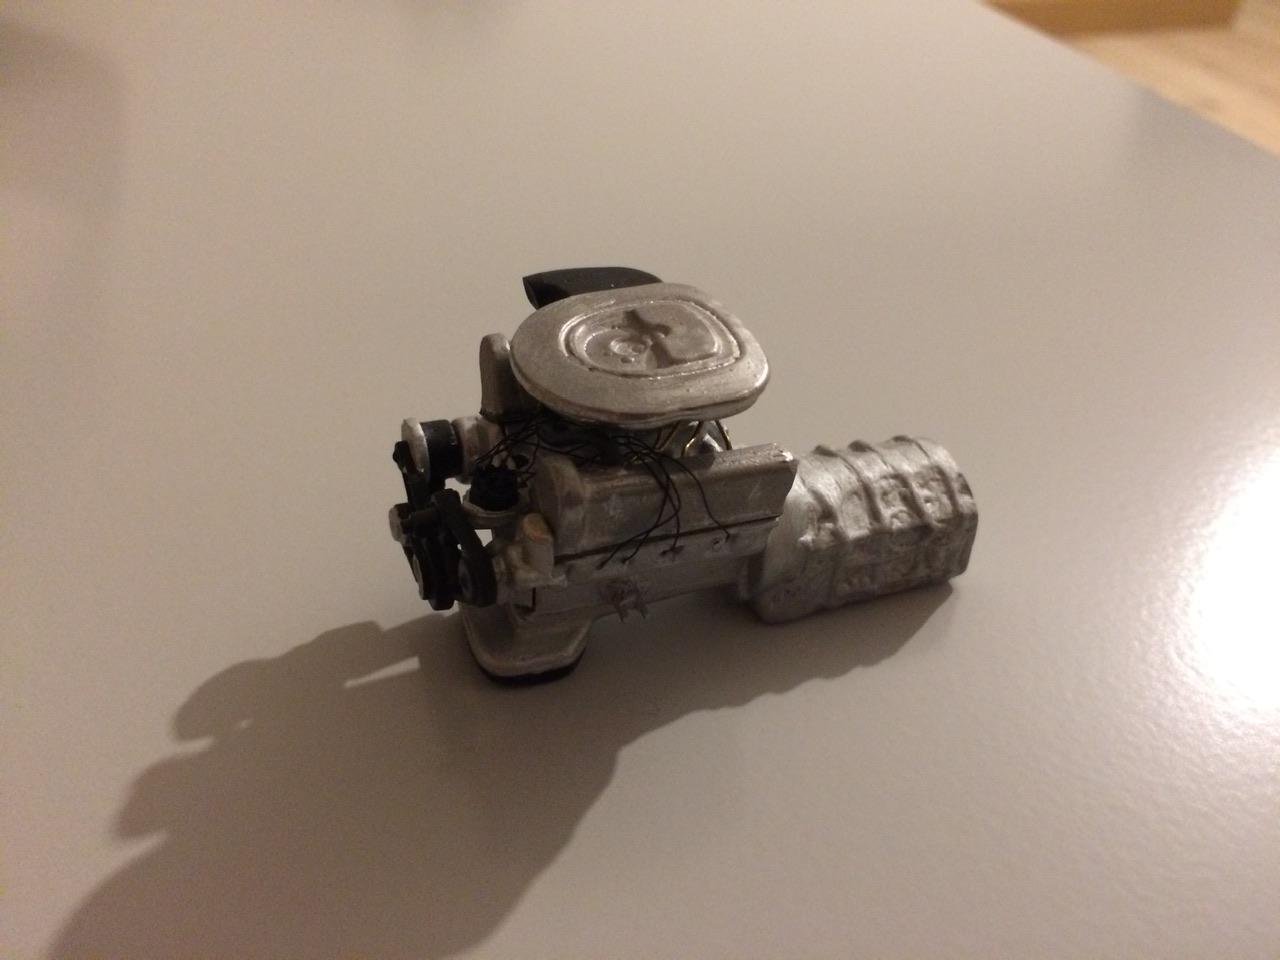
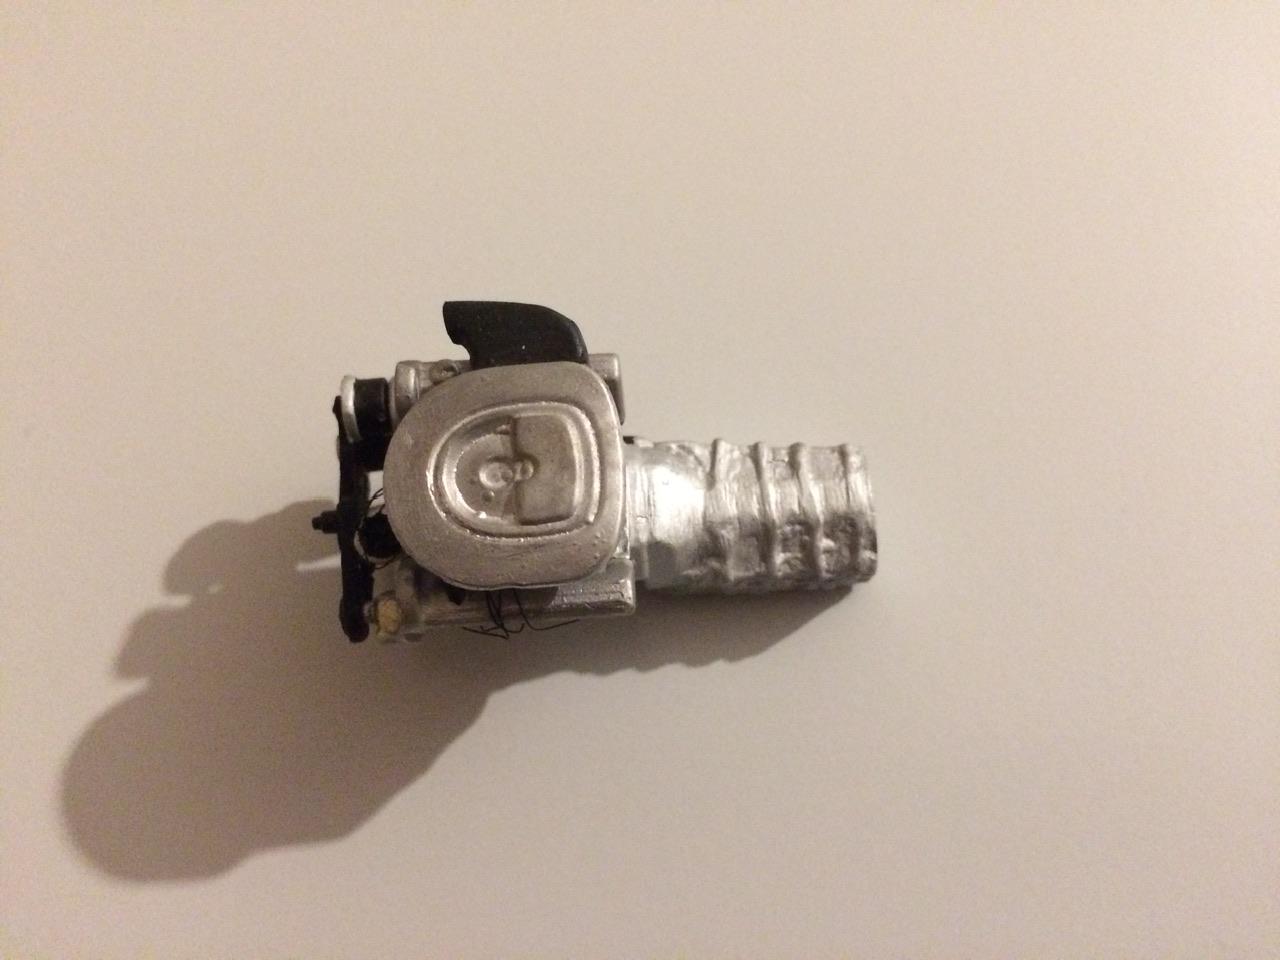
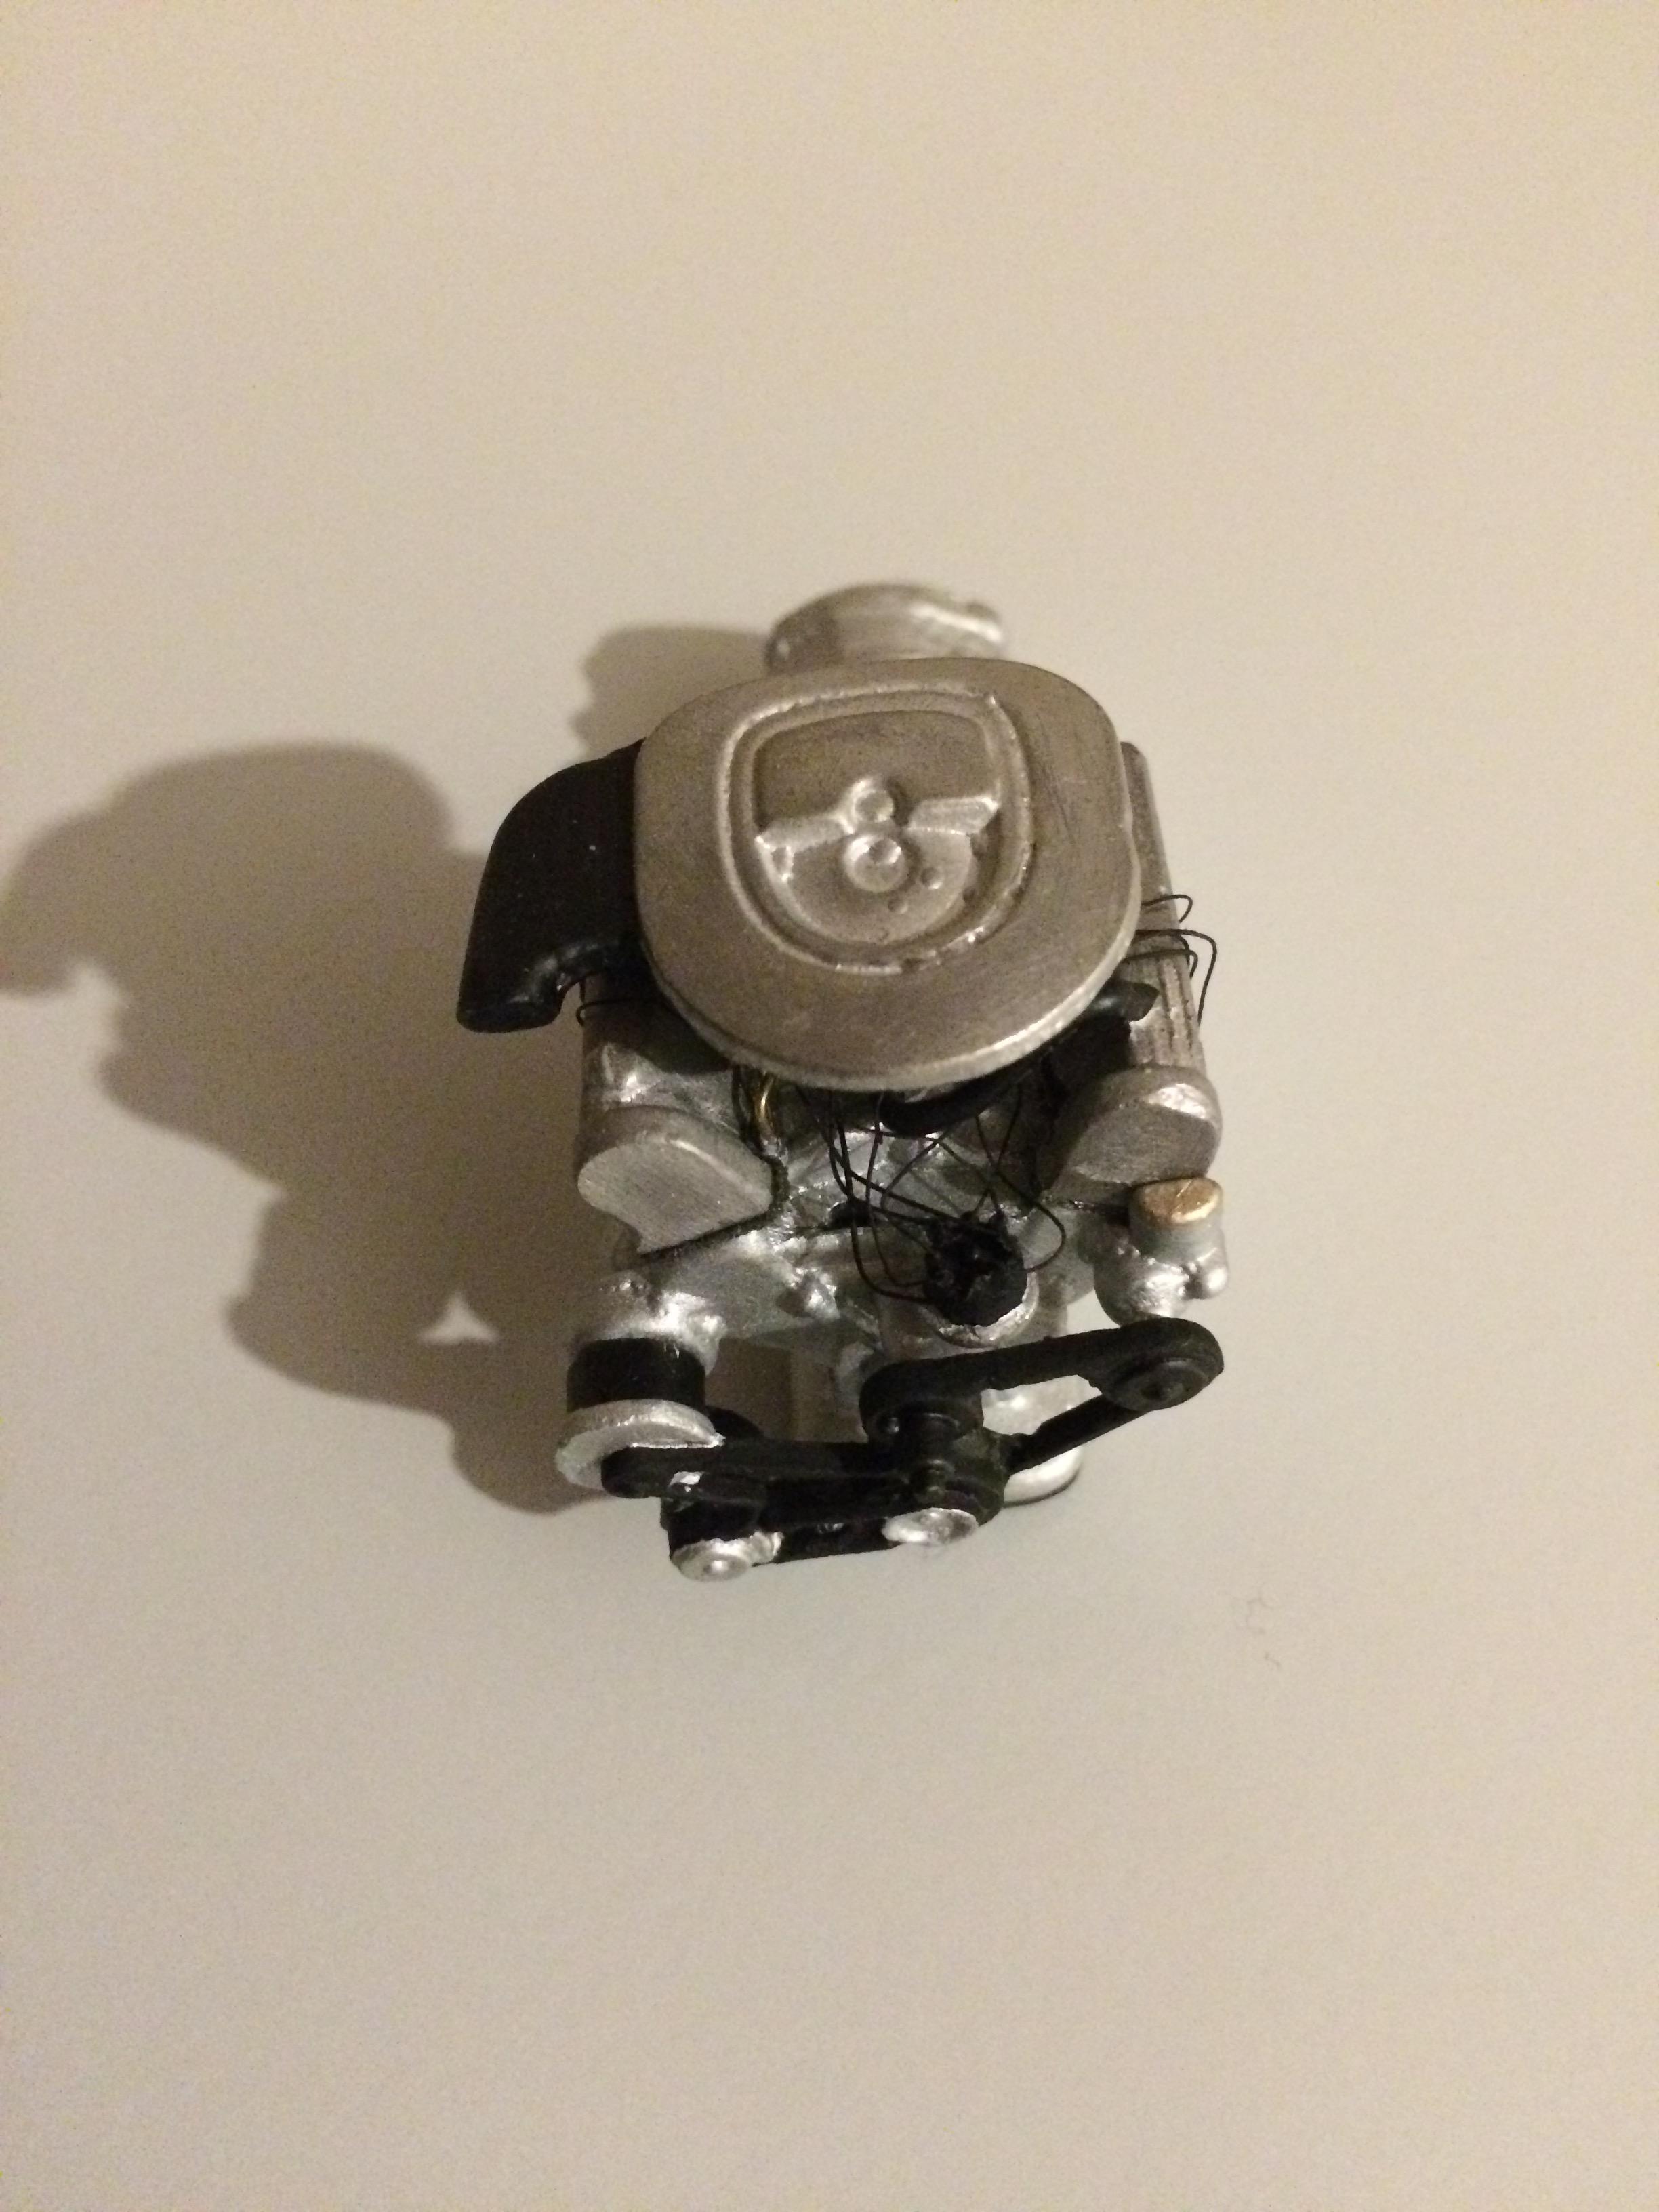
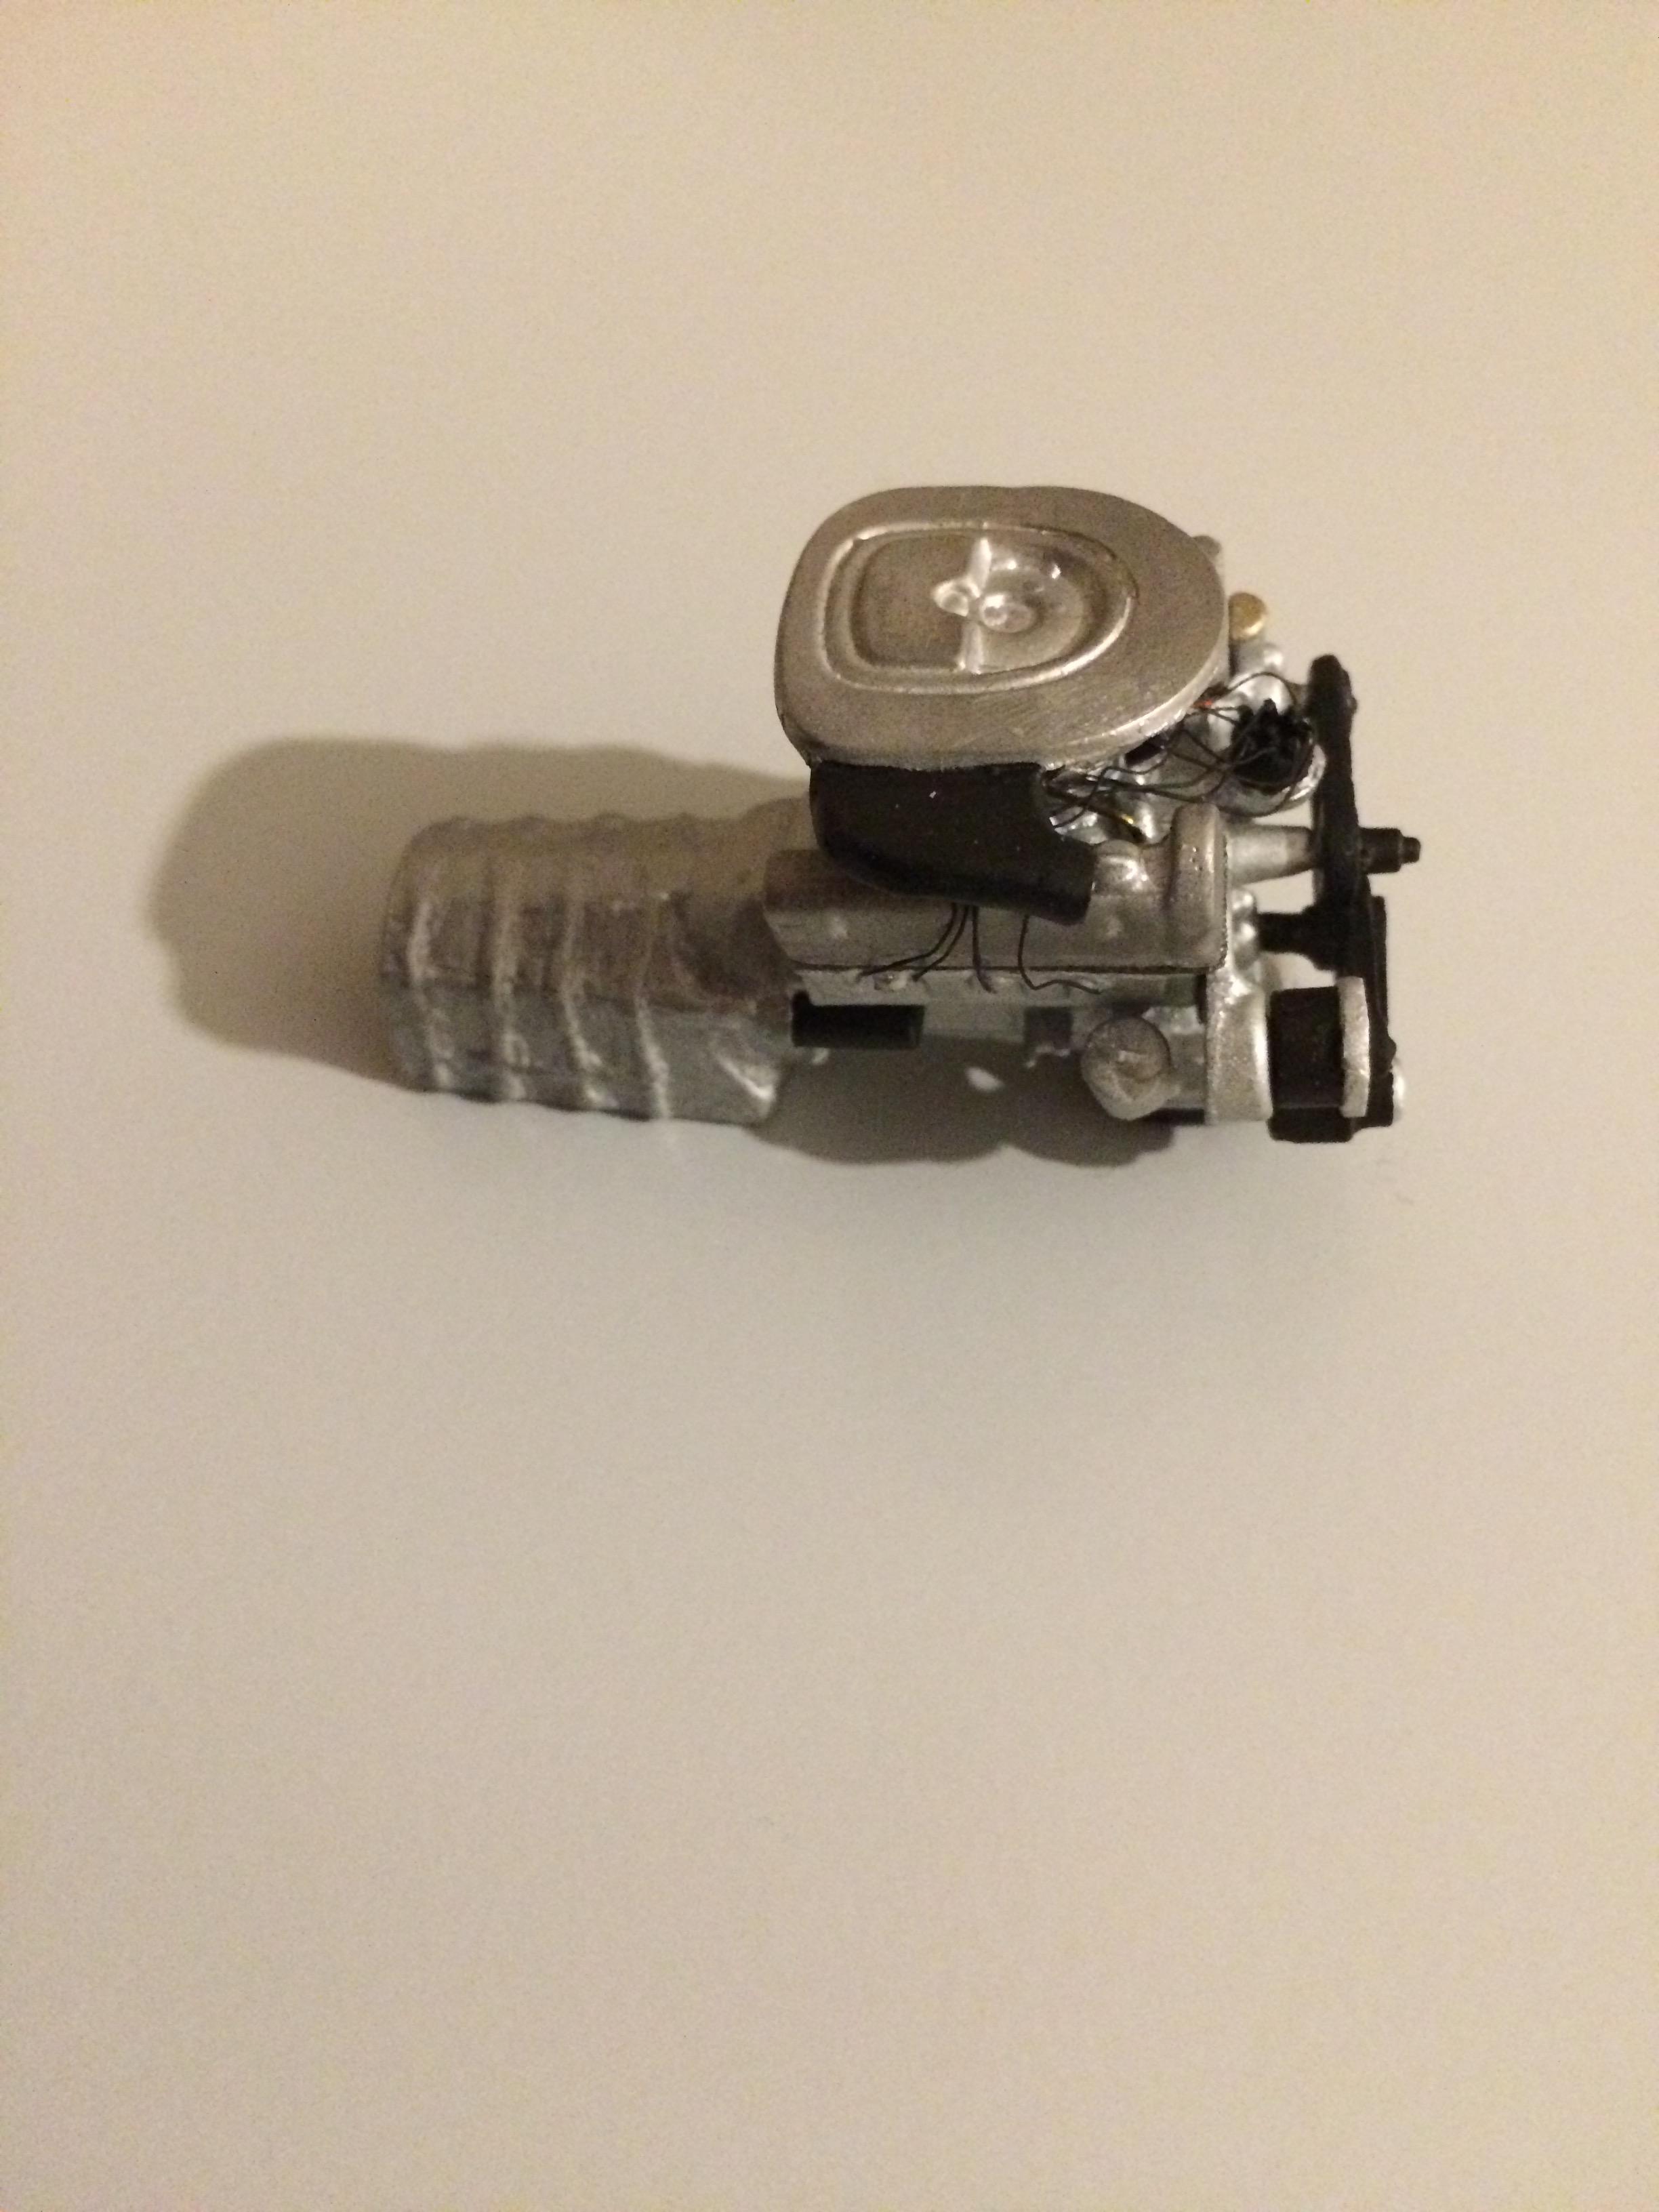
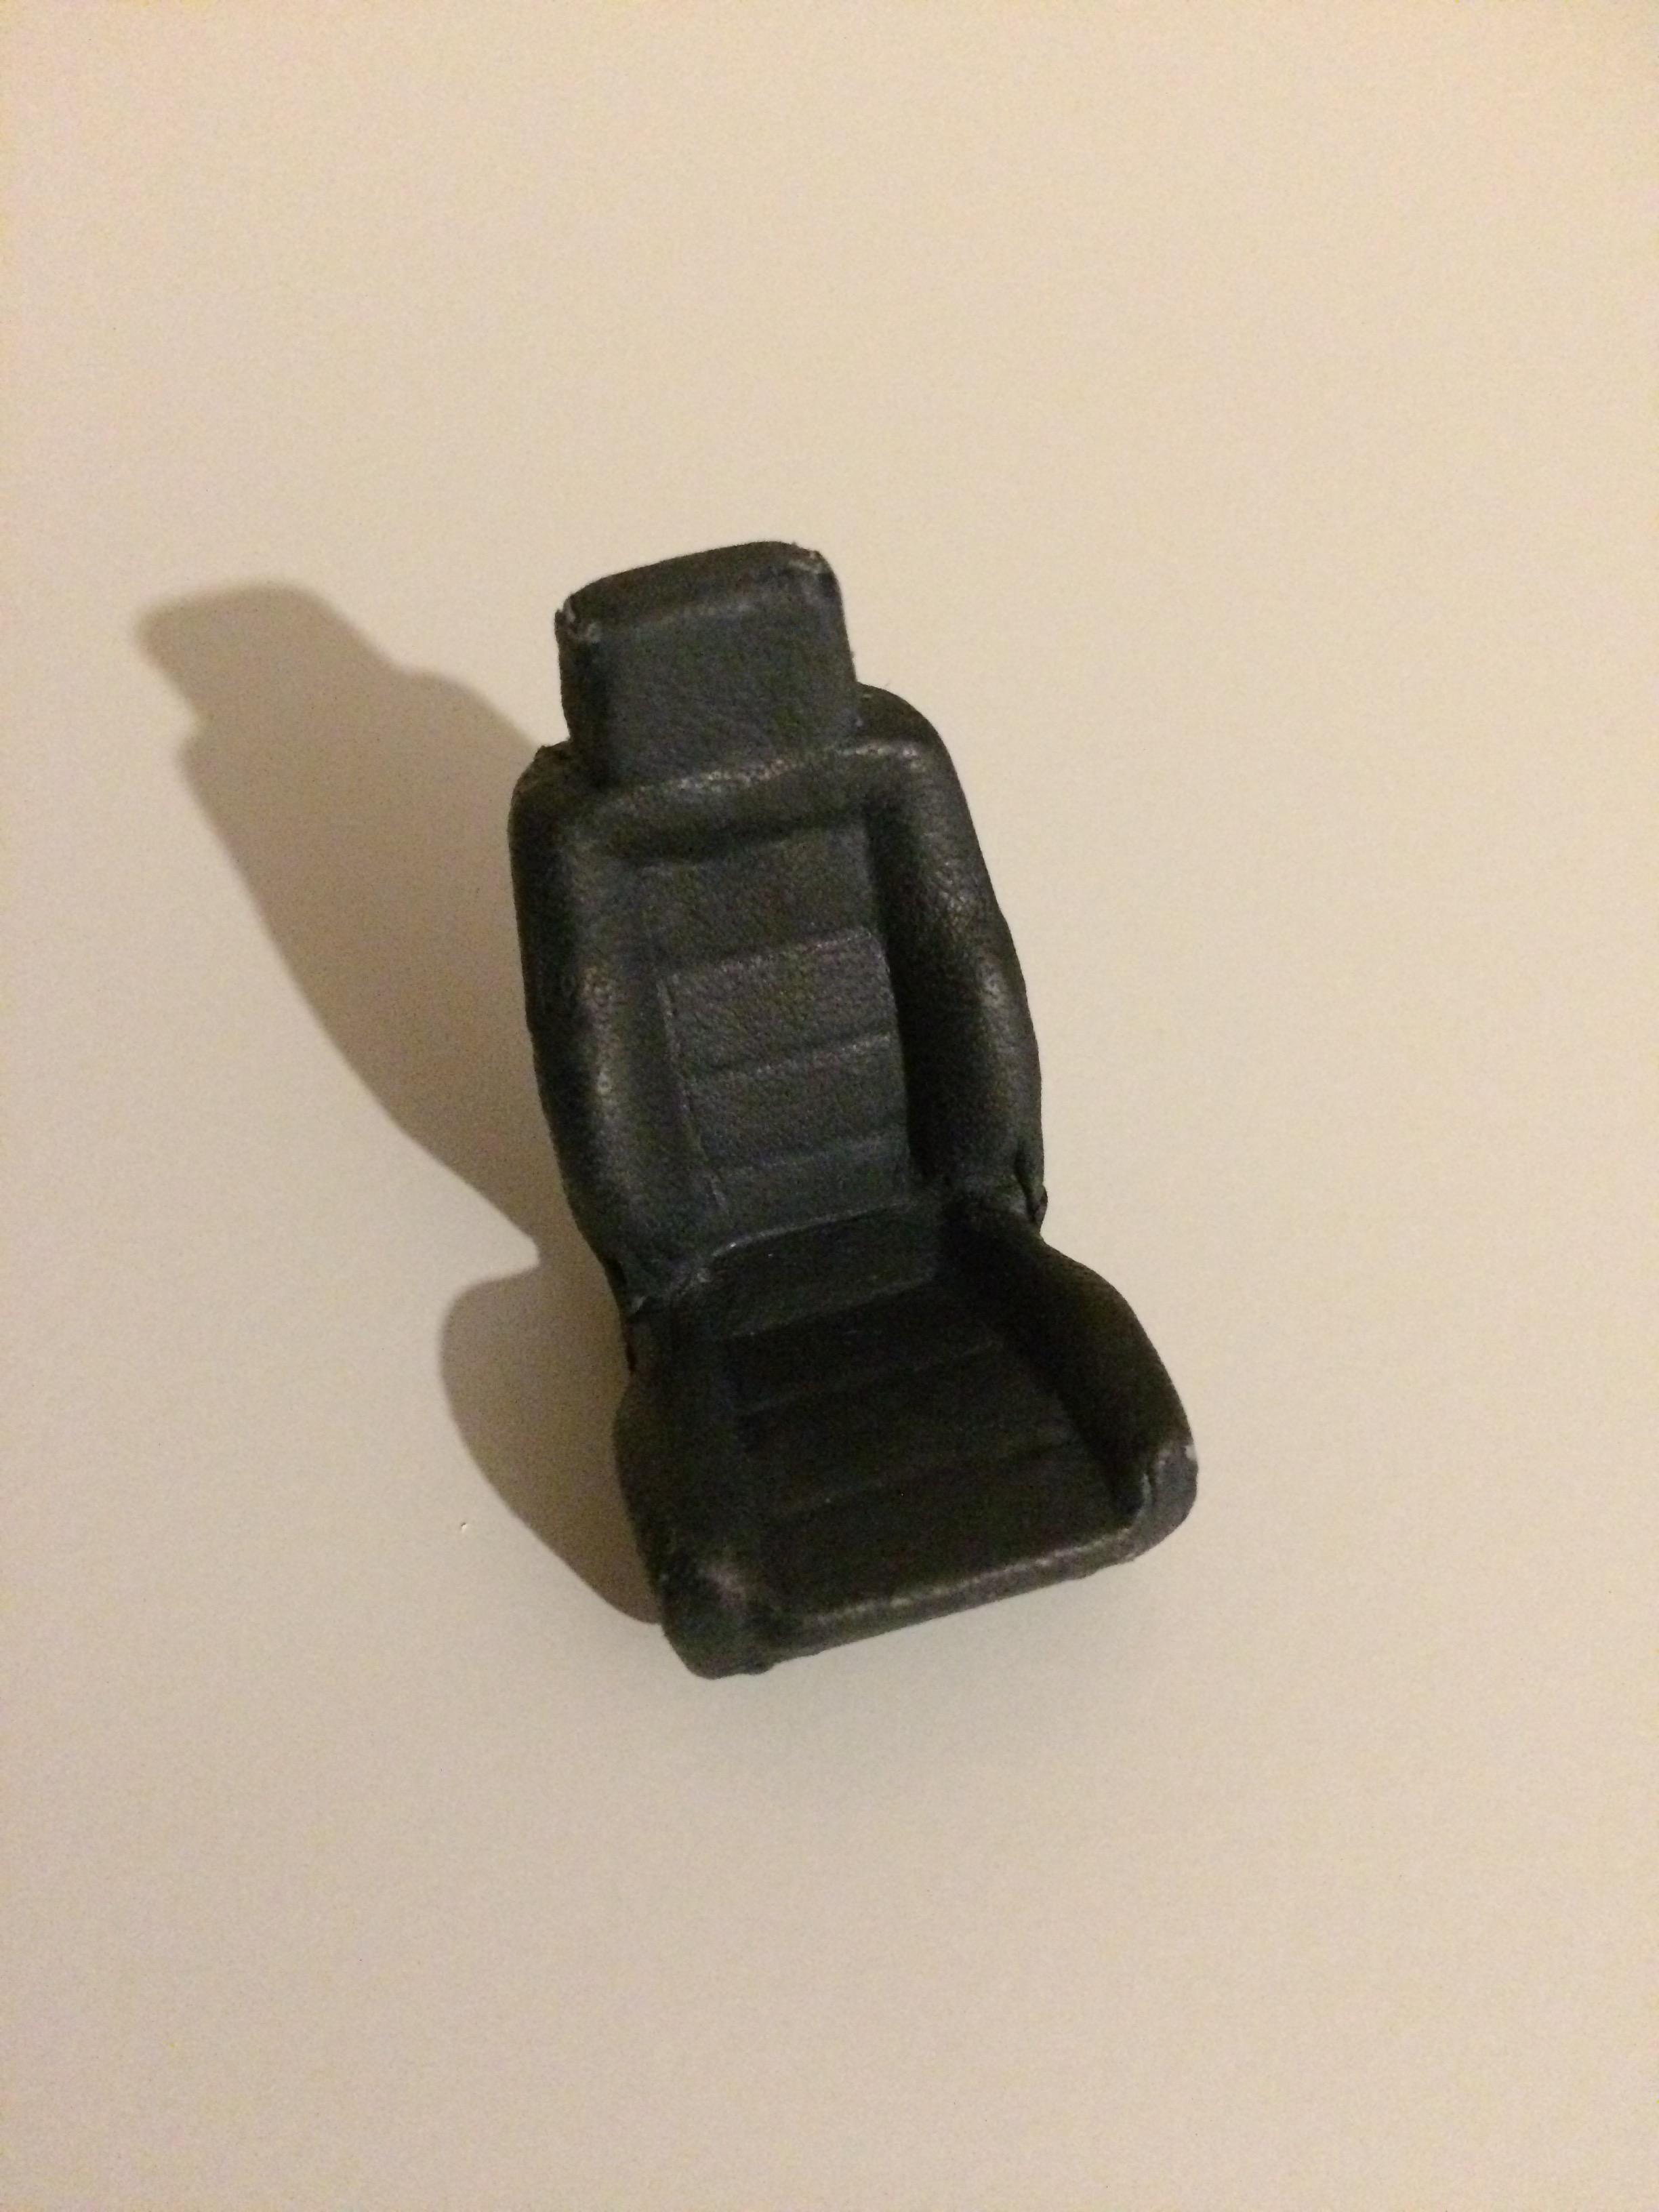
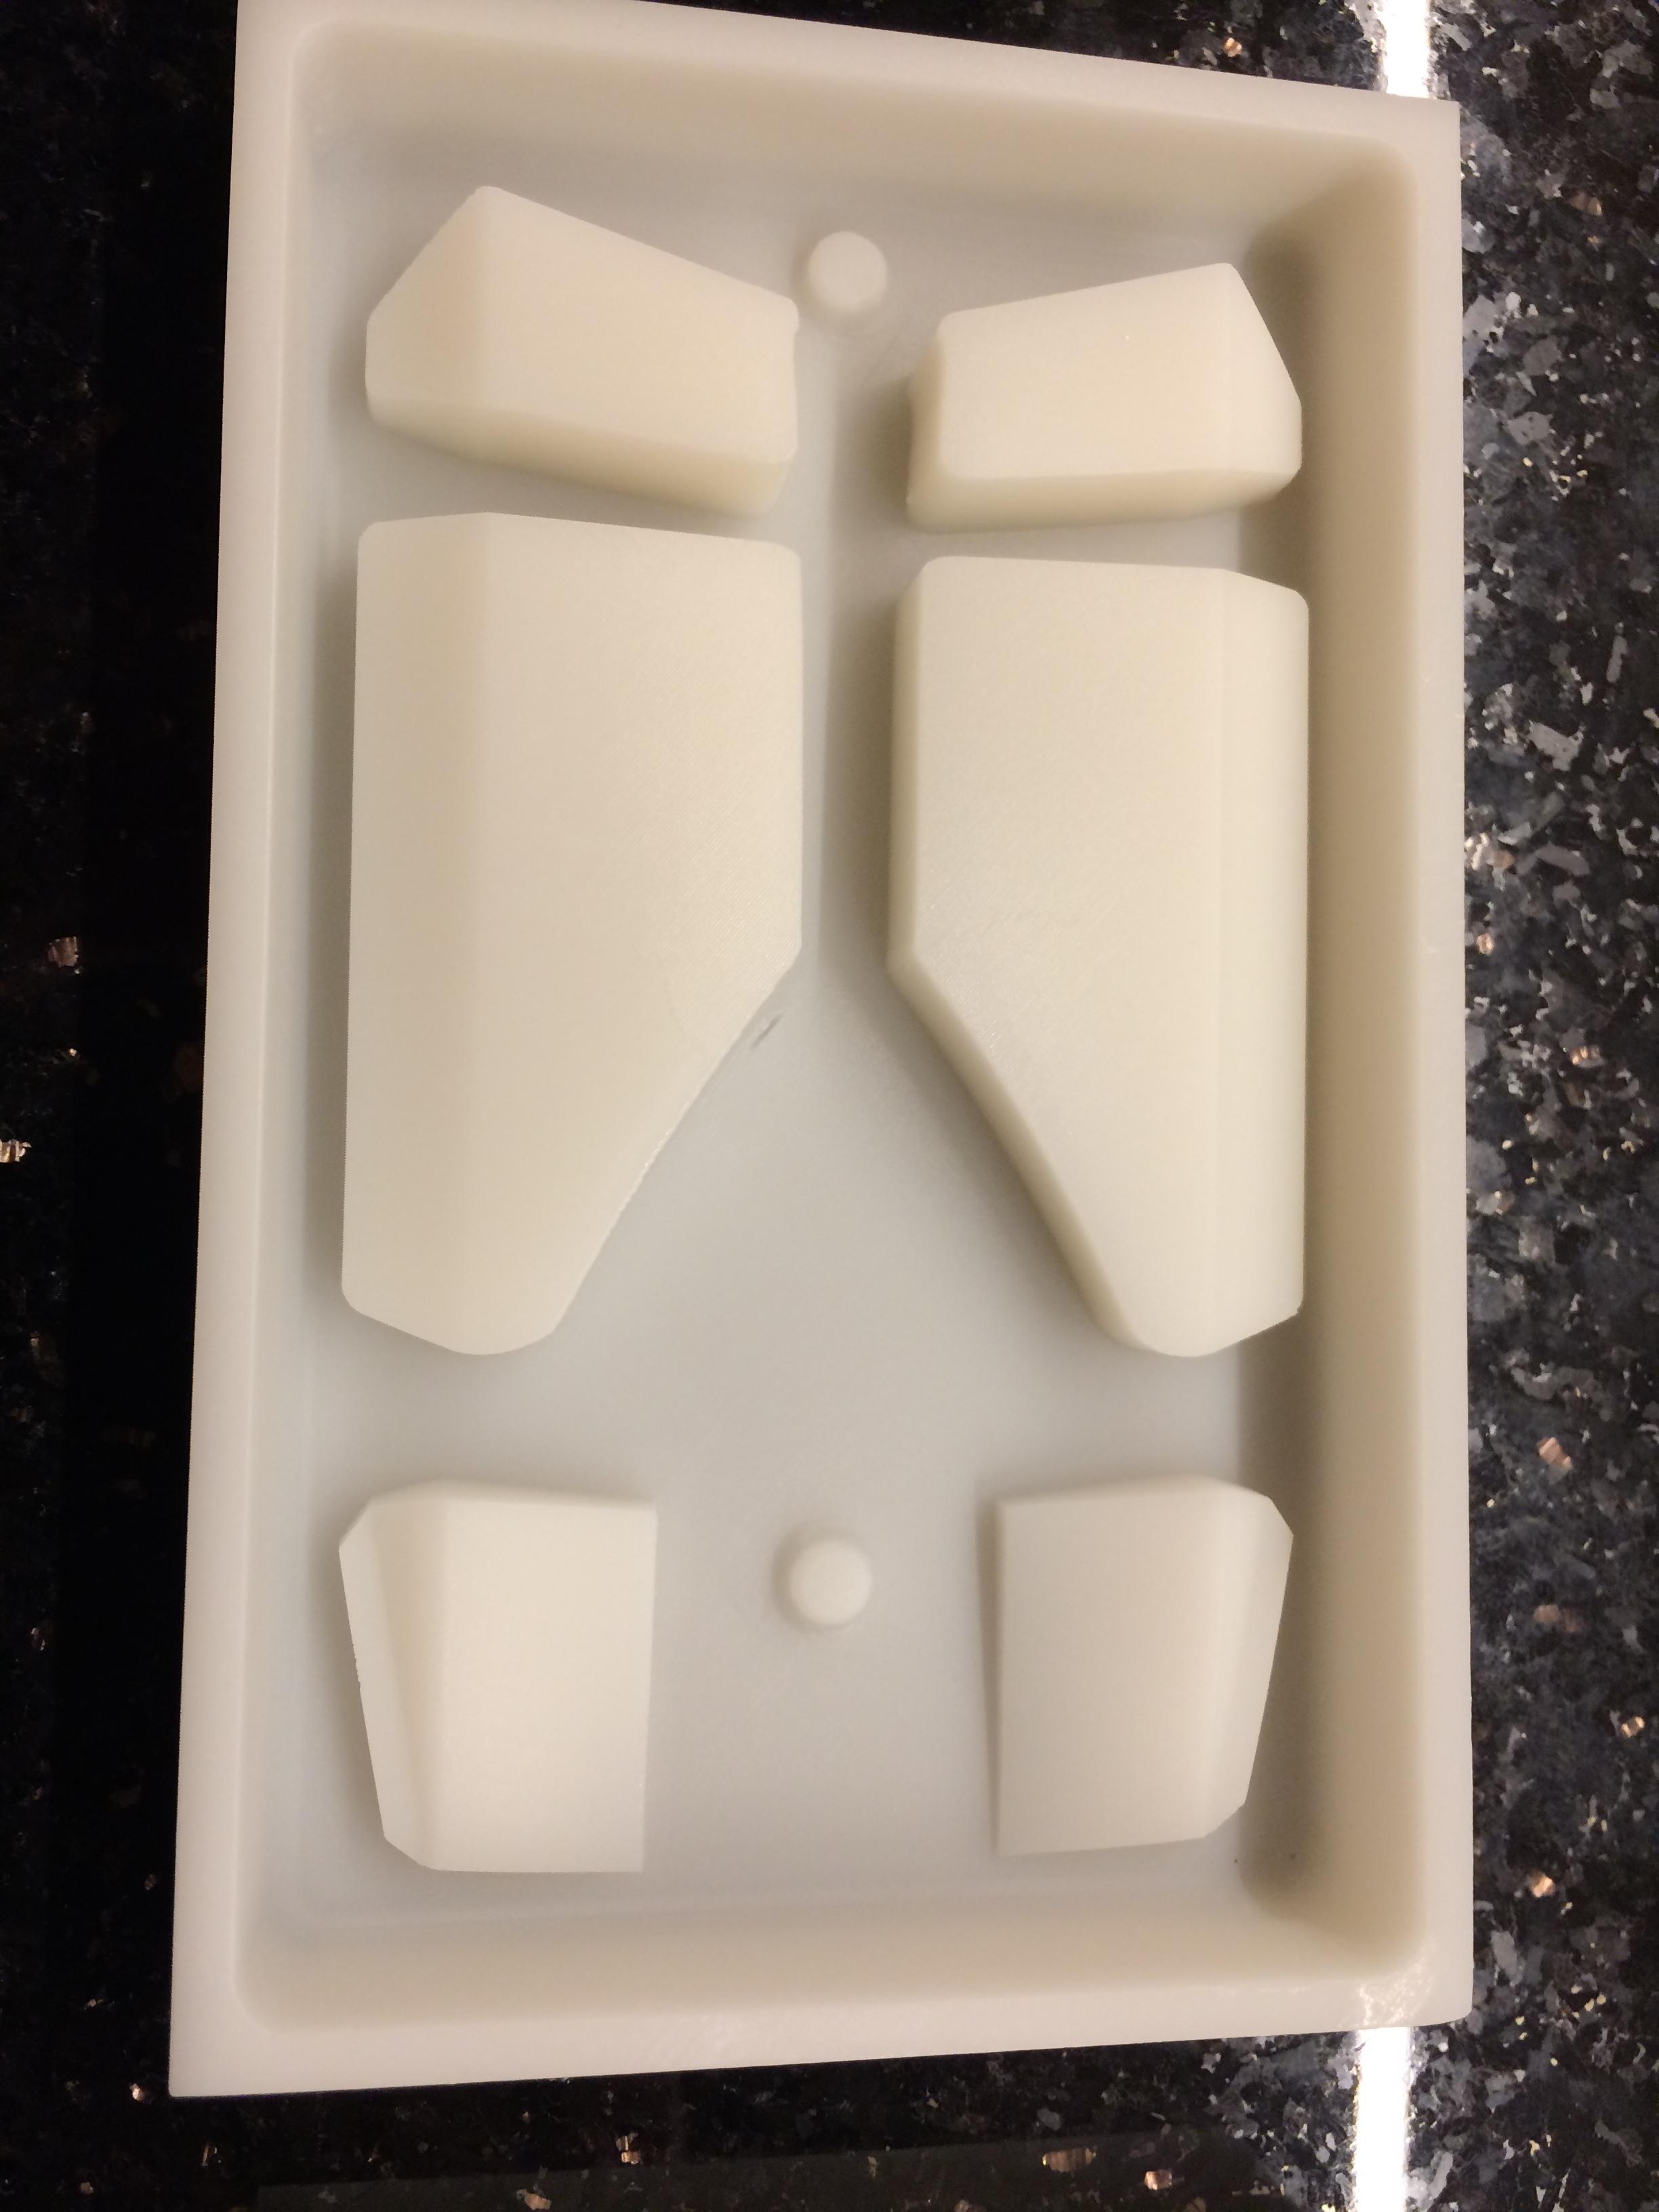
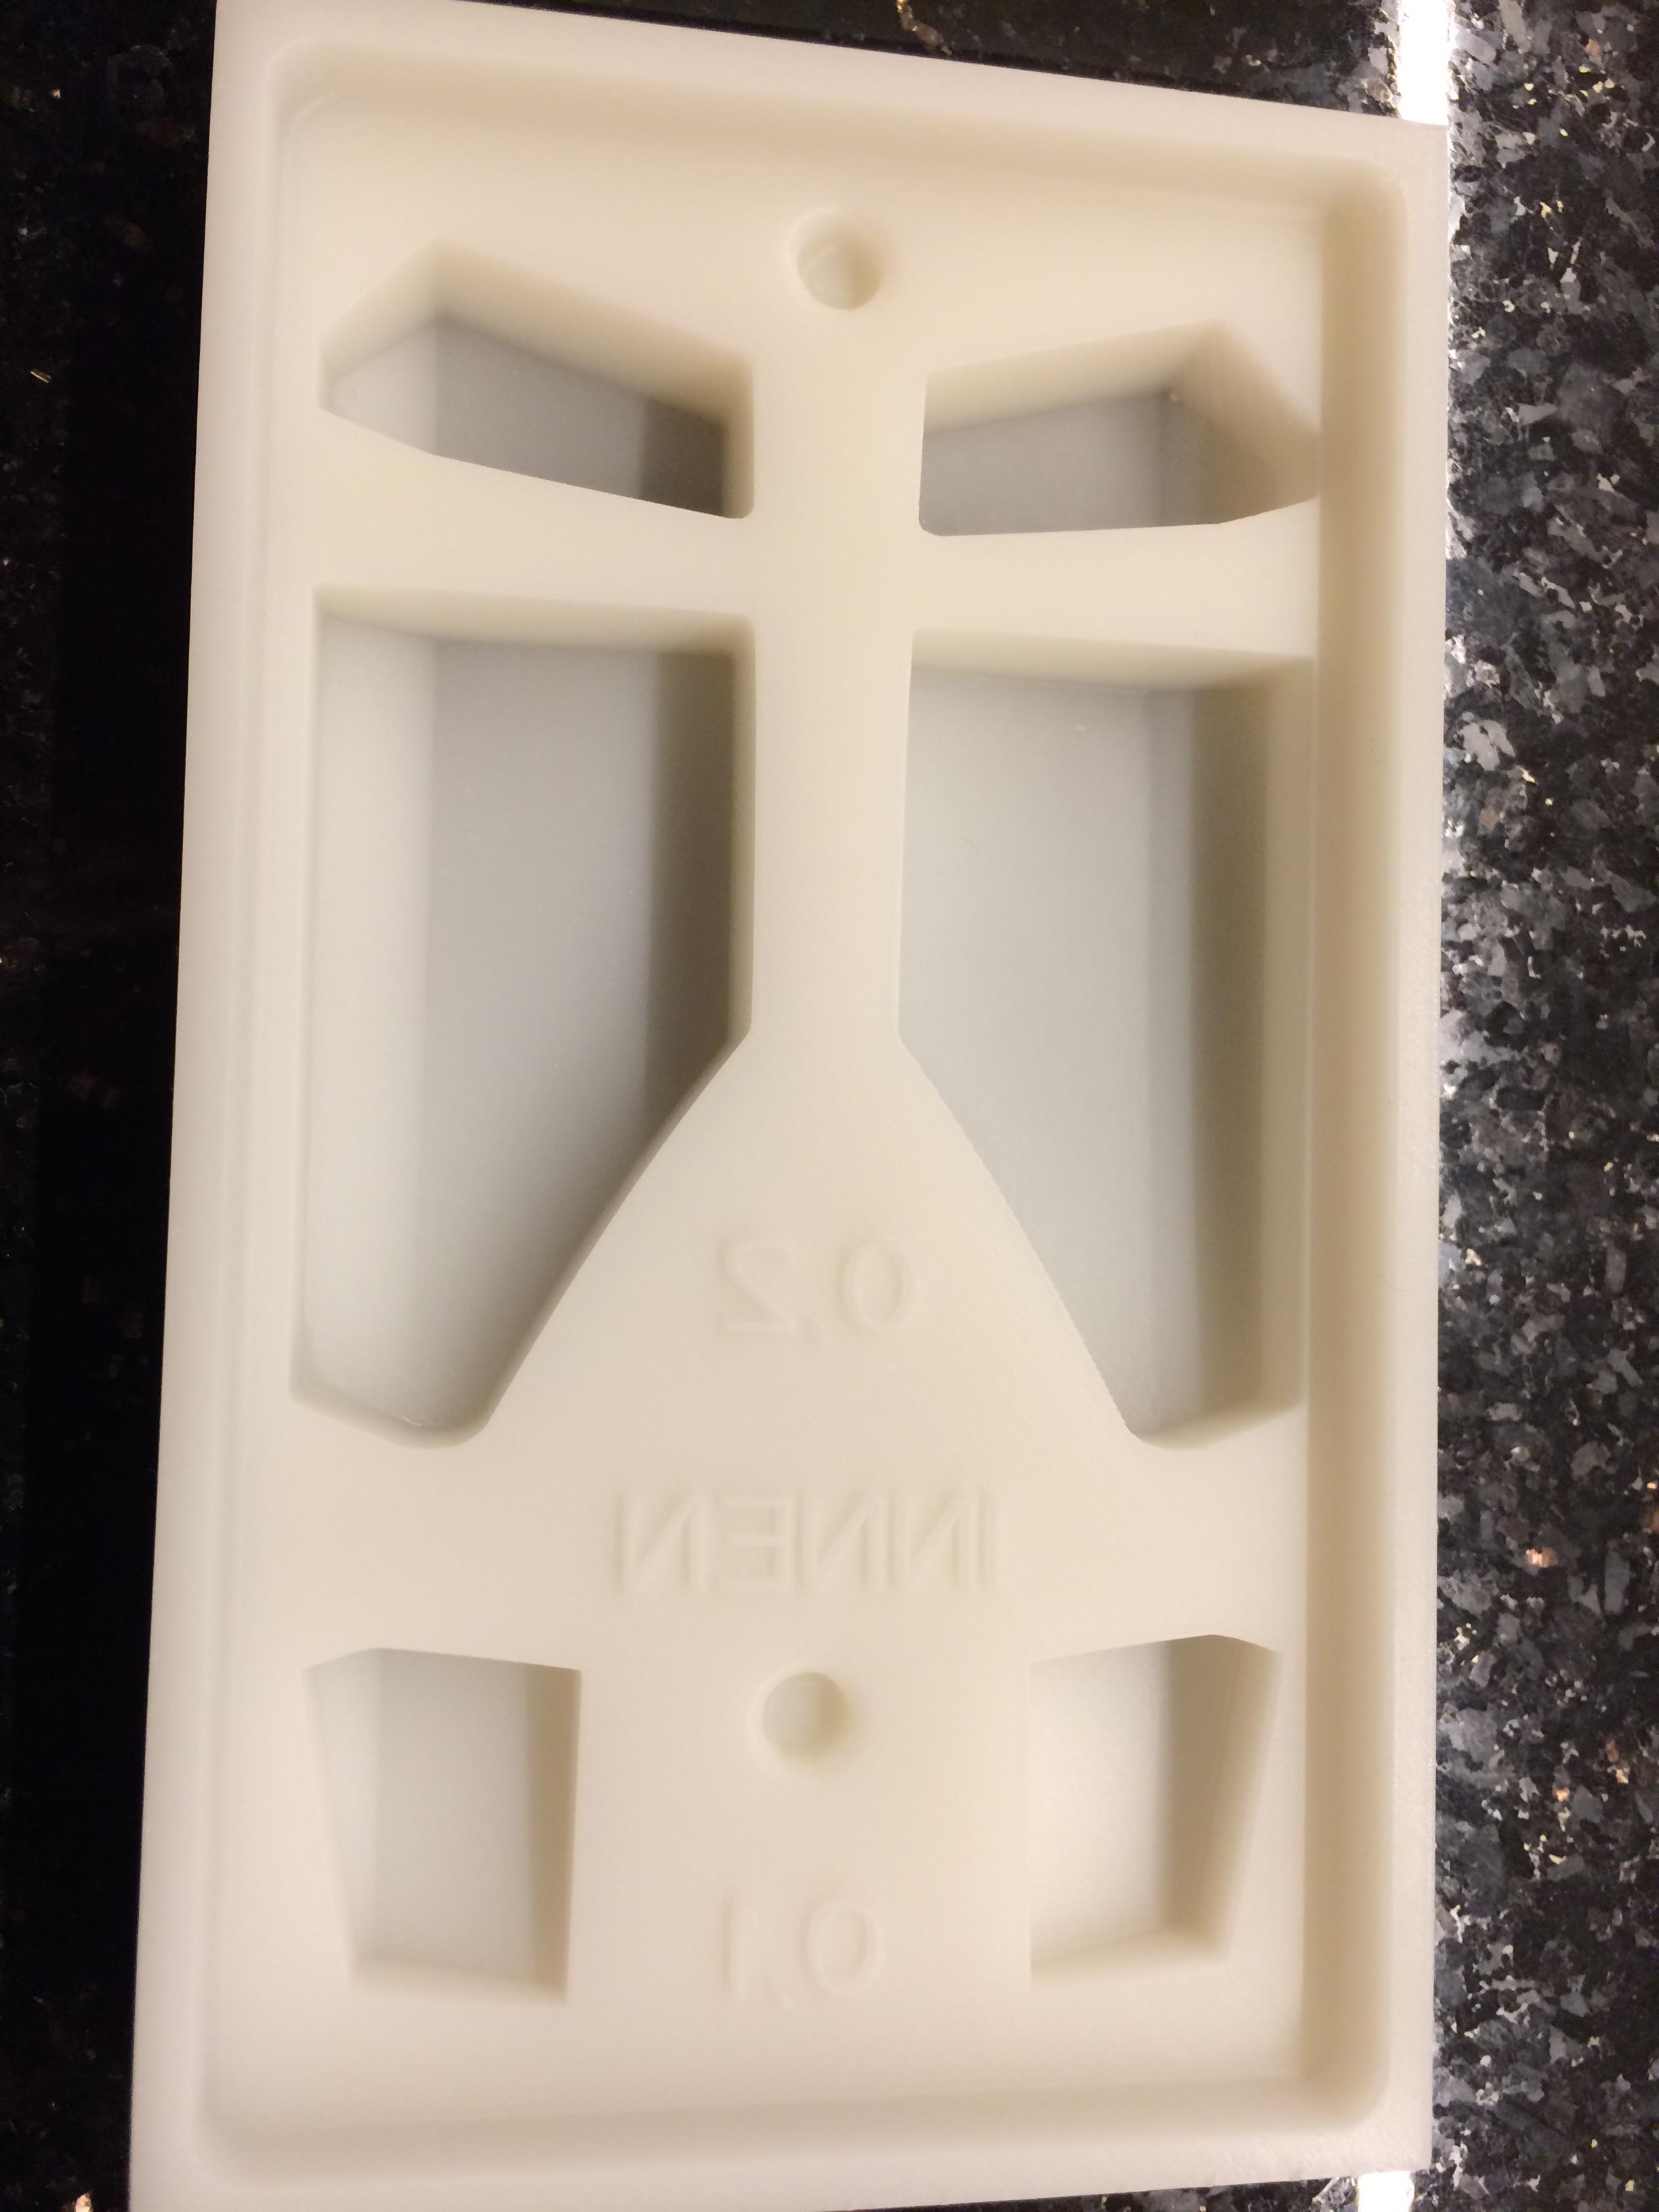
Chronicle Part 3: As the imperator has a Mercedes V8 engine and Recaro CS seats, I bought a Tamiya kit of the MB 500 SEC Lorinser. Inspired by the GunzeSangyo Fiat 500D kit that my dad gave me for christmas I decided to do the engine and the seats with white metal. So I used the Tamiya parts to make casting forms out of plaster. The parts look like this:
-
Thank you, Happy New Year too. Yes I am still - after more than 30 years - following this project. The original plan has been to use the wooden model to form sheetmetall around it. But meanwhile I changed to something different. Will post it soon.
-
Thank you Joe. I think a sculpture like this would be cool: Lamborghini sculpture But for now I have something different in the works….
-
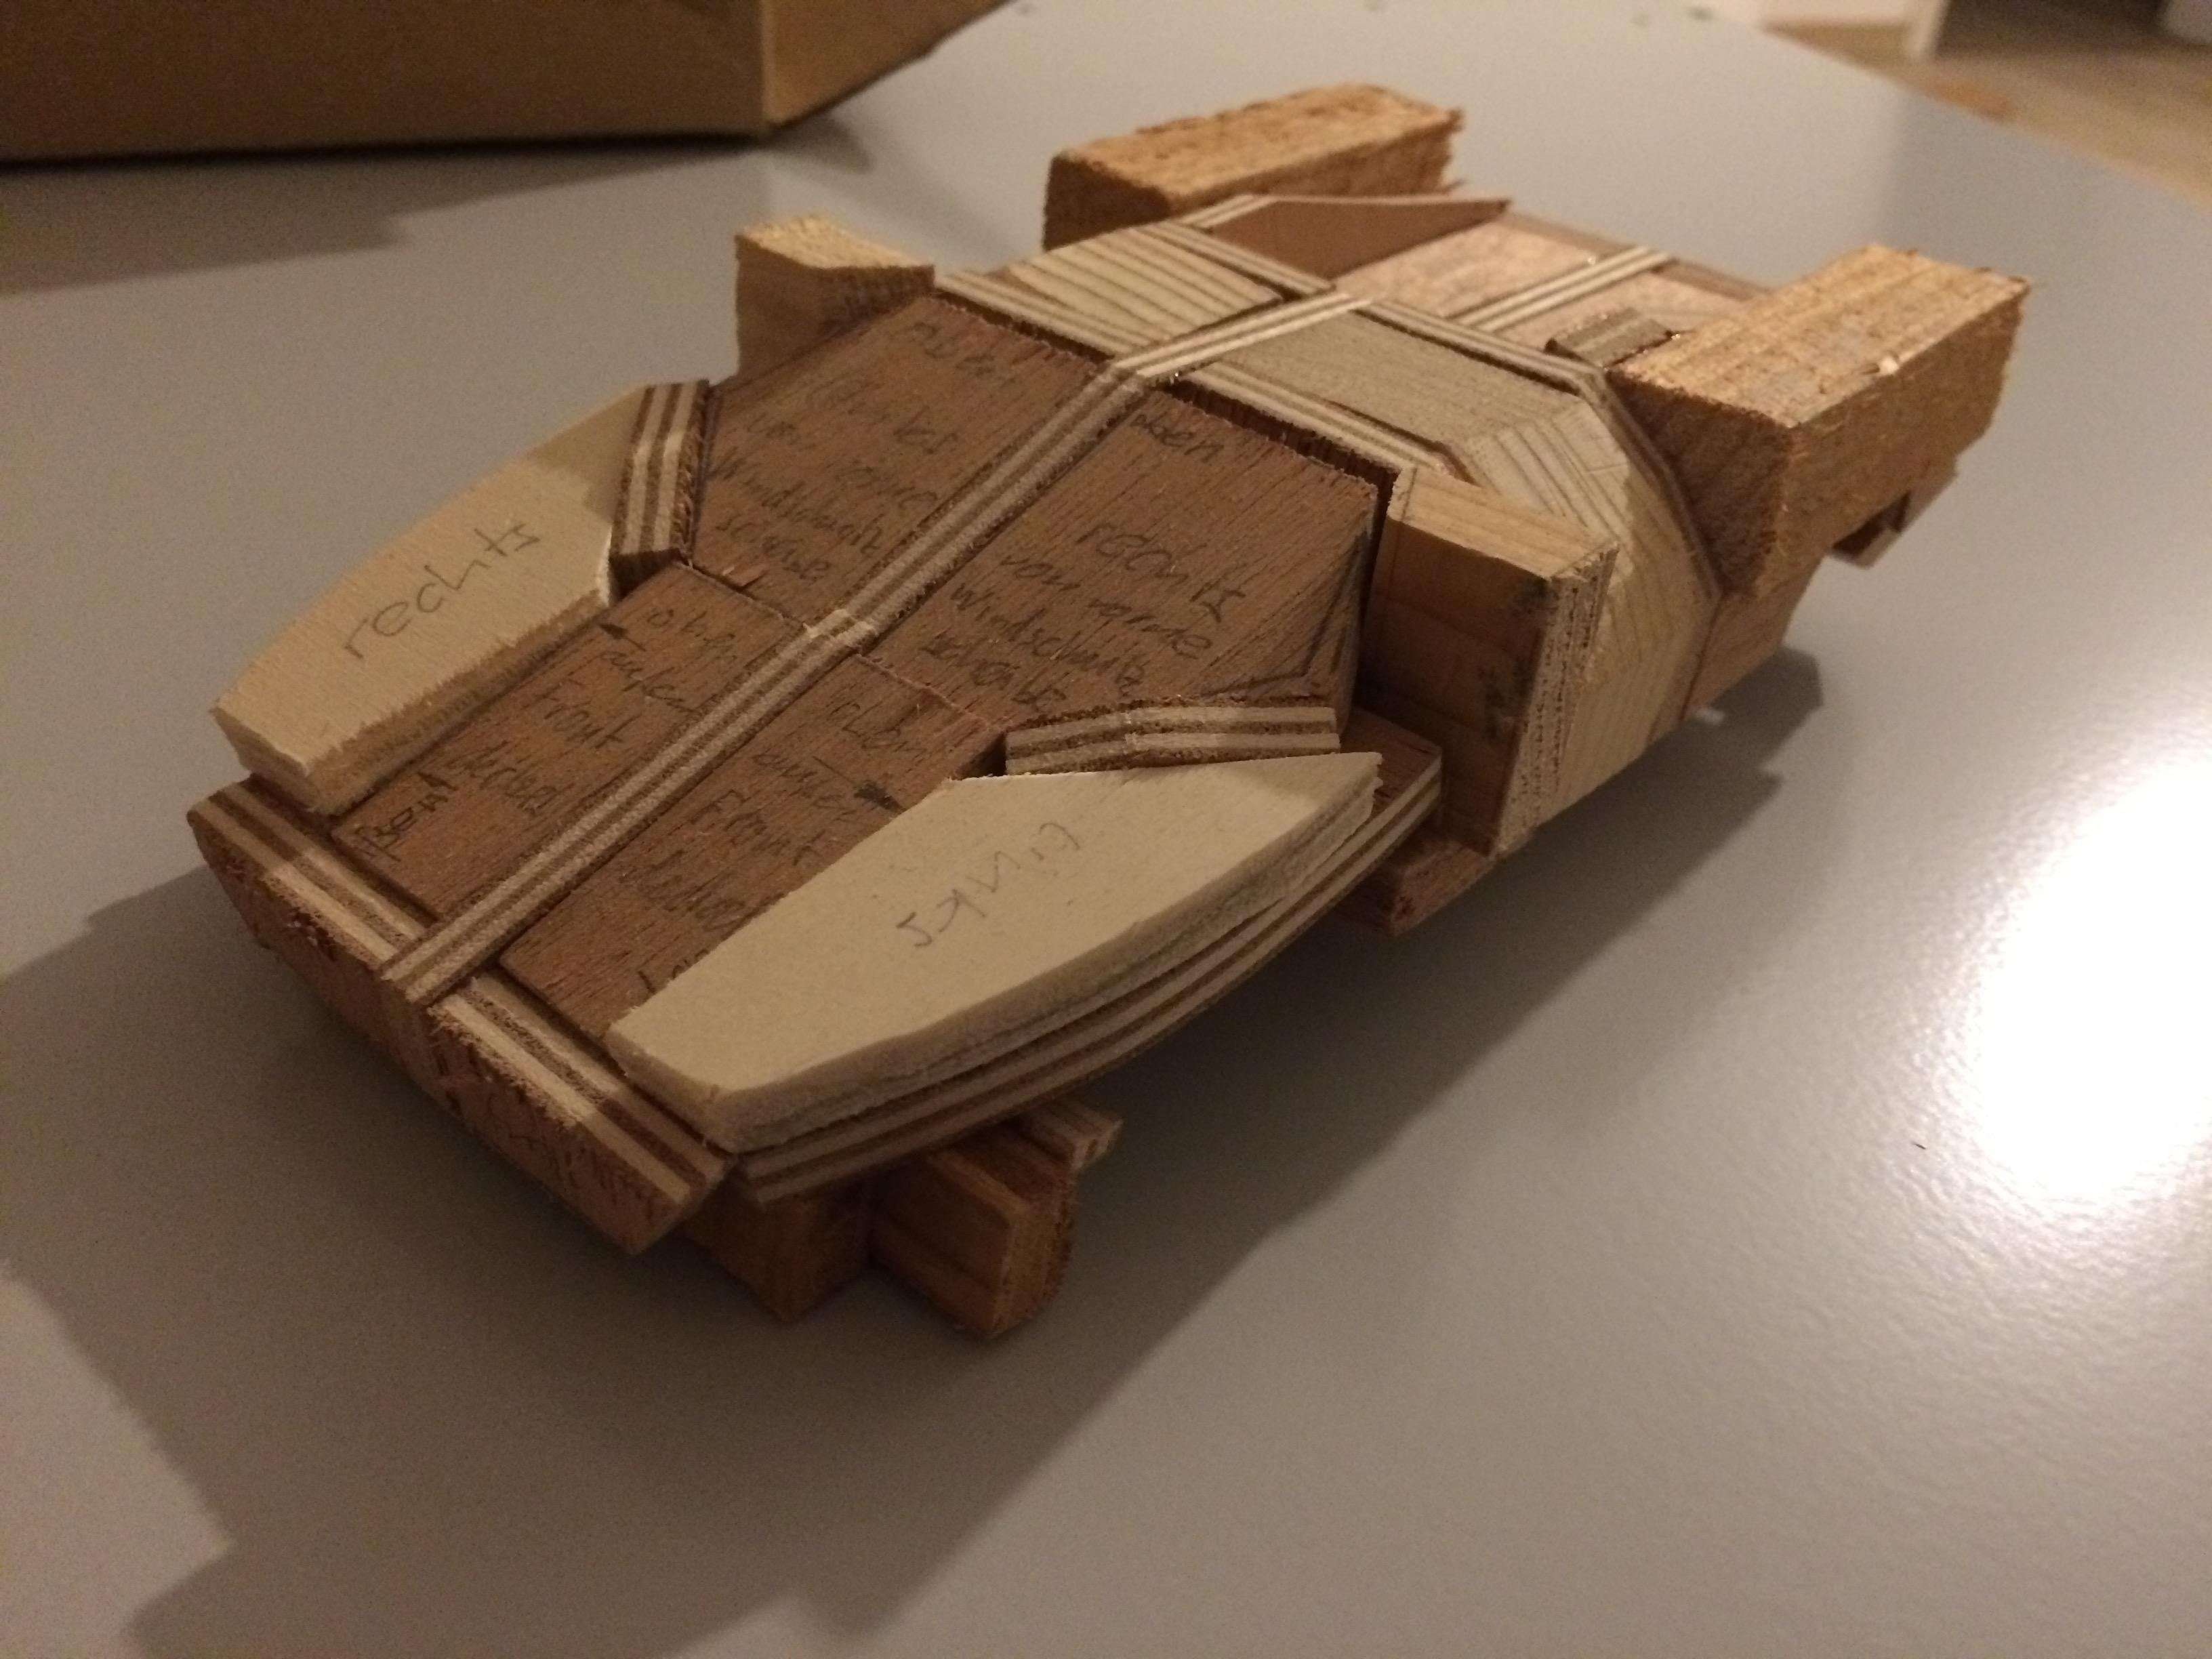
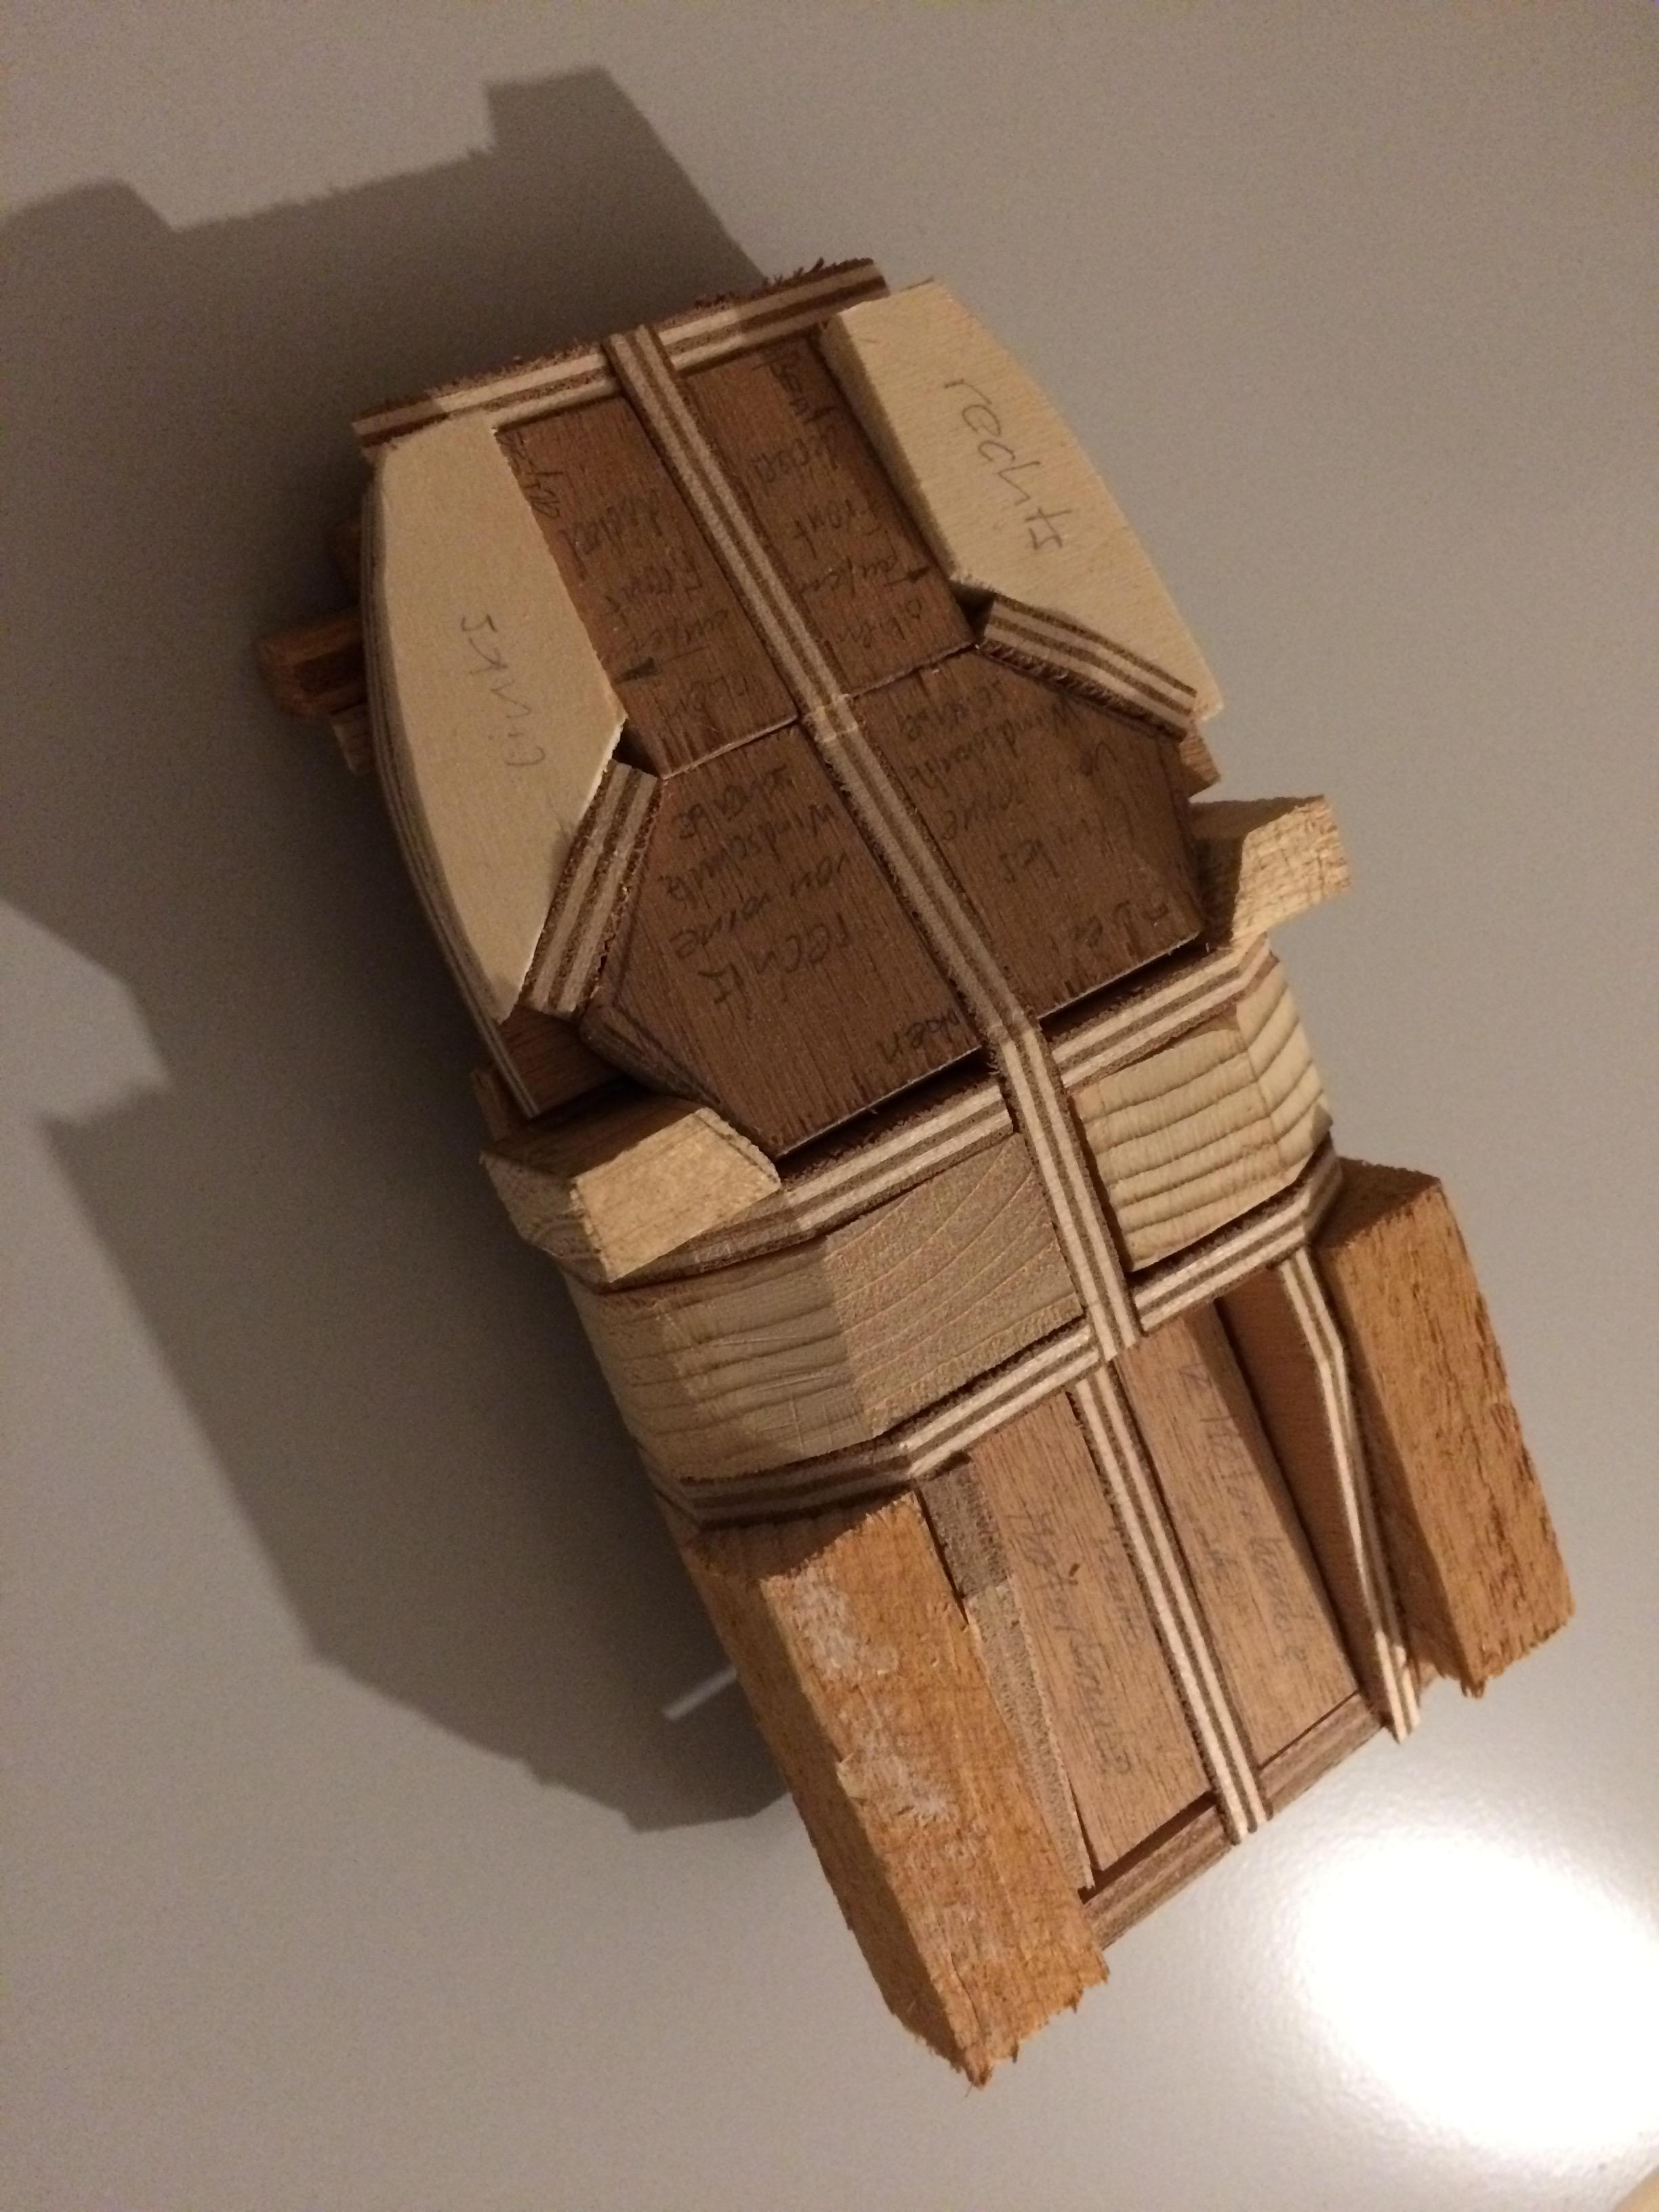
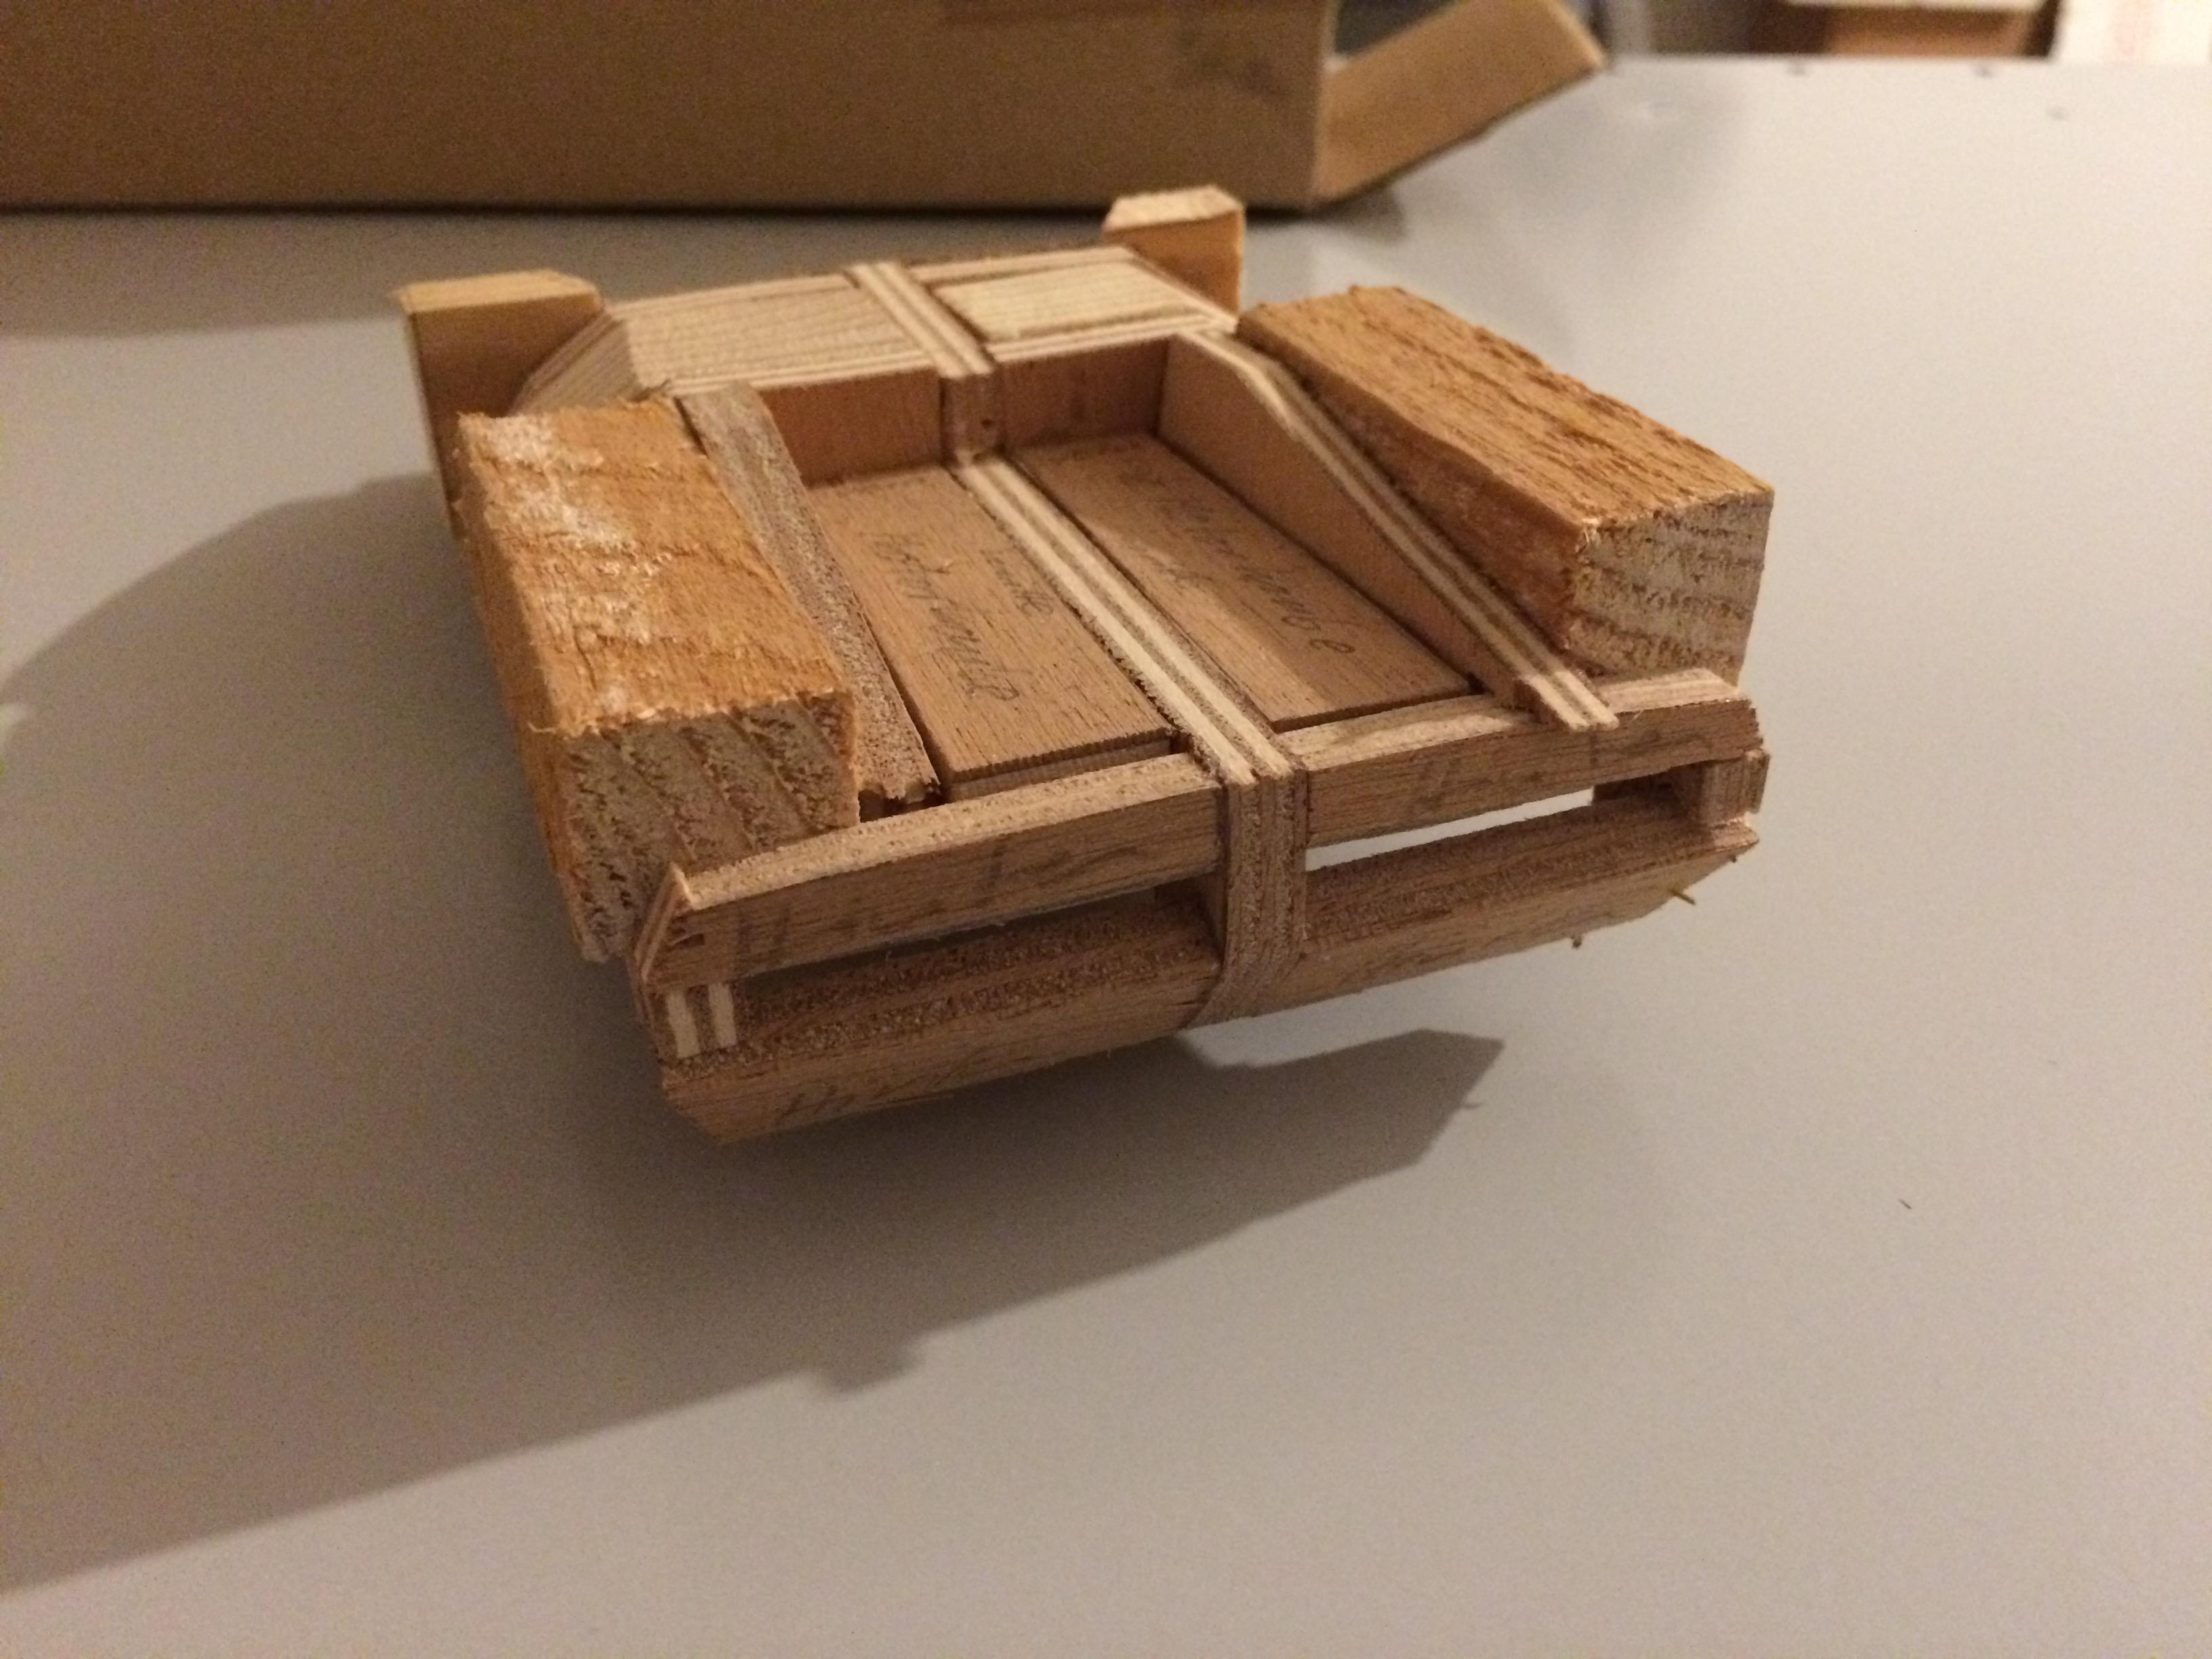
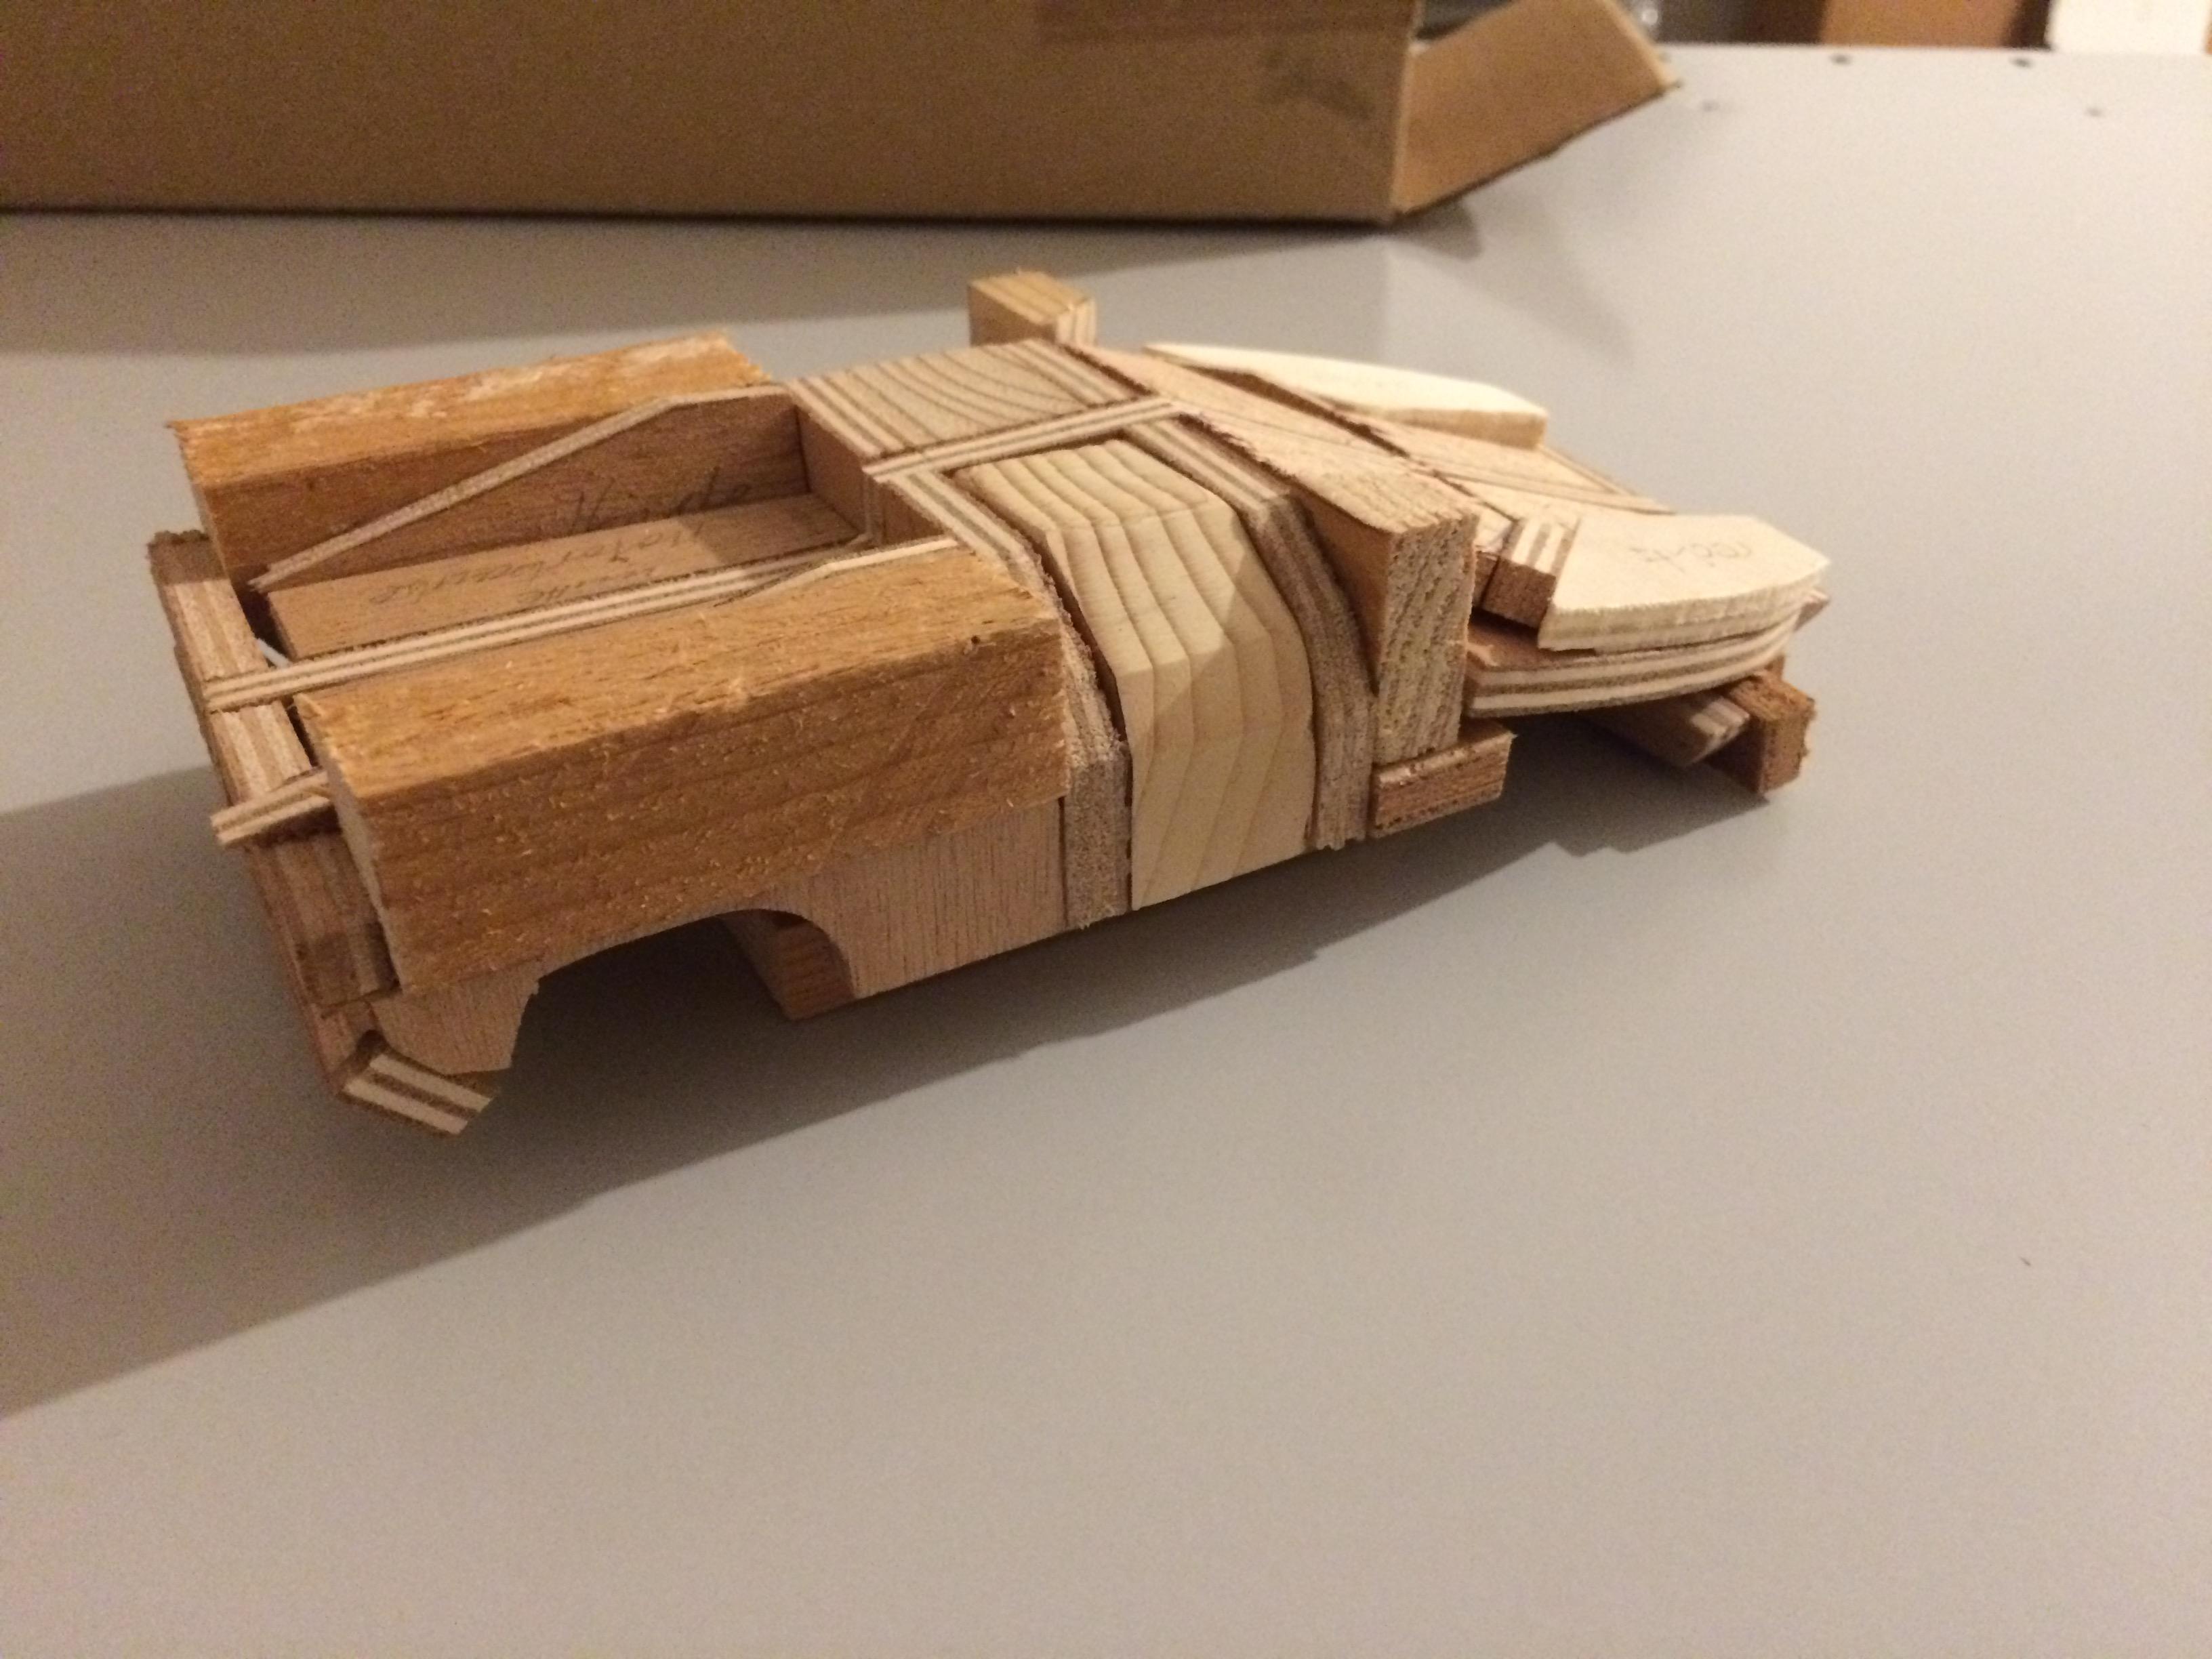
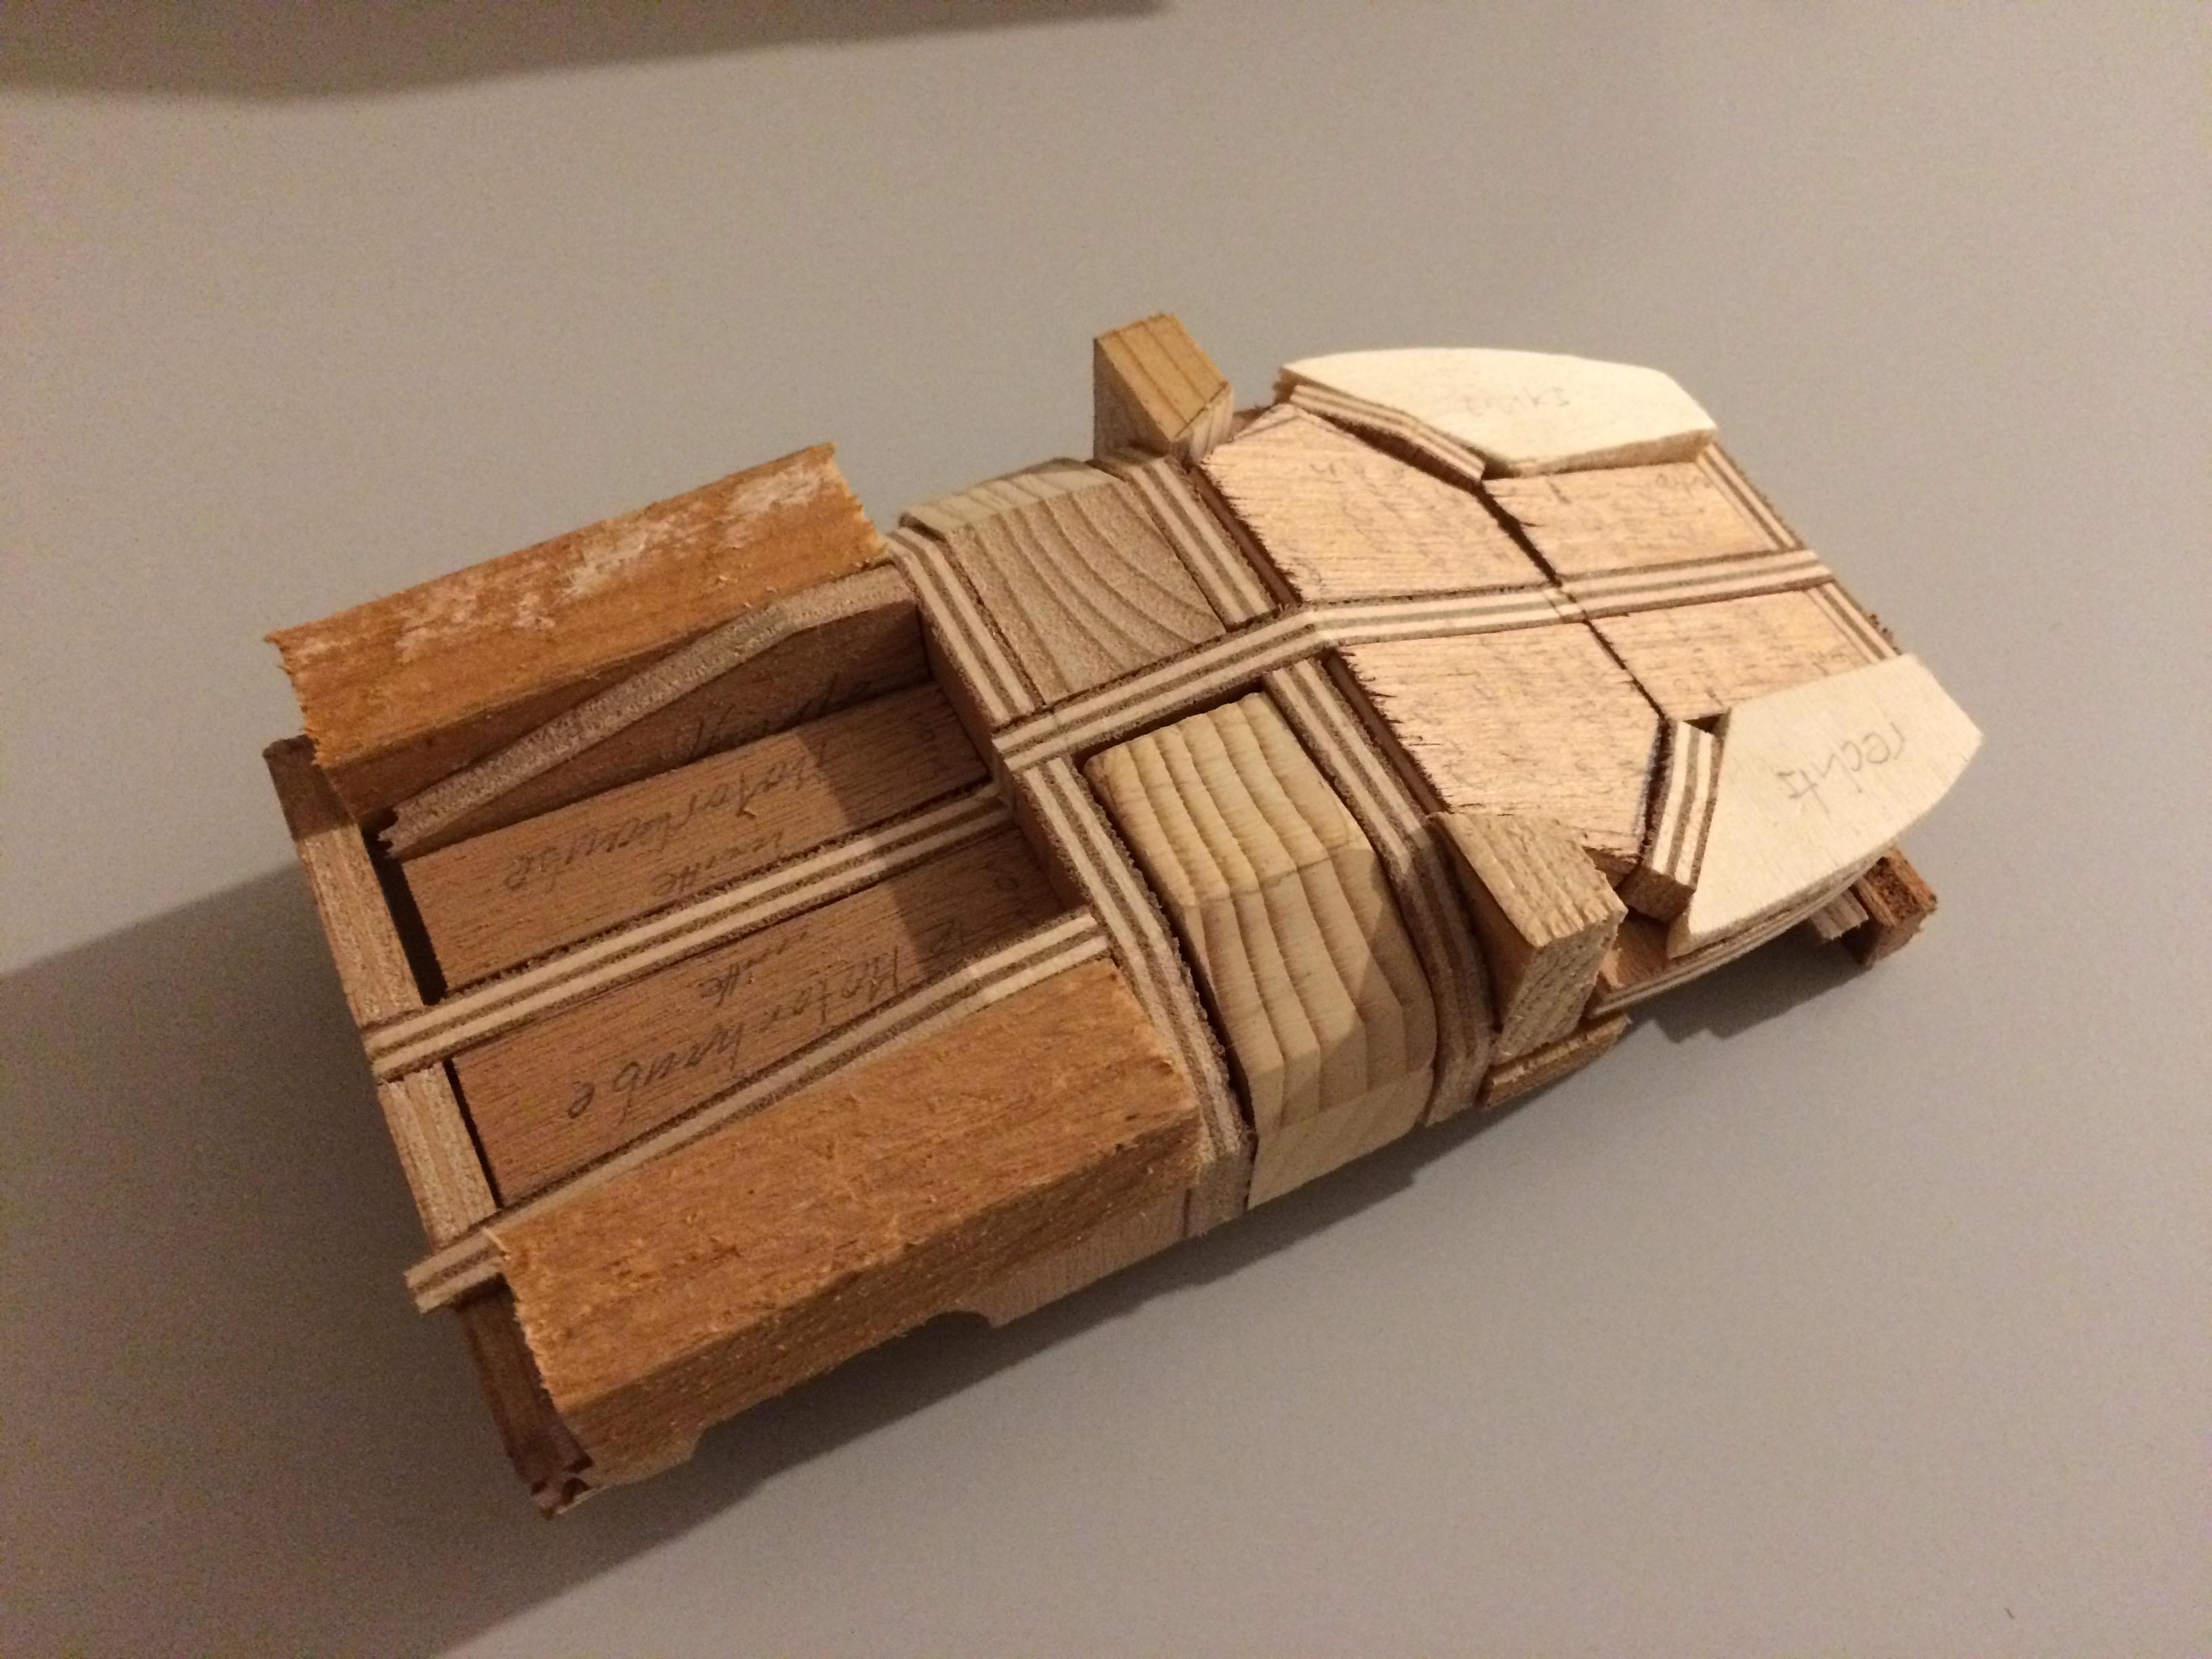
Chronicle Part 2: After the cardboard model I startet to built a wooden model. But I never finished it…
-
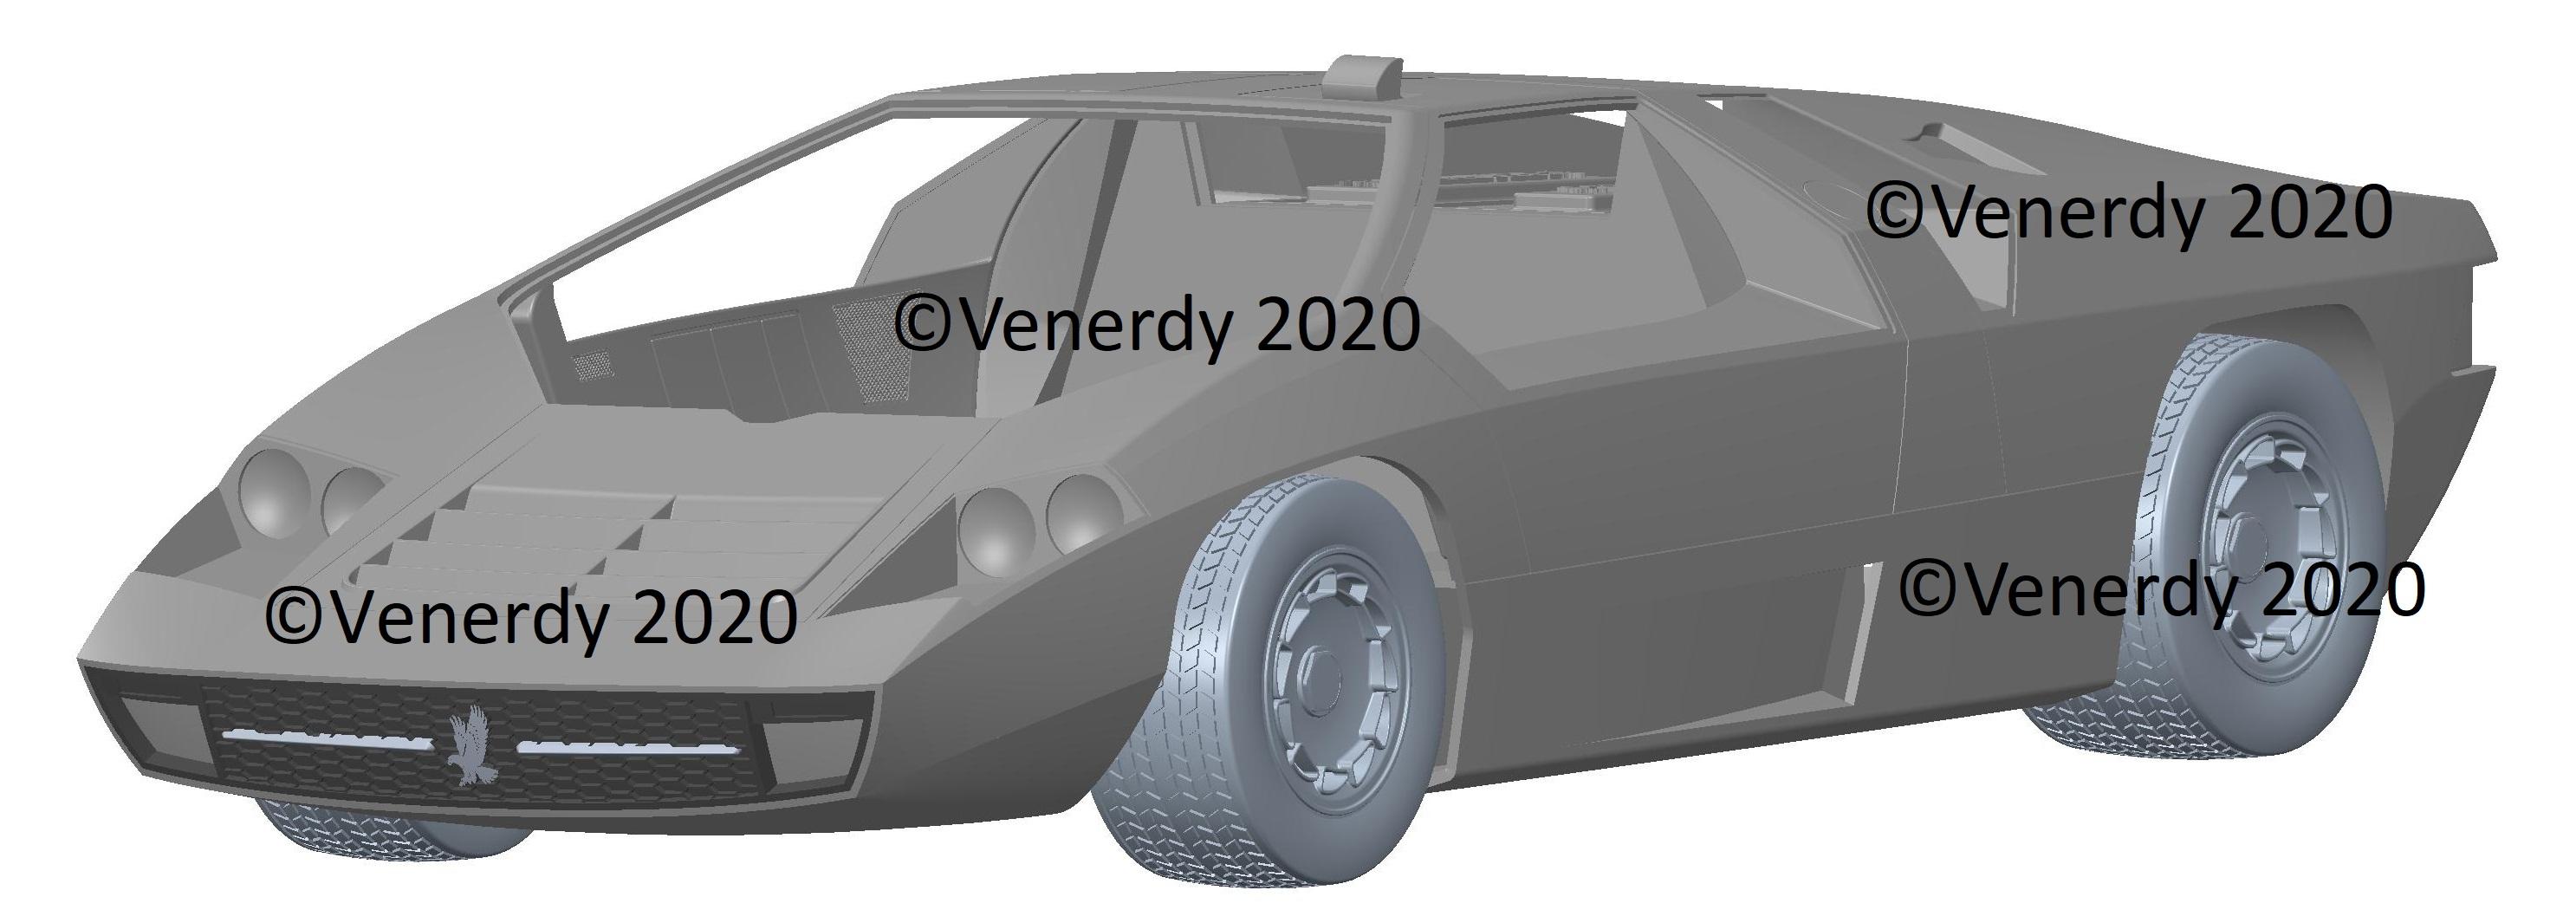
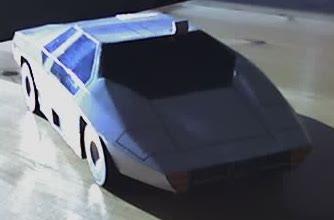
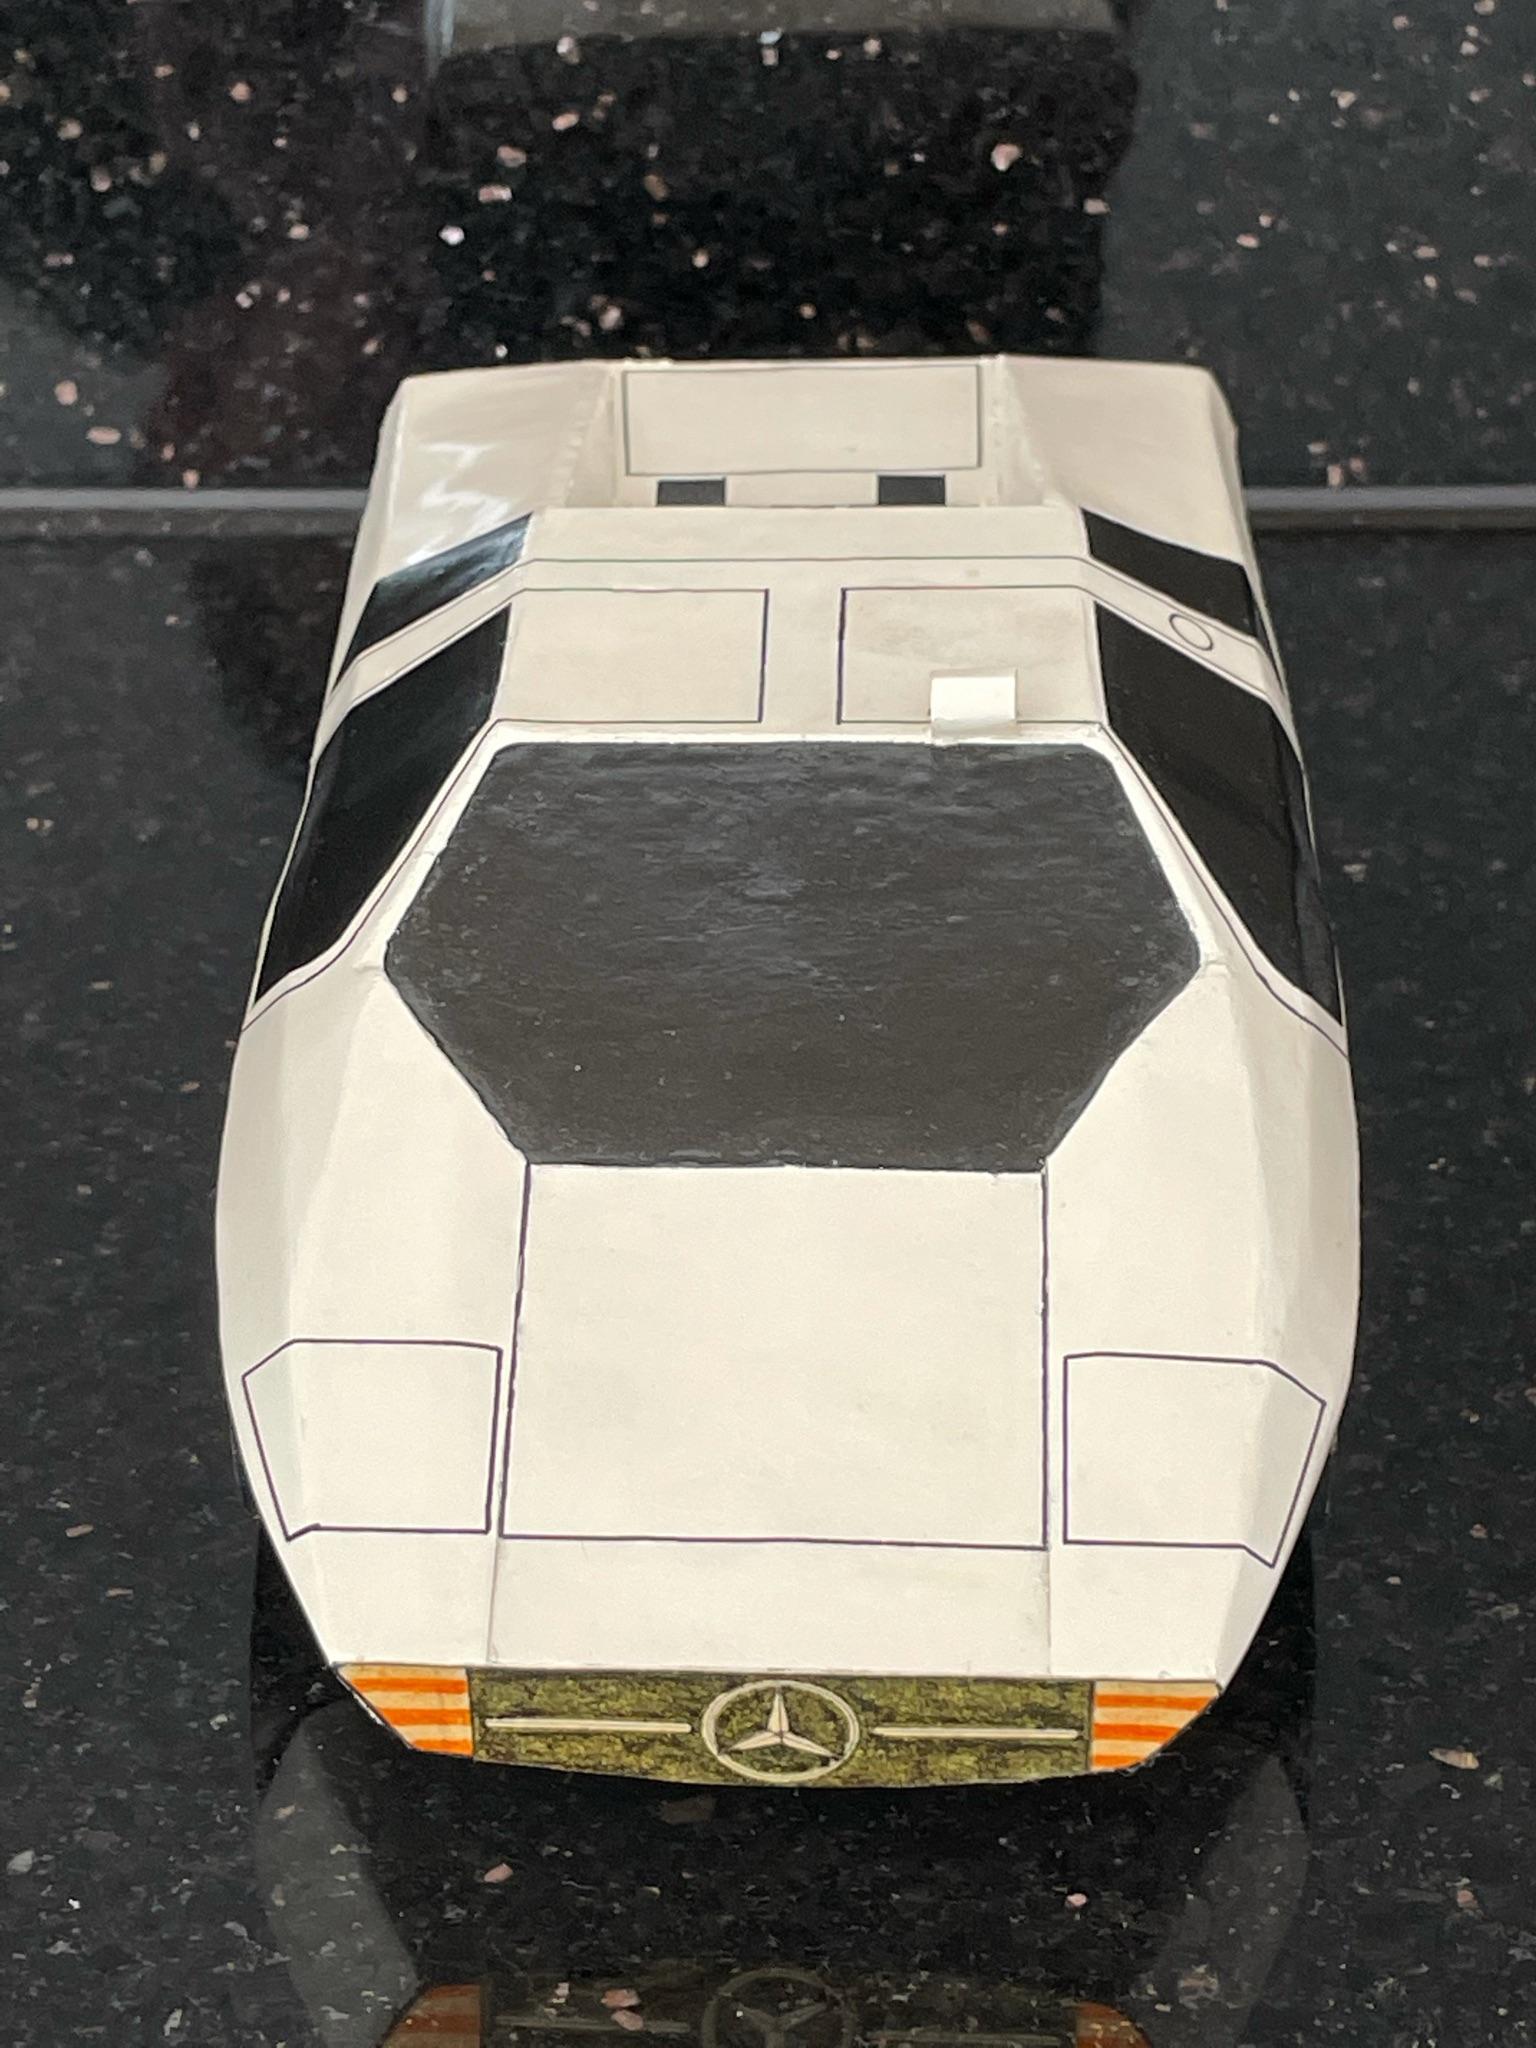
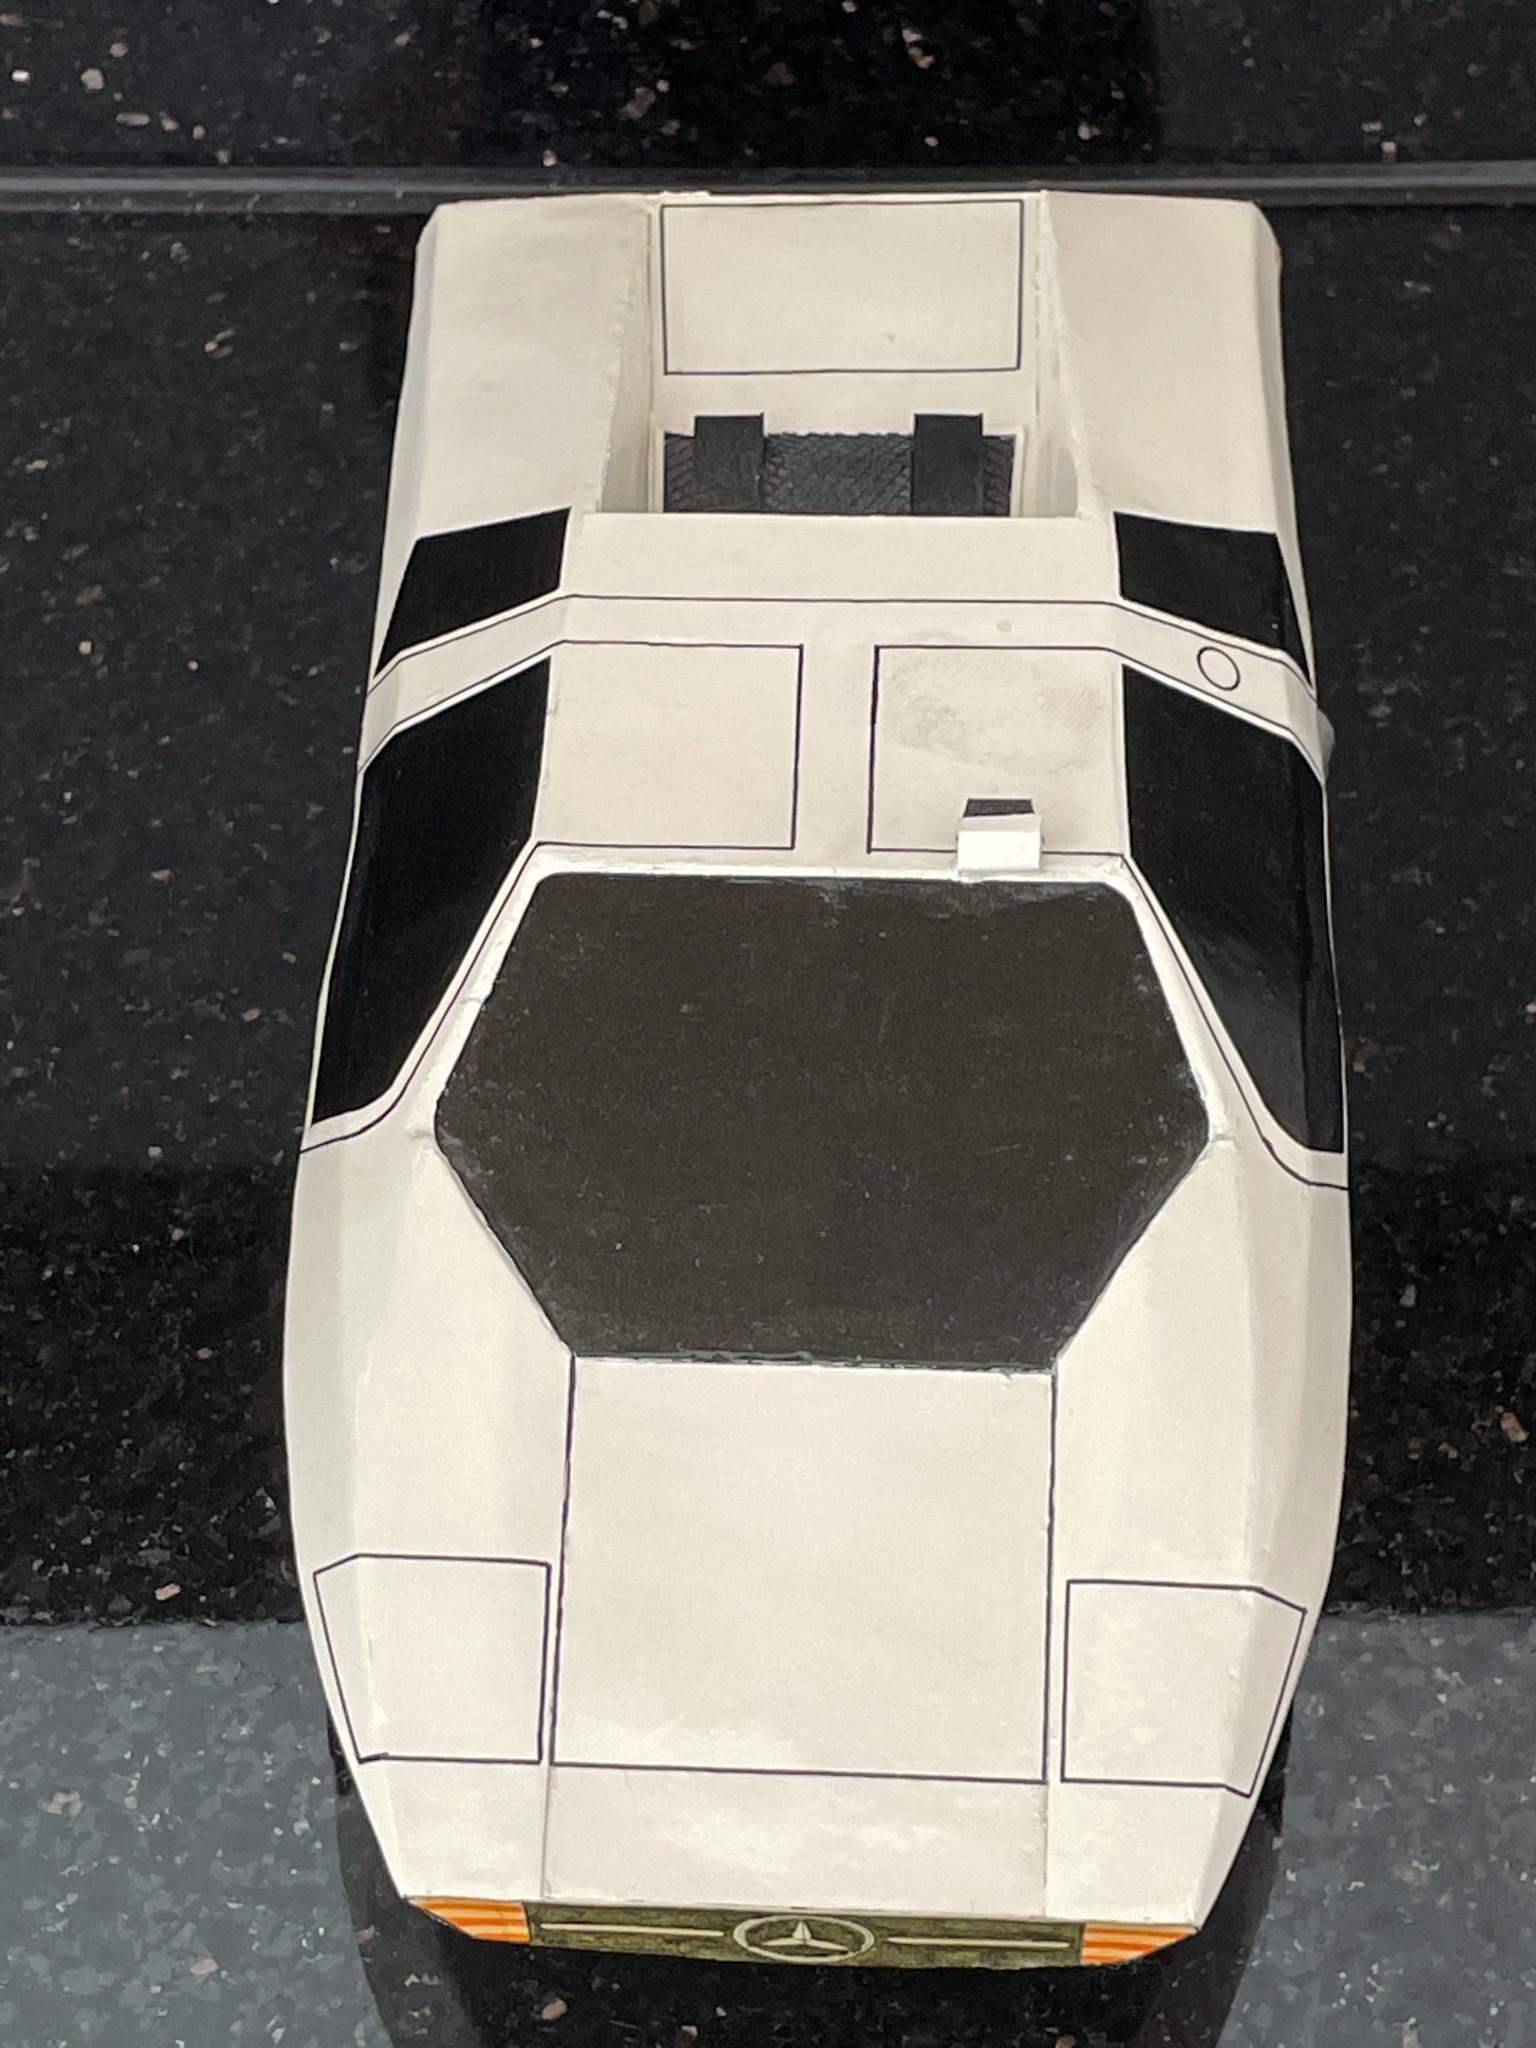
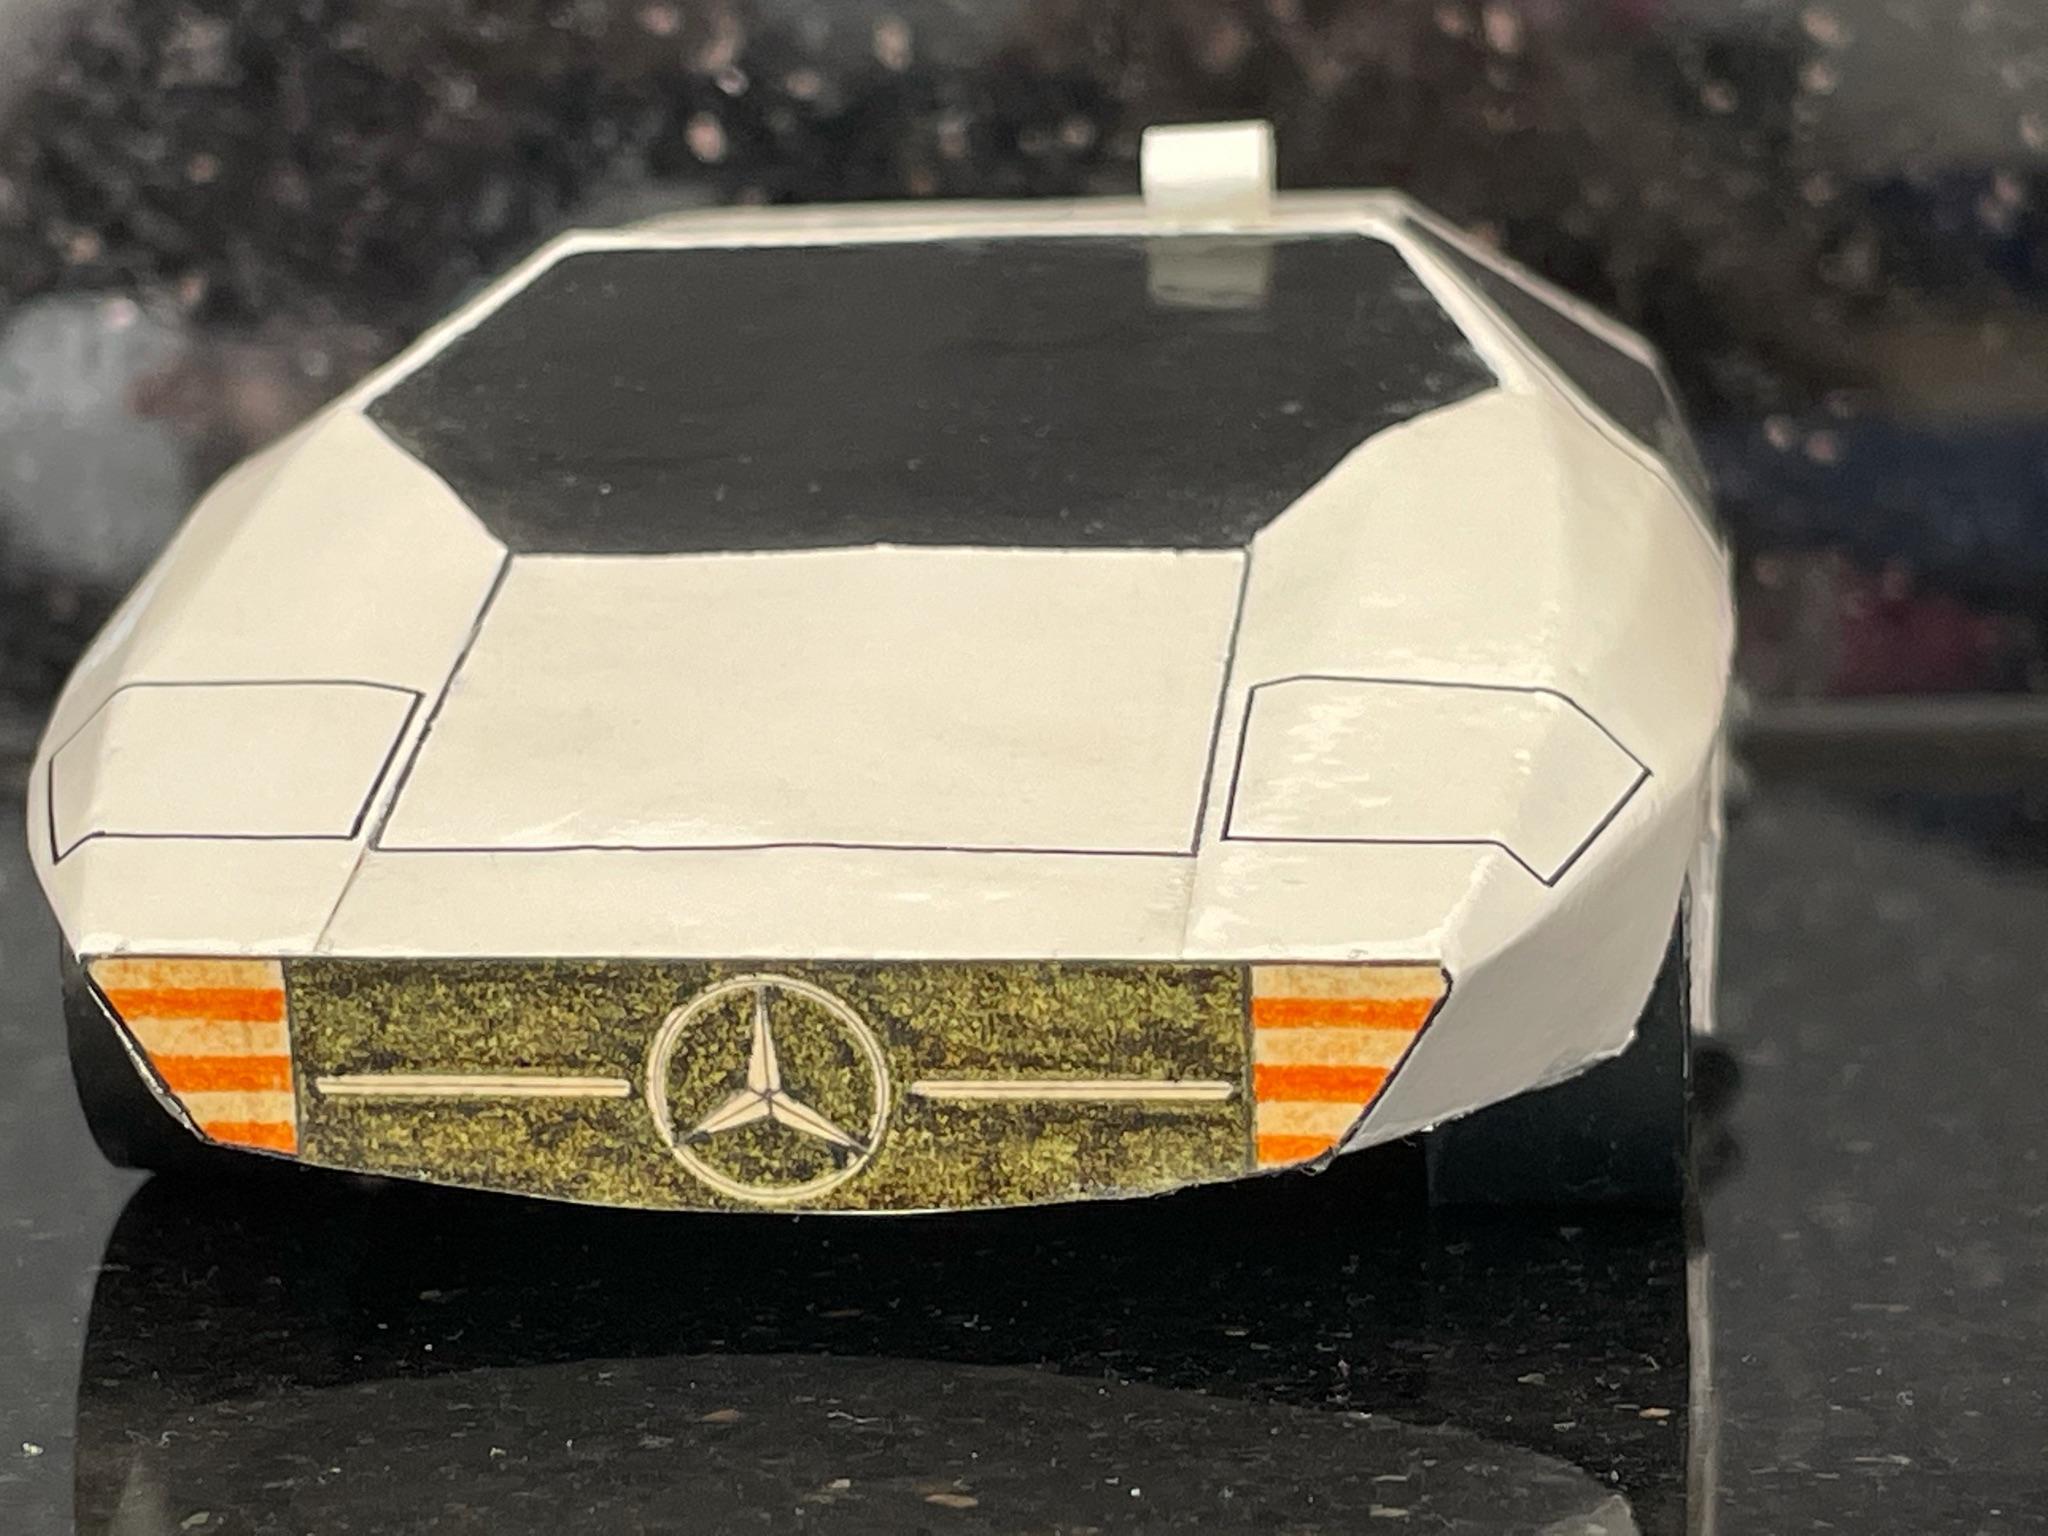
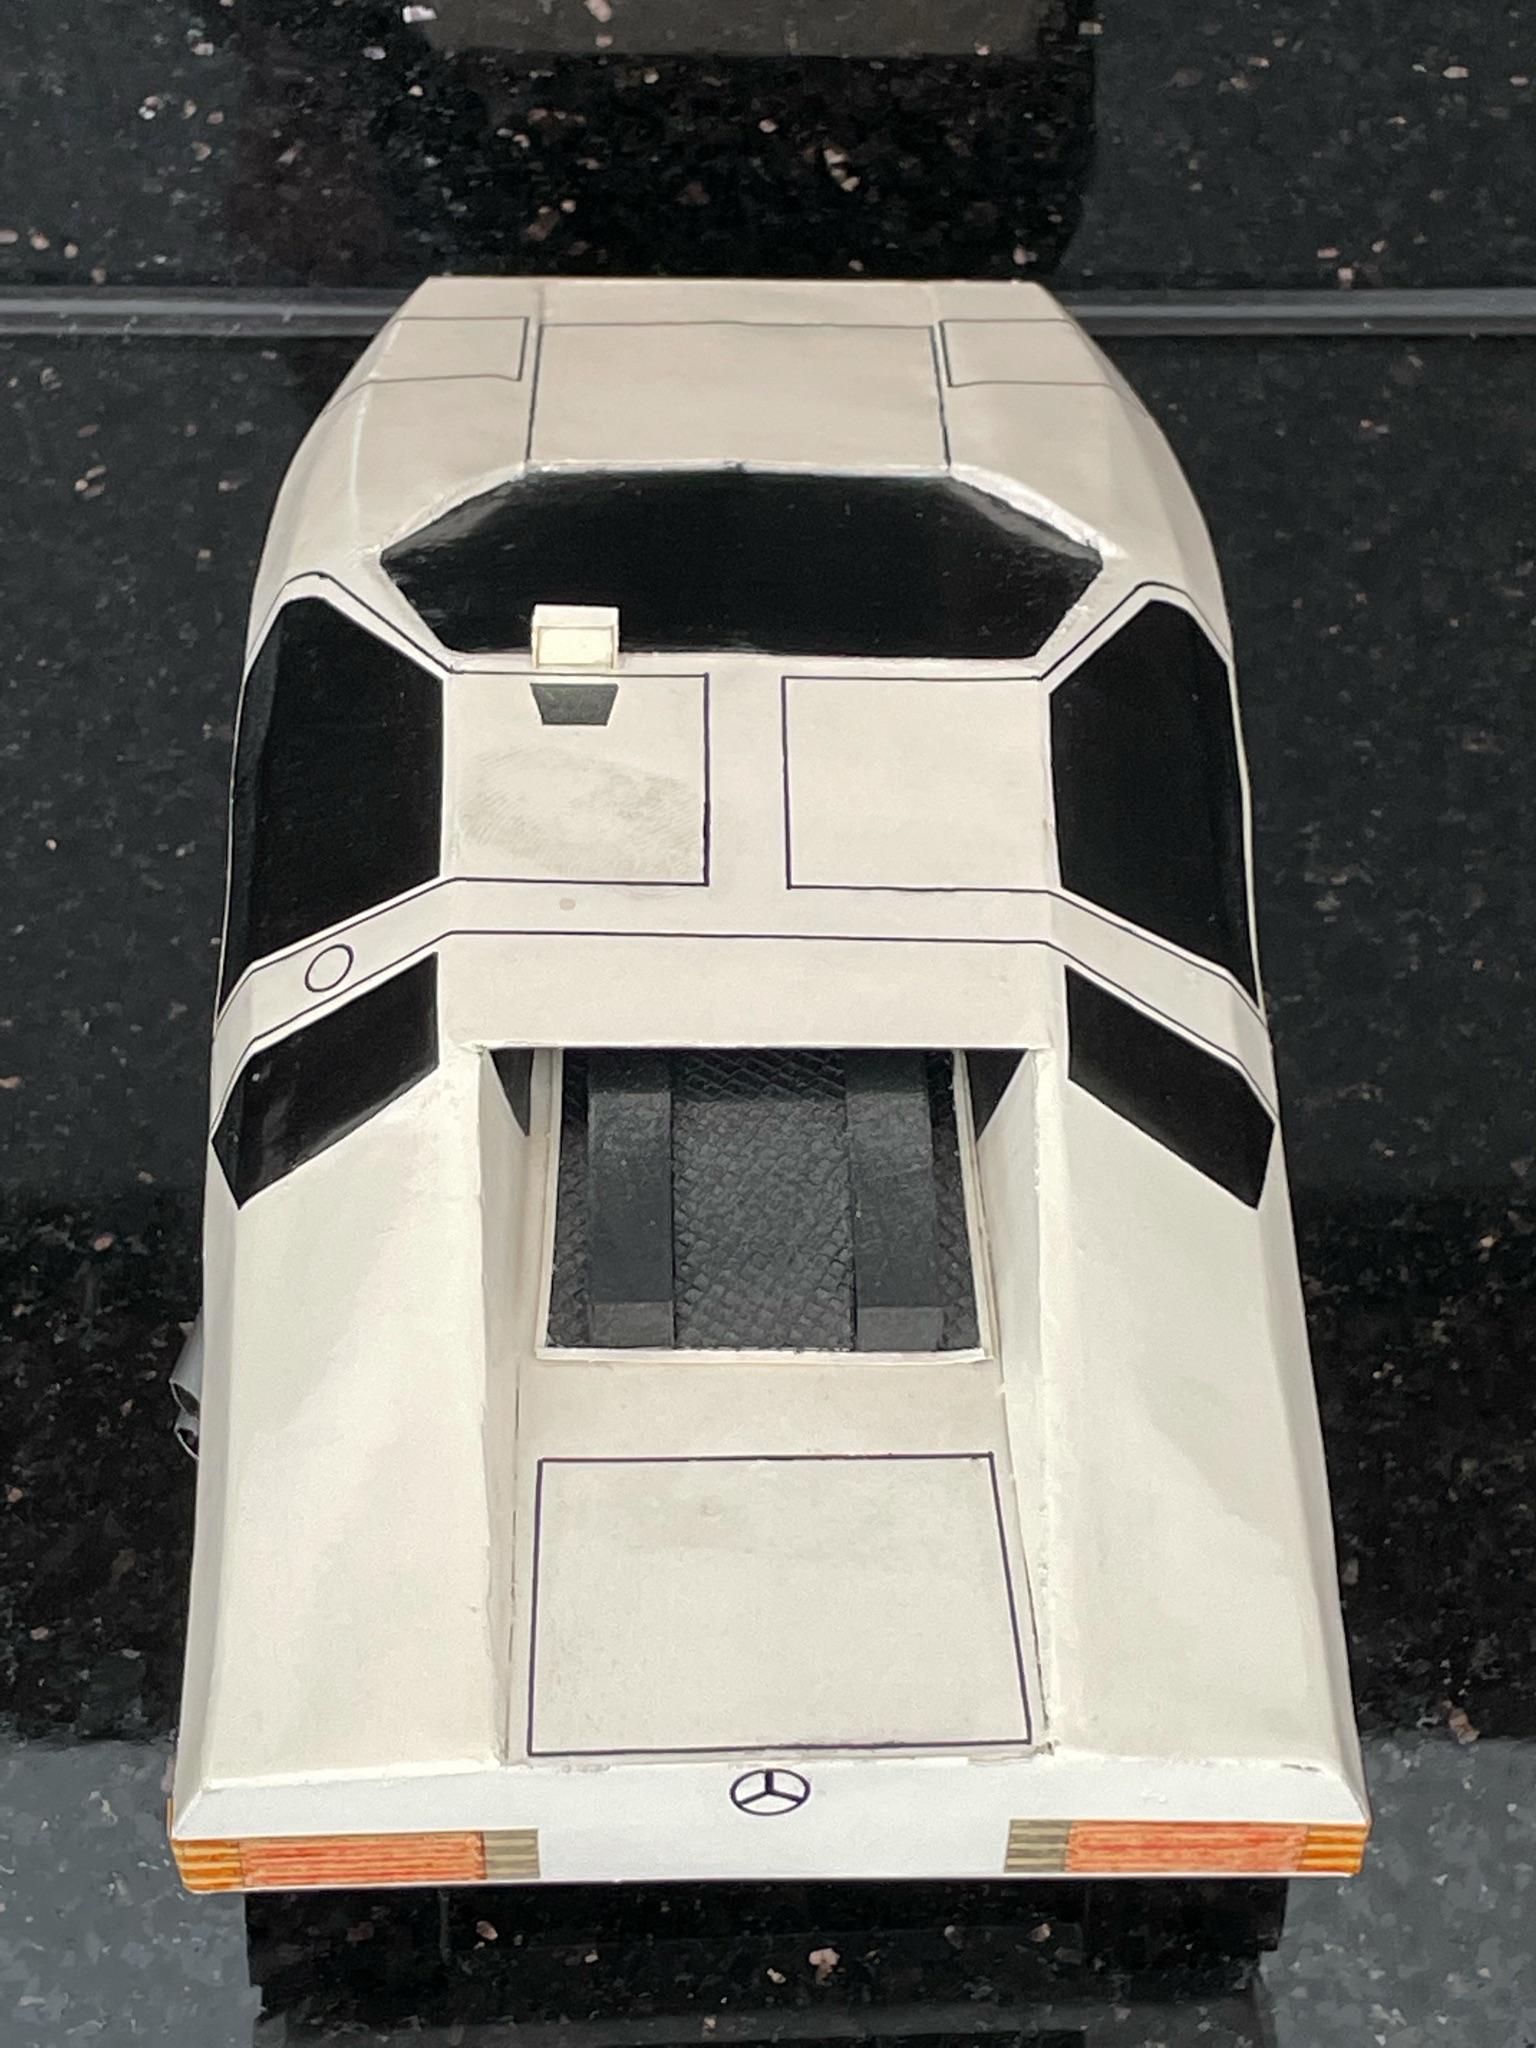
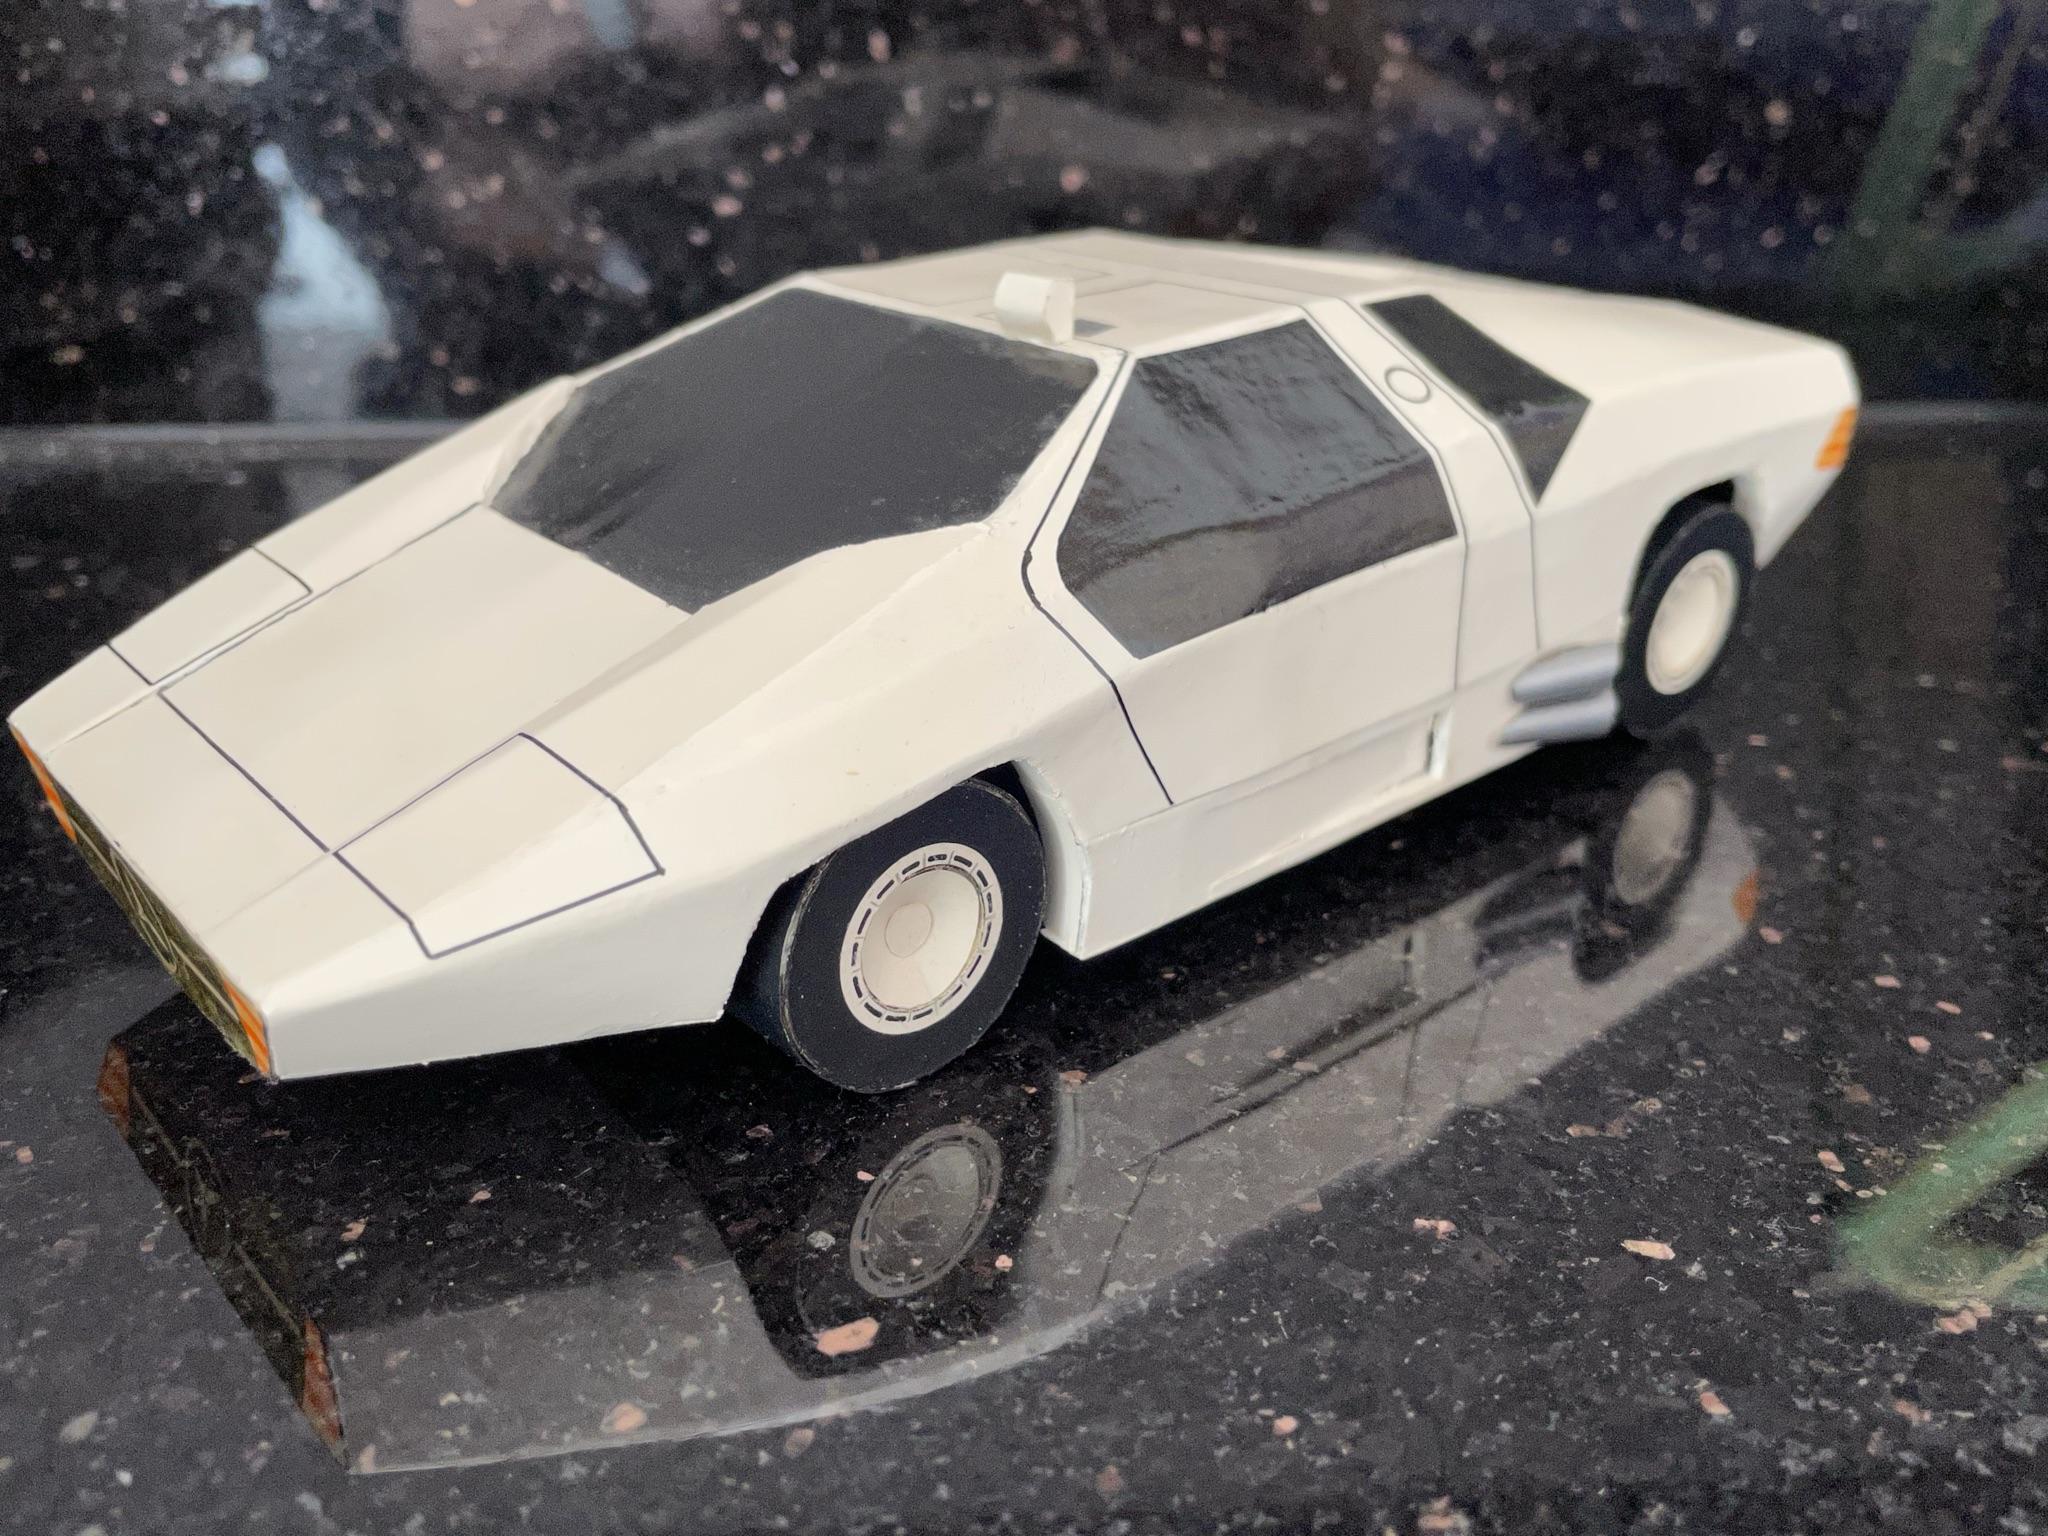
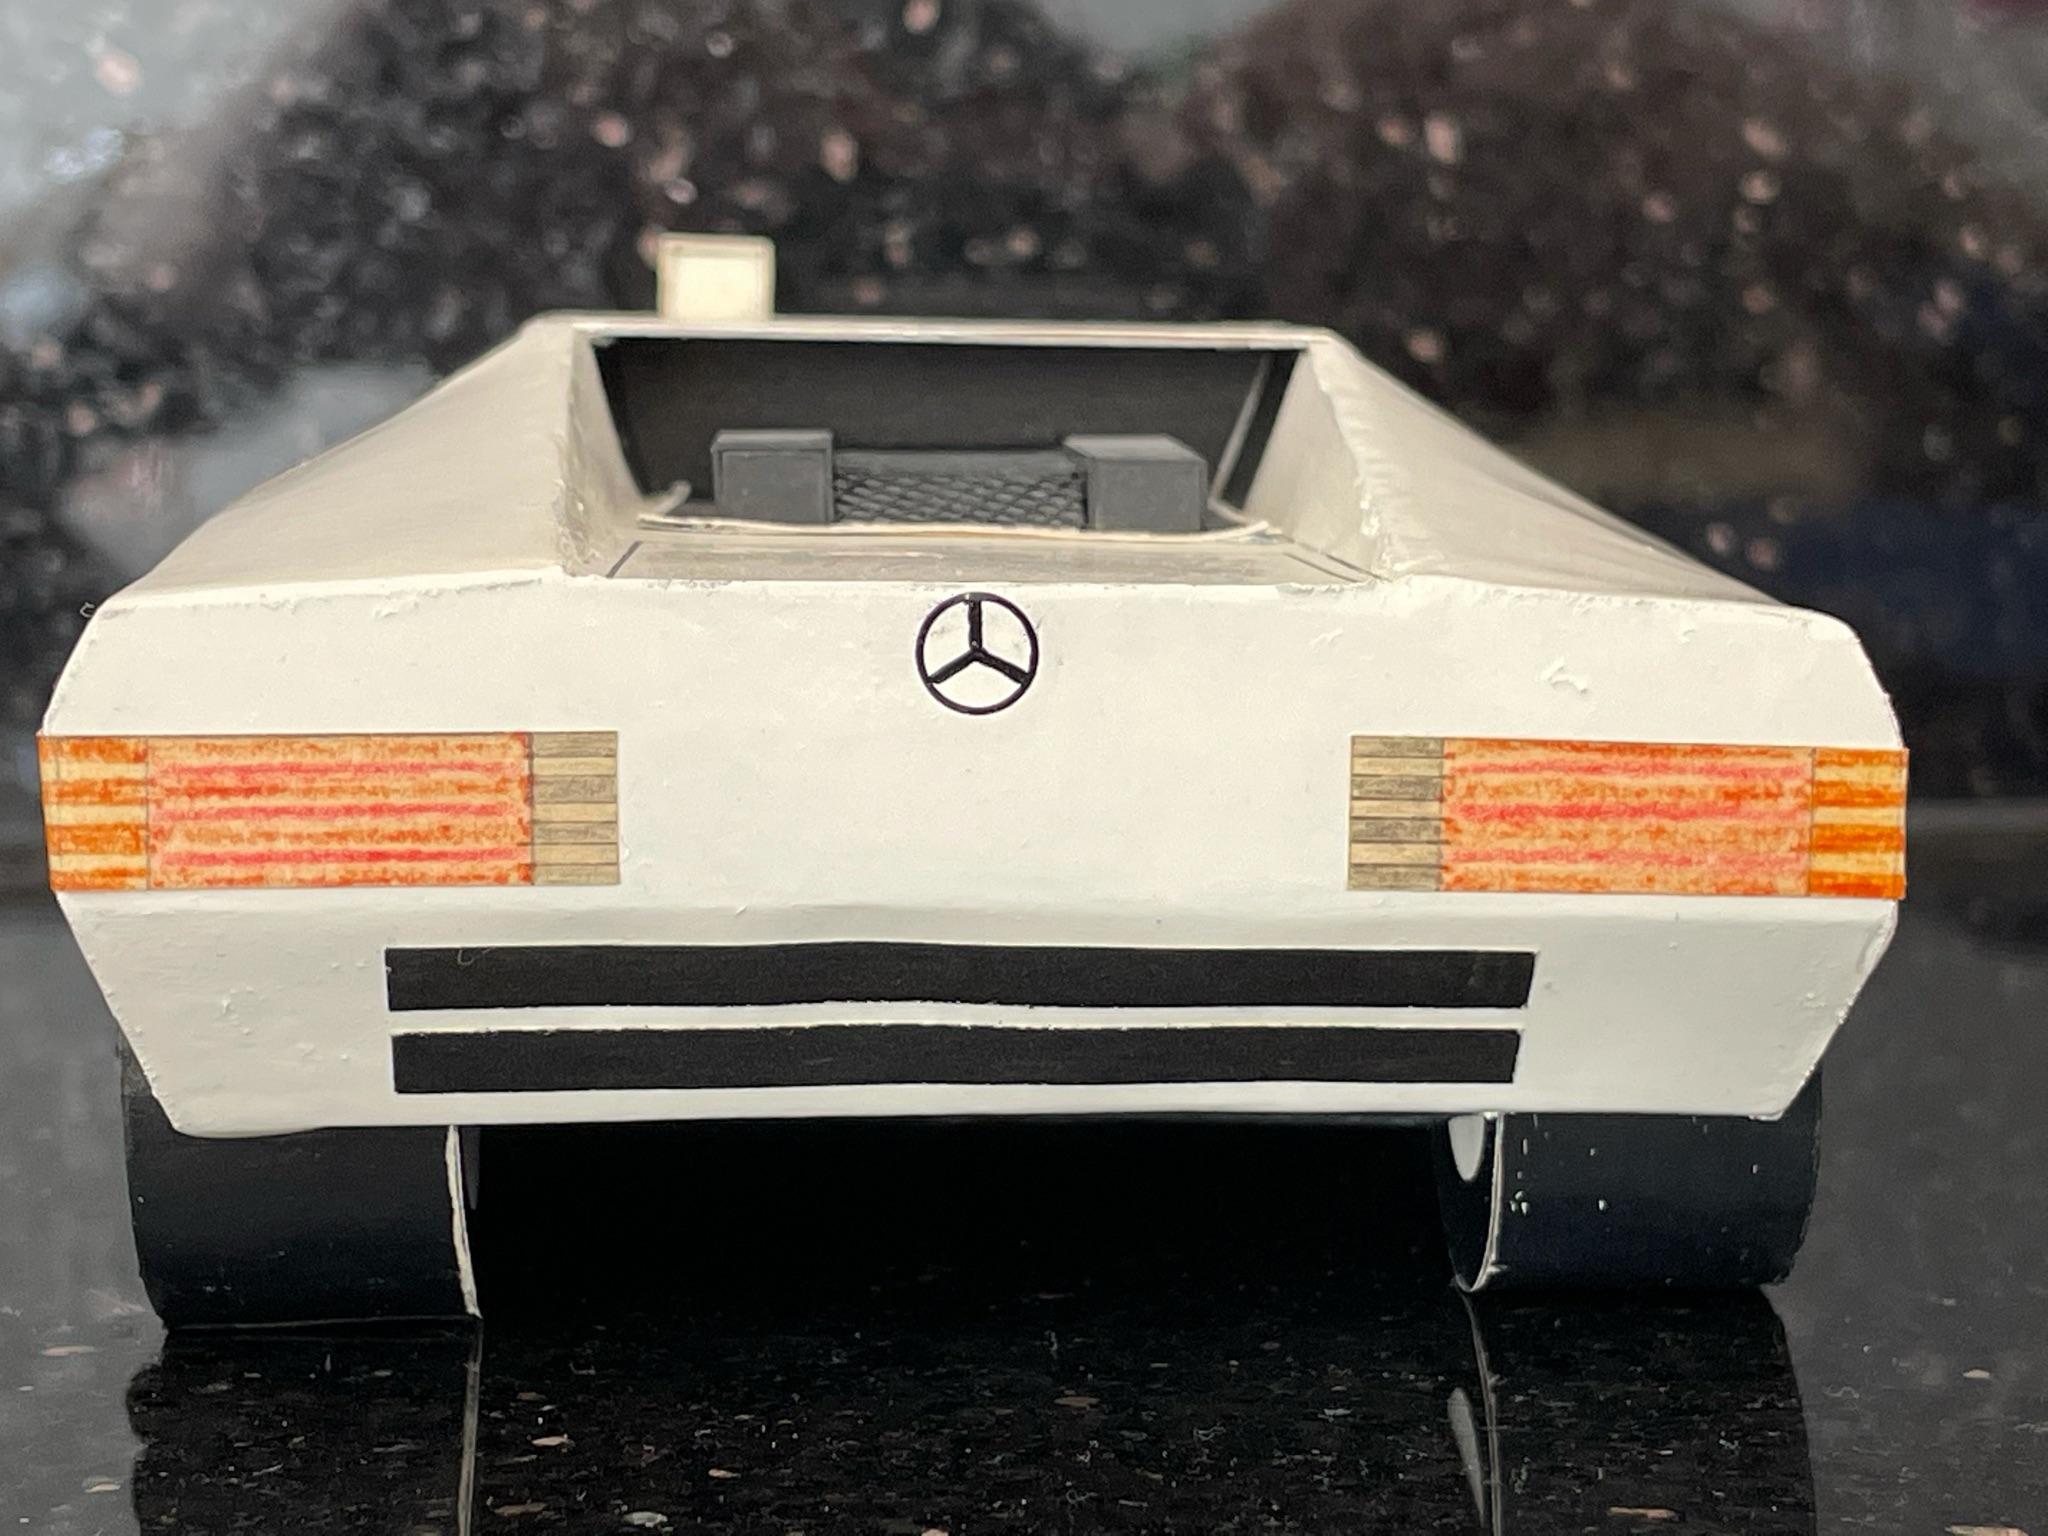
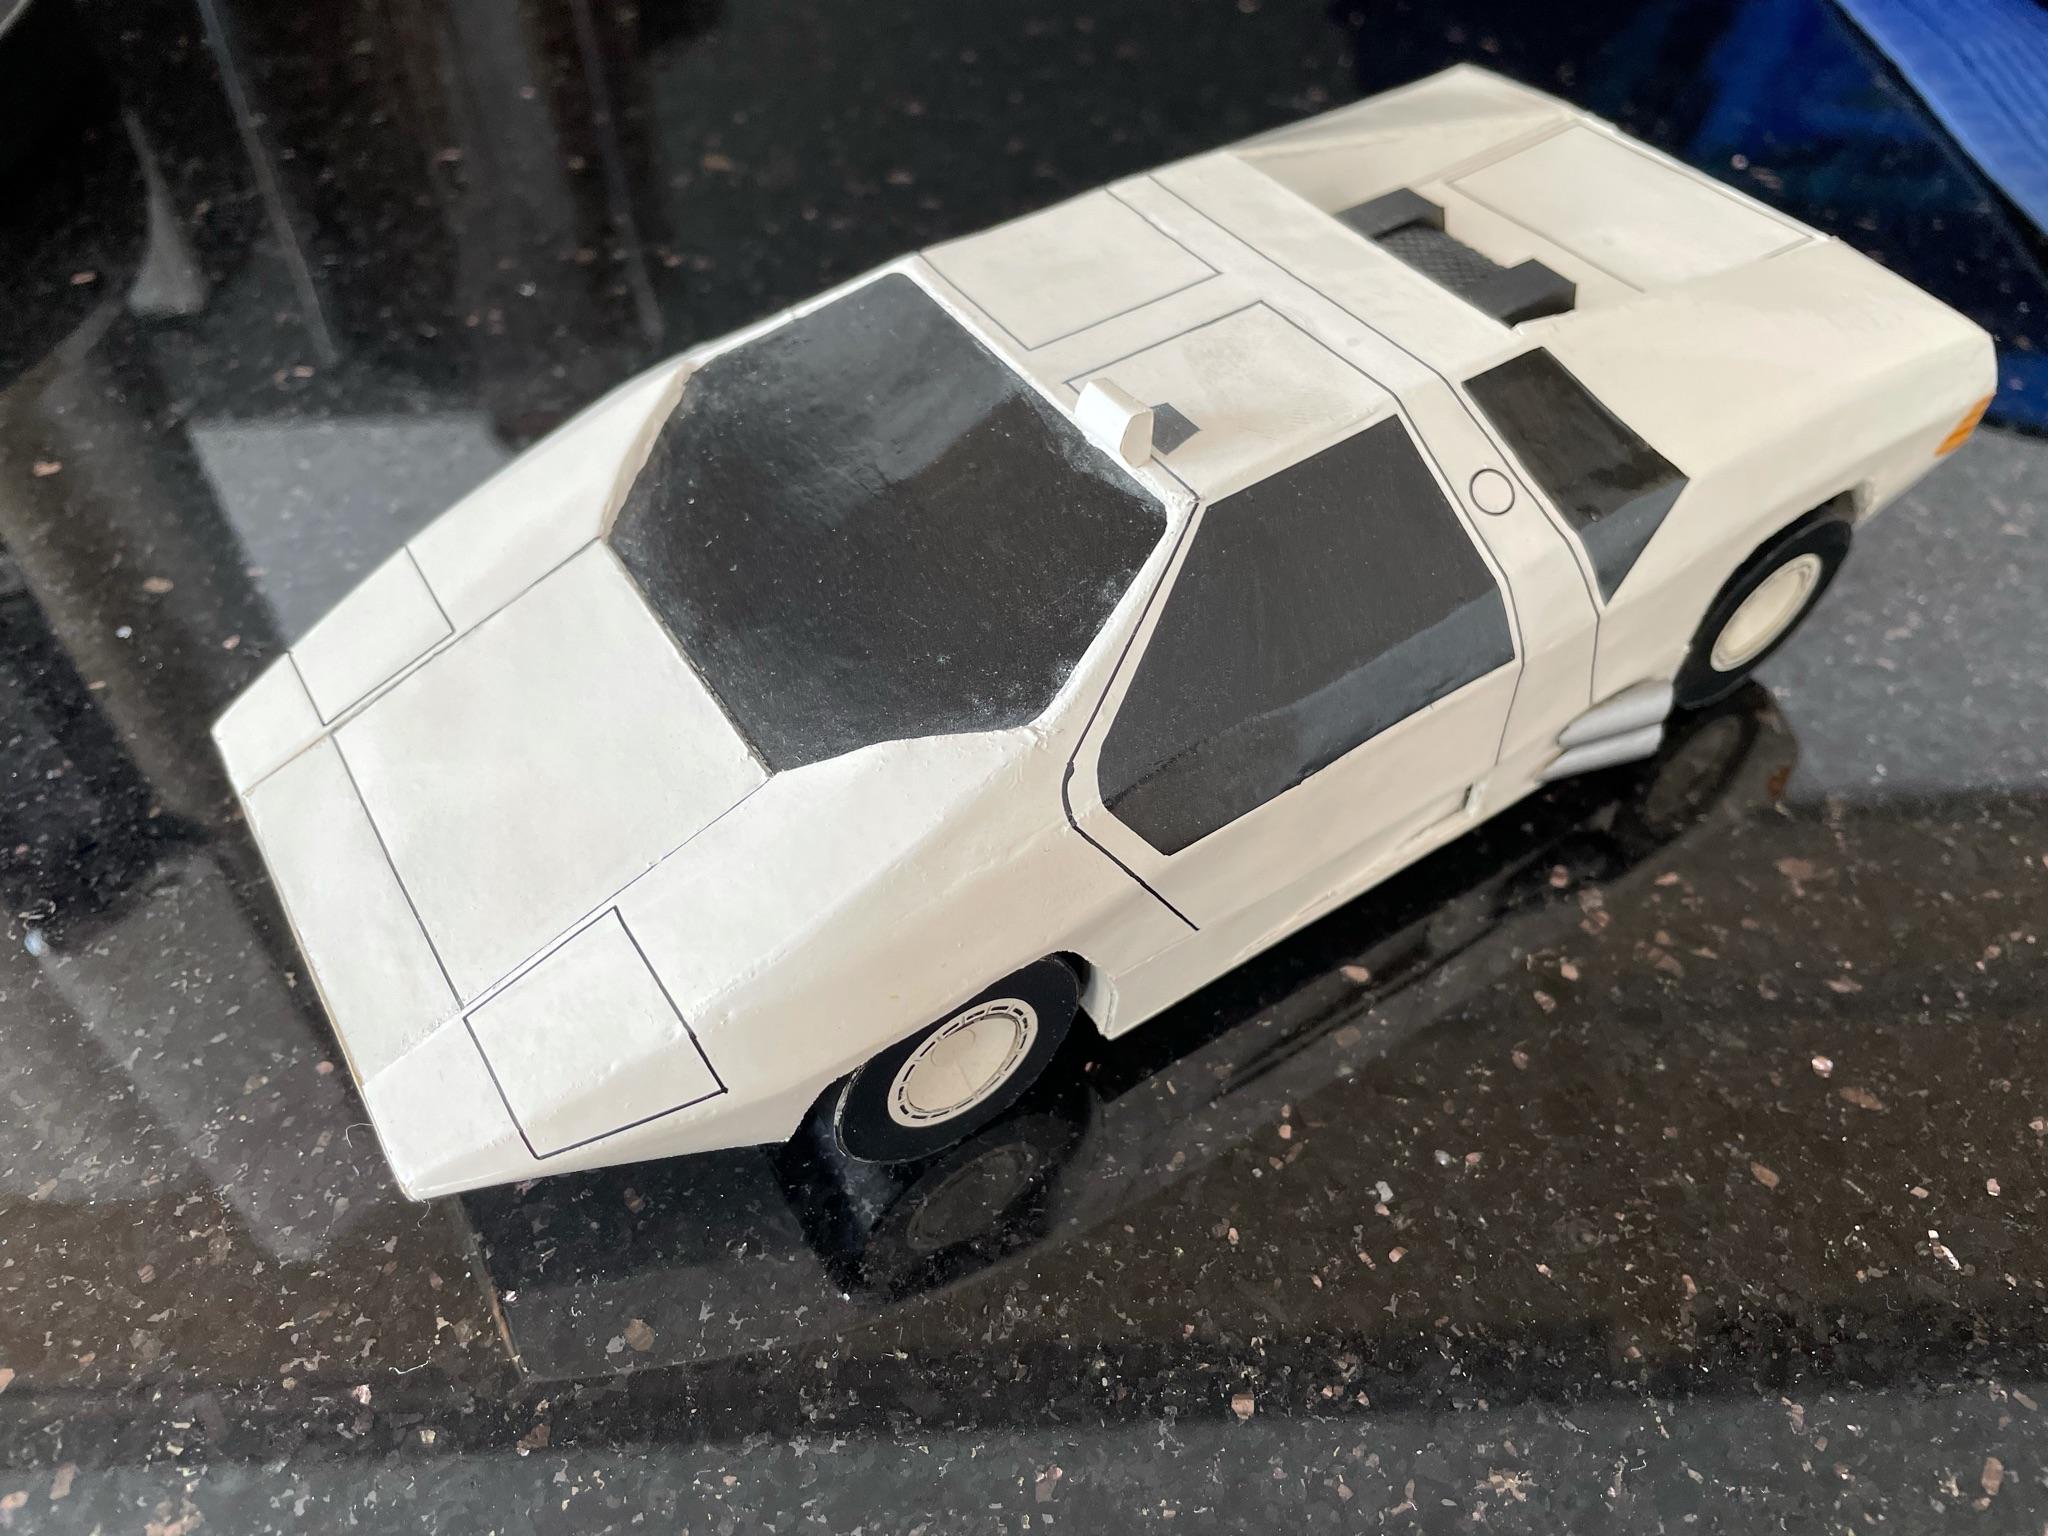
Hello, a few years ago I found a topic about a scratch built ISDERA imperator here on this forum ( imperator by Dann Tier ) To clean things up, I now start this topic to post about my build. My wish to have a modelcar scale 1/24 of the imperator started in 1984 when this car was unveiled. We can even go back to 1978 when the CW311 was shown at the international car fair (IAA = Internationale Automobil-Ausstellung) Frankfurt / Germany. I was a seven year old boy then. I waited patiently many years for a model car kit to be made, I wrote a letter to Tamiya, but then in around 1990 I decided to build the model myself. First I made a technical drawing w/ side / front / top view. Maybe I will find it again to post pictures here. Then I made a cardboard model based on this drawing as a mock-up and to check the proportions. To have a early success, I painted and detailed this model to make it look like a CW311:
-
1961 Mercedes Benz 190SL - Revell with a few modifications
capricorn71 replied to 89AKurt's topic in WIP: Model Cars
Hello, I found this thread by chance and I can imagine how many hours and work went into this kit.. I built this model a few years ago. The only modification/ addition I made is the soft top cover. Your built is amazing! Greetings from Germany Erich
-
Hello, a Series 2 Imperator is for sale: Bonhams auction A lot of photos, worth a look. BR Erich
-
...Wait!! -is this what you carved out of that wood??!! Hello Dann, that is the cardboard model I made with the same sections I used for the wood model I made afterwards. It was meant to check the proportions. There are a view errors I would have corrected in the wood model. BR Erich
-
Hello Dann, the wood really could be used to do a sculpture. Good idea. Yes the seat is covered in real leather. Bought it in a dedicated modelcar shop in Munich 20 years ago. BR Erich
-
Hello Dann, what a fantastic work. You are totally crazy- Must be your age ( I am year 71 btw) Best regards from Germany Erich
-
Hello everybody, after one year in a moving box my CW311 is finally released and back in the display cabinet. So I could do some better photos.
-
Yesterday I foundt the box with the parts I did for this project more than 20 years ago. Take a look:
-
Thank you Francis. My parts are done by a high end SLA printer. And as you can see even this parts have visible layers. Vg Erich
-
Dann, as you know from my very first post it‘s a long time ago since I started with this project. So I hope I will be patient enough to get the surface done properly. The last time I built a modelcar is around 15 years ago. It was a Tamiya Ferrari 360. Back then I started with painting the body instead with the chassis. On older builds I often lost the patience at the end and the final painting of the body wasn ´ t perfect. So I learned from that. Grüße aus Deutschland ?? Erich
-
Thank you so much Dann! When I started to do the model by CAD I didn‘t know if it really works well - although I use this program since 22 years. But I design mechanical parts, not styling surfaces. Now I am in deed a little bit proud that I managed to get the model done. And for the most I am very, very glad to be close to a nice model of the imperator eventually. Unfortunately I don‘t have a workbench in my new home yet, so the final assembly has to be paused. Sanding at the kitchen table wouldn‘t be a good idea to my wife ;-) Viele Grüße aus Deutschland Erich
-
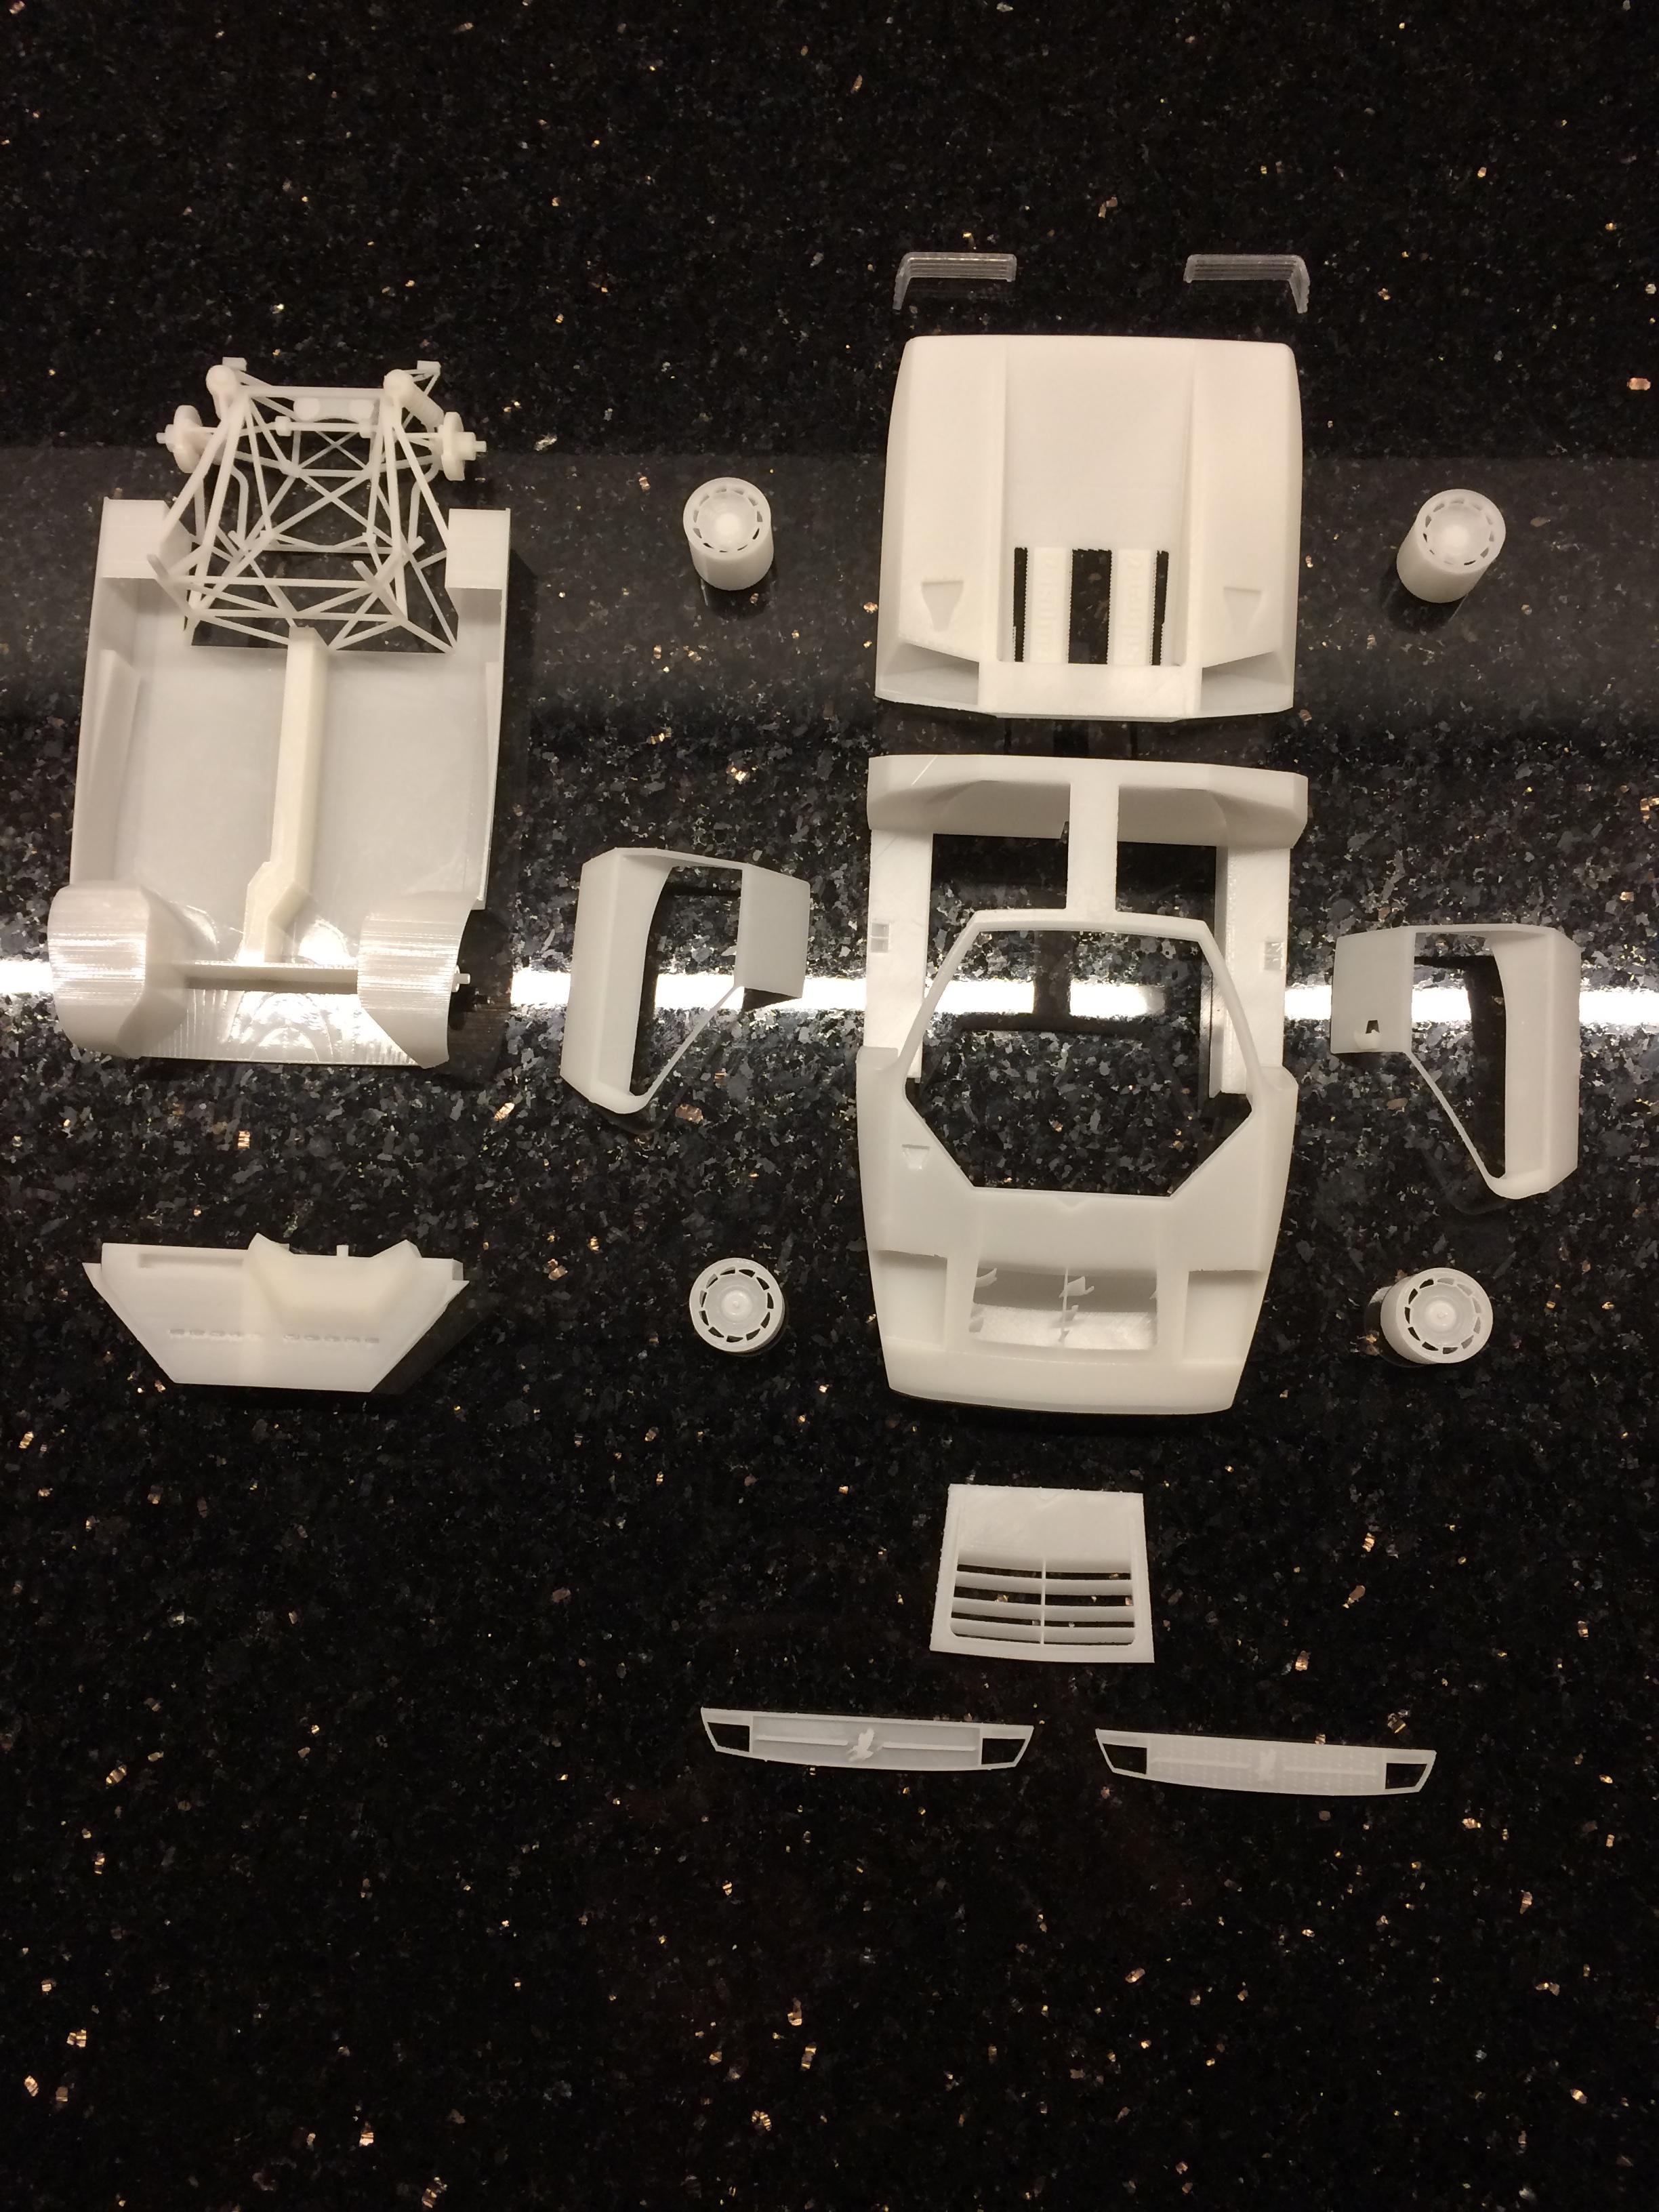
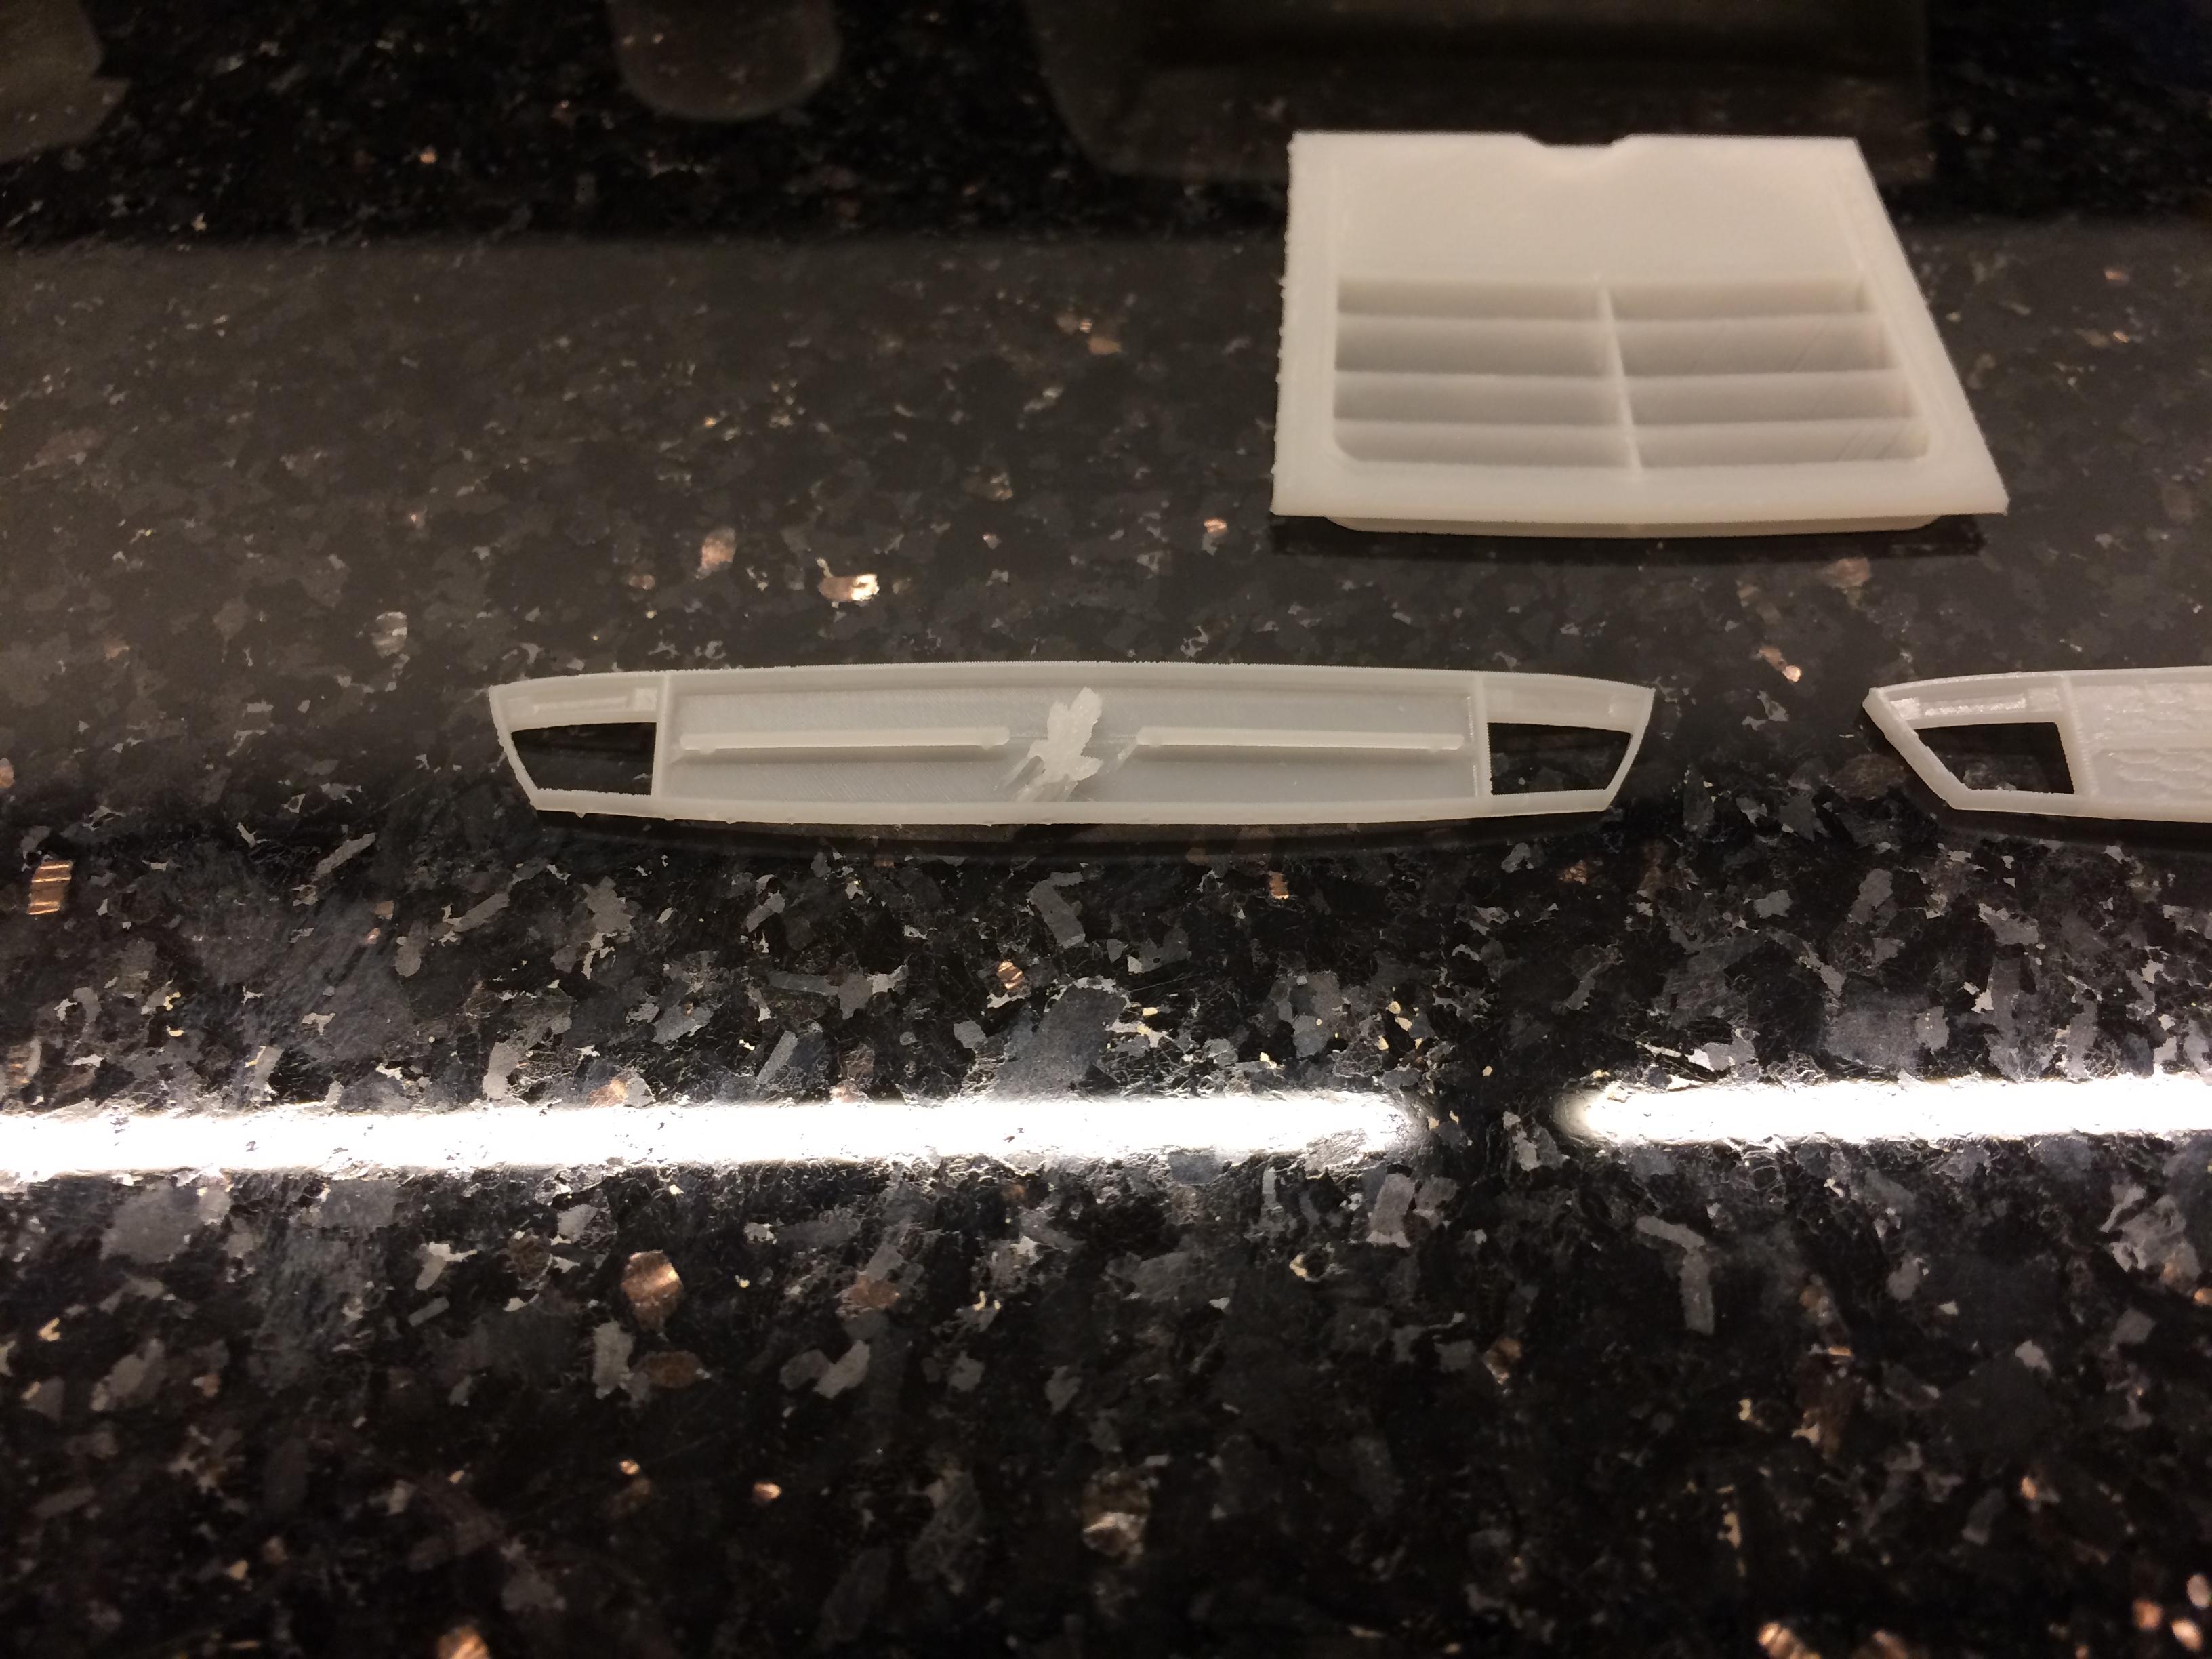
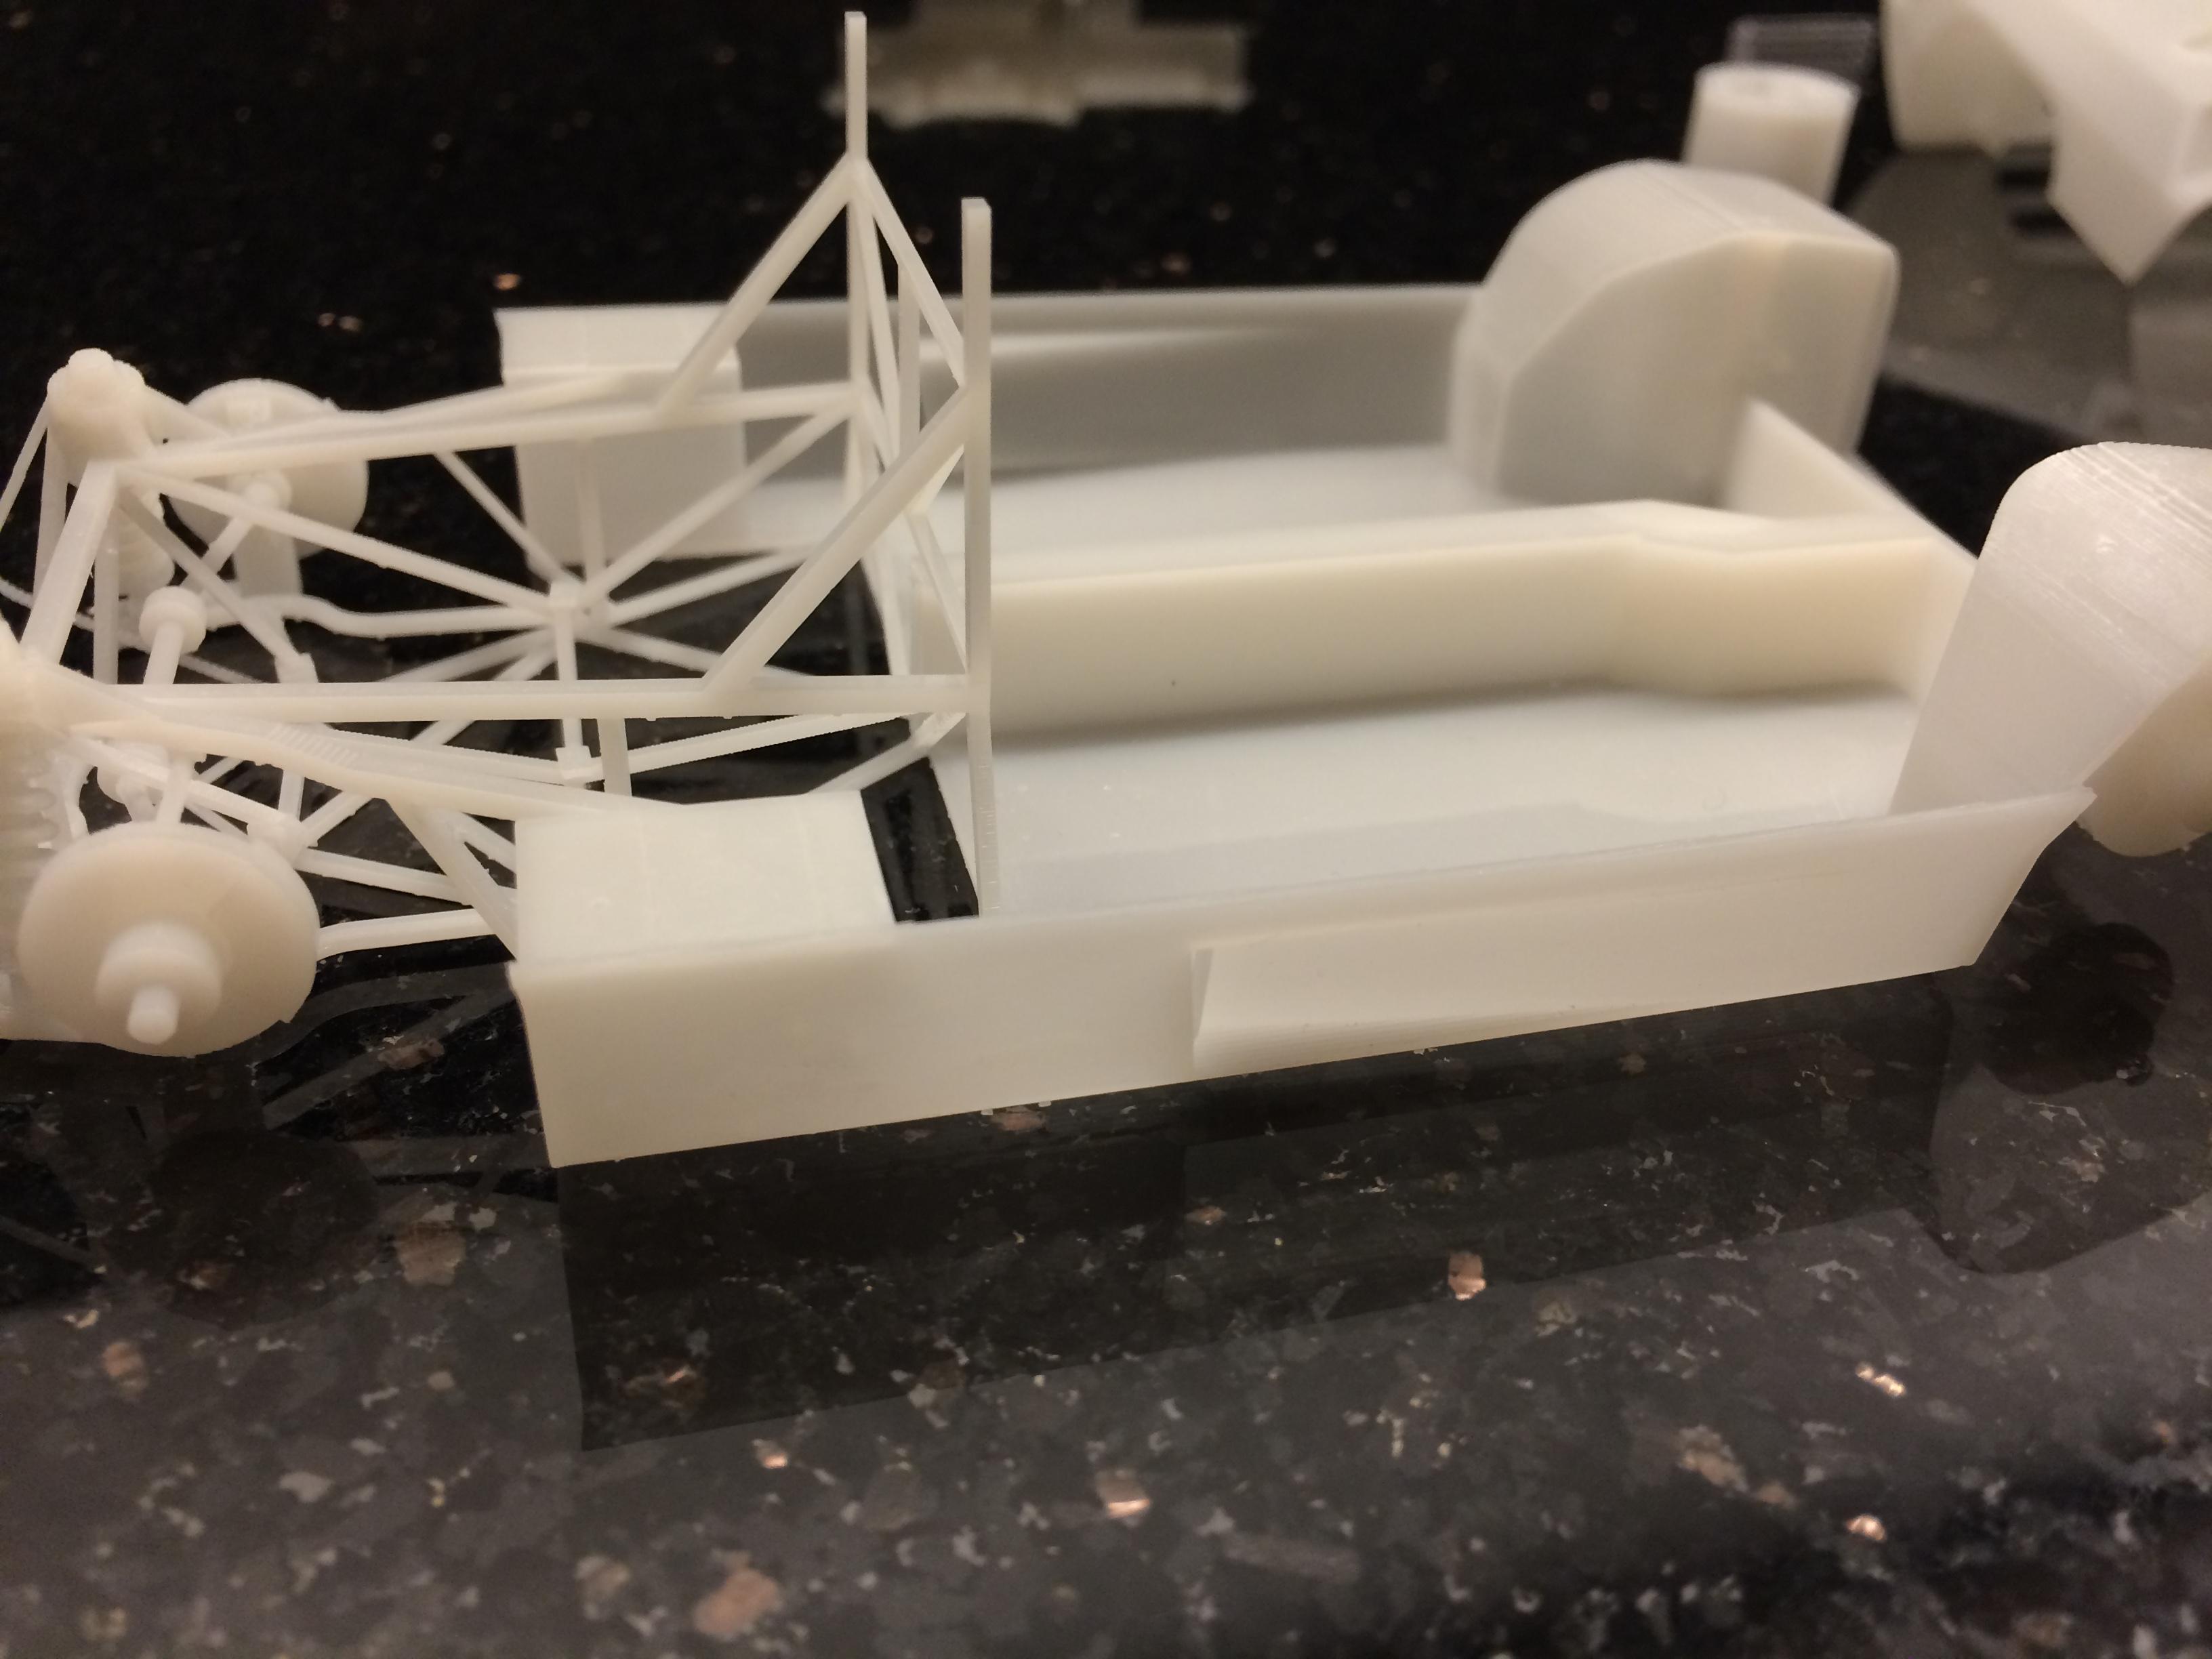
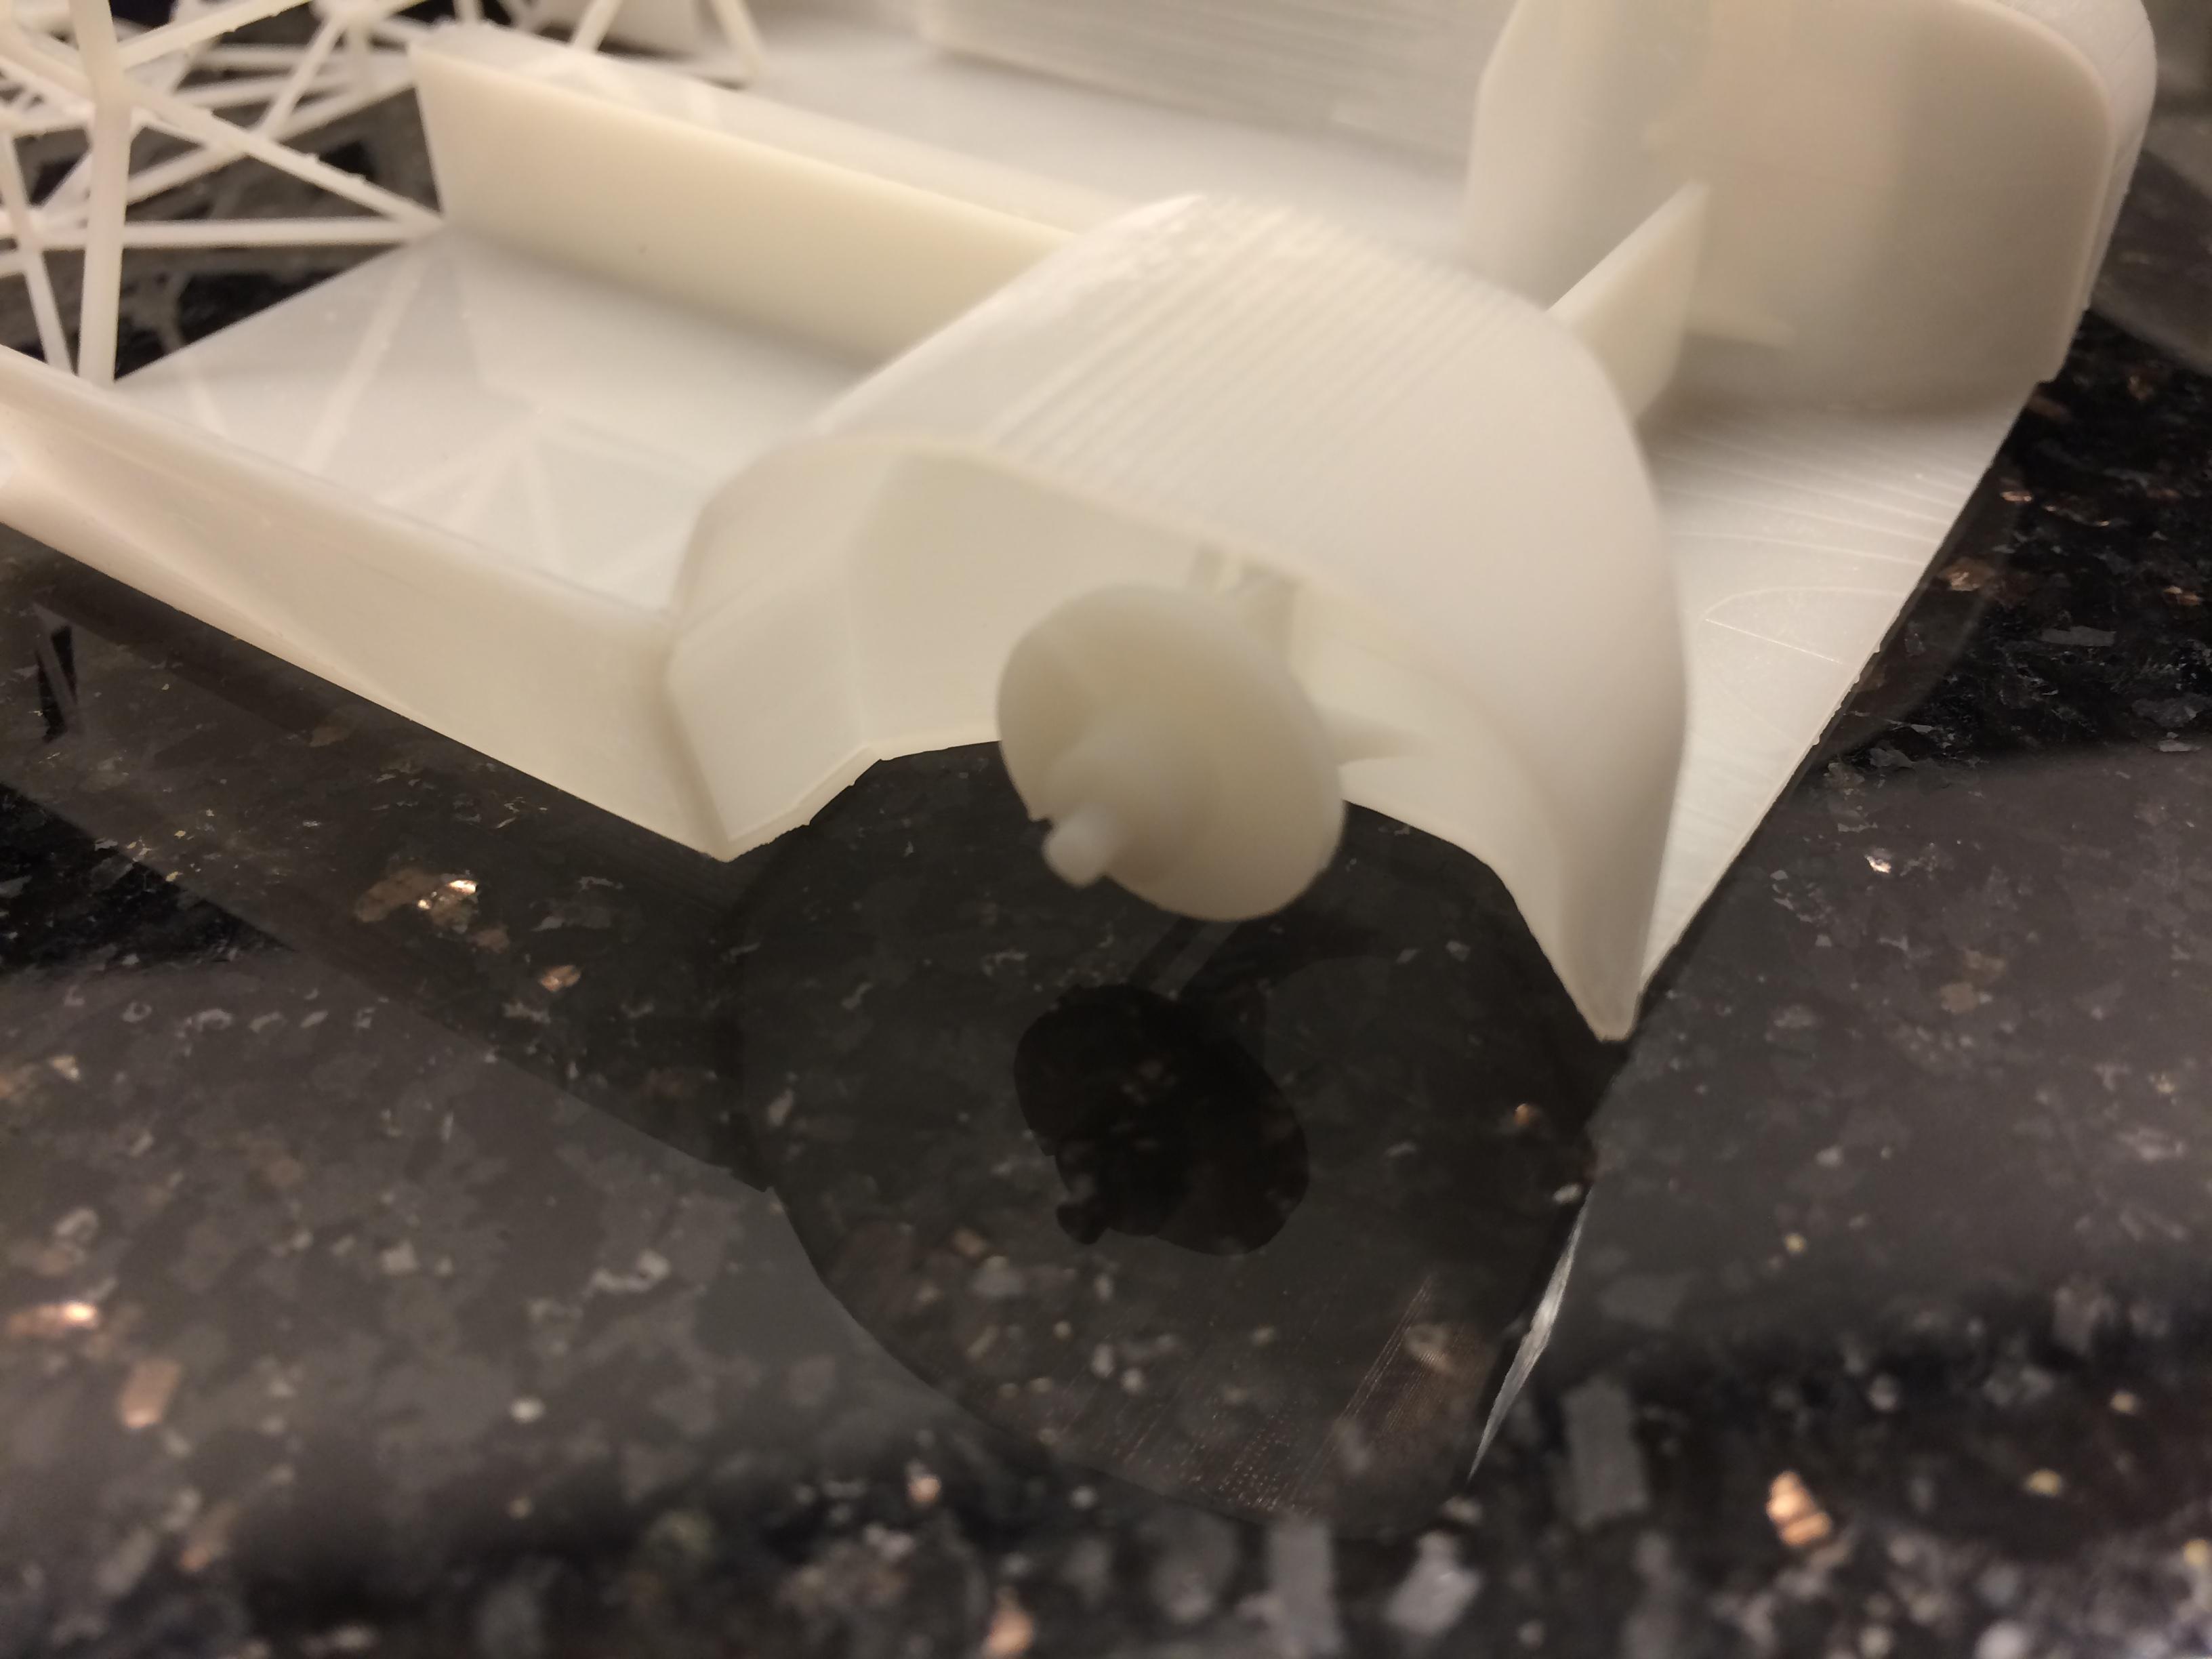
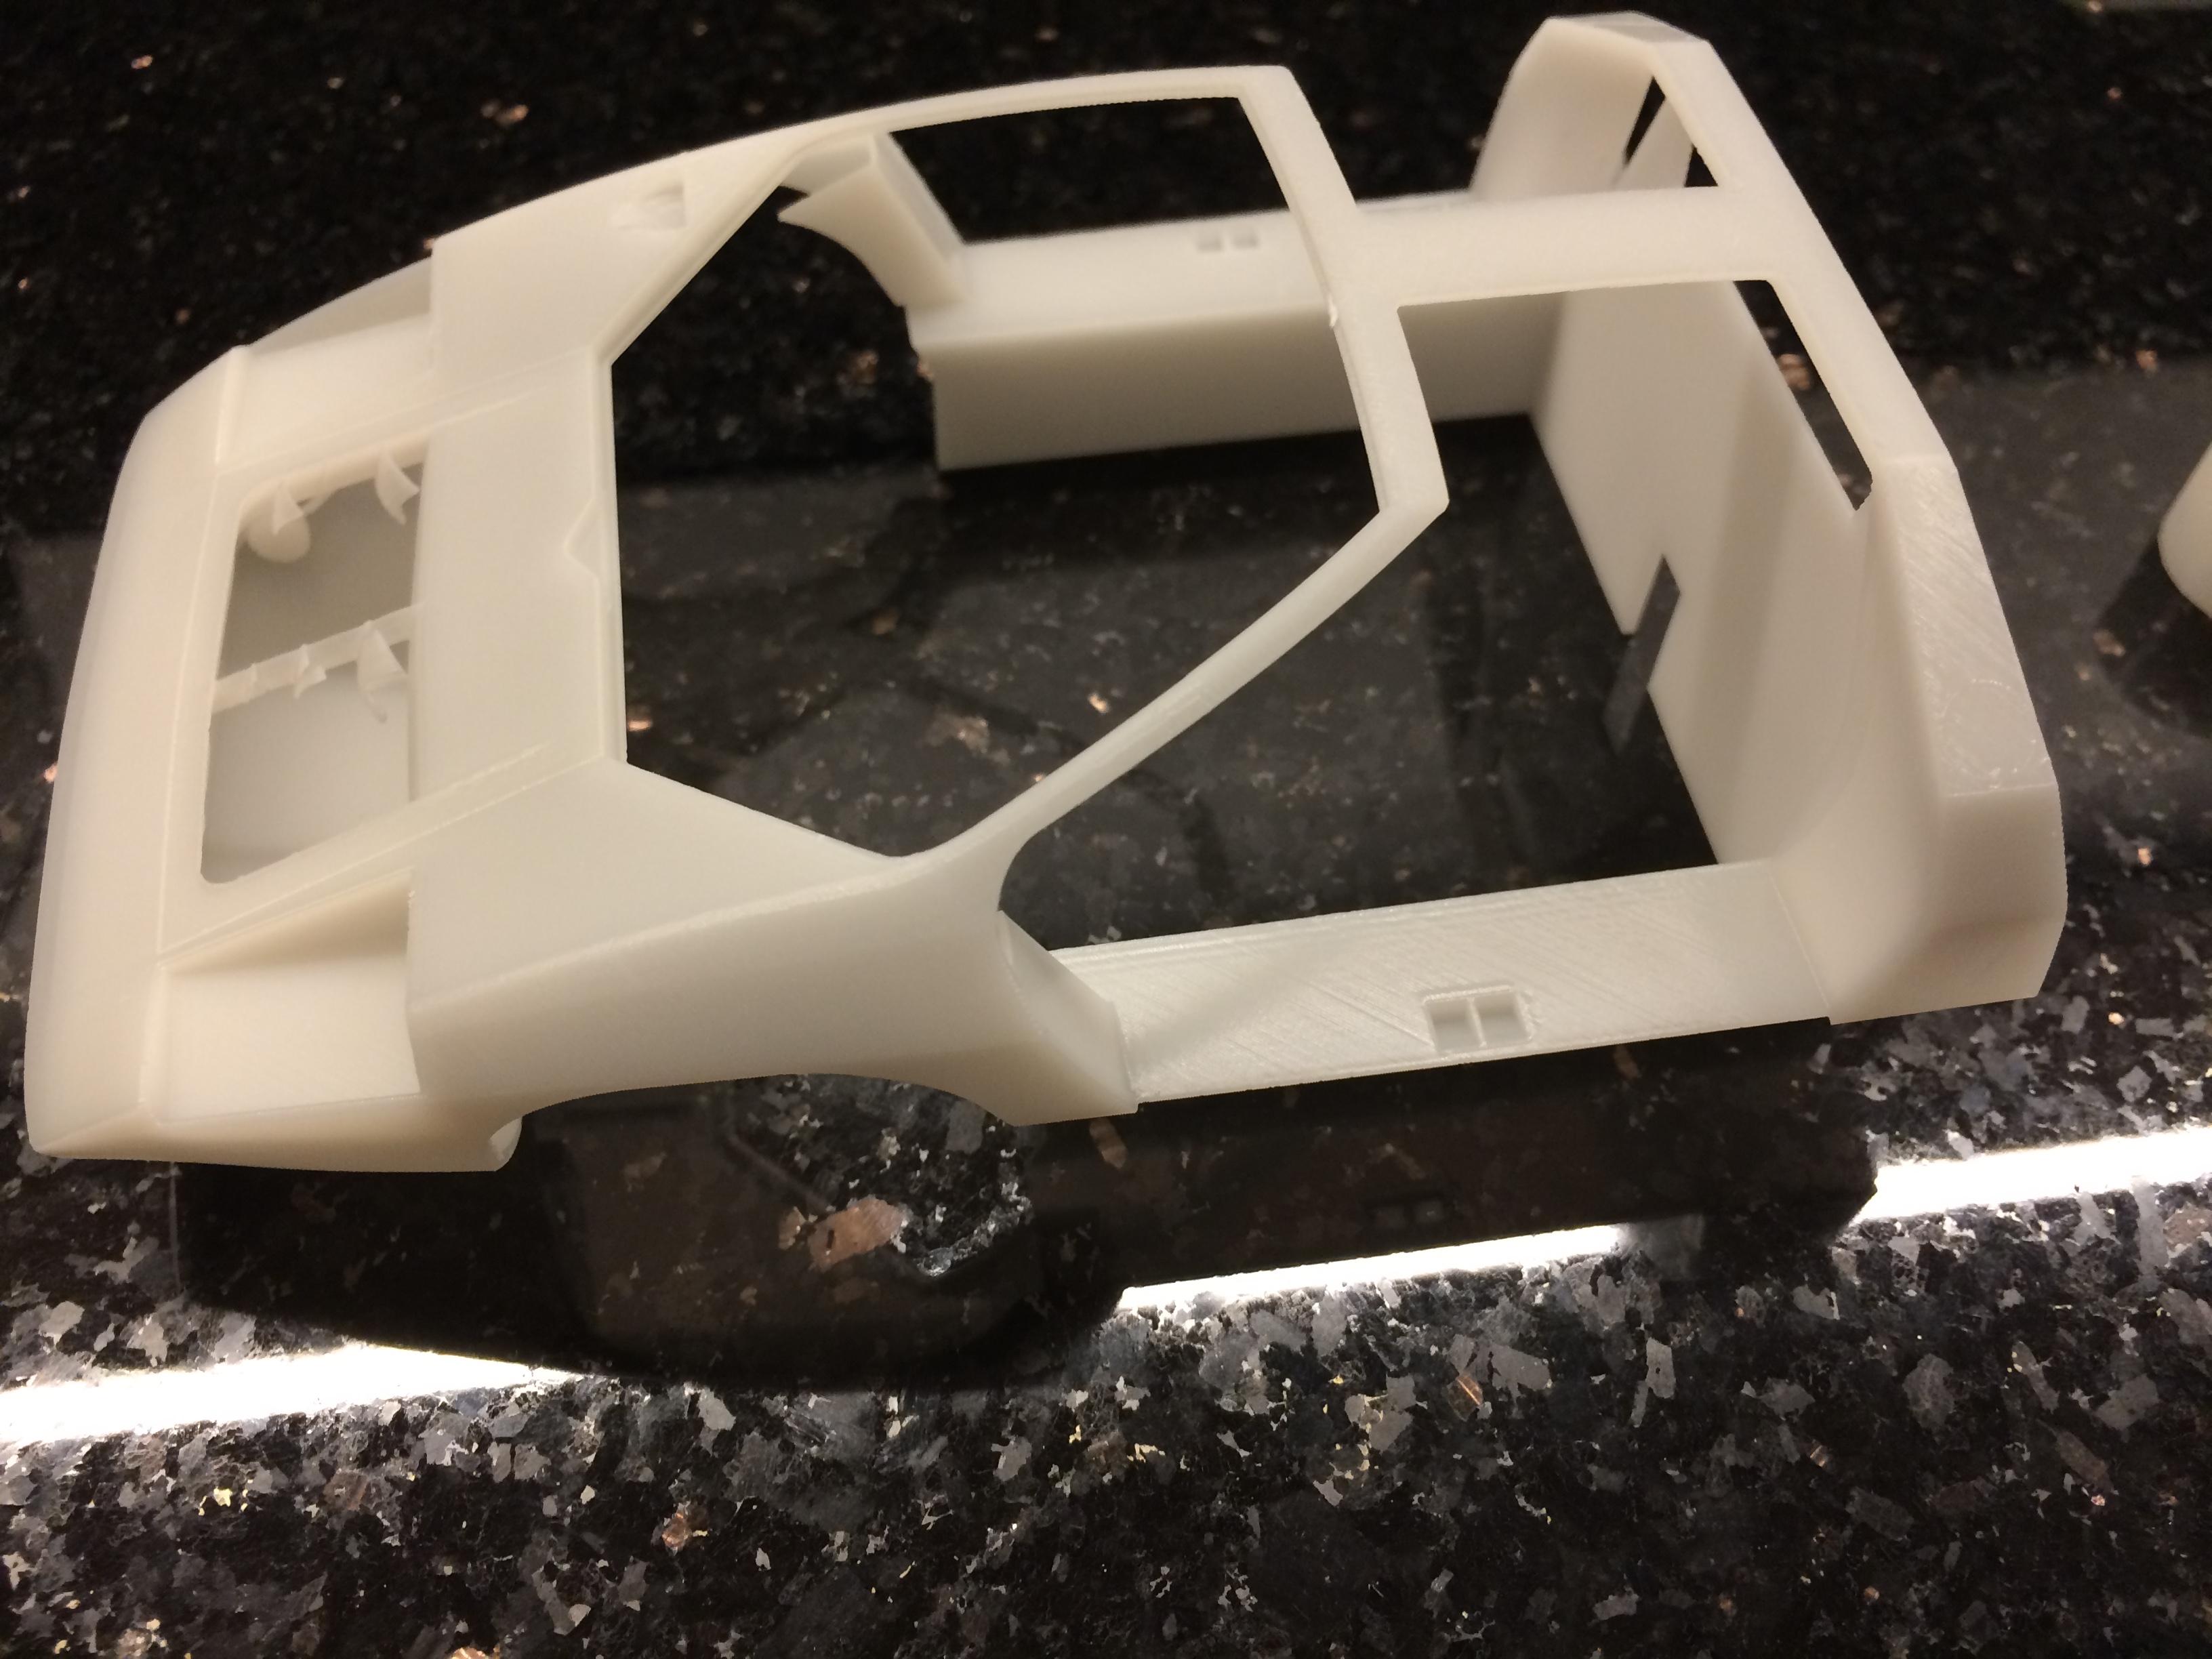
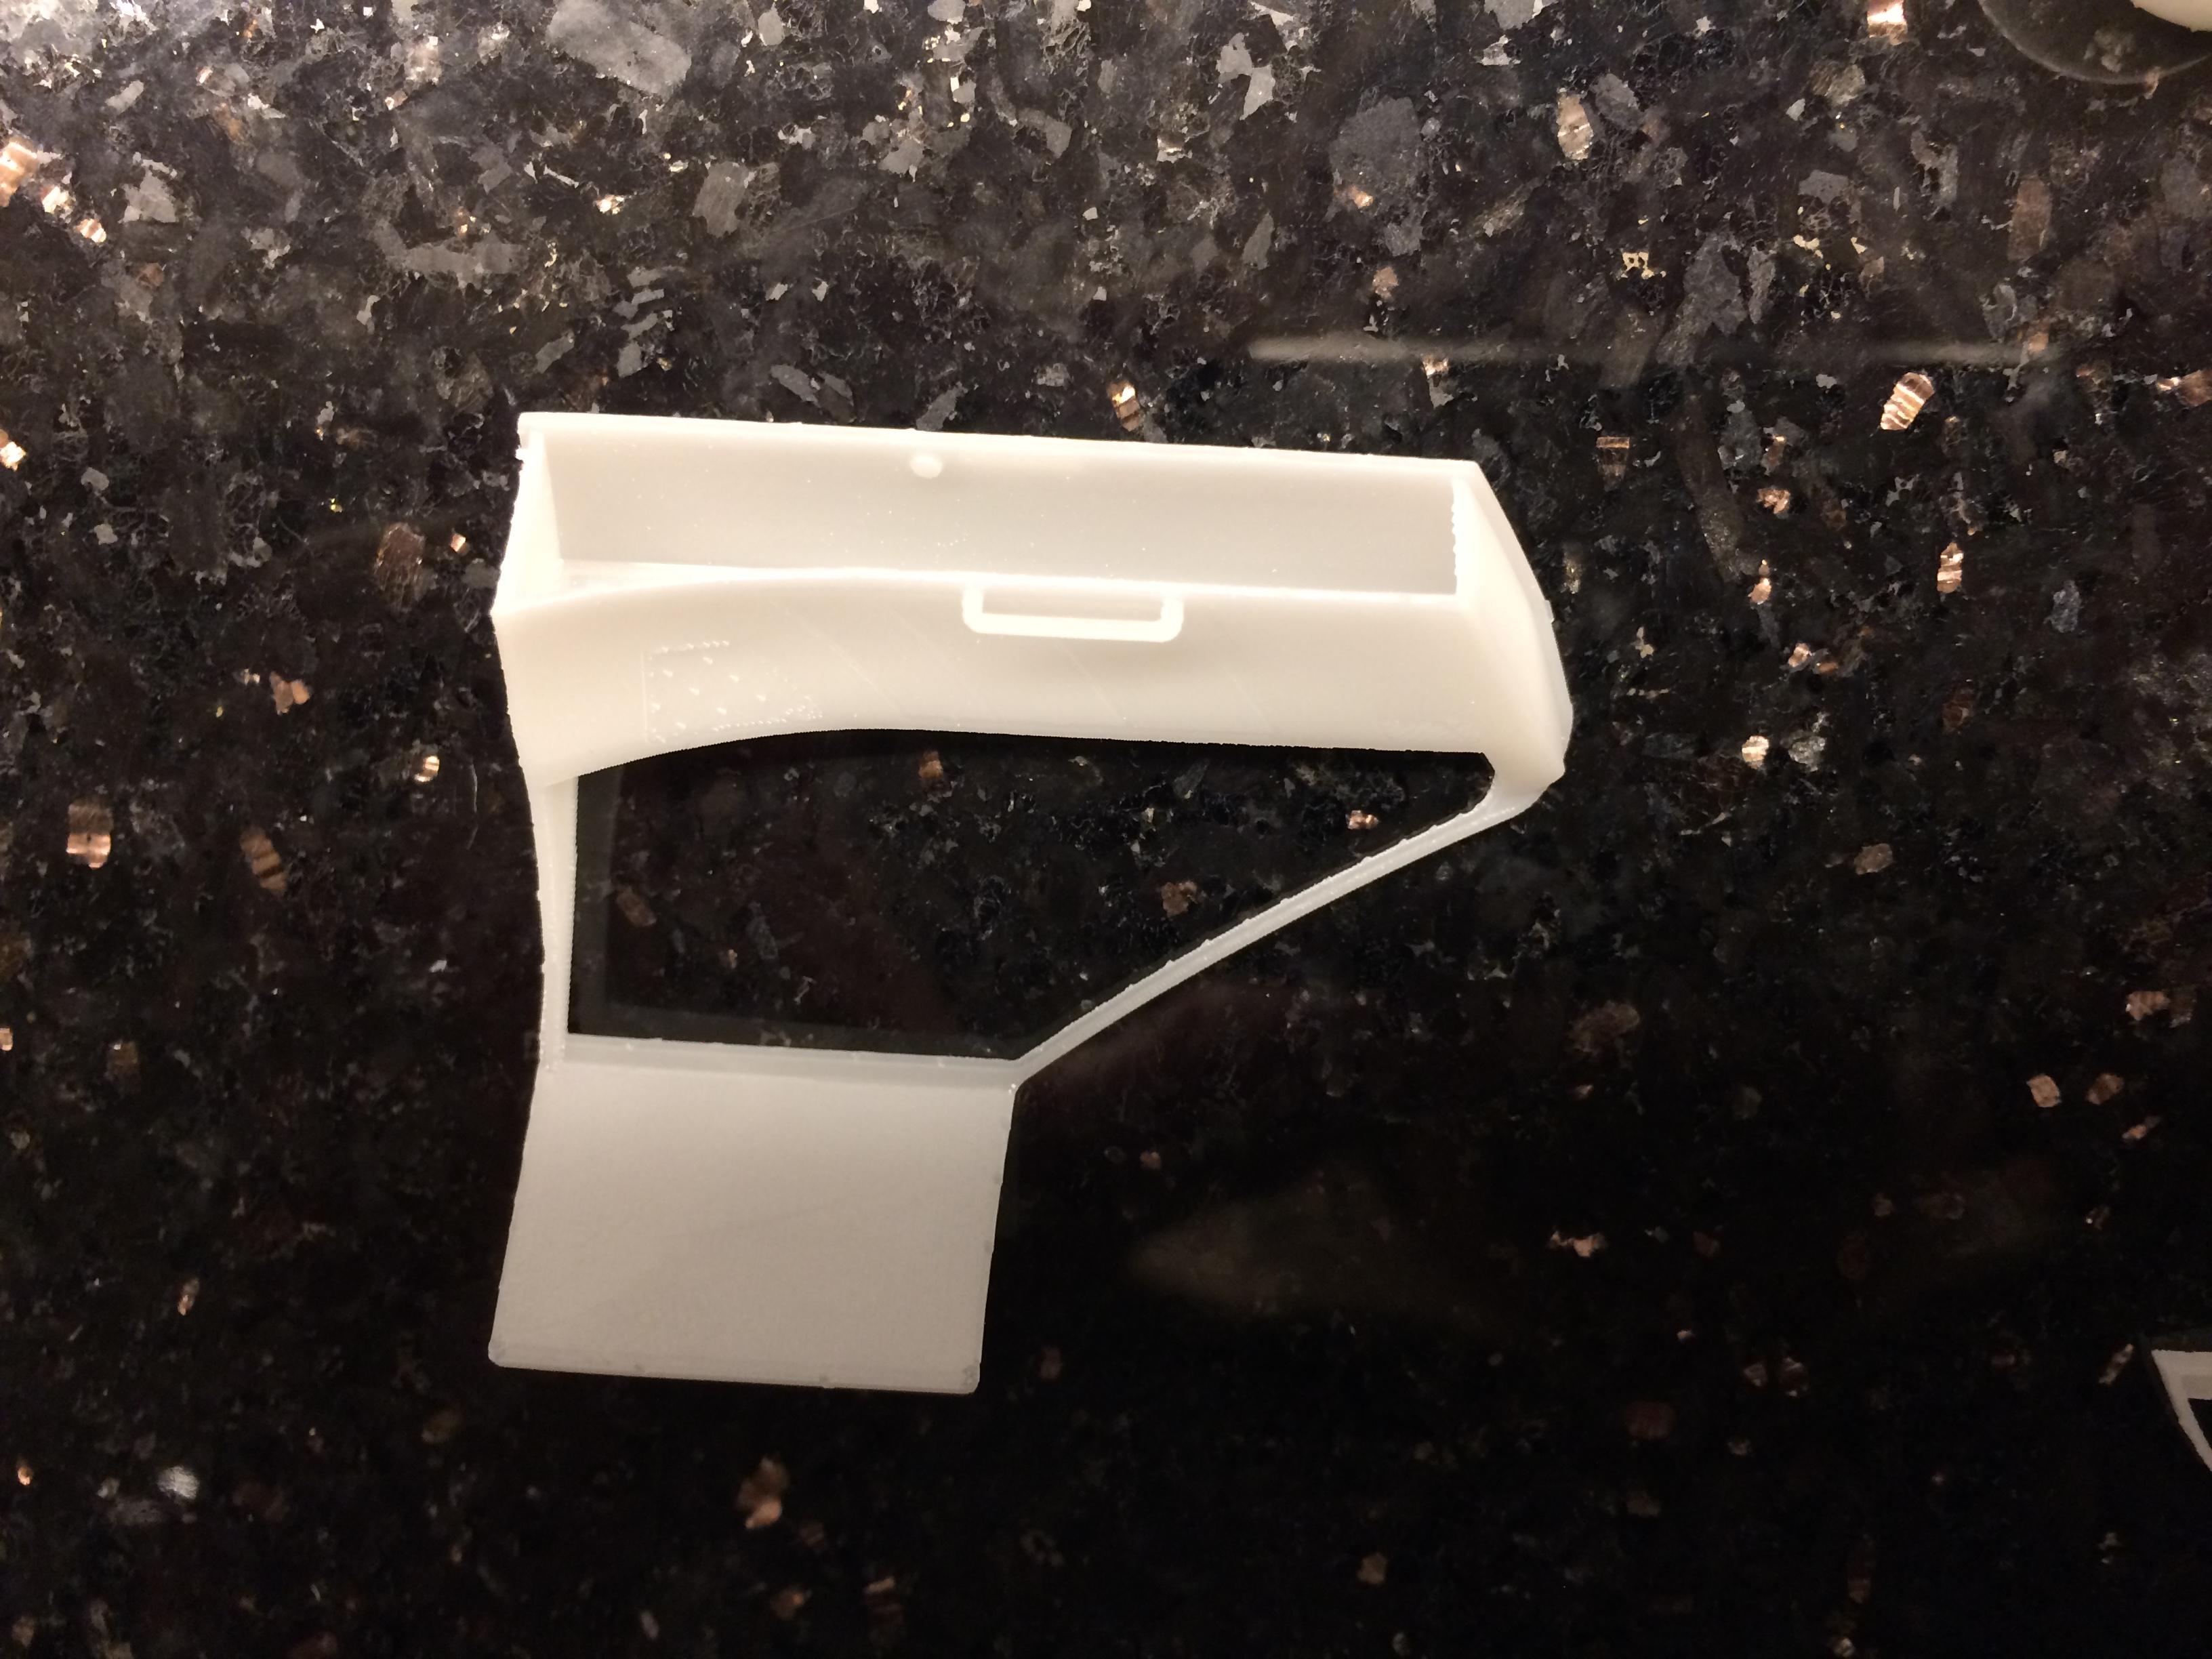
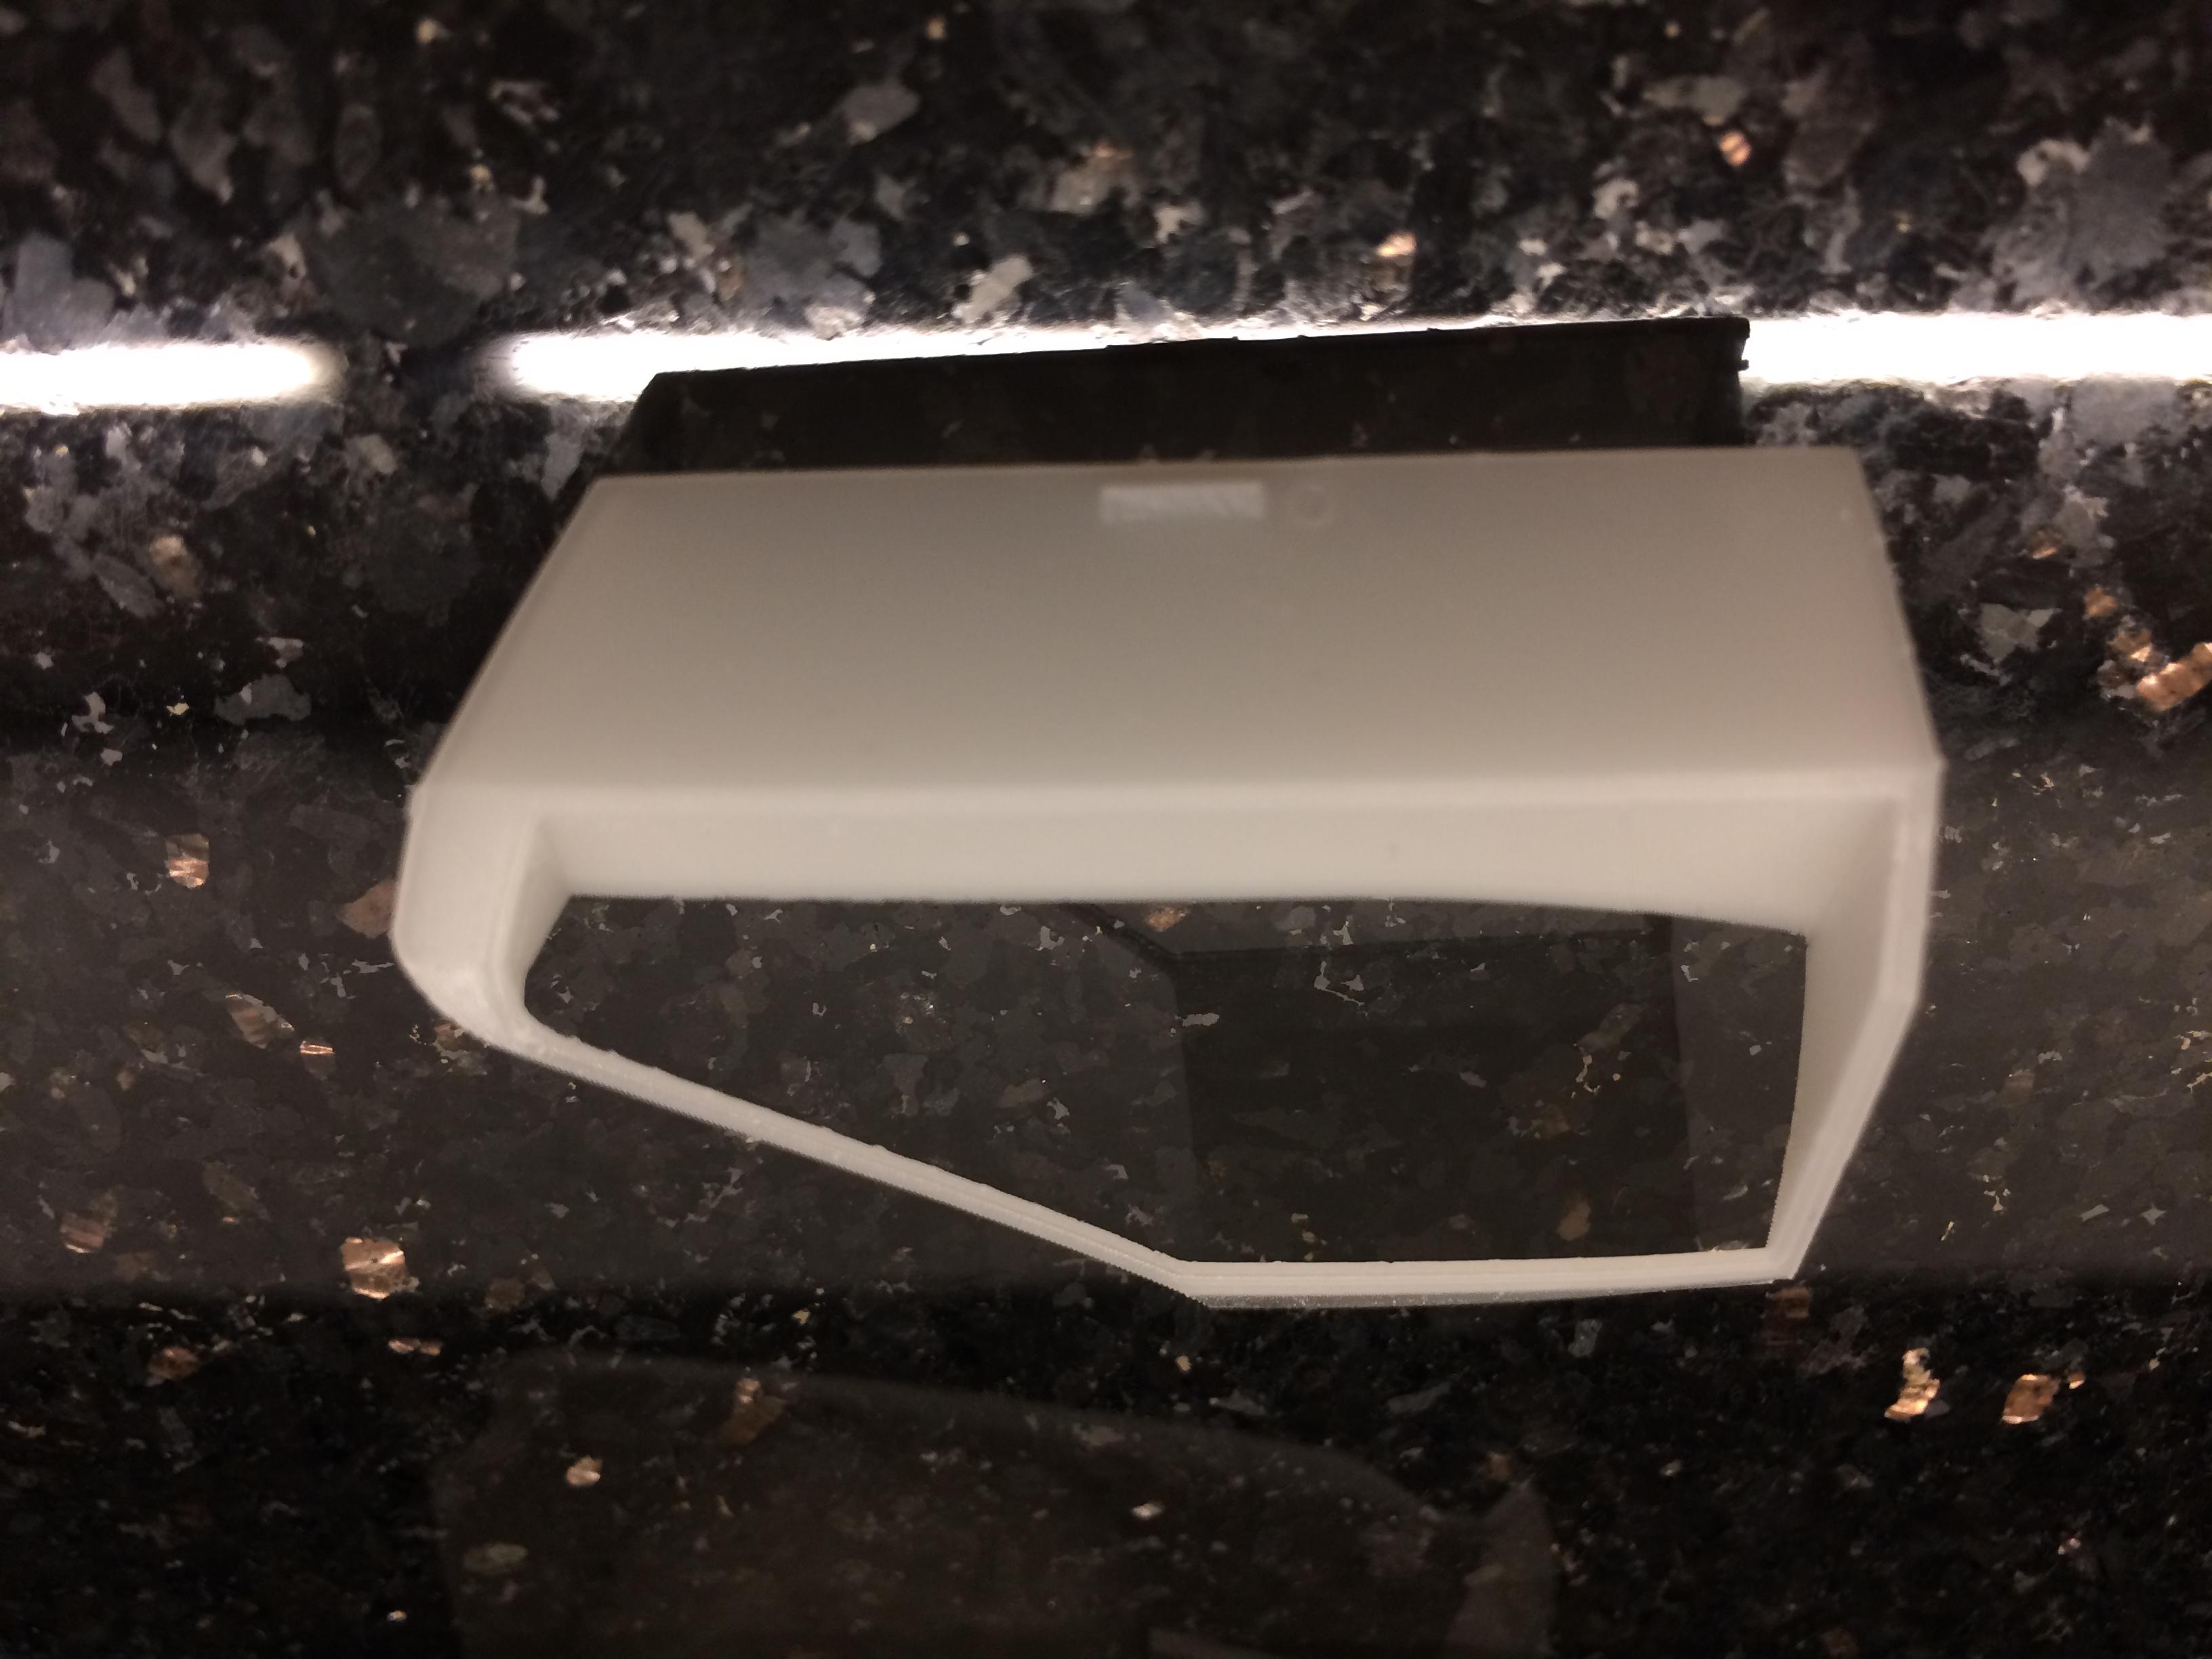
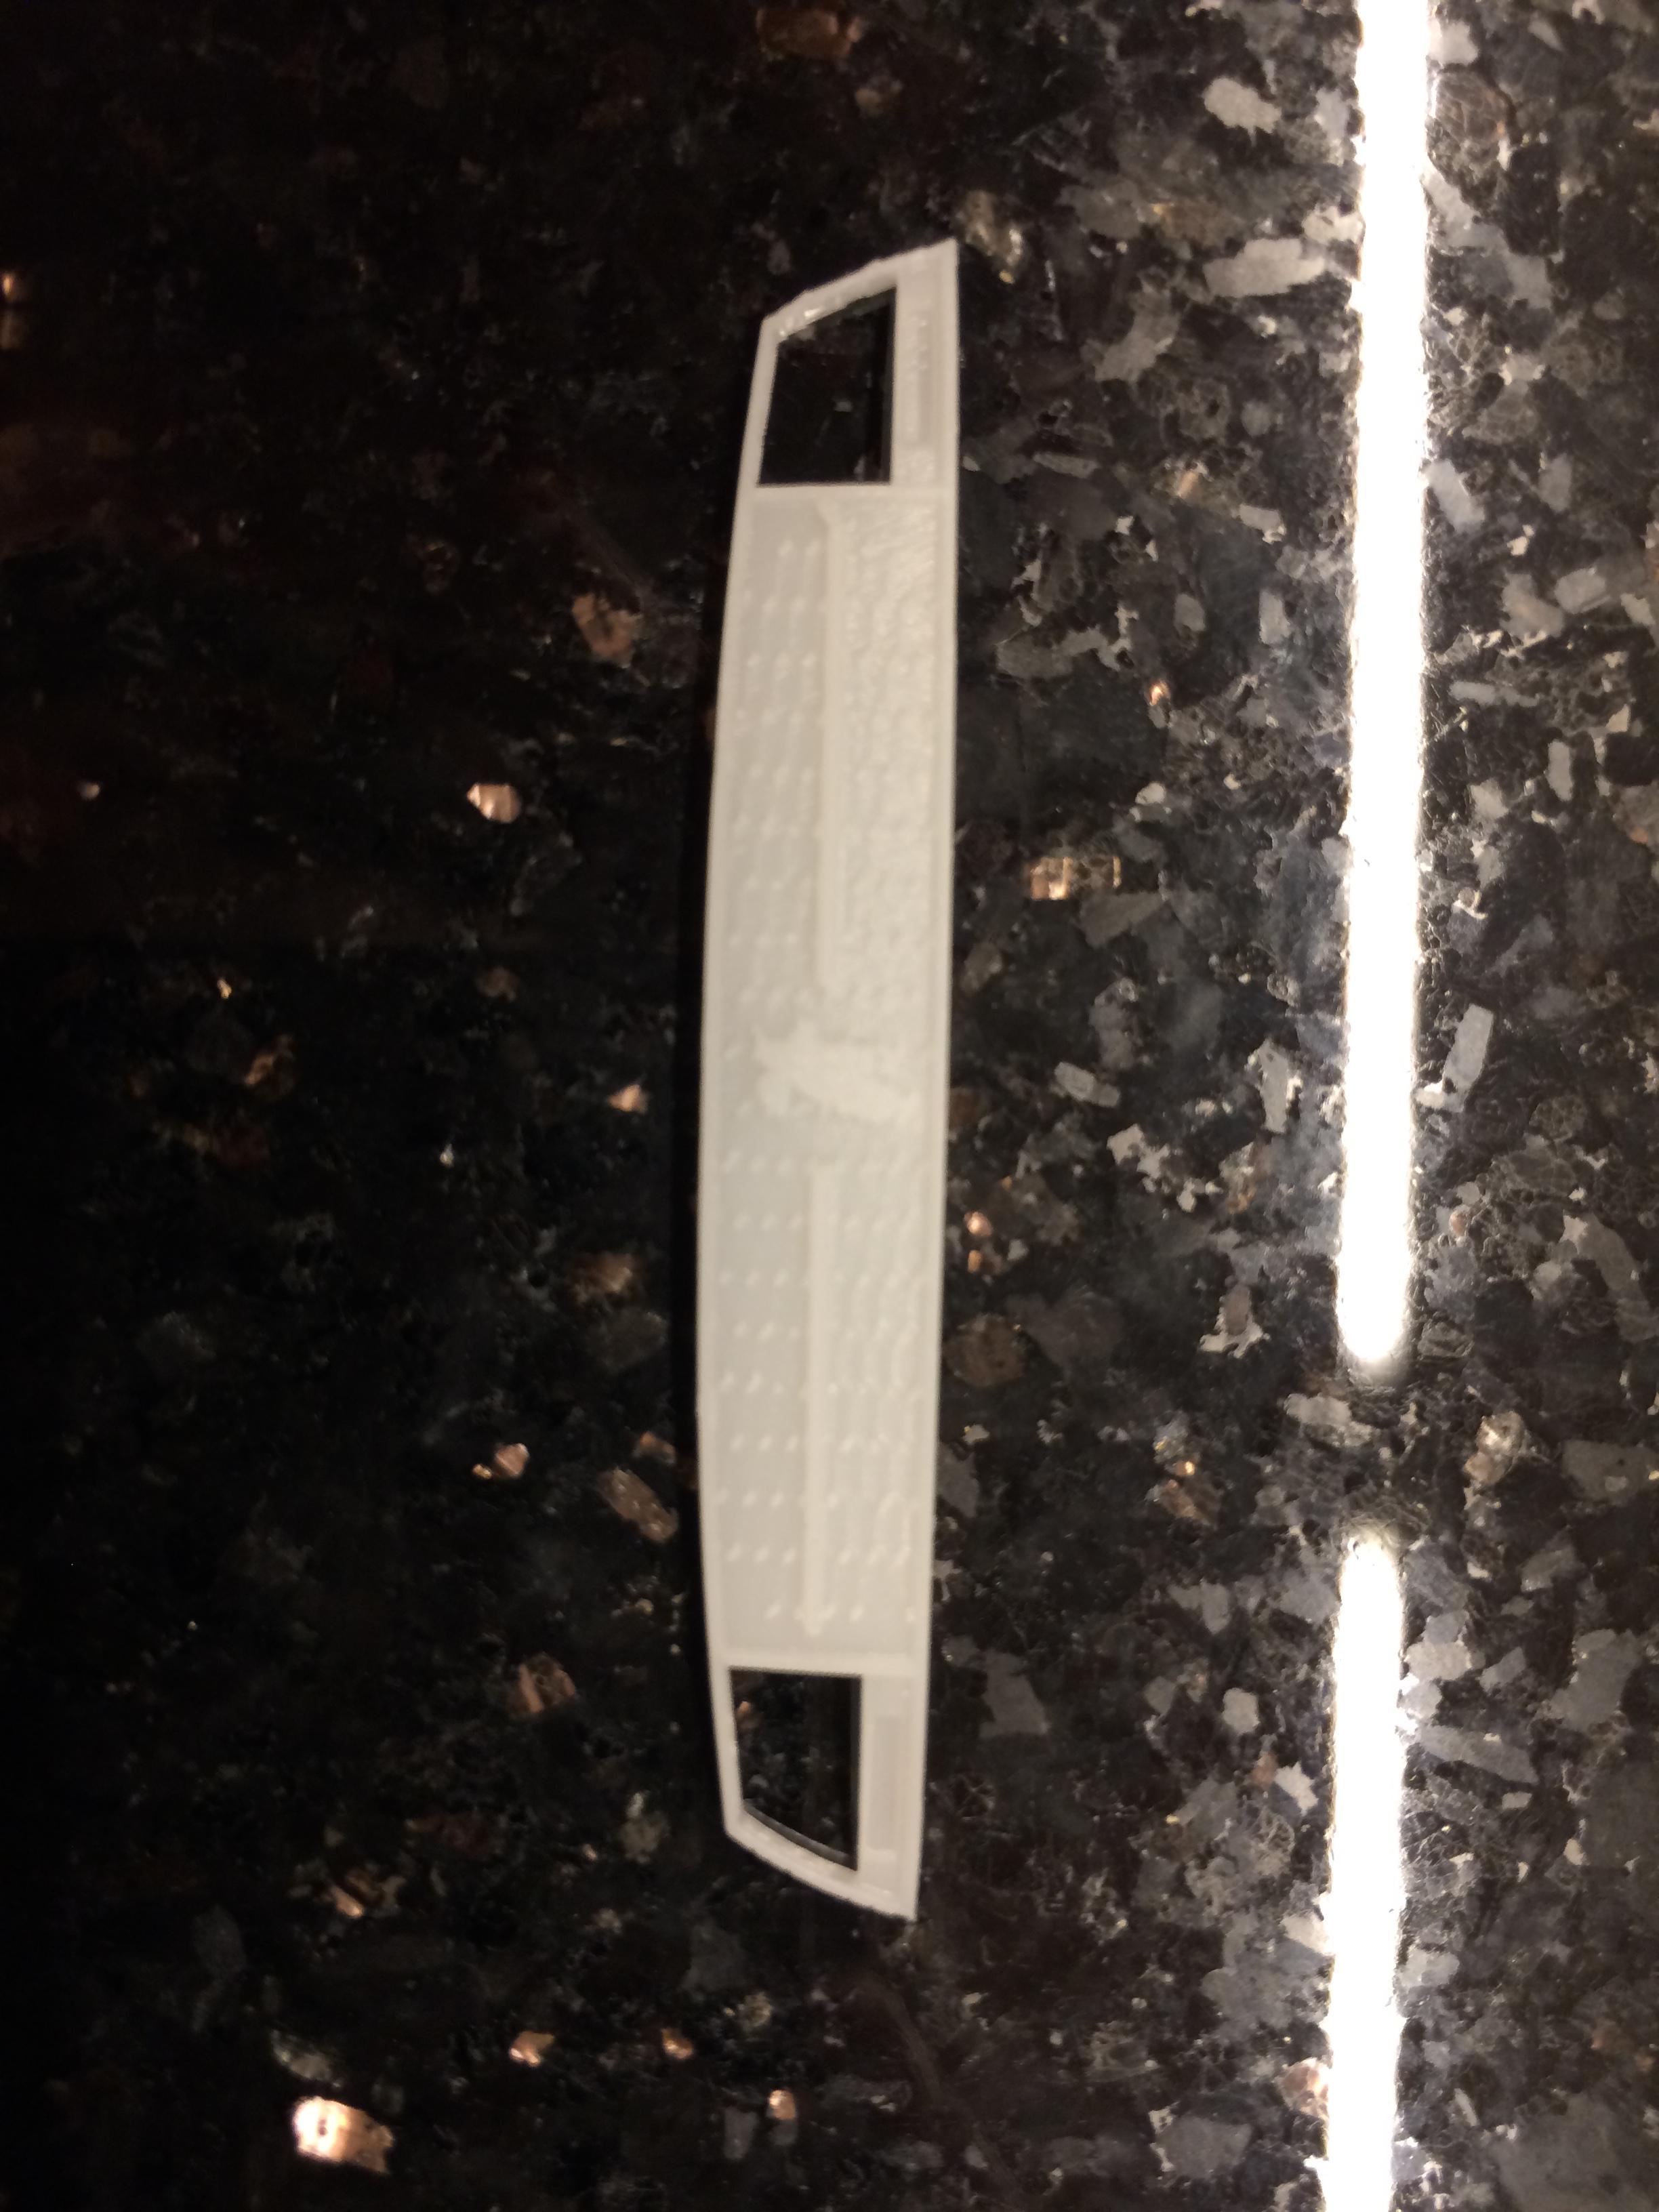
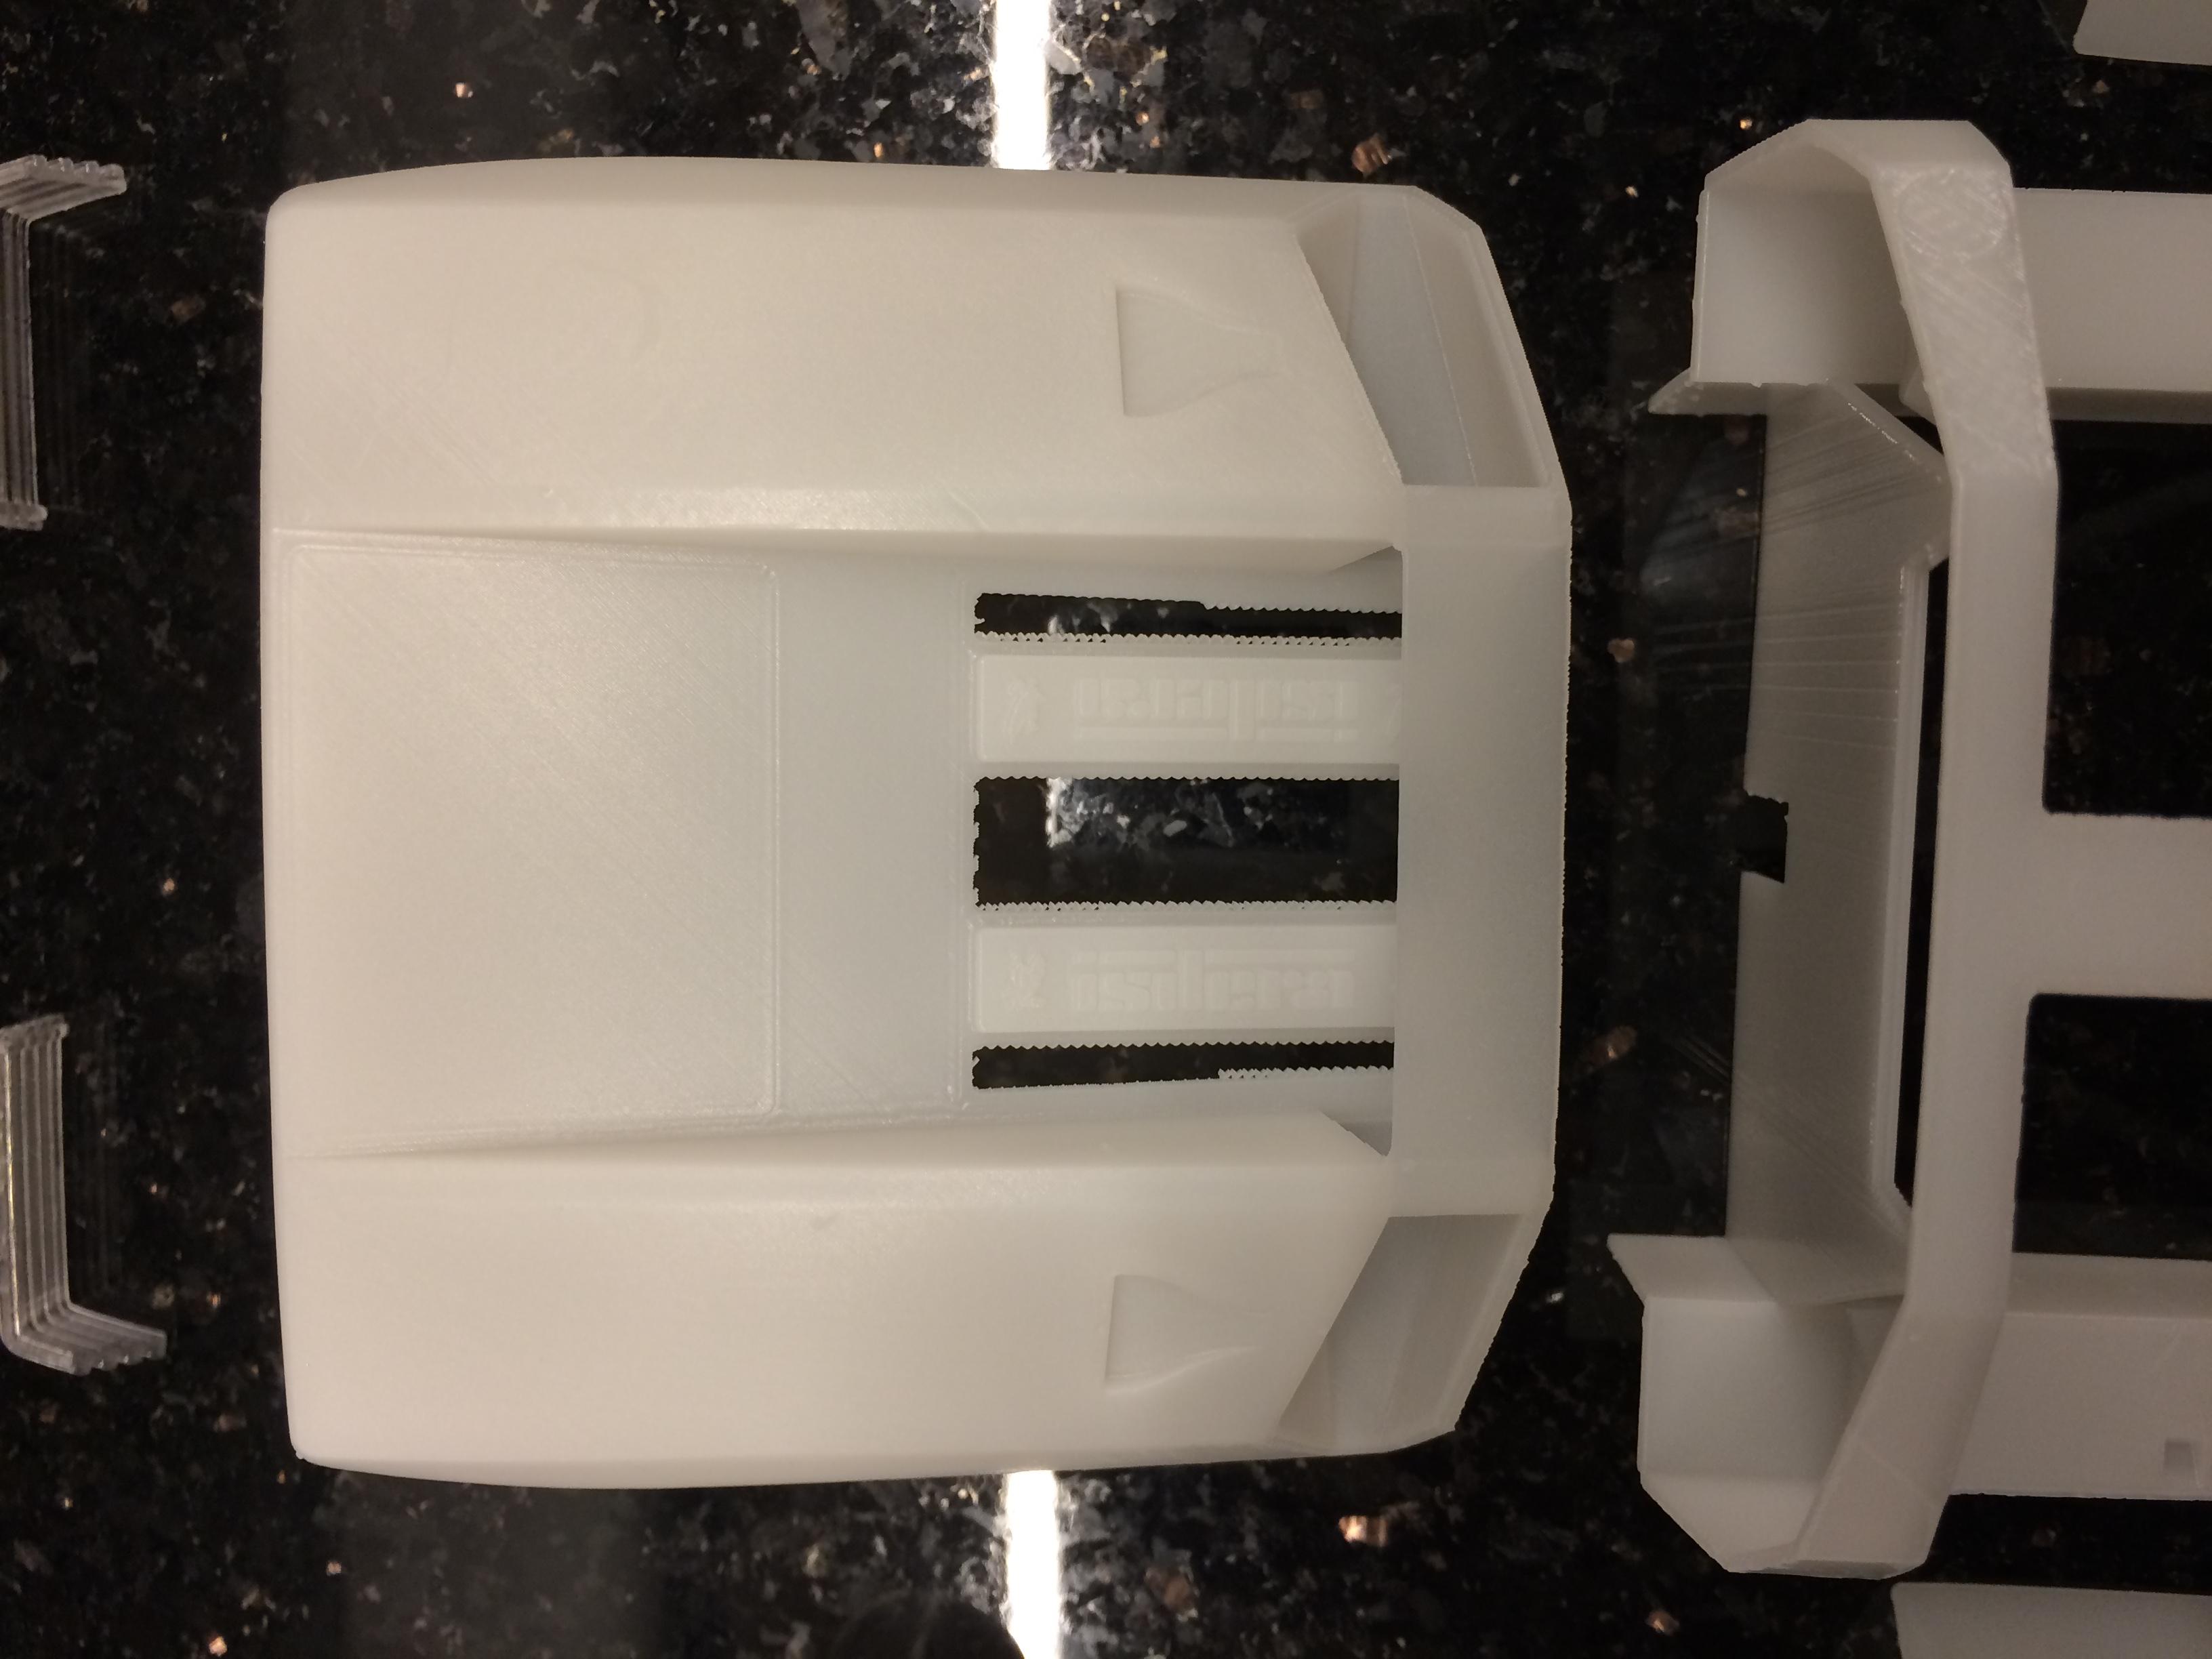
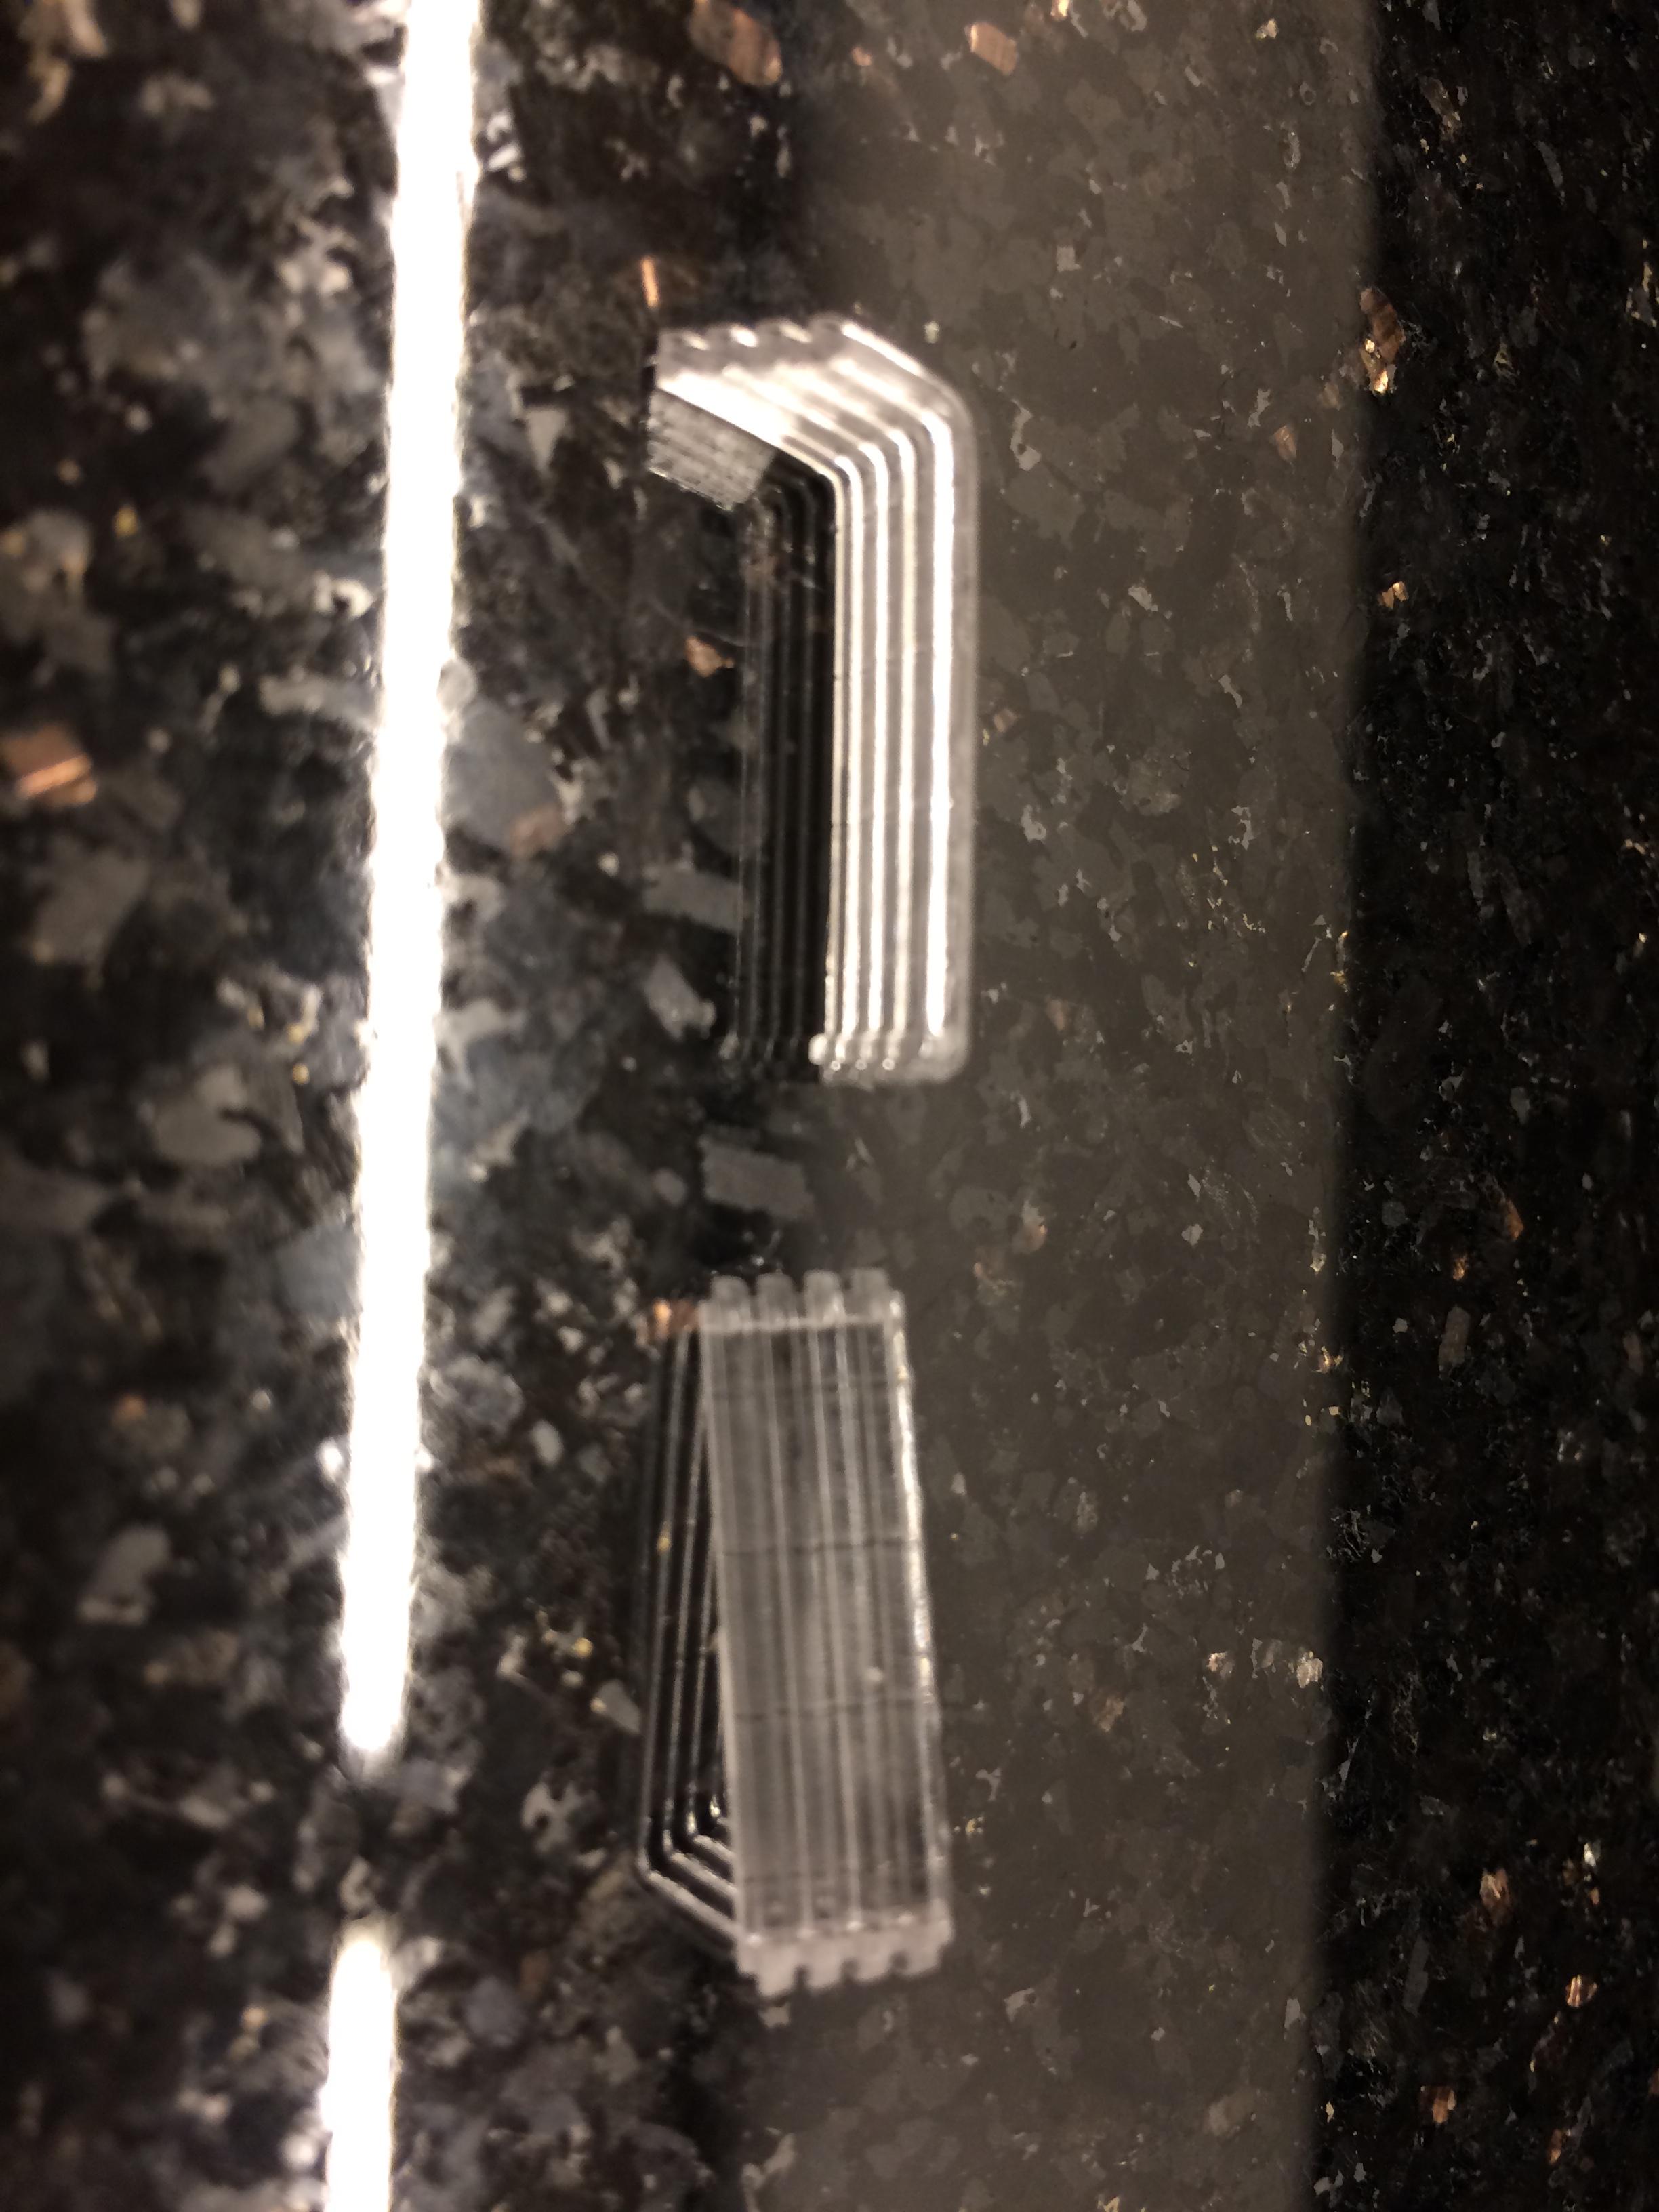
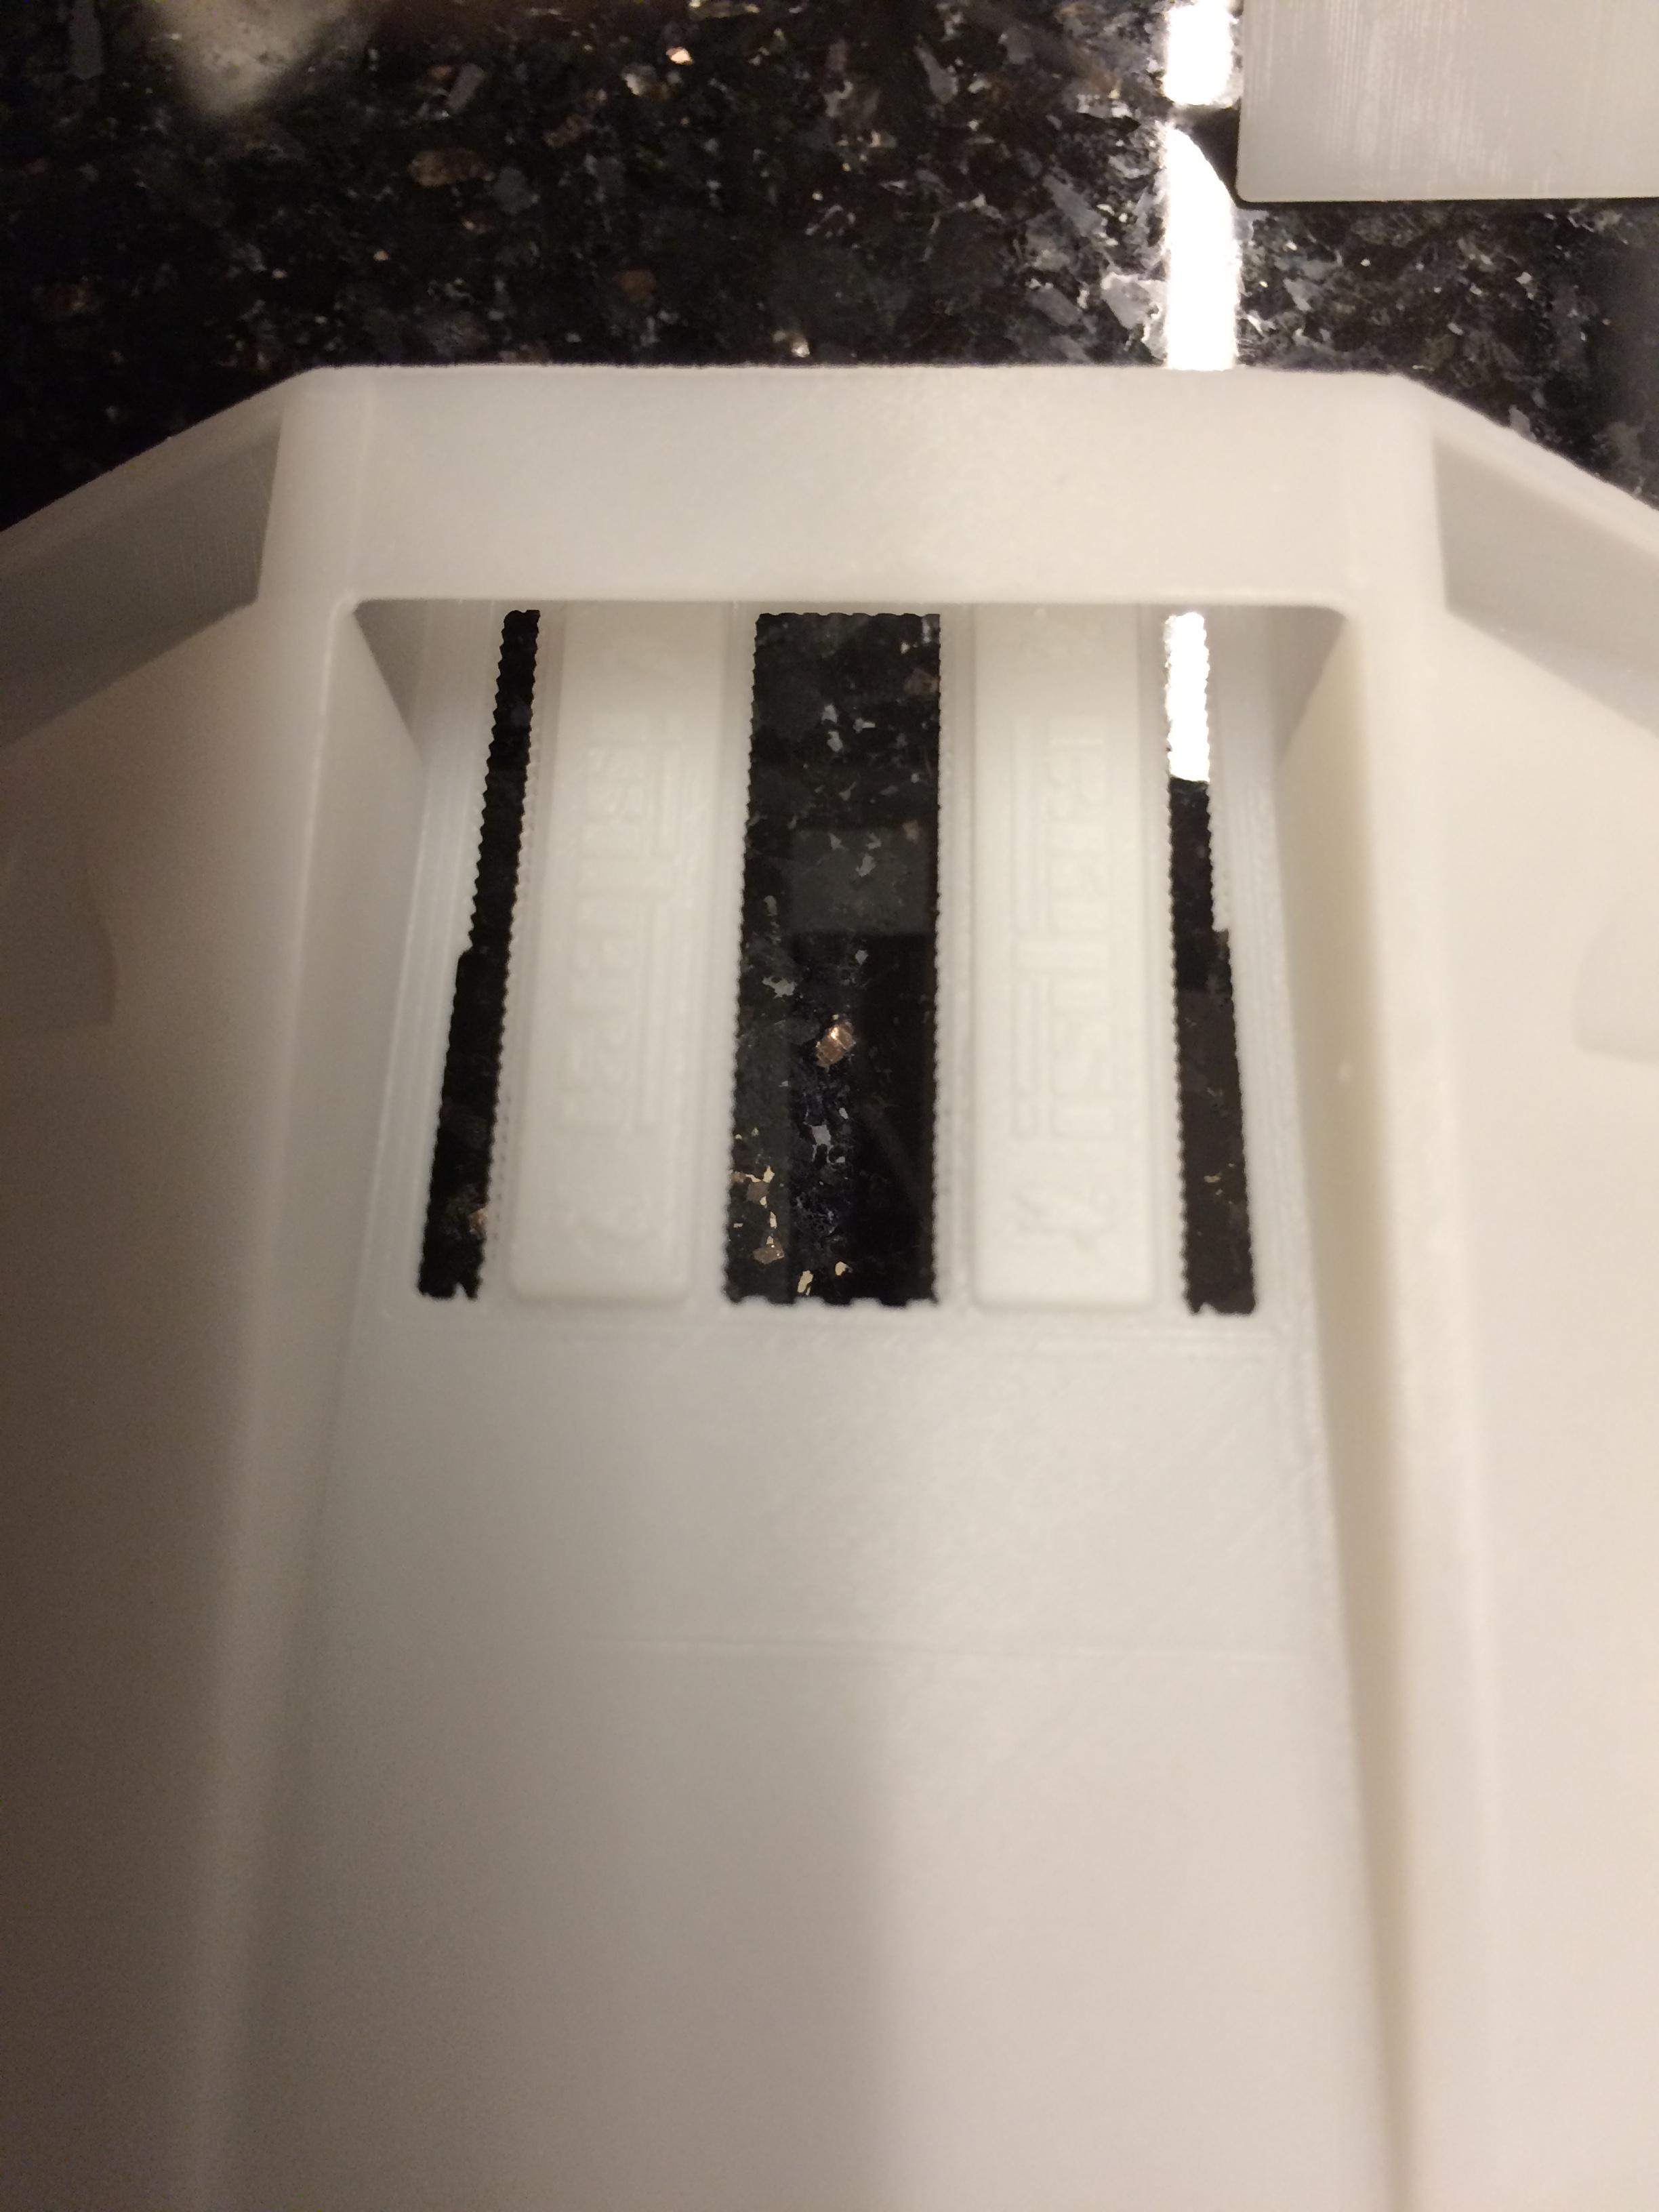
Hello together, now I do have some news I would like to share. Today I received the 3D printed parts. I had to modify the slats of the front hood as they where to thin. Unfortunately my CAD model crashed then so I had to made a separate part for the front hood. The hexagon pattern for the grilles also made problems, so I made a second version for the front grille. But enough talked, here are the pictures of the parts.
-
Hello Dann, thank you! Your feedback has always been a true motivation to carry on with this project. Now I even have a plan how to do the windows and headlight covers. I will do them by thermoforming with a plaster mold. To create the mold, I will do a 3D printed negative mold. I once did a canopy for the 1/12 Lindbergh GT200 by thermoforming with a plaster mold. Worked well back then. Greetings from Germany Erich
-
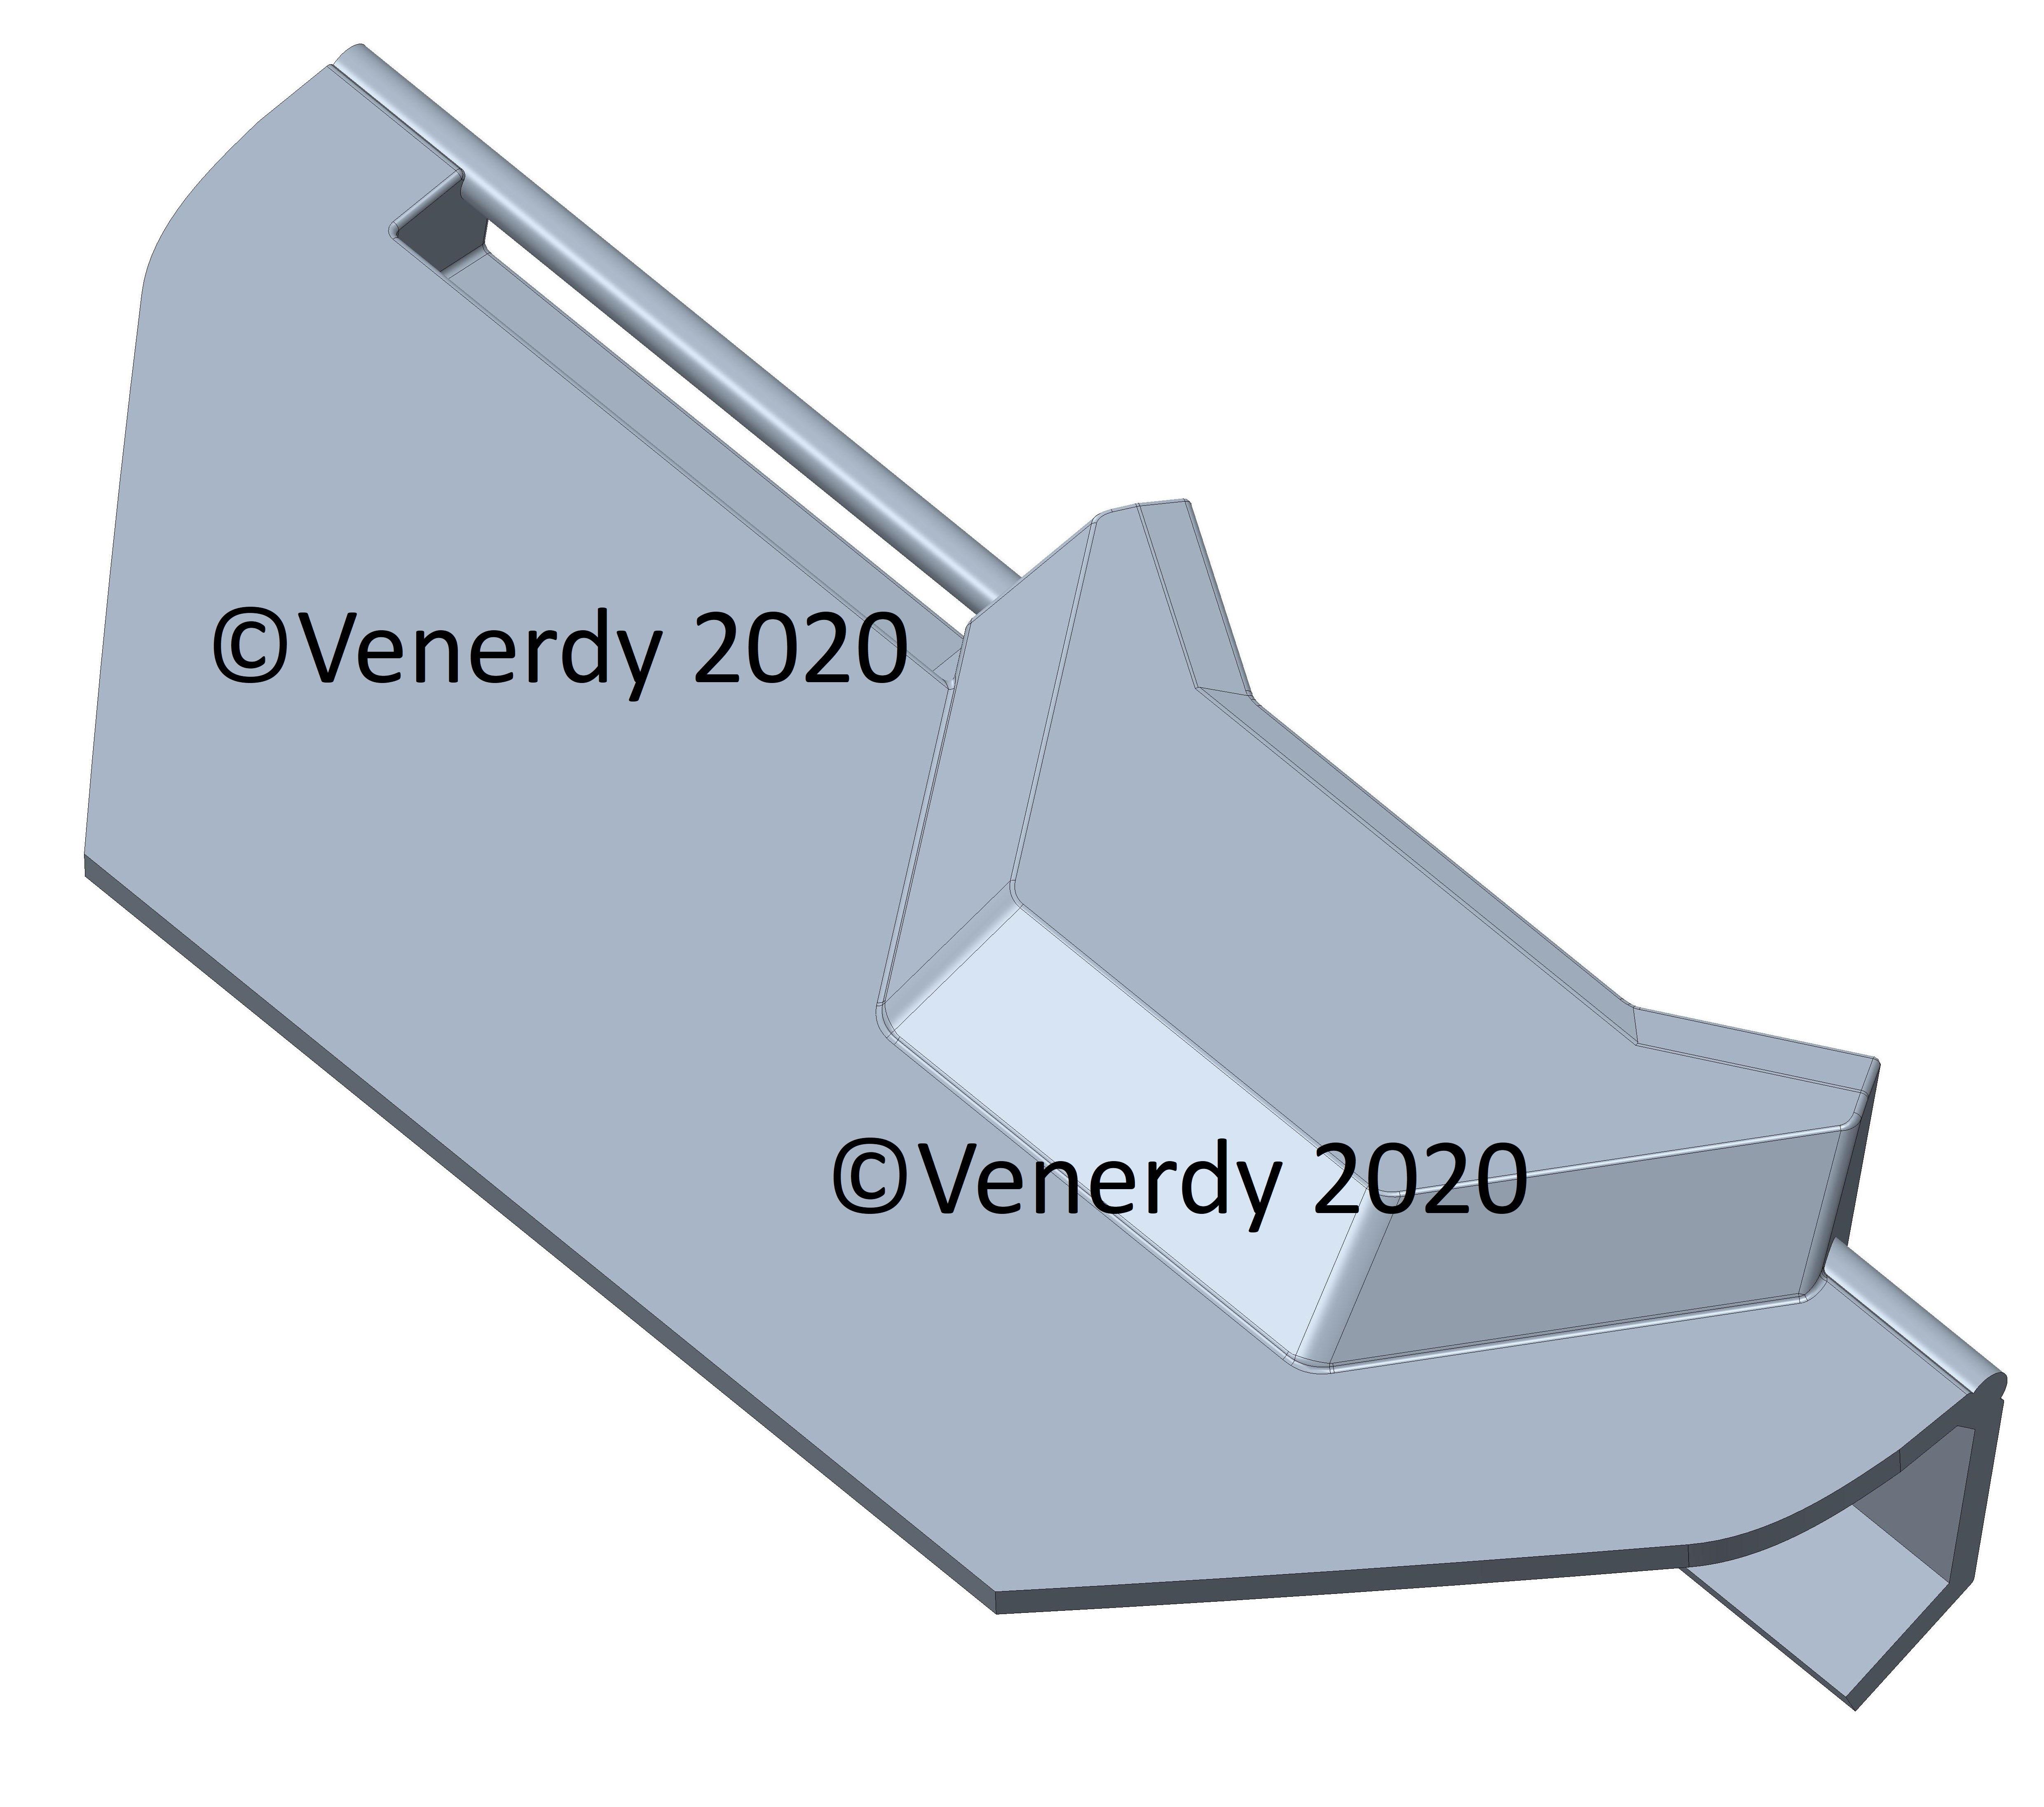
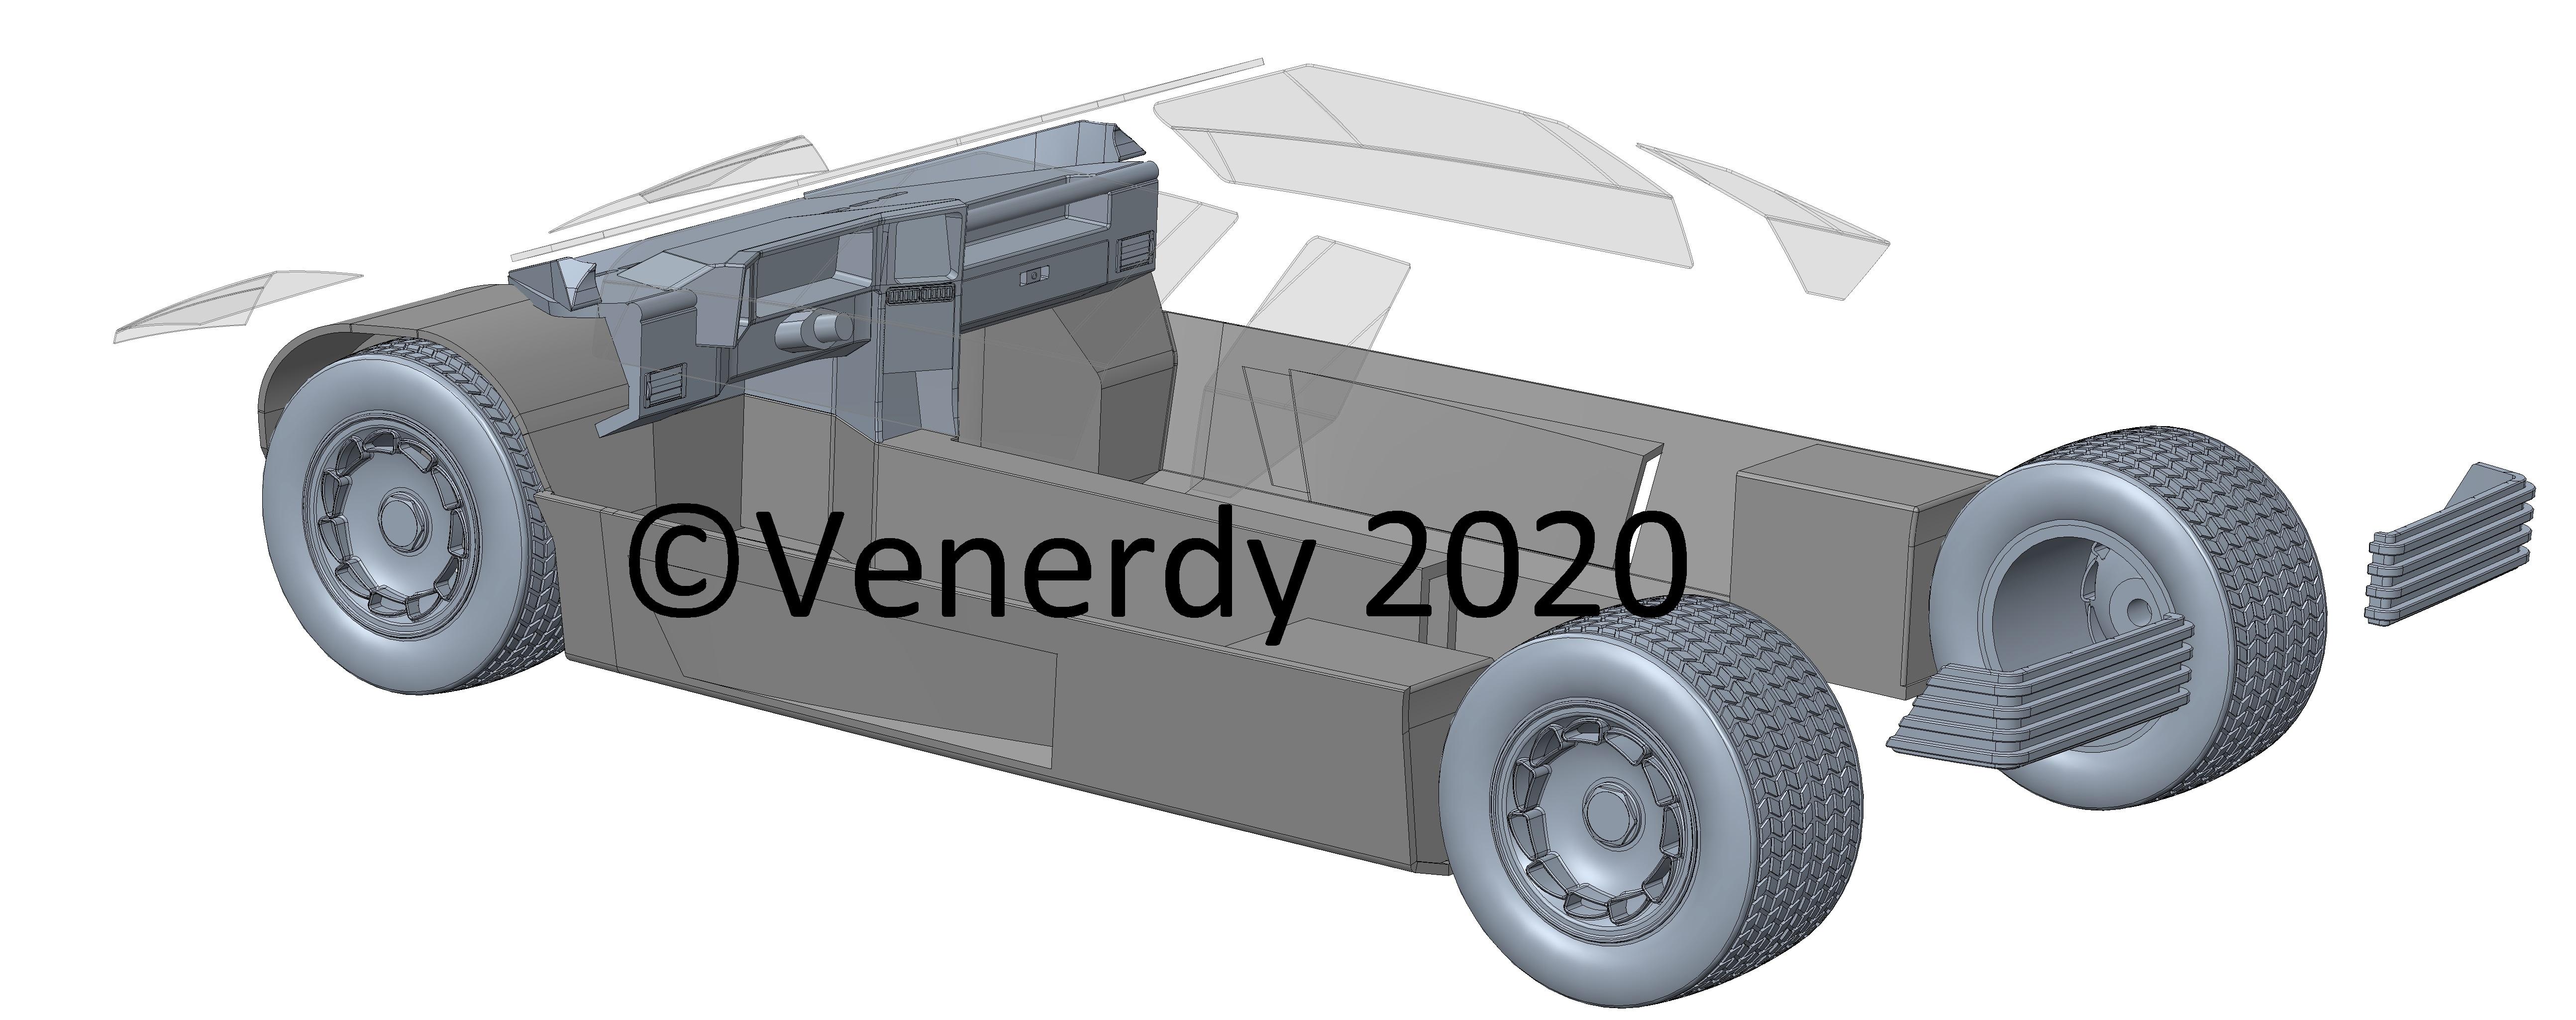
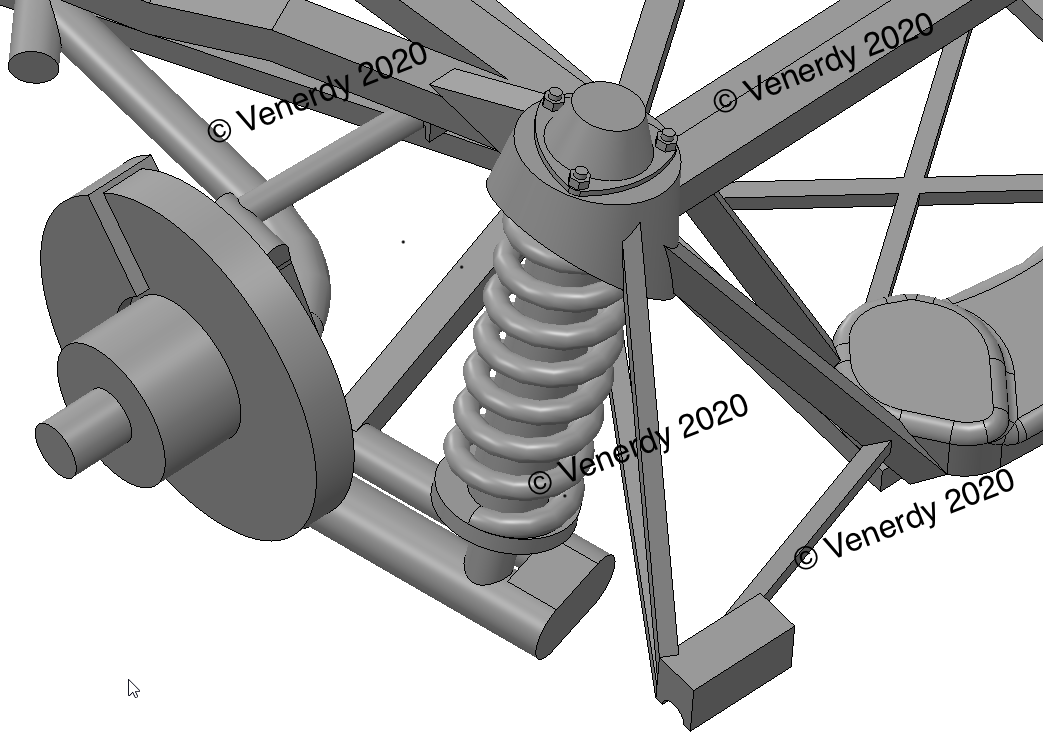
After the summer break I was able to go ahead. I added the front and rear suspension as well as the tubular frame of the engine bay. So the chassis should be ready soon.
-
Hello Dann, this is absolutely amazing. Great work. It will be a fantastic model. Maybe in a 5 years I can catch up with mine. Somehow I have to little sparetime for this hobby. Greetings from Germany Erich
-
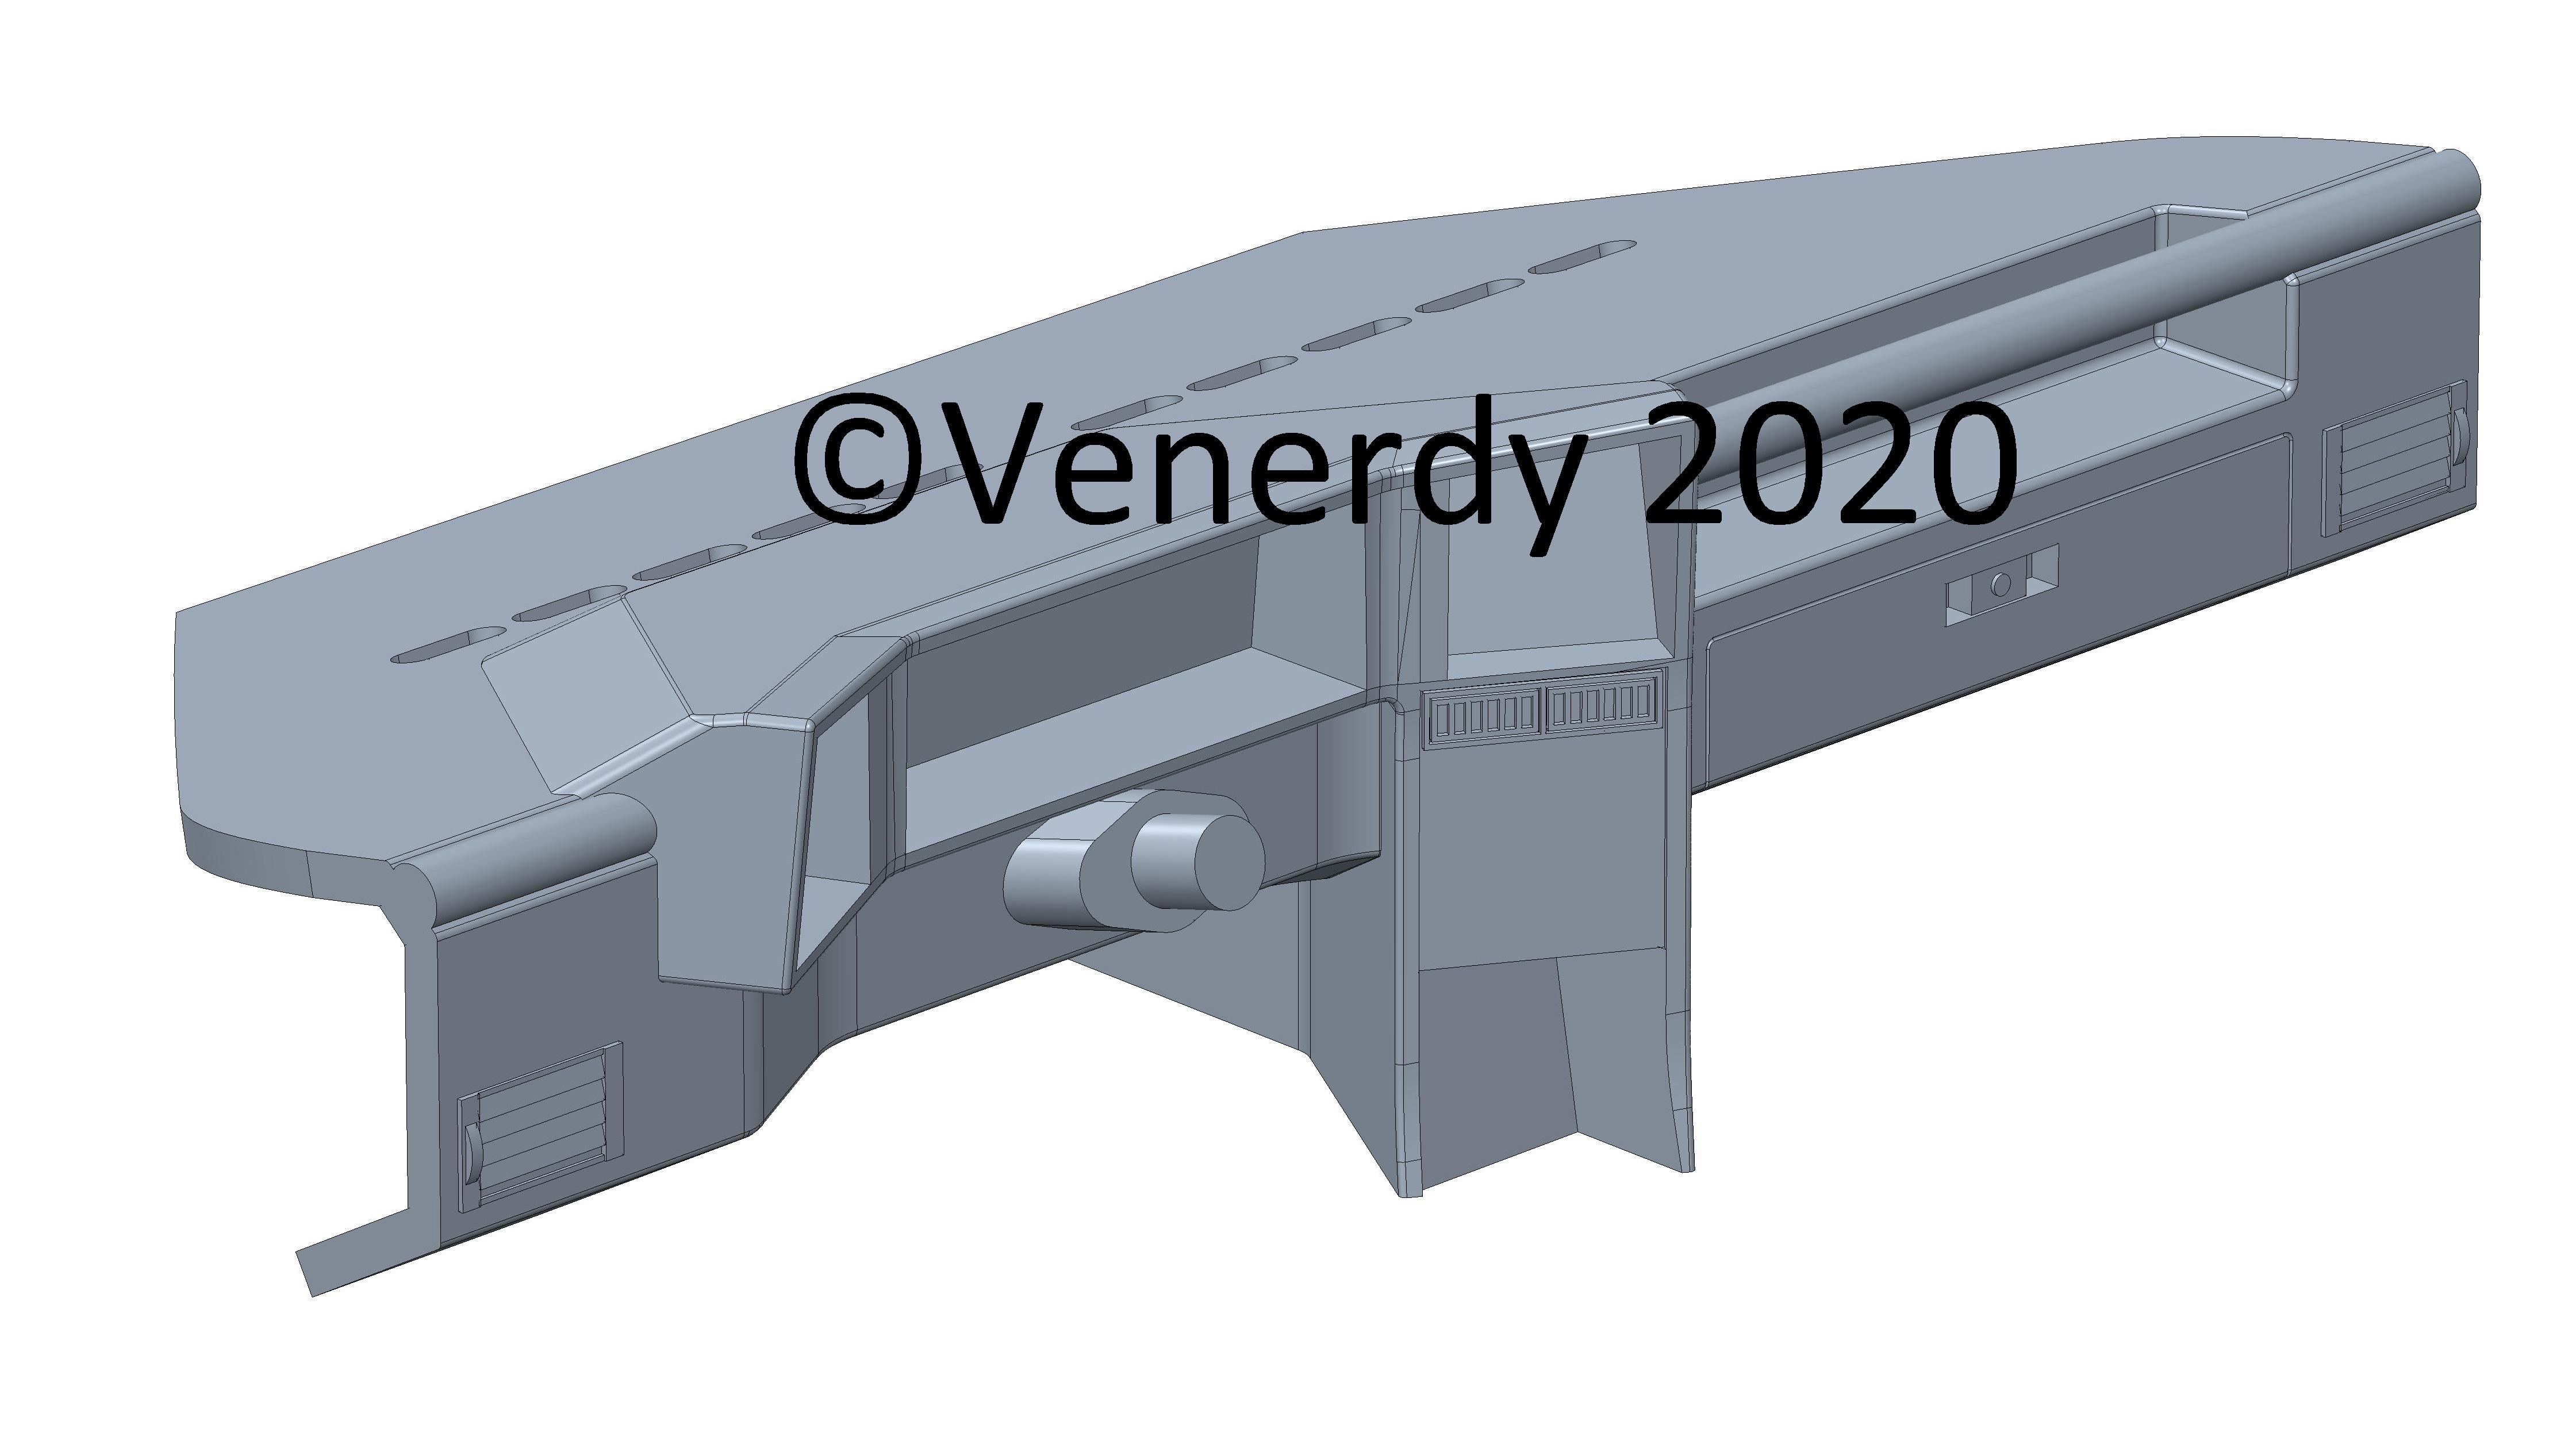
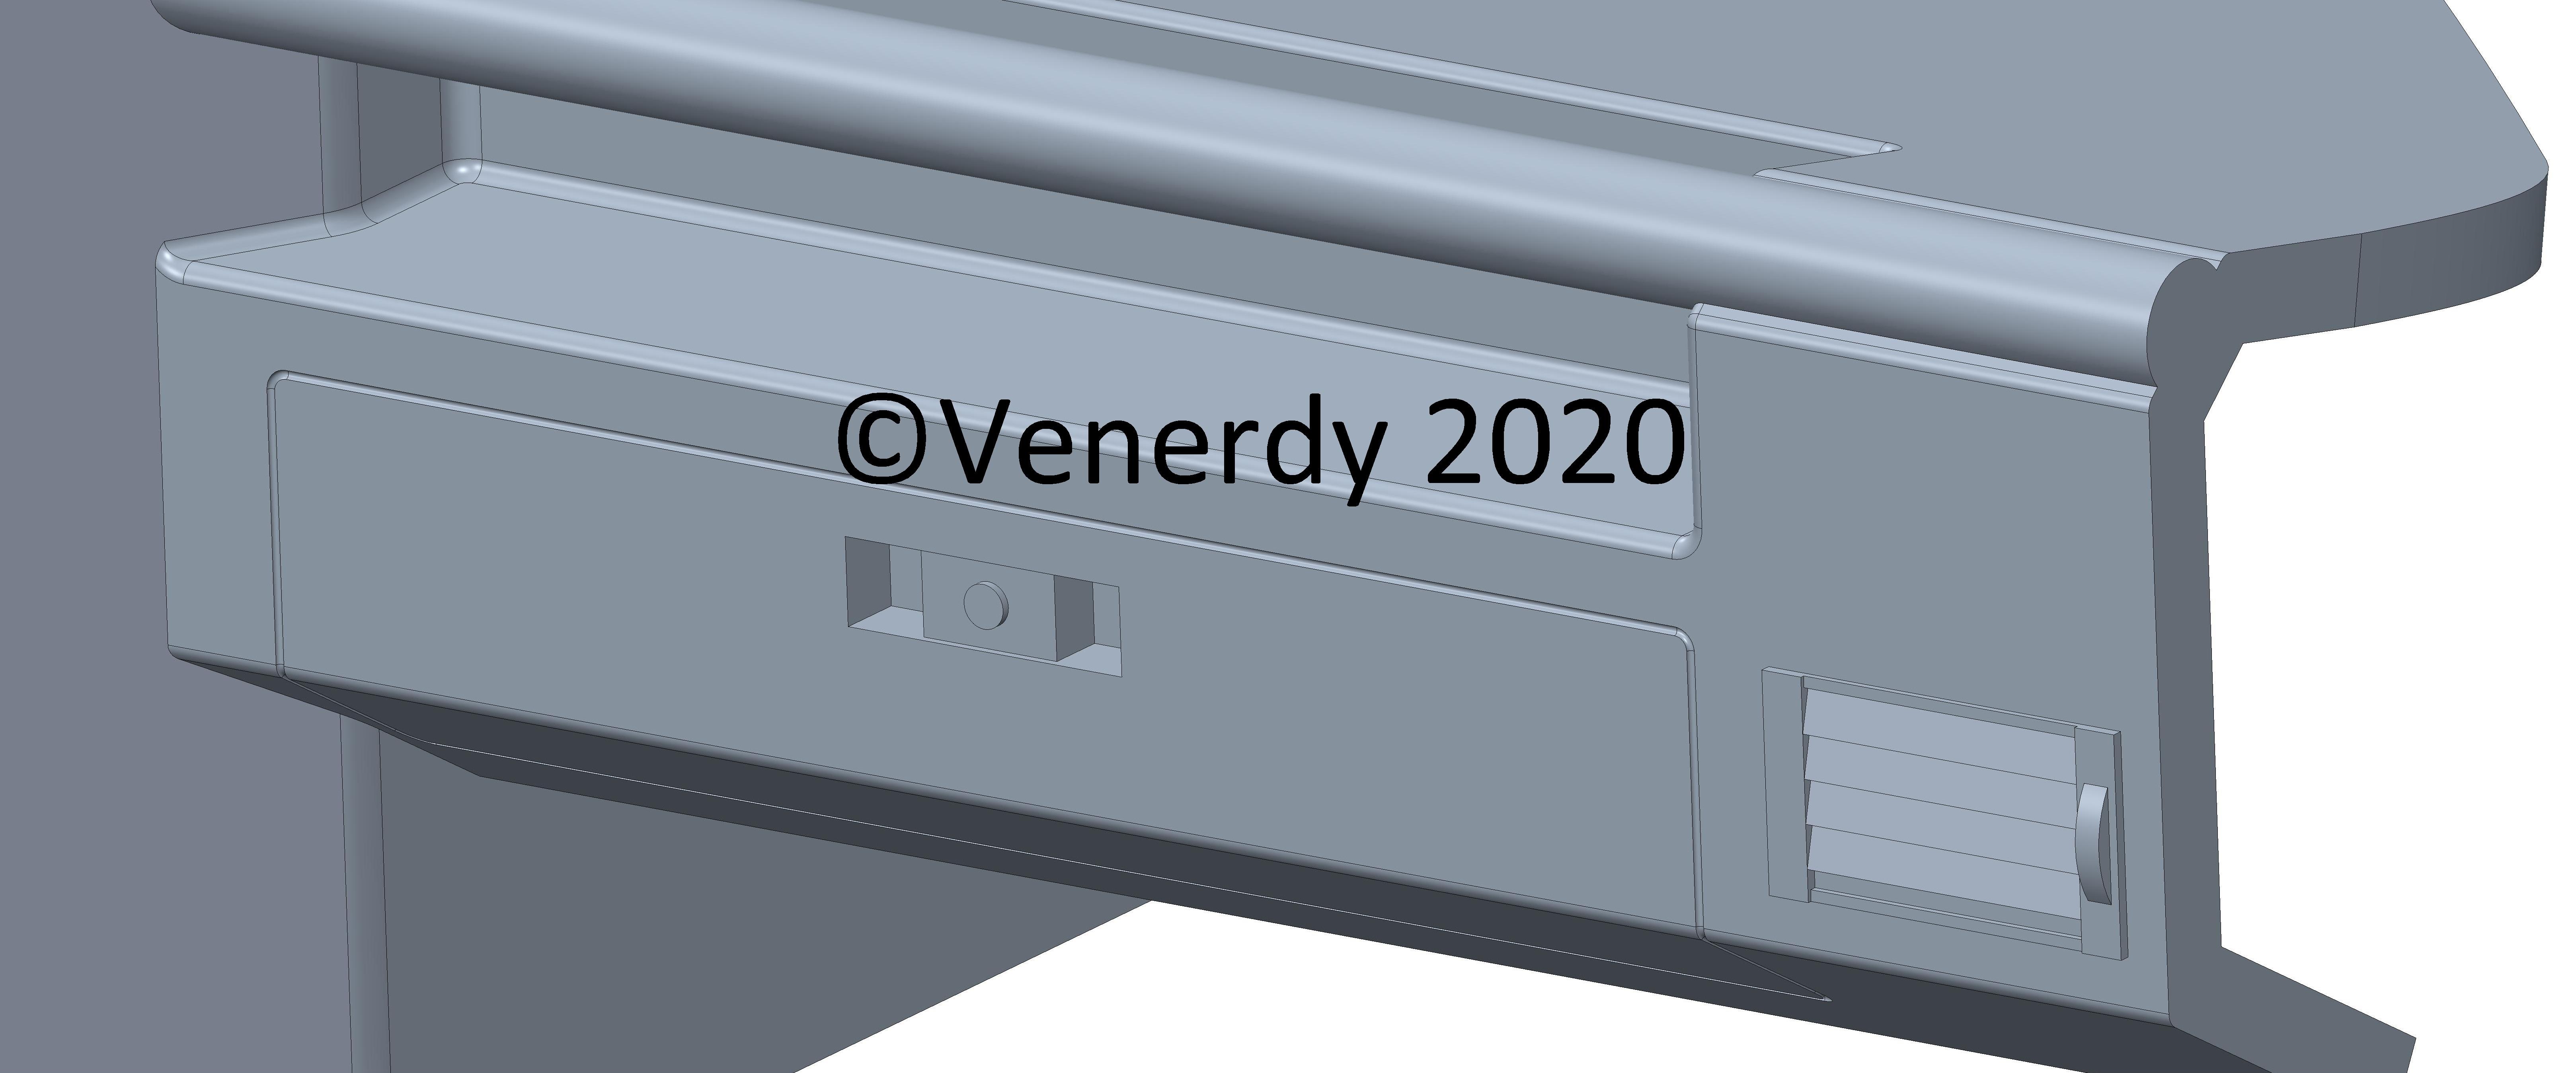
Thank you Dann. Now here are some updates: - Dashboard is ready - Chassis is ready if I do the tubular frame the old fashioned way with brass profiles - Taillights are ready
-
Don´t worry, I´m stuck in the garden too...irrigation system + robo mower have to be installed. But nethertheless the dashboard is almost ready.
-
Thank you. The dashboard has been more difficult than I thought. But now the general shape is done and I am confident to get the details done as well.