Search the Community
Showing results for tags 'scratchbuild'.
Found 13 results
-
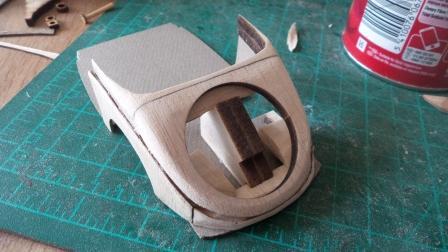
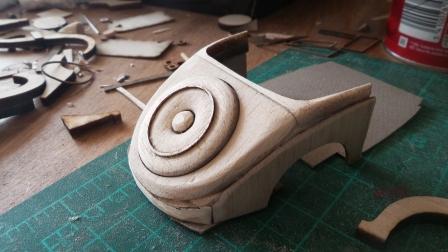
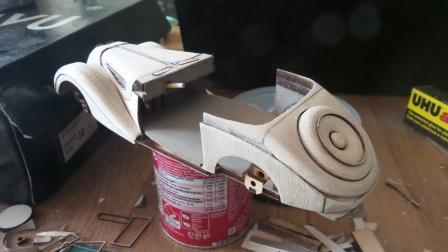
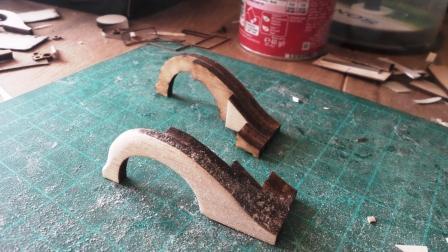
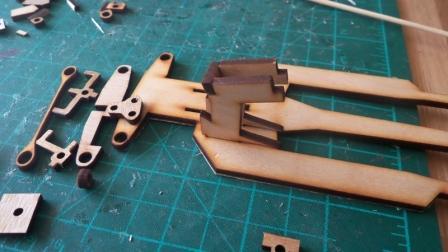
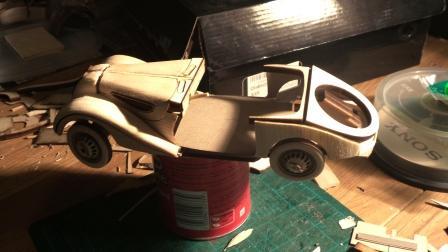
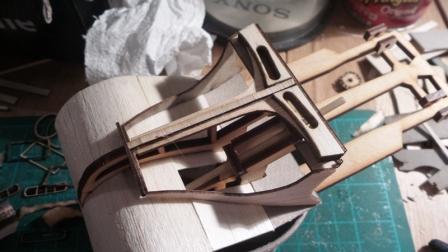
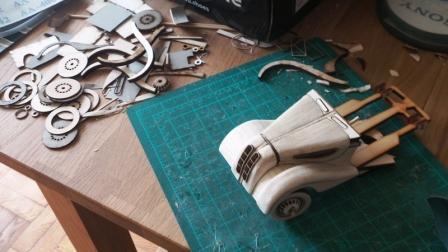
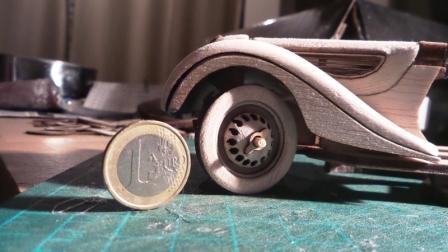
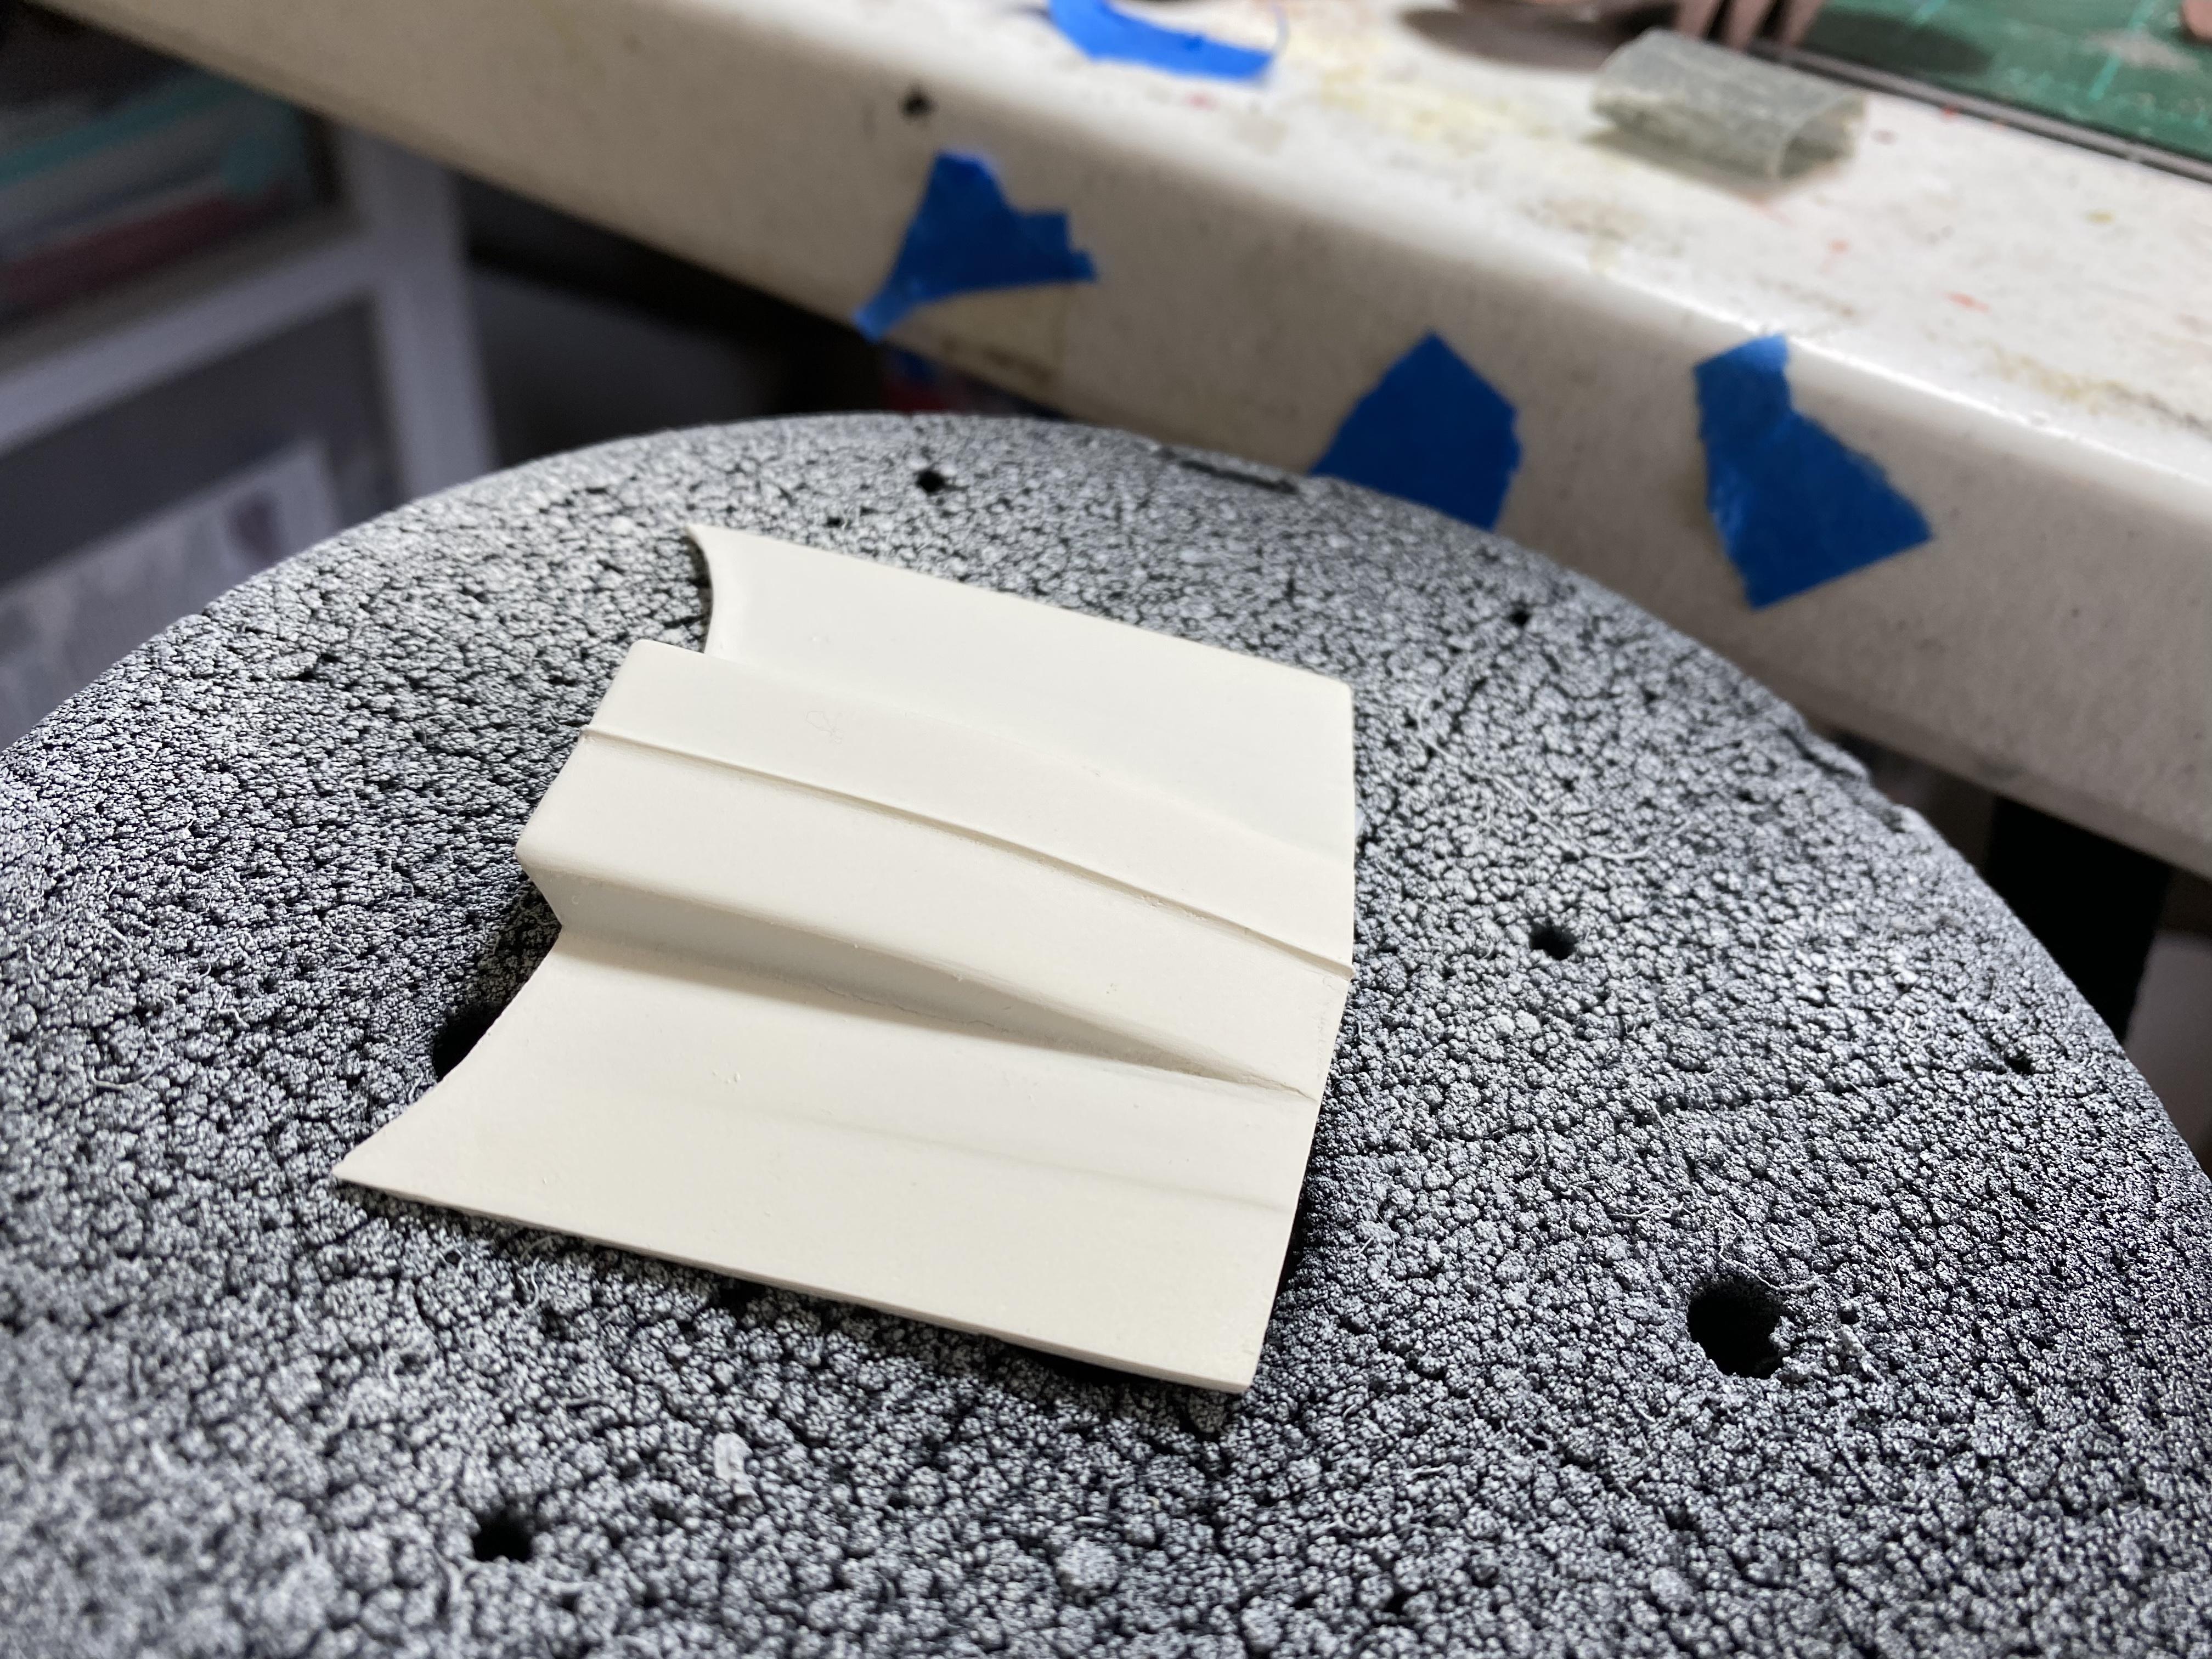
Hello from Vienna, i have started another big Project, a different theme for a Diorama, rarley seen. i will build a Scene from the 1000 miles Race 1931 trough Italy. This was held from 1927 on to 1957, 1000 Miles in one Day ! then it was cancelled, much to dangerous a race on normal Streets with also normal traffic, there where severeal heavy Accidents and dead People. Today this "race" is a historic Event , held on the classic Route but in 4 days. I will use the old Matchboxkit Mercedes SSKL as Rudi Carraciolas/ Werner Sebastians (Mechanic) Ride to Victory and a much older , around 1966, kit from Pyro for the second placed Alfa 6c with Giuseppe Campari behind the Wheel and his Mechanic Attilio Maroni. Also two Airfix Kits, the Alfa 8C and the Bugatti 35C, both will be convertet to the Car Version i need. Here is how matchbox Kit look, for the Age and Scale not so Bad , i have seen Carkits in 1/24 from Today they look not as good....some Flaws are here, so the fenders where a dark Red not Black, some Details are a bit crude Well the Alfa is another Thing, the overall Dimensions are right, but crude Details. See the 2 half Wheels, no Spokes just plain Plastic...... The first Thing to change are the Wheels, i will use etched Ones with Alurims, a bit complicated but ....see yourself I want a Drive-trogh-town-scene so i try a few MiniartKits and a Verlinden Relief fassade and this is how it should look First i try to altered the Italian Townbuilding. A lot of Sanding requiered since this Kits are Vacuformed and have some faults and round Edges.....and to line up the 2 Wallsections is a challenge too :shock: Well the vacukits from miniart took more Work then expected, and i altered two of them a bit. So the italian Building will not have the big Balcon, i moved the inner wall forward, will add a small balcon like on the Verlinden Building. So it should look, Boxart Paper Mockup Work in progress Size Comparsion Verlinden-miniart, Minart uses much bigger Windows and Doors..... First try with the full Scale Buildings I added the Royalmodel Sicilian house to the Project, i like the Shape. As most of the offered buildings, this is a plaster made ruin, so i must first rebuild it to not damaged. But only after glue the broken Walls togheter, like a puzzle :shock: ....i manage this with Lego and patafix , making a partial Mold, then pour Artist Plaster in this, a little Sanding and voila.... So here it is glued togheter with out the Stonebench before the Wallfountain. And too bad, it looks way to massive...... With that i play around with the Layout. The Cooktop is the Size, so a bit of the House to cut off. The Small one on the Right side will be a little Church.On the Leftz Side i think on the Alfa 8 C with tirechange, nuvolari suffered from 9 changes on this race, the SSKL in Front , behind the Alfa 6c and in the Doorway the Bugatti. And i began the work on the MB SSKL. The matchbox Kit has a good fit and is finly detailed,but in a few Spots tehy are wrong. As all Modelmanufacturers , even CMC, they molded too much Holes in the Frame, on Original pics you can spot somewhat like a Sheetmetal ohe frame, so i build this with thin Plasticard. Drilled the remaind holes with 0.5 and 1.00 mm and also rebuild the Frontdamperrod
-
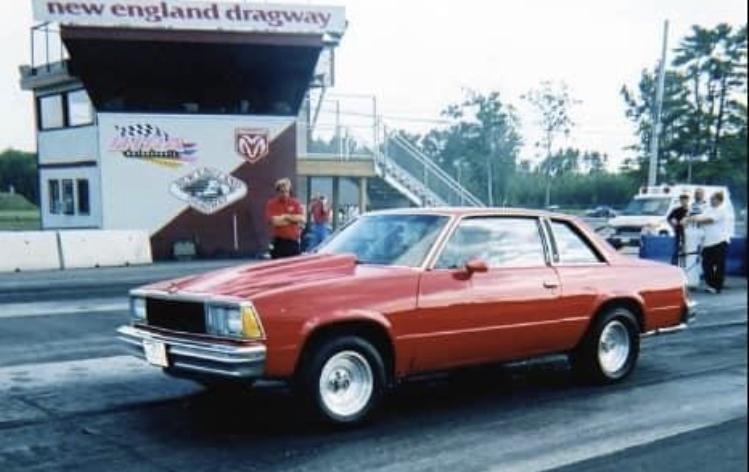
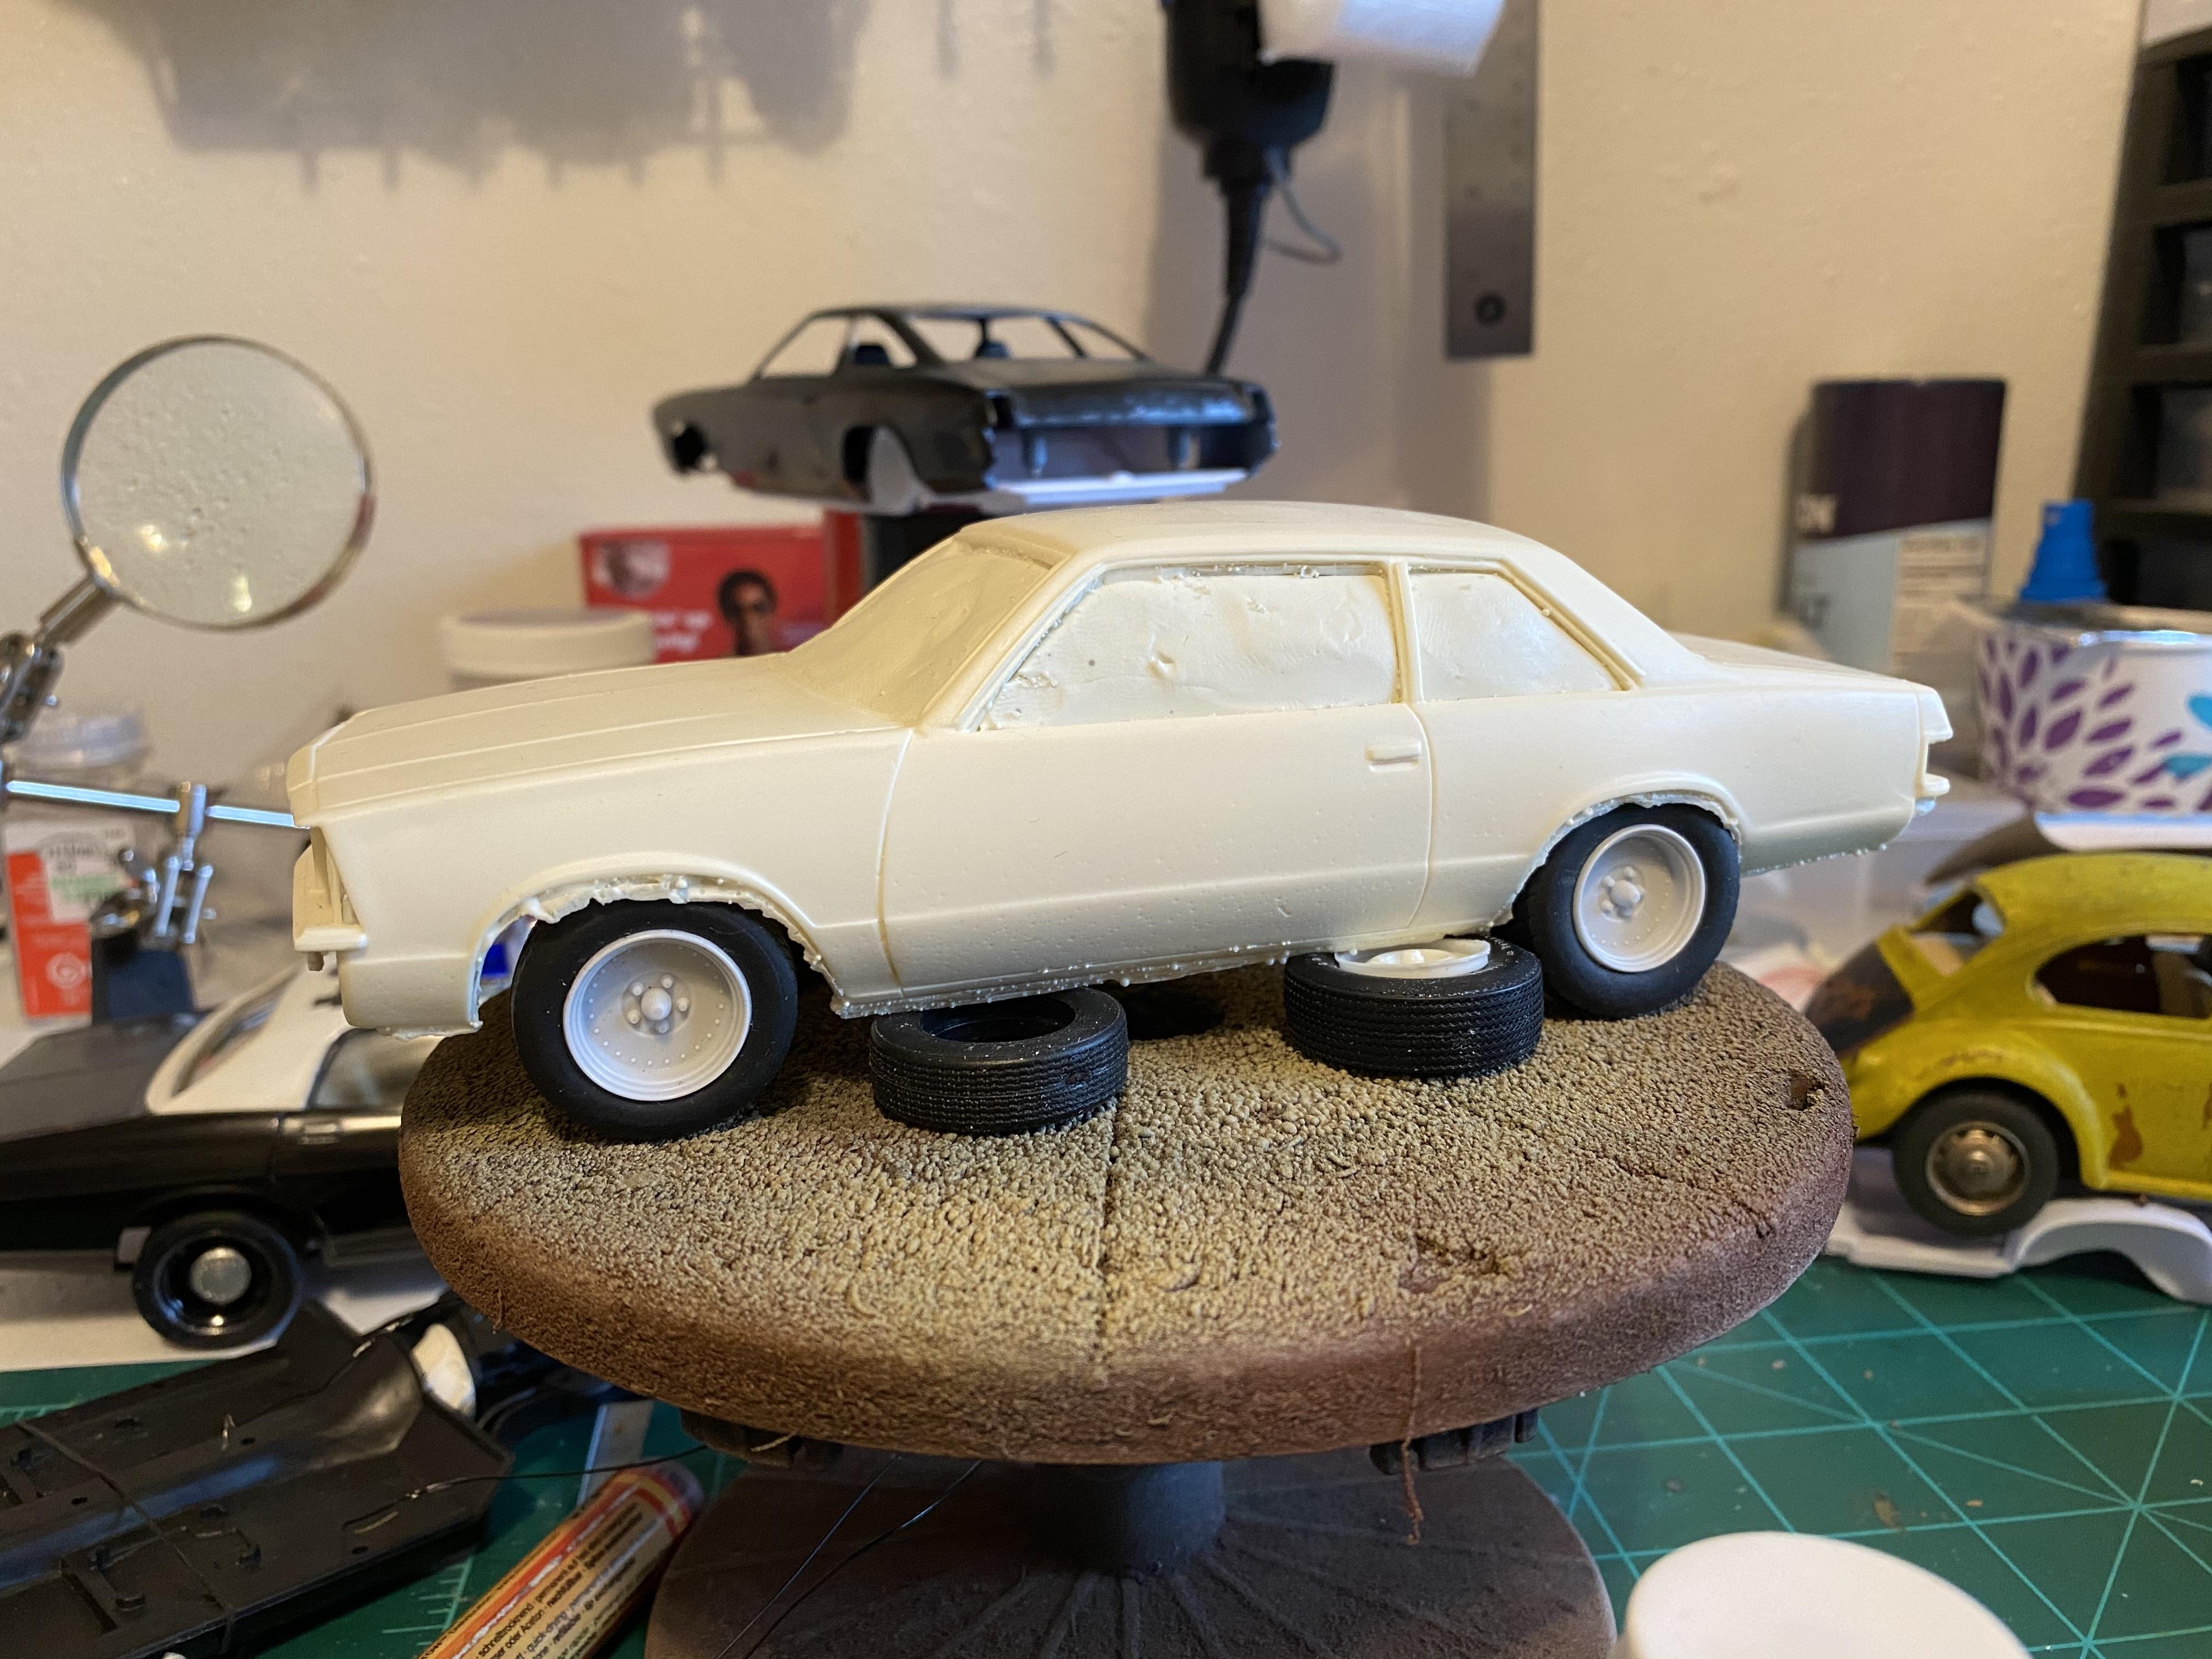
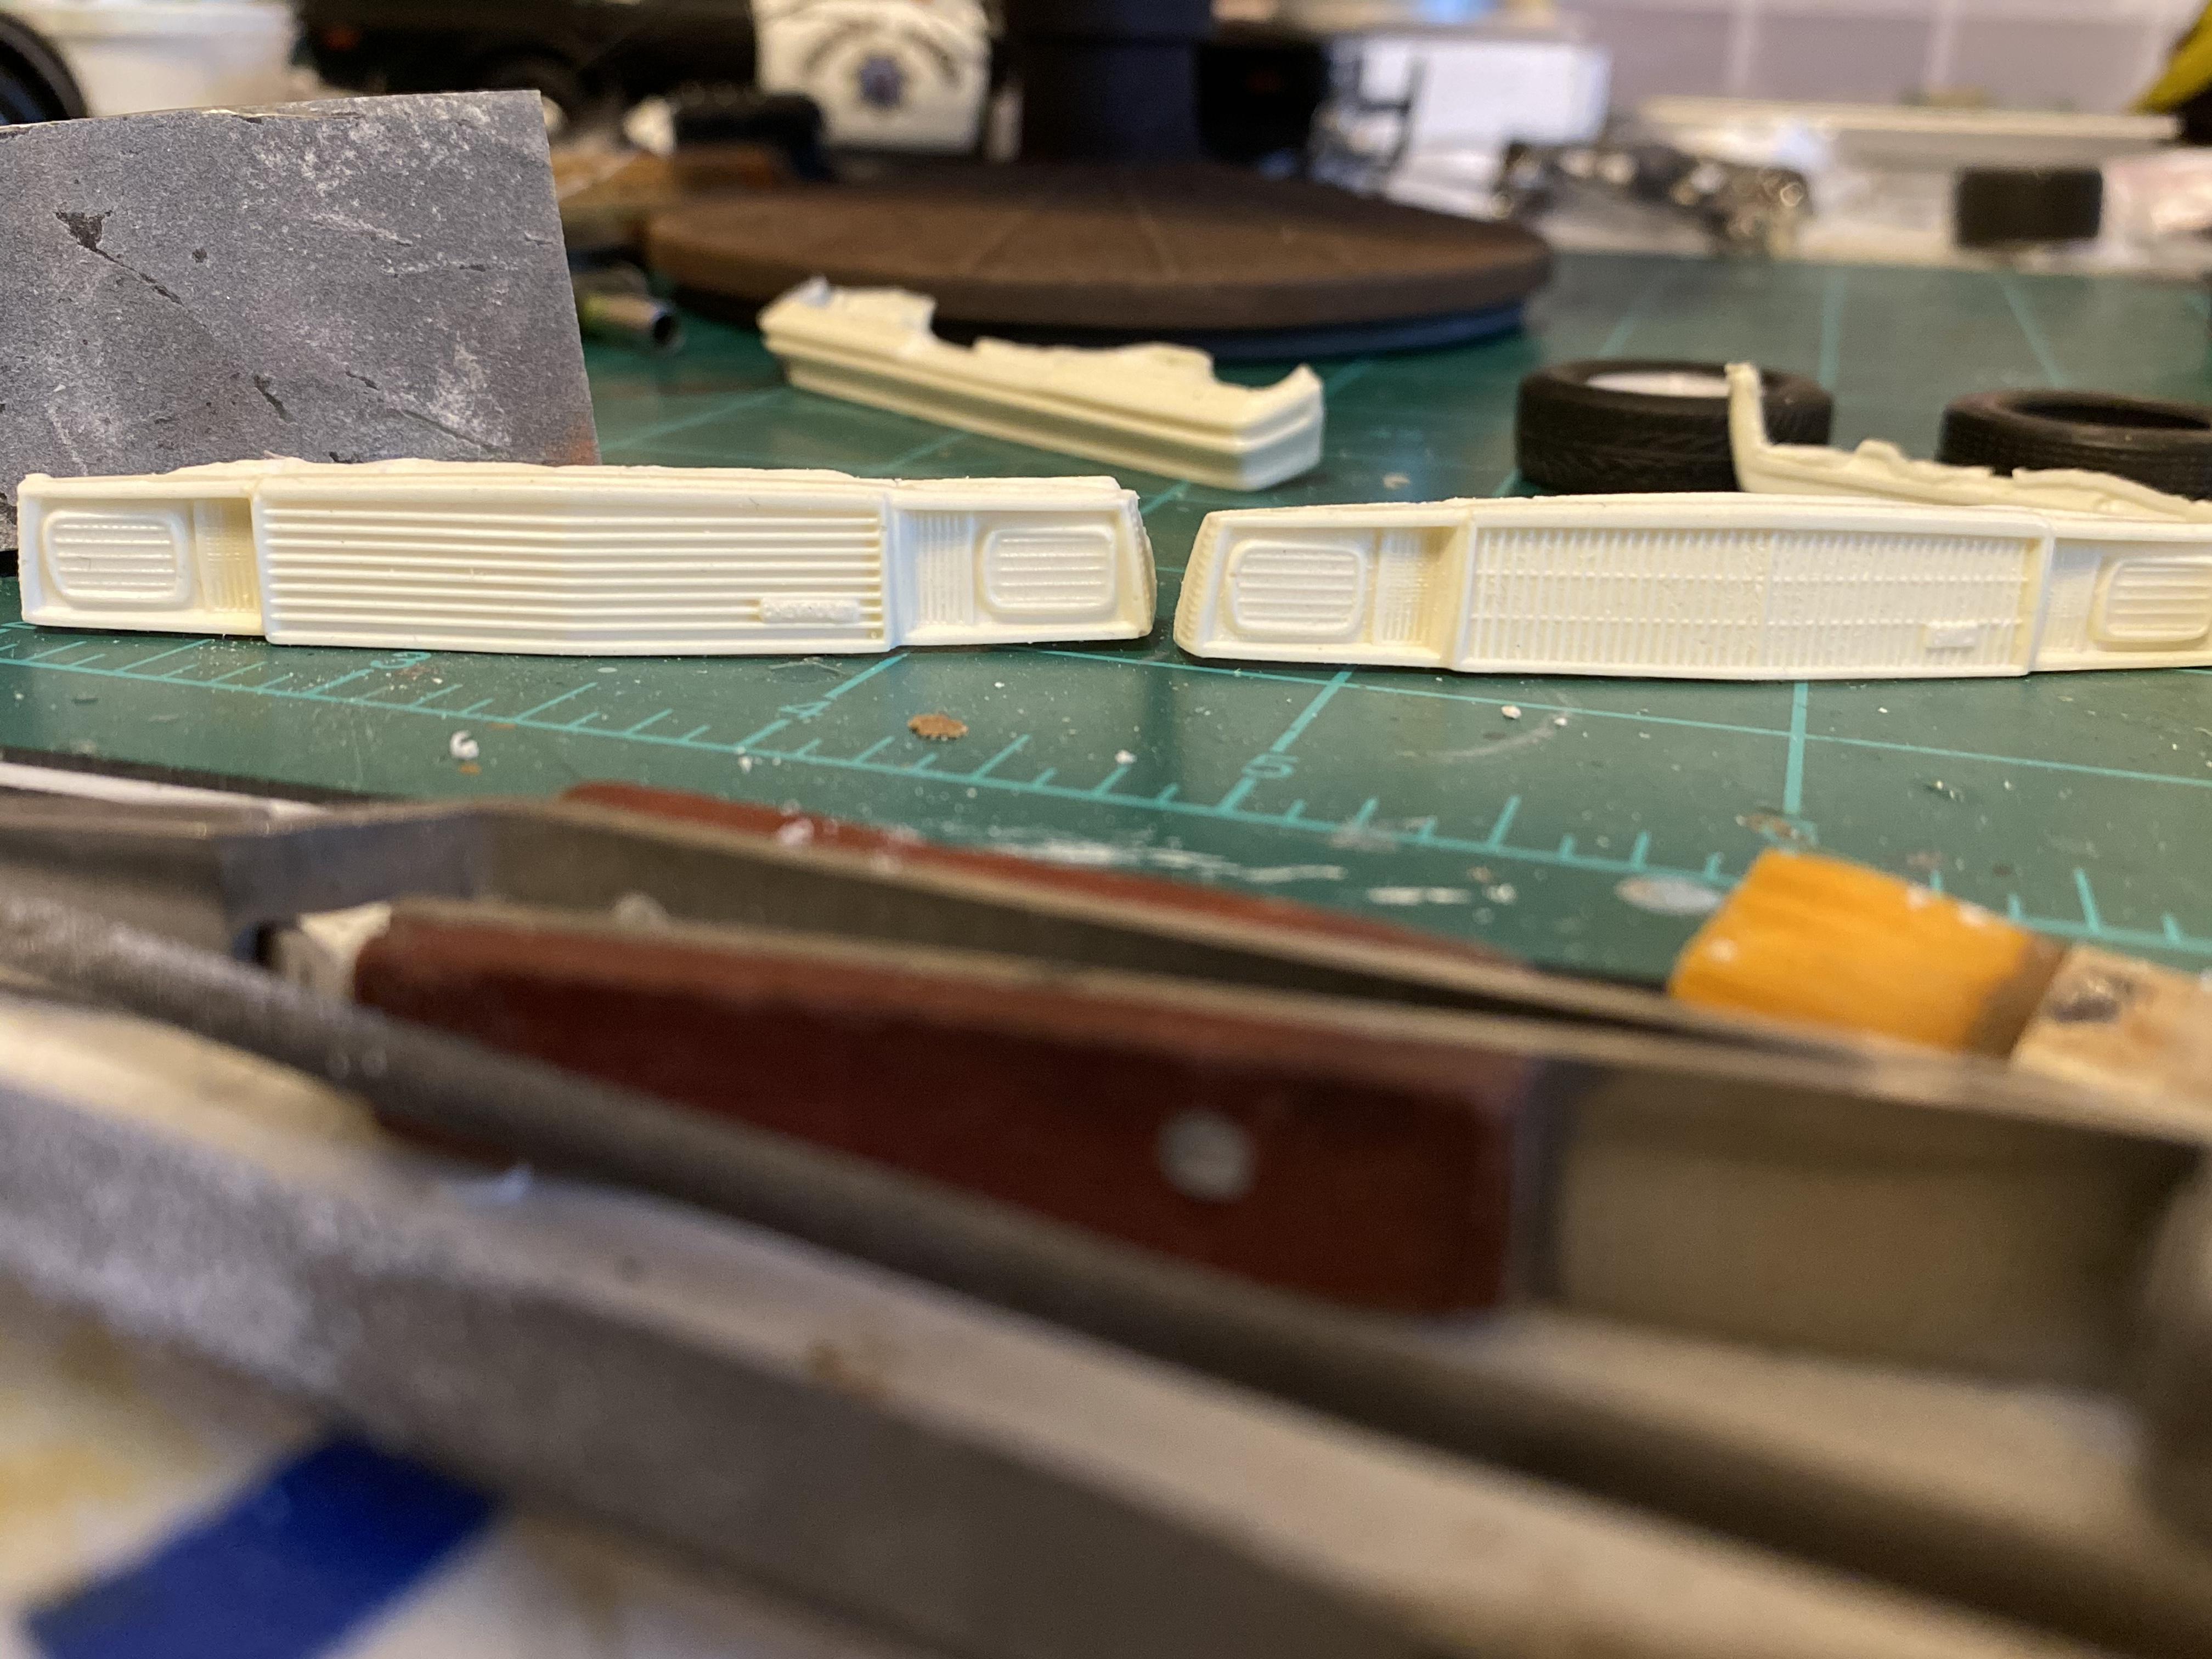
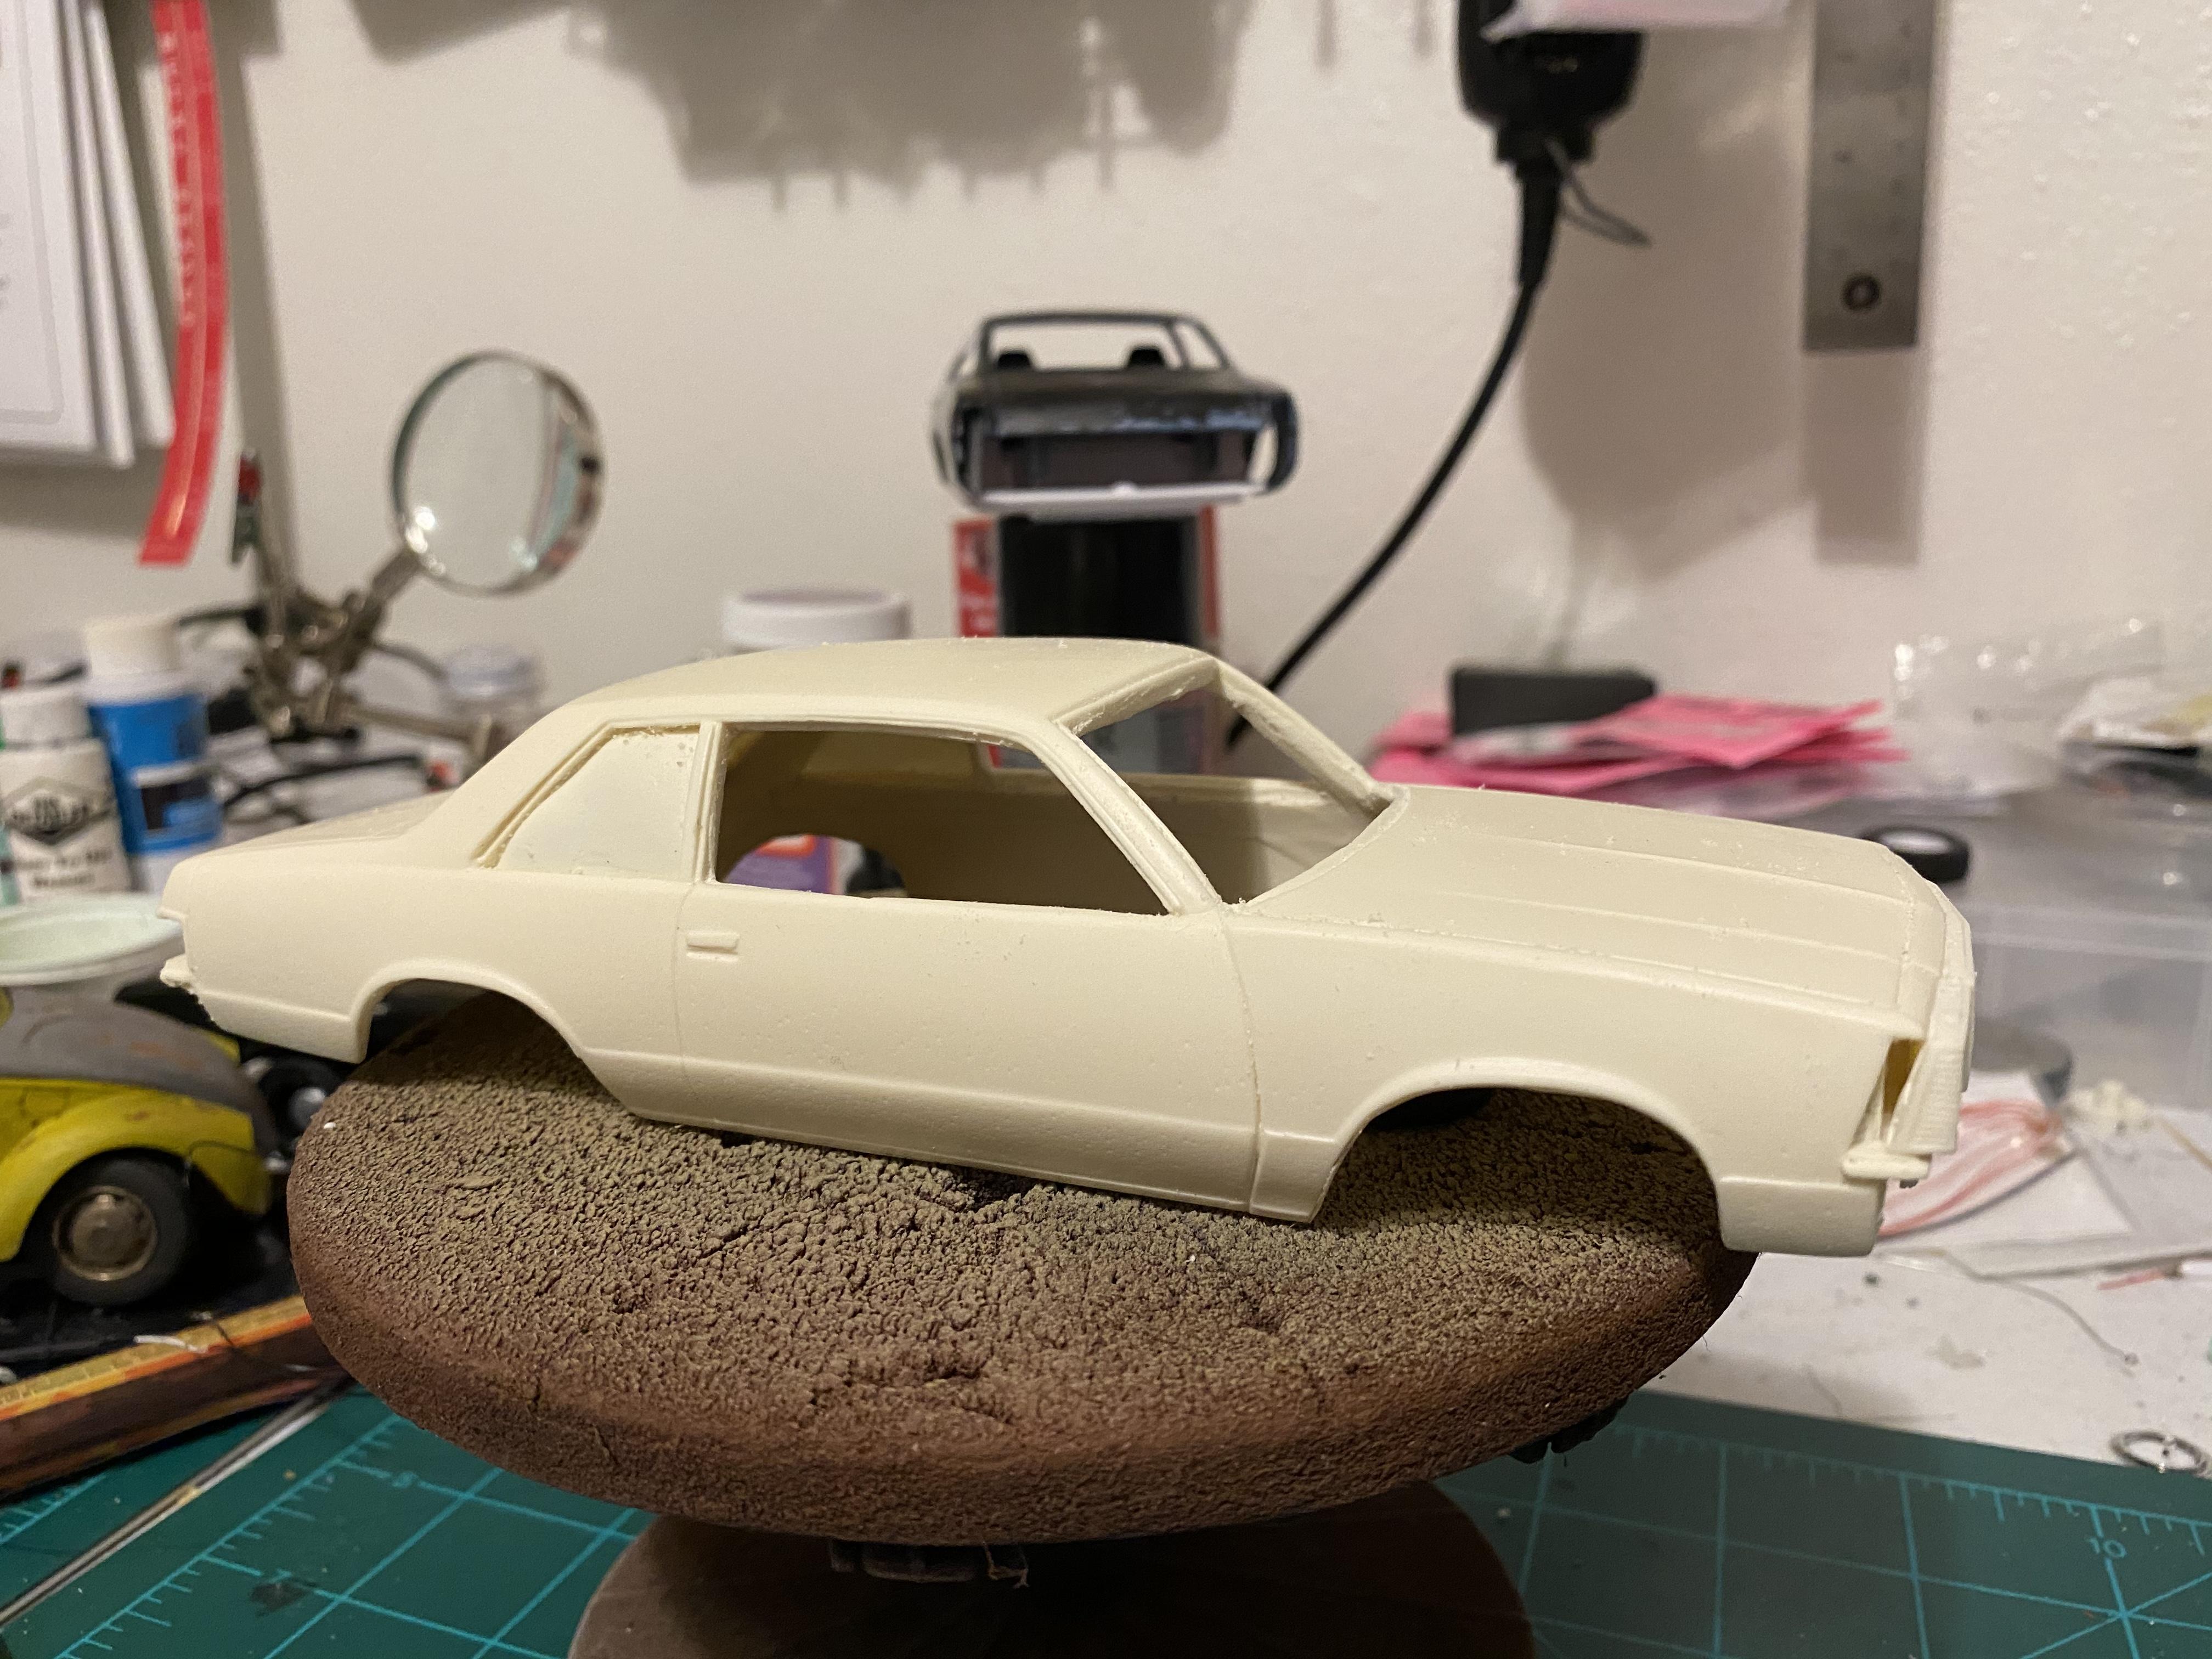
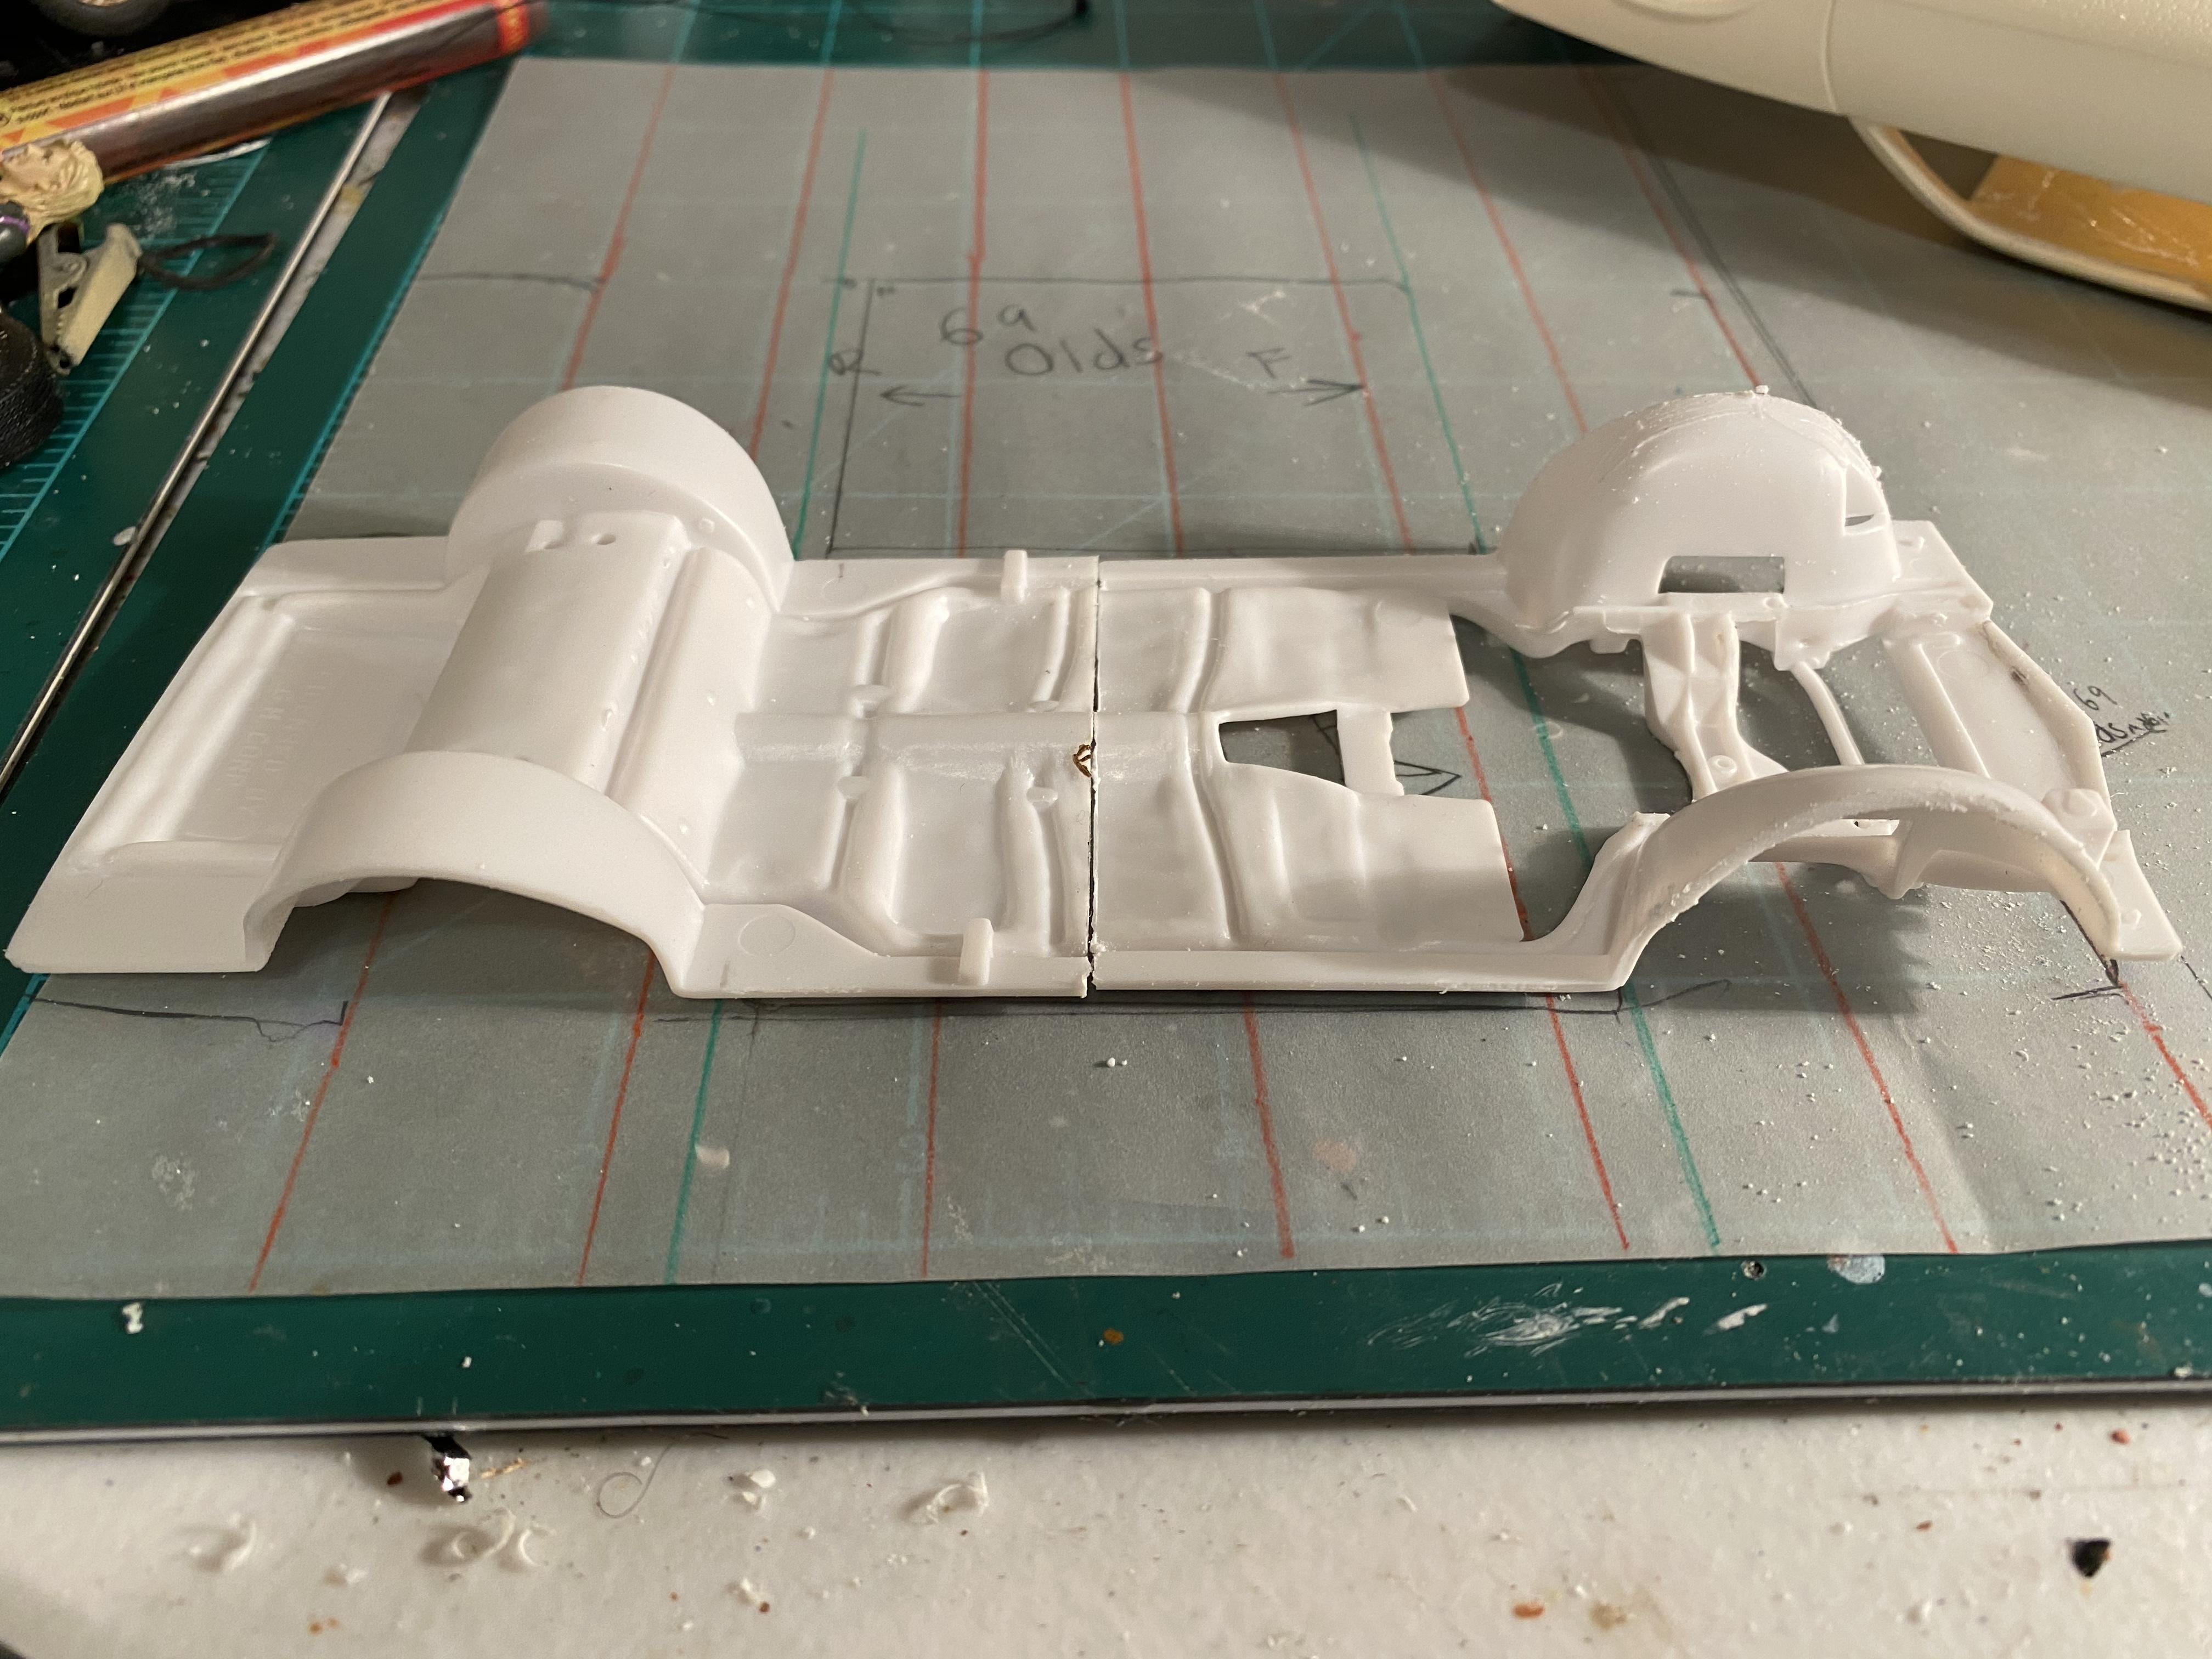
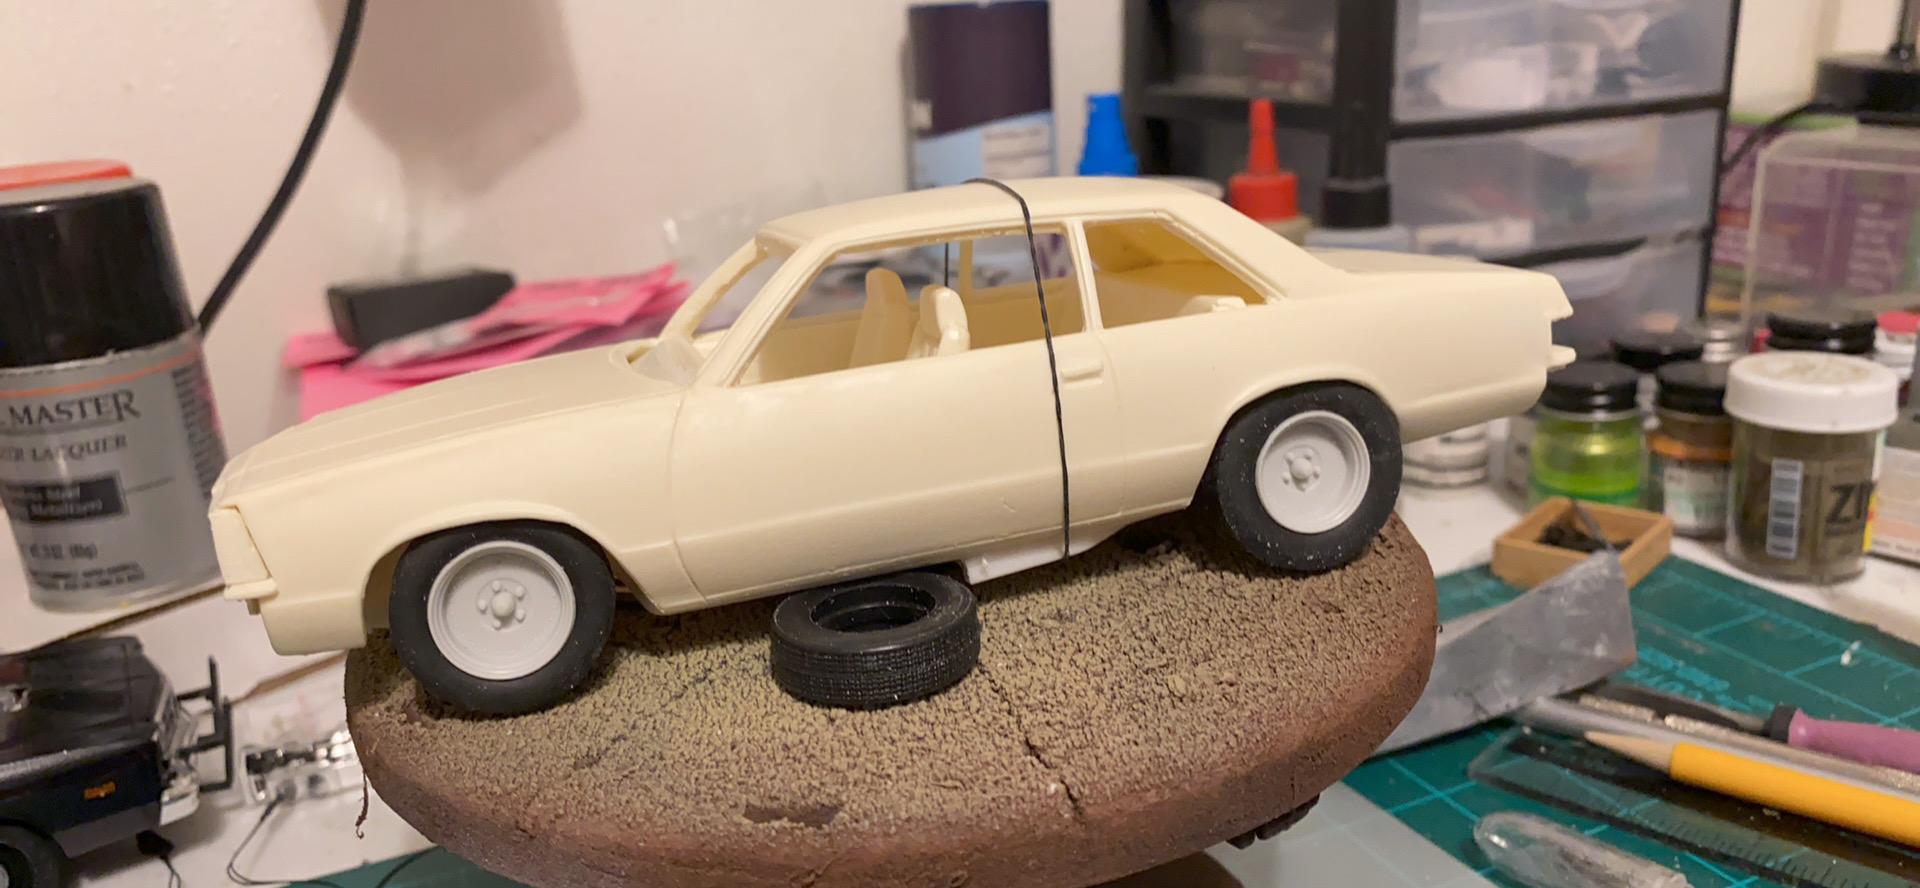
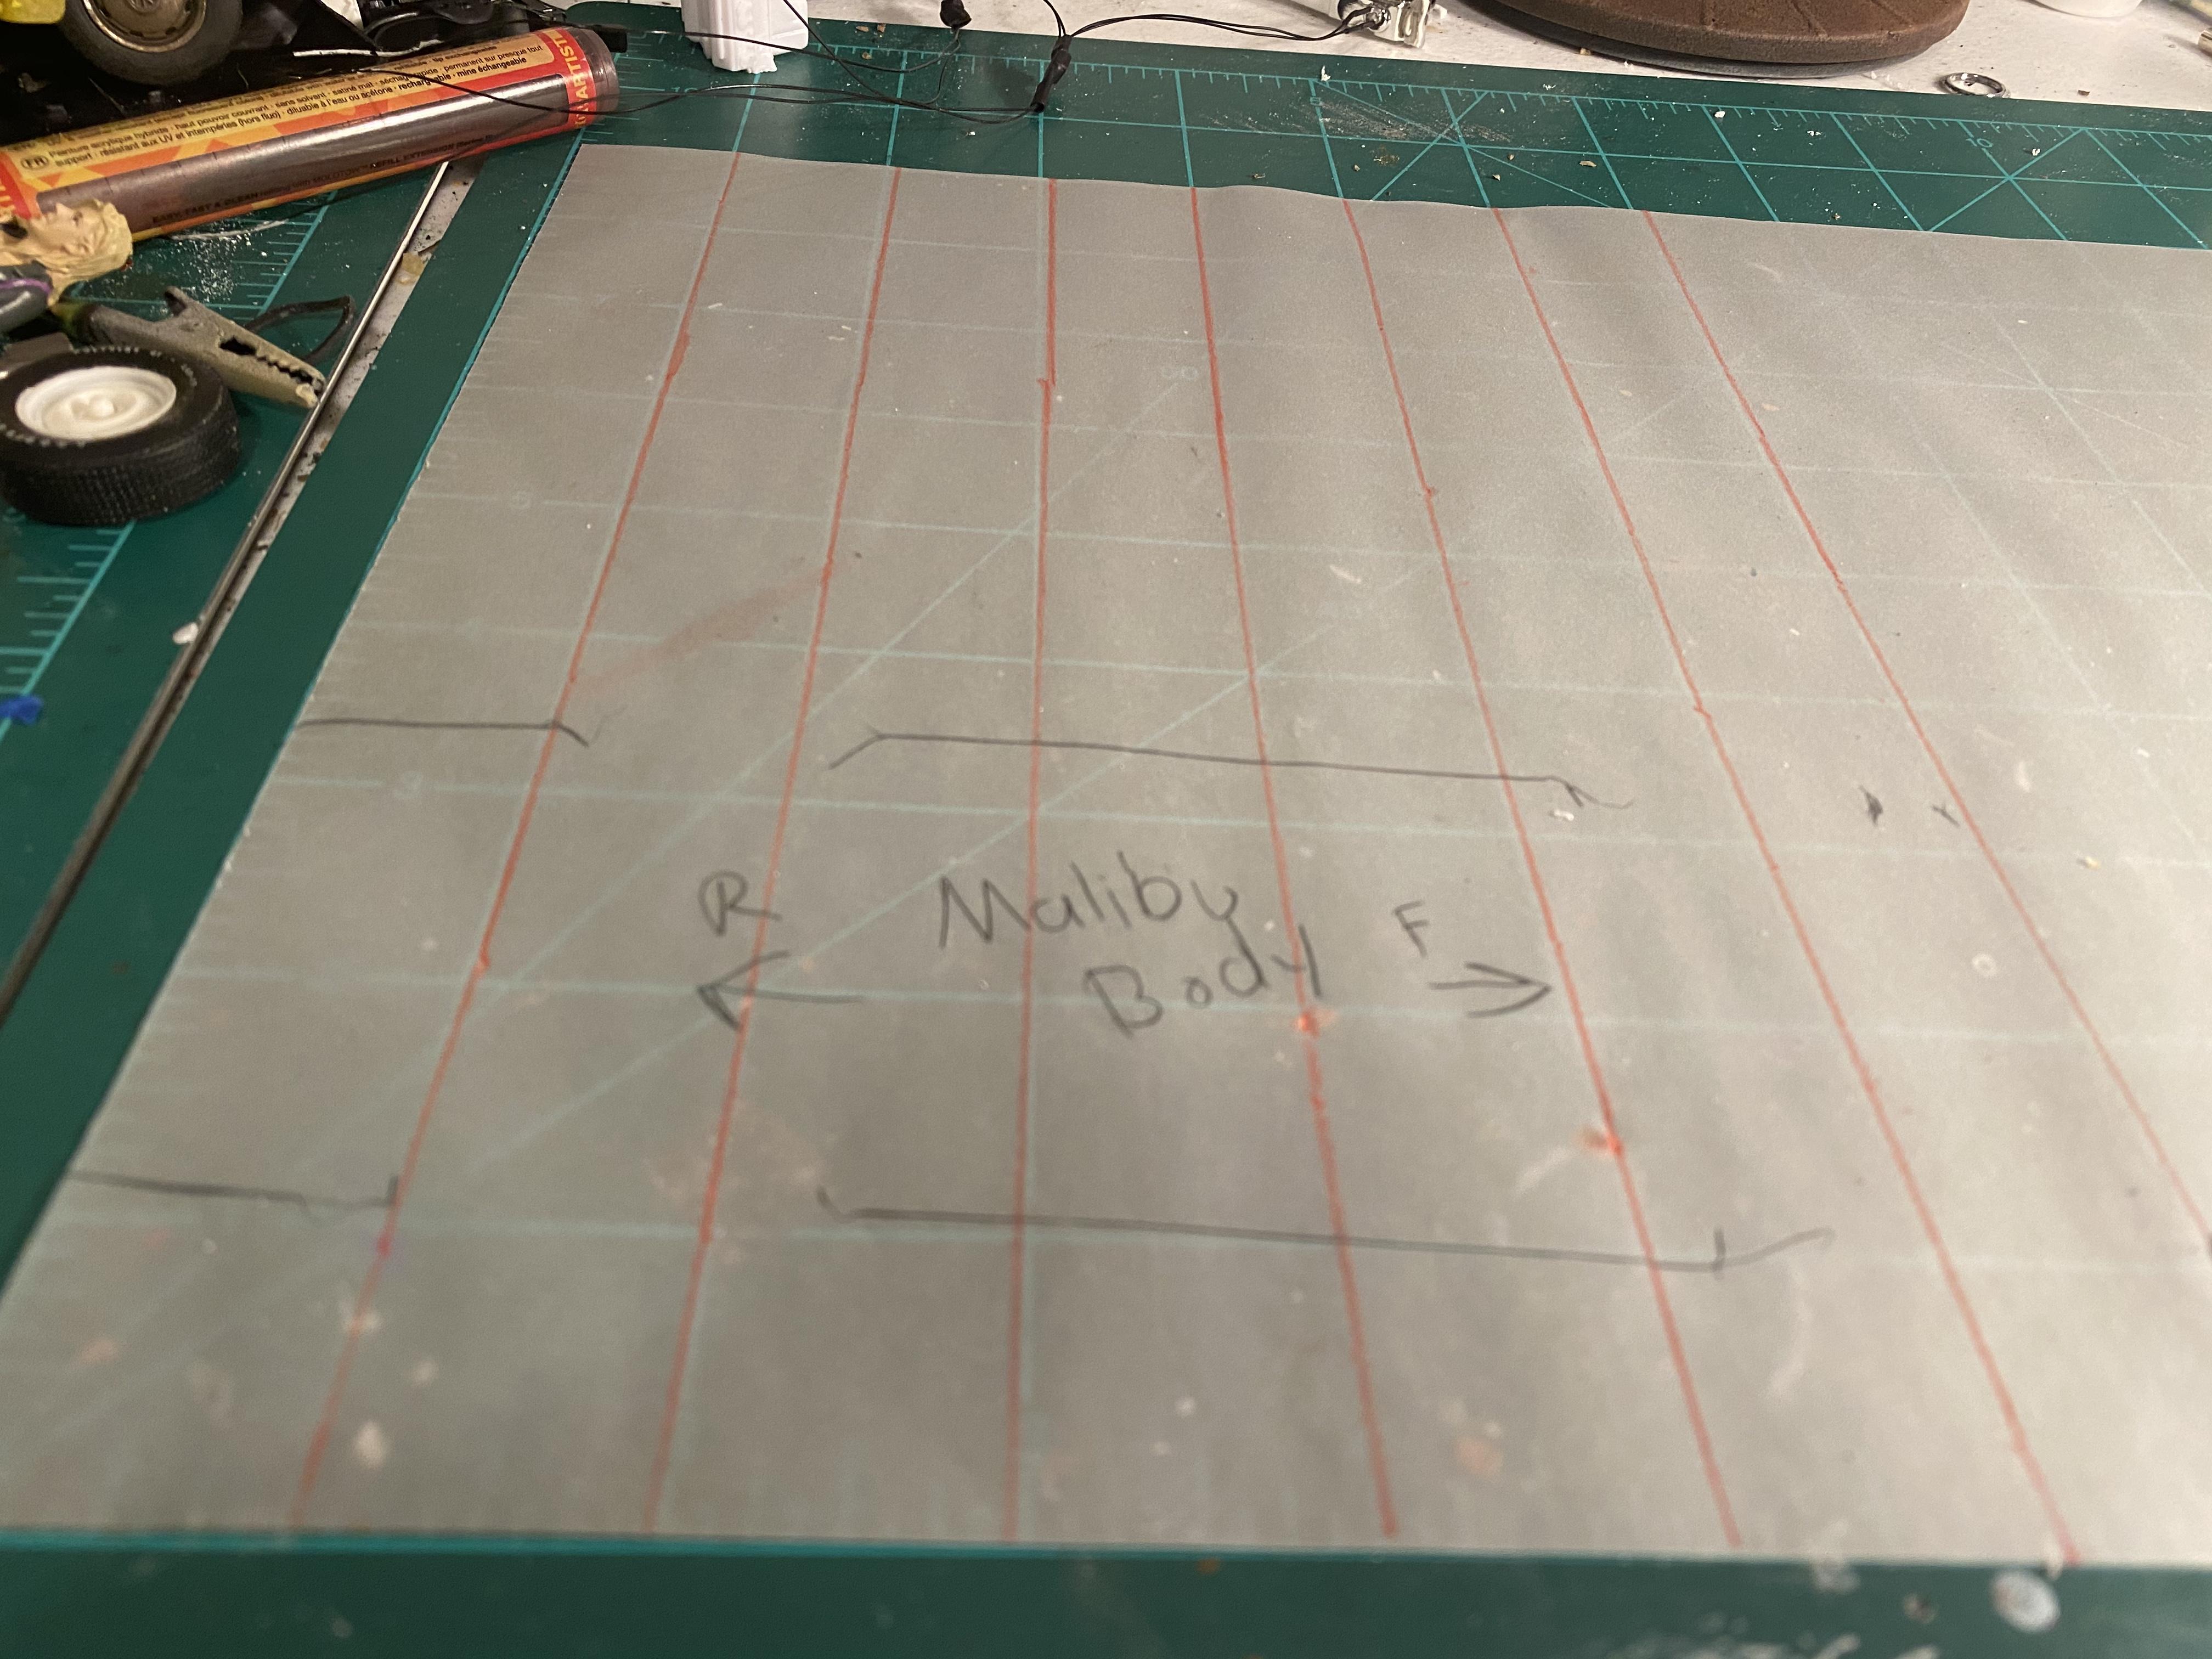
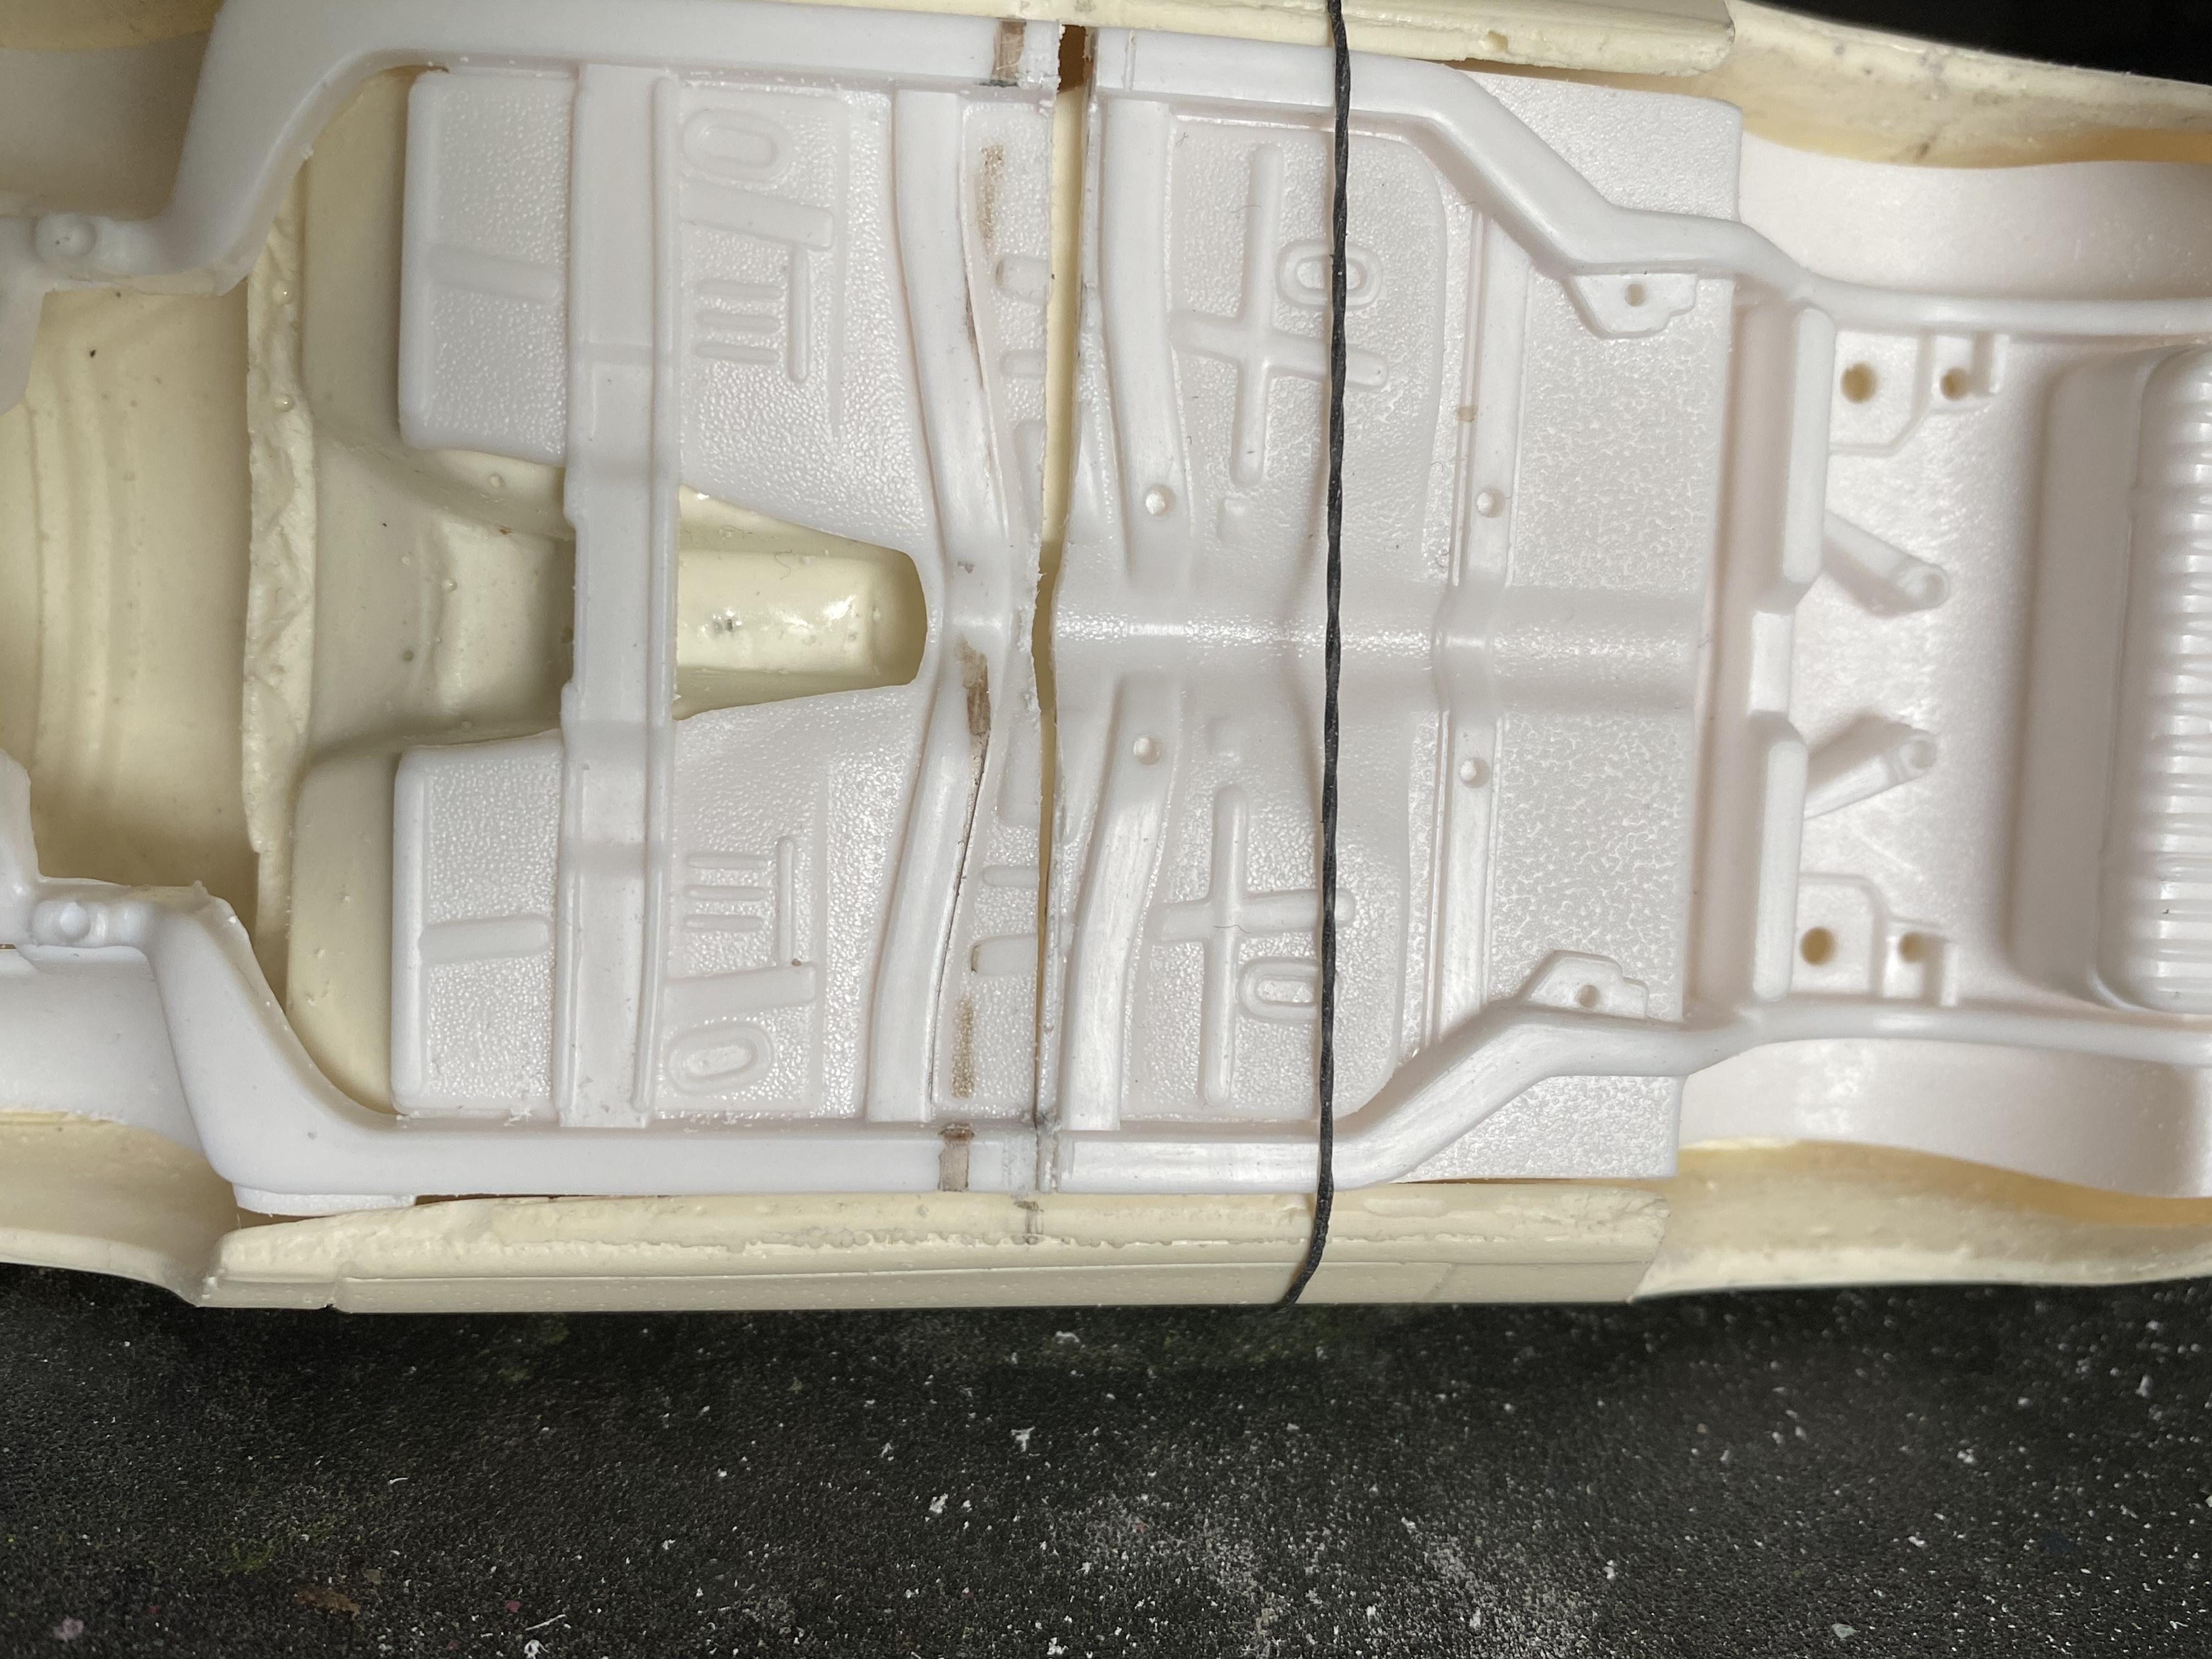
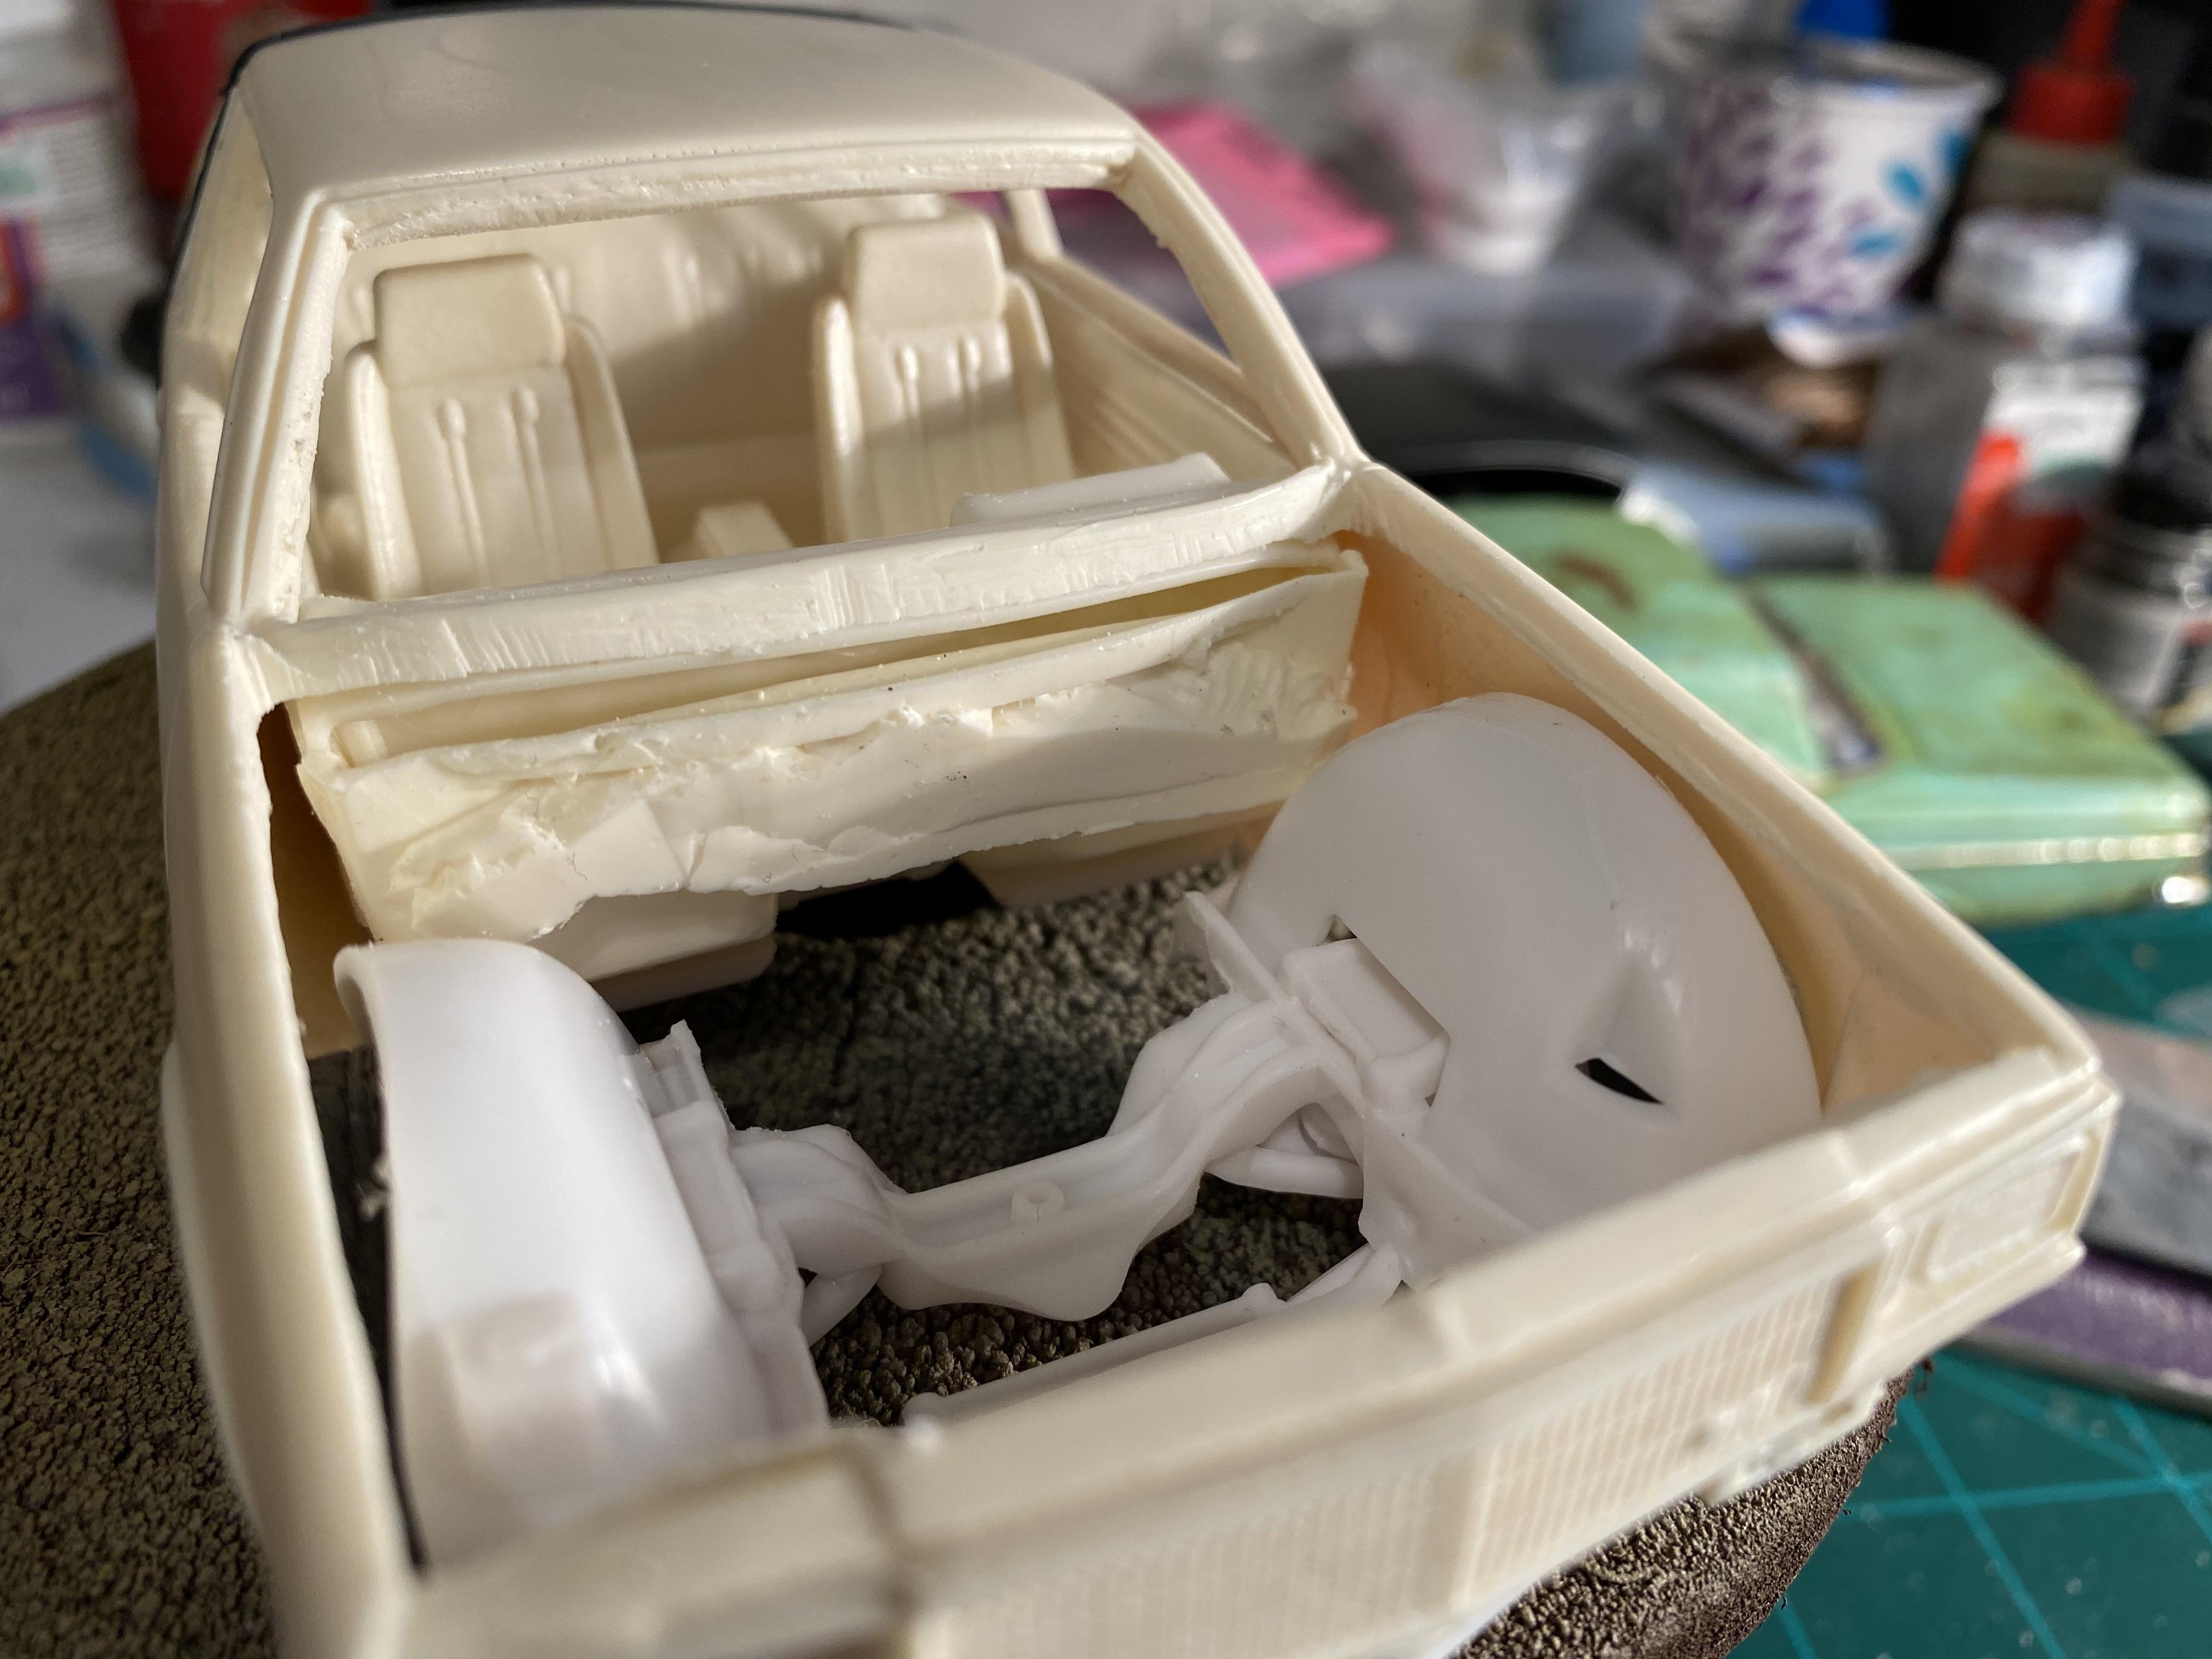
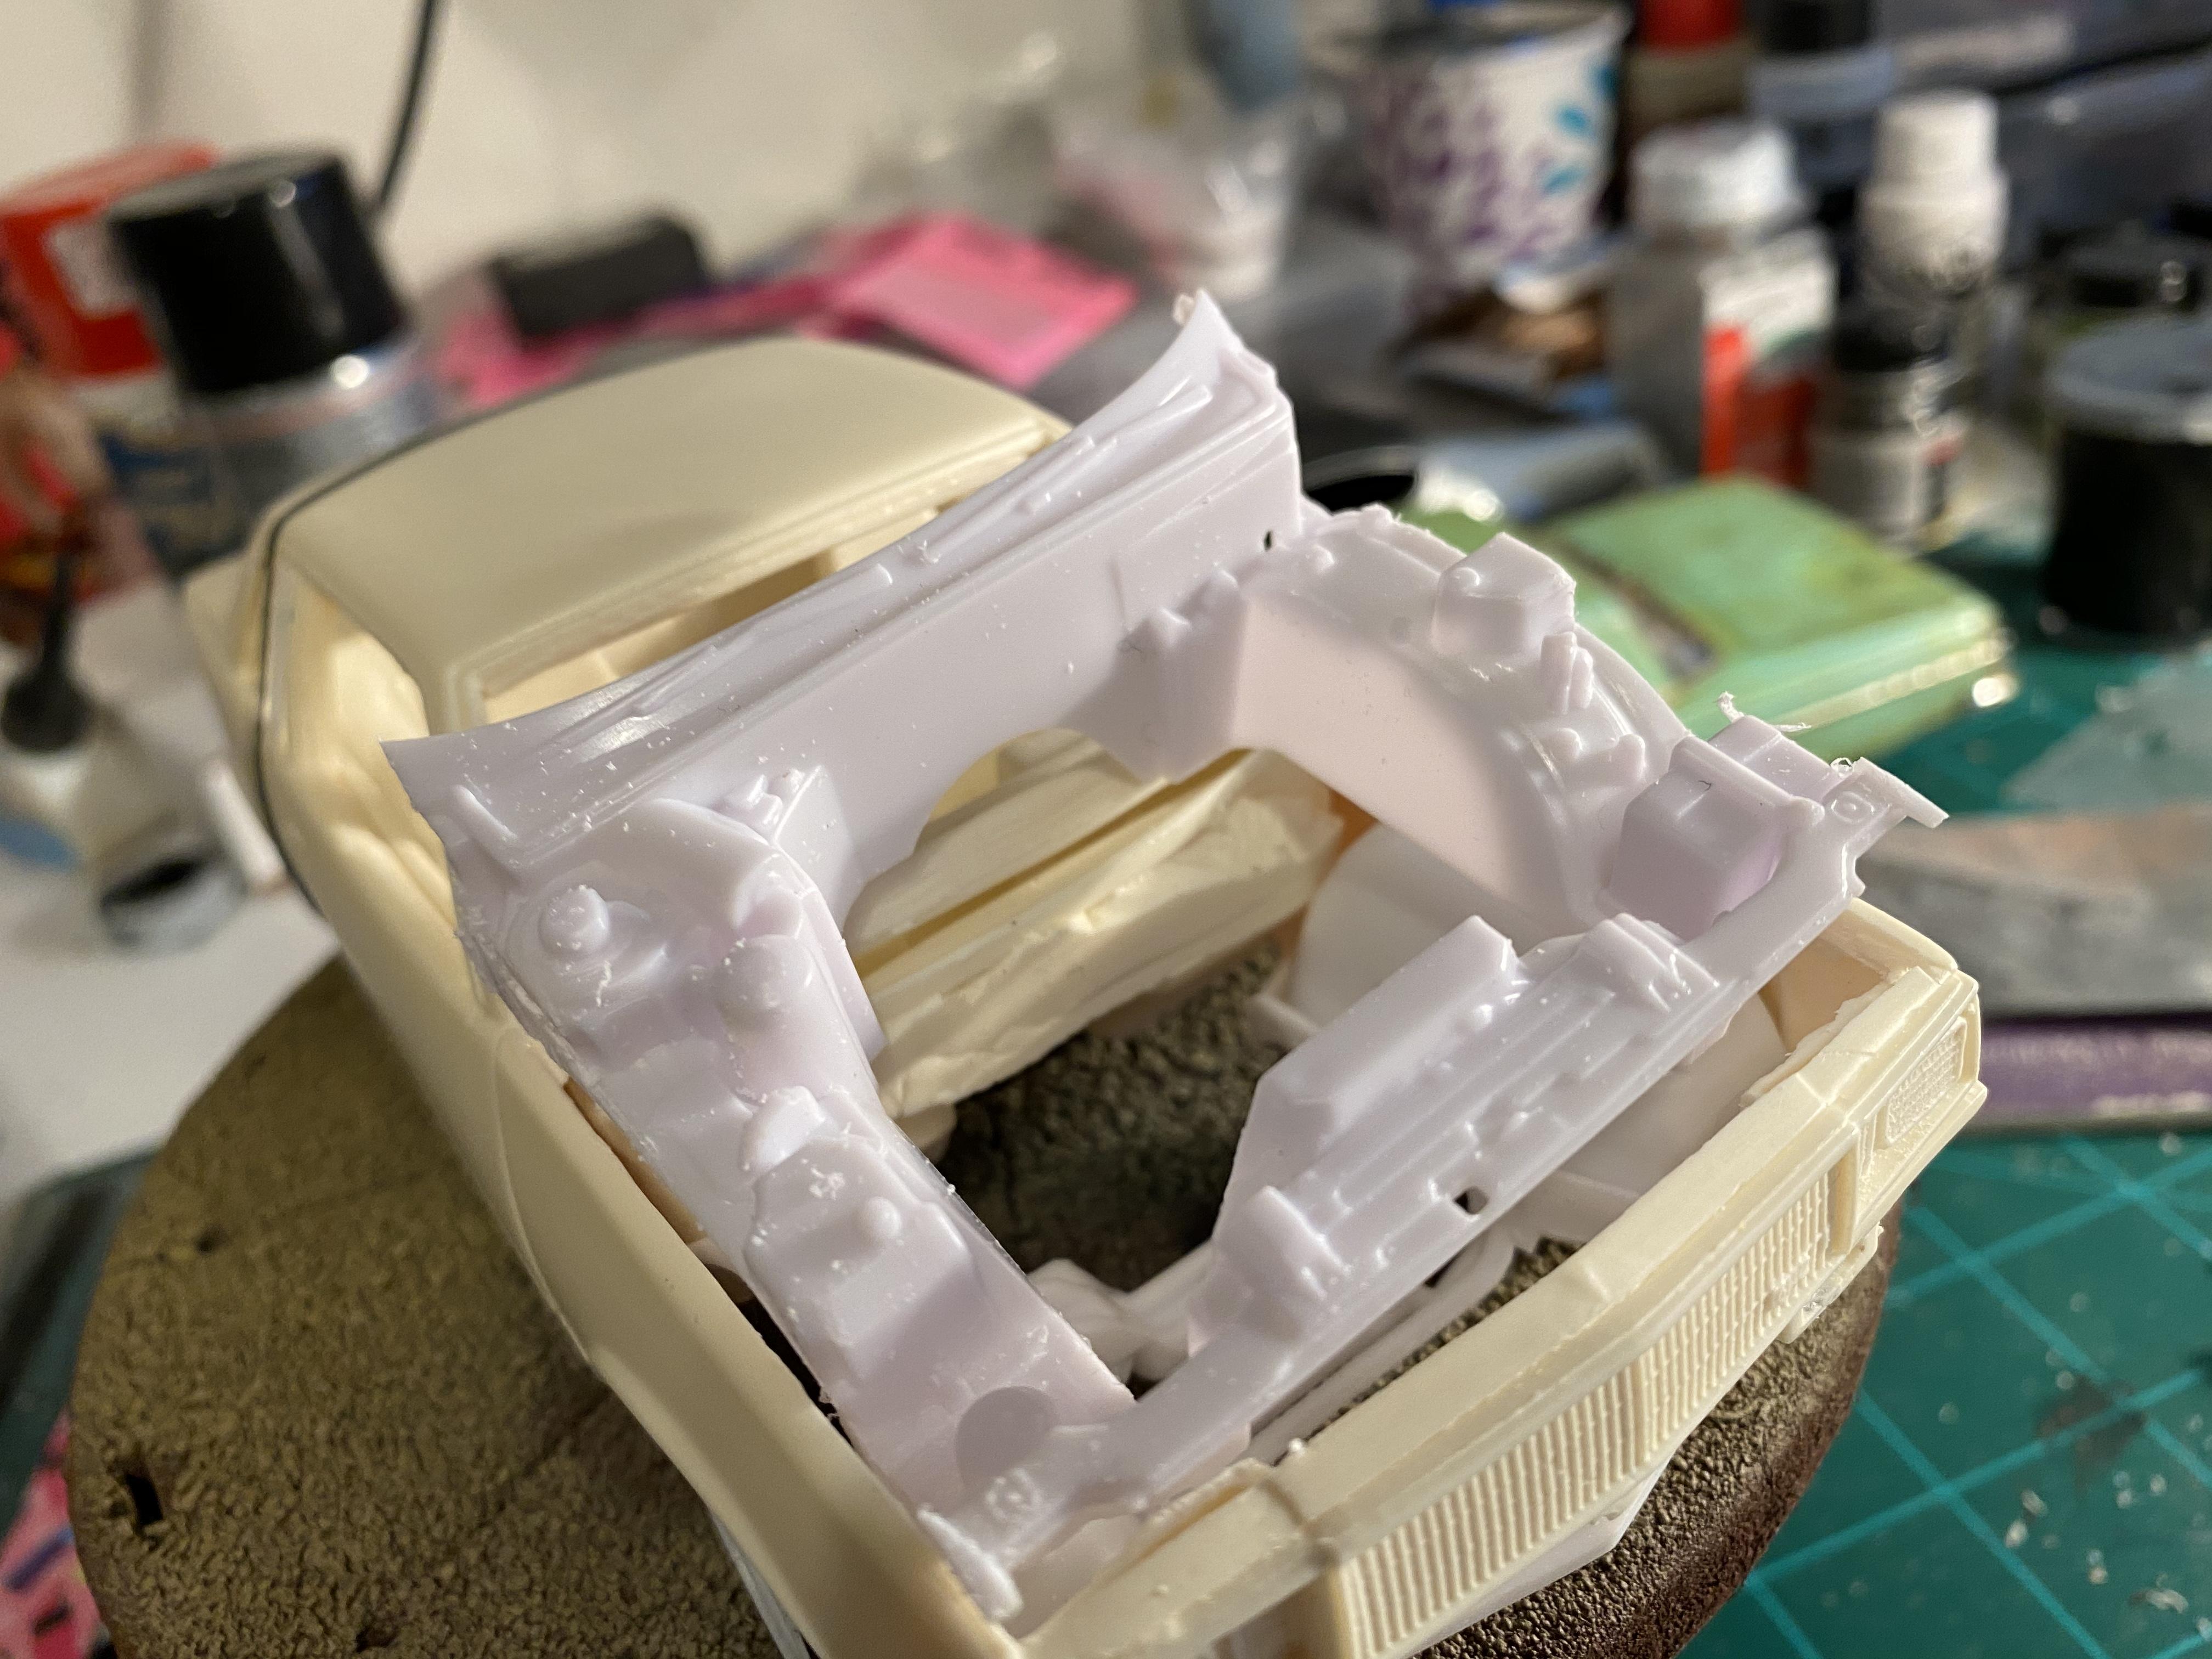
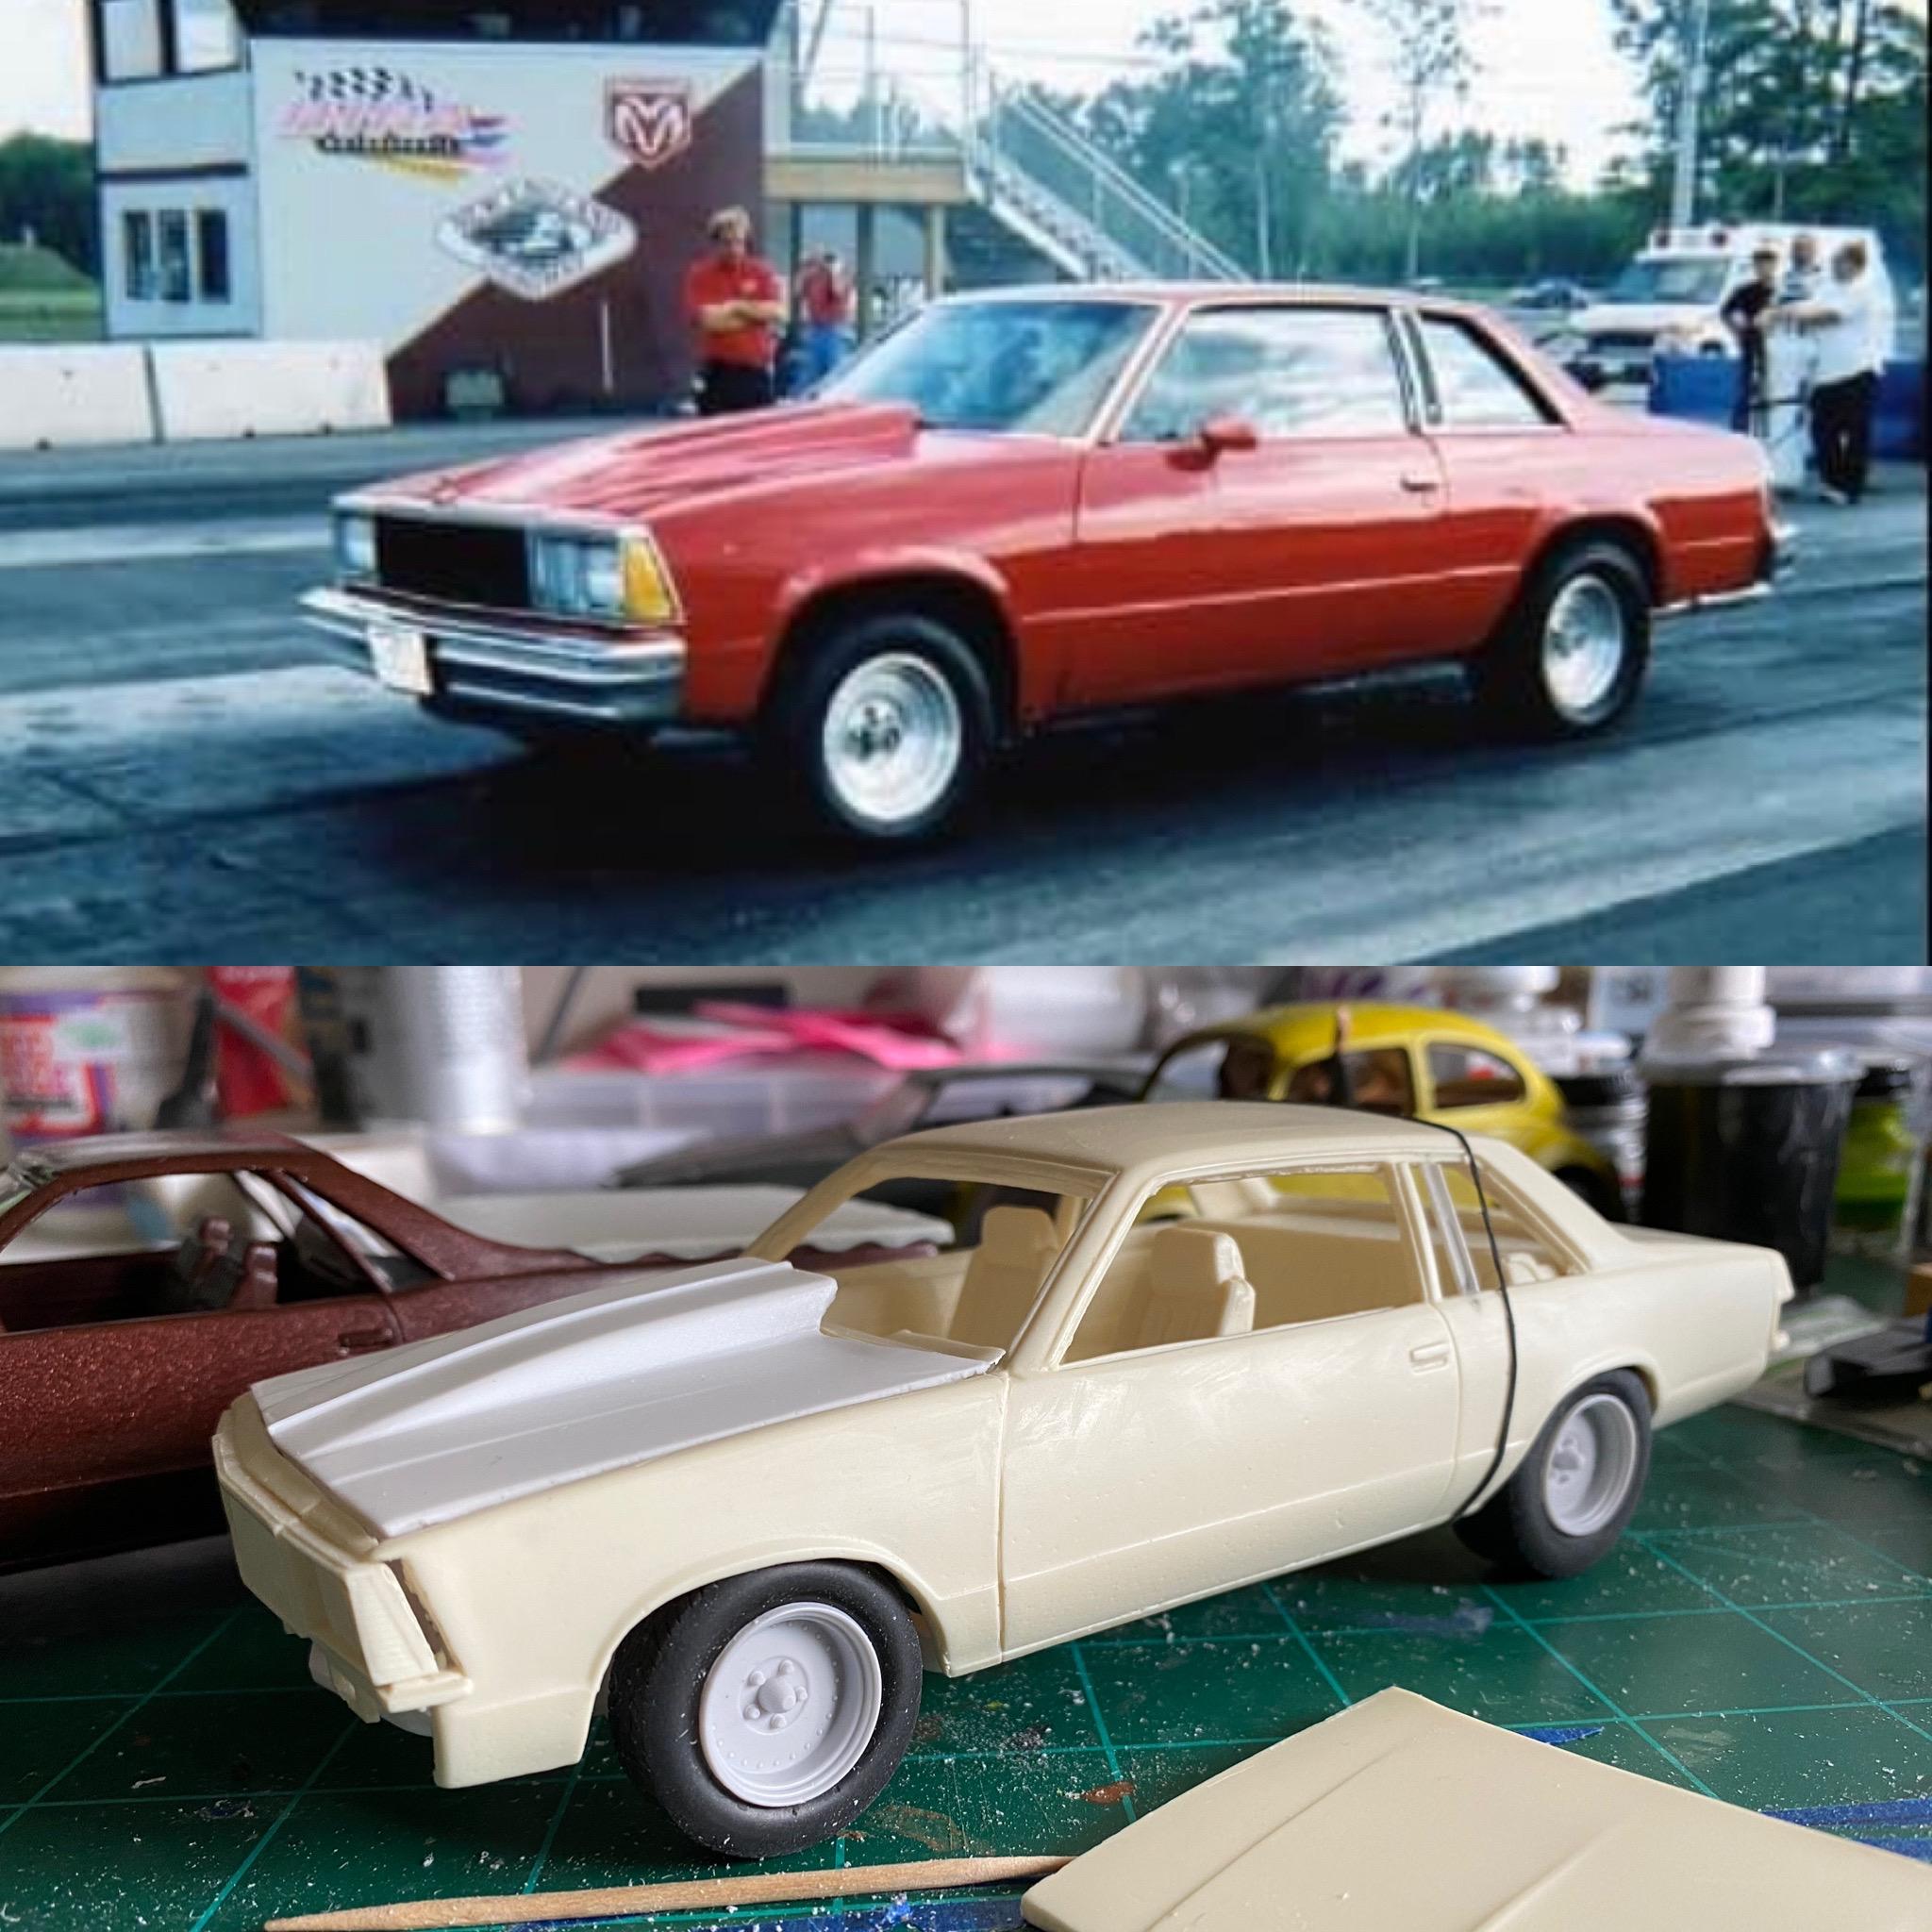
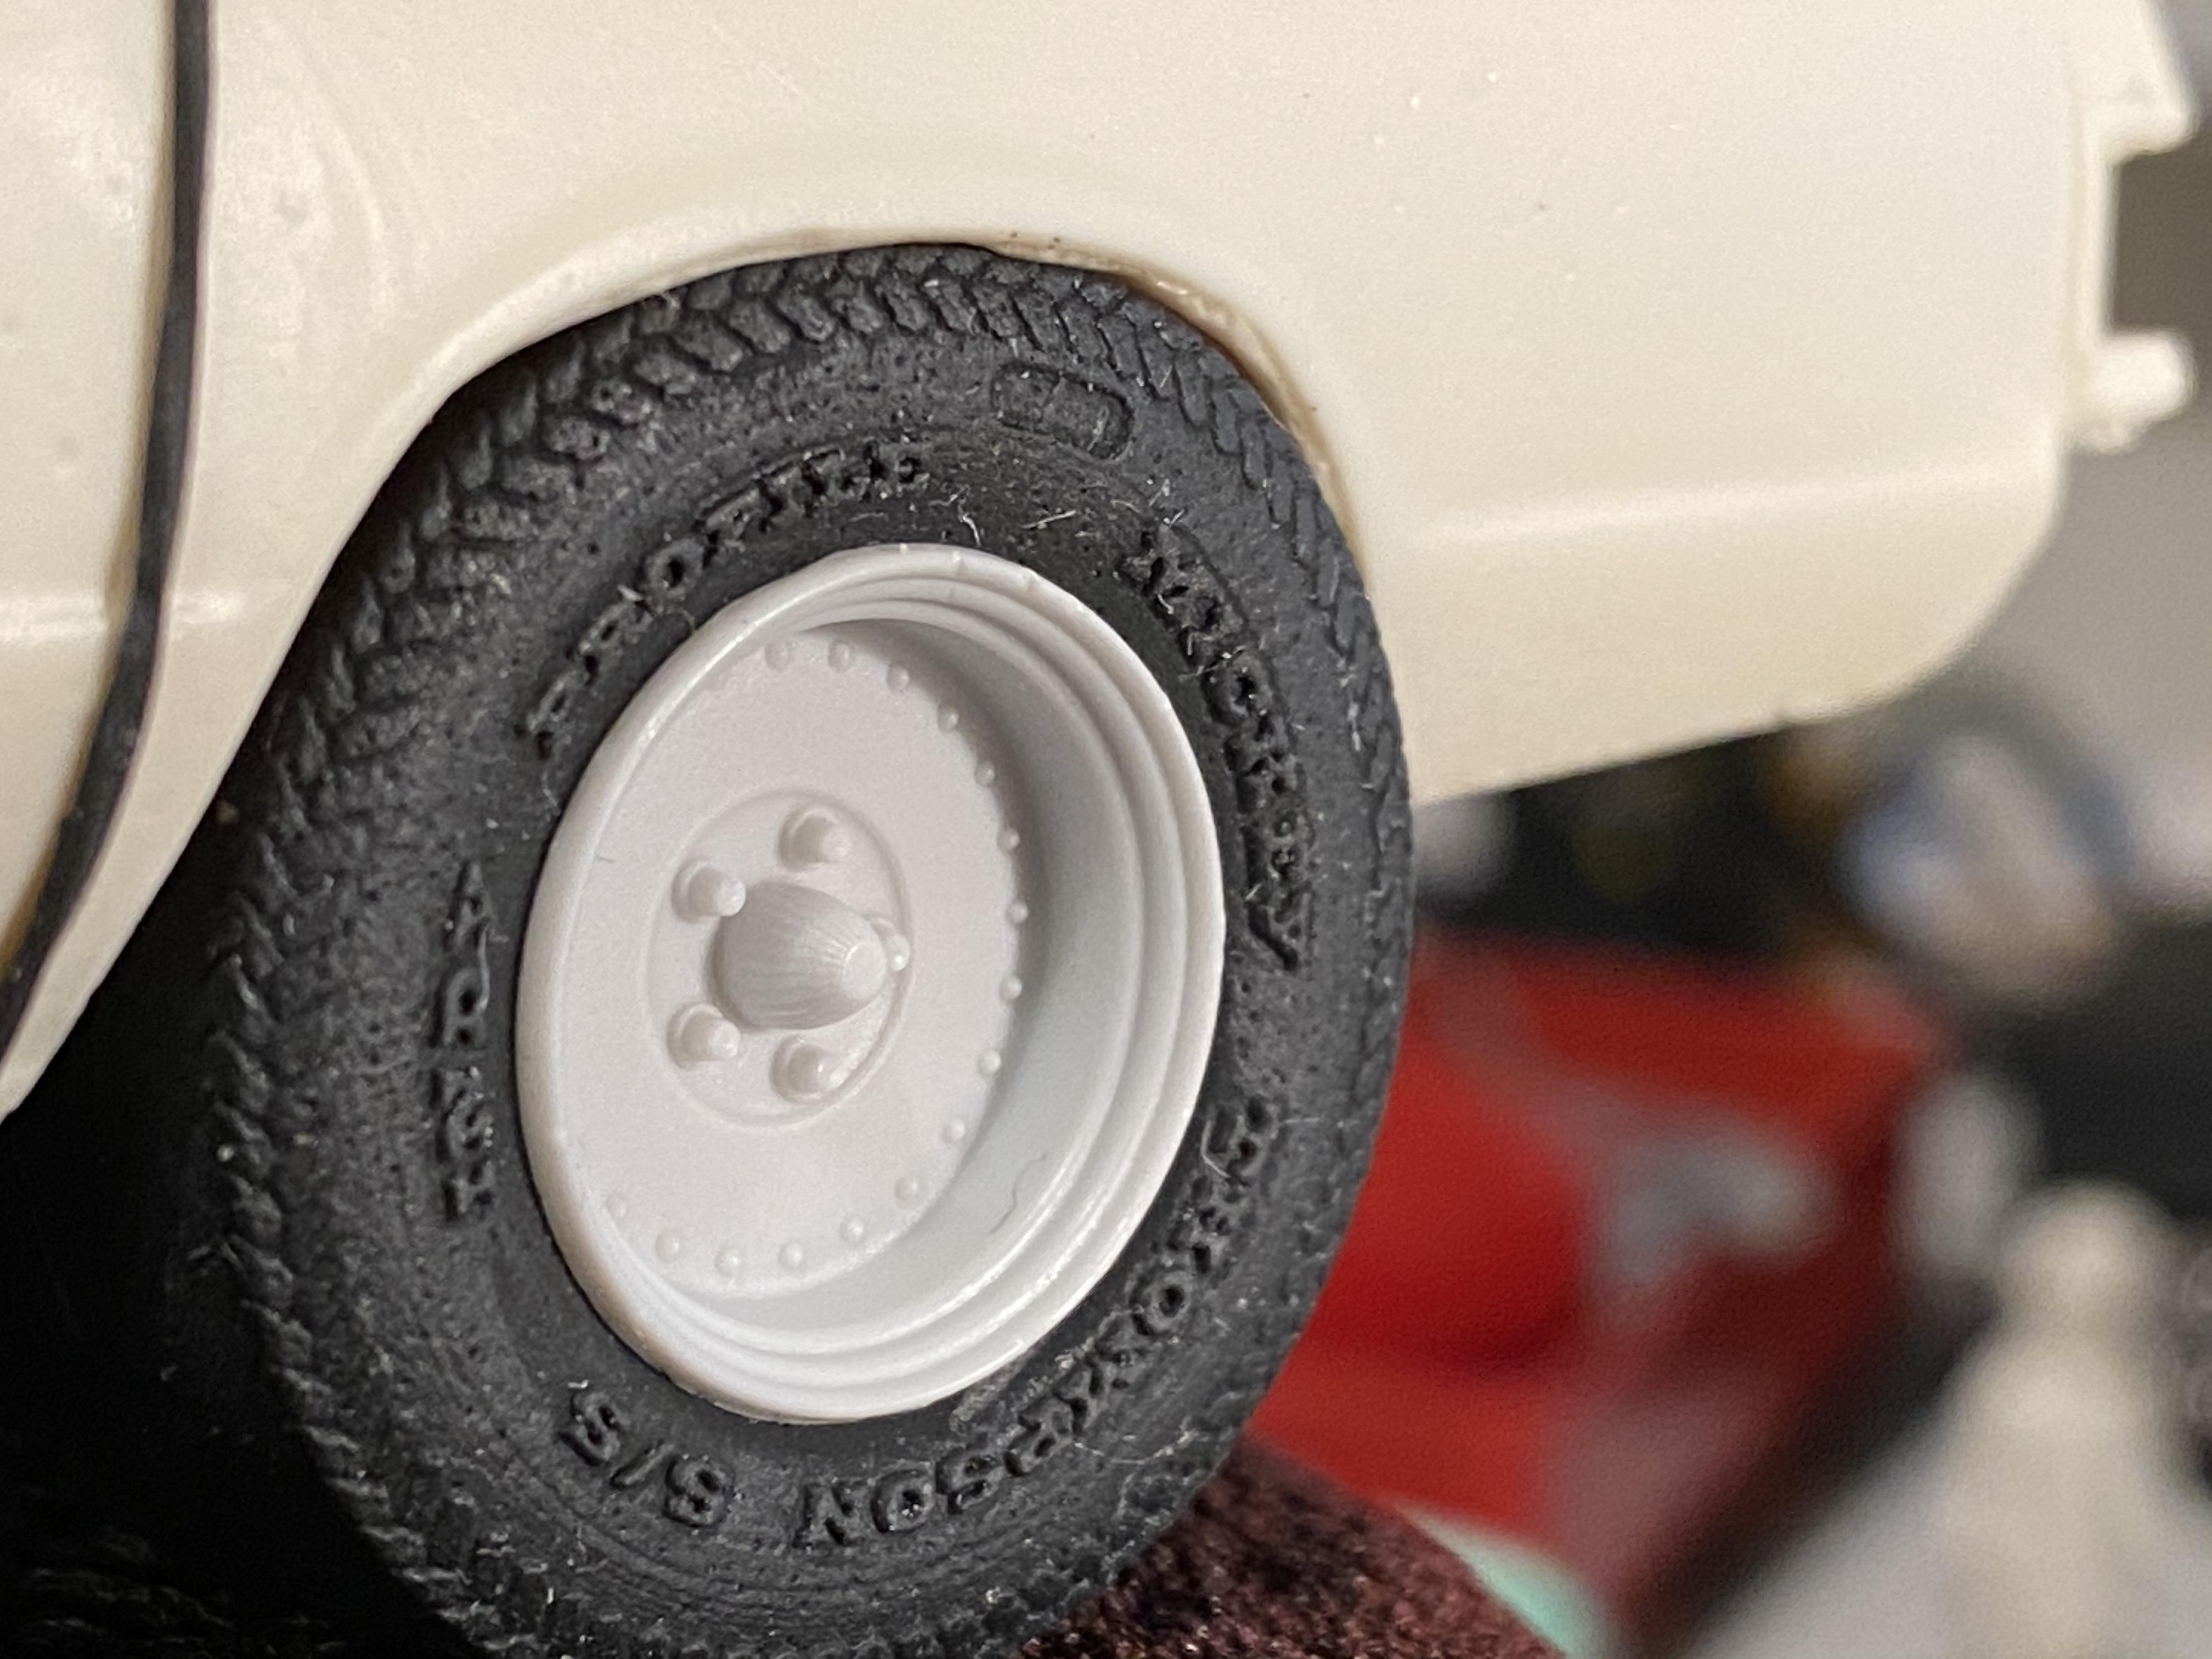
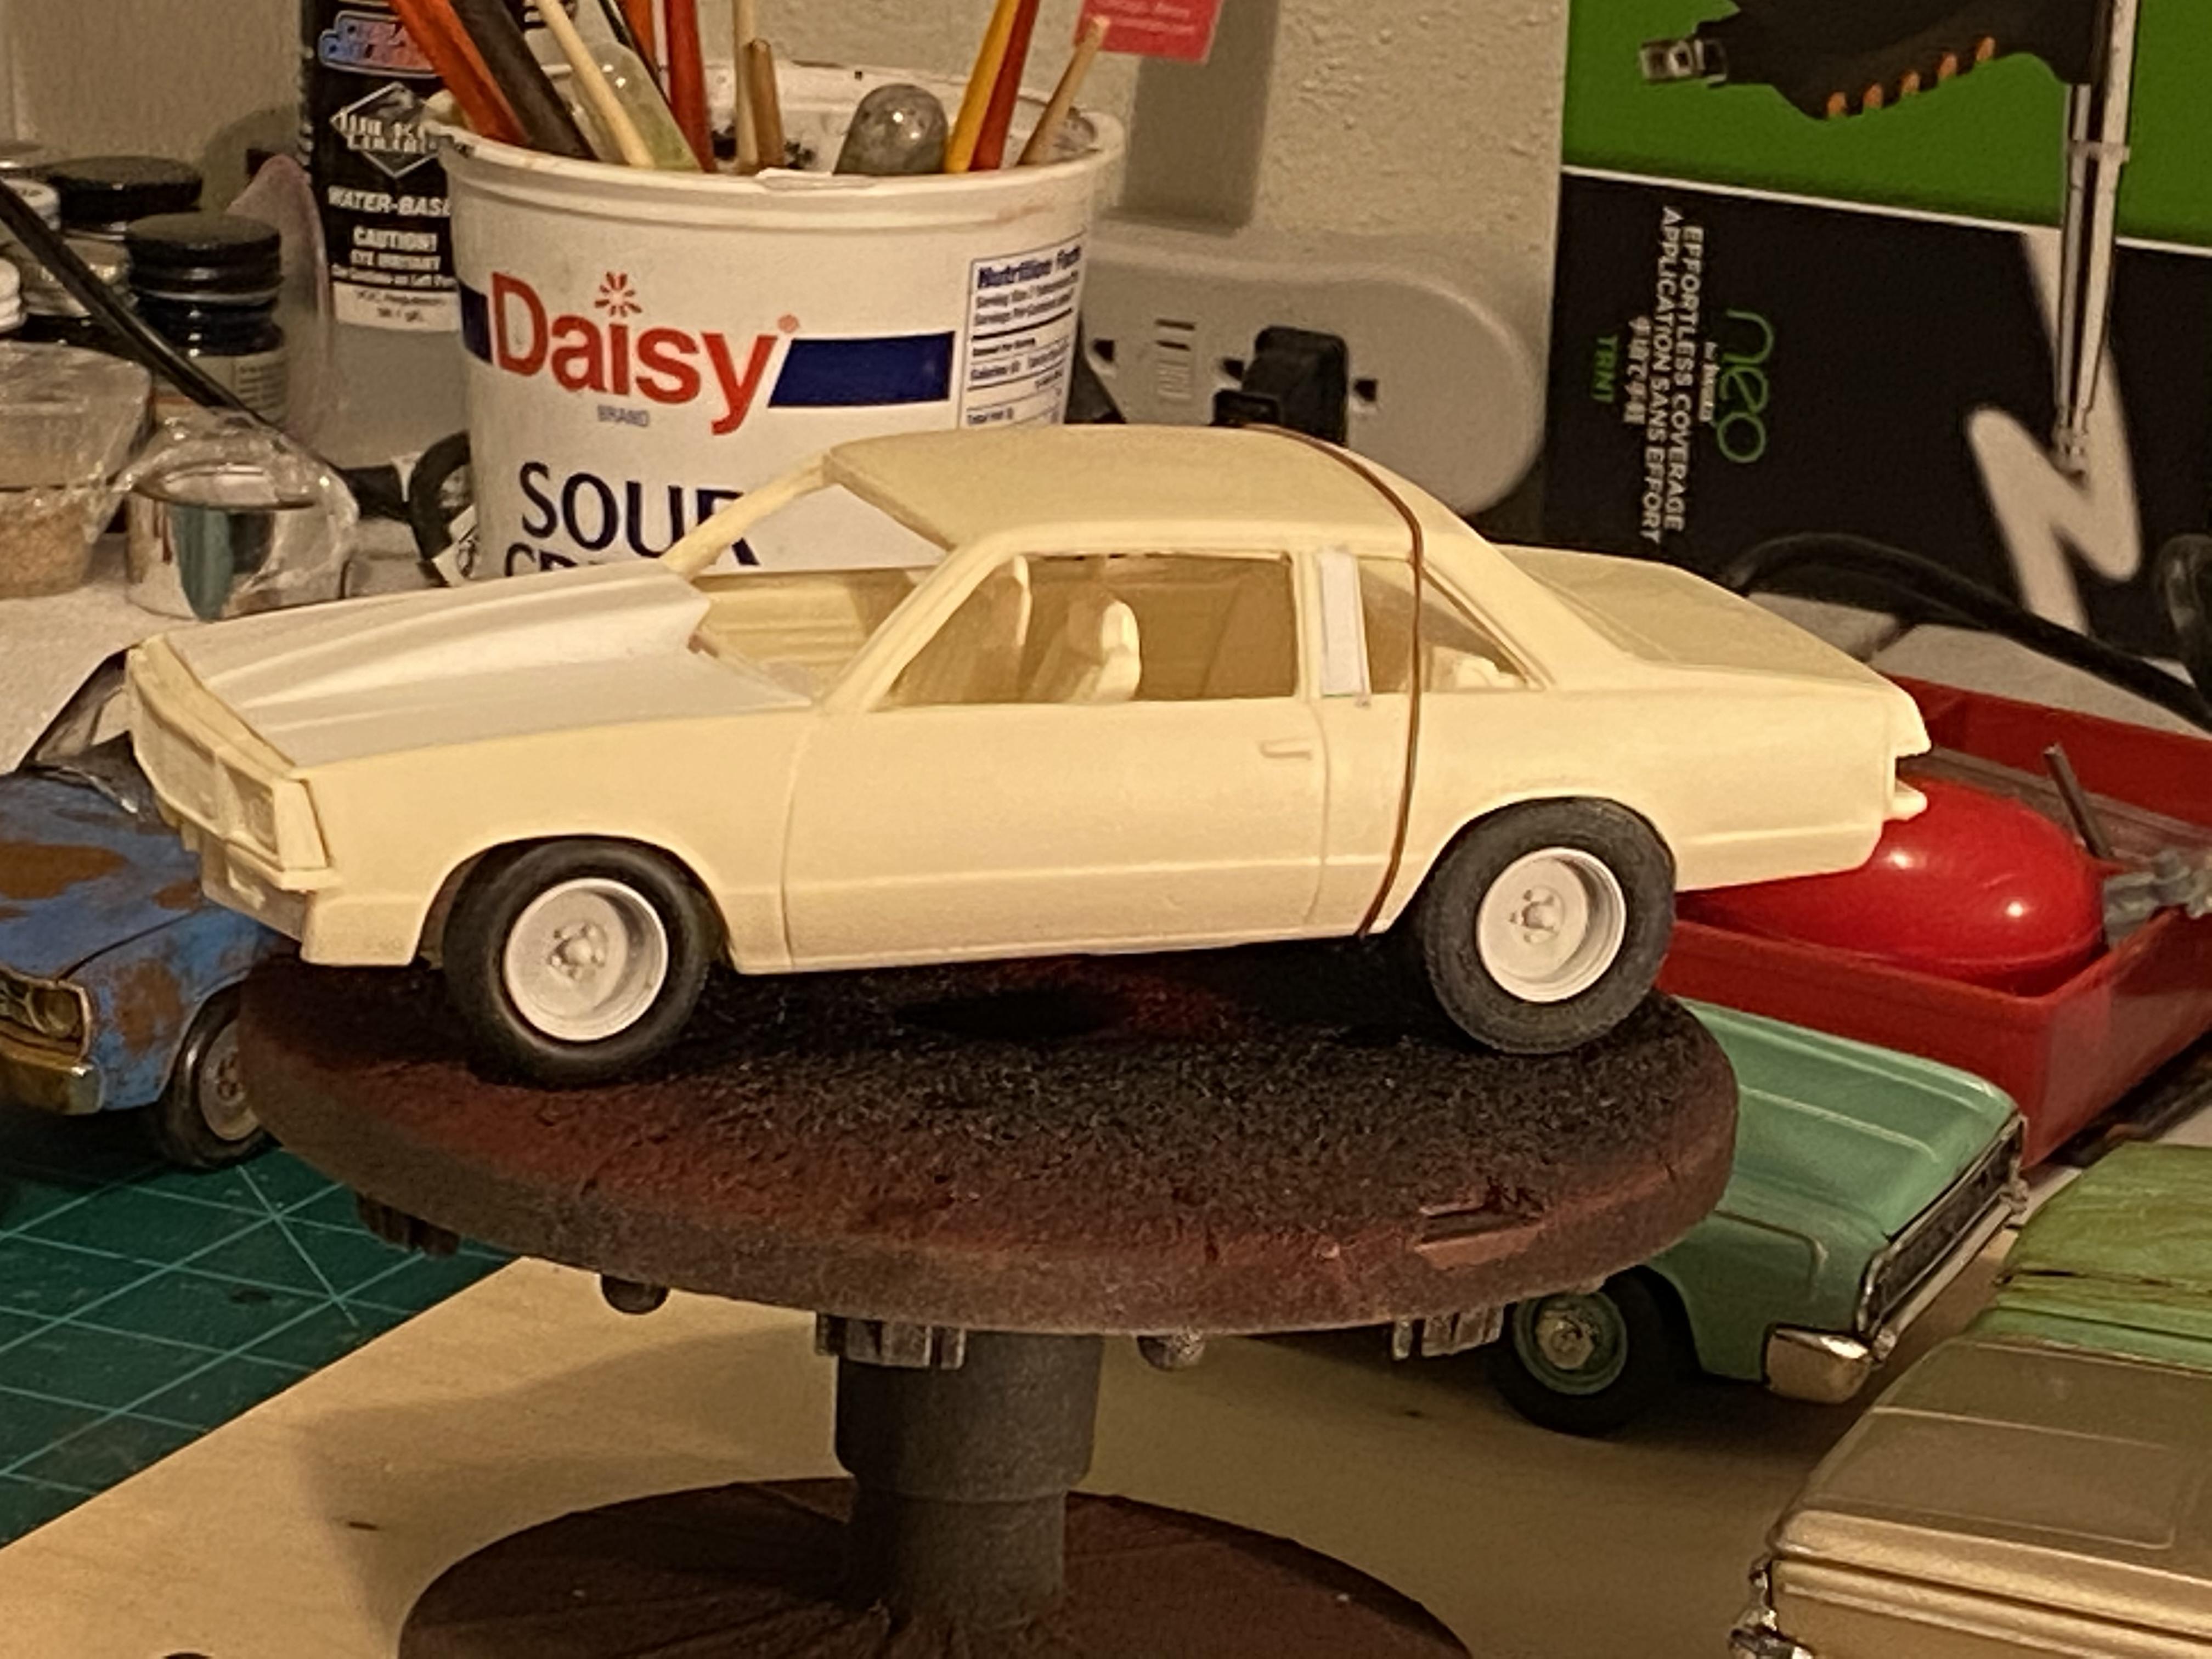
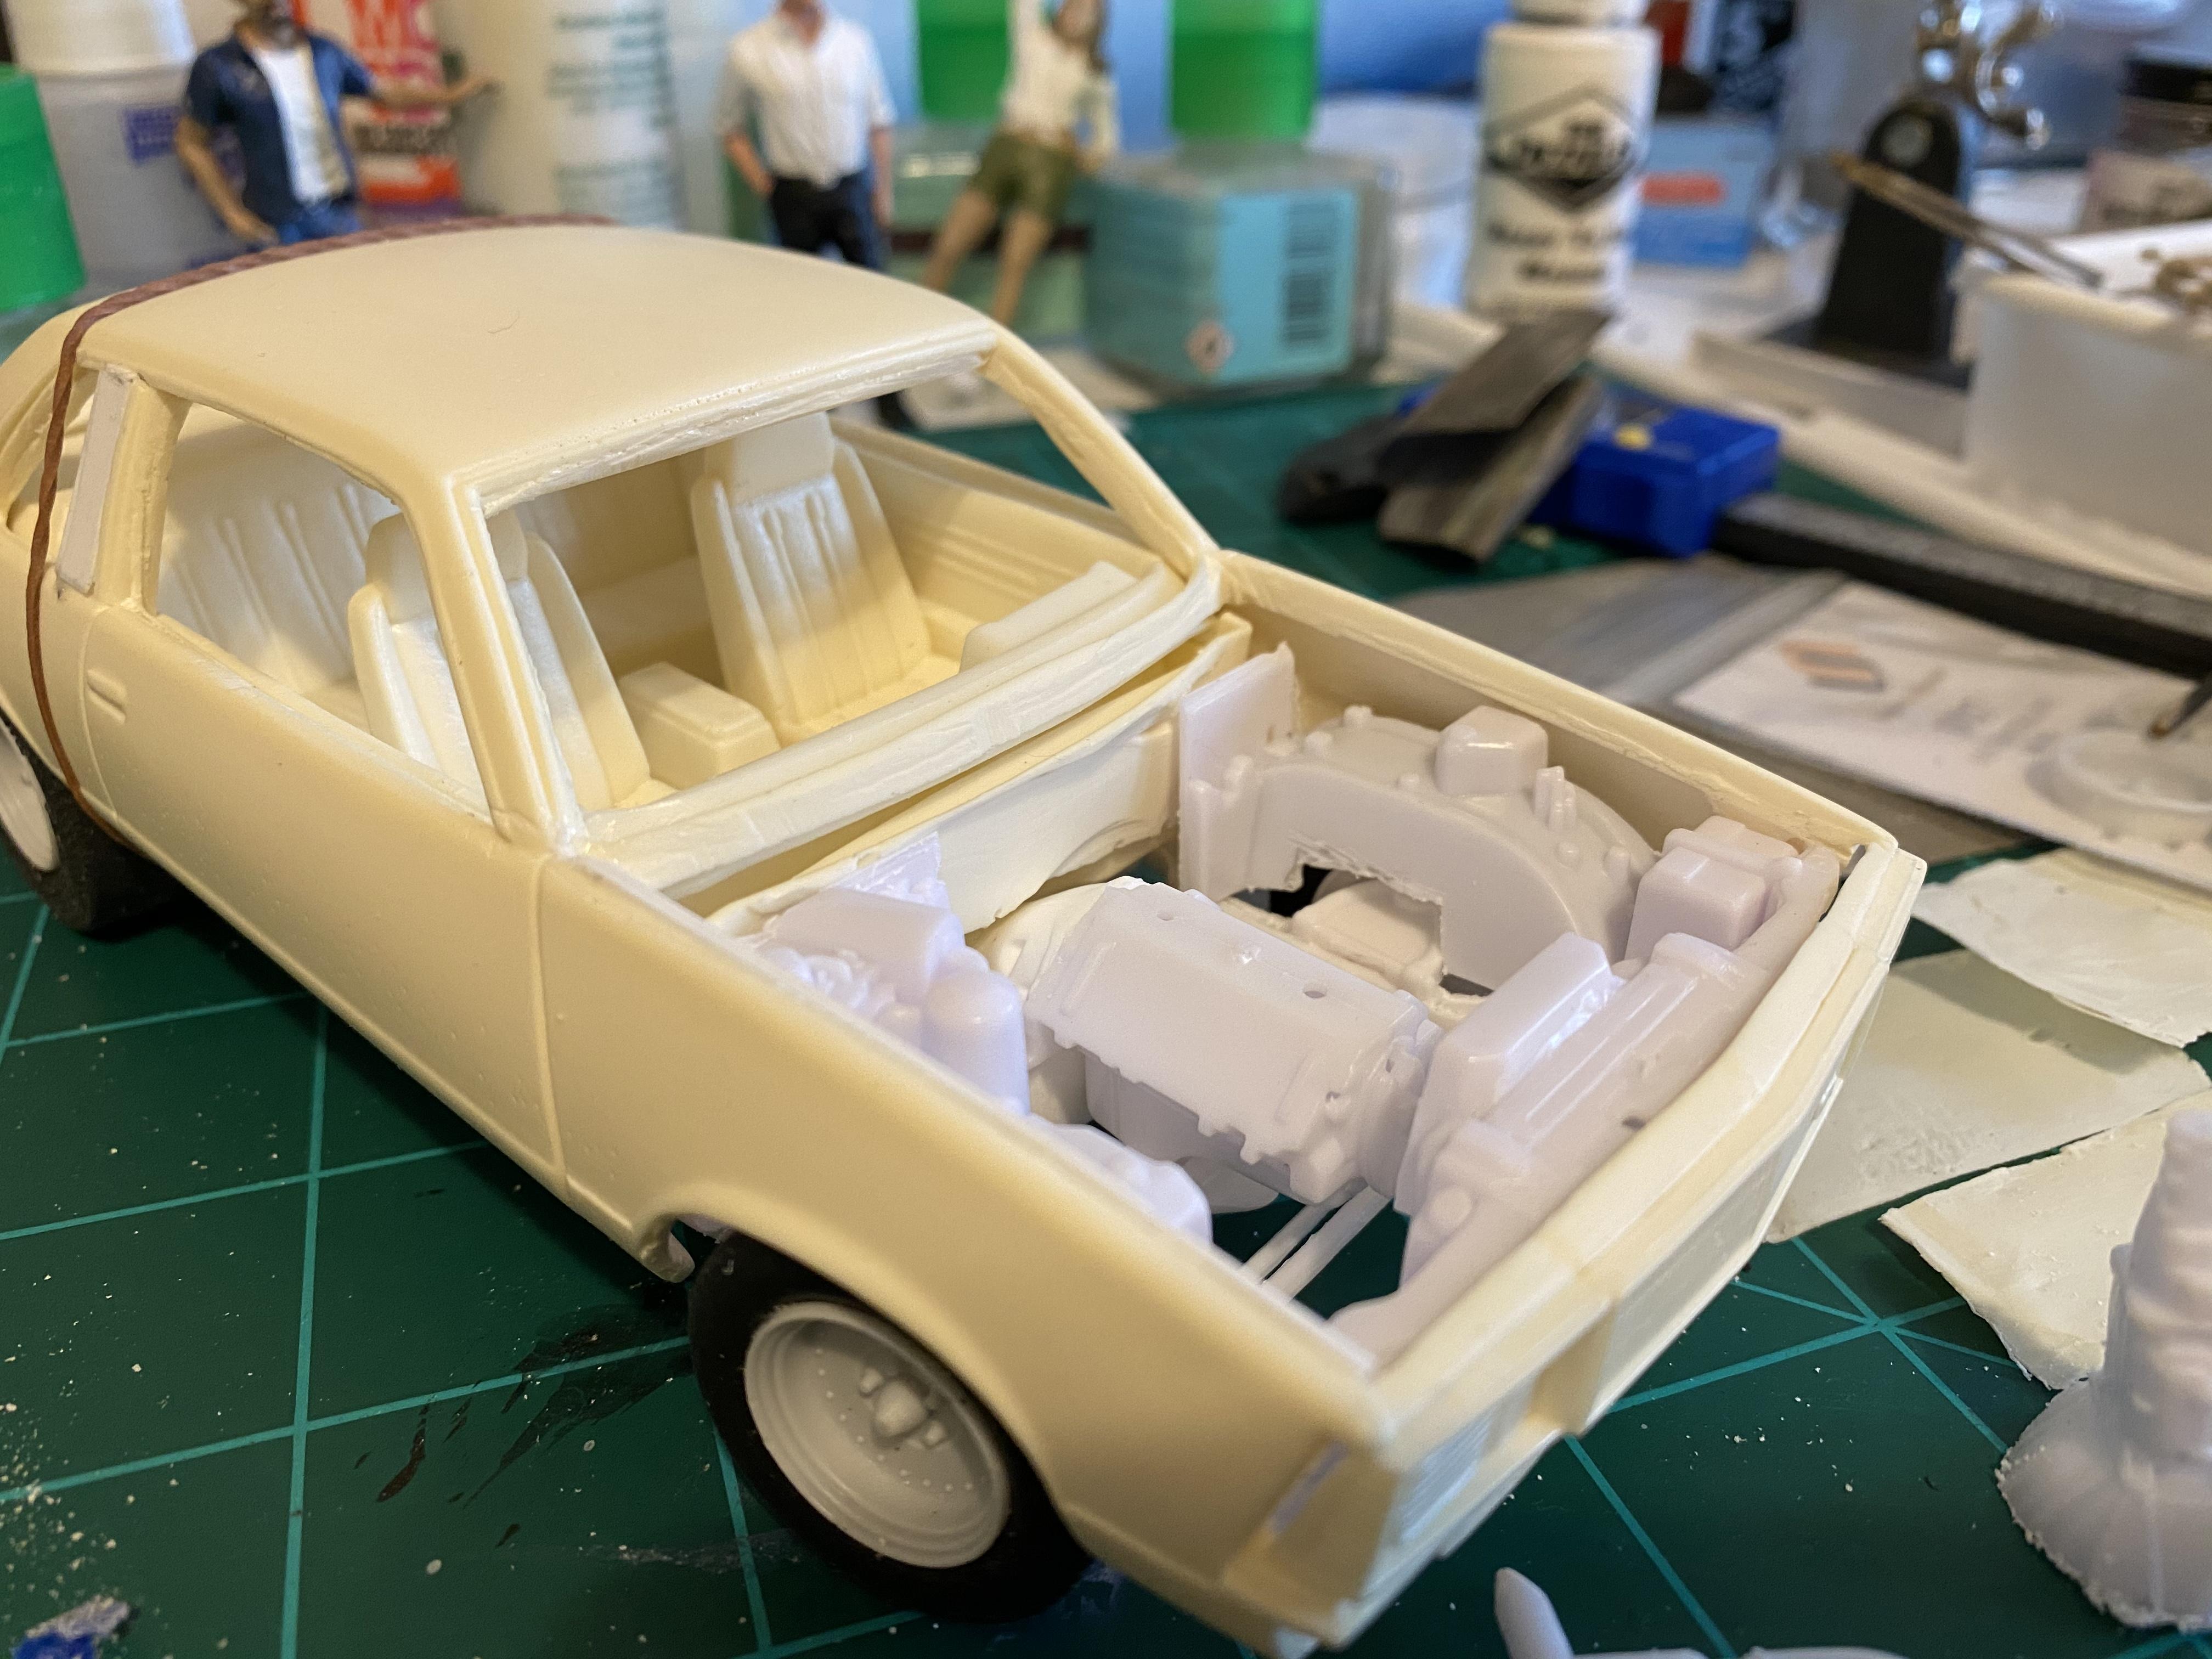
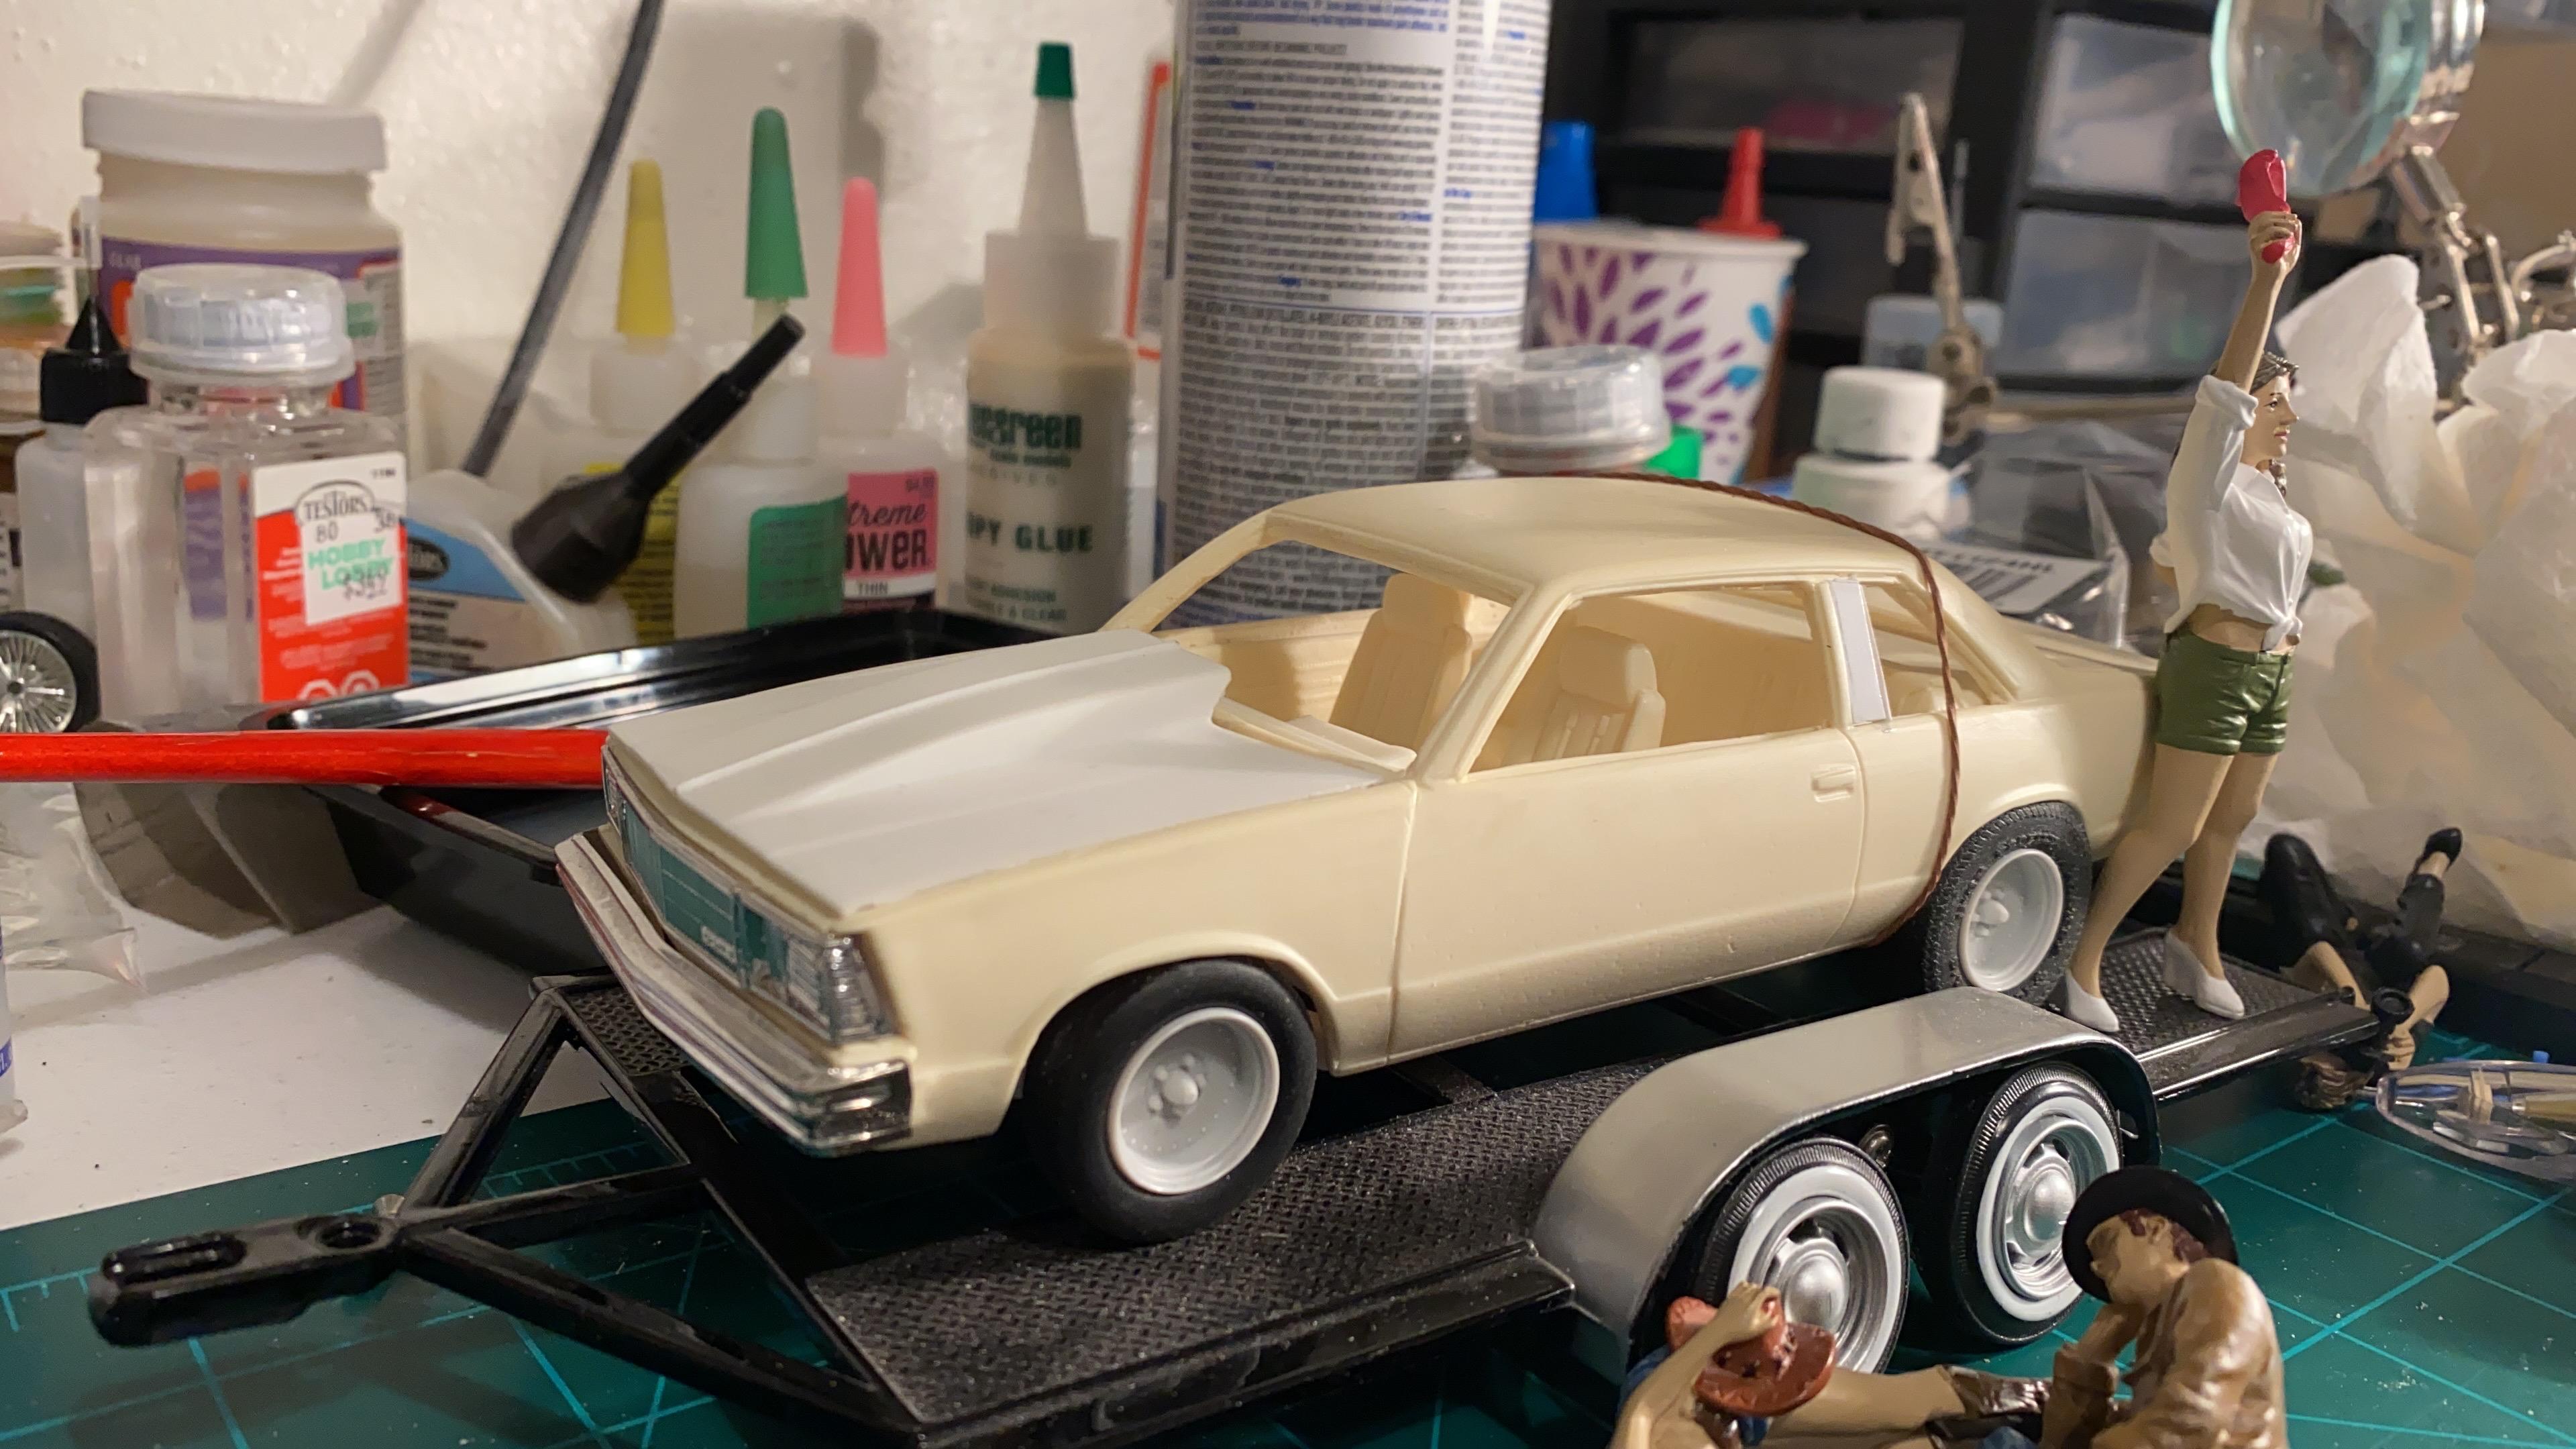
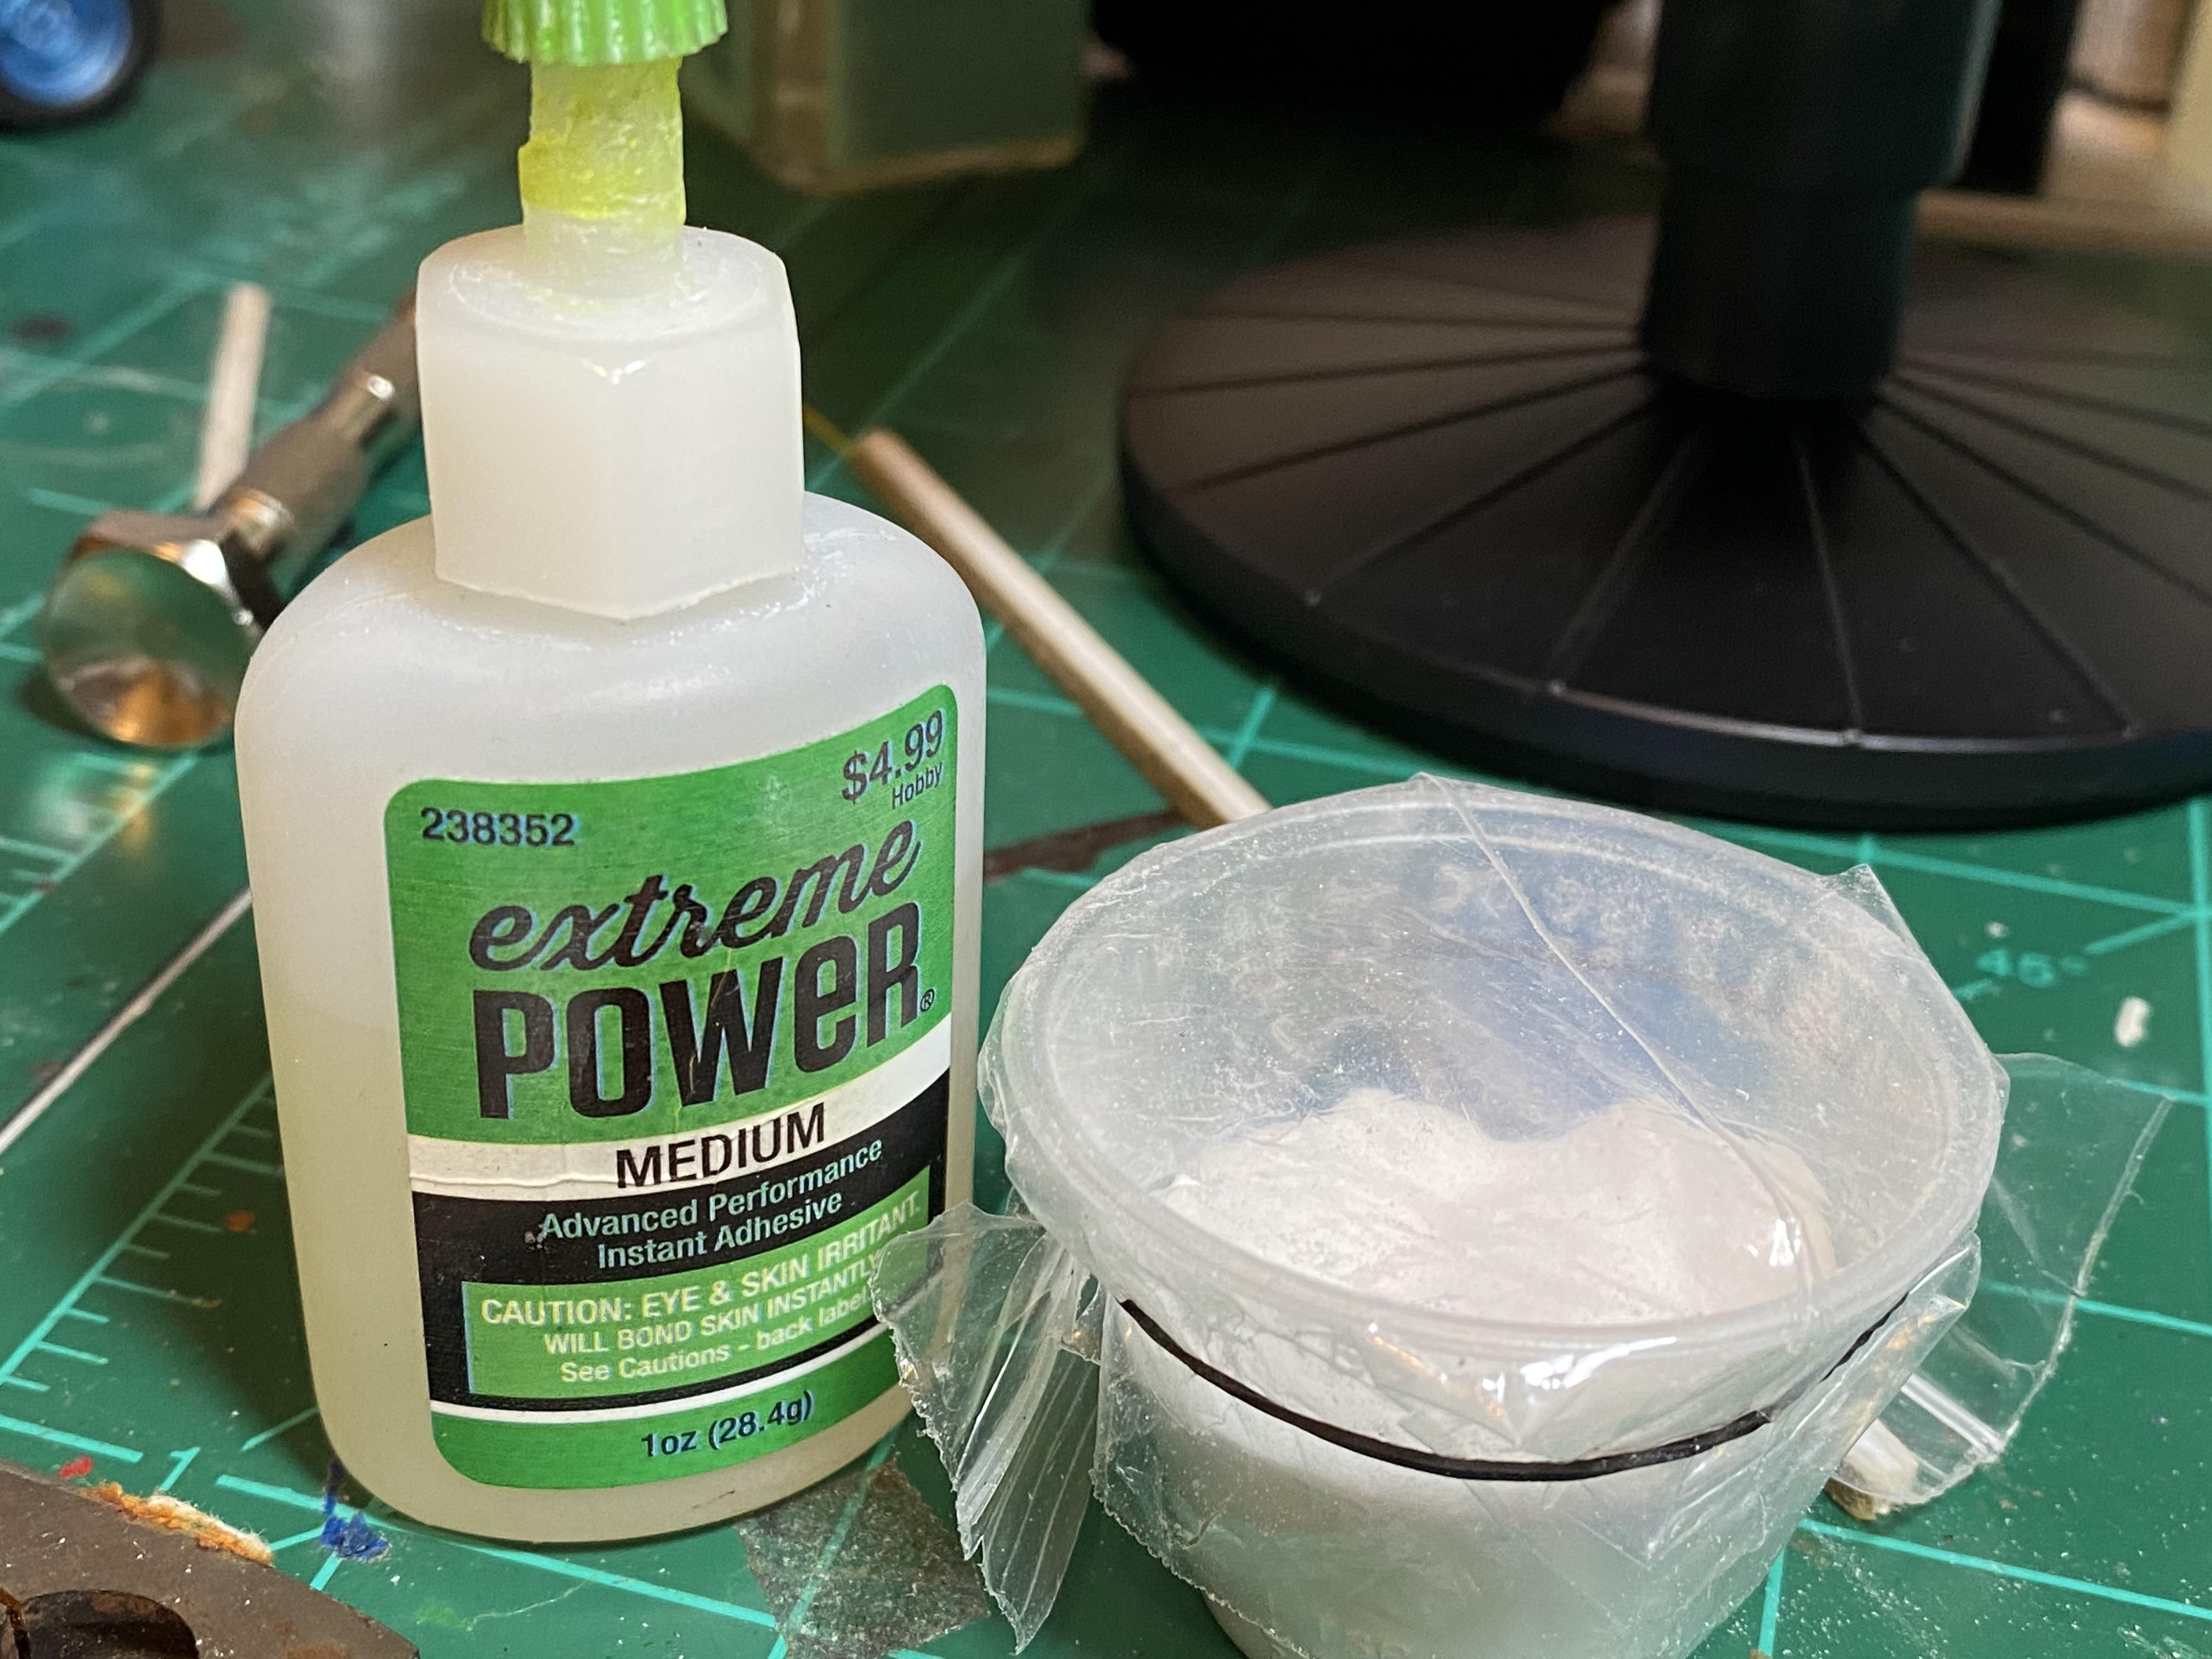
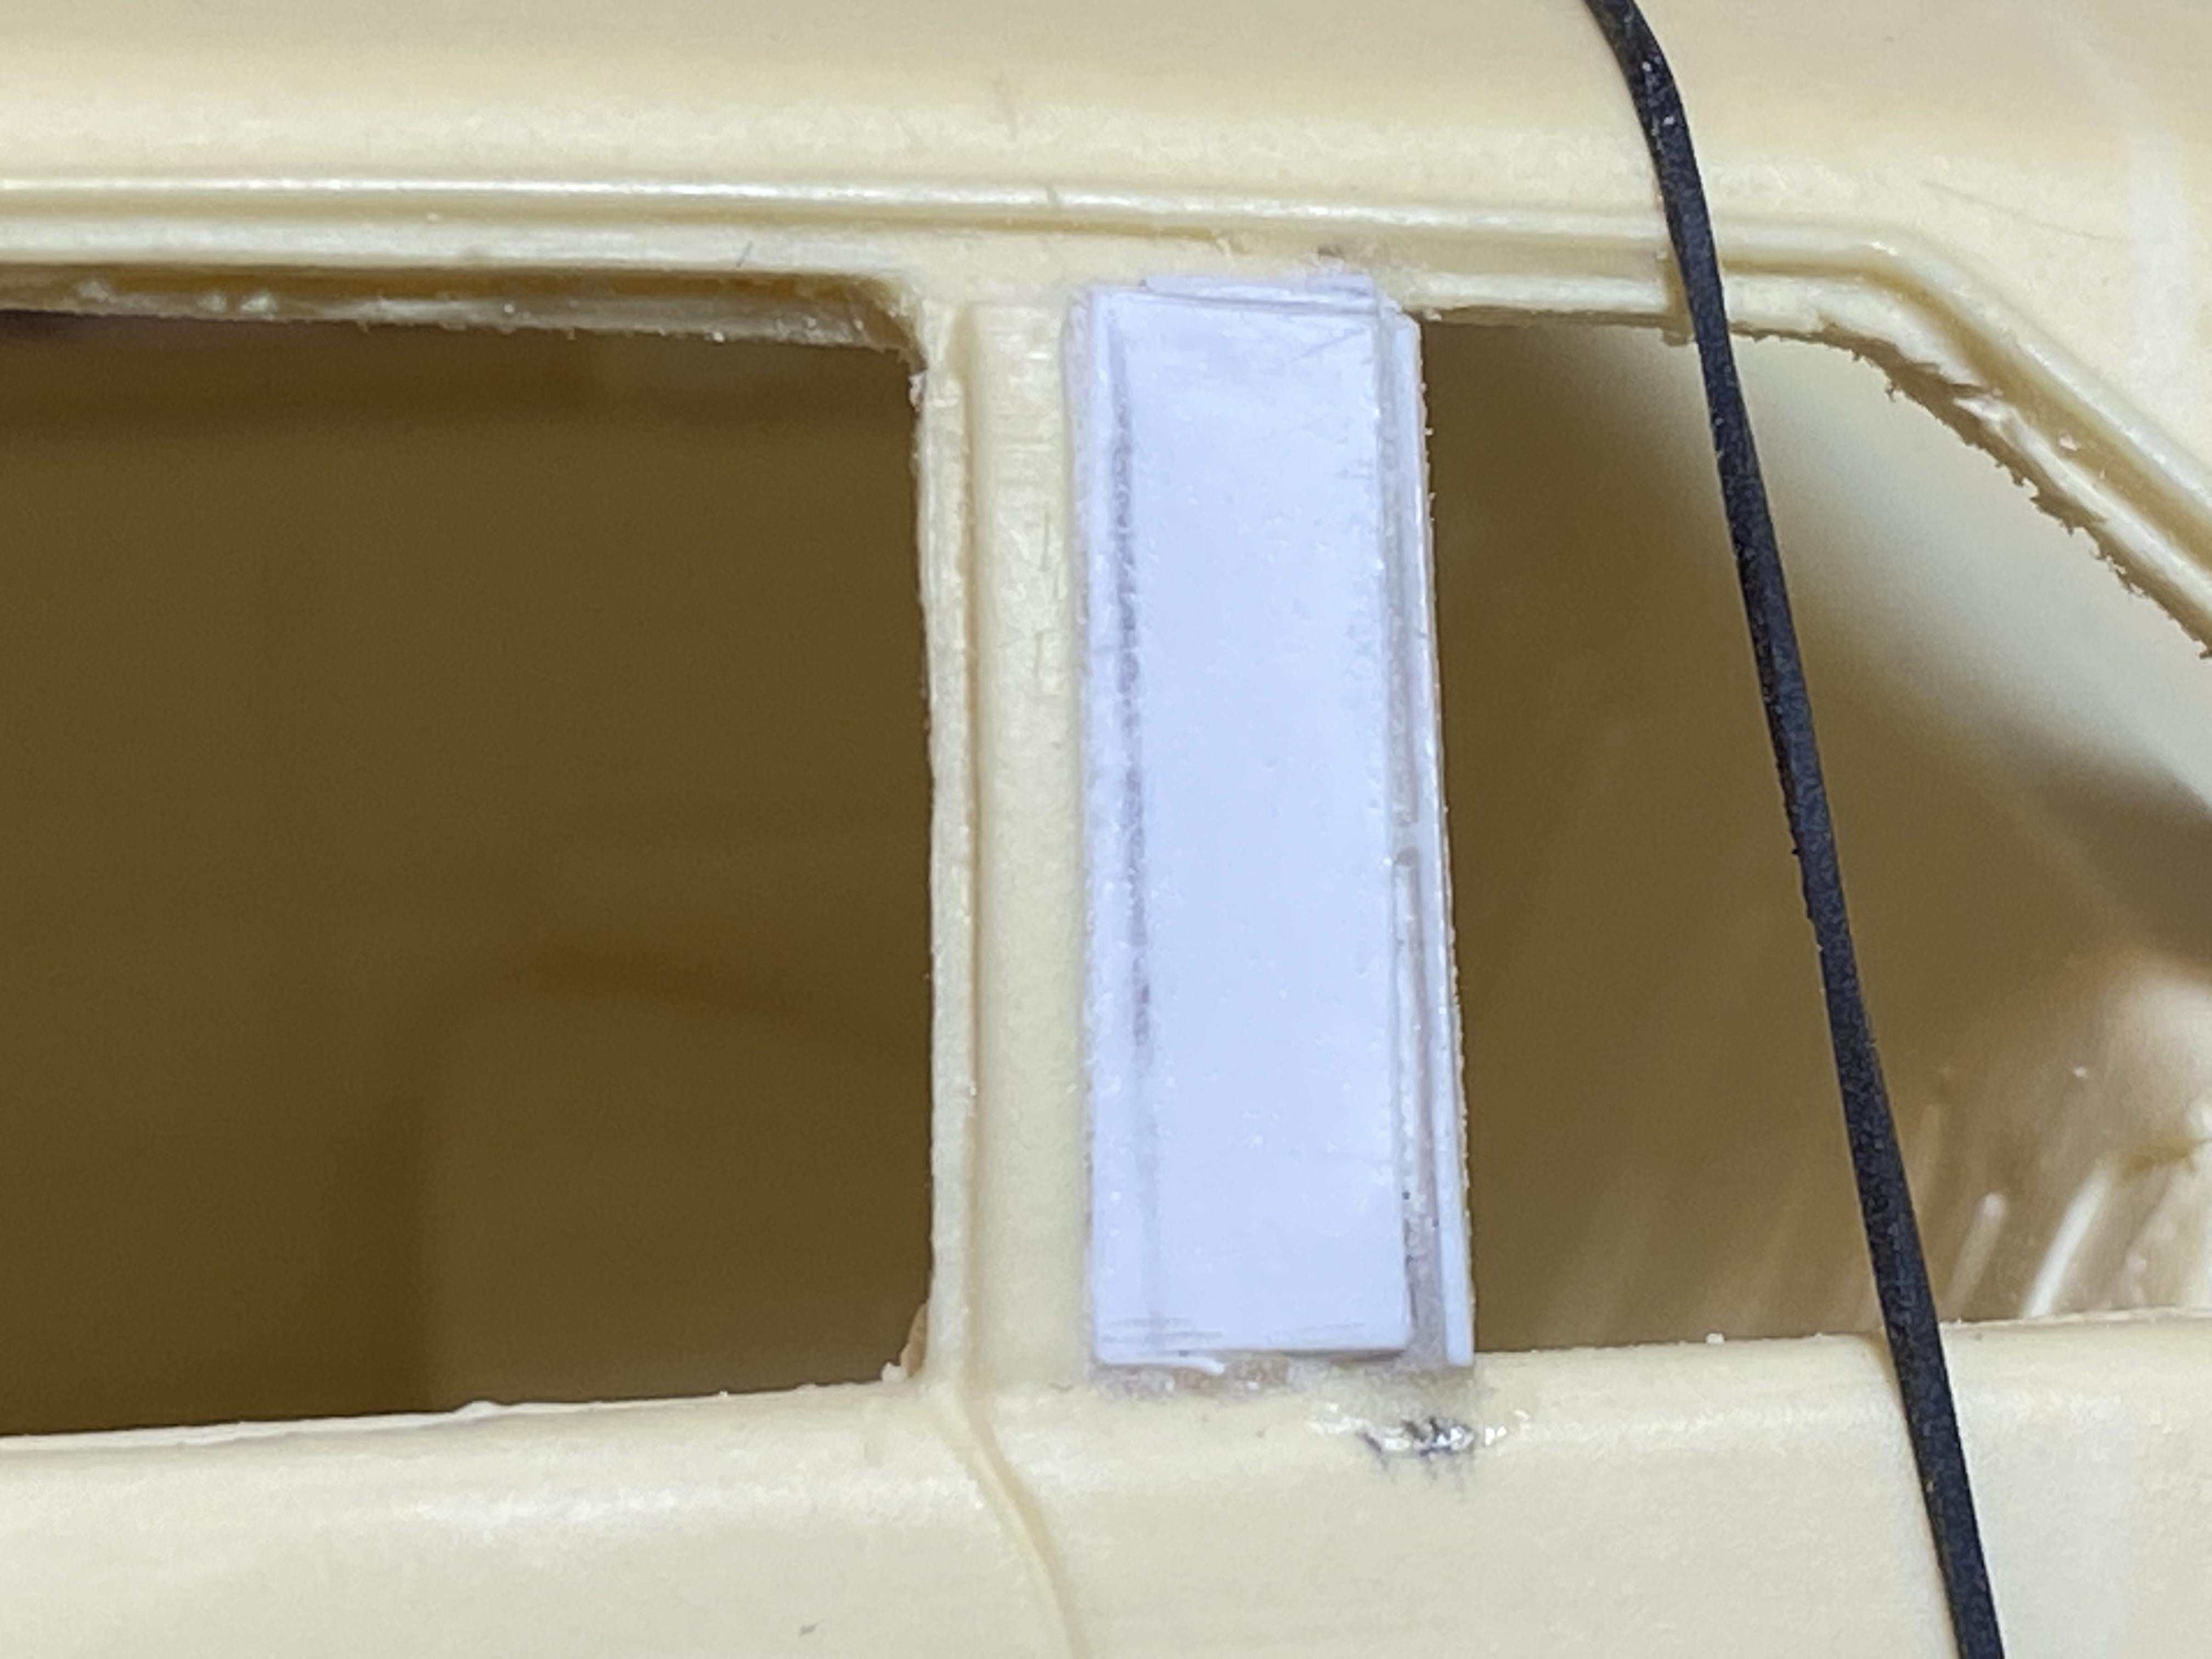
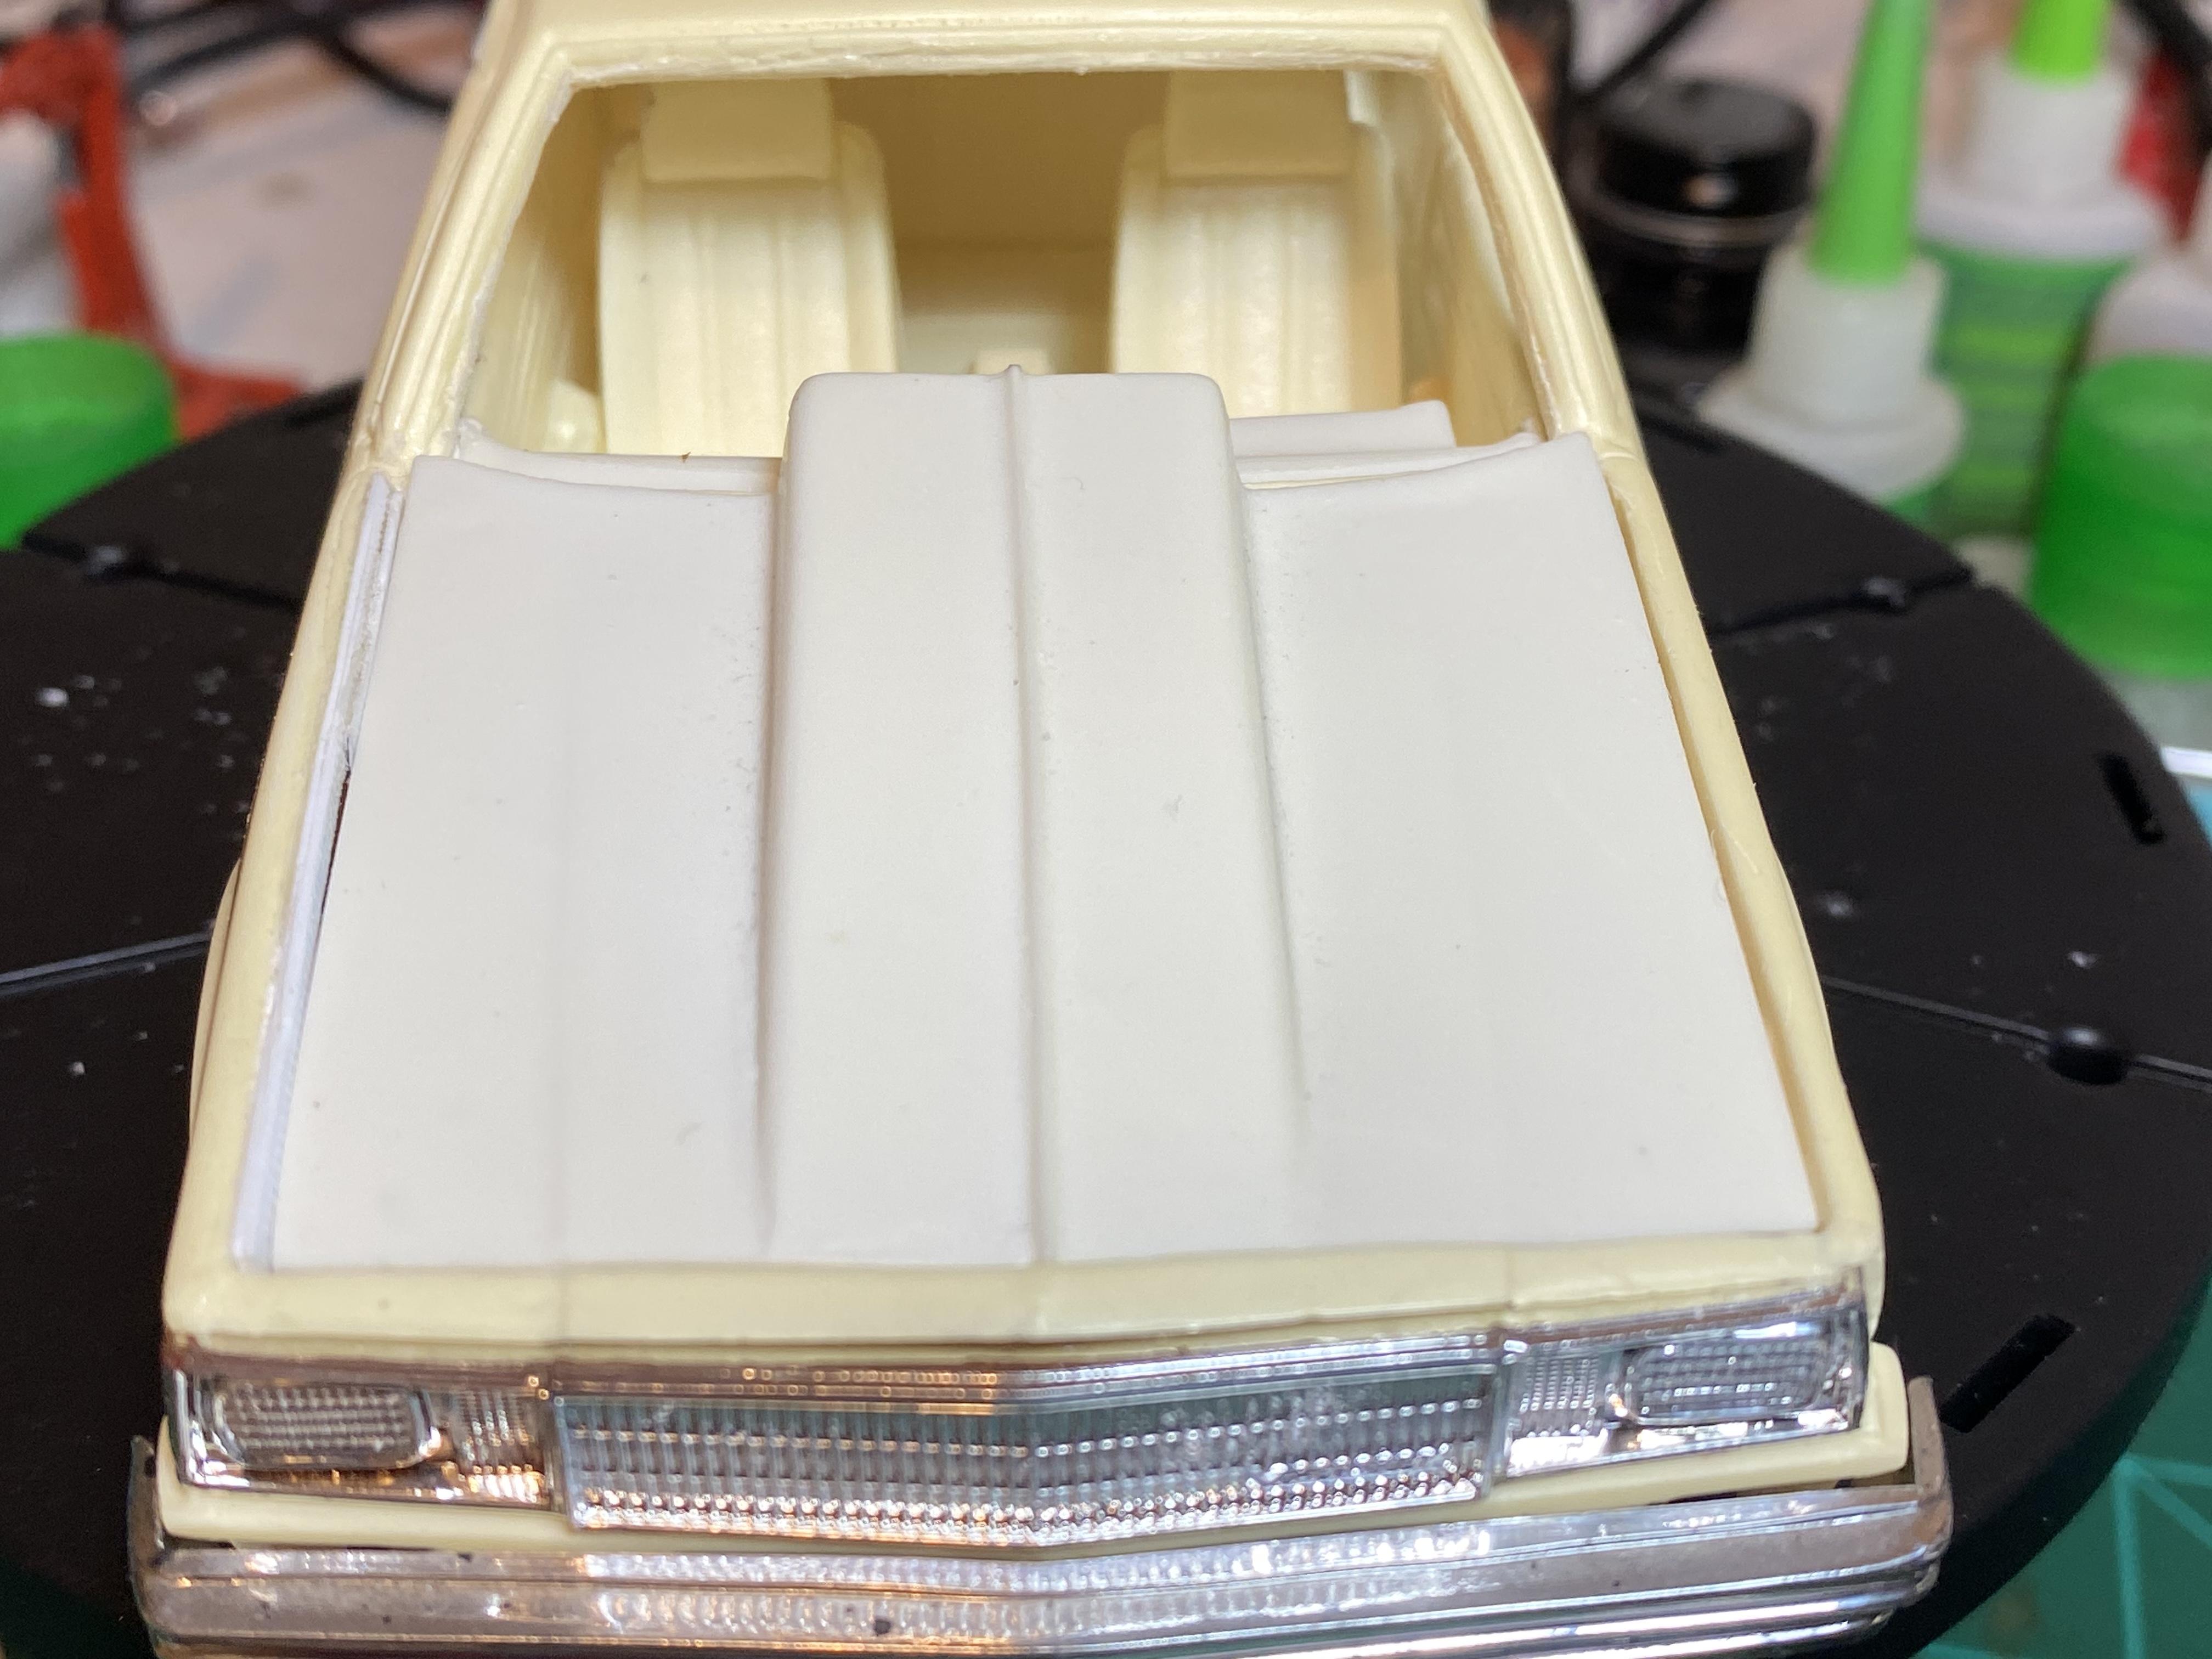
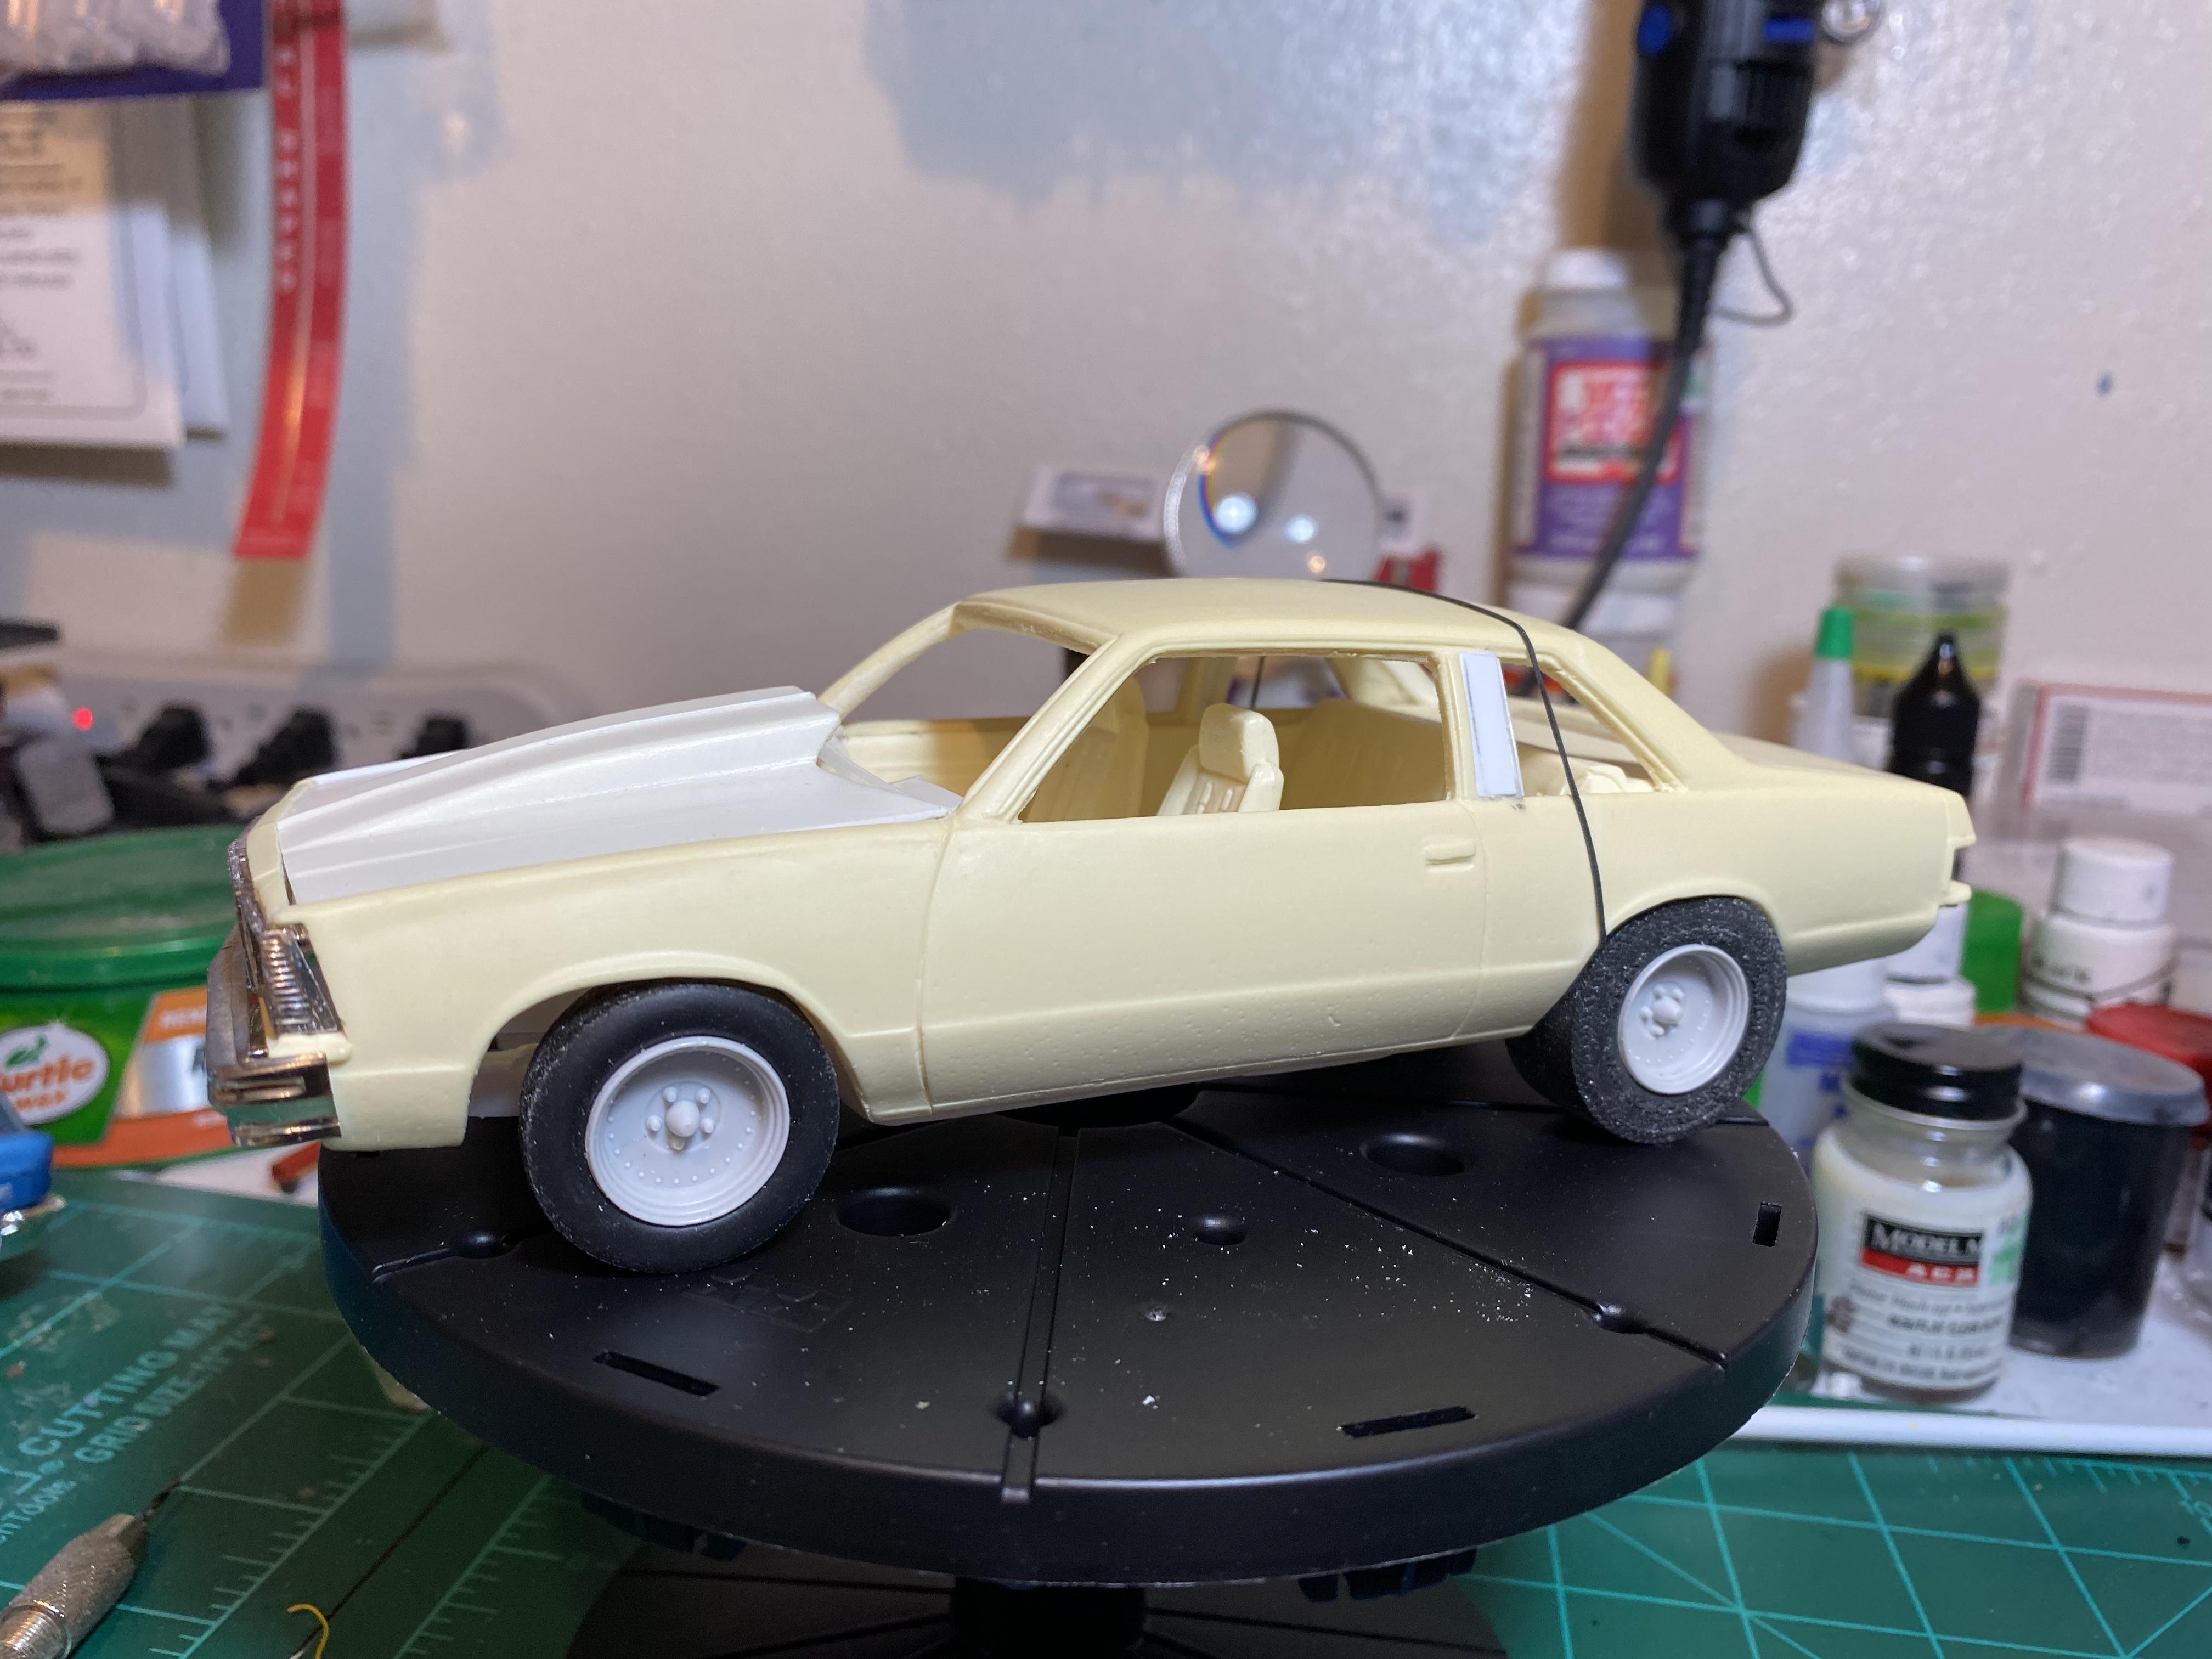
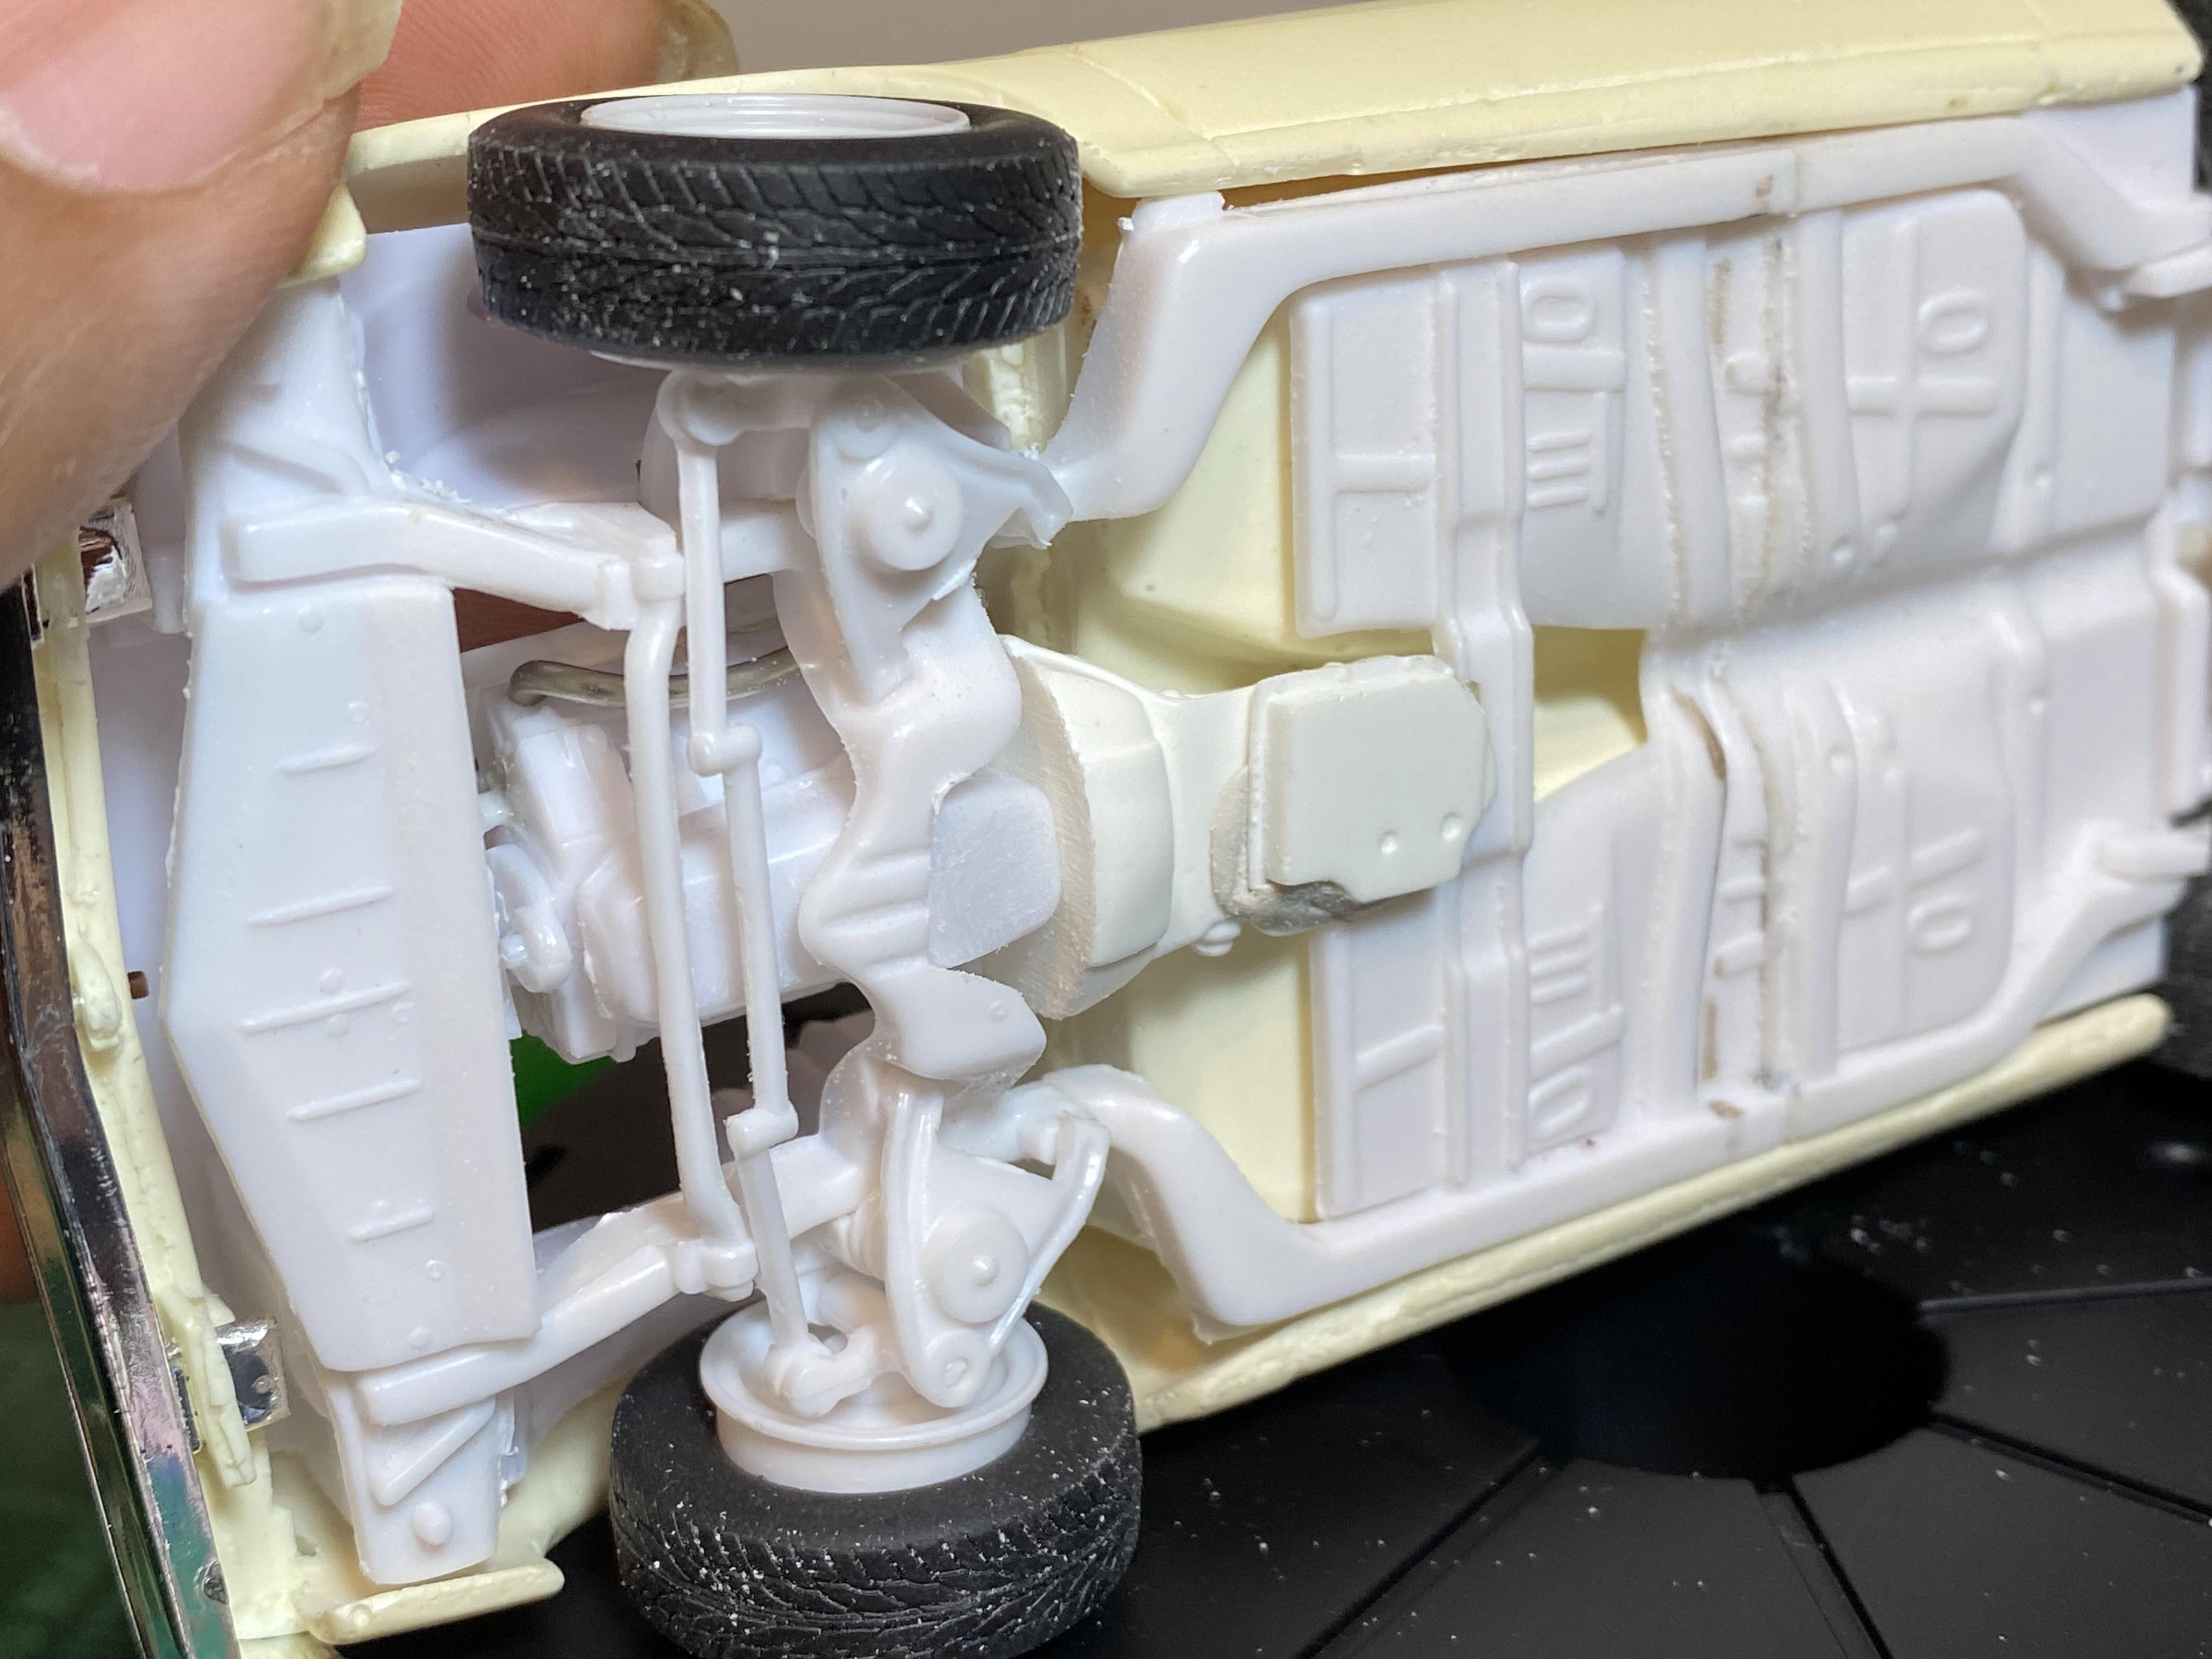
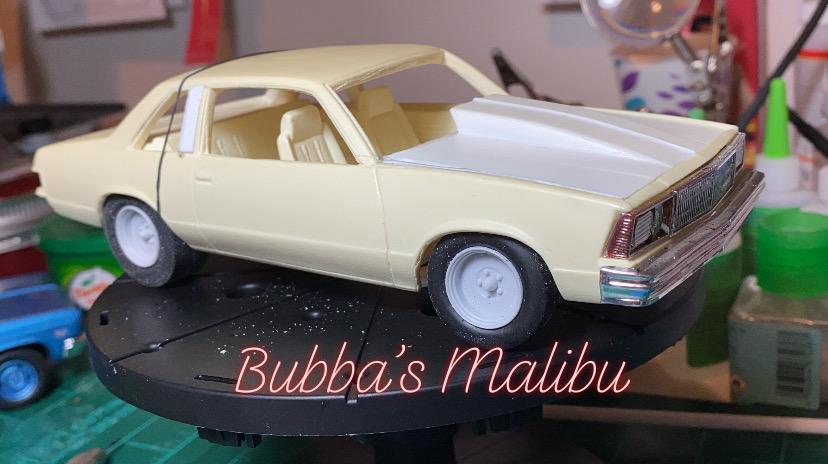
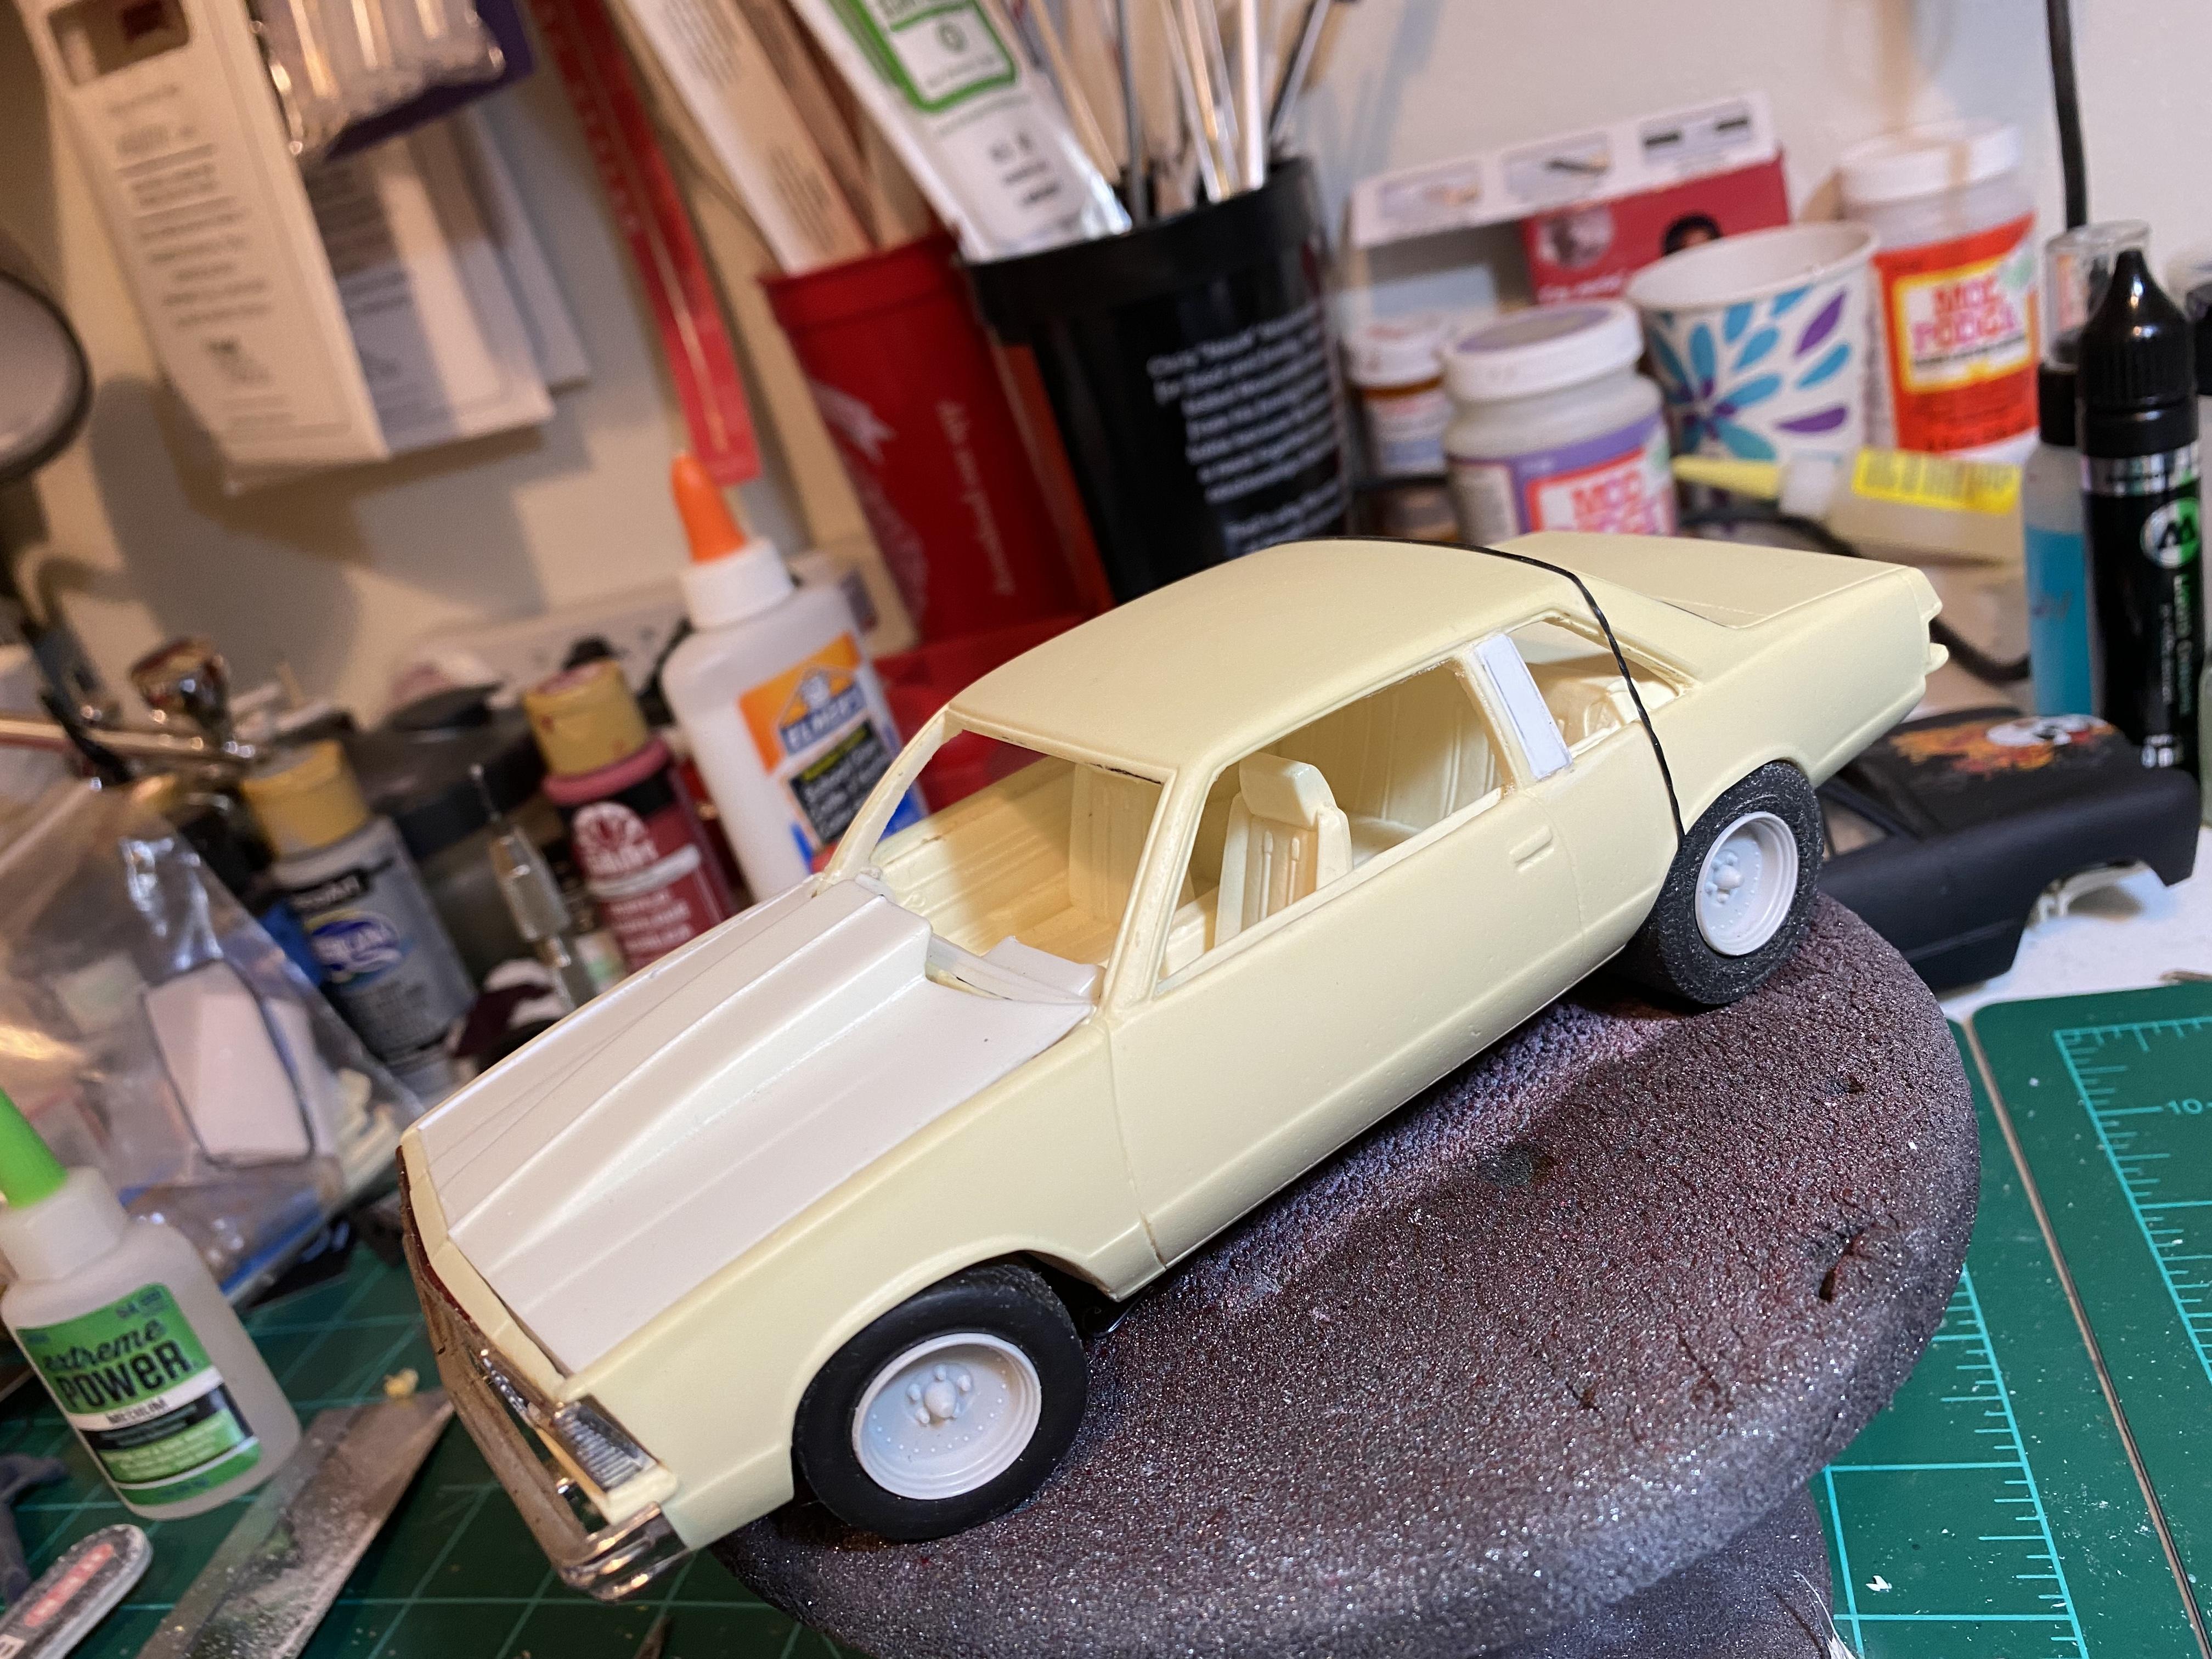
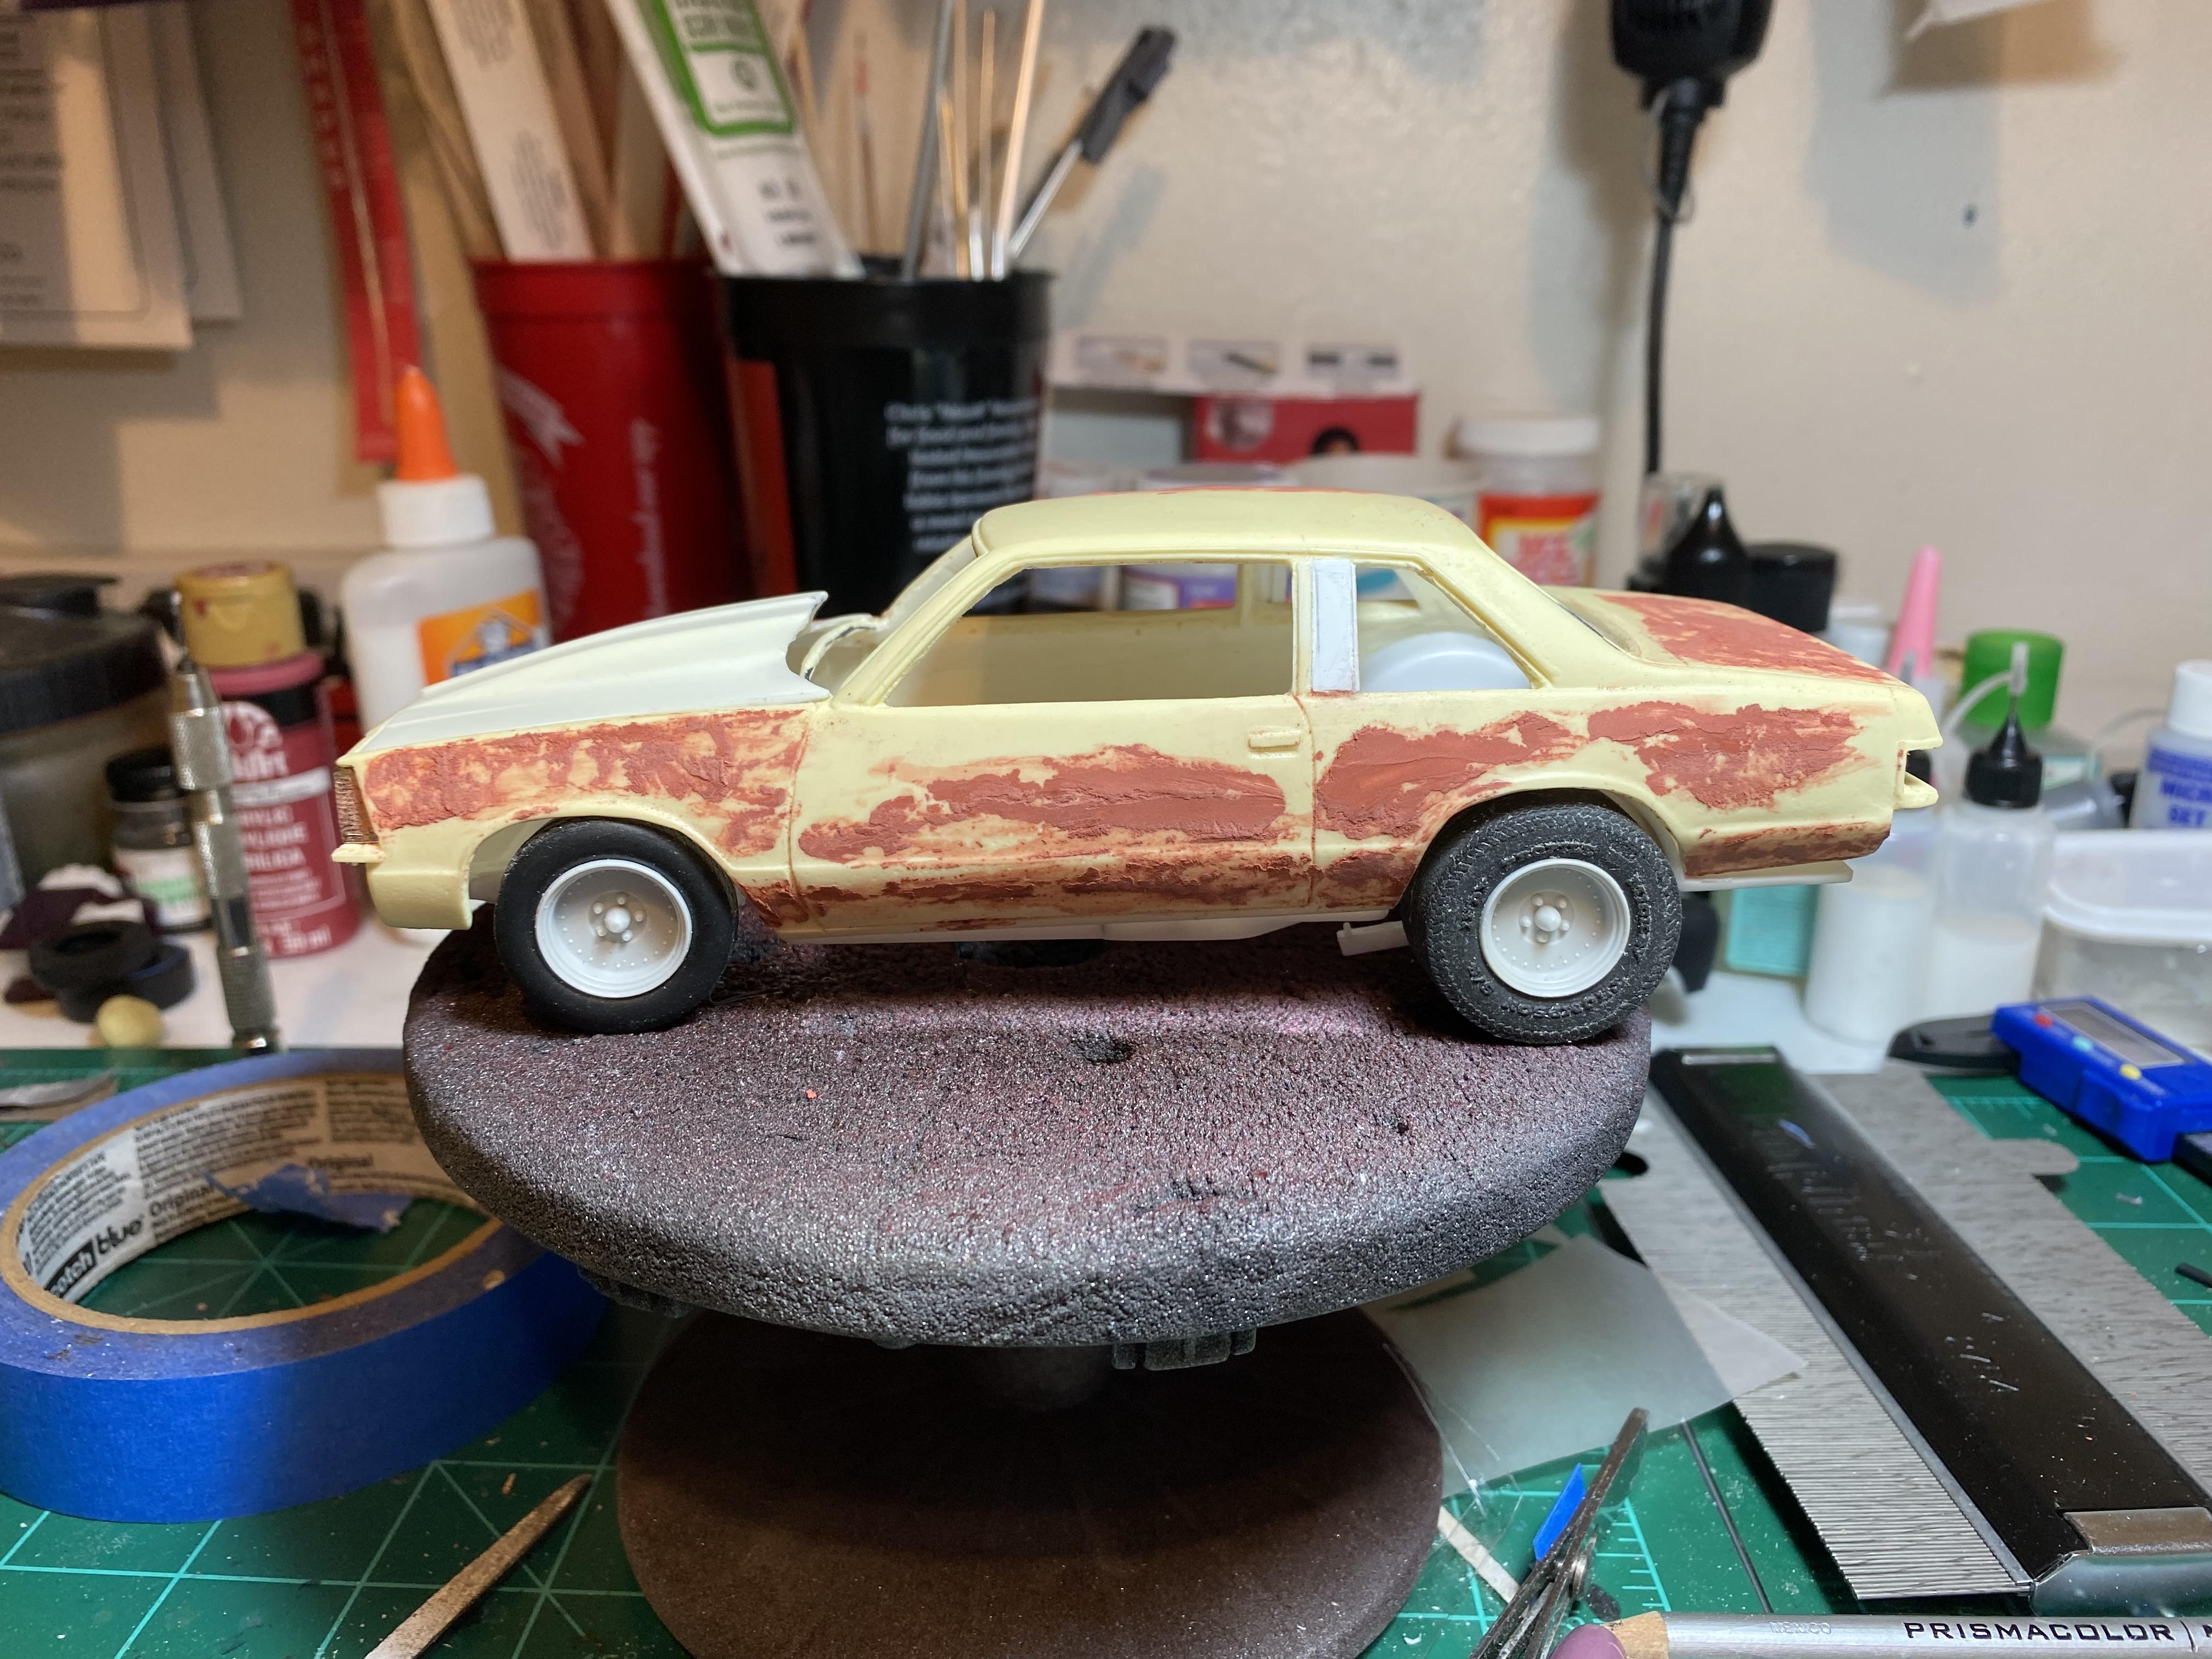
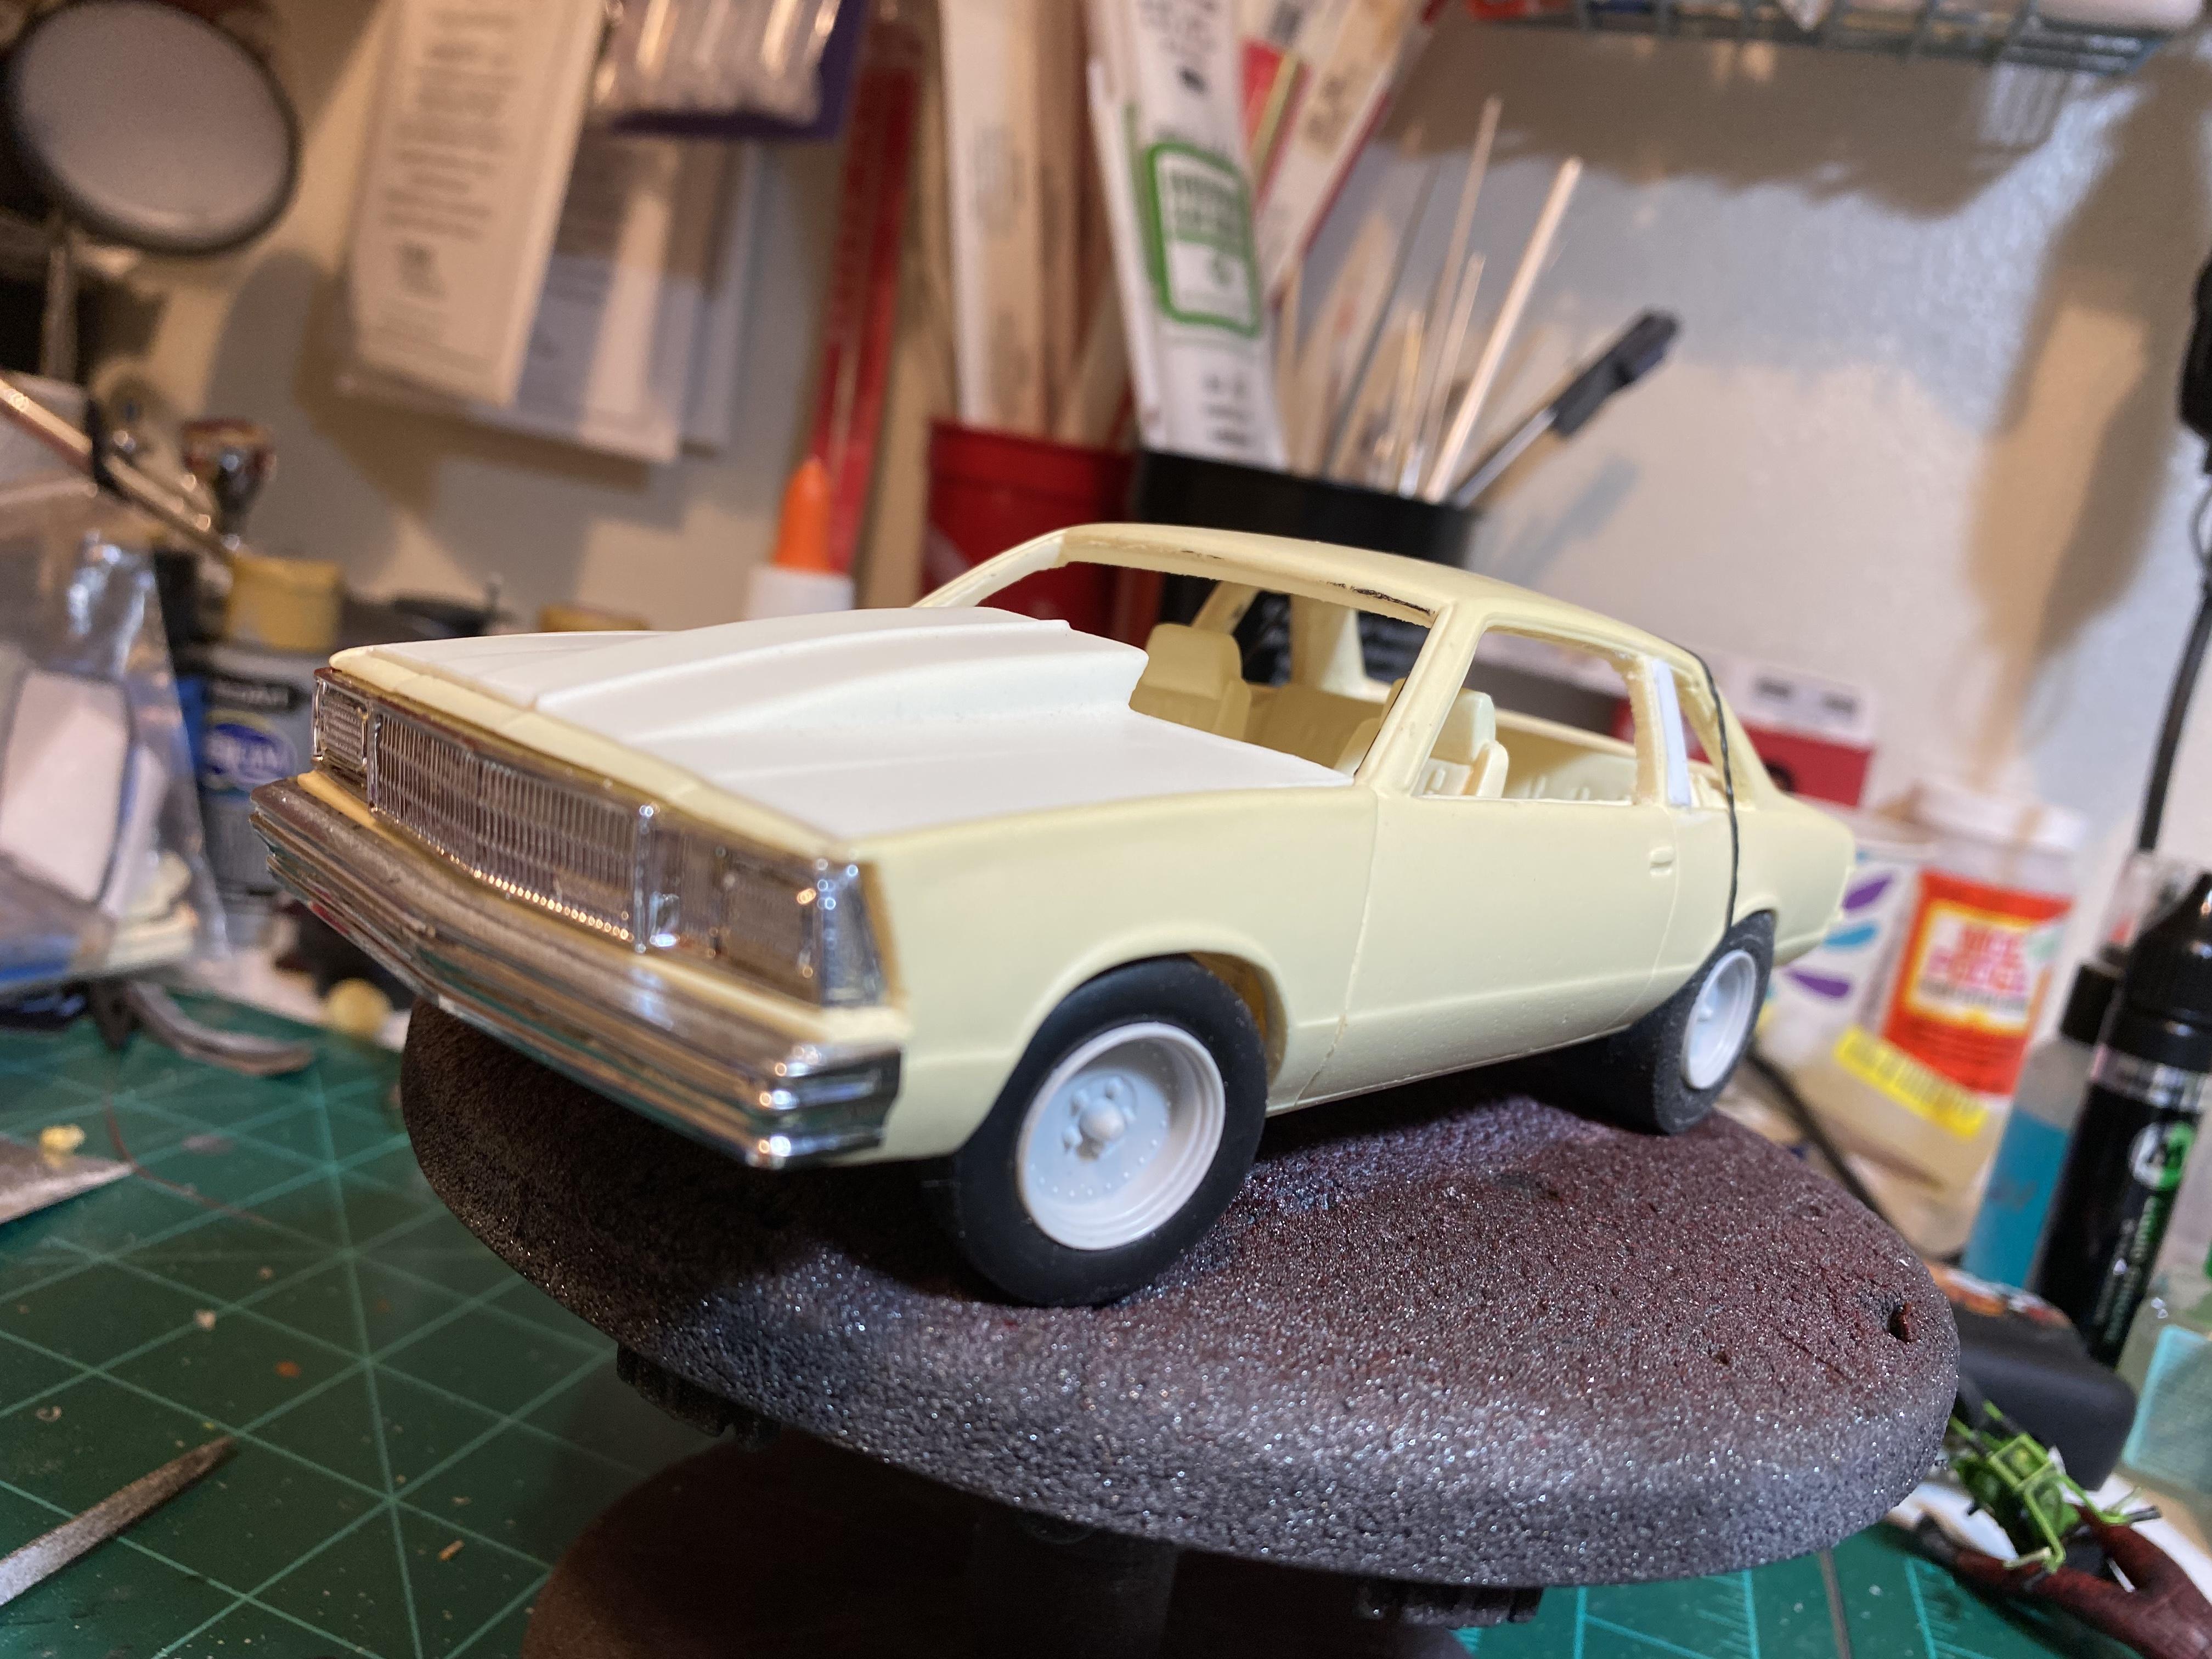
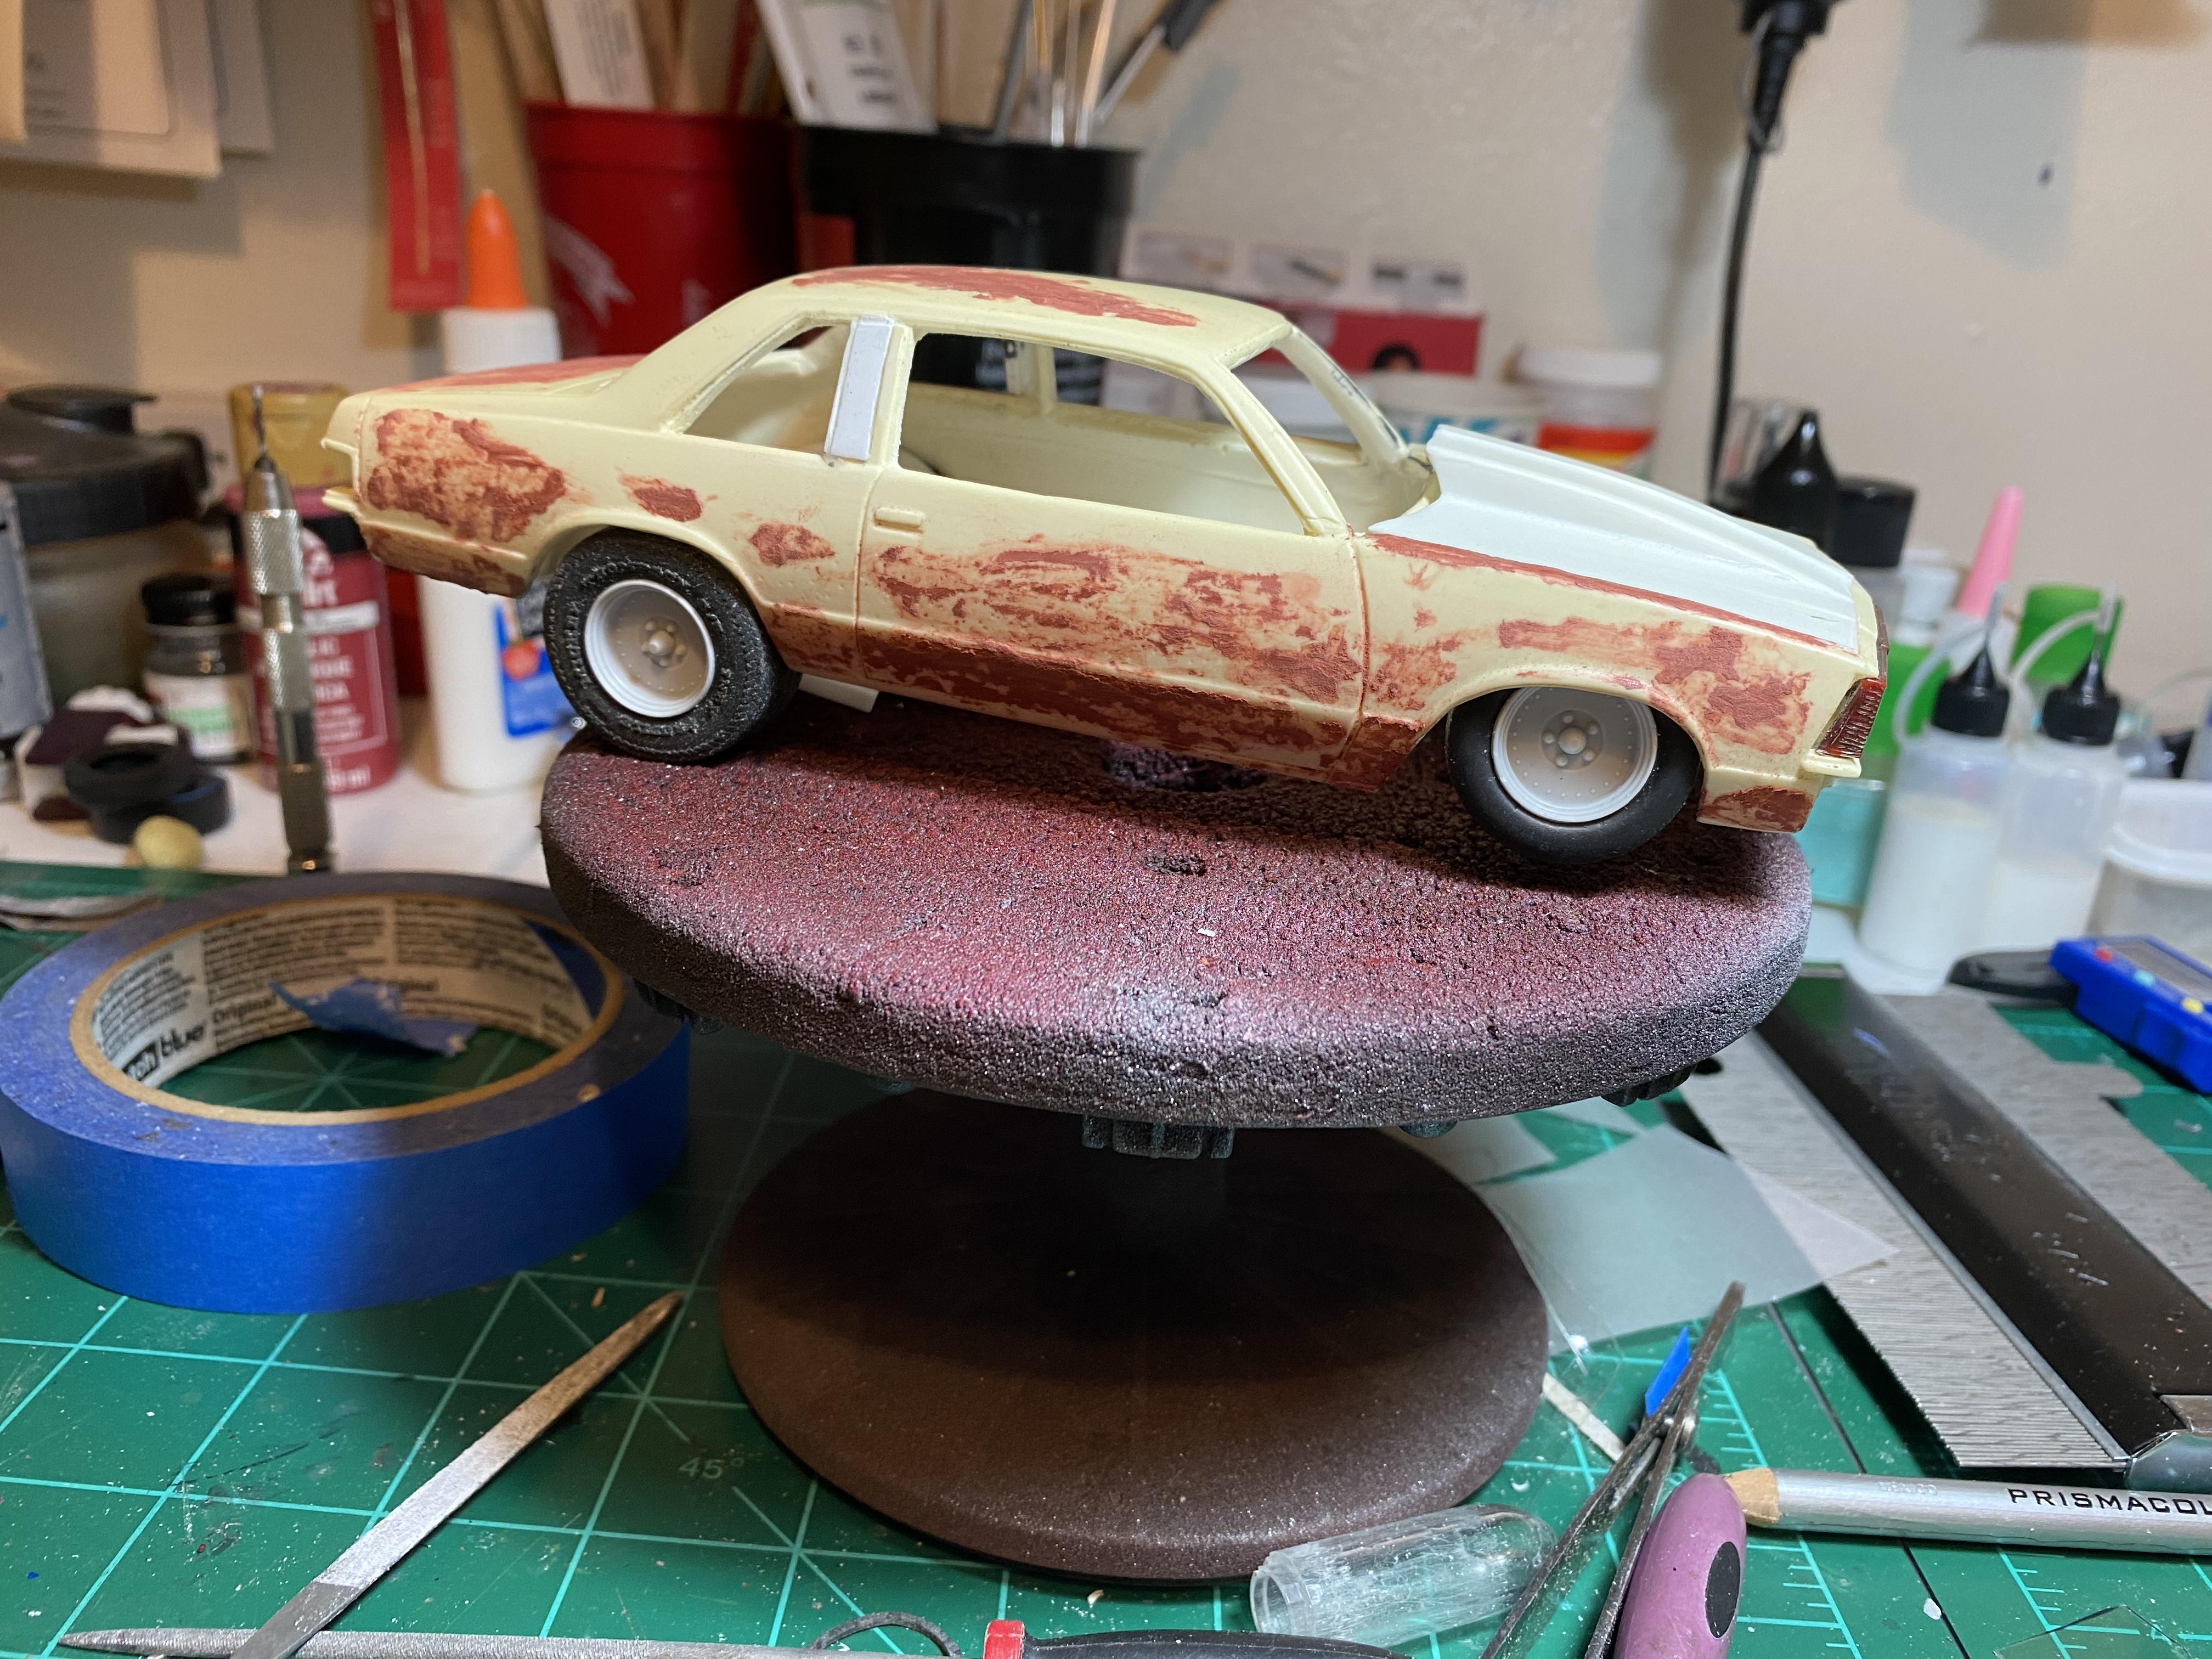
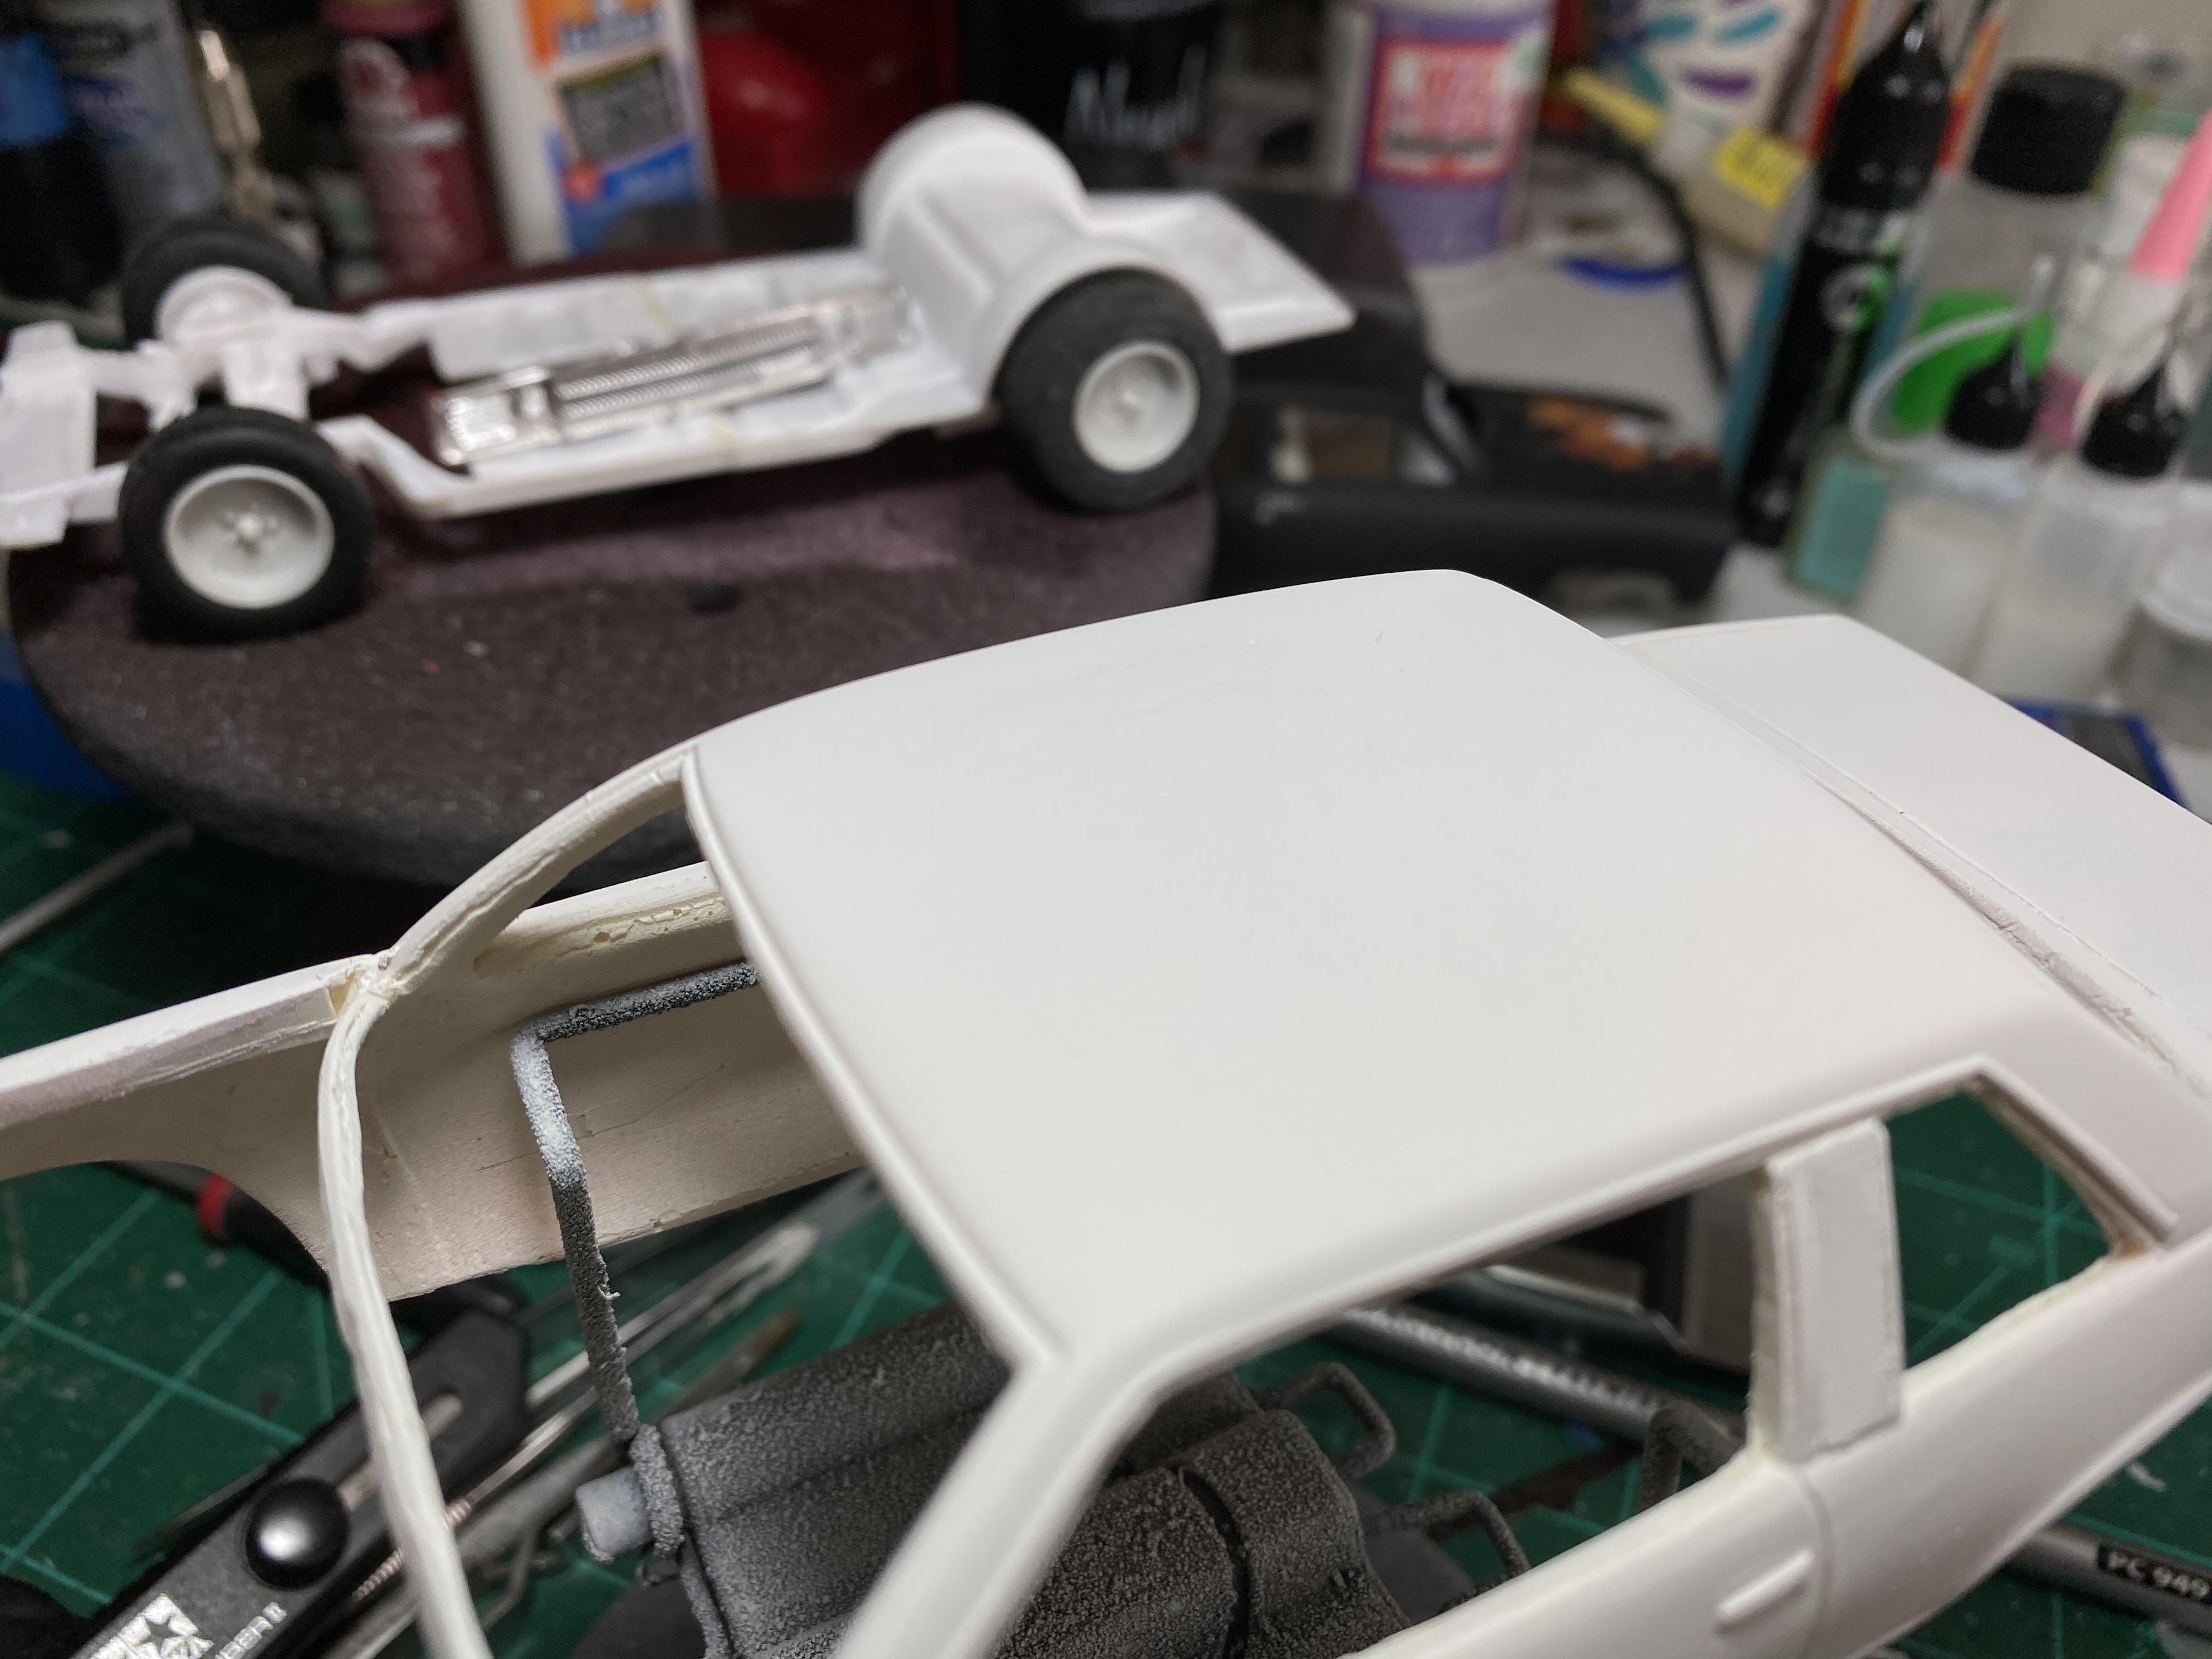
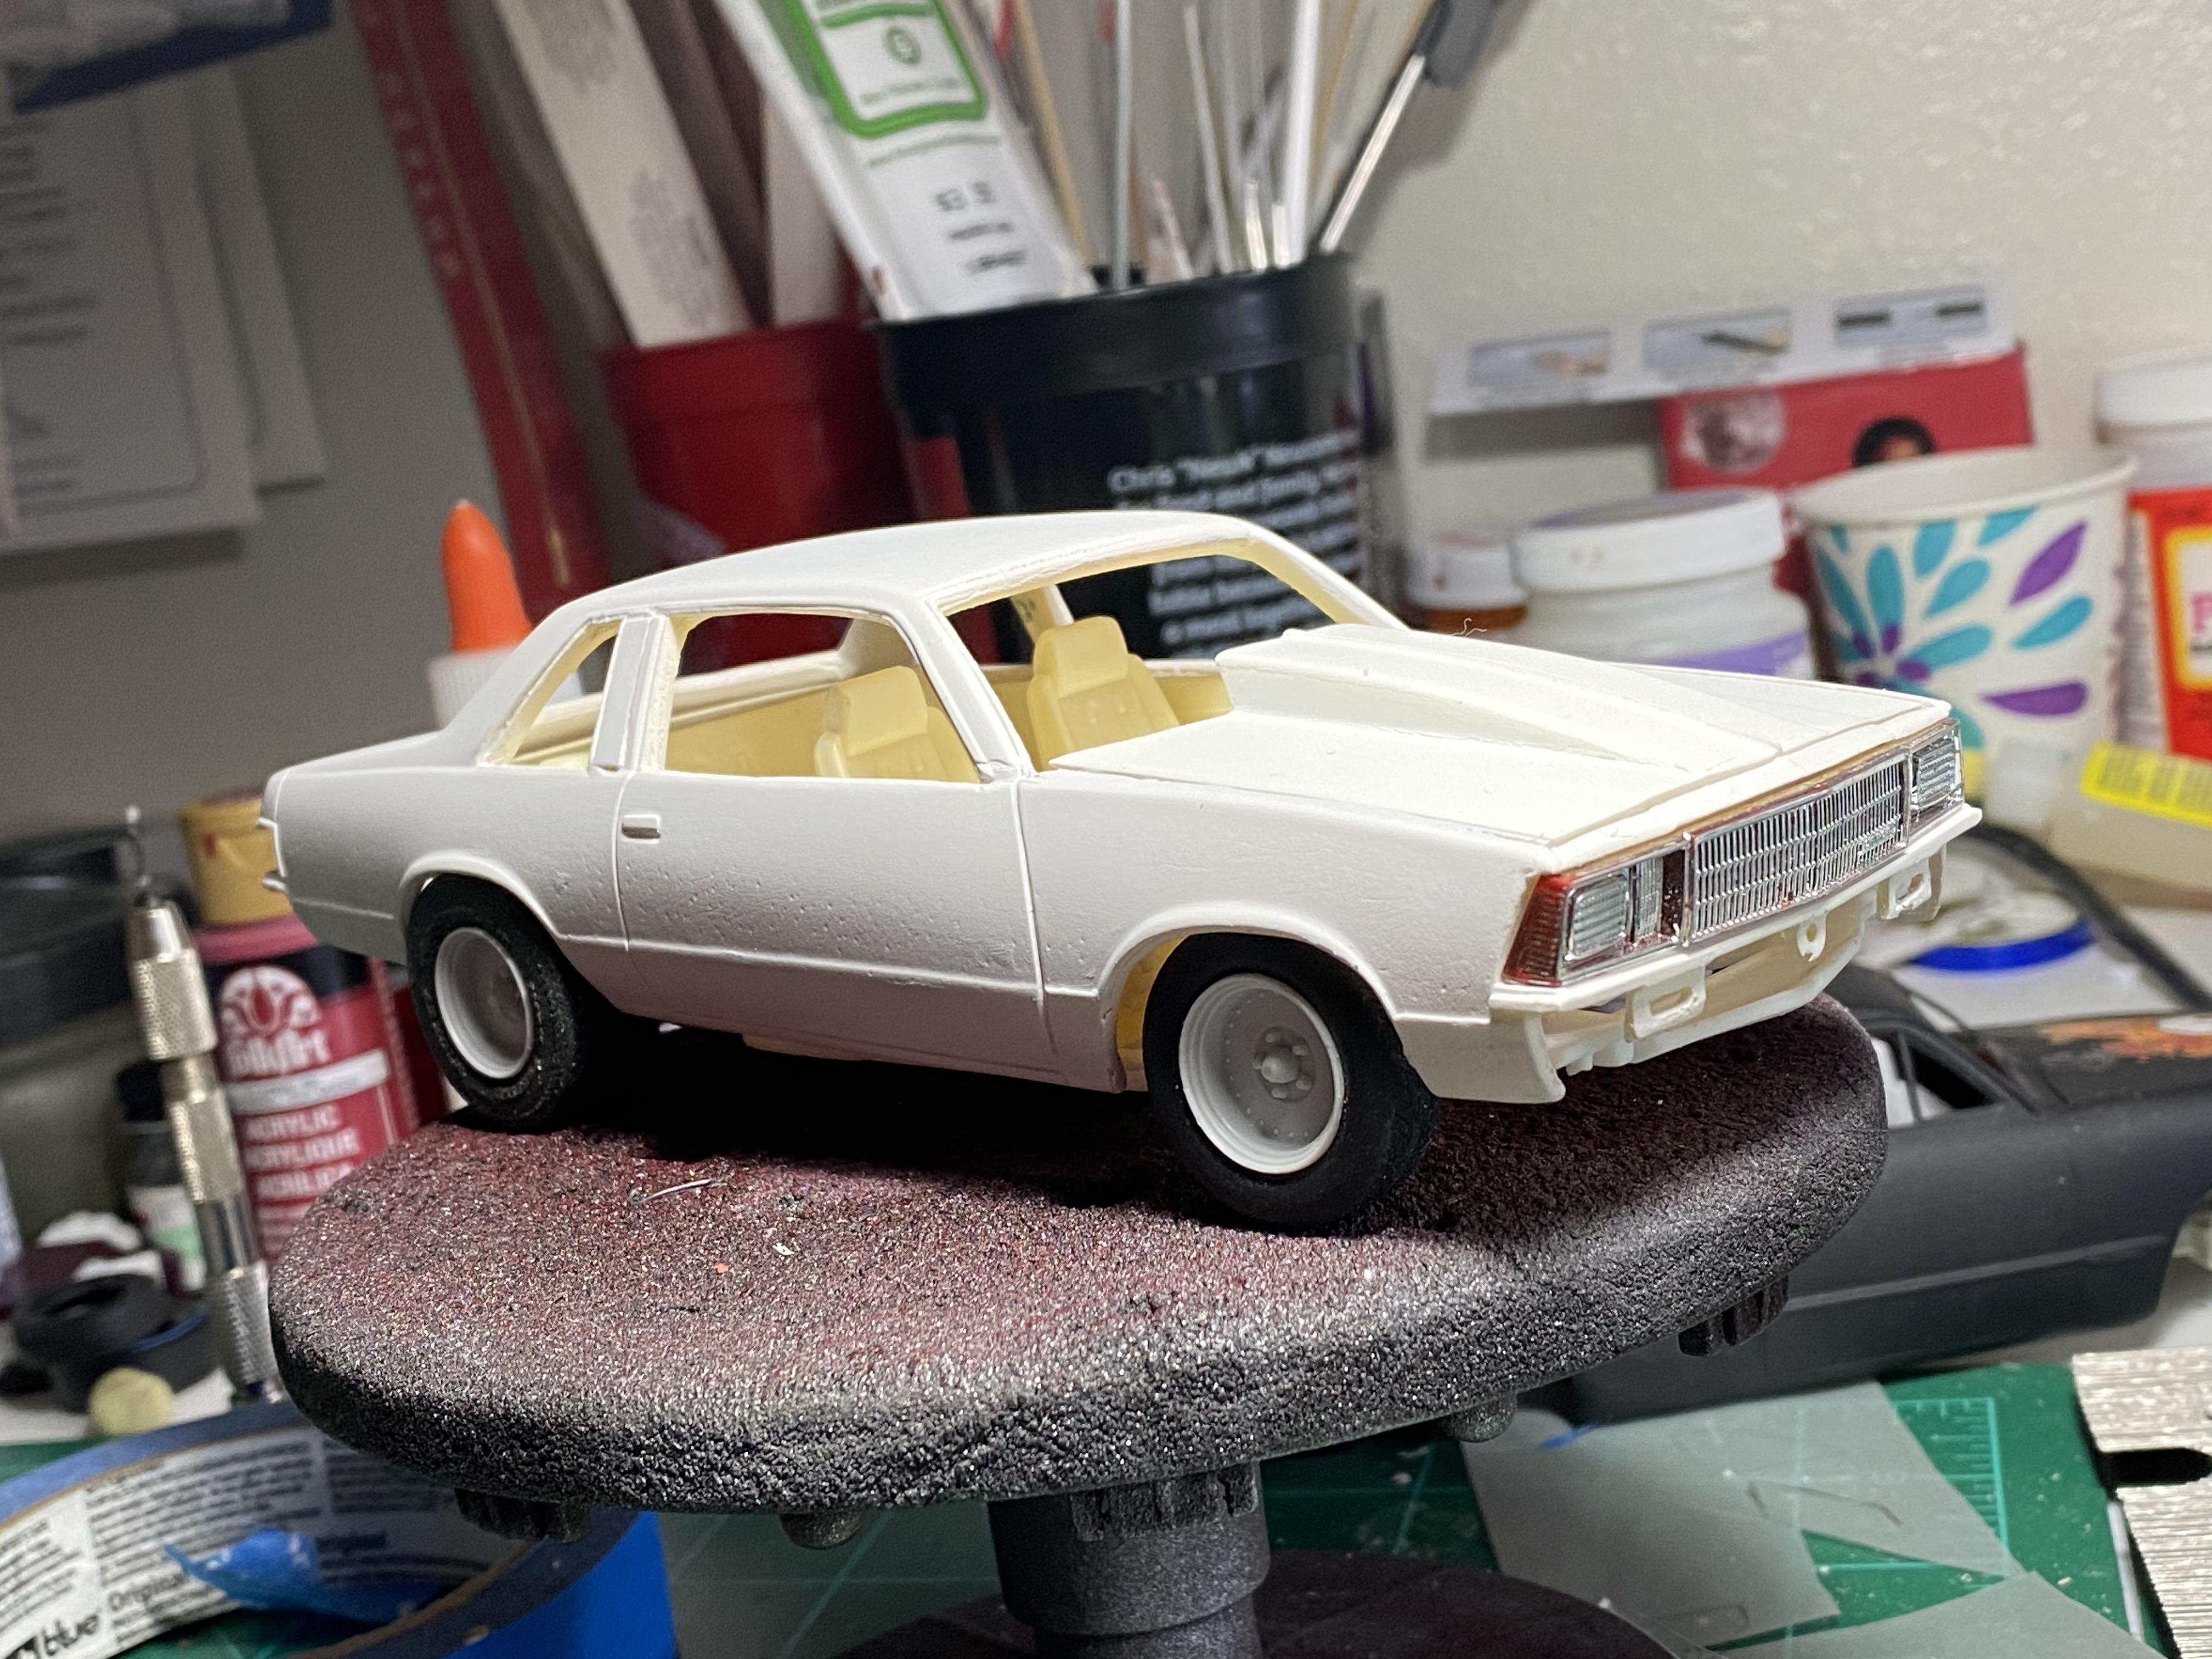
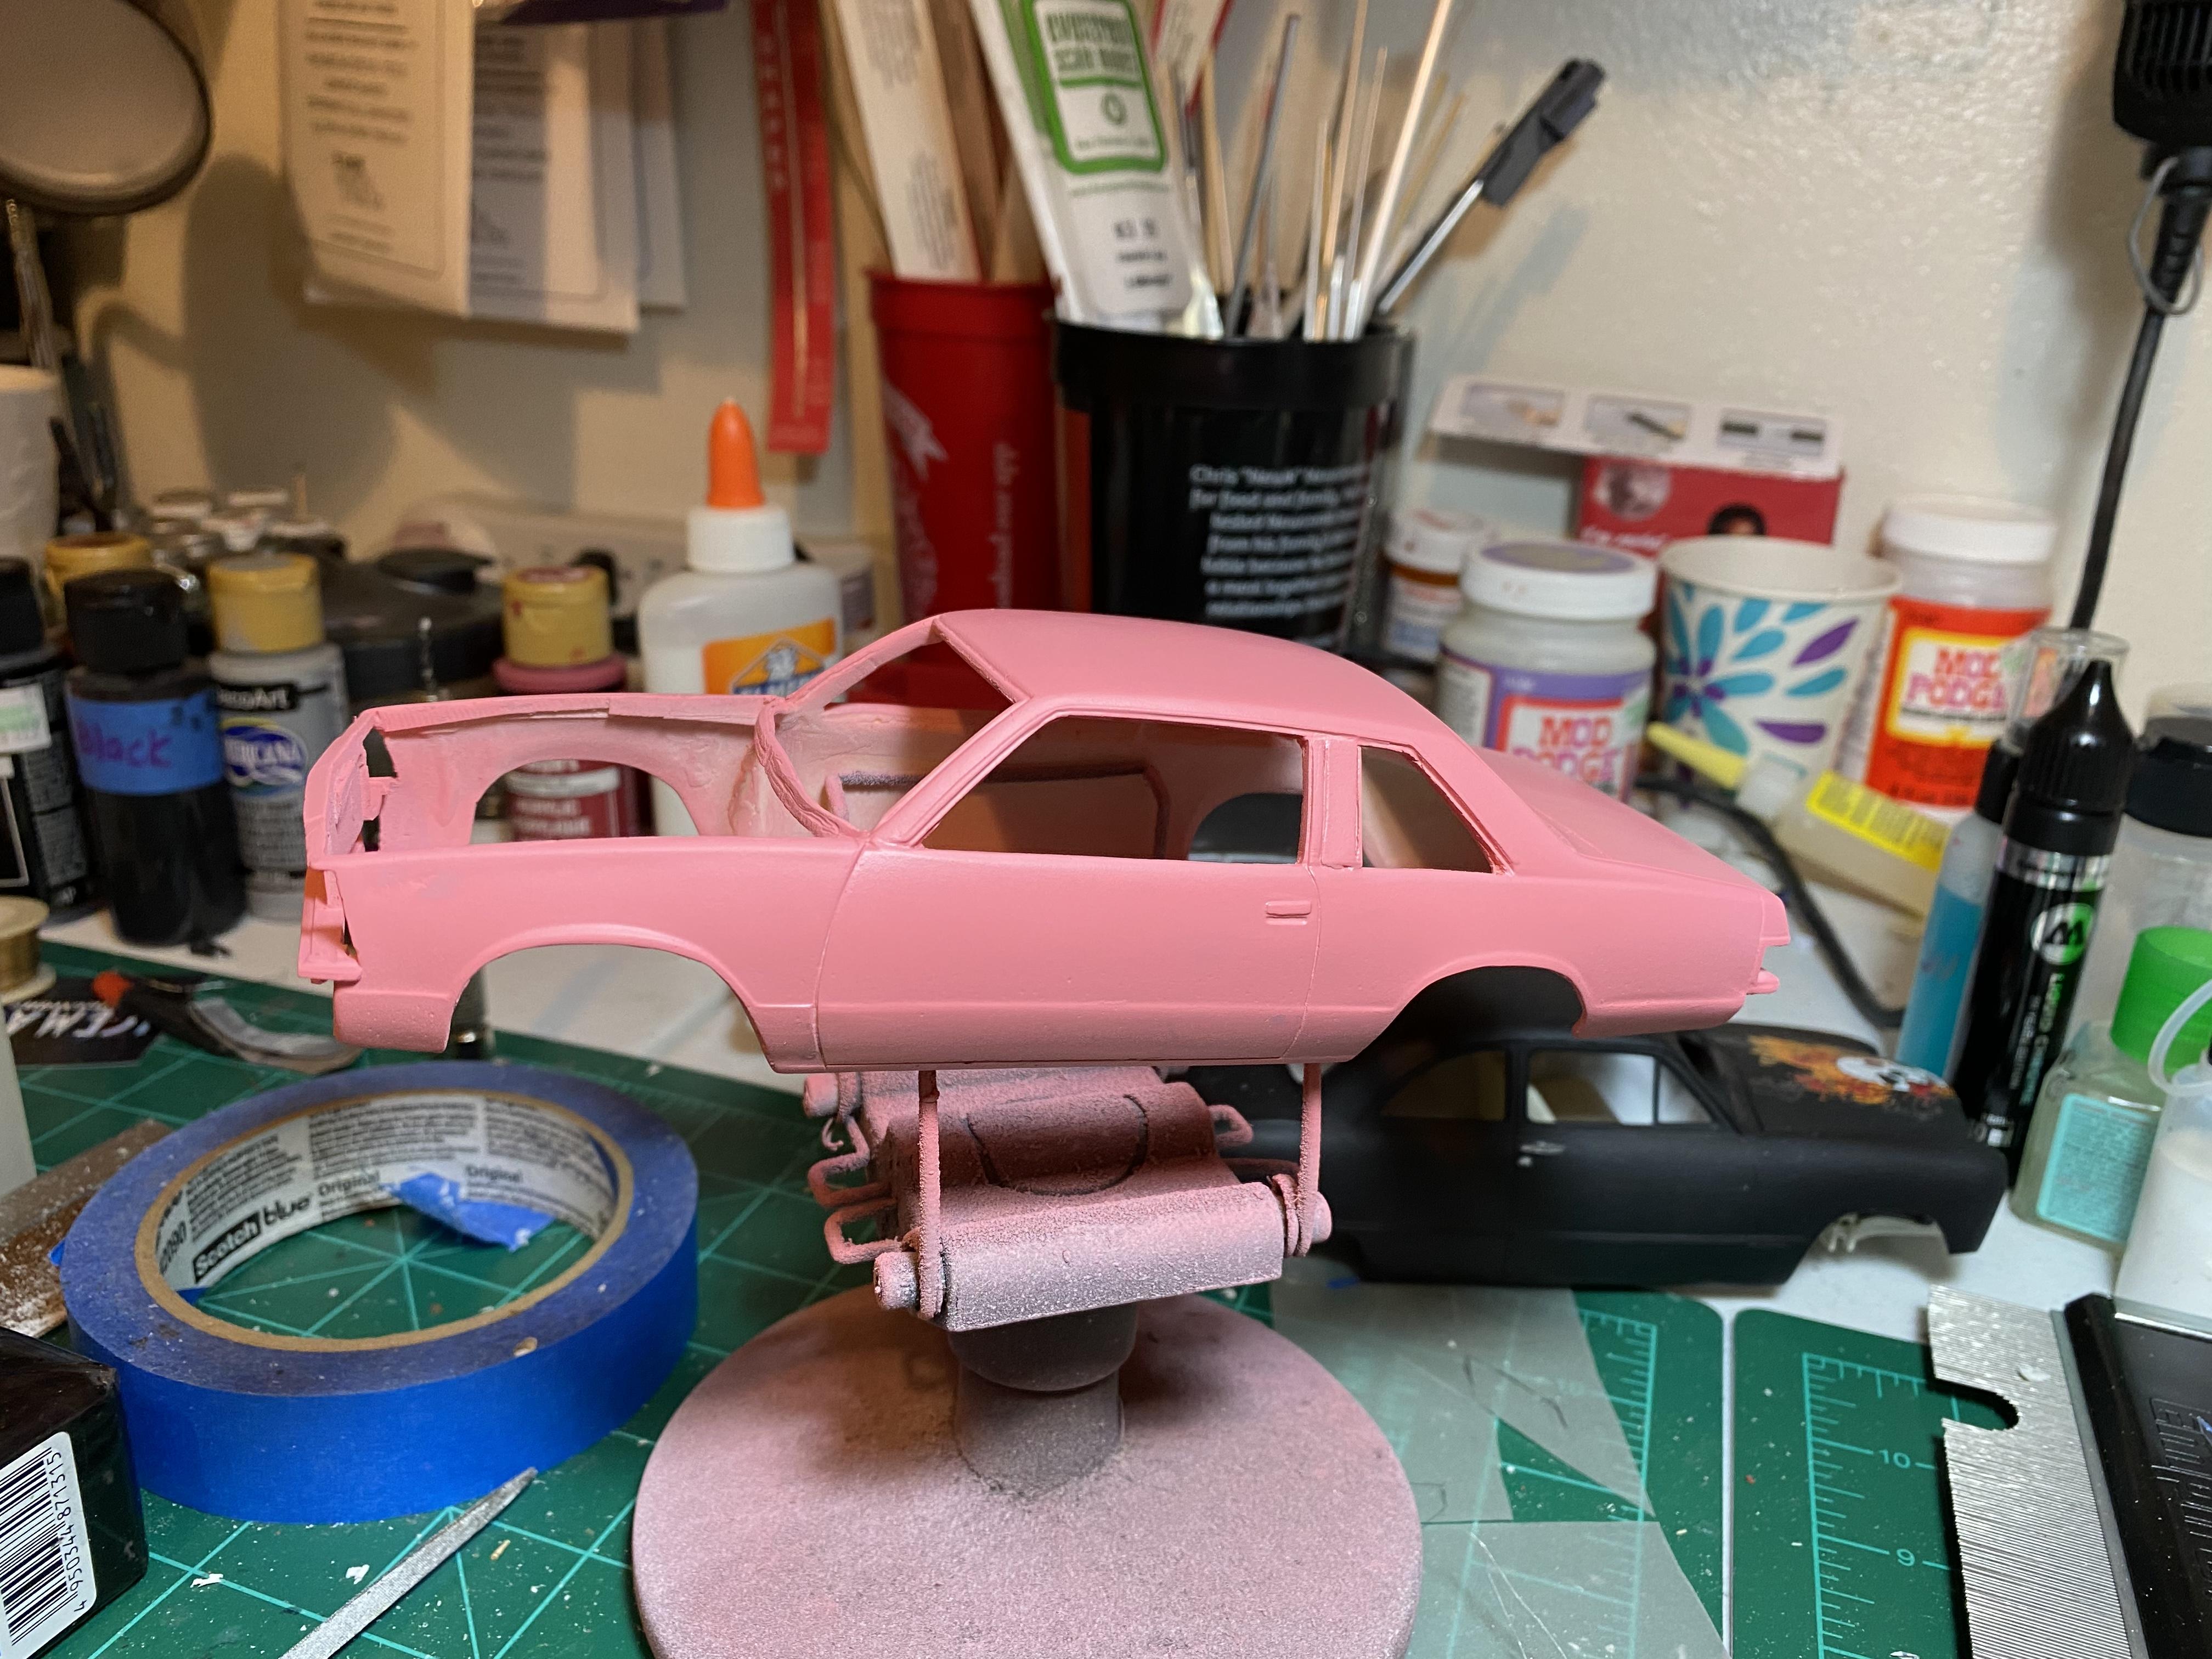
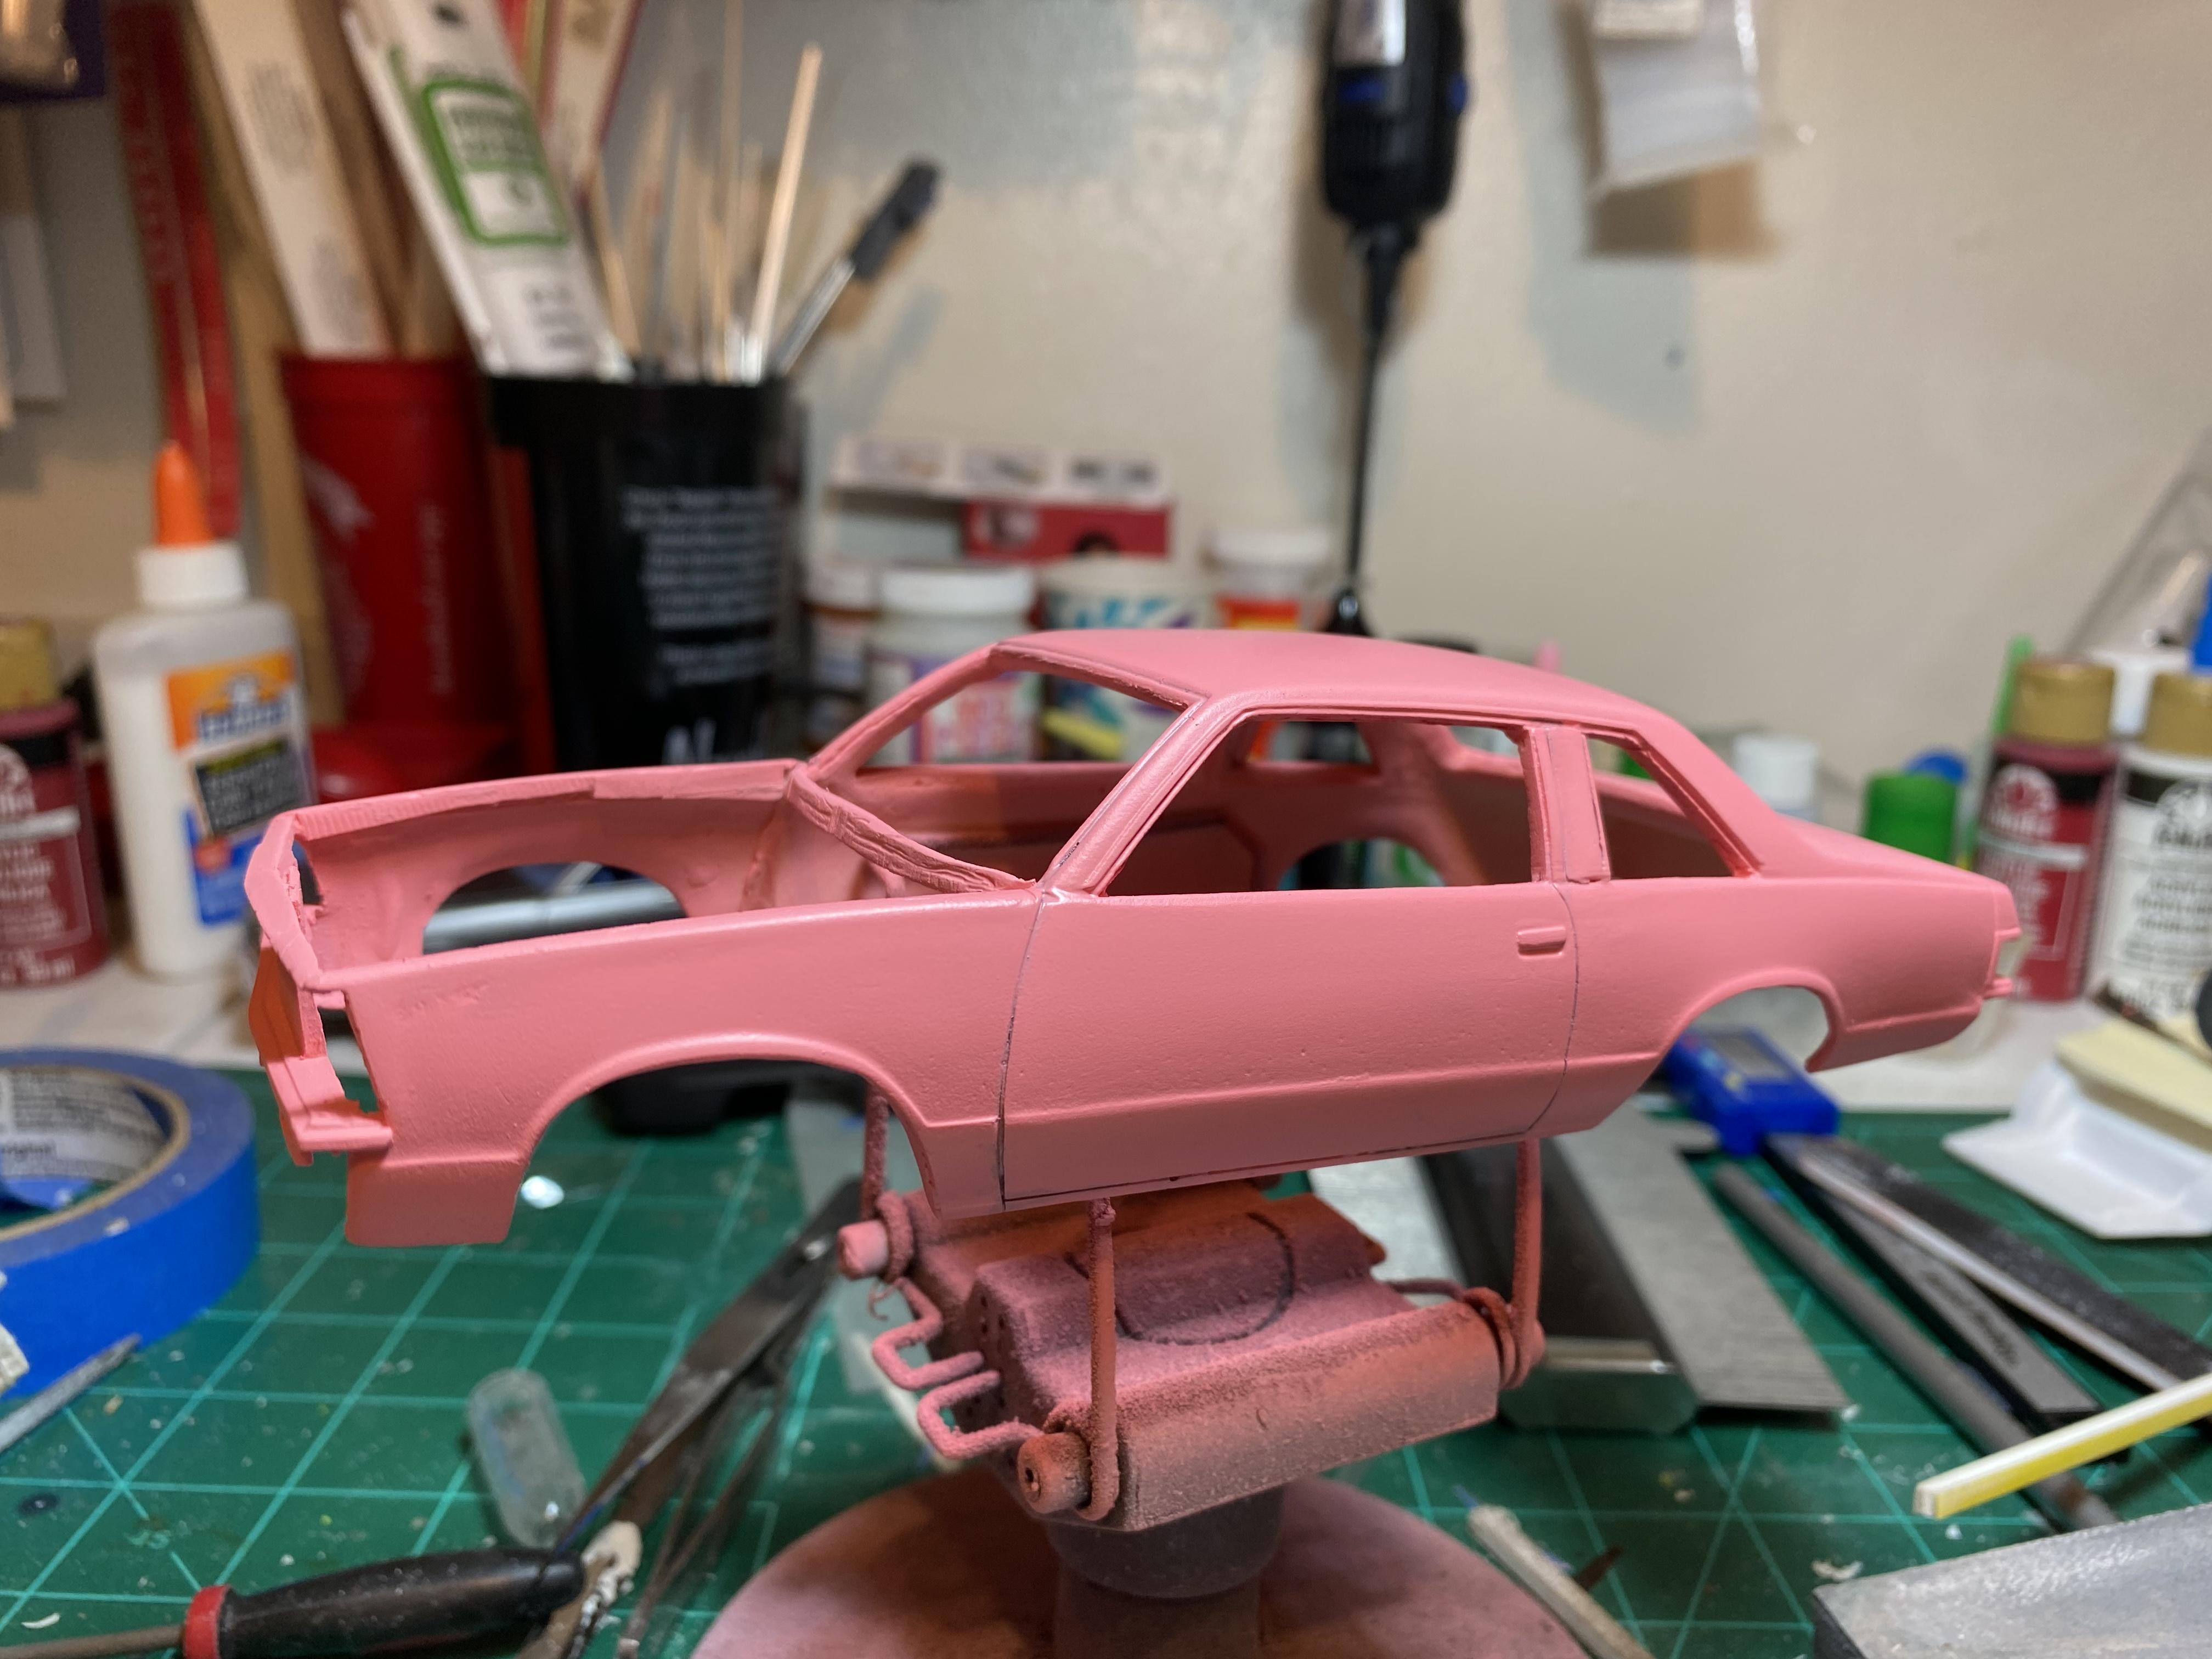
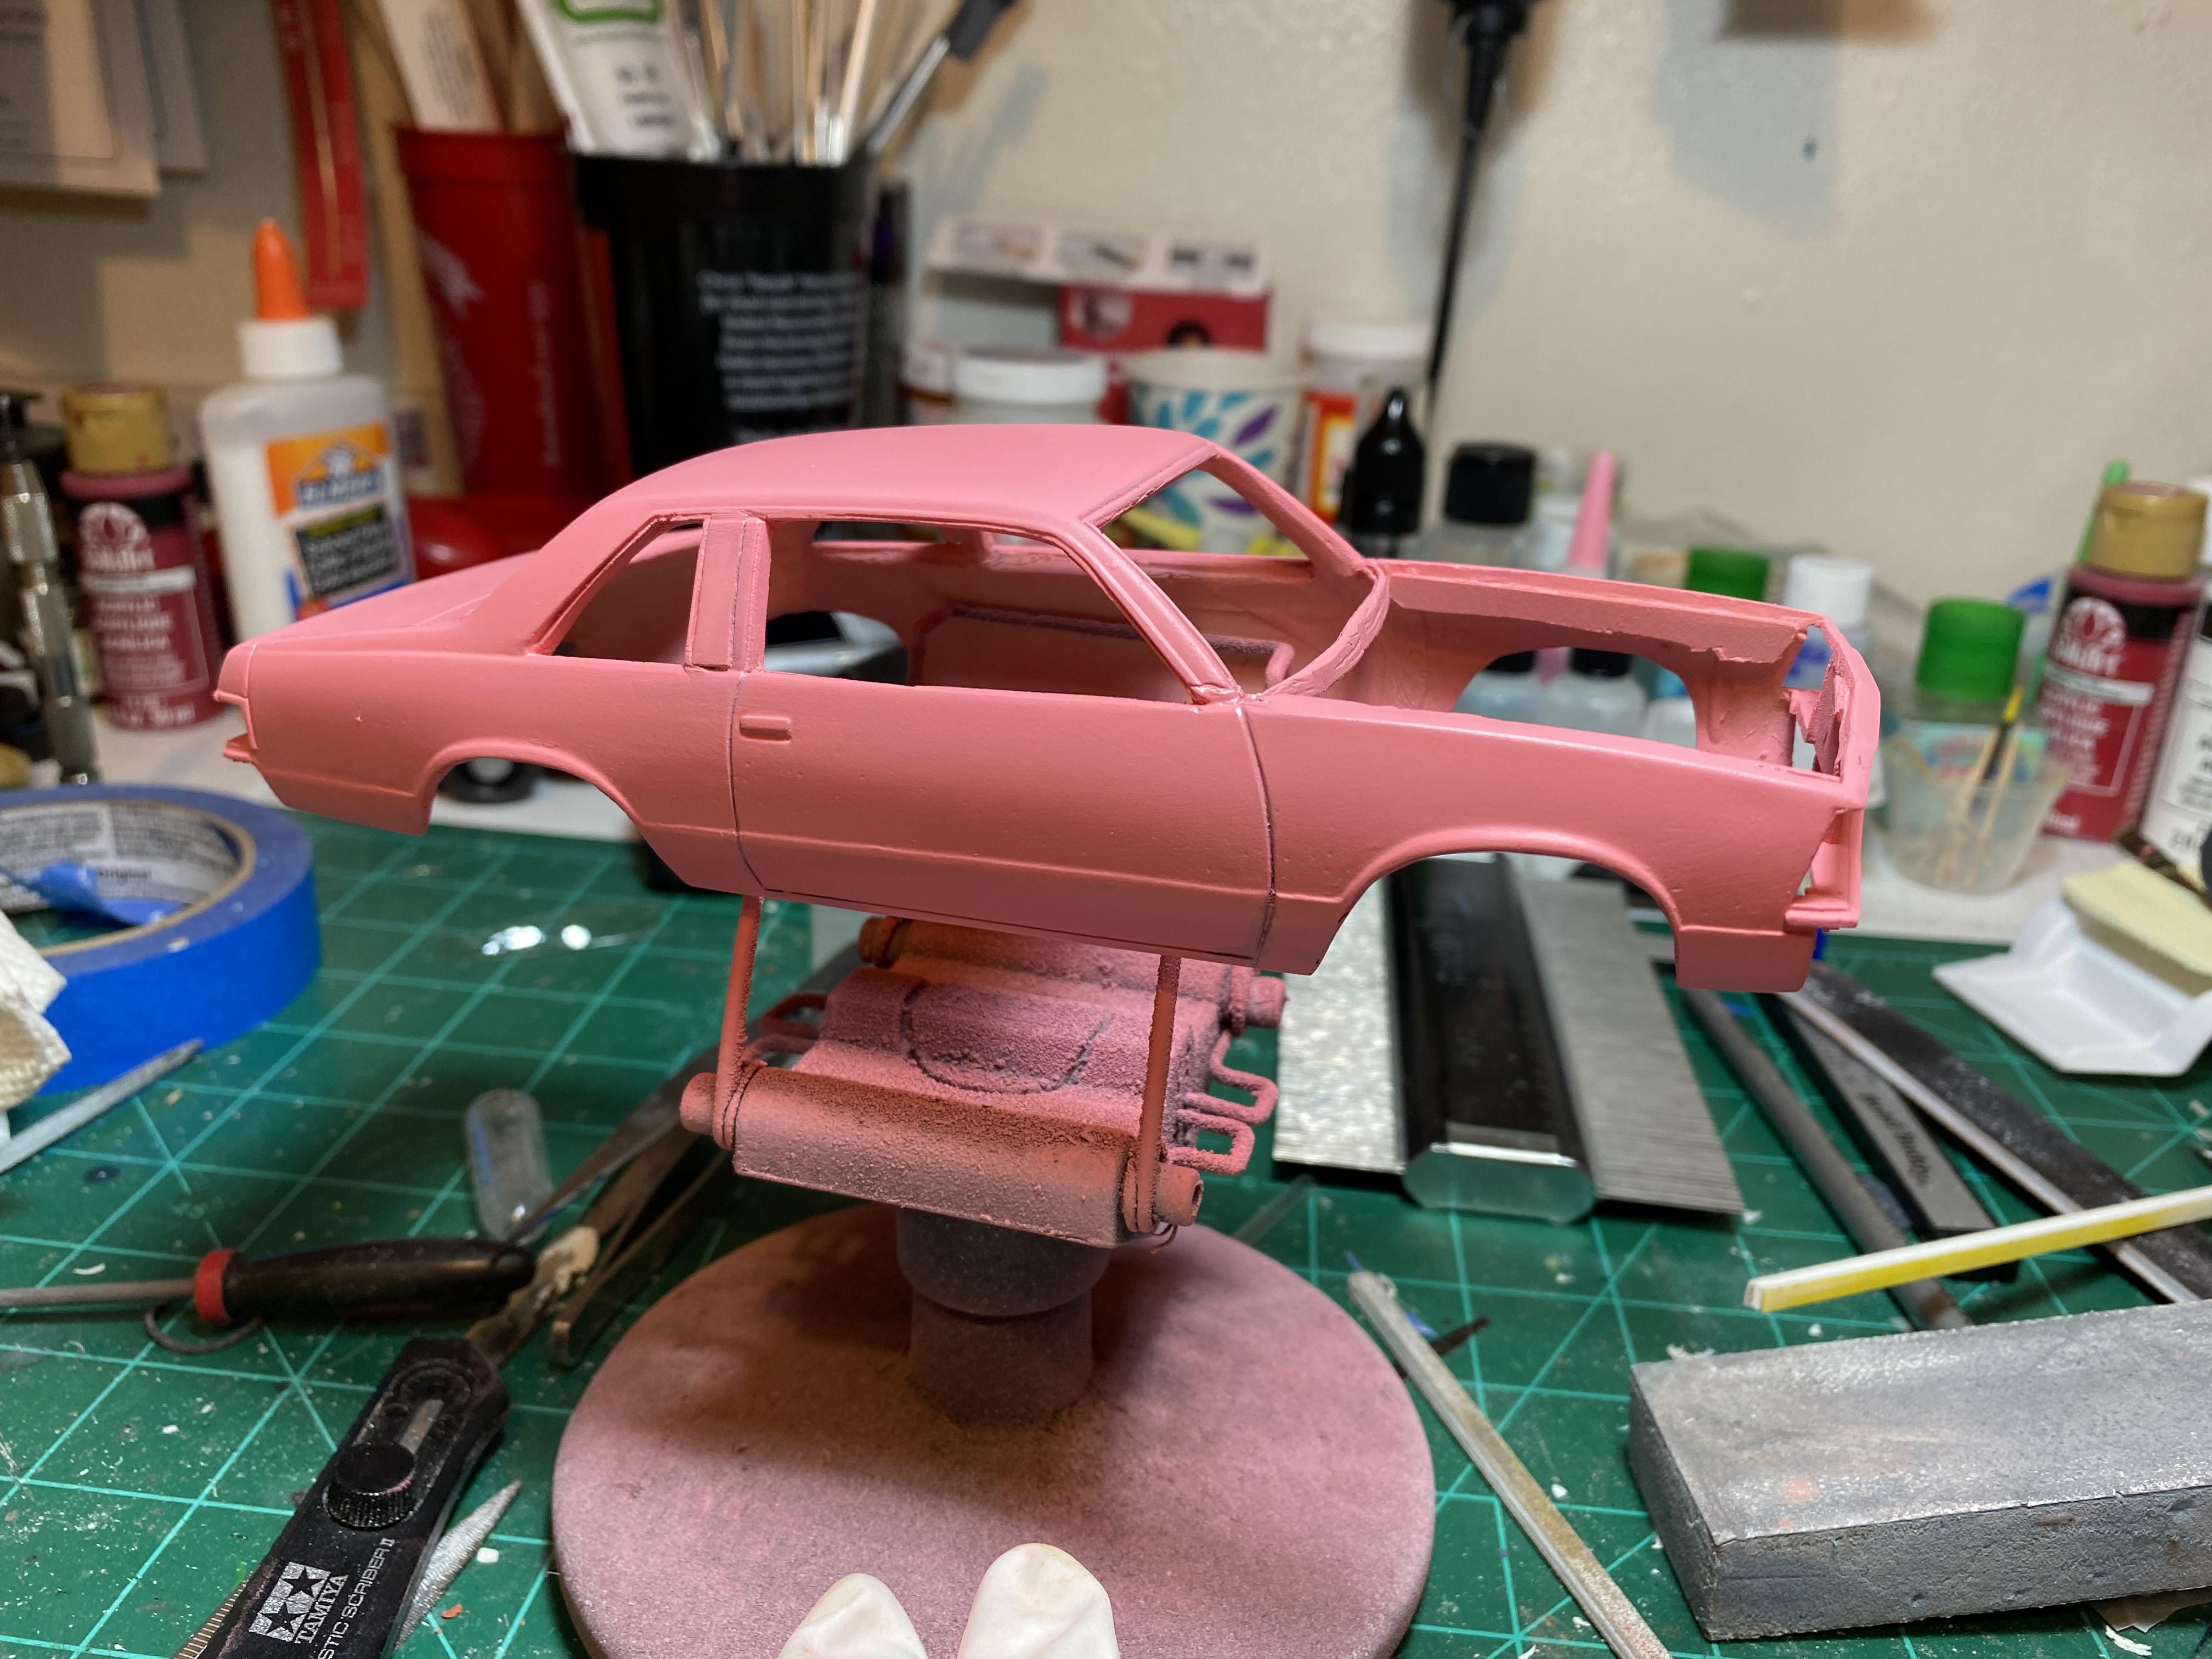
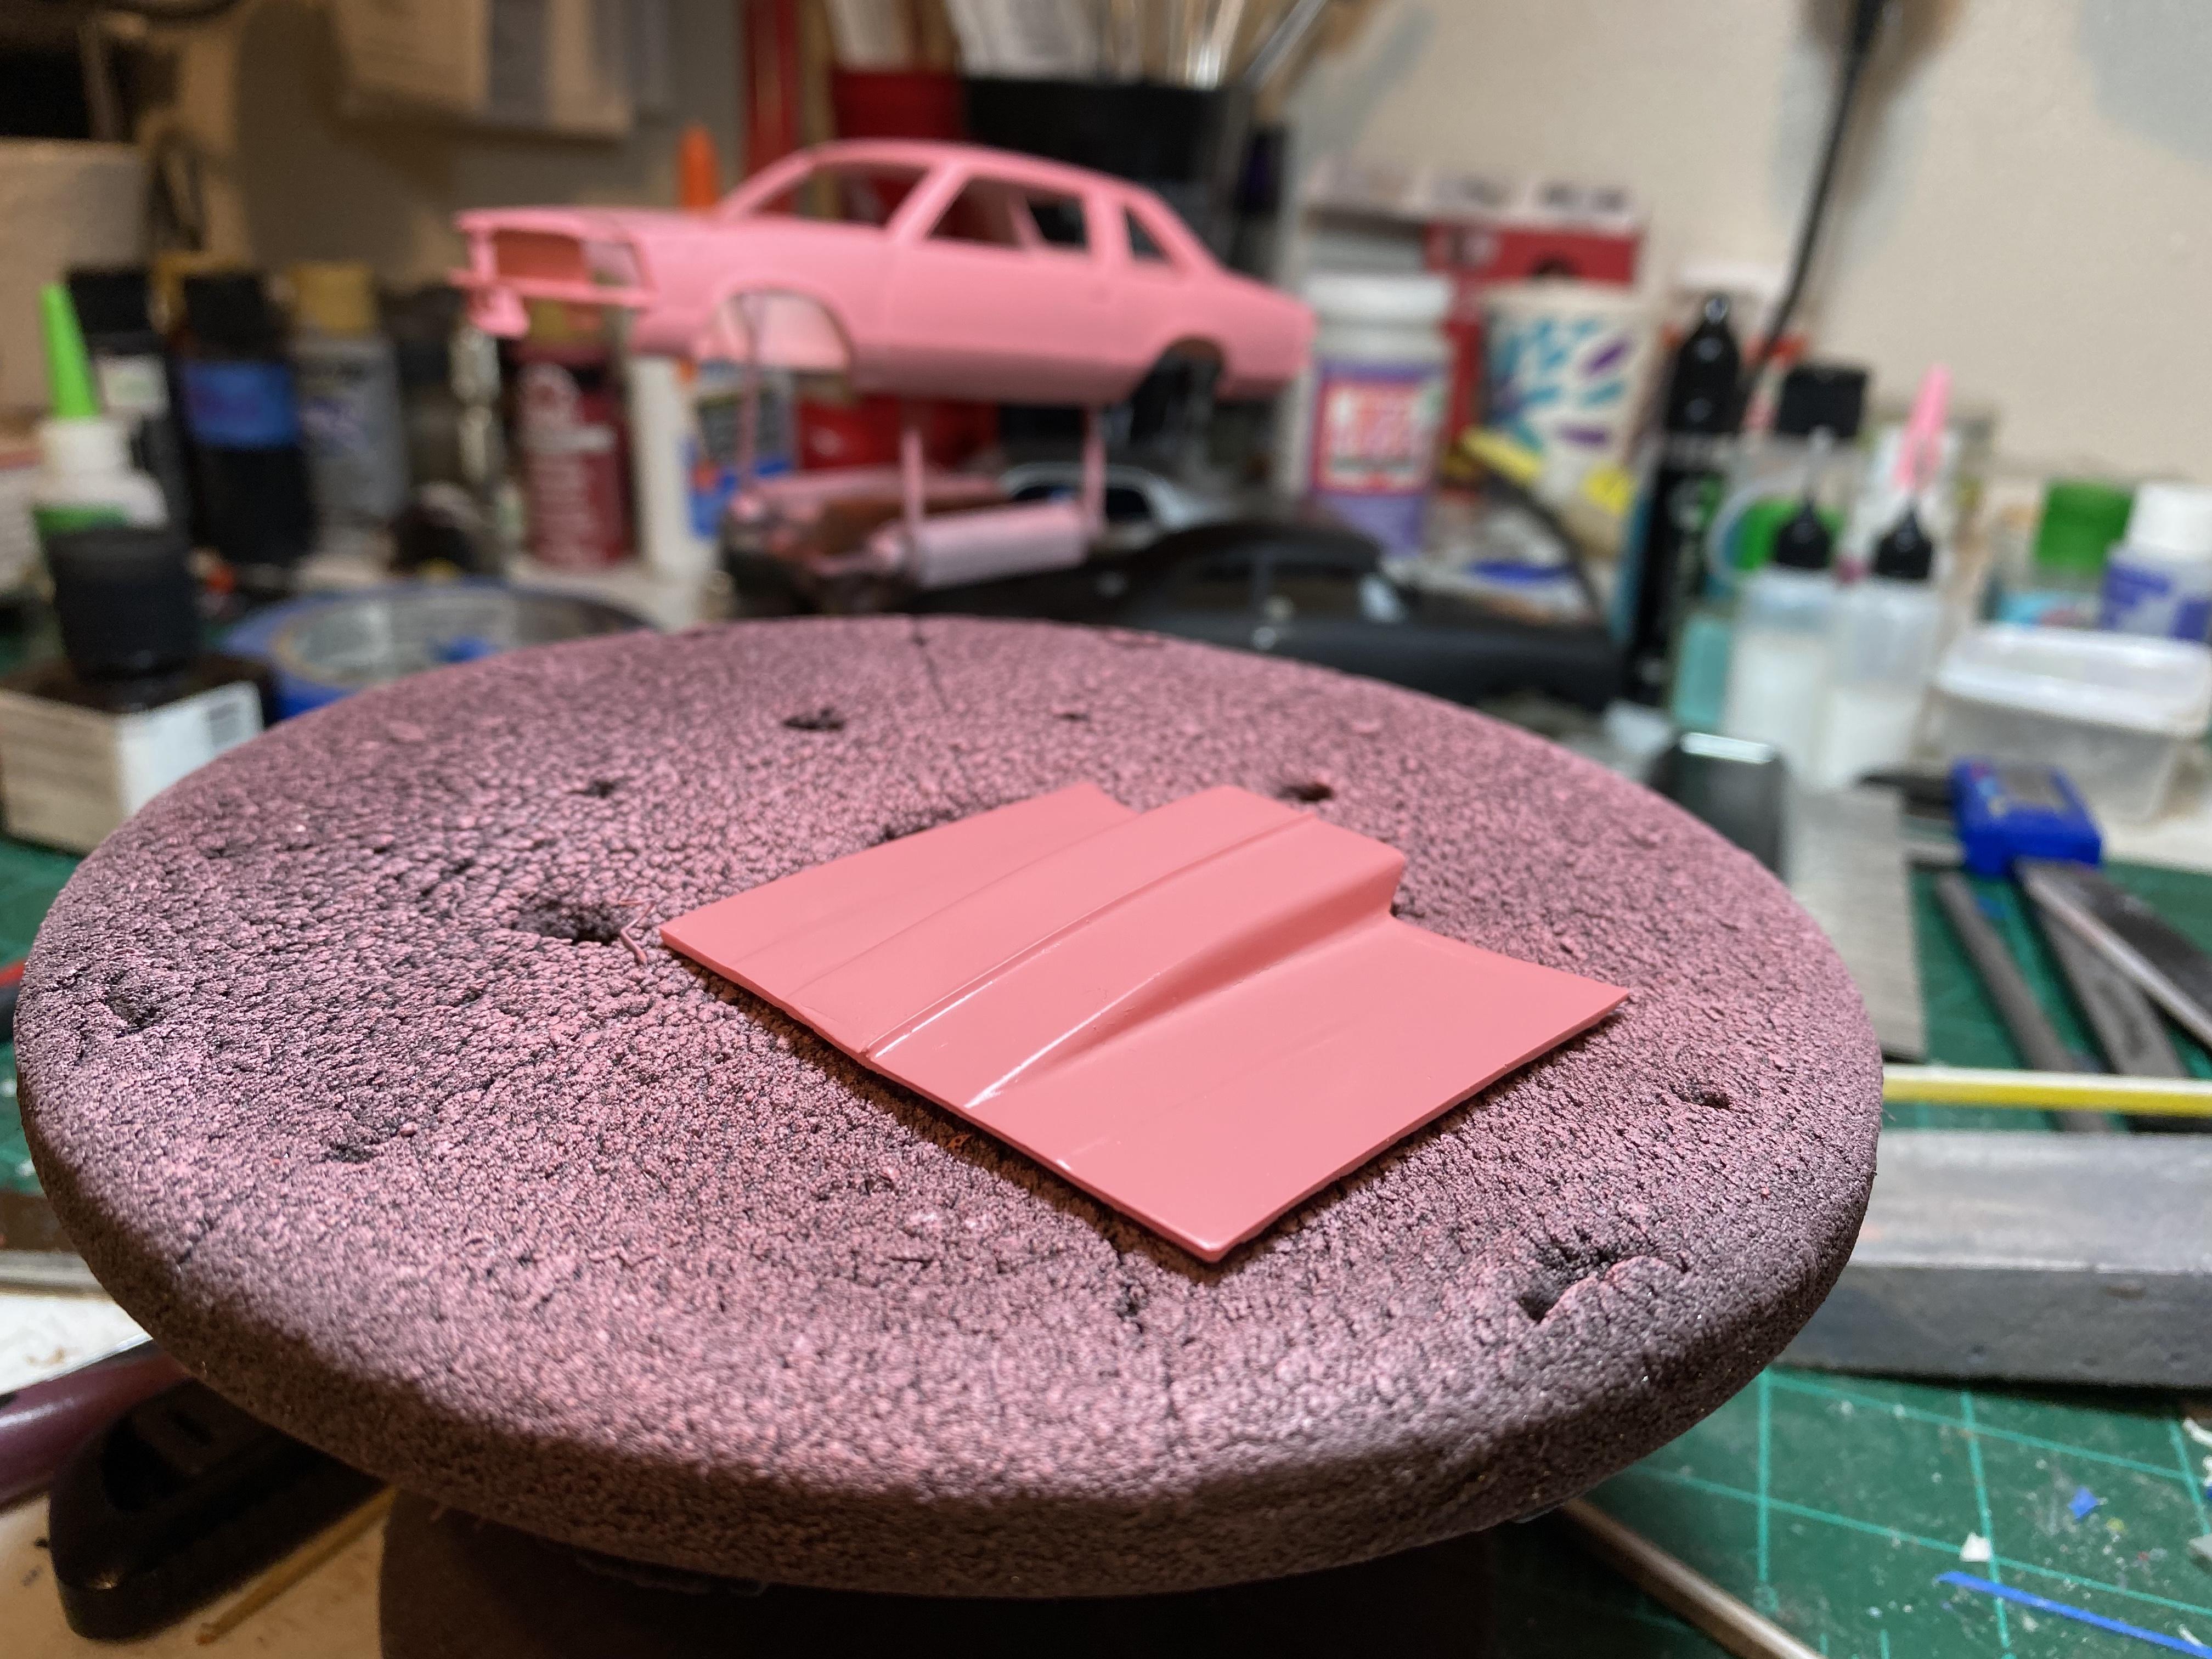
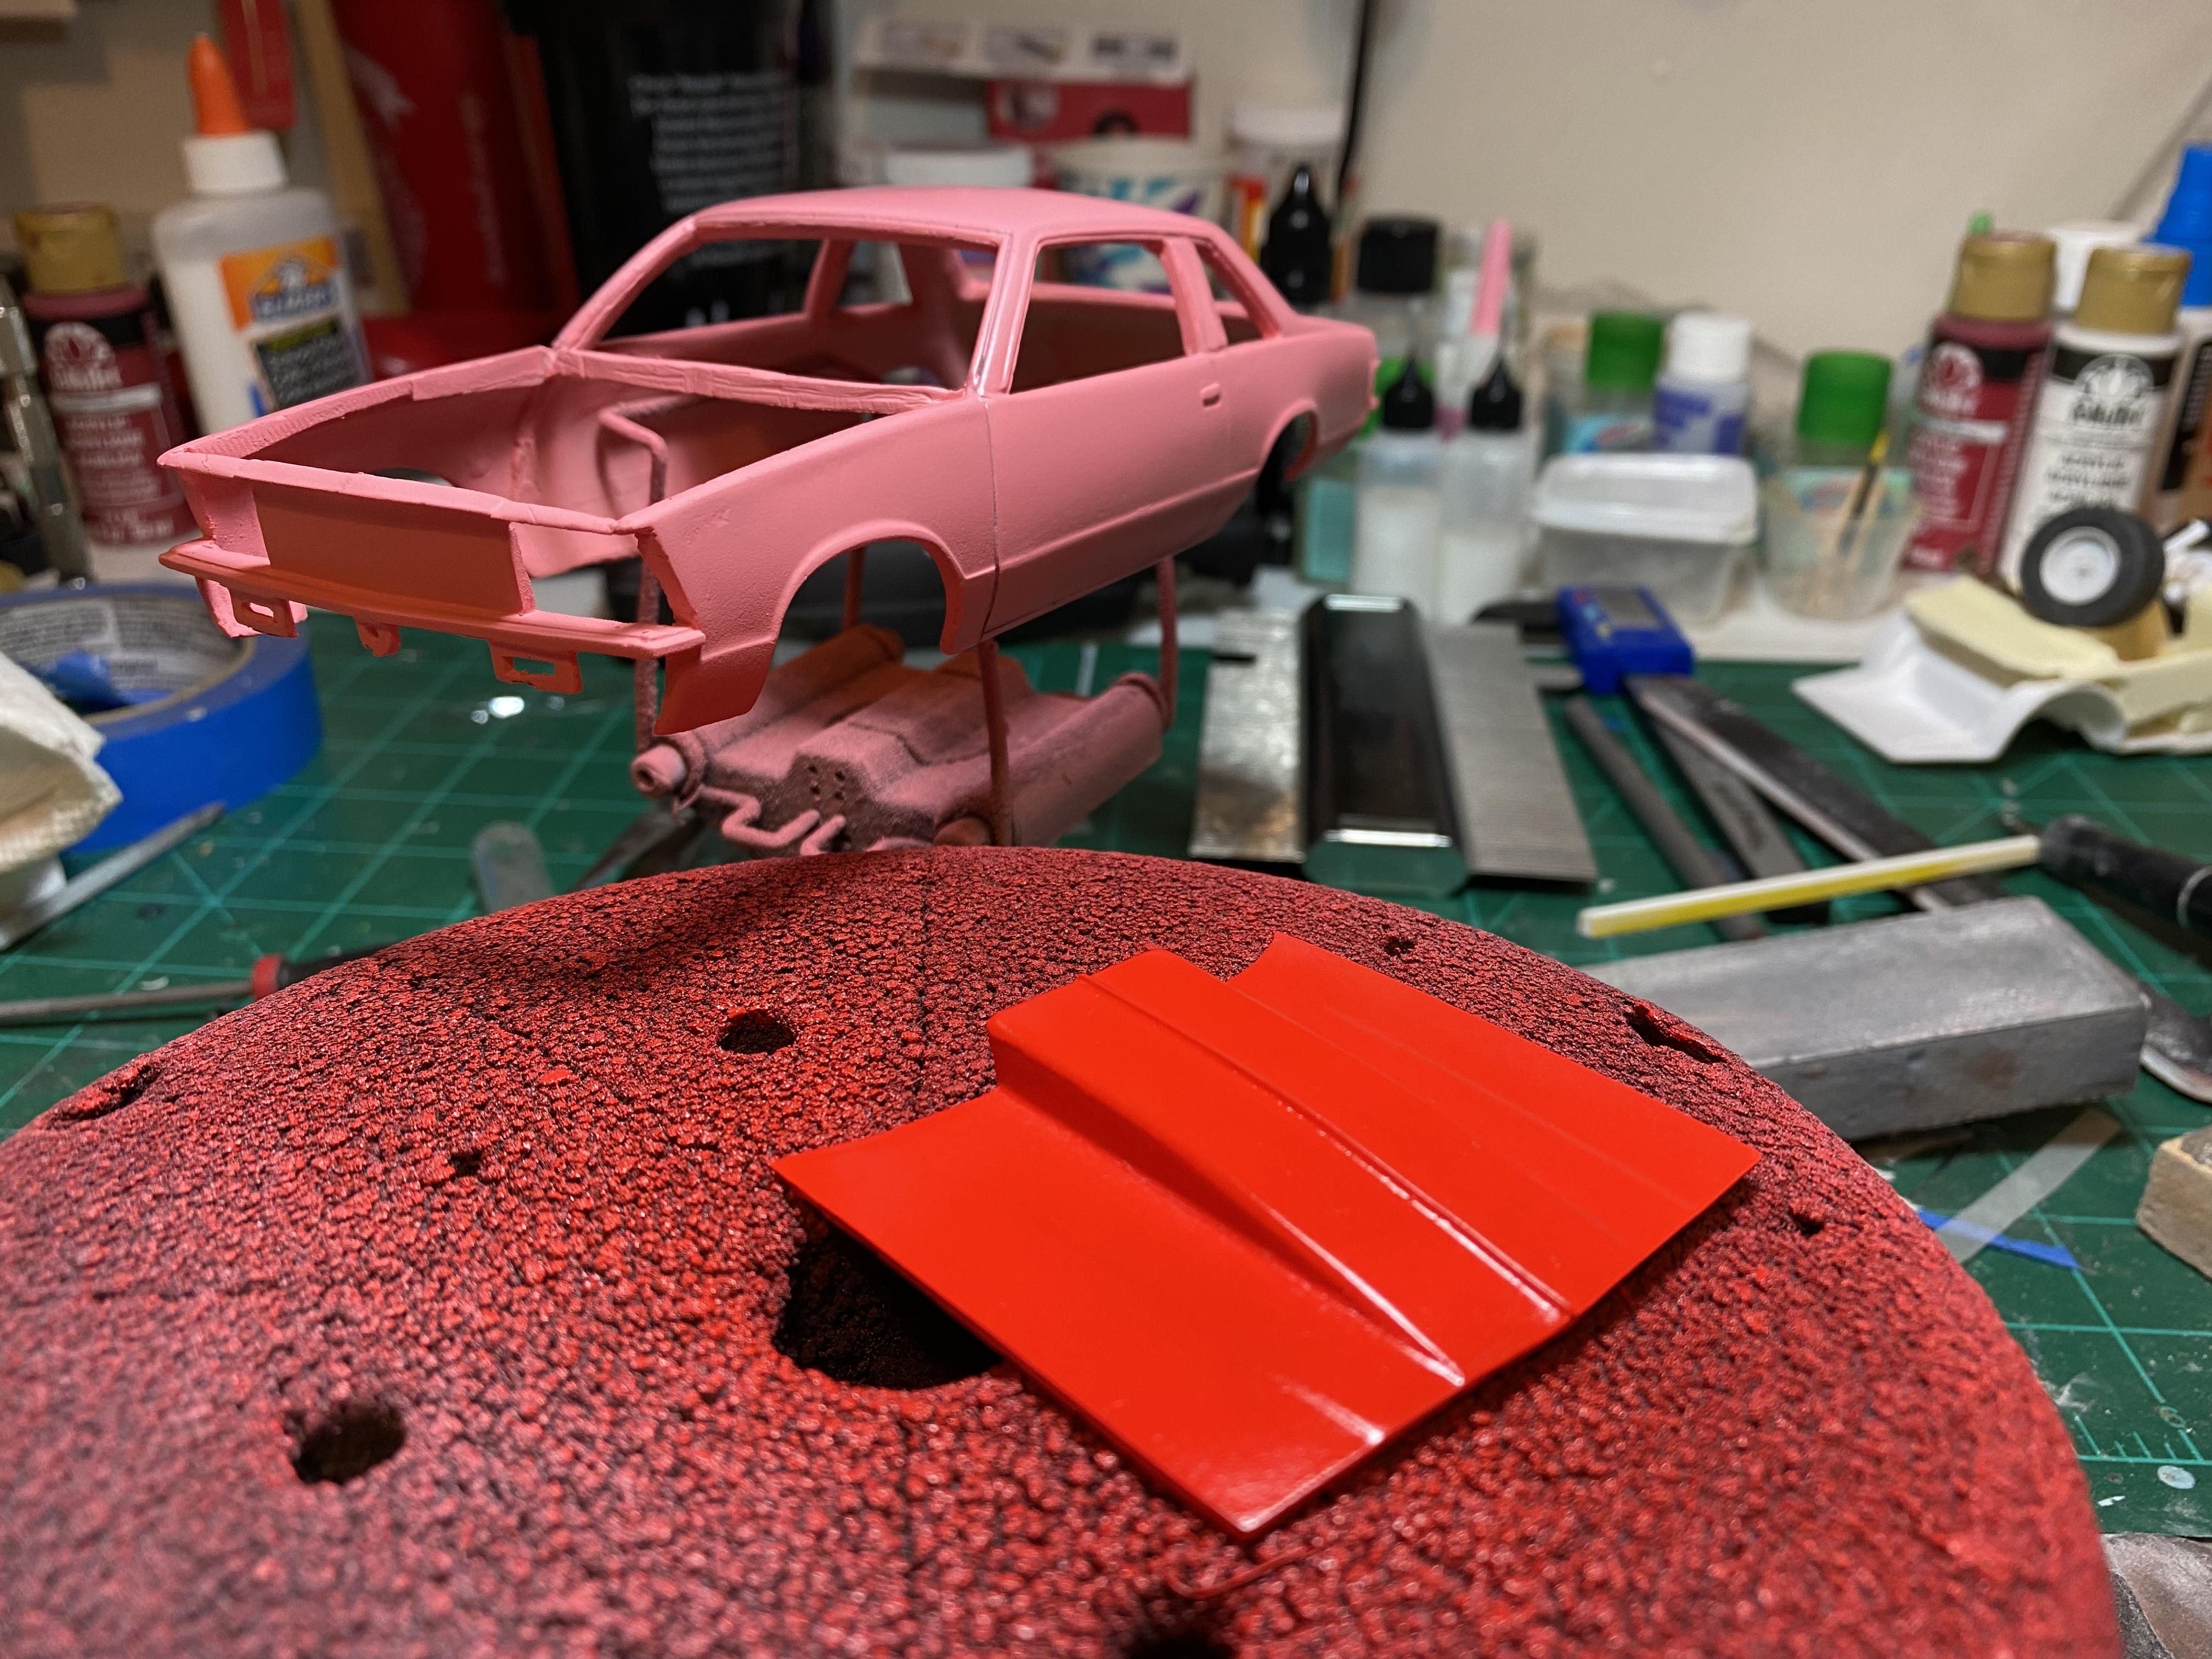
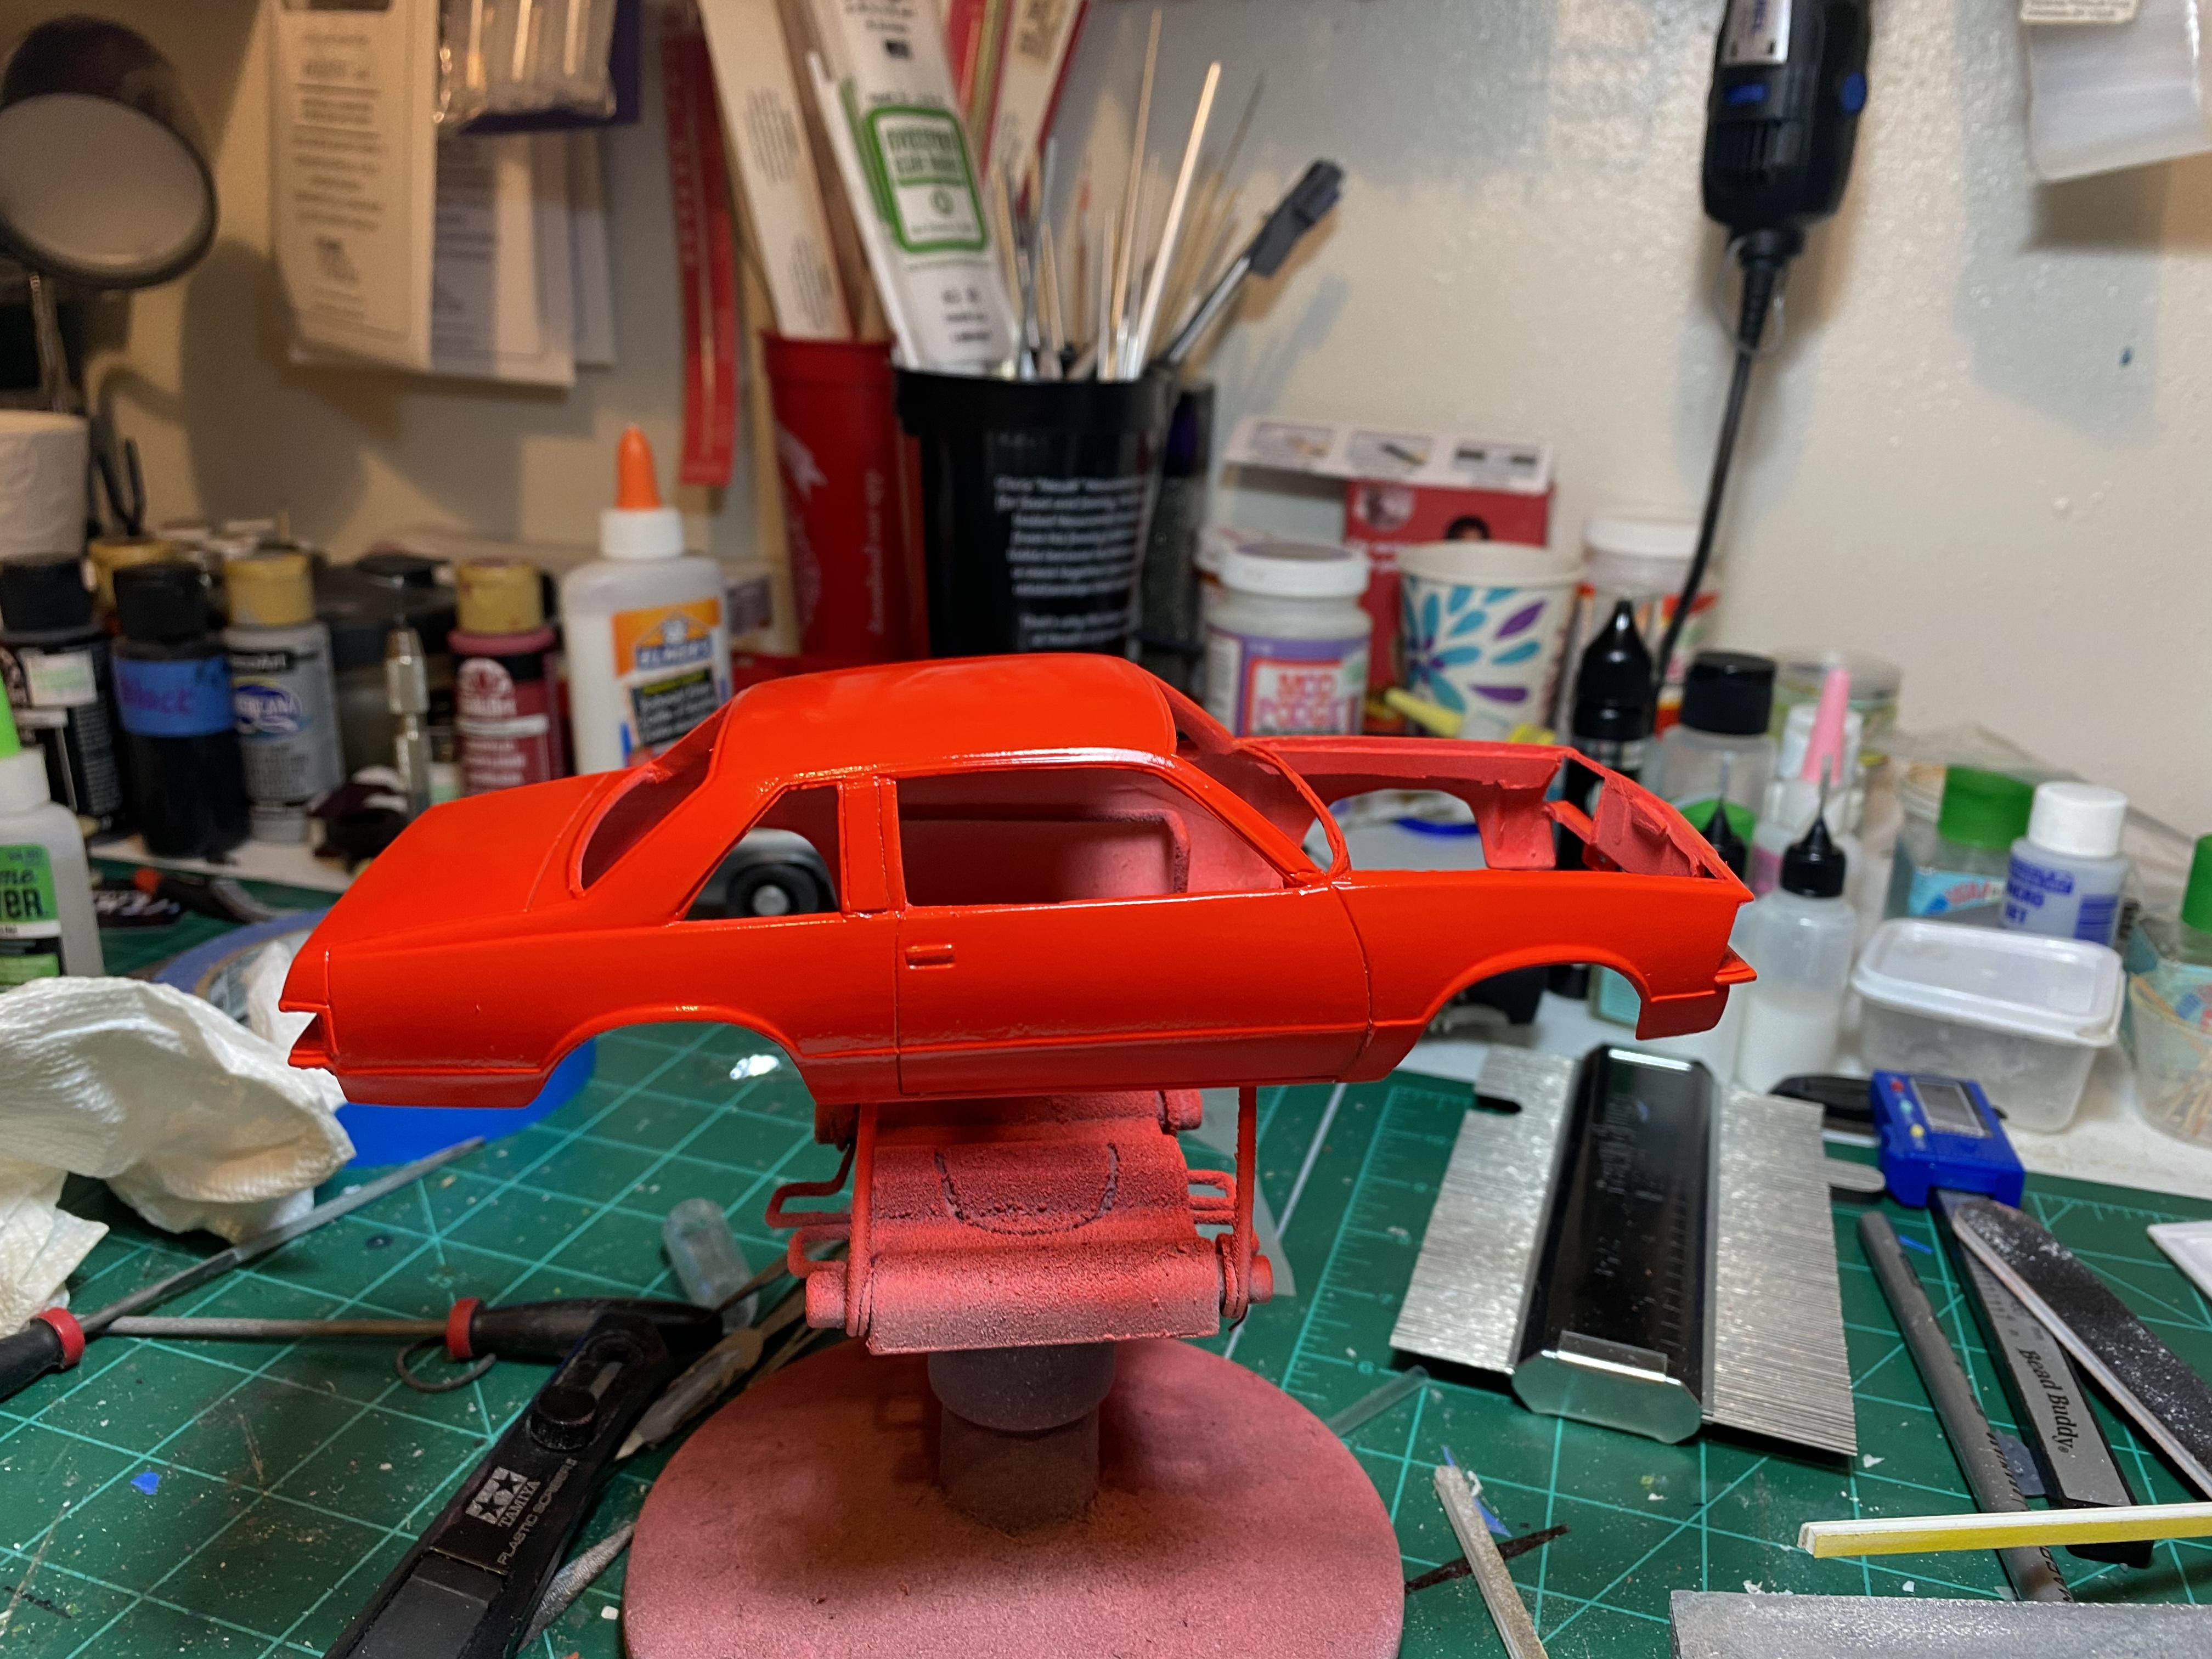
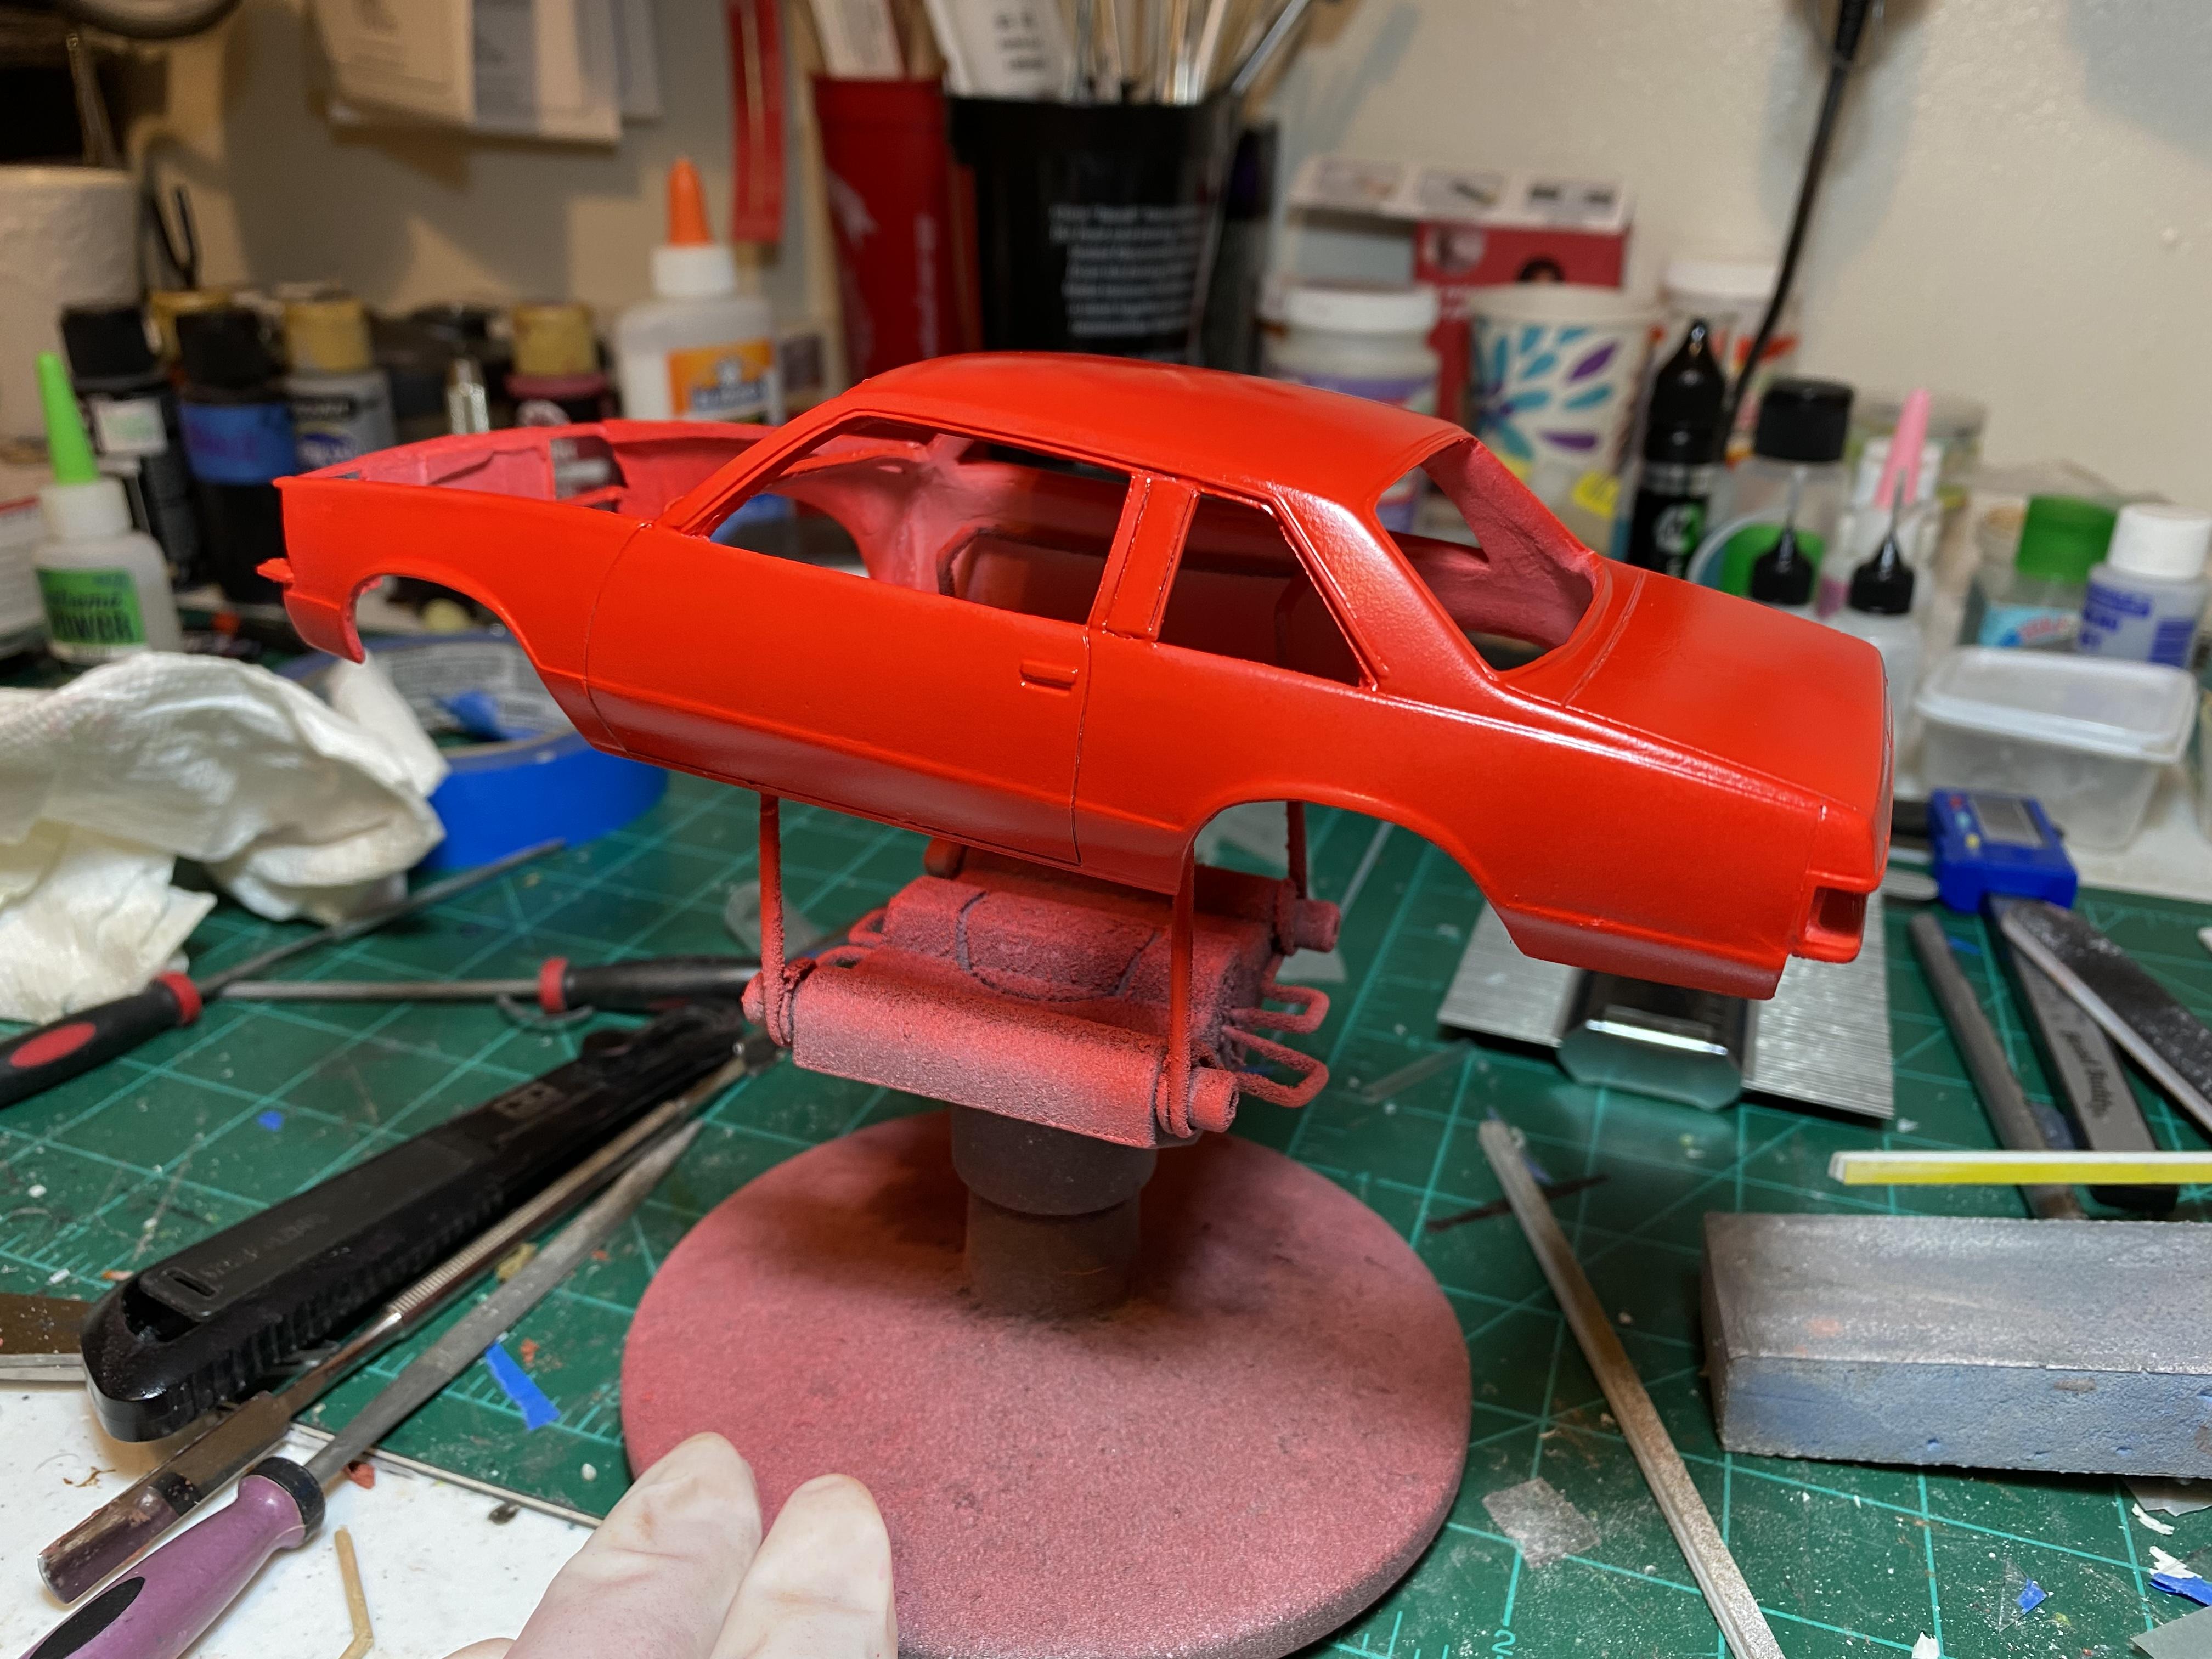
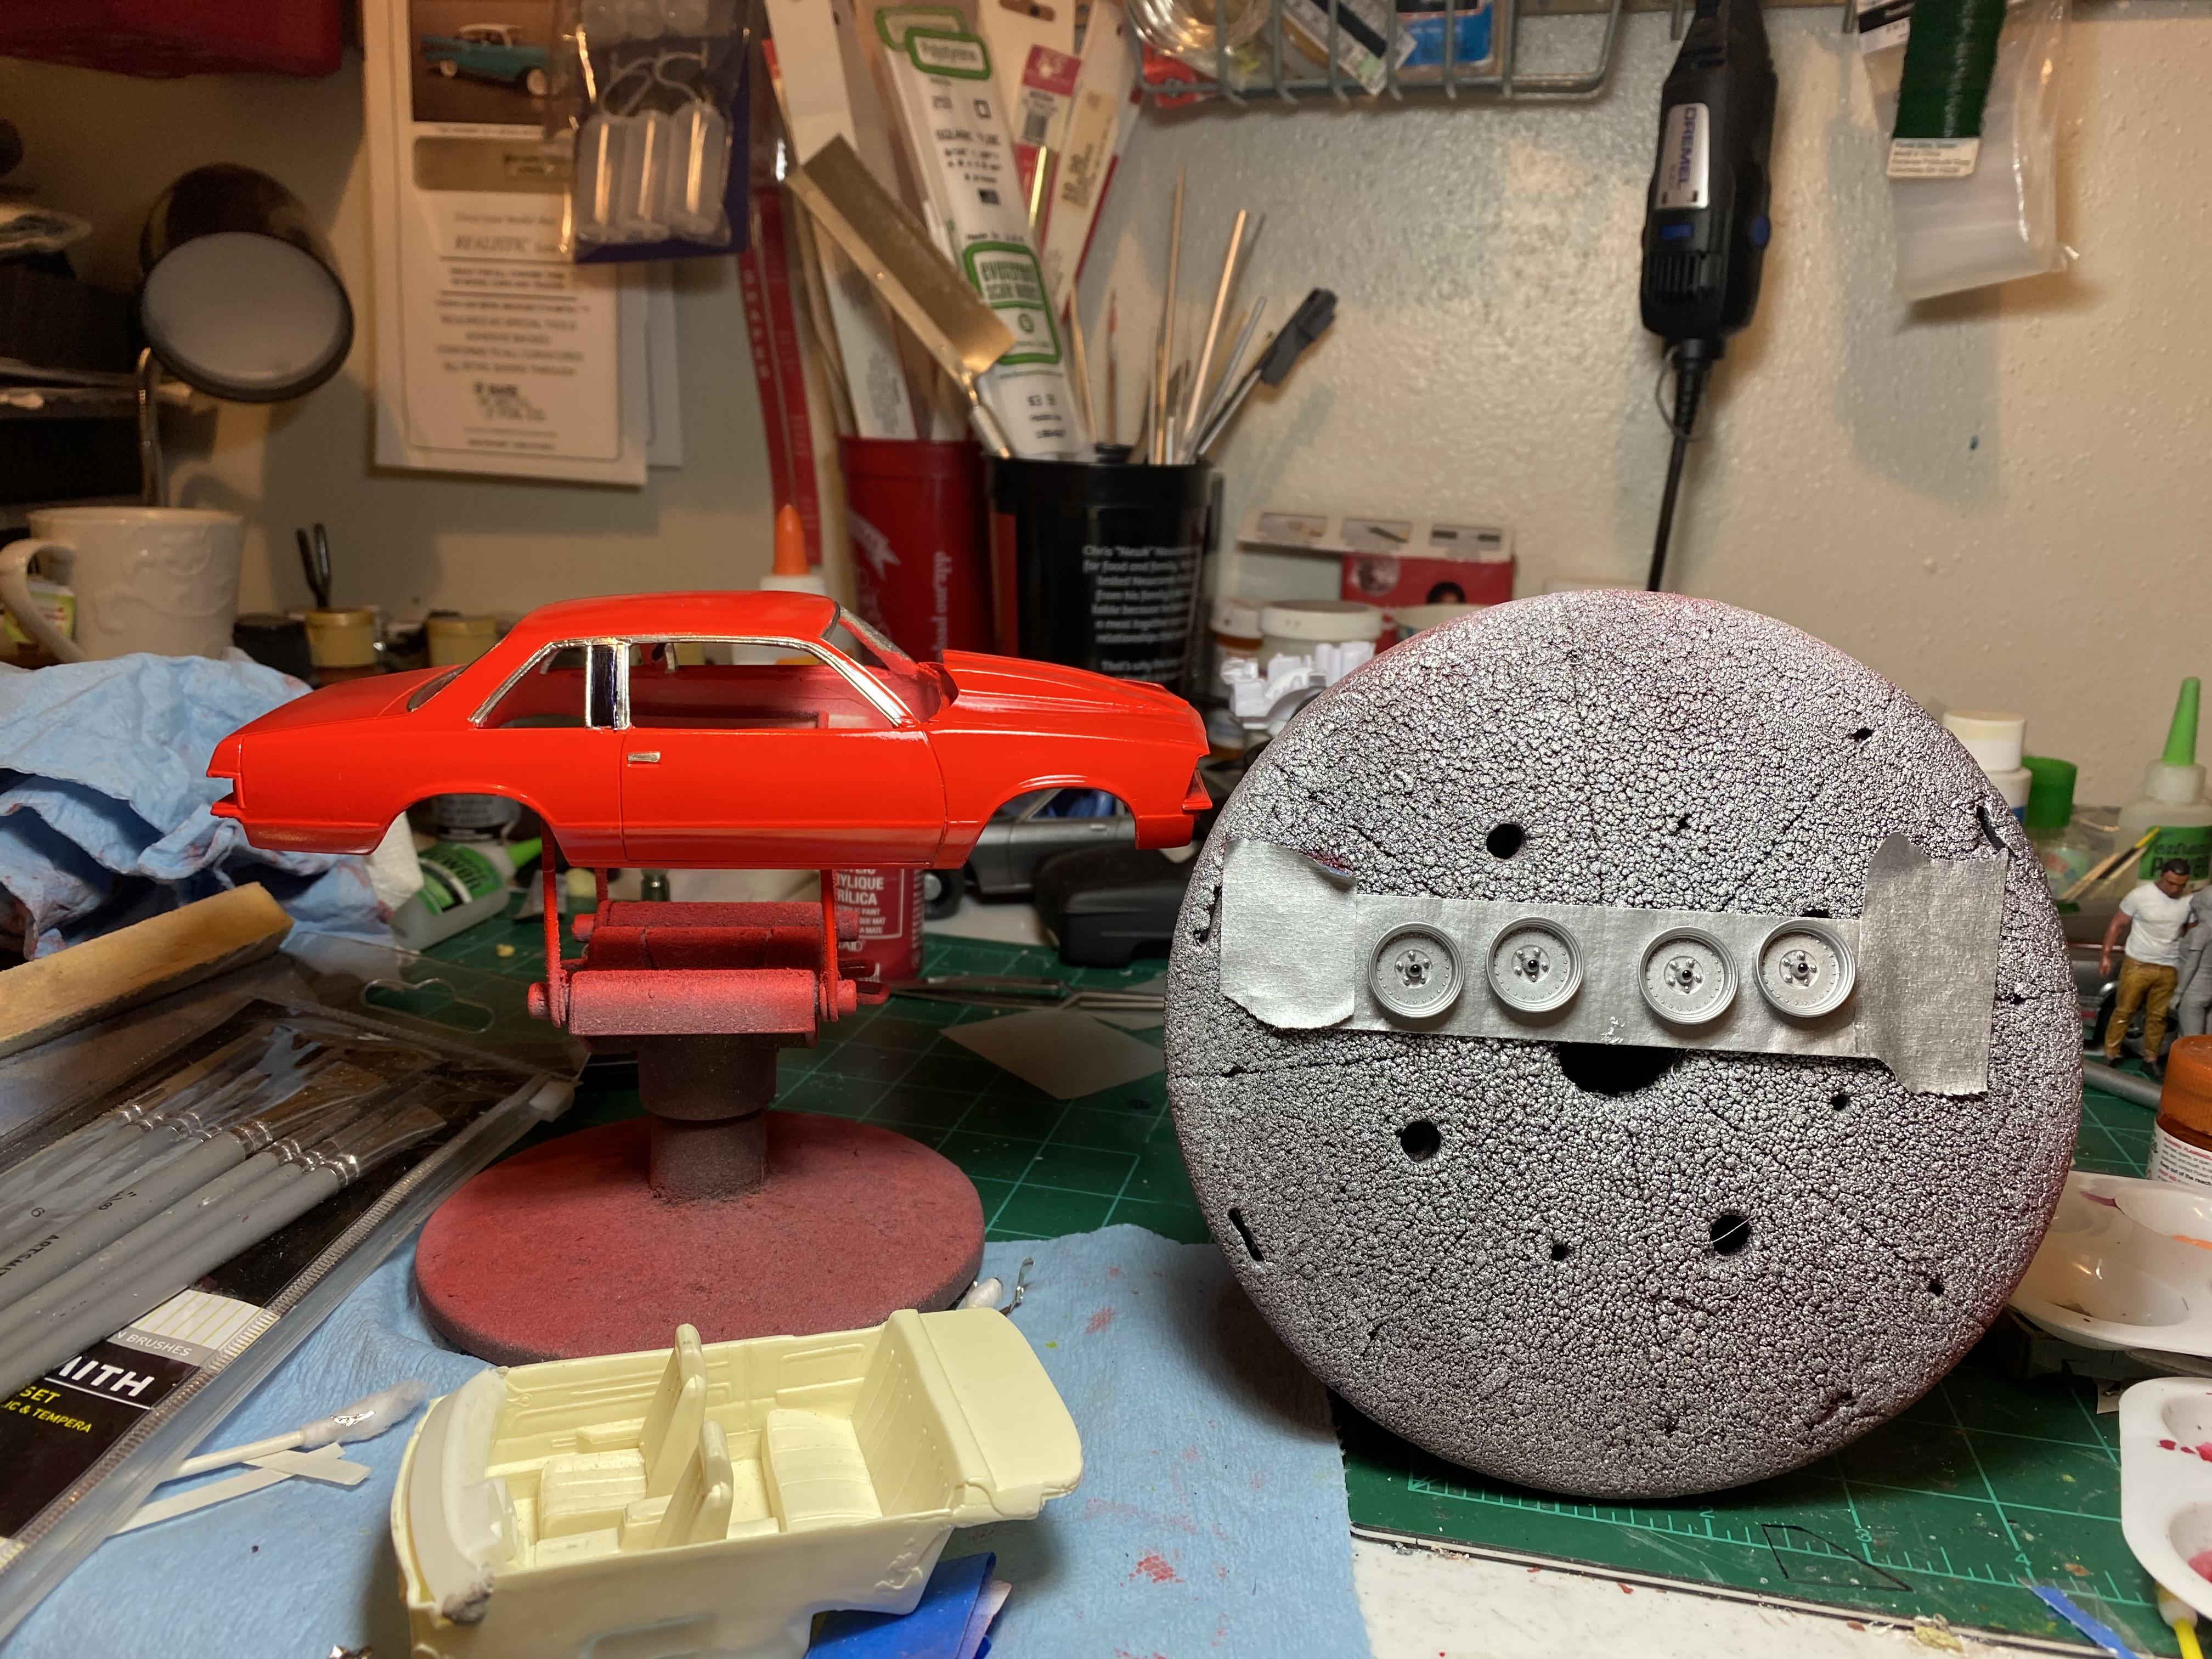
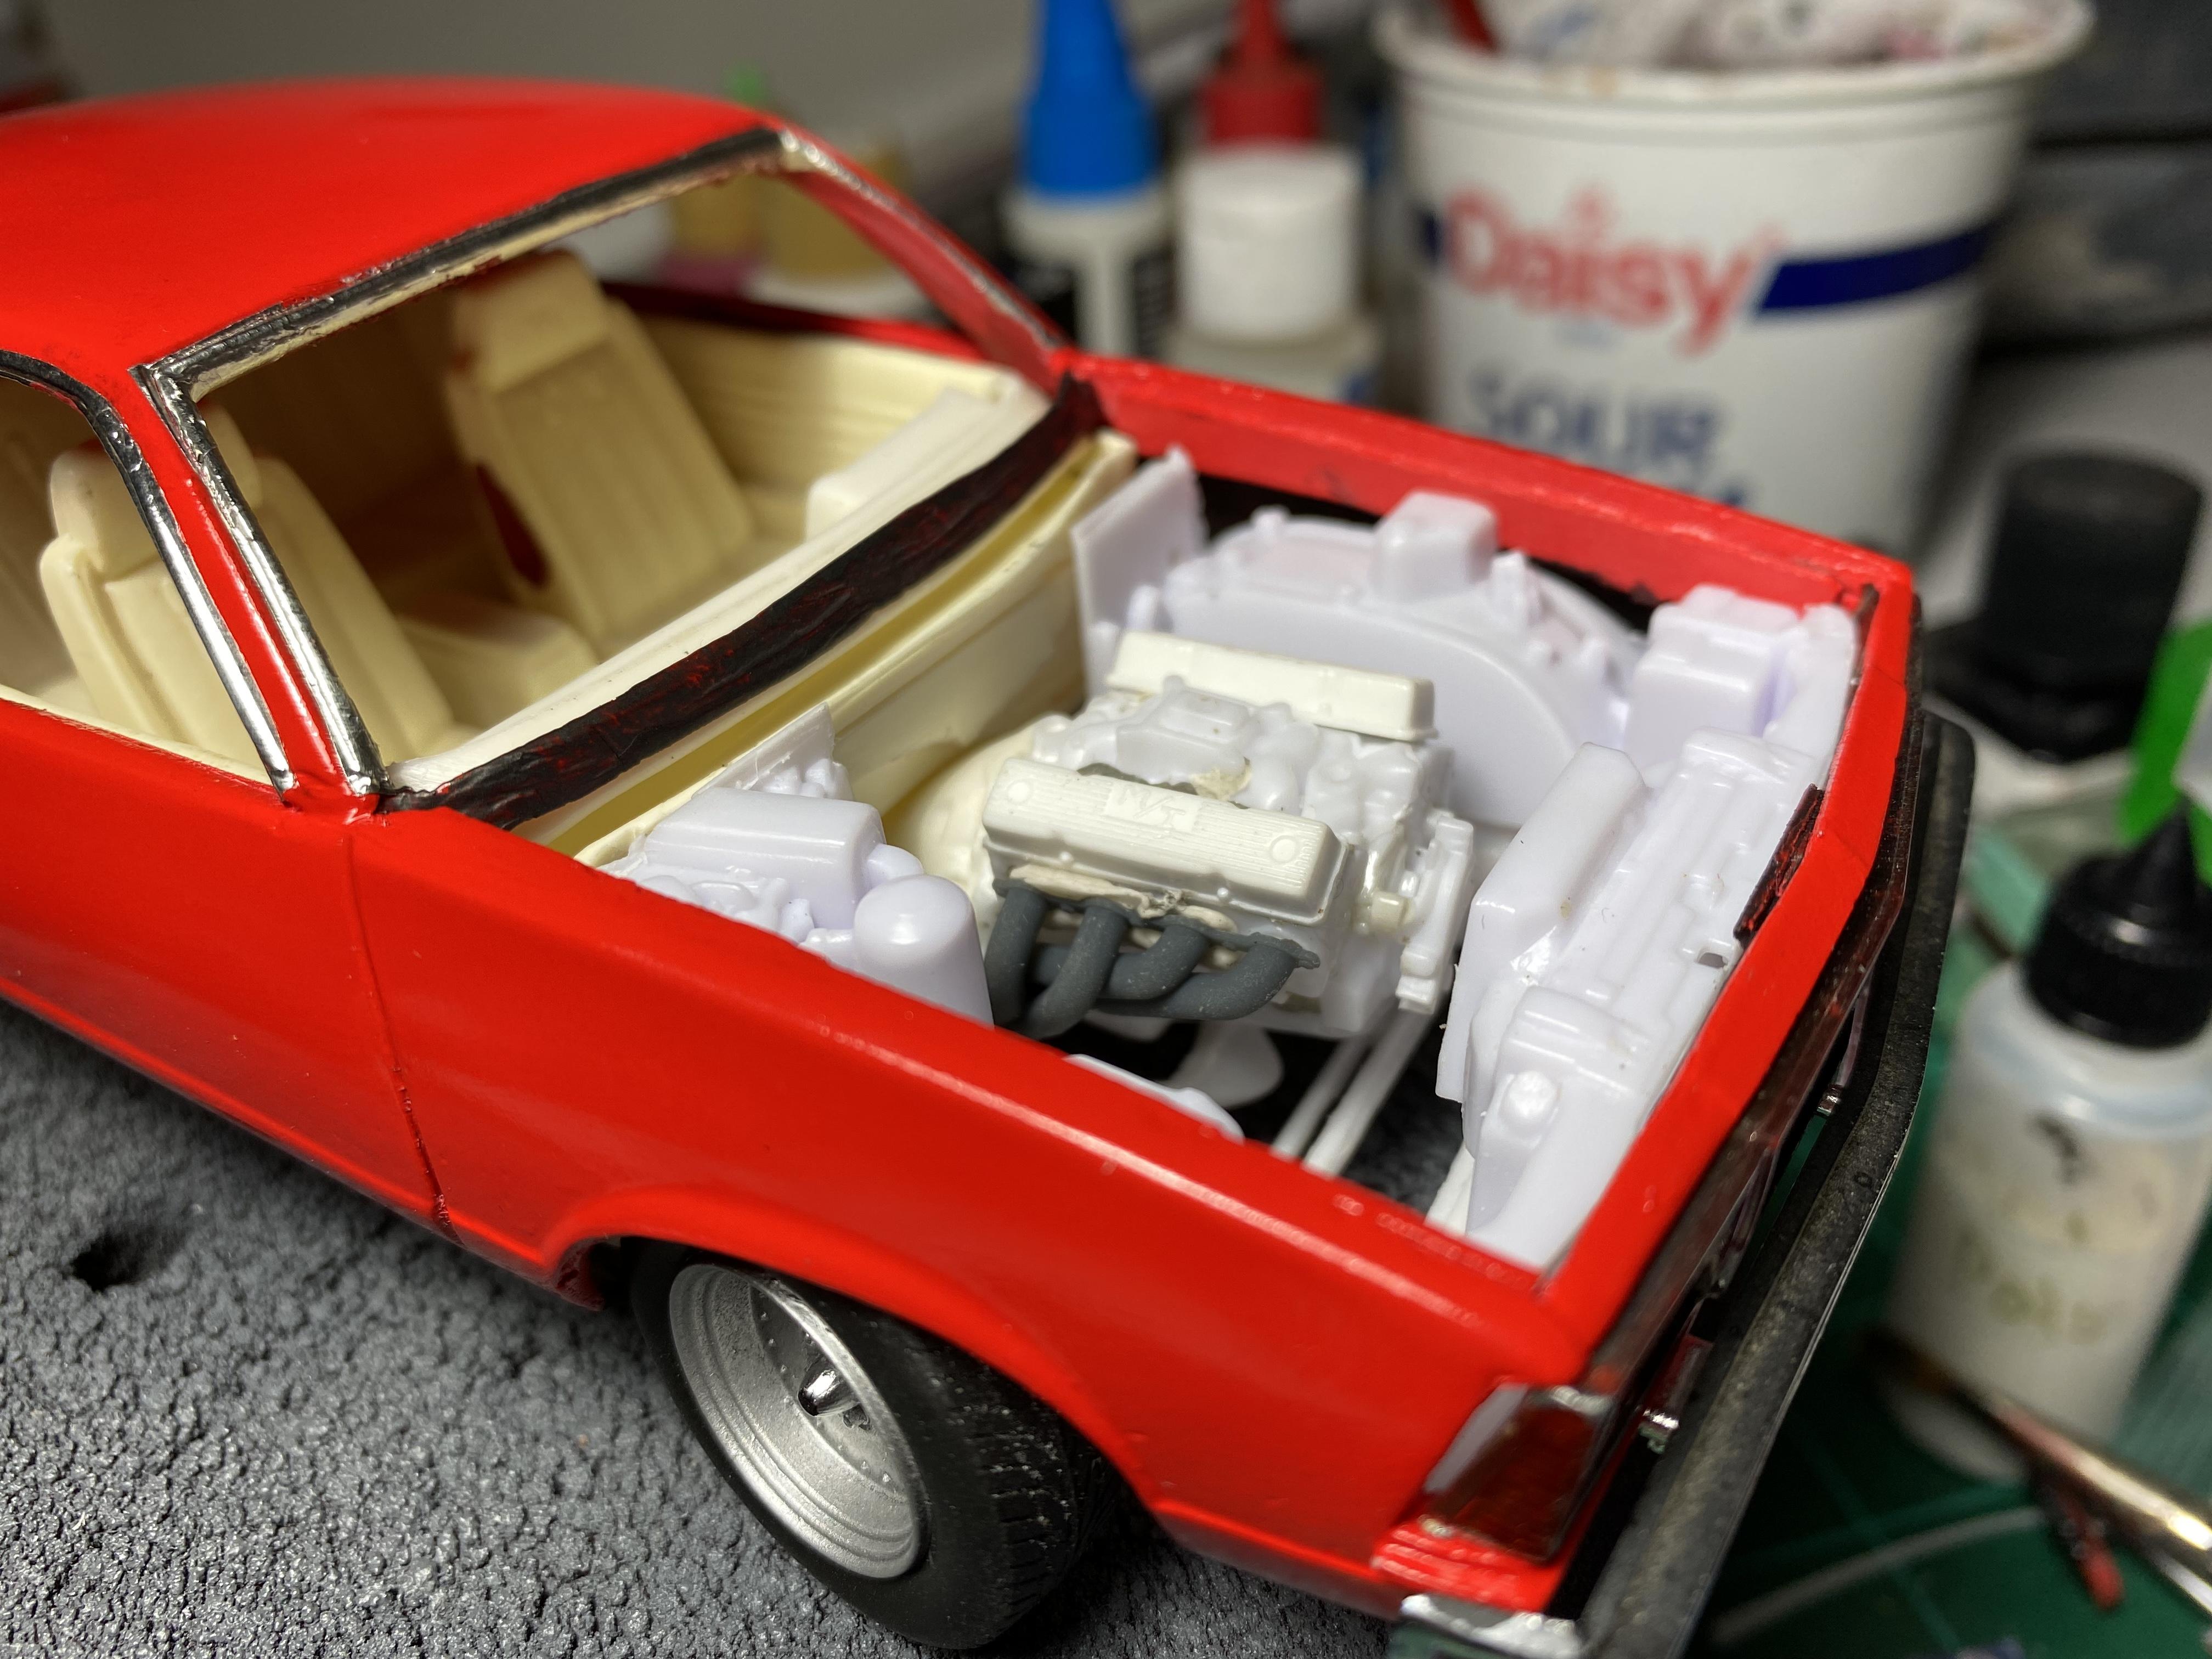
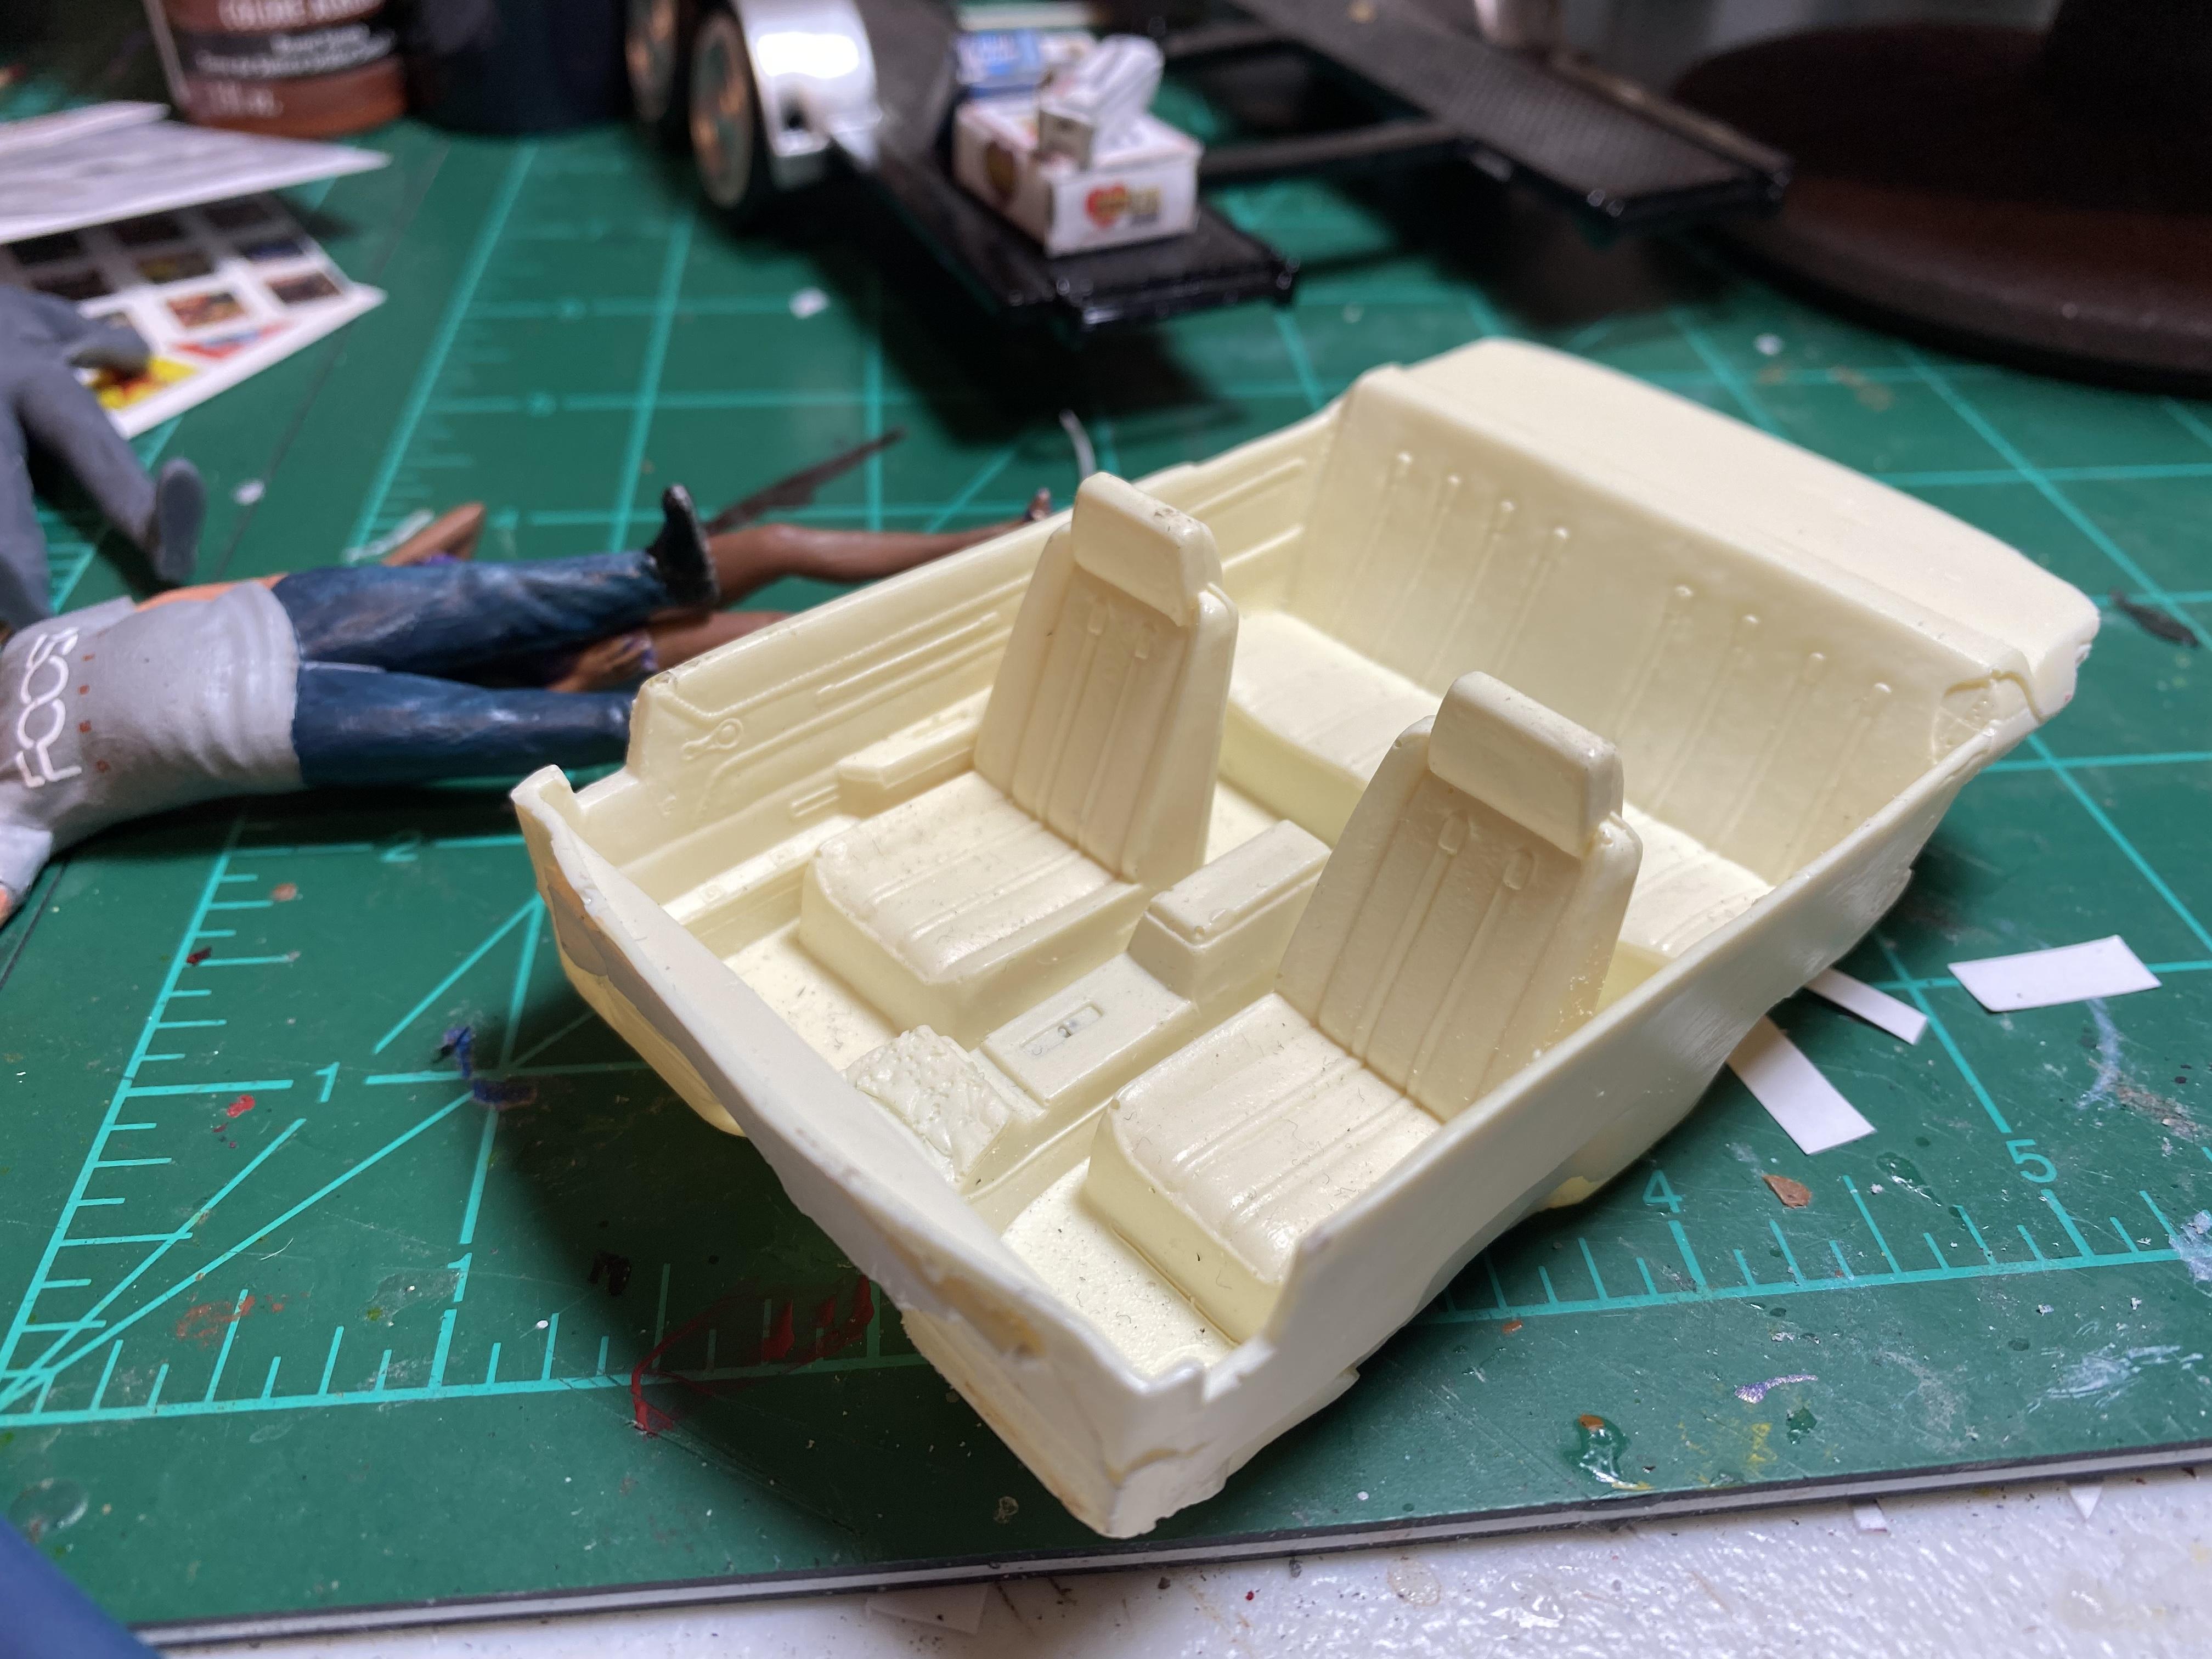
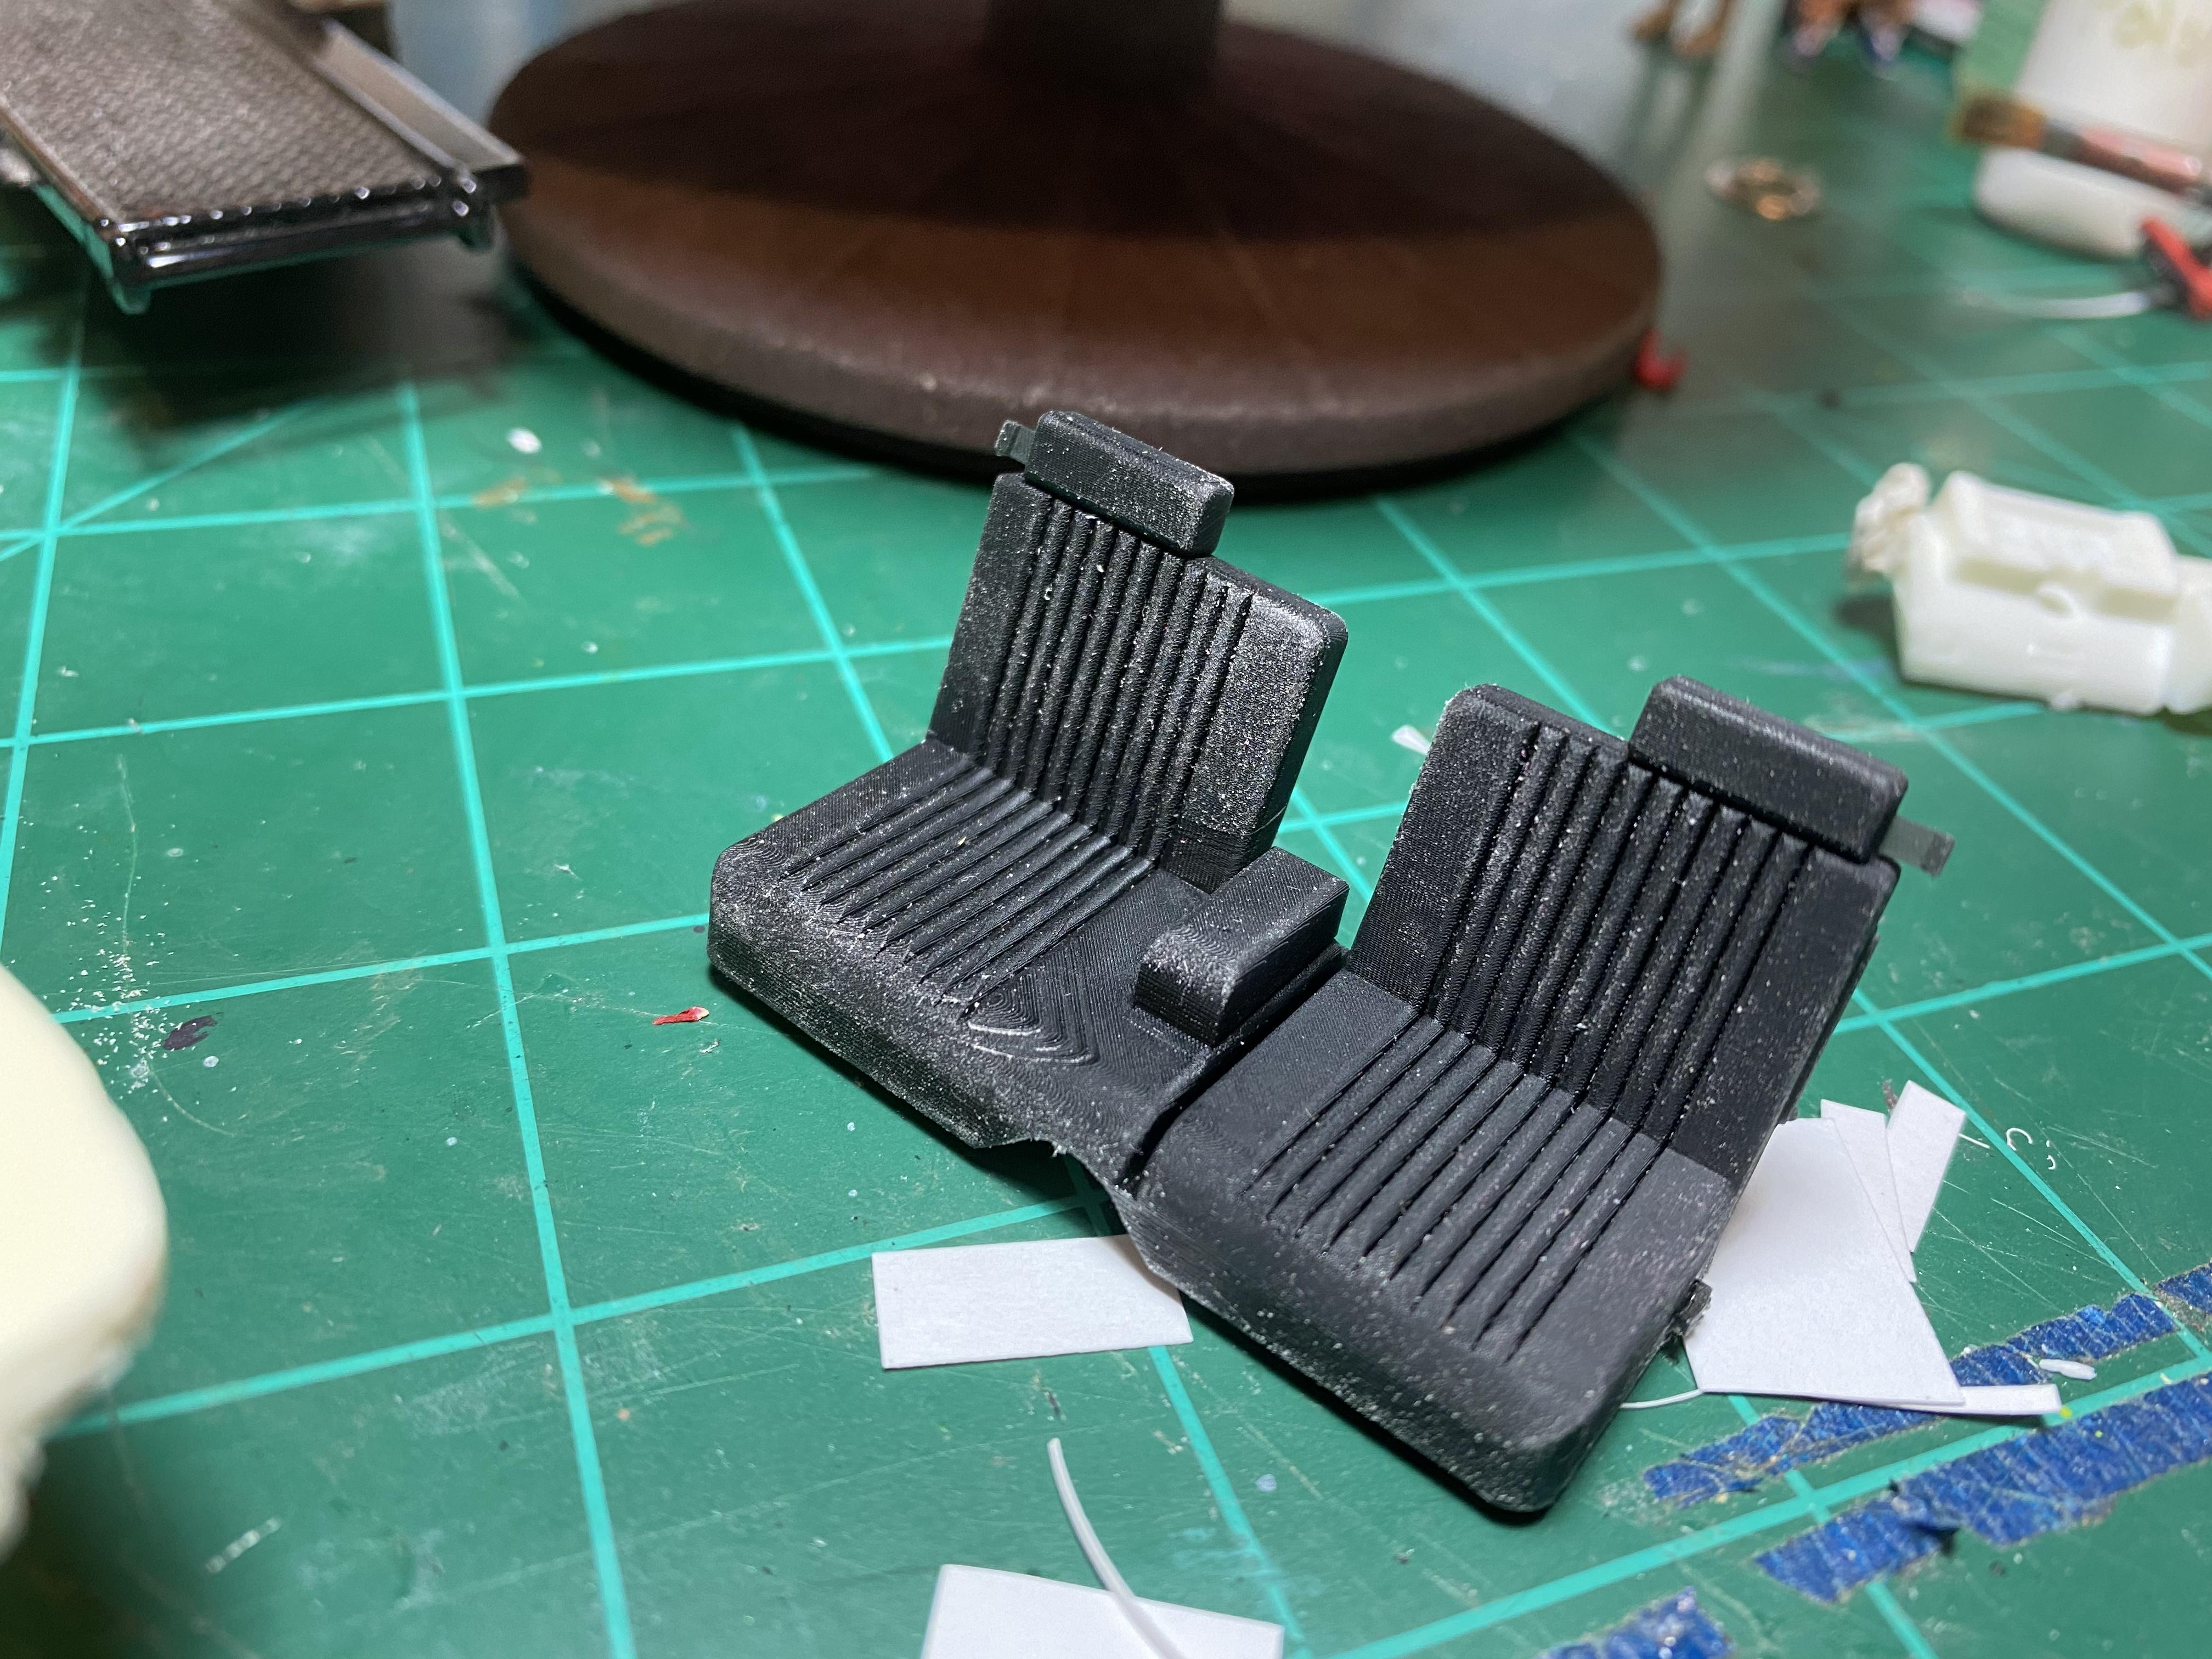
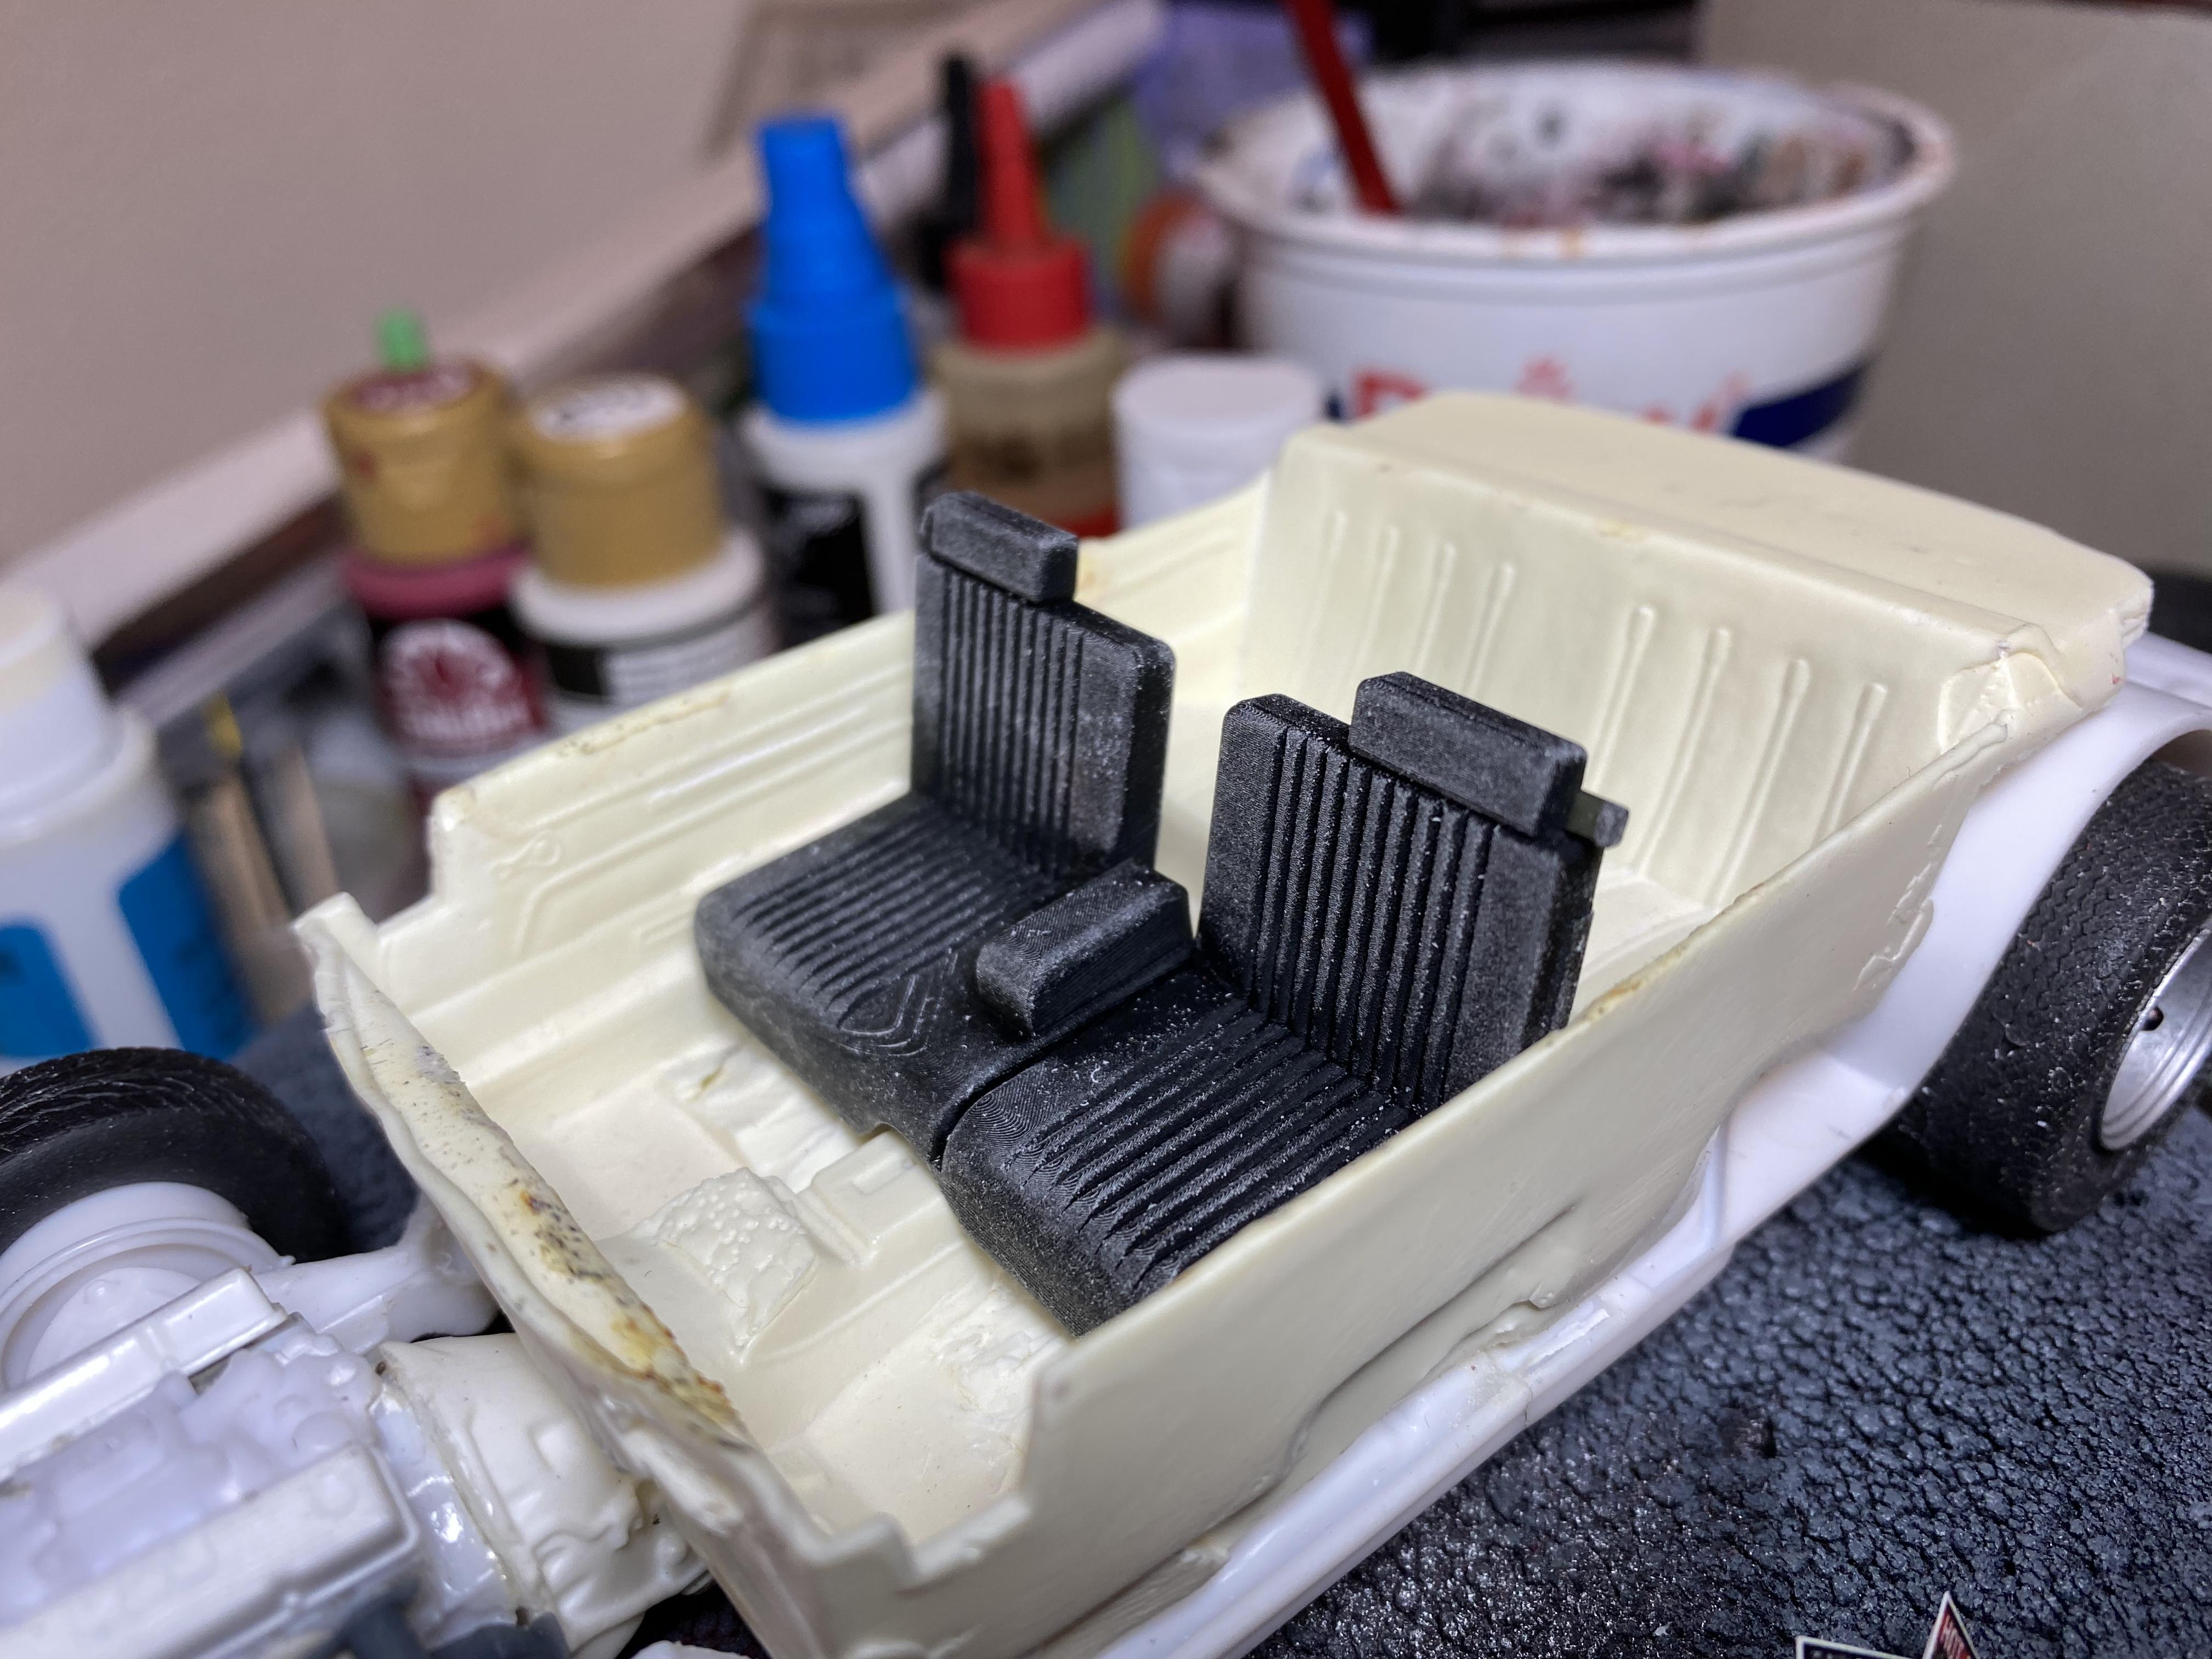
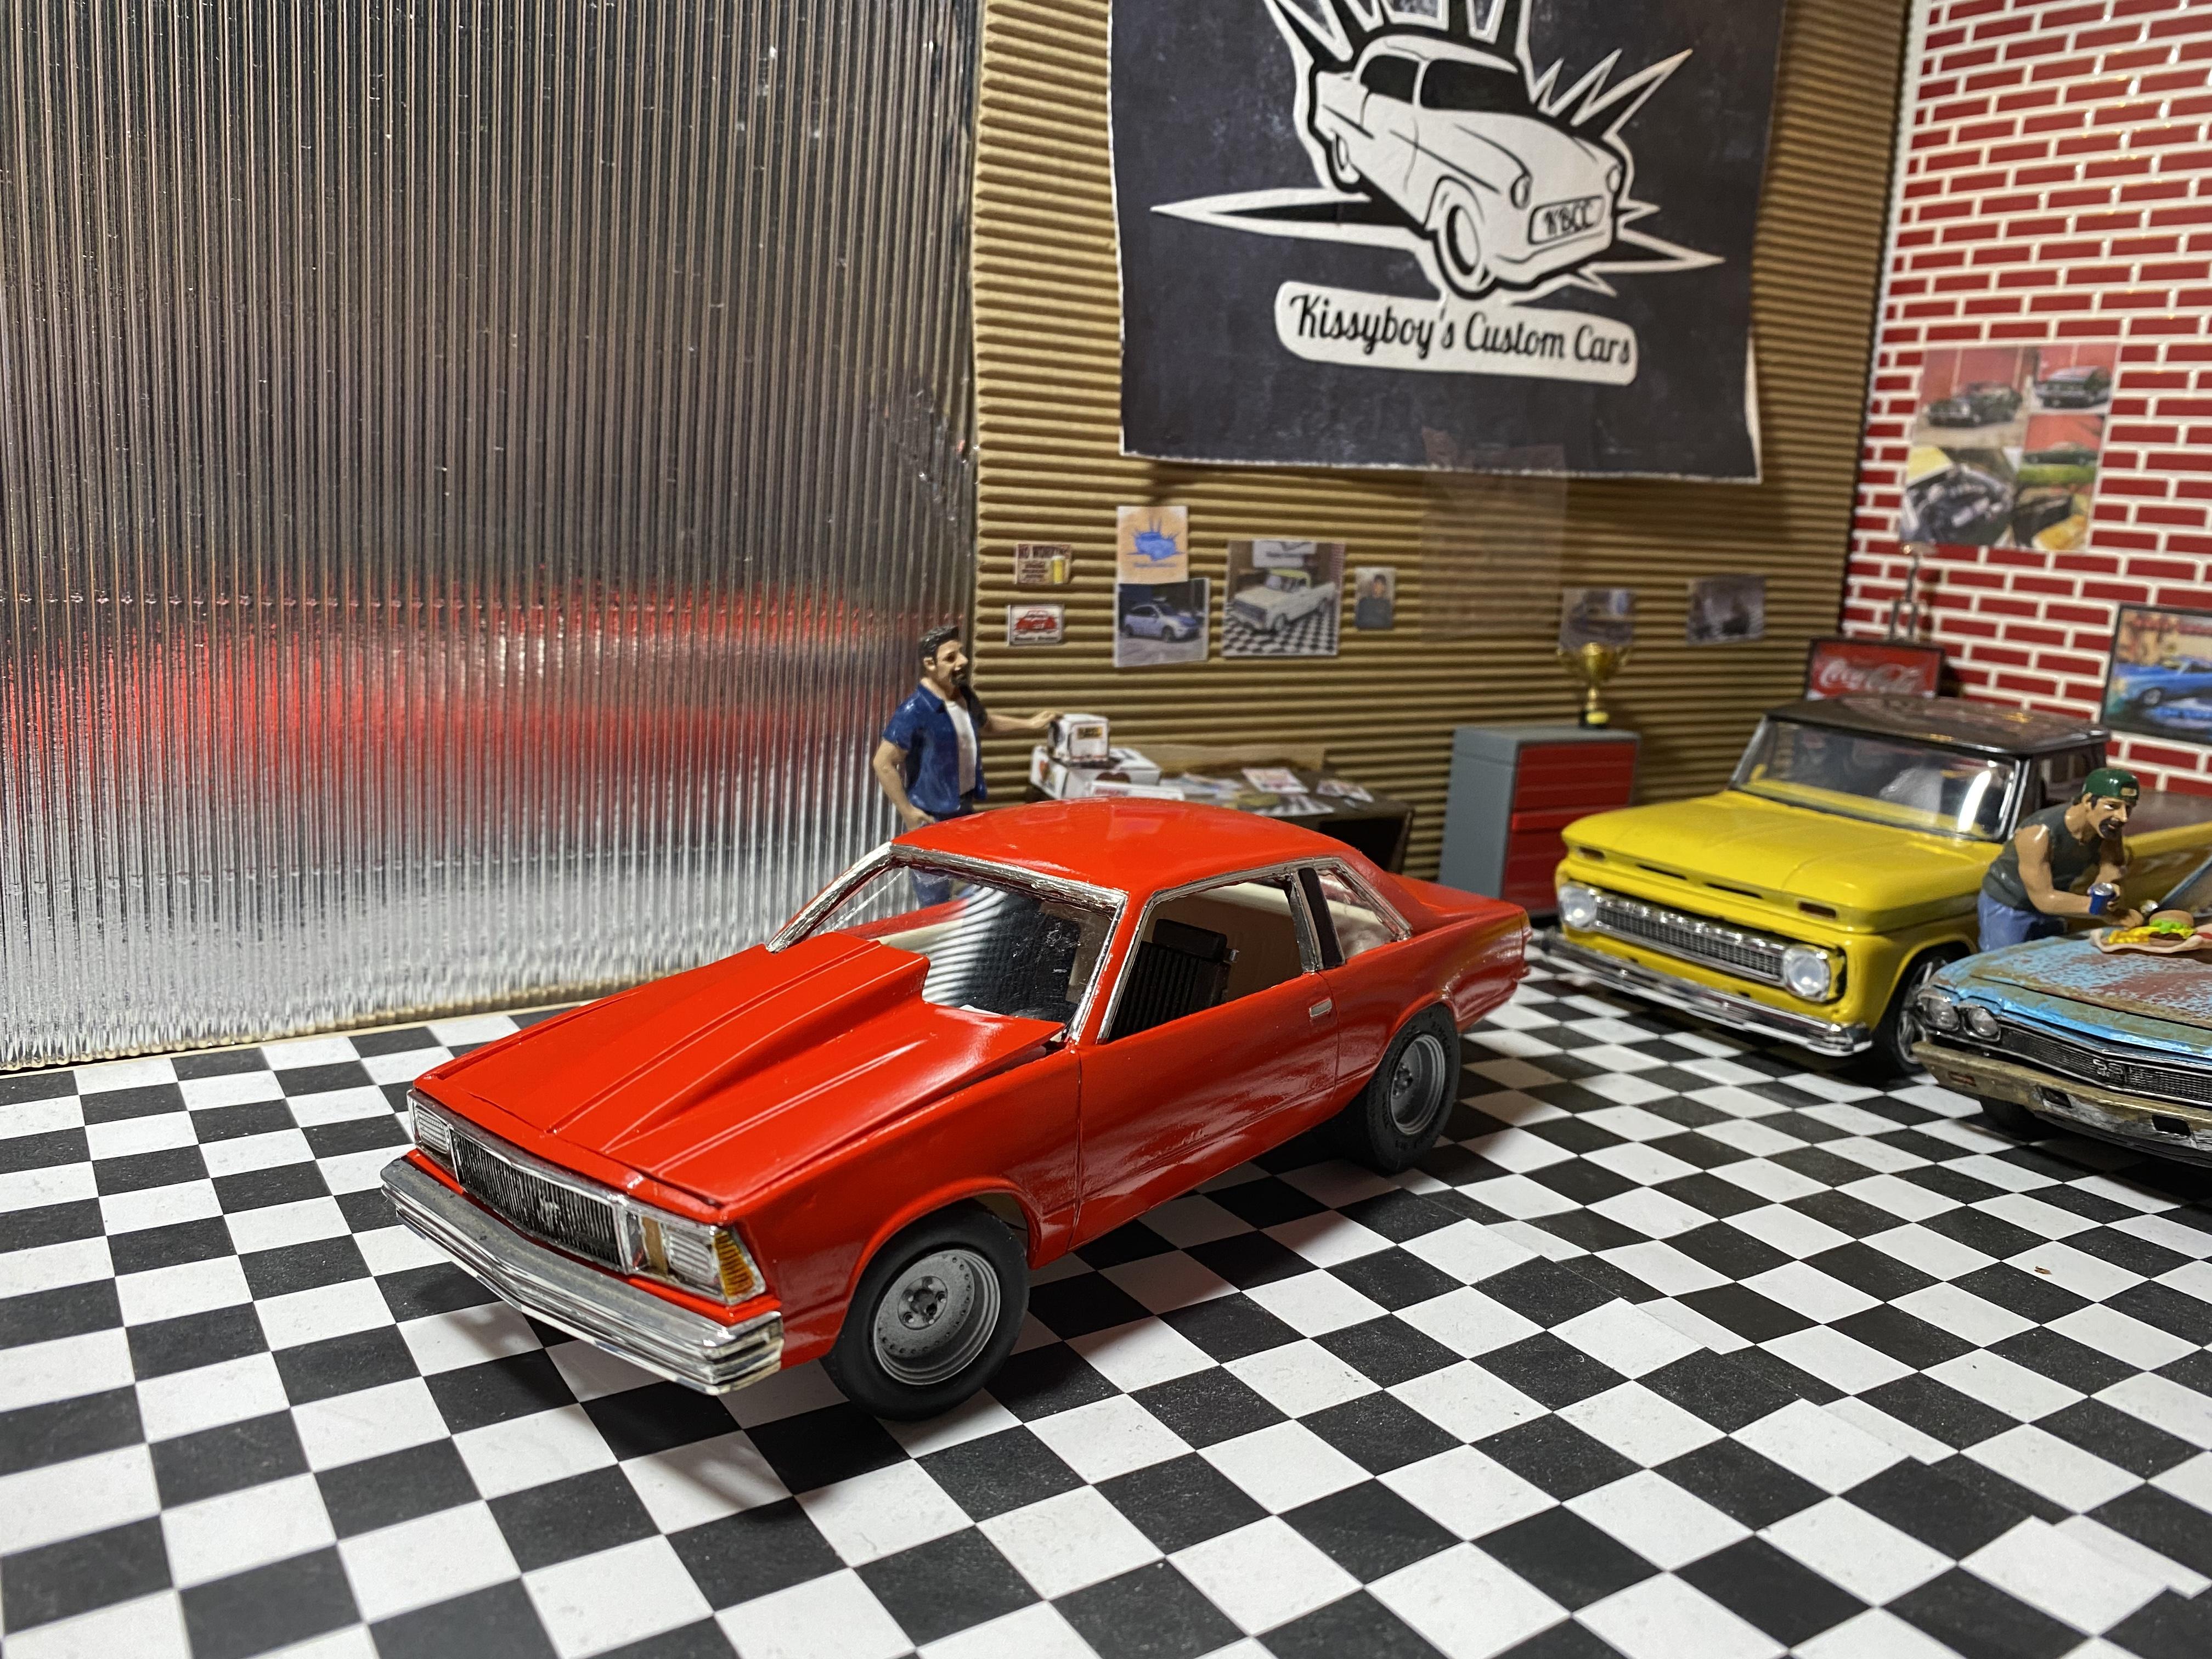
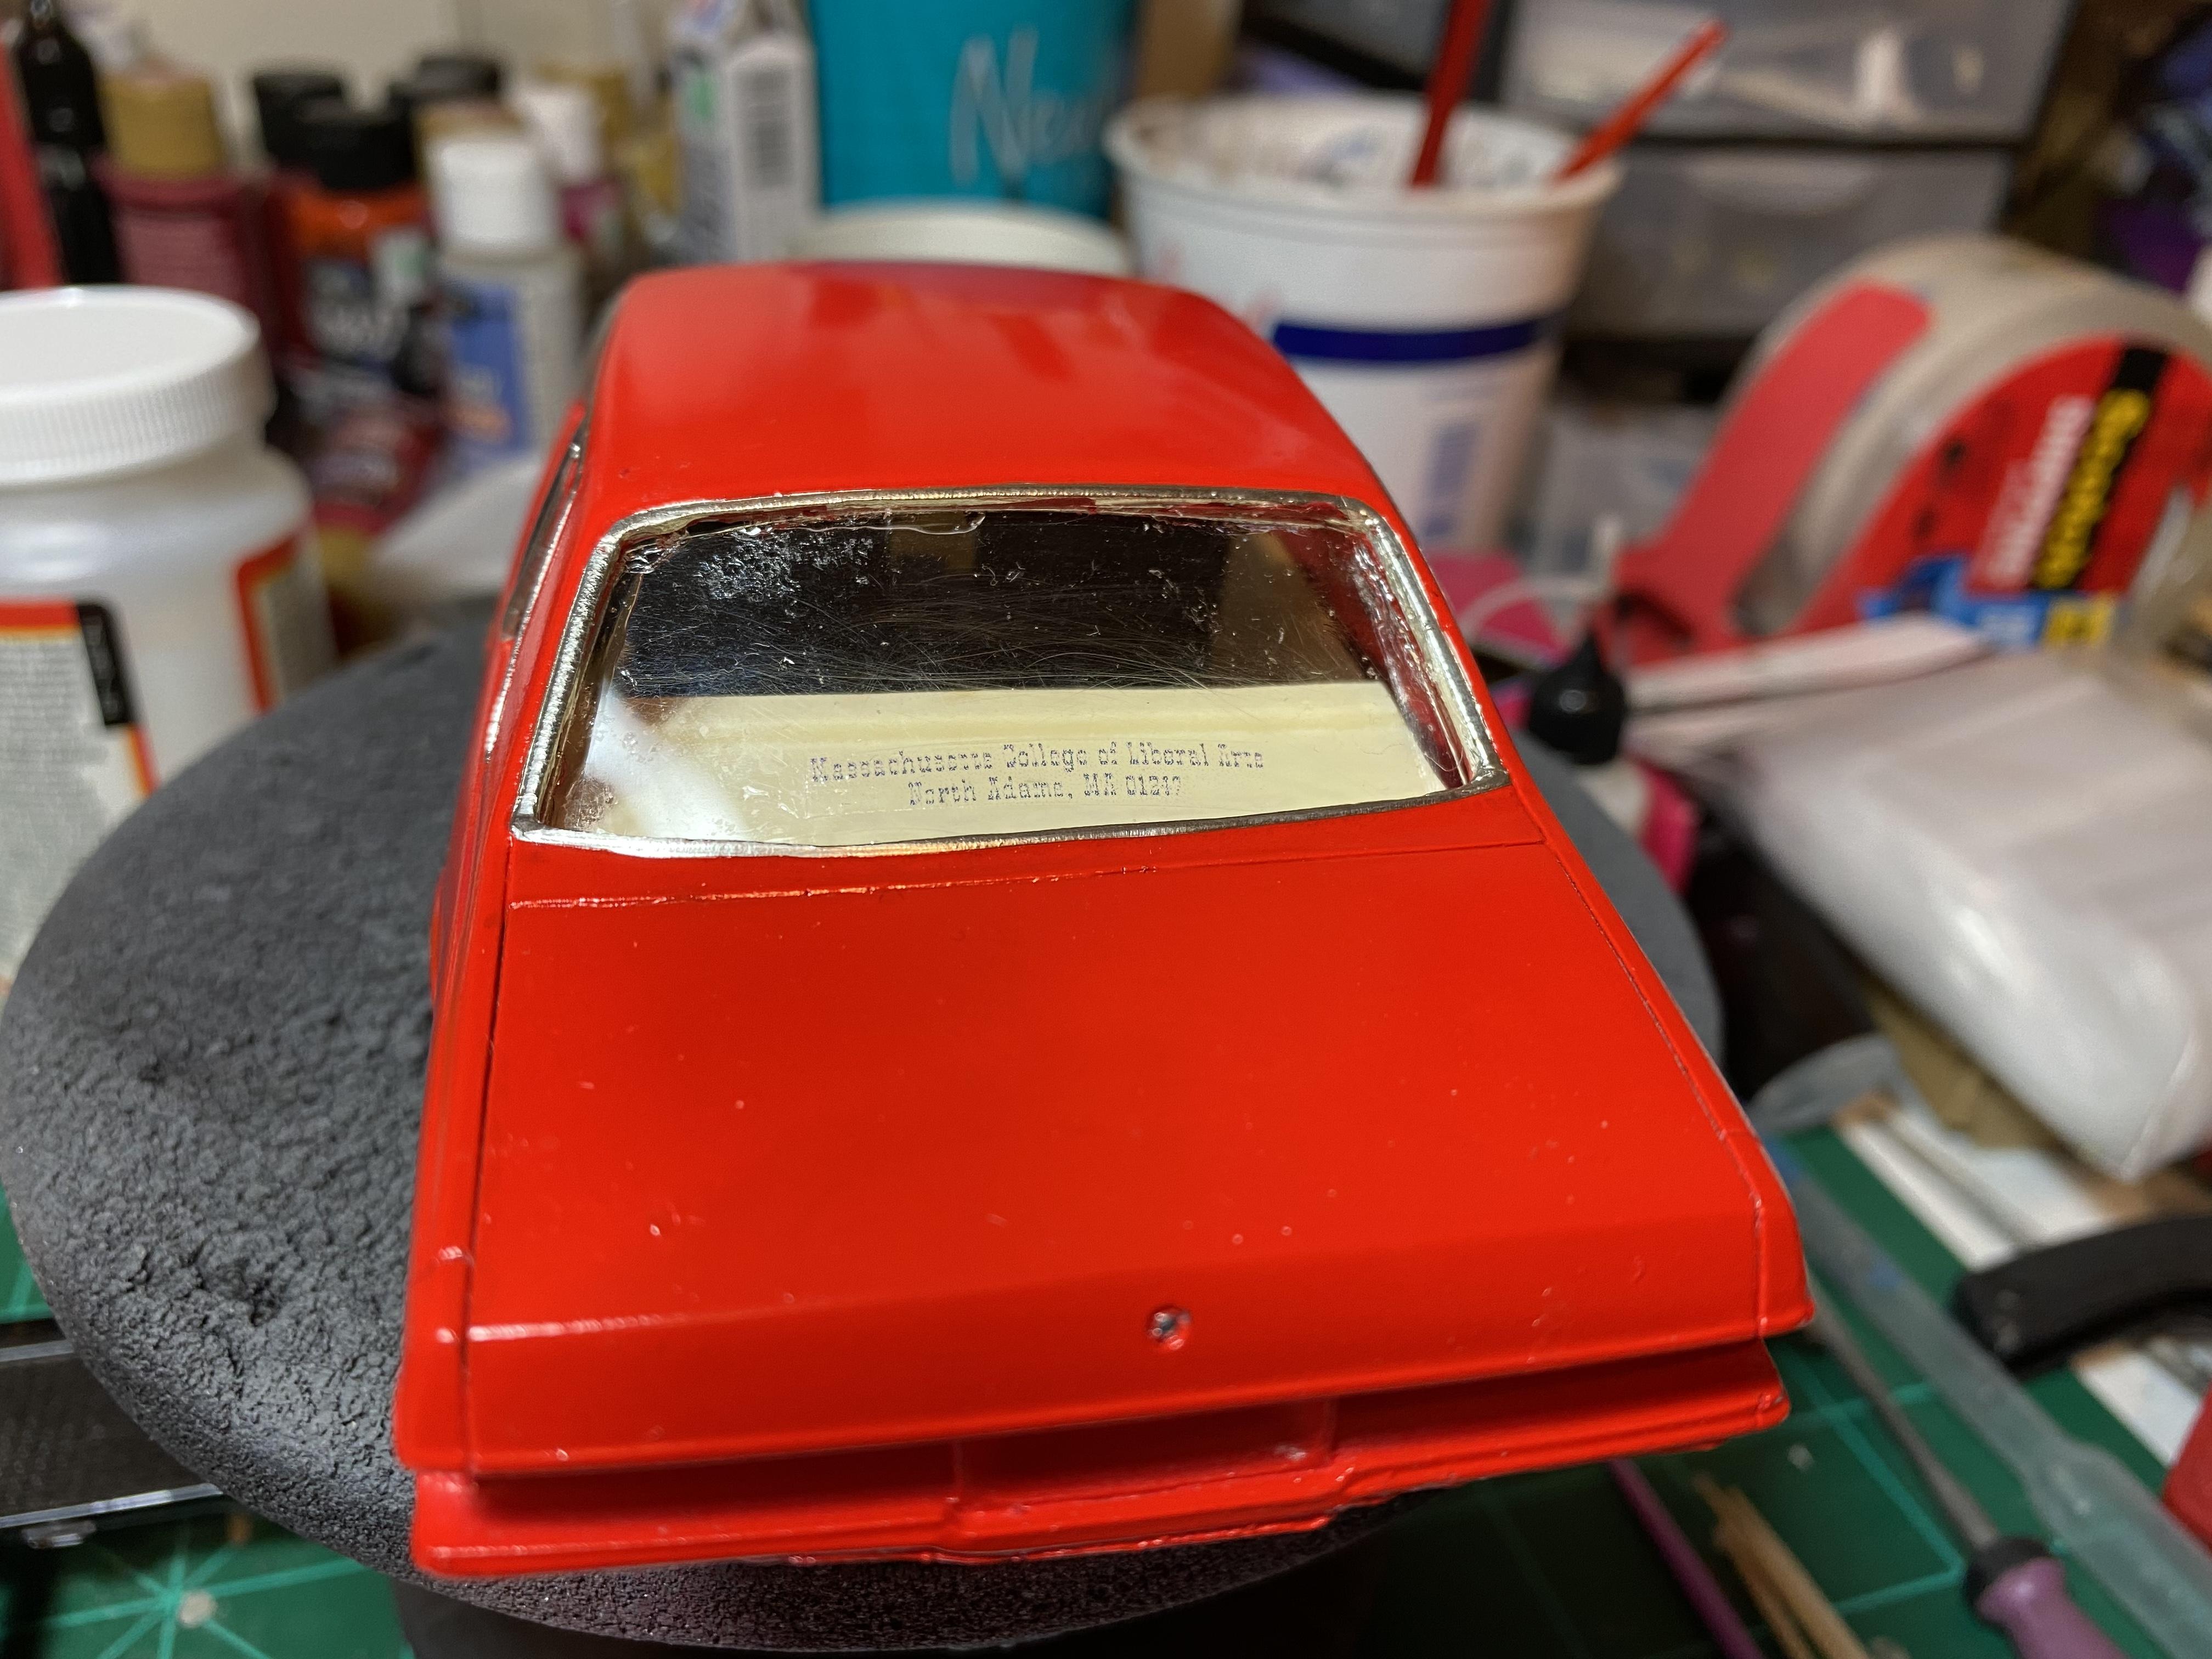
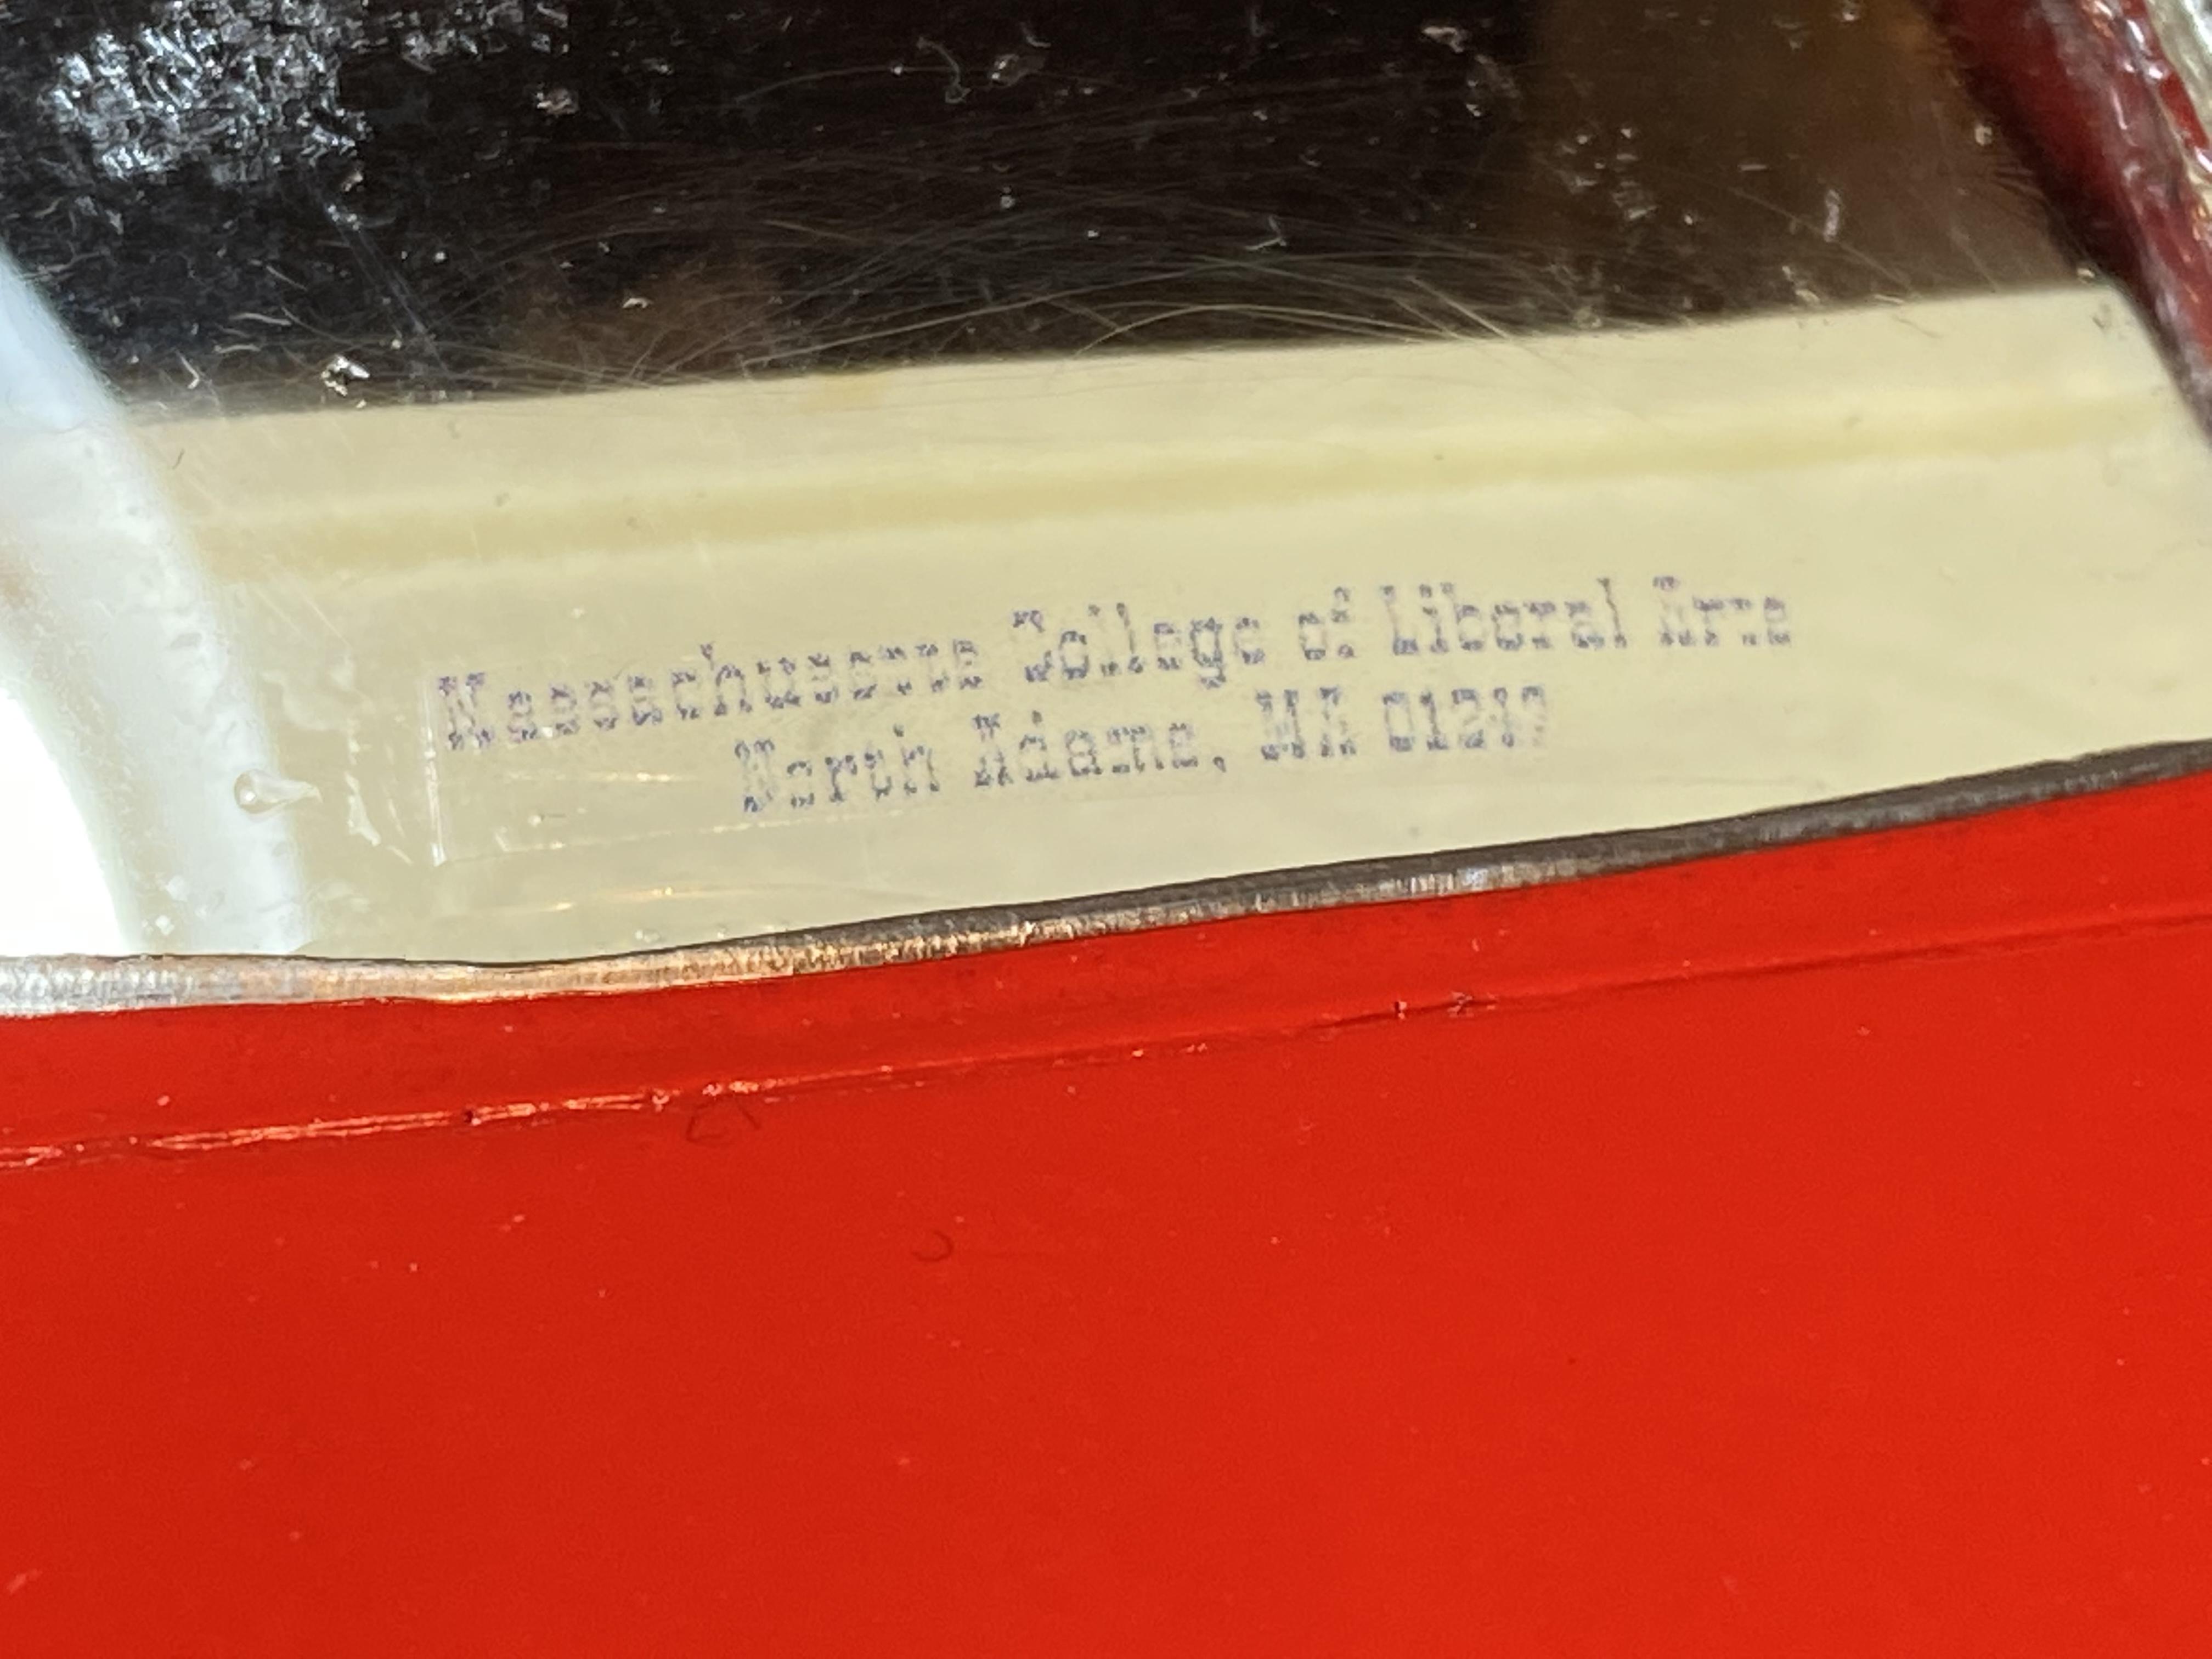
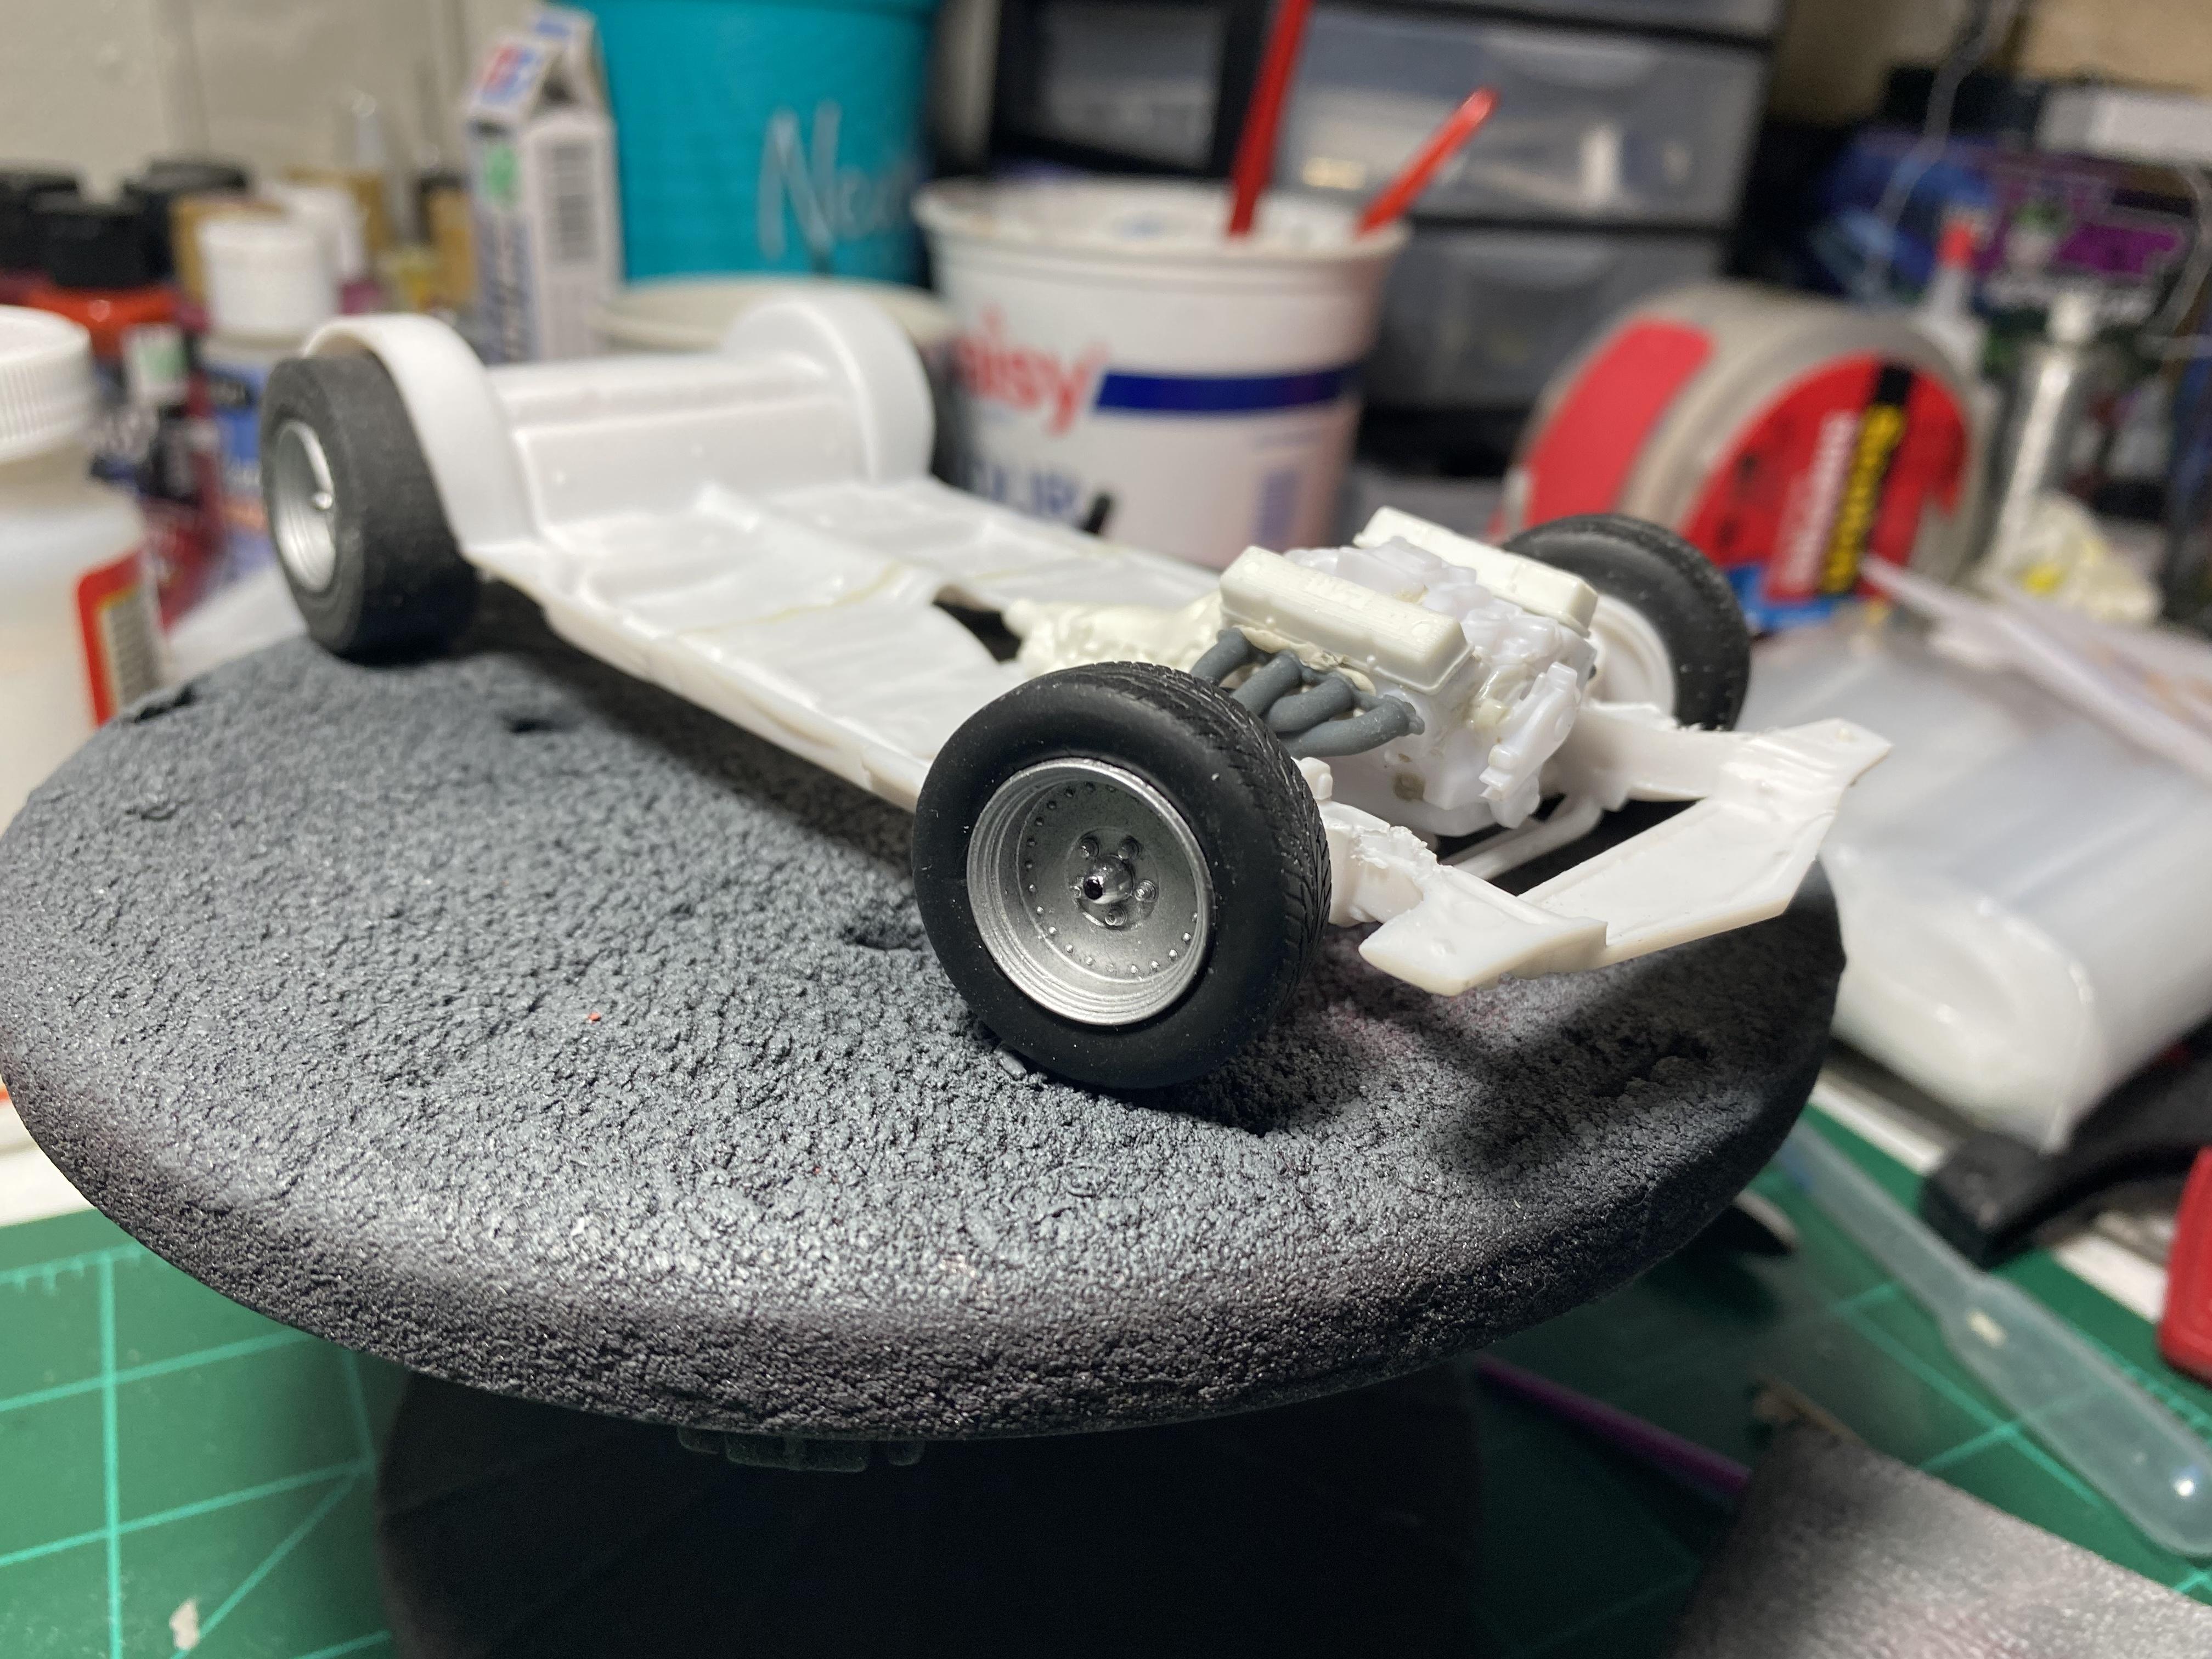
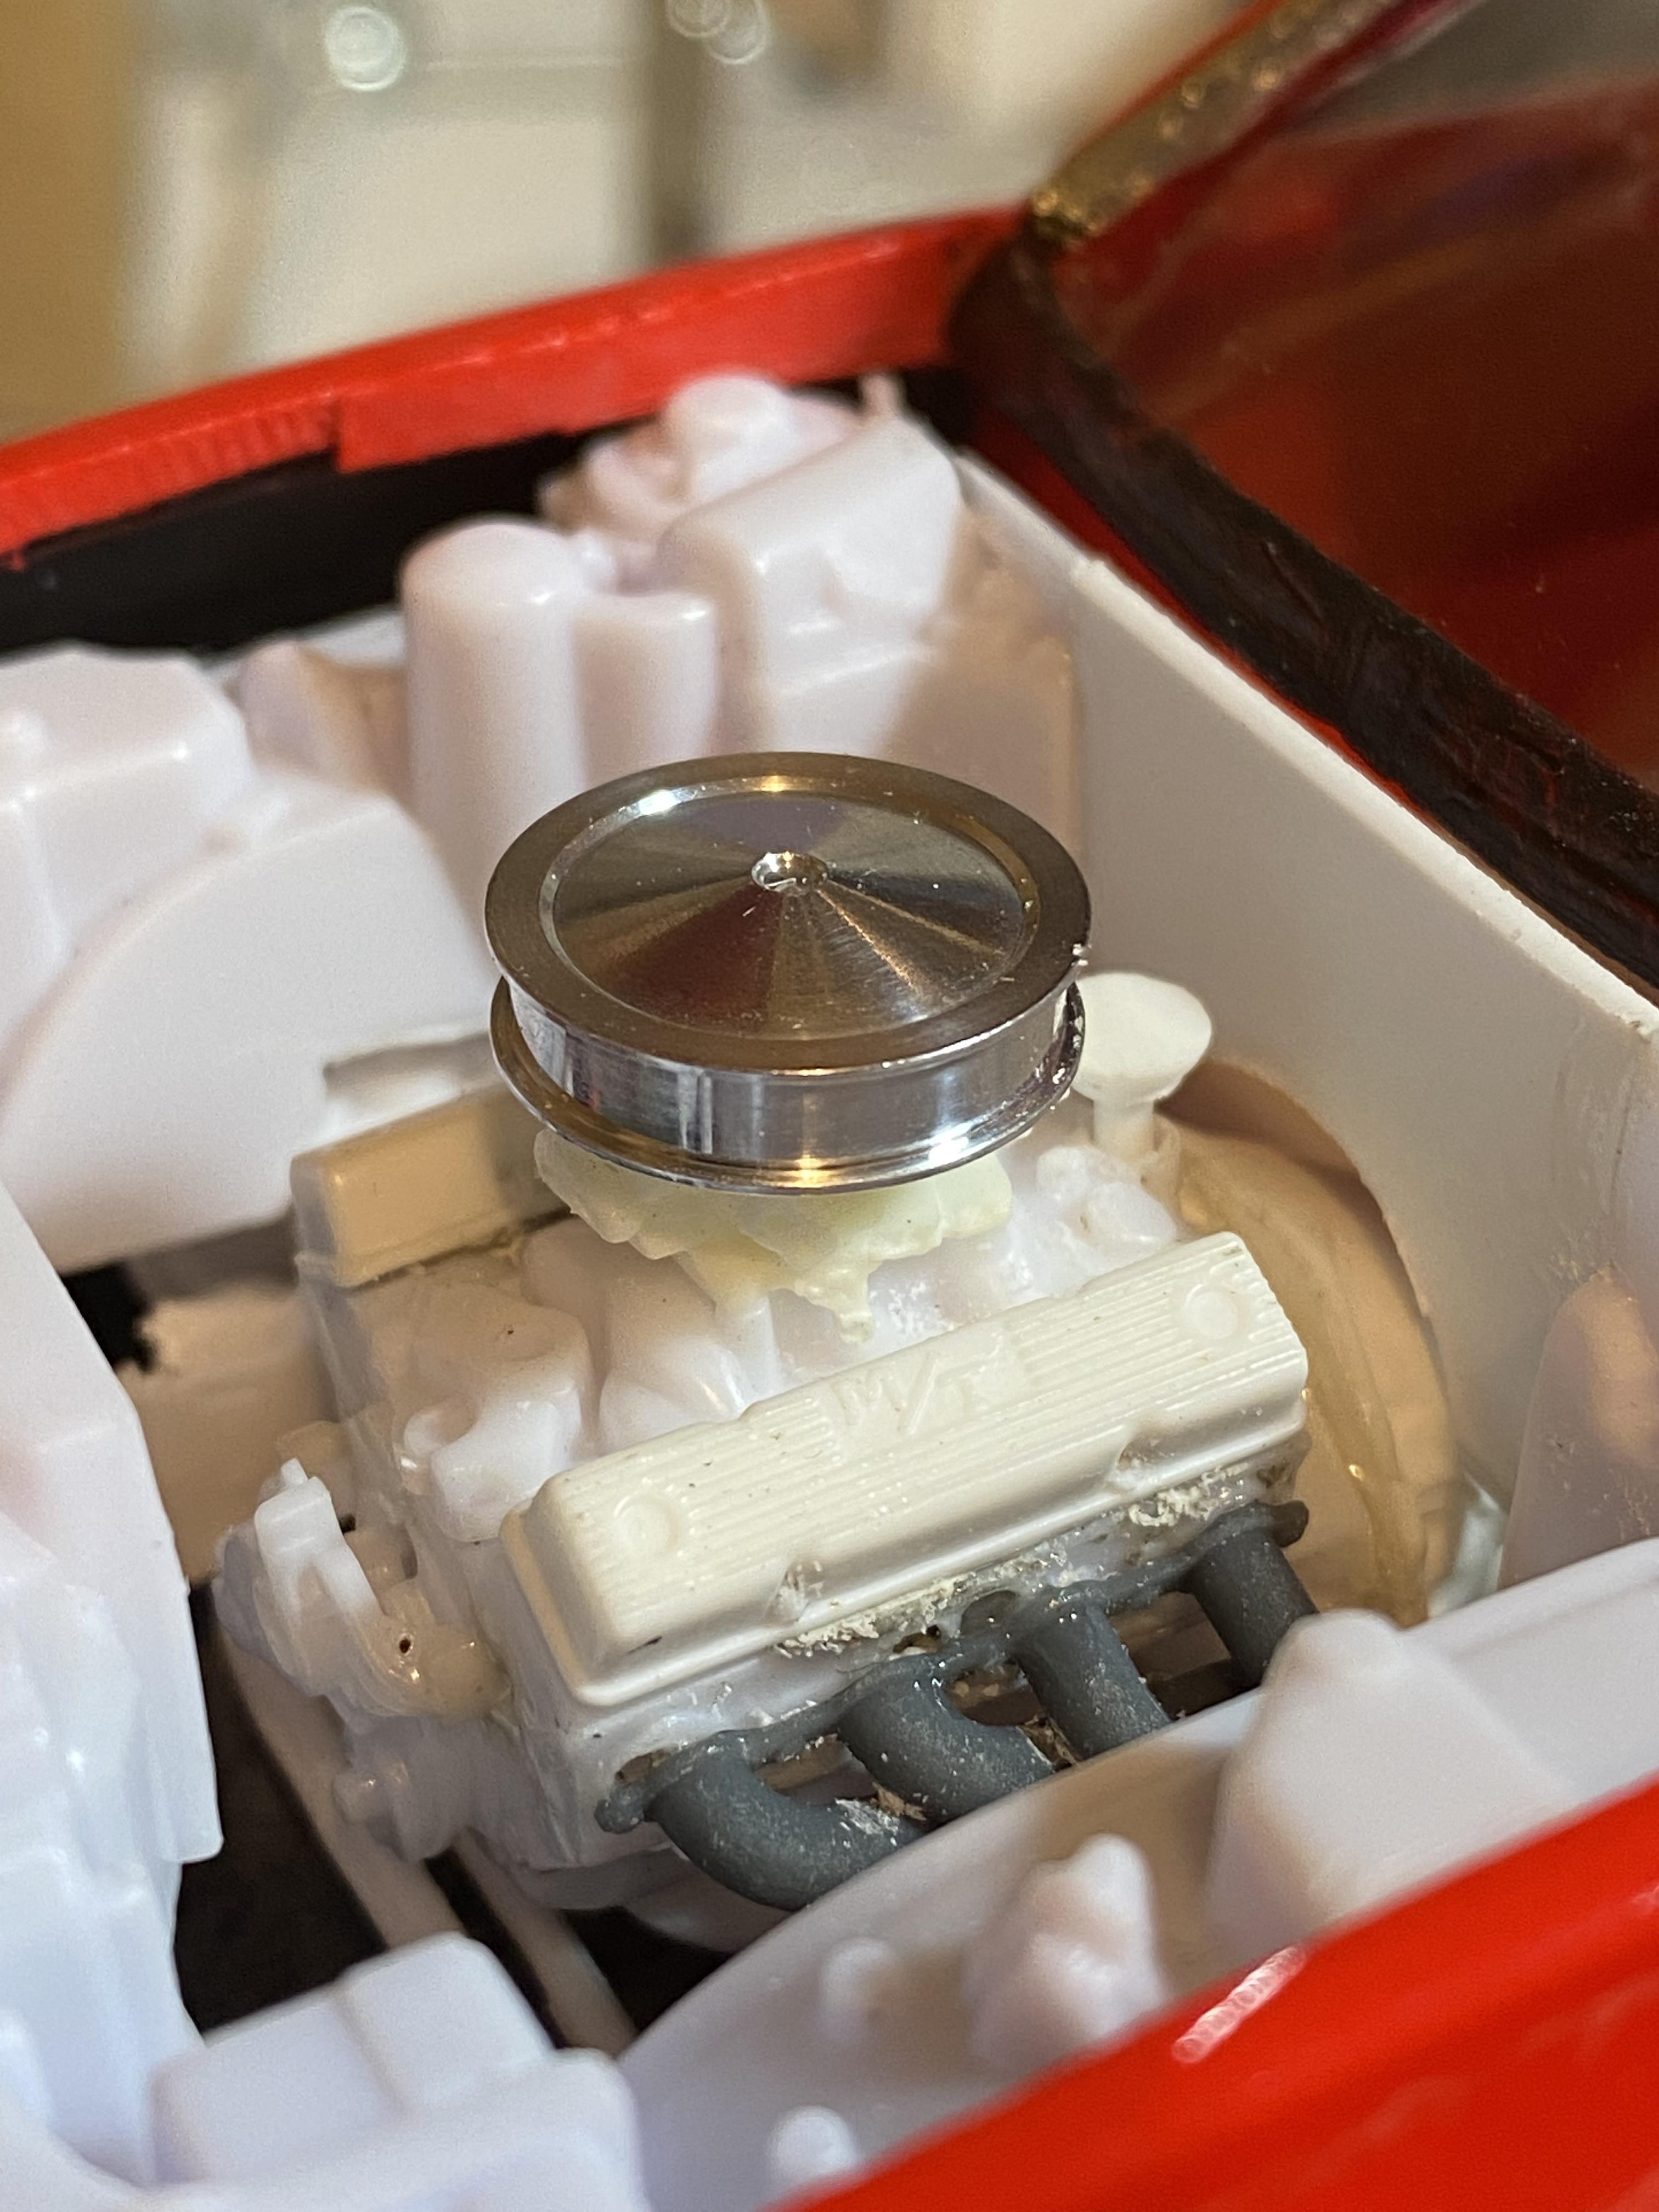
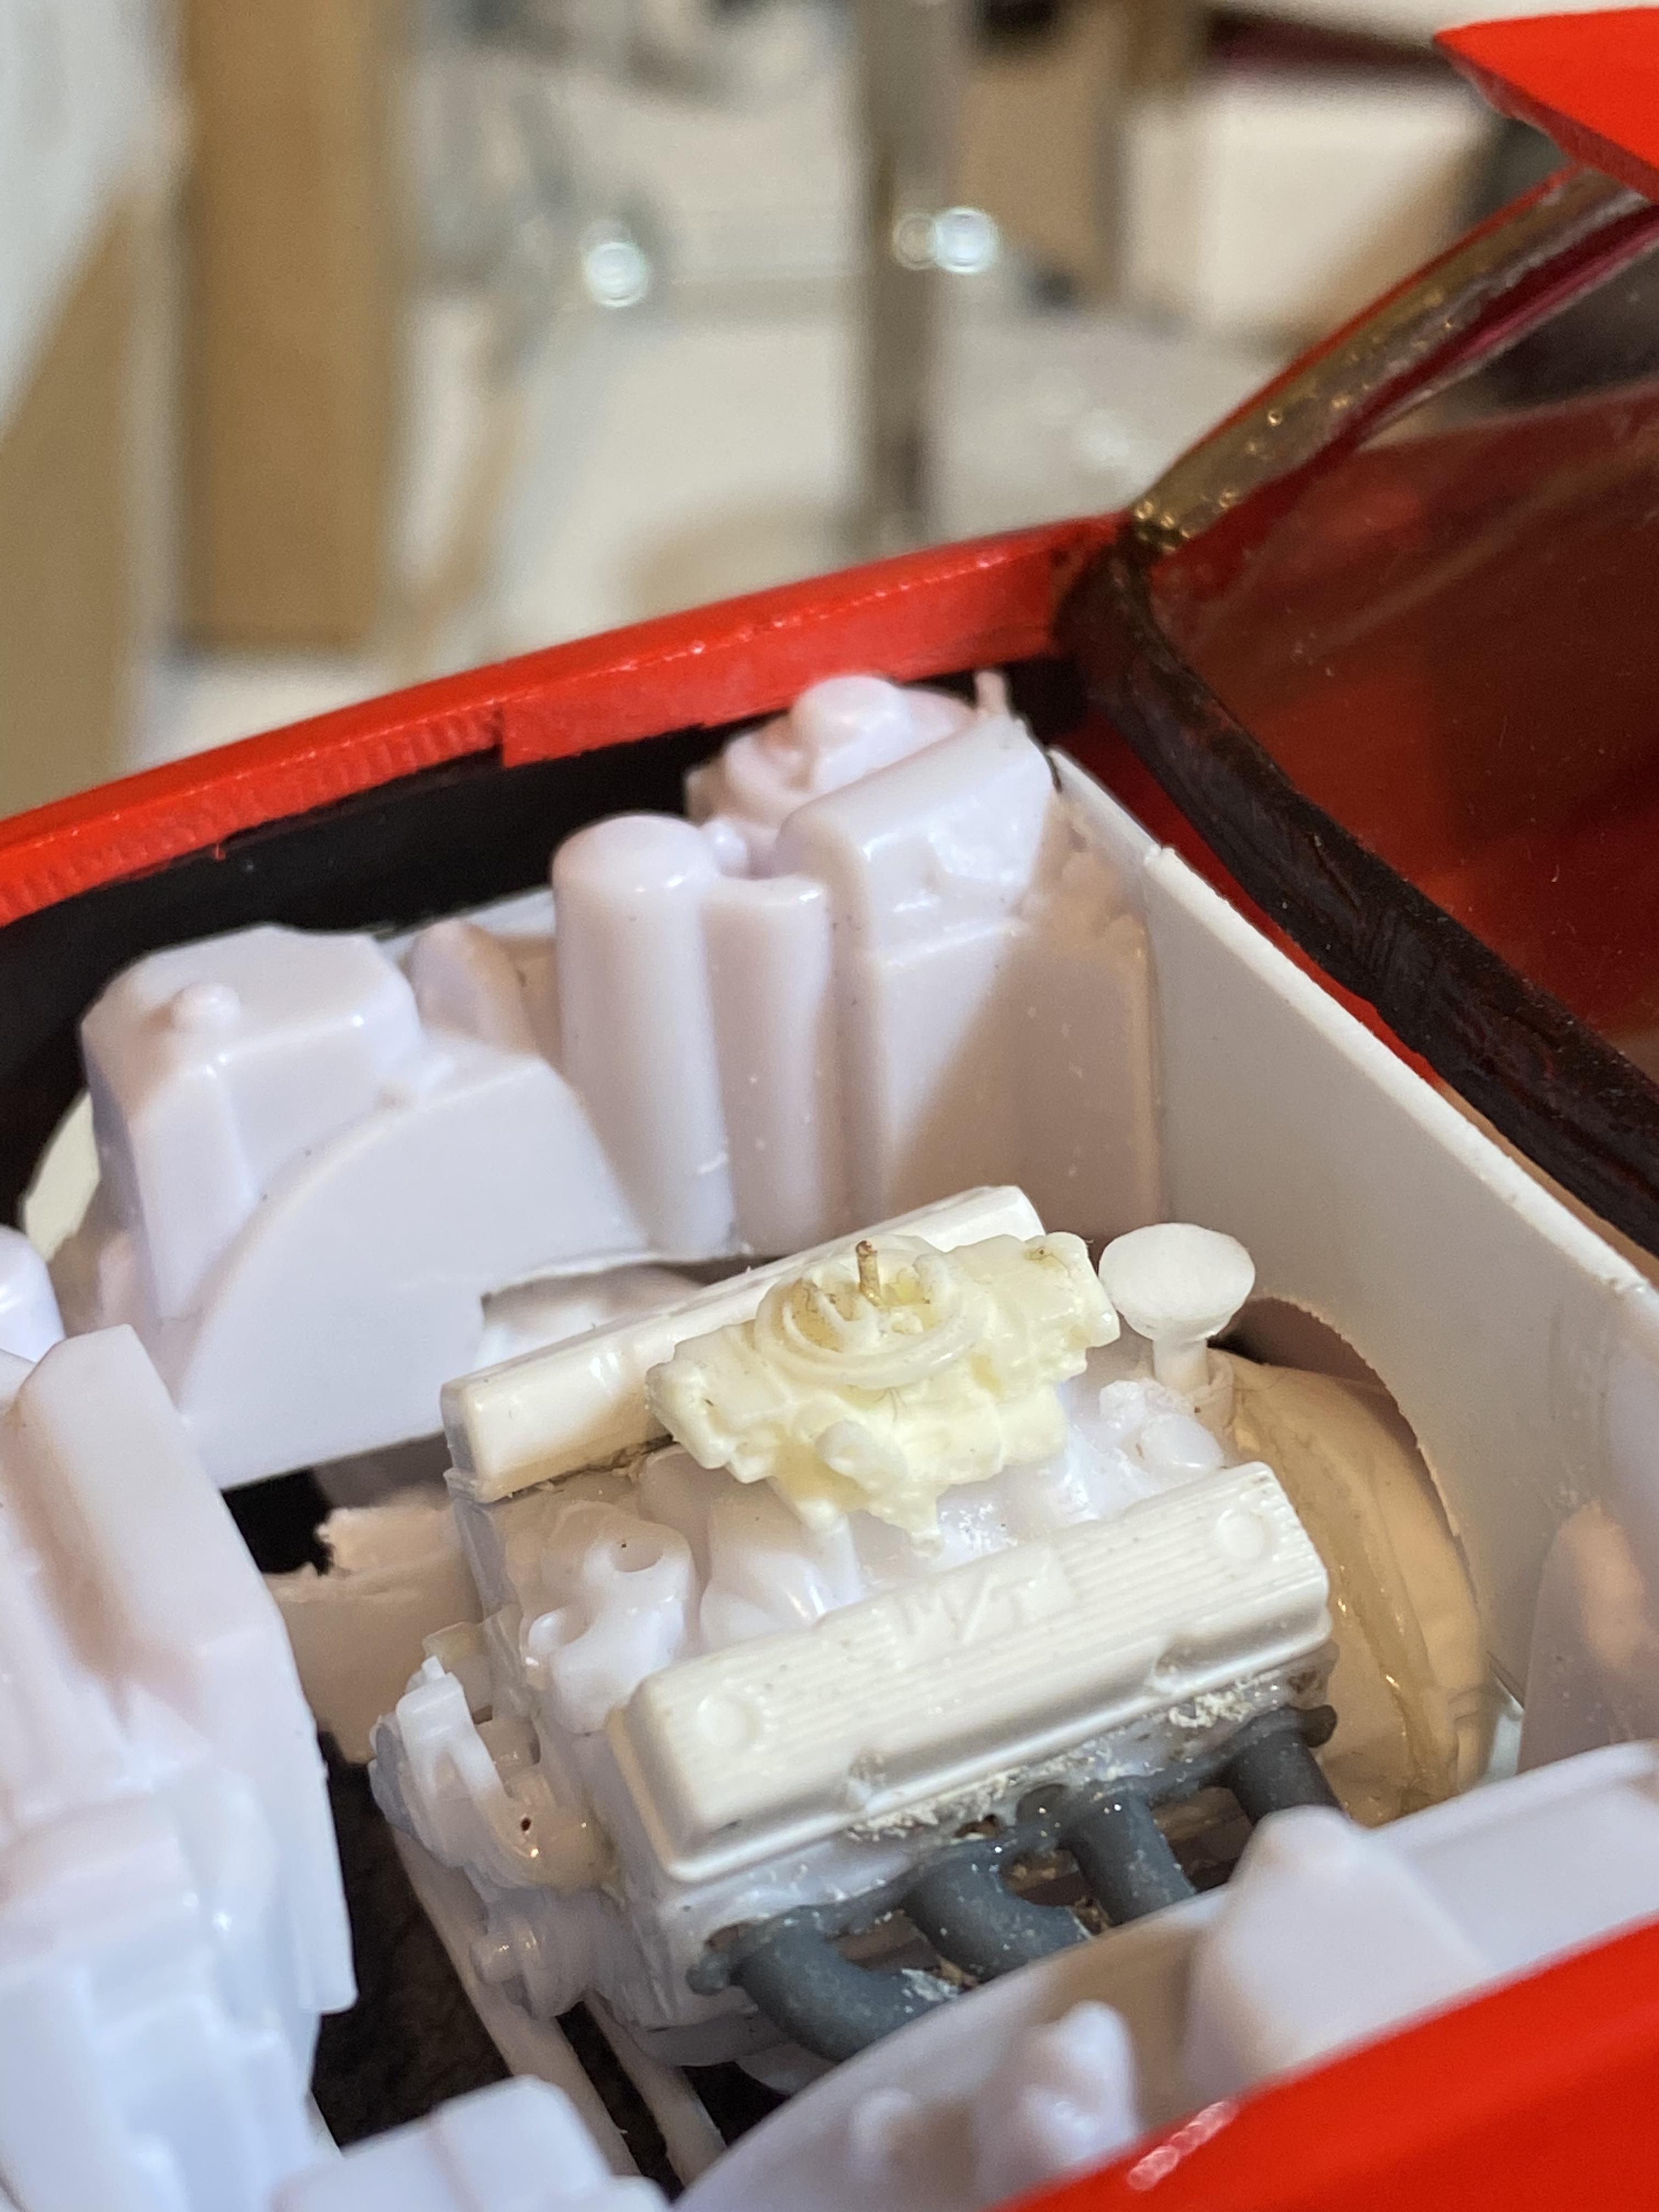
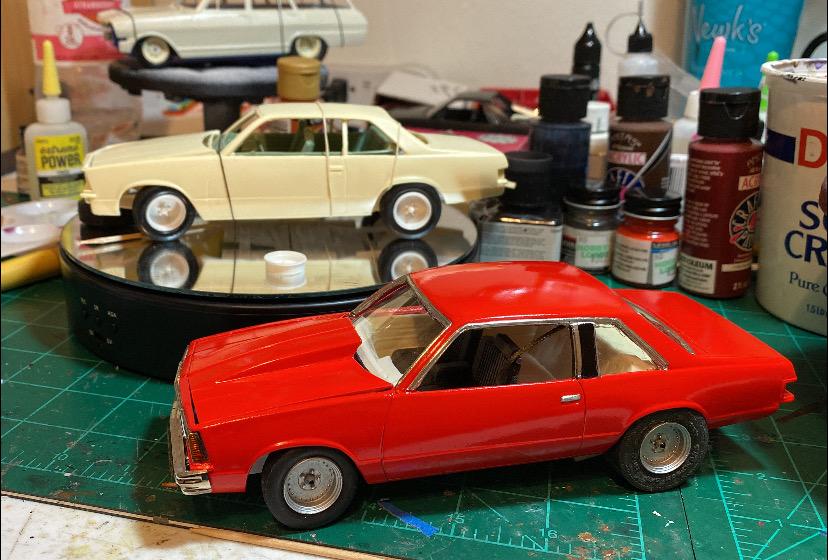
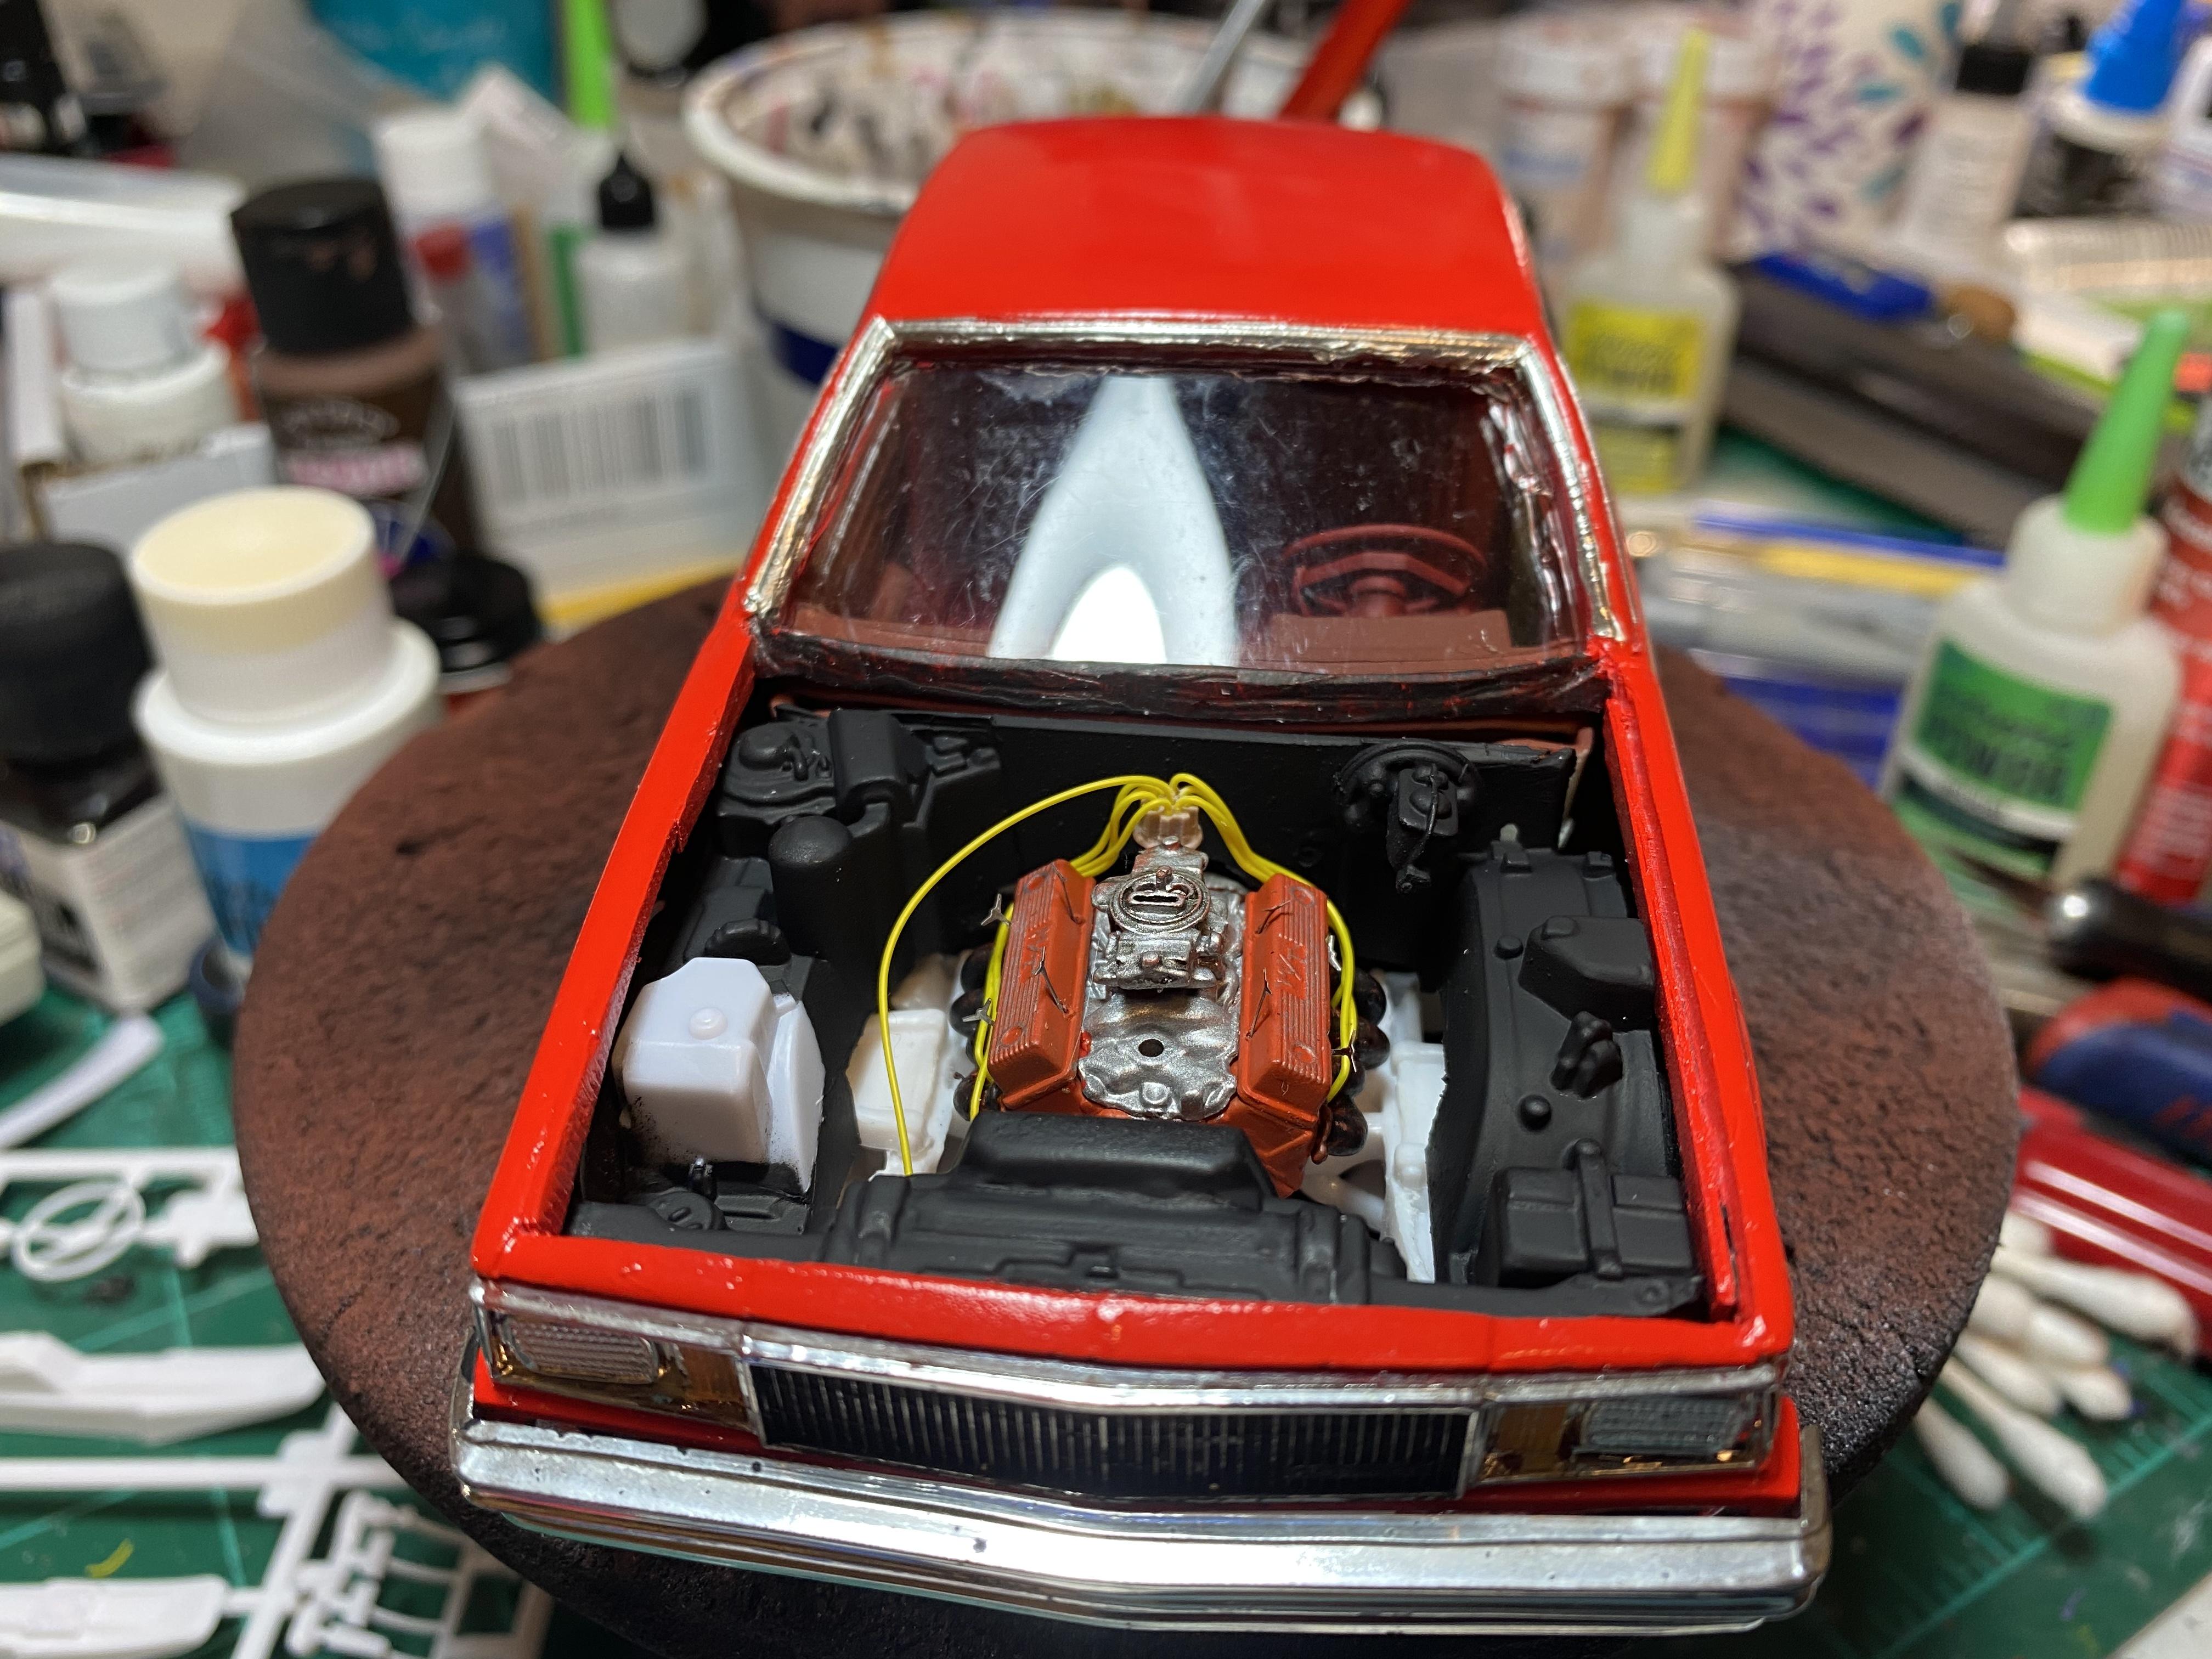
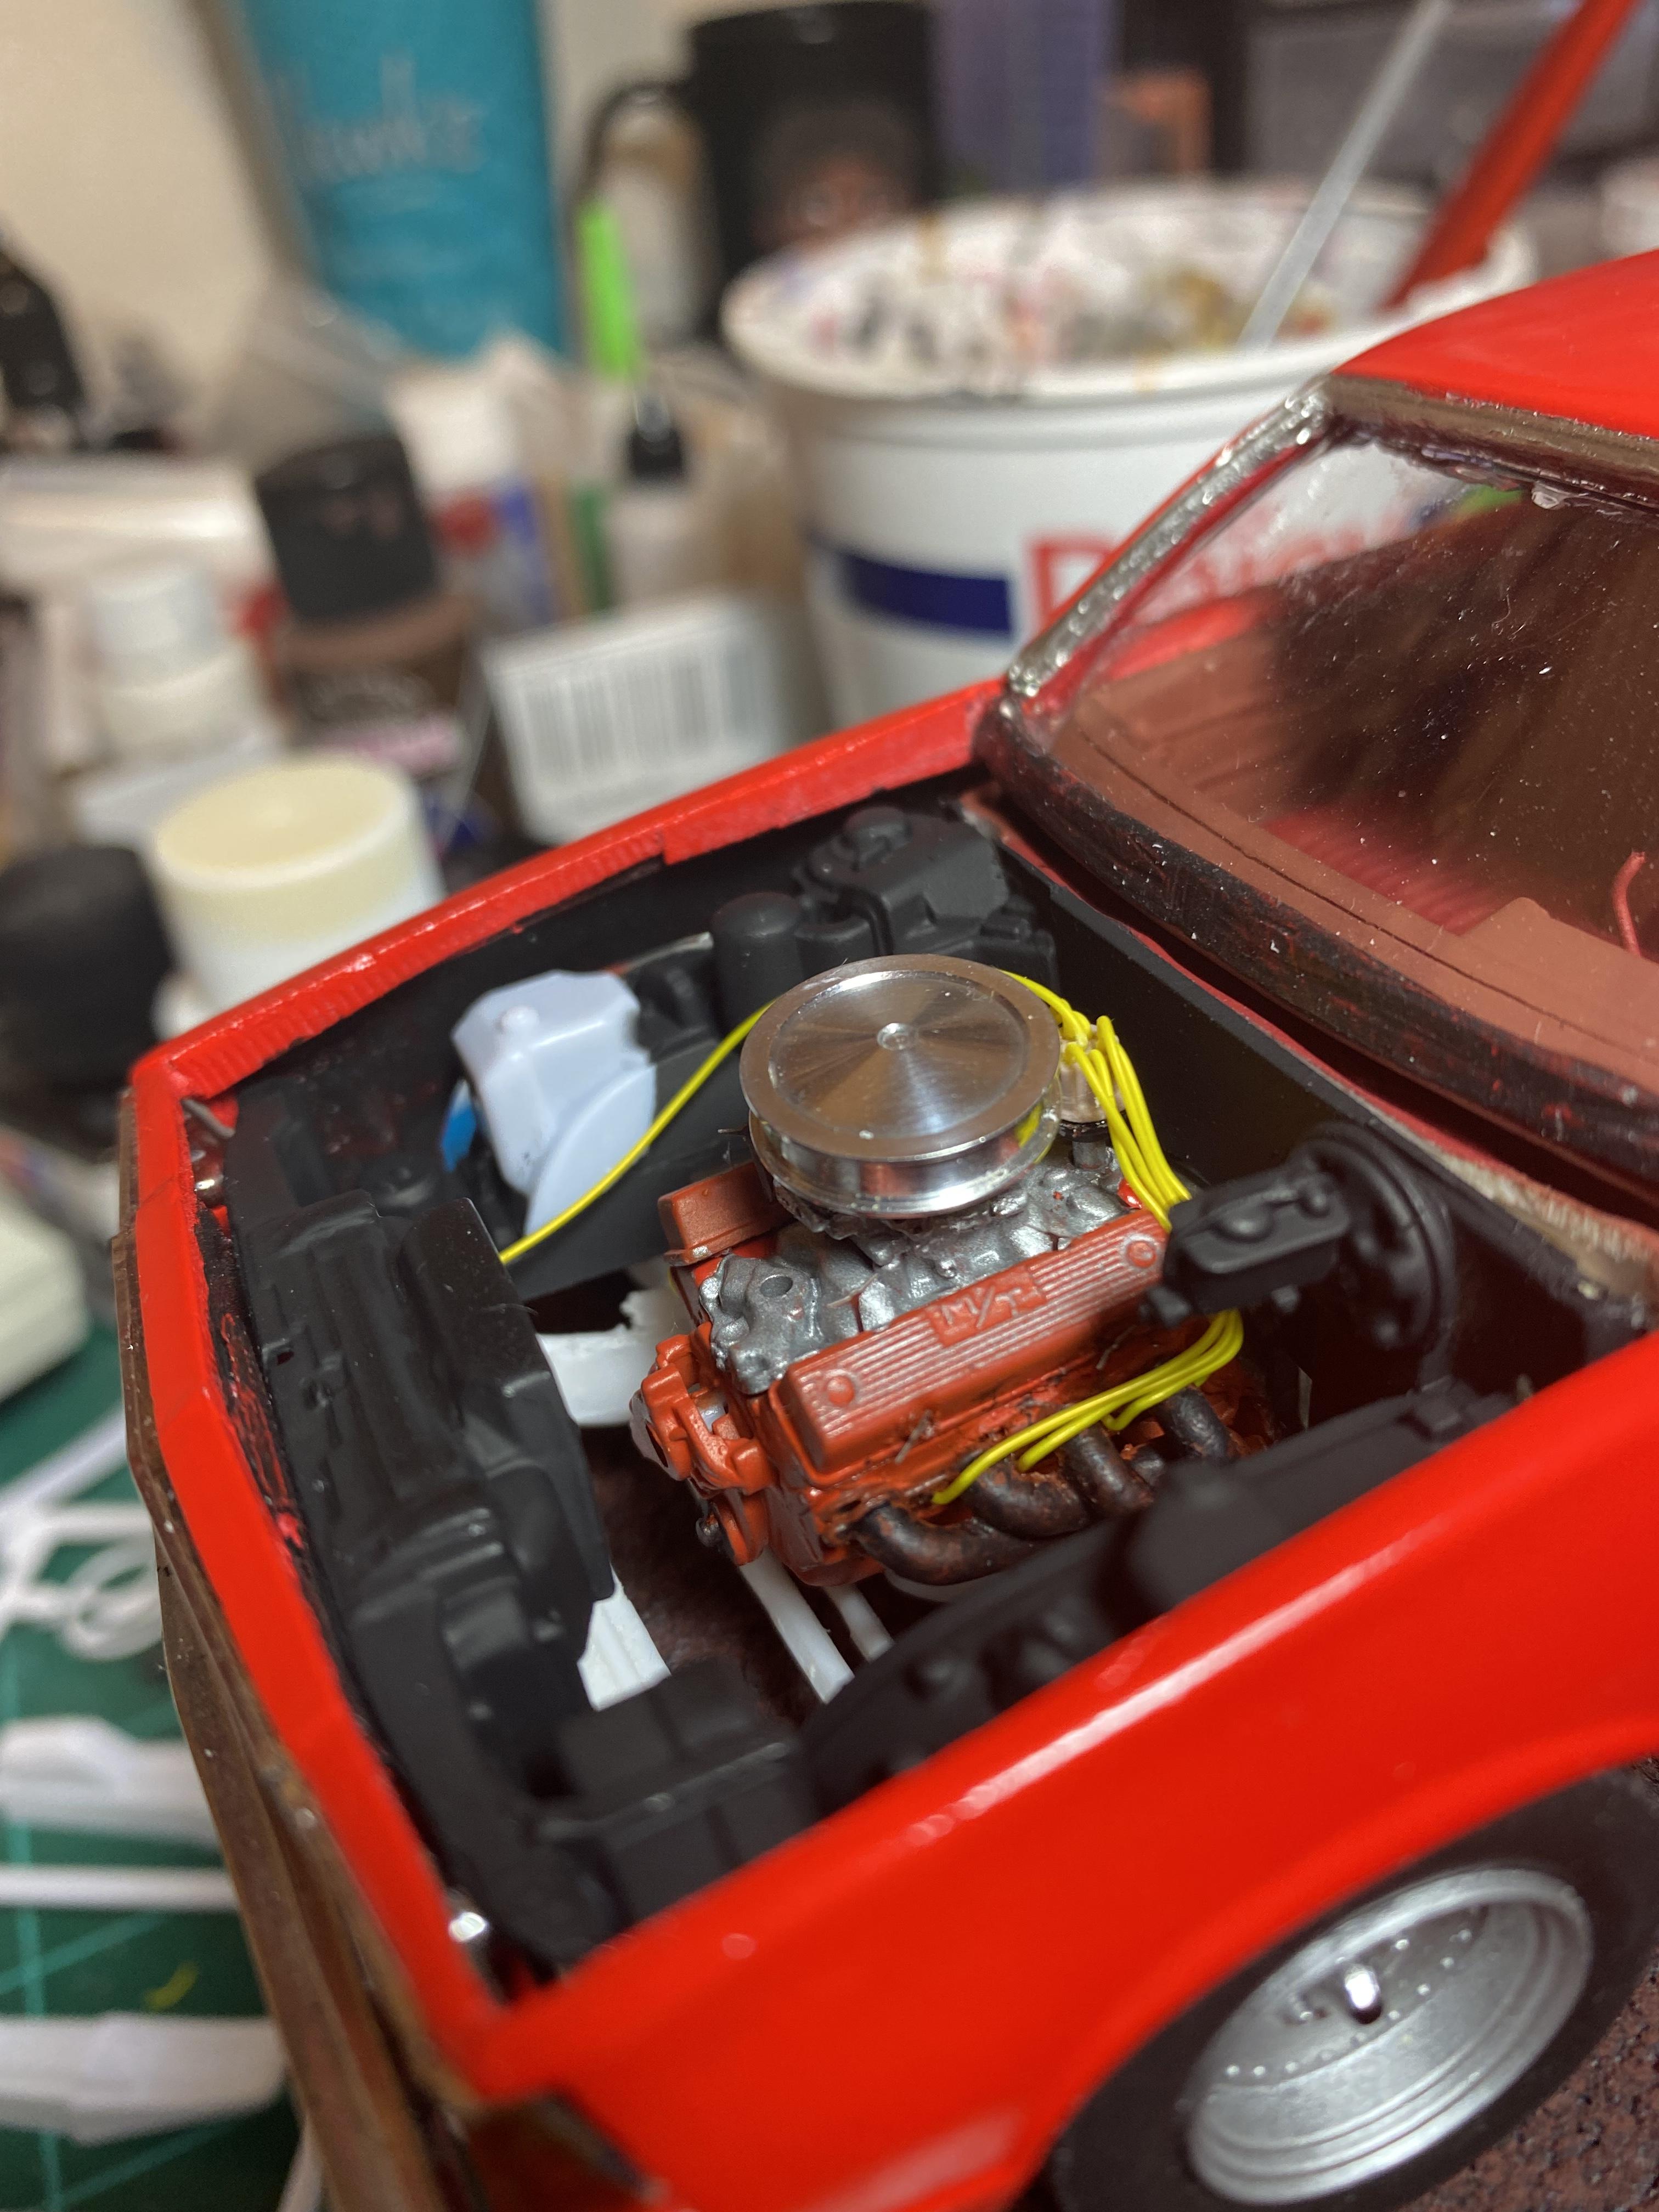
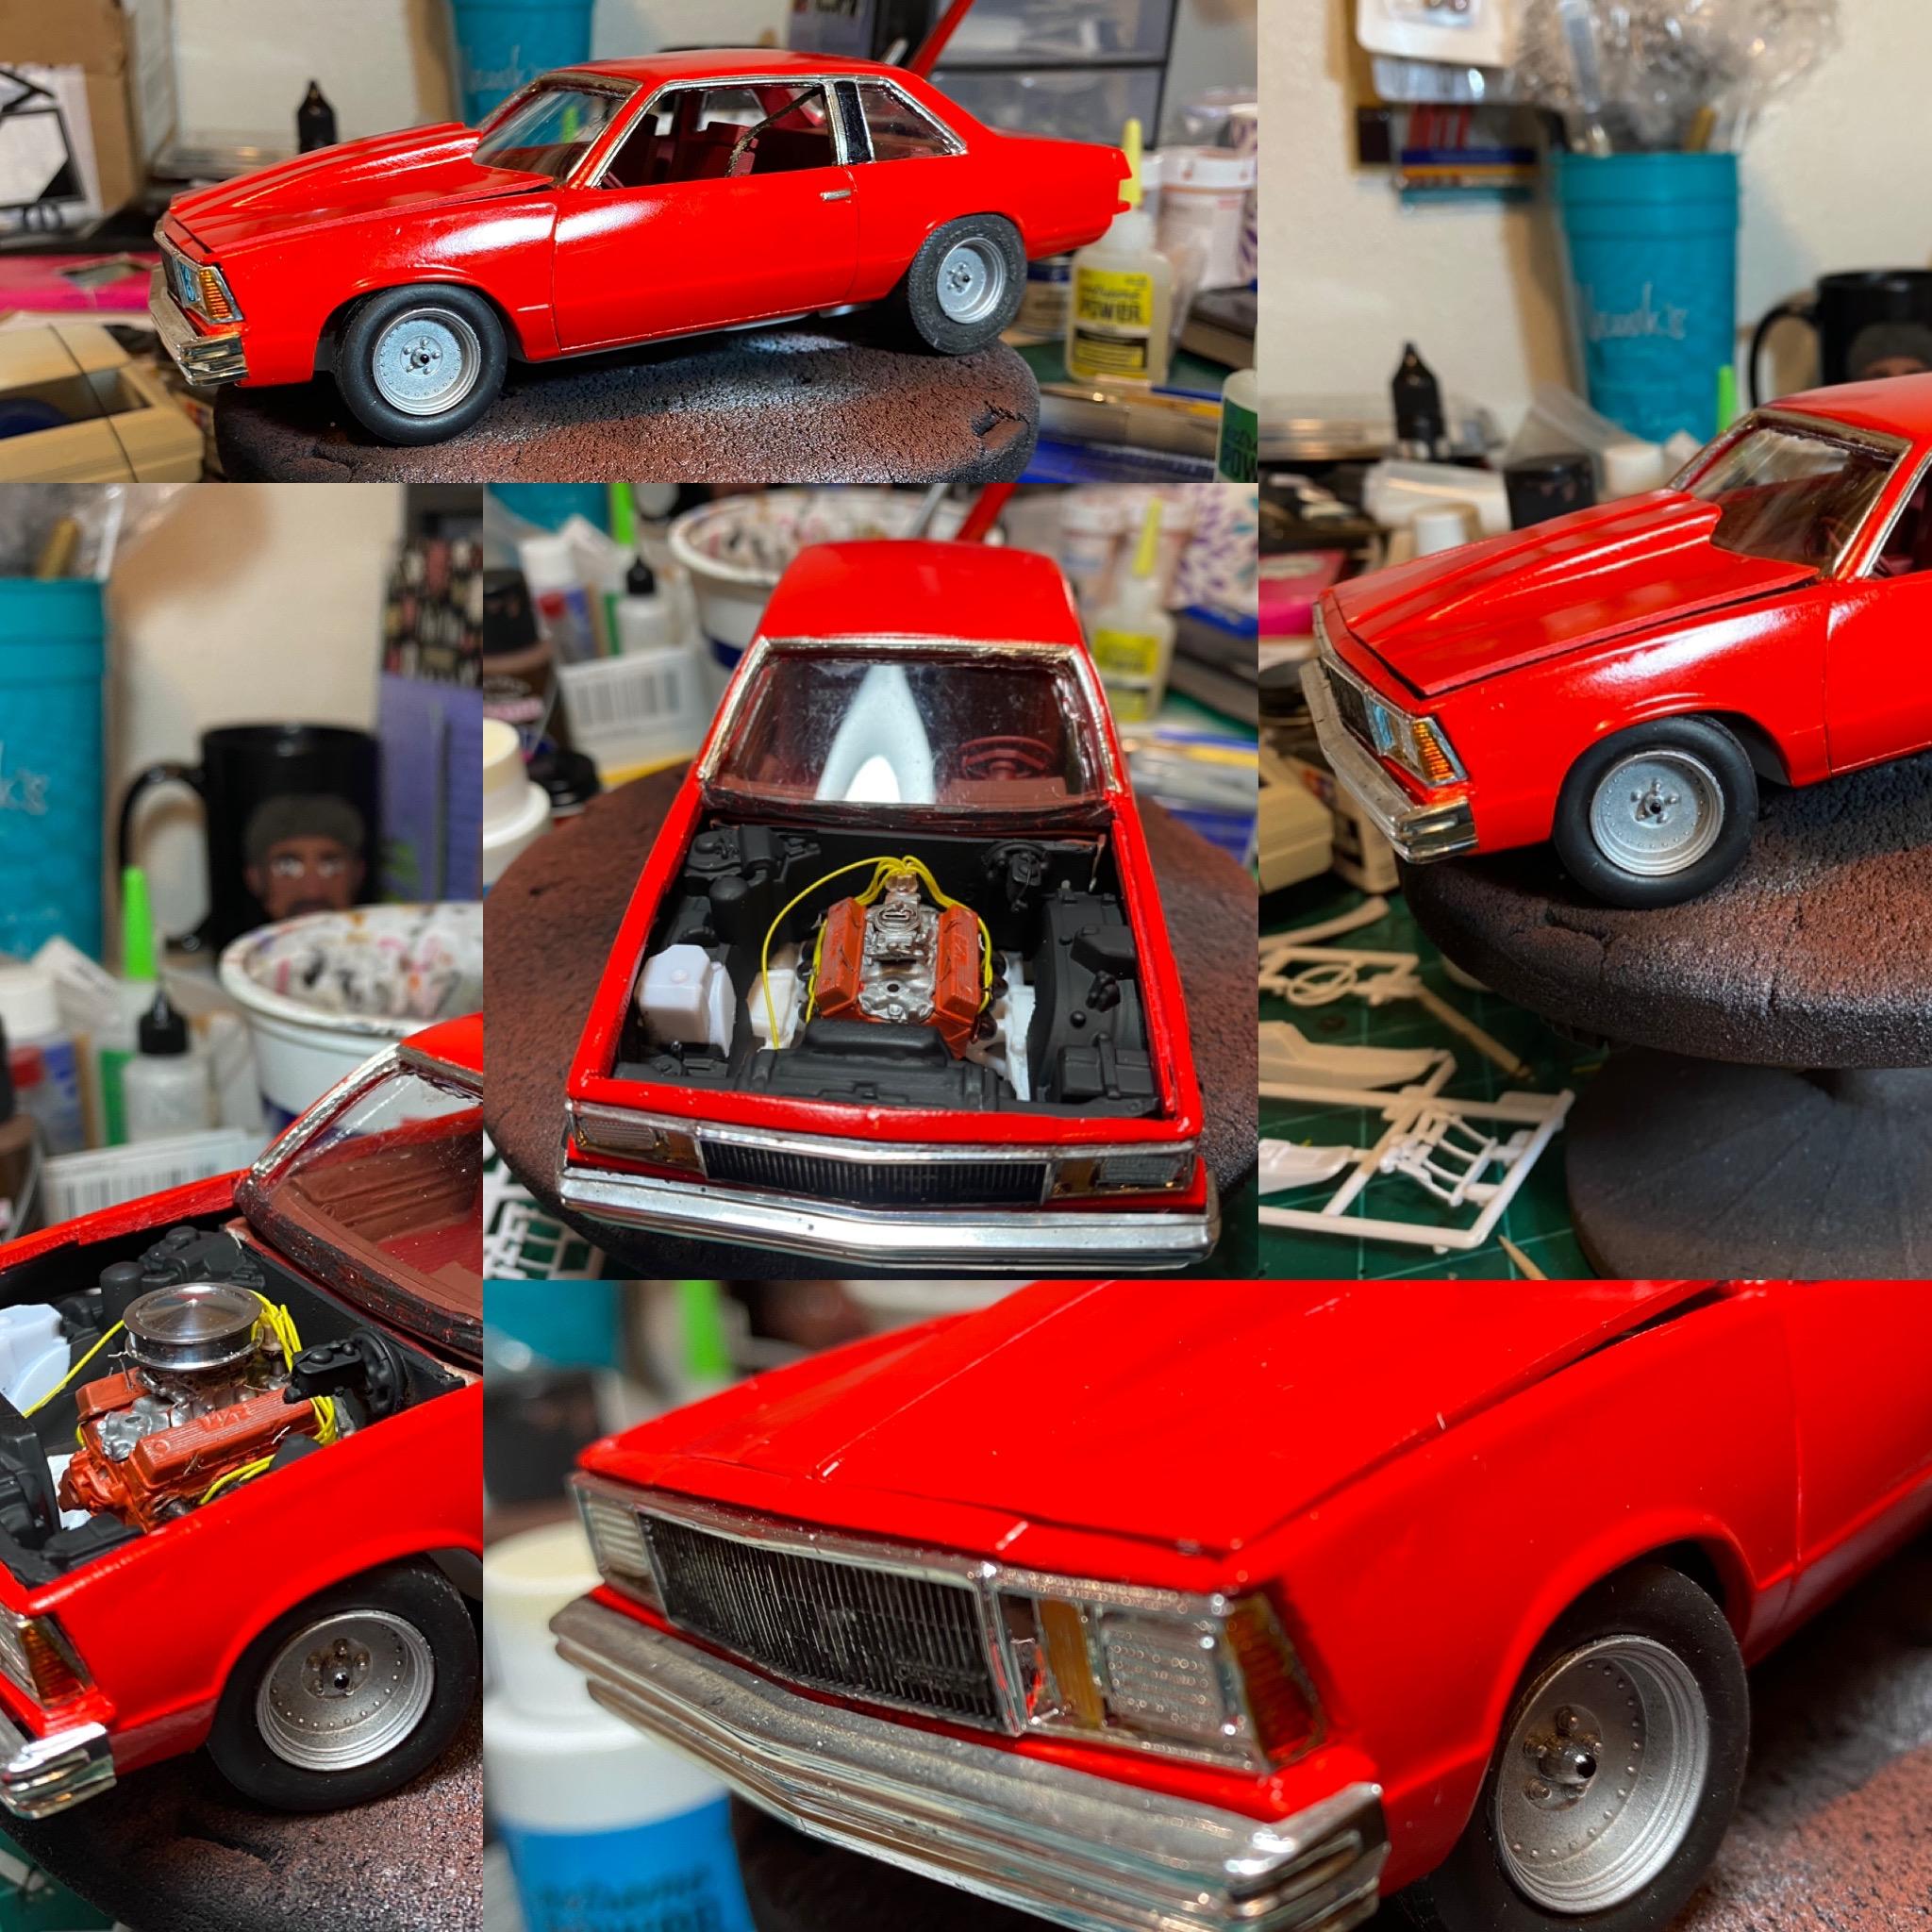
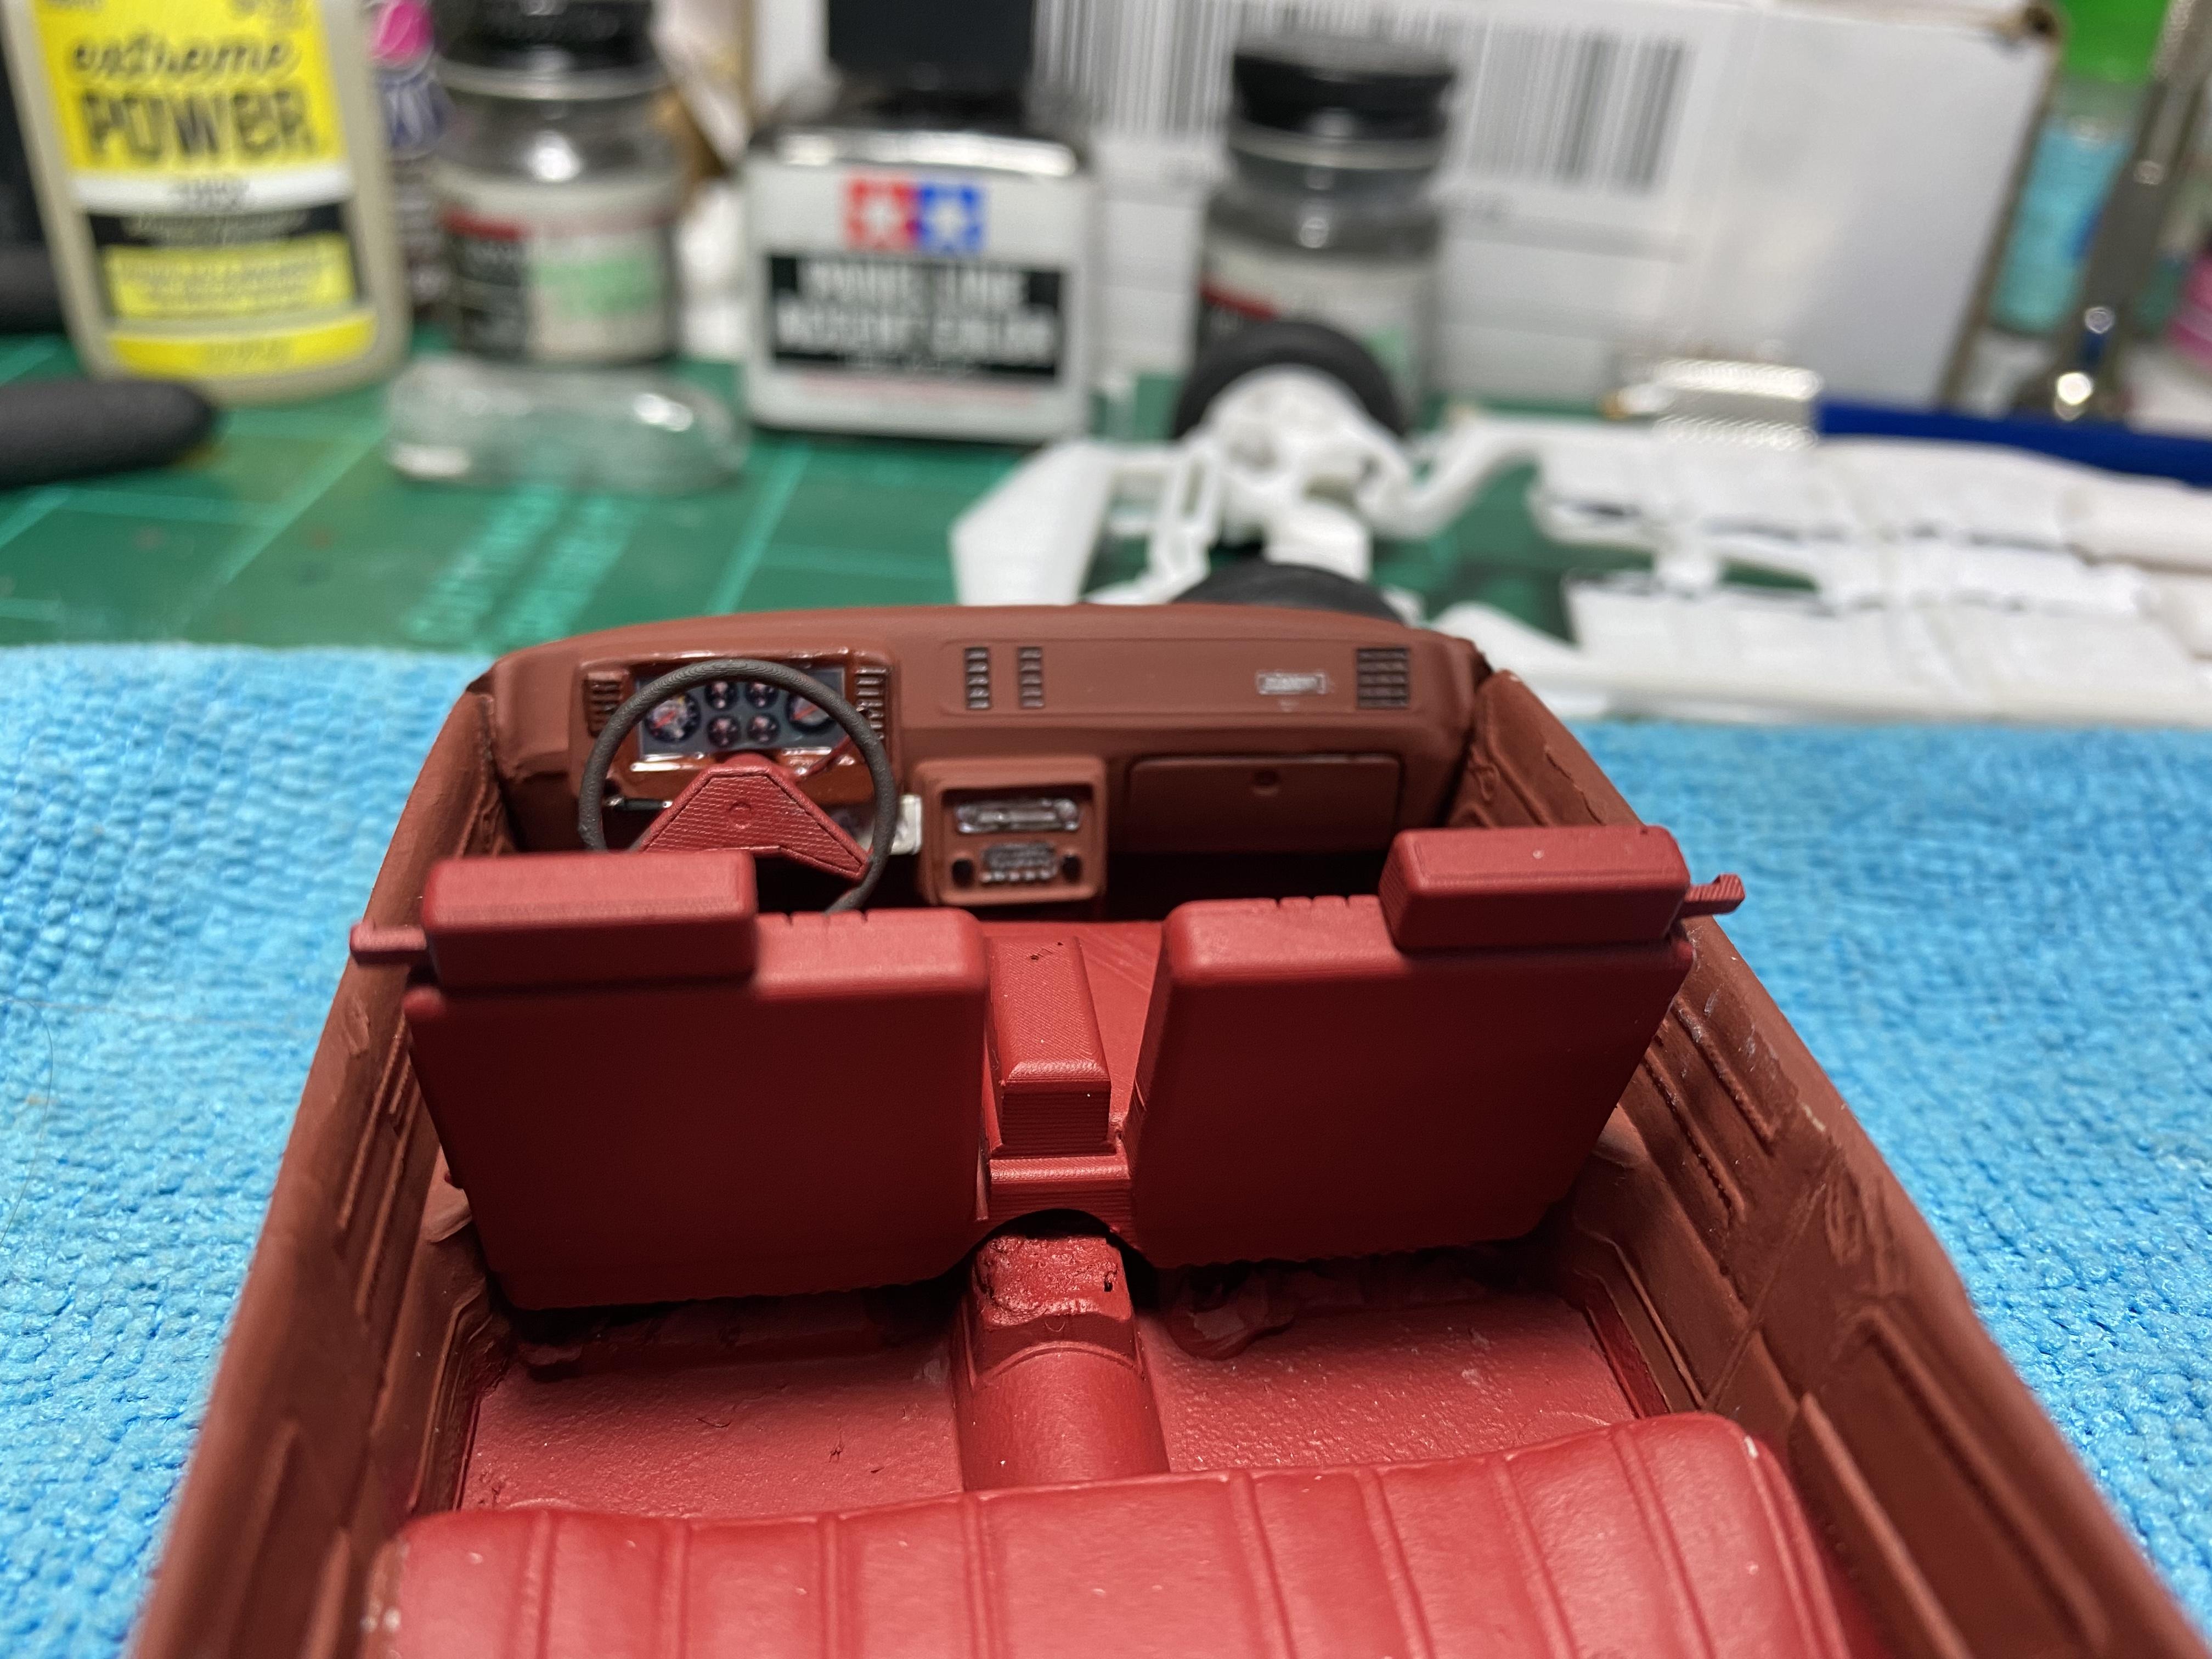
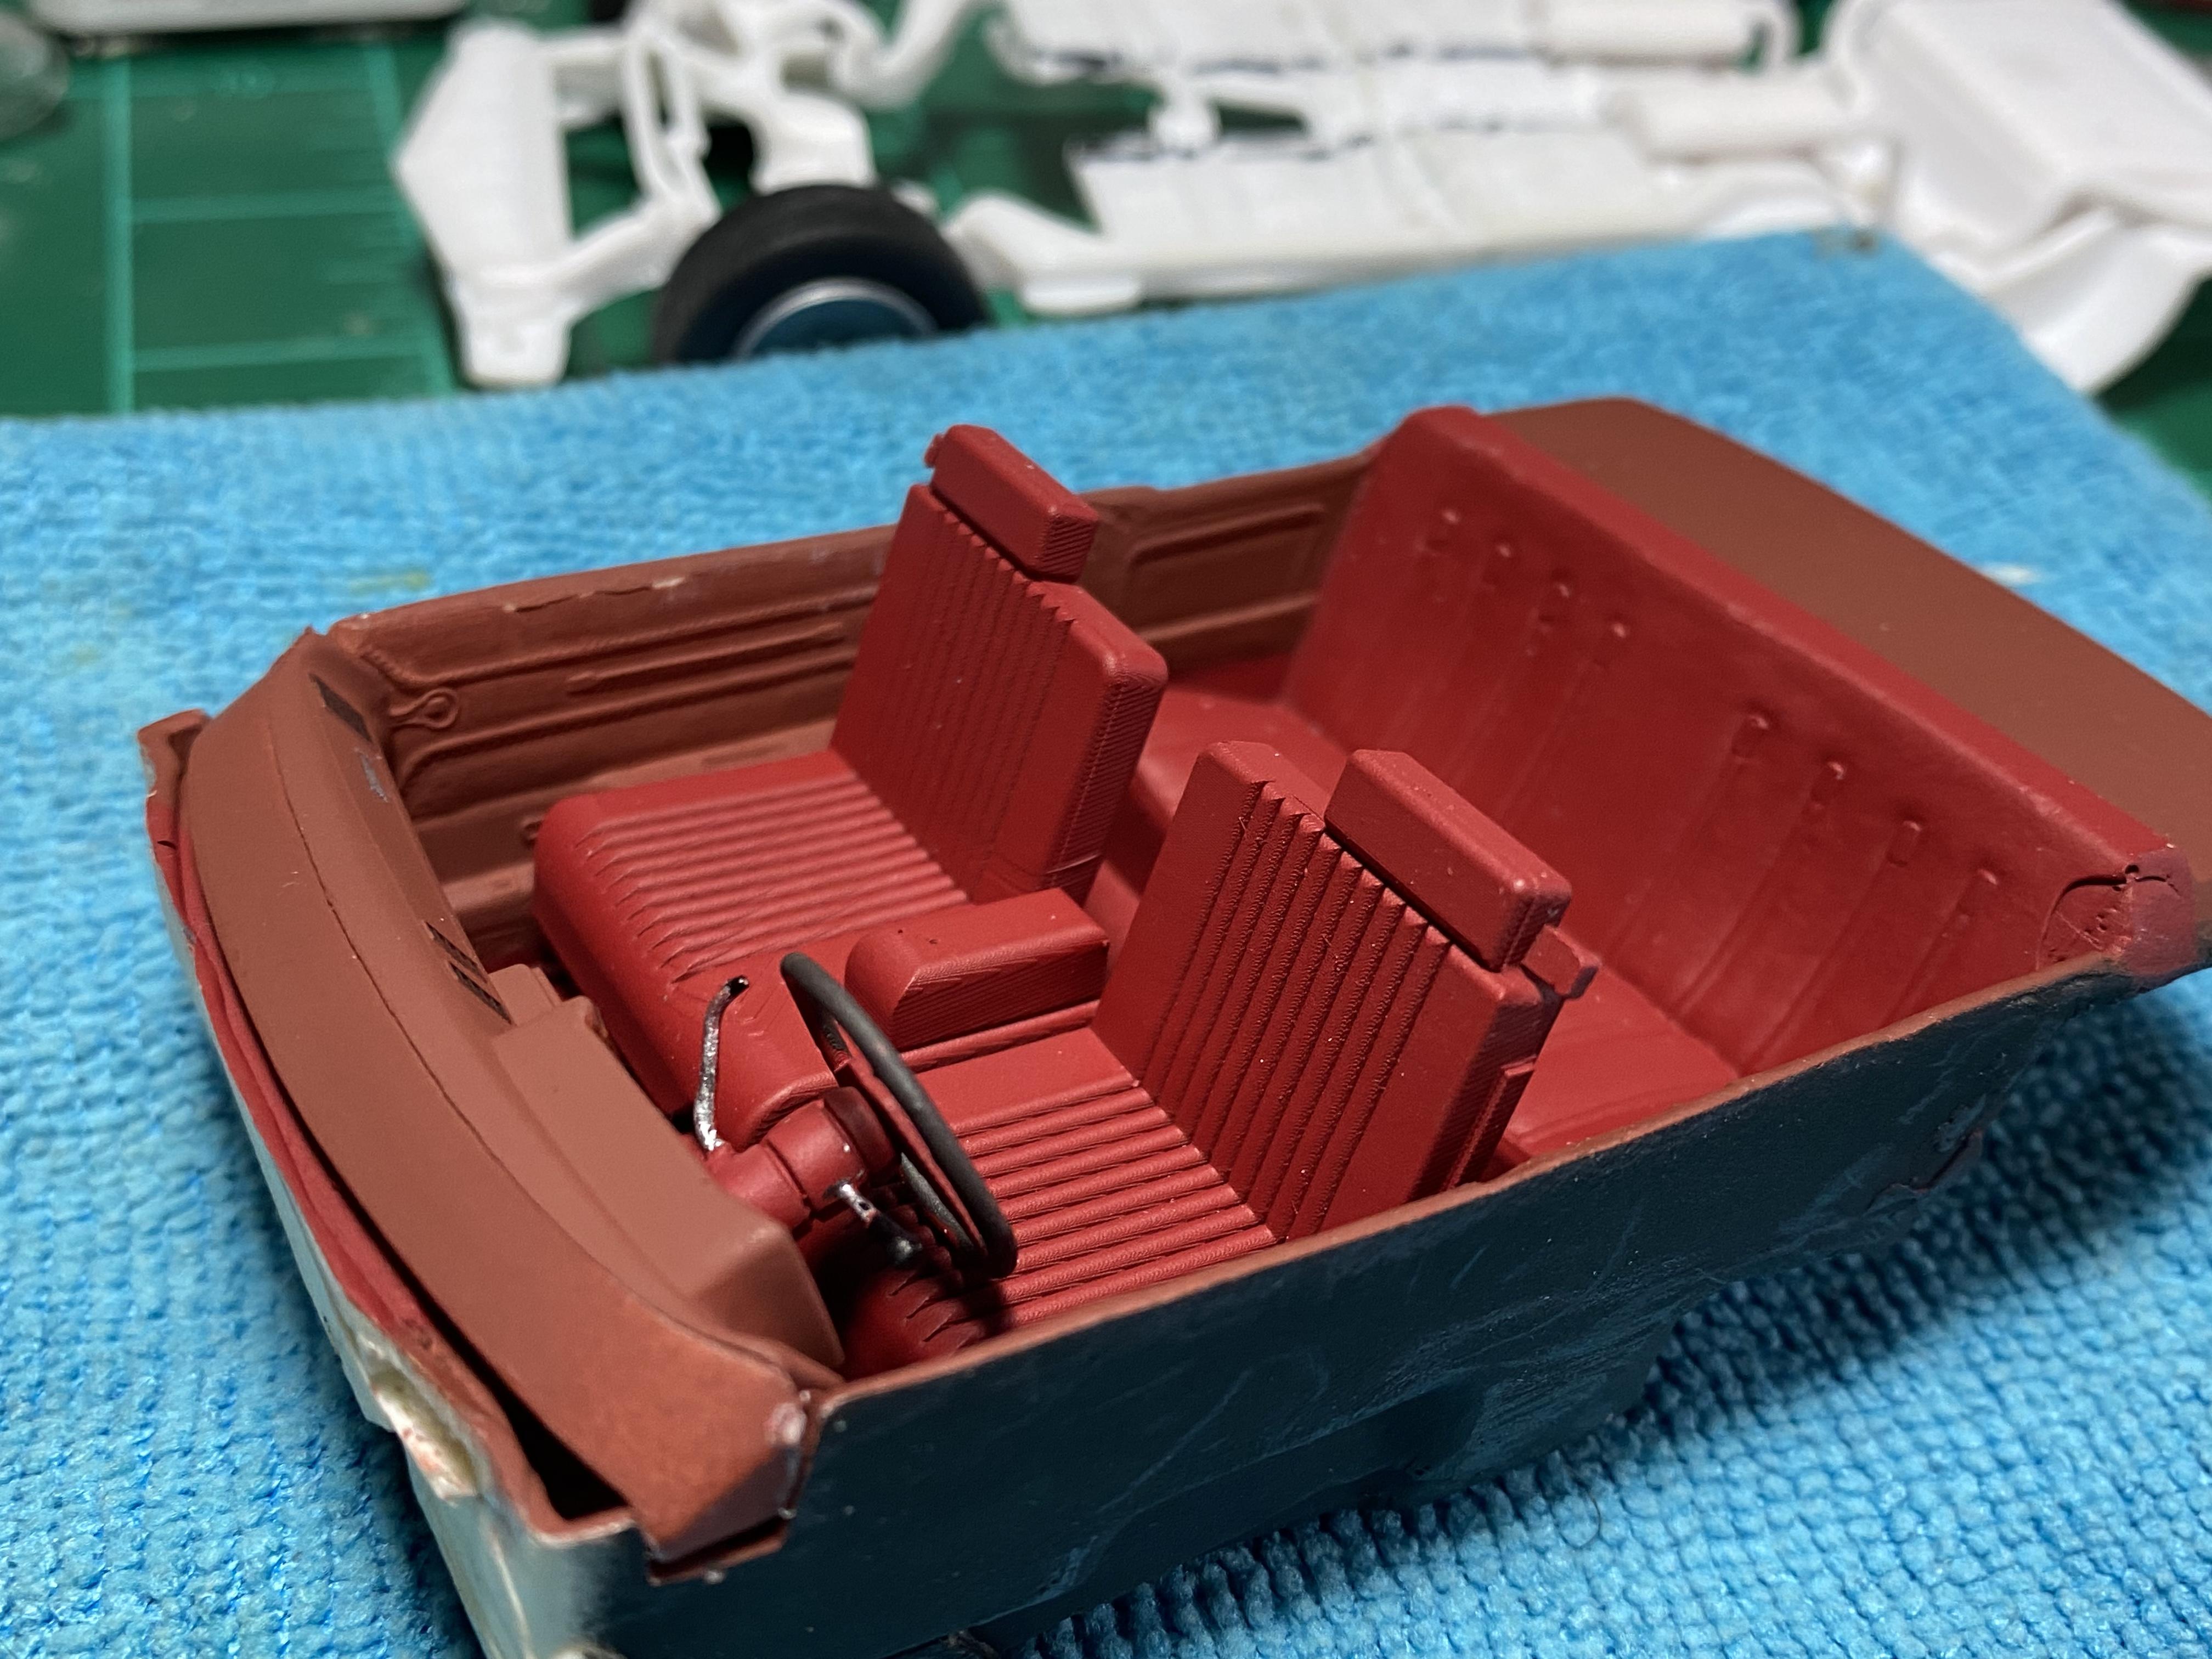
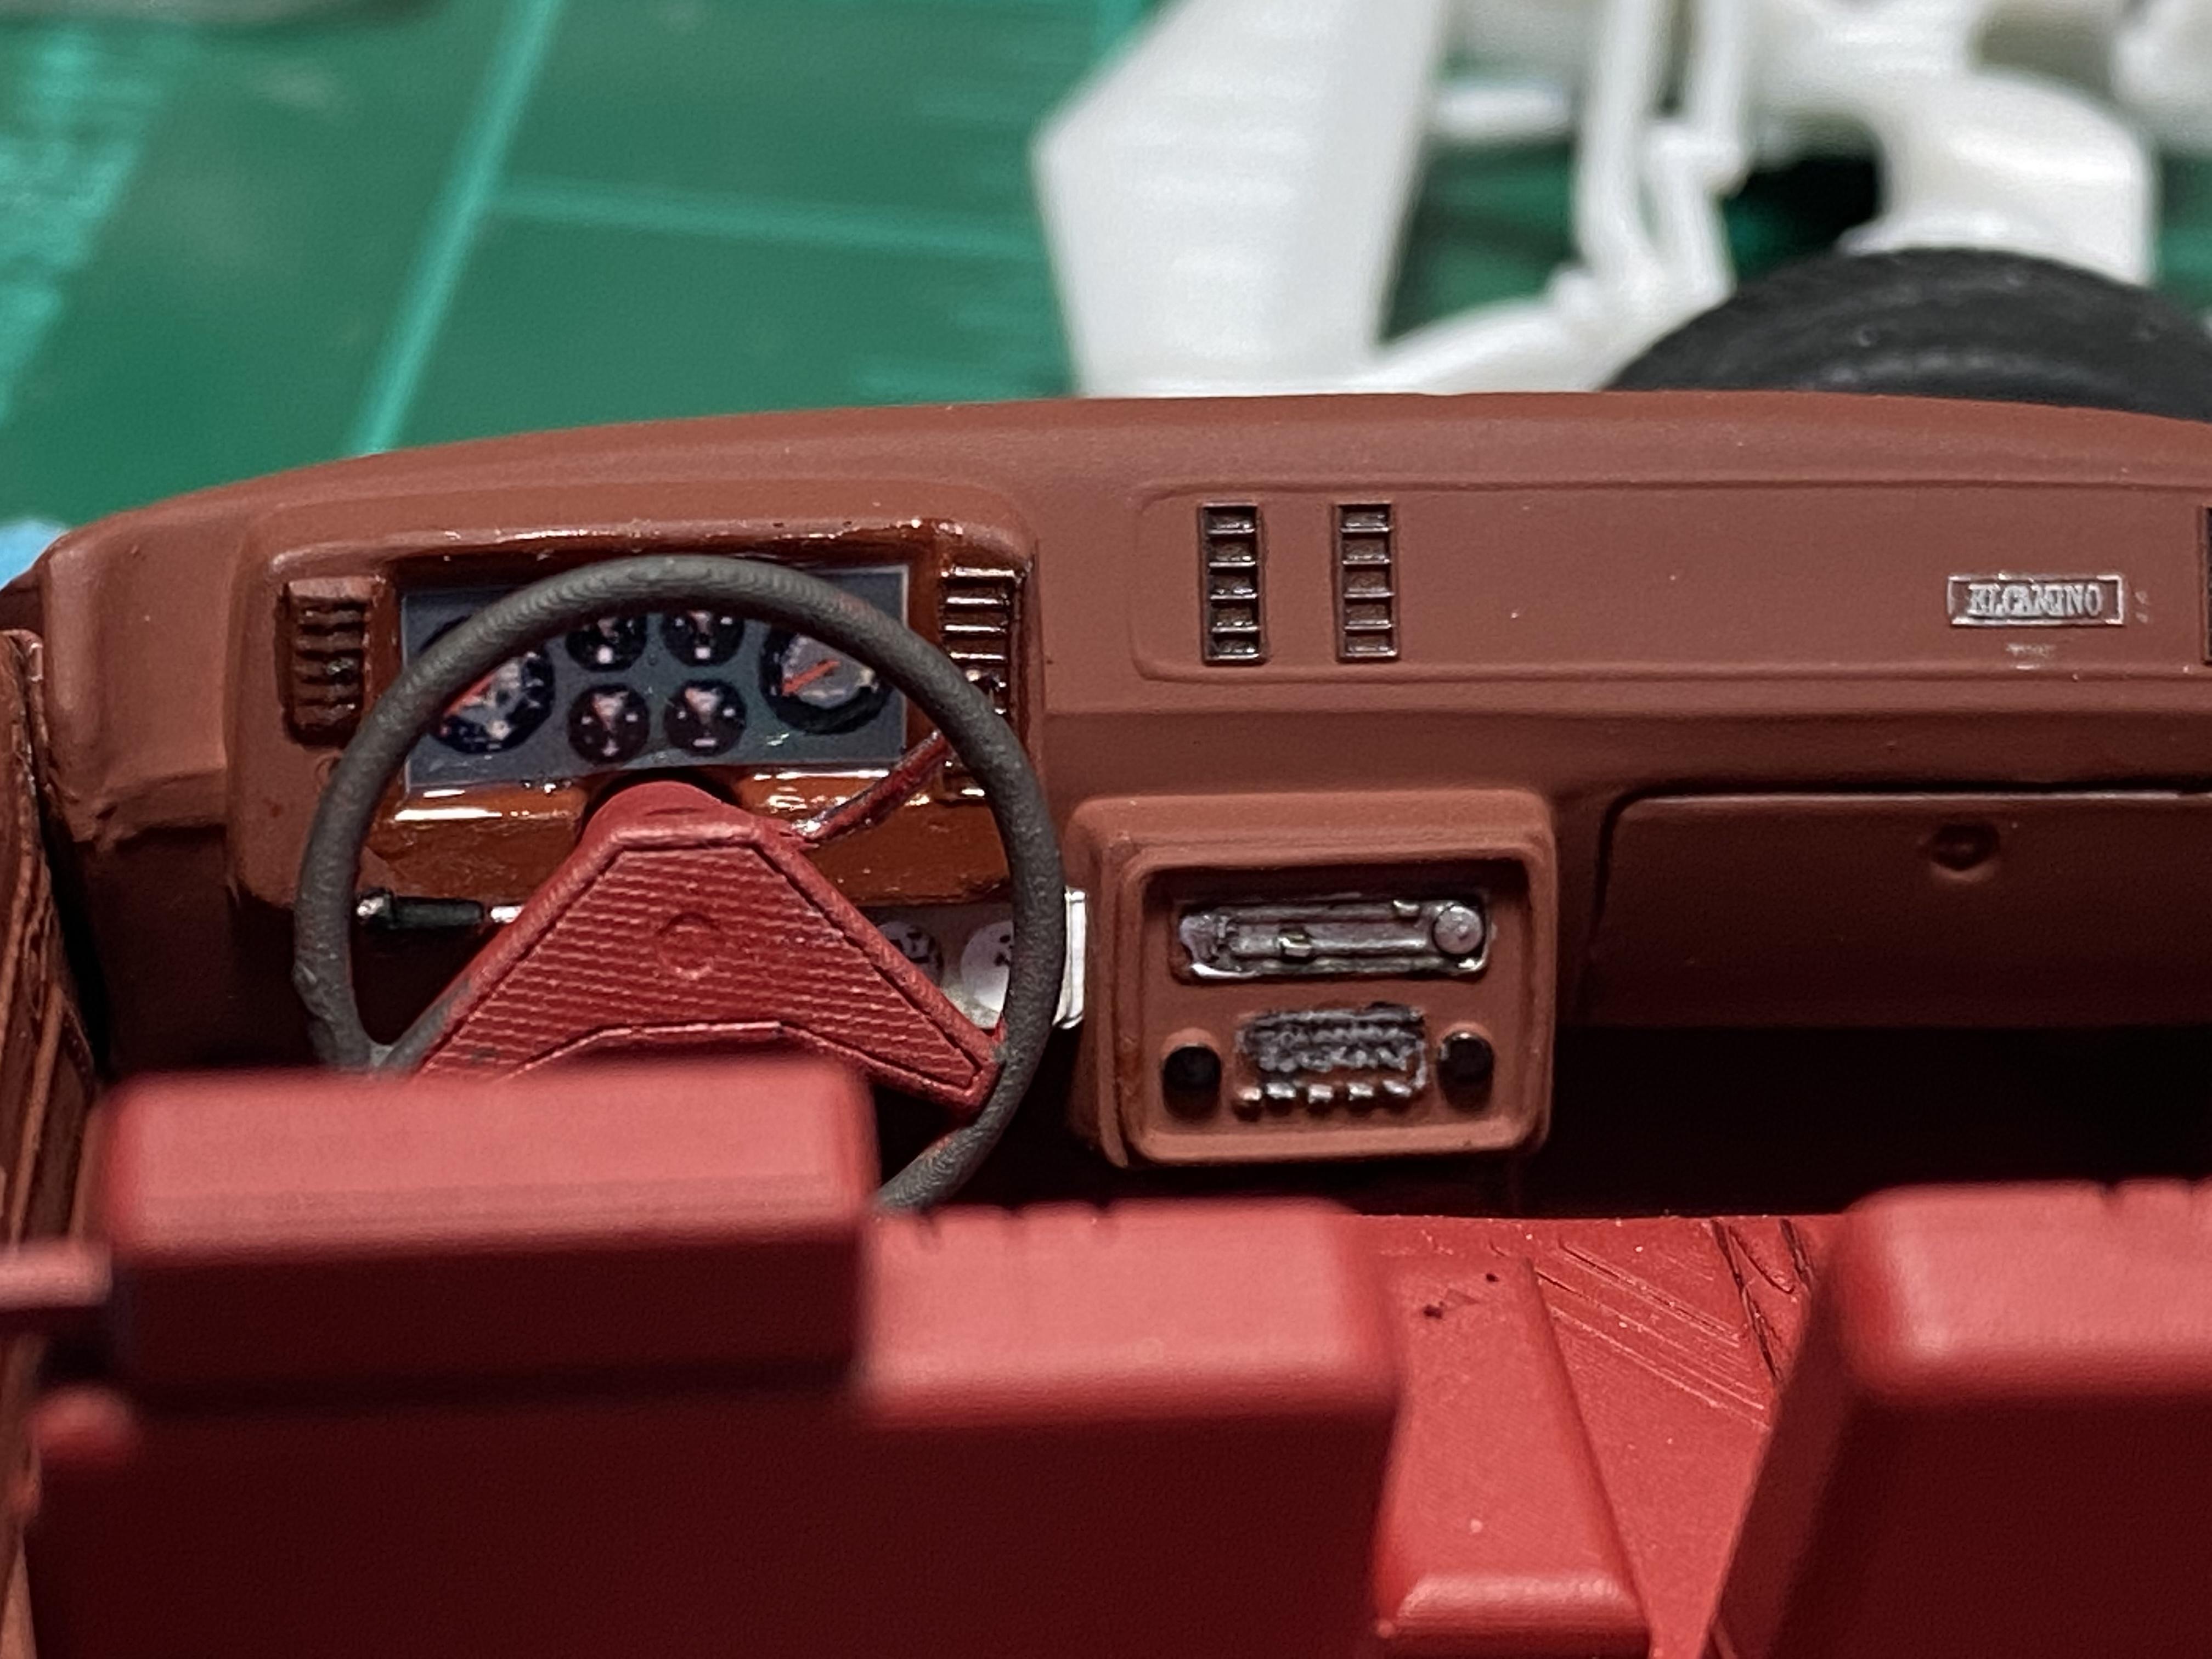
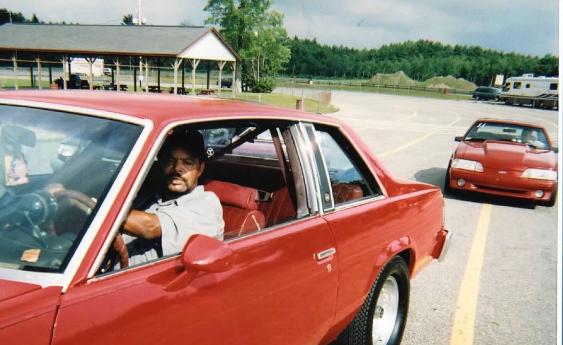
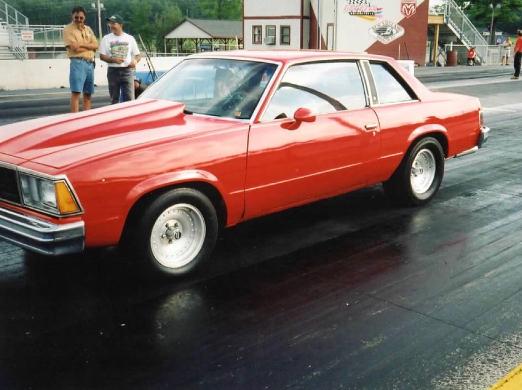
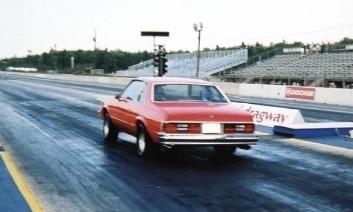
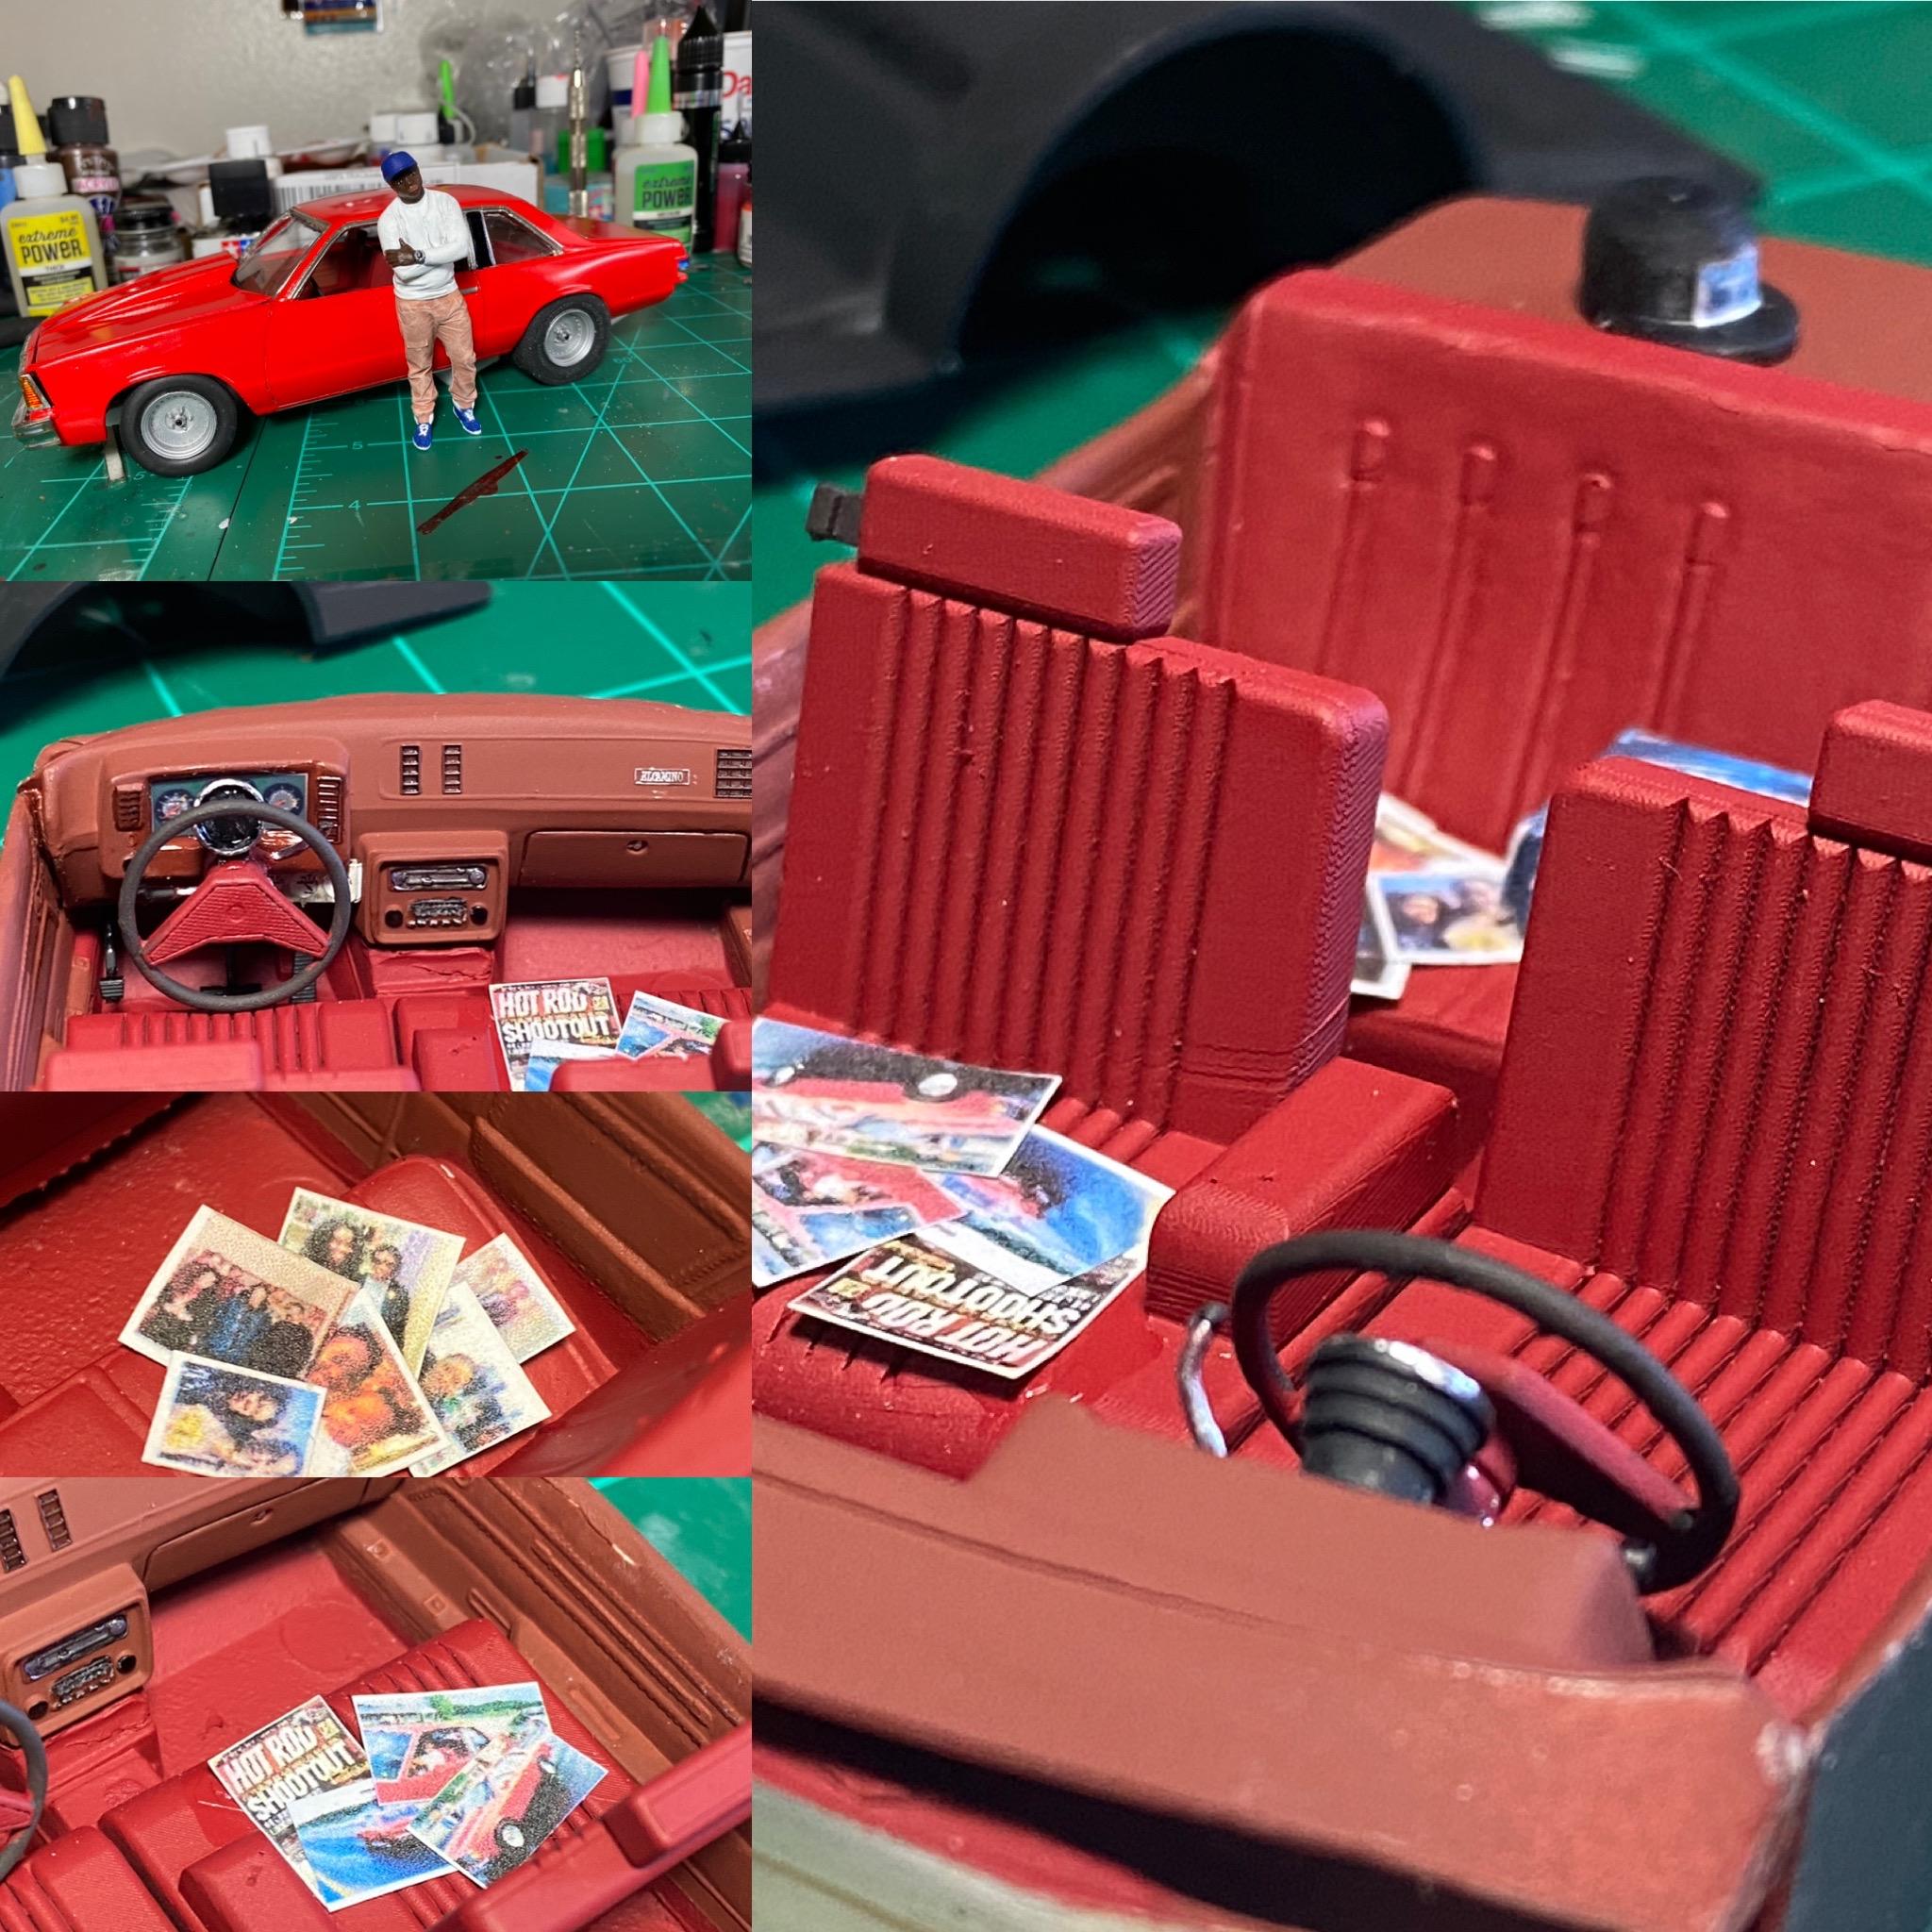
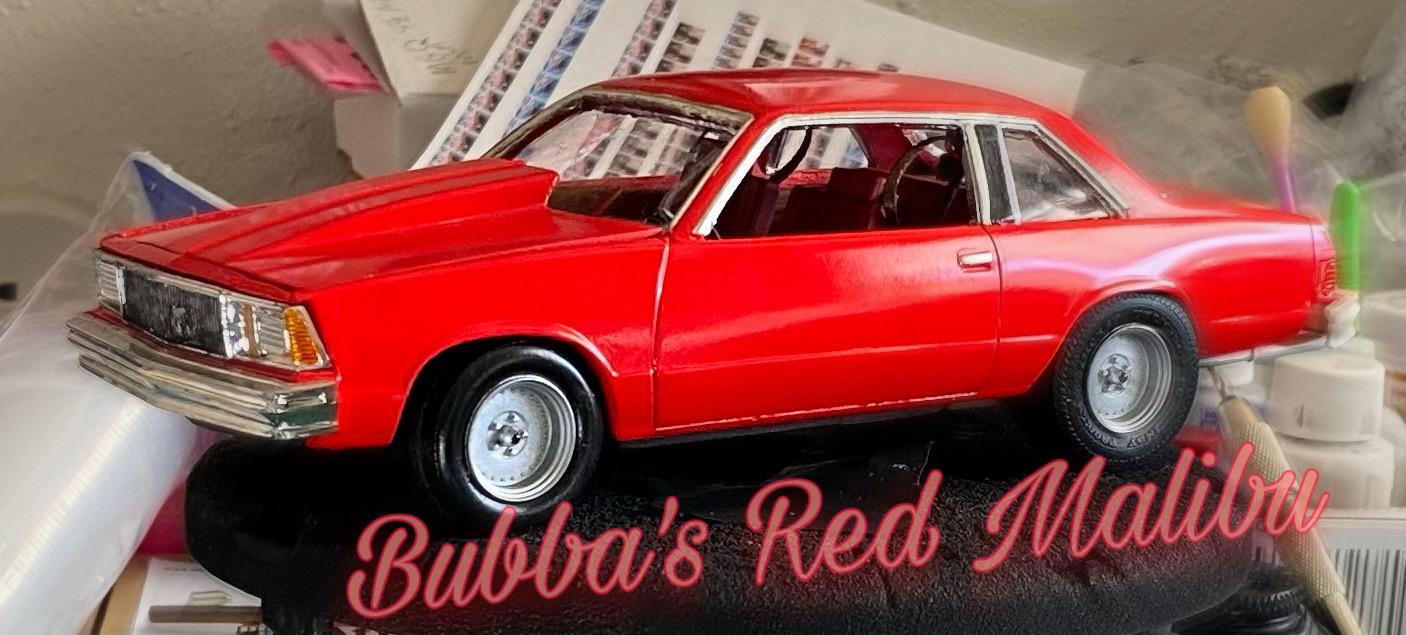
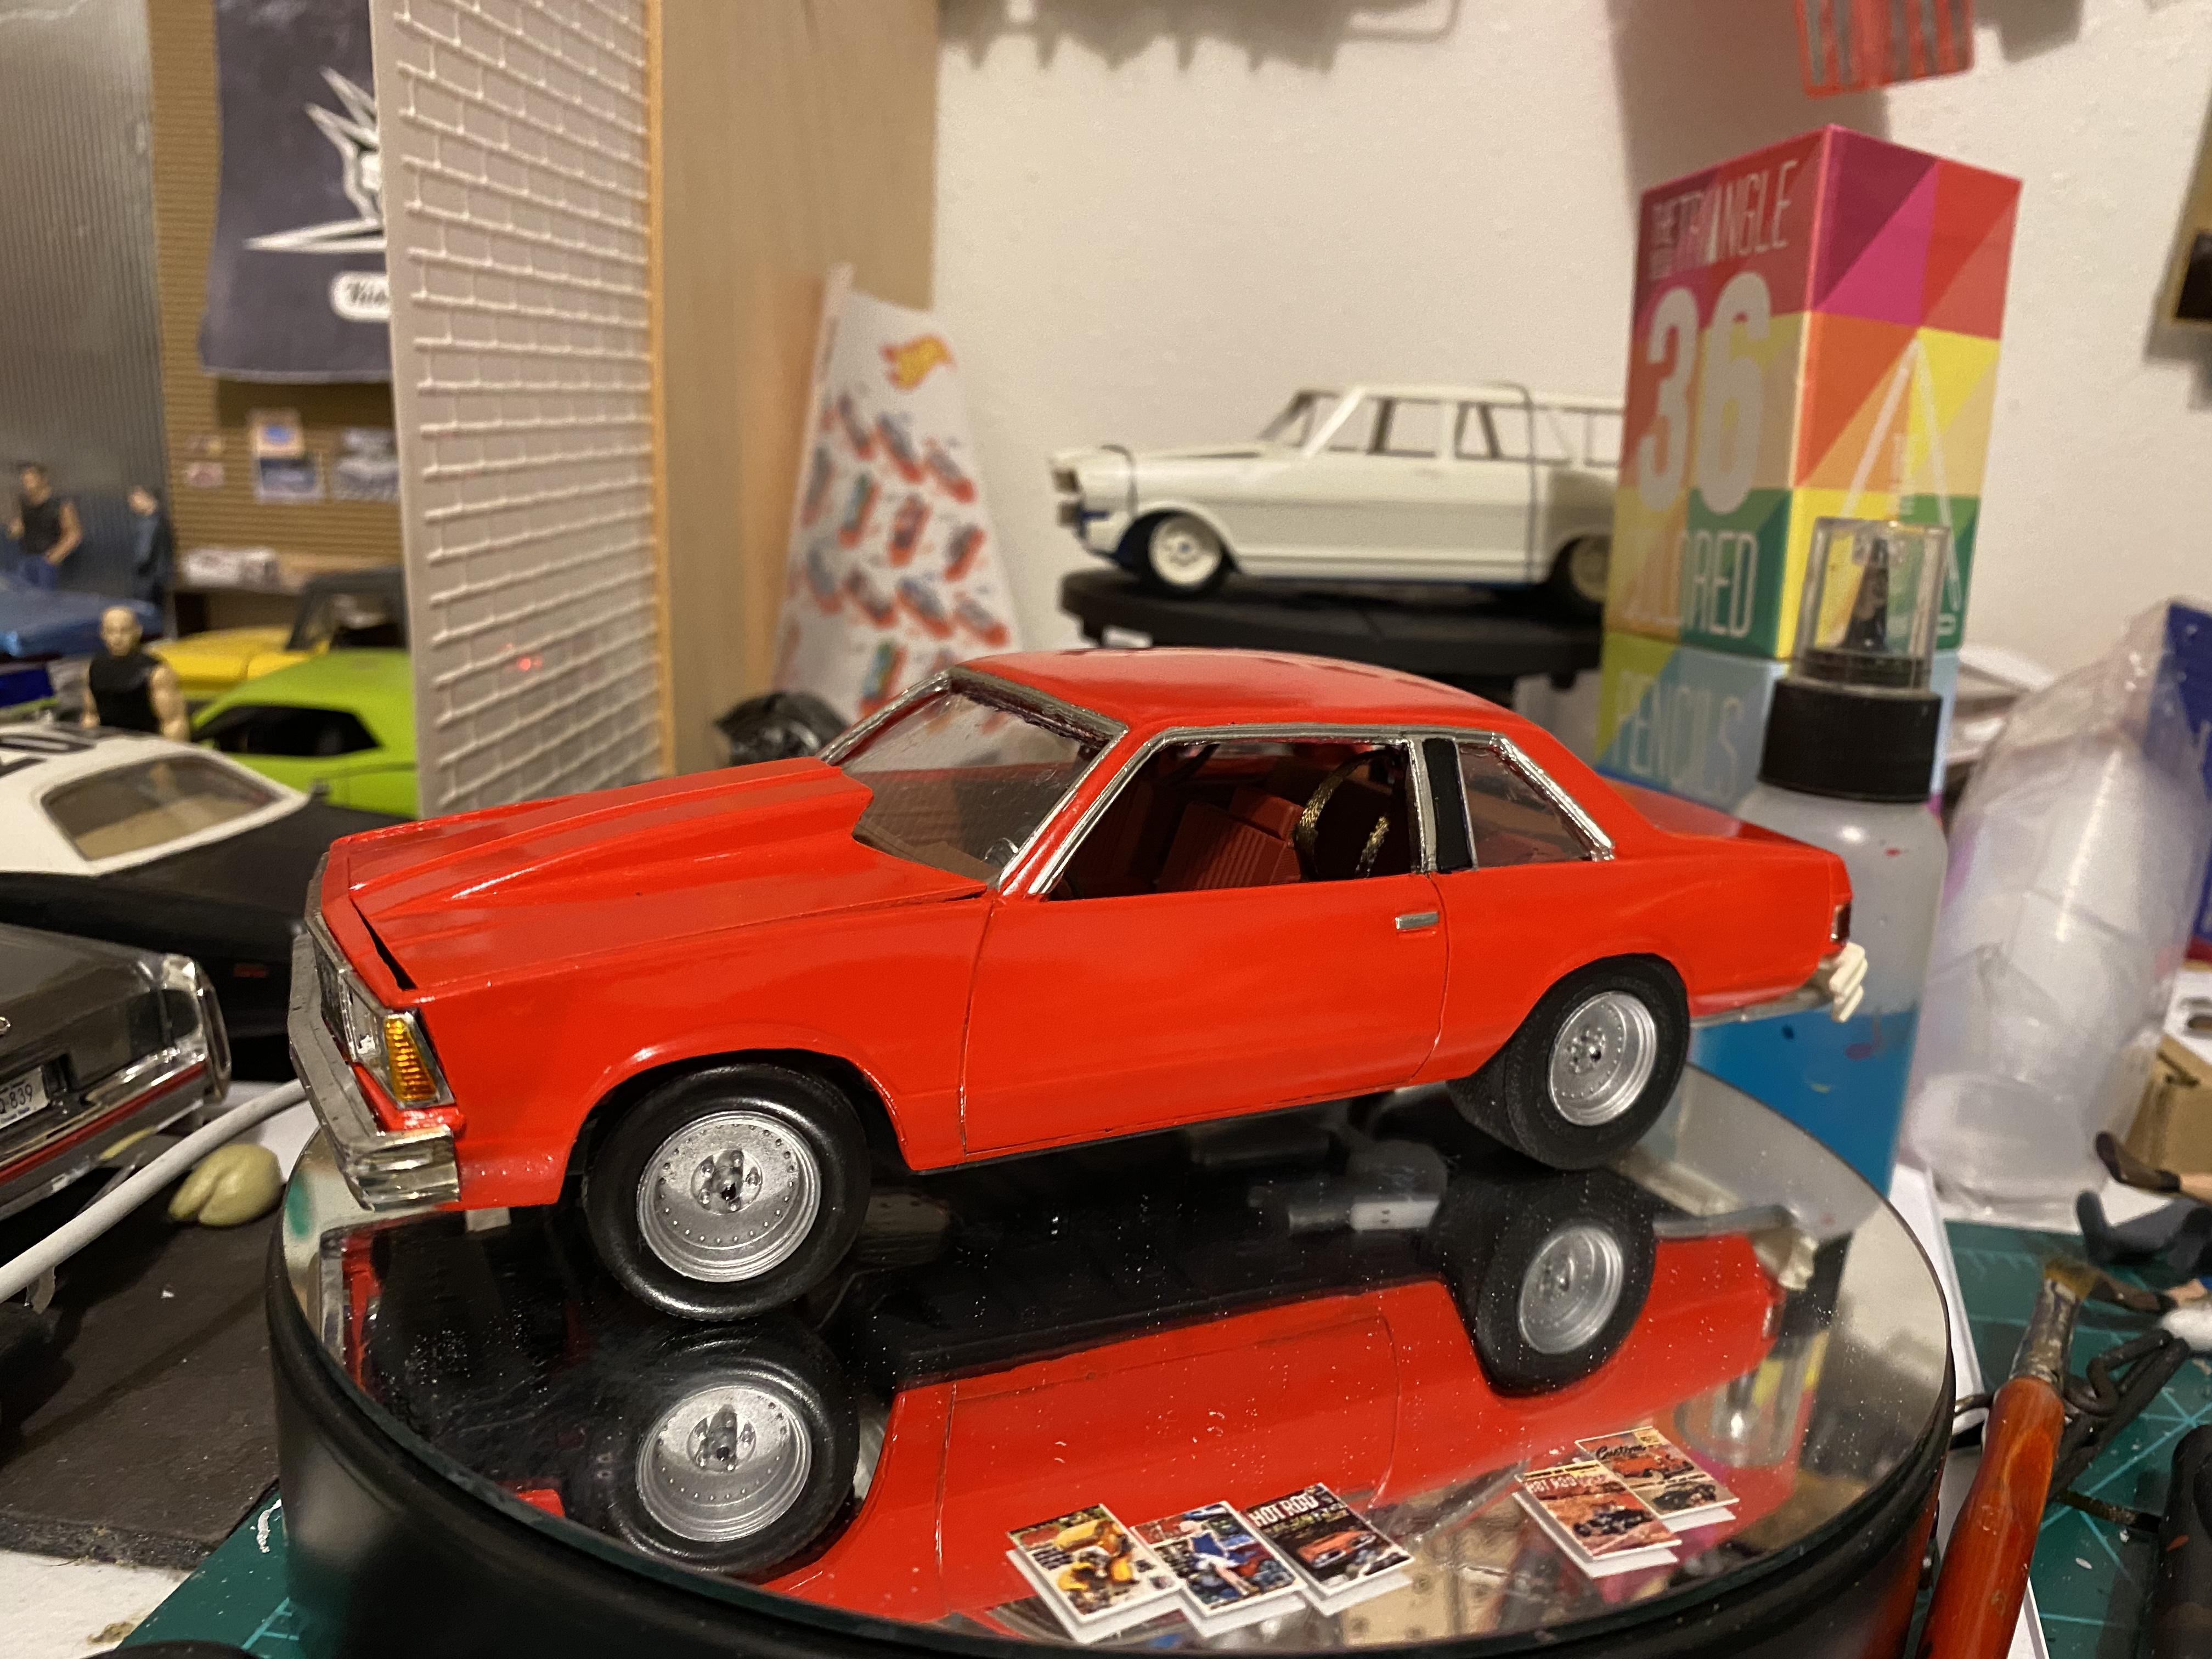
I recently completed my first all resin body project. I found the body, bumpers and grille on EBay from A&J Resin of a 1981 Chevy Malibu. This project was special because I had been wanting to recreate my uncles car in scale since the mid 1990’s. Kits used: AMT 86 El Camino AMT 69 Olds 442 Revell 83 Olds Hurst 1981 Chevy El Camino (promo) Aftermarket: Scenes Unlimited wheels Morgan Automotive Detail distributor Lex’s Resin Cowl hood Model Car Parts dash gauges Overal the project took a little over a year to complete…but doggone sure worth it. IMG_0486.MOV

- 13 replies
-
- 1
-

-
- resin
- chevy malibu
- (and 2 more)
-
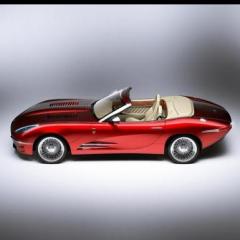
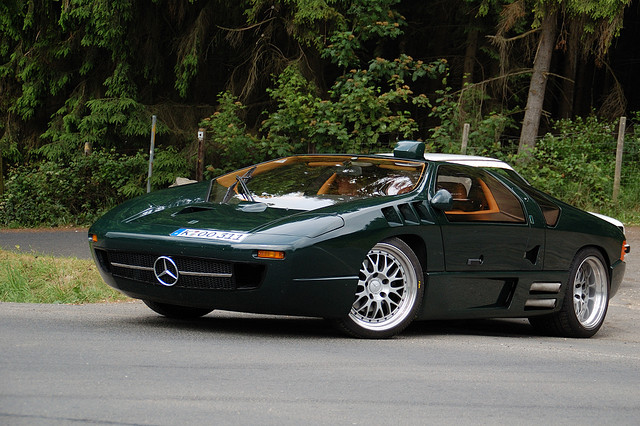
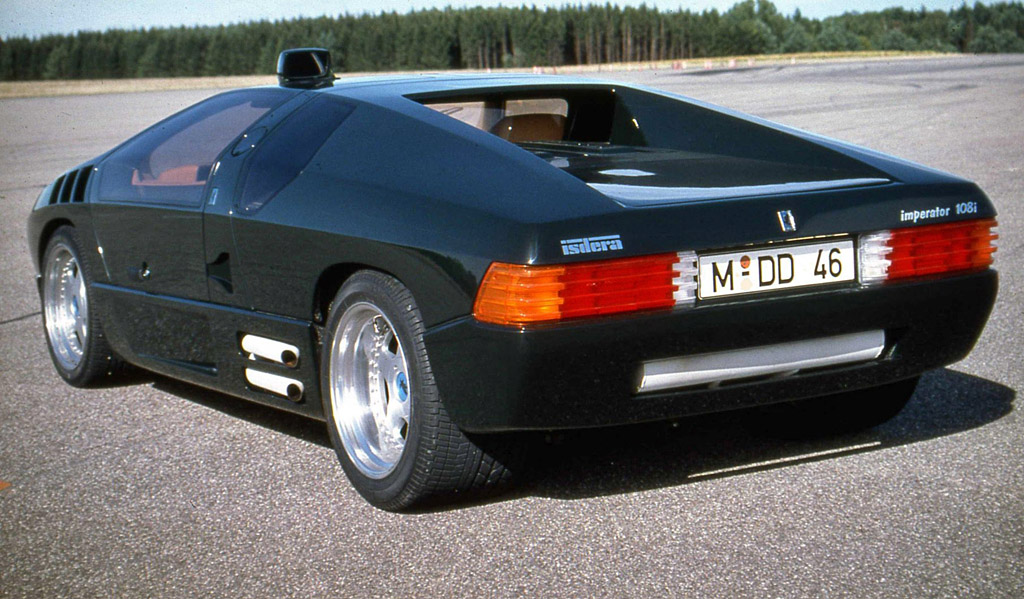
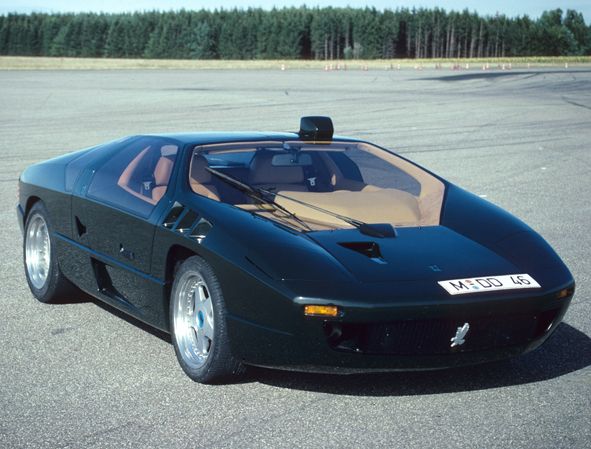
Hi, everyone!! I decided that I cant wait any longer to see if this car will ever be kitted, so I've decided to TOTALLY make it myself. I'm pretty sure that the majority of people out there haven't even heard of it before, but its a very unique automobile, powered by Mercedes. Its kinda like the C111 concept, but waaaaay cooler!!
-
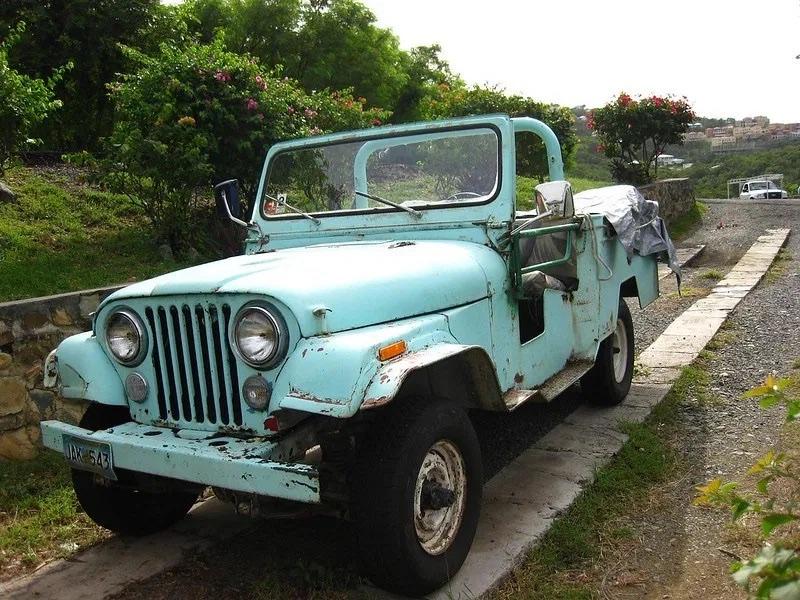
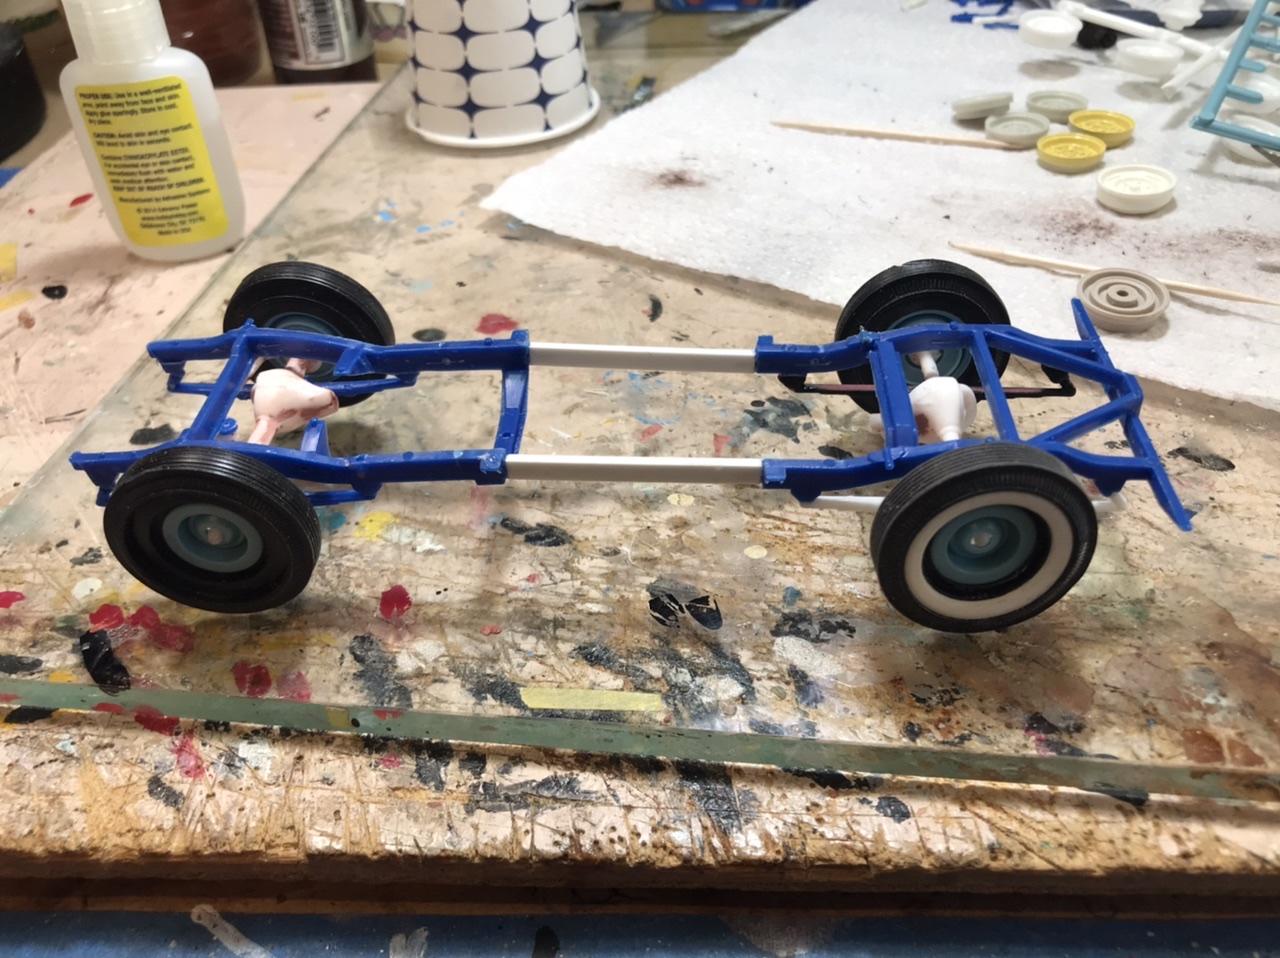
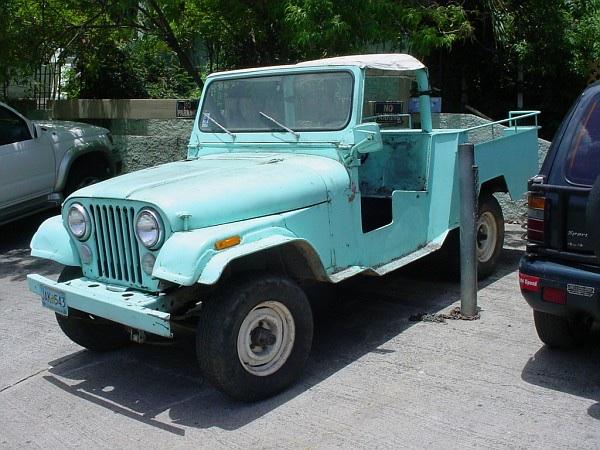
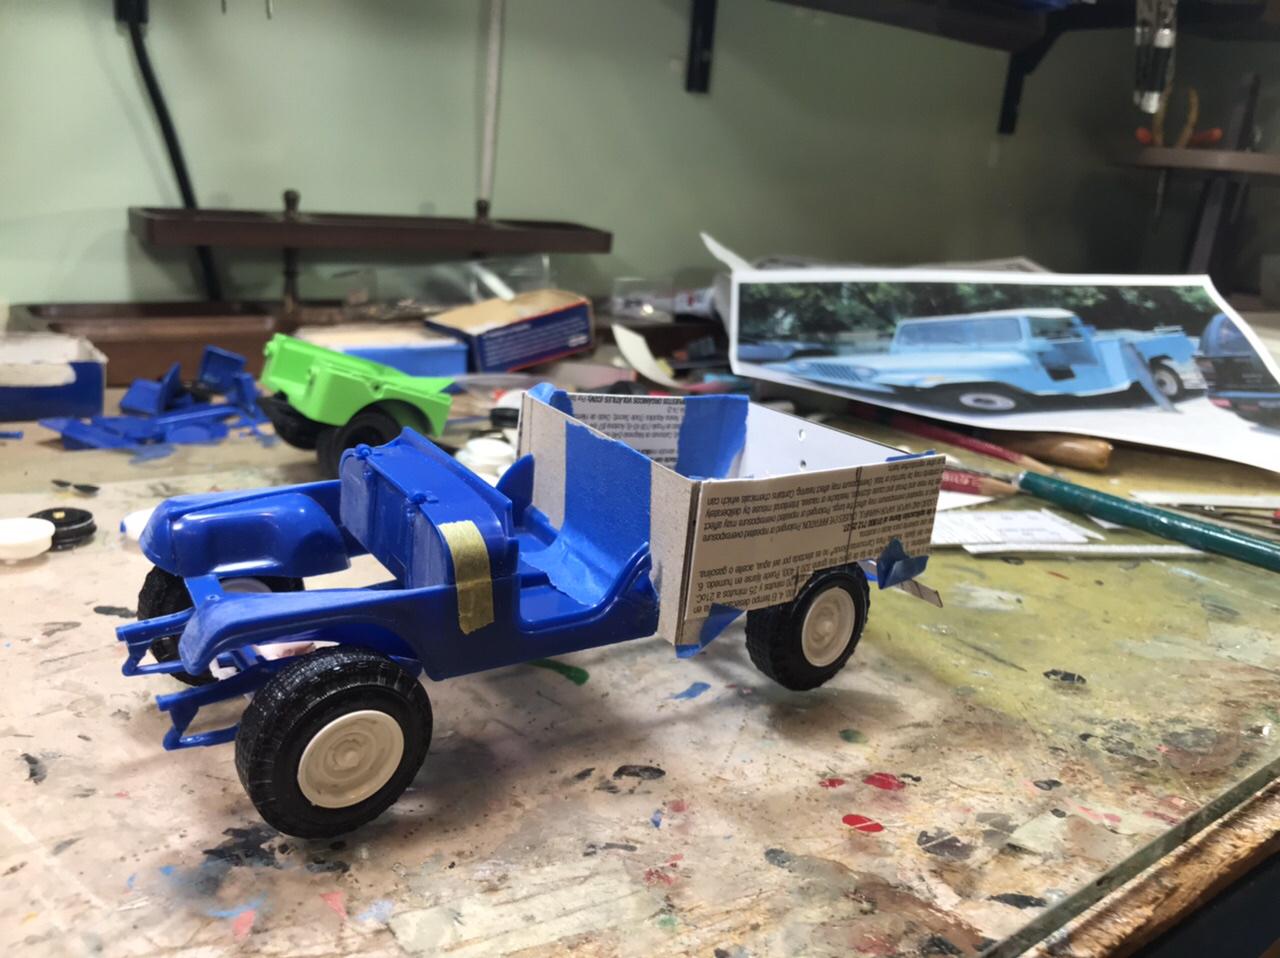
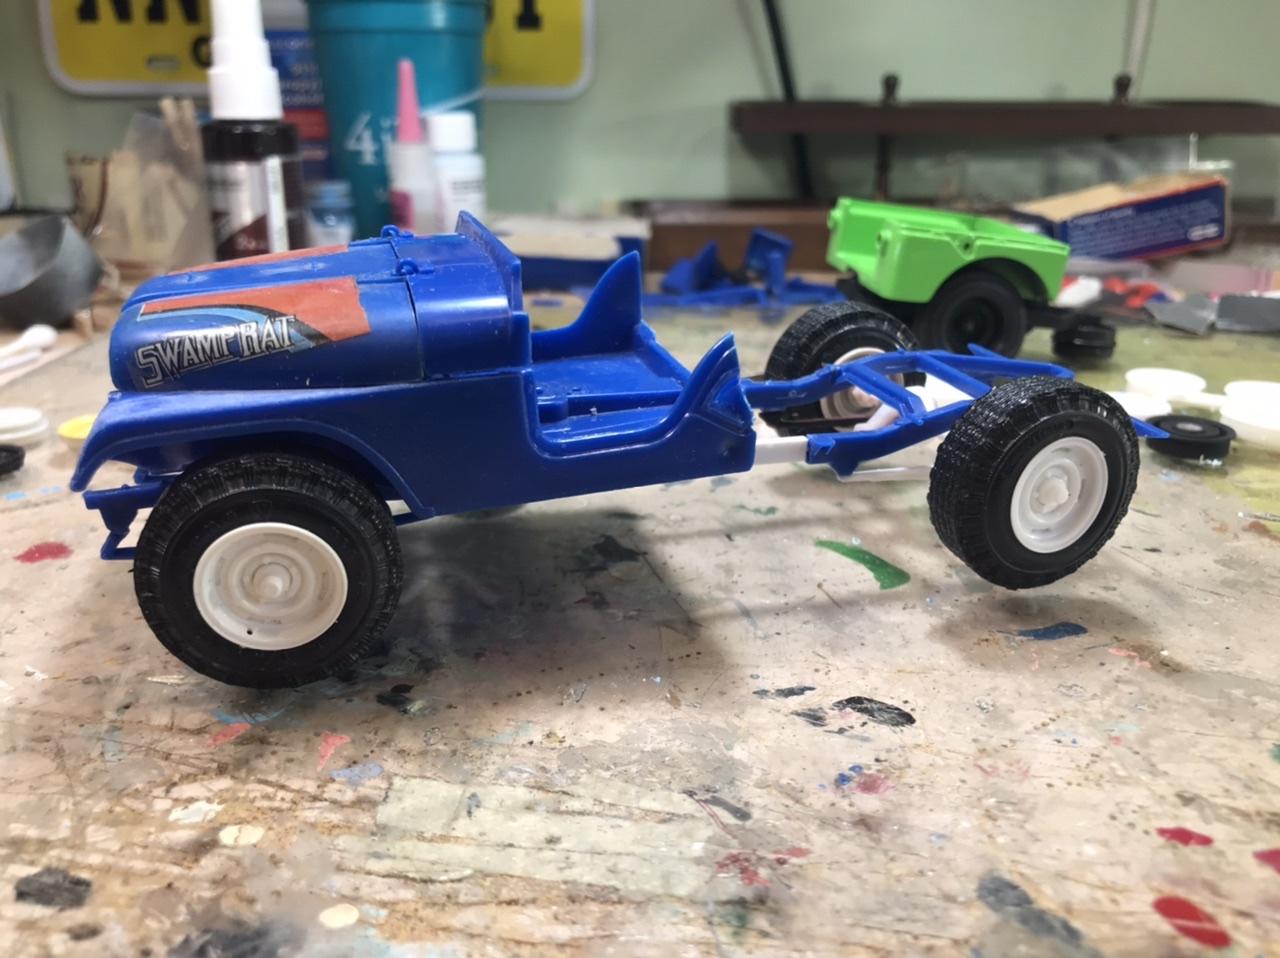
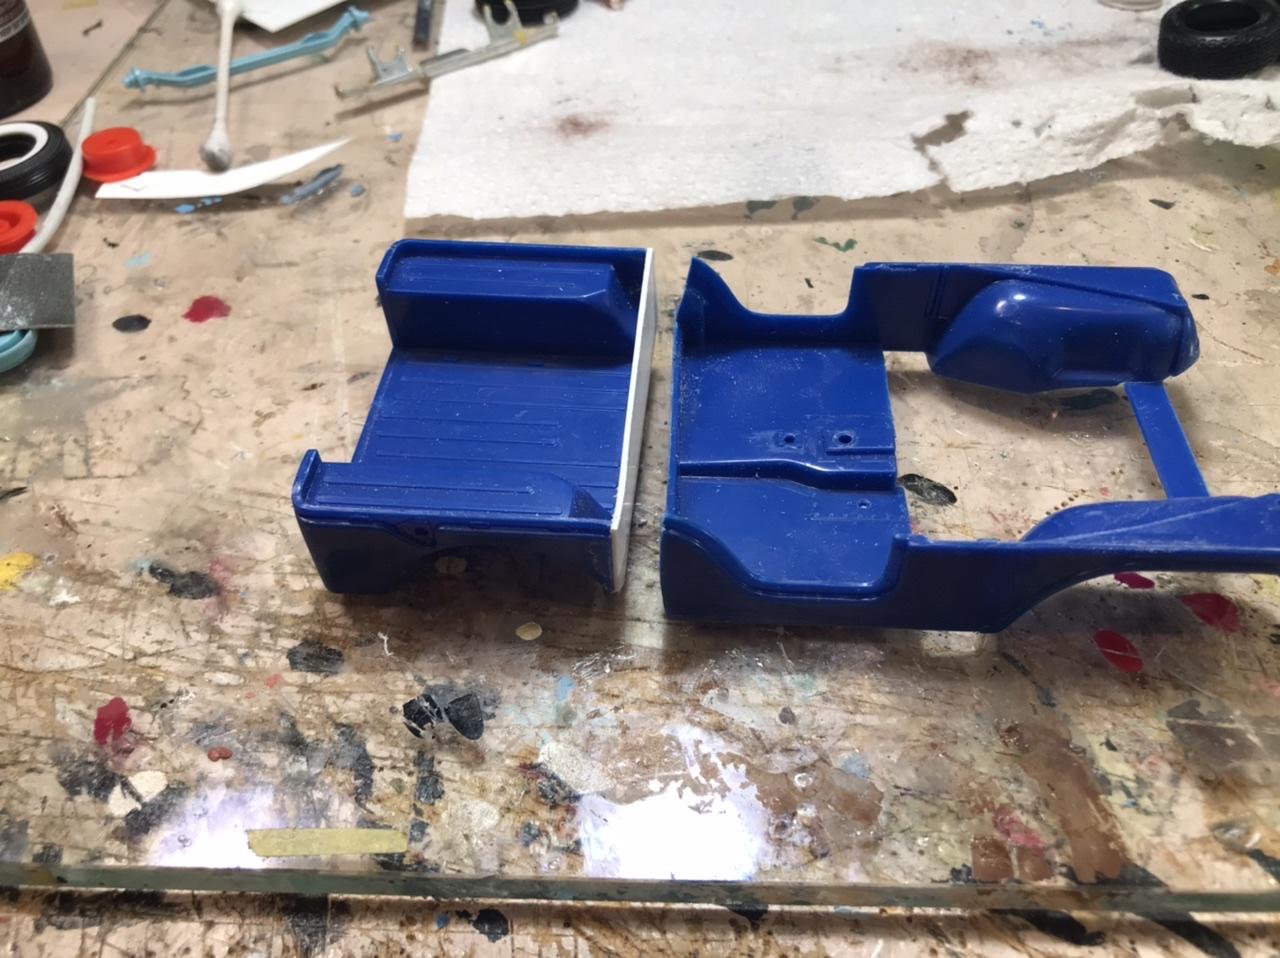
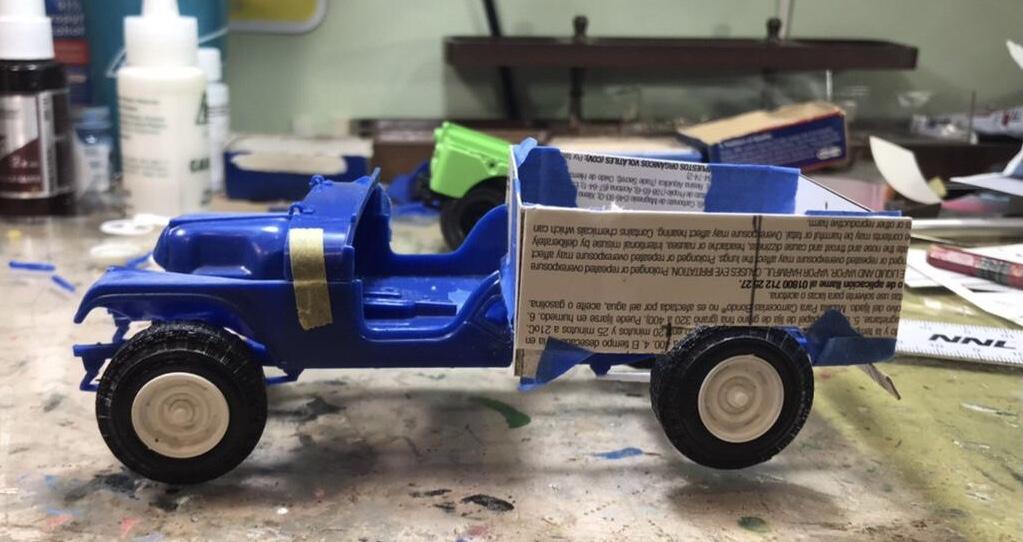
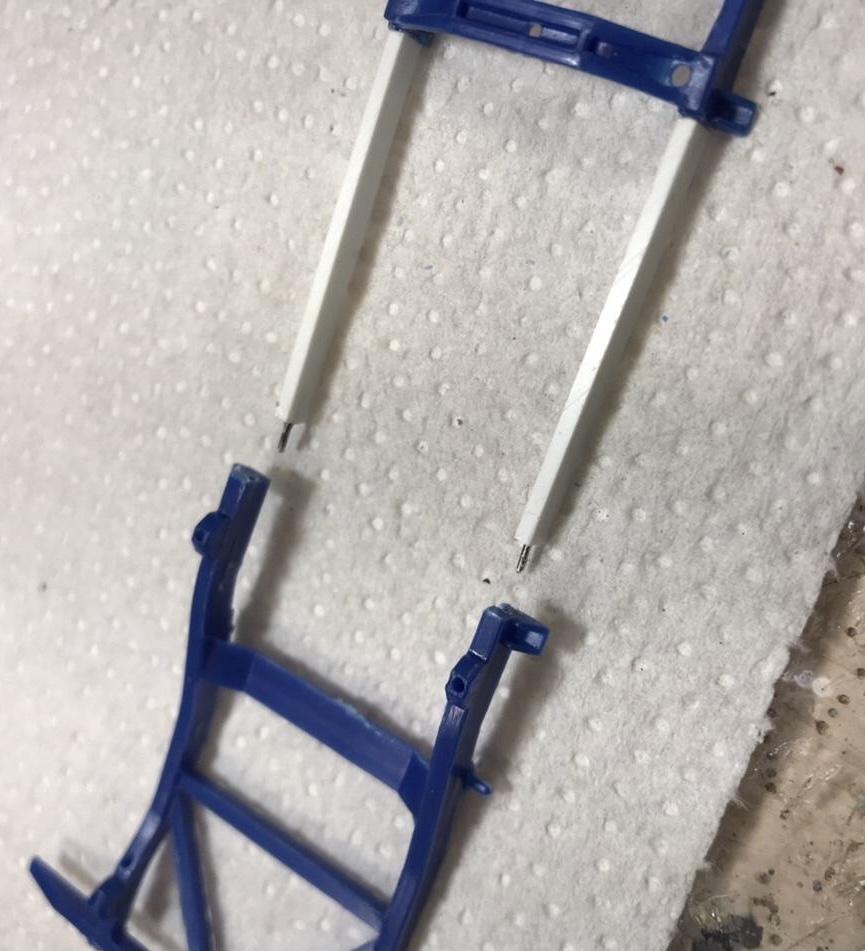
Off on a new adventure! I took this photo back in 2007 on St John while vacationing in the US Virgin Islands. Unfortunately I took one quick shot, not a side or rear view, which would aid me immensely building this as a model. With Google as my friend, I searched “St John, Jeep” and look what popped up?! Same exact Jeep.. see the plate number! A few years older with more wear on it. So I can reasonably expect it’s still tooling around the island! As I’ve been accused of “ruining perfectly models” in the past, you may ask “why?”. I was immediately drawn to this battered Jeep with its locally welded rear section because it fits my theme of unique old survivors. I’m not alone since I found another picture. Secondly, I want to undertake the challenge of scratch building it and seeing just how close a replica I can create! First thing I noticed is that the Jeep has a longer than standard wheelbase. The CJ6 wheelbase is 20” longer than a standard CJ5, so I extended the flat bottom with Evergreen strips. Note that I strengthened it with pins as I always do. I cleaned up the really poor MPC axles and got it up on wheels. Here’s how bad the axles actually are! Missing parts and near zero mating surfaces to join the two halves! On my Junker Jeep, the axles were broken off so I had replaced the shafts with round plastic stock. Probably should have done that here too! My favorite magic trick of sawing the lady in half. We aren’t going to need anything behind the seat so off with it. And that back half has become a trailer. Here I start getting familiar with the relationship the parts will have to deal with. Important as I scratch build the box. And here we are figuring out the dimensions and fit. I’m having to approximate since I’m working with a single front angle photo. If I had a side view, I’d scale the photo to the wheel base and simply measure it all off. Note that I’m working with cardboard, and old packaging scraps of it. It’s best to do your trial work in a throw away medium before committing precious sheet plastic to the project. Working on approximating the body requires a lot of sitting back and staring it it! And I like to review it in photos since they accentuate errors. It’s also important for me to walk away and come back the next day because getting too close to the model blurs my objectivity. Sometimes I come back and immediately see something in one of those “What was I thinking?” moments! And as far as the vehicle, I have no idea why it has a crudely welded local body. Maybe it was damaged. Maybe the owner wanted a longer and wider box.. maybe the chassis was stretched too... we may never know! It’s just going to be fun for a project!
-
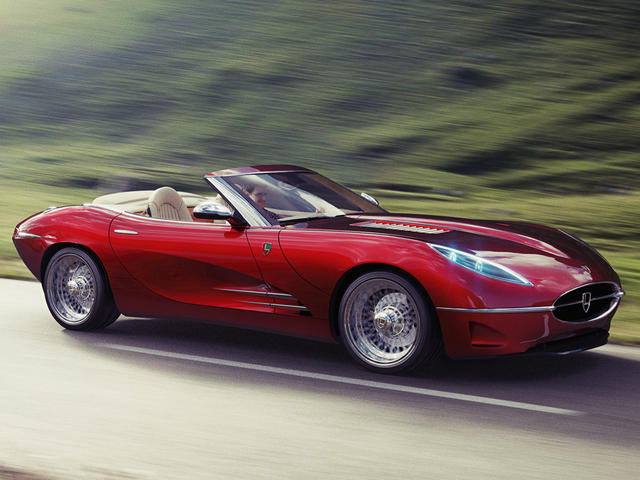
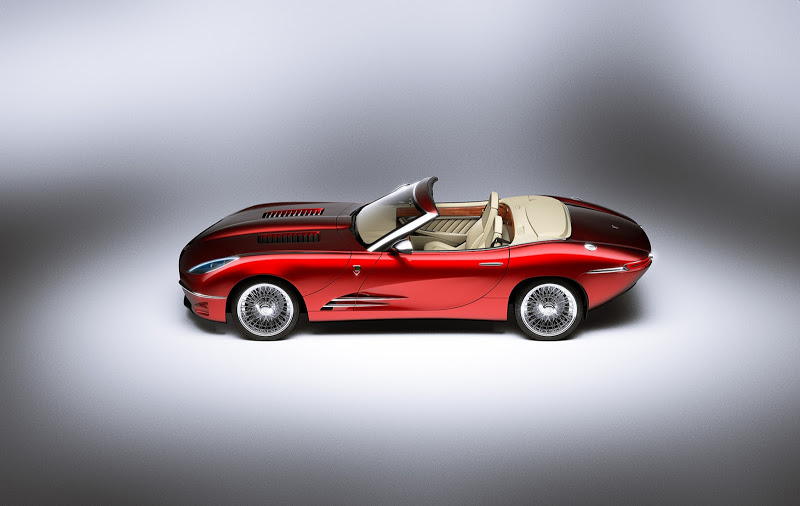
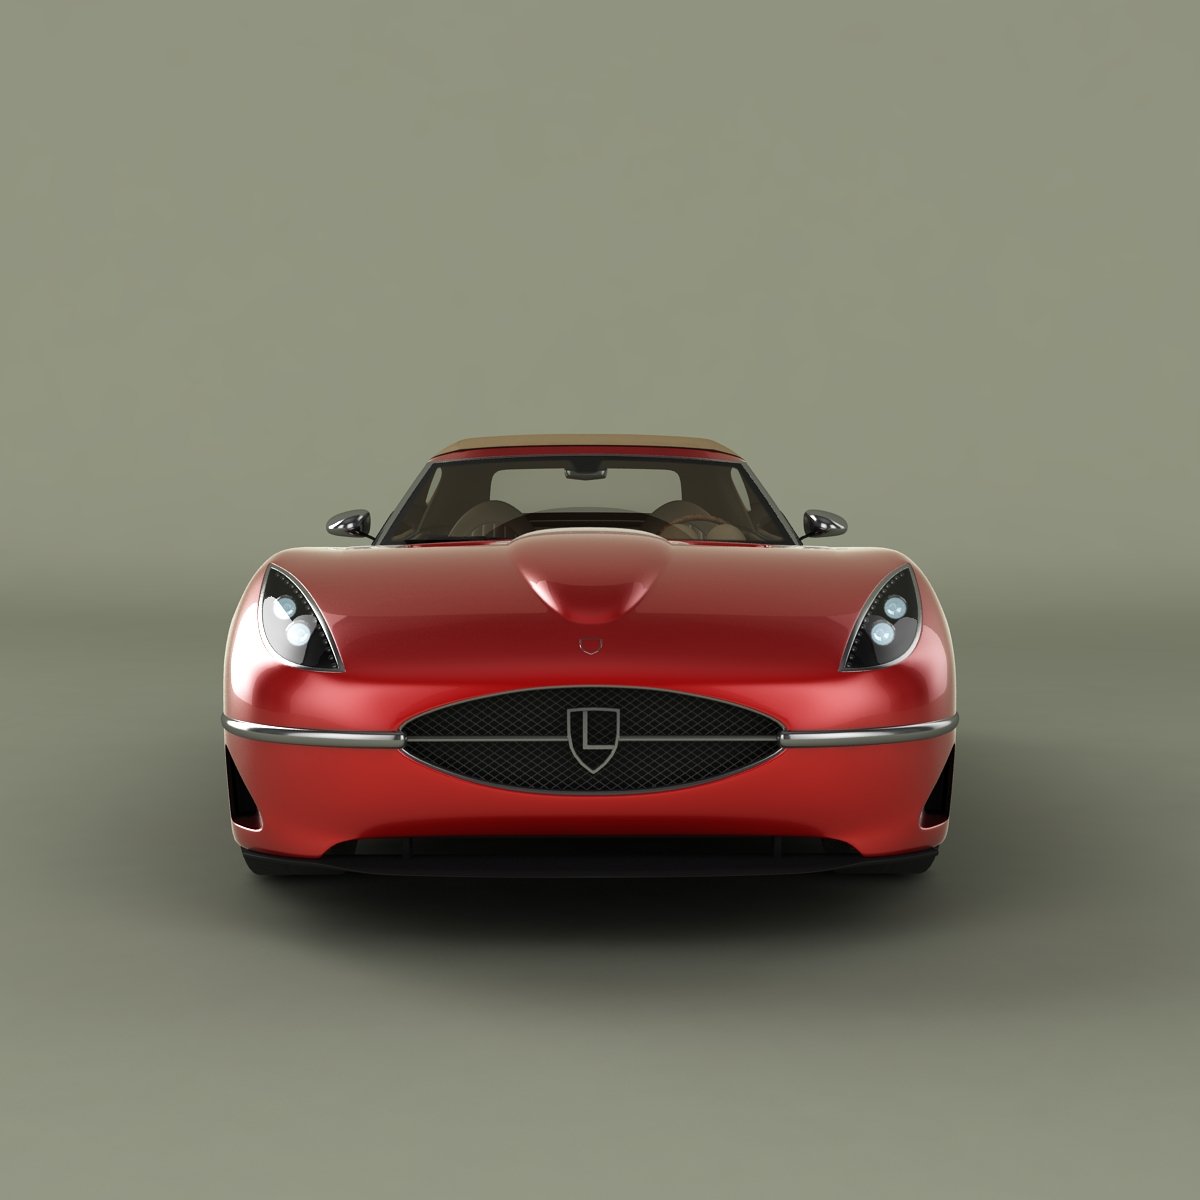
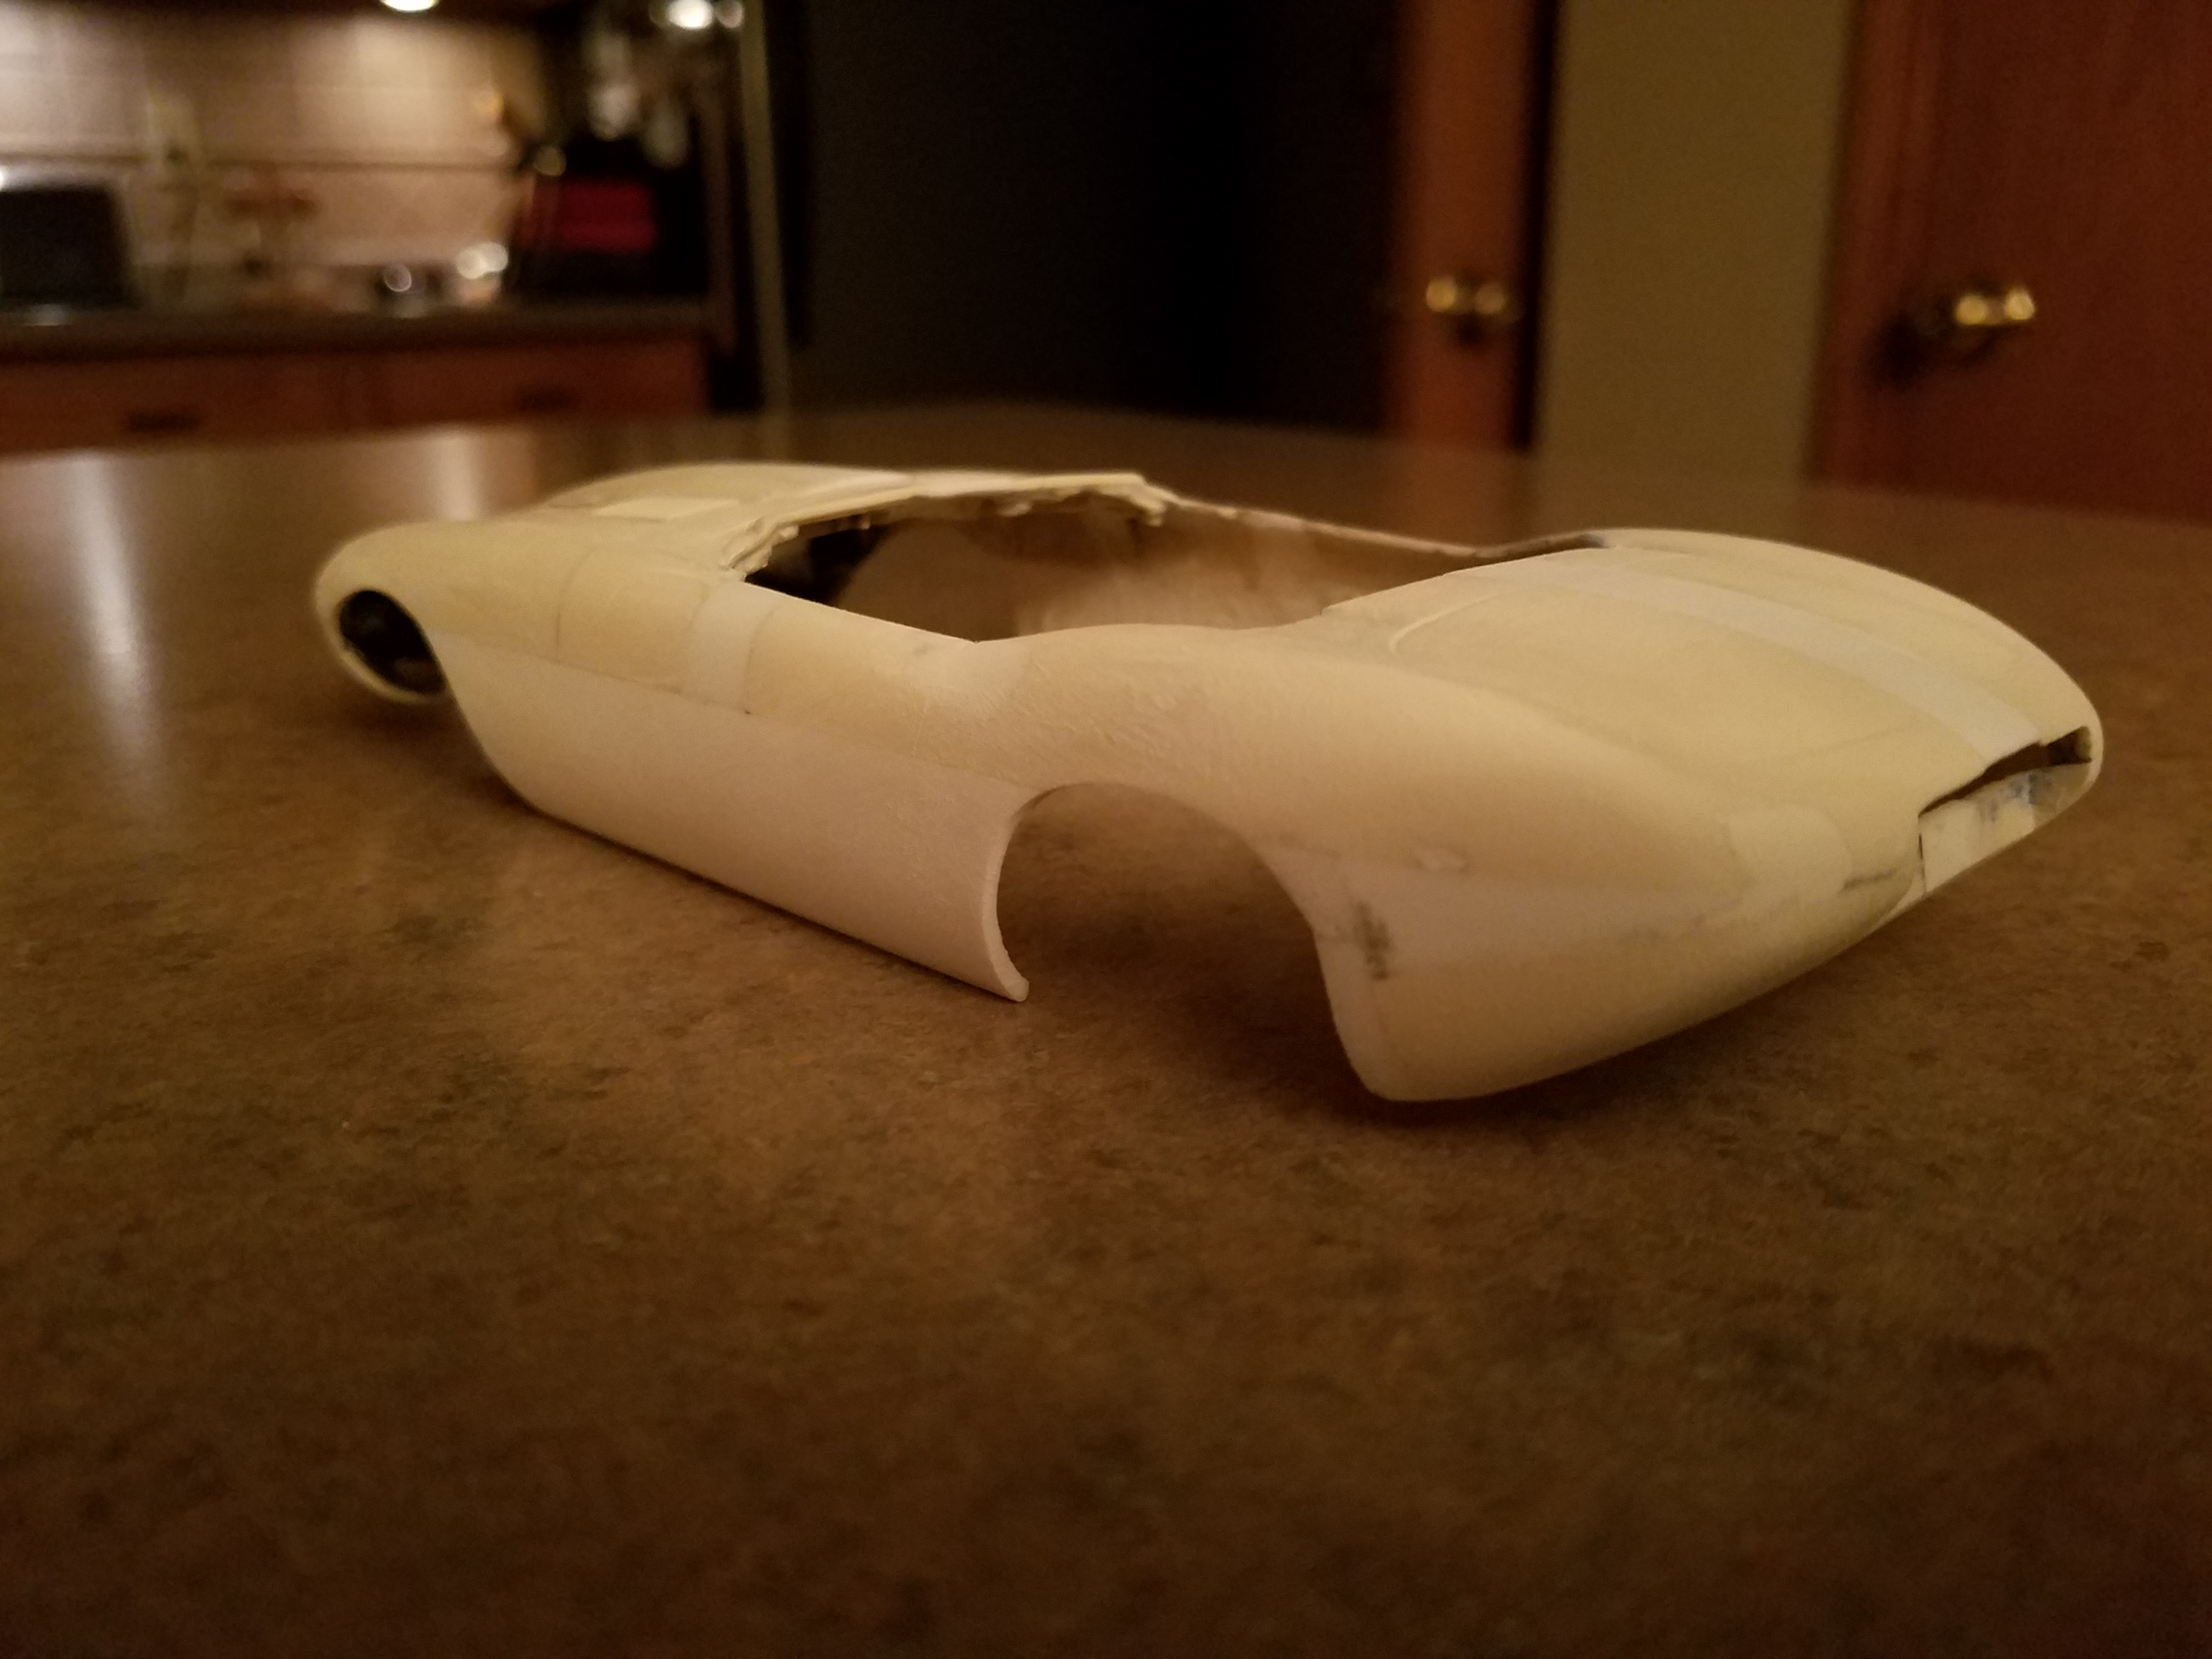
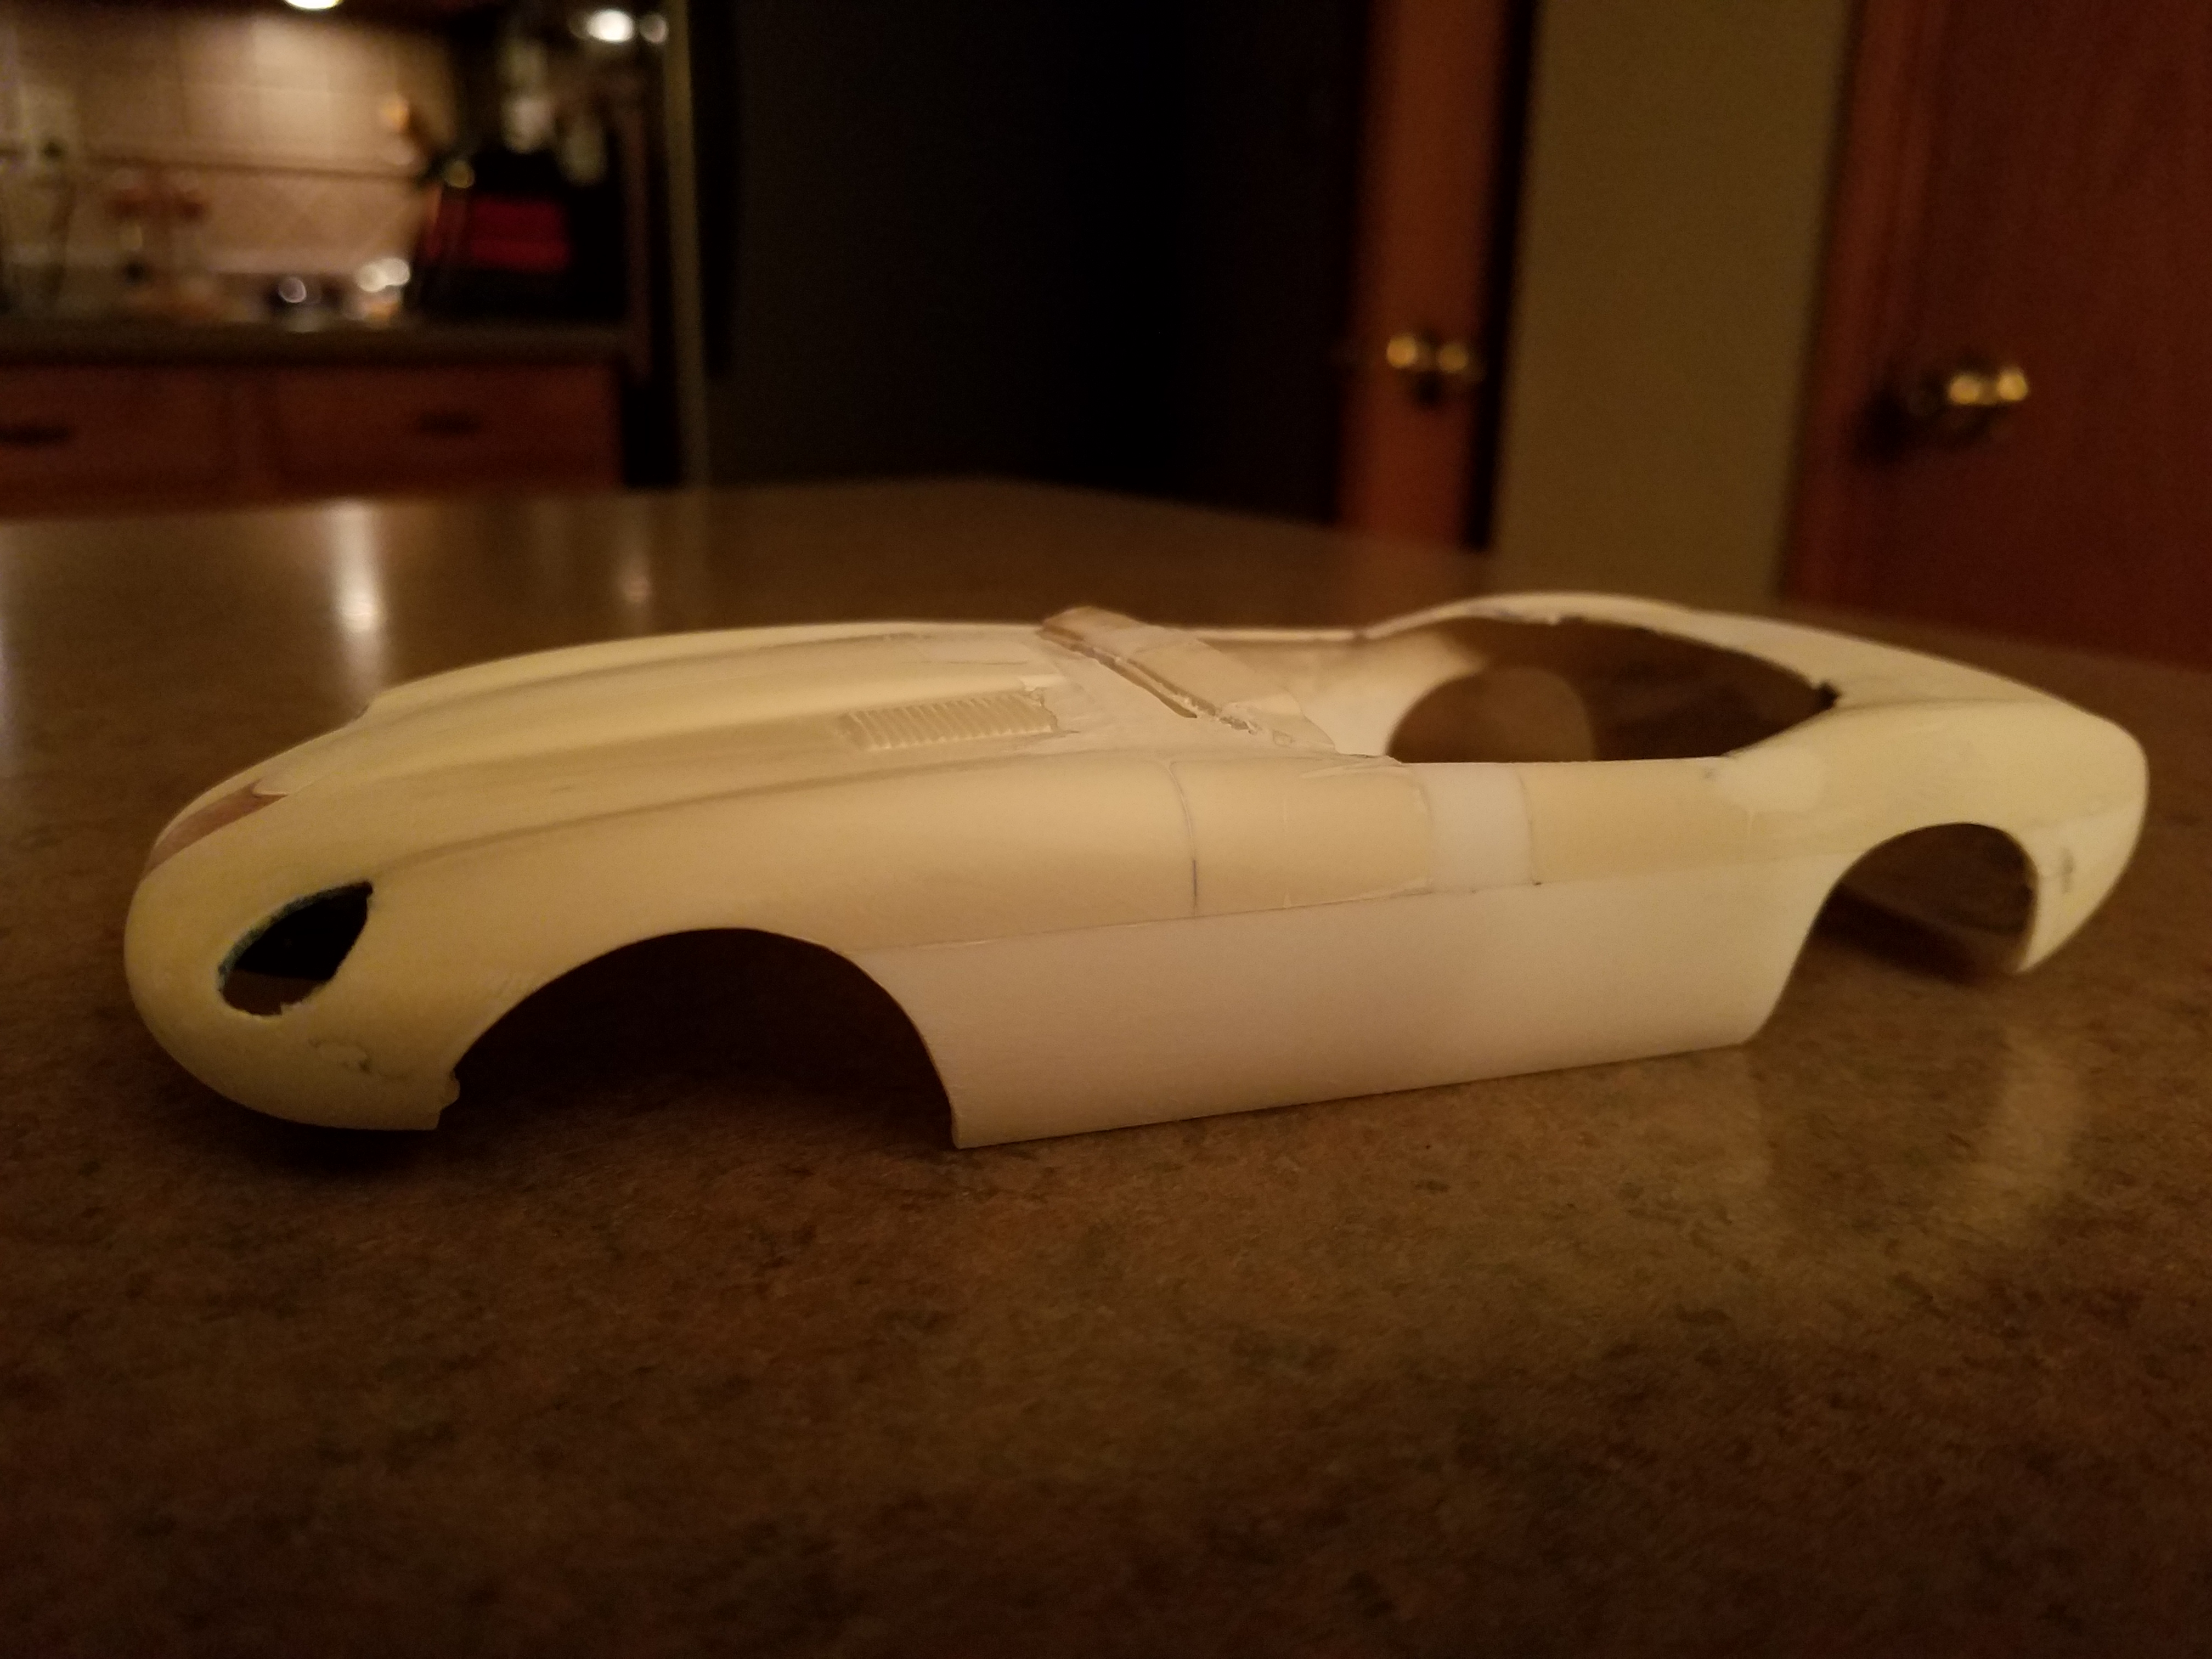
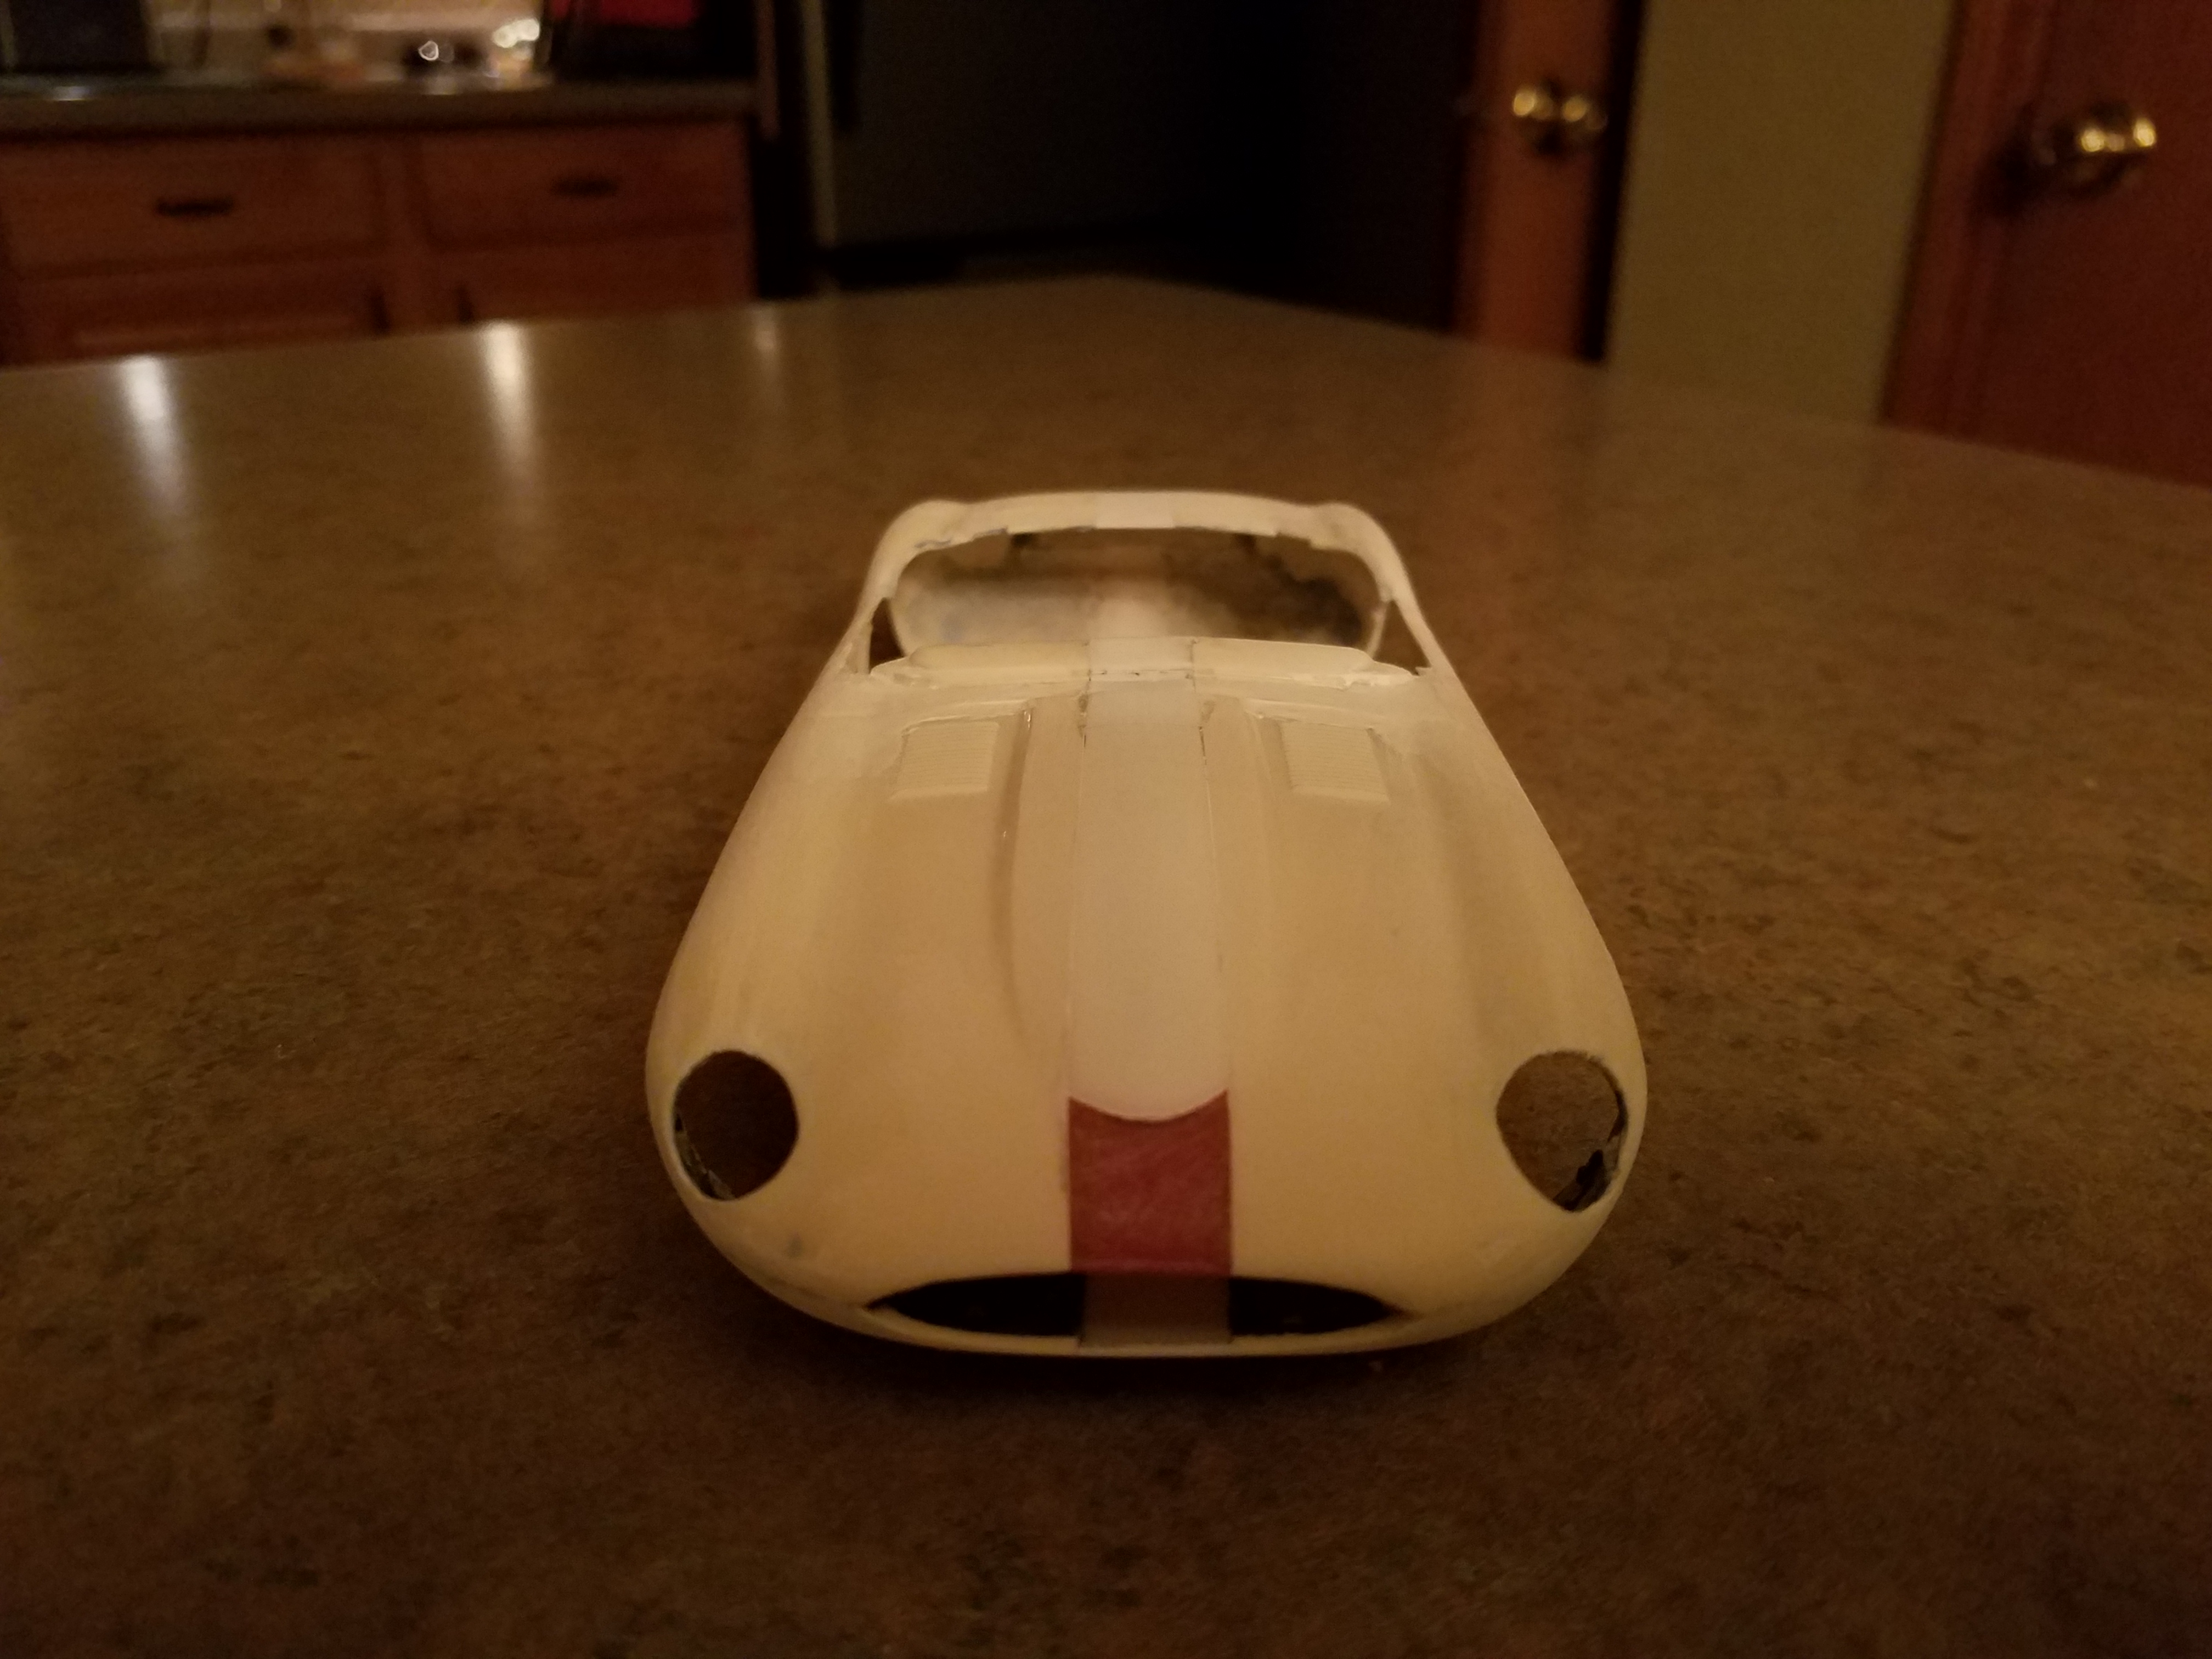
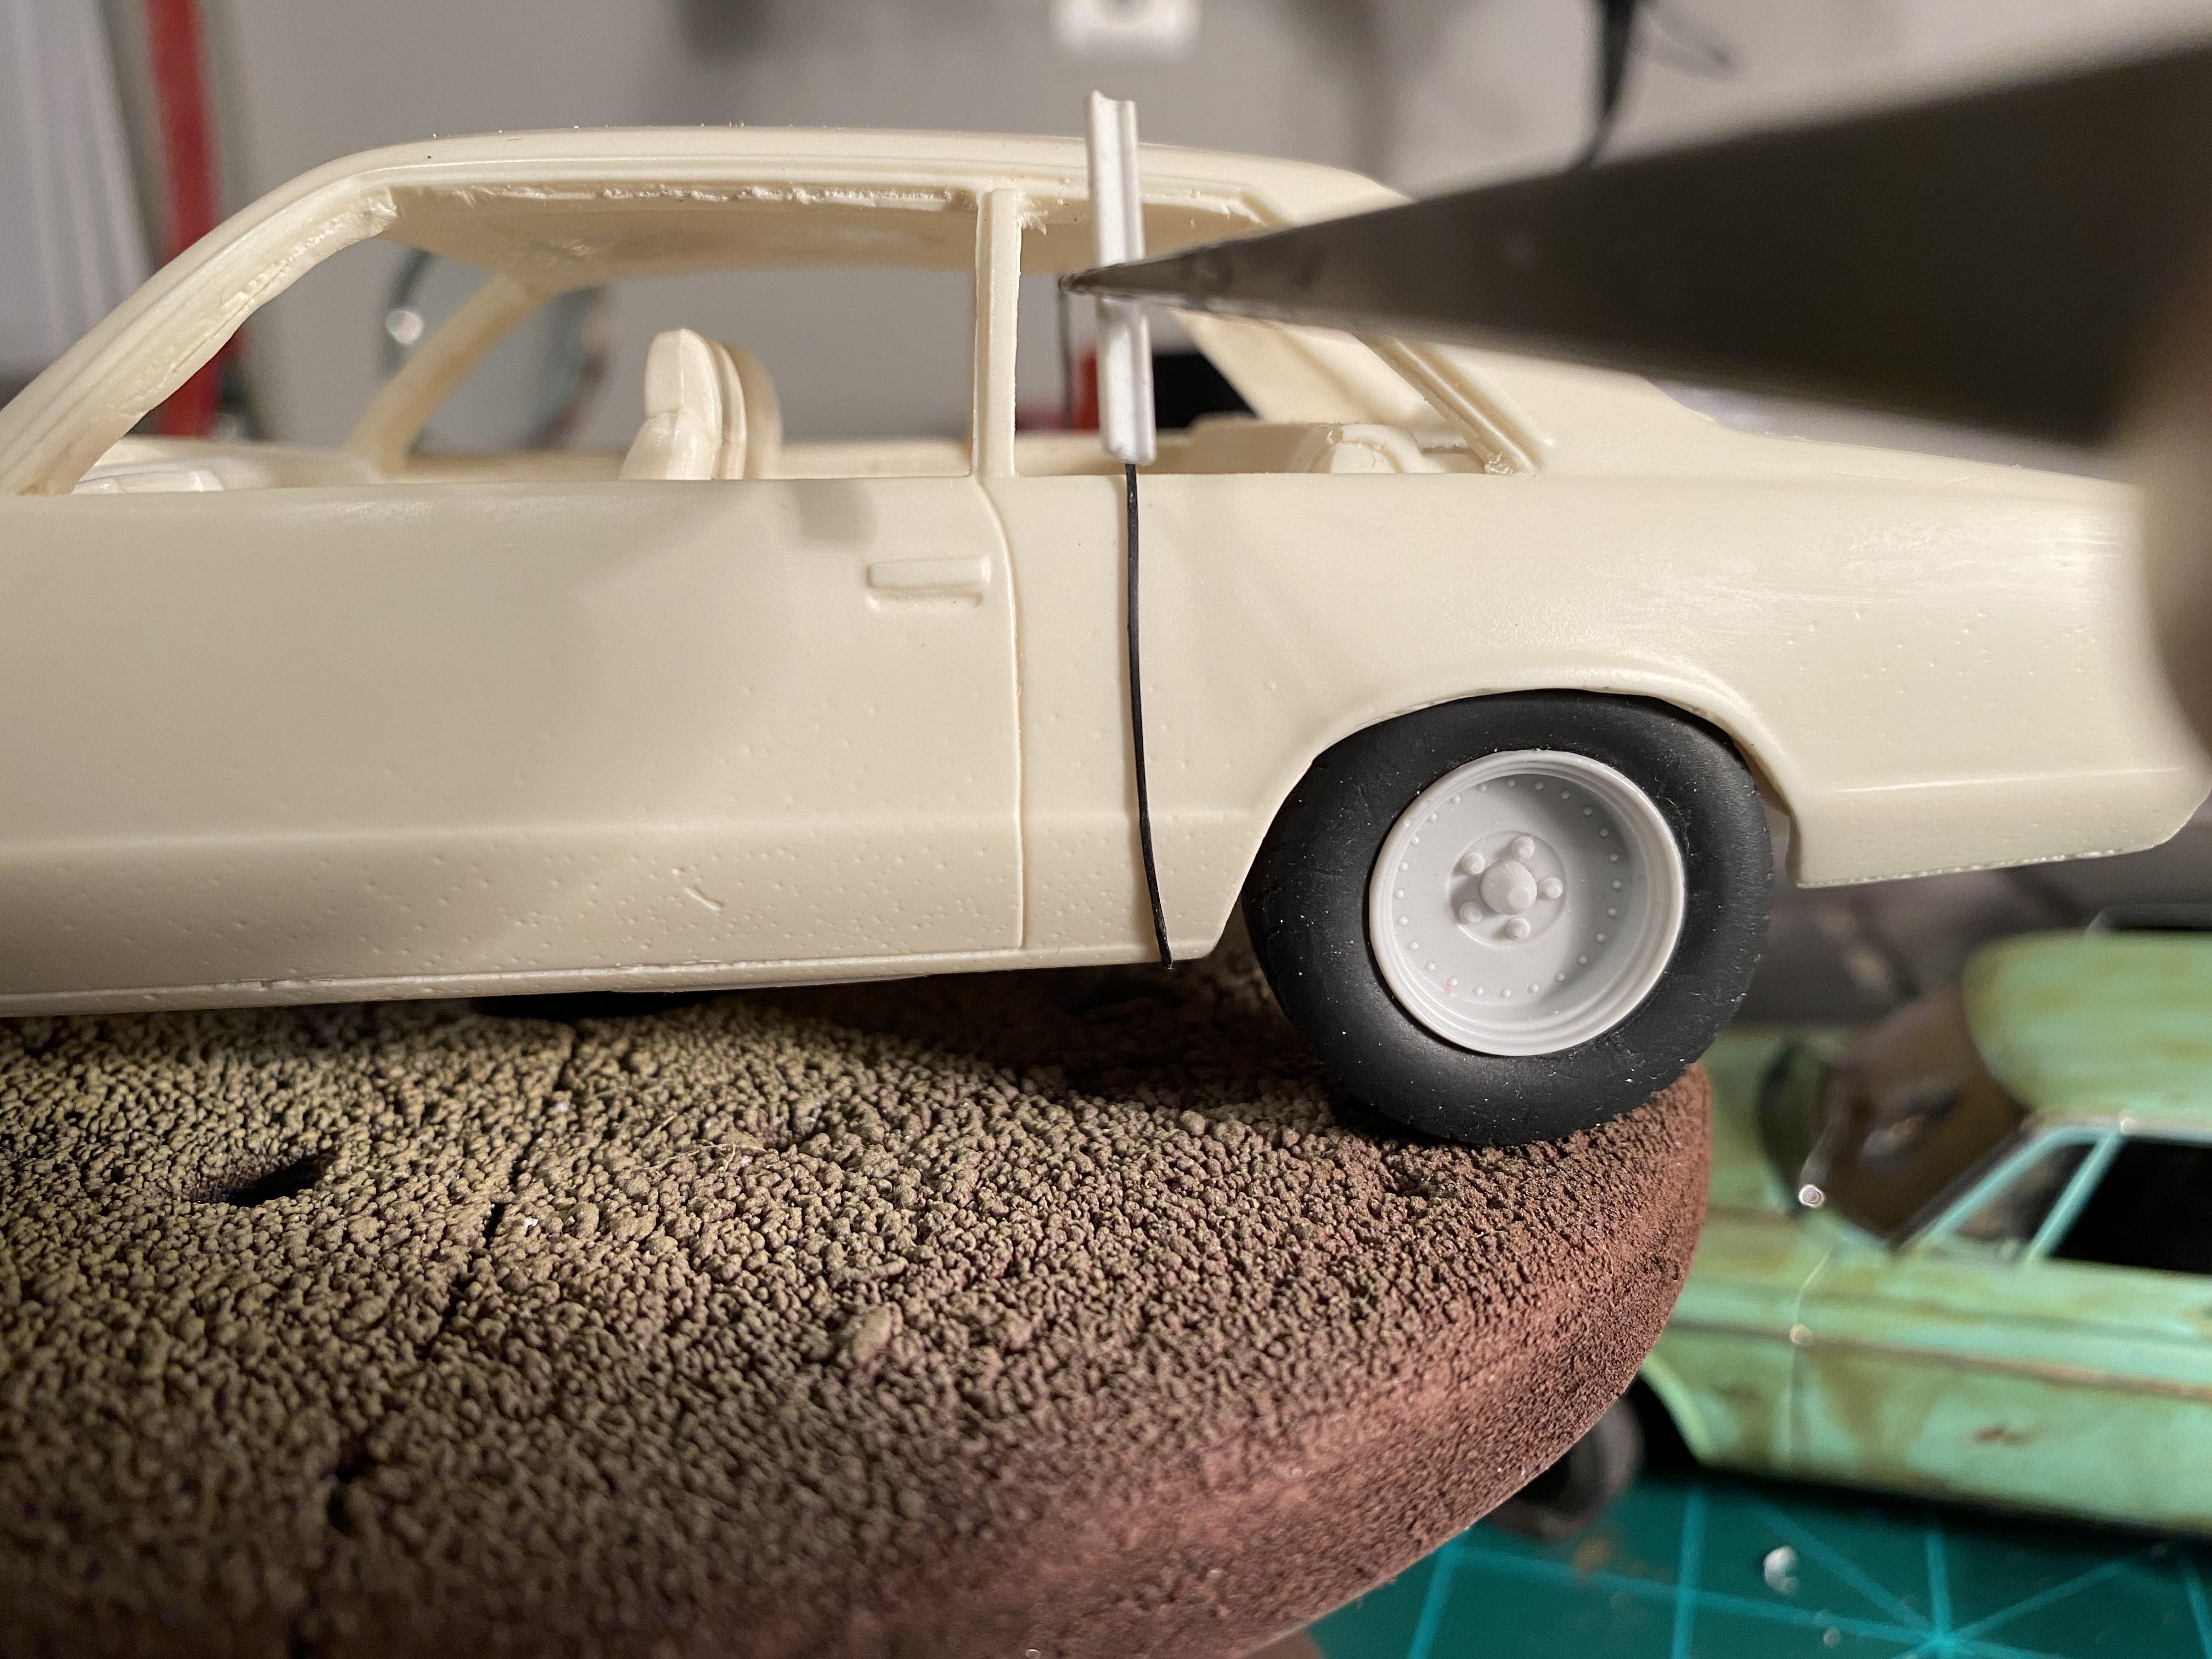
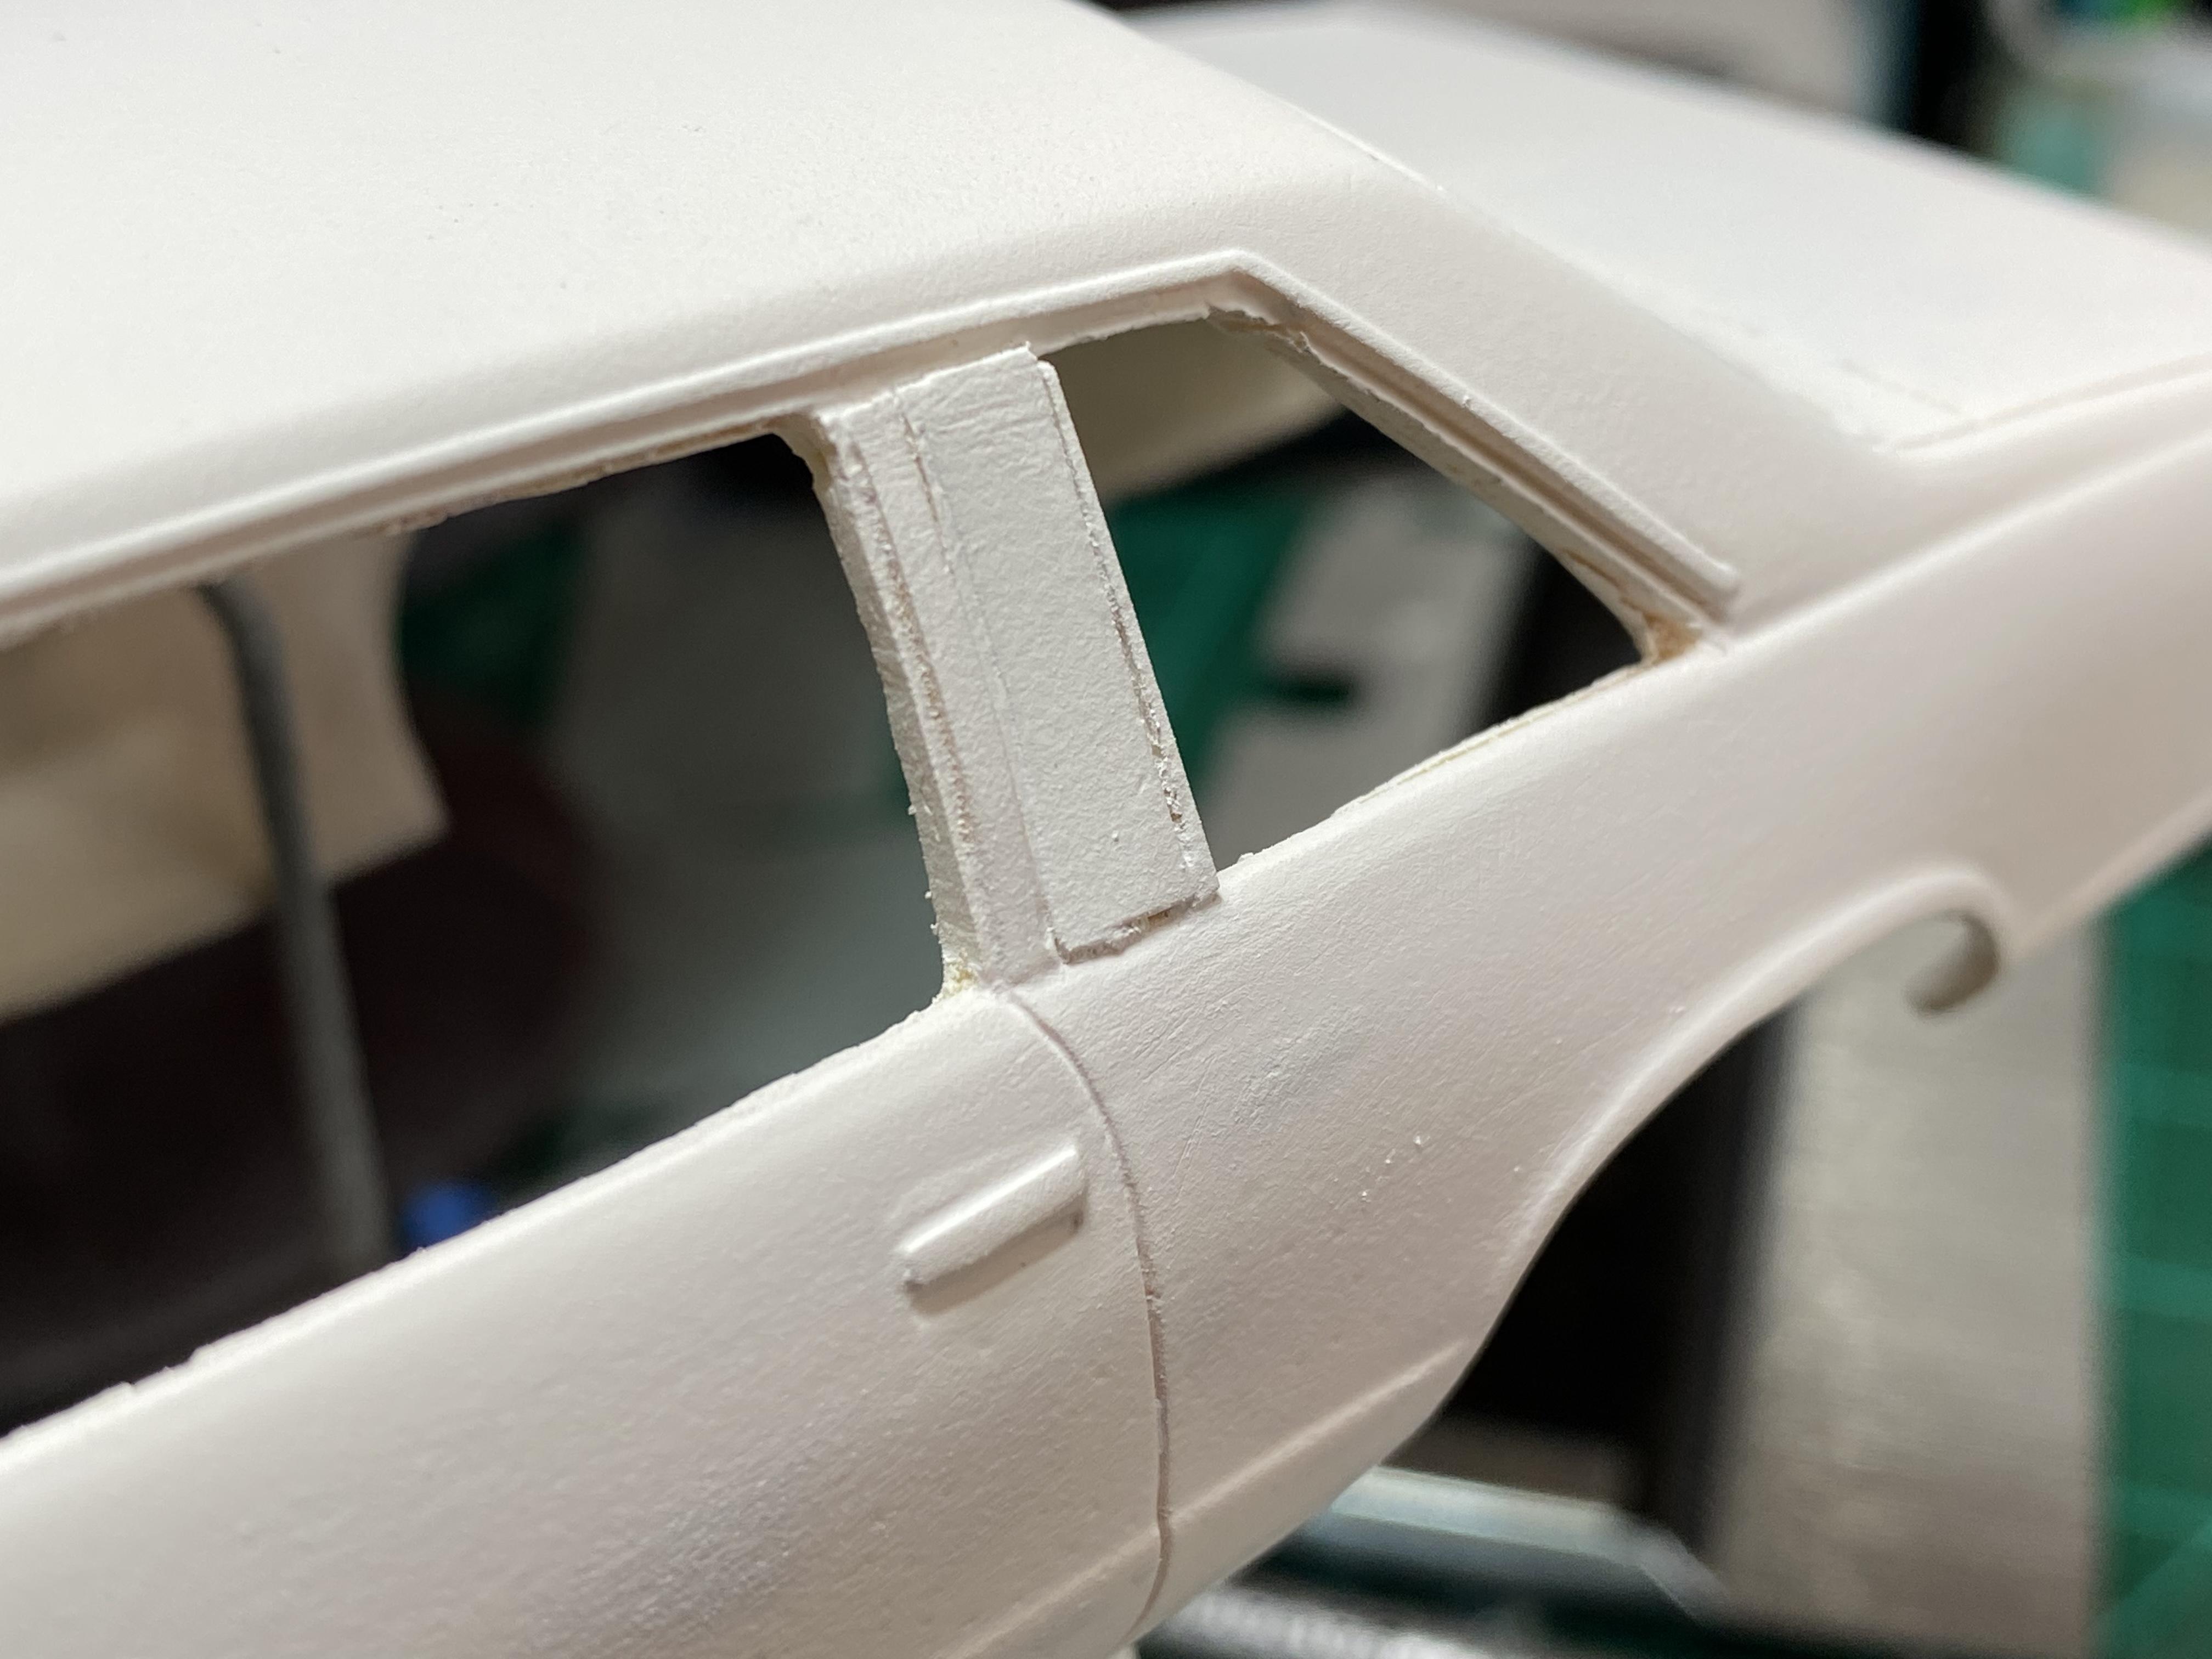
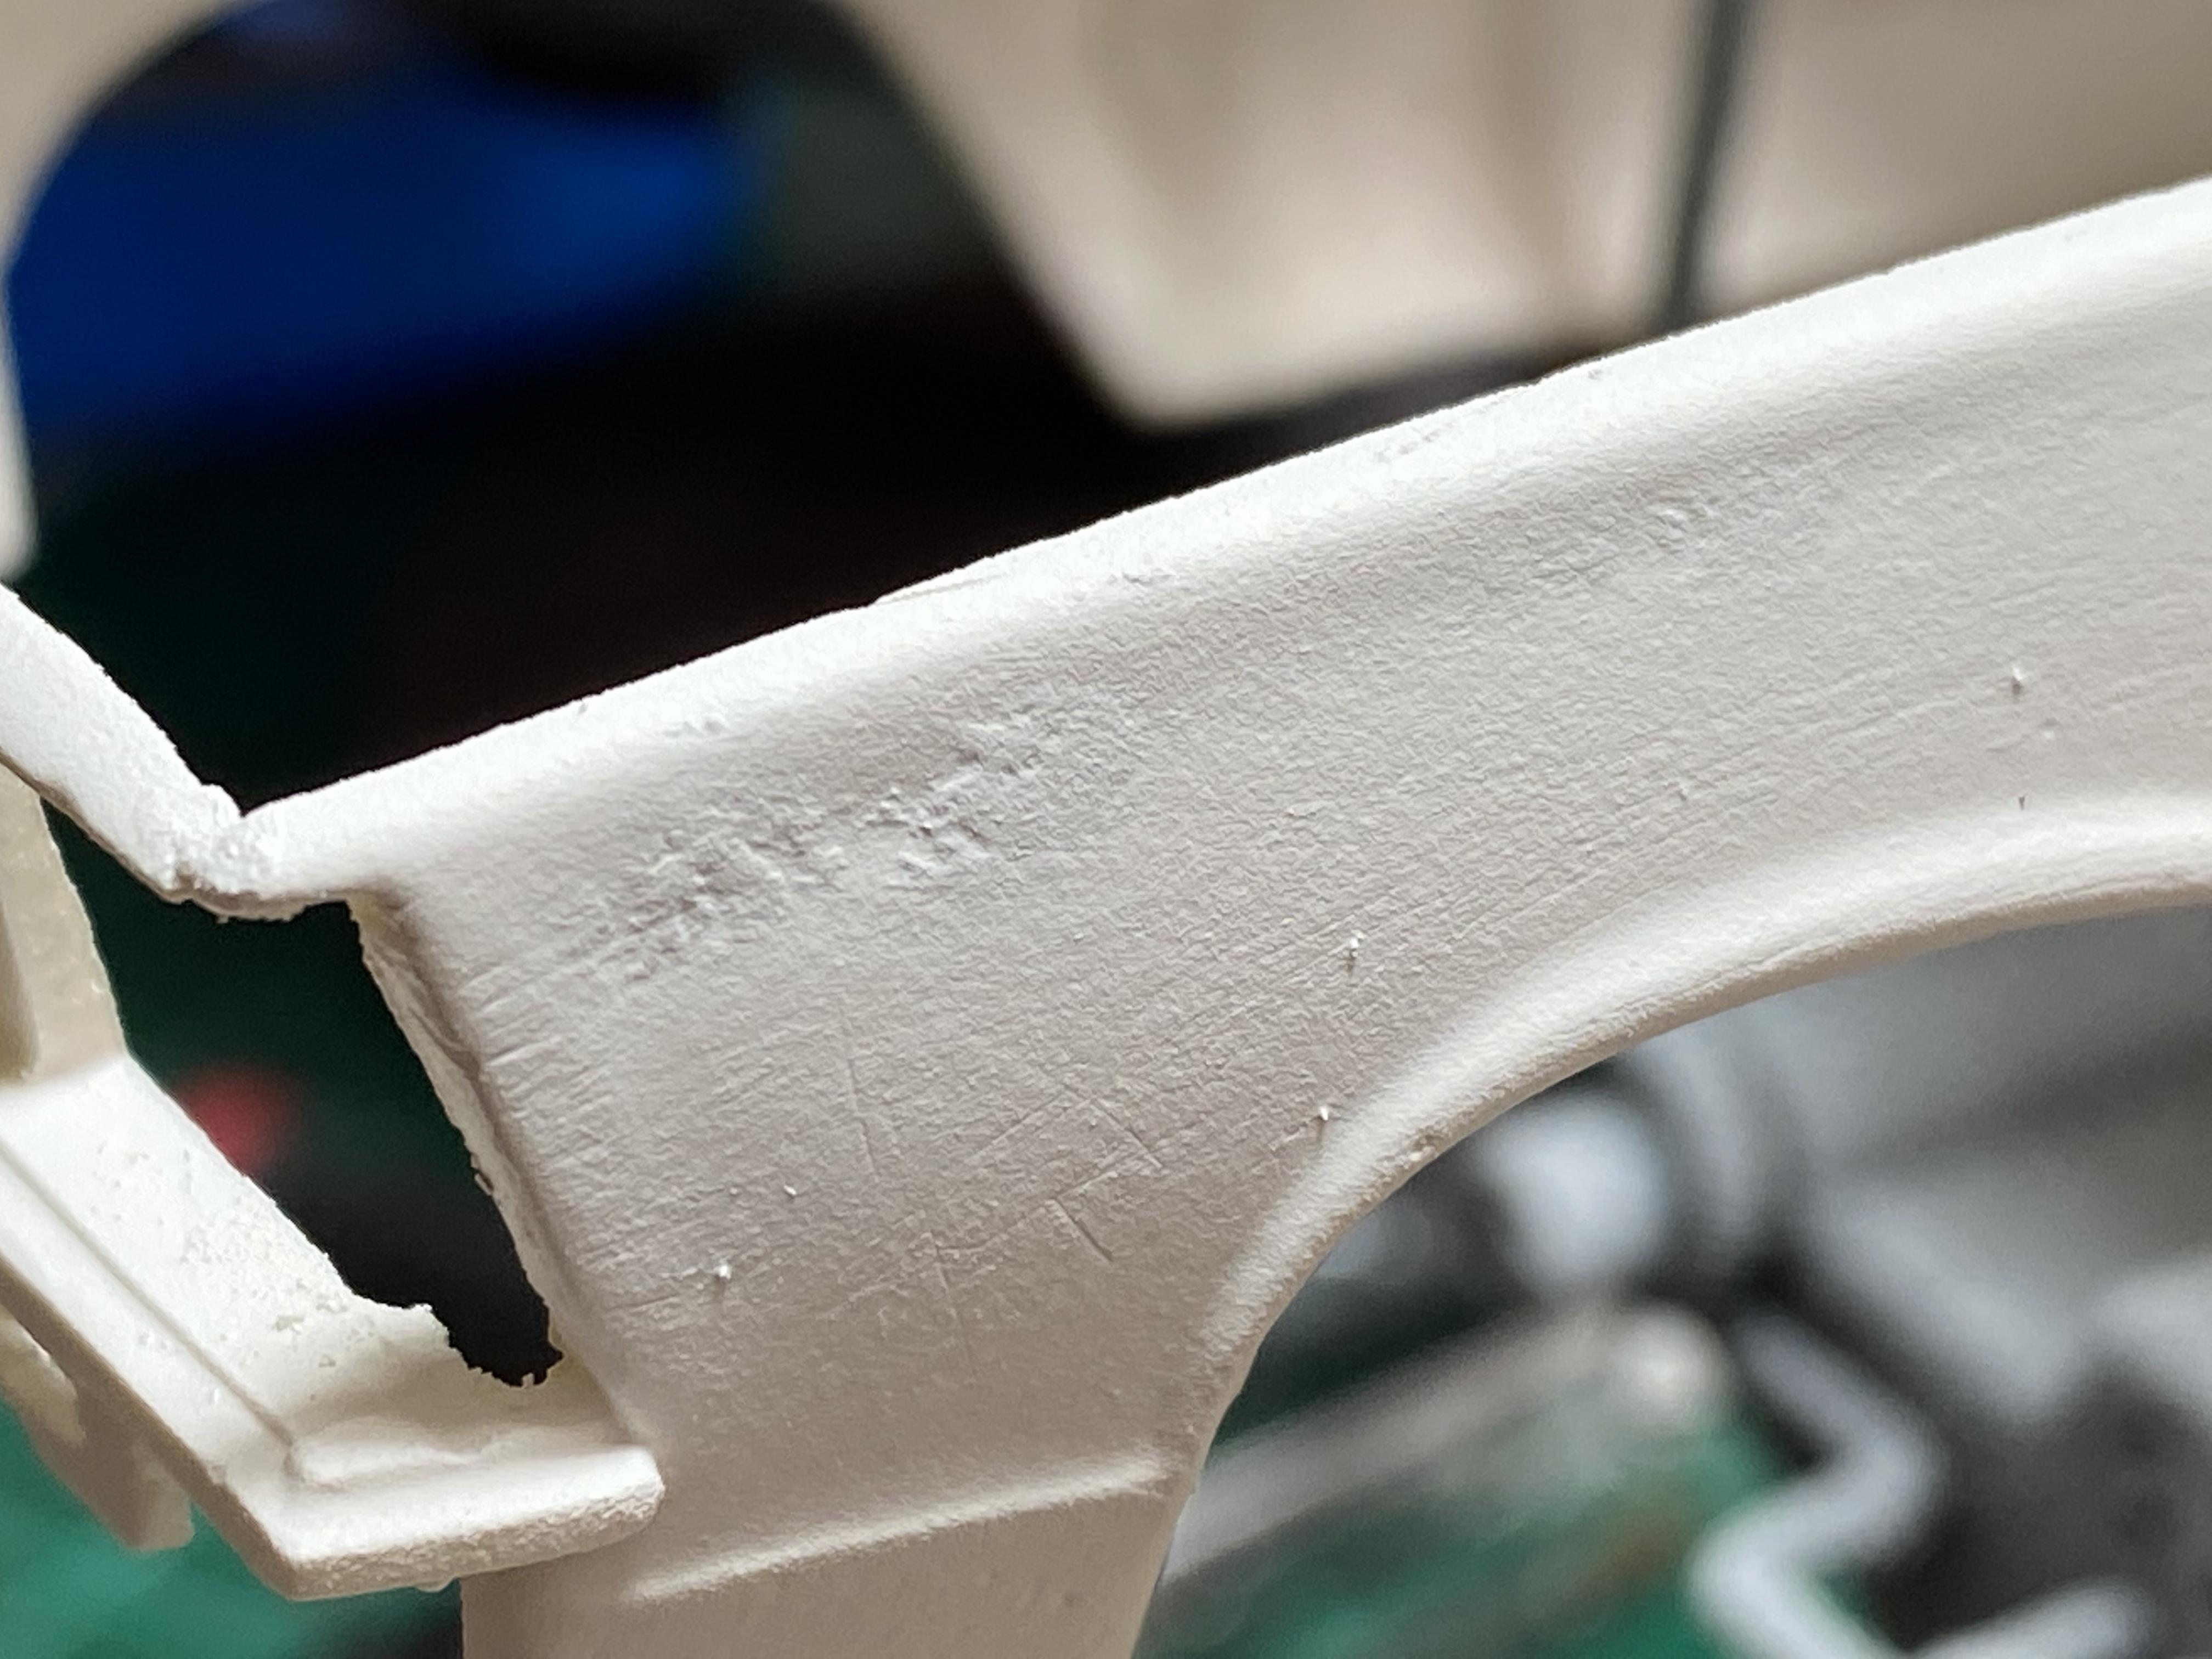
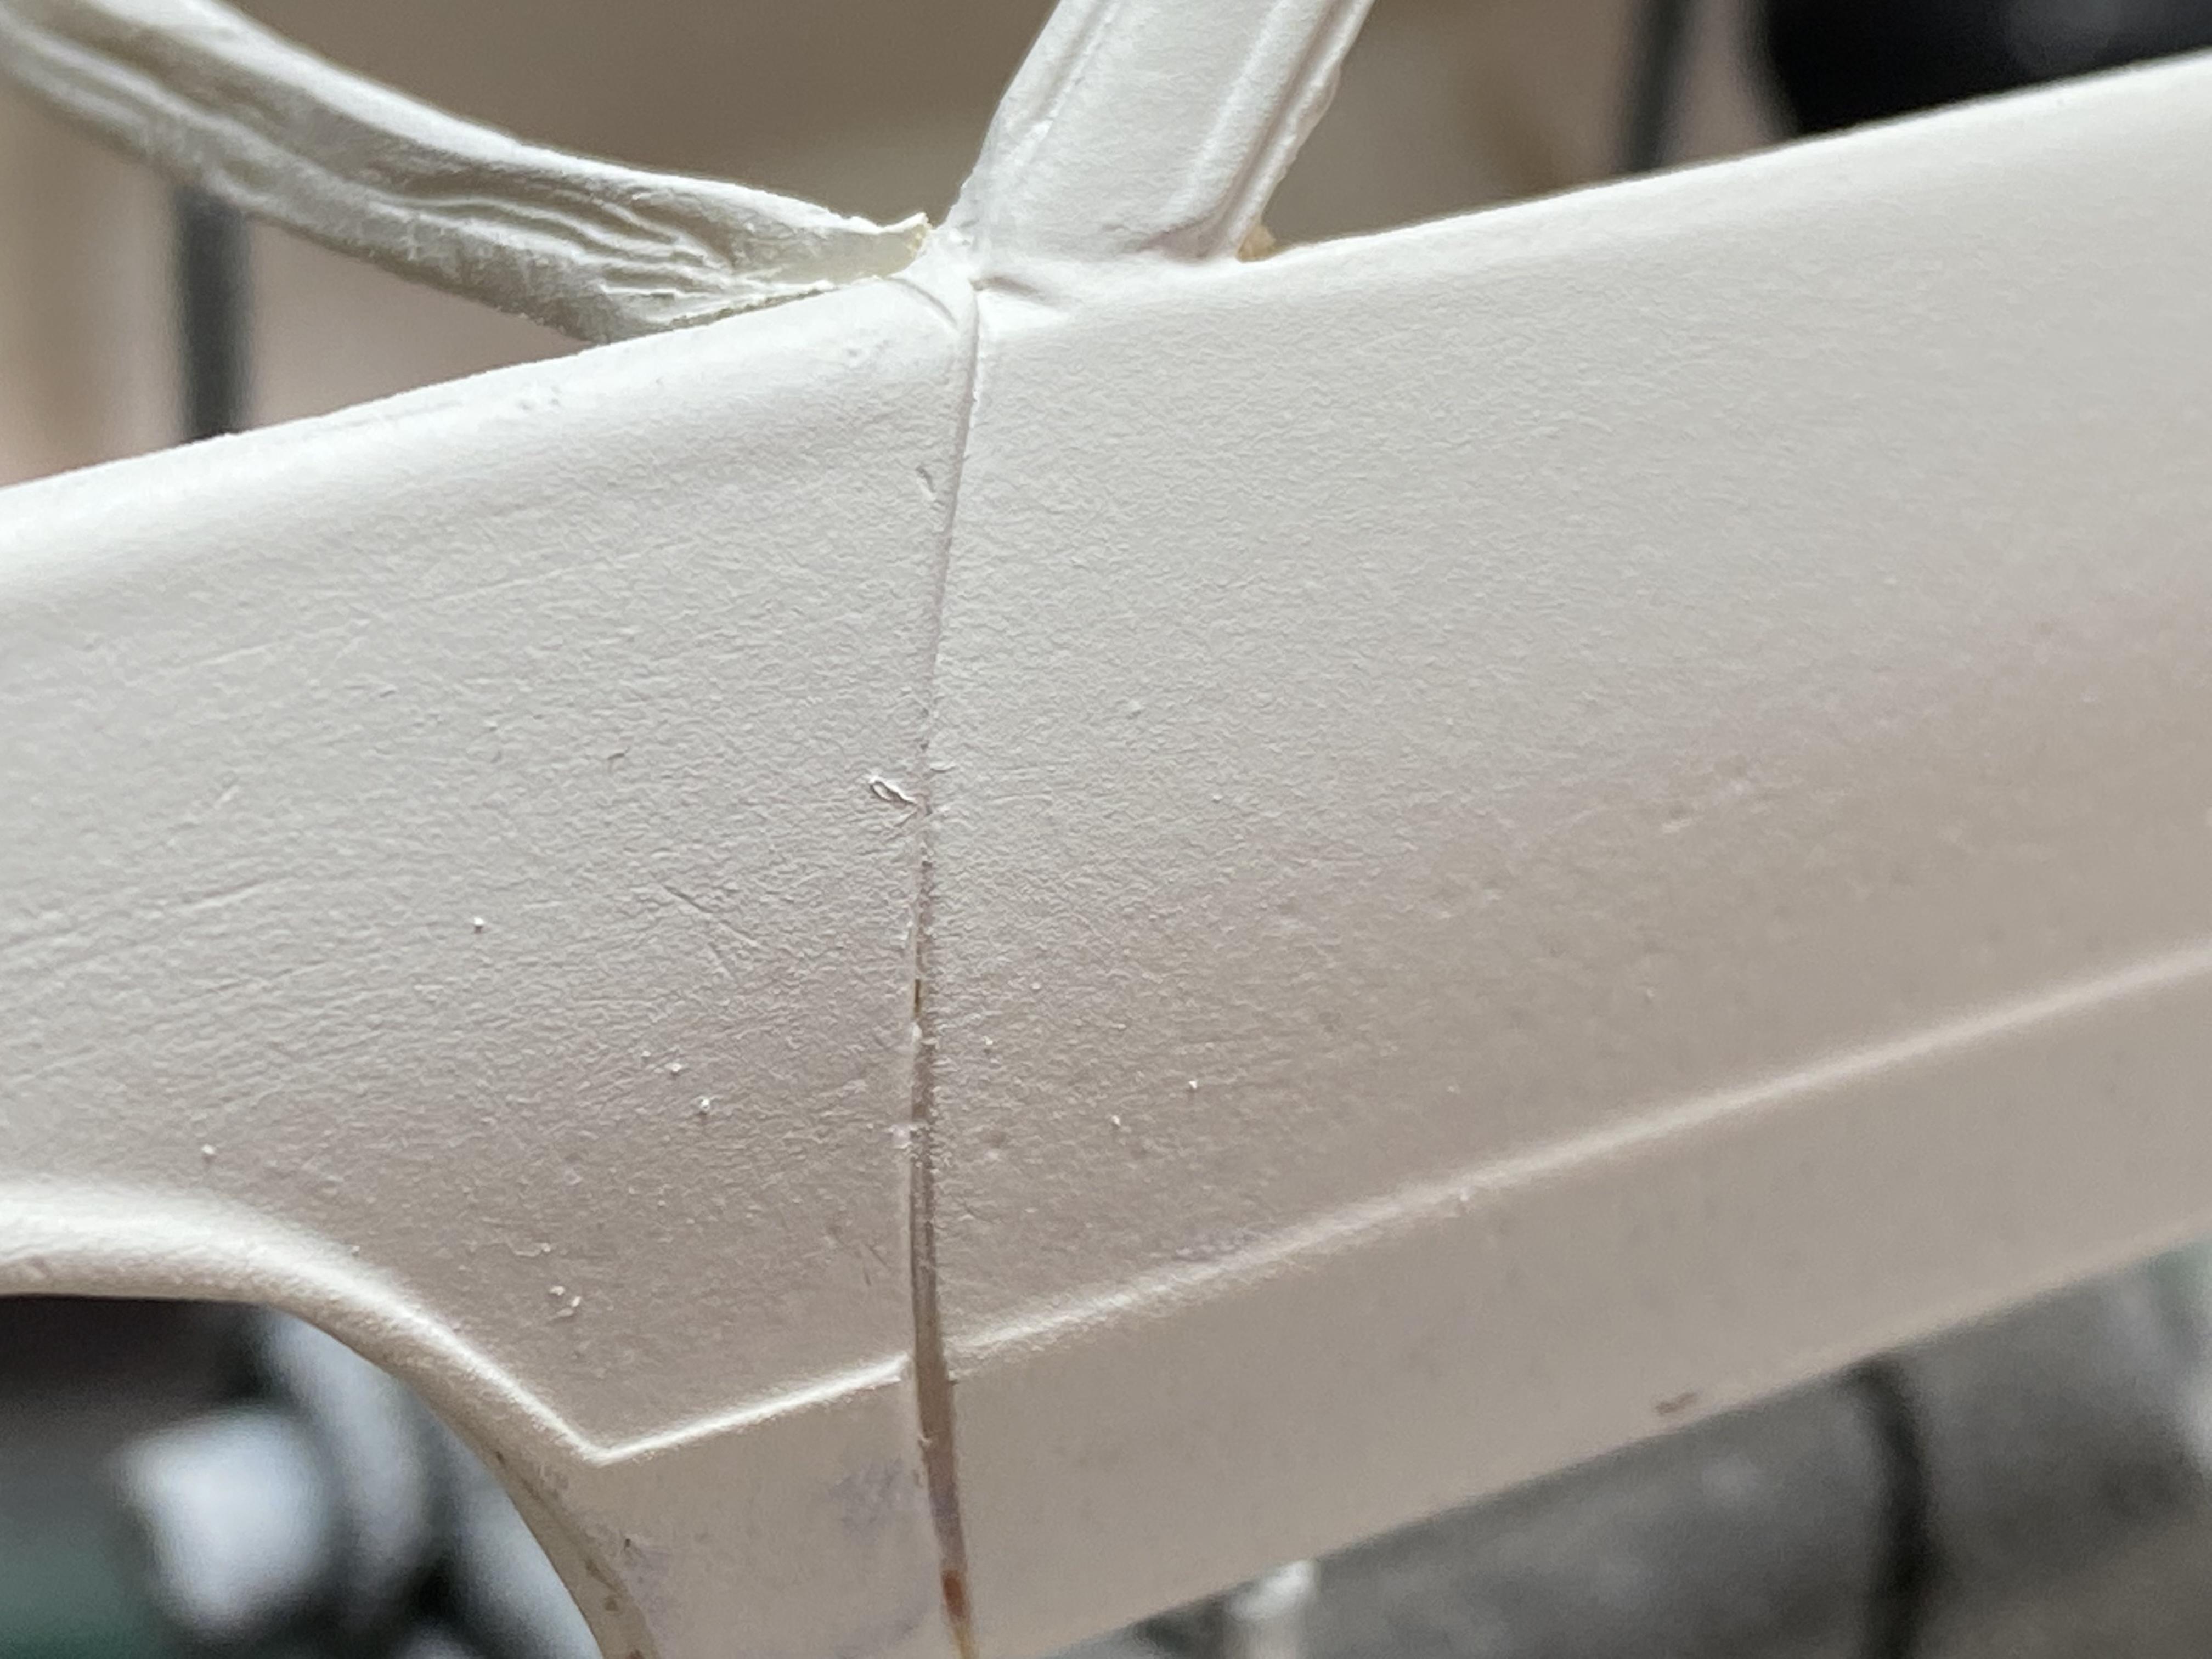
 This is my build of Bo Zolland's digital rendering of a new age Jaguar E-type, he referred to it as the Lyonheart. I started with a builtup of an original Monogram Jaguar E-type that I purchased at a local meeting for $2. I stripped it apart which was quite easy and put it in the pond for a few days to strip off the paint from the 70's. Next task was to take all the body parts and glue them together to create a one piece body that would be the starting point for the long road of cutting, gluing, filling, sanding, etc. I made a 1/24 scale printout of the sideview of the digital rendering of the Lyonheart and realized the E-type was 10 mm too short on the total length....sigh here we go. Cut the body at the front of the doors and added 10 mm of plastic from a Nascar body (which had the exact contour I needed) carefully sanded the mating surfaces, squared up, and glued the body back together. Next step was to add the necessary height to the side profile. Added in the center pieces from the beltline to the rocker from another Nascar kit (nice smooth sides). Next, on the rear quarter I had to pie cut and add in plastic to match up with the center. After all that dried I sanded smooth and got ready for the next step....had to widen the body 8 mm. Cut the body down the middle and added 8 mm of plastic on the hood, trunk, and front and rear valance. Amazingly (!), it sits dead level on the table and is now a scale 1/24 which is correct for my plans.
-
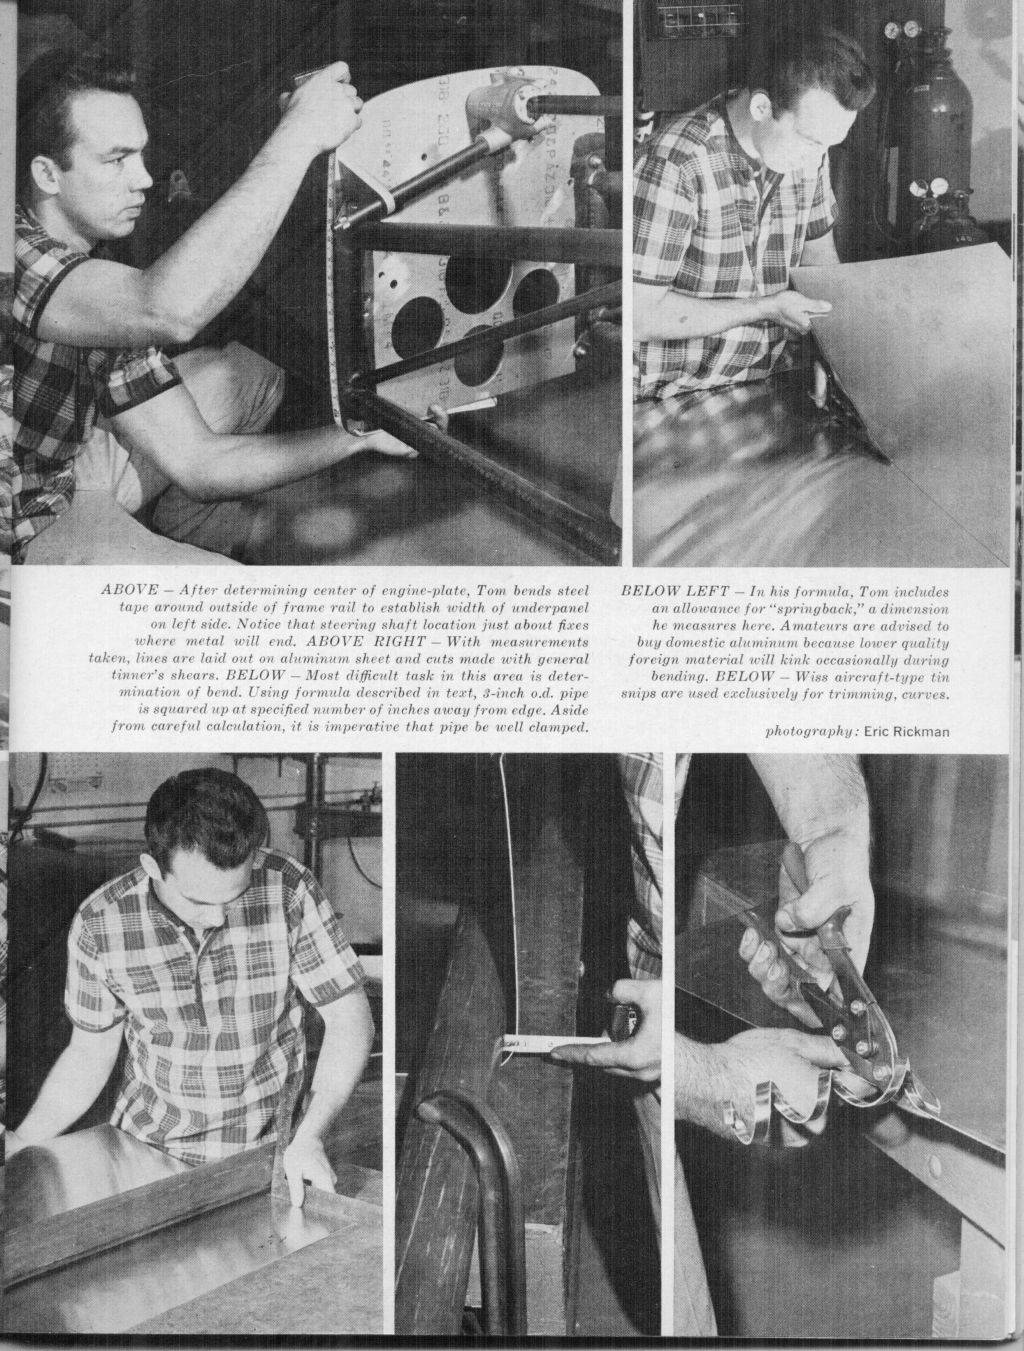
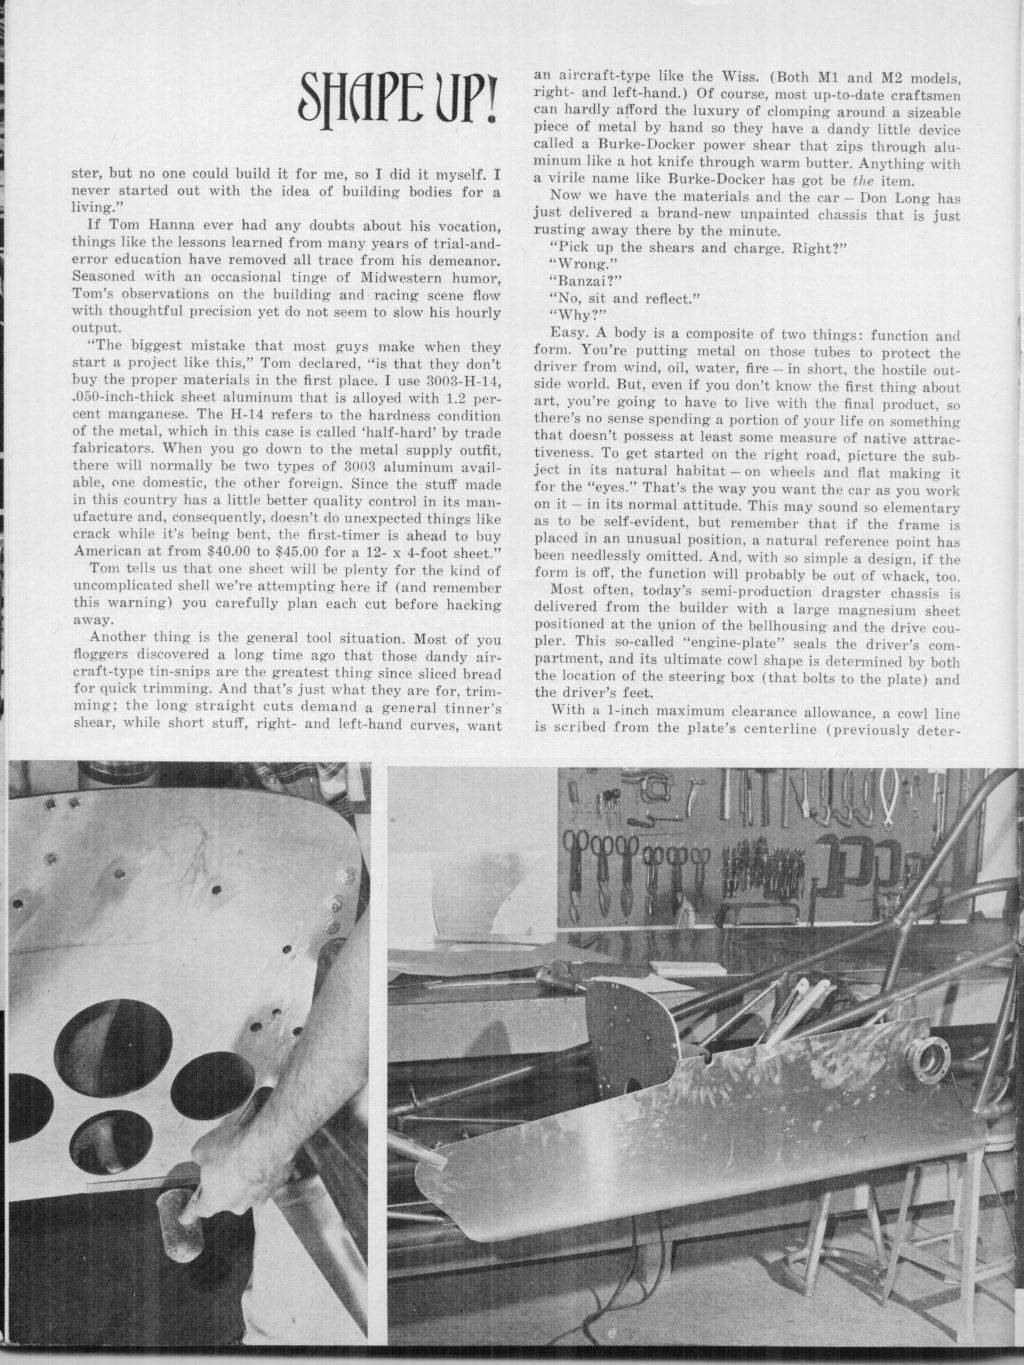
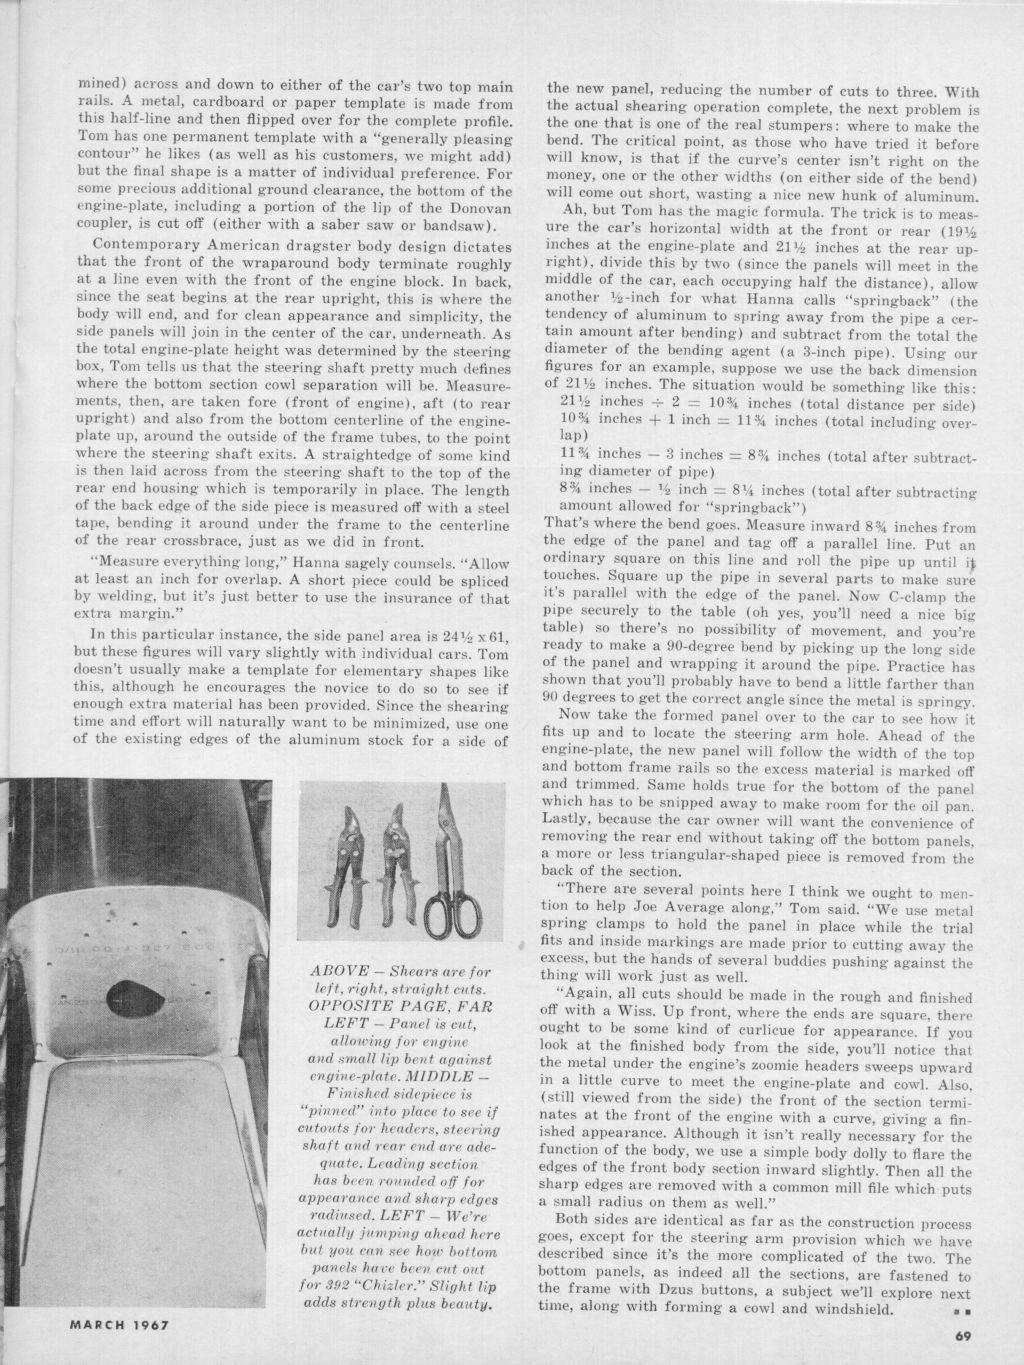
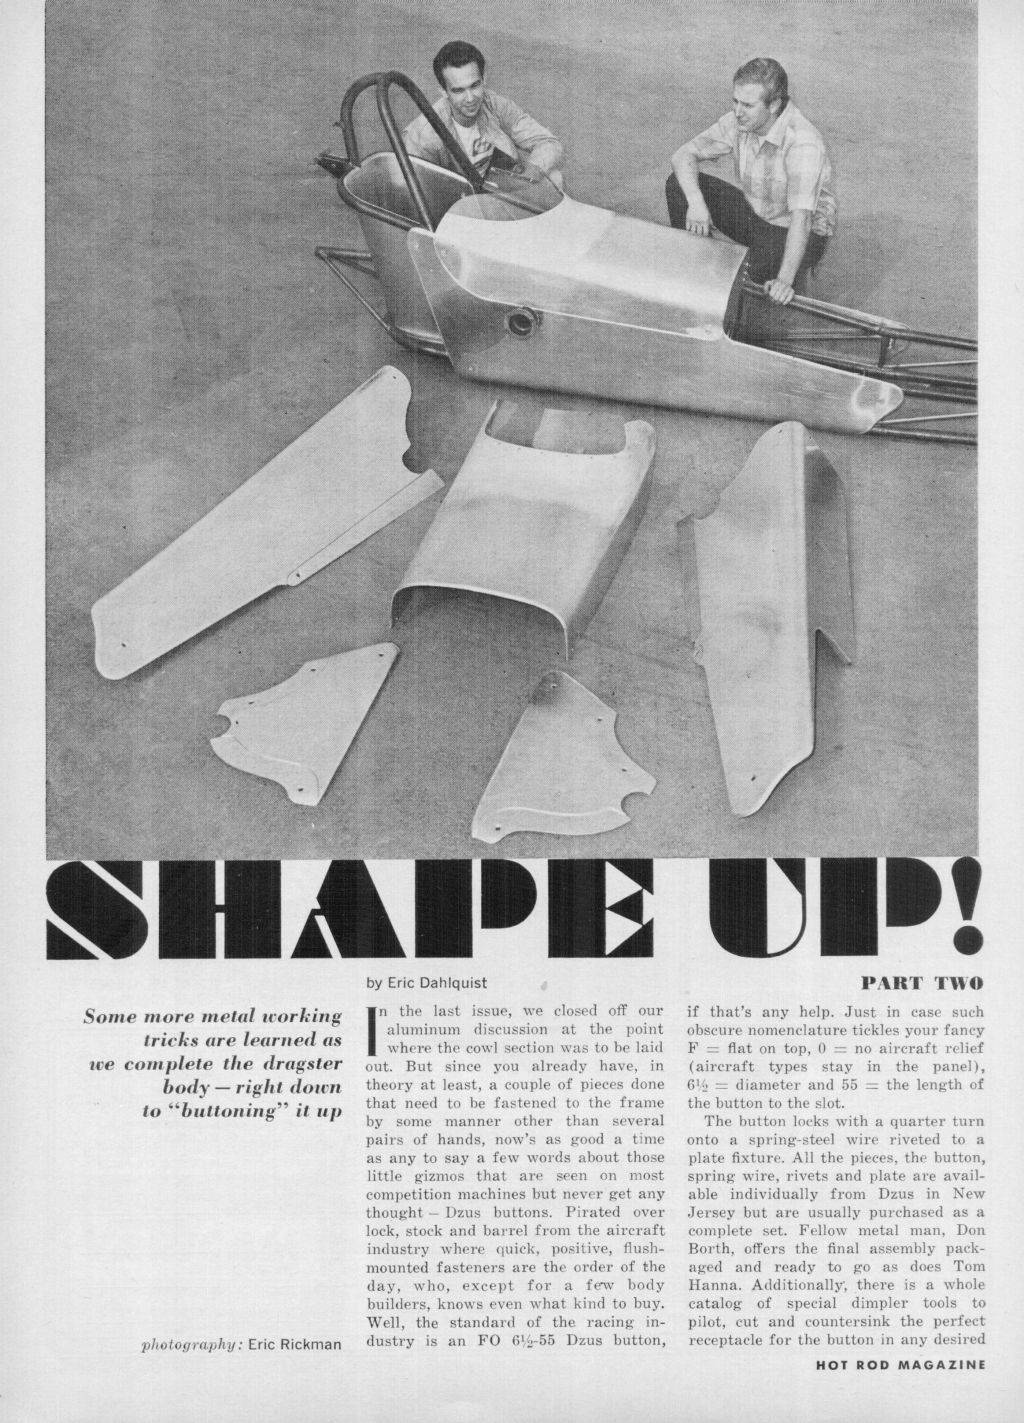
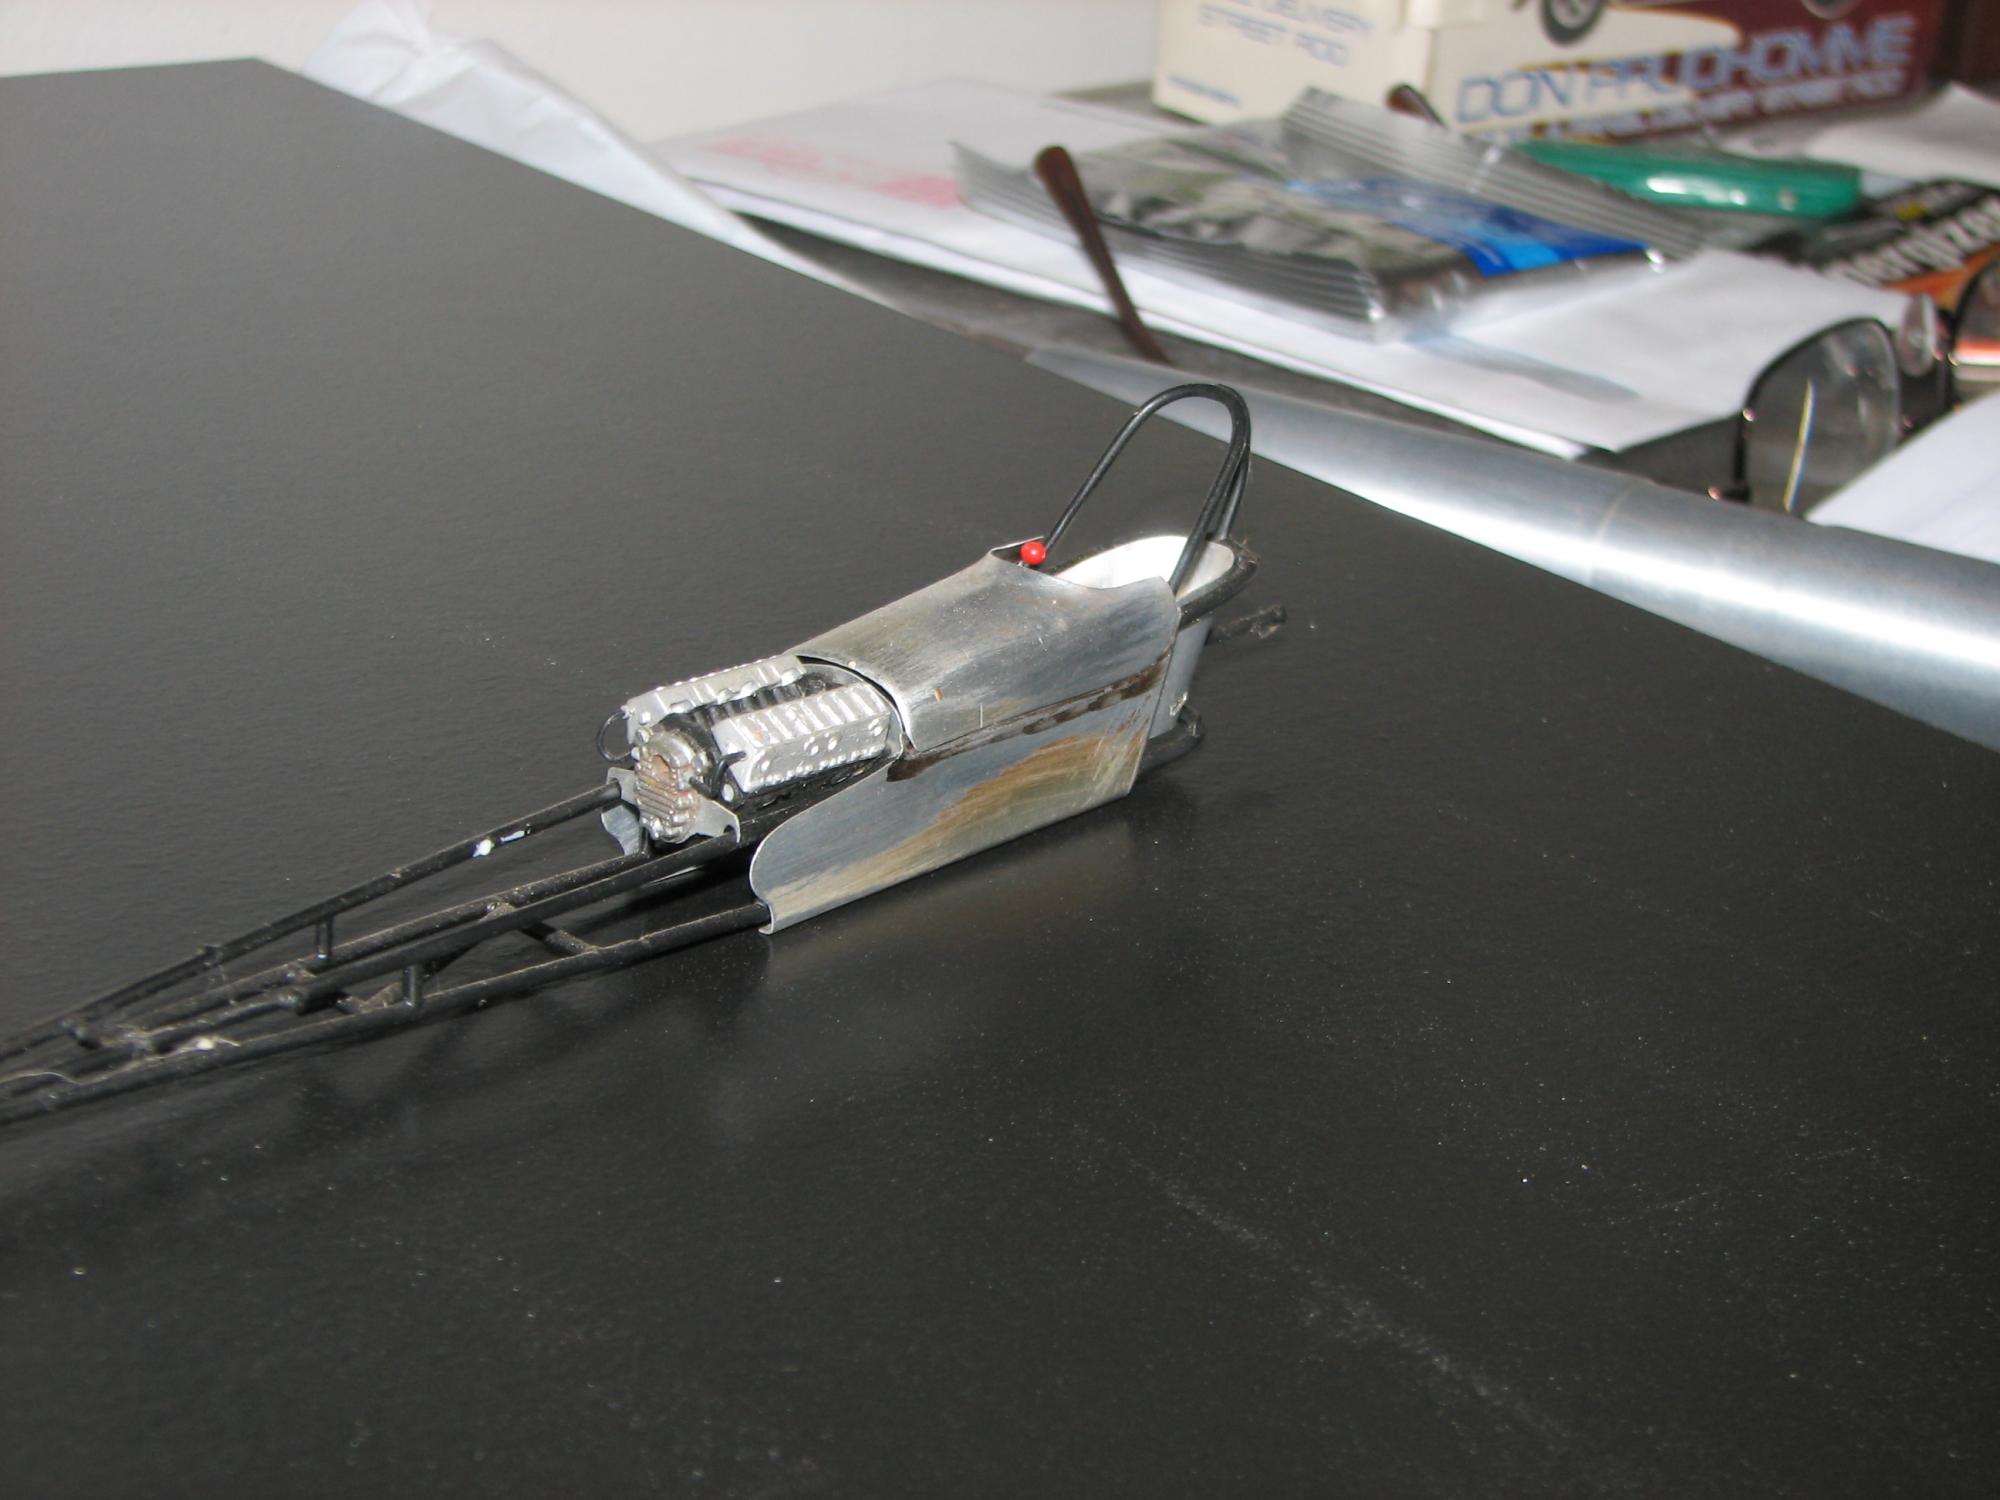
Sorry for the file size. I didn't want to reduce the physical size, because the text is important. Tom Hanna tells you how to build a shorty body for a dragster. From HRM, back in the later '60s. Also attached are a few photos of a body I built, using Hanna's guidelines. It's not black magic!
-
So, after a while of not posting on here, i have decided on my next project, i want to build a BRISCA f1, unfortunatly there are no sets made of these cars, so it will have to be scratch built, i have managed to make one in a 3d model software before, so how hard can it be irl right? having just been paid my first wage, i can now afford the styrene to make it, but im not sure the sizes i should get and i may need a bit of help with some things, as its my first time scratchbuilding. i have found a brilliant build diary on a website showing exactly how the guy made one, however there isnt any sizes that i can refer to, so im not sure of the styrene i should get, here is a link to the build diaries from 1 to 5: http://f1stockcars.com/?s=build+diary. Also, does anyone know of any sites that sell styrene based in england, as it takes weeks to be shipped from america and my local model shop doesnt stock it.
-
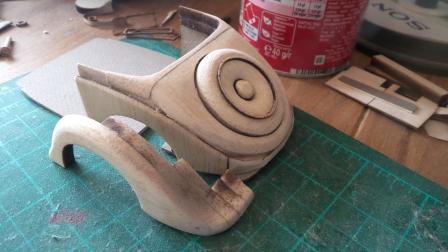
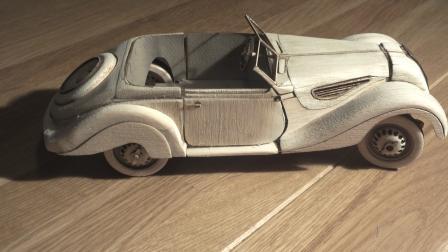
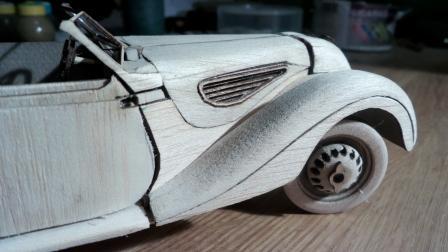
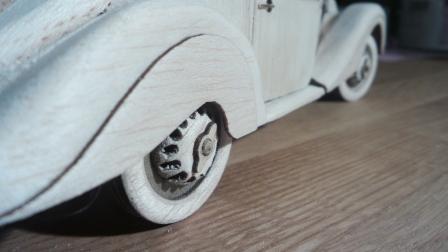
Hello ... I thought to show some pictures of my ongoing project, a BMW 327 Roadster from 1939, guess not very famous in USA. Today I finished the body, not easy built, but as a first trial I am happy ...
-
 I vowed to never do it again. Just kidding! I've been planning, gathering supplies. And it just so happens another trove of model bits found themselves the other day. Within that group was a die cast Hummer, remnants of a '55 Stepside gluebomb, and some 1/32 rig tires. So it's time for another tractor! Rather than another beast with a 6cyl Cummins, this is getting a four-banger Datsun engine.
 -
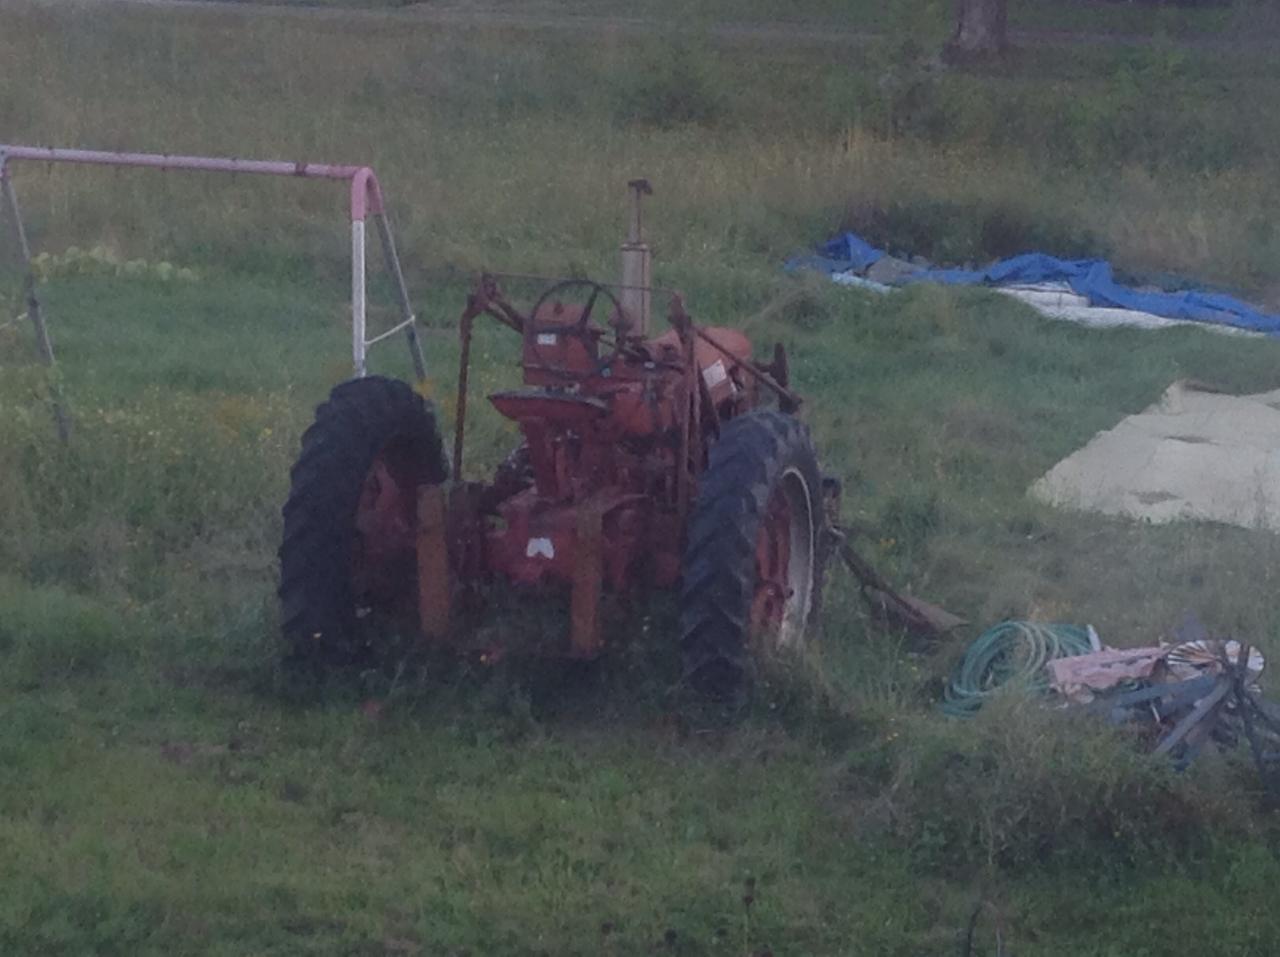
New readers: don't be disparaged by these first posts! It gets better, I promise! Trying to find a 1/24 or 1/25 farm tractor was not something I wanted to pursue any further. AMT Ertl made some, but I don't have $90 plus shipping to buy models. I had this Freightliner cabover lying around which I hated and it's lending its parts to this tractor I'm making. I have a lot of reference for tractor stuff, as there are some examples of these fine machines in the yard This is our Farmall H, of which I'm getting basic tractor-y ideas from. More to come....
-
Looking for a tutorial on how to scratchbuild the old Holley Blue fuel pumps and filter assembly's, or possibly a link to a resin caster that is currently selling them. Thanks in advance!
-
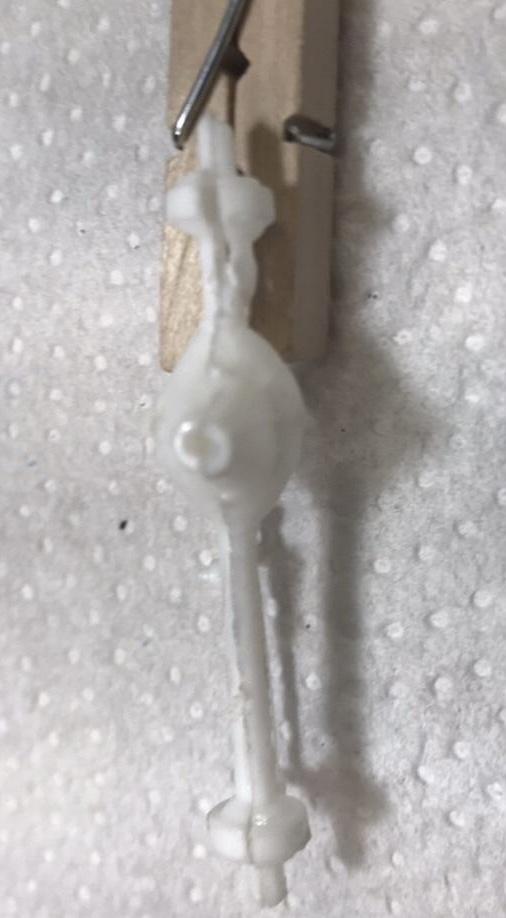
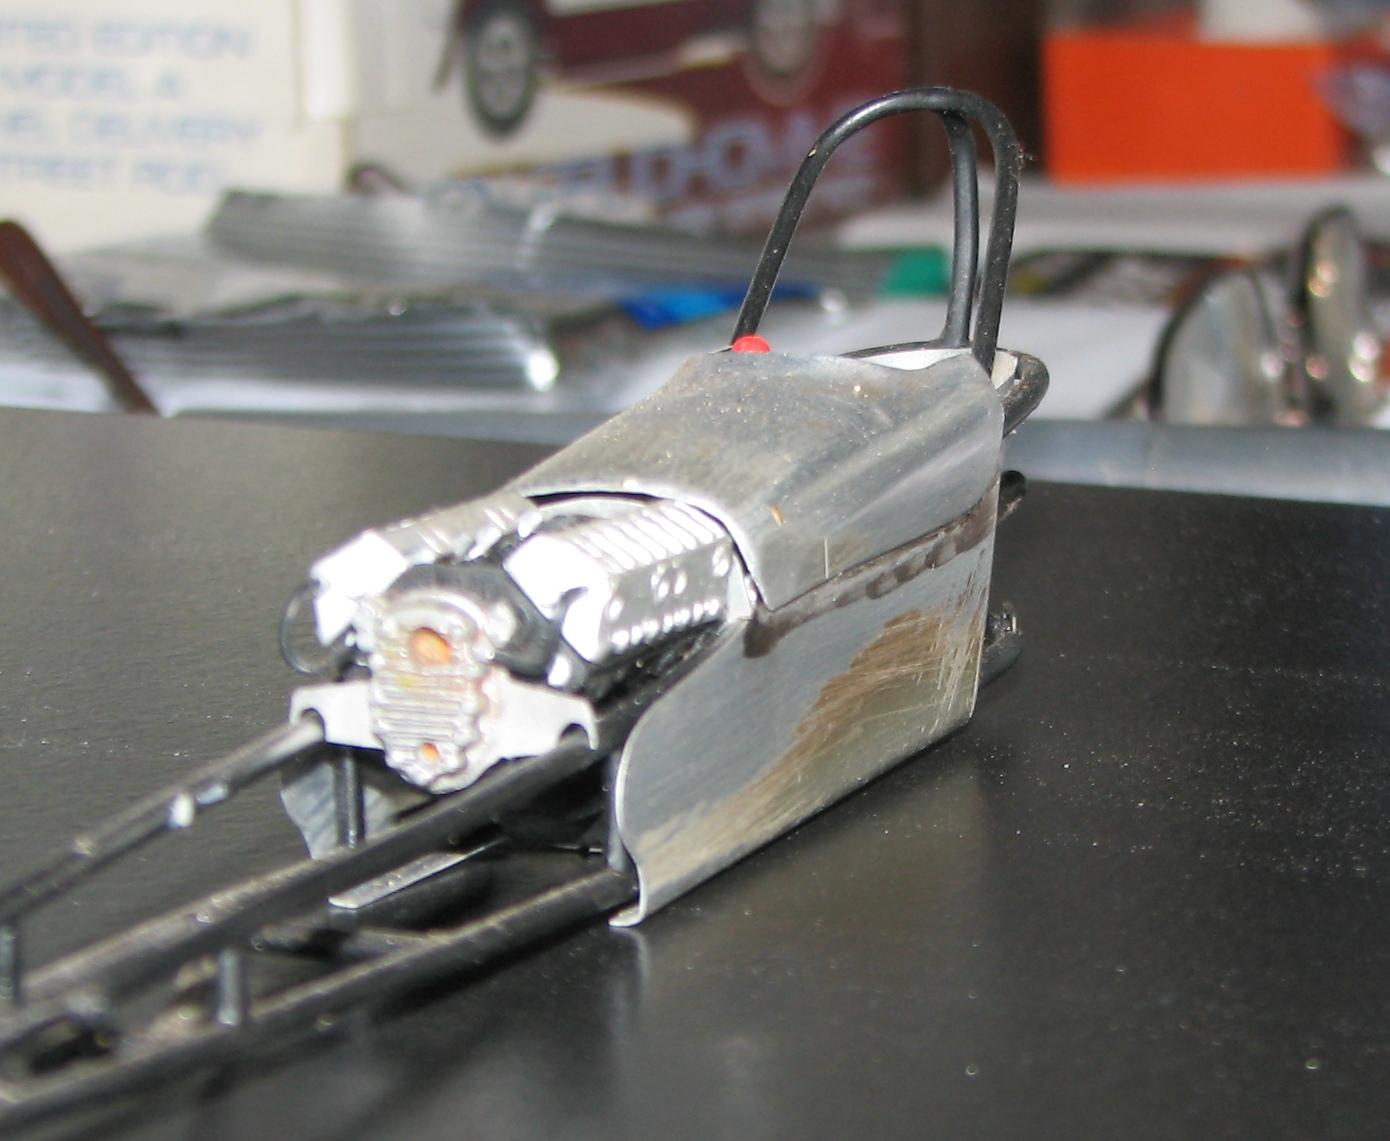
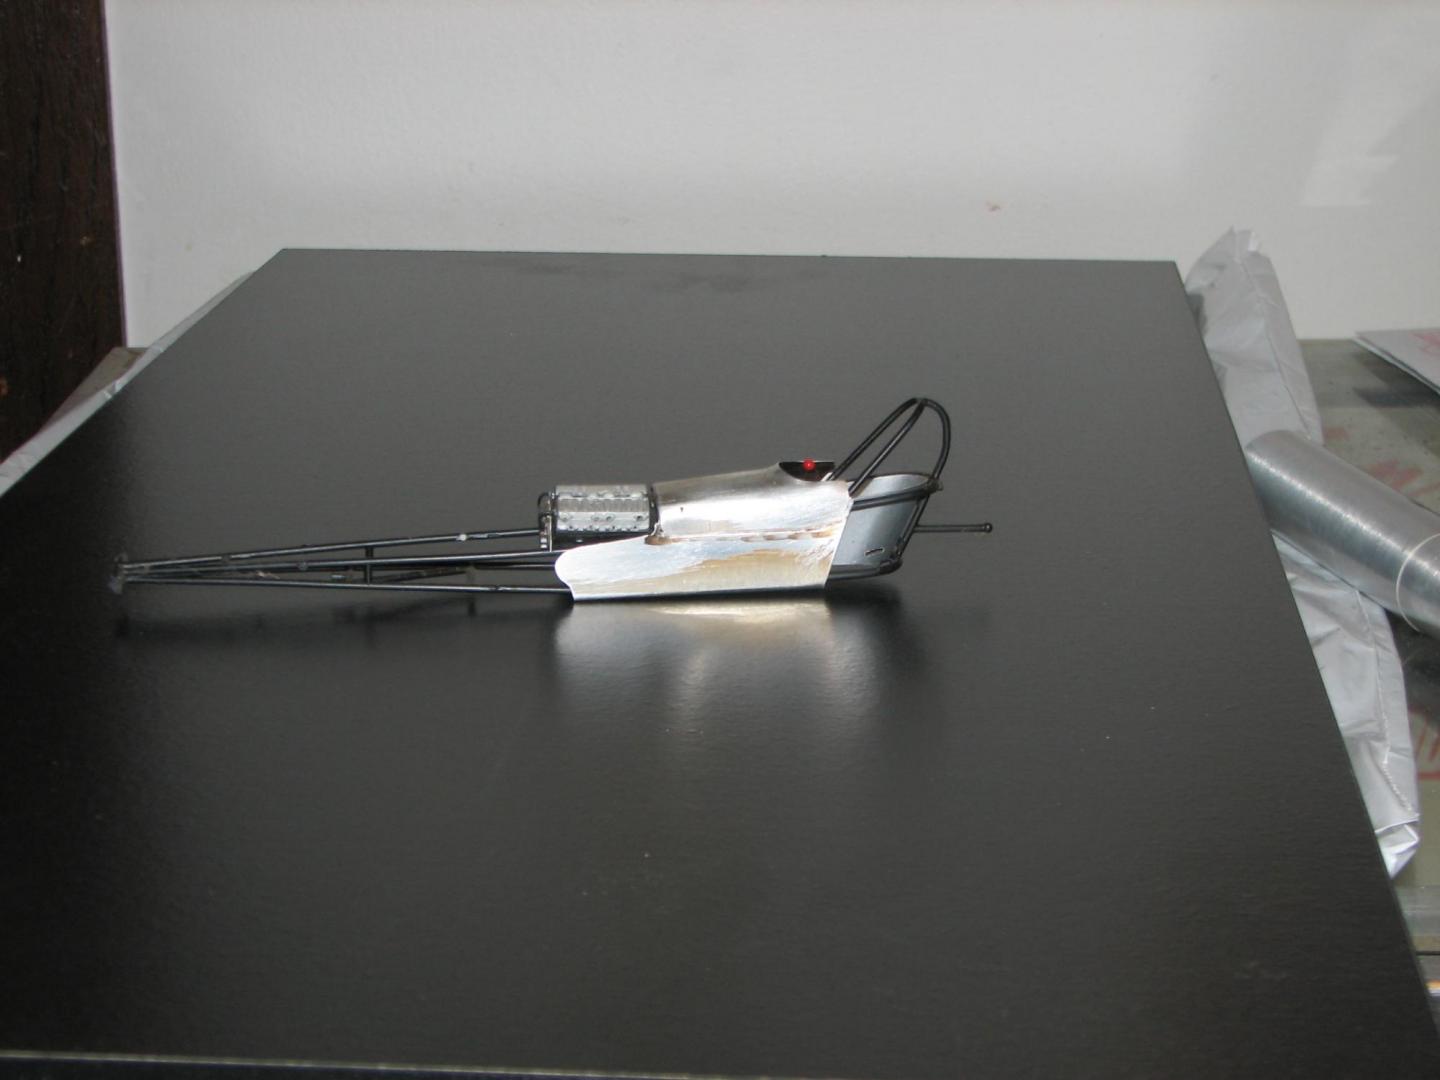
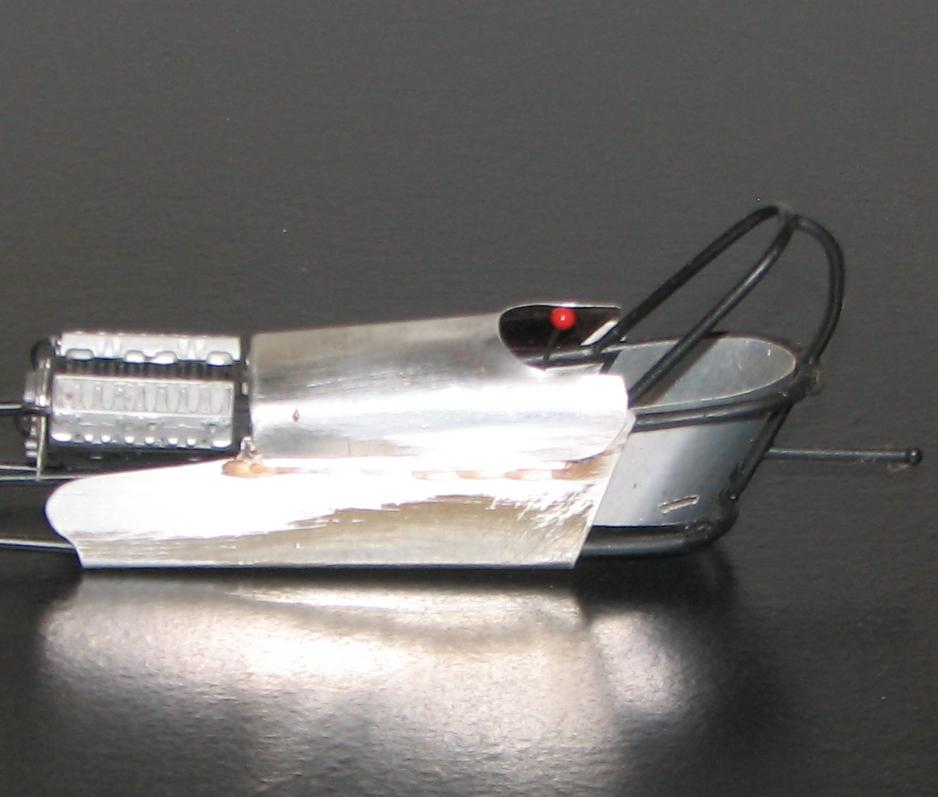
Here I will show you how to scratchbuild an extractor. Use this tutorial as a guide only- you can choose your own size/shape/whatever. The same techniques can be used to create all sorts of types of extractors/headers. It's a lot easier than it looks and a whole lotta fun so don't be afraid to try it! Just experiment and have fun This extractor isn't a replica of any particular 1:1, it's just based off the many I've seen in magazines/on the net/other peoples' builds etc... Rito enough talk, let's get building- ------------------------------------------------------------------------------- Here are all the materials/tools I used to make this extractor- 0.5mm styrene sheet 1.6mm styrene rod 3.2mm styrene rod hobby knife; No. 11 blade pinvise; 1mm, 1.5mm bits sanding stick dremel grinding bit lighter styrene cement rubber band ------------------------------------------------------------------------------ First of all, and the most important thing, is to plan how you are going to make you extractor. What size does the flange/pipes need to be? Is it going to clear chassis rails/steering boxes/whatever else? A little planning ahead will save alot of headaches in the long run. Test fitting is also very important- check the fit of every piece you make as the part comes together. Alright, let's really get building Using the 0.5mm sheet, we need to cut the flange out. If you have the kit header handy, you might be able to use it to get the correct size. Next is to drill 1.5mm holes where you want the pipes coming out (not a bad idea to use your 1mm bit to drill pilot holes first). This will make things alot easier rather than just gluing the pipes straight to the flange. Okay, pipes. to make a bend in rod, I use a lighter. I know some people can bend rod without heat, but I just can't. Well not without breaking it anyway . The trick here is to use just enough heat to be able to bend the rod easily; just a second right above the flame is enough for rod this small. Too much heat and it will begin to pit, or of course catch fire. Also, allow plenty of room from the end of the rod where you make your bend. If you make it too close, the tip of the rod will expand and it won't look so pretty. Neither will it fit in the holes in the flange- First bend- Also a good idea to mark where you want your bends before you bend them. And remember to test fit. Now cut the excess, but make sure you leave plenty of length. Continue using this same method to make the rest of the pipes. Oh don't forget to test fit them as you go . As you can see, there is a fair bit of excess rod sticking through the other side of the flange, this will be trimmed away a little later.
-
I'm going to be building a supply trading truck for the Zombie/Apocalypse build, and will need to scratch build most of the "supplies." Can anyone think of a site/forum where there are how-to pages or tutorials? A place where I can see a ton of examples to get my creative juices flowing? I've tried google, but this is one of those things where I don't know what I have to put in to get what I want. I end up with a ton of pages on scratch building a real gas generator instead!


_1984-1993_(1991-1993)_(01)_-CA2-.jpg.8d07f13614fd8949d63585fda73b2526.jpg)