
BIGTRUCK
-
Posts
2,581 -
Joined
-
Last visited
Content Type
Profiles
Forums
Events
Gallery
Posts posted by BIGTRUCK
-
-
I spent my share of time waiting in lines to get in model swaps but the Feb 26th show was the longest. It opened at 9:00 I got there at 9:10 and got in at 9:40. Im glad the weather was fine and happy the shows are coming back stronger then the last 2 years.

-
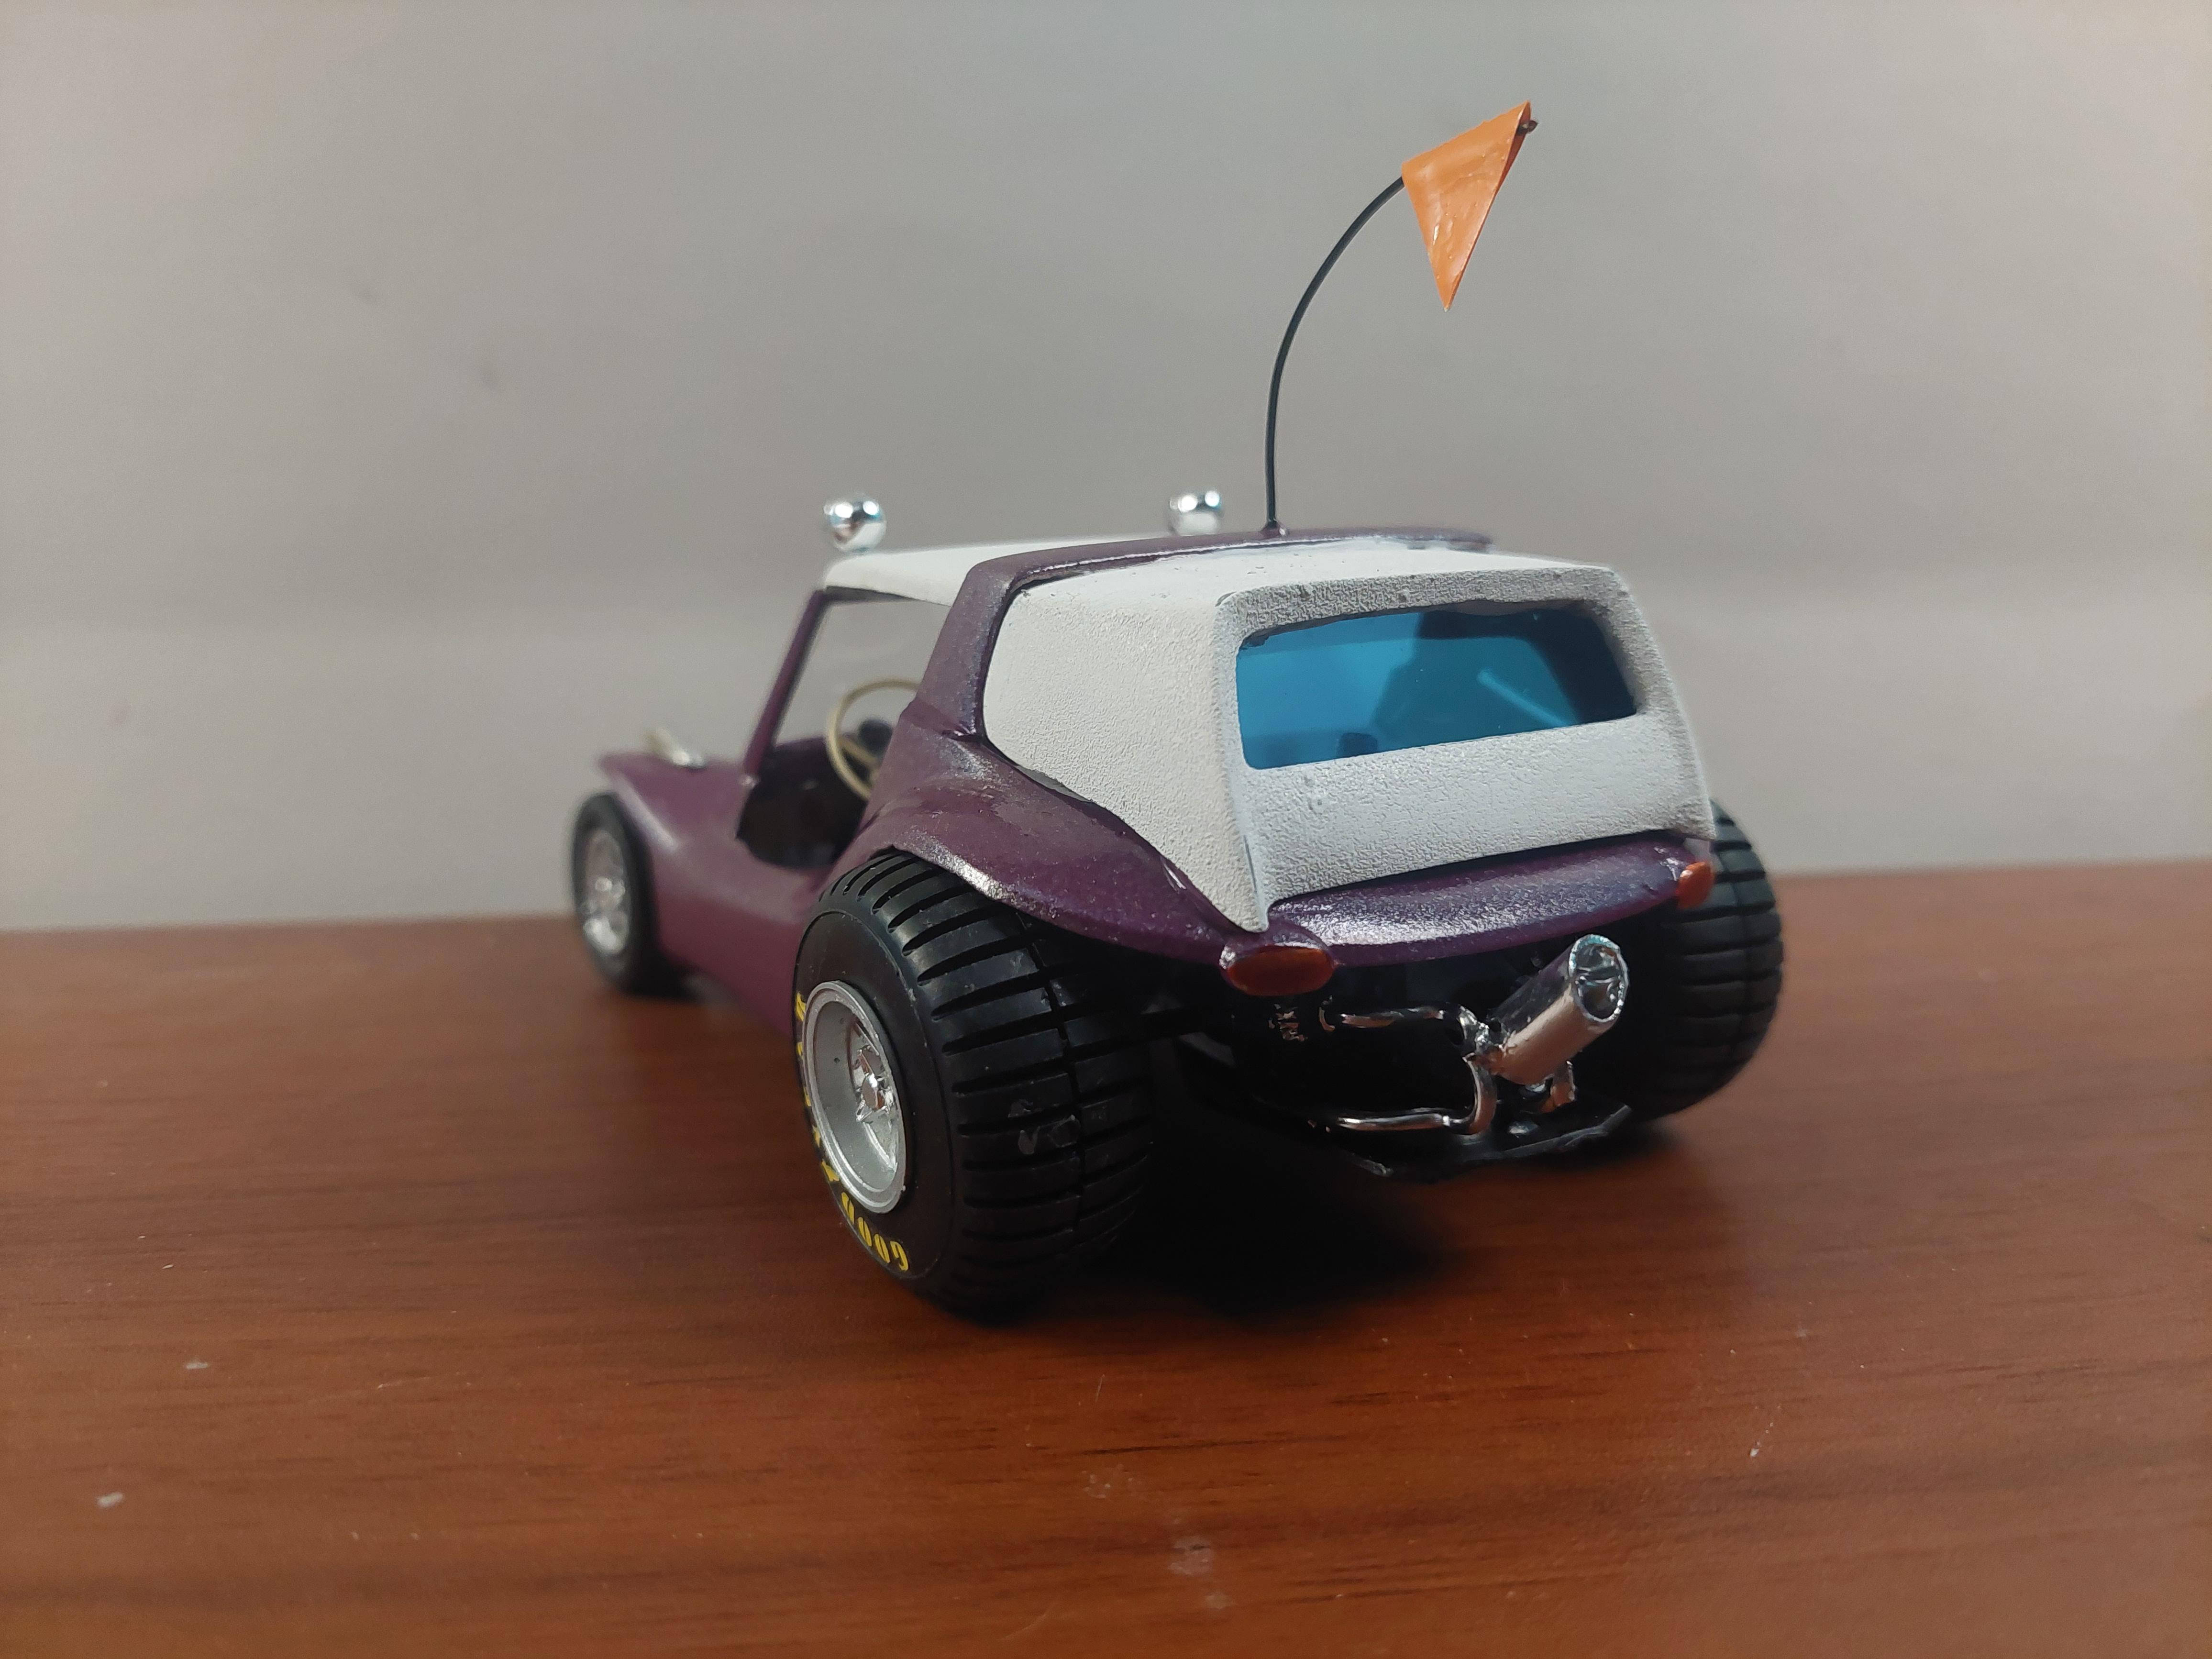
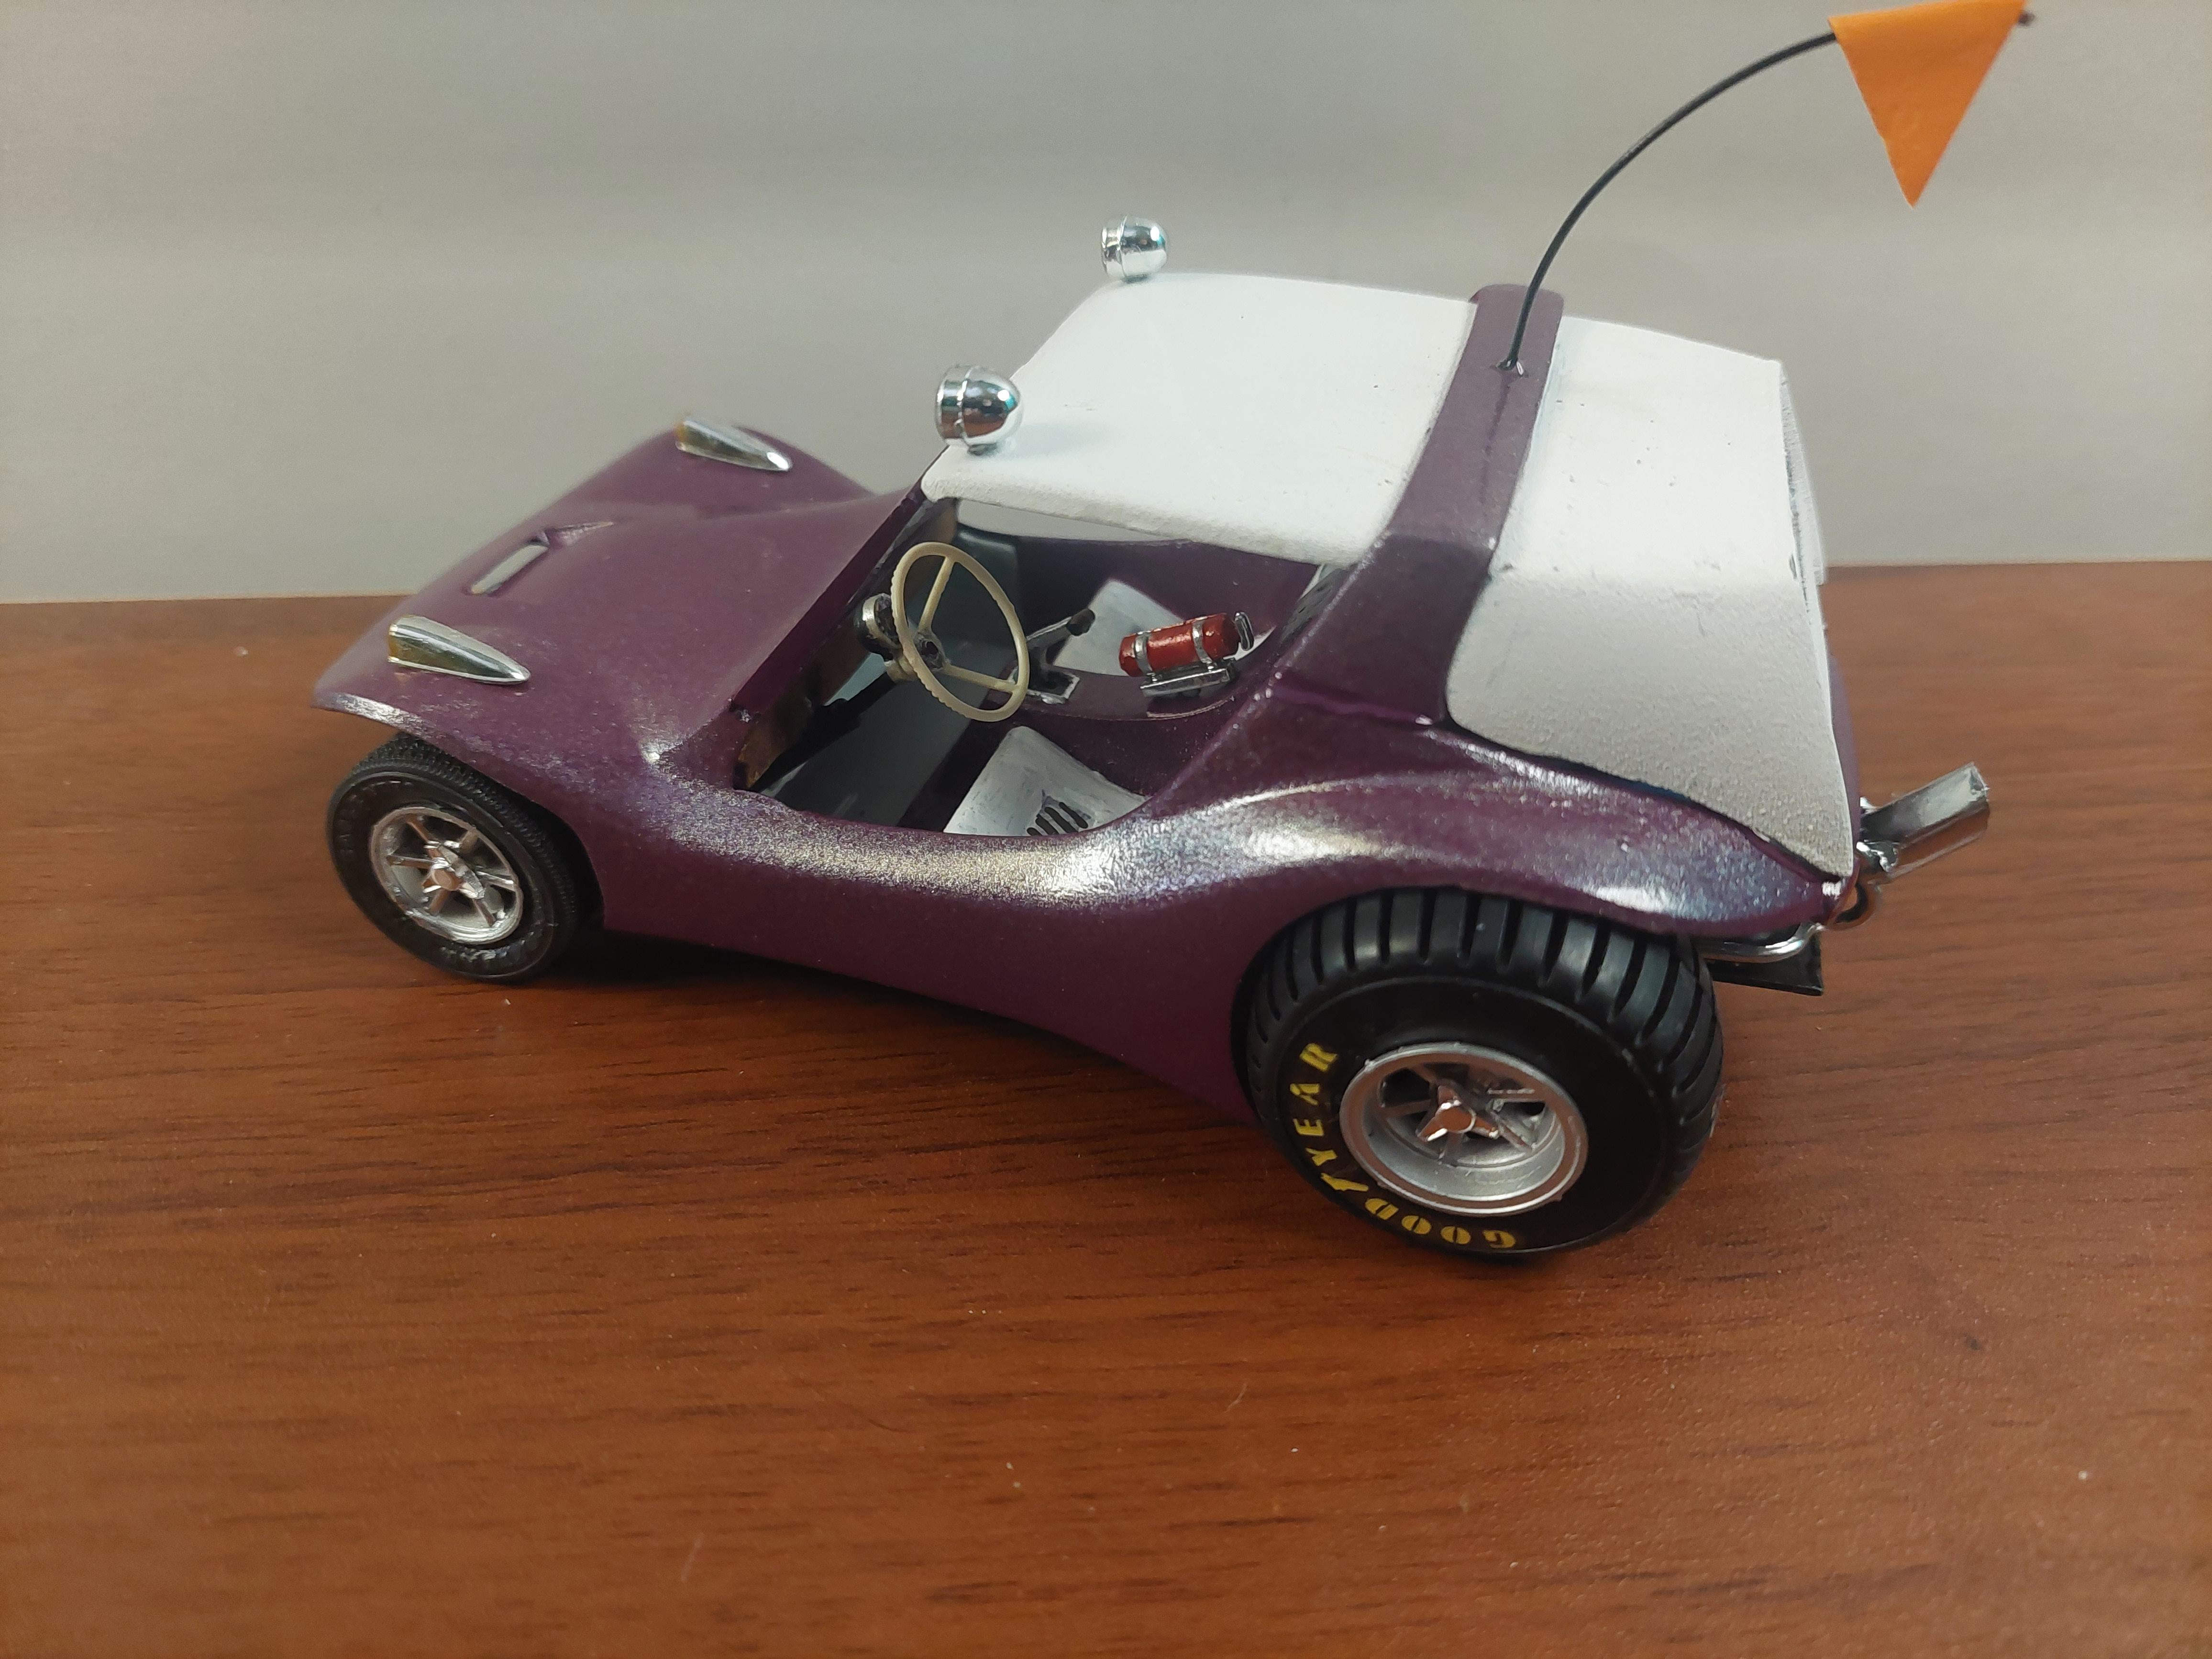
A glue bomb save of another showrod almost did not happen when the clear coat and paint crazed . I figured all the clean-up work time and started over prime,paint and clear. This time going lighter on the purple shade and adding wider front tires. Other changes to the build were new roof lights,chrome signals , exhaust pipe,new glass front and back ,steering wheel and column , tac, shifter and extinguisher then topped off with a roof whip & flag.

-
 3
3
-
-
As smooth as it was going when I shot the last coat of clear the finish started to craze. I really dont understand what happened as all the paint, pearl clearcoat and high gloss clear coat were all Tamiya. So off to remove all paint and start over. While the body was soaking ,I worked on the chassis which was in poor shape do to a glue overdose from the original builder. Only difference in paint this time was I changed the shade of purple to a much lighter one. Now to repaint the interior and get the motor cleaned up and painted. I also upgraded the front tires to a wider tire.
-
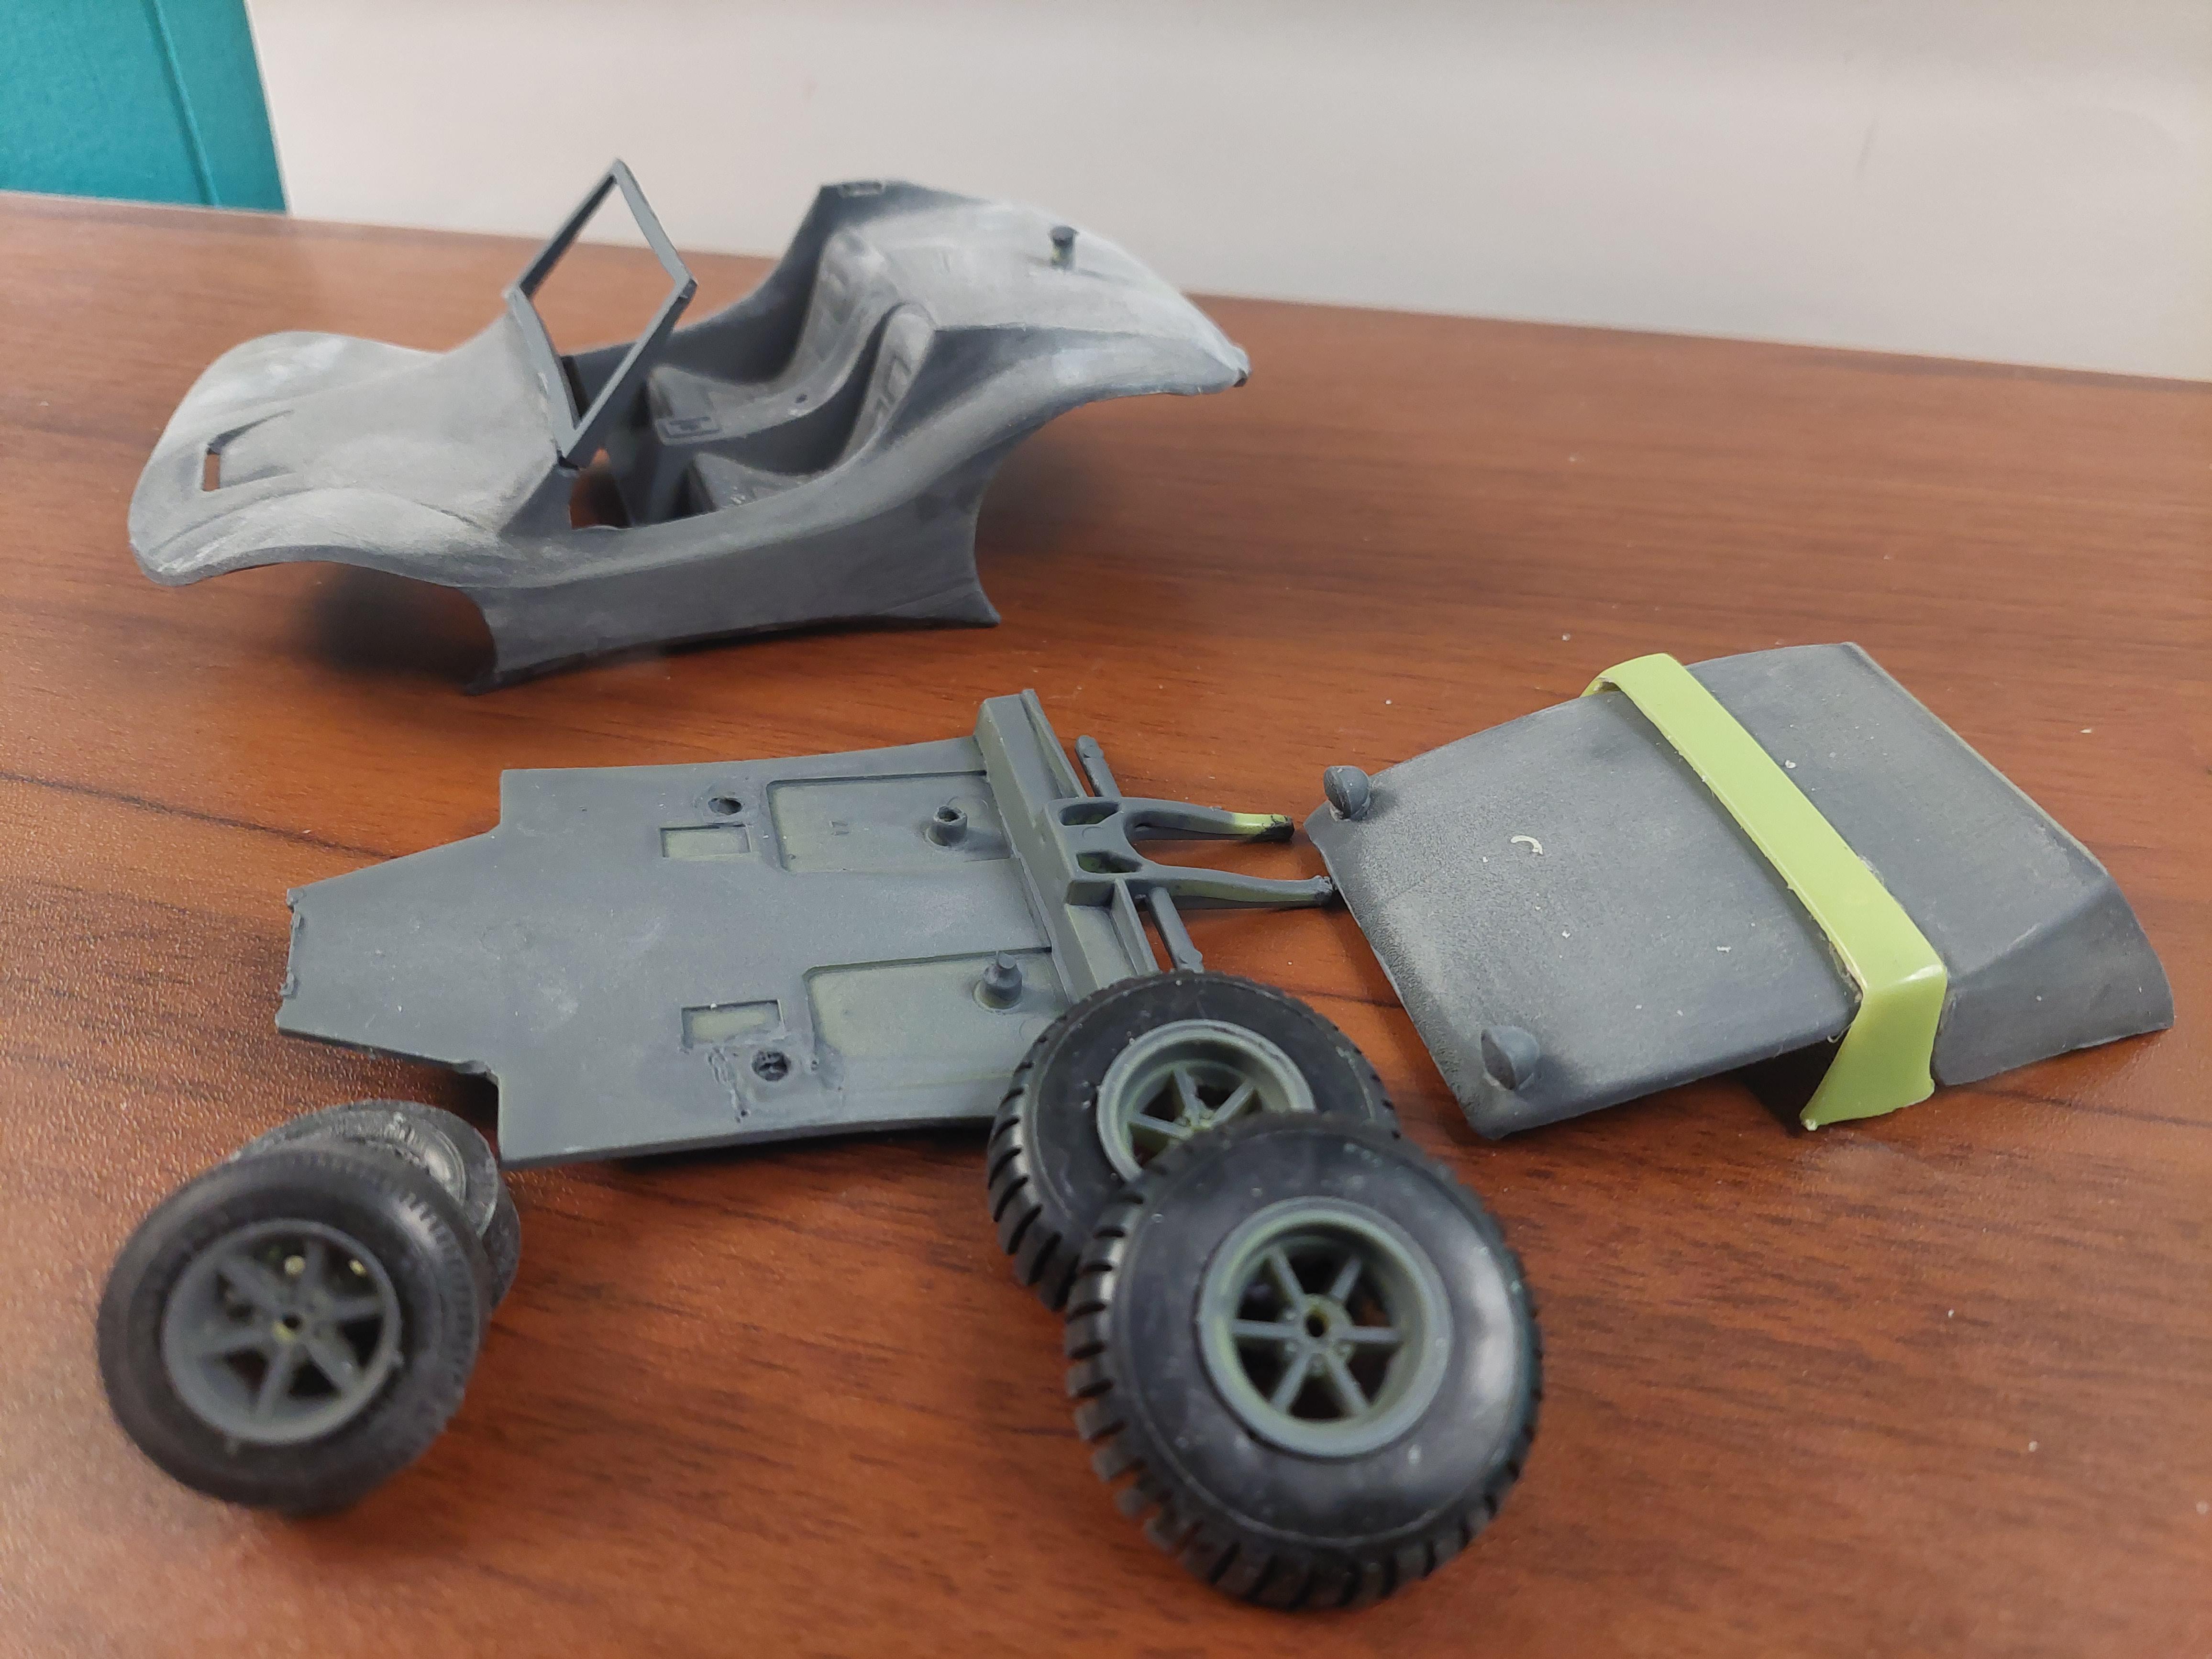
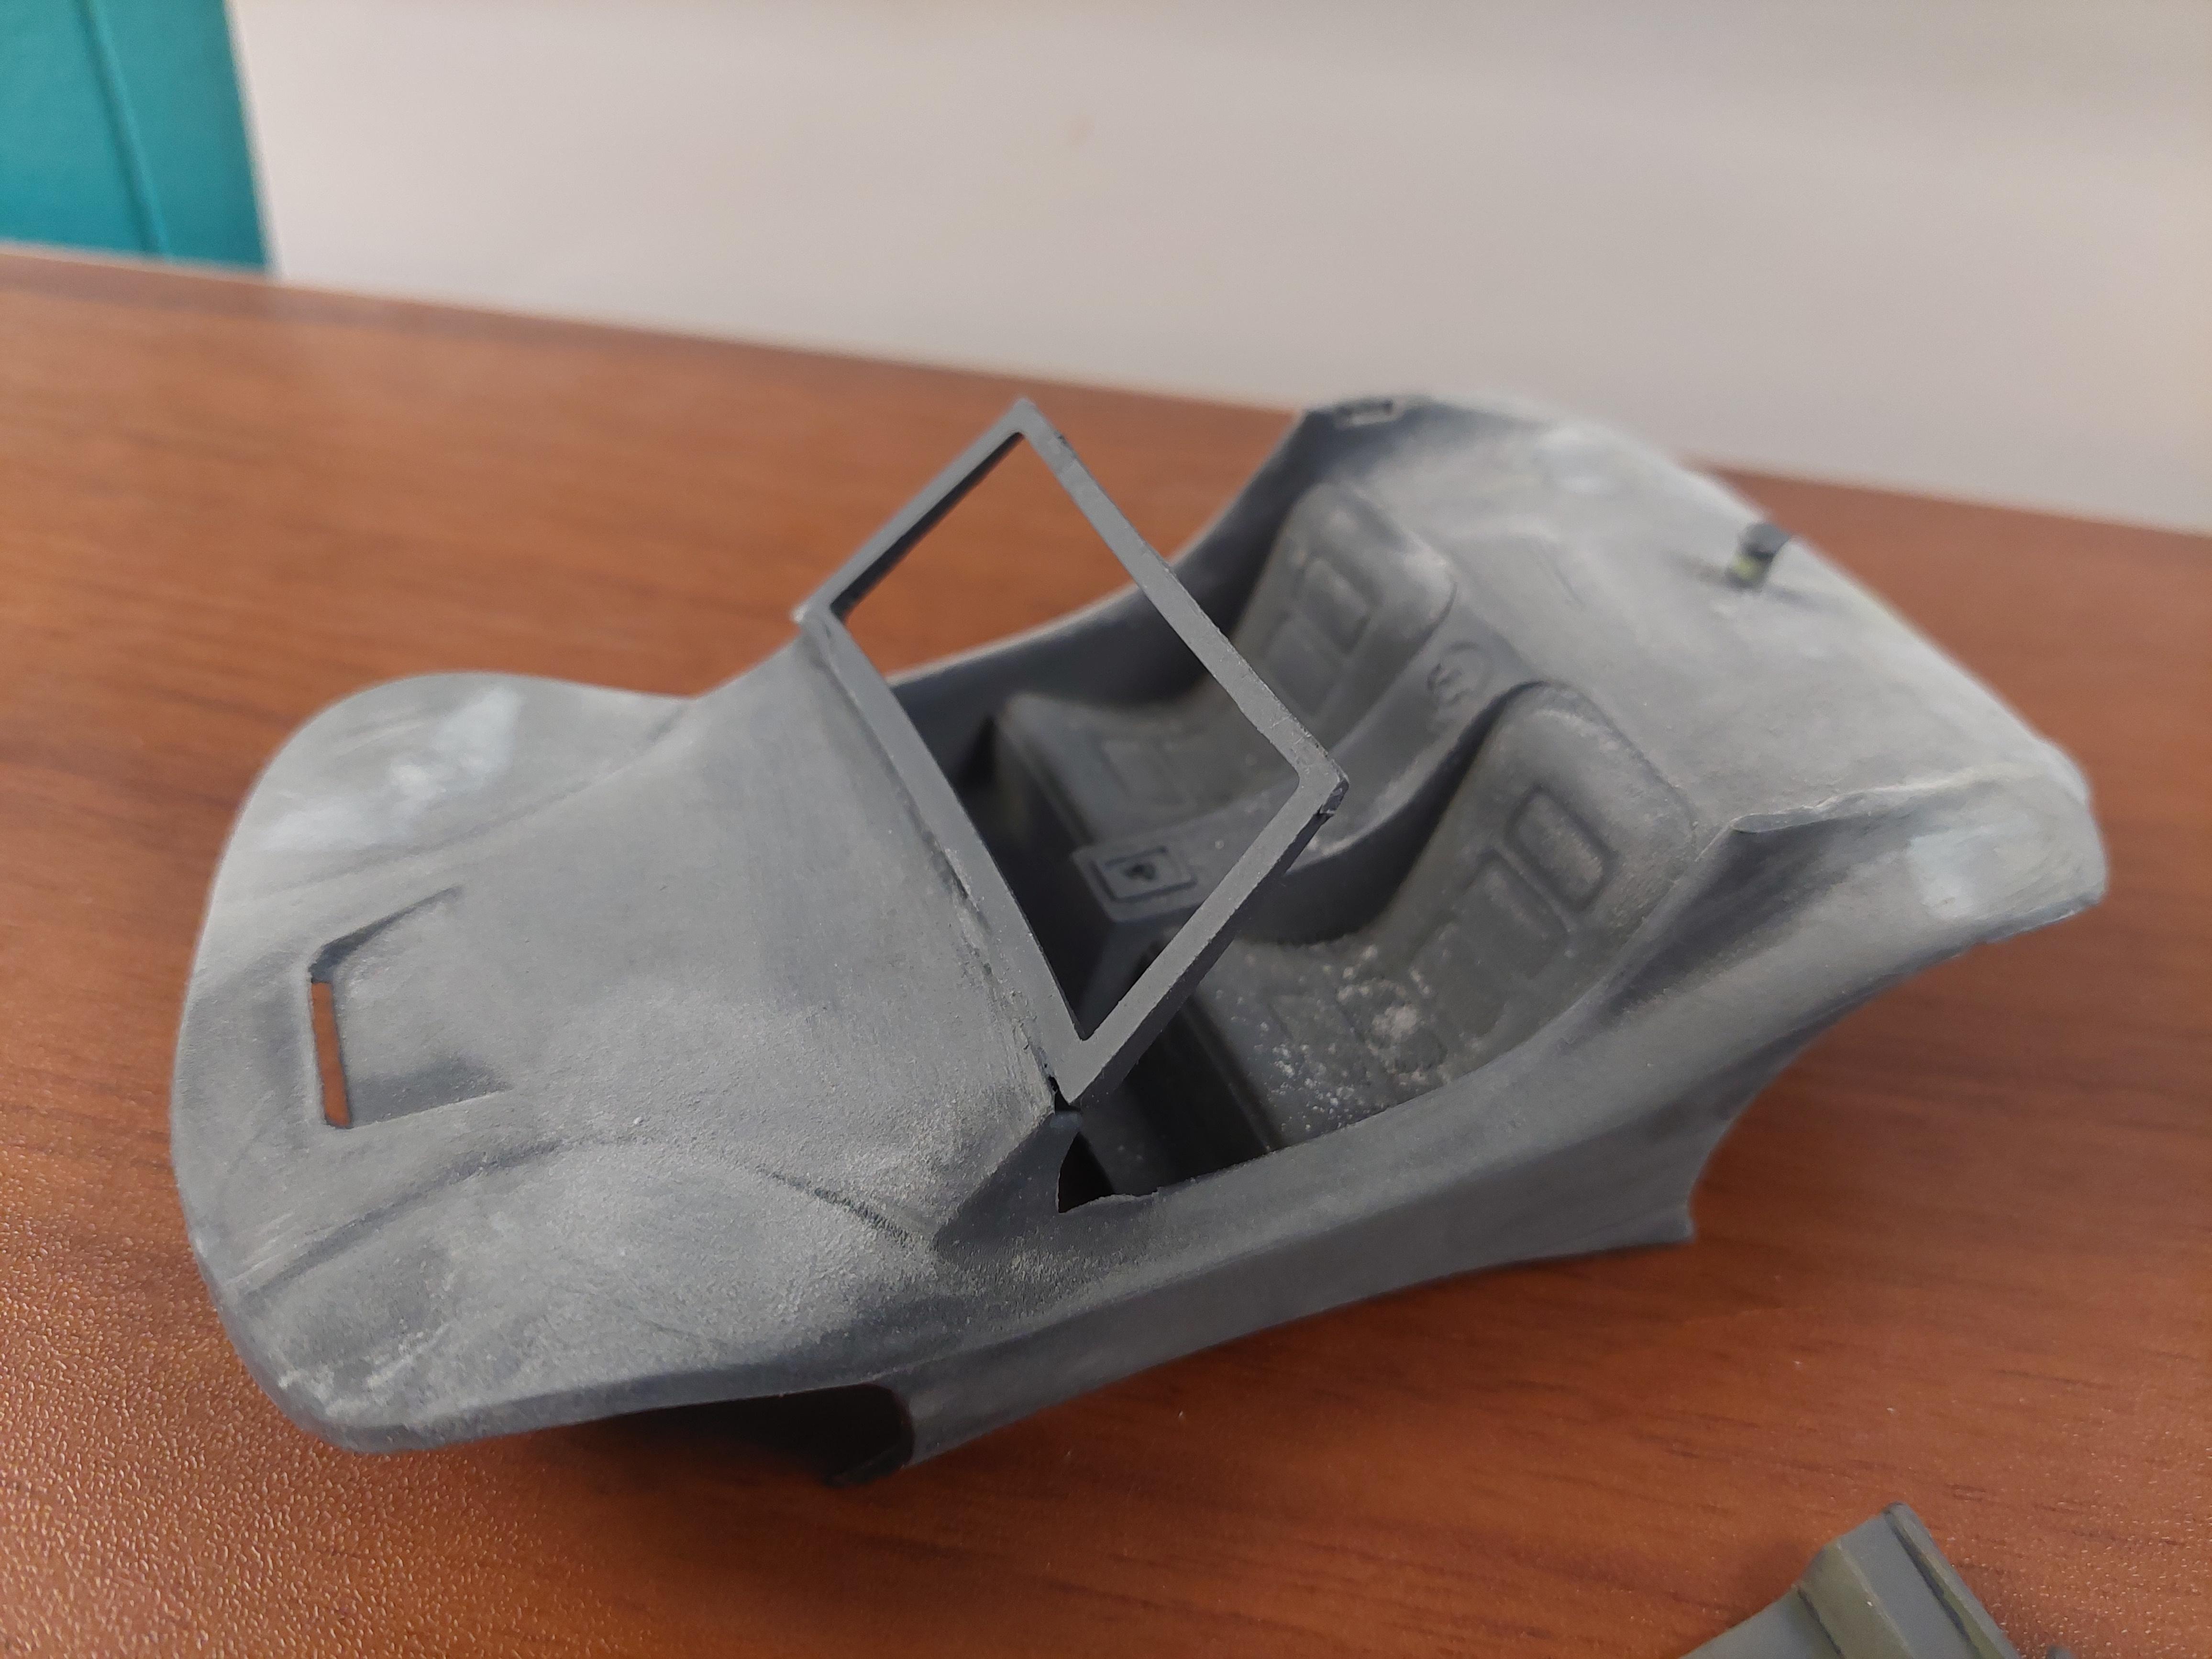
Well I started a re-do of another needy build from yester-year "The Li'L Van" a Tom Daniels design from Monogram. It was released again in 1996 but this one I believe was mid 70's. It came apart pretty good but needed alot of clean up. Paint and glue were pretty thick. All chrome needed to be removed because of all the glue and repainted or done with Molotow, such as the mags. So far only a few items were from the parts box. Body , chassis and roof are close to being done. Once I get the VW engine cleaned up and painted , make 1 axle shaft , things should move along nicely.
-
2
-
-
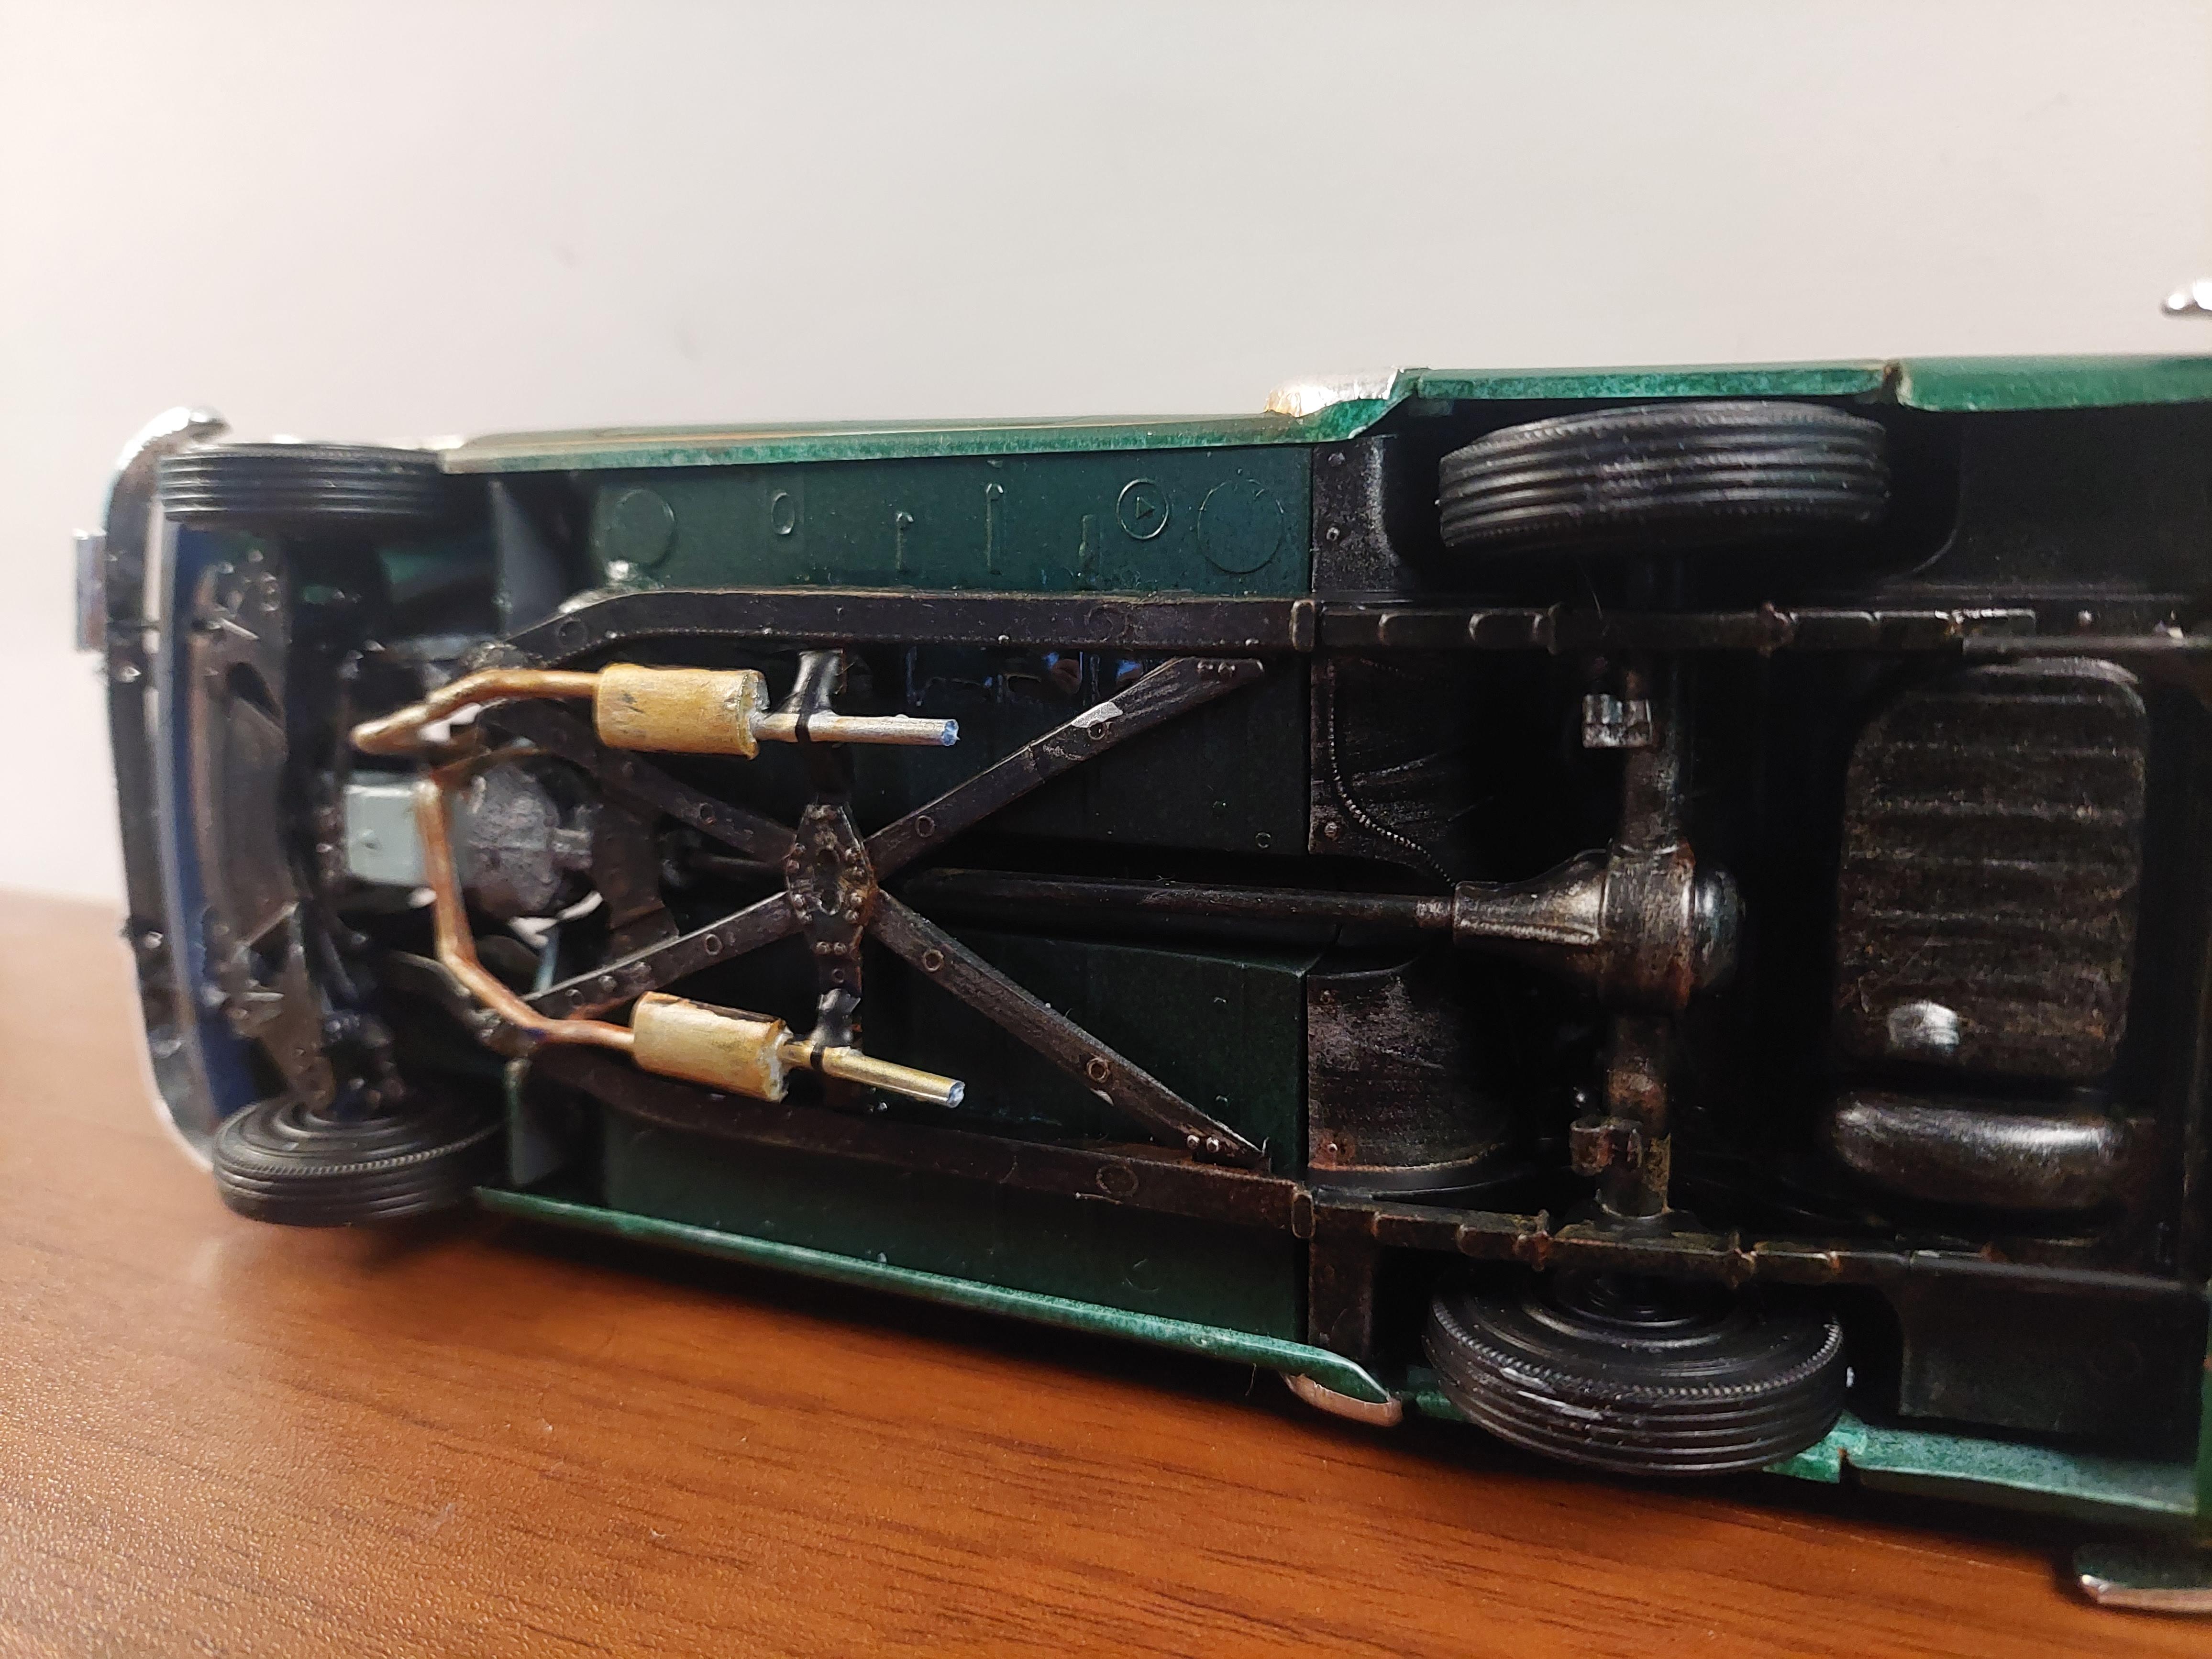
This build up of a 51 Chevy with a some what hopped-up 6cyl. dual carbs and dual exhaust with header , worn faded paint and chrome, and blanket on the front seat was more work than if I built it as a gasser or custom.
The seat cover was made from a tissue coated with a mixture of warm water and Elmers glue sprayed onto the seat, when it dried it hardned and contoured to the seat and painted. All parts were kit parts. Wide whites were painted on. Bare metal foiled and painted Hunter and Light mist green then slight wear was being done as I was building.
-
3
-
-
This kit is not a very popular kit, I ve never built one so gave it a try. I gave it a 60ish style interior build with fur and piping. I went with the drop top but it does come with a hard top. Built right from the box except the (2) spots , sidepipes, skirts and mirror. This kit was an early 90's issue.
-
2
-
-
Its a "Beast" for sure, good work.
-
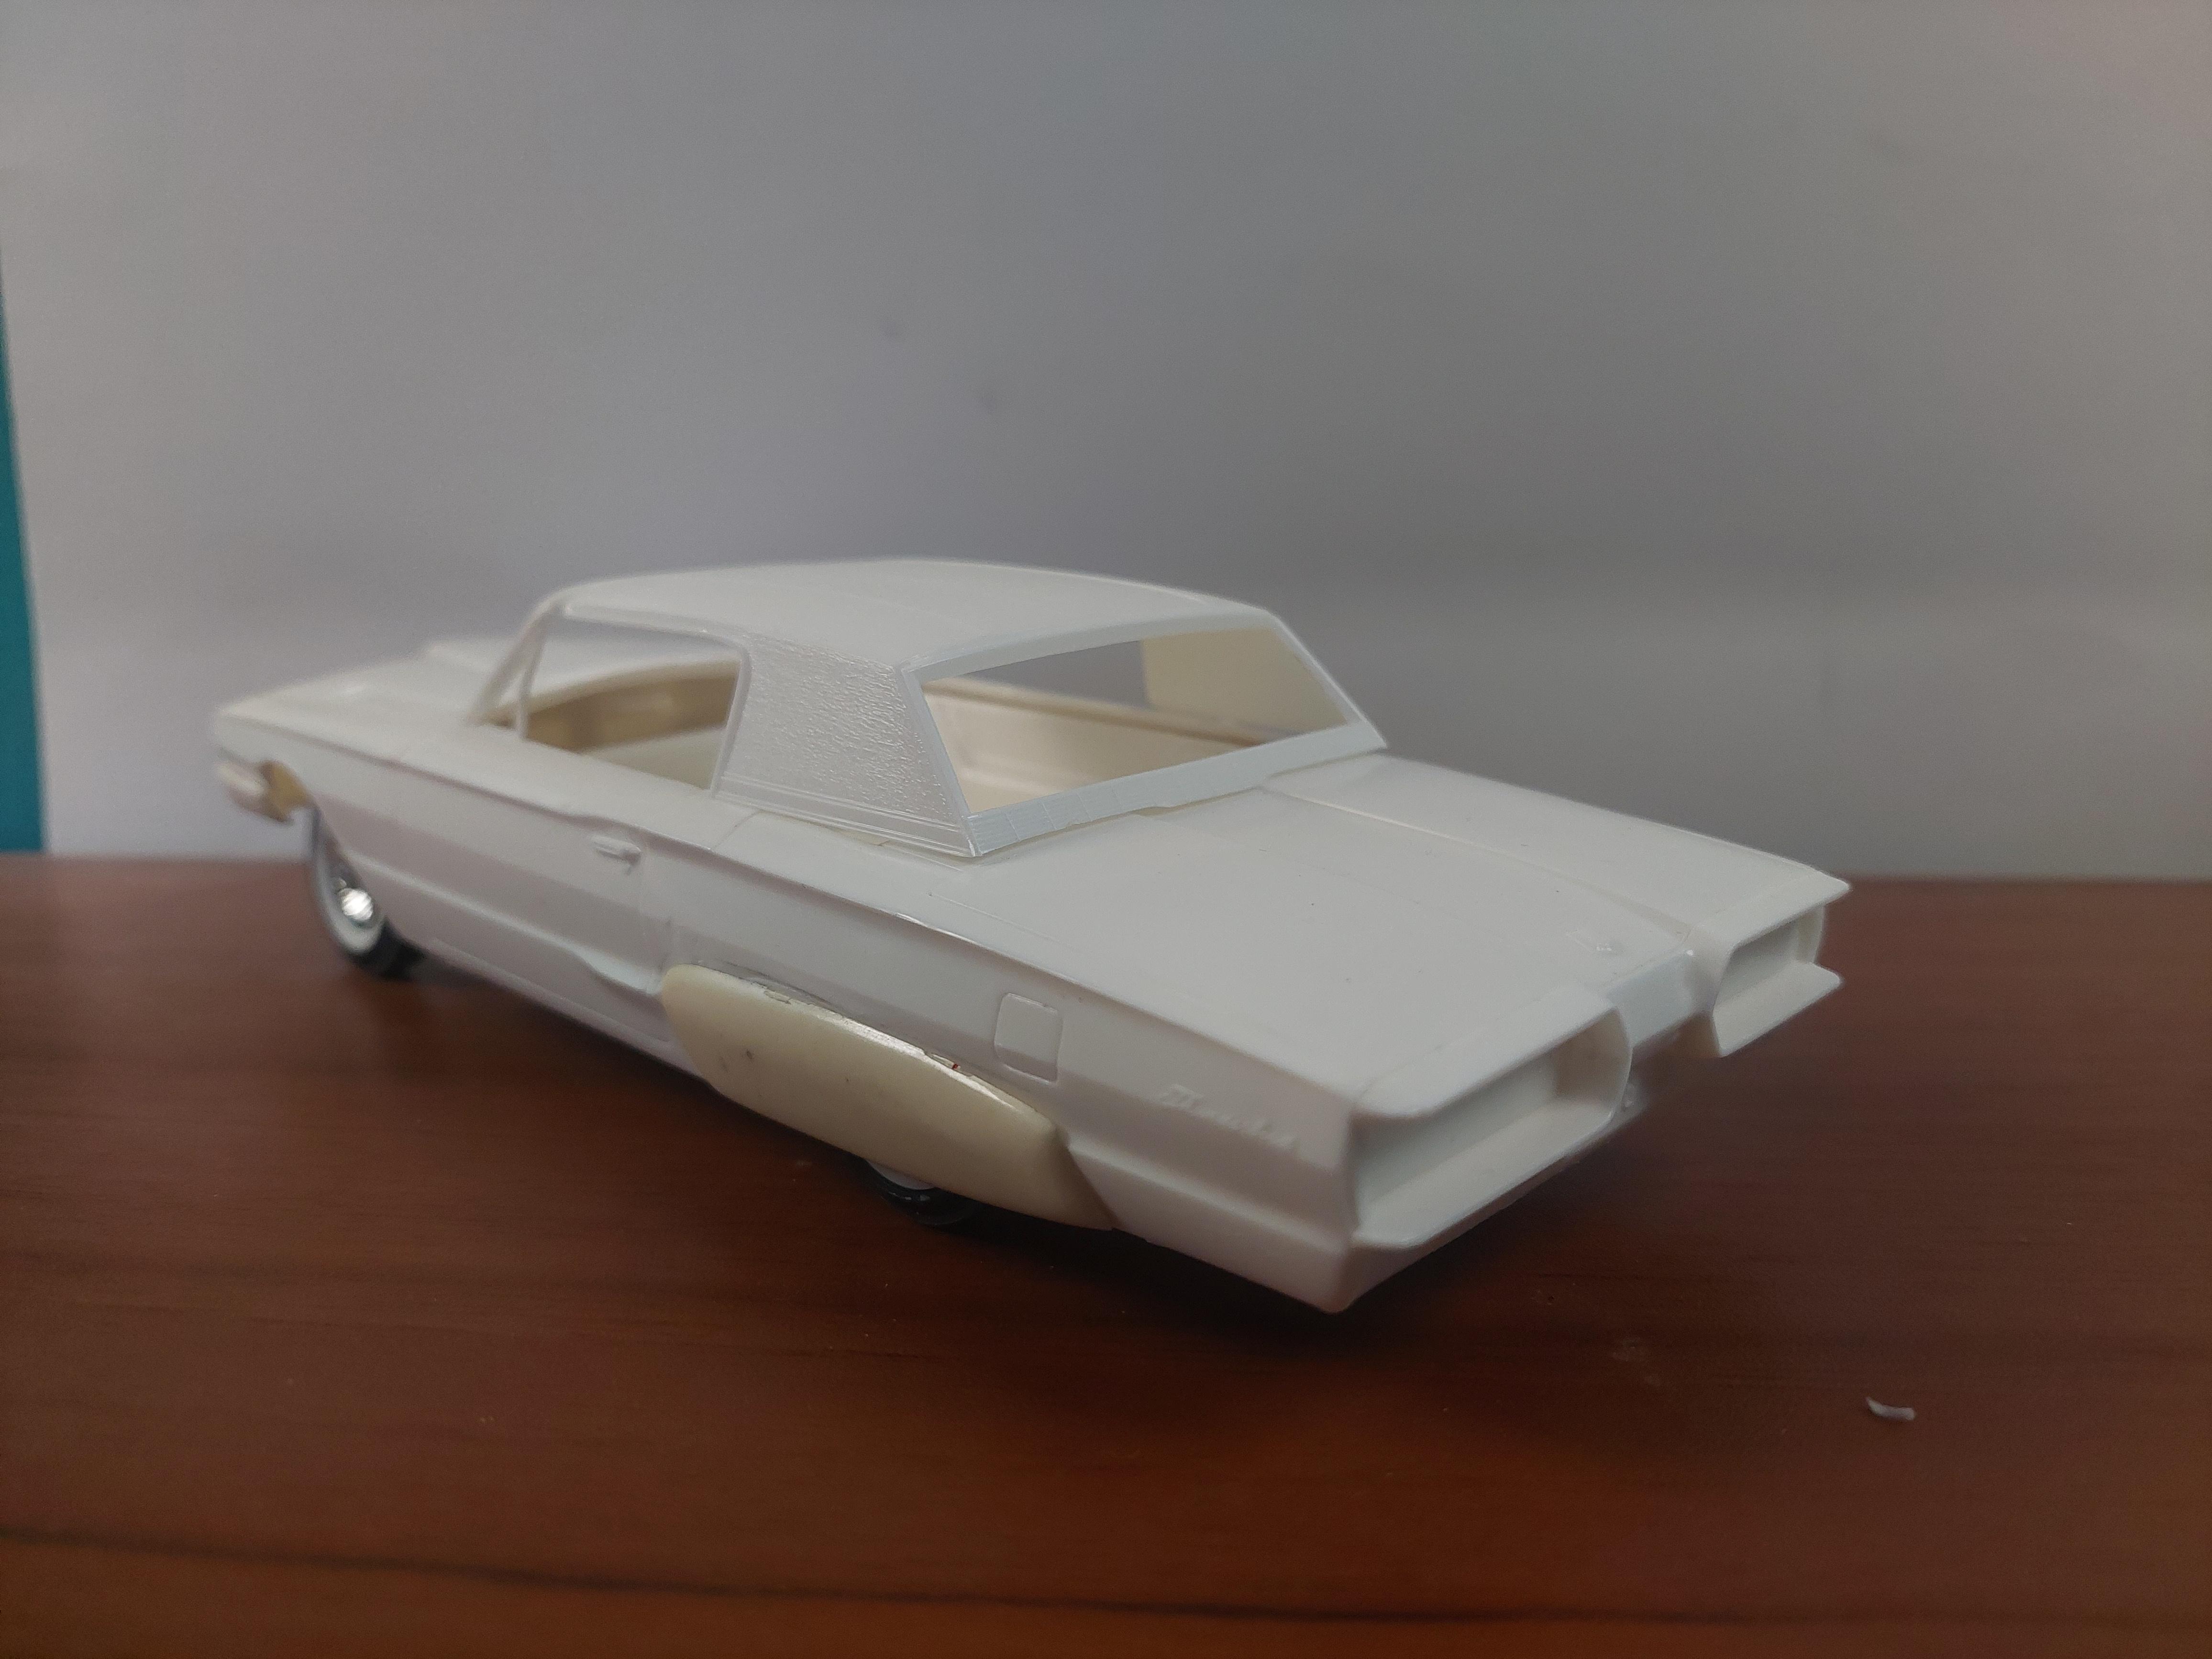
Still doing this 66 TBird, but now will be without the roof. Fur the interior floors in pink and pipe trim the seats in pink, add a chrome Targa bar and a few other goodies such as side pipes spots etc. .
-
-
Ive never built a 66 TBird before for lack of interest but a custom one sounded alot better and this early mock-up with parts box wide whites and front and rear custom treatments along with parts box skirts and custom hood will work out nice. Targa bar open top or complete roof or maybe a half roof I have to see which way this is going to go.
-
1
-
-
Nice back in the day group.
-
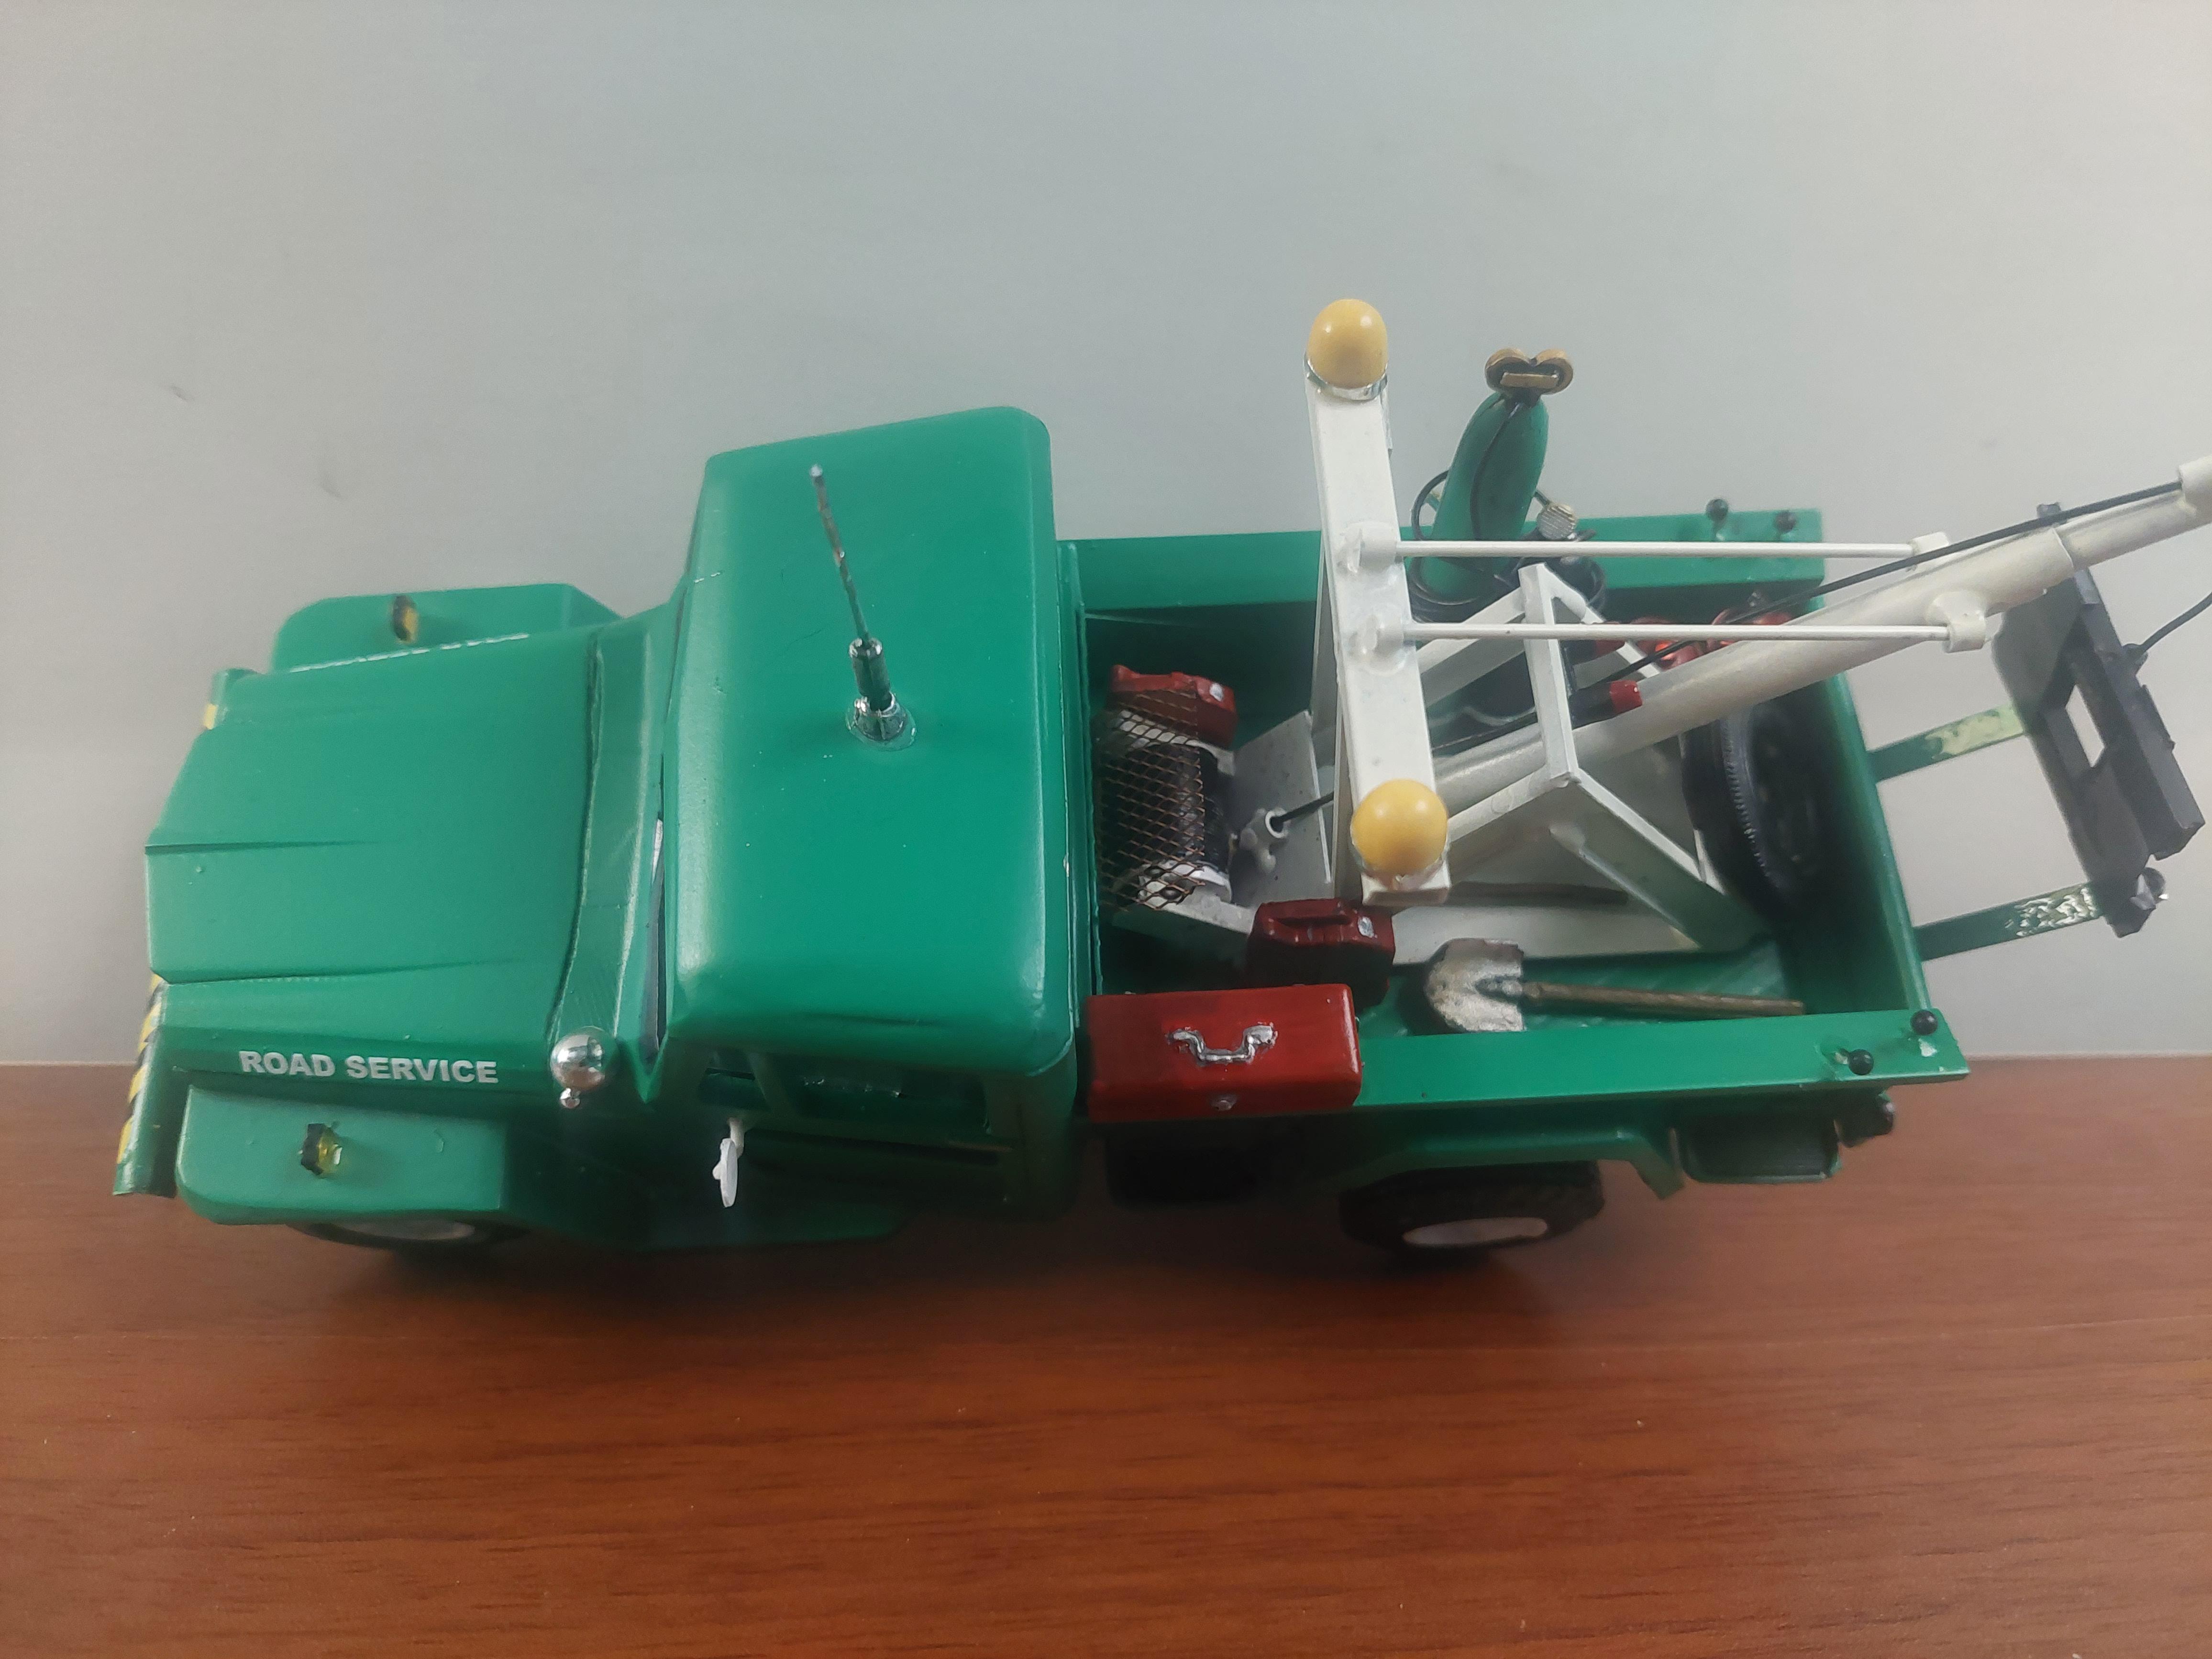
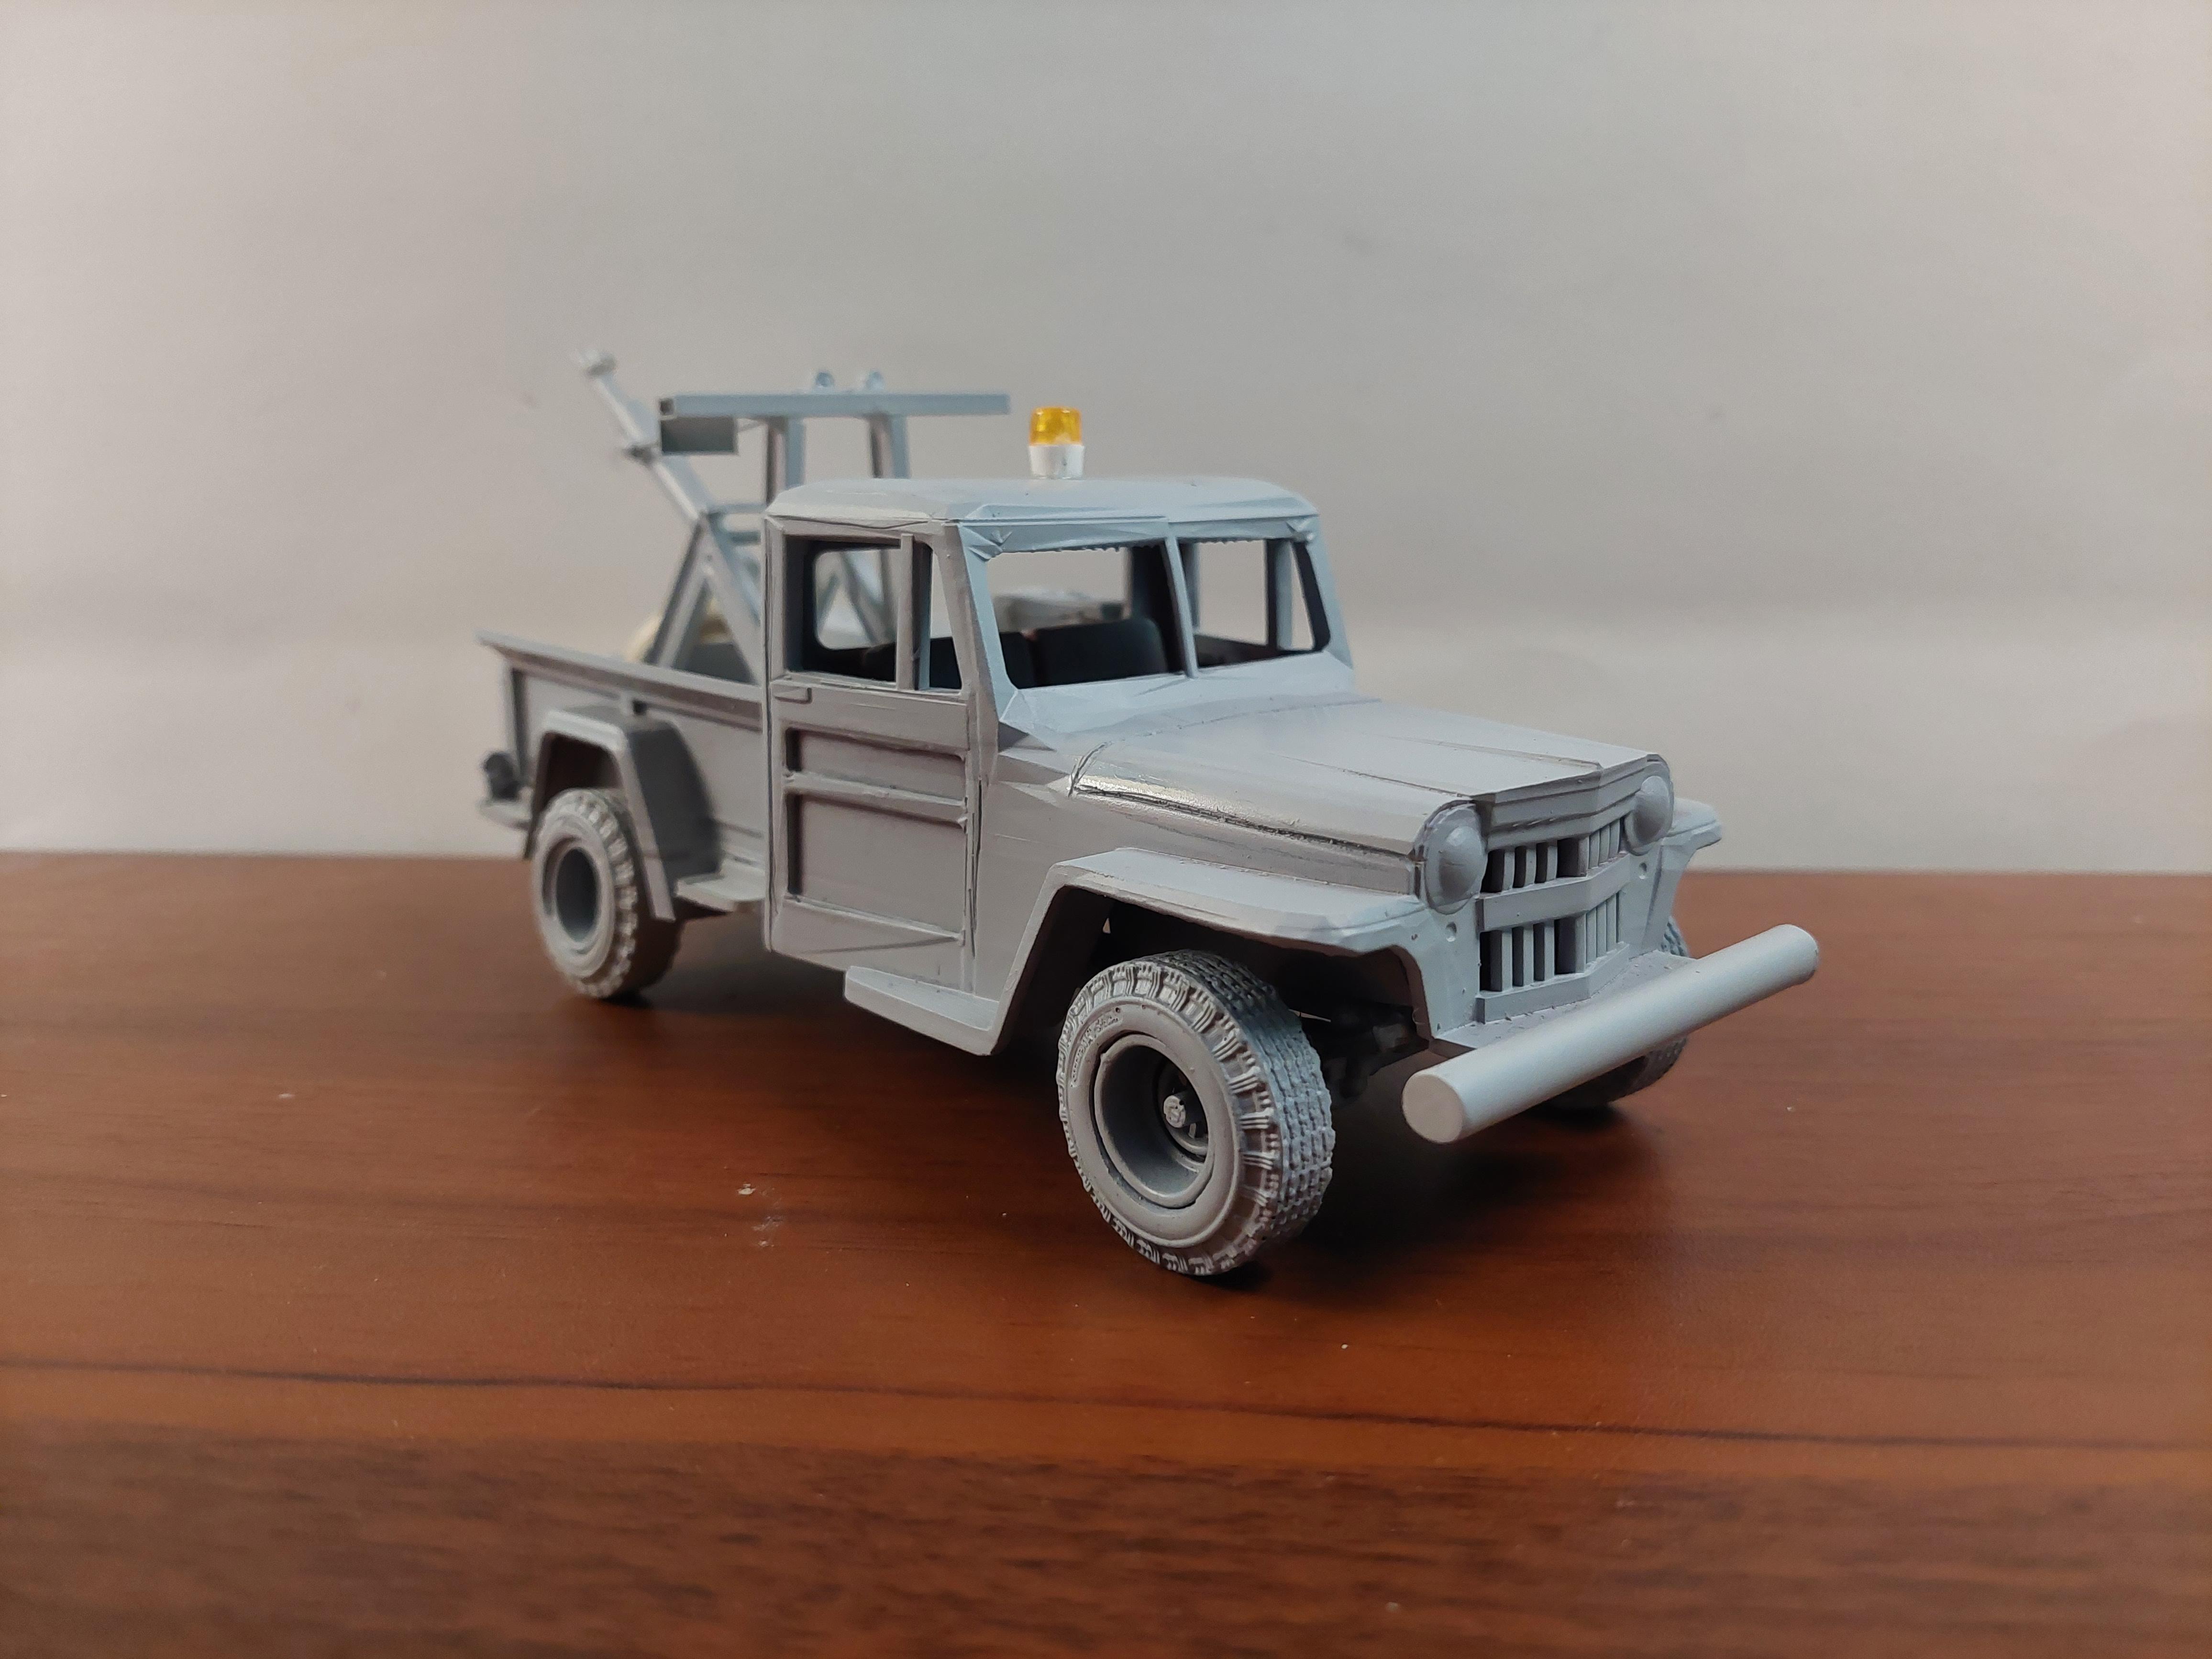
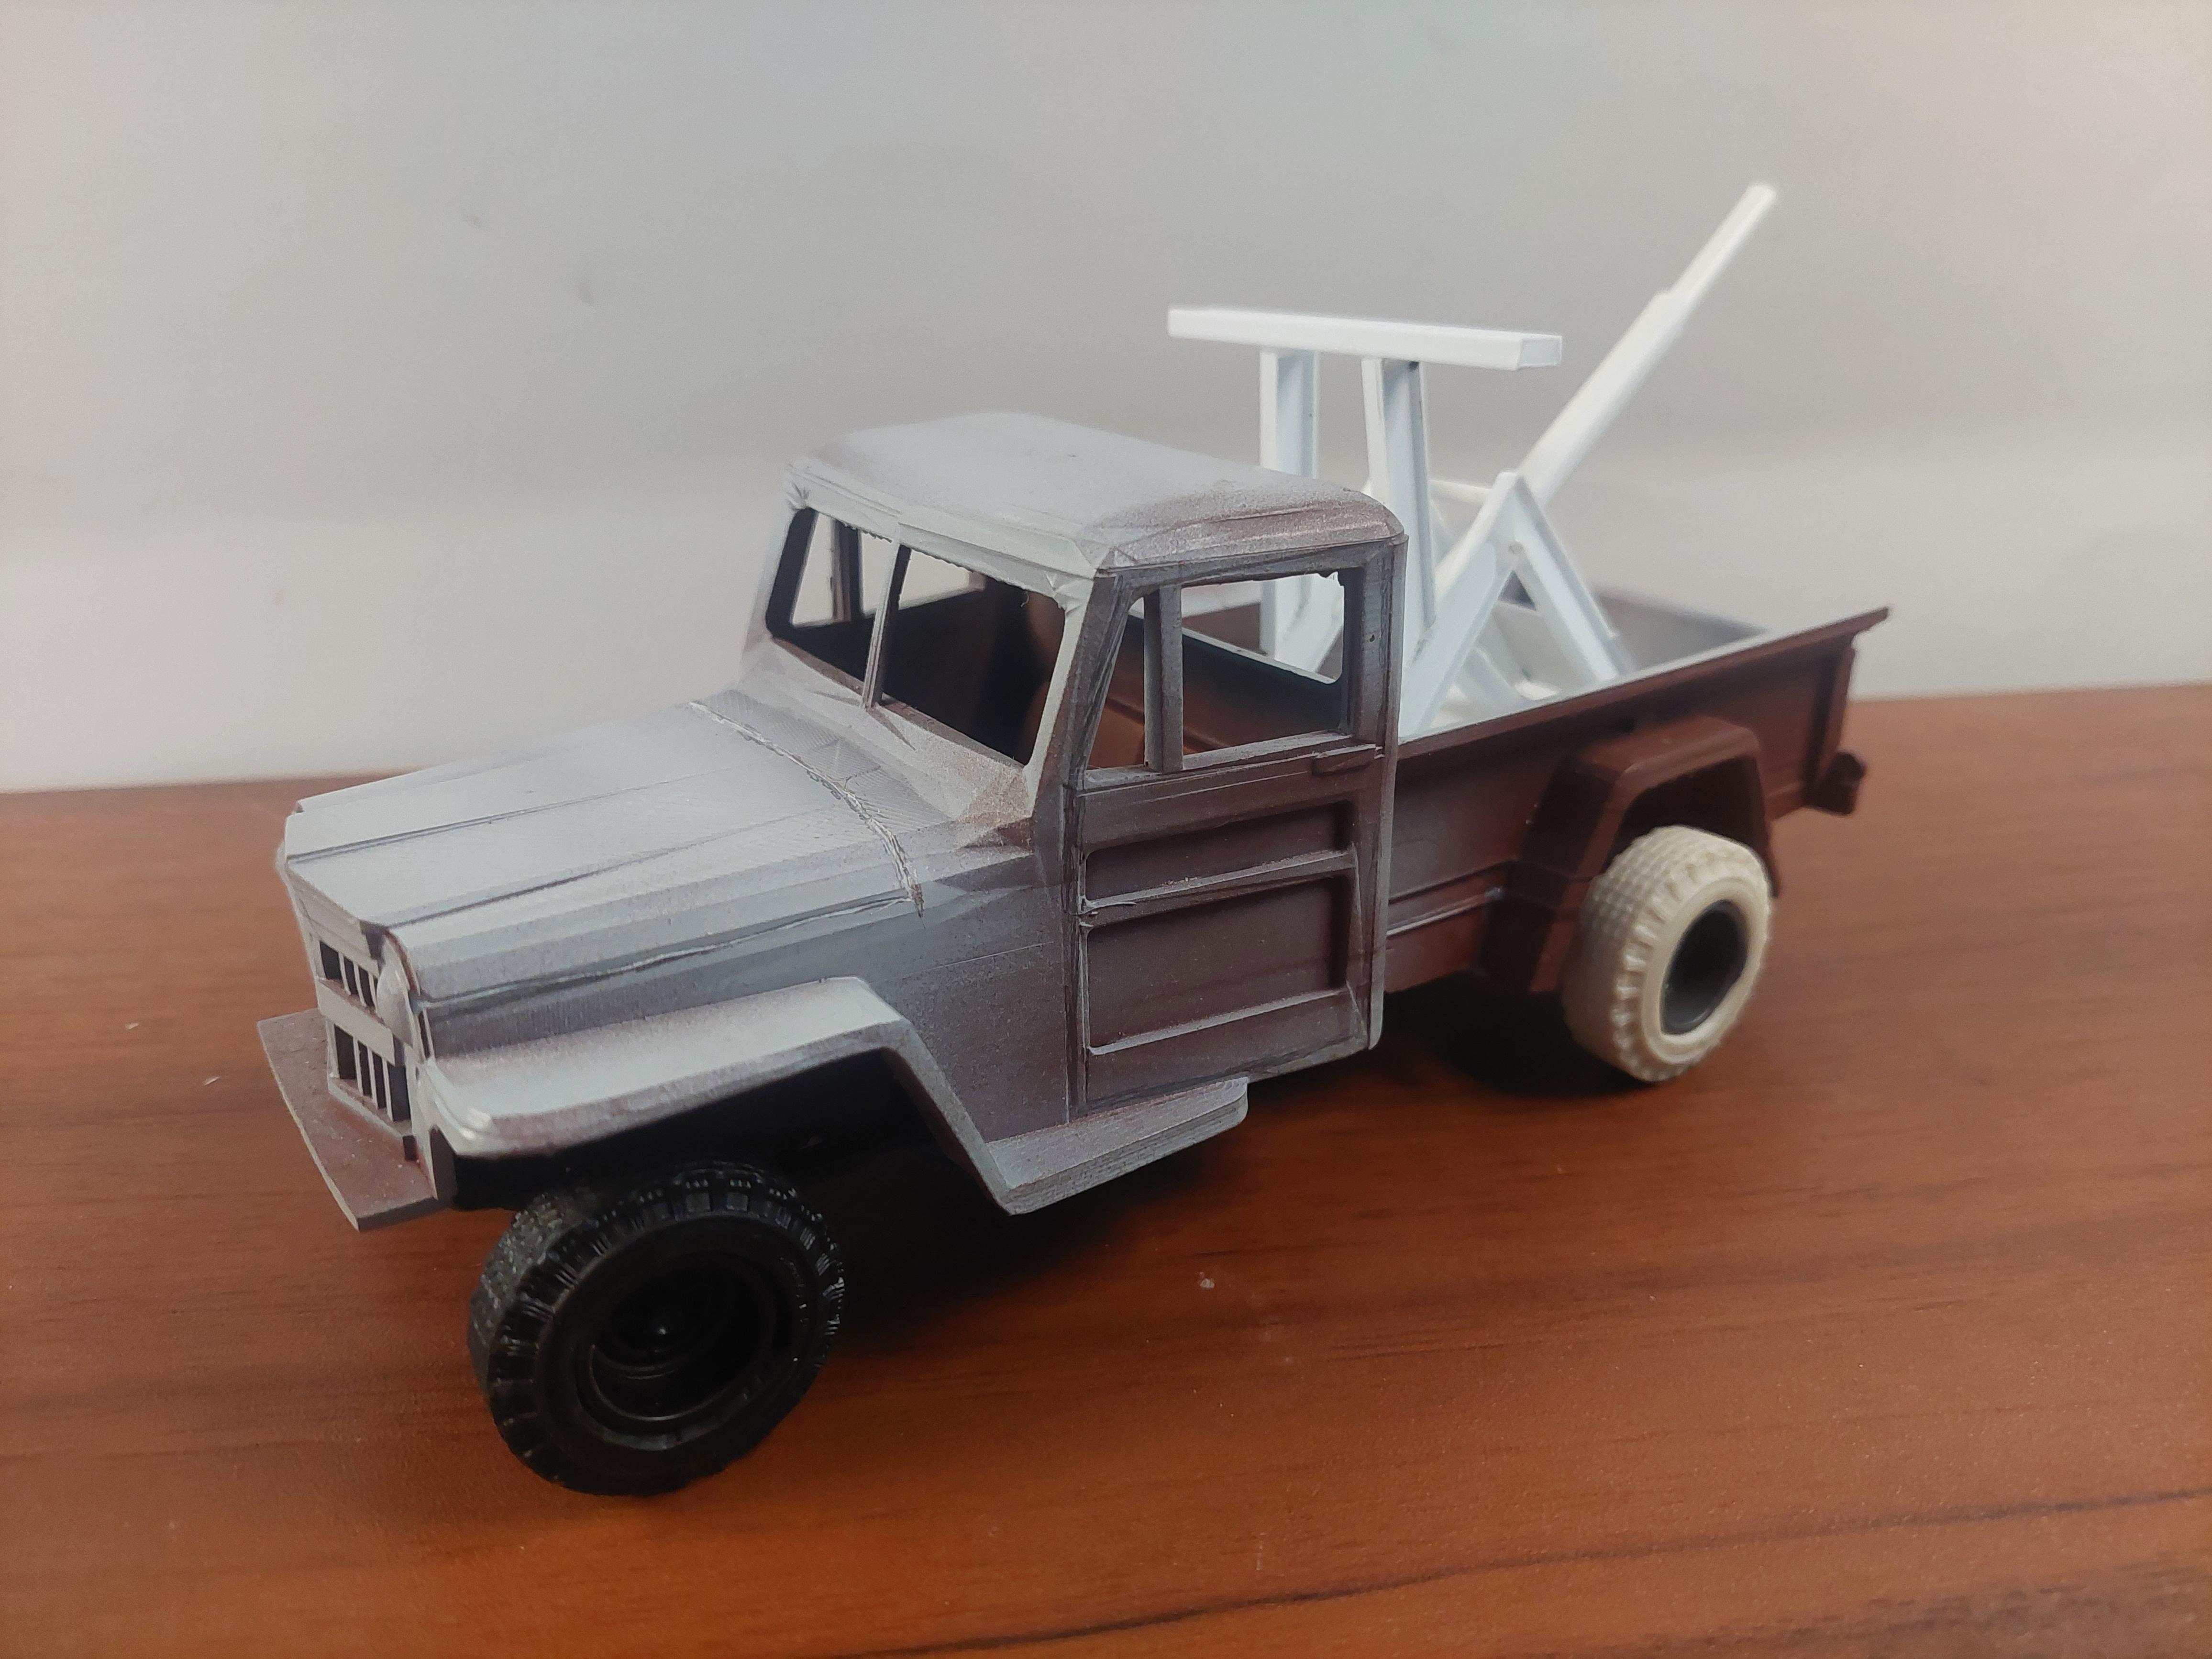
I started this in October and it fought a pretty good battle but its nkw done. It started as a 3D printed body only item and after I gathered up interior and chassis items I decided curbside was going to be my route. I tried my hand at resin casting simple items such as the : tires,wheels,gas cans, tools and tool box, light beacons and winch. Seat is 53 Chevy SD ,chassis is a modified Ford 4x4, boom, bumper,mirrors and cradle are made from evergreen plastic and glass is from clear sheet platic. Paint is Tamiya green and racing white all toned down with dull coat. Decals are Gofer everything else is parts box. Other than alot of sanding and scoring door and hood lines the only issue was when I bought this Jeep is seemed like it was not fully cured so I had to purchase a UV light to complete that.
-
3
-
-
Progress moving nice now, the UV light worked well curing. Interior is next , then all the paint detailing. So far no more leaking ..
-
Mounted my UV light to help cure this 3D print so I can get on with completing ...here it is in action. The turntable does not have a switch to turn on, the UV or sunlight activates it.
-
I purchased this one but have yet to try it out.
-
2 hours ago, NOBLNG said:
Sorry to hear about the issues you’re finding. Instead of putting it in a box, how about putting it in a south facing window if you have one and let it sit there? Might help the curing?🤷♂️
I picked ip a UV Lamp on Amazon , I may be back in business soon..
-
2
-
-
This build has been a nightmare from day 1 when a crack developed on the back of the cab. I fixed the crack and then noticed a wet spot next to the repair....another crack. After chasing 1 more wet spot and another coat of primer I let it sit for about a week. No more problems so I continued the build. I drilled 2 pin sized holes for levers and the next day wet spots appeared. I contacted the person who did the 3D printing and he said the leak means in areas it has not fully cured. My options are put the body out in the sun so the UV can do its thing to complete the process or hit it with portable UV light. Sun is not really an option where I live maybe until next April, I dont have a portable UV source that would help so Im boxing it up until next spring before trying it again. Besides the leaks getting all over the body and making the primer soft heres what I found out about the problem on a 3D site:
Why Do Resin 3D Prints Leak/Explode/Pop?
Resin 3D prints can leak or explode due to uncured resin being trapped inside the model. This uncured resin is trapped inside but is still slowly curing and expanding, so it produces extra pressure inside the model until it finally finds a way out. This can either leak, explode, or pop so it can be very dangerous.
So until the next update on a sunny day next year, on to another different build..😁
-
7 hours ago, Ulf said:
Next kit from Moebius ??
😁That would have saved me alot of time and I would have missed all the fun and aggravation. But it would be a neat kit to have. MPC came out with a later (maybe a 1968 Jeep) version called a Commando.
-
Thats a pretty cool build, a really spot on custom.
-
1
-
-
This is what I came up with up to now. There were small running boards (if I remember right) came in a 66 AMT Lincoln kit, I made a mold of them , cast a few and they fit perfectly in front and behind the rear tires. Cobbled up a pipe bumper and completed the boom assembly. Now to get that body as smooth as I can and try to get it done this year .
-
2
-
-
These Pegasus get you close but they are only 5 spoke not 6. Hope you find what you need, I know how it can be chasing ideas.
-
1
-
-
I was getting lazy building this jeep but then I started laying in a new floor . I had a bunch of scrap evergreen and the next thing you know I sparked some life to get it done. Fabricate a old homemade boom. Once I get everything done and in position I will loose that tailgate.
-
2
-
-
This is the SMP Imperial box and custom parts, directions and decals. Everything is in pretty great shape except the decals, they are pretty dried out. Looking for intresting trade. The white parts are also common with other SMP/AMT kits of that era. Only wear is from being 61 years old but no box splits or repairs, just 2 very small cracks in folds of instructions
-
-
5
-


AMT Ford 1949 tudor
in Model Cars
Posted
Wow thats reaaly nice..