Sugar Creek Racing
-
Posts
19 -
Joined
-
Last visited
Content Type
Profiles
Forums
Events
Gallery
Everything posted by Sugar Creek Racing
-
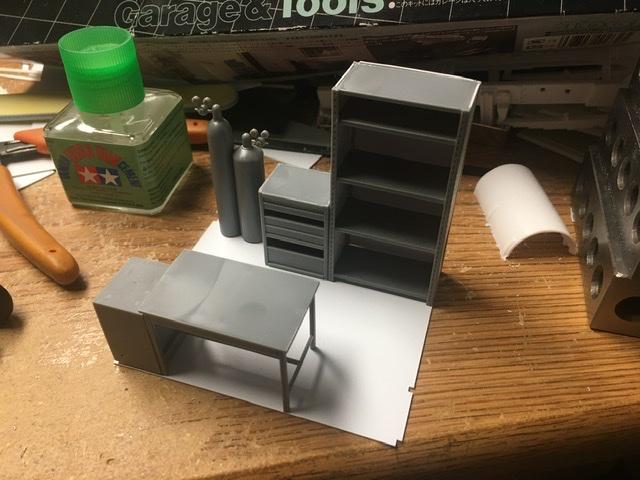
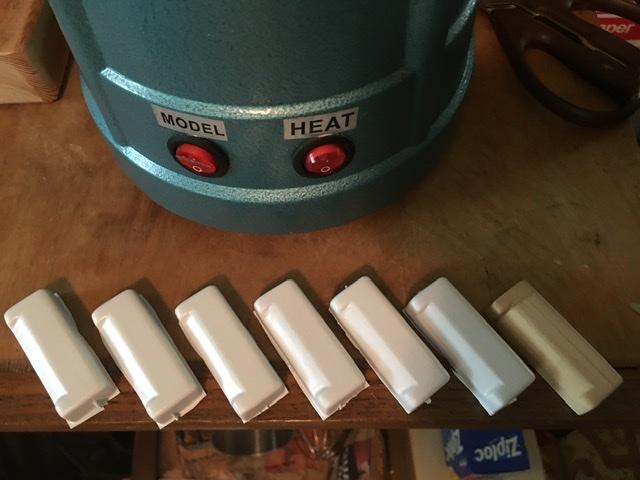
Been working on filling up the shop space. Also had an AC unit printed for the roof.

-
Yes, yes it is... It is going up for auction soon. Pre-auction estimate is over $3 million.
-
Anyone know if a decal sheet has been made for this car? Or able to suggest sheets to piece together the markings?
-
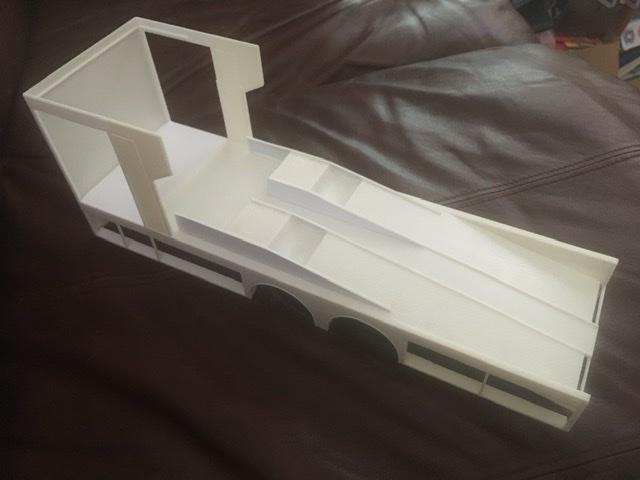
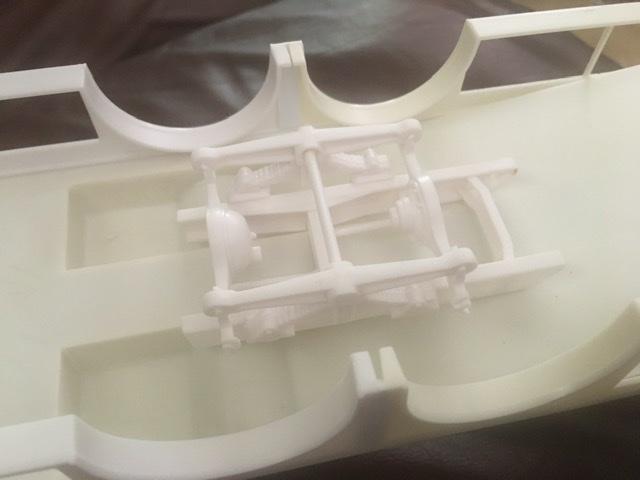
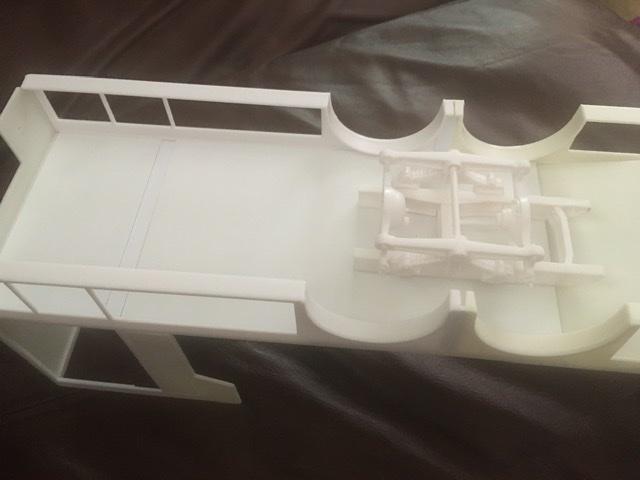
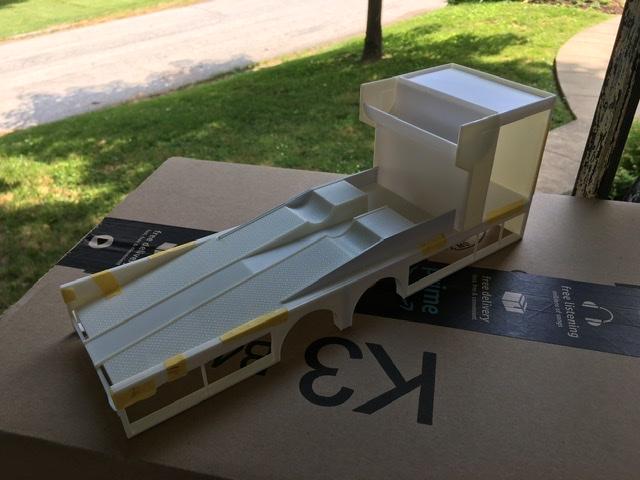
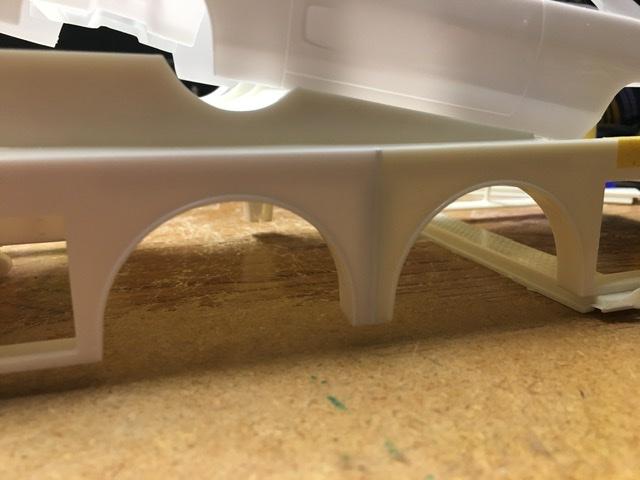
The bed assembly is finally glued up as an assembly. Started looking at how to mount the rear axle assembly. I think I’m going to cheat a little, since the frame will not ever be visible, I’m not planning on a full detailed frame in the “gap”. To mount the frame section there isn’t a good surface to glue to due to the ramp cavities. Decking the bottom over with .060 sheet to get a smooth surface to mount the frame section to and build up the storage compartments on.
-
Grand Sport Corvettes
Sugar Creek Racing replied to 65slotcar's topic in WIP: Other Racing: Road Racing, Land Speed Racers
Well, that simplifies things! Thank you for the reply. Need to get a couple of those HRM kits. -
Grand Sport Corvettes
Sugar Creek Racing replied to 65slotcar's topic in WIP: Other Racing: Road Racing, Land Speed Racers
Awesome work going on here, very nice! Who does the decals for the roadsters? Definitely interested in doing the Penske roadster if not both. Thanks! -
Well, I have the mold now. If you are comfortable gluing them up as shown, I can send you a couple. No guarantees on how quick I could mail them, work is a little crazy right now.
-
Thank you, it is actually a pretty simple conversion to dual wheel. I cut one bed side at the edge of the compartment just forward of the wheel opening, the other the compartment edge just behiind the wheel opening. Resulted in 8mm measured at the bottom edge between the wheels which was perfect for the Astro axle set up. Then you just slide the ramp floor rearward on the flanges. If you arent opening the doors you dont even need to add the floor inside.
-
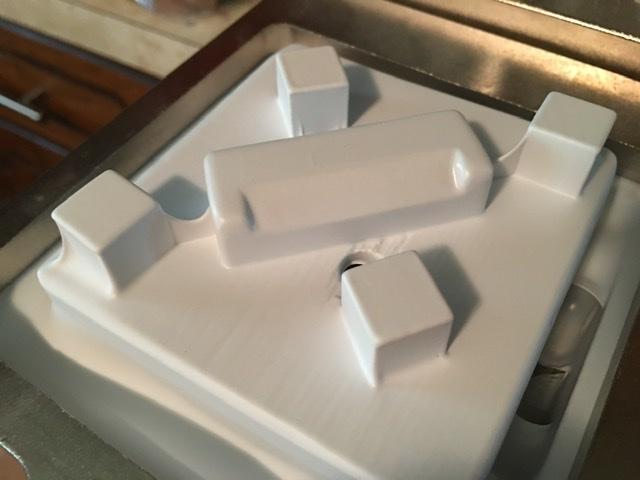
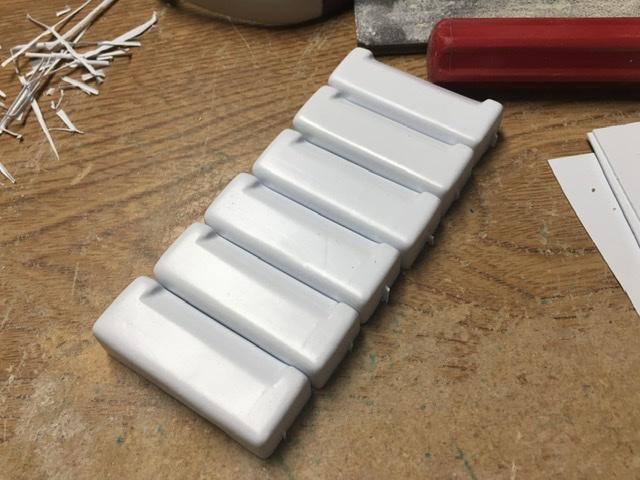
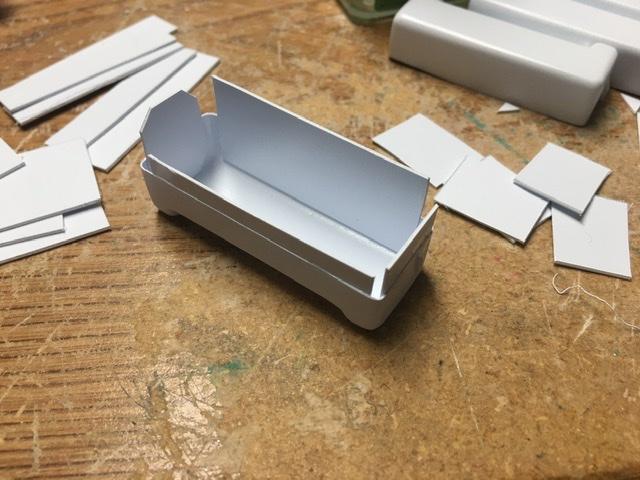
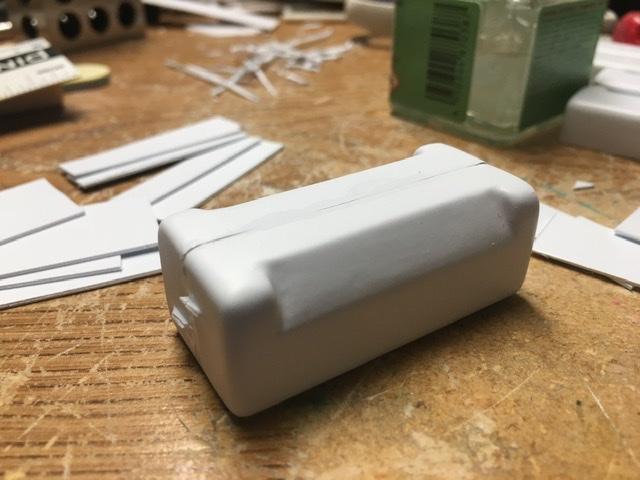
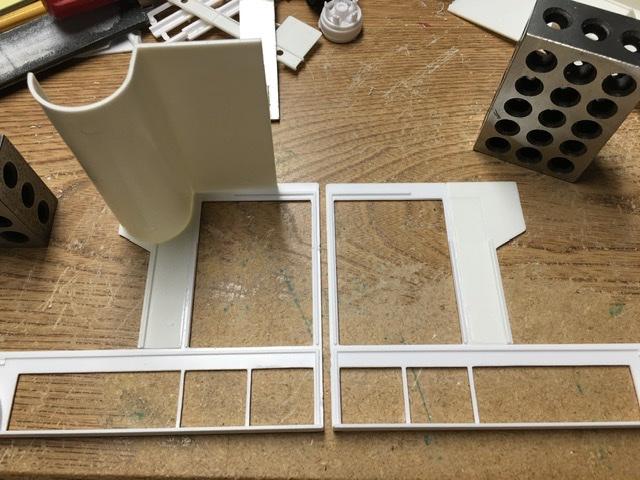
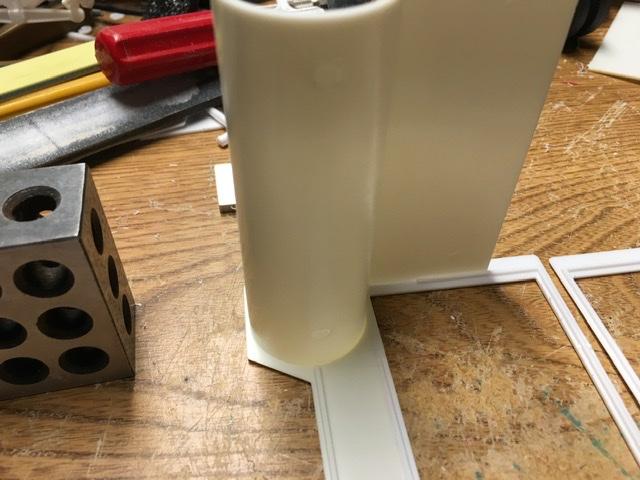
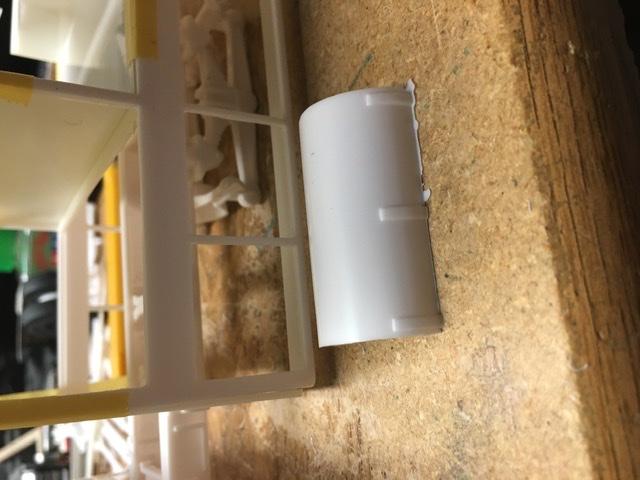
Happy Father’s Day! My treat was some undisturbed build time. I wanted to stow the fuel tanks in the forward compartments on the ramp so that I could mount the ramp further forward on the chassis. The Astro kit comes with both round and rectangular tanks but I didnt like how either were looking in the opening. Plus I hate removing the molded in straps. Weighing everything together, I decided making my own tanks would be better. So, made a mold and vac formed some tank halves sized to fit the openings in the ramp. I’ll post pictures and if there are questions, I’ll resppond.
-
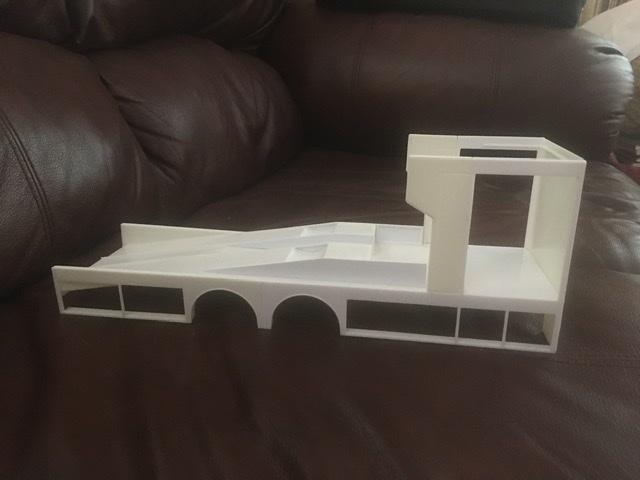
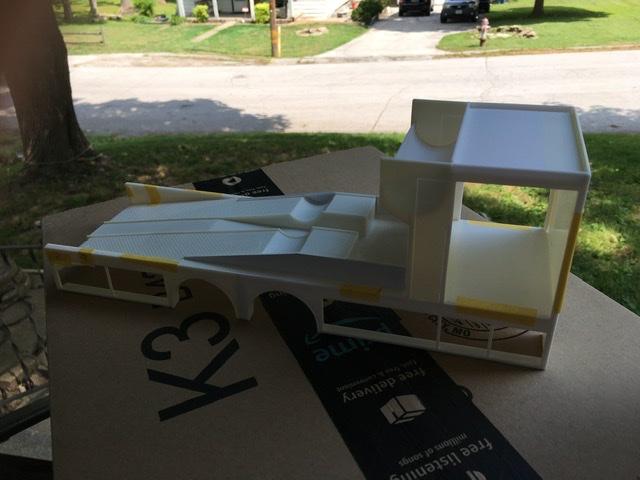
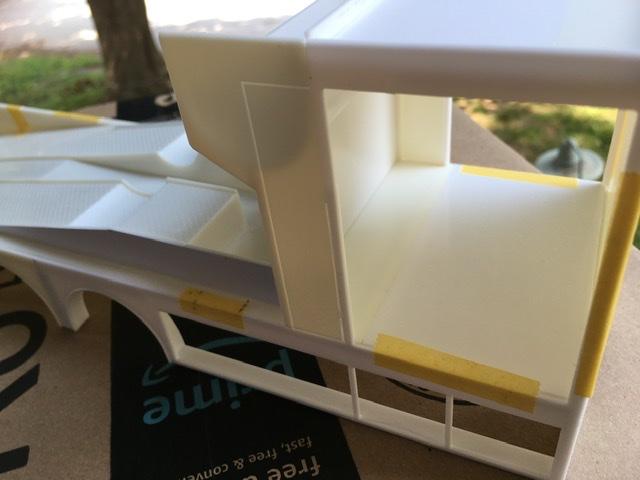
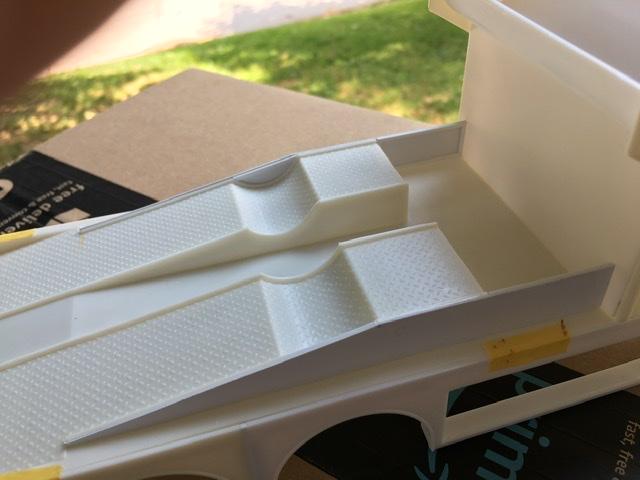
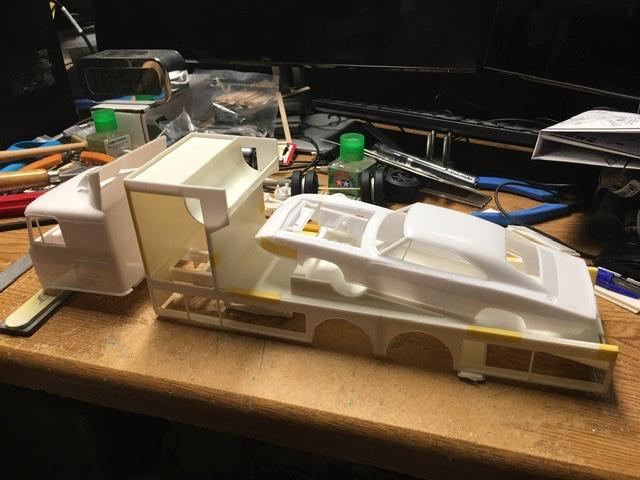
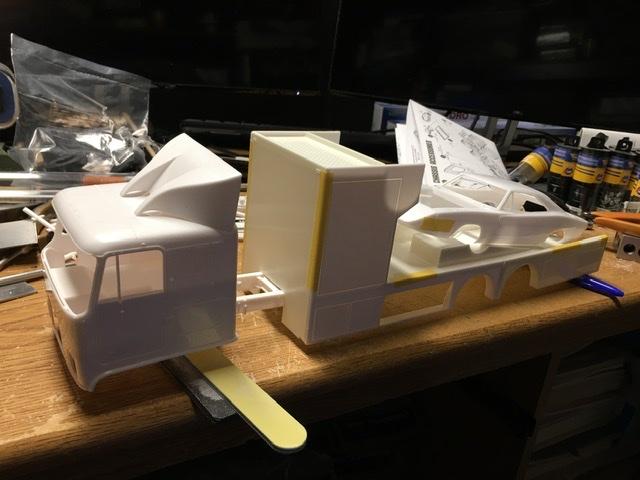
Just a quick update. Got everything mocked up today. I extended the work compartment, extended the ramp floor inside, and extended the tire rack/roof. Also, removed the tread pattern from the roof. Thinking of putting some AC or a skylight or something up there. I didnt care for the way the scoops looked in the ramps. So, I’ve skinned the sides and extended the front to make another storage area. One more thing to change the profile a little from the kit design.
-
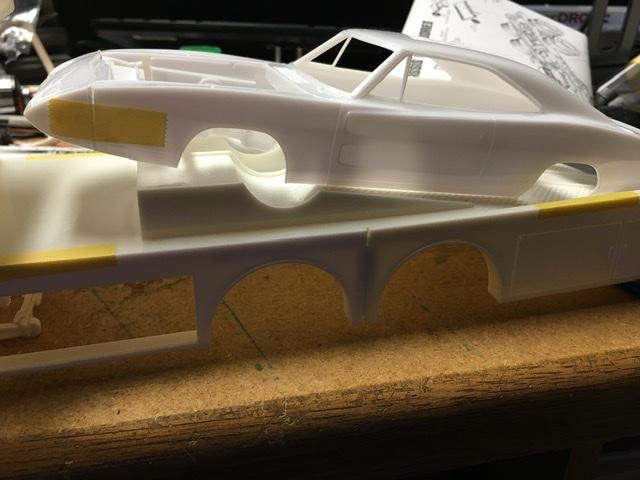
One thing I’ve never liked about this ramp body, as it comes from the kit, is that when you open the doors the spare tire rack intrudes into the door opening and you see tires (which would leak like crazy if it were a real vehicle.). So, since I had extra body parts leftover from splicing two of these together, I figured I’’d slide the rack back by adding a section to each side of the upright compartment and move the tire rack out of the way.
-
BRBO 2020
Sugar Creek Racing replied to gotnitro?'s topic in WIP: Model Trucks: Big Rigs and Heavy Equipment
My Prostar is on the way, along with the day cab from Dave. Smooth side is still in a holding pattern... Nice to know about the Krylon. -
Thanks all for the comments. It is a good time getting back into a “meaty” project.
-
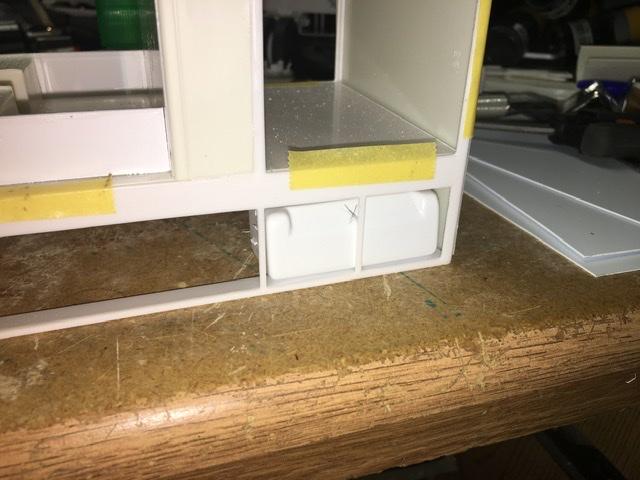
Got a few more hours in. That was a lot of cutting to open all those doors! Going to need a lot of stuff to fill it all back up. Gotnitro? I think that tank idea is going to work out really well. It looks much better with just enough room for the stacks.
-
LMAO! I was just sitting here thinking “wonder if those tanks would fit inside that first set of doors?” and then your post pops up. I agree. Tanks will go in there and the bed will slide forward.
-
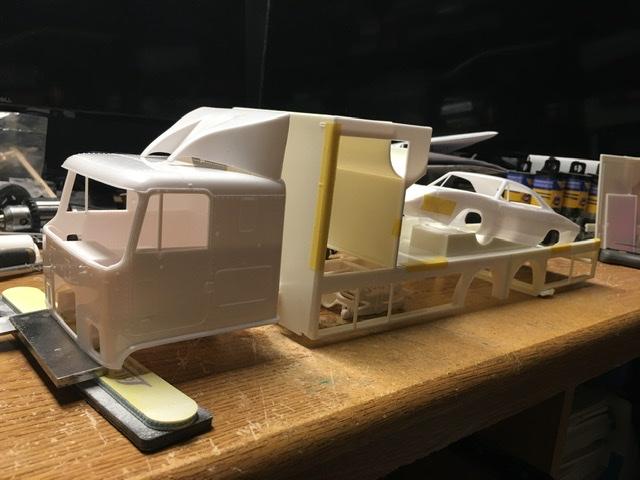
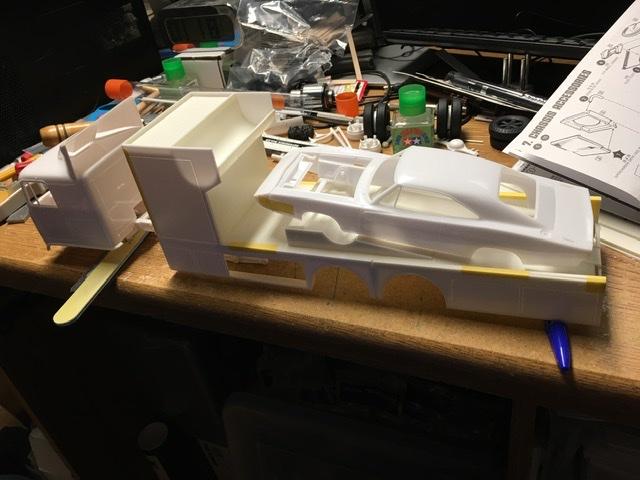
The major surgery on the ramp bed is complete. If I use the kit fuel tanks, the bed would be that far back. I still have the exhaust stacks to go in the gap between the cab and the bed and figured I could fab a rack for a couple spares for the truck on the front wall of the ramp bed. Keep thinking it would look better with the bed closer to the cab.
-
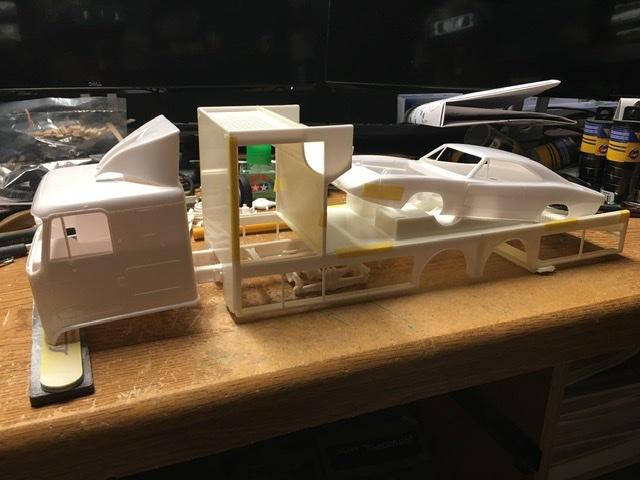
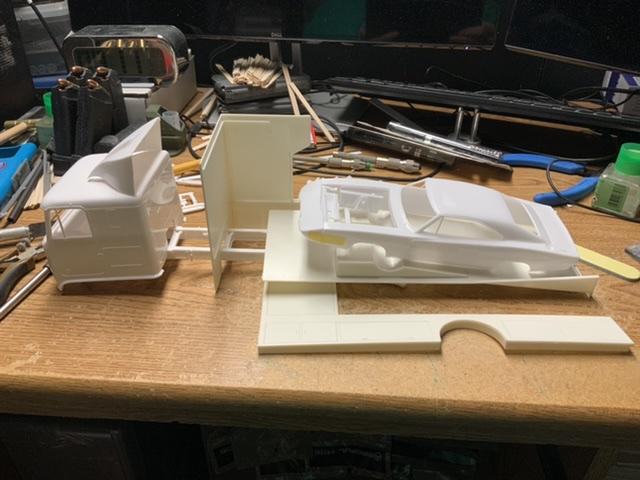
Sunday morning mock up. I’ve wanted to build a ramp truck. However, after working for GM for many years I really wanted it to be a GM chassis. (The only kit ramp trucks are the Malone heavys and the Louisville Ford.) My plan is to use the AMT Astro 95 for the chassis. I’m using two of the Louisville ramp bodies to build one dual axle ramp body. I will add the second axle opening just forward of the one showing in the picture and add a bit of length to the bed so the car isn't hanging off the back. (I’m using a Dodge Daytona in the mock up because I figure that is as long as the load will ever get). This is a fun build, so, there is no basis in reality for this build other than there were some dual axle ramp trucks in racing back in the day. I’m thinking of putting it in some sort of museum livery to explain any discrepancy in time frames between the truck and it’s loads. Basically a vehicle sent out to pick up acquisitions and projects for the museum. Any thoughts from the group before I cross the point of no return and start slicing and dicing?
-
Landy’s Super Stock dart
Sugar Creek Racing replied to GoodbuildNY's topic in WIP: Drag Racing Models
Dave, beautiful work! The Landy Hemi Dart is on my to do list, How did you do the markings on this one? I’ve only found the Revell decals for the 440 version, -
64 Dodge D100 Pickup Pro Street
Sugar Creek Racing replied to AmericanMuscleFan's topic in WIP: Drag Racing Models
Drill Bits Unlimited has quite a nice selection of micro end mills, mainly from the PCB industry. https://drillbitsunlimited.com